A lace braid bun is one of those hairstyles that makes clean hair look planned and second-day hair look even better. The braid only takes in hair from one side as it moves along the head, so it lies flatter than a regular French braid and gives you a softer line to work with when you pin it into a bun.
That matters more than people think. A style that survives a desk job and a grocery run has to do two things at once: stay put, and not feel stiff by noon. Lace braid buns are good at that because they keep the front and sides under control without turning your head into a helmet.
The trick is usually small, boring things. Section size. Tension. Where you anchor the bun. How many pins you use at the end. Nothing glamorous. Everything useful.
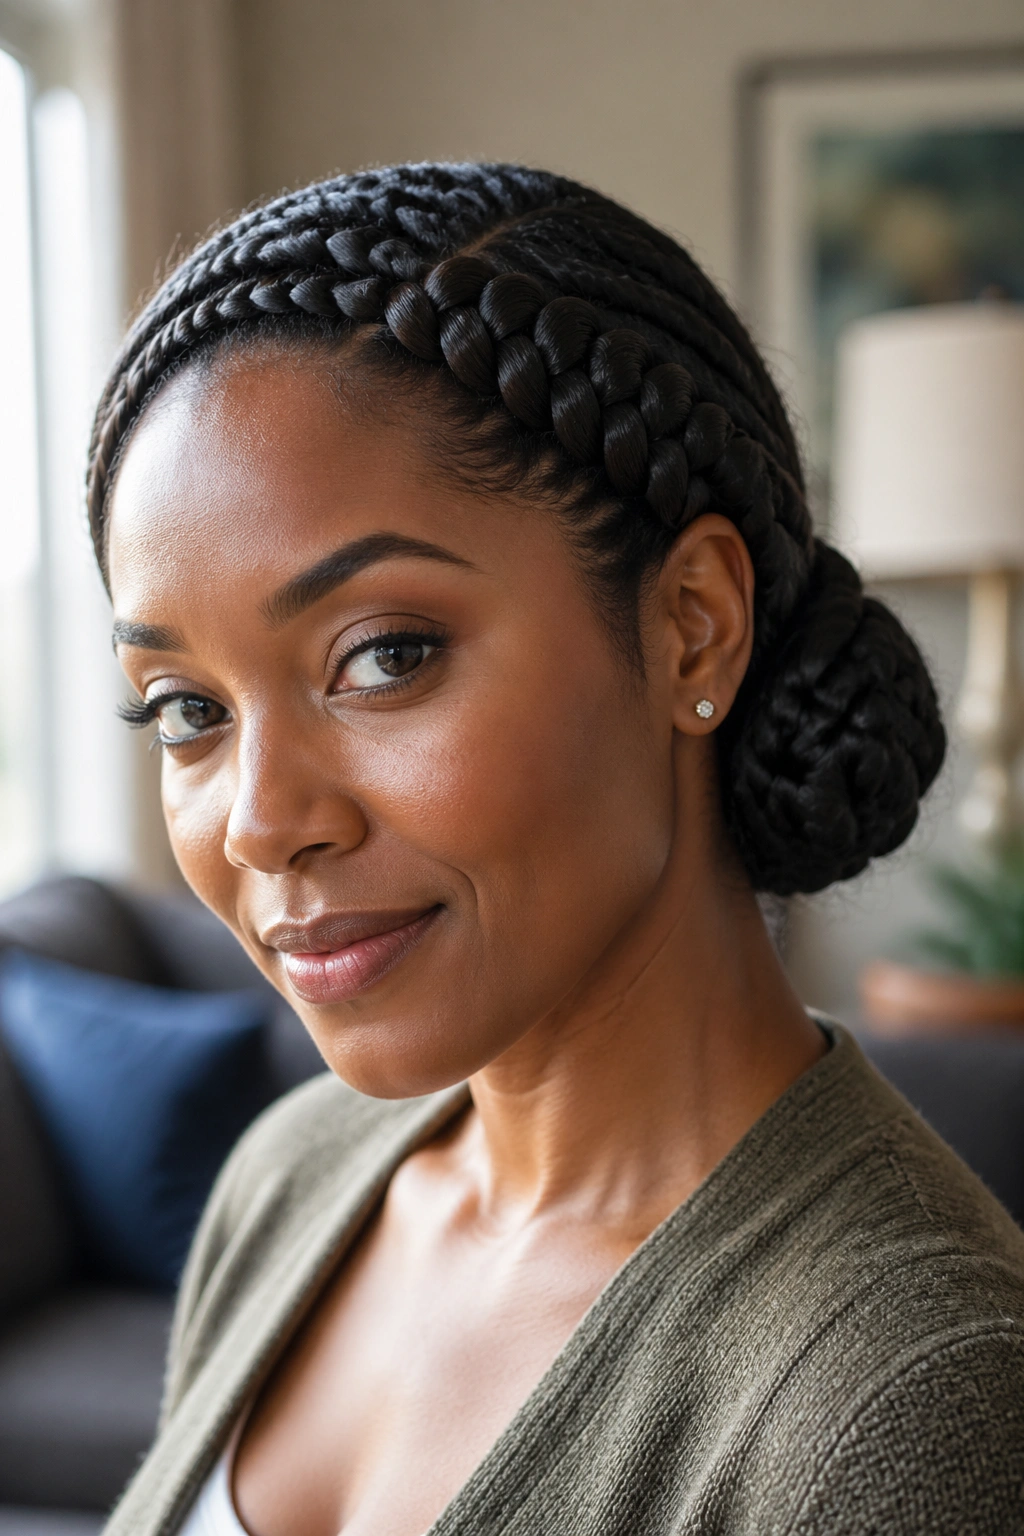
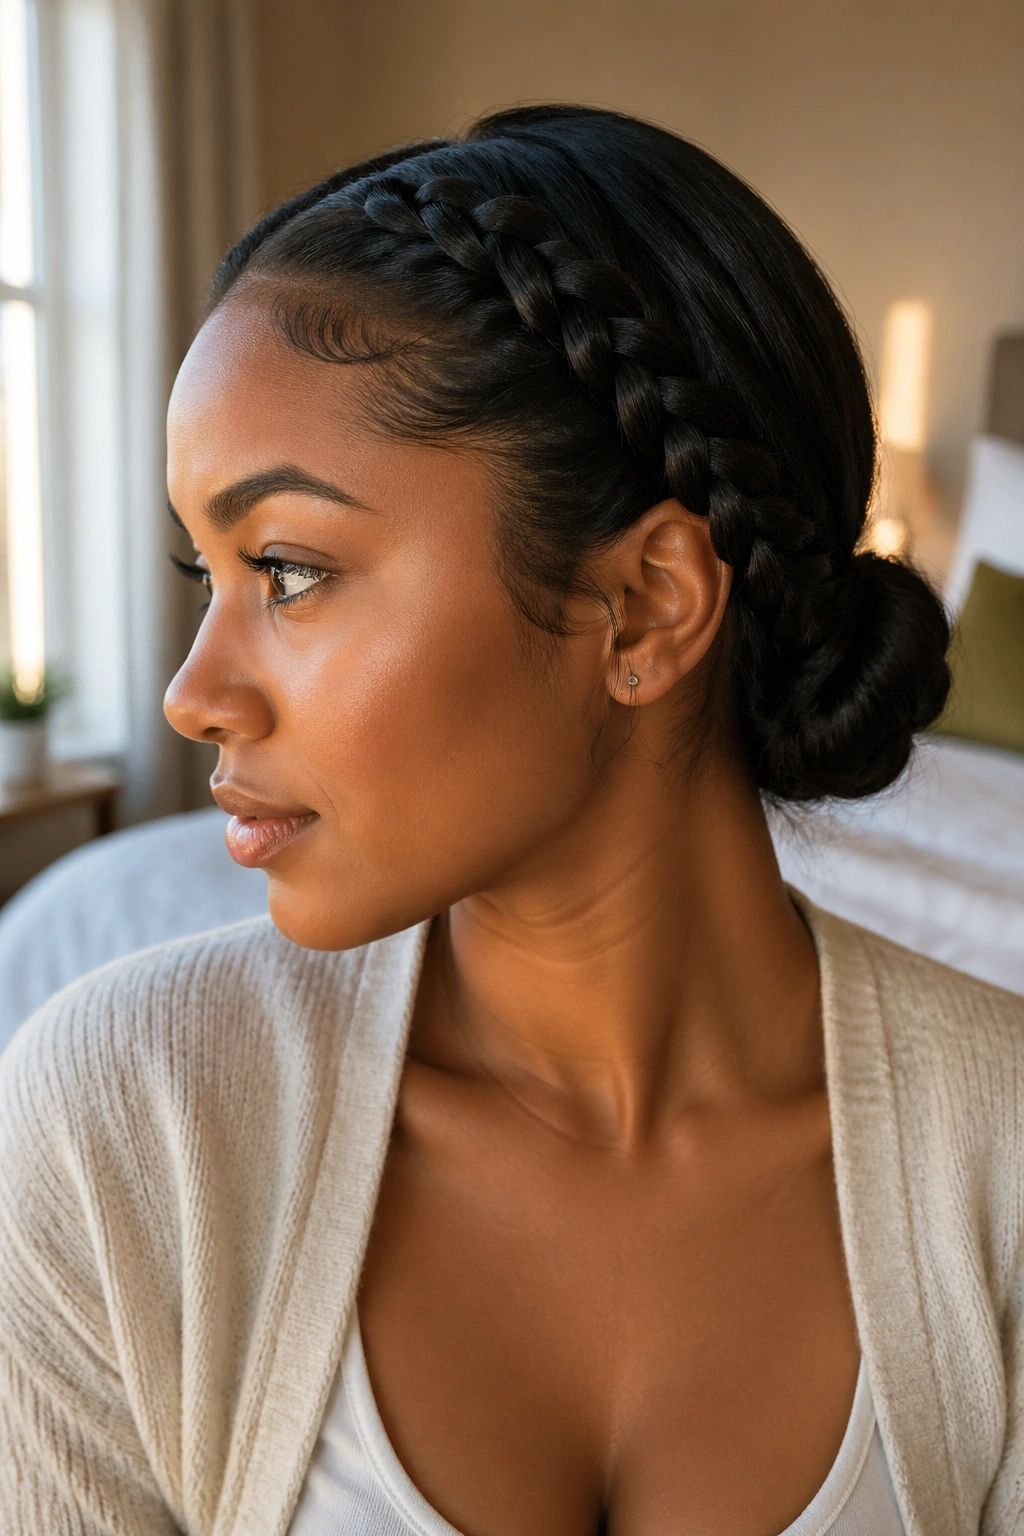
1. Low Lace Braid Bun at the Nape
The low lace braid bun is the style I reach for when the day has no patience for fuss. It sits neatly at the nape, clears the face, and still looks soft enough that you do not feel overdressed for errands after work.
How to place the braid
Start the lace braid at the temple on your heavier side, then add hair only from the top edge as you move toward the back of the head. Keep the braid close to the scalp for the first few stitches, then let it travel lower as it approaches the nape. That one small change keeps the style from puffing out in the wrong place.
Gather the loose hair into a low ponytail with the braid included, twist it into a compact bun, and pin the coil at the base first. After that, tuck the braid tail around the bun and secure it with two crossed bobby pins.
What keeps it from sliding
- Use 1-inch to 1½-inch sections near the front so the braid stays even.
- Mist the roots with dry shampoo or texture spray if your hair is silky.
- Pin the bun with at least 4 bobby pins, crossing two of them in an X.
- If the nape feels loose, slide one pin upward from underneath the bun instead of sideways.
Best for: straight, wavy, or lightly layered hair that needs to stay neat without looking severe.
One small warning. Do not pull the braid too tight across the scalp. A tight braid looks sharp for ten minutes and then starts to fight your head shape. A slightly softer line holds up better and looks calmer by the end of the day.
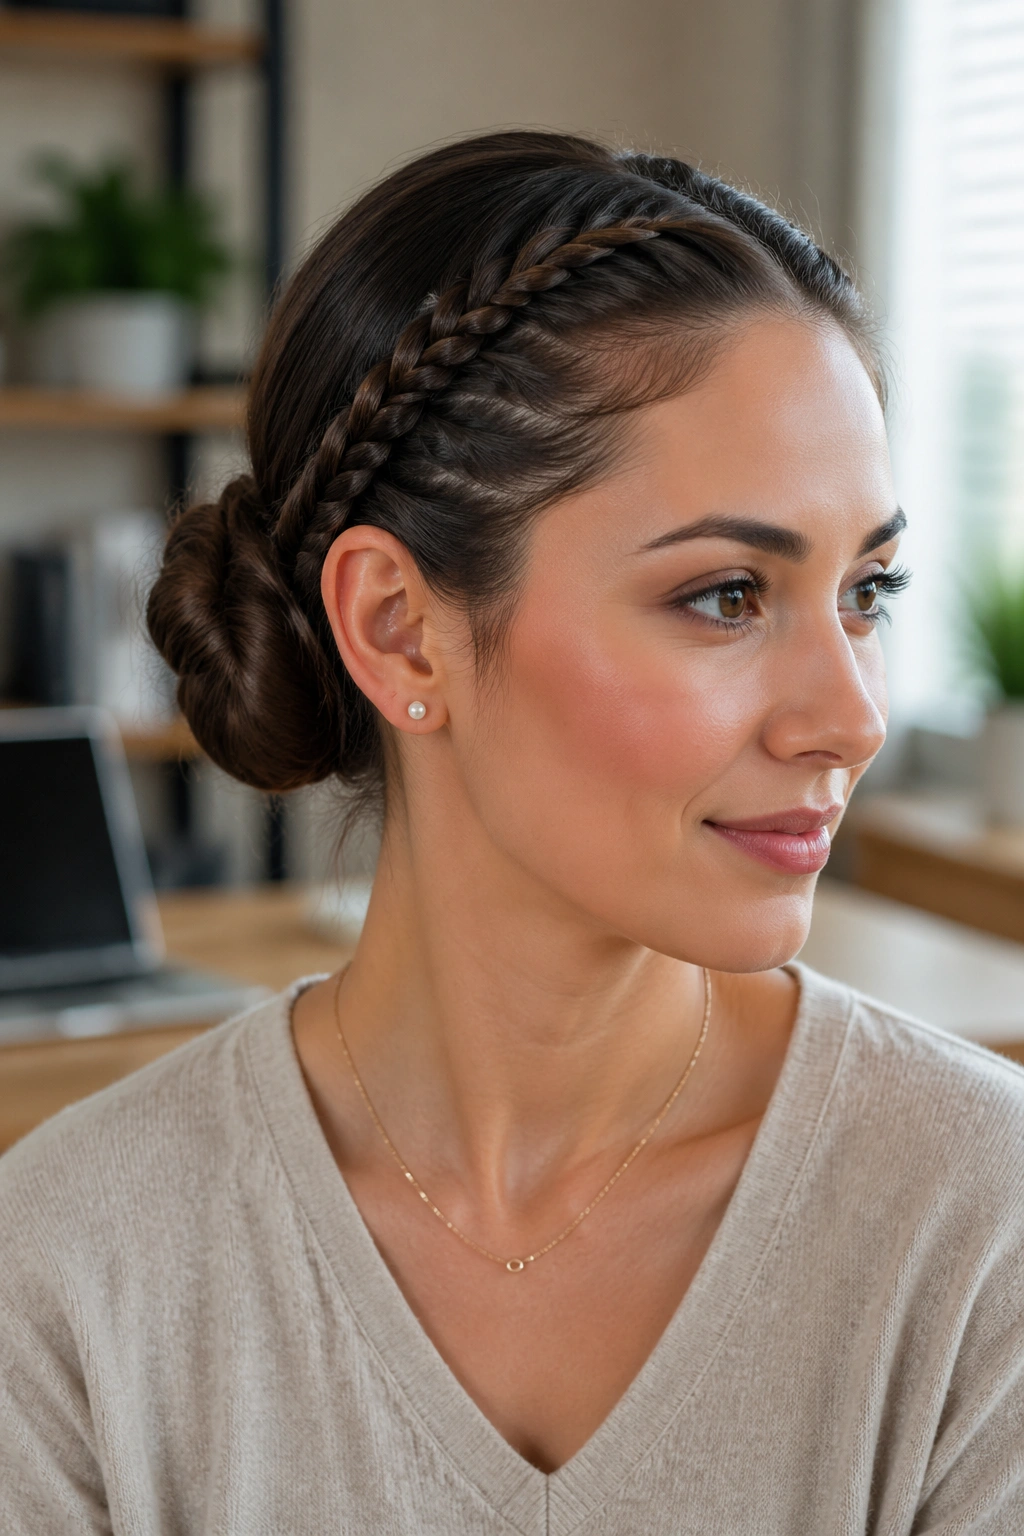
2. Side-Swept Lace Braid Bun Behind One Ear
Need something softer than a tight bun and cleaner than hair left loose? The side-swept lace braid bun lives in that middle ground. It gives the front of your hair some movement, then tucks everything behind one ear and into a low side bun that feels easy to wear.
This version works well when you want the style to do a little face framing without leaving pieces dangling into your coffee or your glasses. It also looks better than people expect with earrings, which sounds trivial until you actually wear it for a full day. The side bun leaves the other side open, so the whole shape feels lighter.
The braid should start high enough to be seen, but not so high that it looks like it is trying too hard. Aim from the temple toward the top of the ear, then curve down behind the ear before you twist the bun. If your hair is short around the nape, leave the last inch of braid loose and pin the end under the bun instead of forcing every strand into the coil.
That last bit matters. Forced buns sag.
A side-swept bun works especially well when the rest of the hair has a slight bend to it. If your strands are pin-straight, wrap the loose lengths around a curling iron for 5 to 8 seconds each before you braid. You do not need curls. You just need enough grip for the braid to hold its shape.
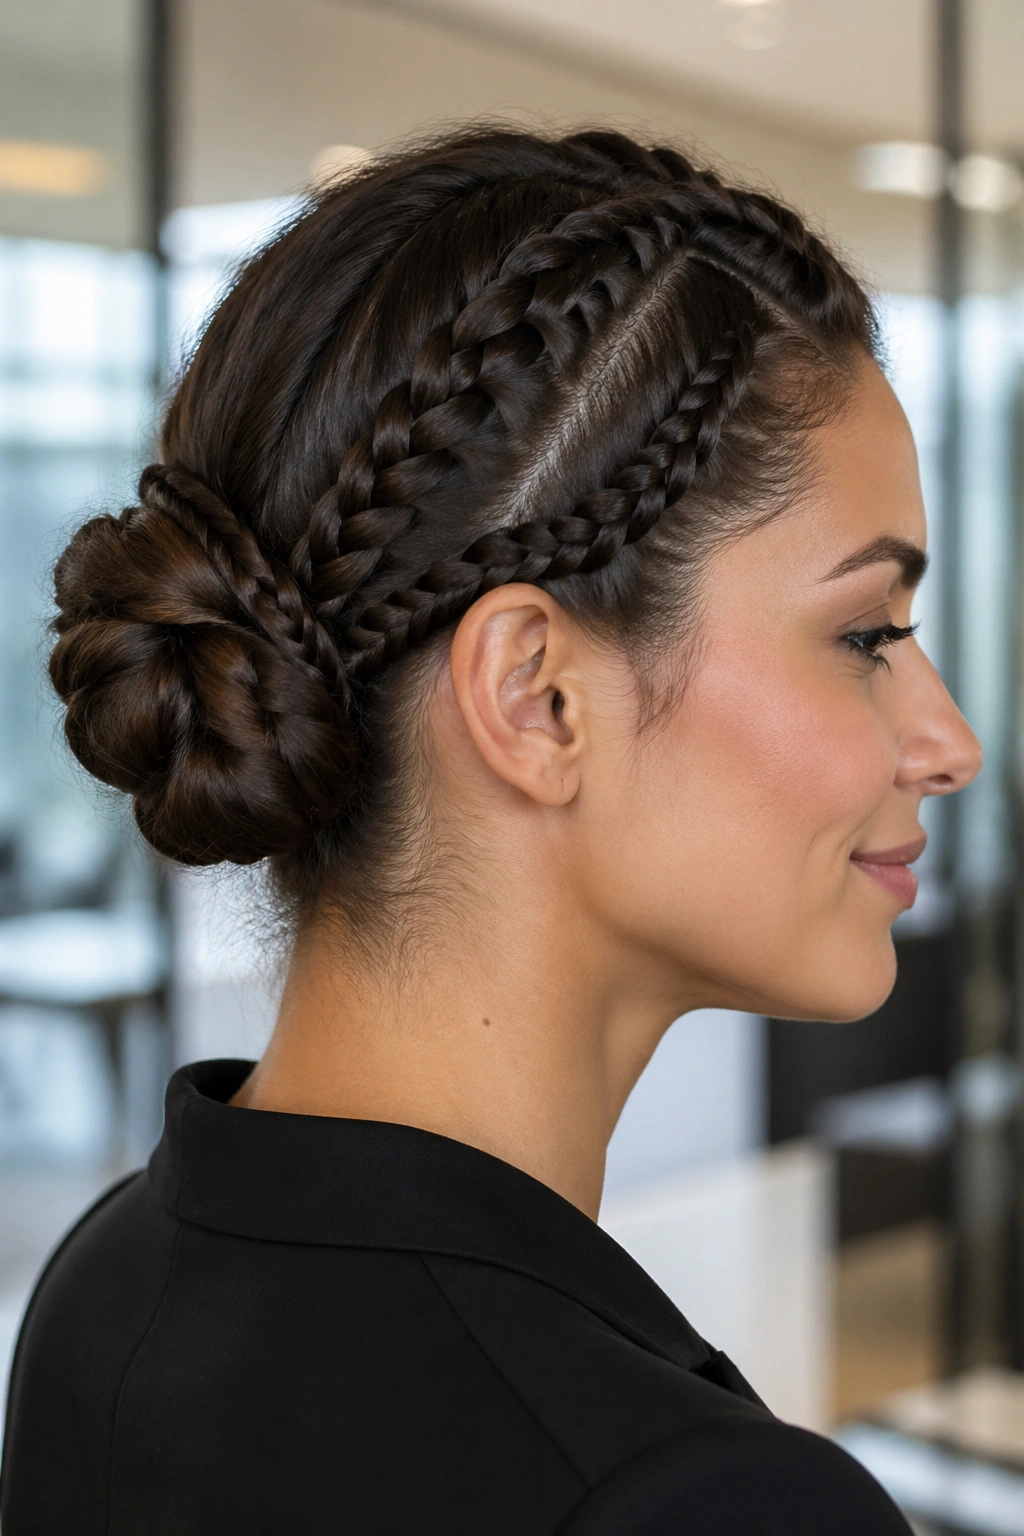
3. Twin Lace Braids Feeding a Center Bun
Picture a center part, two narrow lace braids, and a bun sitting flat at the neck. That is the version that tends to look the most balanced, especially if your face is naturally symmetrical or you just like your hair to feel tidy from both sides.
Why the middle part helps
A center part gives the lace braids a clean lane to travel in. One braid starts at each temple and picks up hair only from the top edge on each side, so the braids stay close to the head and do not drift outward. When both sides meet at the back, the bun has a built-in frame.
That is why this style feels so controlled. It creates its own structure before you even pin the bun.
Tiny details that matter
- Keep both braids the same width or the bun will tilt.
- Use a rat-tail comb to make the part straight all the way back.
- If your crown is flat, lift a 1-inch strip at the roots with a comb before braiding.
- Tie the two braids together with one clear elastic before wrapping the bun.
This style is especially good for medium to thick hair because the twin braids add grip. Fine hair can do it too, but I would add a little texture spray first. Without it, the part can look too crisp and the bun can feel smaller than you want.
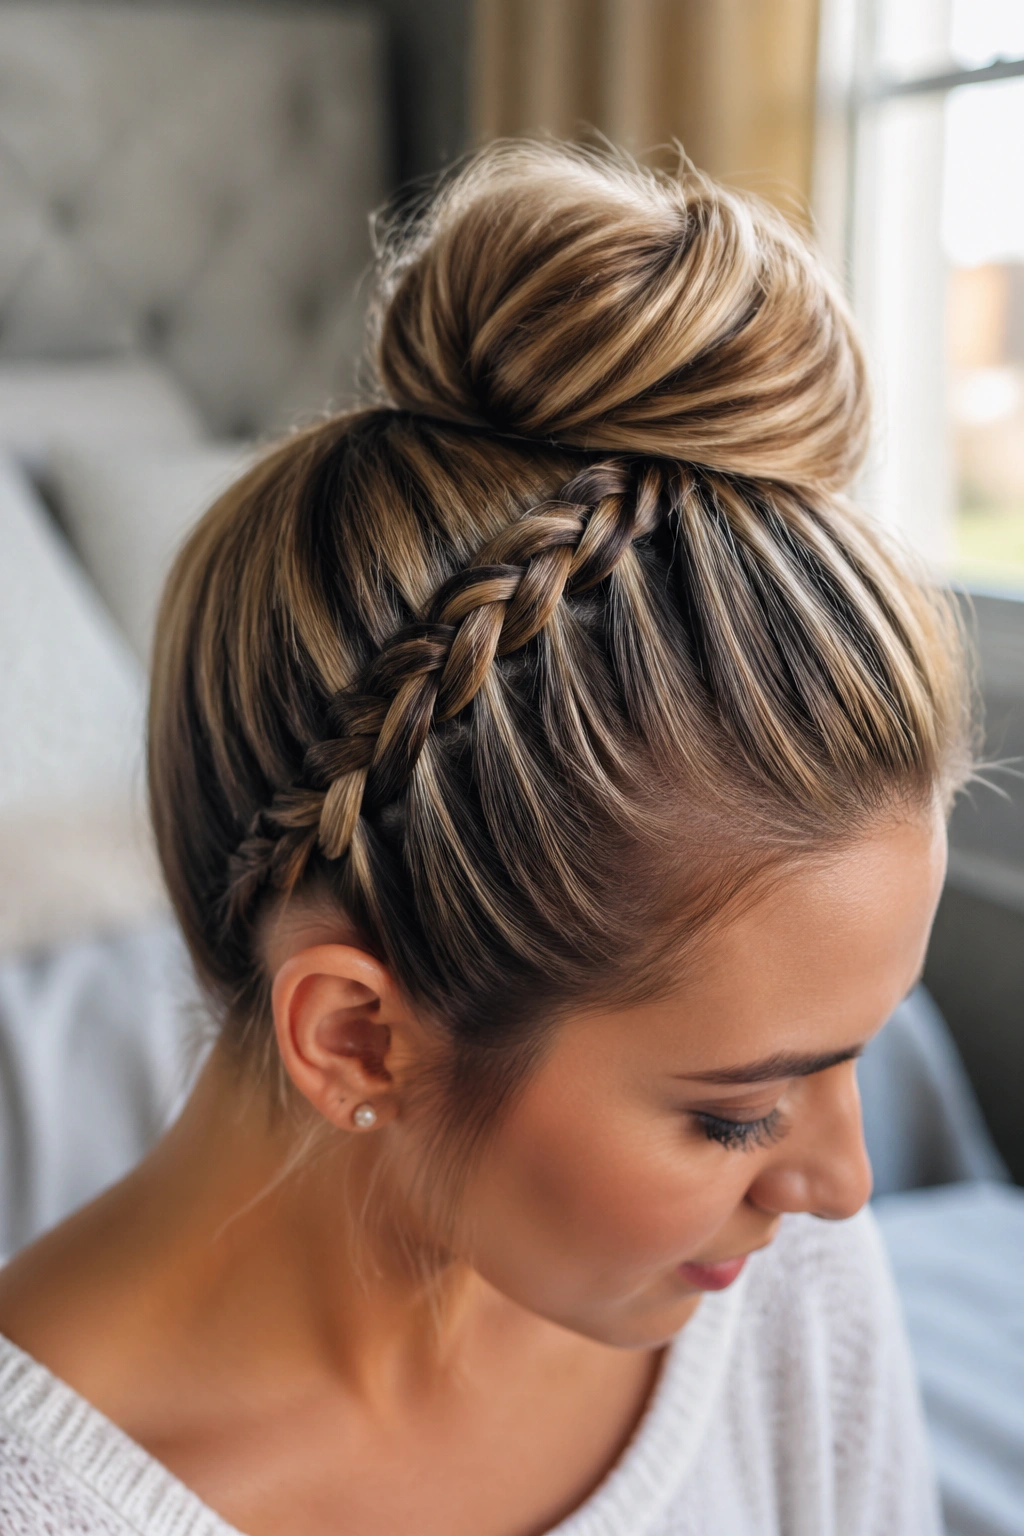
4. Wrapped Lace Braid Top Knot
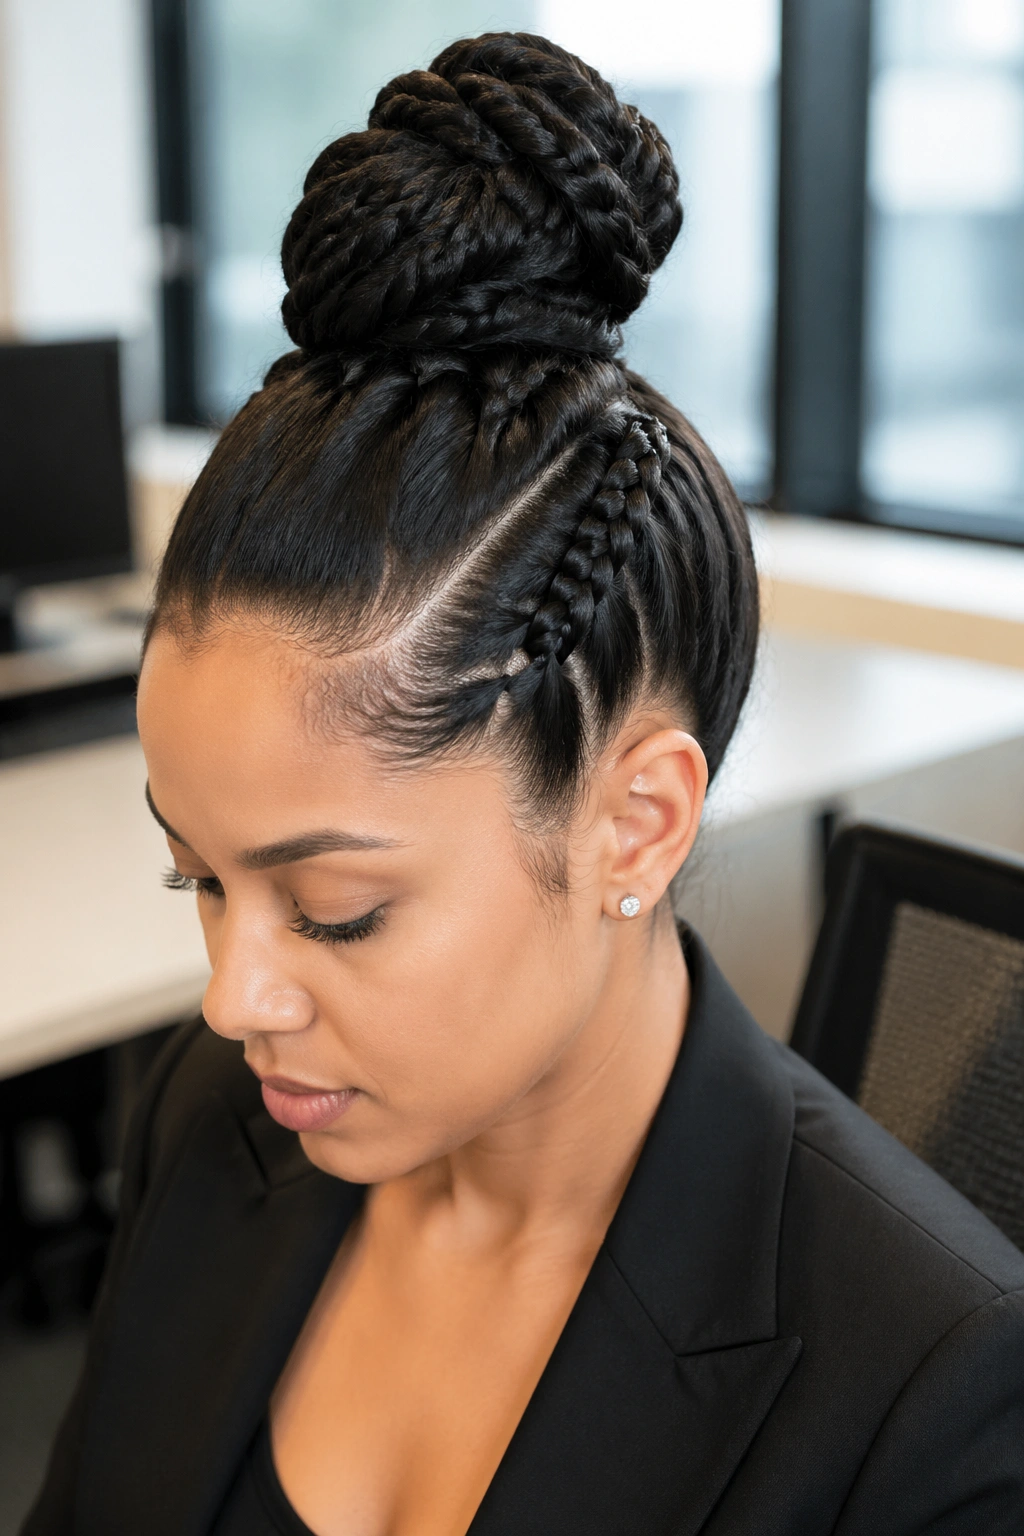
A top knot does not have to look rushed. When a lace braid feeds into it, the whole style gets more shape and the bun stops looking like a last-minute fix.
This works best when you want your hair completely off your neck. A wrapped top knot is useful on long office days, hot bus rides, or any stretch of errands where you know your head will be getting bumped by a hood, scarf, or tote strap. The lace braid should travel from the hairline to the crown, then disappear into the base of the knot so the bun feels intentional instead of piled on.
The shape matters more than the height. Keep the knot high enough to feel lifted, but not so high that it pulls your hairline tight. If your hair is very long, twist the length into two loops rather than one giant coil. The smaller shape sits more securely and does not slump halfway through the day.
A tiny bit of pomade on the fingers helps here. Smooth the front, braid the side, then twist the knot while the hair still has a little control. Too much product makes the braid greasy. Too little leaves wisps sticking out in every direction. The middle ground is the sweet spot.
If you wear this style with a blazer or a structured coat, it looks clean and sharp. If you wear it with a sweater and flats, it feels casual enough for errands without looking sloppy.
5. Diagonal Lace Braid Chignon
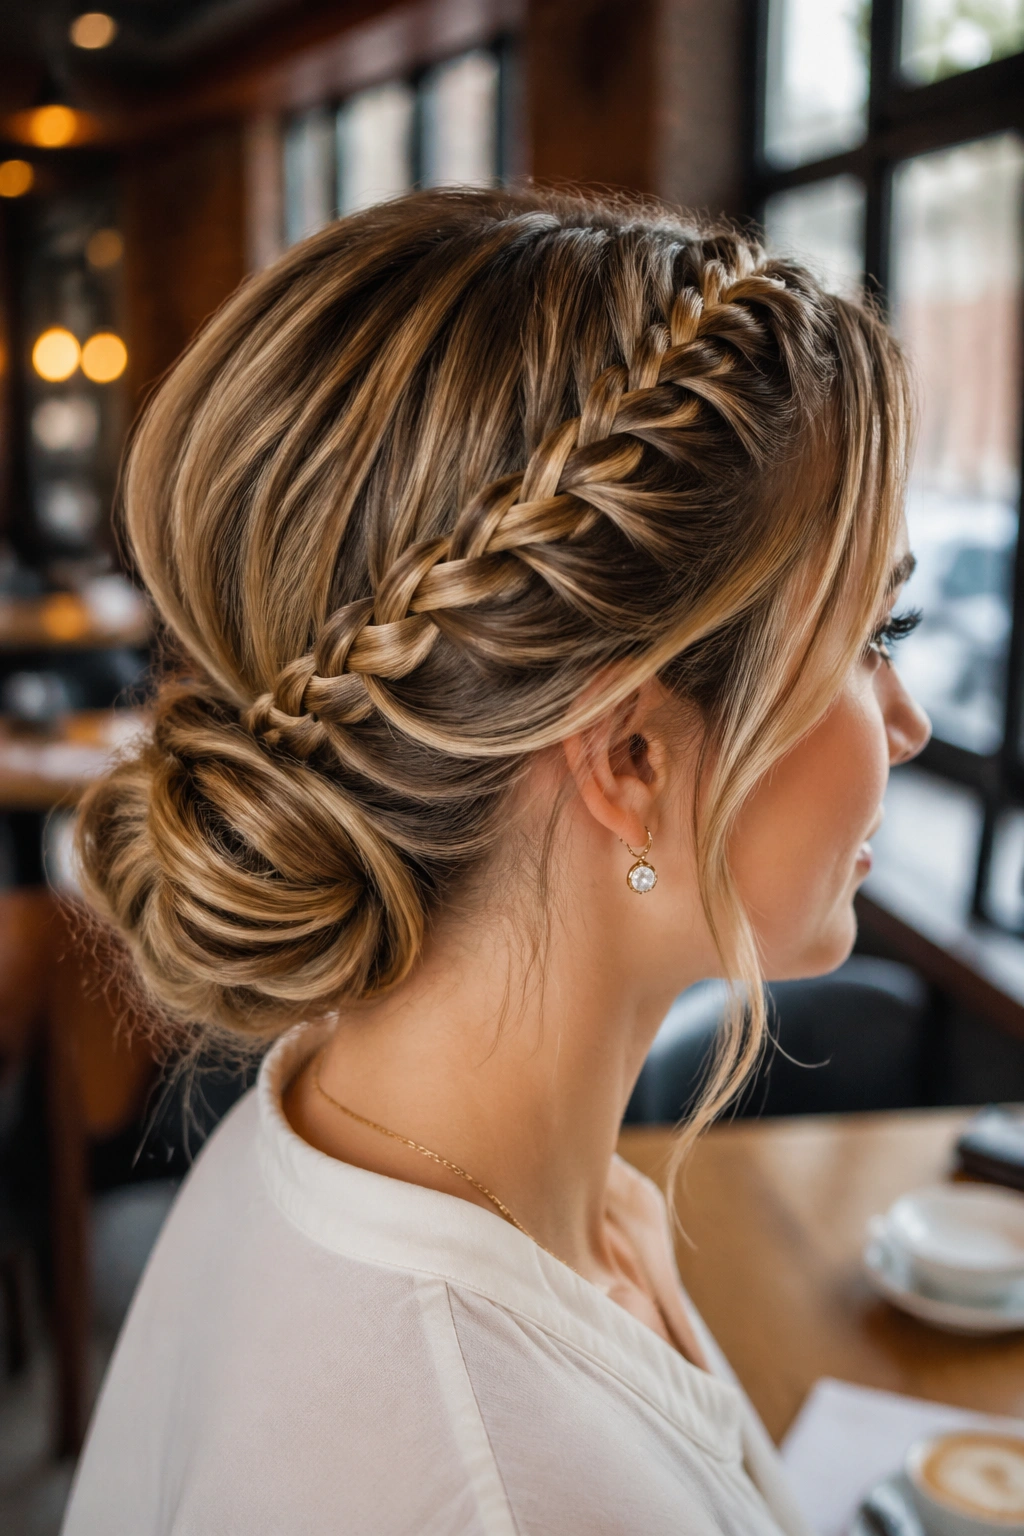
A side-to-side diagonal line gives a lace braid bun more movement than a straight-back version. It starts at one temple, travels across the head, and drops into a chignon at the opposite nape, which makes the whole style look a little more considered.
What makes the diagonal line work
The eye follows the braid. That is the whole trick.
Because the braid cuts across the head at an angle, it softens strong jawlines and helps hide awkward grow-out near the front. It is also useful if one side of your hair is shorter than the other. The diagonal path disguises the difference instead of advertising it.
The bun itself should stay low and slightly tucked under the braid, not sit out like a separate piece. Think of the braid and bun as one shape. If they look disconnected, the style starts to feel accidental.
A few things I would do every time
- Keep the braid close to the scalp for the first 3 inches.
- Use a light mist of hairspray before pinning the chignon.
- Anchor the bun with 6 to 8 pins if your hair is thick.
- Tuck the braid tail under the coil so it does not poke out at the end of the day.
This one is a little more polished than a basic low bun, but not precious. It is the sort of hair that looks ready for a meeting and still behaves at the pharmacy, which is honestly the bar most styles need to clear.
6. Messy Lace Braid Bun with Soft Framing Pieces

I keep coming back to the messy version on mornings that start with a clock check and end with a grocery bag in each hand. It does not pretend to be formal, but it still has enough shape to look like you meant to do something with your hair.
The lace braid is the part that keeps this style from drifting into plain messy bun territory. You braid along one side, stop before the ends get too tiny, and then pull the braid gently at the edges so it looks a little wider. That “pancaking” step matters. It gives the braid some presence without making it stiff.
Leave a couple of face-framing pieces out if your hair naturally falls there. Two slim pieces, not six. Too many loose strands and the style just looks unfinished. Too few and it loses the soft edge that makes the bun easy to wear all day.
What I would watch for
- Use a small clear elastic at the end of the braid.
- Twist the bun loosely first, then pin it after you like the shape.
- Pull only the outer braid edges; don’t tug the middle apart.
- Finish with a light mist of flexible hairspray so the front stays soft.
This is the version I would wear on a day that includes both a desk and a long line somewhere. It looks relaxed, but it is not careless. There is a difference, and it shows.
7. Sleek Lace Braid Bun with a Sharp Part

Sleek. Low. No stray ends.
That is the entire mood here. The sharp part and the tighter lace braid give the bun a neat, almost tailored feel, which is why this version works so well for interviews, client meetings, or any day you want your hair to stay in the background and do its job.
Start with a clean part — center or deep side, your call — and smooth a pea-sized amount of styling cream over the top and sides. Then make the lace braid narrow and even, keeping the added sections thin so the braid sits flat. The bun should be compact, not fluffy. If it swells outward, the sleek look disappears fast.
A boar-bristle brush helps, but a regular smoothing brush will do the work if you go over the roots before braiding. The important part is pressure at the scalp, not fancy tools. You want the hair to lie in the direction you set, especially around the temples.
This style is not the one I’d choose on very humid days if your hair frizzes easily. It can still work, but you’ll need more product and more patience. On drier days, though, it looks crisp in a way that a messy bun never can.
Use two small pins to hide the elastic and one longer pin under the bun for support. If you can see the pins, you have used too many or placed them too high.
8. Double Lace Braid Bun with Extra Grip
If one braid feels too plain, two braids can lock the whole style down. This is the version I would choose for hair that slips, slides, or refuses to stay where you put it for more than half an hour.
Instead of one lace braid feeding into the bun, create a braid on each side and bring both toward the back. You can keep them narrow and close to the head, then wrap each braid around the bun base in opposite directions. That gives you more anchor points and a lot less chance of the style loosening up by lunch.
It also looks fuller. Not bigger in a bulky way — fuller in the sense that the bun has more structure. Fine hair often benefits from this, but thick hair does too because the two braids spread the weight out instead of putting everything on one side.
The parts that save time later
- Use two matching elastics so the braids end at the same tension.
- Pin the first braid across the bun base, then pin the second over it.
- If the hair is slippery, rough-dry it first with texture spray.
- Keep the bun low enough that the braid ends do not poke upward.
This is a strong commuter style. It does not move around much, which is exactly what you want when you are hopping between a desk, a bag, and a quick stop somewhere on the way home.
9. Lace Braid Rose Bun
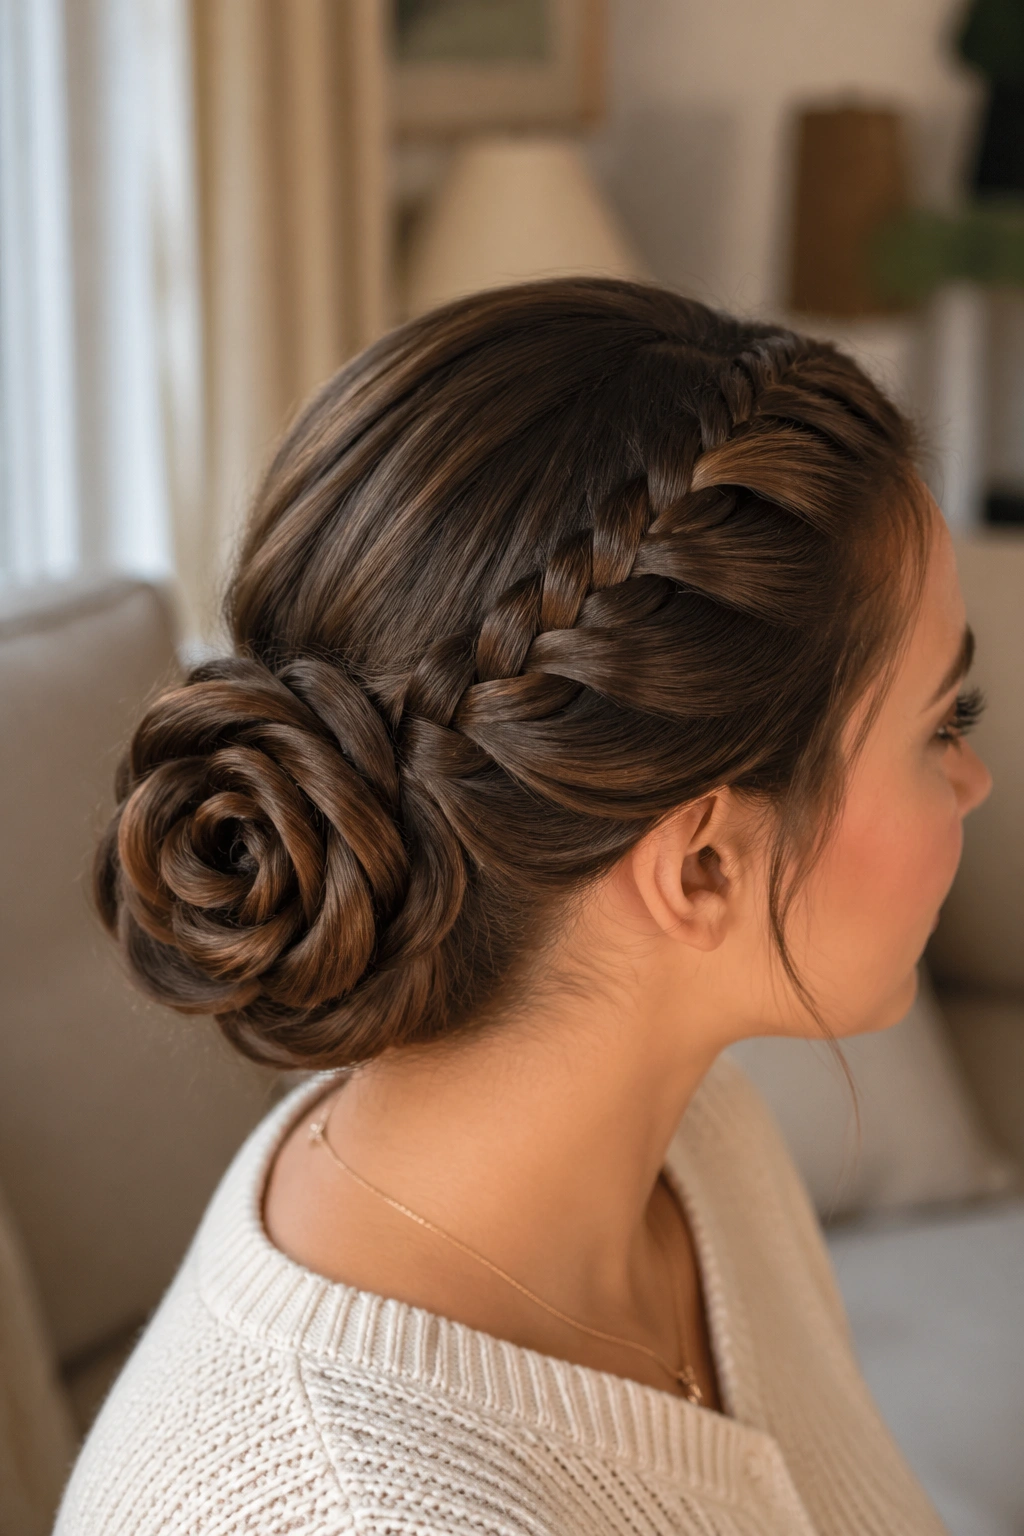
Want a bun that looks more deliberate than a plain coil? The rose bun is the one that gives you that effect without turning your morning into a project.
The braid feeds into itself in a spiral, almost like a coiled ribbon. You start the lace braid at one side, keep it neat but not too tight, then wind it around the center of the bun in a circular path. The ends disappear underneath the outer ring, which creates that rose-like shape people notice even from across a room.
This style works best on medium to long hair because you need enough length to wrap a smooth loop. If the braid is too short, the rose loses the pattern and turns into a lumpy knot. That is fixable, but not worth fighting on a busy morning.
A little spray wax on the fingertips helps the braid hold together while you coil it. Not much. A thin film. If your fingers feel slick, you have used too much.
The rose bun is a nice middle ground when you want something prettier than a standard bun but still practical for the day. It is secure, and it holds up surprisingly well under a coat collar or a scarf, which is more useful than it sounds. Decorative styles often fail at that part.
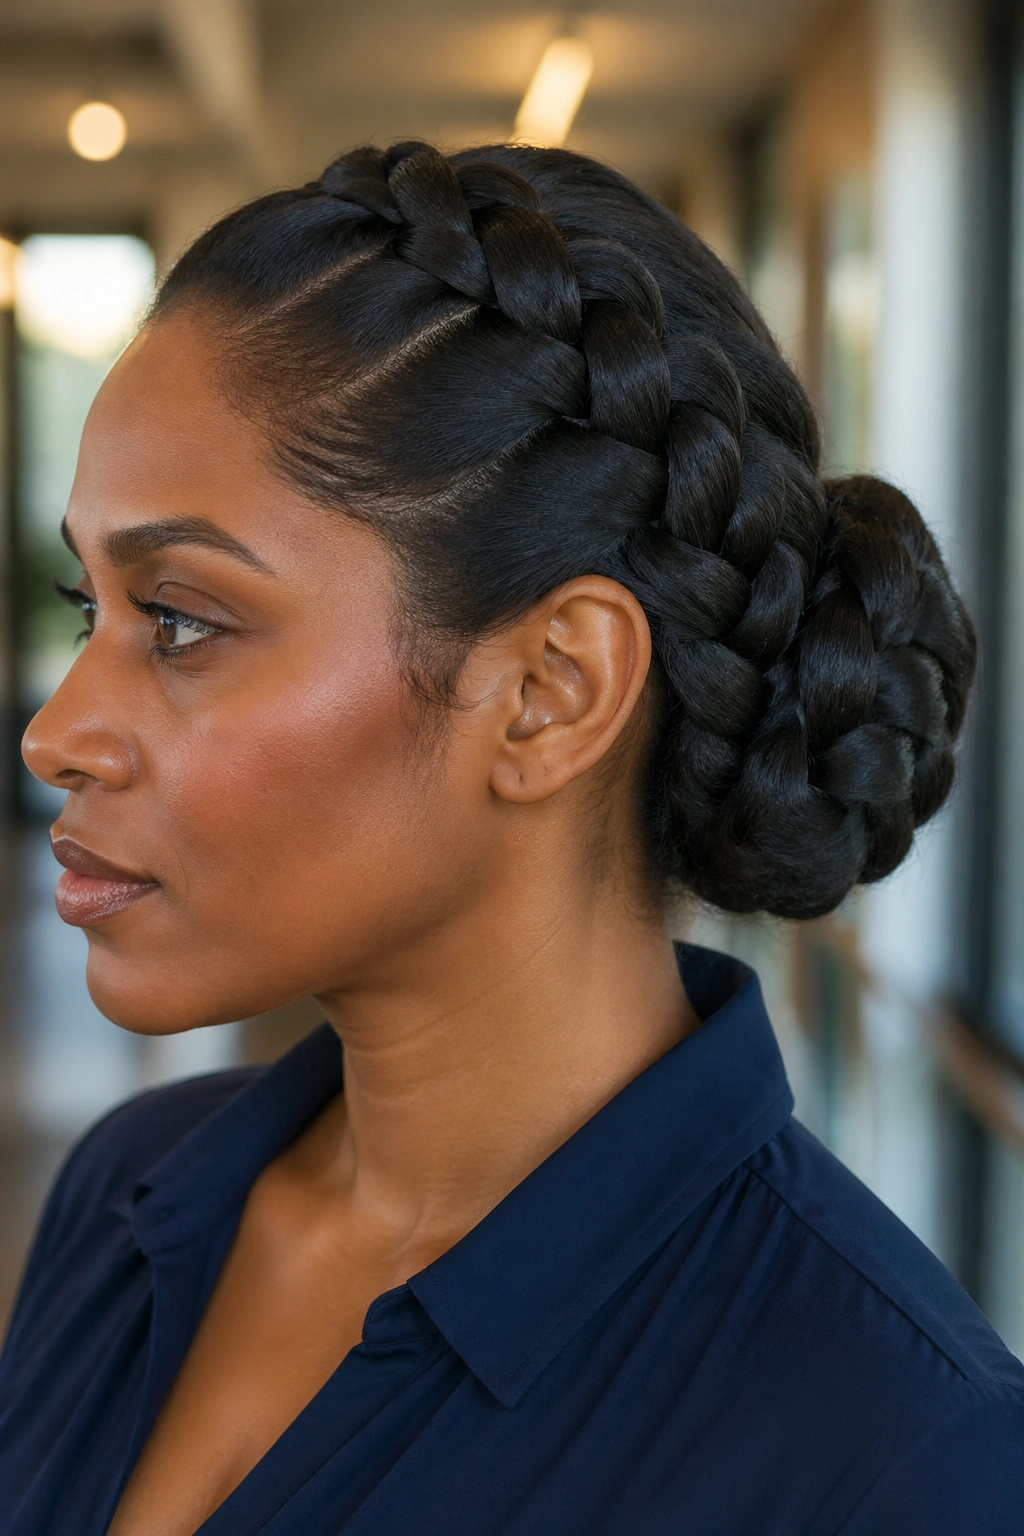
10. Crown Lace Braid Bun
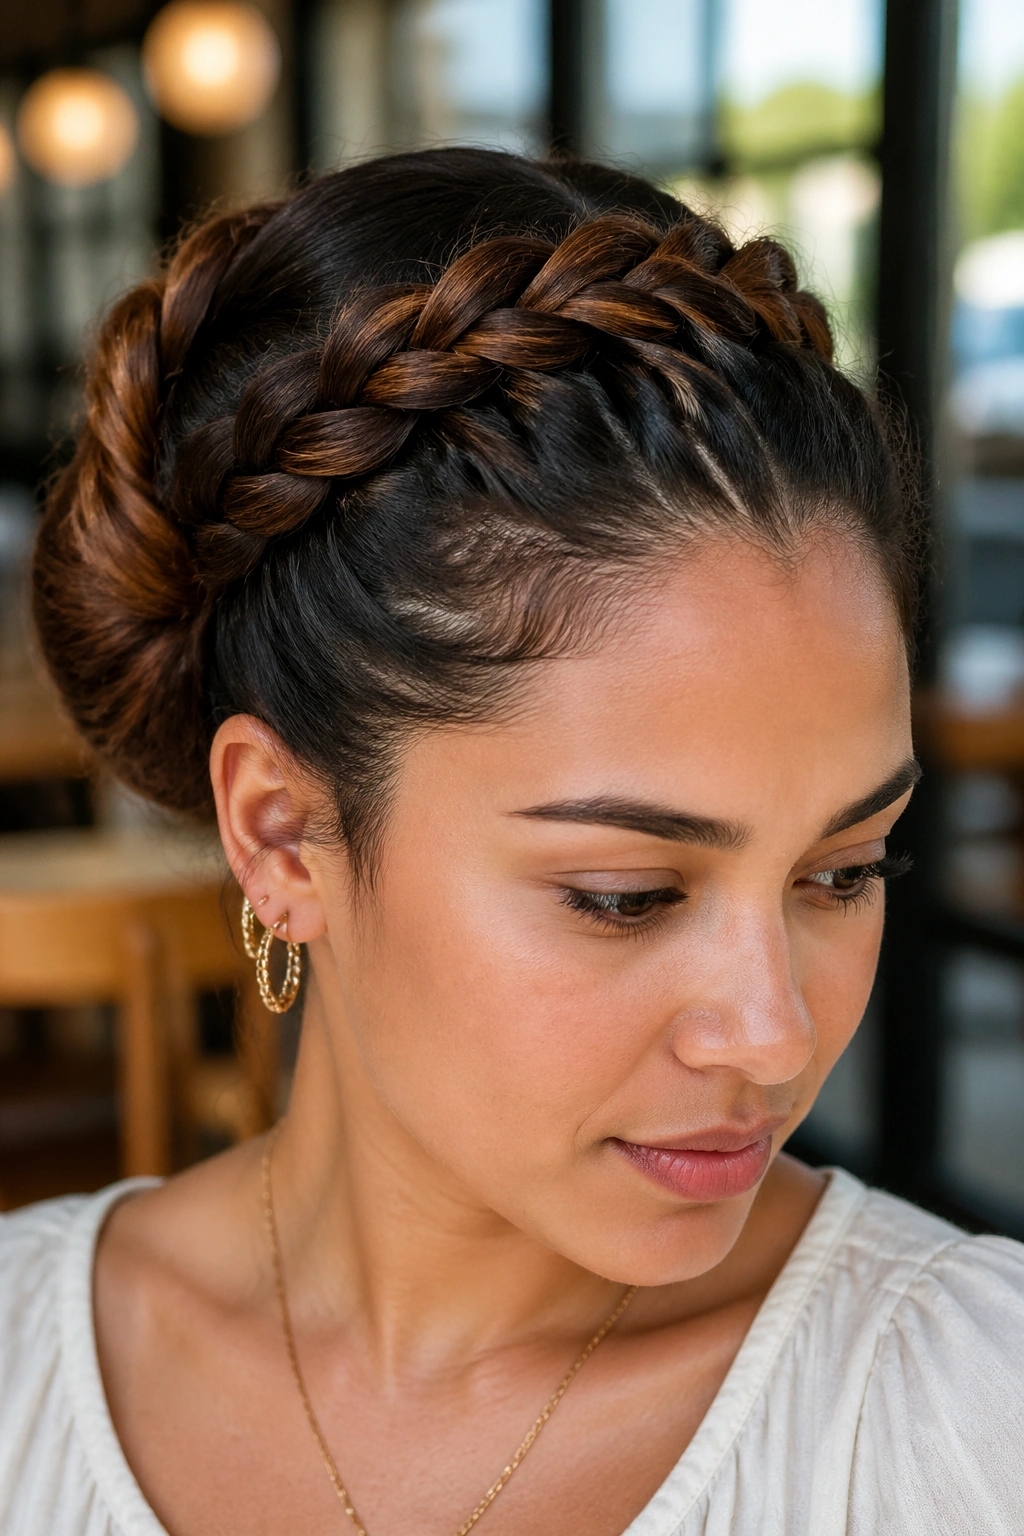
A crown braid usually feels formal; a crown lace braid bun can be much easier to wear. The braid sits around the upper head like a soft band, then the rest of the hair gets gathered into a bun near the nape or tucked under the back of the crown line.
The benefit here is lift. A crown braid opens up the face and gives the style height without needing a lot of teasing. If your roots lie flat, this is one of the better ways to make the hair look fuller without making it stiff. The braid itself is the decoration.
I like this version when the front of the hair needs to stay out of the way but I still want some shape on top. It is useful for growing-out layers, especially around the temples and bangs, because the braid can cover the awkward pieces while the bun keeps the rest contained.
The only real drawback is that it takes a little more time to place cleanly. If you rush the crown line, it can drift upward and leave gaps near the hairline. Slow down at the front. The back can be pinned quickly; the front is what people see first.
A slim comb, a few strong pins, and a small amount of smoothing cream go a long way here. Keep the crown line even, and the rest takes care of itself.
11. Curly Lace Braid Bun That Keeps Its Texture
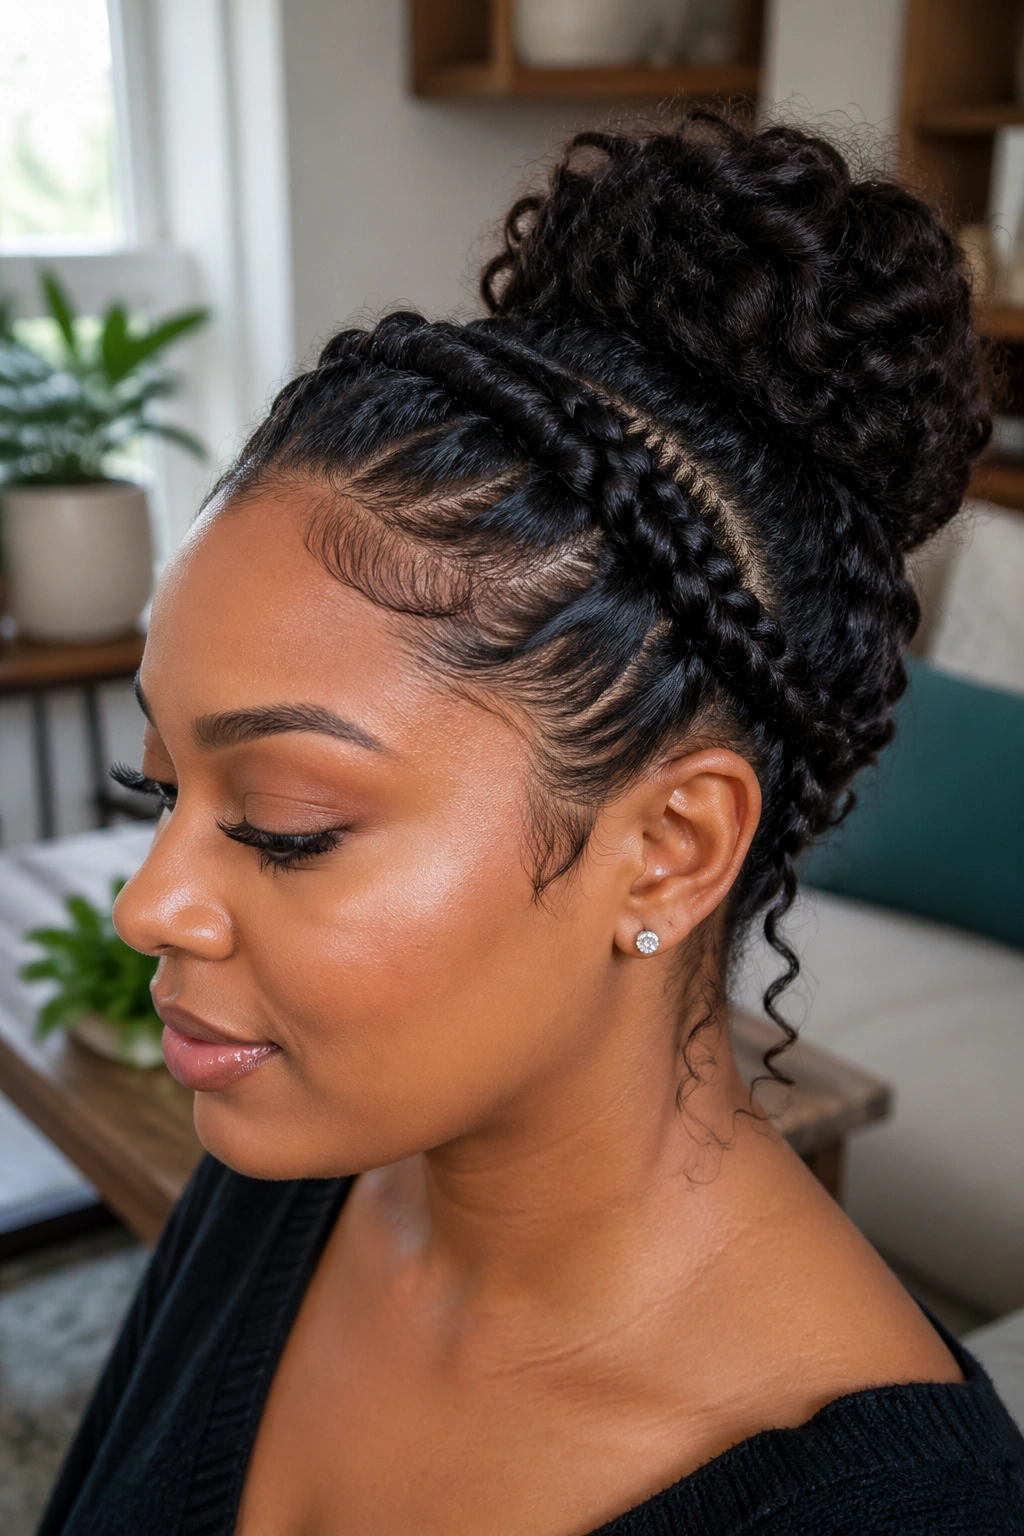
Curly hair changes the whole feel of a lace braid bun. The braid starts with more texture, the bun gets more movement, and the final shape can look richer without extra effort.
Do not brush curls dry and then try to force them into a neat braid. That is a fast way to create frizz and lose the curl pattern you probably wanted to keep. Work with damp or fully dry curls that have been refreshed with water and a leave-in conditioner. Then smooth the top section with your fingers or a wide-tooth comb and let the rest stay natural.
The lace braid should be looser than it would be on straight hair. Curly strands shrink, and if you braid too tightly, the style pulls up higher than you meant. Leave a little softness around the front, then gather the lengths into a bun that follows the curl pattern instead of fighting it.
What helps curly hair hold the style
- Use a satin scrunchie or soft elastic at the bun base.
- Smooth the hairline with a small amount of gel or curl cream.
- Pin the bun where the curls naturally want to sit.
- Leave the ends tucked but not crushed, so the curl shape still shows.
This version is good for long days because the texture hides tiny imperfections. If one curl frizzes out, it reads as part of the style instead of a problem. That is a nice change.
12. Thick-Hair Lace Braid Bun with Bigger Sections
Thick hair needs less fuss, not more.
That sounds backwards until you try to force dense hair into tiny braid sections and watch the whole thing turn stiff and puffy. For thicker hair, the better move is to use slightly larger sections in the lace braid, keep the tension even, and let the bun stay a little bigger at the base. A compact tiny bun can look lost in heavy hair. A fuller coil reads balanced.
Start with a firm elastic at the end of the braid so the braid does not stretch out while you pin. Then split the ponytail into two sections, twist them loosely, and wrap them around each other before tucking them into the bun. That cuts down on bulk without flattening everything.
Things that make thick hair behave
- Use 8 to 10 bobby pins if the hair is dense or coarse.
- Anchor one pin into the elastic first, then add more around the sides.
- Keep a small gap between the braid and the scalp so the hair does not bulge.
- If the bun feels too heavy, split it into two stacked loops instead of one coil.
A thick-hair lace braid bun can look expensive in the plainest sense of the word: neat, full, and held together without a fight. The style does not need to be perfect. It needs to be secure.
13. Fine-Hair Lace Braid Bun with Texture and Padding
Fine hair can hold a lace braid bun if you build the base correctly. The mistake is treating fine strands like they will behave the same way as dense hair. They will not. They need grip, and they need a little help filling space.
Start on second-day hair if you can. If not, work a dry shampoo or texture powder into the roots before you braid. Keep the lace braid narrow and soft, because fine hair looks cleaner when the sections are smaller. A braid that is too wide can end up looking stringy, which is the exact opposite of what you want.
What I would add for grip
- Spray texture spray at the roots before braiding.
- Tease a small hidden section at the crown to give the bun a base.
- Use a bun donut or small padded insert if the hair is very fine.
- Pancake the braid edges gently so the braid looks wider, not thinner.
A padded base is not cheating. It is a smart way to give the hair a shape it would not hold on its own.
This style is especially good when you want your hair to stay lifted through a long day but still look light at the head. Fine hair can droop fast, and a little support keeps the bun from collapsing by late afternoon. The key is restraint. Too much teasing or too much product and the style gets brittle. A little lift, a little grip, and the braid does the rest.
Final Thoughts
The best lace braid buns are the ones that match your hair, not the ones that look hardest in a photo. A low nape bun will probably do the most work for the least effort. A side-swept or sleek version earns its place when you want a little more polish.
If your hair tends to slip, build more grip before you braid. If it is thick, give it room. If it is fine, add padding or texture instead of trying to force volume out of thin air. That one adjustment usually matters more than the exact braid pattern.
Keep a couple of strong pins in your bag. Honestly, that tiny habit solves more hair annoyances than any fancy styling trick.