Circle braid patterns have a sneaky talent for making hair look finished even when the rest of the style stays easy. A braid that travels around the head does more than keep strands in place — it frames the face, softens sharp features, and gives the whole style that halo effect people keep saving to their camera rolls.
The shape matters more than people think. A circle braid can sit high and neat like a crown, low and loose like a milkmaid wrap, or tucked into something messier so it feels romantic instead of rigid. Same idea, very different mood. And if your parting is a little crooked or your section sizes aren’t identical, that does not kill the look. In fact, a slightly imperfect halo often looks more believable than one that’s been chased into submission.
Hair texture changes the outcome too. Fine hair needs tighter tension and a few hidden pins. Thick hair often needs smaller subsections so the braid doesn’t bulge. Coily hair and extension-heavy styles can carry more height and drama, which is why the same circle braid can read soft on one person and bold on another.
The best place to start is the classic crown shape, because once you can trace a clean circle, every other variation makes more sense.
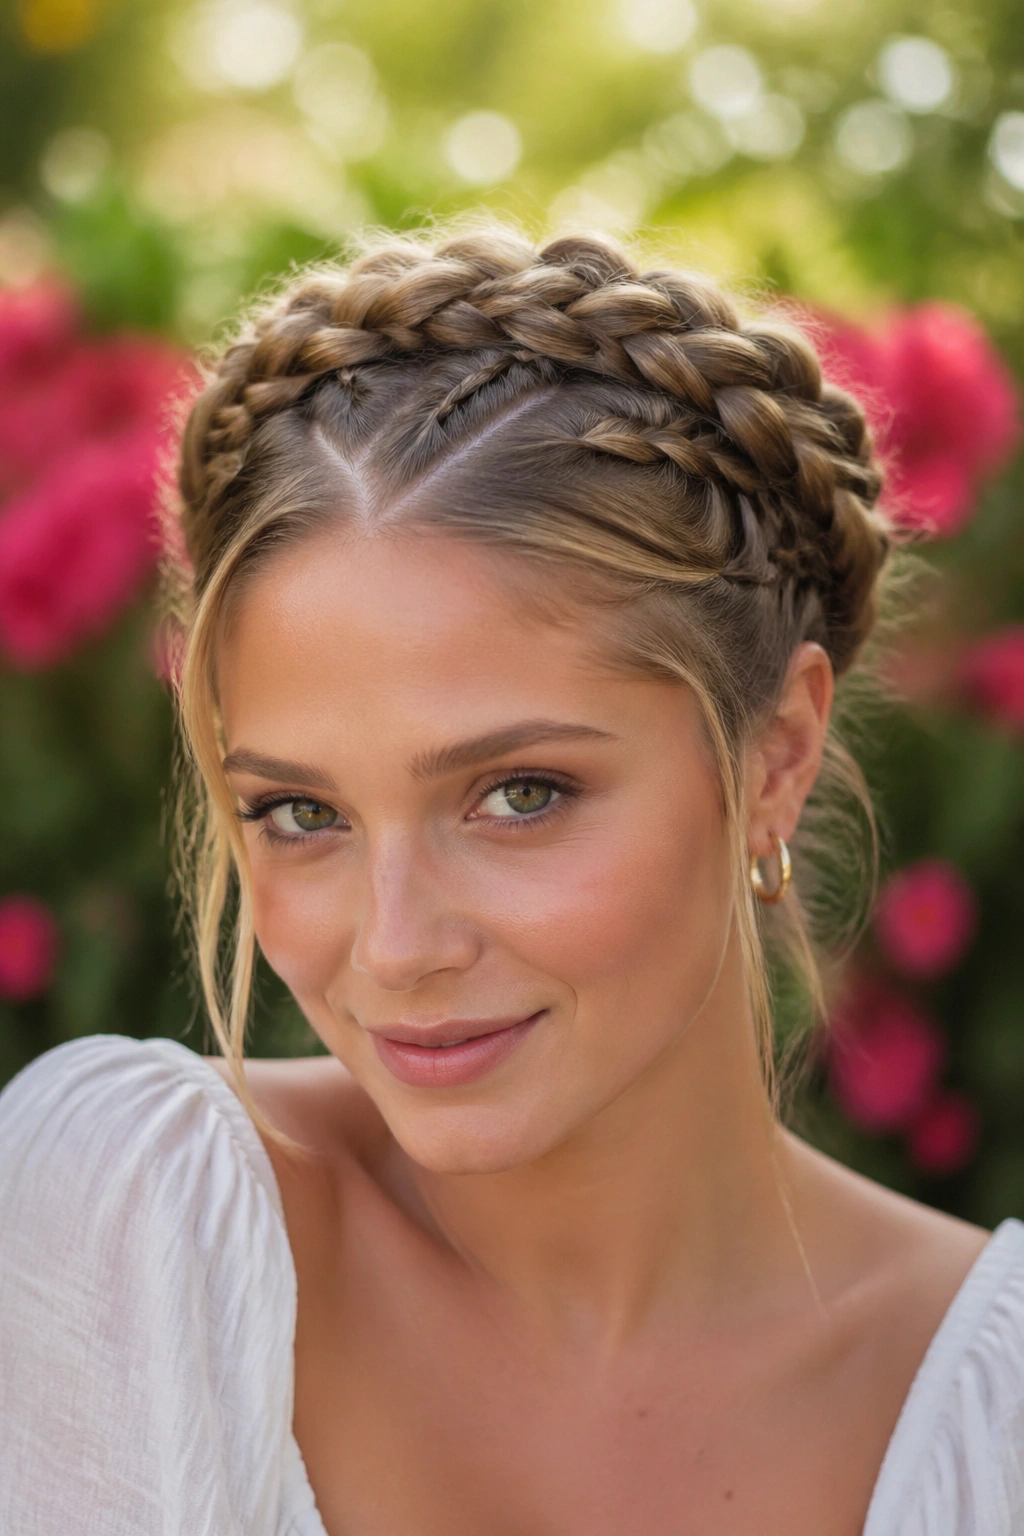
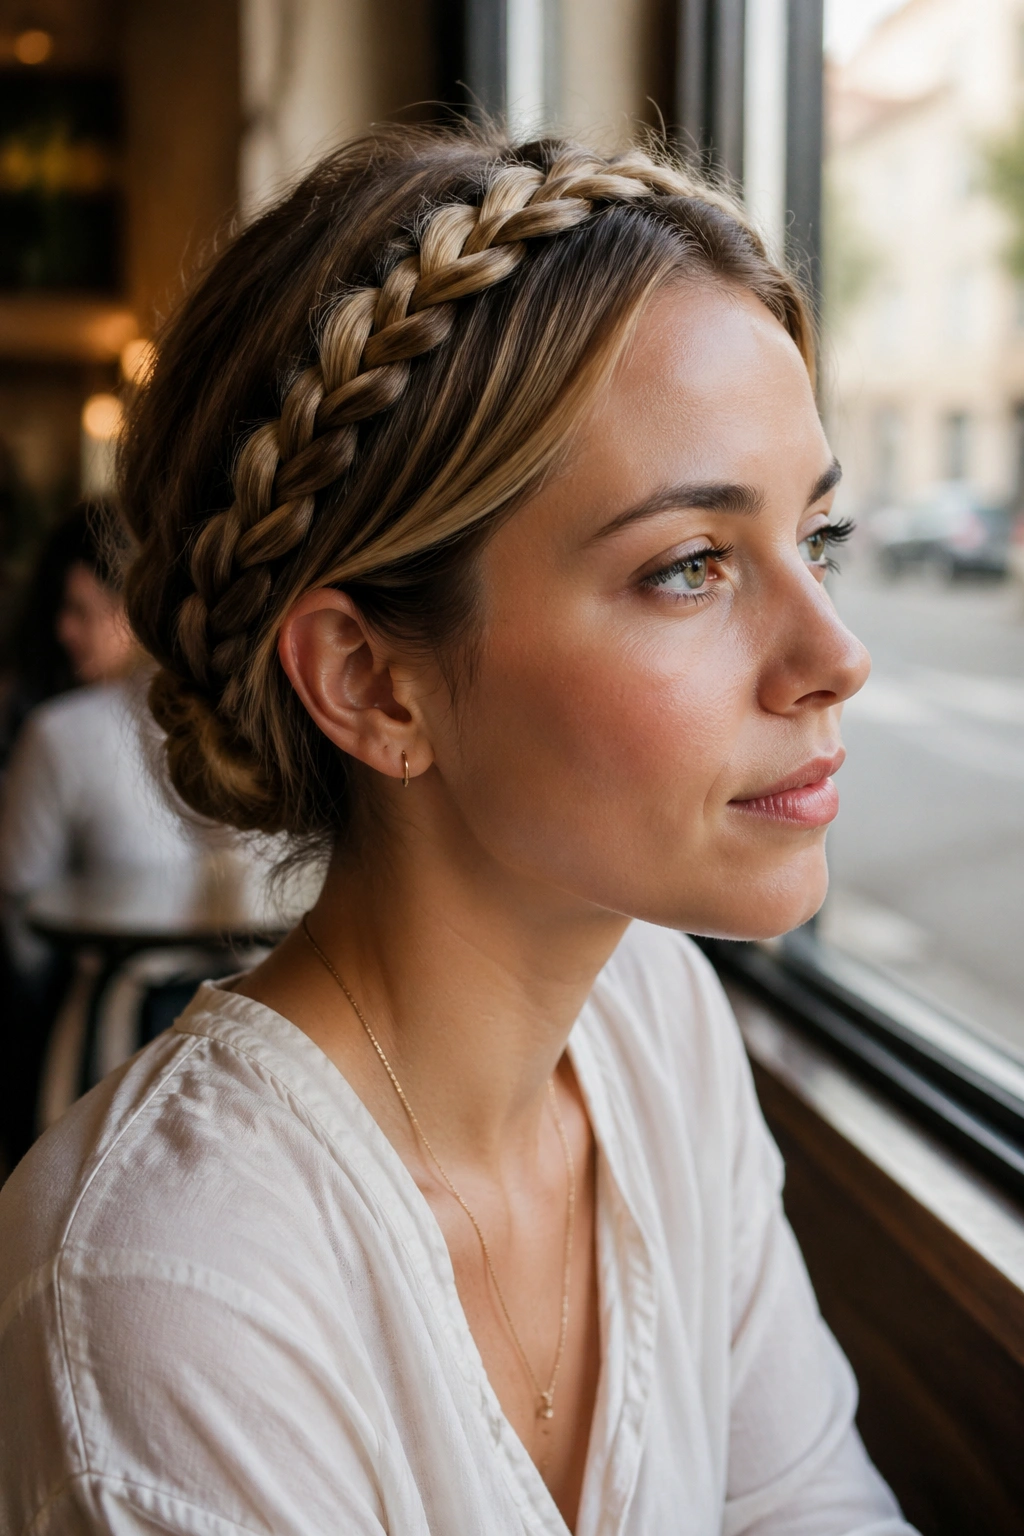
1. Classic Halo Crown Braid
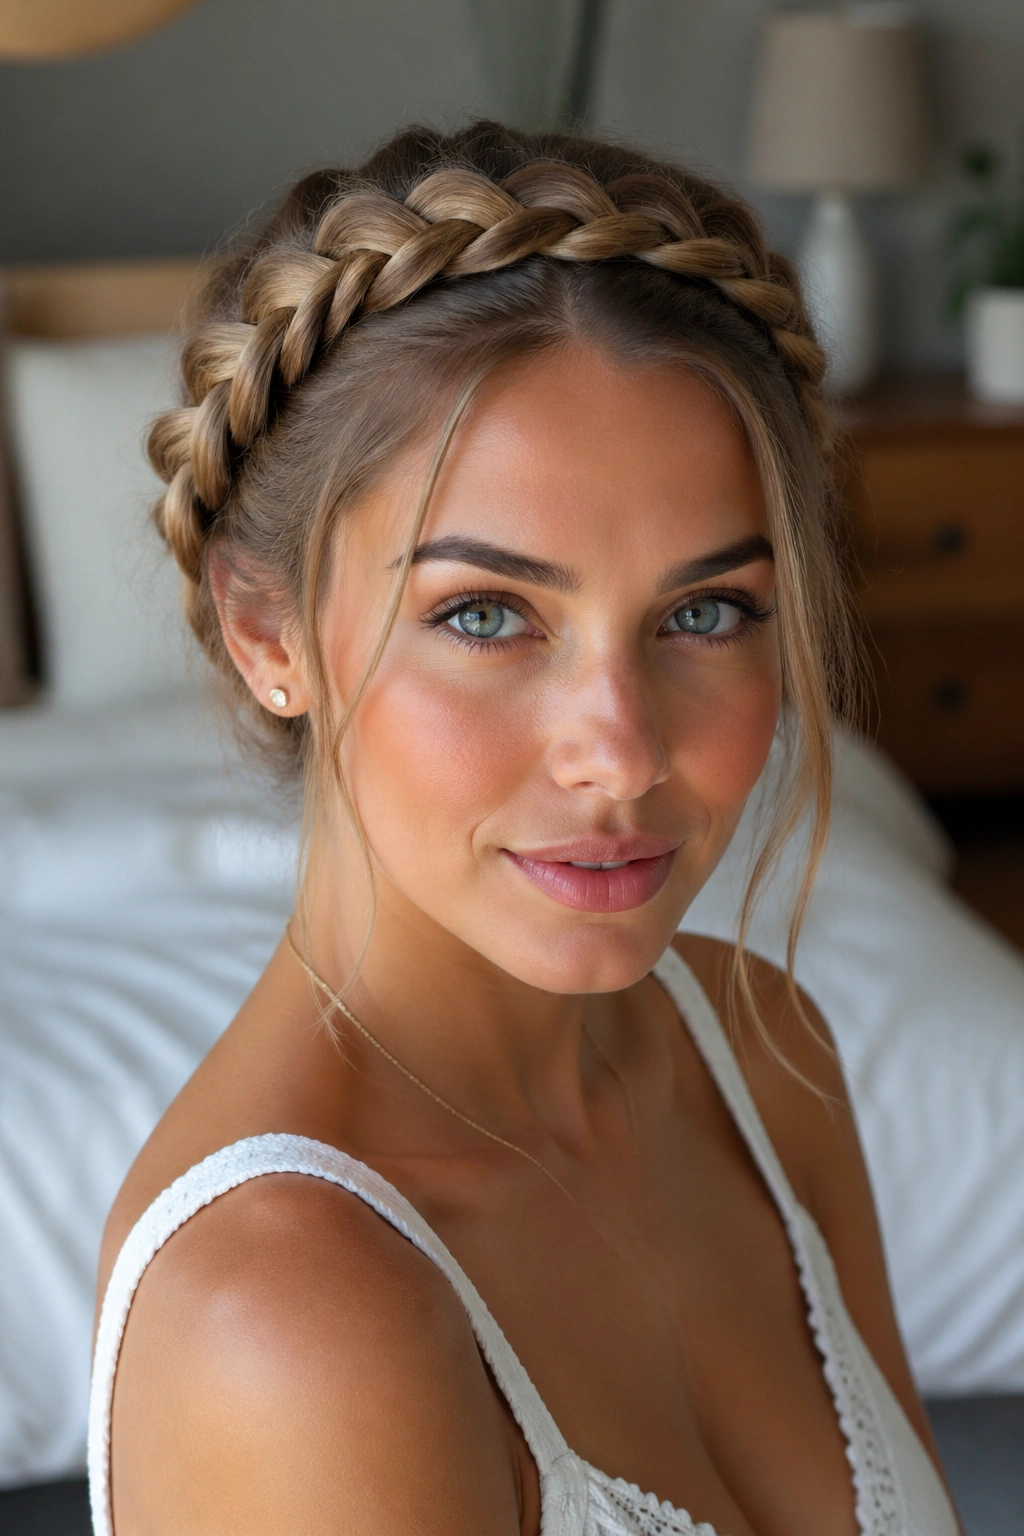
The classic halo braid is the cleanest version of the shape, and it still earns its place because it works on so many hair lengths. You braid from one side of the head, follow the hairline, and pin the tail where the circle closes. That’s the whole trick. Simple. Pretty. Annoyingly useful.
Why It Works
A regular crown braid gives you a smooth line that sits about 1 to 2 inches back from the hairline, which makes the face look framed without swallowing it. If your hair is shoulder length or longer, the braid usually has enough material to make a full loop without looking thin. On layered hair, take smaller sections near the nape so the ends stay hidden.
- Part from ear to ear with a tail comb.
- Keep each braid section about 3/4 inch wide for a neat finish.
- Cross the strands tightly enough to hold shape, but not so tight that the braid bends upward.
- Pin the tail under the first braid segment with 2 crossed bobby pins.
Best move: mist the top layer with a light-hold spray before you start. It keeps shorter pieces from slipping out while you braid.
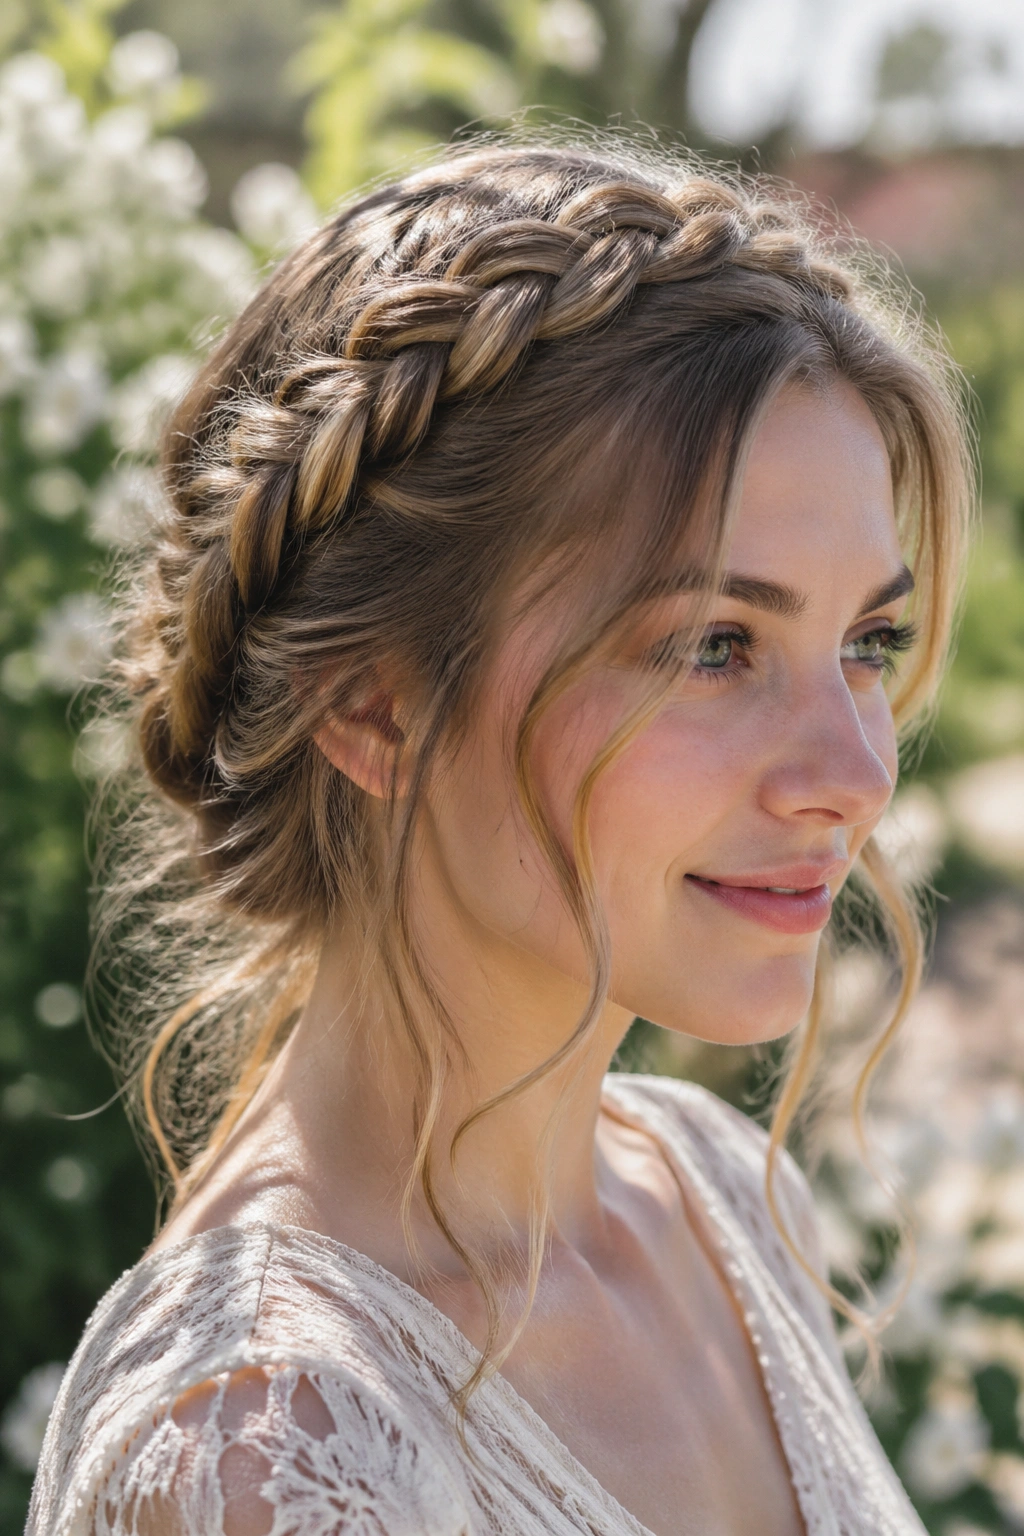
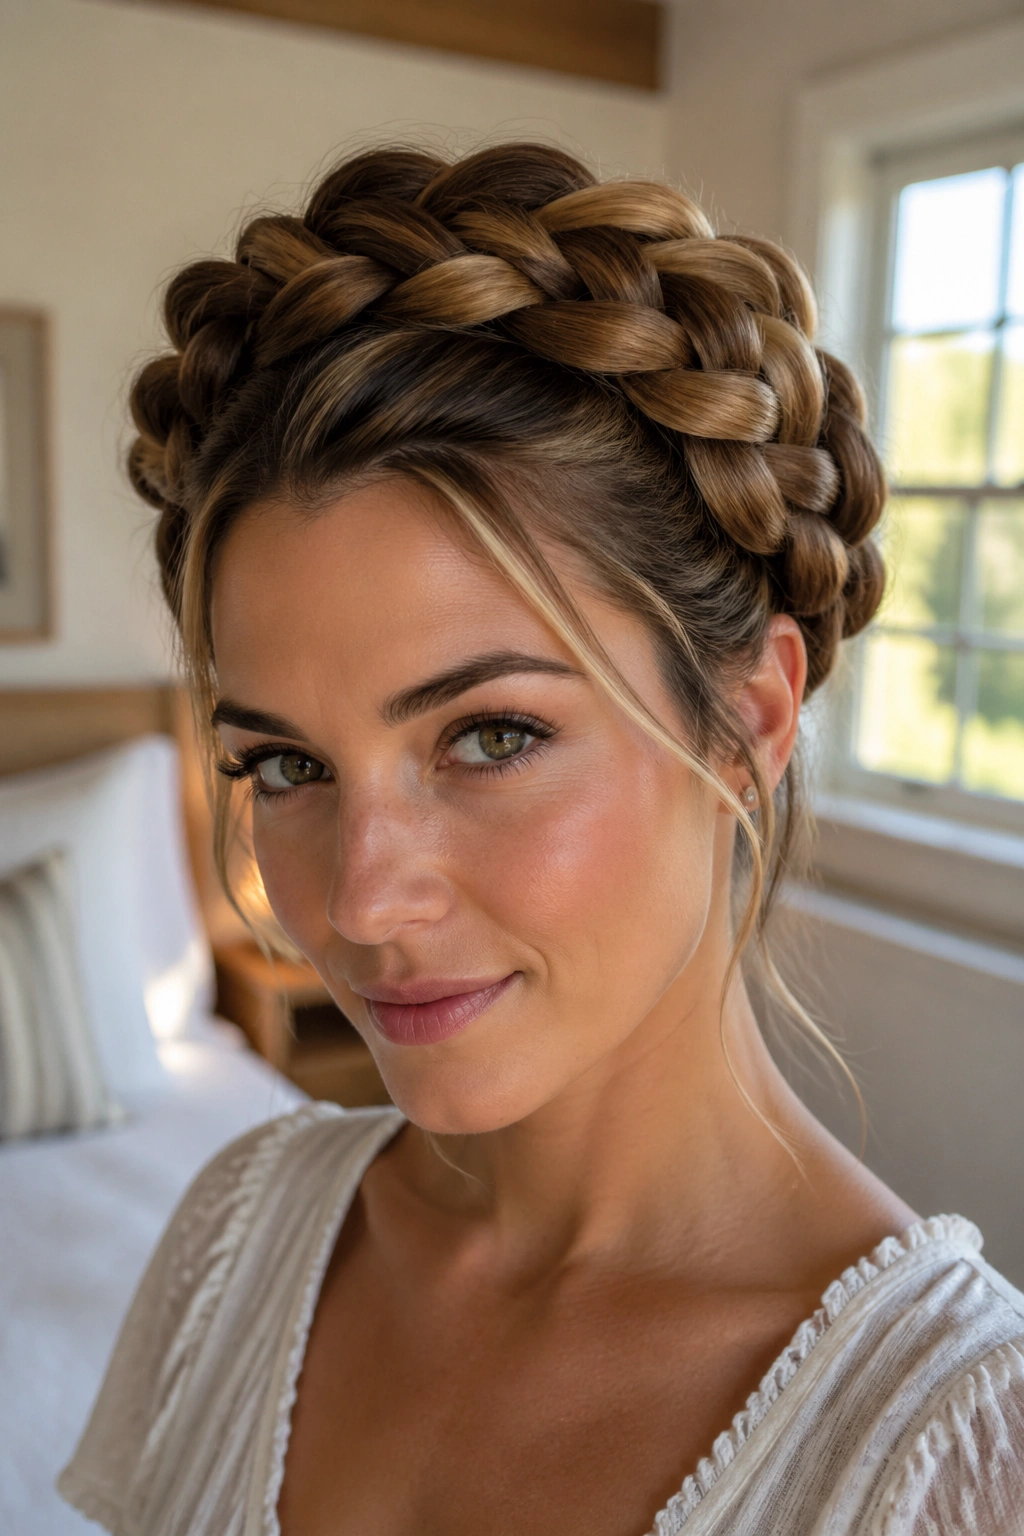
2. Raised Dutch Halo Braid
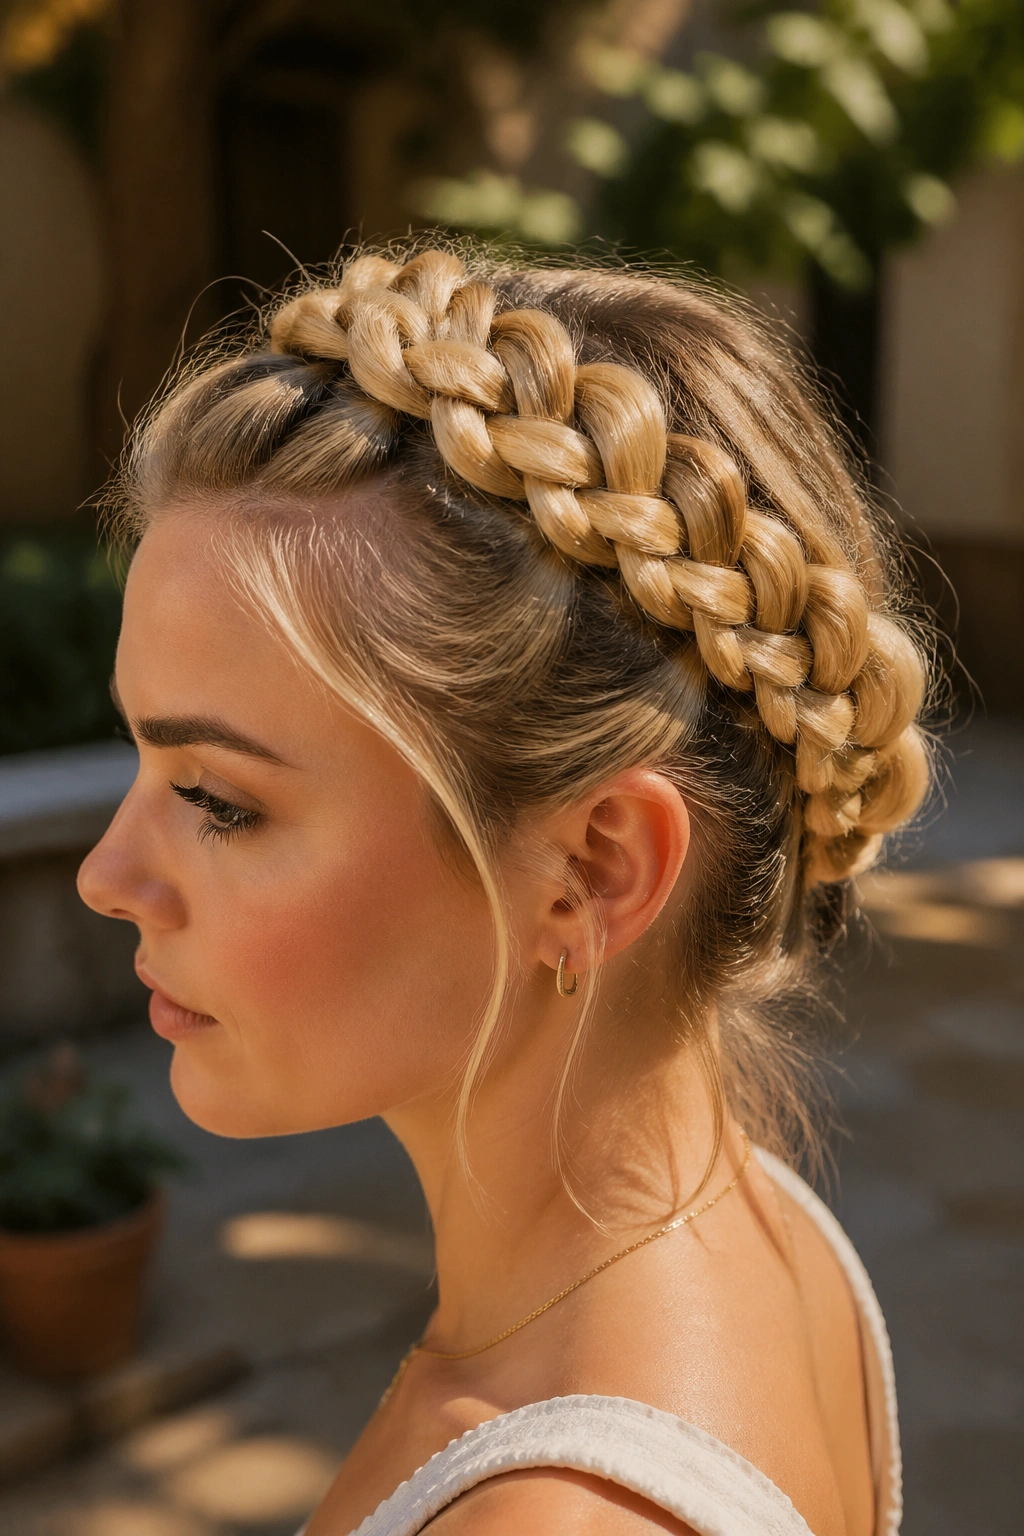
A Dutch halo braid sits proud of the head, and that lifted ridge gives the circle more body than a flat braid ever will. If you like braids that show up from across the room, this is the one. It has more texture, more shadow, and a little more attitude.
The key difference is the braid direction: each strand crosses under instead of over, which pushes the braid outward. That tiny switch changes the whole shape. On medium or thick hair, the raised edge looks almost sculpted, especially when the braid starts just behind one ear and tracks the full curve of the head. Fine hair can wear this too, but you’ll want smaller sections and a firmer grip.
Wear it with a middle part if you want symmetry. Push the front a little off-center if you want it to feel less formal. Either way, the raised edge is doing most of the work, and it does it well.
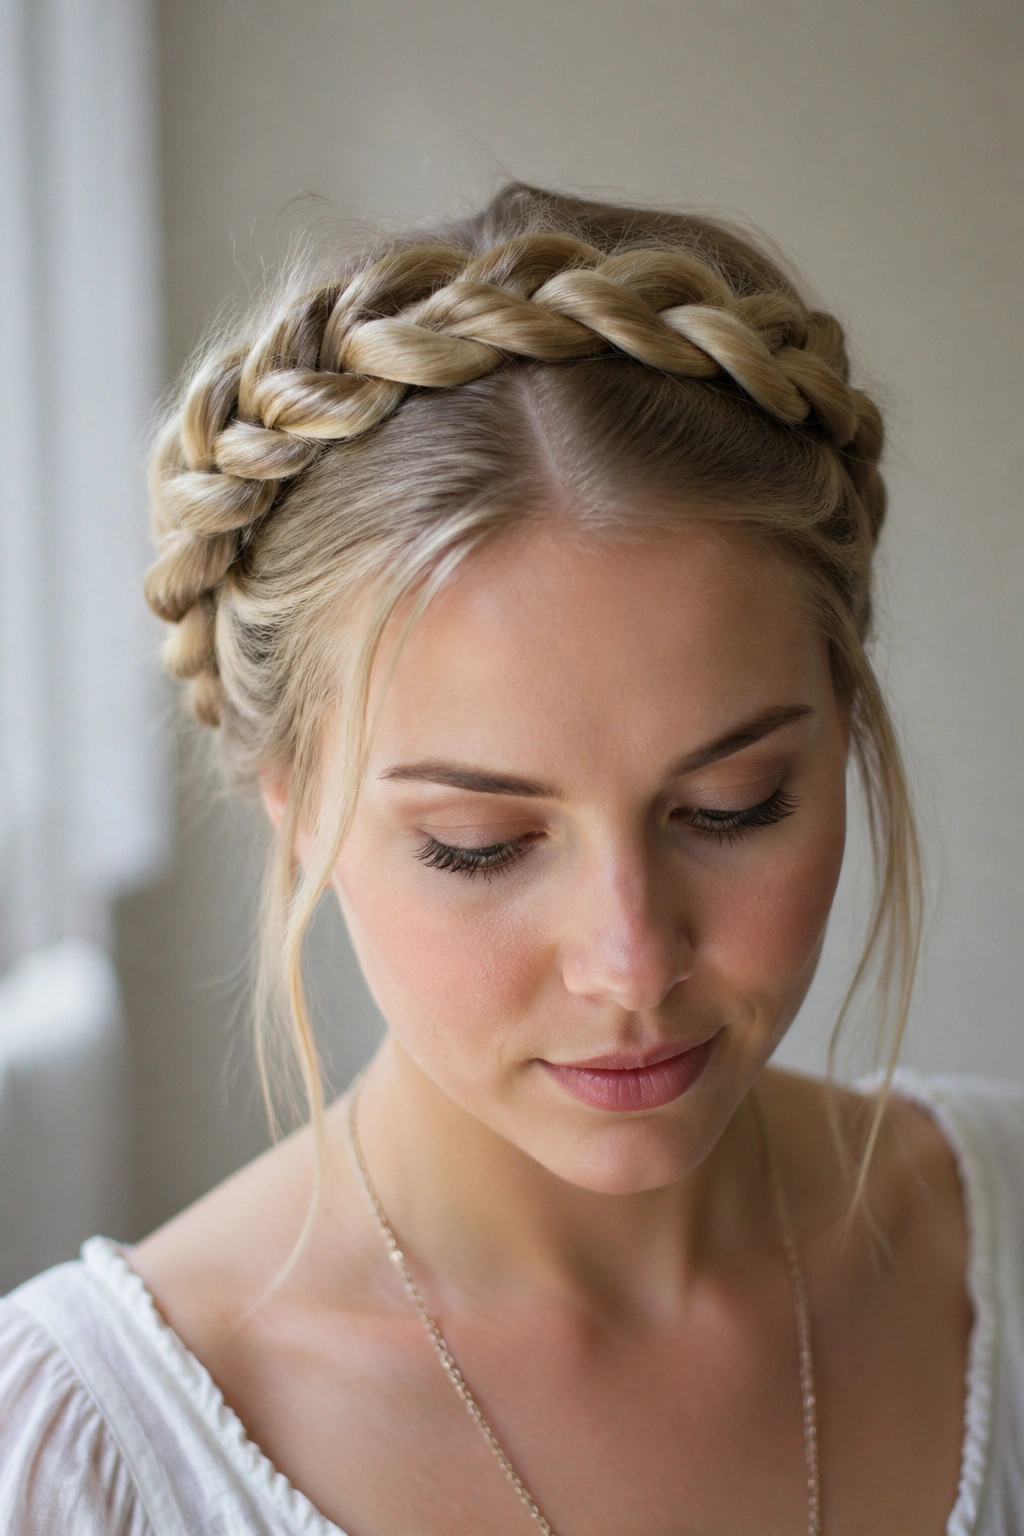
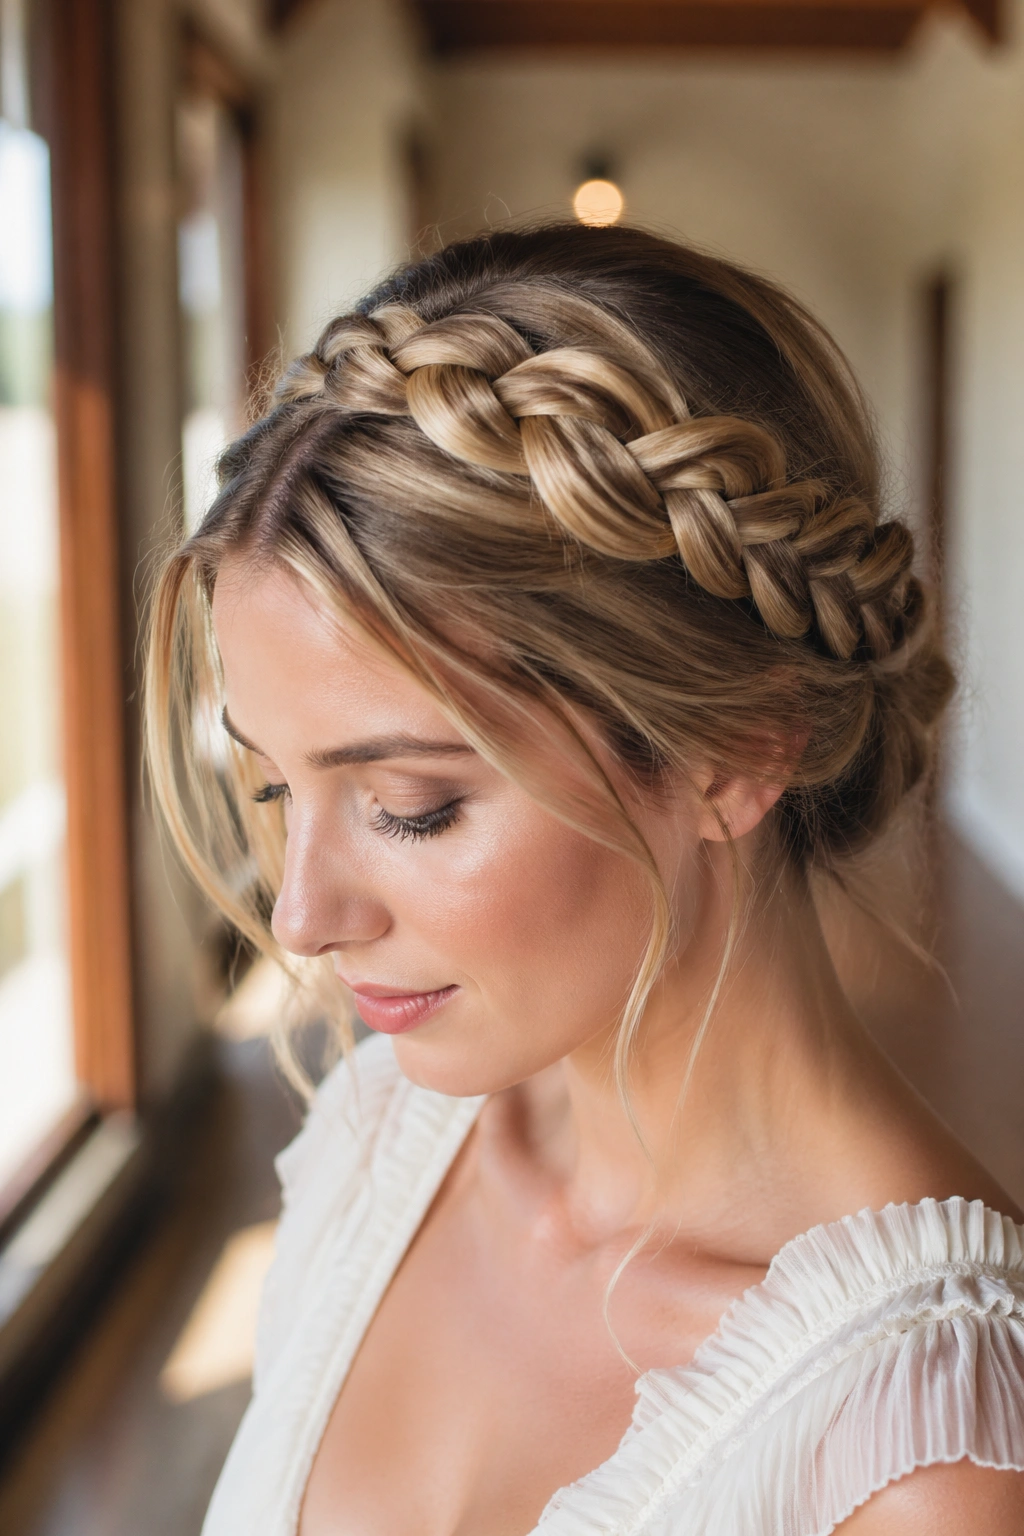
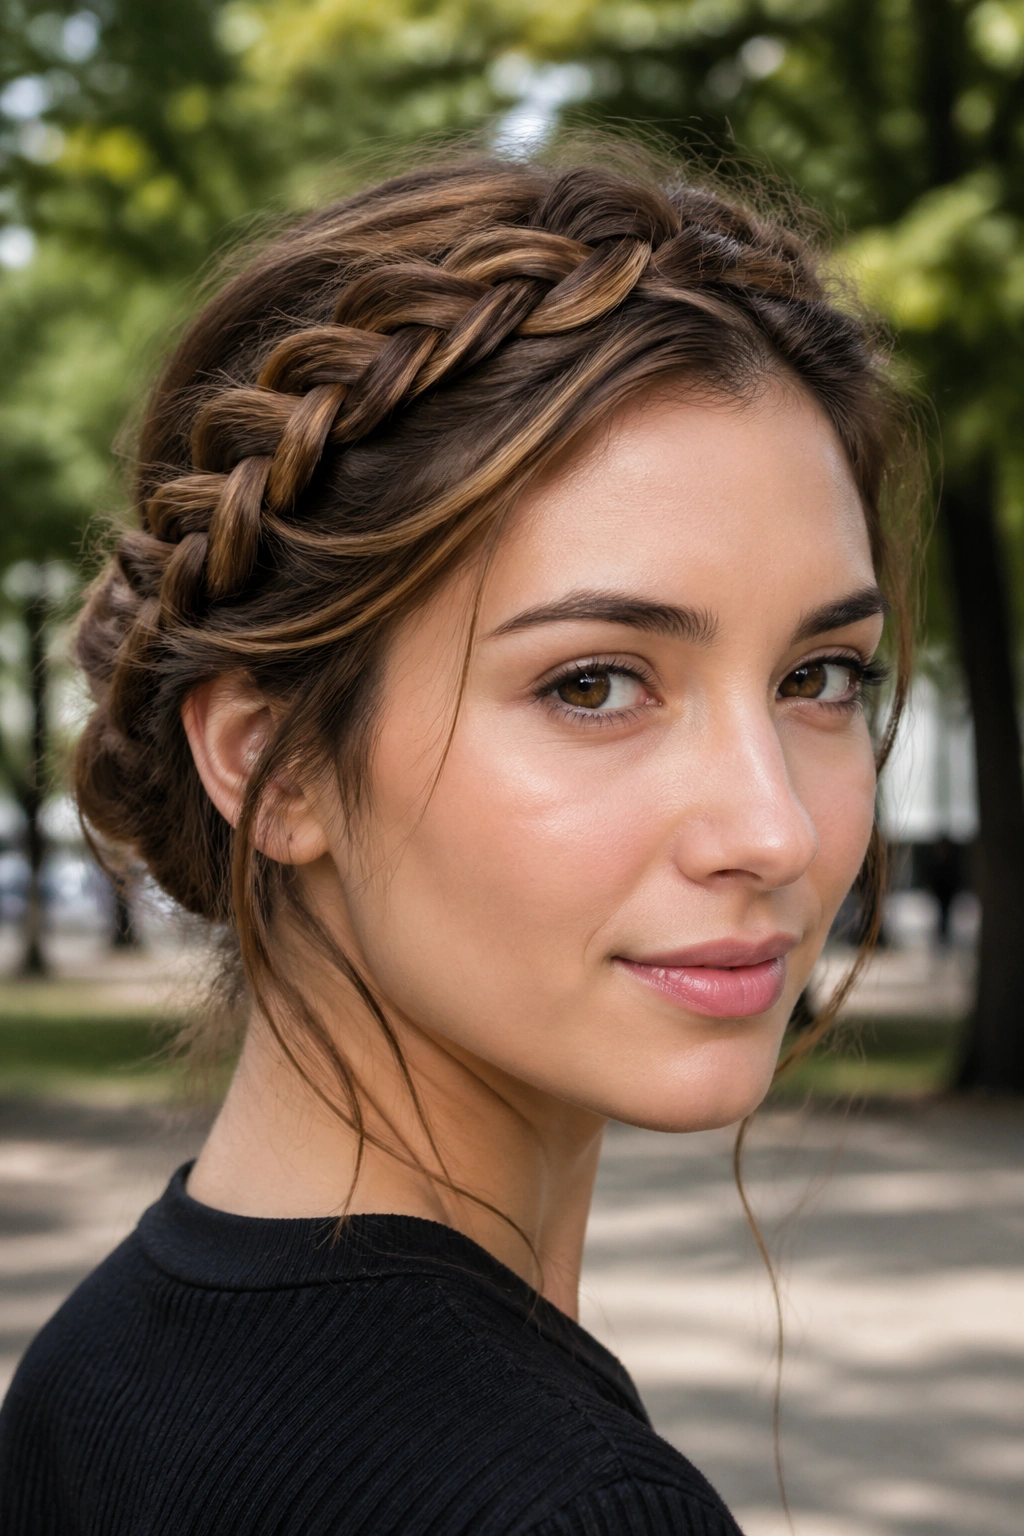
3. Soft French Halo Braid
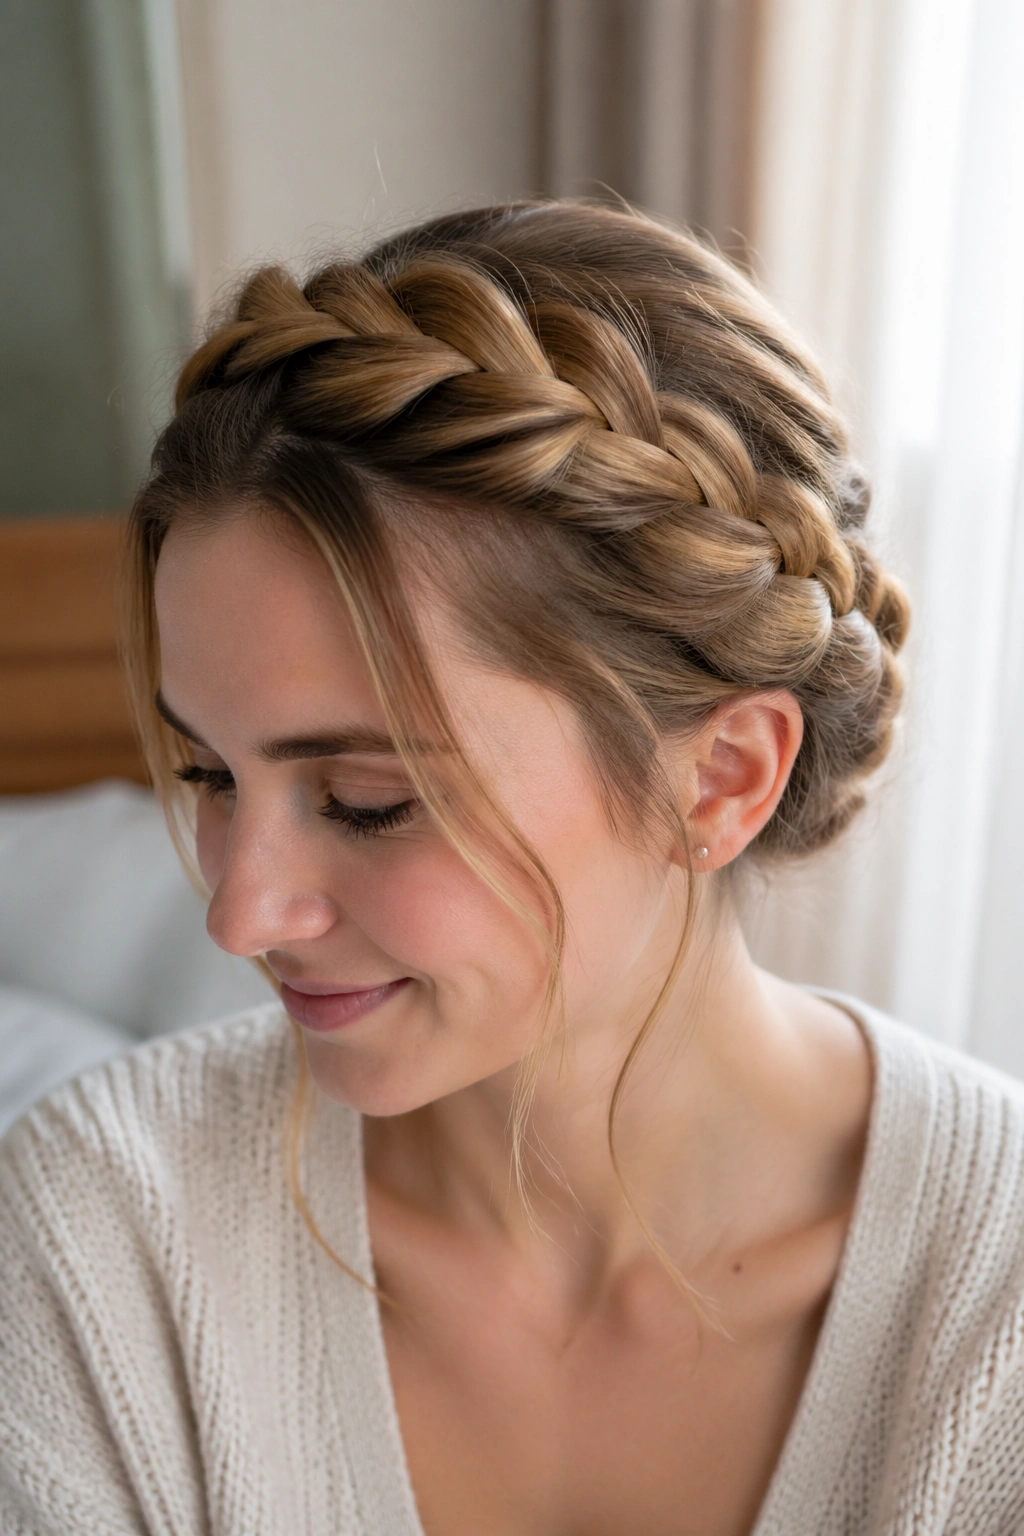
Why does a French halo braid feel gentler than a Dutch one? Because the braid sinks into the hair instead of popping away from it, so the circle looks woven into the head rather than perched on top. That softer profile is one of the reasons brides keep coming back to it.
The braid starts with three sections and picks up hair as it moves around the head, but the crossing stays over, not under. That keeps the surface smoother and the line less dramatic. It’s a good match for fine or silky hair, since a French braid tends to lie flatter and slide into a cleaner arc. If your hair is very layered, let a few face pieces loosen on purpose. The shape can take it.
How to Wear It
Keep the braid at ear level if you want a more delicate frame, or lift it slightly higher for a more formal crown. A satin ribbon tucked into the base looks especially good here. So does a single pearl pin near the temple.
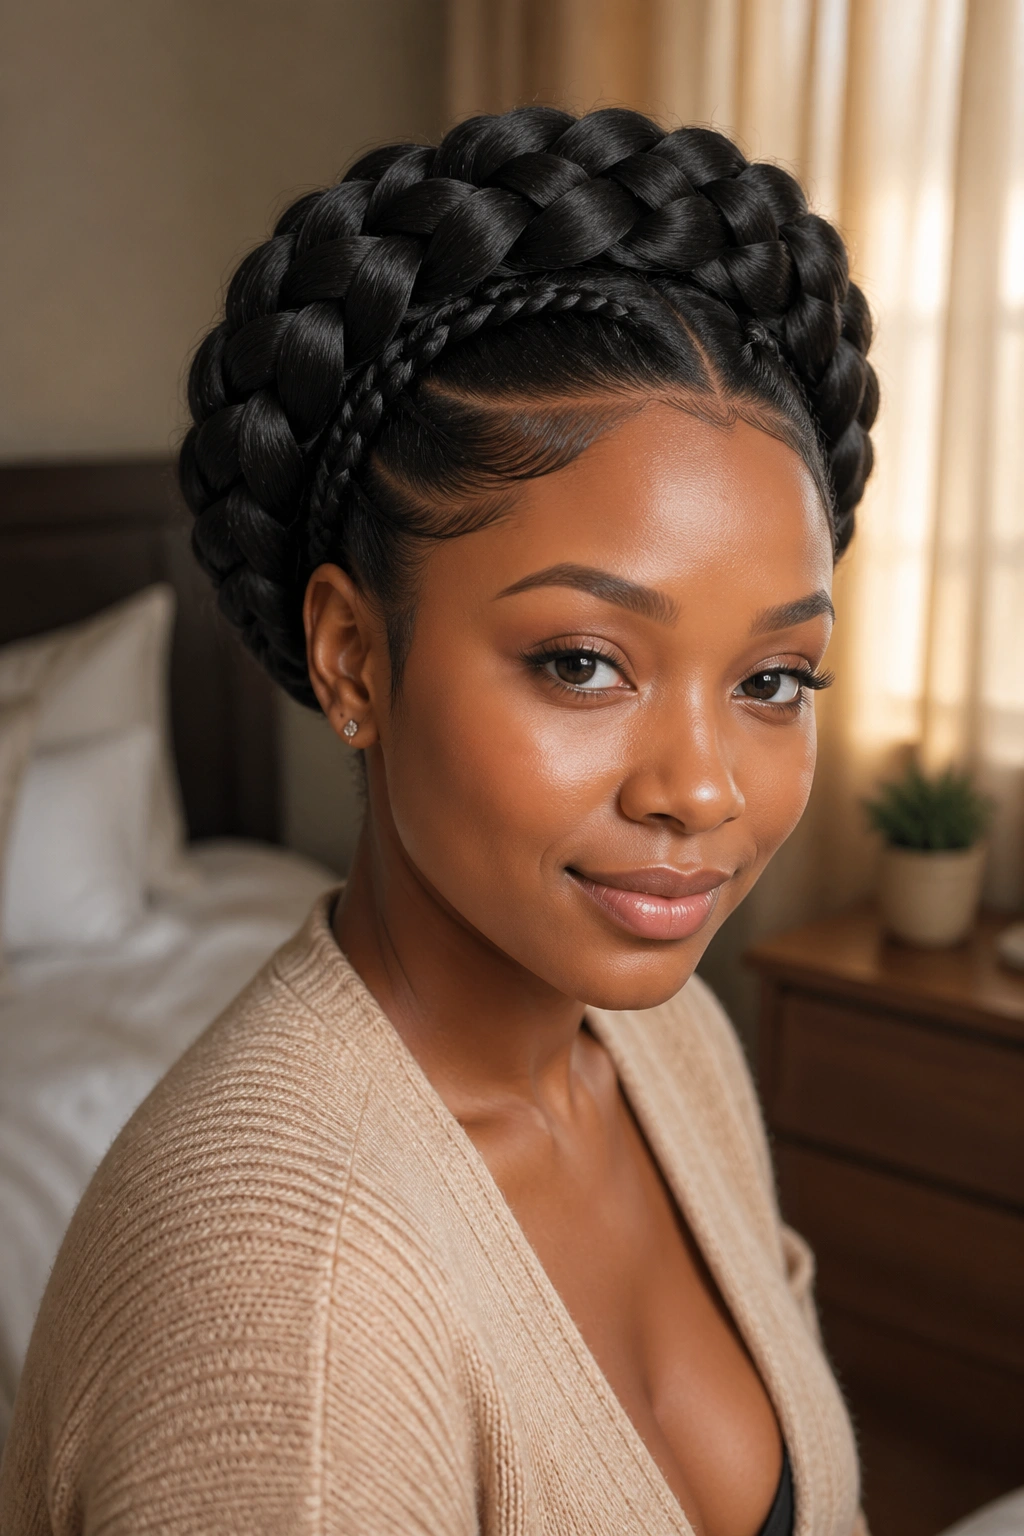
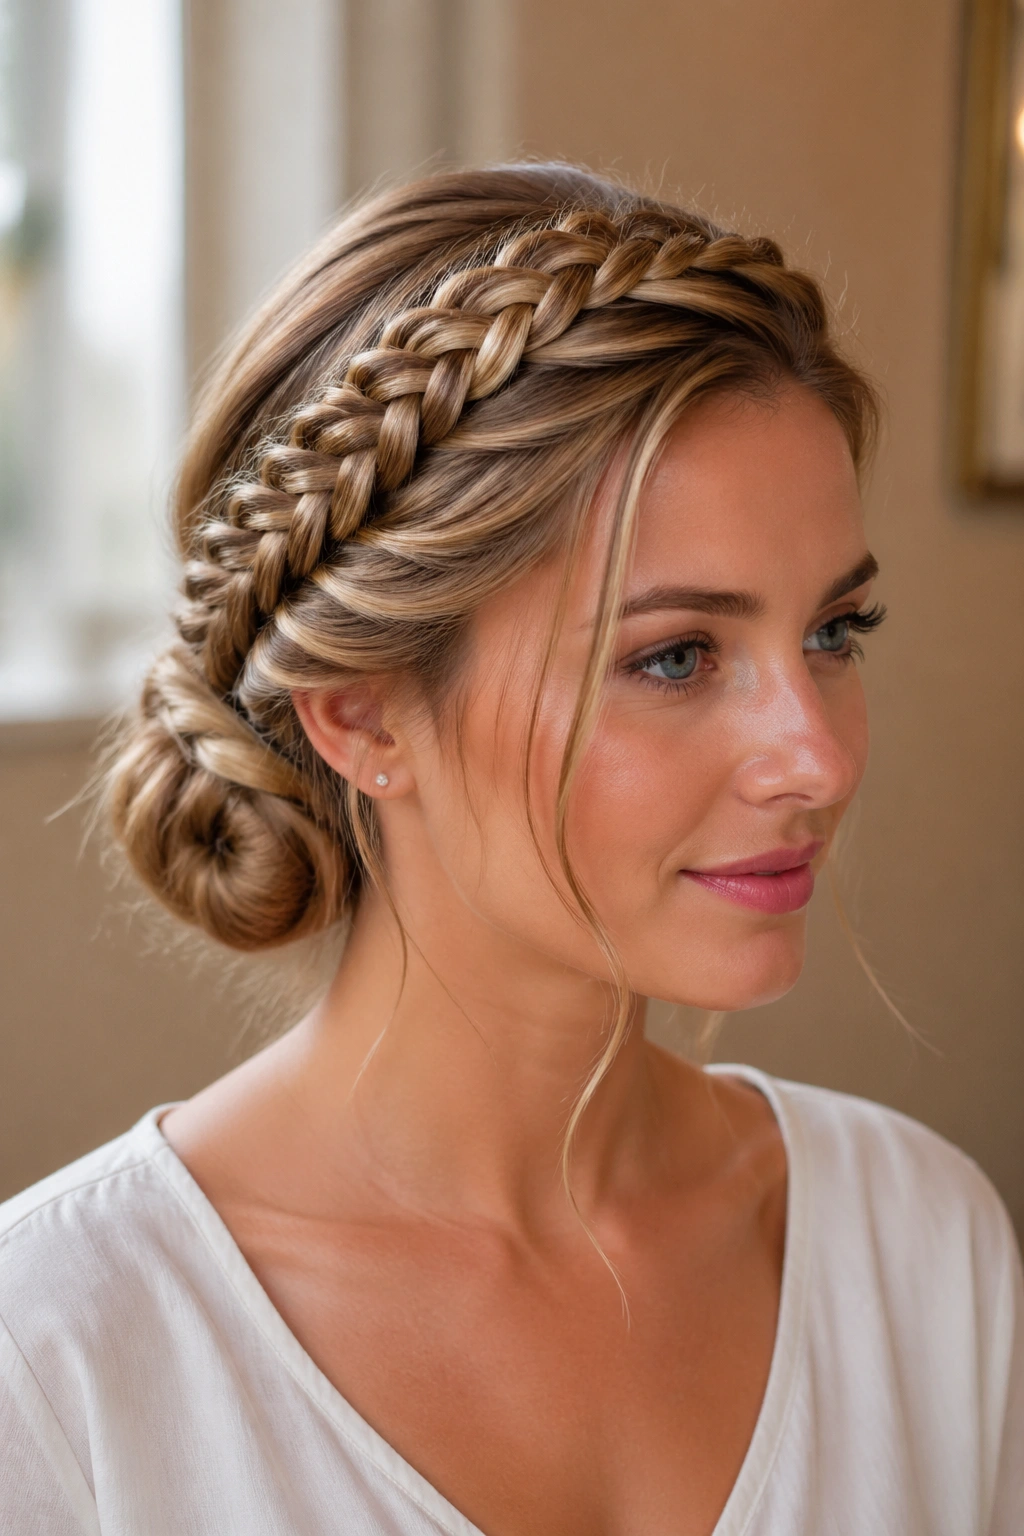
4. Double Ring Circle Braid
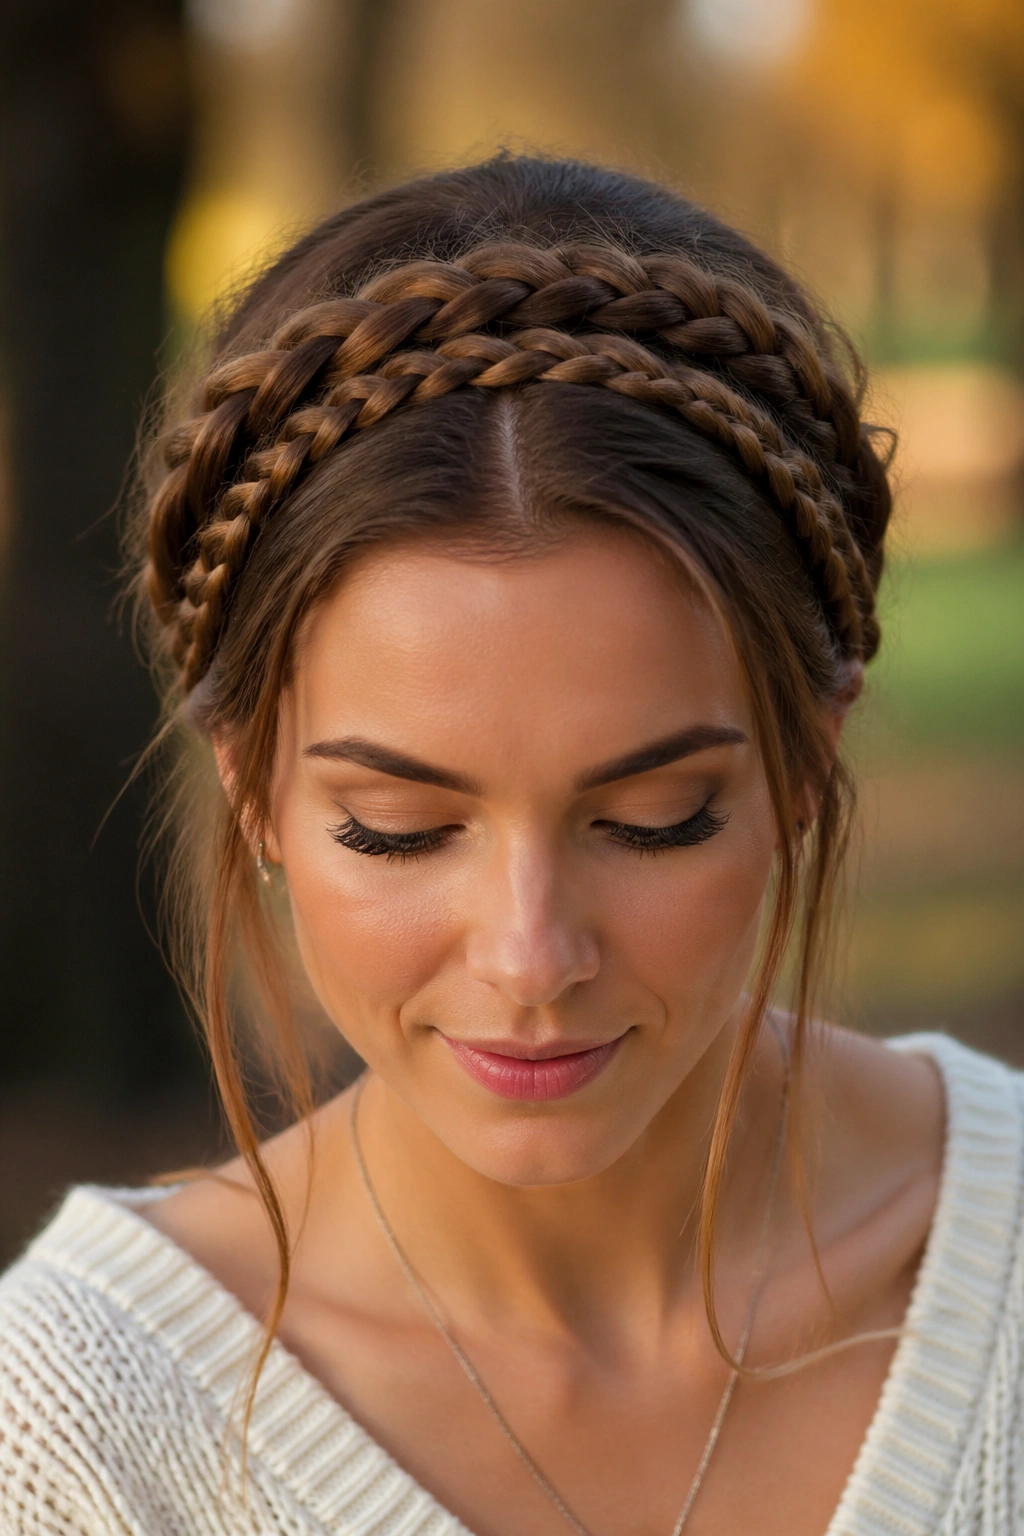
Two circles. That’s the whole point, and it works because the eye reads the shape as deliberate the second it sees the inner ring. A double ring circle braid can be full and dramatic, or controlled and architectural, depending on how far apart you place the two braids.
Start with a smaller braid close to the crown, then build a second braid around it with about 1 to 1½ inches of space between the rings. The gap matters. Too little room and the design looks crowded; too much and the second braid feels detached. I like this pattern on dense hair because the extra braid fills space that would otherwise disappear in a single loop.
- Inner braid: thin, tight, and close to the part.
- Outer braid: slightly thicker so it frames the first one.
- Anchor points: use pins at the back of the head and just behind both ears.
- Finish: wrap the ends flat under the second ring.
That second circle gives the style a little hush of luxury without needing jewelry.
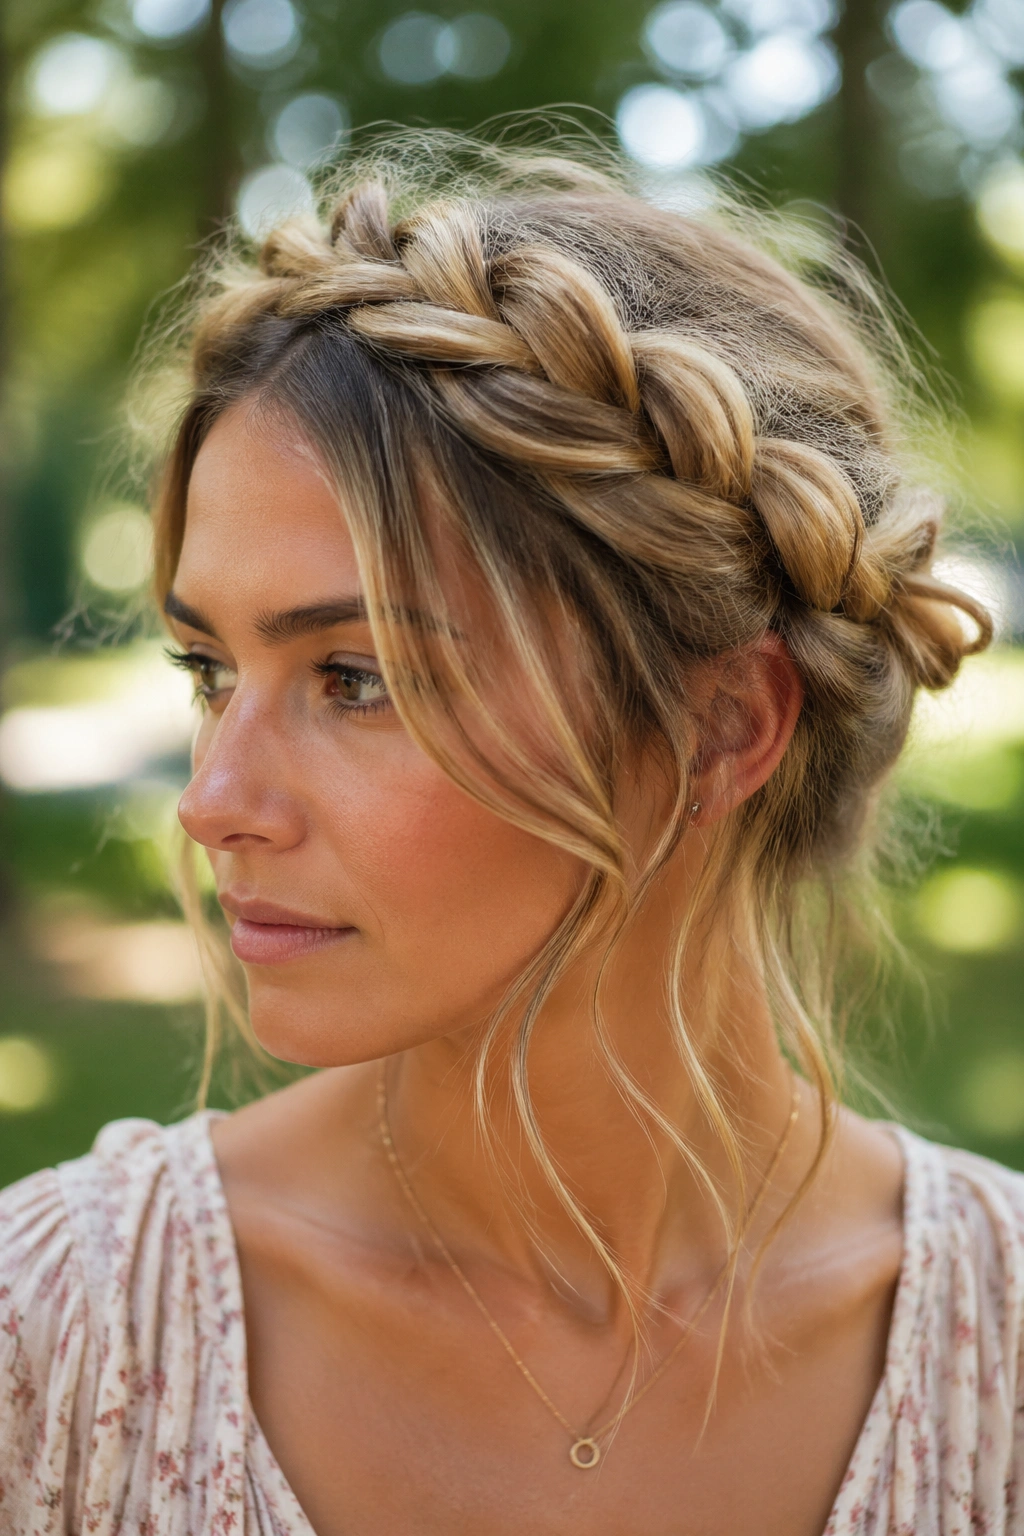
5. Loose Boho Halo With Tendrils
A loose halo braid is what happens when you stop trying to make every strand behave. It’s softer around the edges, and that softness is the point. The braid still travels in a circle, but the texture stays airy, with a few wispy pieces around the cheeks and neck.
I like this version when the hair has a bit of grit or second-day texture, because too-smooth hair can make it look overhandled. Pull the braid out gently after it’s pinned, starting from the outer edges and working only a little at a time. You want width, not frizz. If the braid starts to puff too much, press it back with your palms instead of combing it out.
The tendrils matter here. Leave two small pieces near the temples, about the width of a pencil, and curl them loosely if the rest of the hair is straight. That little bend keeps the halo from looking severe. It feels lived-in, which is usually why people like it.
6. Rope-Twist Halo Braid
A rope-twist halo is cleaner than a three-strand braid and faster than people expect. Two sections twist around each other, and because the pattern is tight and round, the circle reads crisp from every angle. If your hair slips out of regular braids, rope twists can behave better.
The structure is different enough that it changes the whole mood. Rope twists reflect a little more light and can look almost corded when the hair is sleek. They’re also easier to keep even if your hands tire halfway through, since each side only has to twist in one direction before wrapping around the other. On straight hair, use a tiny bit of cream or gel on the first 2 inches of each section. On textured hair, dampness helps the twist hold its line.
Best for short to medium lengths, especially when you want a halo effect without the bulk of a chunky plait. It’s tidy. It’s quick. It doesn’t ask for much.
7. Fishtail Crown Braid
A fishtail circle braid looks intricate even when the shape is straightforward. That’s the charm of it. The tiny over-and-under pattern creates a woven edge that feels more detailed than a standard braid, and around the head, that detail makes the halo look almost lace-like.
What Makes It Different
The braid pulls hair from two larger sections, then keeps nipping tiny pieces from the outside edge into the center. That gives the finished crown a narrow, grainy texture that holds up beautifully on thicker hair. On fine hair, it works best when the sections are a little larger than you think you need, because tiny fishtails can vanish fast.
How to Wear It
- Keep tension even from the start; fishtails show sloppy hands faster than most braids.
- Add a soft shine serum to the lengths, not the roots.
- Leave the tail tucked low behind the ear for a cleaner finish.
- If you want a fuller look, pancake only the outer edge, not the entire braid.
The braid itself does the talking here, so the rest can stay quiet.
8. Half Halo Braid Across the Front
Not every circle braid needs to close all the way around. A half halo braid sweeps across the front hairline and stops near the opposite ear, which gives you the frame without the full crown commitment. It’s a smart choice when you want to keep most of your hair down.
This version works especially well if your ends are layered or blunt, because the back stays loose and full while the braid controls the front. You can braid from temple to temple, or start just above one ear and trace the forehead line before pinning the end behind the other ear. The front edge usually looks best when it sits about 1 inch back from the hairline — close enough to frame, far enough to breathe.
The style feels casual, but not careless. That’s a useful line to walk.
9. Waterfall Circle Braid
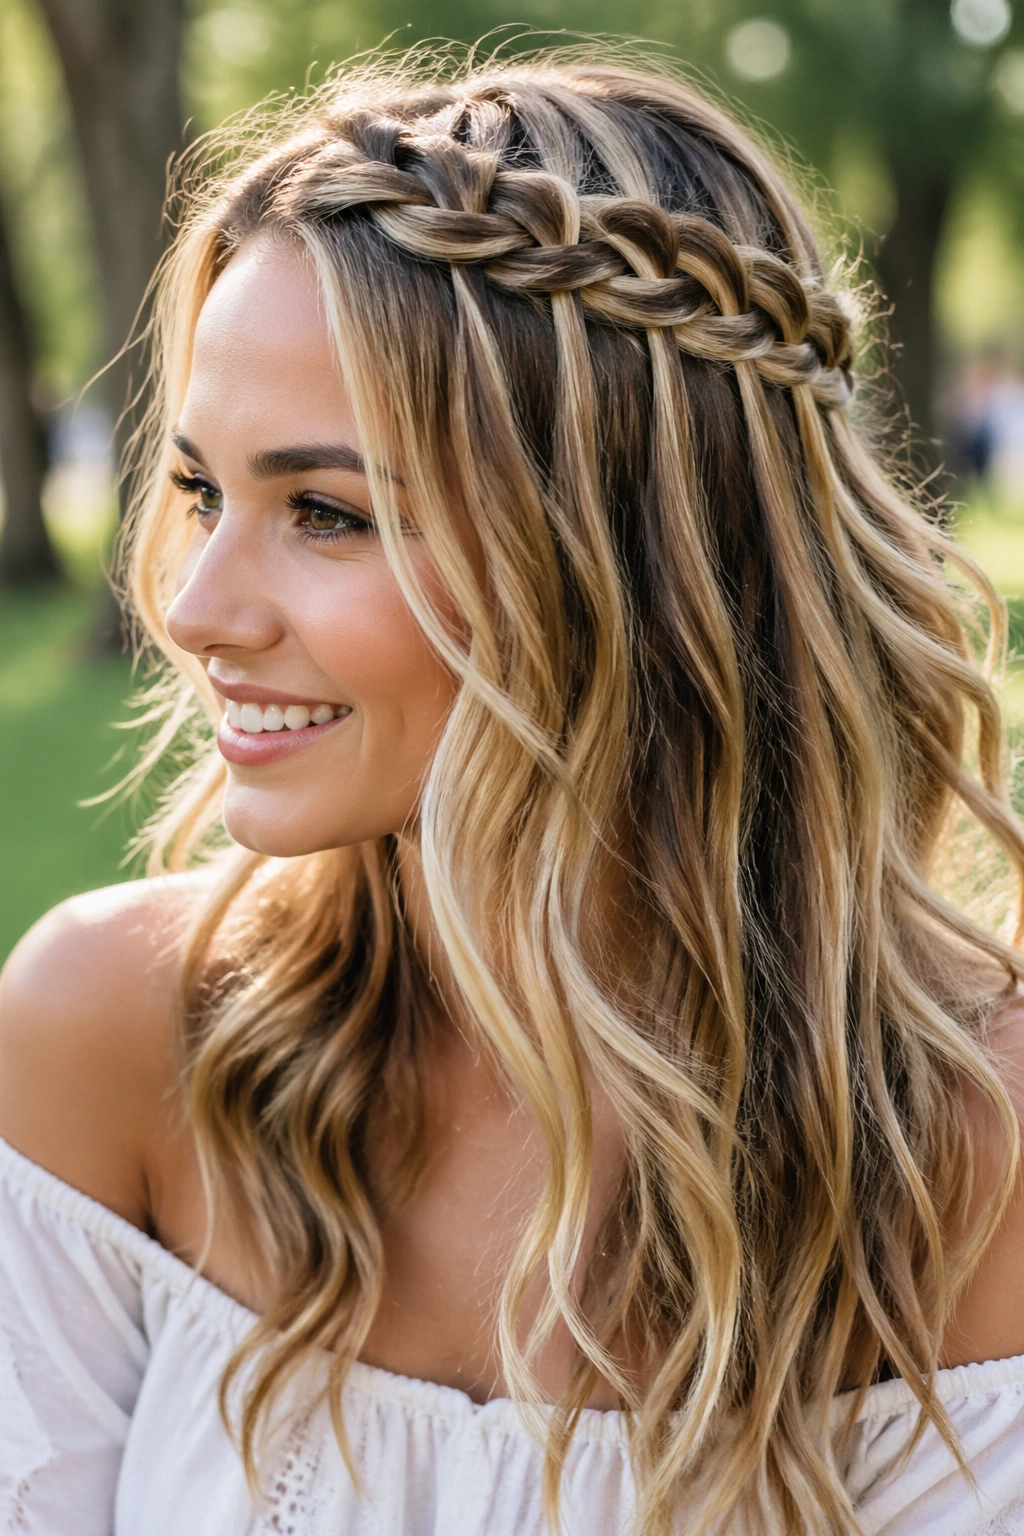
Why does a waterfall braid feel so delicate? Because the dropped strands create movement inside the circle, not just around it. Hair slips out of the braid at intervals, then gets replaced by fresh sections as the braid travels along the head.
The effect is especially pretty on wavy or curled hair, where the loose pieces blend into the rest of the texture instead of looking detached. Keep the dropped strands the same width each time — about 1/4 to 1/2 inch — or the pattern can get messy fast. If you’re using a curling iron afterward, curl only the free-hanging pieces away from the face so they don’t tangle into the braid line.
How to Get the Most From It
A waterfall circle braid looks best when the braid itself stays snug and the loose strands stay soft. That contrast is the whole game. Pin the finish under a hidden panel of hair, then mist lightly from 10 inches away so the fallen pieces keep moving.
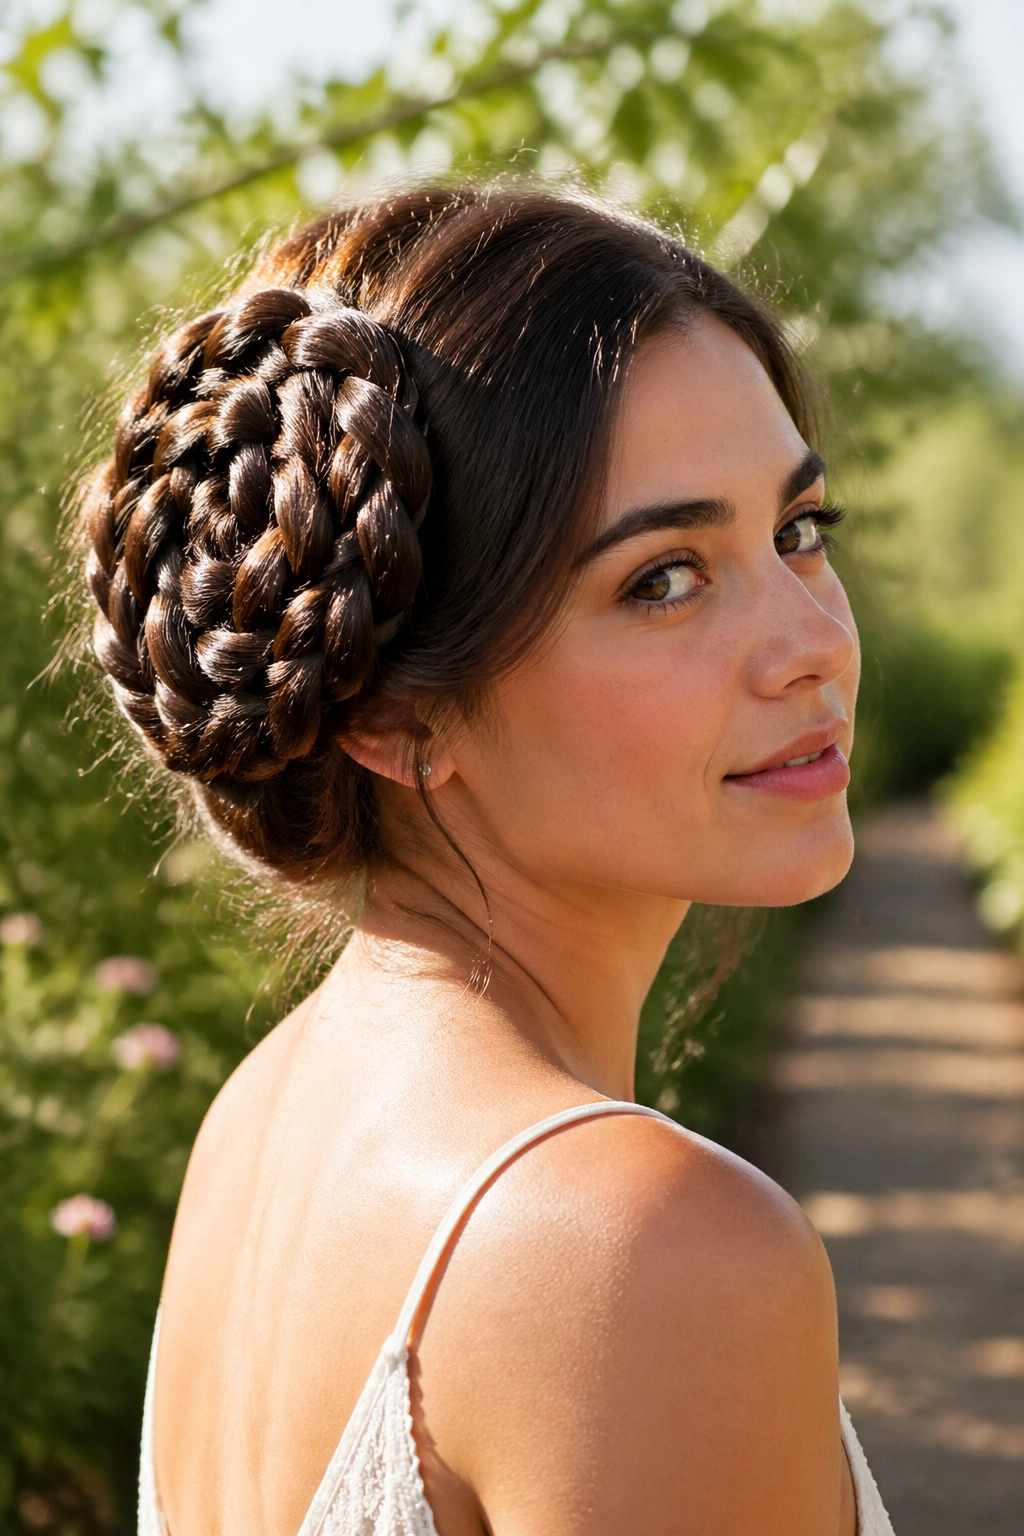
10. Twin Milkmaid Halo Braids
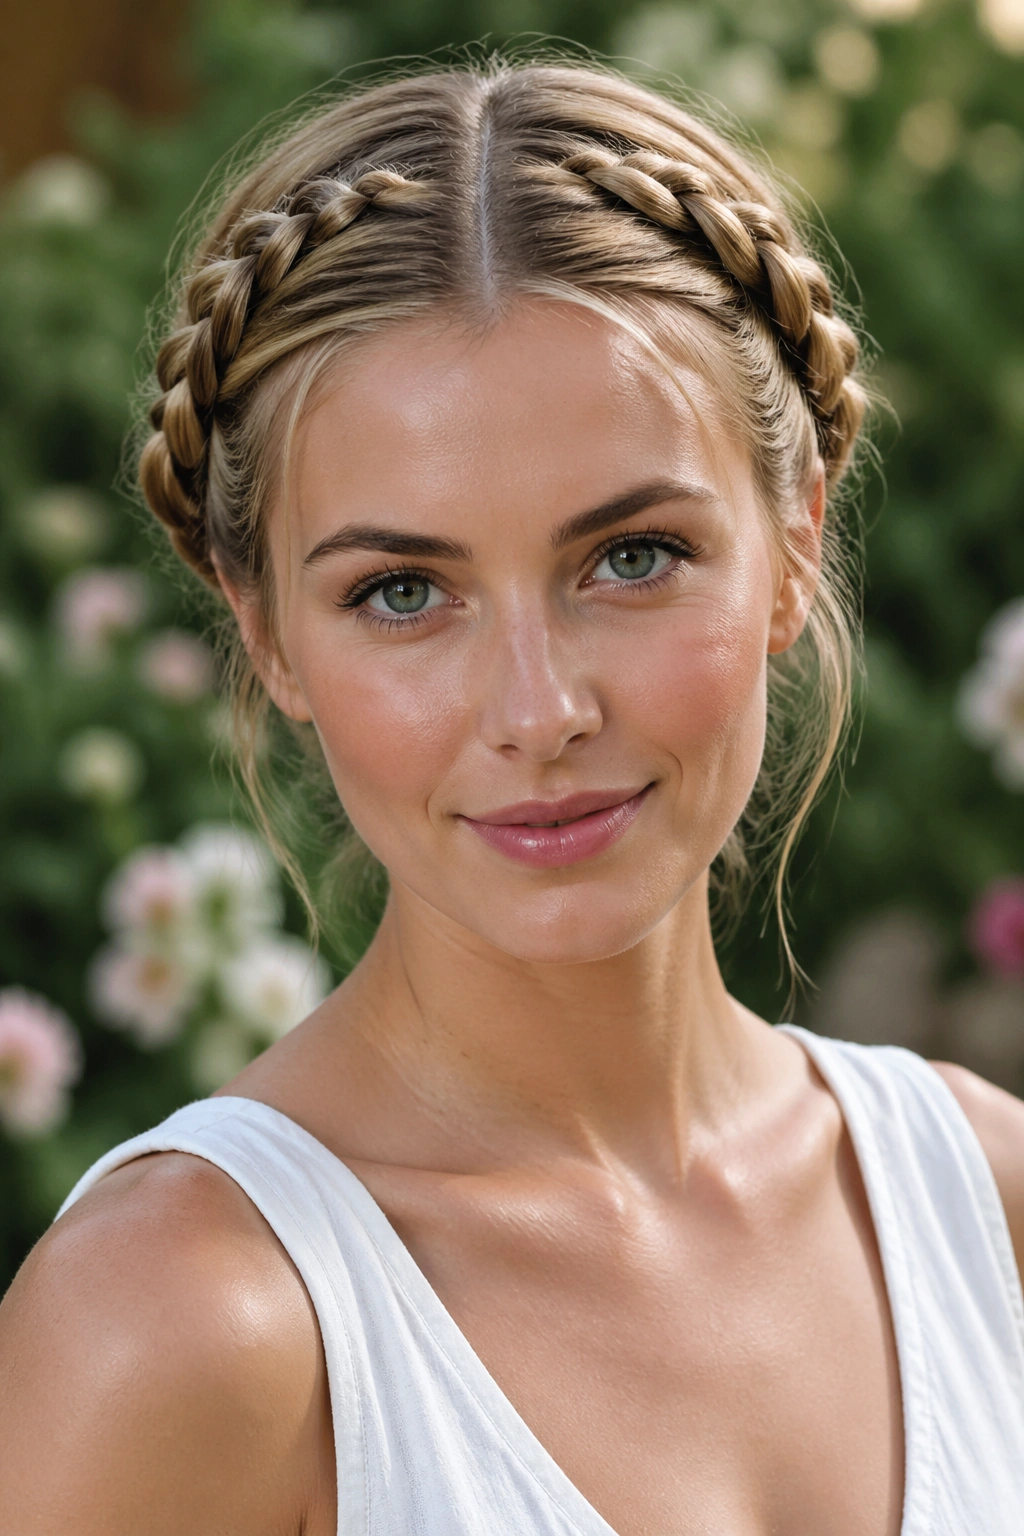
Twin milkmaid braids are the old-school cousin of the single halo, and I mean that in the best way. Two braids are woven separately, then lifted across the head like a frame. The result is neat without feeling precious, and the center part keeps everything symmetrical.
This style is especially kind to medium-length hair. If the ends are long enough to tuck under, you’re in good shape. If they’re shorter, use small clear elastics and hide the ends with pins beneath each braid. A little volume at the crown helps the braids sit higher, which keeps the shape from drooping toward the ears.
You can keep the center part sharp and straight, or soften it with a zigzag if you want the style to read less strict. Either way, the twin-braid halo feels sturdy. It stays put.
11. Braided Bun With Halo Base
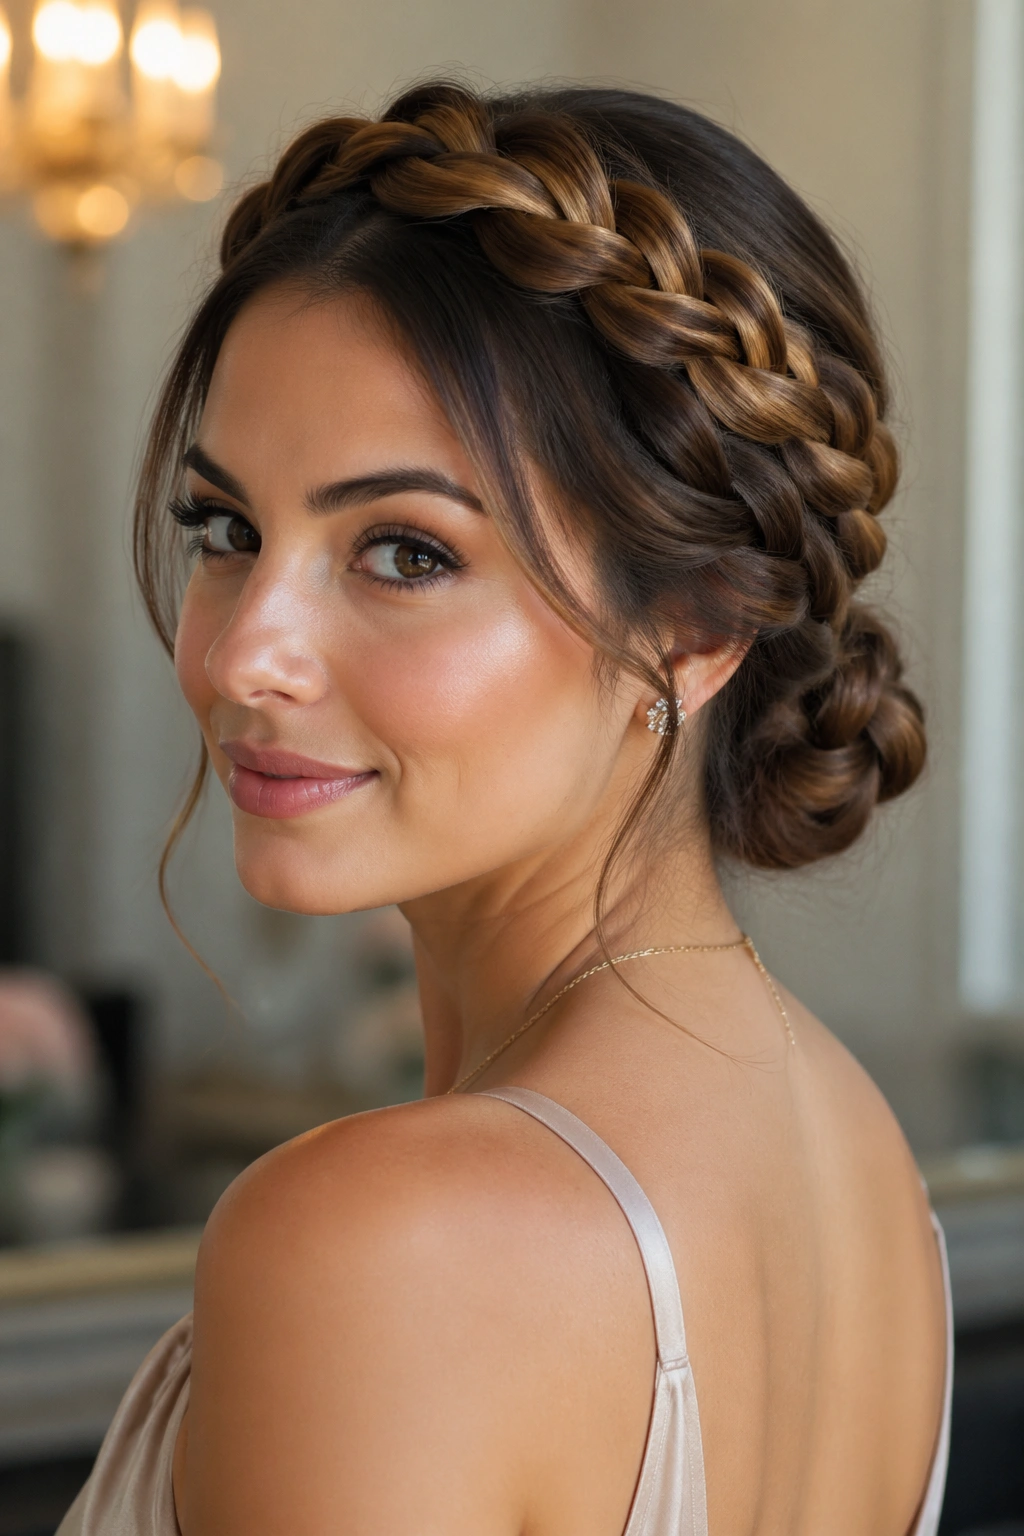
A braided bun with a halo base gives you two shapes in one: the circle around the head and the knot at the back. That combination looks polished without turning stiff, which is why it works for weddings, dinners, and long days when you want your hair off your neck.
Start with a braid that circles the crown, then gather the remaining lengths into a low bun or twisted knot. The bun can be smooth or slightly undone, but it should sit centered under the braid line so the style feels balanced. If the bun gets too large, the crown braid loses its role and the whole thing becomes top-heavy. Keep the knot compact. That’s where restraint helps.
A few hidden pins under the bun and one or two at the braid’s crossing point usually hold it. If you like ornament, pin a small comb where the bun meets the nape. It looks expensive without trying to be.
12. Feed-In Halo on Coily Hair
Feed-in halo braids are built for hair that wants a little structure and a little length. Each section starts small, then extra hair gets added gradually, which keeps the circle smooth instead of bulky at the starting point. On coily textures, that gradual build matters a lot.
The best part is control. You can keep the braid snug at the hairline while still making the crown look full, especially if you add braiding hair in 1/4-inch bits rather than one thick chunk. That method keeps the braid from bunching where it begins. A light edge gel along the perimeter helps the first inch of hair stay neat, but don’t drown it. Too much product makes the braid slippery.
This pattern holds beautifully when the sections are consistent. It also wears well for several days, which is why people reach for it when they want a halo with staying power and a clean finish around the face.
13. Goddess Halo Braid With Extensions
A goddess halo braid is what happens when you want the circle shape to feel fuller, longer, and a little more dramatic. The added extension hair gives the braid thickness from the start, so the crown shows up with less effort. Good news for anyone whose natural hair is fine at the ends.
The trick is to match the extension texture to your own hair as closely as possible. If the mismatch is too obvious, the braid can look pasted on instead of blended. Feed the hair in small sections and keep the added pieces tucked into the middle of the braid so they disappear into the weave. A braid this full usually needs more pins than people expect — four to six hidden pins is normal if the circle is large.
This one likes a soft finish at the hairline and a strong shape through the crown. Big. Rounded. Intentional.
14. Microbraid Crown With Beads
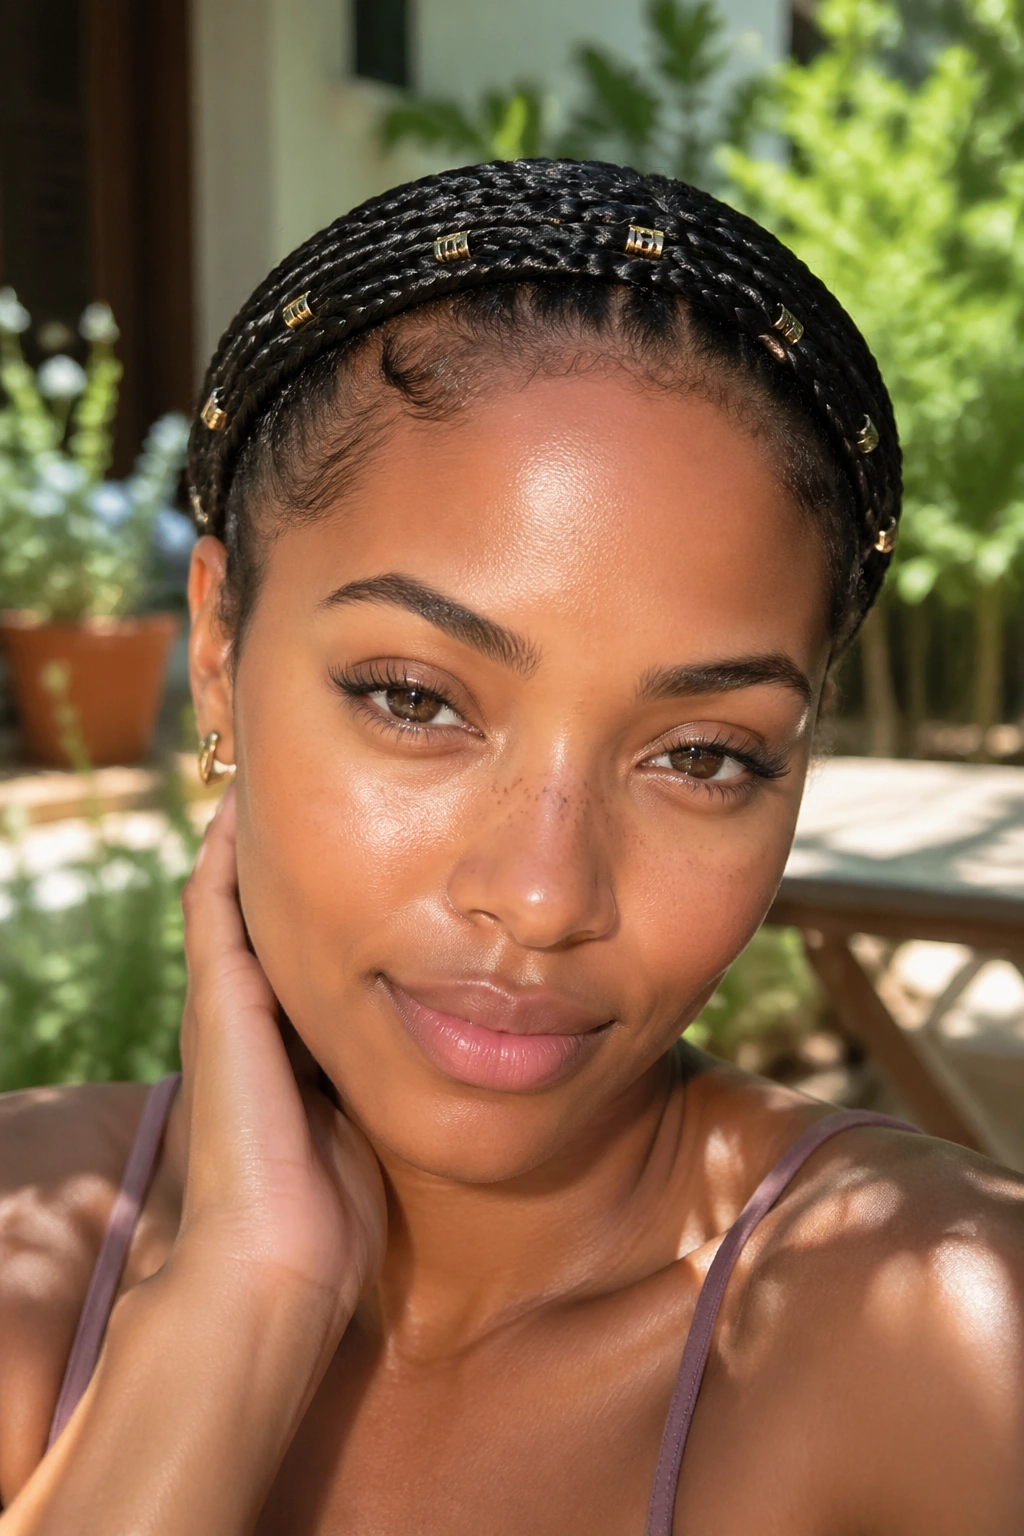
Microbraids around the head make the halo read like jewelry, and that is part of the appeal. Tiny braids create a fine, detailed edge, and when you add a few beads or cuffs, the whole crown starts looking handmade in the best sense of the word.
What to Watch For
The sections need to be narrow — around 1/8 inch if you want the pattern to stay delicate. Too wide, and the micro effect disappears. Because the braid count is high, the style takes patience, but the payoff is a halo that feels precise and decorative. Lightweight beads are better than heavy ones, since extra weight can tug at the braid and distort the circle.
How to Get It Right
- Use a rat-tail comb for clean part lines.
- Keep the braids close to the scalp, not floating above it.
- Space beads at the temples or near the back, not everywhere at once.
- Seal the ends with small elastics before adding hardware.
A little restraint goes a long way here. The braid is already doing a lot.
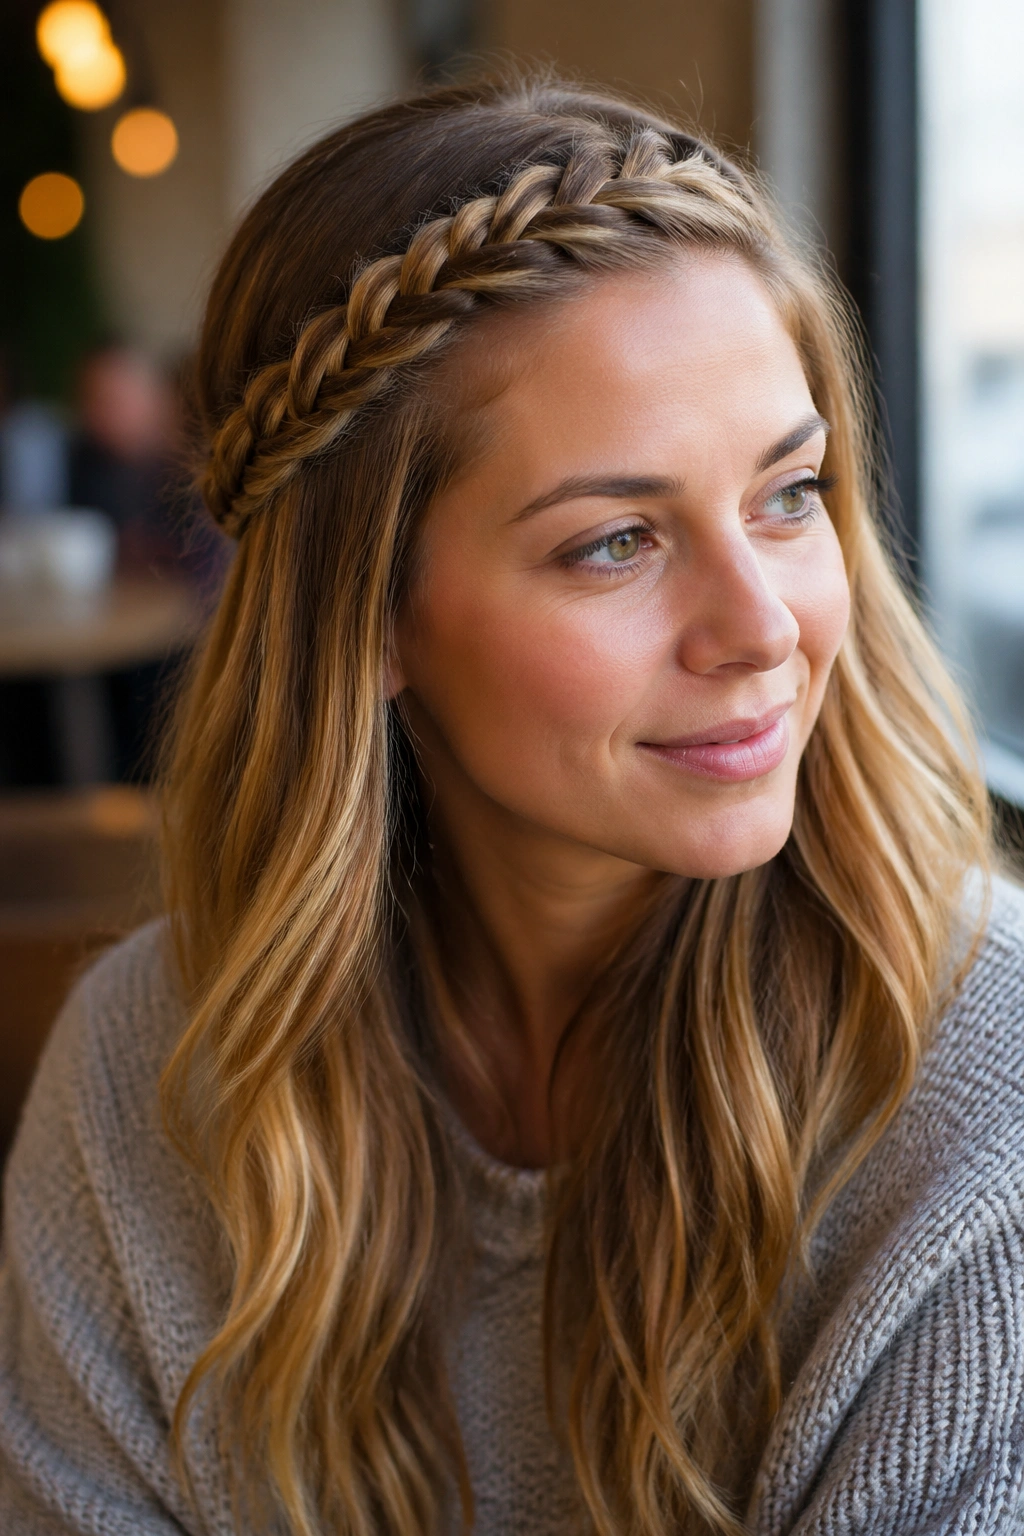
15. Braided Headband Circle Pattern
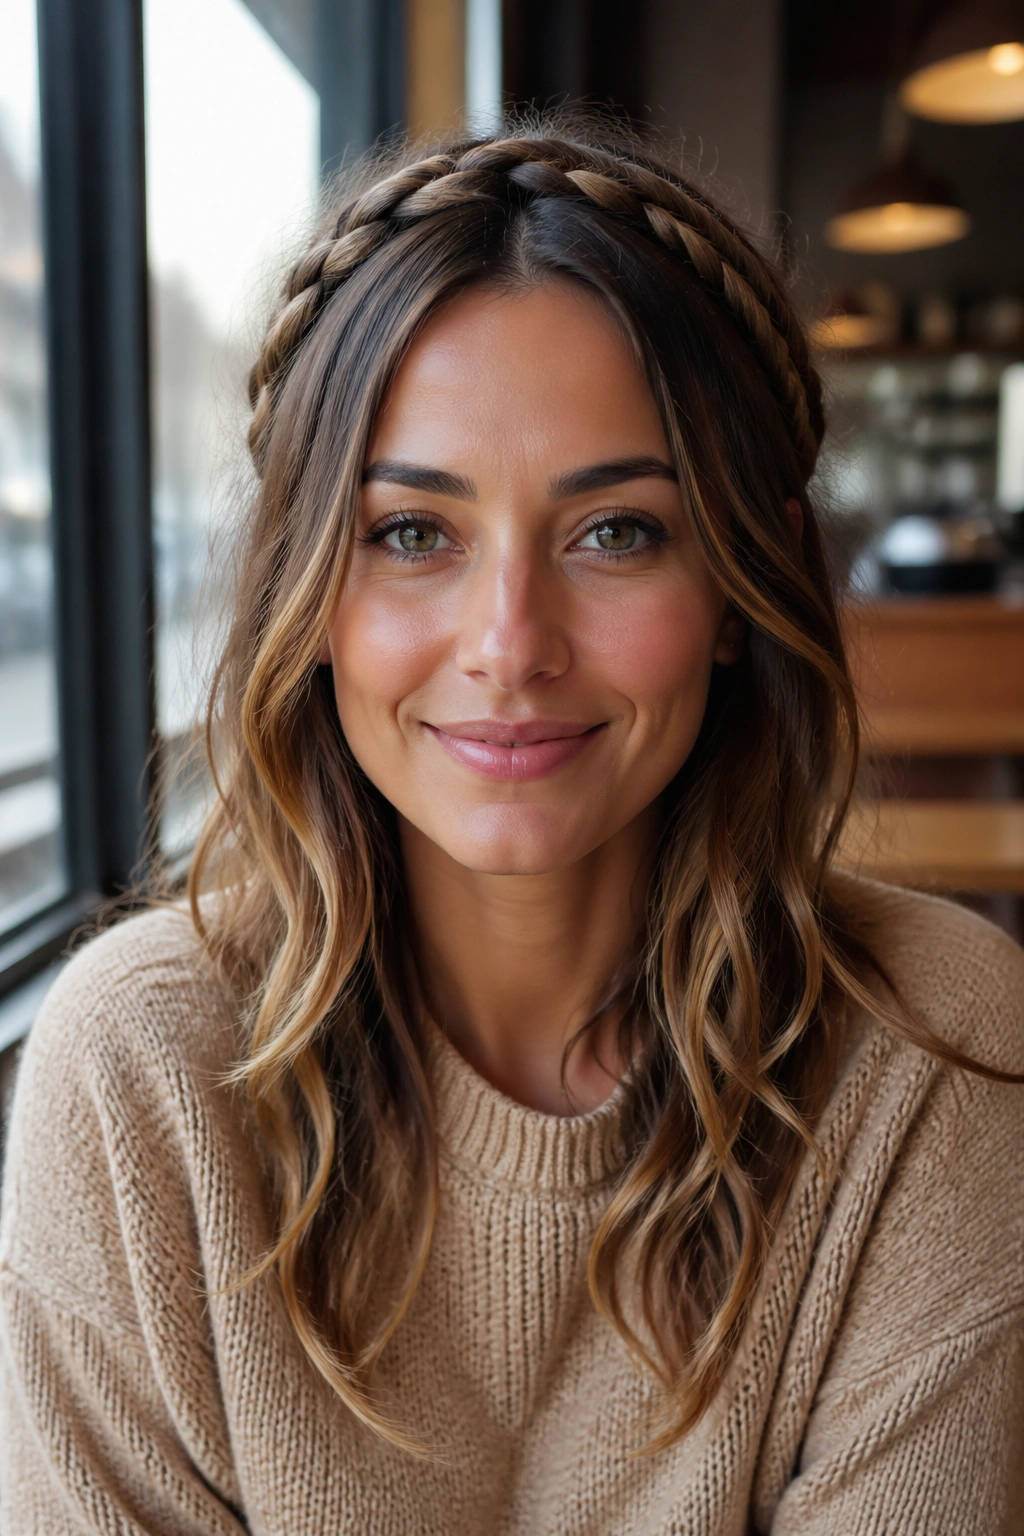
A braided headband version is the easiest way to get a halo effect without committing to a full crown. You braid a front section and lay it across the hairline like a band, then pin it behind the opposite ear. That’s enough to shift the whole look.
Why do people love it? Because it solves the “my hair is in my face” problem and still leaves the rest loose. It’s a useful trick for straight, wavy, or lightly curled hair, especially when you want to keep volume at the back. If the braid is too thick, it can start to feel costume-like, so keep the band slim — about the width of two fingers is plenty.
How to Wear It
Pair it with a low ponytail, loose waves, or a tucked bob. If your hair is very fine, tease the roots just behind the braid a little so the band doesn’t sit flat against the head. That tiny lift changes everything.
16. Side-Swept Crown Braid
A side-swept crown braid gives the halo a little motion. Instead of sitting perfectly centered, the braid starts heavier on one side and arcs across the head with a gentle lean. That asymmetry softens the face and keeps the style from looking too formal.
This pattern is useful when one side of your hair is denser or longer than the other, because the braid can borrow volume where it needs it. Start the braid above the heavier side, keep the tension firm, and let the circle ride slightly higher near the crown before dropping lower toward the nape. That uneven path is what makes it interesting. It also helps if you have a deep side part and want to keep it, rather than forcing the hair into a center split.
The finish should feel balanced, not perfect. Perfect is overrated here.
17. Zigzag-Part Circle Braid
A zigzag part changes the whole mood of a circle braid, and it does so without touching the braid itself. The pattern at the scalp adds tension and movement before the first braid section even starts. That’s why it feels playful instead of plain.
It works best on medium to thick hair because the parting needs enough density to stay visible around the curve of the head. Use the pointed end of a rat-tail comb and keep the zigzags shallow — too sharp, and the line starts to look fussy. The braid itself can stay simple, but the contrast between the part and the crown gives the whole style some edge.
The Science Behind It
The eye follows the part line before it follows the braid, so the zigzag becomes part of the design. That makes the halo feel more intentional, even if the braid is loose or textured. It’s a small change. Big effect.
18. Lace Braid Halo
Unlike a standard braid that pulls hair from both sides, a lace braid only feeds in from one side, which makes the circle look lighter and more open. The result is a halo with a soft edge and a visible sweep of hair underneath. It almost floats.
That structure is useful when you want the front and top to stay smooth but still show a clear braided line. Lace braids are kinder on layered cuts too, because the dropped side can hide shorter pieces better than a tight, all-in braid. Keep the feeding side consistent and let the outside edge stay neat. If the loose side gets too wide, the braid loses its clean outline.
Best for people who like a braid that frames without swallowing the rest of the hair. It’s subtle, but not shy.
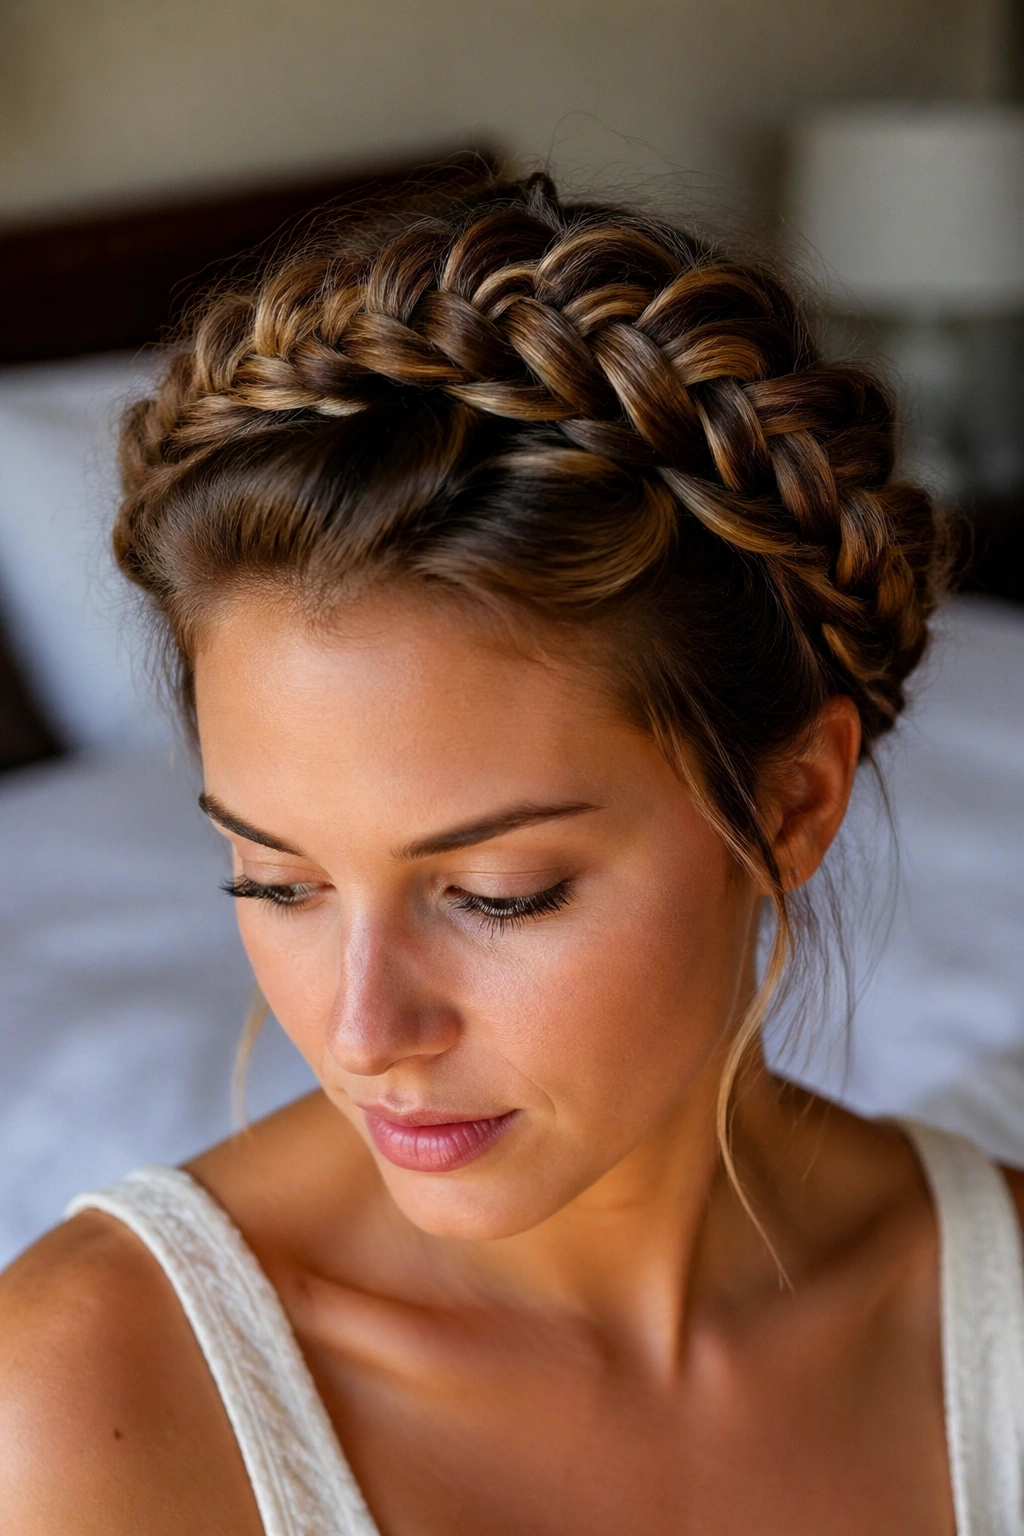
19. Chunky Oversized Halo Braid
A chunky halo braid has presence. The thicker the braid, the more the circle reads from a distance, which makes it a good choice when you want the hairstyle to do the heavy lifting. It’s bold without needing accessories.
Why It Works
Large sections create a braid that sits higher on the head and casts a stronger shadow against the hair underneath. That gives the halo depth. On thick hair, you can go big without losing shape. On finer hair, pancake the braid after it’s pinned so each segment looks fuller. Just don’t pull it so hard that the braid turns flat and frayed.
How to Use It
- Start with sections around 1 inch wide.
- Keep the braid close to the scalp for the first half.
- Gently widen the outer loops after pinning.
- Use three to four strong pins at the back crossing point.
This is the version I’d pick when the hair itself is part of the outfit.
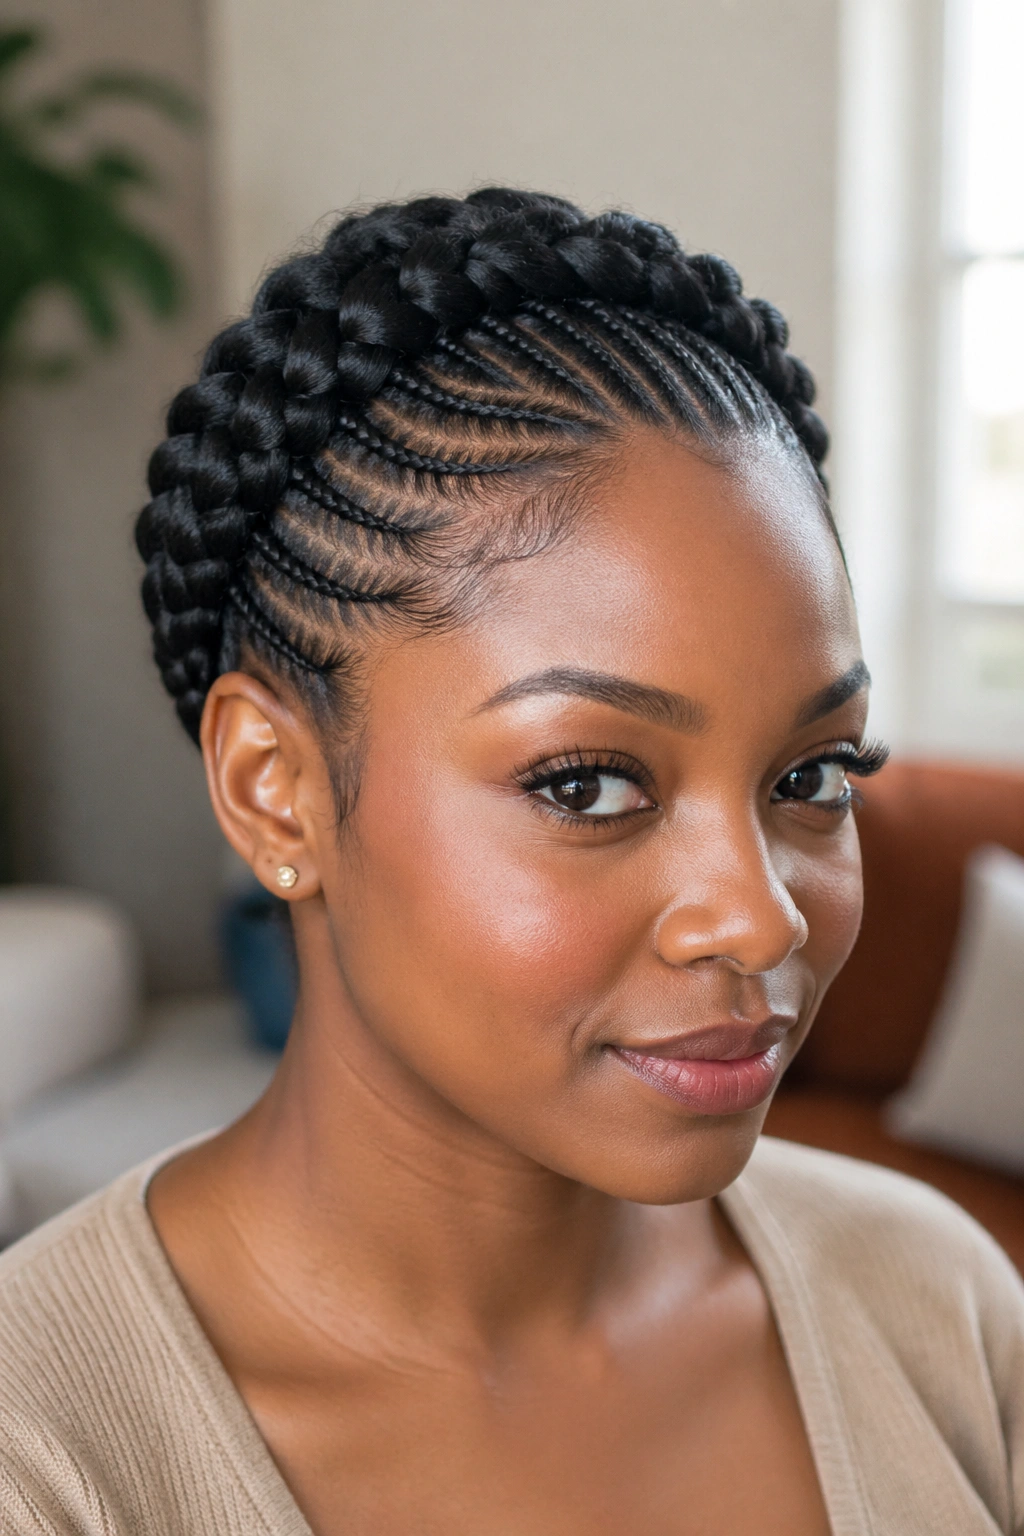
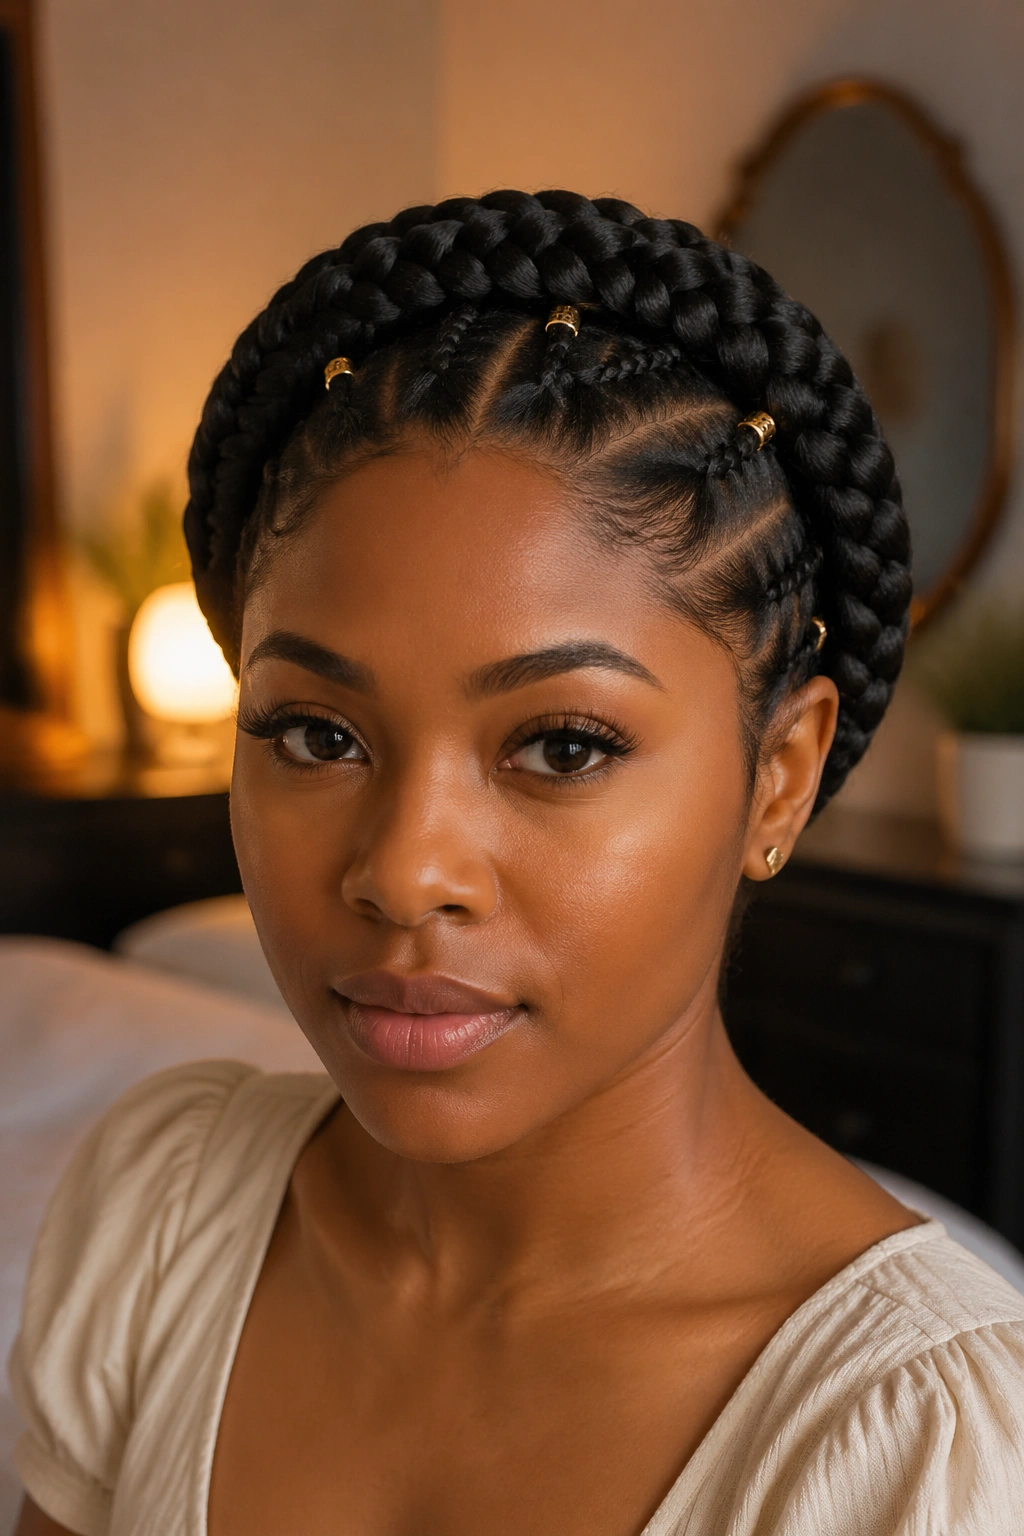
20. Cornrow Halo Around the Hairline
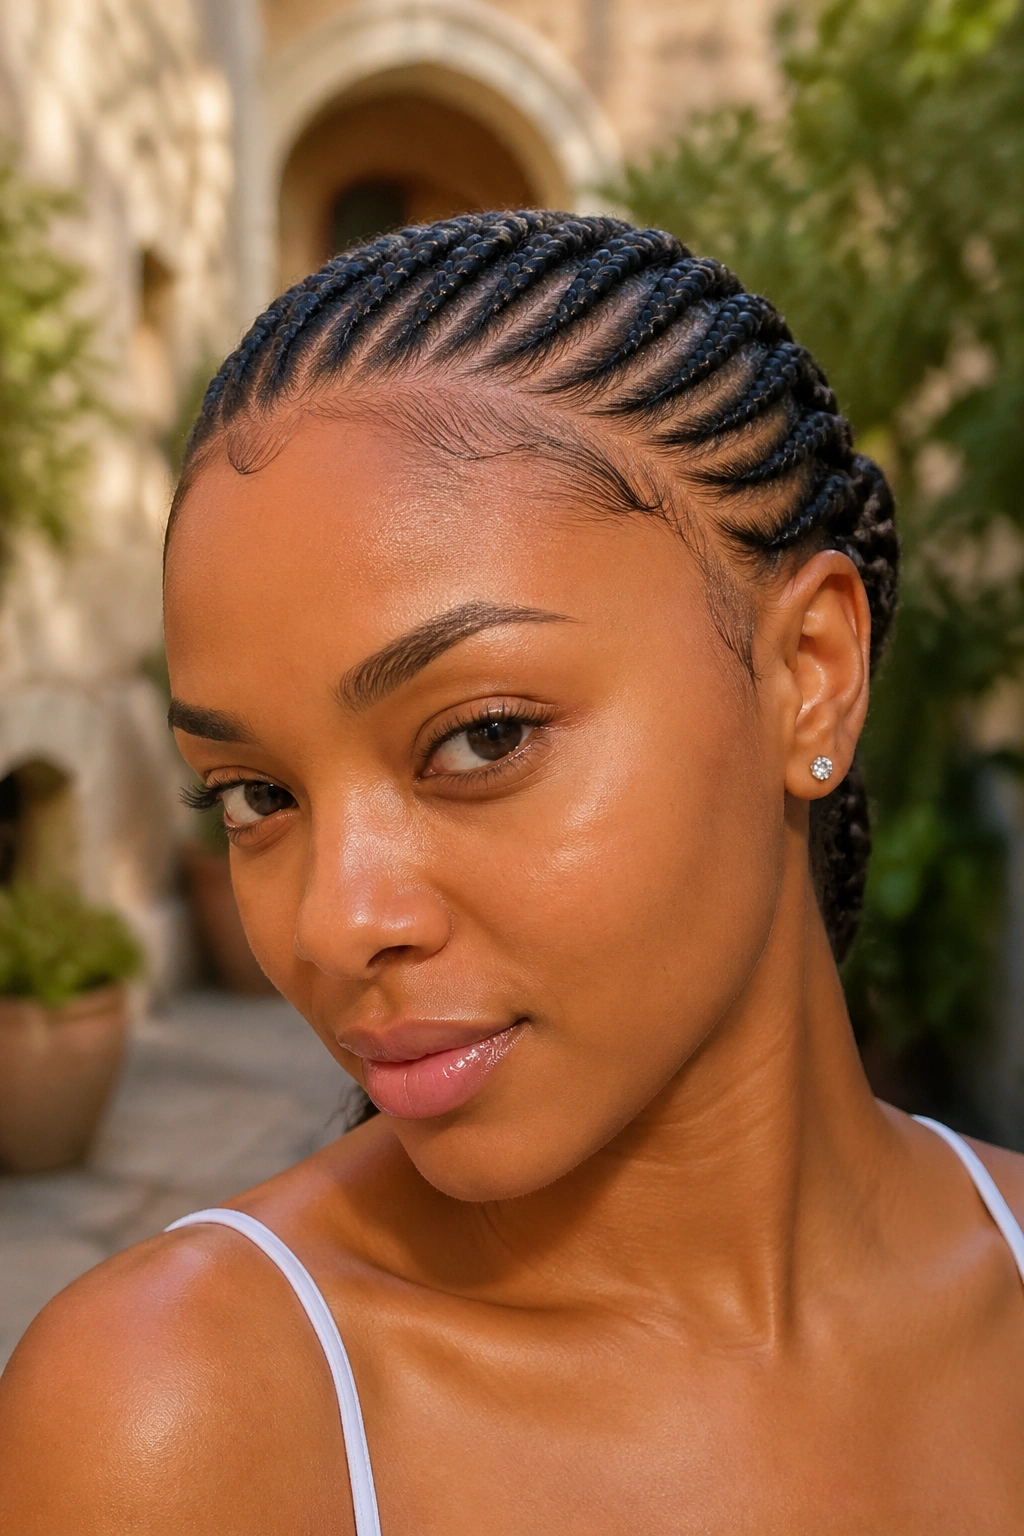
A cornrow halo gives the circle braid a sharper edge and much more control along the perimeter. The lines sit close to the scalp, so the style stays neat even when the weather or the day tries to fight back. There’s no fluff here. Just structure.
The braid usually starts with 8 to 12 small cornrows, depending on head size and density, all curving around the hairline before meeting at the back or weaving into a bun. The smaller the rows, the smoother the circle will lie. If the sections get too wide, the arc can kink near the temples, and that ruins the flow. Keep the partings crisp, and smooth the roots before braiding so the lines don’t puff up later.
This pattern suits protective styling beautifully, especially when paired with low manipulation for several days. It stays clean. It stays put. That matters.
21. Twist-and-Braid Faux Halo

Why choose a faux halo? Because sometimes you want the ring effect without building an entire crown from scratch. A twist-and-braid version lets you create a circle from two or three sections that are pinned and crossed into place, which makes the style quicker and easier to adjust.
This pattern works well if your hair is layered, short in the back, or not quite long enough for a full braid. Twist the front sections away from the face, braid the longer side pieces, then pin everything into a curved path around the head. The texture mix makes the style look more complex than it really is. And that’s the charm — it looks engineered, but it isn’t fussy.
How to Get the Most From It
Use the faux halo when you need volume near the temple and a secure shape at the back. The pinned sections should overlap slightly, or the circle can break visually. A few hidden grips under the crown hold it together better than one giant bobby pin ever will.
22. Loc Halo Wrap
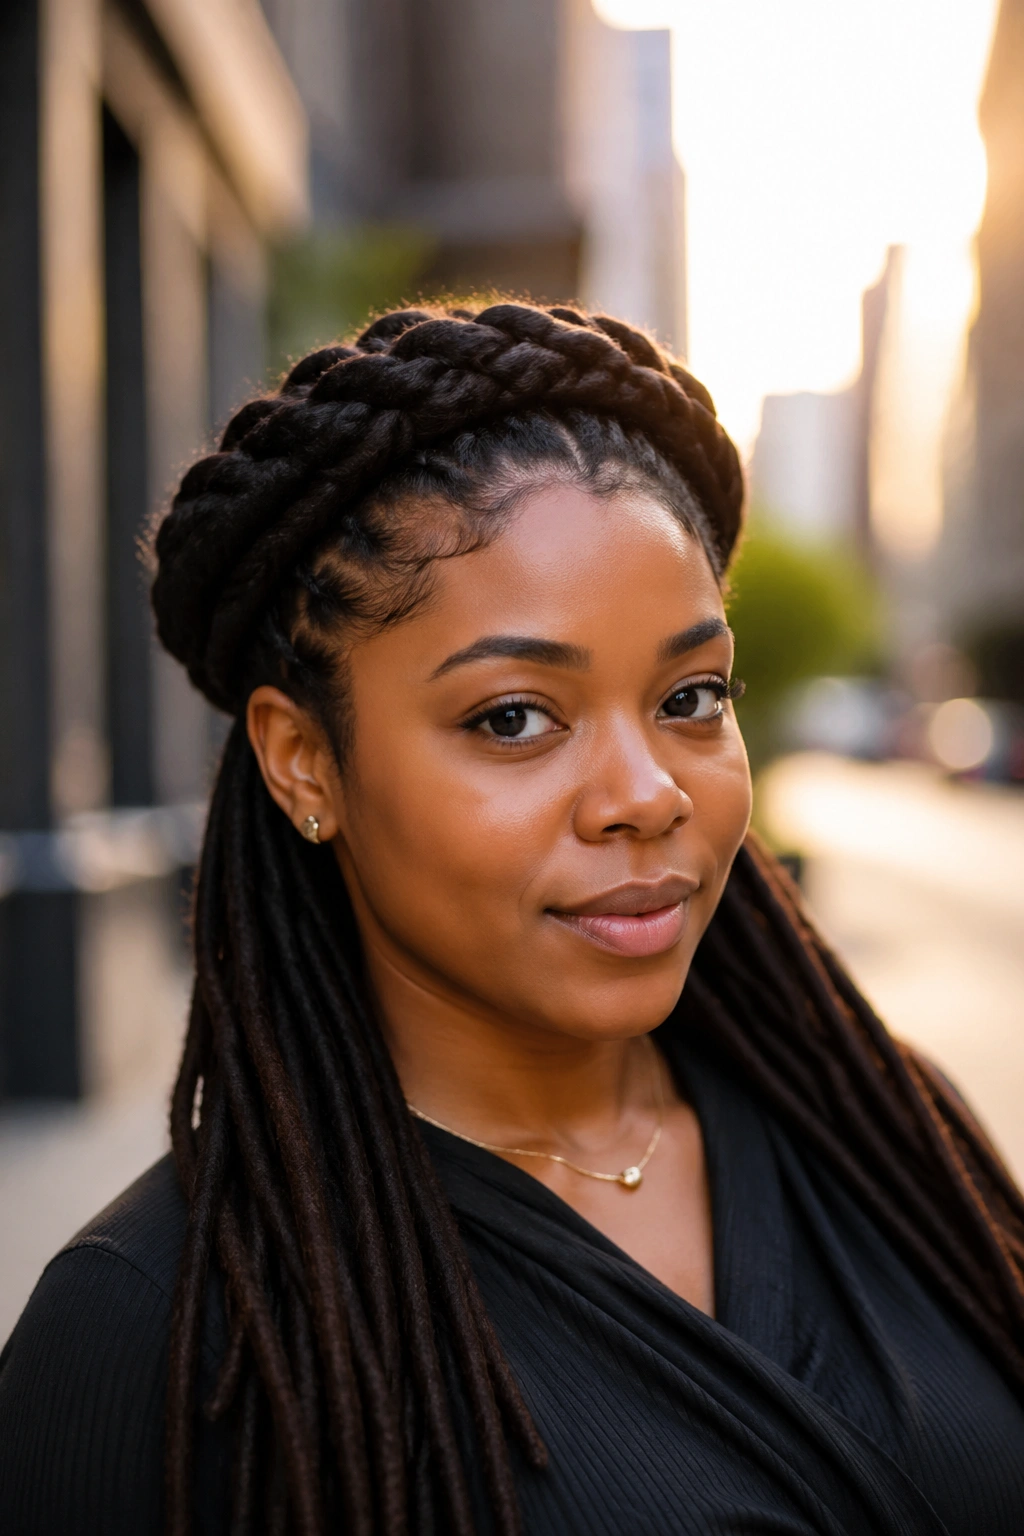
Locs change the halo game because the braid pattern doesn’t need to carry all the weight on its own. The locs themselves give you thickness, length, and texture, so the circle can be simple and still feel full. That’s a gift.
A halo wrap on locs usually starts by lifting sections from one side and sweeping them around the head in a smooth curve. Because the locs already have body, you don’t need to force a tight braid pattern unless you want extra detail near the front. Keep the line neat at the edges and pin at the back where the weight naturally gathers. If the locs are long, a low tuck works better than trying to hide every end.
The style looks strongest when the circle follows the hairline without pulling too tight. Let it breathe a little.
23. Box-Braid Circle Wrap
A box-braid circle wrap is one of those styles that looks much more complicated than it is. The braid count does the visual work, so the halo shape becomes a pattern of lines and movement instead of one big braided rope. I like that. It feels graphic.
Because box braids are already sectioned, you can arrange them into a ring, twist them back, or wrap them into a circular crown with less fuss than loose hair requires. The main thing is weight distribution. If all the braids are gathered too high, the halo can tilt. Spread the anchor points around the head so the pressure lands in more than one place. Use a few flat pins and, if needed, a small elastic hidden under a braid crossing.
This version is especially practical when you want a style that lasts and keeps the scalp mostly protected. It’s neat, sturdy, and not overly precious.
24. Curly Leave-Out Halo Braid
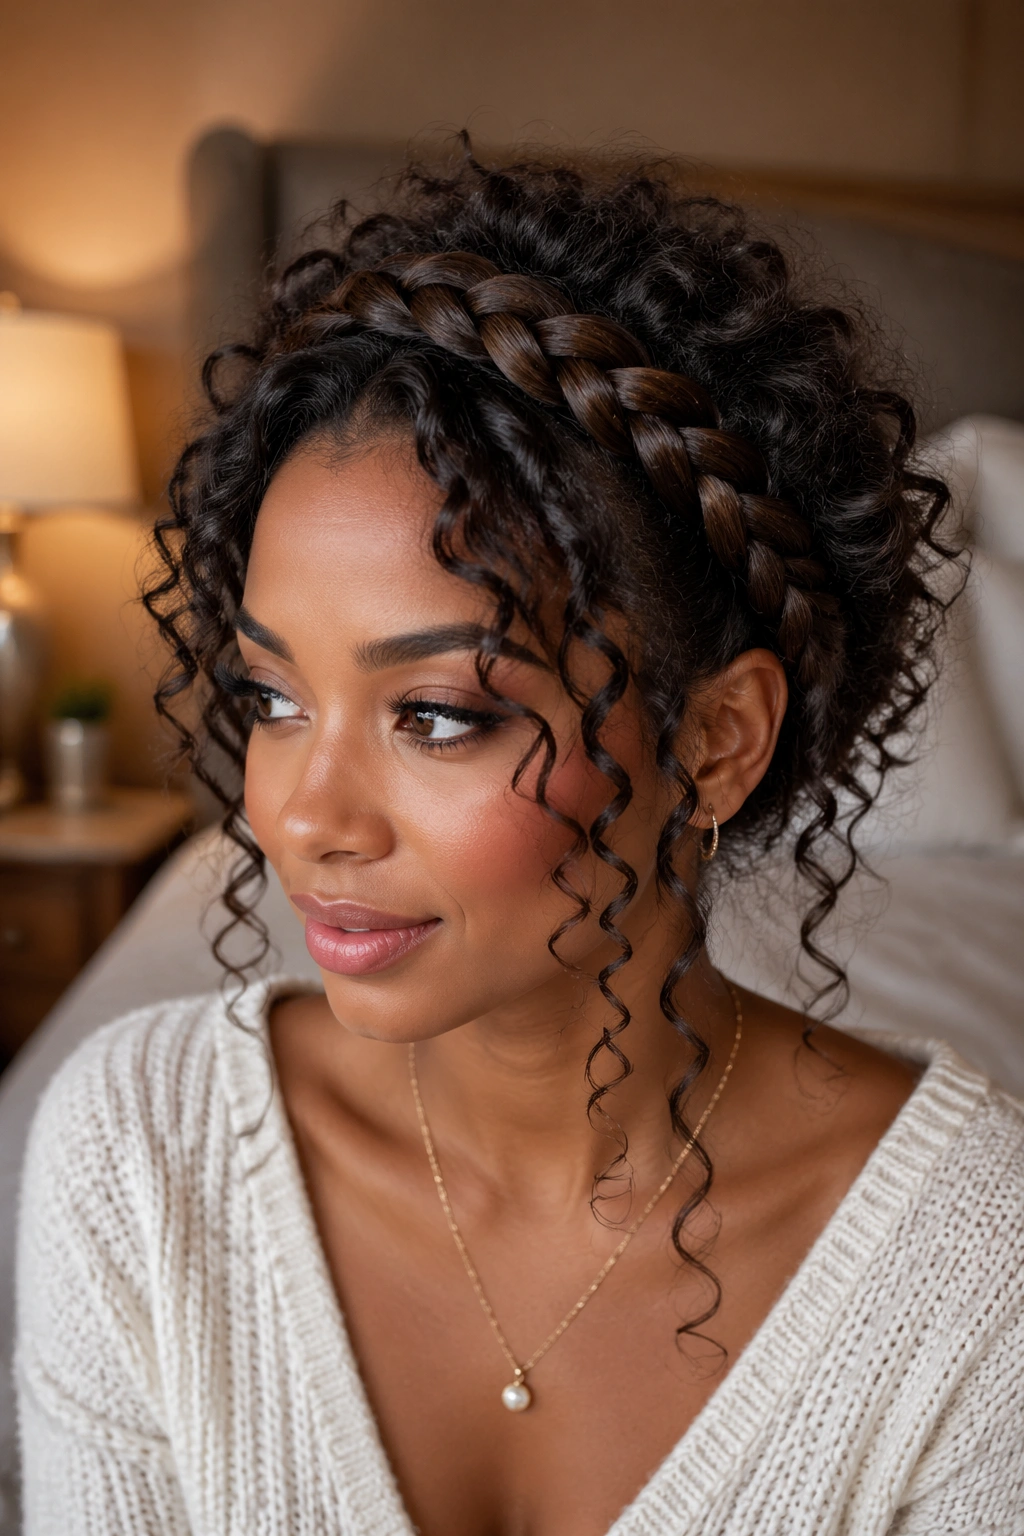
A curly leave-out halo braid keeps the circle clean while letting the texture around it do the softening. The braid frames the face, but the loose curls make the whole style feel less rigid. That contrast is what gives it life.
The leave-out can sit at the temples, around the nape, or in a full halo of curls beneath the braid. Curl pattern matters here. Tight coils need less shaping and more definition cream. Loose curls may need a 3/4-inch curling iron or a few finger coils to keep the pieces from fraying into the braid line. If the braid is thick, keep the leave-out small. Too much loose hair can pull attention away from the crown.
How to Wear It
This works well for half-up styles, formal looks, and anything that needs a little motion around the face. The braid sets the frame; the curls give it air.
25. Braided Flower Halo
A braided flower halo takes the circle and turns the finish into a rosette or petal shape at the back, which makes the style feel decorative without needing extra accessories. It’s a pretty little trick. Also a bit of a pin-heavy one.
The braid is wrapped into a circular base, then the tail is coiled or folded into a flower-like knot. To keep the petal shape visible, you need to flatten the braid slightly before pinning and let one edge fan outward. If the braid is too tight, the flower just looks like a bun. If it’s too loose, it falls apart. That middle ground is where the style lives.
This pattern works best on medium-to-long hair with enough length to create a visible swirl. A pearl pin in the center is optional, but I do like it. A little shine right at the middle draws the eye exactly where it should go.
26. Halo Braid With a Low Chignon
A halo braid with a low chignon gives you the best of both worlds: the ring around the head and a clean knot at the nape. It reads formal, but not stiff. That matters if you want something polished that still has shape in the back.
The braid should sit securely around the hairline before the remaining lengths are gathered into the chignon. Keep the knot low and slightly tucked, about 1 to 2 inches above the neckline, so the halo stays dominant. If the chignon creeps too high, the silhouette gets lopsided. A smooth finish works well here, though a soft twist in the knot can keep it from looking too severe.
What Makes It Different
Unlike a full braided bun, this style leaves the lower shape visible, which creates a longer neck line and a cleaner profile. It’s a good choice when you want structure without losing elegance to heaviness.
27. Two-Tier Crown Braid
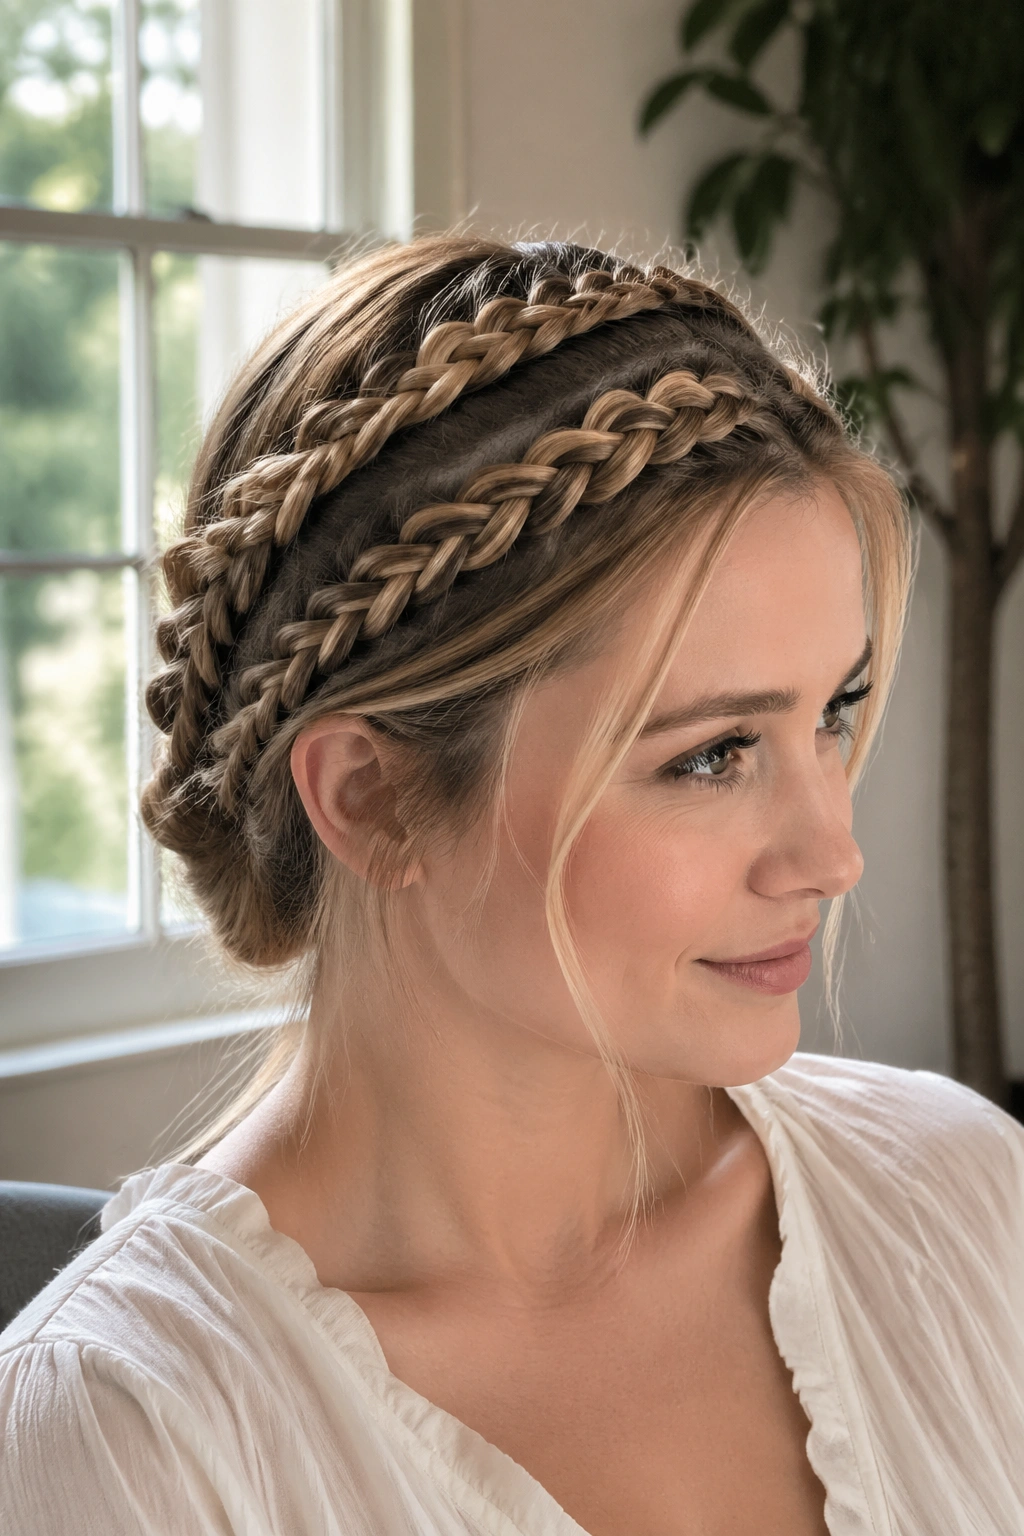
A two-tier crown braid uses one braid high on the head and another a little lower, which creates a layered halo effect that looks rich without needing decoration. The spacing between the tiers matters. About 1 inch between the rows is usually enough to keep the design readable.
The top braid can be thinner and tighter, while the lower one carries more weight and curves around the ears. That contrast keeps the style from looking crowded. On long hair, the extra tier gives you somewhere to hide the ends cleanly. On shorter hair, it can help build the illusion of a fuller crown.
How to Wear It
Try this when a single halo feels too simple for the outfit. It’s especially good with sleek dresses, high collars, or anything that benefits from a strong neckline frame. The pattern has presence, but it does not shout.
28. Messy Undone Halo Braid
A messy halo braid works because it refuses to look overpolished. The braid still circles the head, but pieces are pulled loose, the crown gets a little lift, and the ends disappear in ways that feel intentional enough without looking nailed down. That looseness is the appeal.
This version is good when the hair has texture, when it’s slightly dirty in the best possible way, or when you want the halo to look like you made it in five minutes and somehow got lucky. Pull only the outer edge of the braid after pinning, not the inner spine. If you overpull, the structure falls apart fast. Let the front pieces bend away from the face, and stop fussing once the shape holds.
It’s the kind of braid that looks better with a few imperfect pieces. That’s the whole mood.
29. Braided Halo With a Tucked Tail
A tucked-tail halo braid is neat without feeling severe, which is harder to pull off than people think. The braid travels around the head, then the end disappears beneath a hidden section of hair so the circle feels complete. No dangling tail. No obvious closure. Just a clean loop.
The tuck works best when the braid ends near a place with enough density to hide them — behind the ear, under the back curve of the crown, or just above the nape. Use two pins in an X, then press the tucked section flat with your palm for a few seconds so it settles. If your hair is slippery, a tiny dab of styling paste on the ends helps them stay buried.
This is the version I reach for when I want the halo shape to look finished from every angle. It’s tidy. It’s calm. It doesn’t need anything else.