Goddess braids have a reputation for looking polished, but the styles that really earn their keep are the ones that still look decent when wash day gets close. Clean parting matters. So does braid size, tension, and how much hair is left swinging loose at the ends. Get those pieces right and the style stays neat far longer than people expect.
The first thing I look at is the shape, not the decoration. Big, sloppy sections frizz faster. Tiny, overworked parts can pull at the scalp and make the style miserable by day three. The sweet spot sits somewhere in the middle: enough structure to hold, enough softness to keep the braids from feeling stiff and bulky.
A lot of braid styles fall apart because they invite too much touching. You smooth them. You re-wrap them. You check the mirror one more time and end up disturbing the parts. The styles below are the ones that hold their lines, protect the hair, and still look intentional when the clock is creeping toward wash day.
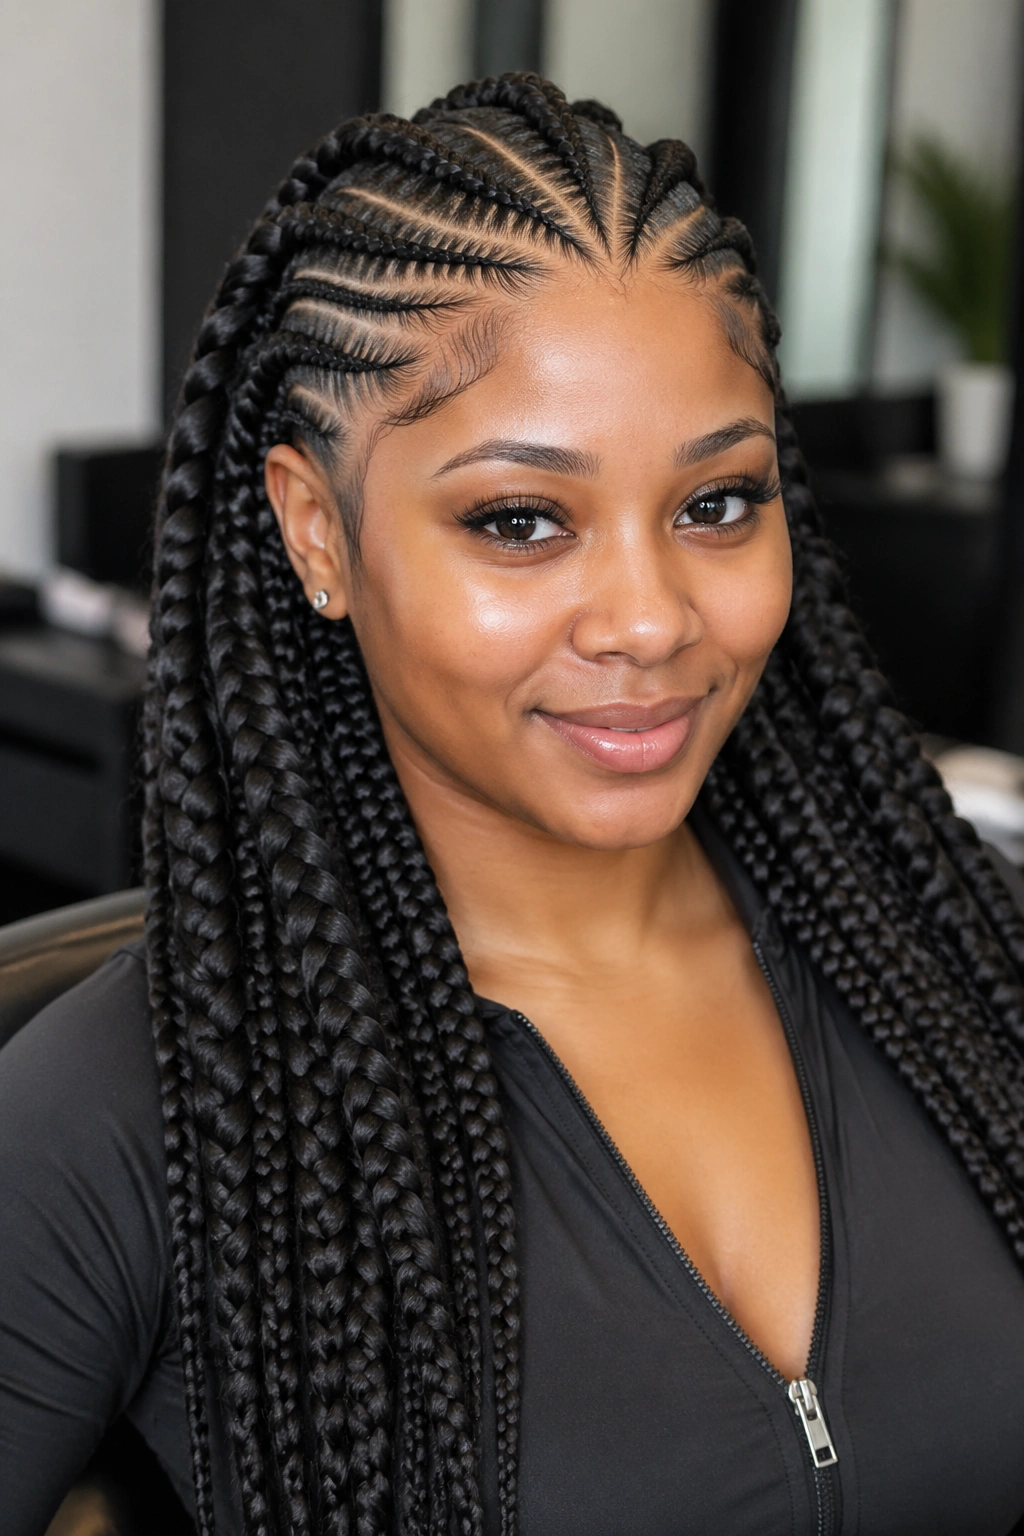
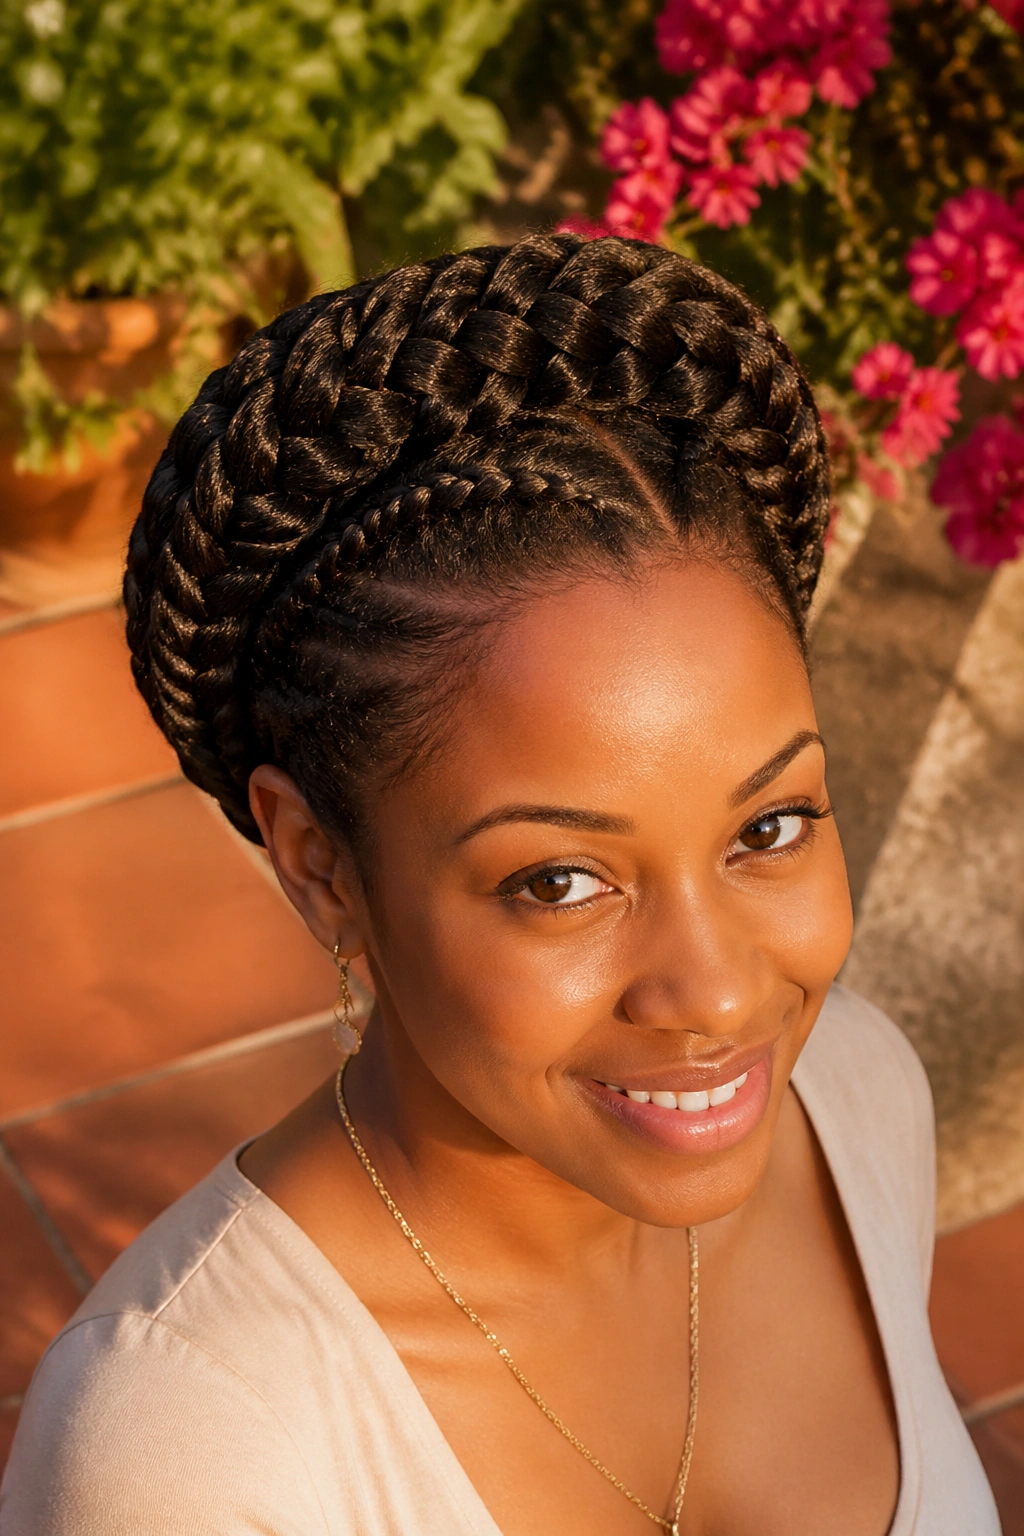
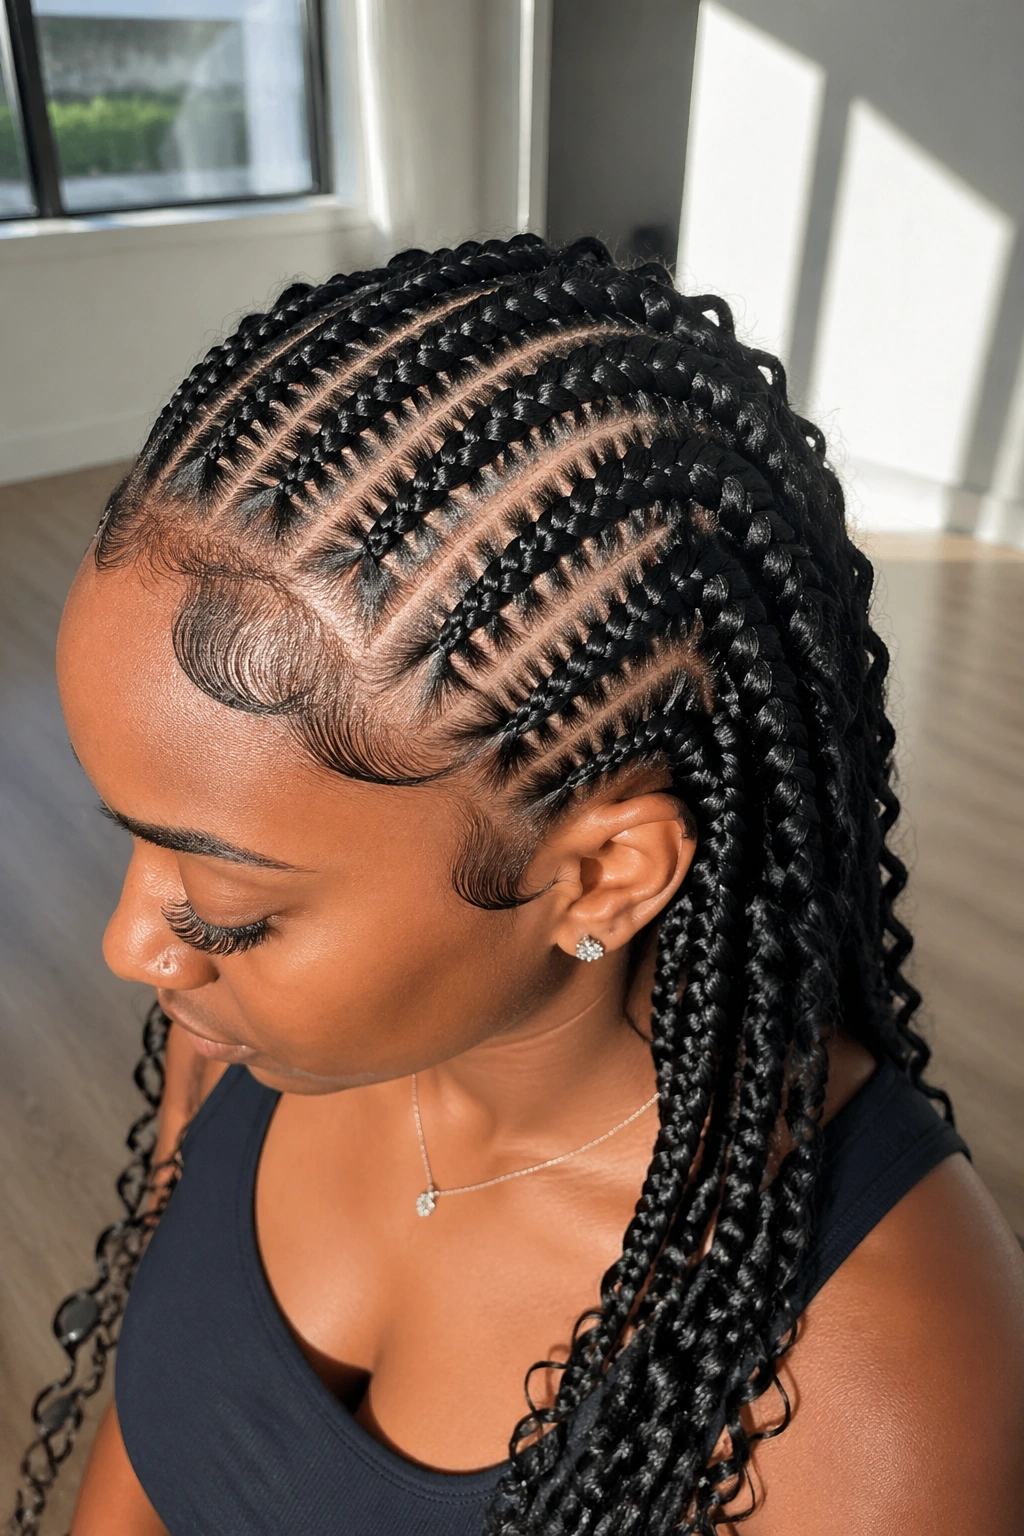
1. Classic Straight-Back Goddess Braids

Straight-back goddess braids are the style I reach for when I want the cleanest possible base. The rows run from the hairline to the nape in neat lines, and that direction does a lot of quiet work for you. Hair moves less. Parts stay readable longer. Frizz has fewer places to hide.
Why the clean rows help
A straight path means less rubbing. When the braids all move in the same direction, they don’t twist around each other every time you turn your head or pull on a hoodie. That alone can buy you extra days of order.
- Keep each part around 1 to 1½ inches wide if you want a tidy look that is still easy to sleep in.
- Use a light foam wrap after braiding so the surface lays down and dries smooth.
- Braid to the nape, then finish the ends neatly instead of leaving loose, fuzzy tails.
My favorite thing about this style: it looks deliberate even when it starts to age a little. The lines stay strong.
2. Curved Goddess Braids That Sweep Around the Head
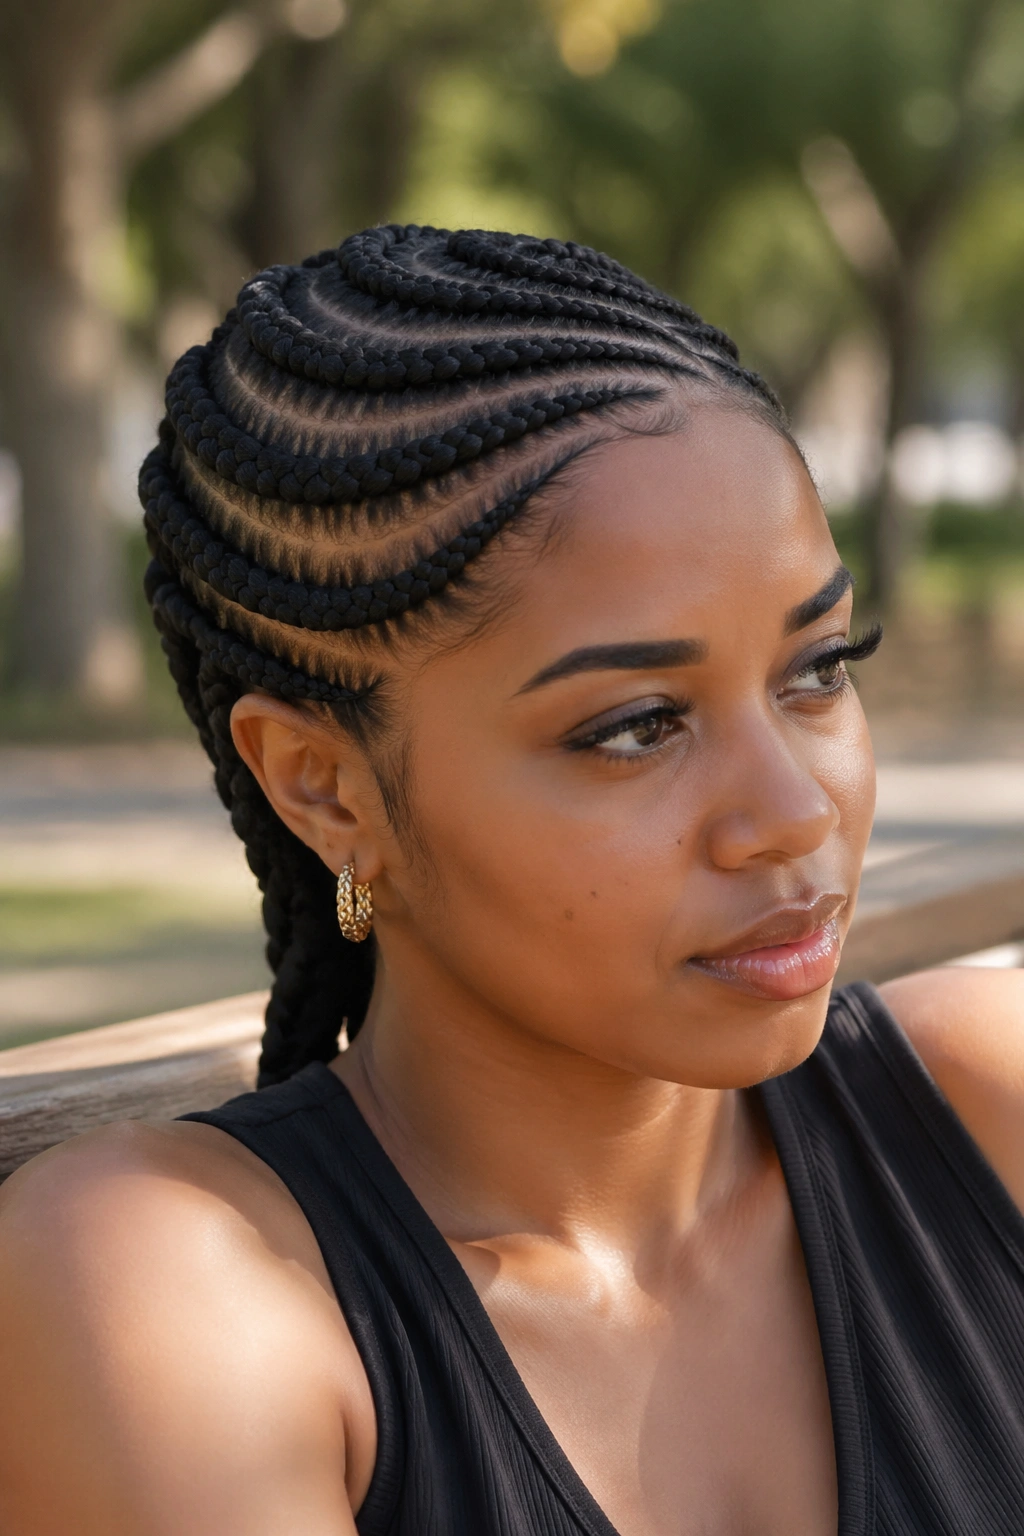
Curved goddess braids look soft, but they’re doing more than styling the face. The curve changes how the hair sits against the scalp, which helps the style keep its shape when the new growth starts showing. A hard straight part can look crisp on day one and a little blunt by the end of the week. A sweep has more forgiveness.
If you want a style that frames the face without shouting for attention, this one lands in a nice place. The curve can start near the temple and arc toward the opposite ear, or it can bend around the crown in a more dramatic line. Either way, the shape naturally hides the earliest signs of regrowth.
The trick is to keep the curve smooth. Jerky parting makes the whole style look busy. Soft, continuous lines give the braid room to age gracefully, which is exactly what you want when you are trying to stretch to wash day without feeling scruffy.
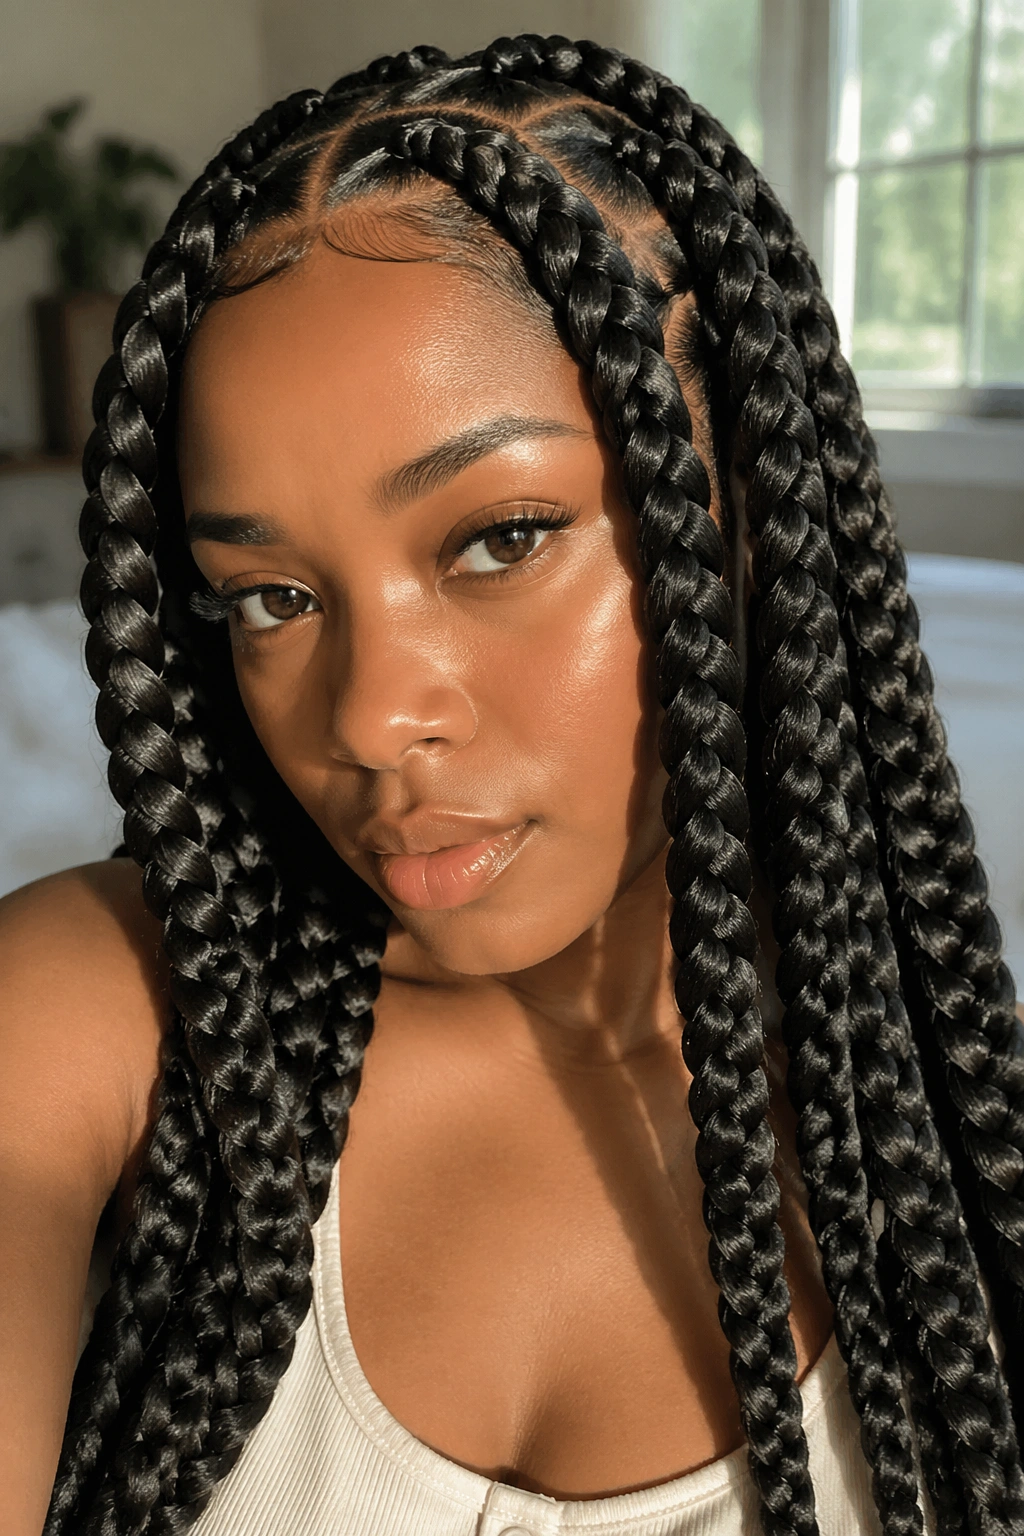
3. Middle-Part Goddess Braids Into a Low Bun
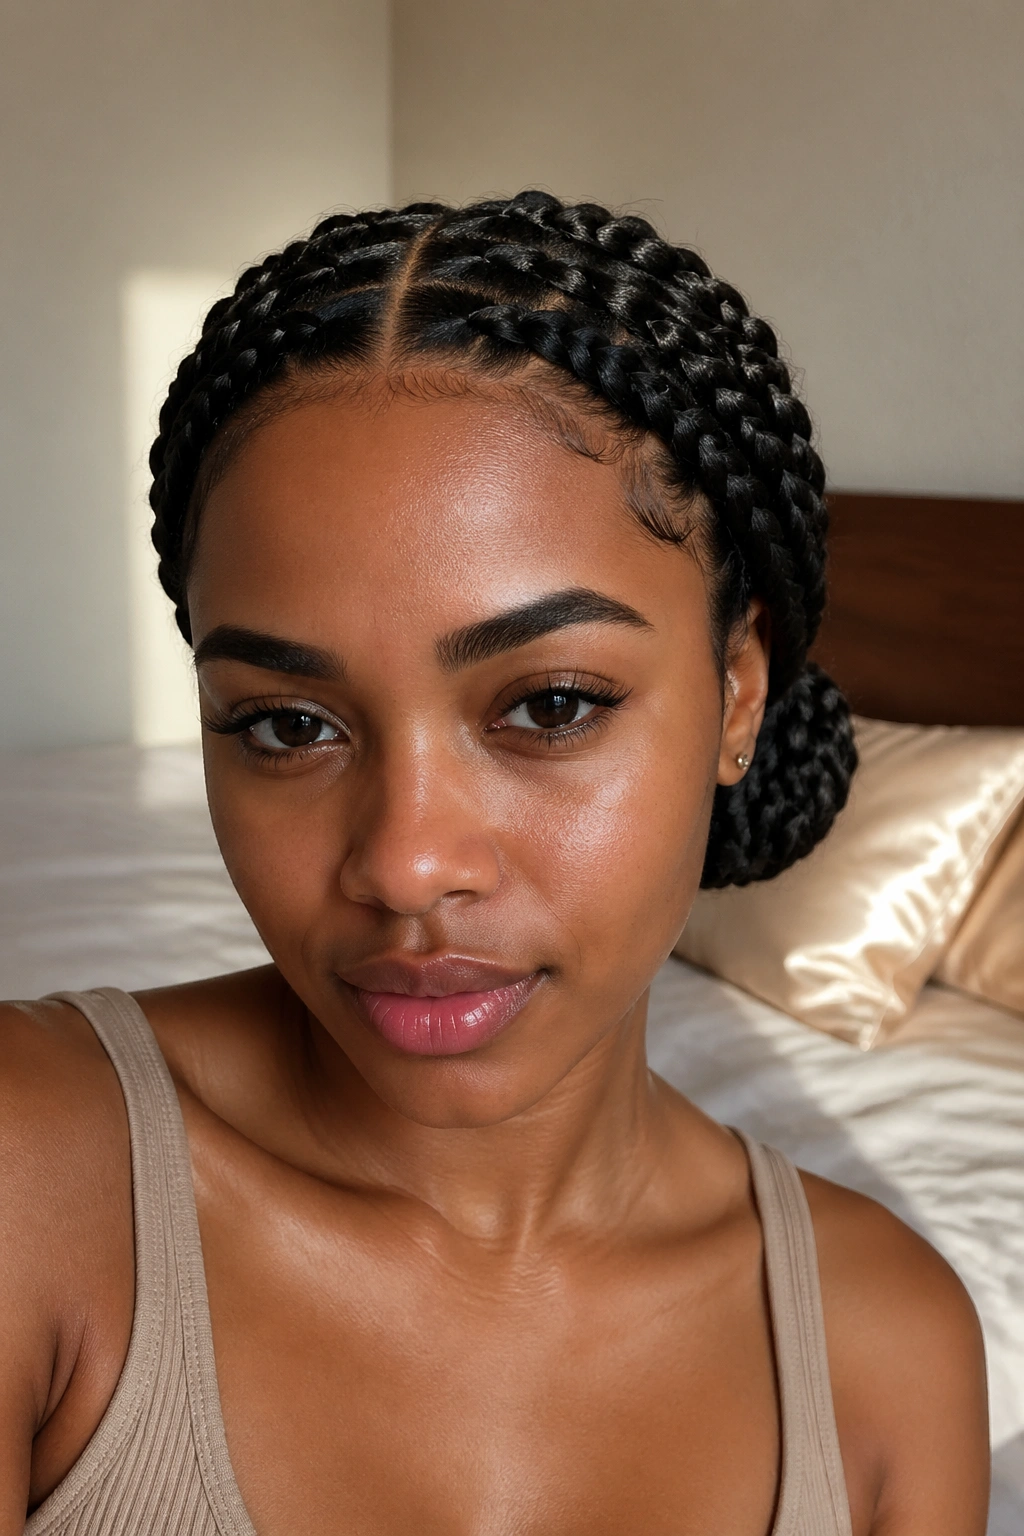
Why does this one survive so well? Because the hair is gathered in a way that cuts down on movement. A middle part gives the style balance, and the low bun keeps the ends tucked away instead of brushing against collars, scarves, and pillowcases.
That matters more than people think. Loose ends are usually the first part to go fuzzy. Once they start rubbing, the whole style looks older than it is. A low bun keeps the tail of the braid contained, and that buys you a cleaner finish for longer.
How to wear it to bed
Wrap the bun in a satin scarf before bed, then pin the scarf so it doesn’t slide to one side. Keep the bun low and flat. If you build it too high, it gets squashed overnight and the top of the style starts to look lumpy by morning.
This is the style I’d pick for someone who wants something neat, work-friendly, and not fussy. It behaves.
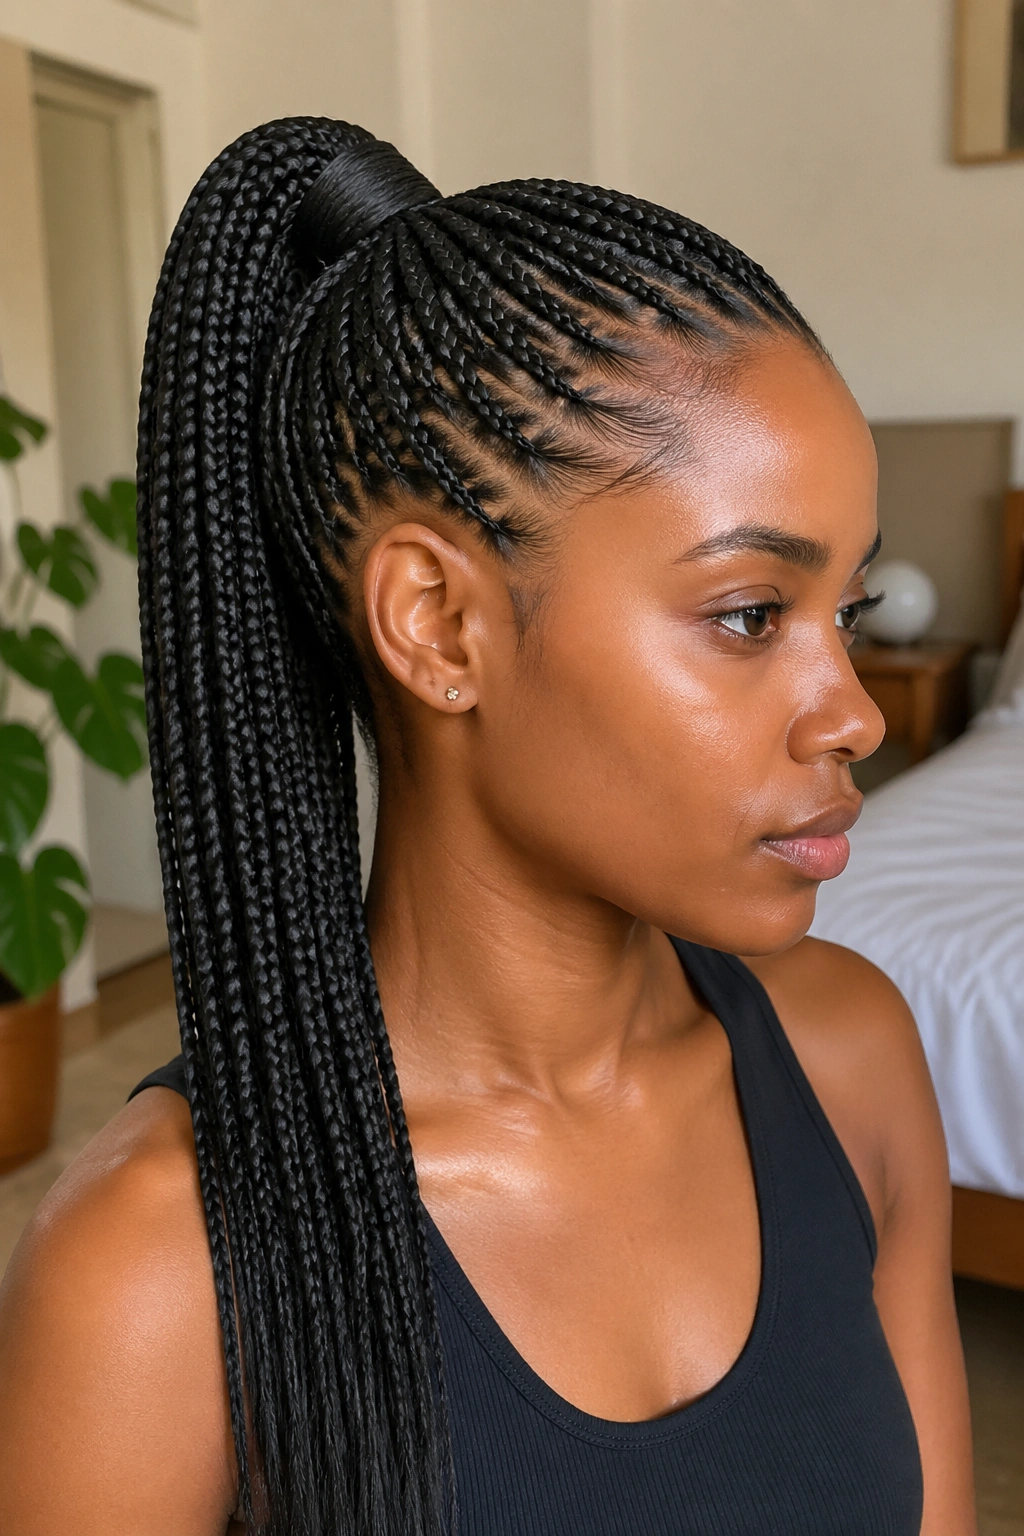
4. High Ponytail Goddess Braids
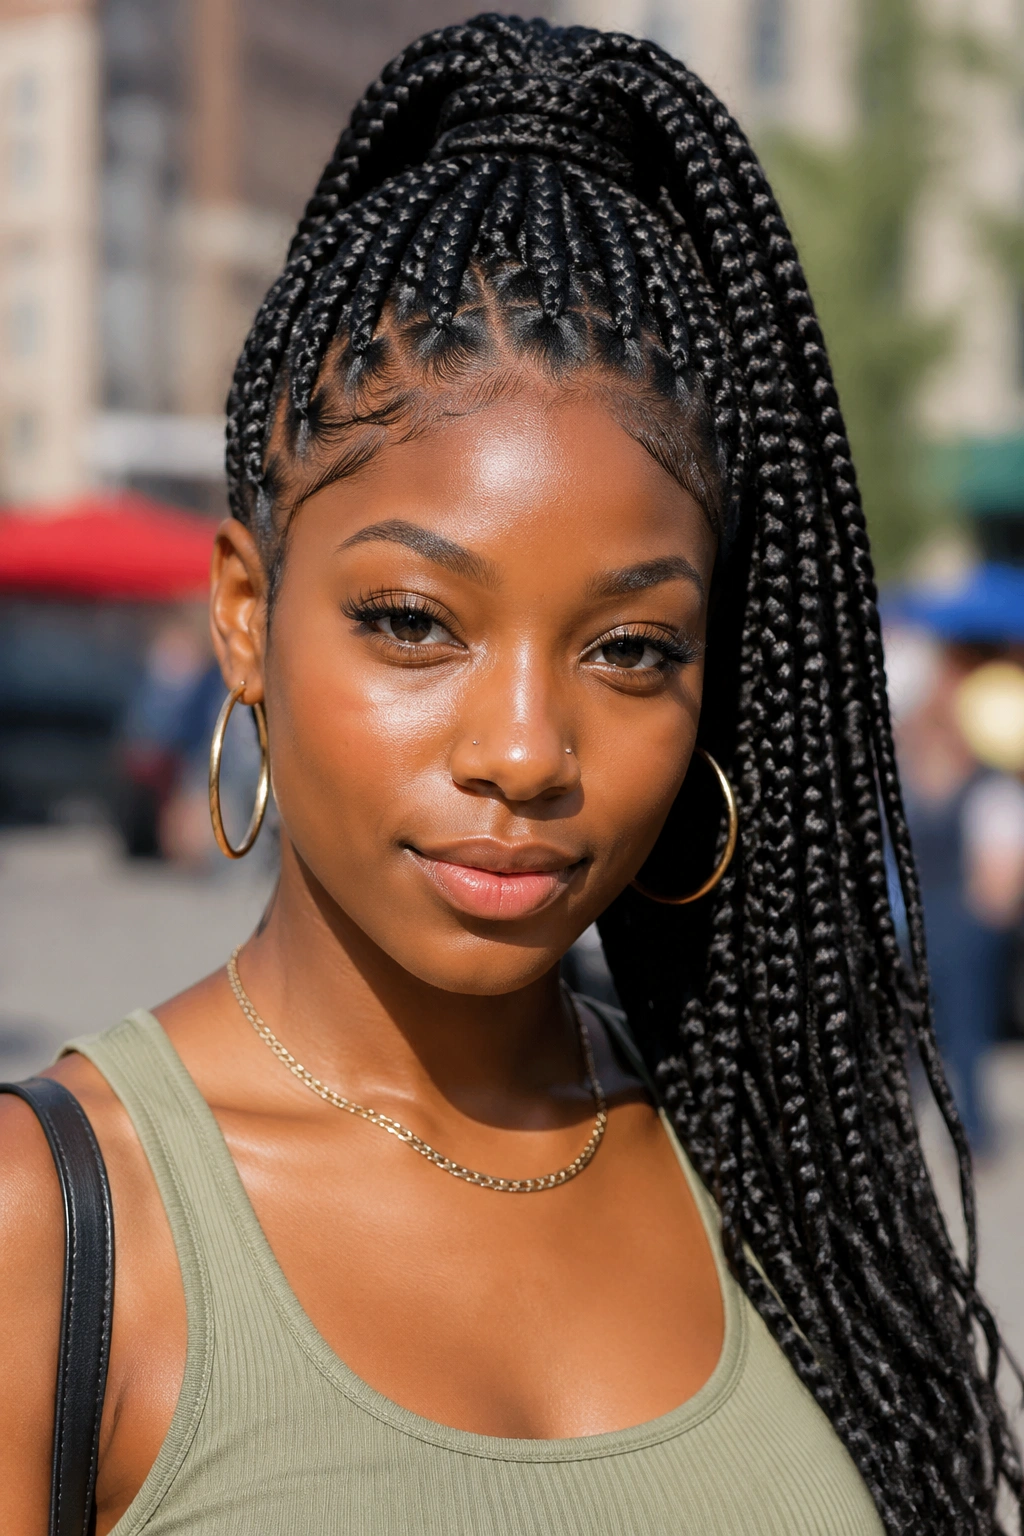
A high ponytail changes the whole mood fast. The braids lift the face, pull the style off the neck, and make the hairline feel cleaner during warm days or long runs of errands. It’s one of those styles that looks put together without requiring a lot of extra work.
The key is anchoring the base well. If the ponytail is too loose, the weight of the braids drags at the roots and the style loses its shape before the week is out. If it’s too tight, you’ll feel it in your scalp by bedtime. Nobody needs that.
- Secure the ponytail with a snag-free elastic under a small wrapped section.
- Keep the ponytail centered or just slightly off-center so it doesn’t swing as much.
- Finish with a light mist of holding spray on the base, not the whole braid.
- Sleep with the ponytail inside a satin bonnet so the ends stay smooth.
One good rule: the higher the ponytail, the more important the anchor. Don’t skip that part.
5. Half-Up, Half-Down Goddess Braids
Half-up, half-down styles work because they split the difference between tidy and relaxed. The top section stays controlled, which keeps the style from sliding into your face, while the lower section still moves and gives the braids some life. That balance is part of the appeal.
It also makes the style easier to stretch. The top knot or half ponytail catches the braid bulk that would otherwise rub around the crown. The lower braids rest more freely, which means fewer dents and fewer places for frizz to flare up.
I like this style for days when you want the braids to look styled, not merely tied back. It takes a little more care than a full ponytail, though. You need to smooth the top section well and avoid redoing it five times in the mirror, because every extra adjustment steals a little polish.
A half-up style also plays nicely with small accessories. A few cuffs near the top section are enough. More than that starts to feel crowded.
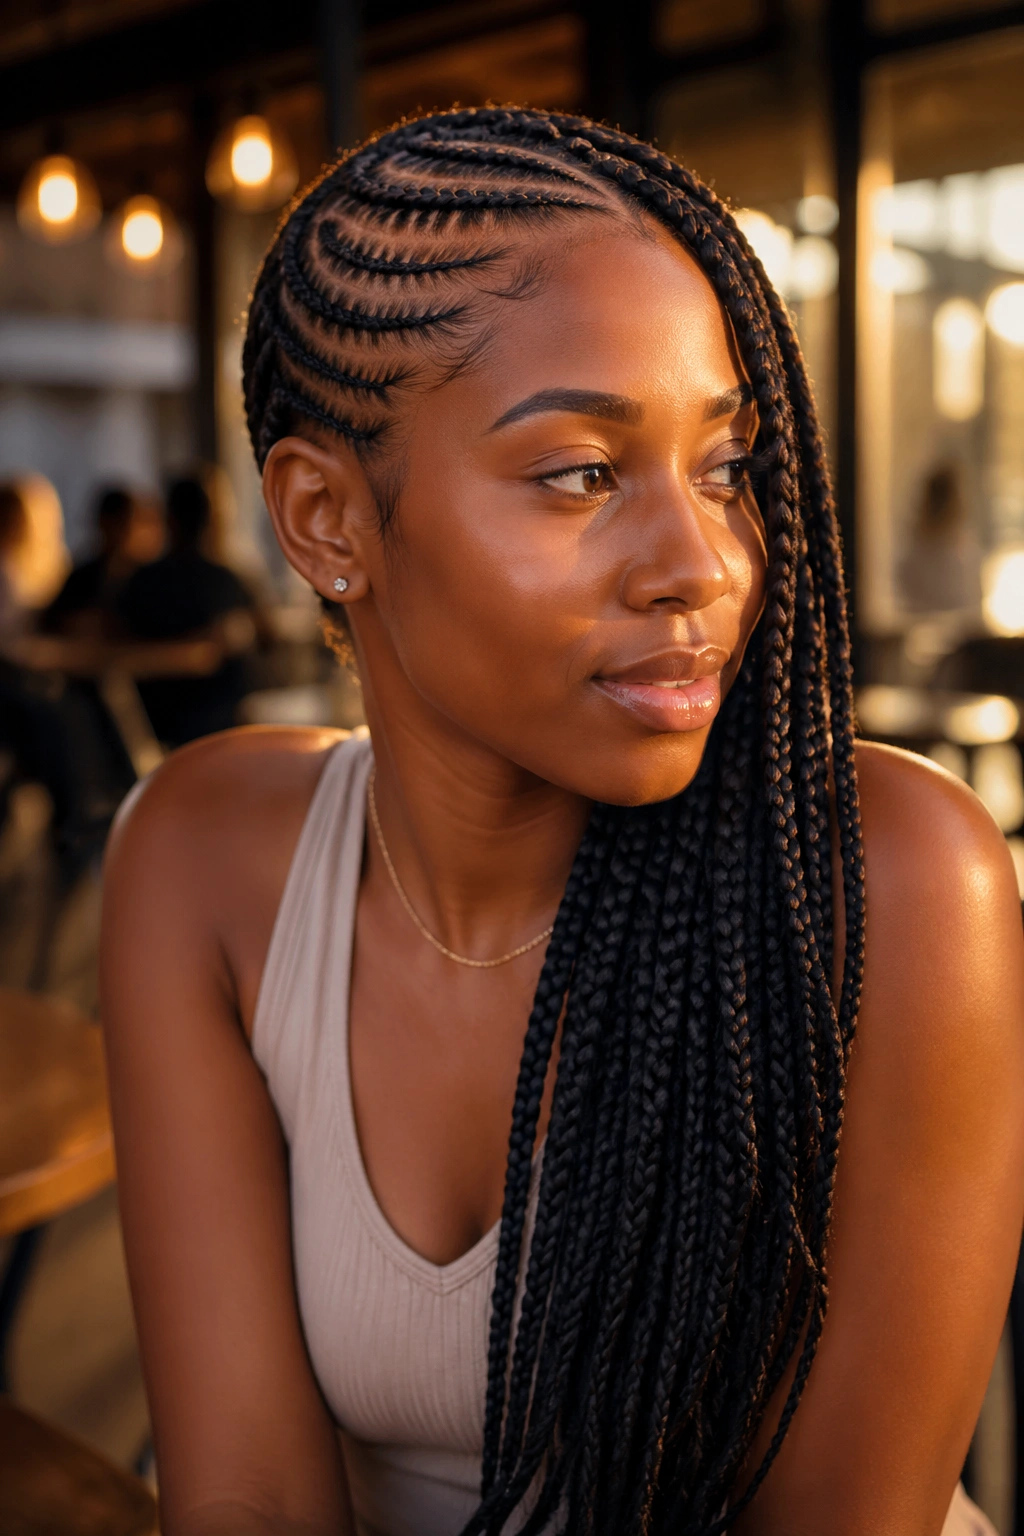
6. Feed-In Goddess Braids With Fine Cornrow Accents
Feed-in goddess braids are a smart choice when you want the style to look sleek from the start. Unlike chunky rows that begin at full size, feed-in braids start small at the hairline and gradually build in thickness. That subtle taper makes the scalp look cleaner and gives the whole style a smoother finish.
The other advantage is comfort. Because the braid grows out of the part instead of sitting on top of it, the tension spreads out more gently. That can help the style hold up better through the middle stretch, when a lot of braids start feeling rough around the edges.
If you’re choosing between straight rows and feed-ins, I usually lean toward feed-ins for longer wear. They look crisp on day one and stay readable longer because the start of each braid is less bulky. The style still needs a good wrap at night, but the base has a better chance of staying neat.
7. Jumbo Goddess Braids
Jumbo goddess braids are for people who want impact without sitting in a chair forever. Fewer braids mean less time, less scalp clutter, and less chance of tiny sections frizzing up in every direction. They’re bold, but they’re not fussy.
What makes jumbo braids last
A lot of people think bigger braids fall apart faster. Not always. If the parts are clean and the braid is packed evenly, jumbo braids can hold their shape beautifully because there are fewer individual pieces working loose.
- Keep the rows wide enough to support the braid, but not so wide that the scalp shows gaps.
- Use a light setting mousse at the end of the install so the braid surface smooths down.
- Tie the ends securely, since big braids tend to snag more at the tips.
- Sleep with the braids spread loosely inside a bonnet, not stuffed into a tight knot.
The catch: jumbo braids show tension fast if they’re installed too tightly. Good size, bad tension, and the style goes from chic to annoying in a hurry.
8. Mixed-Size Goddess Braids
Mixed-size braids are the answer when you want movement. One thick braid next to two slimmer ones keeps the style from looking too rigid, and that little shift in scale does a lot for the overall shape. It also helps disguise tiny changes as the style gets older. Your eye sees variation instead of frizz.
This is a strong choice for anyone who gets bored with symmetrical styles. The pattern still looks intentional, but it doesn’t read as stiff. I especially like mixed sizes when the braids sweep around the head or feed into a ponytail, because the different widths give the style a softer fall.
Place the thinner braids near the hairline if you want the front to feel lighter. Put the larger braids toward the back if you want the style to carry more weight there. That small choice changes how the braids sit on your head all week.
9. Side-Swept Goddess Braids
Can a side-swept style really last longer? Yes, and the reason is practical. When the braids all move to one side, you cut down on the constant back-and-forth rubbing that happens with center-heavy styles. The pattern feels less symmetrical, but the wear is often easier.
Why the side sweep helps
A side sweep also frames the face in a way that hides some of the early flyaways. The eye follows the direction of the braid instead of staring straight at the roots, which is handy when you’re stretching the style and don’t want every tiny new growth to announce itself.
The style works best when the heavier side is anchored close to the ear and the lighter side stays tucked closer to the crown. That keeps the braid from slipping around during the day. If the sweep is too loose, it starts drifting and the whole point disappears.
This is one of those styles that looks more dressed up than the effort suggests. That’s a good thing. It means you can wear it to work, dinner, or a regular Tuesday and not feel overdressed.
10. Crown Goddess Braids Updo
A crown updo is one of the safest bets if you want the braids out of the way and the ends protected. The hair wraps around the head, often in a circular pattern, and the ends tuck into the shape instead of hanging loose. That alone can extend the life of the style.
Picture this on a day when you need your hair to stay off your neck, off your shoulders, and off your mind. That’s where the crown updo earns its place. It looks structured, and because the ends are hidden, the braid stays cleaner for longer.
- Ask for the crown to sit low enough that it does not press hard at the temples.
- Pin the tucked ends flat so they don’t poke out by day two.
- Use bobby pins that match the braid color if you want the finish to look clean.
- Wrap the front hairline at night so the crown keeps its shape.
The style is tidy, and sometimes tidy is the whole point.
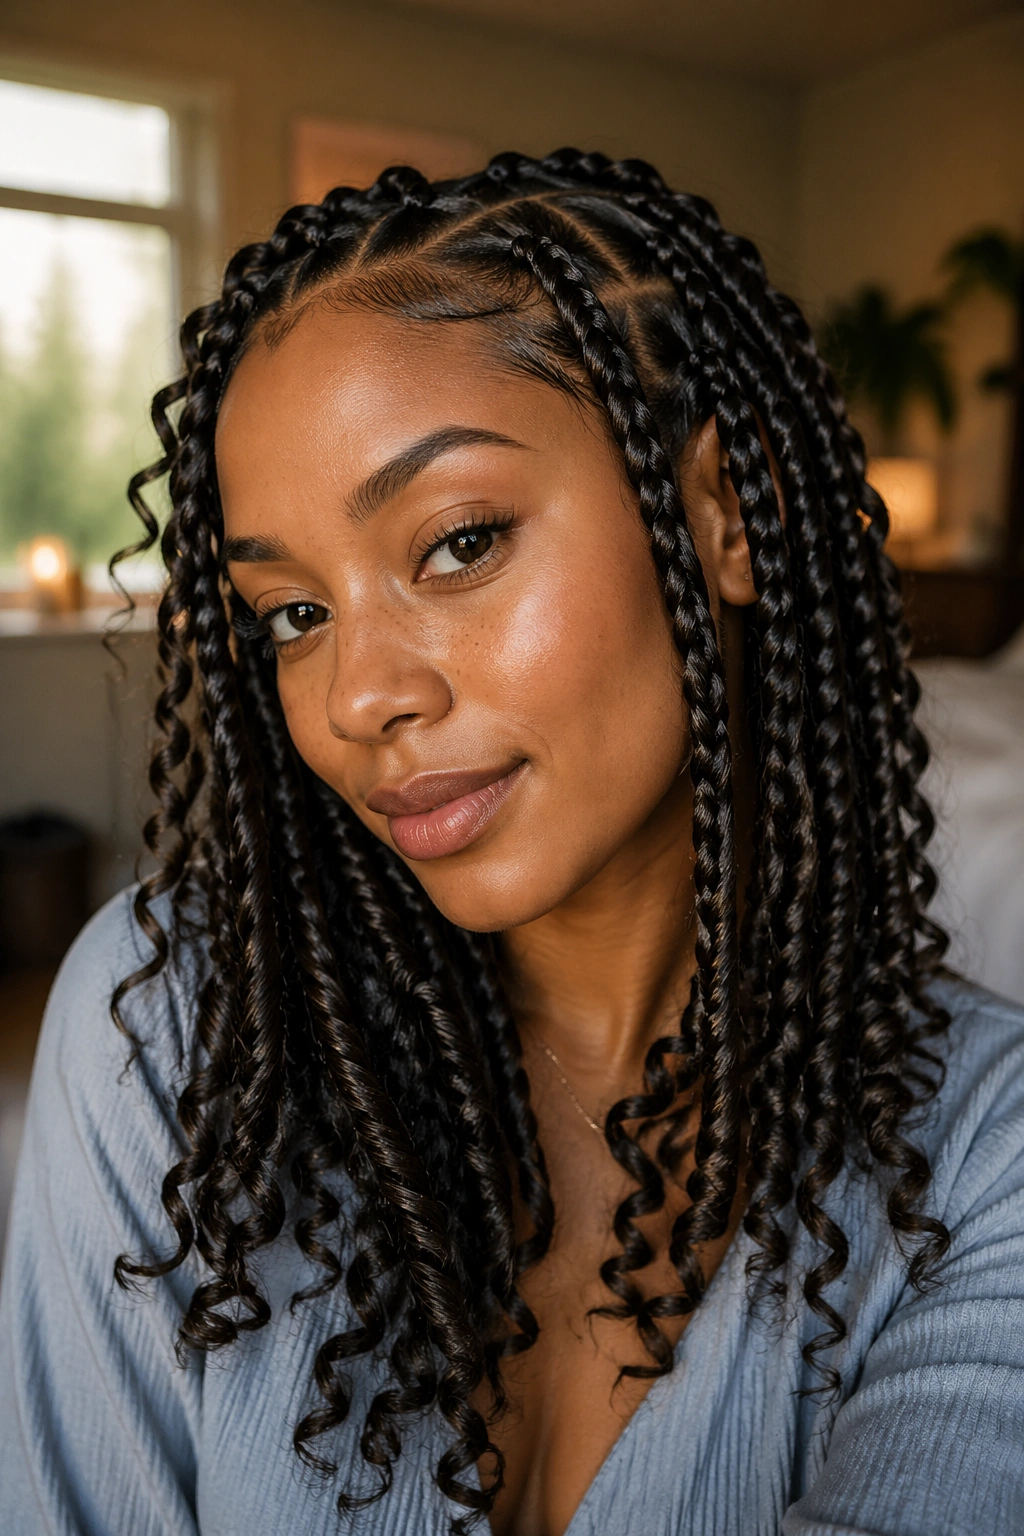
11. Triangle-Part Goddess Braids
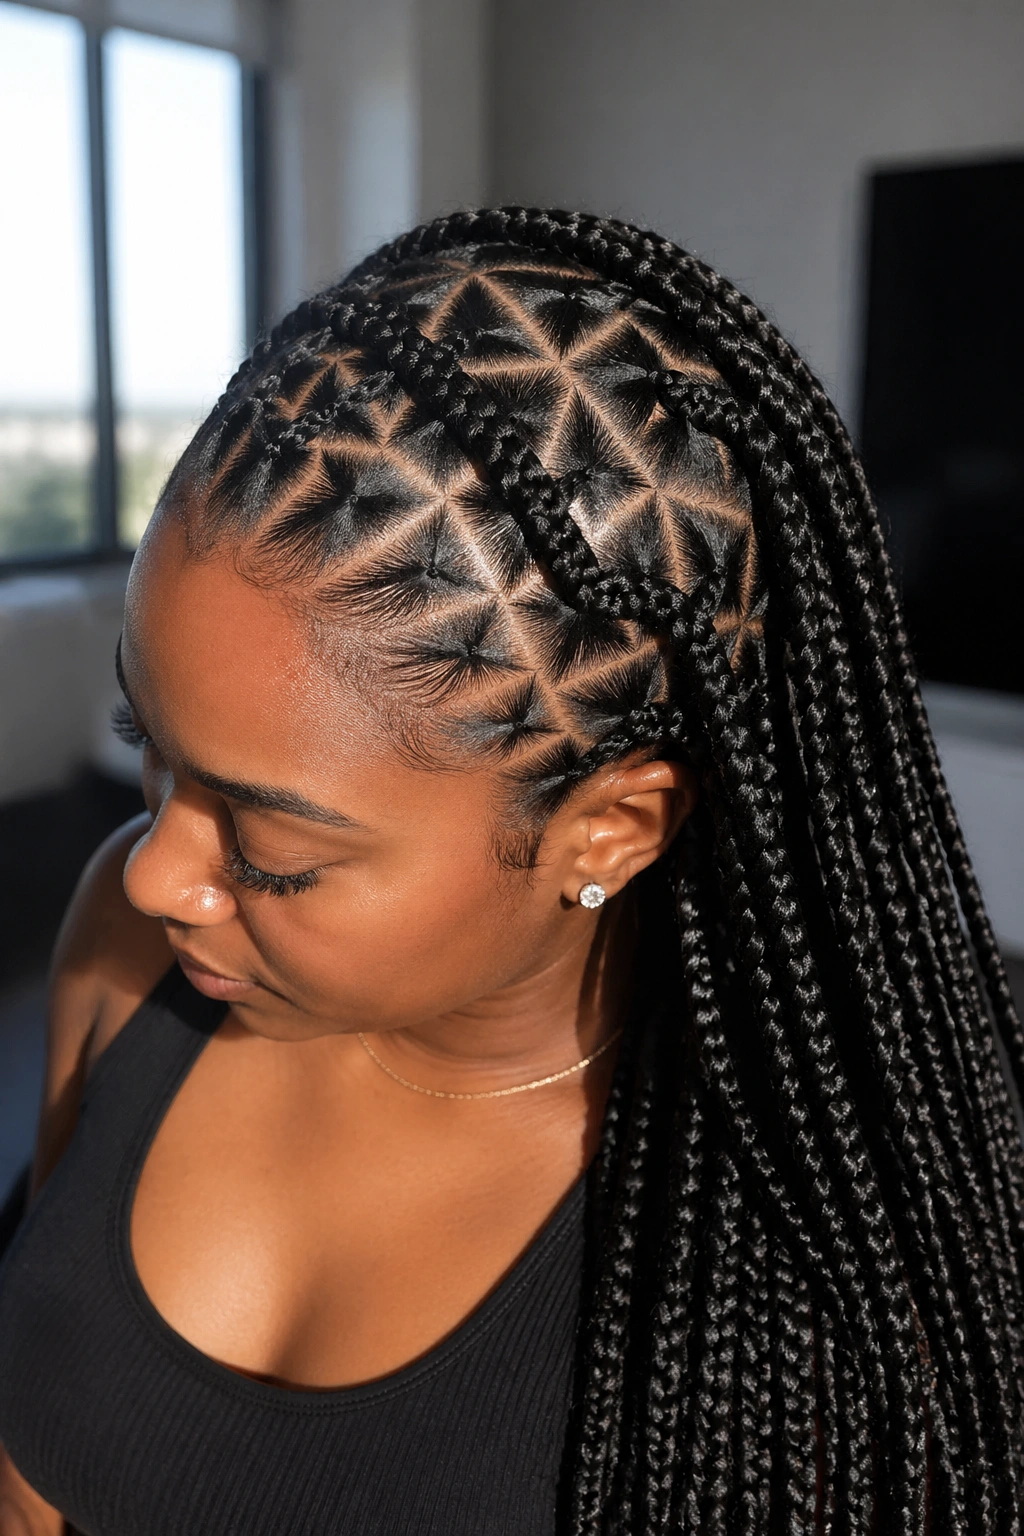
Triangle parts do one job very well: they make the parting pattern feel like part of the design, not just the plumbing underneath. Straight parts can be classic, but triangle sections add a little edge that stays visible even after the braids soften up. That matters when you want the style to still look interesting near the end of the wear cycle.
The parts need to be sharp, though. Sloppy triangle points look unfinished fast. Clean angles create a graphic look that holds up as the hair grows out, and because the eye is already reading the geometry, a small amount of frizz won’t ruin the whole style.
I like triangle parts on medium-size goddess braids because the shape has room to show. If the braids are too tiny, the pattern gets lost. If they’re too large, the triangles look stretched. Somewhere in the middle is where the style really works.
12. Zig-Zag Part Goddess Braids
Zig-zag parts are for the person who wants the style to feel a little playful without losing control. The part line moves instead of sitting flat, and that tiny twist makes the style less predictable. It also hides regrowth better than a hard straight line, which is useful when you’re trying to stay neat until wash day.
Unlike a simple center part, the zig-zag pattern gives the scalp more visual movement. That can be a blessing when the roots start to puff up. The pattern still looks intentional, so the style doesn’t read as “grown out” as quickly.
How to make the pattern work
Keep the zig-zag line wide enough to see from a normal viewing distance. If the points are too sharp, the line gets busy and hard to maintain. I’d keep each angle at least a quarter inch apart so the design stays readable.
This is a good choice if you like details that show up in motion. The braids look especially good when worn down and slightly angled over one shoulder.
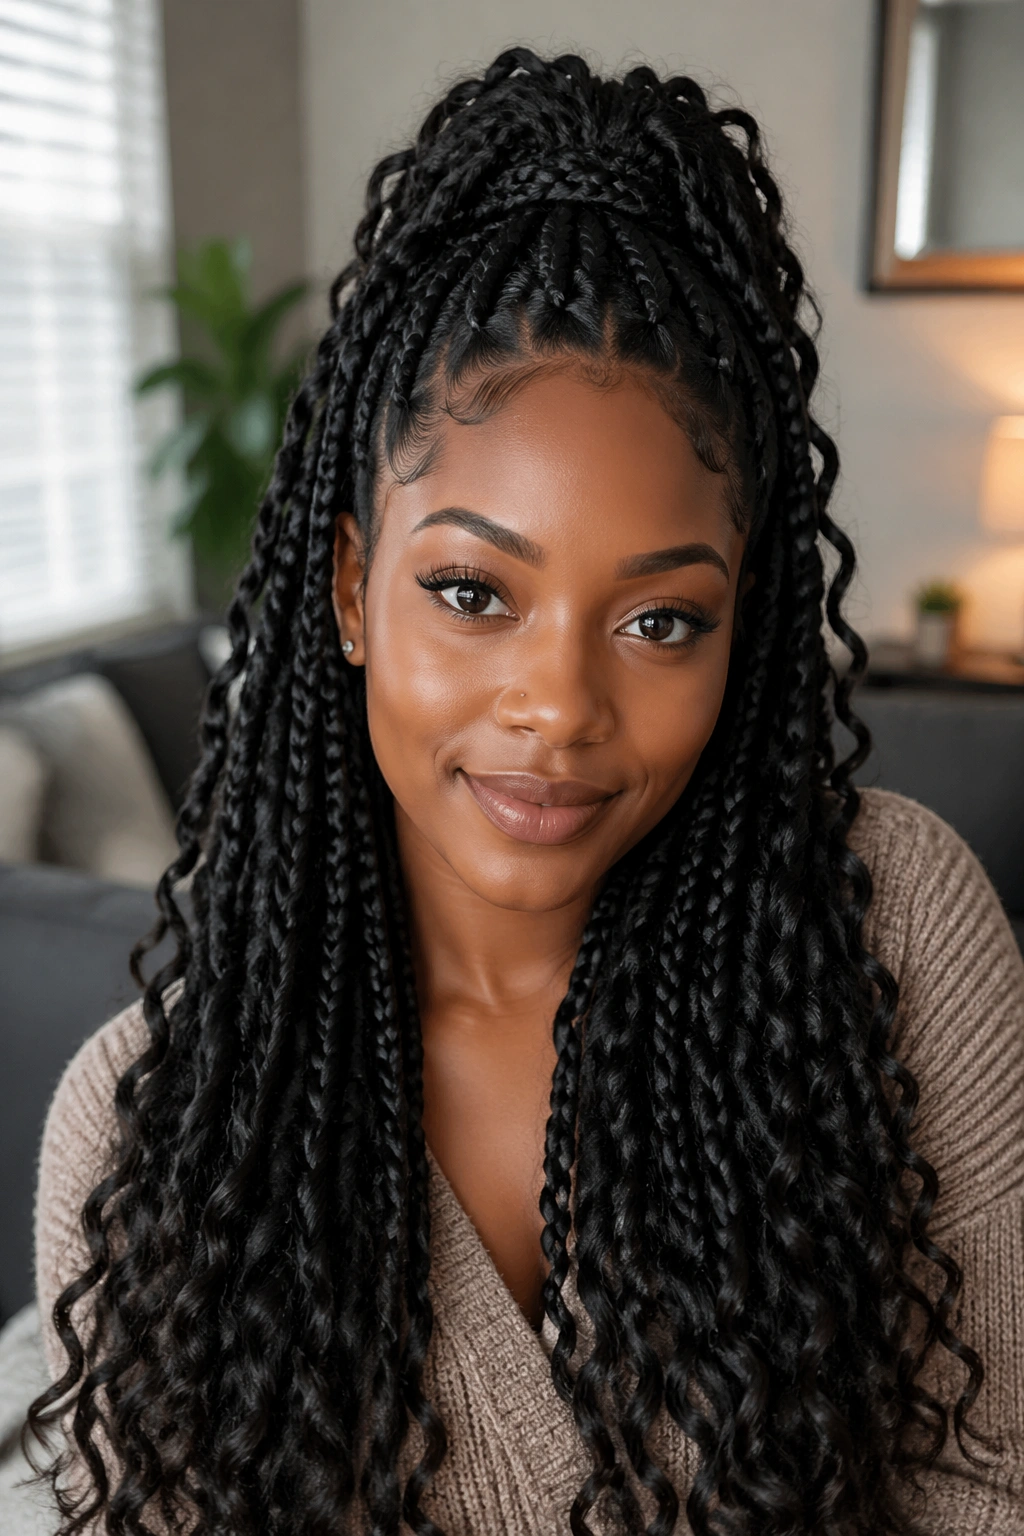
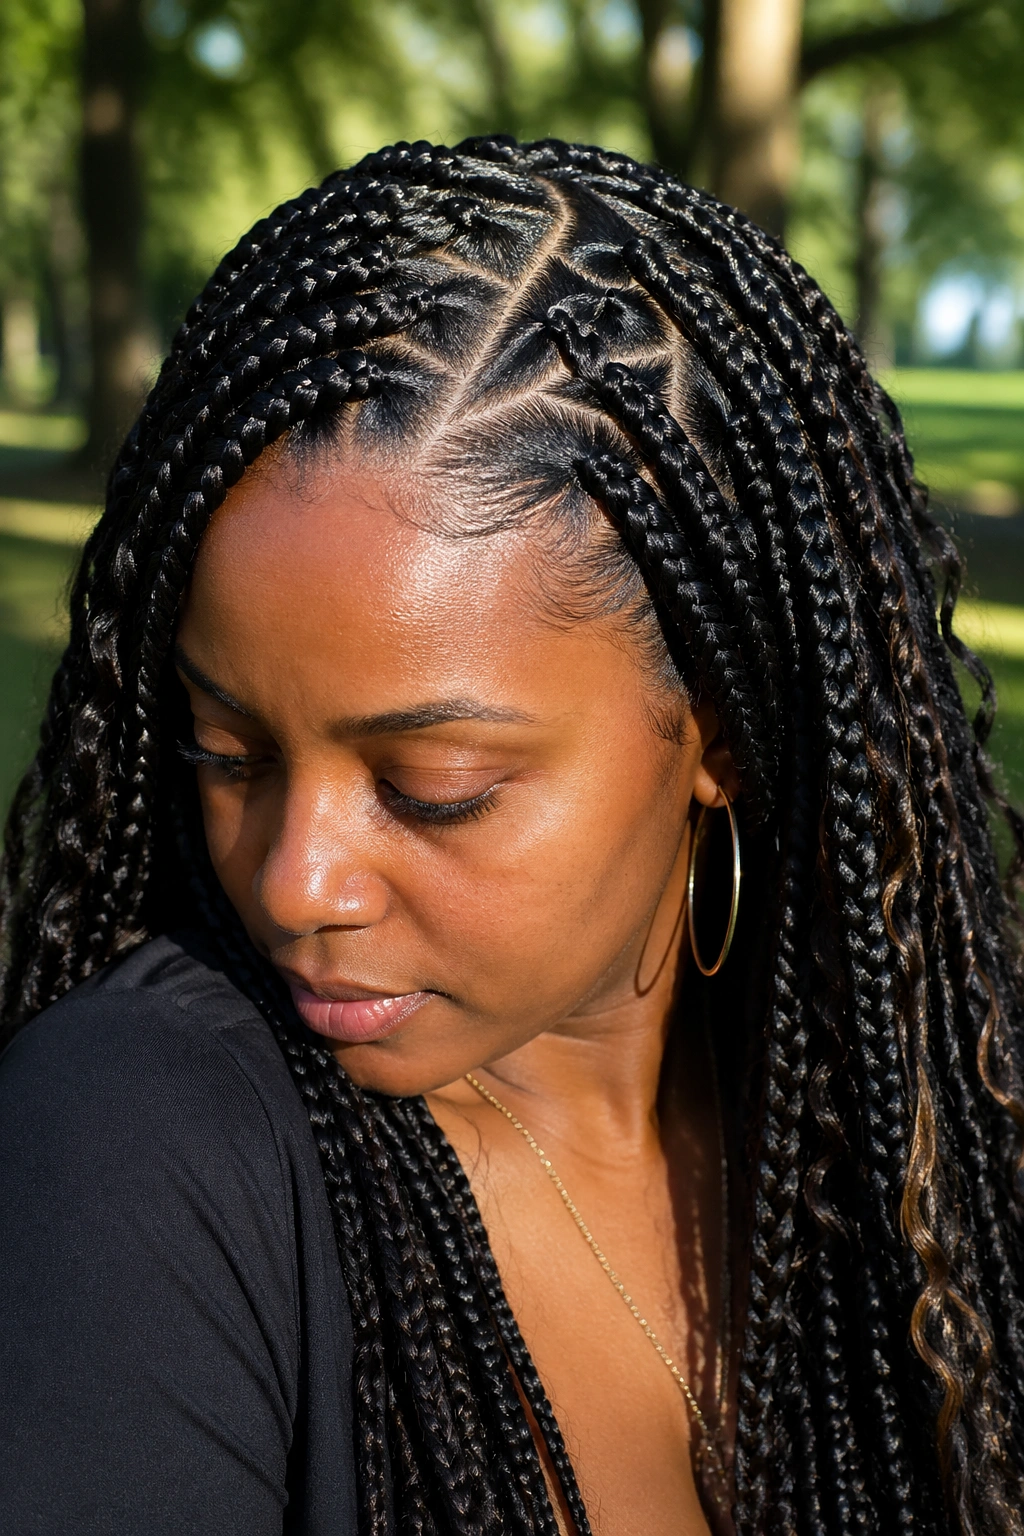
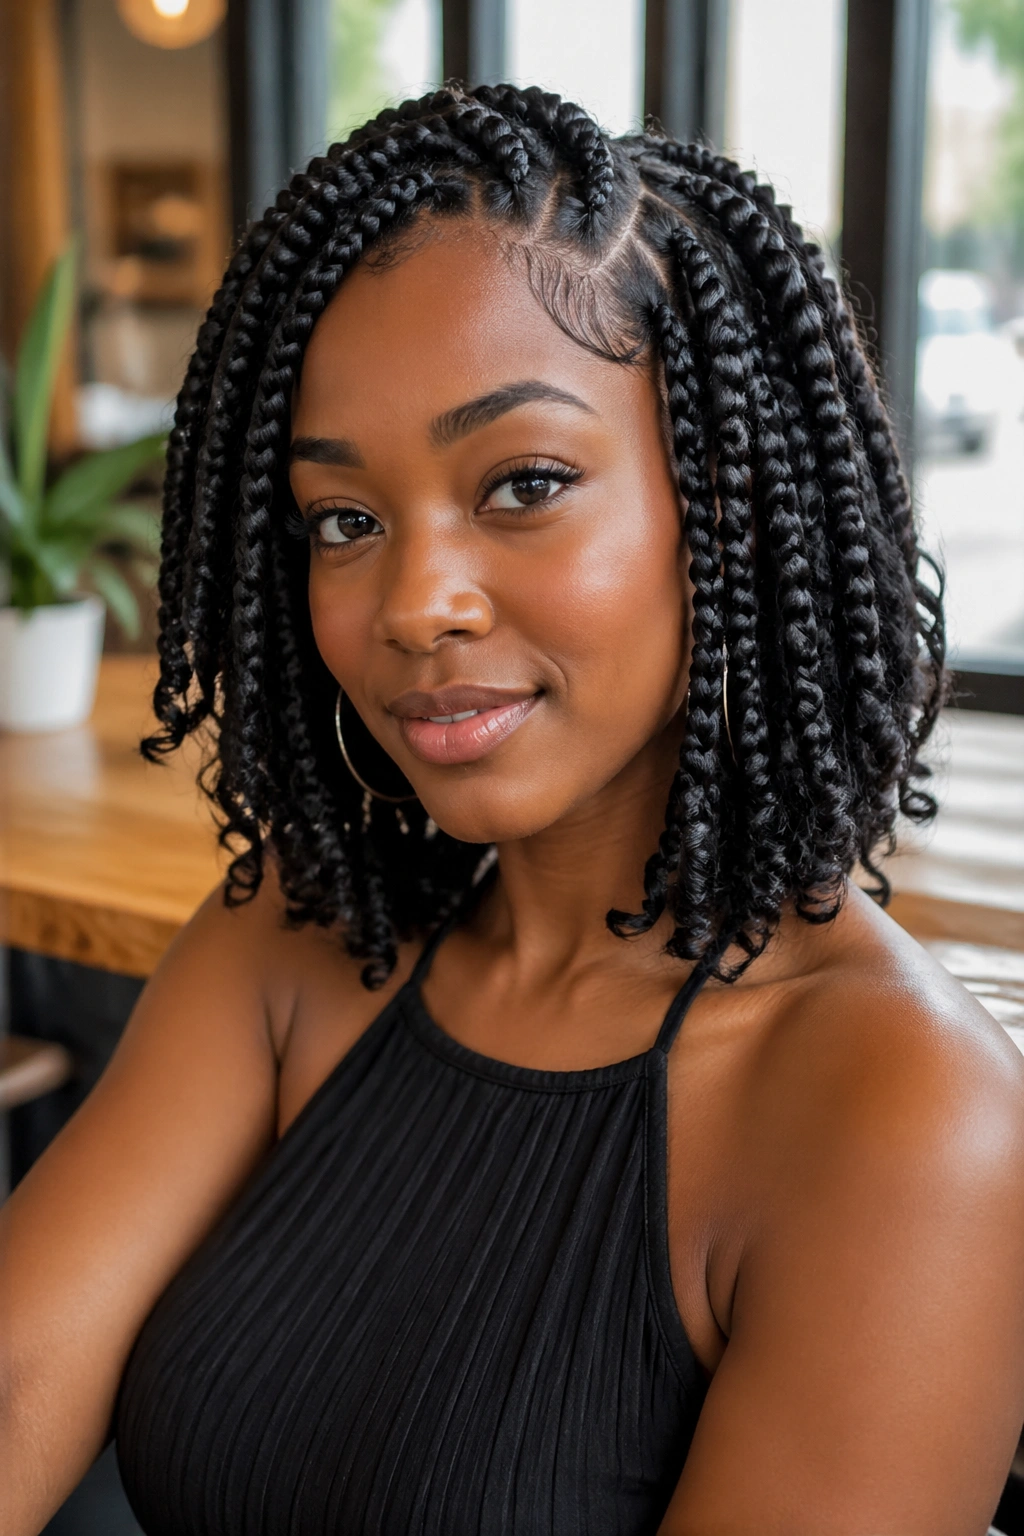
13. Goddess Braids With Curly Ends
Curly ends give goddess braids a softer finish, and that softness helps the style feel fresh even when the roots start settling in. The curls break up the heavy line of the braid, so the whole look feels less rigid. They also move well, which keeps the style from looking flat.
The weak spot is the ends
That said, the curls need care. If they’re left loose and uncovered at night, they frizz faster than the braids themselves. A small amount of foam at the ends before bed helps keep the curl pattern together, and a loose pineapple wrap at the back keeps them from getting crushed.
- Set the curls with foam or wrap lotion before sleeping.
- Keep the curl pieces light; too much hair at the ends makes them drag.
- Avoid piling the ends under your neck when you sleep.
- Refresh the curls with a tiny bit of mousse, not a heavy cream.
The style survives best when the curls are there to soften the braid, not fight it. That’s the line.
14. Boho Goddess Braids With Loose Curls

Boho goddess braids are all about contrast. You get the structured braid base, then you layer in loose curls that interrupt the line in a softer, messier way. Done well, it looks relaxed and expensive. Done badly, it turns fuzzy fast. No middle ground there.
The reason this style can still make it to wash day is that the curls are usually placed with intention. A few face-framing pieces are enough. You do not need curls everywhere. In fact, too many loose pieces make the style age faster because every strand becomes a little point of friction.
Use this style when you want movement more than crispness. It’s not the neatest option on the list, and I wouldn’t pretend otherwise. But if you keep the curls limited and wrap the braids at night, it stays wearable for days without losing its shape.
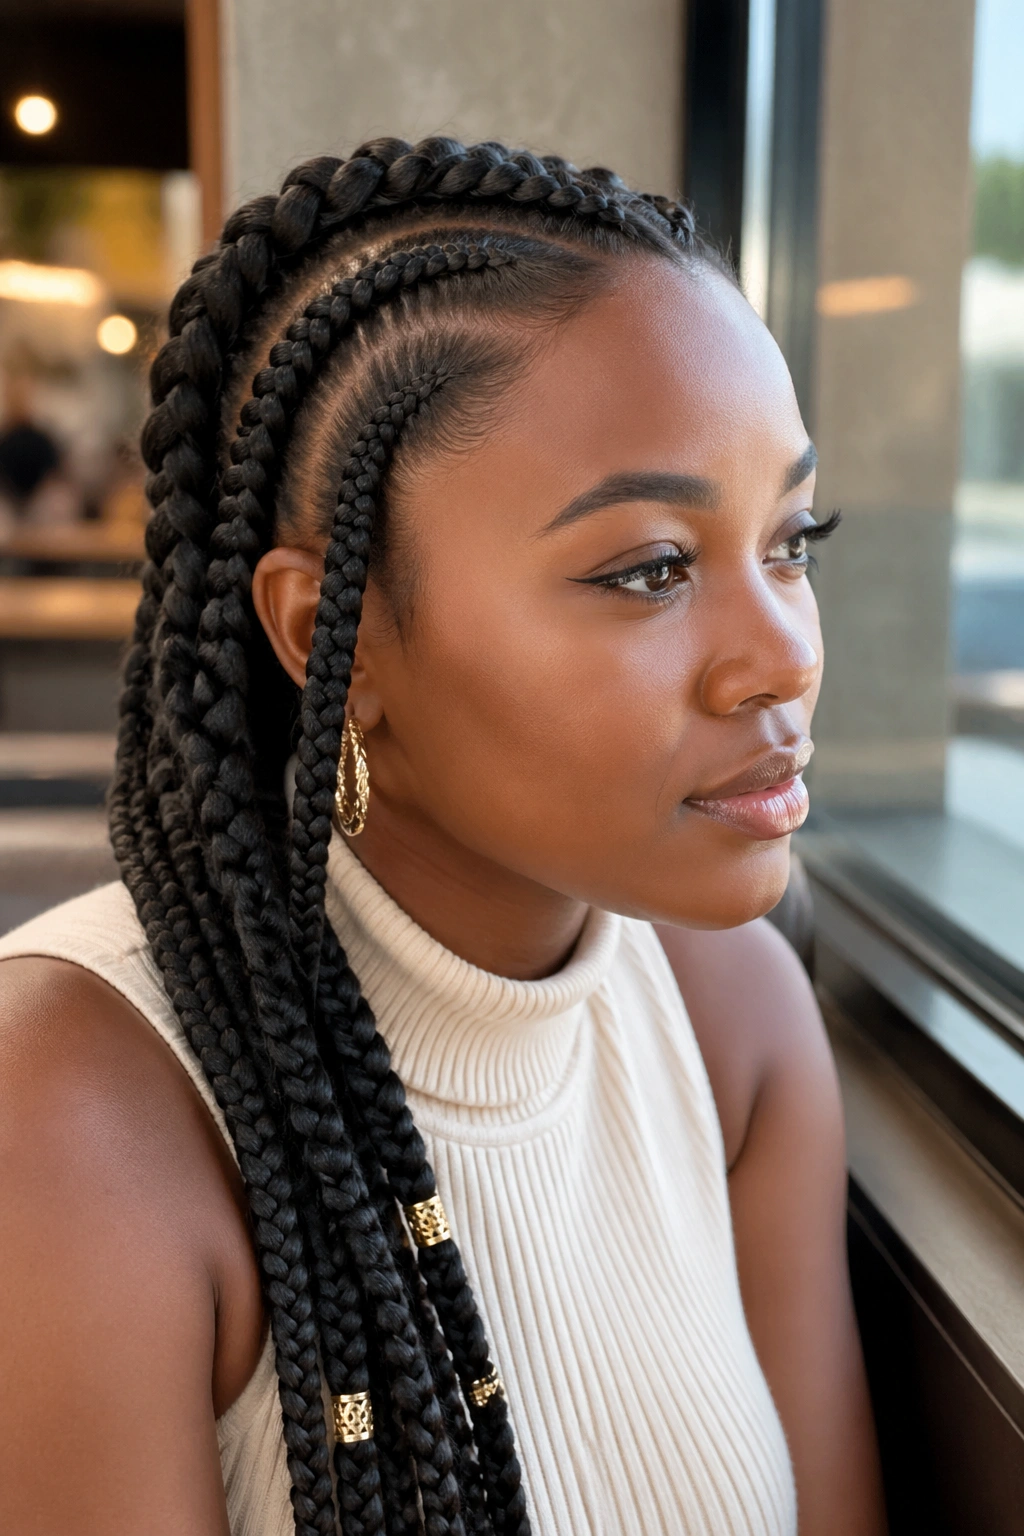
15. Goddess Braids With Beads and Cuffs

Can accessories help a style last? Sometimes, yes. Beads and cuffs do not stop frizz, but they can hide some of the wear that shows up near the ends. They also give the style a finished look even after the braid surface softens a little.
Where to place the accessories
The trick is restraint. A few cuffs near the mid-lengths or at the tips look cleaner than a braid overloaded from root to end. Beads work best when they’re clustered in one area, not scattered everywhere.
- Put heavier beads on the lower half of the braid so they don’t tug at the roots.
- Use cuffs on alternating braids if you want a balanced look.
- Keep the hairline free of heavy pieces so the front stays comfortable.
- Choose accessories that won’t snag when you wrap your hair at night.
I like this style for anyone who wants a little shine without changing the whole braid pattern. The accessories are a detail, not the whole story.
16. Stitch-Pattern Goddess Braids
Stitch-pattern goddess braids are the crisp, clean cousin in the family. The sections are built with a visible “stitched” parting line, which gives the style a sharpened look from the scalp outward. That sharpness helps the braids stay visually neat even after a few days of wear.
The reason is simple: the braid already has a built-in structure. The parting acts like a frame, and the braid sits neatly inside it. When the hair starts to soften, the pattern still reads clearly because the lines are strong to begin with.
This style rewards careful installation. If the stitching is uneven, the whole effect falls apart. If it’s neat, the style can look polished for a long stretch because there’s so much order at the base. It’s one of my favorite choices when someone wants the braids to look precise rather than soft and romantic.
17. Lemonade-Style Goddess Braids
Lemonade-style braids lean hard to one side, and that slant gives them a lot of built-in staying power. The lines feel long and controlled, which means the style can grow out a bit without looking messy right away. The shape does some of the visual work for you.
They’re also a good pick when you want to keep one side of the head flatter. The braid direction helps guide the hair, and that makes it easier to wrap and sleep on without flattening the entire style. The front still needs a little care, but the overall shape is forgiving.
The style looks strongest when the braid sizes stay consistent from front to back. If the rows change too much, the sweep loses its rhythm. Keep the edges clean, keep the parting deliberate, and the look will stay sharp longer than you’d expect.
18. Mohawk Goddess Braids

Mohawk goddess braids give you height down the center and controlled sides, which is a smart setup if you want the style to stay off the temples. Those side areas are where a lot of braids start to feel tired first, especially if they’re constantly rubbing against glasses, scarves, or pillows.
Unlike a full-head pattern, the mohawk shape leaves the center to carry the style. That makes it feel bold without being bulky everywhere. The sides can be braided flat or slicked close, and the middle row can take the decorative weight.
Who this works for
If you like volume but hate hair in your face, this one makes sense. It also works well when you want to show earrings or neckline details, because the braids pull attention upward. My one caution: don’t overstuff the center with too much hair. A mohawk shape needs space to breathe, or it starts looking heavy.
19. Wrapped-Base Braided Ponytail
A wrapped-base ponytail is one of the neatest ways to finish goddess braids. The base stays sleek, the elastic disappears under a wrap, and the rest of the braids drop into a controlled tail. That covered base matters more than it seems. It stops the style from looking like it was thrown together at the last minute.
The wrap makes the difference
Use one braid or a small section of extension hair to circle the base and hide the band. Keep the wrap snug but not tight, or it will bump out after a night of sleep. A smooth base also makes it easier to refresh the style with a little mousse and a scarf.
- Choose a low or mid ponytail if you want less tension.
- Keep the wrapped section flat against the scalp.
- Use a strong elastic that does not snag the braids.
- Sleep with the ponytail tucked into a bonnet so the ends stay aligned.
This is a good “I need it to hold” style. Clean, practical, and easy to wear.
20. Bob-Length Goddess Braids
Bob-length goddess braids are underrated. Shorter braids swing less, snag less, and usually stay neater near the ends because there’s less length to rub against coats, seat backs, and shoulders. That makes them a strong option if you want the style to stay looking fresh through the last few days.
They also dry faster if you wash your scalp while wearing them. That matters. Heavy, long braids can take forever to dry around the base, and nobody enjoys sleeping with damp hair. A chin-to-shoulder length braid solves a lot of that headache.
I like bob-length braids for people who want structure without the weight. The style still feels dressed up, but it’s easier to live with. If you have a busy week and no patience for a lot of upkeep, this length gives you a cleaner runway to wash day.
21. Waist-Length Goddess Braids
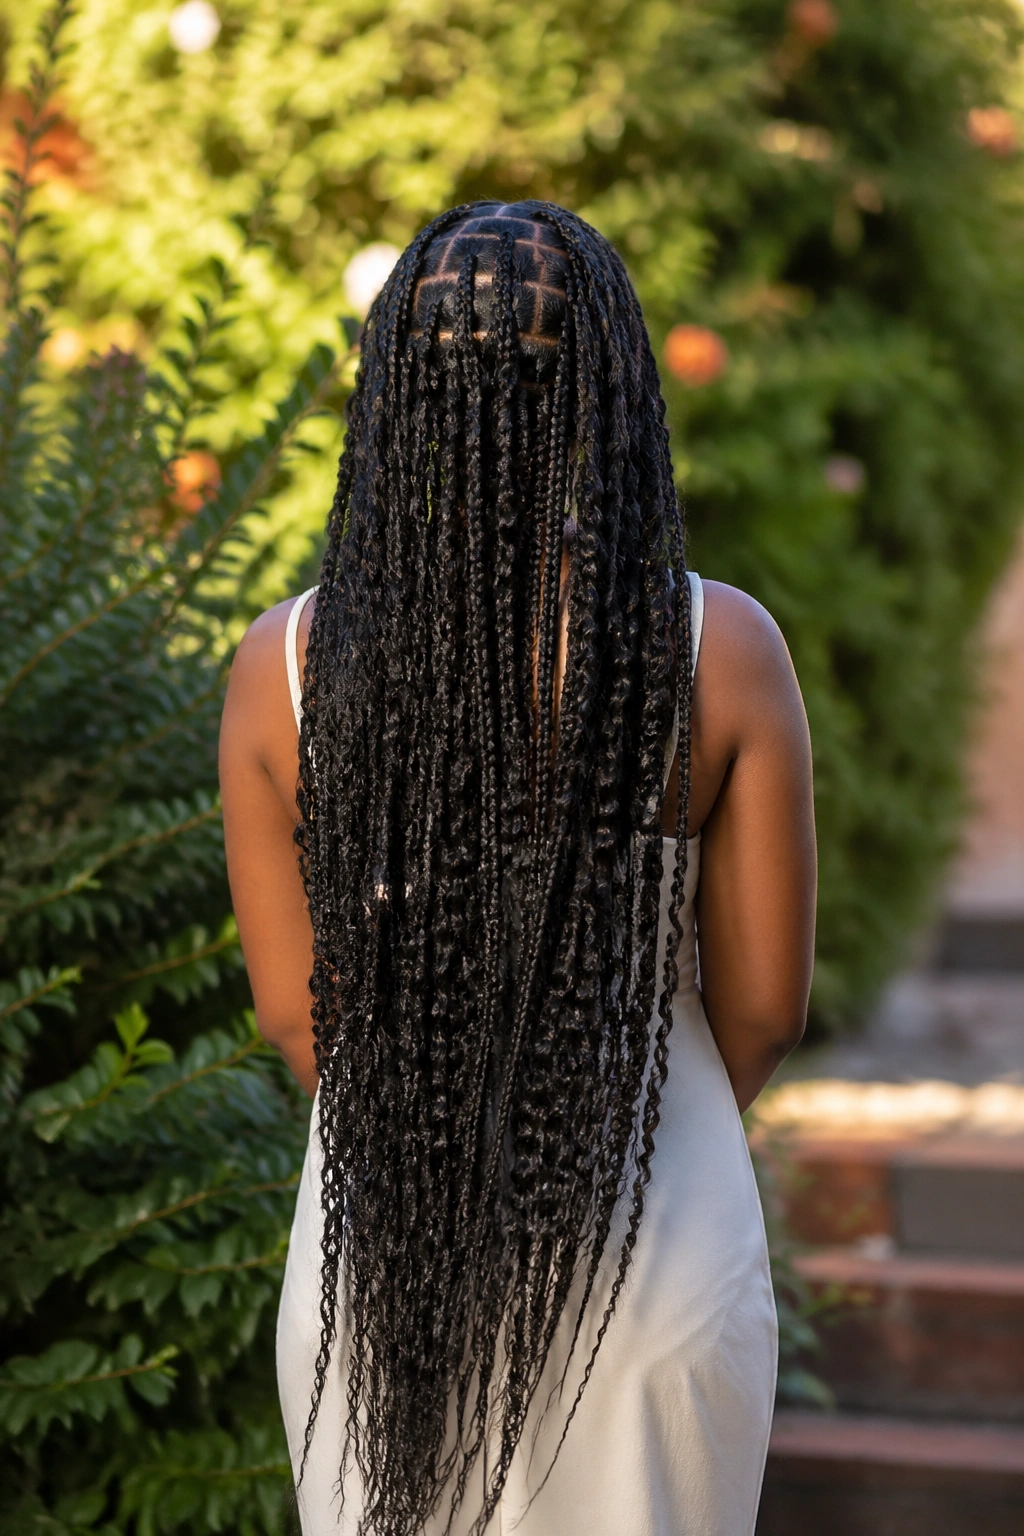
Waist-length goddess braids are a statement, but they’re not just about drama. The length gives you room to style the braids in ponytails, over-the-shoulder drapes, or loose falls, and the extra length can help the ends stay tucked away instead of stopping awkwardly at the collarbone.
The downside is weight. Long braids need careful parting and a sensible braid size, or the pull starts to show. Medium-width sections usually wear better than very large ones here, because they balance the length without making the scalp work too hard. If you want this style to survive comfortably, keep the base clean and the ends sealed.
It helps to think about how you actually move through the day. If you wear backpacks, high collars, or scarves a lot, the ends will get bumped. If you sleep hot, the length can get tangled unless you wrap it well. None of that makes the style a bad idea. It just means the braid has to fit your routine, not somebody else’s photo.
Waist-length braids can last until wash day, sure. They last best when they’re treated like a style you’re living in, not a costume you only admire in the mirror.