Mermaid braids were made for Rapunzel-length hair. Shorter hair can pull off the vibe, sure, but there’s something about long lengths—waist-grazing, hip-skimming, the kind that swishes when you turn your head—that gives a braid room to look theatrical without tipping into costume territory.
The trick is that extra length is a blessing and a headache. You get more drape, more movement, more places to tuck a section or wrap a strand, and more chances for the whole style to look expensive instead of fussy. You also get weight. Plenty of it. Long hair can slide out of elastics, sag at the crown, and turn a neat braid into a shapeless rope if you don’t give it enough grip.
I like mermaid braids on long hair because they can be as polished or as loose as you want. A little texture spray changes everything. So does a tail comb, a stack of small elastics, and the patience to make sections even before you start tugging them apart.
These 13 versions lean into that length in different ways—some are soft and romantic, some are strong and clean, and a few are deliberately messy in the best possible way.
1. Classic Pull-Through Mermaid Braid
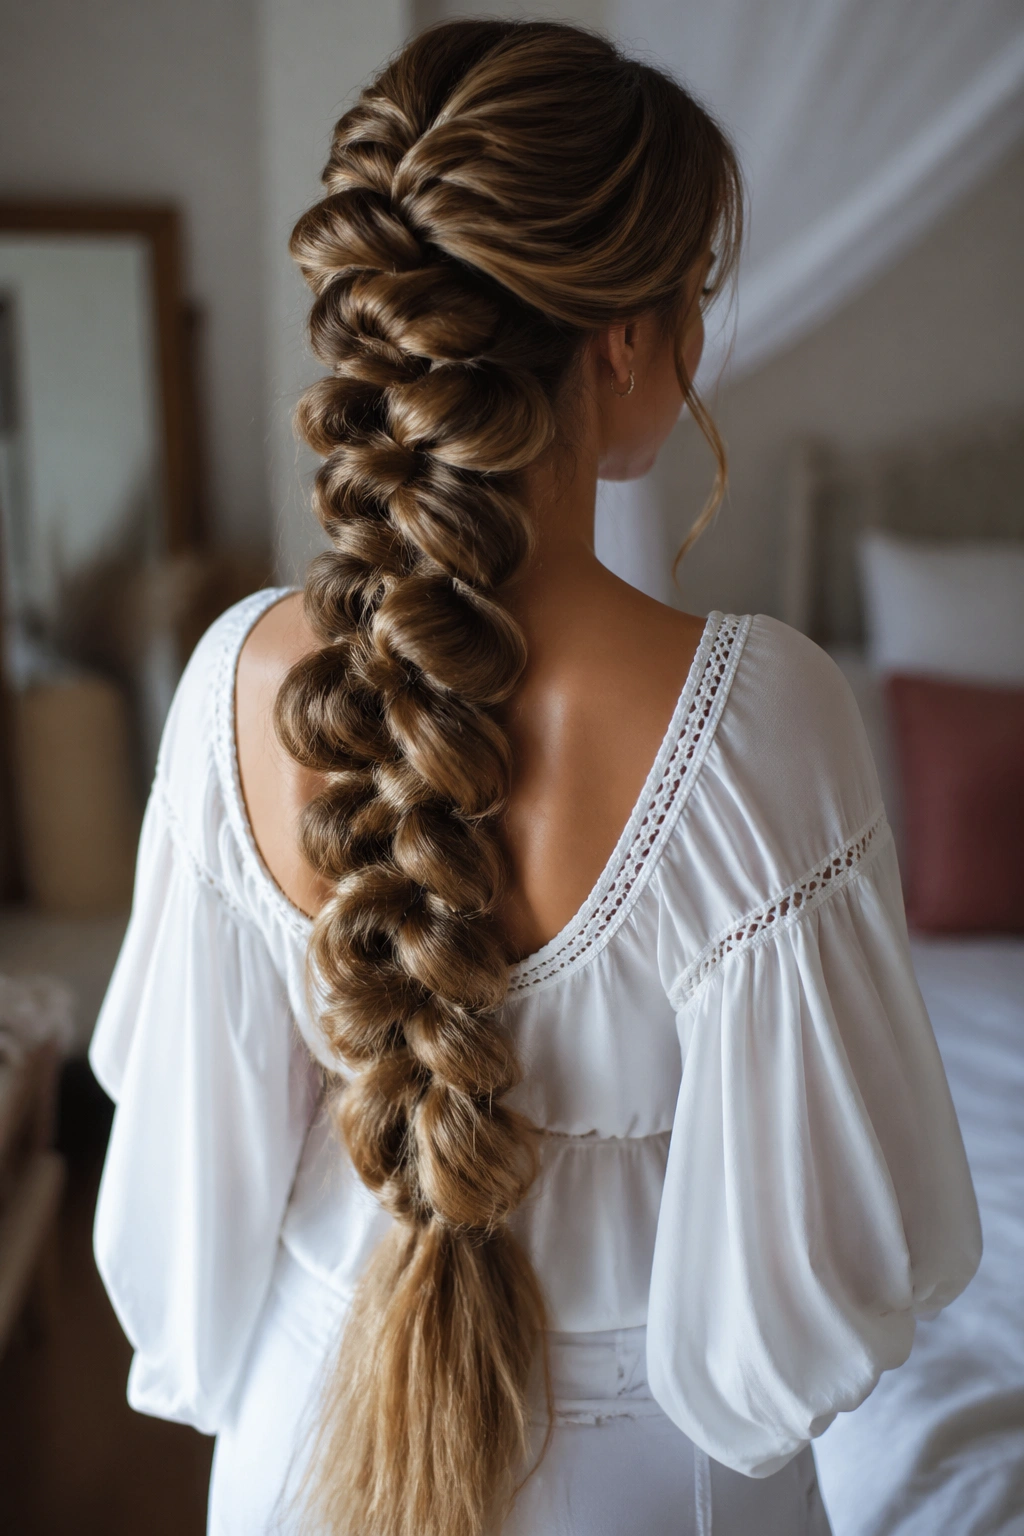
The pull-through braid is the style I reach for when someone wants the look of a thick, elaborate mermaid braid without needing three extra hands. On Rapunzel-length hair, it has a gorgeous trick up its sleeve: each loop can be sized to make the braid look even fuller than the actual amount of hair would suggest.
Why It Works on Rapunzel-Length Hair
A pull-through braid uses a series of ponytails stacked down the back, then split and folded over each other so the finished braid looks woven. With long hair, the loops can be big and soft instead of tight and stubby. That gives the whole style movement.
It also forgives layers better than a standard three-strand braid. If the ends are fine or slightly frayed, they disappear into the structure. If the hair is thick, the braid stays bold instead of collapsing into a skinny tail.
Quick notes:
- Use 8 to 14 clear elastics for waist-length hair, more if your hair is very long.
- Keep each section the same size for a clean spine down the center.
- Gently tug each loop outward after securing it to get that wide, mermaid shape.
- A little dry texture spray at the roots helps the elastics hold.
My favorite part: it looks complicated from far away and almost suspiciously easy up close.
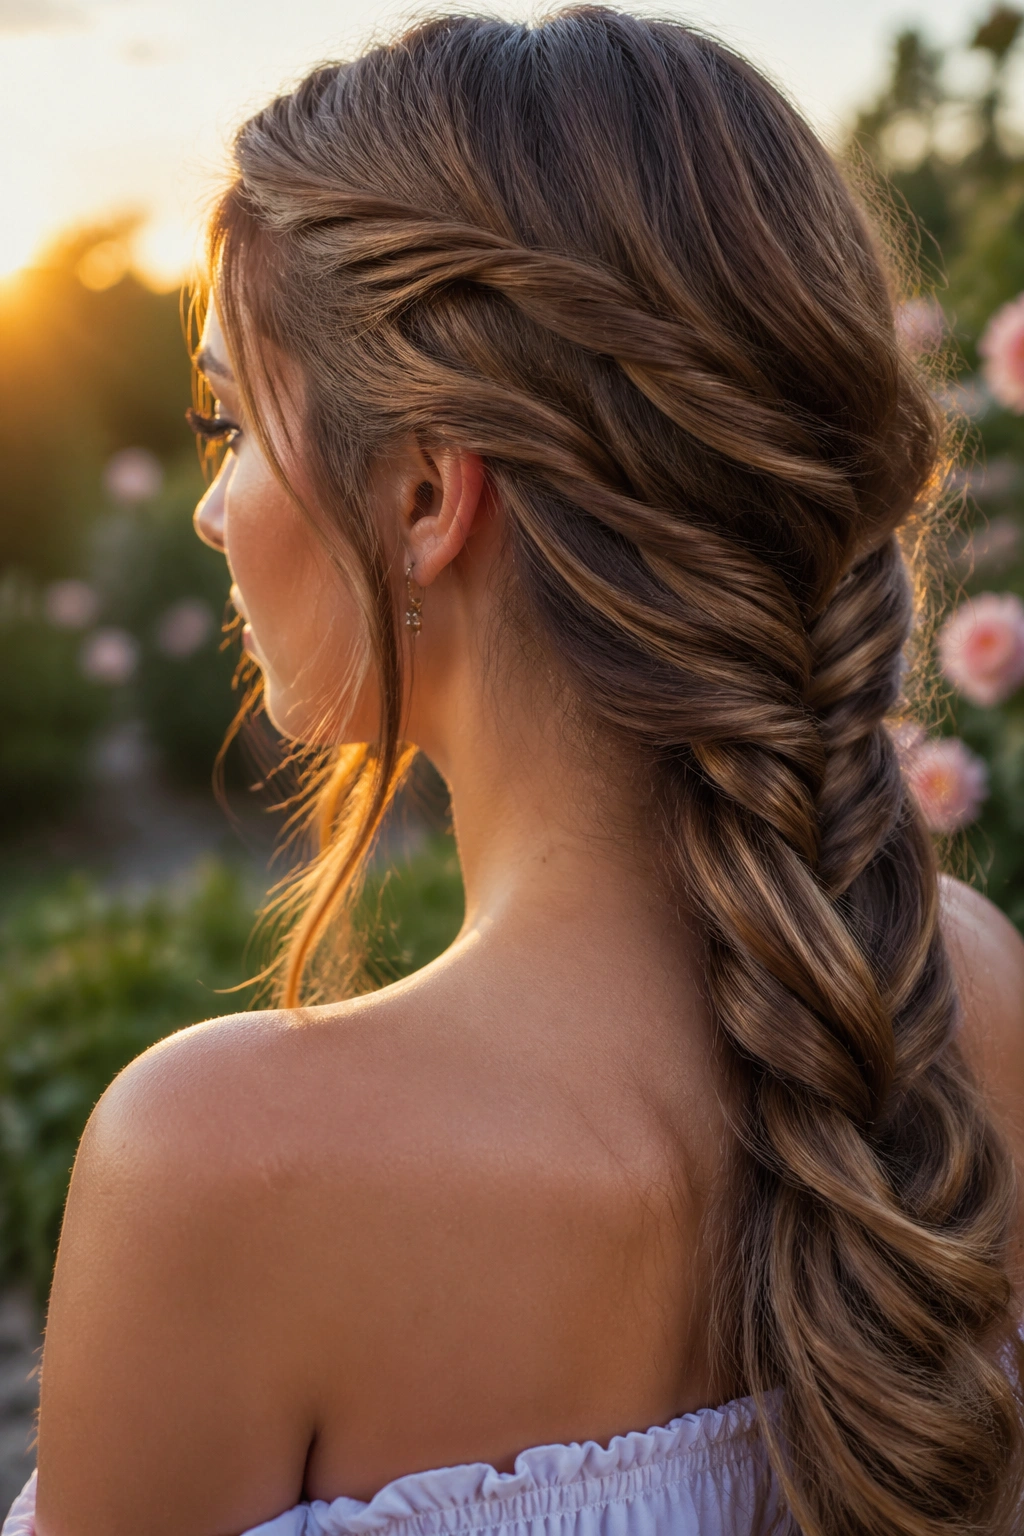
2. Fishtail Mermaid Braid
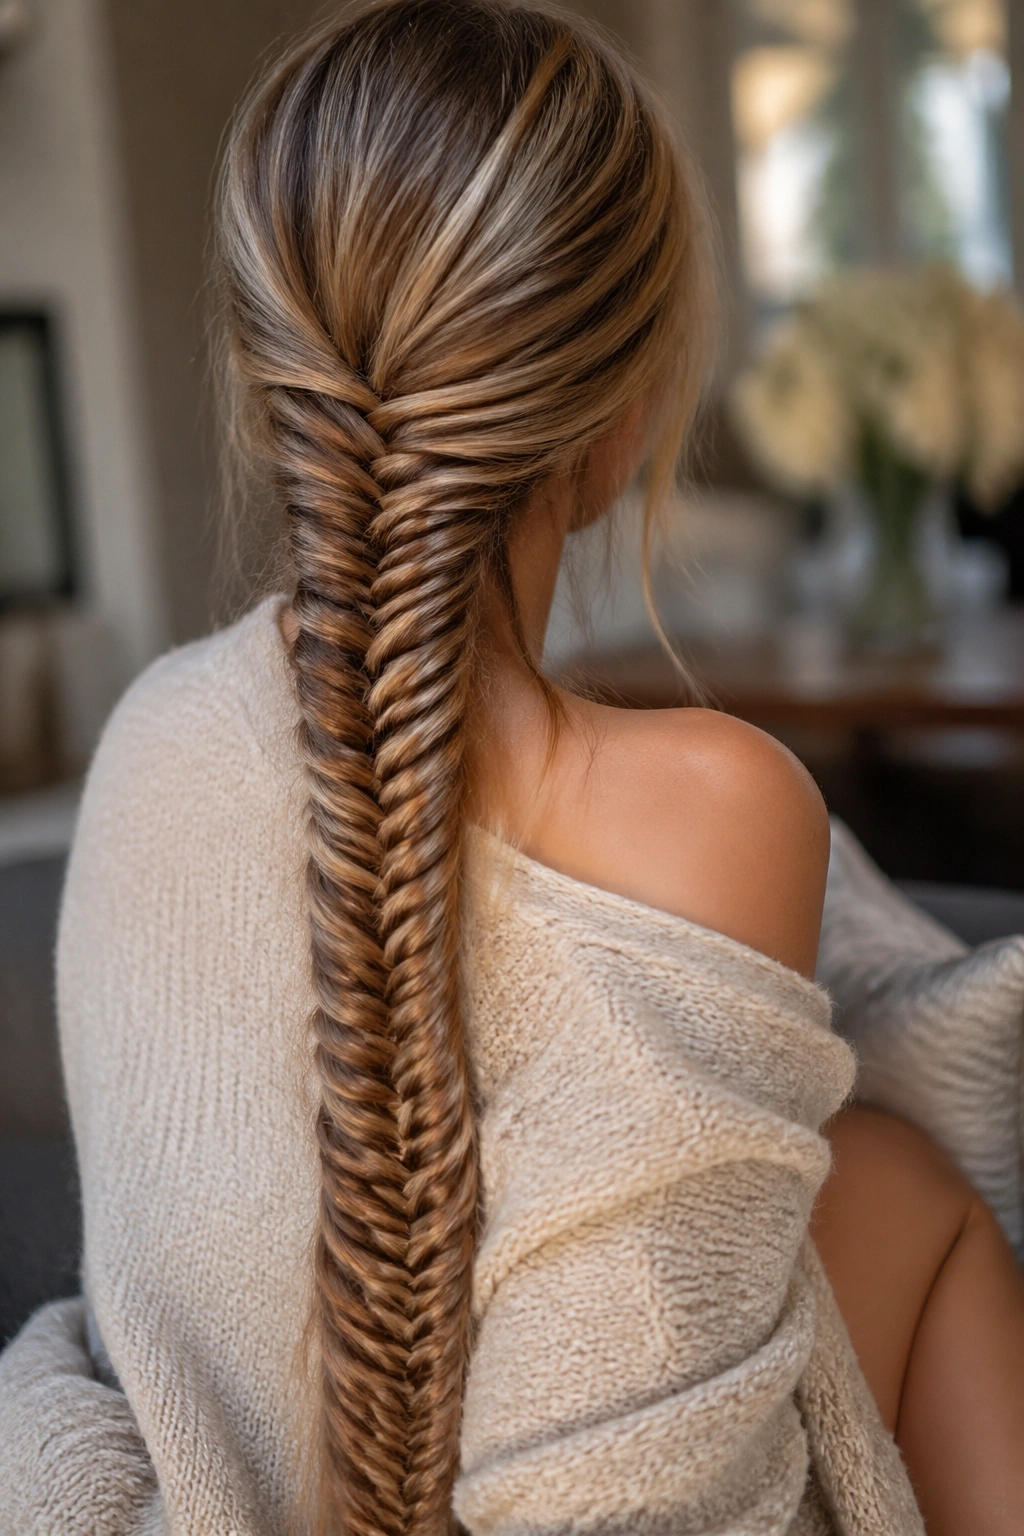
A fishtail braid is the one that makes people stop and stare because the texture is tiny, neat, and a little bit hypnotic. On long hair, that fine woven pattern stretches downward like scales, which is exactly why it reads as mermaid hair instead of just “nice braid.”
The biggest mistake is pulling too hard at the start. Don’t. Keep the crown smooth, braid with gentle tension, and let the pattern do the work. The beauty of a fishtail on very long hair is that you don’t need much styling drama elsewhere; the braid itself is the drama.
If your hair is silky, mist the mid-lengths with a touch of texturizing spray before you start. It gives your fingers a little more control, which matters more than people think. The braid will hold better, and the tail won’t split apart halfway down your back.
I’m also a fan of fishtails when the ends are uneven. A standard braid can expose that in a nasty way. A fishtail hides it. The alternating sections create enough visual noise that the eye sees texture first and flaw second, which is why this braid works so well on hair that has layers, highlights, or both.
3. Waterfall Mermaid Braid
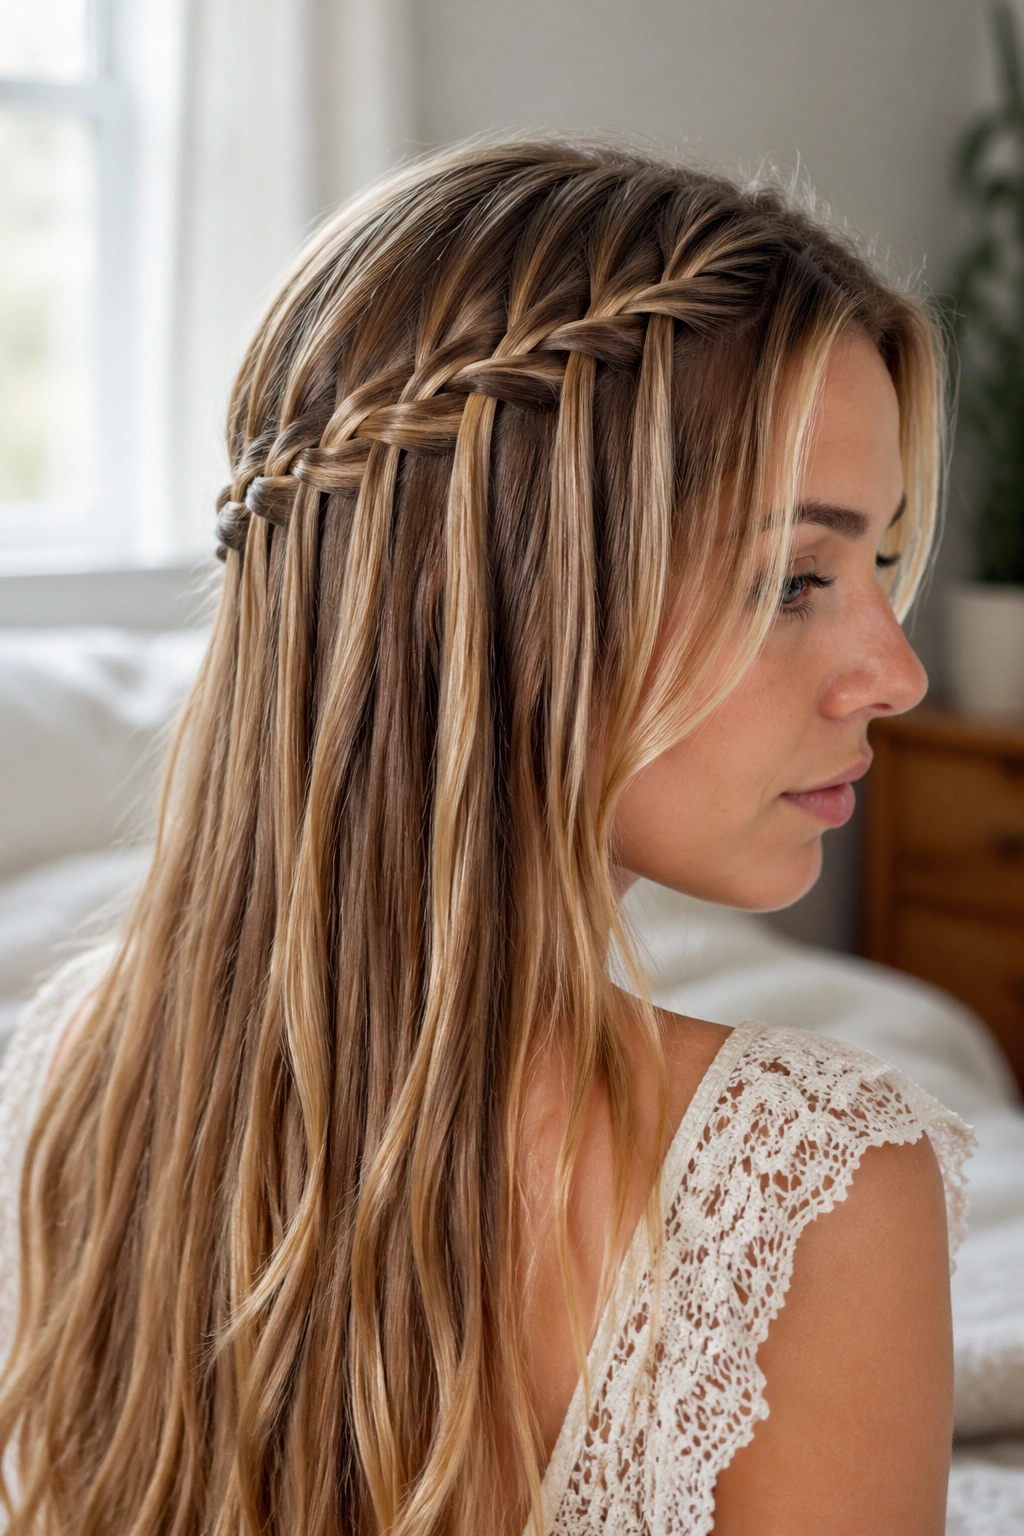
What keeps a waterfall braid from looking flat? The answer is the hanging lengths. That’s the whole reason it belongs in a mermaid-braid lineup. The braid crosses over the head, while sections of hair drop free like little streams, and on Rapunzel-length hair those streams have enough weight to look intentional instead of stringy.
The style works best when the braid starts just above the temple and curves toward the back of the head. If you place it too low, the effect gets buried in the rest of the hair. Too high, and the braid can feel stiff. A soft arc is the sweet spot.
How to Wear It
Use the waterfall braid as a half-up style, then leave the rest of the hair loose in loose waves or brushed-out curls. Straight hair can work too, but the free-hanging pieces usually look richer when they have some bend in them. I’d pin the end of the braid under a small curtain of hair, not on top where the bobby pins show.
For extra-long hair, one neat trick is to pair the waterfall braid with a small hidden braid underneath it. That anchors the top section and keeps the style from slipping by the end of the day. Don’t over-tighten the first few crossings or the braid will pull at the hairline and lose its soft edge.
4. Dutch Mermaid Braid
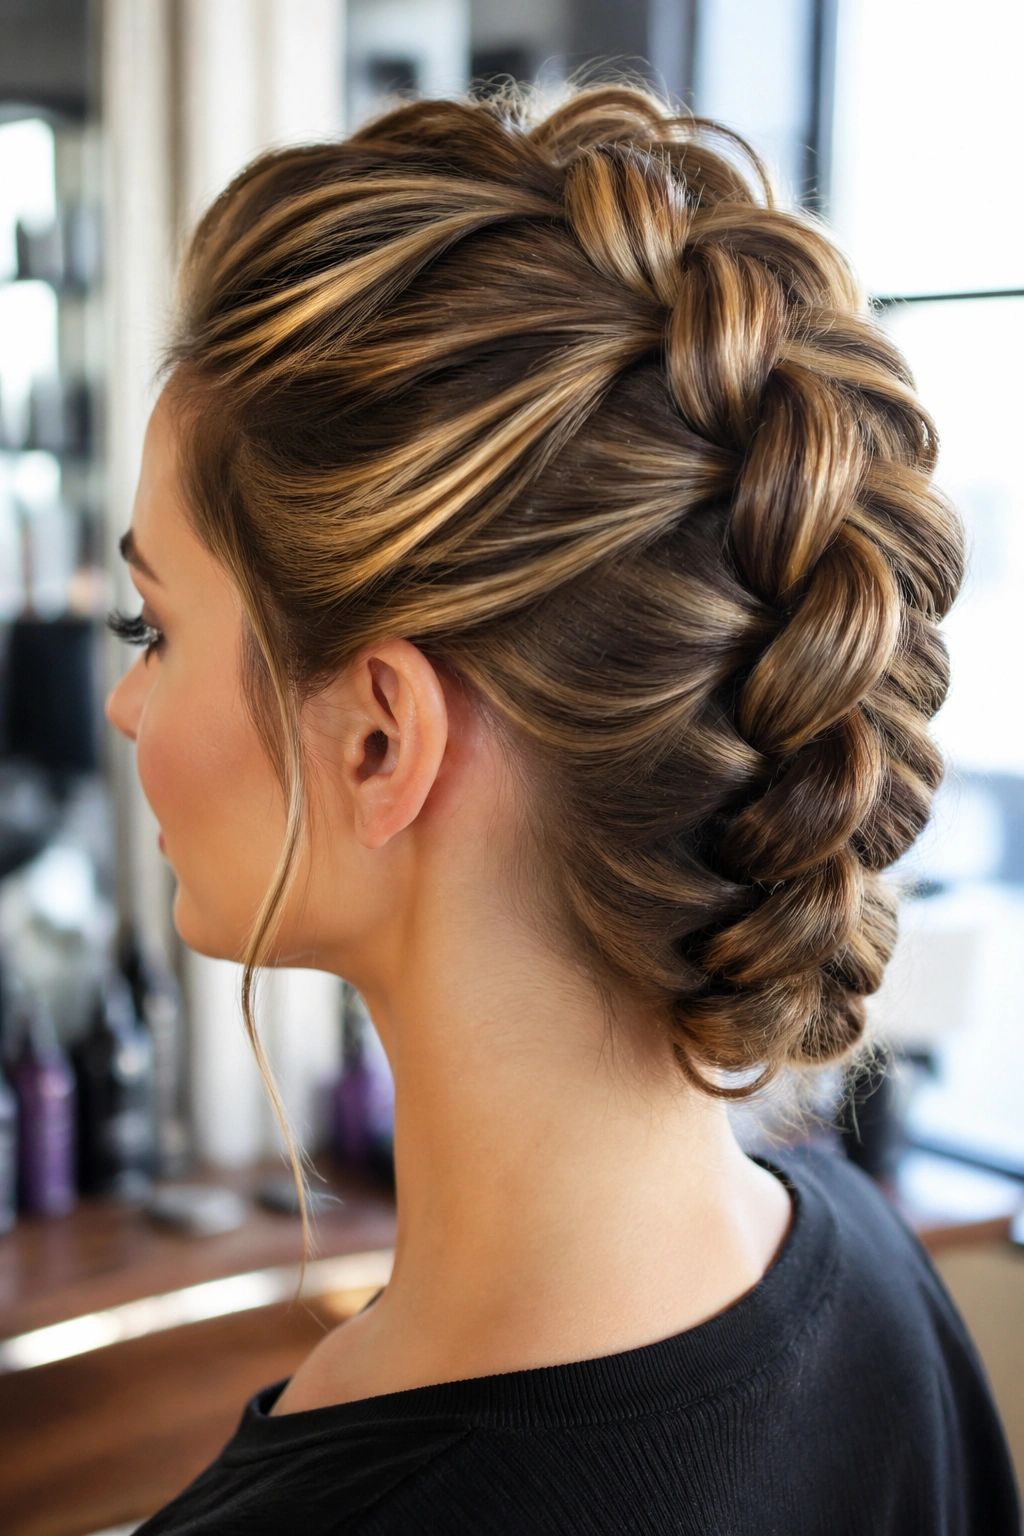
Picture a braid that sits up off the head instead of melting into it. That raised shape is what makes a Dutch mermaid braid feel strong and visible, especially on hair that falls past the waist. The braid reads from across the room. Nice feature, that.
A Dutch braid is worked underhand, so the sections sit on top of the middle piece rather than tucking behind it. On long hair, that means the braid gets a little ridge down the center and a thicker profile overall. If you want a style that keeps its shape in wind, humidity, or a crowded evening, this is the one I’d trust.
What Makes It Different
- It creates more height at the scalp than a standard braid.
- It holds shape better when the hair is heavy.
- It looks especially good when the braid travels from crown to nape.
- It can be pancaked once, lightly, for a wider finish.
The part that matters most is tension. Keep the first 3 to 4 crossings snug, then relax a bit as you move down the length. If you braid the whole thing too tightly, the head shape can start to look severe. A Dutch mermaid braid should feel sculpted, not armored.
5. Loose Boho Mermaid Braid
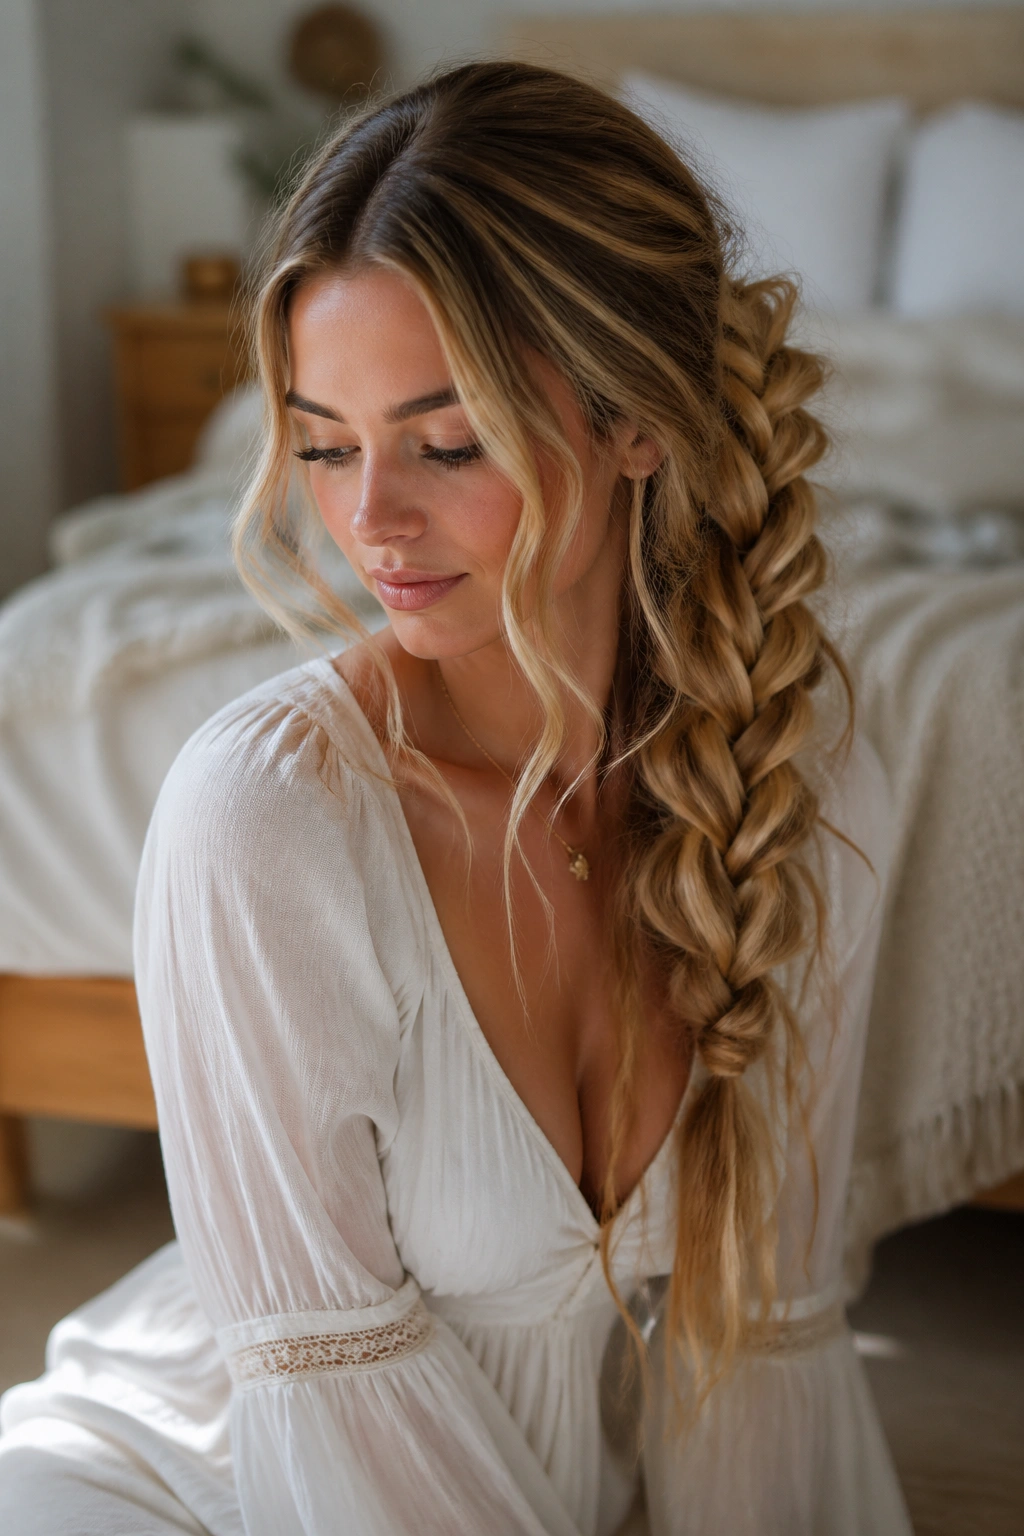
This is the braid that looks like you spent the afternoon by the water, even if you were nowhere near water and mostly just stood in front of a mirror with five hair ties and a mild opinion. It’s soft, undone, and much harder to make look good than people assume.
On Rapunzel-length hair, the loose boho version has room to breathe. That matters. The long lengths let you pull out face-framing pieces, loosen the braid at the sides, and still keep enough structure that the style doesn’t collapse into fuzz. You want it to look touched, not wrecked.
I like this version with a center part and a braid that starts low, somewhere around the back of the head. Let a few pieces slip around the temples. Let the braid itself widen a little as you go. The best boho mermaid braid is not an accident; it’s a controlled mess with good bones.
A flexible-hold hairspray helps after you’ve done the loosening. Not before. If you spray first, you’ll fight the braid while you’re trying to soften it, and that gets sticky fast. Finish the shape, then mist from about 10 inches away and leave the movement alone.
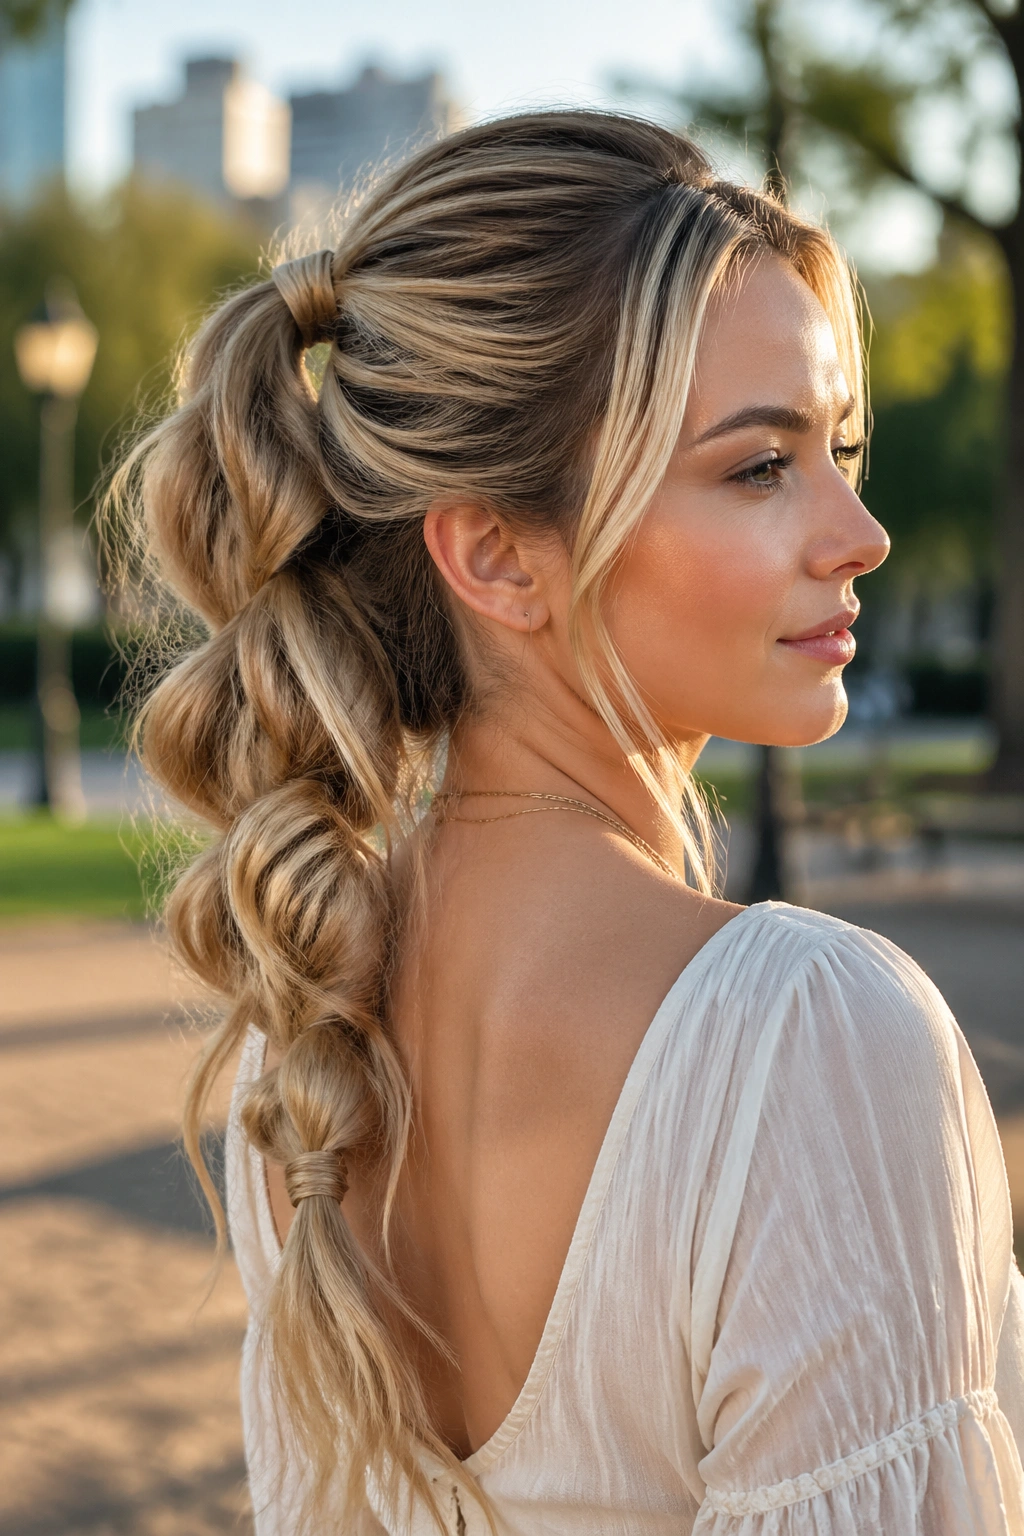
6. Bubble Mermaid Braid
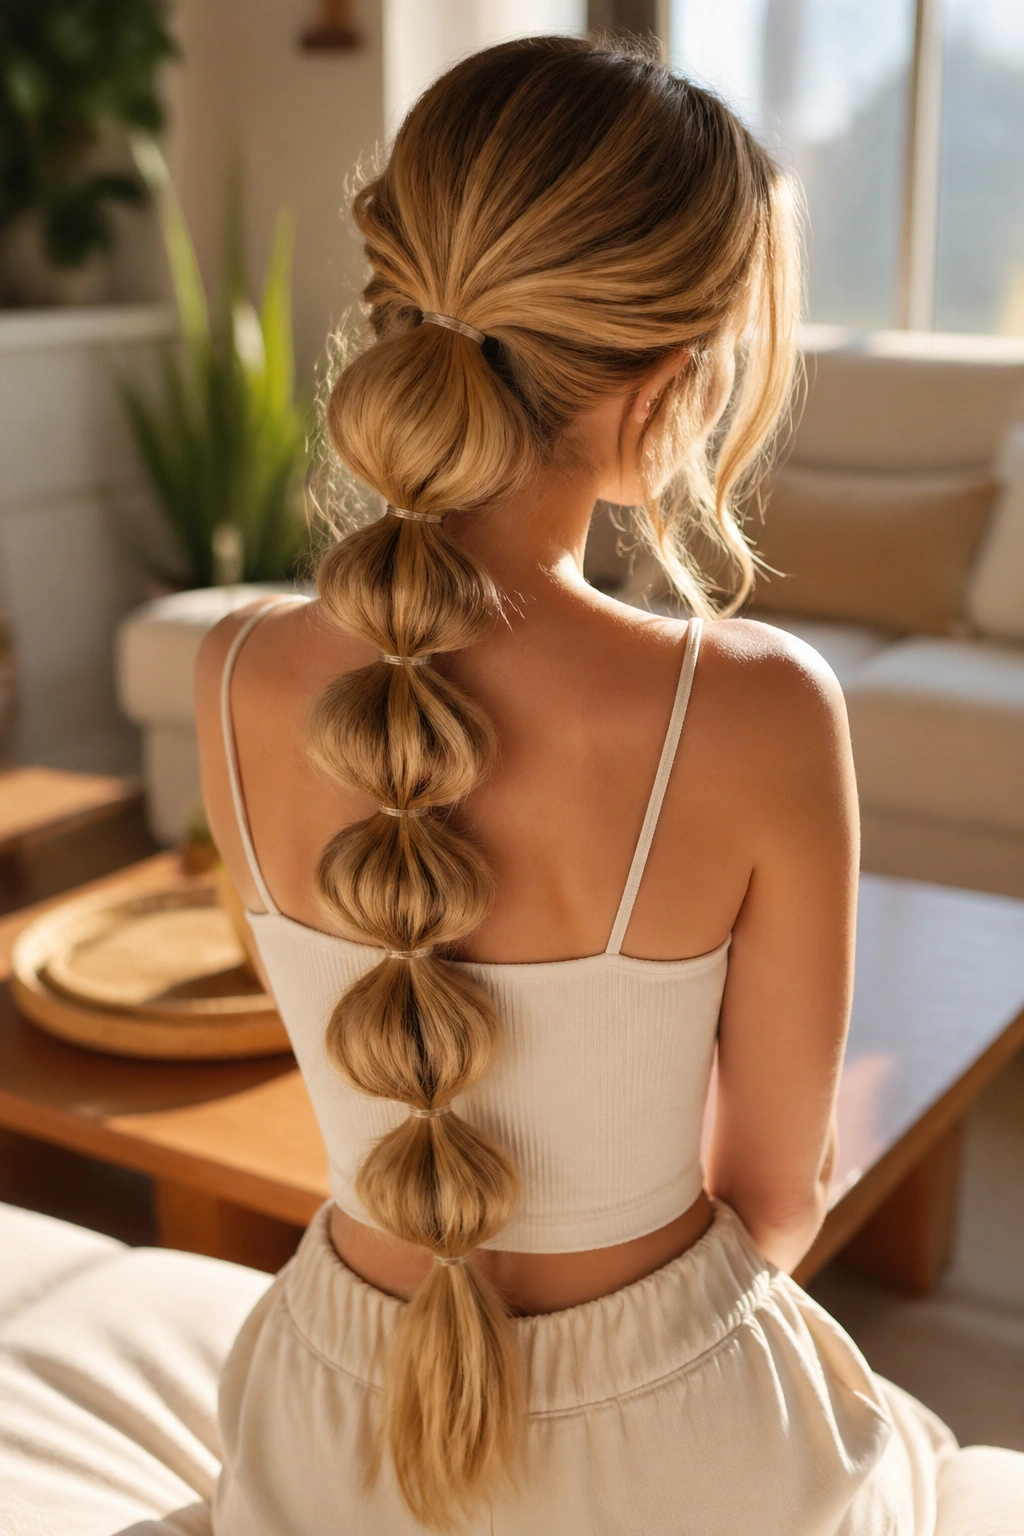
A bubble braid is not technically a braid, and I say that with affection. Hair purists can grumble. The rest of us get to enjoy the fact that it gives huge mermaid energy without needing perfect finger work or a long braiding session.
The structure is simple: gather the hair into a ponytail or a series of linked sections, then add elastics every 2 to 3 inches and puff each gap into a rounded bubble. On extra-long hair, the result can look sculptural in a way that a woven braid sometimes doesn’t. It also keeps the length on display. That’s the point.
Why It’s Worth Trying
A bubble braid is easier on your hands than a tight braid, which matters if your hair reaches your lower back and takes forever to gather. It’s also a smart pick for layered hair, because the elastics do most of the holding. Loose ends stay tucked inside the bubbles instead of escaping everywhere.
If your hair is thick, use two elastics at each section: one to secure the base and one just below it. That tiny extra step keeps the bubbles from sliding apart. If your hair is fine, a light tease inside each bubble gives the style more body. Not much. Just enough.
This is the braid-style I’d reach for when you want long-hair drama with less effort and no visible weaving mistakes.
7. Half-Up Mermaid Crown Braid
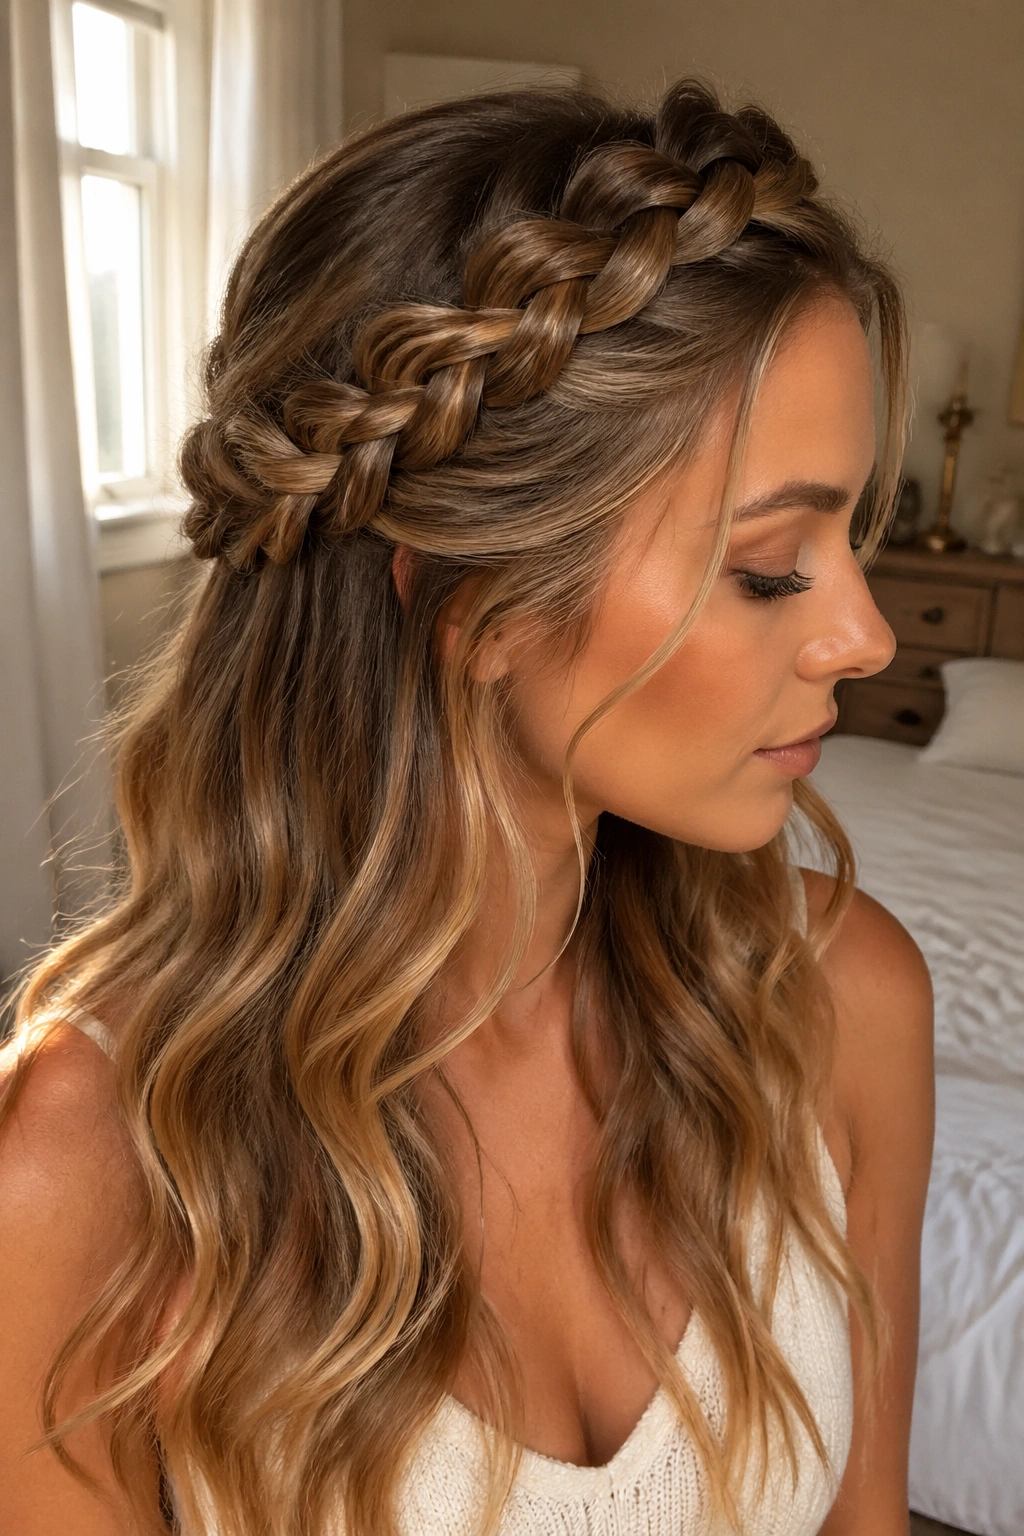
If you like wearing your length down, this is the one to bookmark. A half-up mermaid crown braid lets the hair stay visible while the top section does the decorative work, and on very long hair the balance feels graceful instead of busy.
Start the braid near one temple and curve it around the head like a soft crown, then secure it at the back with pins hidden under the loose lengths. The crown should sit above the ears, not down near the middle of the head. Lower placement tends to sag and can make the style feel heavy.
How to Keep It from Sliding
- Anchor the braid with crossed bobby pins under the back section.
- Spray the pins before inserting them if your hair is silky.
- Keep the braid a little loose so it lies flat against the scalp.
- Leave the bottom half in waves, curls, or brushed-out bends.
I’m picky about this style because it can look dreamy or fussy, and the difference is usually about placement. A crown that’s too narrow feels timid. A crown that’s too wide turns into a headband. Aim for the middle ground, and let the hair underneath stay soft.
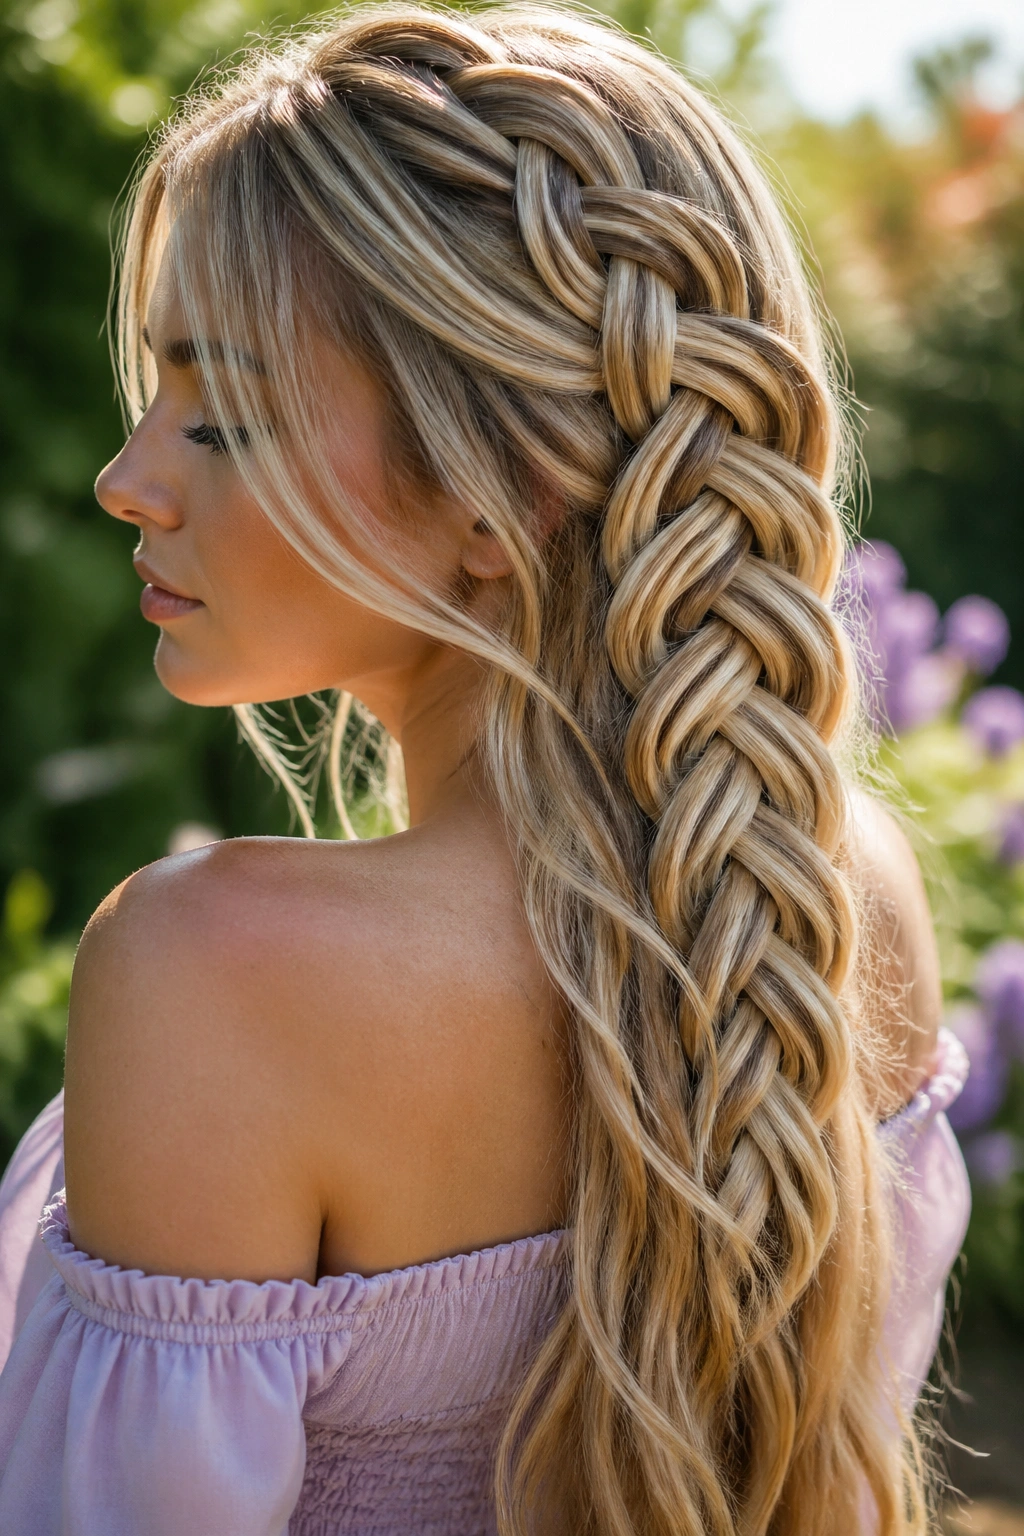
8. Side-Swept Mermaid Braid

One braid over one shoulder changes the whole mood. It makes the hair feel deliberate, and on Rapunzel-length strands it gives you a long line that almost acts like a piece of clothing. The braid becomes part of the outfit.
A side-swept mermaid braid works especially well if your hair has a natural part that already pushes volume to one side. You can lean into that instead of fighting it. Start the braid low at the nape, sweep it over the shoulder, and keep the tension a little looser as the braid moves down. The length will take care of the rest.
The nice thing about this style is the way it moves. Every time you turn your head, the braid shifts across the collarbone. If you’ve ever worn a stiff updo and hated how it felt locked in place, this is the opposite of that. It has swing.
Center parts are not required.
If you want a cleaner finish, tuck the braid’s top section behind the ear and hide the anchor elastic under a wrapped strand. If you want it softer, pull a few narrow pieces free near the face and leave the tail slightly undone. Either way, the shoulder placement does a lot of the work for you.
9. Four-Strand Mermaid Braid
Why bother with a four-strand braid when three strands already work? Because long hair can handle the extra pattern, and the added weave gives the braid a richer surface. It looks more complex without needing more bulk.
The first time you make one, it can feel fussy. The hand pattern is different, and yes, you will probably pause halfway through to check which strand goes where. That’s normal. On Rapunzel-length hair, though, the payoff is worth it because the extra weaving creates a braid that catches light in a softer, more layered way.
How to Get the Most From It
Keep the sections even. Uneven strands show up fast in a four-strand braid because the pattern is tighter than a standard braid. Clip the unused strands if that helps your hands stay organized, and begin the braid where the hair is already gathered neatly, usually just below the crown or at the nape.
A little shine serum on the mid-lengths helps the pattern read cleanly, especially if the hair is very dark or very frizzy. You do not need much. A pea-sized amount warmed between the palms is enough. Too much and the braid starts to slip.
This is the braid I’d choose when I want something with a little more brainwork and a little more polish than the usual three-strand version. It’s not hard forever. It just asks for attention.
10. Ribbon-Woven Mermaid Braid
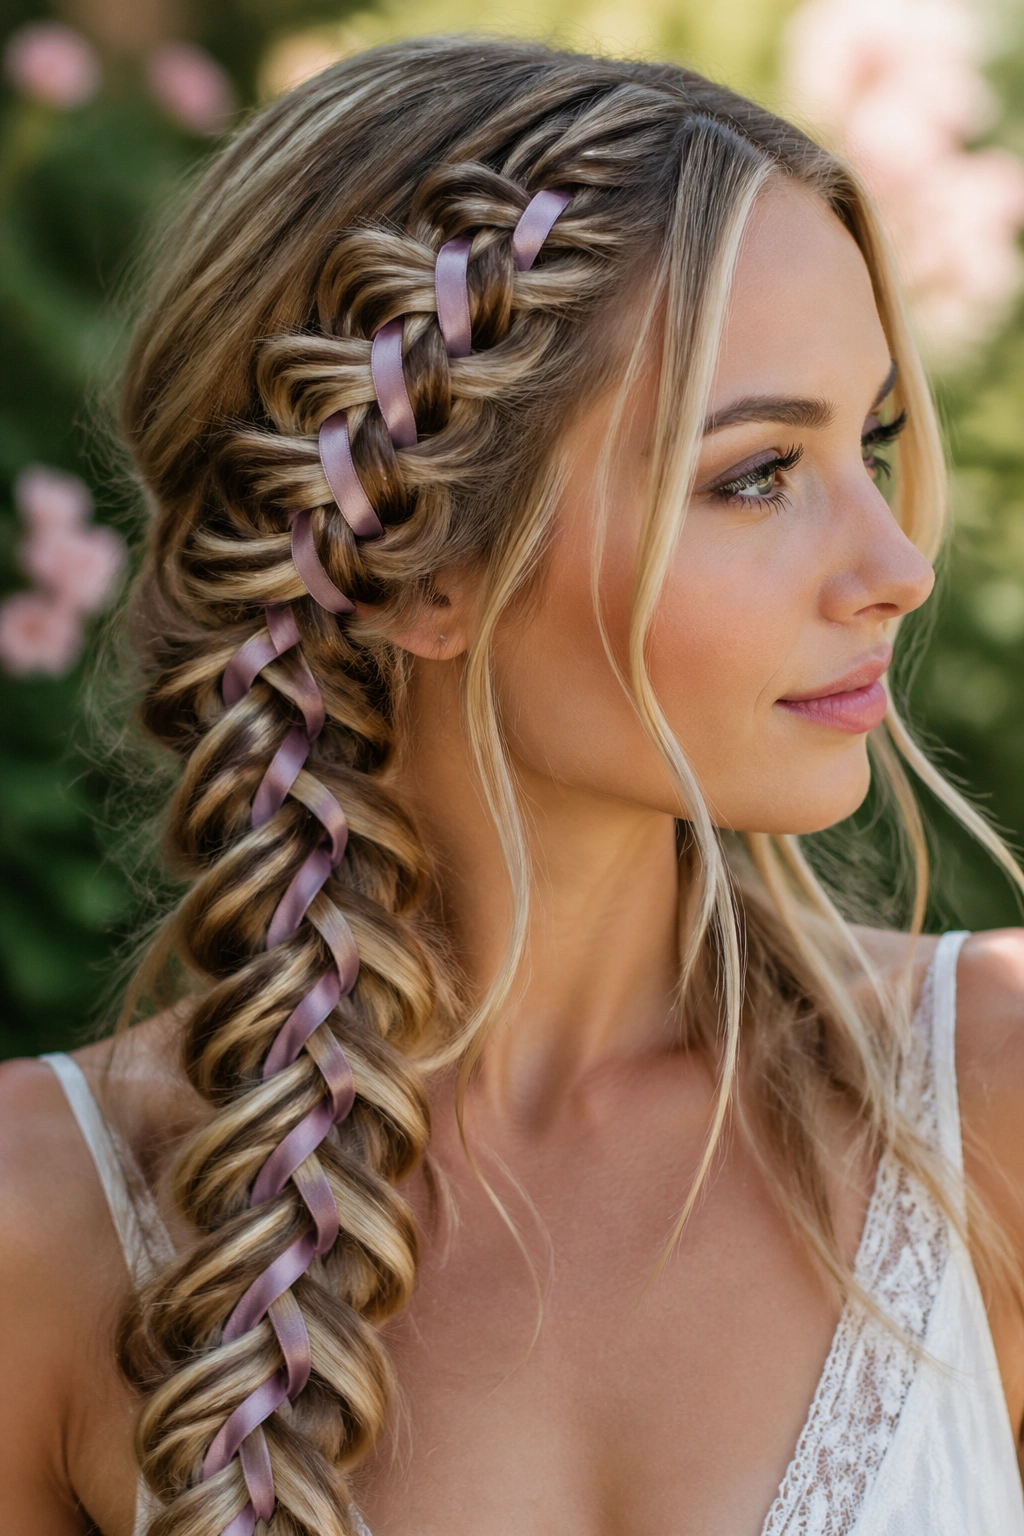
A ribbon changes the whole story. Thread a narrow satin or grosgrain ribbon through a braid on long hair, and the style stops reading like an everyday braid and starts looking like something that belongs at a wedding, a dinner, or an afternoon where someone definitely brought flowers.
The ribbon should be narrow enough to weave without making the braid bulky—about 1/4 to 1/2 inch wide usually works well. If the hair is thick, a slightly wider ribbon can still behave. If the hair is fine, keep it slimmer. The ribbon can be woven into a classic braid, a fishtail, or even a pull-through braid if you want to make the color show up in repeated bands.
What to Watch For
- Use matte ribbon if your hair is slippery; it grips better than slick satin.
- Hide the knot under the first braid cross or under a wrapped strand.
- Match the ribbon to your outfit or keep it one shade darker for a more grounded look.
- Don’t pull the ribbon too tight or it will pucker the braid.
I like this style because it gives the length a little direction. A long braid can feel like a lot of hair hanging in one place; ribbon gives the eye a place to follow. That’s the real trick. It turns the braid into a line, not just a mass.
11. Rope-Twist Mermaid Braid
A rope-twist braid has a cleaner, sleeker look than a standard braid, and that contrast works well on extra-long hair. The twist pattern shows up clearly, almost like a spiral down the back, which makes it one of the easiest ways to get a mermaid-adjacent style without spending forever on sectioning.
Unlike a three-strand braid, a rope twist uses two sections twisted in the same direction, then wrapped around each other in the opposite direction. That opposite twist matters. It keeps the hair from unfurling. On long hair, the spiral pattern becomes more visible the farther down you go, which is exactly where a lot of simpler styles start to lose interest.
It’s a good choice when your hair is thick and heavy because the rope shape holds a neat line. It also works when you need the style to survive movement. A braid can loosen at the edges; a rope twist tends to stay compact.
I’d prep the hair with a bit of smoothing cream or light oil on the ends only. Not the roots. The goal is to reduce frizz without making the twist greasy. Secure the braid with small snag-free elastics every few inches if the hair is very long, then let the twist rest over one shoulder or down the center back.
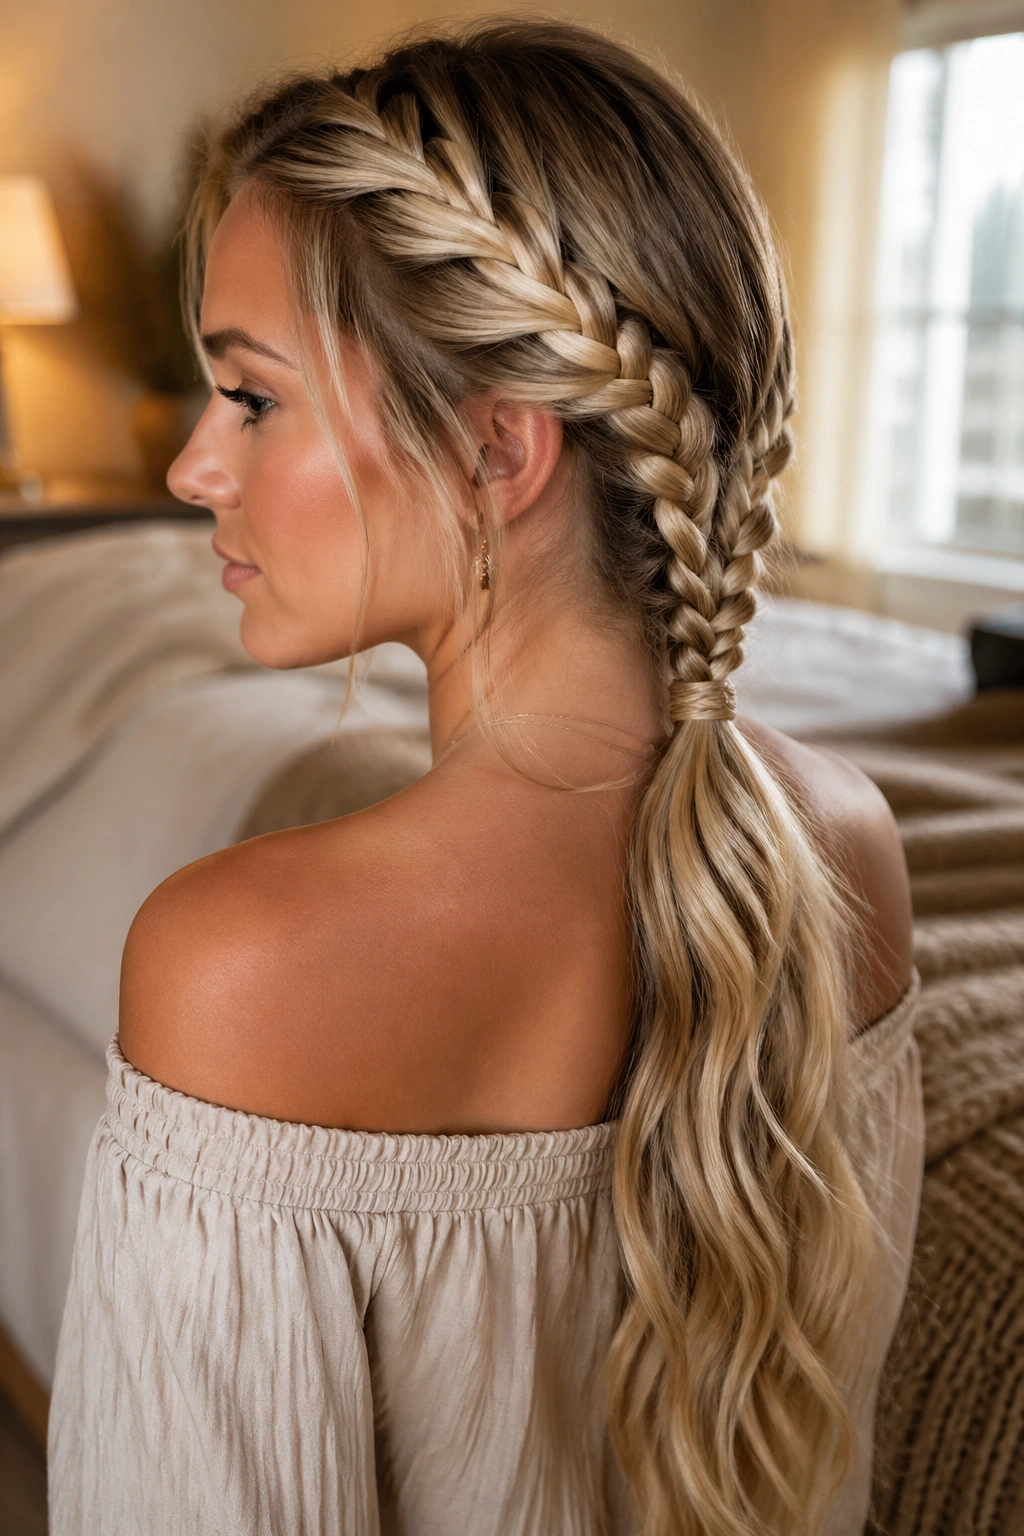
12. Messy Mermaid Pony Braid
This is the braid you wear when you want the length on display and you do not want every strand behaving like it’s in a museum. Start with a ponytail—high, mid, or low depending on the mood—then braid the tail loosely or turn it into pull-through sections and rough it up afterward.
The appeal here is the combination of lift at the base and softness down the length. A ponytail gives the style a little attitude, while the braid keeps the ends from looking lost. On Rapunzel-length hair, the end result can feel bold without being fussy. I like it for thick hair because the ponytail removes some of the weight from the scalp before the braid begins.
The mistake to avoid is over-teasing the crown. That can make the whole style look old-fashioned fast. Keep the lift controlled, not fluffy. A clean base with a textured tail looks better than a giant bump that fights the rest of the hair.
Good fit for:
- Thick, heavy hair that needs a break at the roots
- Long layers that need anchoring
- Casual events where you still want shape
- Hair that looks better with a little undone texture
If you want a small upgrade, wrap a strand of hair around the elastic and pin it underneath. That one move makes the pony-braid hybrid look finished instead of tossed together.
13. Twin Mermaid Braids into One Tail
When one braid feels too heavy, split the load into two. Twin mermaid braids that join into one tail give long hair a cleaner shape, more symmetry, and a little breathing room at the scalp. It’s a smart style for very long hair because it controls the top without hiding the length.
Start with a center part. Braid each side from the temples or just behind the ears, then bring both braids together at the nape and secure them into one low ponytail, one shared braid, or a wrapped knot. The join point matters here, so keep the elastic hidden with a strip of hair or a small accessory that belongs to the rest of the look.
This style has a strong silhouette. Two braids frame the head; one tail keeps the length from feeling chopped in half. It also works well if the hair is thick enough that a single braid starts to feel bulky. Splitting it first makes the weight easier to manage.
A pair of twin braids can be tight and neat or loose and soft. I’d go neater at the top and looser through the ends. That gives the style shape where it needs control and movement where it needs interest. On hair that reaches far past the shoulders, that balance is the difference between “nice braid” and something people ask about all night.
Mermaid braids are at their best when the hair has room to fall, bend, and catch a little air. Rapunzel-length hair gives you that in spades, which is why these styles feel so satisfying to wear. Some are polished, some are messy, and a few are the kind of thing you fix in the mirror once and then stop fussing over because the length is doing half the work for you.