There is a specific kind of frustration that only comes from staring at a three-month-old salon invoice while your roots are screaming for attention. We have all been there—sitting in a stylist’s chair for eight hours, neck cramping, wallet thinning, wondering if there is a better way to achieve that intricate, woven look without the logistical nightmare of booking appointments. The truth is, the gap between “salon-perfect” and “home-made” is much smaller than most people think. It really comes down to muscle memory and a very strategic mirror setup.
Braiding your own hair is a form of functional art. It is one of those skills that feels impossible for the first twenty minutes, then suddenly clicks, and you never look back. I spent years practicing on mannequin heads before I realized the real challenge isn’t the technique; it is the “bathroom mirror yoga” required to see the back of your own skull. Once you master the hand positioning and learn to feel the tension rather than just seeing it, the world of DIY styling opens up.
You do not need a professional license to create something that looks expensive and polished. What you need is a bit of patience, a decent rat-tail comb, and the willingness to let your arms get a little tired. Over time, I have found that certain styles are far more forgiving for the solo braider than others. Whether you are working with natural curls, sleek straight strands, or added extensions, the following styles prove that your best stylist might actually be staring back at you in the mirror.
Preparing Your Hair for Maximum Grip and Longevity
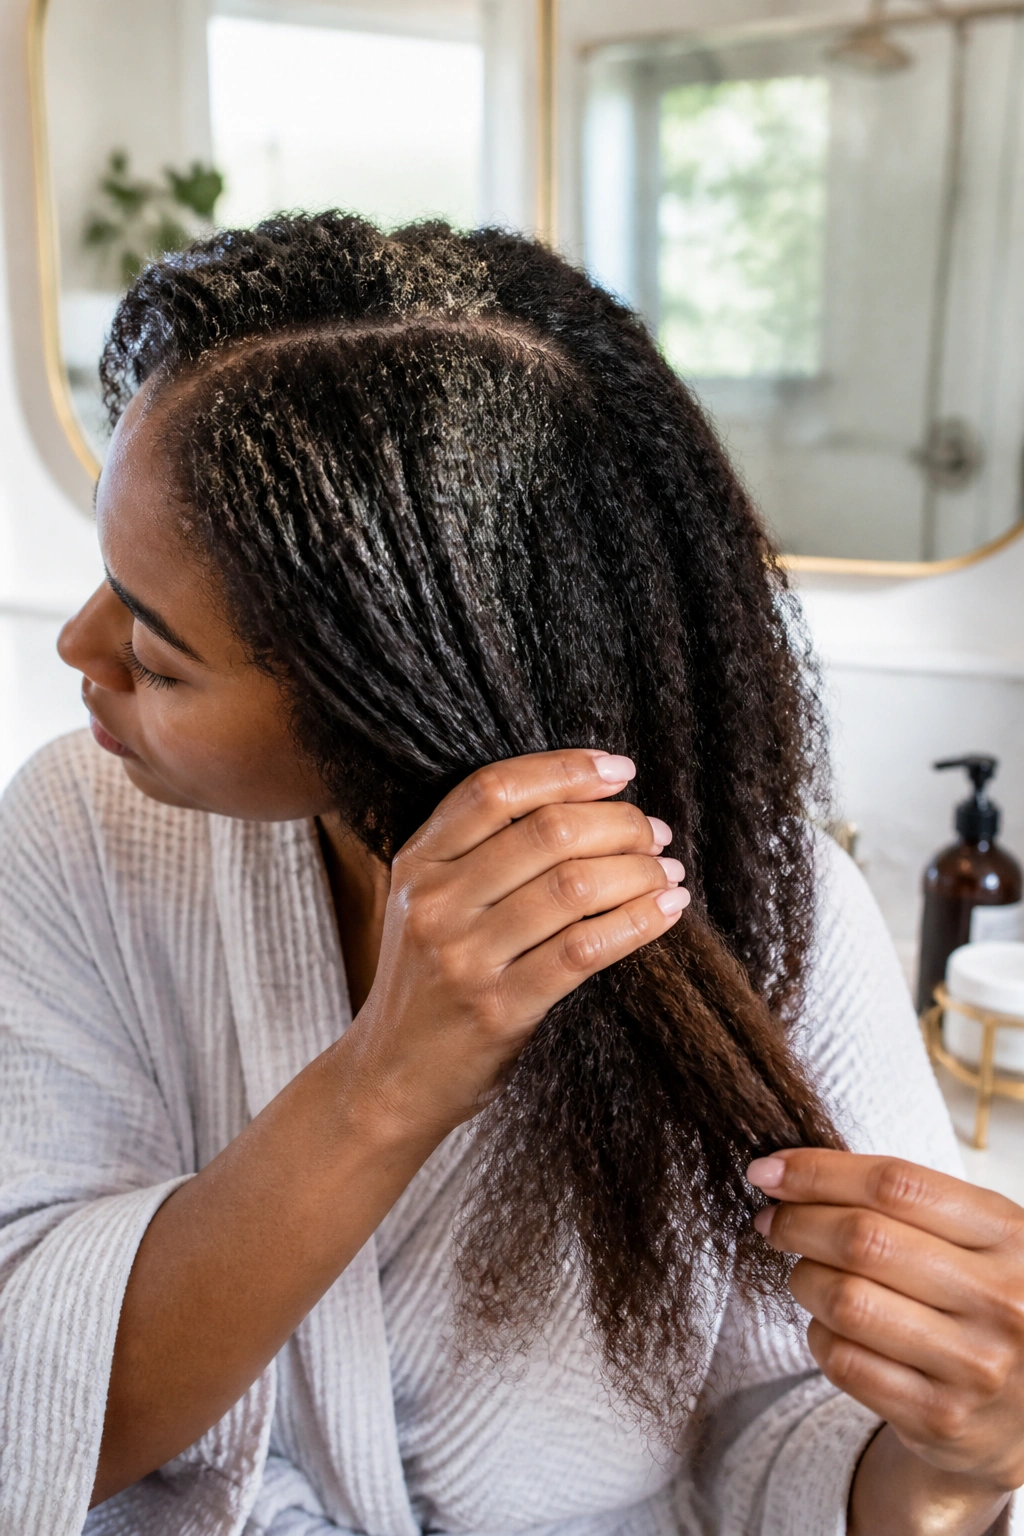
Before you even think about sectioning, you have to talk about texture. If your hair is too clean, it will be slippery, and your braids will slide out before you can even secure them with an elastic. Historically, the best braids happen on “second-day” hair. The natural oils provide a bit of tackiness that helps the strands stay where you put them. If you just washed your hair, a light dusting of dry shampoo or a texturizing spray can mimic that lived-in feel.
Detangling is the next non-negotiable step. Trying to braid through knots is a recipe for a headache and raggedy-looking plaits. Use a wide-tooth comb or a dedicated detangling brush, starting from the ends and working your way up to the roots. If you have curly or coily hair, braiding on damp hair with a bit of leave-in conditioner or a botanical gel can make the process significantly smoother and result in much cleaner parts.
Finally, consider your workspace. You need a large mirror in front of you and a handheld mirror (or a well-placed wall mirror) behind you. This “hall of mirrors” effect is the only way to ensure your parts are straight and you haven’t missed a rogue chunk of hair in the back. Light is your friend here. Make sure you can see the shadows of your sections clearly. Once your tools are laid out—clips, elastics, edge control, and a comb—you are ready to begin the actual work.
1. The Classic Three-Strand Plait
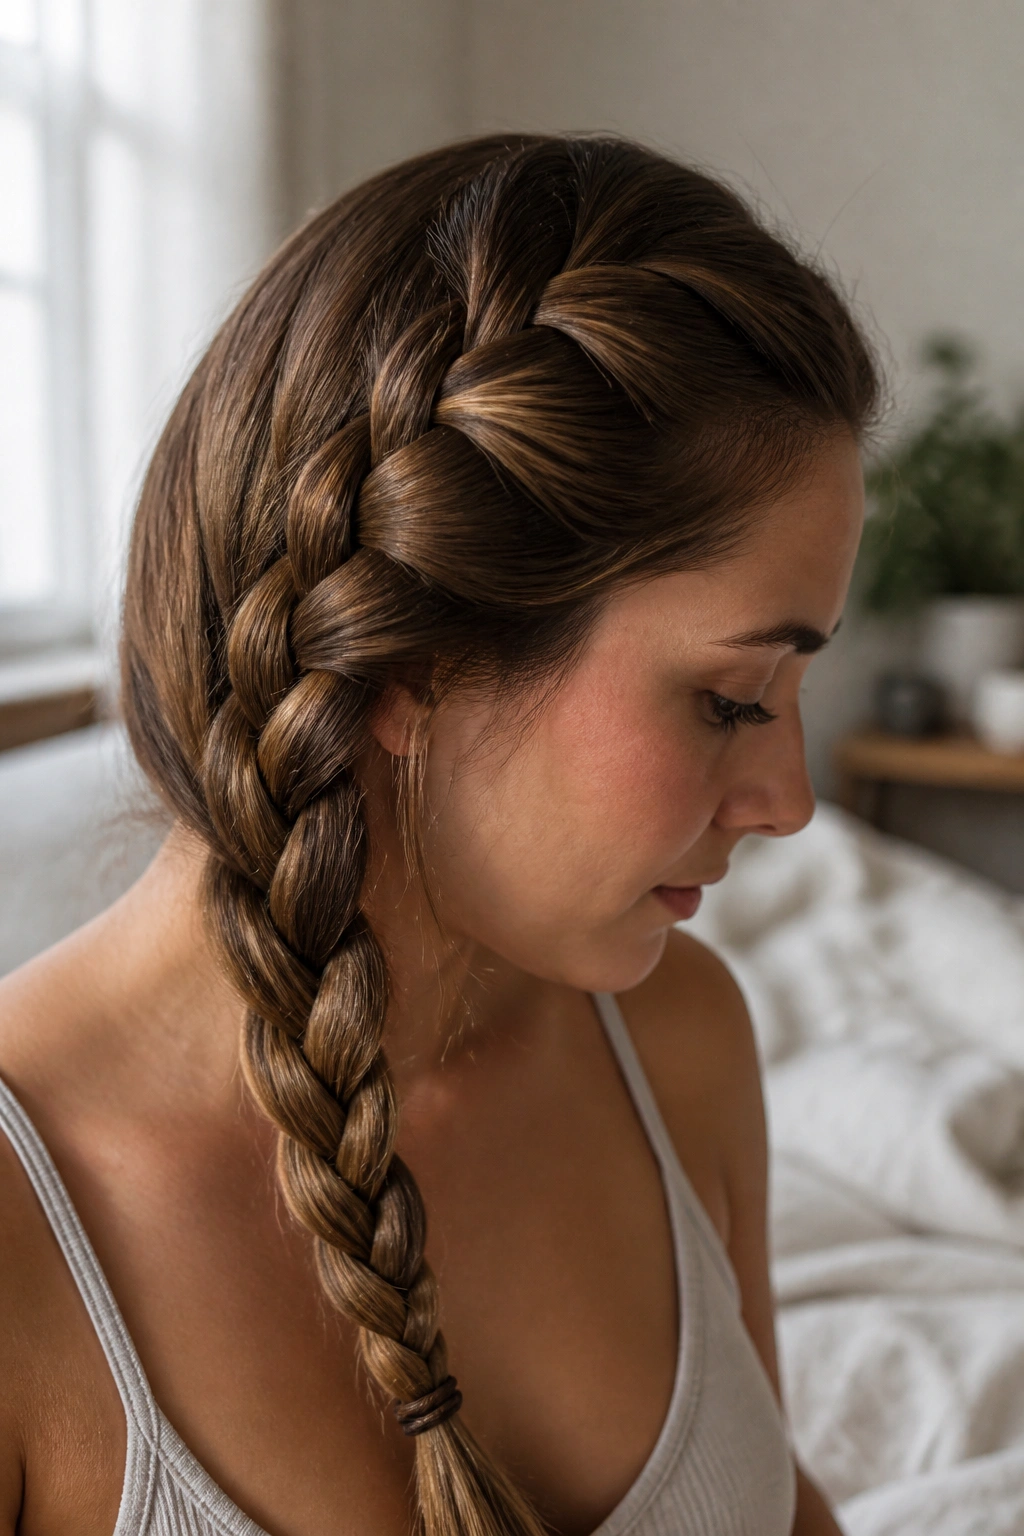
The three-strand plait is the foundation of almost every other style on this list. It is the first braid most of us learn, but mastering it on yourself requires a specific grip to maintain even tension from the nape of the neck down to the tips.
Why It Remains a Foundation
The beauty of the classic plait lies in its simplicity. It serves as the perfect “rest” style when you want your hair protected but don’t have the energy for complex weaving. When you do it yourself, the key is to bring the hair over one shoulder as soon as you pass the jawline. This prevents your arms from fatiguing too quickly and allows you to see what you are doing.
Quick Braiding Facts
- It requires exactly three equal sections to prevent lopsidedness.
- Tension should be firm but never painful on the scalp.
- It works on almost every hair length from chin-level to floor-length.
- It is the most effective way to prevent tangles while sleeping.
Pro tip: For a more modern, voluminous look, “pancake” the braid by gently pulling on the outer edges of each loop once the elastic is in place.
2. The Traditional French Braid
French braiding your own hair is a rite of passage for any DIY enthusiast. The “overhand” technique creates a sleek, integrated look that stays close to the scalp, making it ideal for windy days or intense workouts. The trick to doing this solo is to keep your hands as close to your head as possible. If you pull your hands away while crossing the strands, the braid will sag, creating a gap between the hair and the scalp that looks messy by noon.
Focus on your pinky fingers; they are your primary tools for scooping up new sections of hair as you move down the head. Start with a small section at the very front of your hairline and divide it into three. As you cross the right strand over the middle, use your right pinky to grab a small sliver of loose hair from the side. Repeat on the left. The rhythm is: cross, add, cross, add. It takes a few tries to get the “scooping” motion down without dropping the other strands, but once it clicks, it is remarkably fast.
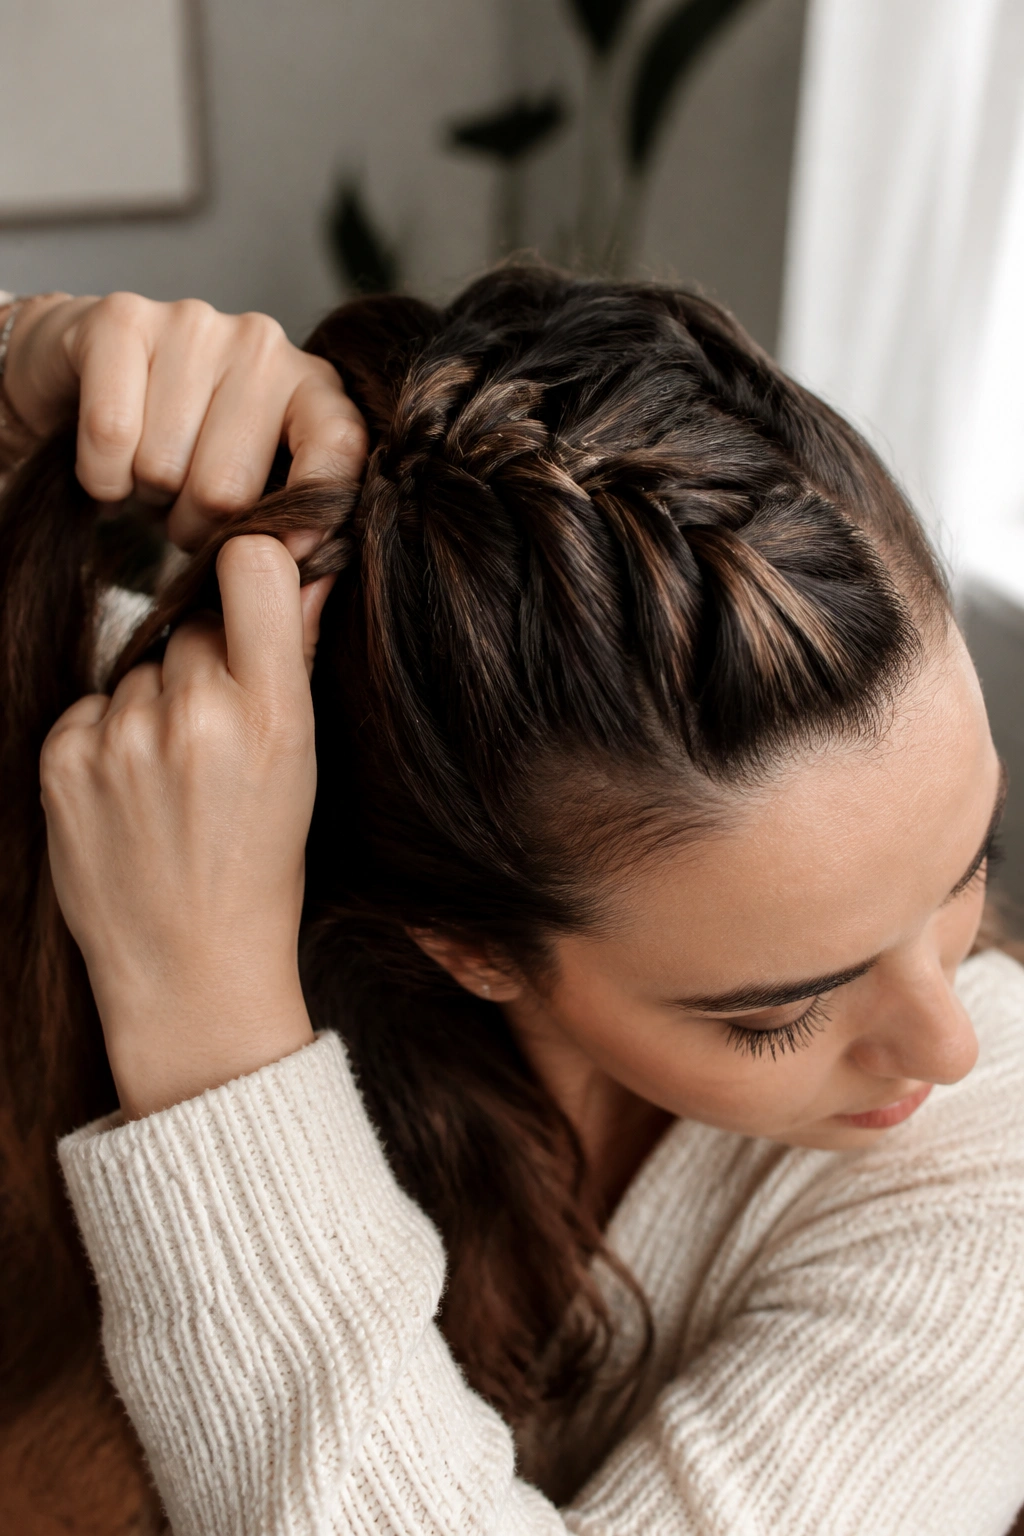
3. The Dutch Braid (Inside-Out Braid)

Why do some people find the Dutch braid easier than the French version? It often comes down to the way our fingers naturally curve. Instead of crossing the strands over the center, you cross them under. This results in a braid that sits on top of the hair like a 3D rope, rather than being tucked in.
Mastering the Under-Hand Grip
When you braid under, your knuckles naturally stay closer to your scalp. This makes it much easier to maintain high tension, which is why Dutch braids often look “sharper” than French ones. If you have very thick hair, the Dutch method is usually the better choice because it highlights the volume of the hair rather than compressing it against the head.
How to Get the Best Result
- Use a braiding pomade on your fingertips to keep flyaways at bay.
- Keep your sections consistent in size for a uniform “spine” look.
- Practice the “under” motion slowly before adding hair to the sections.
- Finish the braid all the way to the ends to prevent unraveling.
4. The Fishtail Braid
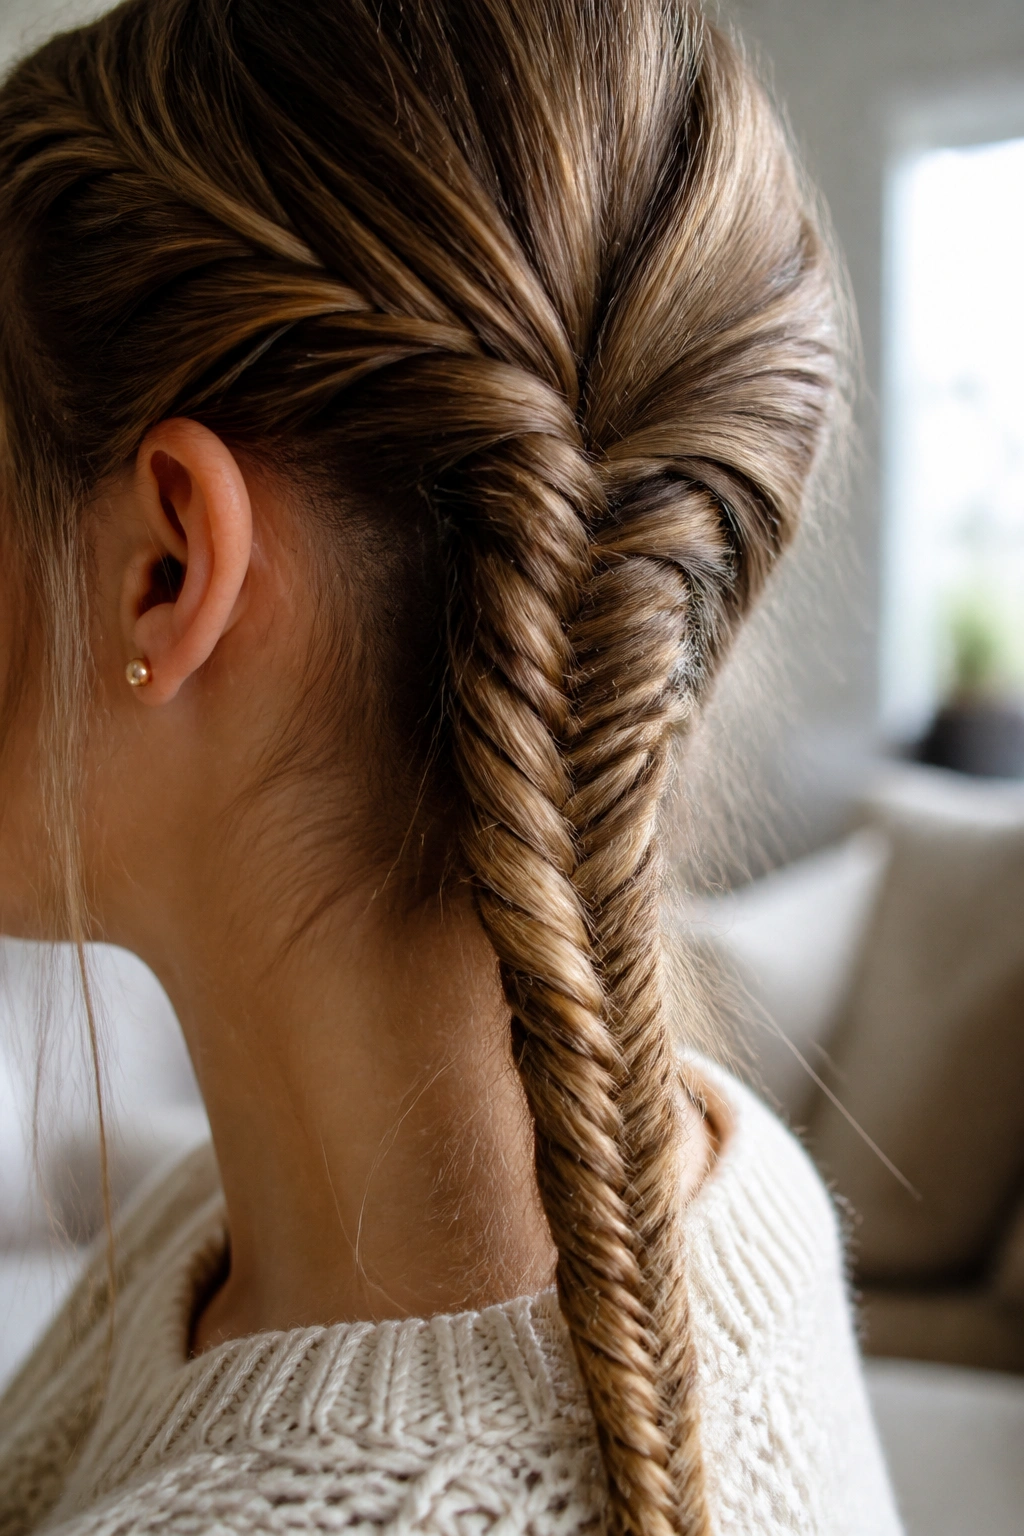
Imagine you are running late and want a style that looks like it took forty minutes but actually took five. The fishtail is the answer. Unlike the three-strand methods, this only uses two main sections, which makes it much easier to manage if you have a lot of hair to wrangle.
The Mechanism of the Move
The fishtail relies on taking a tiny sliver of hair from the outside of one section and crossing it over to join the inside of the other. It is a repetitive motion that becomes almost meditative. The smaller the slivers you take, the more intricate the “fish scale” effect looks. If you take large chunks, it ends up looking more like a standard messy braid—which has its own charm, but lacks the specific fishtail elegance.
- Split hair into two equal halves.
- Pull a thin strand from the far left and cross it to the right.
- Pull a thin strand from the far right and cross it to the left.
- Keep the tension tight at the base to avoid a “drooping” neck.
Insight: This style actually looks better as it gets slightly messy. If a few pieces fall out, it just adds to the “boho” aesthetic that makes this braid so popular.
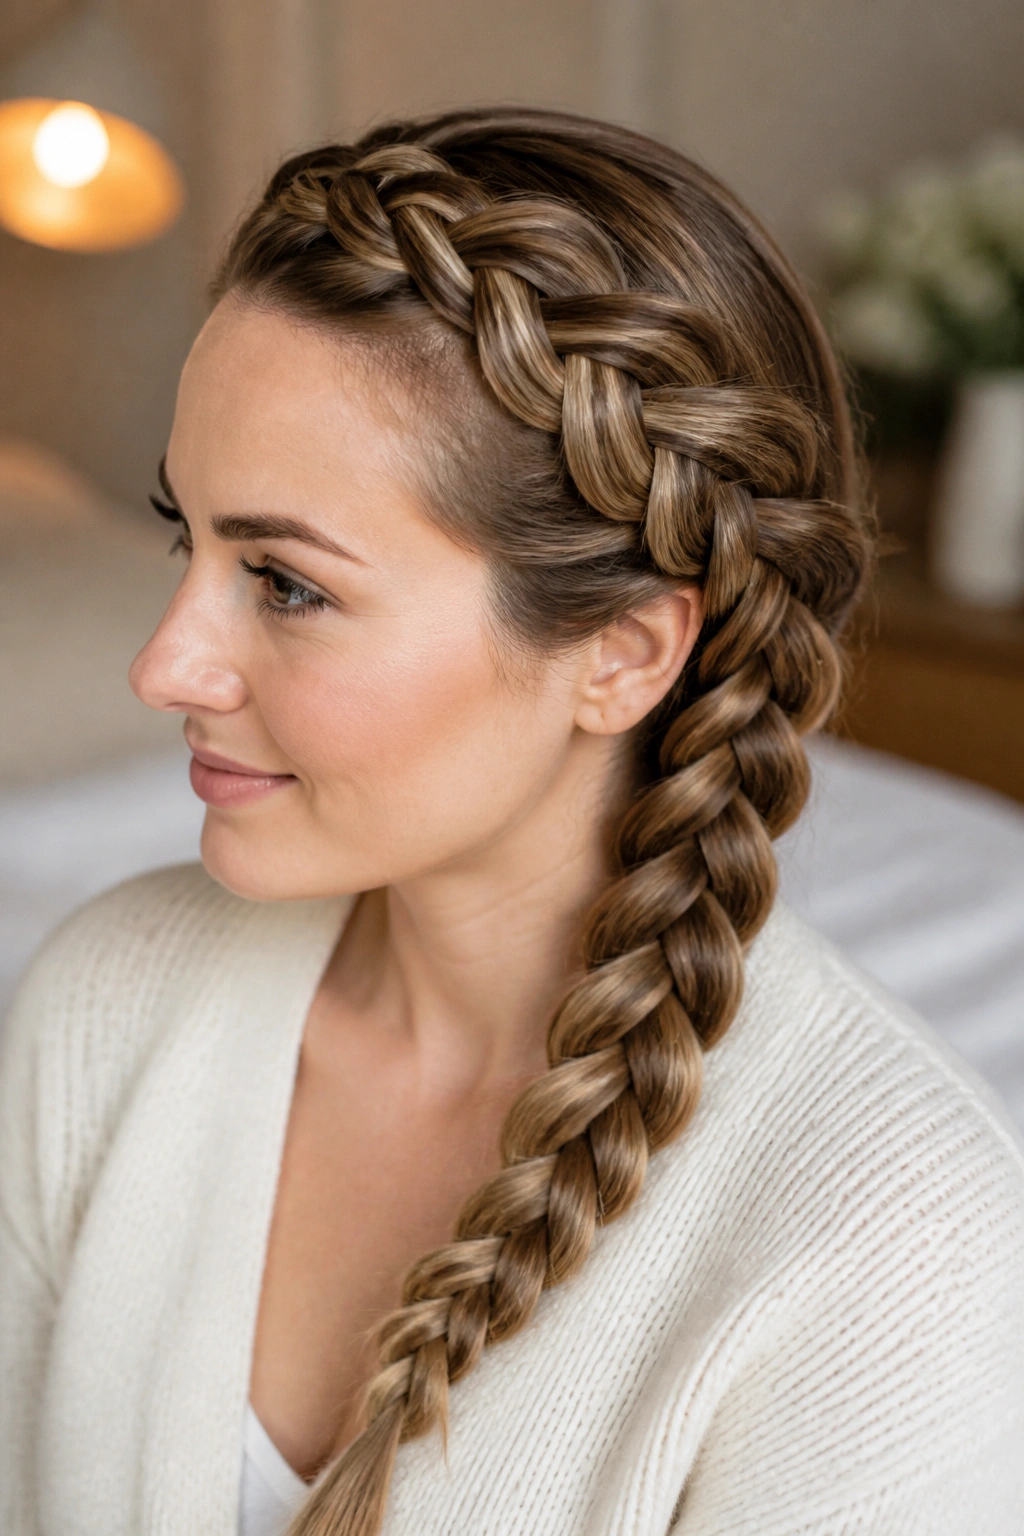
5. The Simple Rope Twist
The rope twist is technically not a braid because it only involves two strands, but it is a staple in the world of self-styling. It is incredibly fast and creates a look that mimics a thick cord. The secret to a rope twist that doesn’t immediately unspool is the “double-twist” method. You must twist each individual strand in one direction (let’s say clockwise) and then wrap the two strands around each other in the opposite direction (counter-clockwise).
This creates a mechanical tension that locks the hair in place. If you twist them both the same way, the whole thing will just fall apart as soon as you let go. I love this style for a quick office look because it is polished and sleek. It works exceptionally well on hair that has been treated with a light oil or shine serum. Because there are only two strands, it is very easy to do behind your head without needing a mirror for every single move.
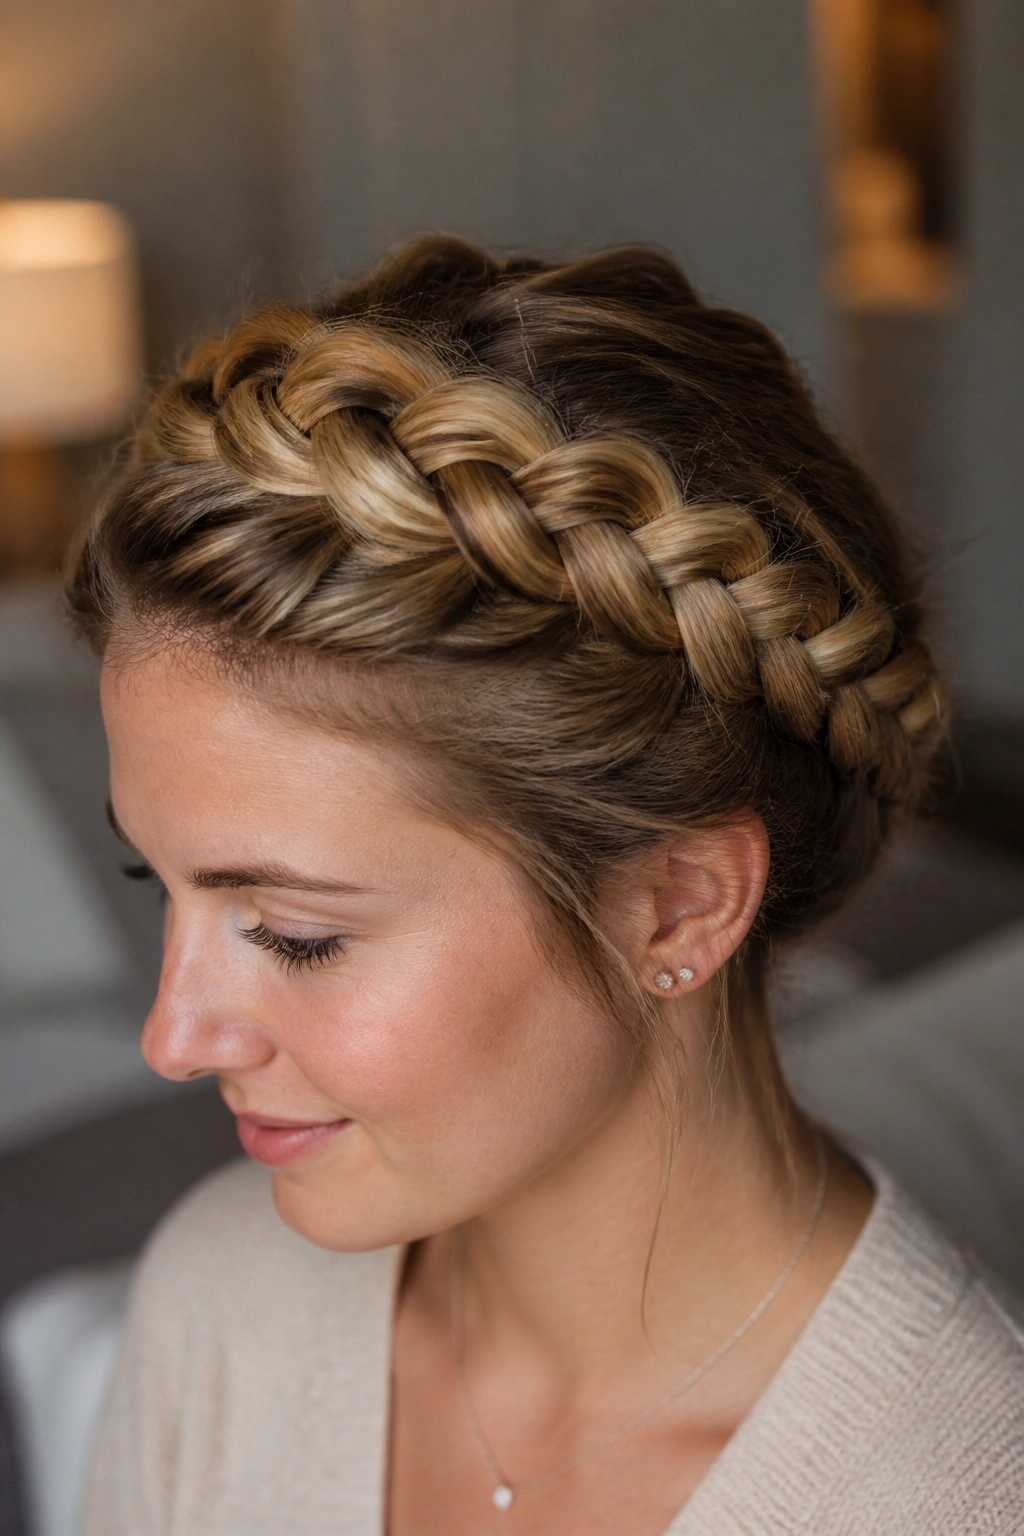
6. The Halo Braid
The halo braid is often confused with the crown braid, but it is generally much easier to execute on your own. A true crown braid is one continuous Dutch braid that circles the head, which can be exhausting for your arms. The halo version is often achieved by creating two separate braids and pinning them across the top of the head.
This “cheat” method is a lifesaver for beginners. You simply part your hair down the middle into two sections. Create a Dutch braid on each side, starting near the nape of the neck and working toward the front (or vice versa). Once you have two pigtail braids, you wrap them around the top of your head and tuck the ends under each other, securing them with bobby pins. This gives you the exact same regal look as a professional crown braid but with half the arm-ache and a much higher margin for error.
7. The Pull-Through Braid
If you can put hair into a ponytail, you can do a pull-through braid. This is the ultimate “fake” braid for people who struggle with traditional weaving techniques. It relies entirely on small elastics rather than crossing strands.
Why It’s a Top Pick for Beginners
This style is virtually indestructible. Because every section is secured with its own elastic, the braid won’t fall out if you are active. It also creates an incredible amount of volume, making it the best choice for anyone with fine or thin hair who wants the illusion of a massive, thick plait.
Step-by-Step Breakdown
- Create two small ponytails, one above the other.
- Split the top ponytail in half.
- Pull the bottom ponytail up through the middle of the split top ponytail.
- Clip that bottom ponytail out of the way.
- Add more hair to the split ends and secure them into a new ponytail.
Pro tip: Always use clear or hair-colored elastics. The goal is for the rubber bands to be invisible so the “braid” looks like a complex series of loops.
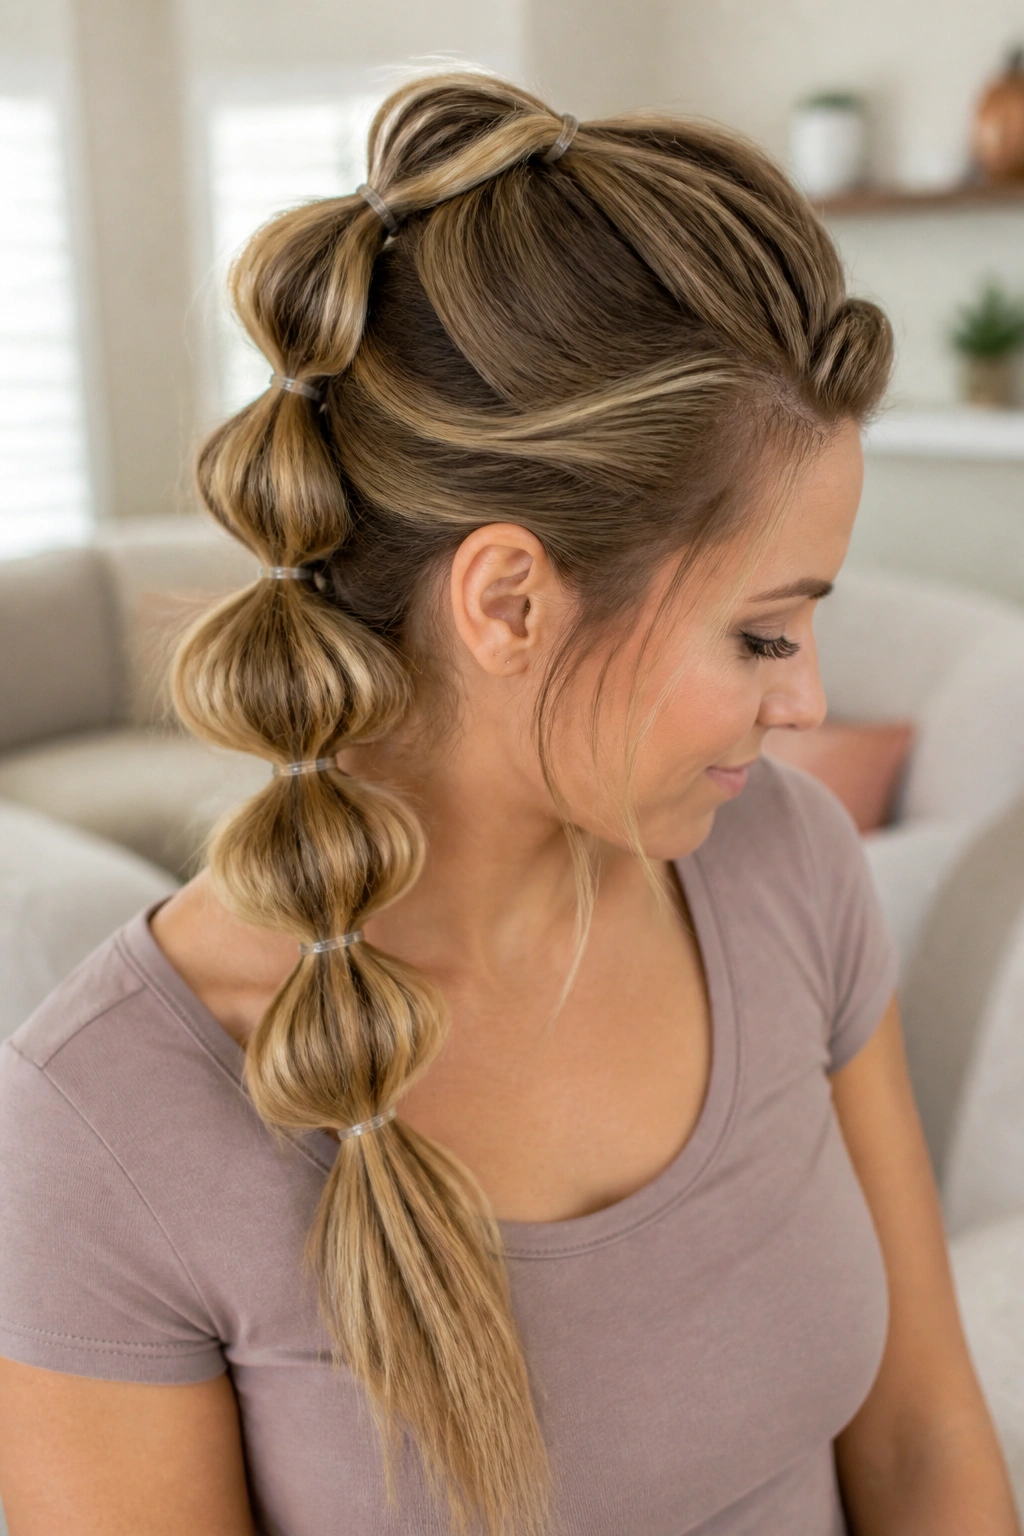
8. The Bubble Braid
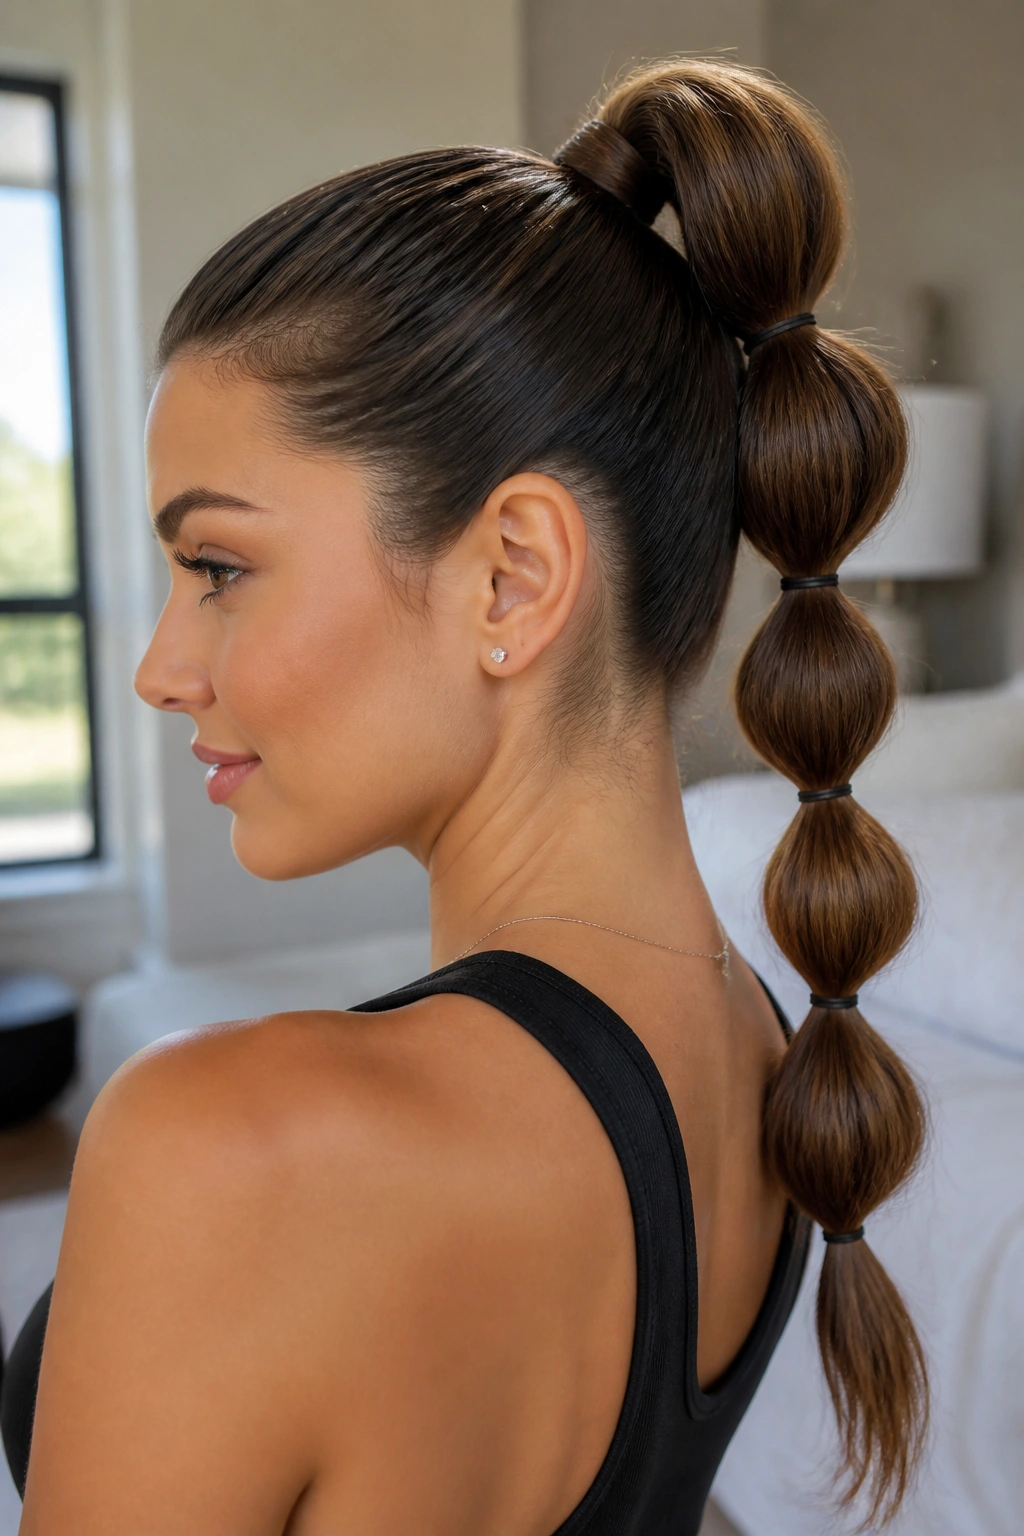
The bubble braid is less of a braid and more of a sculptural statement. Over the years, it has become a staple because it requires zero actual braiding skill. It is essentially a series of ponytails that are fluffed out to look like “bubbles.”
To do this at home, start with a high ponytail. Place another elastic a few inches down the length of the hair. Use your fingers to pull the hair between the two elastics outward, creating a rounded, bulbous shape. Continue this all the way down. The key to making this look “high-fashion” rather than “middle-school” is the prep work. Smoothing your hair with a firm-hold gel at the base and ensuring your “bubbles” are uniform in size makes all the difference. It is a fantastic way to keep long hair out of your face while still showing off its length.
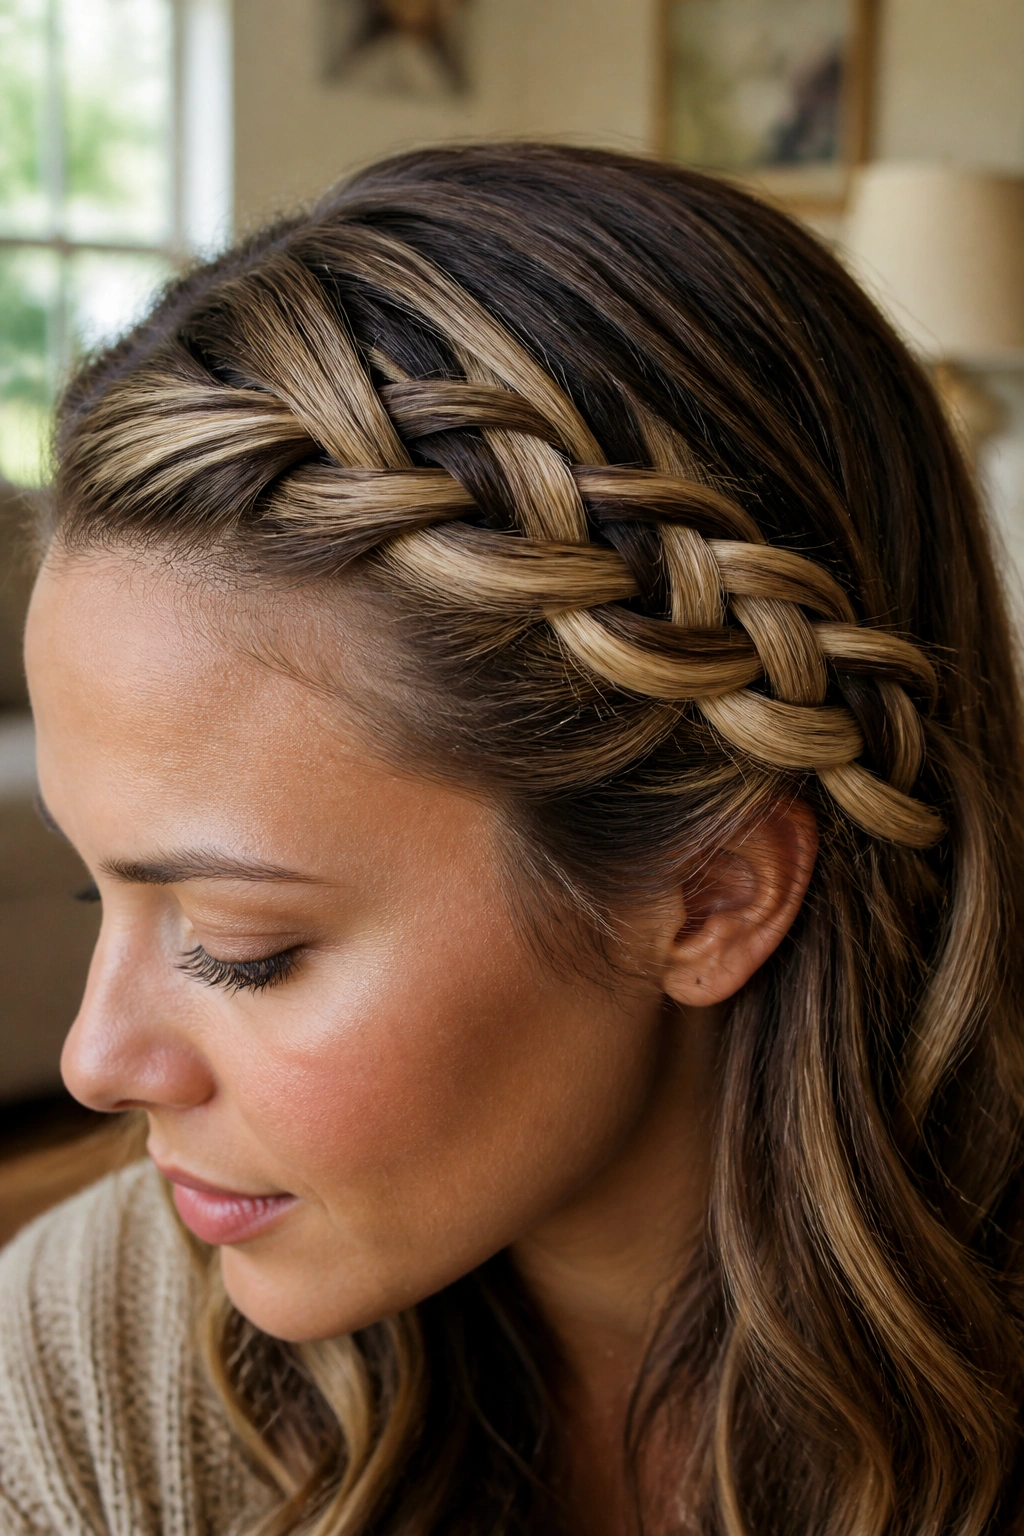
9. The Waterfall Braid
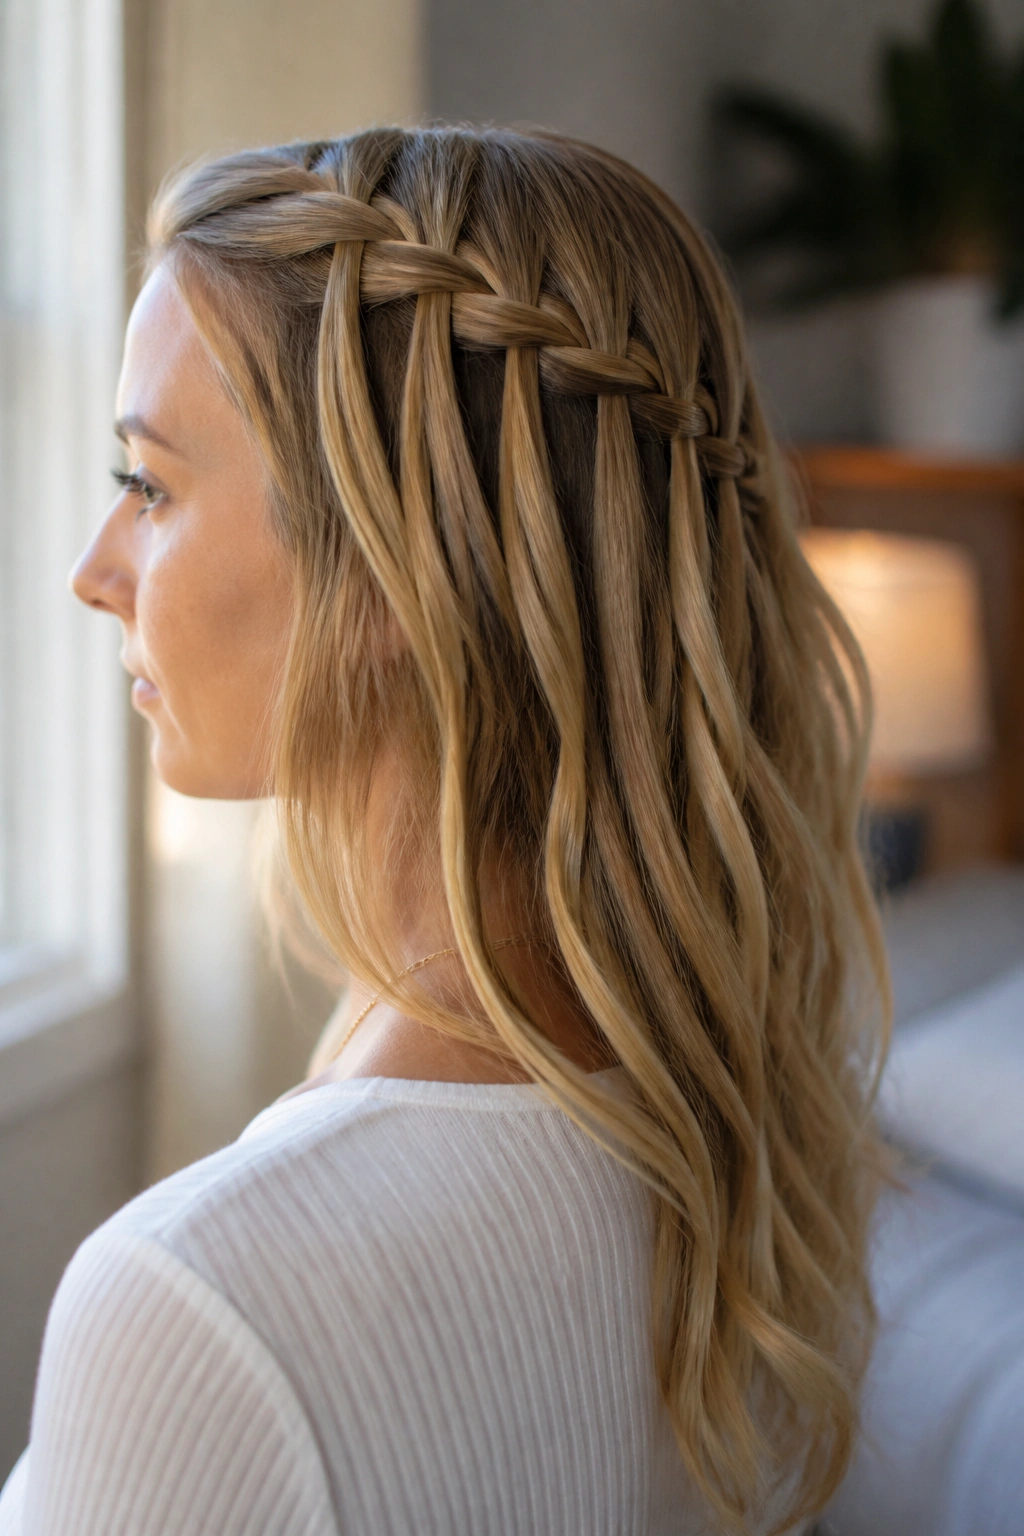
Is it possible to do a waterfall braid on yourself without getting your fingers tangled? Yes, but it requires a bit of a mental shift. This style involves a French braid technique where you “drop” one of the strands and pick up a new one from directly behind it.
The Logic of the Drop
The waterfall braid creates a beautiful, cascading effect where strands of hair seem to flow through the braid like water. When doing this solo, it is easiest to start on one side of your head near the temple. As you move toward the back, instead of crossing the bottom strand over, you let it hang. Then, you pick up a new piece of hair right next to where the old one fell and use that as your new third strand.
Mastering the Flow
- Keep your tension light; if you pull too hard, the “waterfall” strands won’t hang straight.
- Use a mirror to ensure the braid is horizontal across the back of your head.
- This style looks best on wavy or curled hair, as it emphasizes the cascade.
- Secure the end with a small pin hidden under the top layer of hair.
10. Side-Swept Dutch Braid
The side-swept Dutch braid is the “cool older sister” of the standard pigtail. It starts at one temple and travels diagonally across the back of the head, ending over the opposite shoulder.
A Scenario for Success
Imagine you have a formal event but no time for a professional blowout. This style is the perfect solution. Because it is asymmetrical, it feels intentional and artistic. The diagonal path also means you aren’t trying to reach directly behind the center of your head for as long, which is a major relief for your shoulder muscles.
- Start with a deep side part.
- Begin your Dutch braid with small sections at the “heavy” side of the part.
- Gradually add hair as you work your way around the curve of your skull.
- Ensure you are scooping hair from the very top and the very bottom to keep it secure.
Insight: If you have layers, some pieces might poke out near the nape. A little bit of flexible-hold hairspray or a decorative clip can easily hide these “flyaway” moments.
11. Large Box Braids (Solo Method)
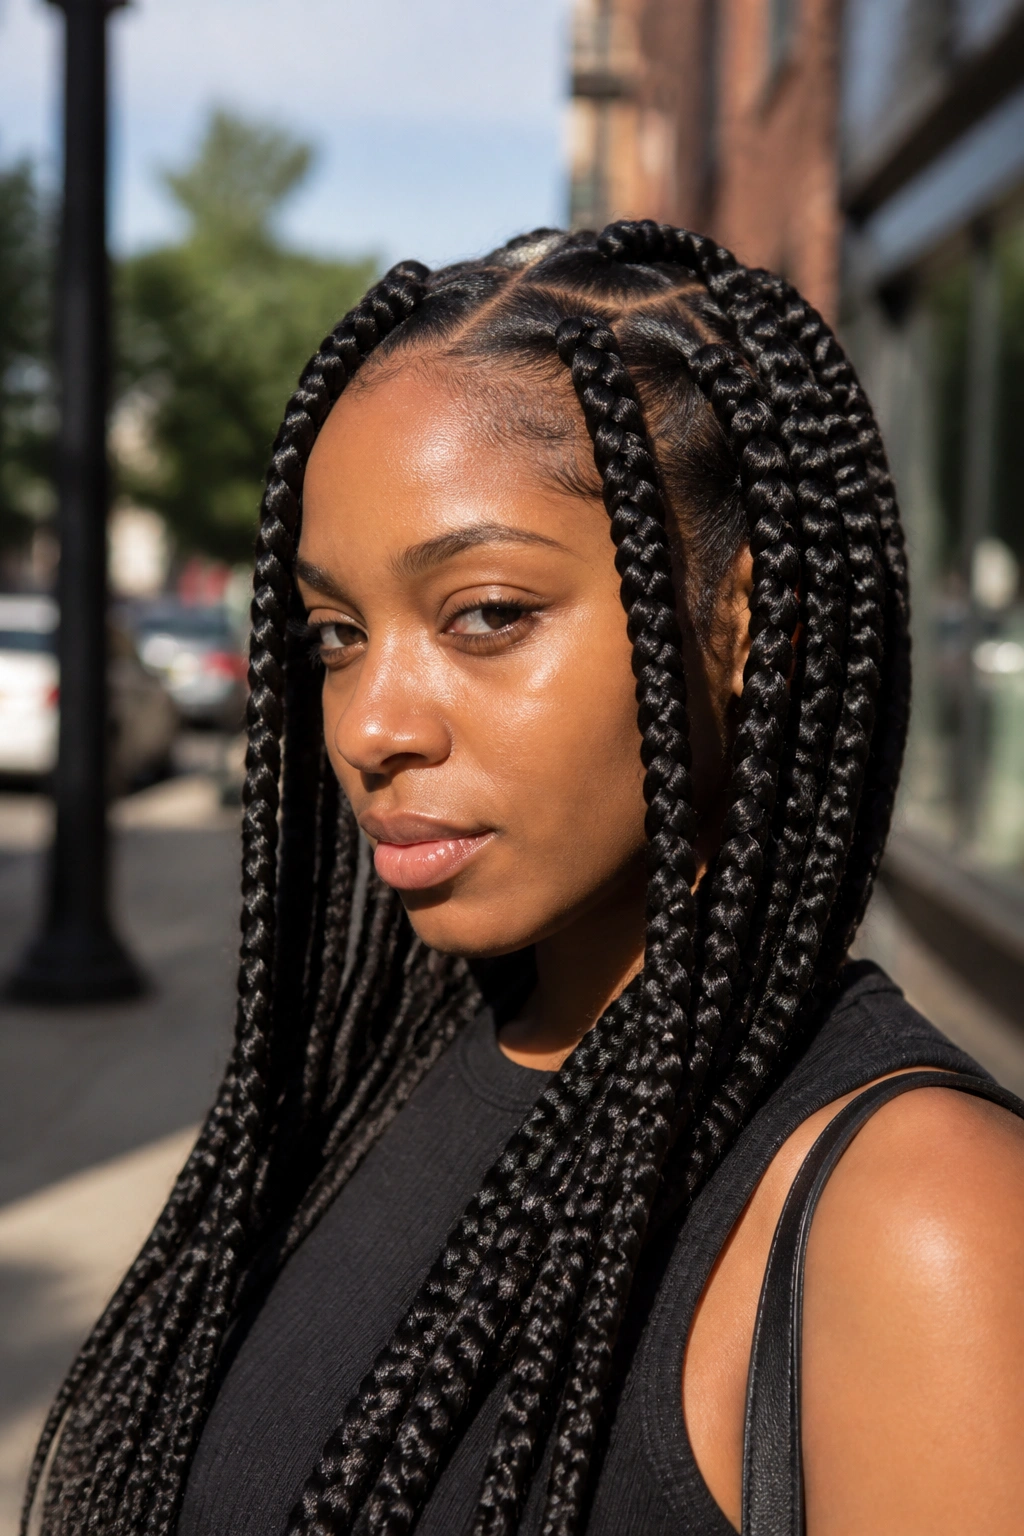
Many people assume box braids are strictly a salon service, but you can absolutely do them yourself if you have the time. Large or “jumbo” box braids are the best place to start because you only have to manage 10 to 20 sections rather than hundreds. The key to successful solo box braiding is the “rubber band method.”
Instead of trying to grip the extension hair and your natural hair at the same time—which is where most beginners fail—you pre-section your hair into small boxes and secure them at the base with a tiny rubber band. Then, you simply thread the extension hair through the rubber band or braid it into the pre-made ponytail. This ensures your parts are crisp and your sections are even before you ever start the actual braiding process. It takes a lot of the stress out of the “grip” and allows you to focus on the neatness of the plait itself.
12. Medium Knotless Braids

Knotless braids are often preferred over traditional box braids because they lay flatter and put less tension on the hairline. The difference is that you start with your natural hair and gradually “feed in” the extension hair as you go.
Unlike the traditional box braid, which has a visible knot at the scalp, the knotless version looks like it is growing directly out of your head. For a DIYer, this requires a bit of dexterity. You start a three-strand braid with your own hair for about two or three passes. Then, you take a small sliver of braiding hair, fold it over your index finger, and add it to two of the strands you are currently holding. You continue adding small amounts until the braid reaches your desired thickness. It is a slower process, but the results are much more natural and significantly more comfortable for your scalp.
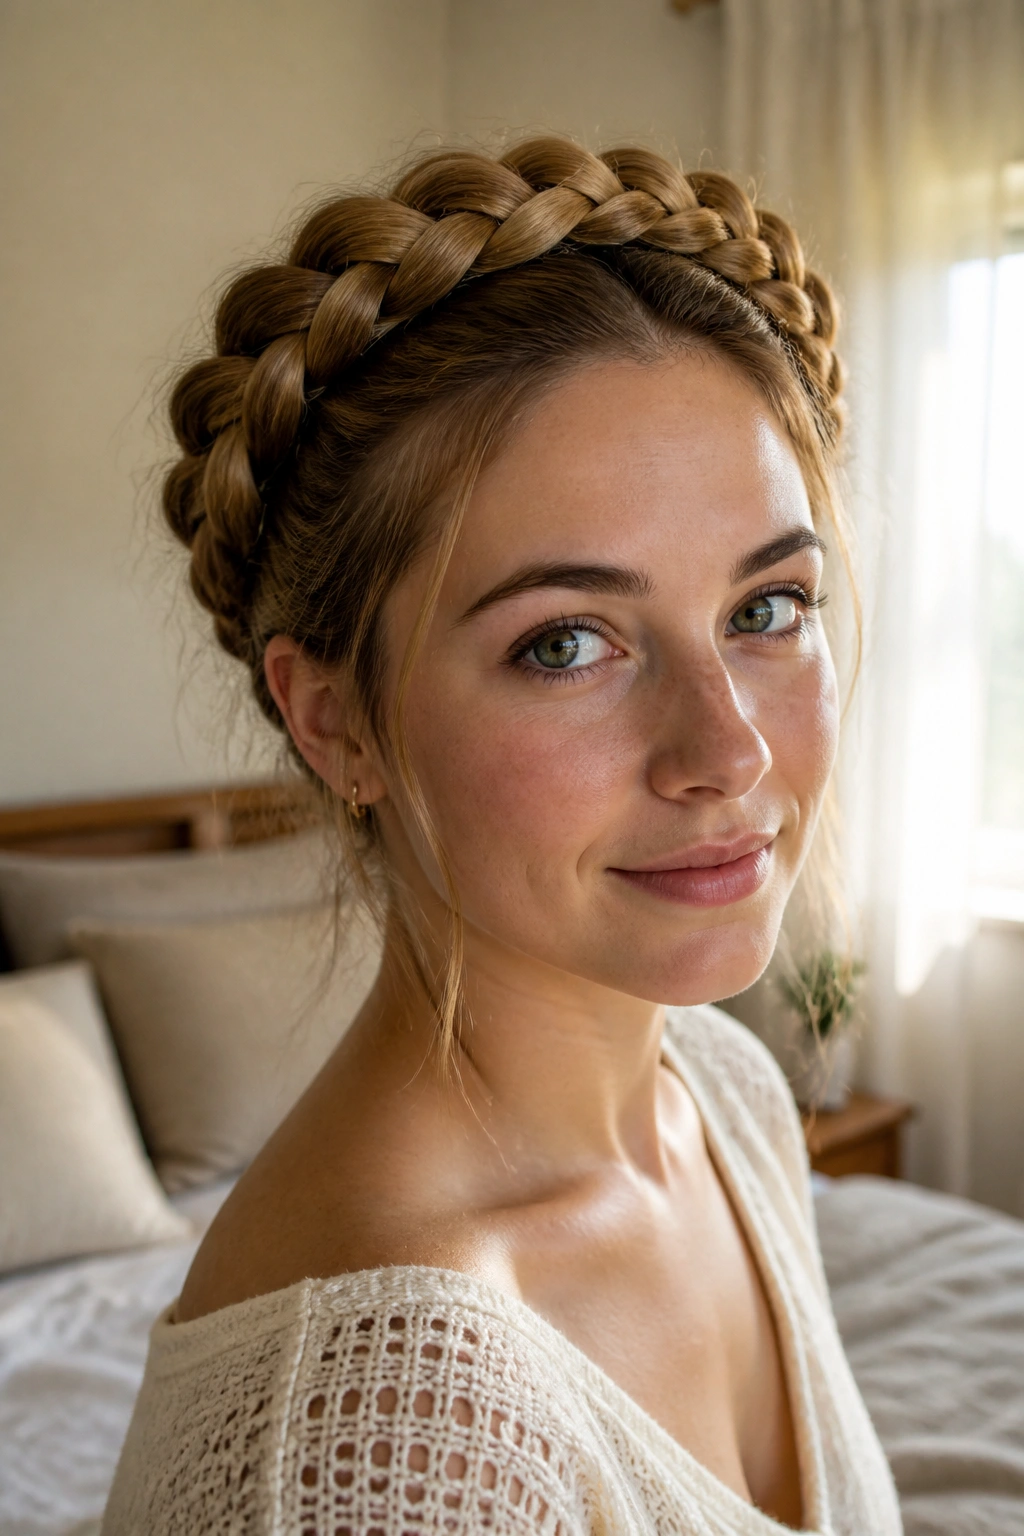
13. Milkmaid Braids
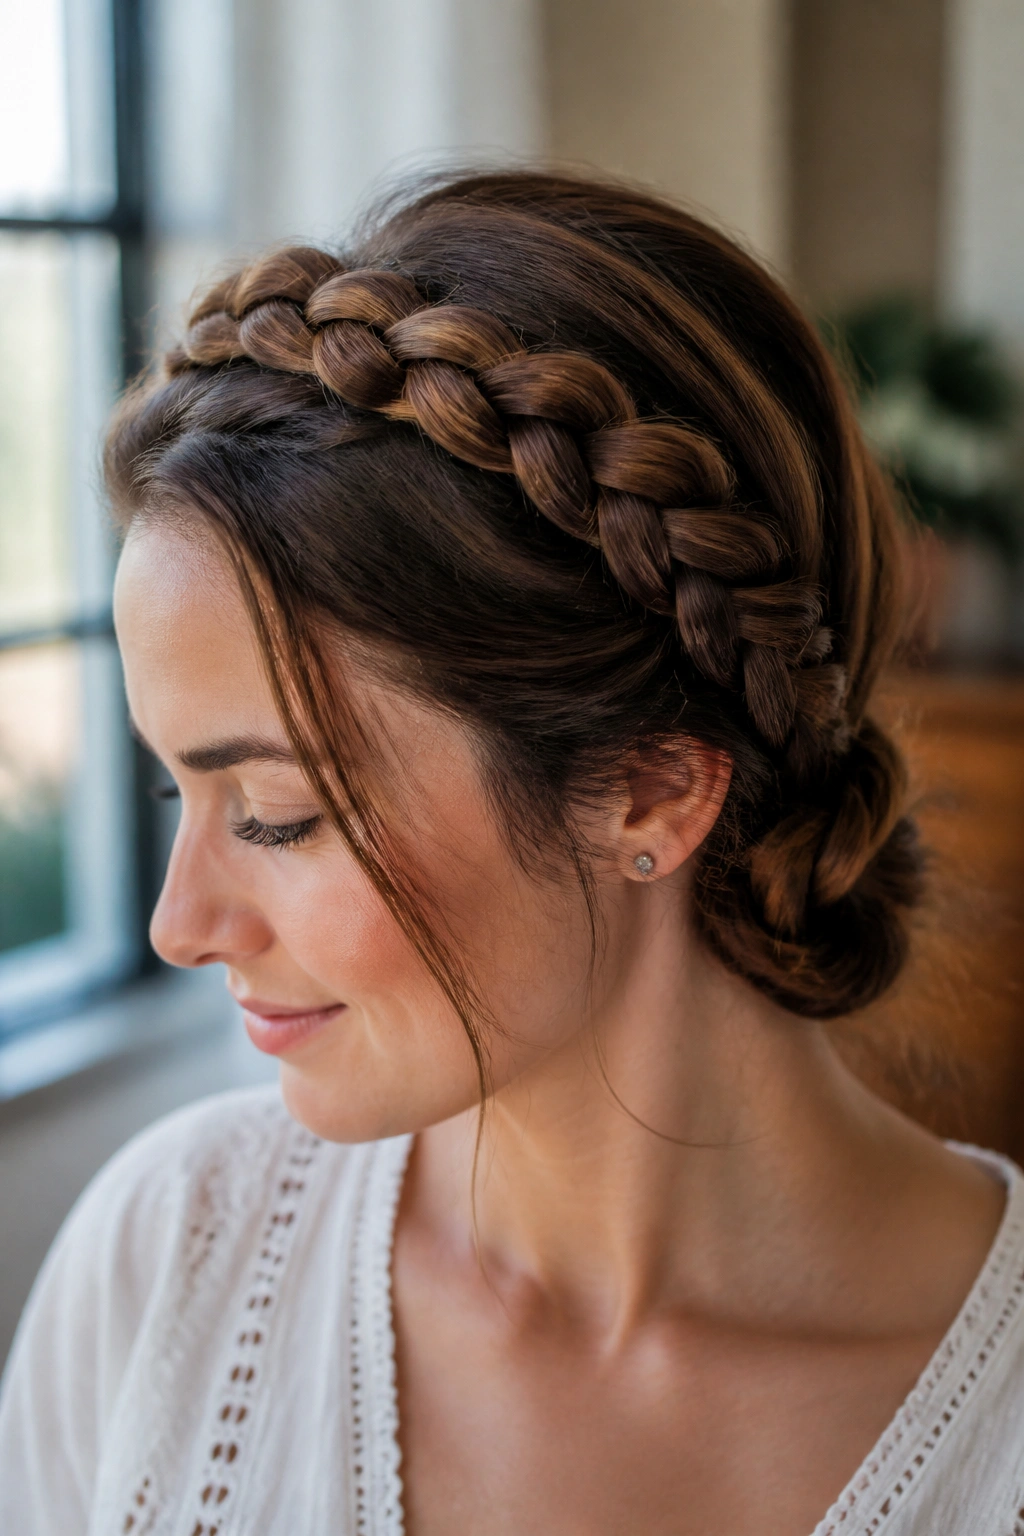
The milkmaid style is the ultimate “I haven’t washed my hair in four days” savior. It is rustic, charming, and takes about three minutes to complete.
Why It’s the Best Lazy-Day Style
You don’t even need to know how to French or Dutch braid for this one. If you can do two basic three-strand plaits, you can do milkmaid braids. It is all about the positioning. You want to make sure your braids start as low as possible near your ears so that they have enough length to reach across the top of your head.
Quick Style Facts
- Works best on hair that is at least shoulder-length.
- It is a “closed” style, meaning it protects your ends from environmental damage.
- You can leave two small tendrils out in the front to frame your face for a softer look.
- Use matte-finish bobby pins that match your hair color for a seamless look.
Pro tip: Cross the braids on top of your head and pin them slightly behind your hairline. This creates a “headband” effect that is very flattering for most face shapes.
14. The Snake Braid
The snake braid is a fantastic “party trick” style. It looks like an intricate, S-shaped weave, but it is actually just a standard three-strand braid that has been manipulated in a very specific way.
To create this, you braid a small section of hair normally all the way to the bottom. Hold one of the three strands firmly in one hand, and with the other hand, slide the other two strands all the way up the hair towards the scalp. The hair will bunch up into a gathered mess. Then, gently slide the bunched-up hair back down the single strand until it spreads out into a wavy, “snake-like” pattern. Secure it with a pin. It works best as an accent braid—perhaps tucked into a ponytail or pinned back behind the ear.
15. Partial Micro Braids
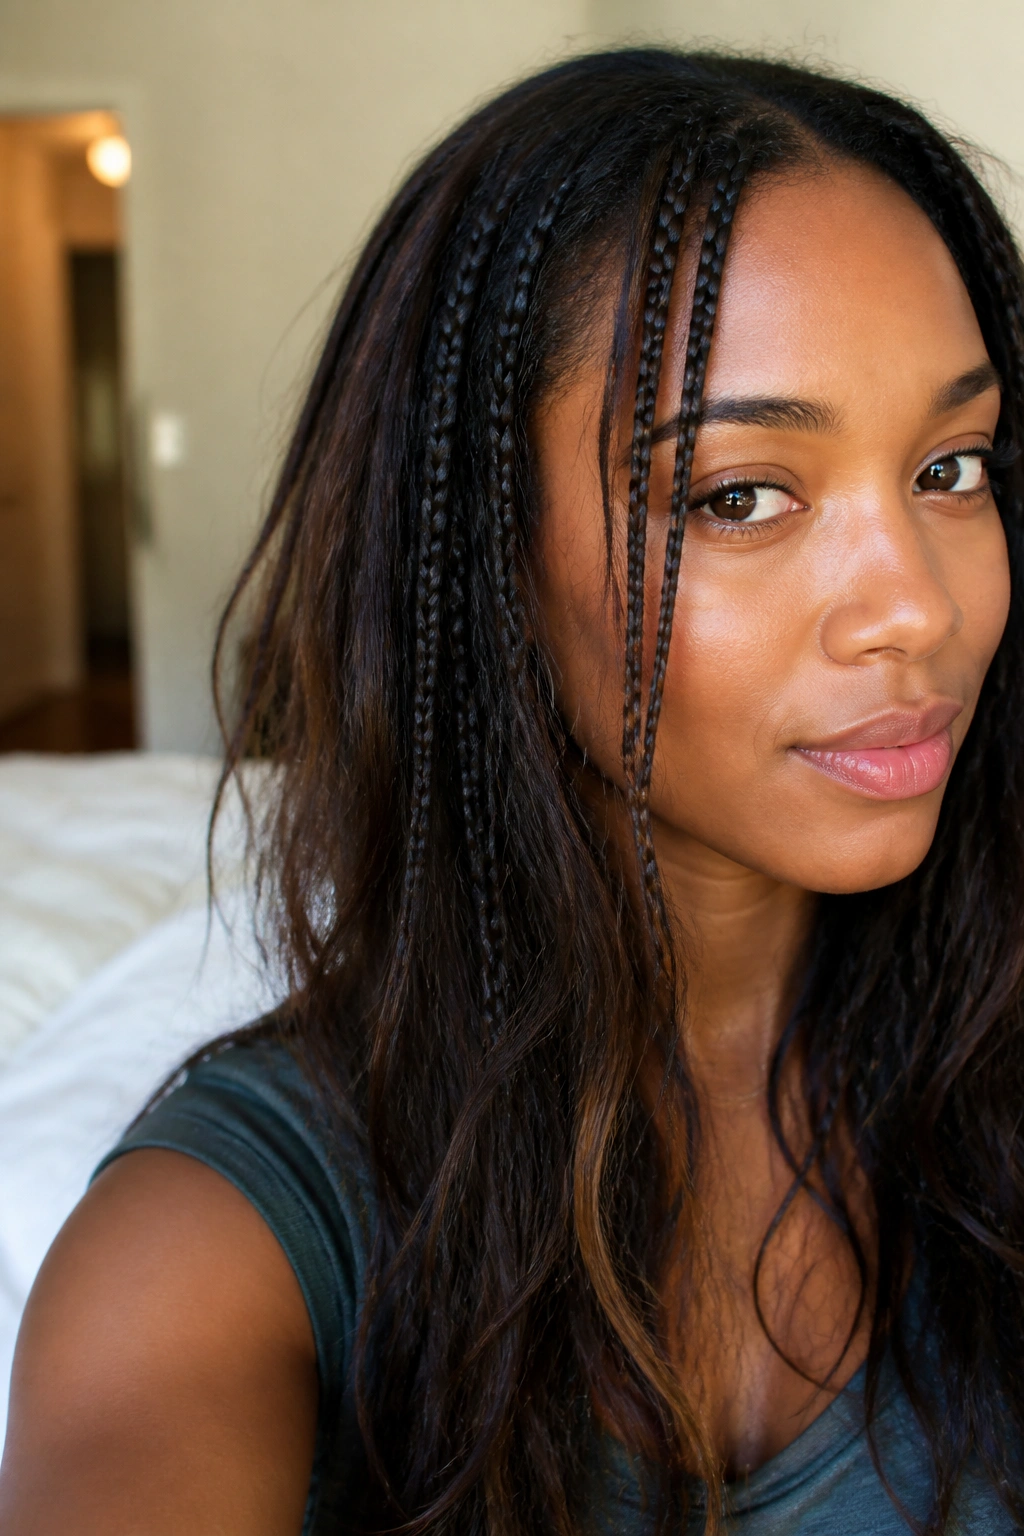
Doing a full head of micro braids on yourself is a Herculean task that I wouldn’t recommend to anyone who values their sanity. However, partial micro braids are a different story. These are tiny, thin braids that are scattered throughout loose hair to add texture.
The Allure of the Accent
Micro braids give off a very 90s, effortless vibe. Because they are so small, they don’t require perfect sectioning. You can just grab a quarter-inch section of hair while watching a movie and braid it down. Adding five or six of these throughout your head creates a “hidden” detail that looks great when your hair moves.
How to Style Them
- Braid them very tightly near the root to ensure they don’t slip.
- Use tiny, clear elastics that won’t weigh down the thin strands.
- You can bead the ends for a more personalized, “boho” look.
- They are a great way to “hide” shorter layers that might be sticking out.
16. The Crown Braid (The Real Deal)
Once you have mastered the halo braid, you might want to try the actual crown braid. This is a single Dutch braid that starts behind one ear and travels around the entire circumference of your head.
A Scenario for High Dexterity
This is the “final boss” of self-braiding. The challenge is the transition behind the head where you have to switch your hand orientation. You have to be comfortable braiding “blind” for at least half the process. The reward, however, is a style that is incredibly secure and looks like a literal crown.
- Start with a deep side part and begin Dutch braiding along the hairline.
- Keep the braid very close to your ear as you move down.
- When you reach the nape, tilt your head forward to make it easier to reach.
- Continue adding hair from the center of your head until you reach the starting point.
Insight: The trick to making the transition invisible is to continue the braid even after you’ve run out of hair to add. Wrap that “tail” around to the start and tuck it under the beginning of the braid.
17. Pigtail Dutch Braids

Often called “boxer braids,” these are perhaps the most popular DIY style for the gym or a long weekend. Having two braids instead of one makes the sectioning much easier because you are only dealing with half the hair at a time.
Why Prose Works for Precision
The key here is the center part. Use the bridge of your nose as a guide to ensure your part is perfectly straight. Clip one side of your hair completely out of the way so you don’t accidentally grab strands from the wrong side. When braiding, try to keep the braid centered over the middle of each section rather than letting it drift too far toward your ears. This keeps the look balanced and symmetrical.
If you find that the braids are bulging at the nape of the neck, it is because you are losing tension as your arms change position. Try sitting in a chair with a low back so your elbows have room to move as you transition from the top of your head down to your shoulders.
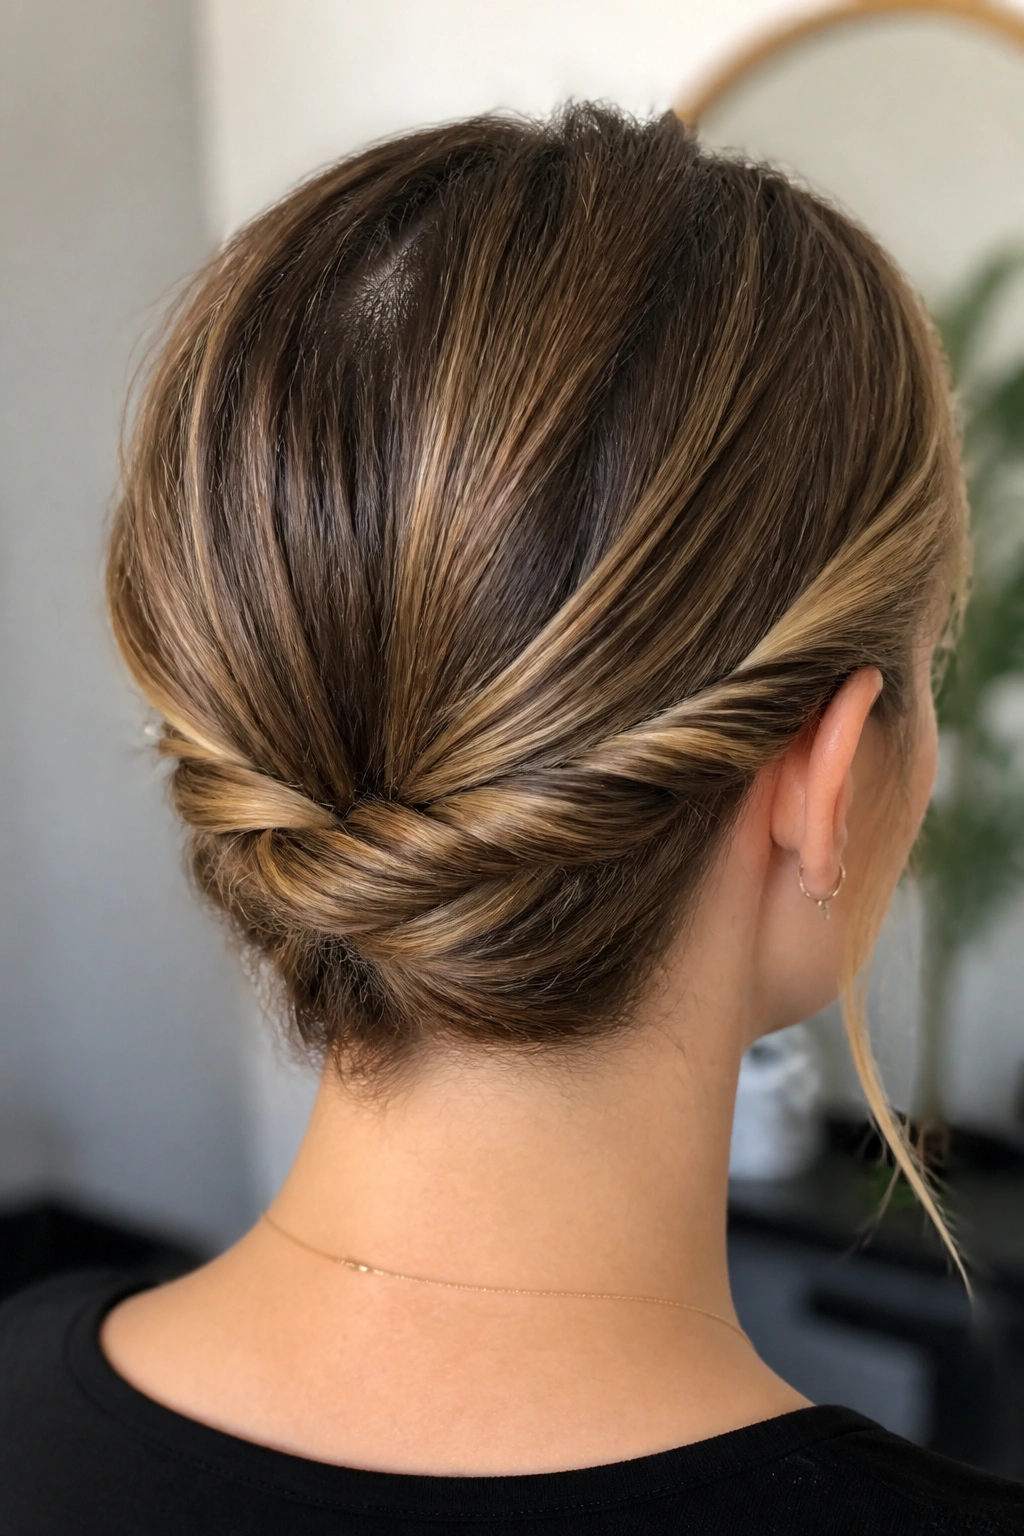
18. Upside Down Braid into Bun
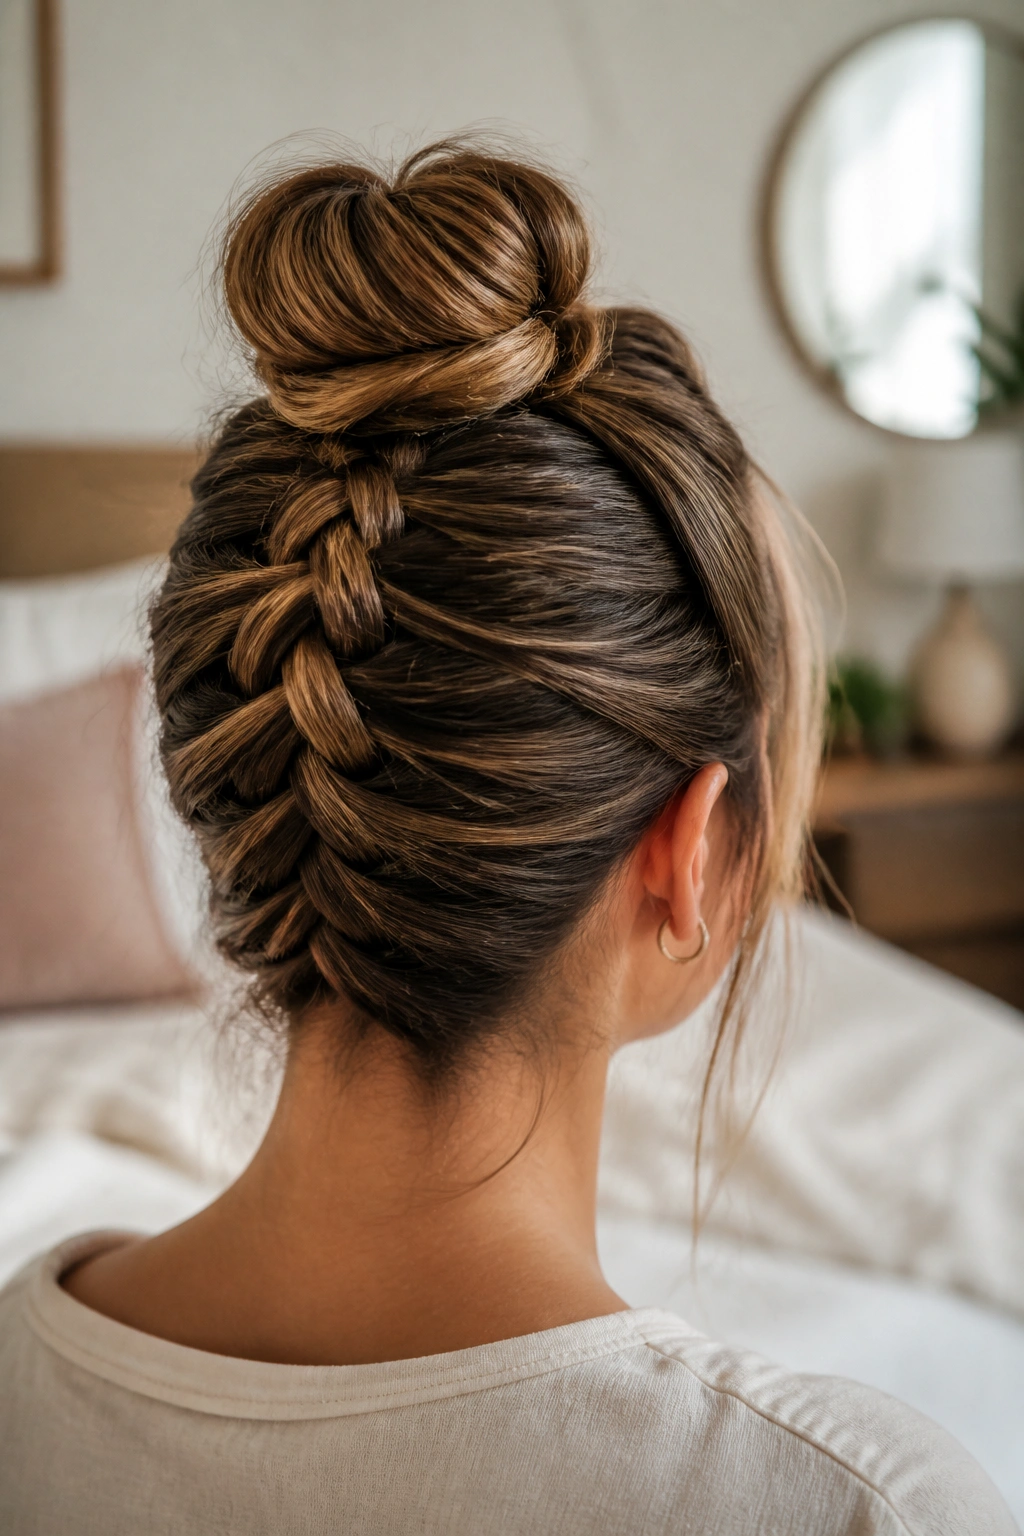
This is the ultimate “updo” for when you want something more interesting than a standard top-knot. It involves French braiding the back of your head starting from the nape of your neck and moving upward toward the crown.
Comparison: Upside Down vs. Standard
Unlike a standard braid that pulls hair away from the face, this style pulls everything upward, providing a natural “lift” to the features. It is much easier to do if you flip your head completely upside down and sit on the edge of a bed or a chair. This allows gravity to help you with the tension.
Best Cooking Uses for Each Material
- Start at the very base of your hairline.
- Braid “up” until you reach the spot where you want your bun to sit.
- Secure the braid and the remaining loose hair into a ponytail.
- Wrap the ponytail into a messy bun or a sleek donut bun.
Recommendation: Use a strong-hold gel on the back of your neck before you start to keep those tiny “baby hairs” from falling out of the braid.
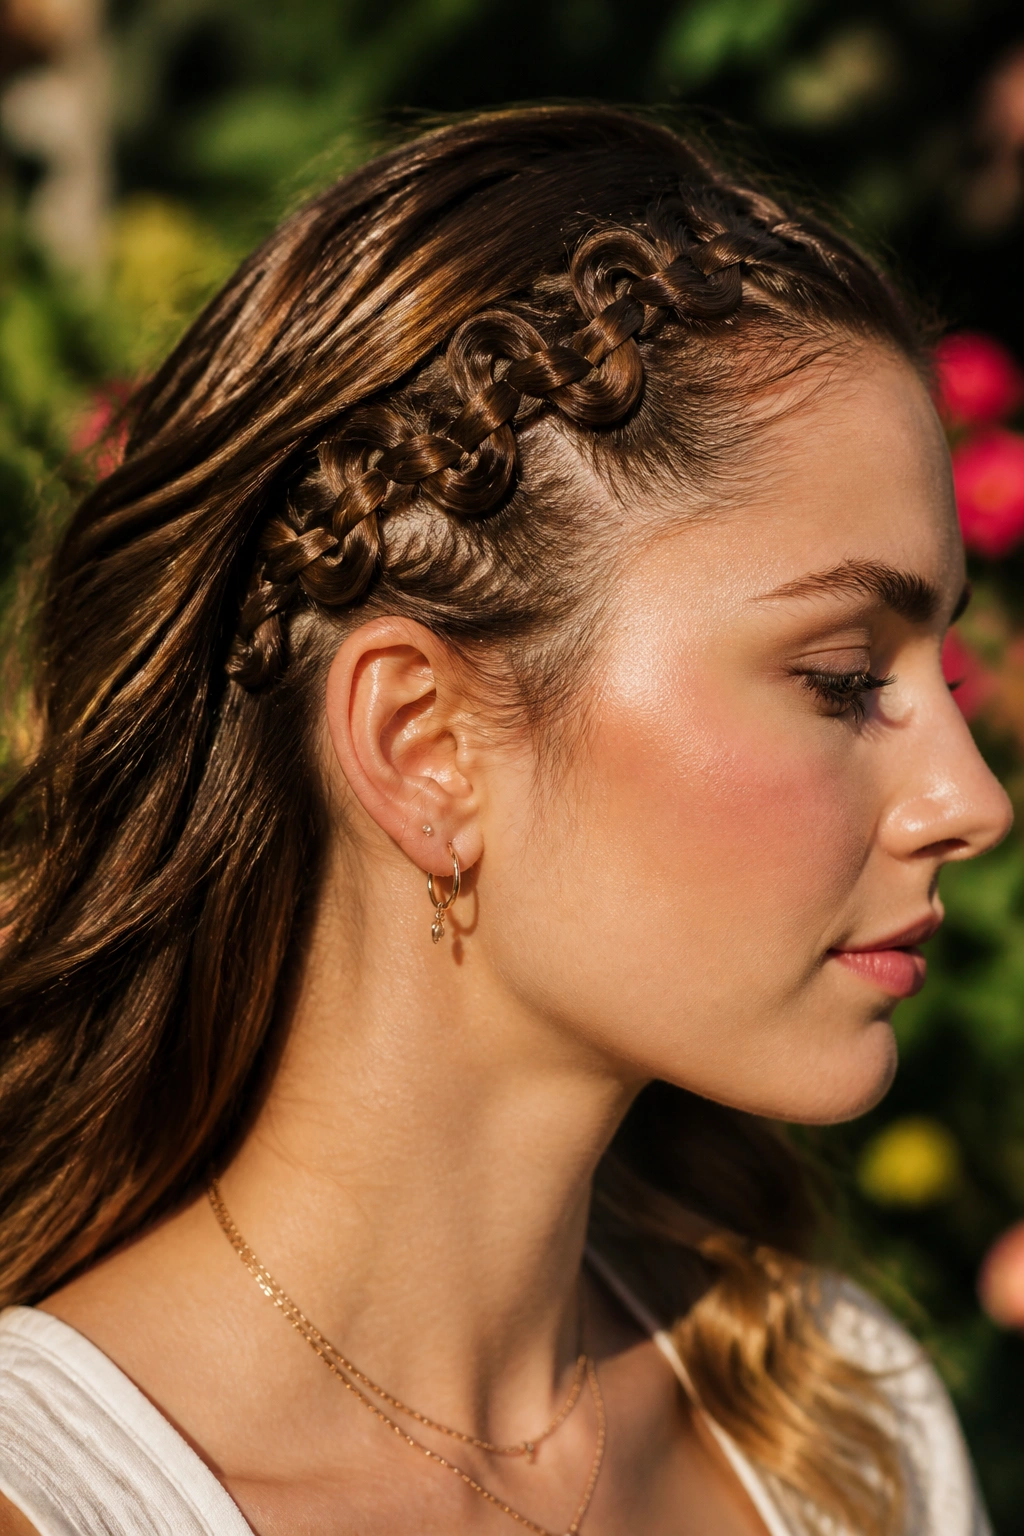
19. The Lace Braid
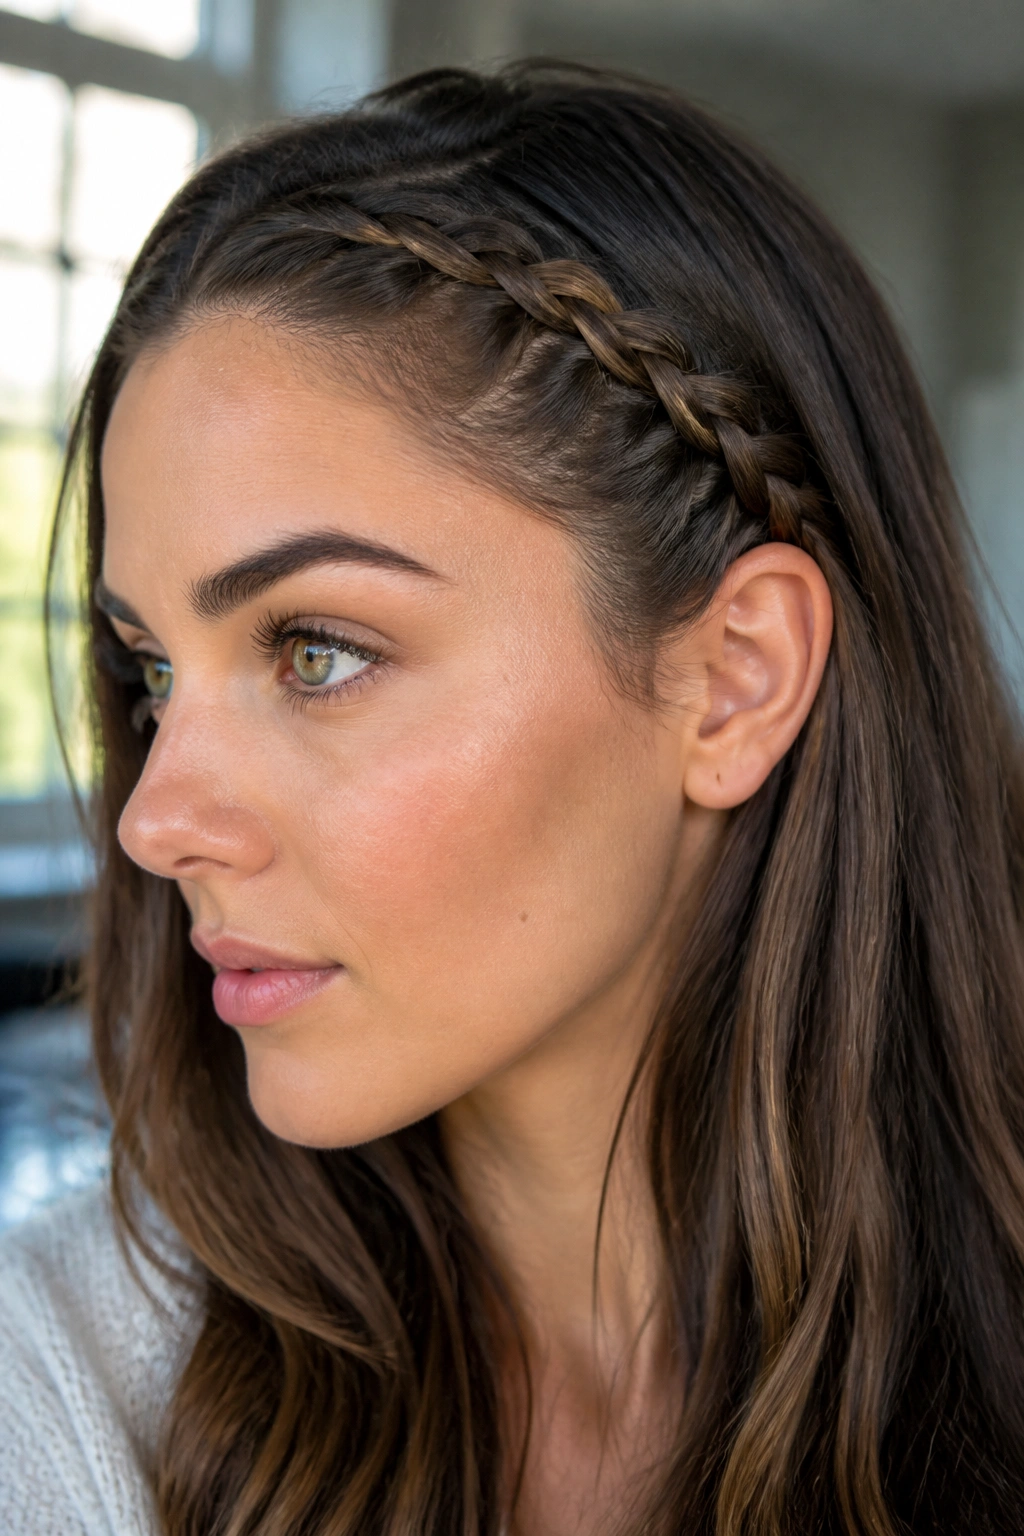
A lace braid is a French braid where you only add hair from one side (usually the top). This creates a “fringe” effect that looks like a delicate piece of lace resting on the hair.
The Mechanics of the Single-Sided Scoop
Lace braids are perfect for growing out bangs or keeping hair out of your eyes while leaving the rest of your hair down. Because you are only adding hair from one side, the braid stays very thin and flexible. It acts almost like a headband made of your own hair.
Quick Facts
- It is much less heavy than a full French braid.
- It can be done in under two minutes once you have the rhythm.
- It works beautifully on short bobs and pixie cuts.
- You can end the braid at the ear and pin it back for a subtle look.
Pro tip: For a “boho” look, pull slightly on the loops of the side where you didn’t add hair. This makes the lace pattern pop.
20. The Four-Strand Braid
If three strands feel too basic, the four-strand braid adds a level of complexity that looks like a woven basket. It is wider and flatter than a traditional braid, making it look very impressive.
The secret to the four-strand move is “over, under, over.” You treat the strands like you are weaving a rug. Take the far-left strand, cross it over the one next to it, under the next, and over the last one. It feels awkward for the first five minutes because your fingers aren’t used to holding four distinct sections, but the pattern is very logical.
This style is best done as a side braid so you can see your hands in the mirror. Because it is so wide, it is a great choice for people with very thick hair who find that three-strand braids look too “ropey” or thin. It also shows off highlights and multi-tonal hair color beautifully because of the way the strands overlap.
21. The Boho Messy Braid

The “messy” look is actually quite difficult to achieve intentionally. It is a balance between a secure structure and a loose, airy finish.
Why the “Mess” is Intentional
You start with a very tight, very neat braid—usually a Dutch or a fishtail. Once the braid is secured with an elastic, you start from the bottom and work your way up, “massaging” the braid to loosen it. You want to pull the hair horizontally to widen the braid.
How to Get the Most From It
- Use a volumizing powder on the braid before you start pulling it apart.
- Don’t be afraid to let a few strands fall out naturally.
- Use a curling iron on the loose ends to give them a finished look.
- This style relies on “grip,” so don’t do it on freshly conditioned, slippery hair.
Insight: This is the best style for weddings or outdoor events because if the wind blows it around, it just looks like part of the aesthetic.
22. Viking-Style Braids
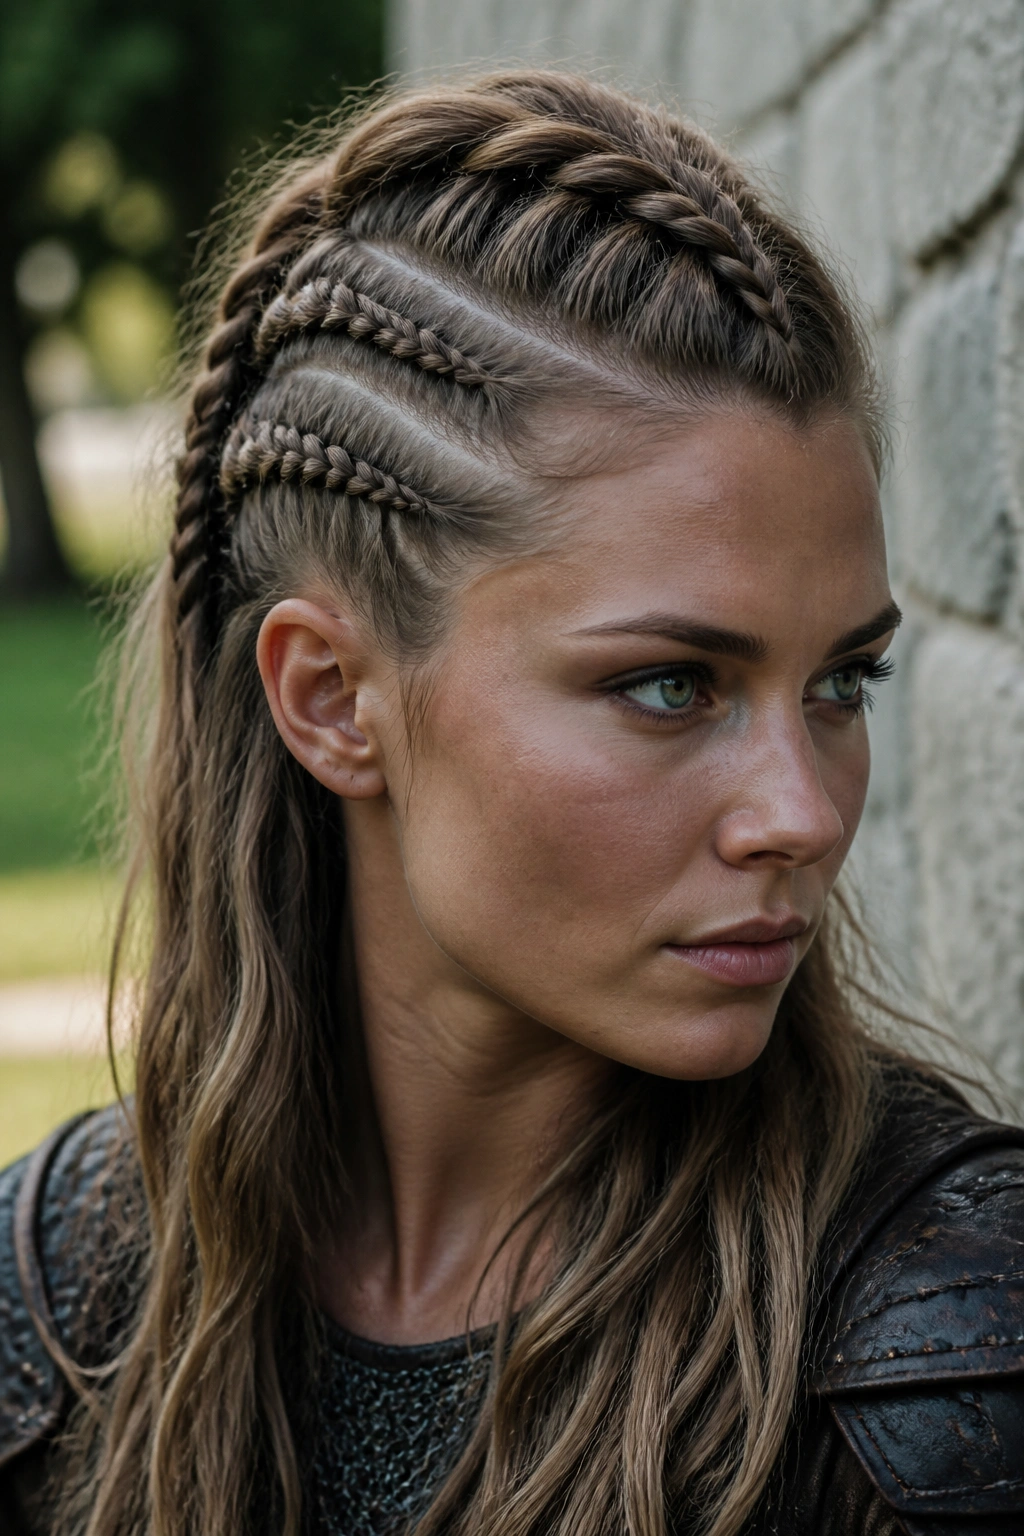
Viking-inspired hair is all about multiple, high-tension braids paired with loose, textured hair. It’s a powerful, edgy look that works for any gender.
The Science of Multiple Rows
The Viking look usually involves two or three tight Dutch braids on the sides of the head (near the temples) while the top remains voluminous or is pulled into a separate braid. The contrast between the scalp-tight side braids and the loose top is what gives it that “warrior” feel.
Key Details
- Use a “wax” or heavy pomade to get the side braids as tight as possible.
- Keep the parts between the braids very clean.
- You don’t have to braid the entire length; you can stop at the back of the head and let the rest hang.
- Adding a few silver hair rings or cuffs to the braids can take the look to another level.
Insight: This is a great style for people with “undercuts” or side-shaves, as it emphasizes the shape of the head.
Wrapping Up
Mastering the art of braiding your own hair is less about having “talent” and more about having a system. Every style on this list relies on the same few principles: consistent tension, clean sectioning, and the right product for your hair type. If your first attempt looks like a bird’s nest, do not be discouraged. Braiding is a physical skill, like typing or playing an instrument. Your hands need to learn where to go without your brain telling them every single move.
Start with the styles that allow you to see what you are doing—like the side-swept Dutch braid or the simple rope twist. As your “braiding muscles” get stronger and your arms stop aching after five minutes, move on to the styles that require you to reach behind your head. The freedom of being able to give yourself a salon-quality look at 7:00 AM on a Tuesday is worth every bit of the practice.
The most important thing to remember is that hair is flexible. If a section is messy, undo it and try again. Use your sense of touch to feel for bumps or loose spots. Eventually, you will find that you can braid your hair while watching TV, talking on the phone, or even with your eyes closed. That is the moment you have truly graduated from the stylist’s chair to the master of your own mane.