Side lace braids for 3B and 3C curly hair do something that a lot of styles promise and don’t quite deliver: they look polished without flattening the curl pattern into a sad little shadow of itself. The braid gives structure. The curls keep their shape. And the whole thing has that nice in-between feel — neat enough for a dinner, soft enough for a regular Tuesday.
What makes this texture family so good for lace braids is the grip. 3B curls bend enough to hold a braid well, while 3C curls give you that springy, dense look that fills out the style fast. The catch is that both patterns can swell, frizz, and shrink the second they’re handled roughly. So the braid has to be planned, not rushed. A clean part, a little slip from leave-in or gel, and a hand that doesn’t pull too hard matter more than fancy technique.
A side lace braid is also one of those styles that can go sleek or relaxed depending on how tightly you braid and how much curl you leave out at the end. That’s useful. Some days you want the braid to hug the hairline and disappear into a bun. Other days you want it to act like a frame and leave the rest of your curls loud and proud. Clean lines matter. So do soft ends.
1. Temple Sweep Side Lace Braid for 3B and 3C Curly Hair
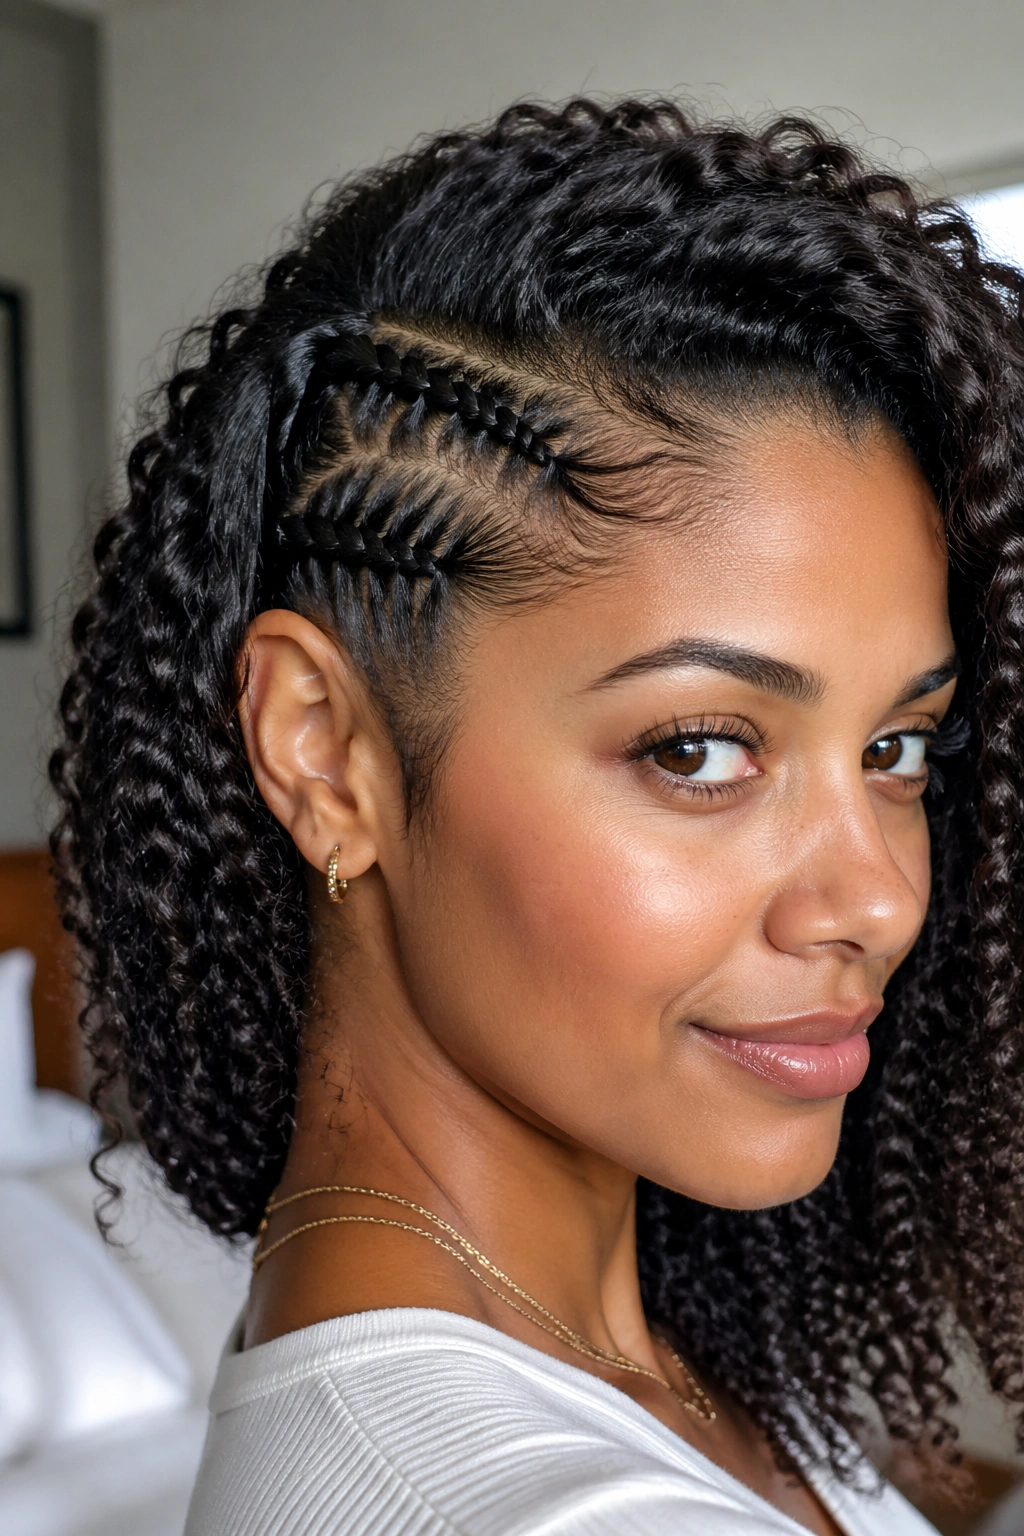
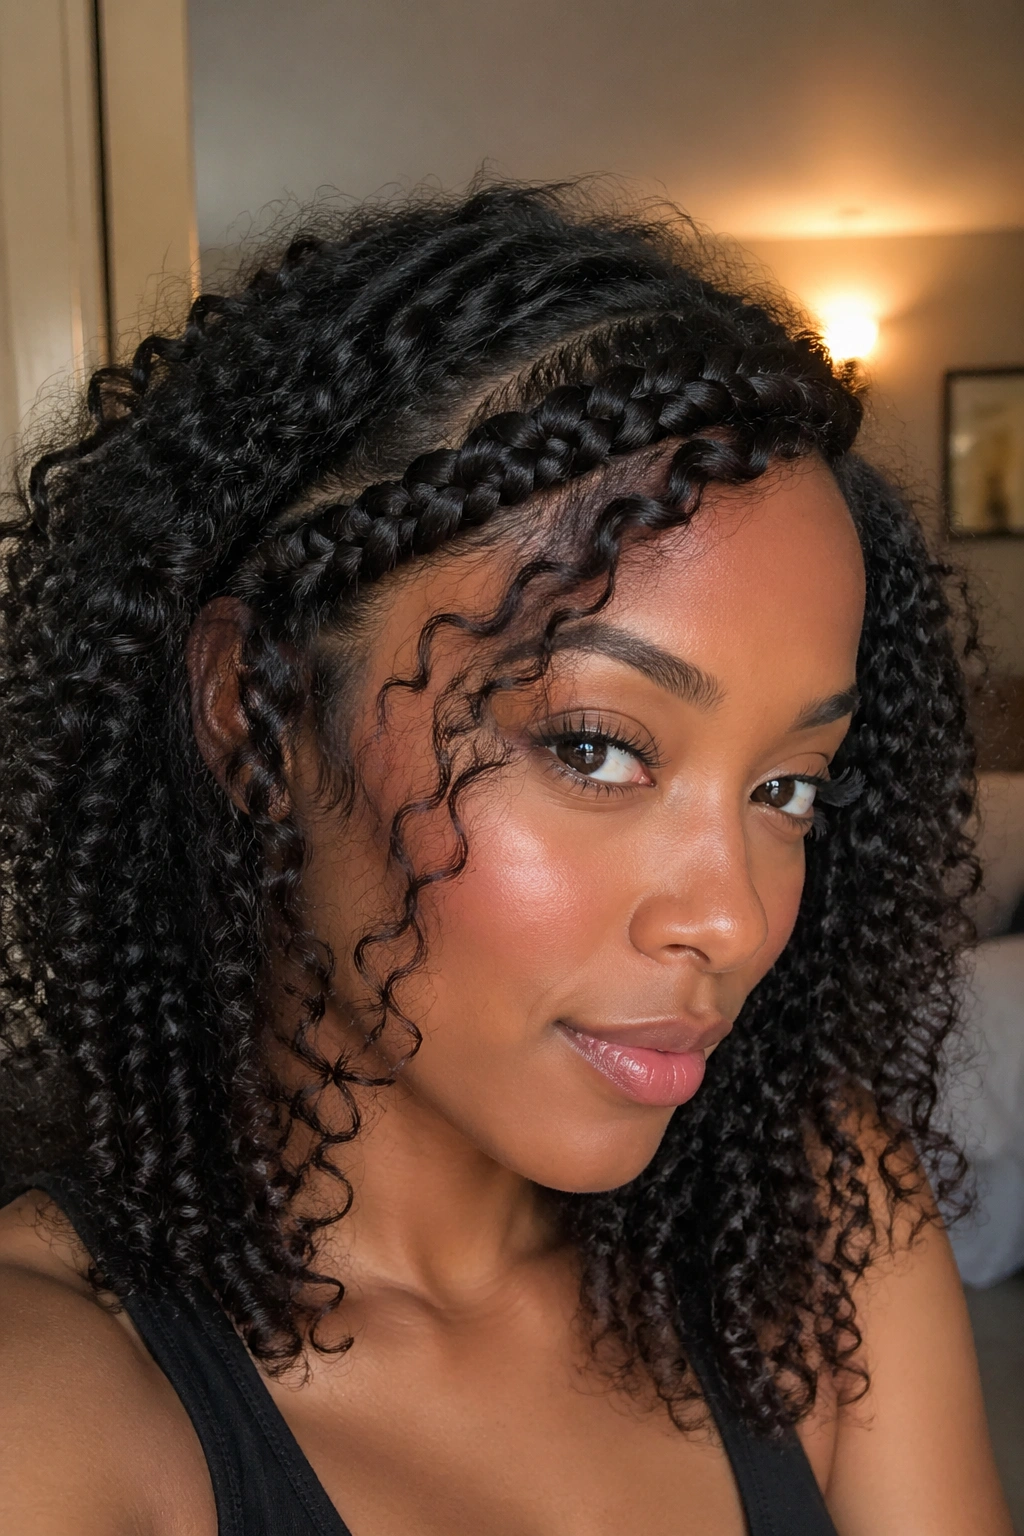
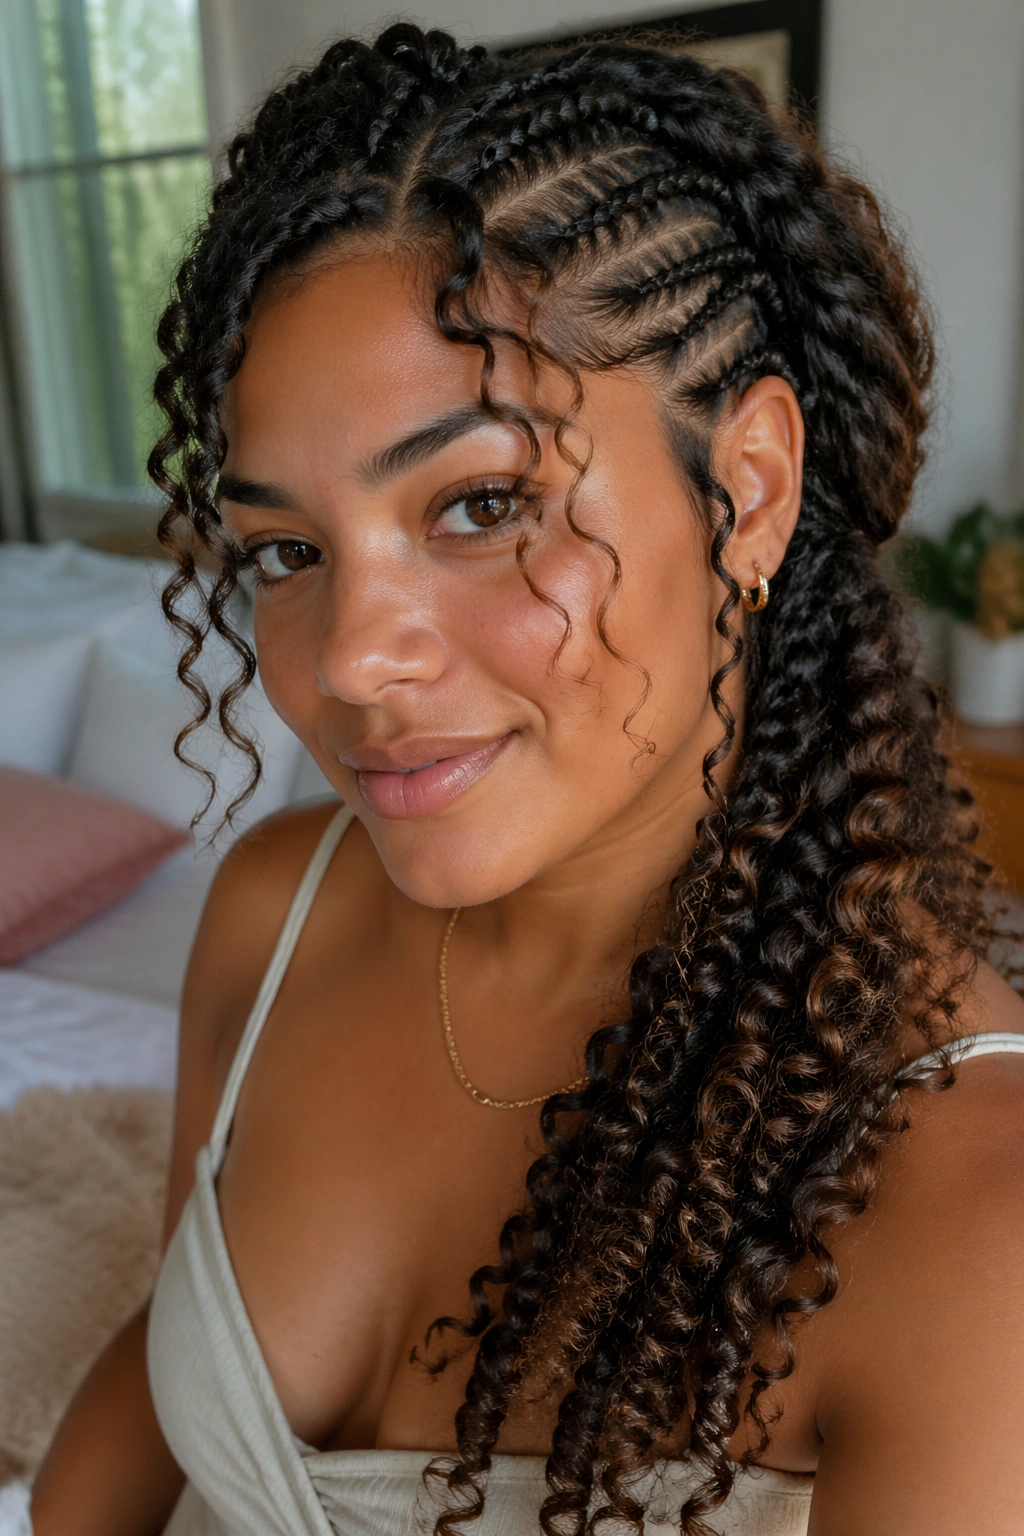
This is the style I reach for when I want the front of the hair to look intentional without committing to a full updo. The braid starts near the temple, follows the curve of the hairline, and stops just behind the ear so the rest of the curls can stay loose. On 3B and 3C hair, that side sweep looks full fast, which is half the appeal.
The trick is to keep the braid narrow at the start and let it widen only a little as you add hair. If you begin too chunky, it can overwhelm the face; if you start too tight, the temple area starts to puff and the braid loses its clean line by lunch. I like using a rat-tail comb for the part and a pea-sized amount of gel or edge control only where the braid begins.
A small detail makes this style better: leave the ends of the braid in a curlier finish instead of forcing them flat. That little contrast — smooth braid, springy ends — keeps the look from feeling stiff. And if your curls shrink a lot, stretch the front section lightly first. Not bone straight. Just stretched enough that the braid can sit where you want it.
2. Deep Side Part Side Lace Braid into a Low Puff
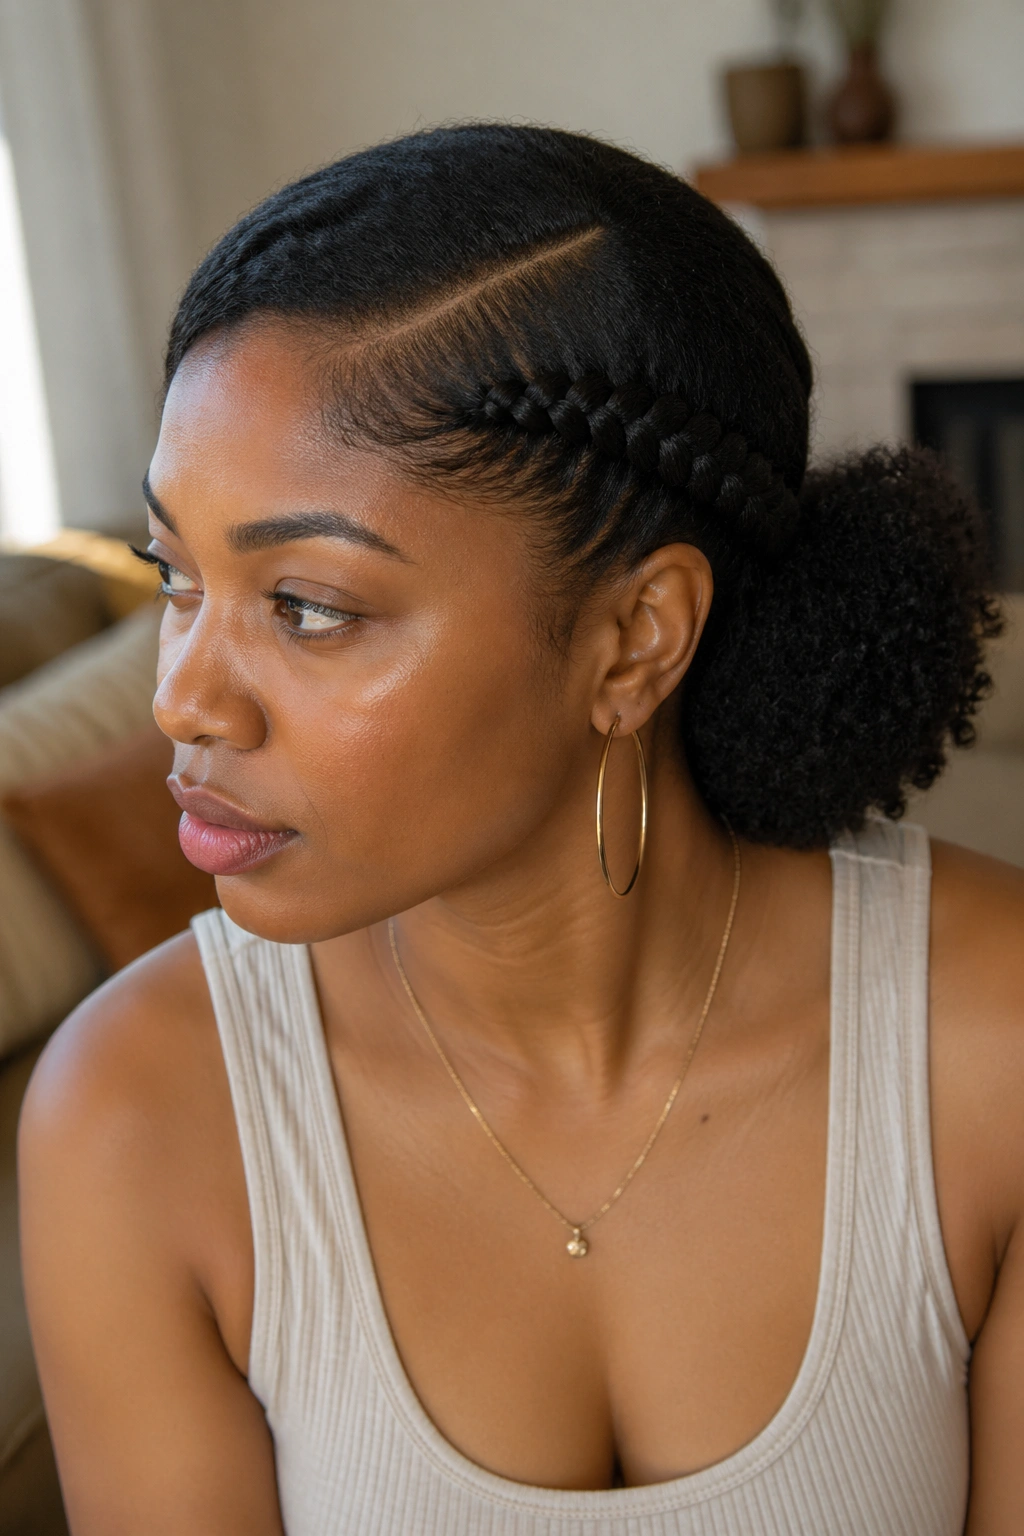
Why does a deep side part change everything? Because it gives the braid a real job to do. Instead of just decorating the hairline, it becomes the line that organizes the whole style, and on dense 3B or 3C curls, that matters more than people think.
A deep side part makes the front look sharper and the puff at the nape look fuller. That contrast is the whole point. I usually braid the heavier side first, keeping the braid close to the scalp for the first few inches, then gathering the rest into a low puff with a satin scrunchie. A satin scrunchie holds without snagging, which is worth the extra minute.
How to Keep the Part Crisp
- Use a little gel on the part before combing it open.
- Clip the loose side away while you braid the heavier side.
- Smooth the roots with a soft-bristle brush only at the top; don’t brush the curl pattern into a helmet.
- Finish the puff with a few gentle finger separations so it looks full, not smashed.
The best part is how forgiving this style is. If the braid softens a little over the day, the puff still carries the look. That’s useful on hair that tends to expand in humid air.
3. Crown Sweep Side Lace Braid with Curly Ends
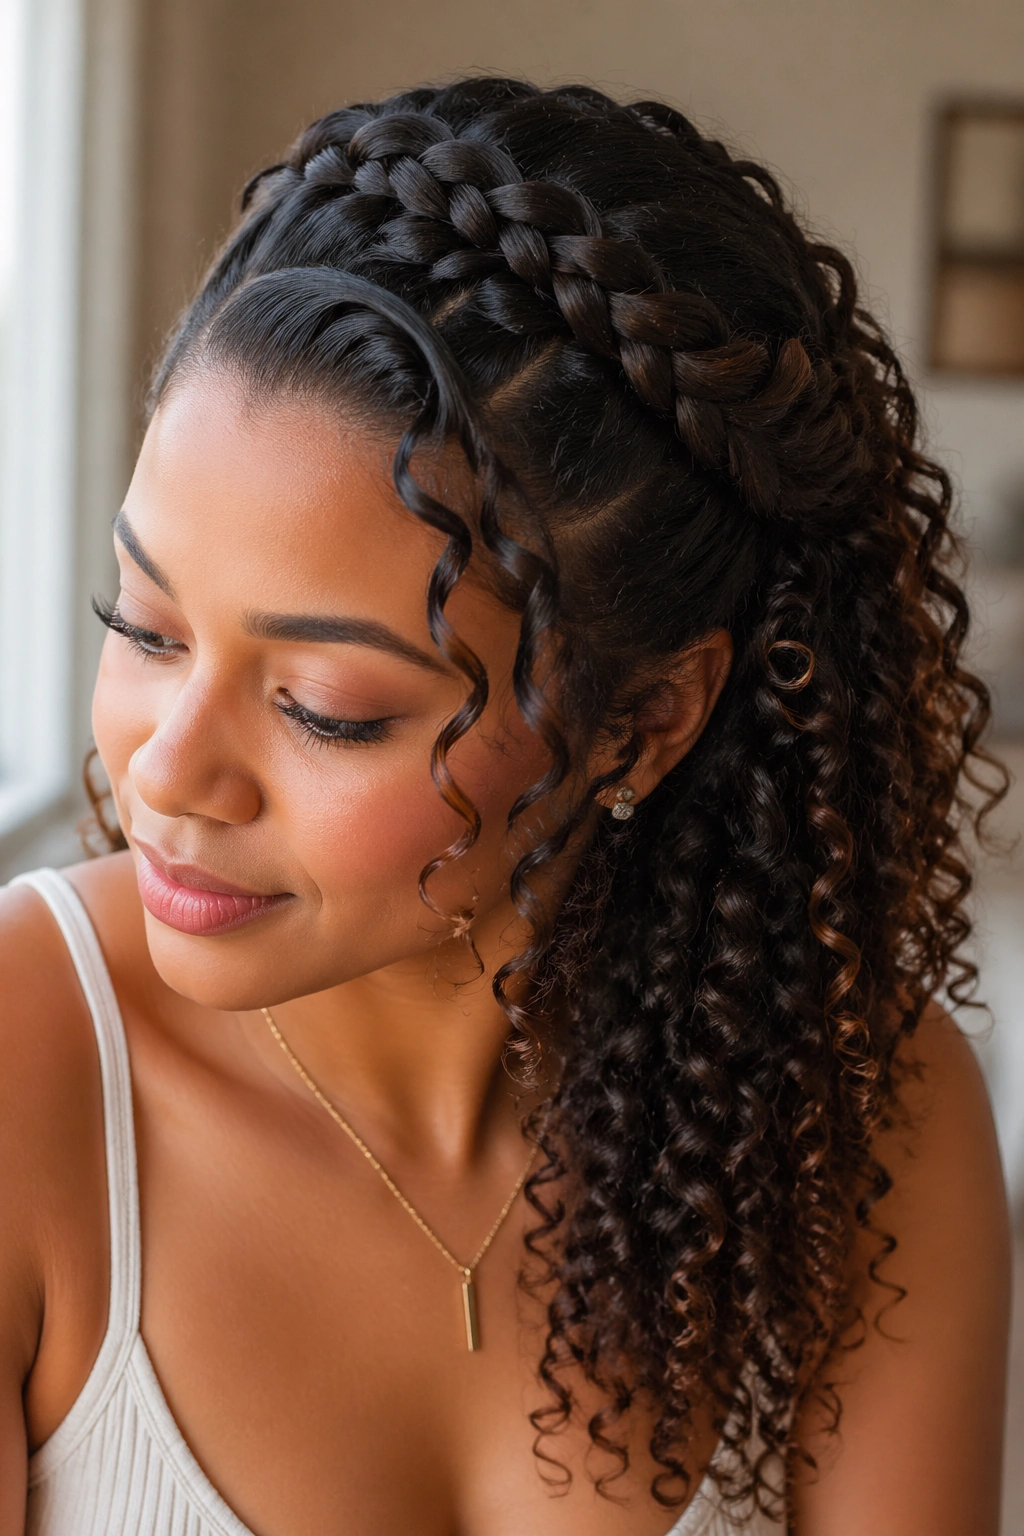
Picture a braid that starts at one side of the crown, glides across the top of the head, and ends right where the curls can spill out. That’s the version I’d pick for brunch, a gallery visit, or any day when you want your hair to look arranged without looking overworked.
This style works well on 3C hair because the crown gets structure from the braid while the length keeps its natural bulk. 3B hair can do it too, especially if the front section is lightly stretched first. I like to braid just tight enough that the line sits flat, then stop before the braid gets too narrow and fussy. The whole point is movement.
There’s a real advantage to ending the braid in curls instead of tucking everything away. The braid creates a visual path across the head, and the loose ends keep the style from reading severe. If your curls are day-two or day-three curls, mist the ends with water and a touch of leave-in before separating them. They’ll look softer and less frayed.
Sometimes the easiest styles are the ones that look the most styled. This is one of them.
4. Double Side Lace Braids That Meet at the Nape
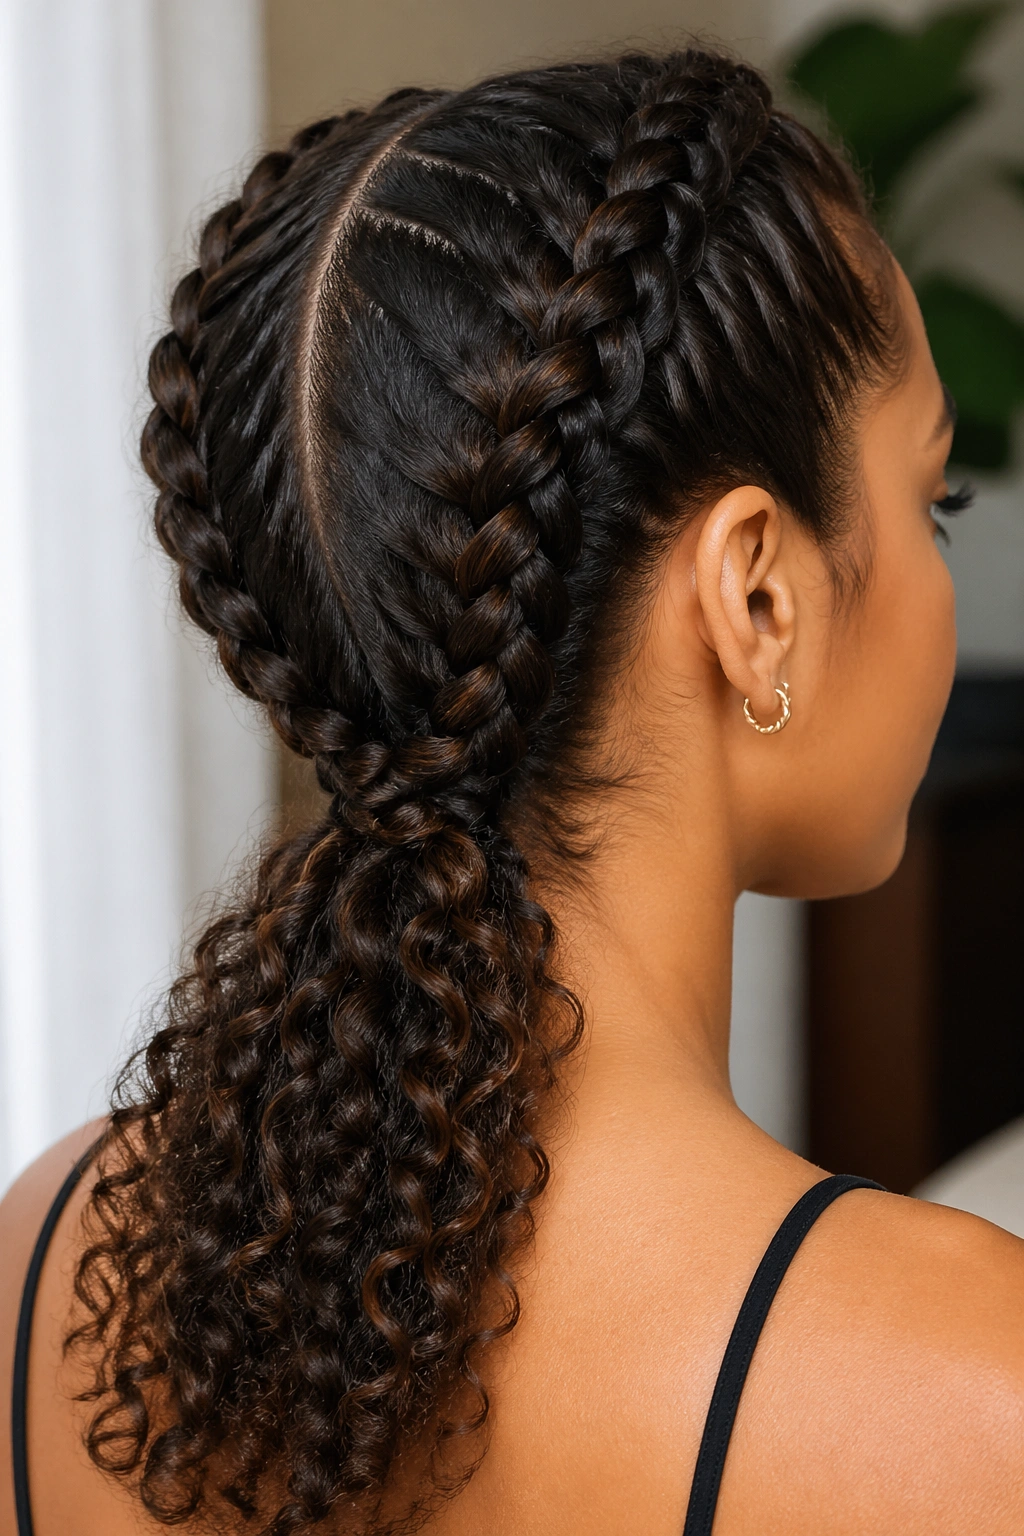
Unlike a single side braid that only frames one half of the face, this version uses two mirrored side lace braids to pull the whole look together. It’s tidy, practical, and a little more structured, which makes it a good choice when you want your curls out of the way without losing the texture.
What Makes It Different
The first braid starts on one side of the hairline. The second starts on the other side. Both travel downward and meet at the nape, where you can tie them together, twist them into a small knot, or pin them flat under loose curls. On thicker 3C hair, this gives a nice anchored look. On 3B hair, it feels lighter and a bit more airy.
A few things help here:
- Keep both braids the same width, or the style looks lopsided fast.
- Use the same amount of tension on each side so one braid doesn’t puff out faster than the other.
- Secure the meeting point with small U-pins if you want it to sit flat under the rest of the hair.
- Add a touch of mousse to the loose curls so the braid lines and the curl texture don’t fight each other.
This one is especially good for active days. It stays put, and it doesn’t mind a little movement.
5. Side Lace Braid with a Braided Bang
A braided bang solves a very specific problem: that front section that never quite knows whether it wants to stay down, shrink up, or split into three different moods. If you’ve ever dealt with a curly fringe that looks great for fifteen minutes and then starts doing its own thing, this style will feel familiar.
The braid begins at the side and crosses the front like a soft bang, then disappears into the rest of the hair or ends just behind the ear. It works because it gives the front pieces a job instead of fighting them. On 3B hair, the braid usually shows more clearly. On 3C hair, it blends faster into the texture, which can actually look nicer because the line feels softer.
I like this when the hair is growing out around the face. You don’t have to force those shorter pieces into the braid if they won’t cooperate. Pin them under the braid or leave them as tiny curls around the cheekbones. That little imperfection keeps the style from feeling too strict.
The braid should not sit so low that it blocks your eyes, and it should not be pulled so tight that the forehead skin moves when you smile. That’s the line.
6. Feed-In Side Lace Braid into a Ponytail
How do you get a side braid to look smooth on 3C hair without flattening all the body out of it? Feed in the hair gradually instead of grabbing big chunks at once. That is the whole trick, and it makes a bigger difference than most people expect.
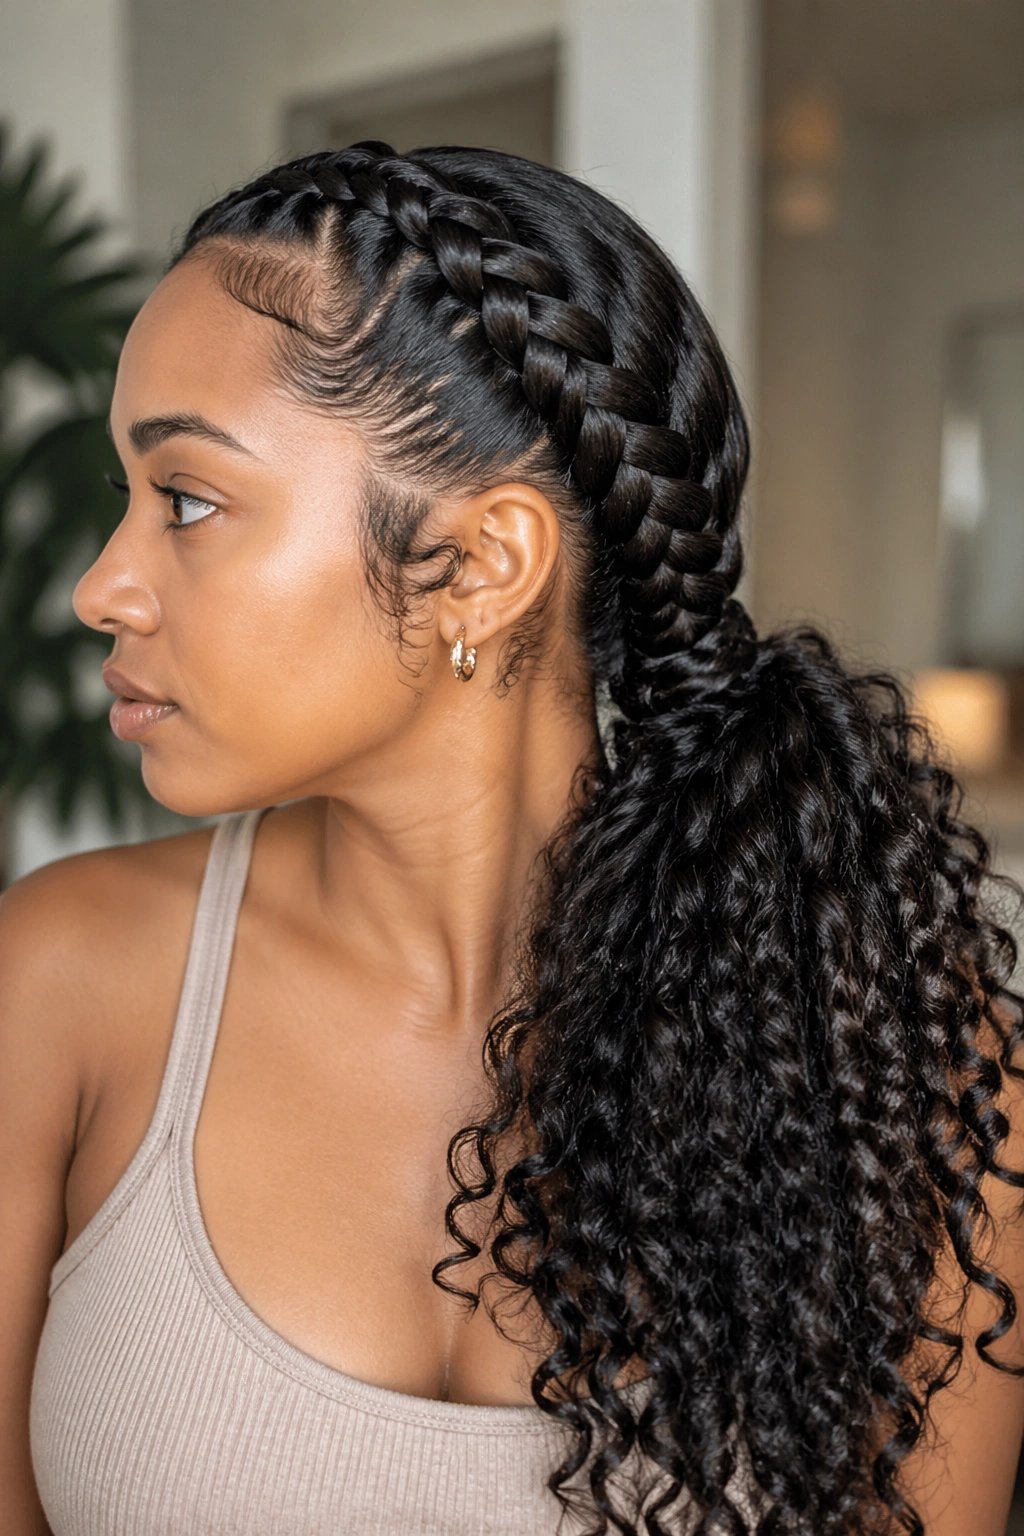
A feed-in braid starts slim at the hairline, then gets fuller as more hair is added. By the time it reaches the ponytail, it has a nice thick shape instead of a bulky root and a skinny middle. This is one of the cleanest side lace braid looks for longer curly hair, especially when you want the braid to feel deliberate instead of casual.
How to Keep It Smooth
Start with detangled, slightly stretched hair. Not wet-wet. A damp, slippery braid tends to swell later, and then the part gets fuzzy. Use gel only where you need it, and smooth each added section before crossing it over.
A low ponytail works best here. High ponytails can tug at the braid and make the side line rise too much. A low one keeps the shape grounded and lets the braid stay the star. Wrap a small curl around the elastic if you want a neater finish. Or don’t. A visible elastic can look fine when the curls are full enough to carry the style.
7. Side Lace Braid Wrapped into a Low Bun
There’s a reason this one shows up for office days, weddings, and anything that makes you want your hair to sit down and behave. The side lace braid gives you the polish. The low bun does the practical work. And together they hold up better than a lot of people expect.
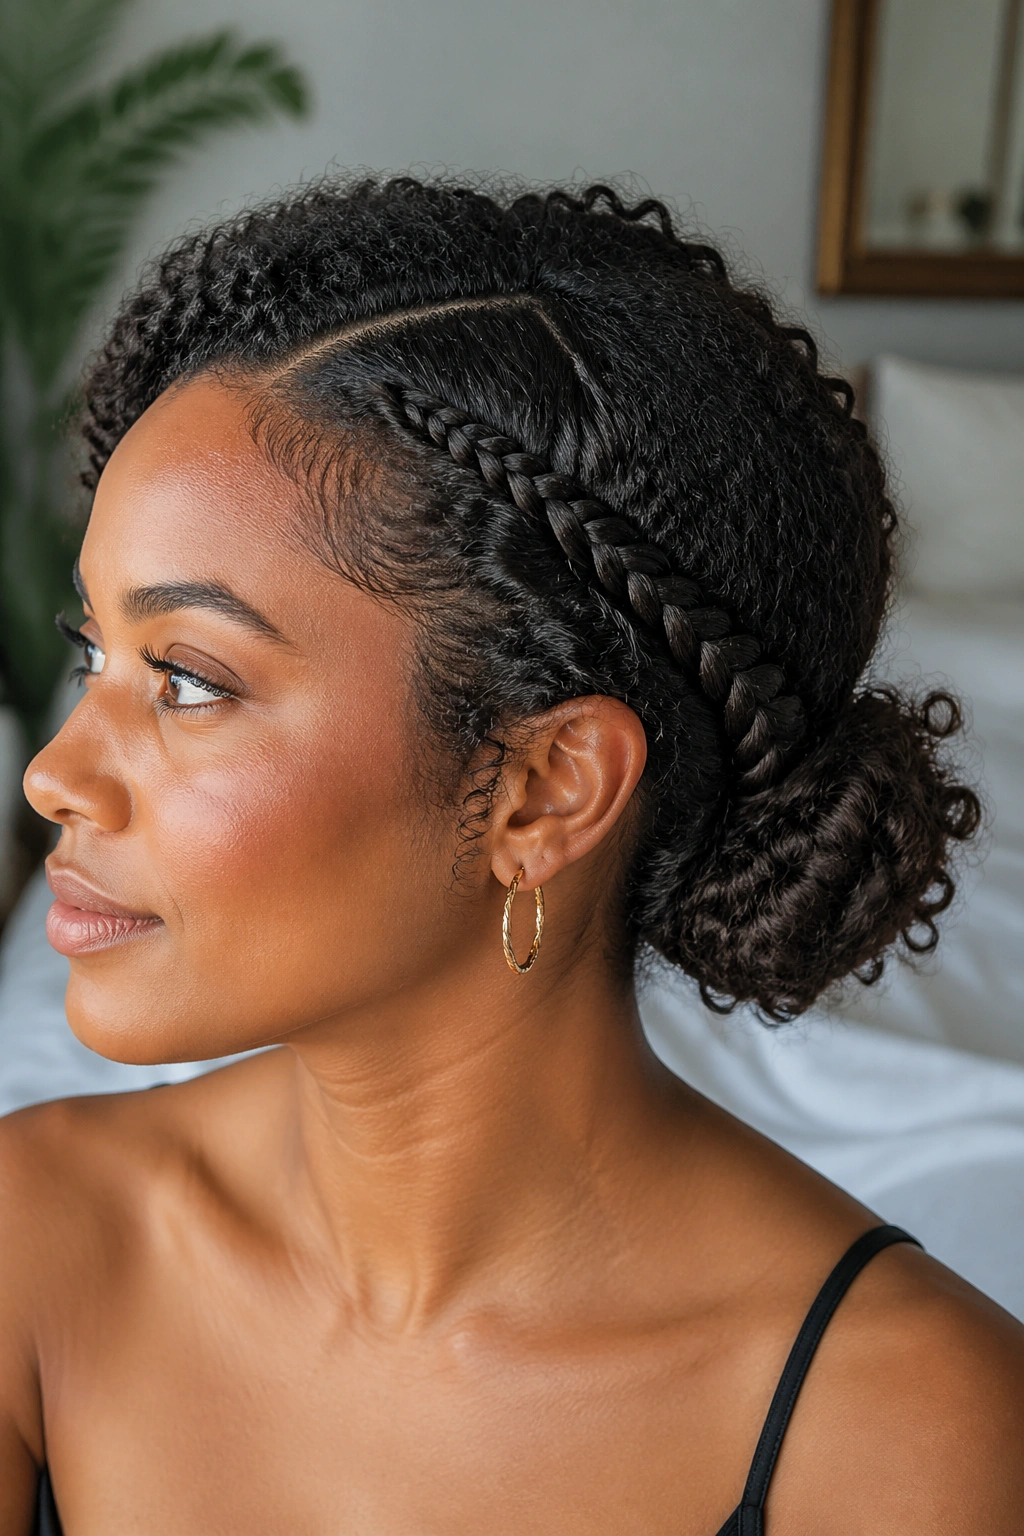
The braid starts at one side of the head and moves toward the back, where it gets wrapped into a bun at the nape or just off-center. On 3B and 3C hair, the bun can be sleek, fluffy, or a little tucked under depending on how much you stretch the length first. I prefer a bun that still shows texture. Pinning every strand flat tends to fight the hair.
This style is one of the better choices if you need your curls off your neck but don’t want the hard feel of a fully slicked style. It also plays well with second-day hair because the braid helps organize roots that may already have a little volume. Use a few bobby pins in an X pattern if the bun feels loose; that usually holds better than trying to jam one giant pin into a dense knot.
A side braid into a bun can look fussy on the wrong hairline. On 3B and 3C curls, though, it tends to feel balanced and grounded.
8. Rope-Twist Side Lace Braid Combo
A plain lace braid is neat. A lace braid that changes into a rope twist halfway down? That has a little more texture, and I like that because it breaks up the predictability of the style without making it complicated.
The braid begins the usual way along the side of the hairline. Once you reach the point where the section gets narrower — usually around the ear or just behind it — switch to a two-strand rope twist. The rope twist uses less tension than a continued braid, which can be easier if your fingers are getting tired or the hair is slippery. It also gives a different pattern, so the style doesn’t read flat.
What Makes It Work
- The braid anchors the front and keeps the part neat.
- The twist adds a softer, rope-like finish at the end.
- The contrast works especially well on textured curls because the hair already has body.
- It’s a smart fix for shorter layers that don’t want to stay braided all the way through.
I’d choose this one when I want a style that looks handmade in a good way. Not messy. Just less rigid.
9. Boho Side Lace Braid for 3B and 3C Curls
Why do the loose pieces matter so much here? Because this braid looks better when it leaves room for curls to breathe. A fully polished side lace braid can be sharp and clean, but the boho version needs a little softness around the face and along the ends.
The braid itself is relaxed, not tight. You leave out a few face-framing curls, usually one to two small pieces on each side, and maybe a few more near the ends if the hair is long enough. Those pieces should be defined, not frizzy, so a little curl cream or a light finger coil helps. I would not overload the hair with product. That turns the loose pieces limp, and the style loses its shape fast.
How to Style It
- Pull out the front curls before the braid is secured, not after.
- Braid with a light hand so the texture stays visible.
- Refresh the loose pieces with water and a drop of leave-in if they start looking dry.
- Use a small elastic that matches the hair color so the end doesn’t steal attention.
This is one of the easiest ways to make a side lace braid feel softer on 3B and 3C hair. It’s also good for people who hate the look of a style that tries too hard to be smooth.
10. Side Lace Braid Mohawk for Stretched Curls
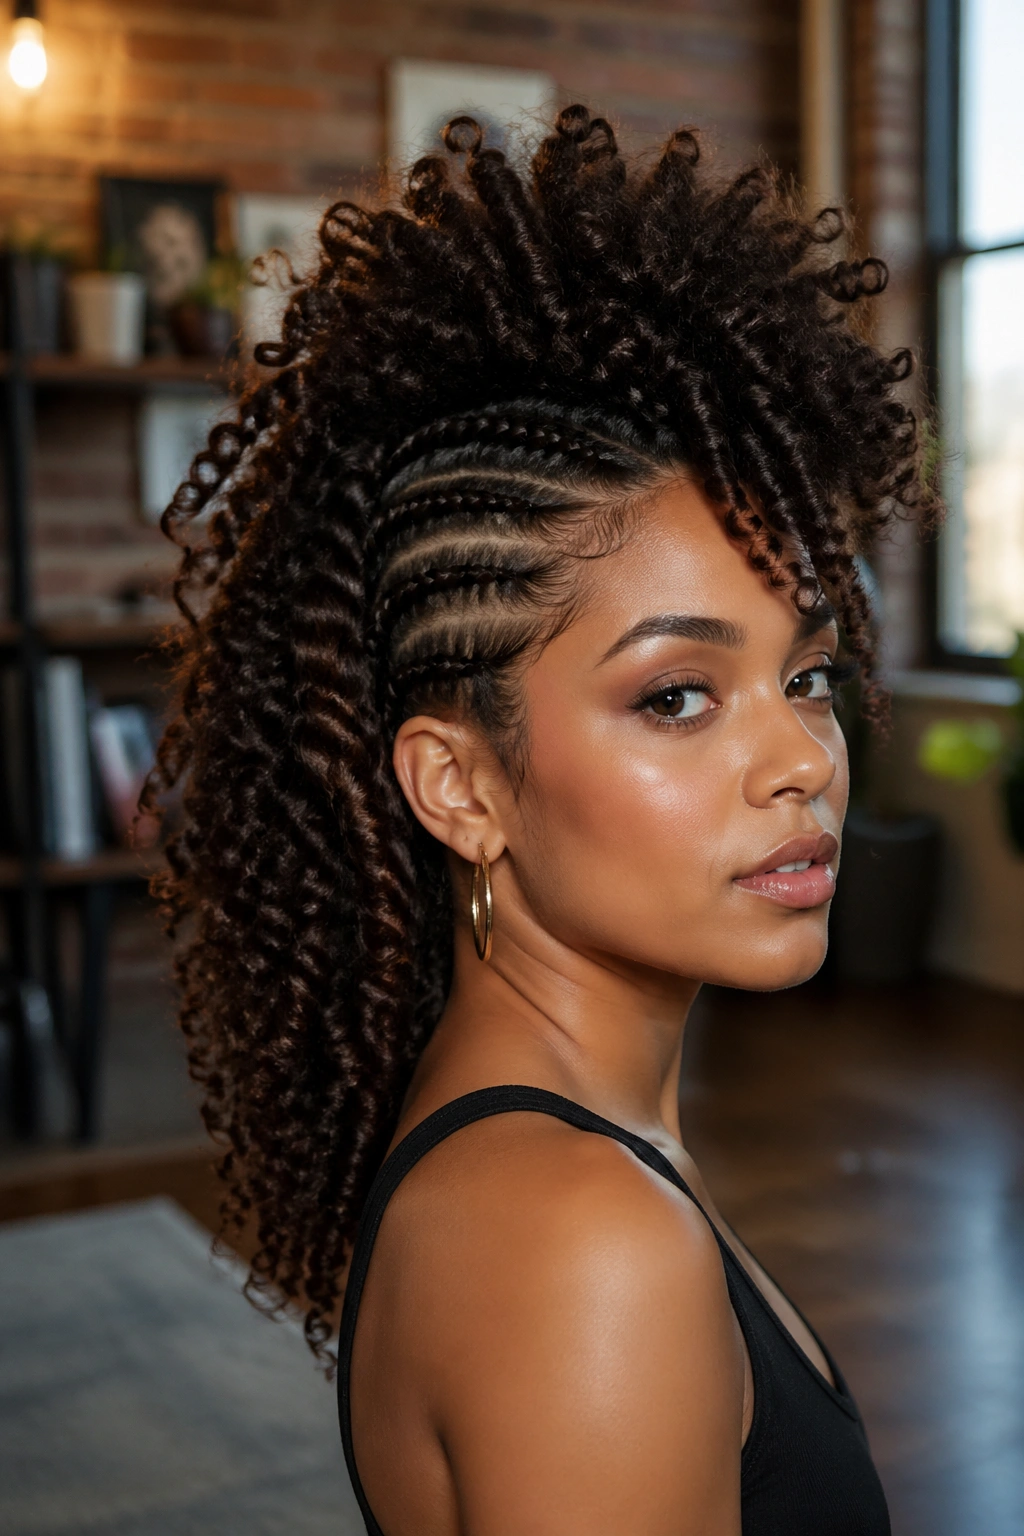
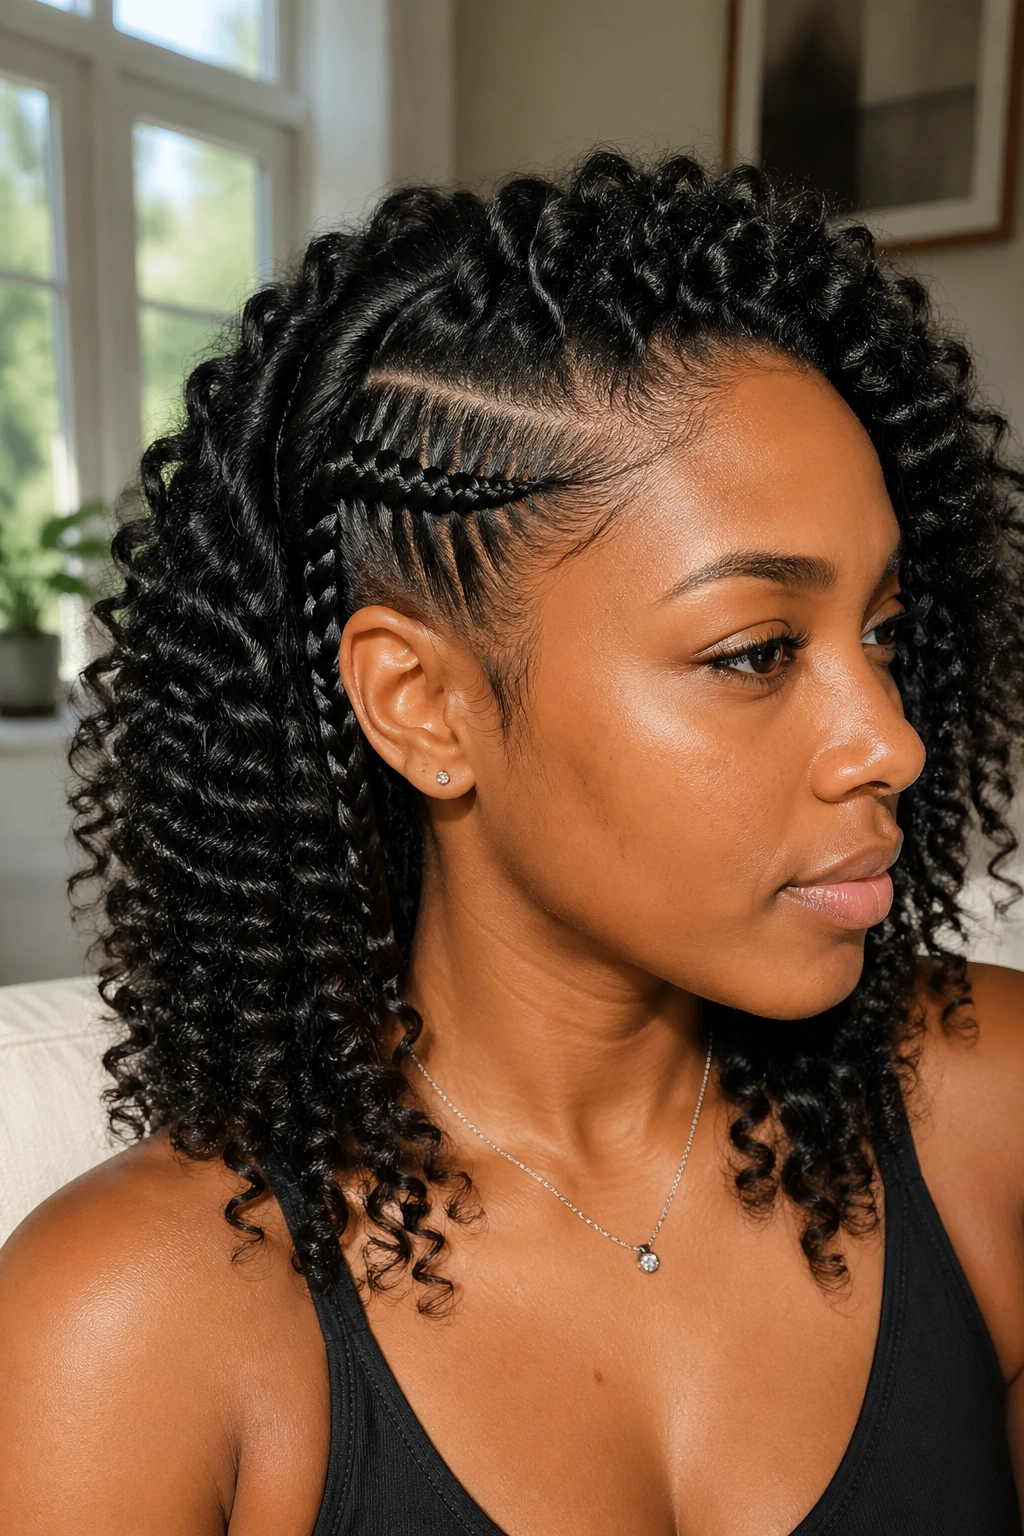
A side lace braid mohawk is for the days when you want some height. Not a little height. Real lift. The braid sits along one side of the head and pushes the eye toward the center ridge of curls, which makes the whole style feel bigger and more sculpted.
The best version starts with hair that’s been stretched a bit, either with a blow-dryer on low heat or a twist-out that’s fully dry. If the roots are too shrunken, the mohawk shape gets crowded and loses its line. The braid should be snug enough to hold the side down, but it should not dig into the scalp. That’s a mistake people make a lot with this style.
Where the Height Comes From
The volume comes from contrast. A flat braided side makes the middle section look taller by comparison. If you fluff the center curls with your fingers after they’re dry, the whole mohawk reads fuller without needing teasing or heavy product.
This one is dramatic in a good way. It feels bold without being fussy, and that’s rare. Keep the roots clean, keep the braid narrow, and let the middle do the work.
11. Side Lace Braid with Beads and Hair Cuffs

Accessories can save a simple braid from looking plain, but only if you use them with some restraint. A few cuffs or beads on a side lace braid add weight and movement. Too many, and the braid starts to look crowded.
I like this on 3B and 3C curls because the texture holds the accessories well. Wooden beads, small gold cuffs, or matte metal rings work nicely. Heavy charms are a bad idea unless the braid is thick enough to support them, because they pull on the side and can flatten the curl pattern near the roots.
There’s a sweet spot here. One cuff near the temple, one or two near the end, and maybe a few small beads if the braid is long. That’s usually enough. If your hair is fine around the edges, skip the heavier pieces near the hairline and place them lower down where the braid is thicker.
A style like this feels personal fast. It can look playful, a little dressy, or low-key depending on the hardware you choose. And yes, the hardware matters.
12. Half-Up Side Lace Braid with a Claw Clip
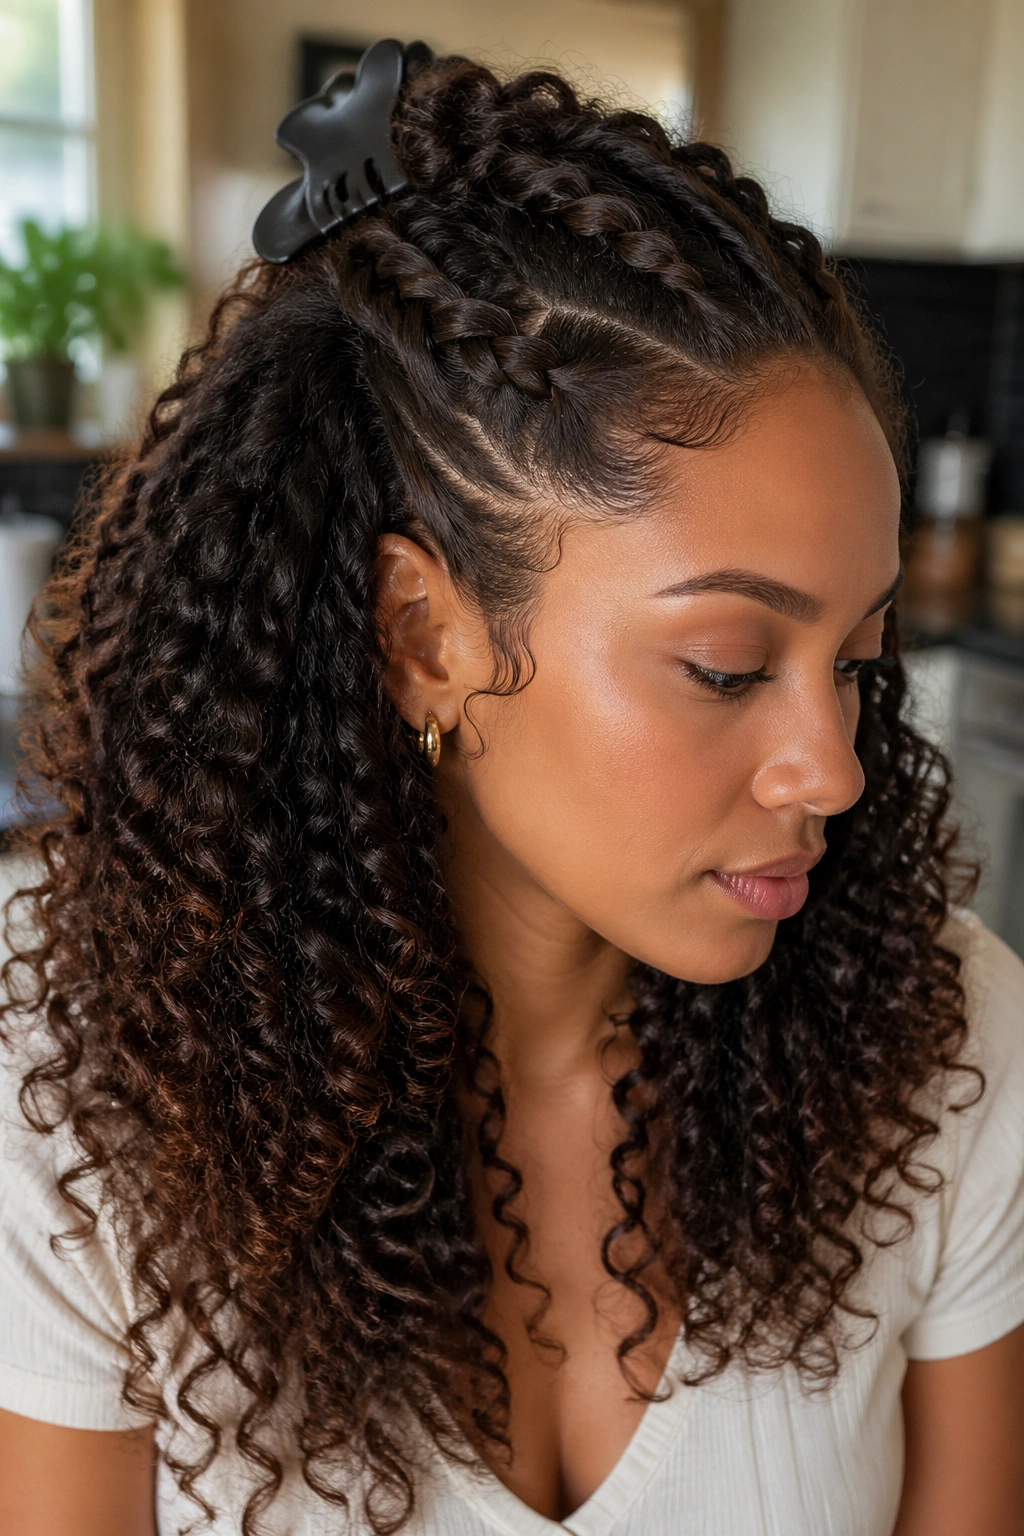
This is the one for people who want their curls out of their face but do not want to spend twenty minutes building a style. The braid starts on one side, moves toward the crown, and feeds into a half-up section that gets clipped at the back with a claw clip. Easy. Useful. Still looks finished.
The trick is to choose a clip that grips the hair without crushing it. A matte claw with strong teeth usually works better than a glossy one that slips. For 3B and 3C curls, I like clipping the braid and the top half together so the weight is spread out. If the clip only holds the braid, the rest of the hair can slide and loosen the style.
This is also a good day-two or day-three style because the braid helps hide any flattening at the roots. The loose curls underneath still get to do their thing, which means you keep volume where you want it. If the ends are dry, mist them lightly and scrunch. Don’t soak them. Wet curls under a clip get awkward fast and take forever to dry.
A half-up side lace braid with a claw clip is the kind of style that earns its keep. Nothing fancy. Just useful in the best possible way.
13. Minimal Side Lace Braid for Everyday Wear

Some days you do not want a full look. You want one braid, one clean part, and a style that lets the rest of your hair stay mostly itself. That is what the minimal side lace braid does so well.
It starts at the temple, takes in just enough hair to stay visible, and tucks behind the ear or ends in a tiny tie near the nape. On 3B and 3C curls, this works because the texture gives the braid presence even when the braid itself is small. You do not need a lot of hair to make an impression here. You need a clean part and a hand that doesn’t fight the curl pattern.
I like this version when I’m short on time or when the hair has enough volume to do the rest of the work. A little leave-in at the front, a smooth part, and a quick braid are enough. If a few curls around the face spring free, leave them alone. That small mess can make the whole thing look softer.
The best side lace braid is the one you’ll actually wear again. For 3B and 3C hair, that usually means a style with enough hold to last the day, enough softness to suit the curls, and enough flexibility that you can redo it without groaning at the mirror.