Locs are a commitment that tells a story over years, not just weeks. There is a specific kind of weight to a mature set of locs—a literal and metaphorical gravity that changes how you carry yourself. But even the most dedicated person in the loc community hits a wall sometimes. You look in the mirror and want something that feels fresh, something that pulls the hair away from your face or tames that fuzzy new growth between retwists. Front braids are the answer to that restlessness. They offer a way to architecture your hair, creating structure where there’s usually just free-flowing volume.
The beauty of braiding the front of your locs lies in the contrast. You get the crisp, clean lines of a well-executed braid sitting right against the textured, organic soul of your locs. It is a styling choice that works just as well for a formal event as it does for a humid Tuesday when you just need your hair out of your eyes. I’ve seen women transform their entire vibe just by sectioning off the front three inches of their scalp and getting creative. It isn’t just about aesthetics, though. It’s a functional move.
However, we have to talk about the elephant in the room: tension. Locs are already heavier than loose natural hair. When you start braiding them, especially at the hairline, you are adding mechanical stress to your follicles. Doing this right means understanding the limits of your scalp. It means knowing when a braid is “secure” versus when it’s “damaging.” We’re looking for styles that celebrate the hair without sacrificing the integrity of the roots. Whether you have micro-locs or thick, traditional ones, there is a way to weave the front into something spectacular.
Let’s look at how we can manipulate these beautiful ropes of hair into shapes that frame your face and highlight your features. We’re going to look at 27 specific ways to approach front braids, ranging from simple two-minute fixes to more intricate designs that might require a bit of patience and a steady hand.
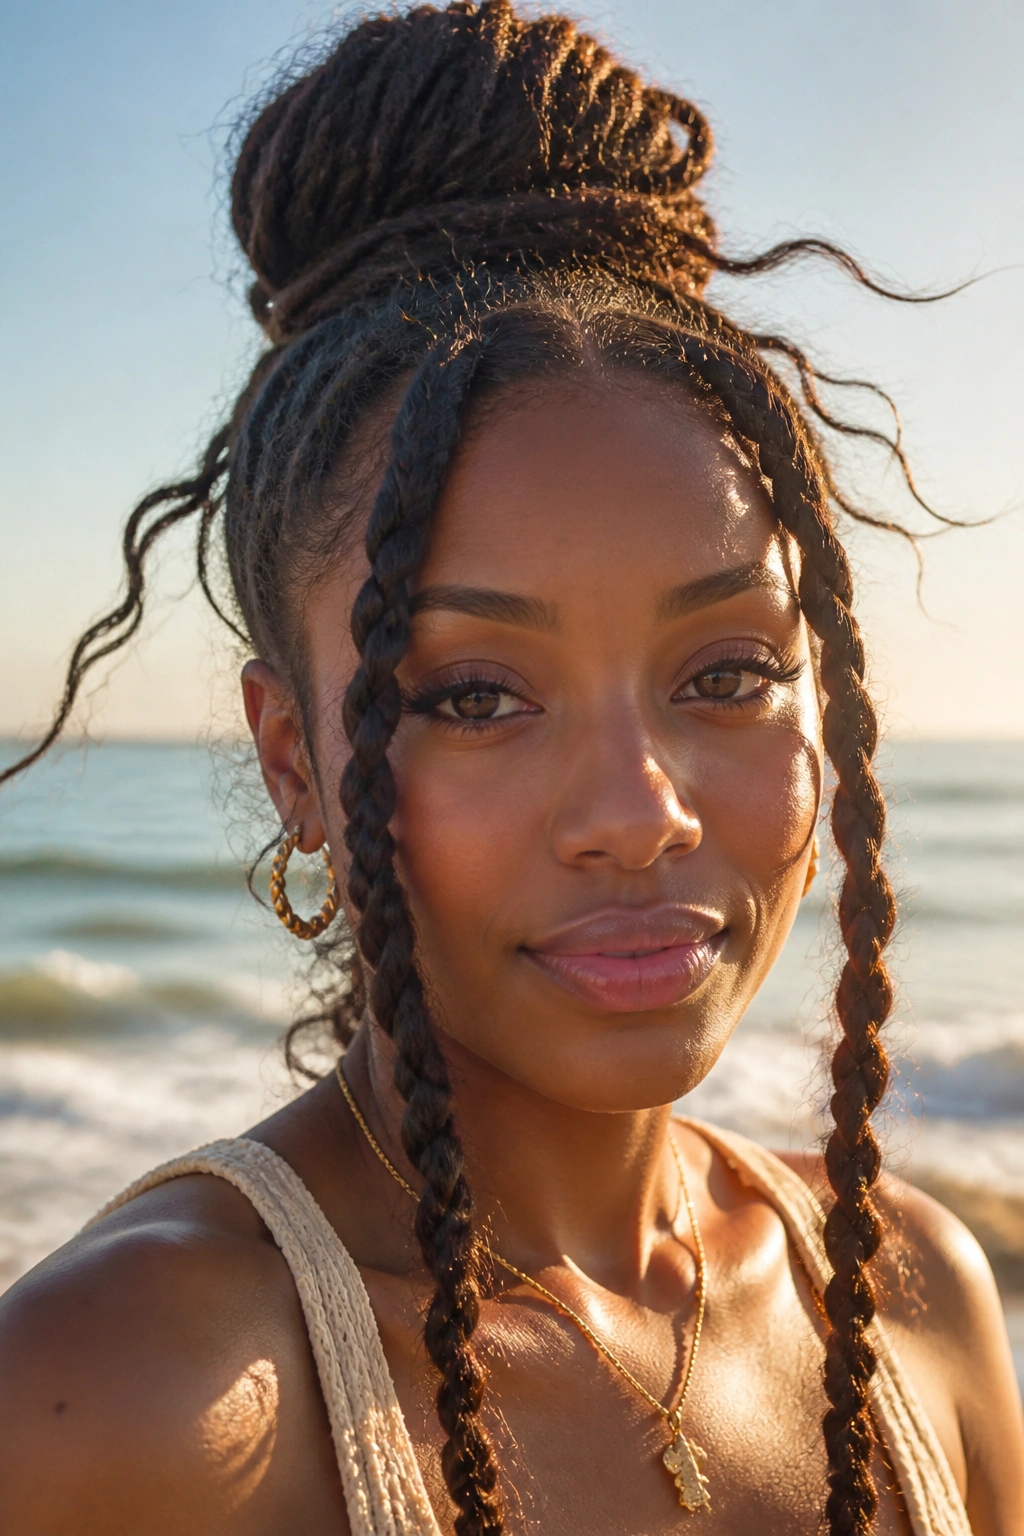
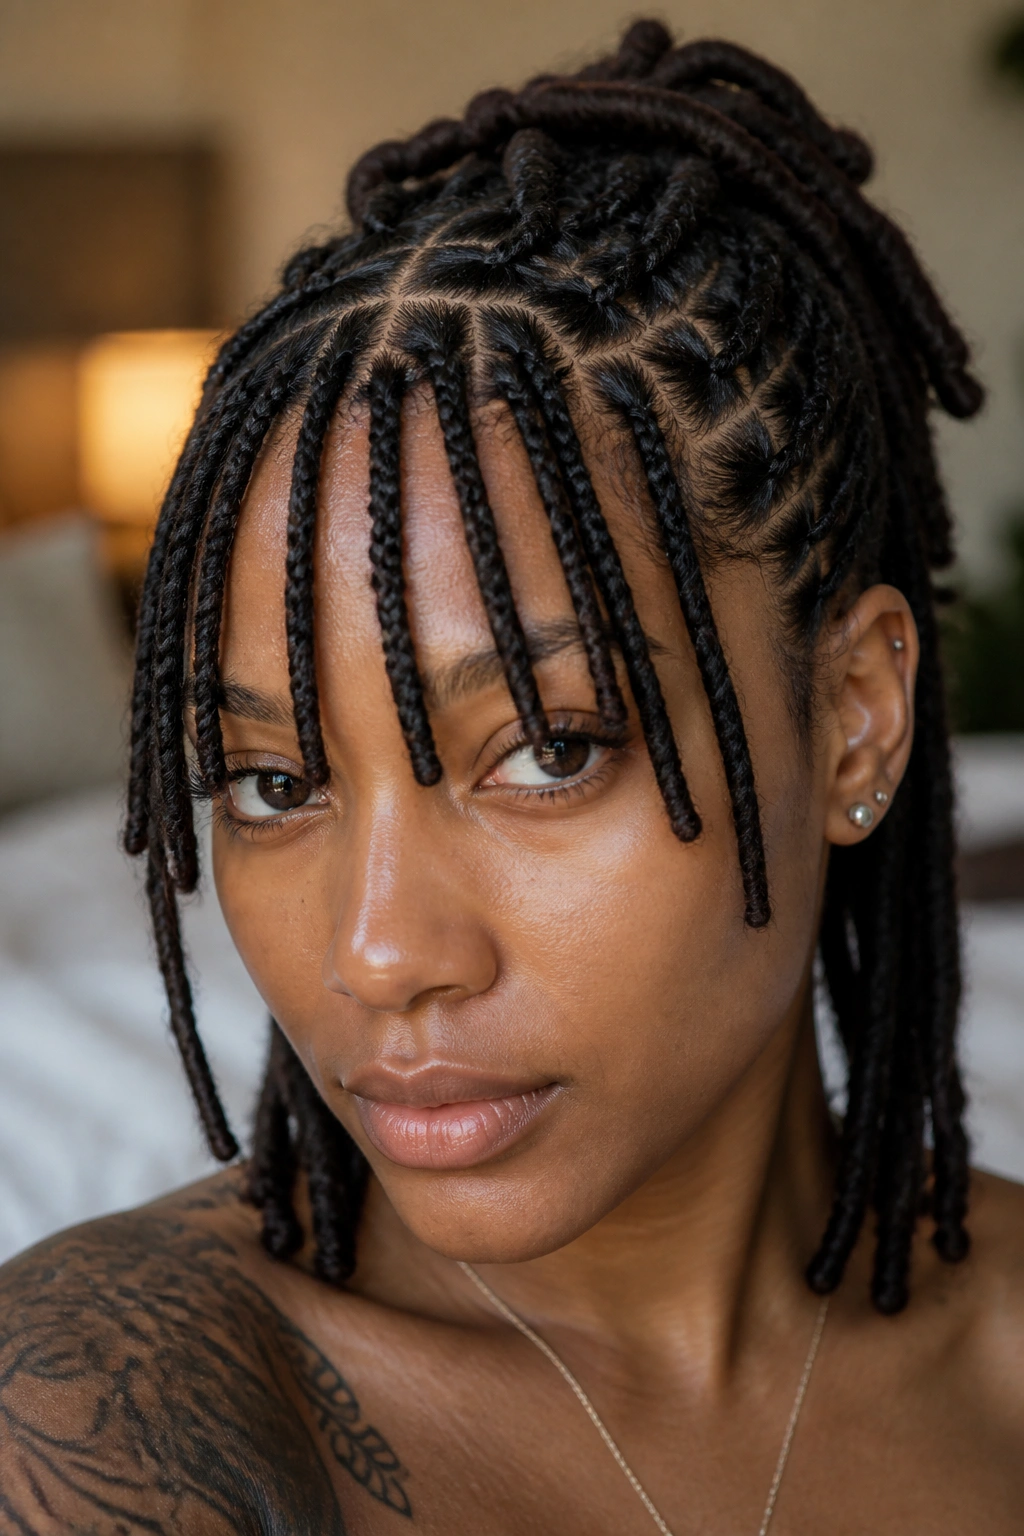
1. Individual Braided Bangs
There is a common misconception that once you have locs, the “bang” look is off the table unless you’re willing to cut your hair. That is simply not true. By taking the front-most locs and braiding them together in small groups, you can create a structured fringe that hangs over the forehead. This provides a heavy, intentional look that frames the eyes beautifully.
Why This Style Works for Maturing Locs
When your locs are in that awkward middle stage where they aren’t quite long enough to tie back comfortably, individual braided bangs give the hair “direction.” Instead of the locs sticking out at odd angles, the braid gives them weight and causes them to lay flat against the forehead.
Key Details for Success
- Group locs in twos or threes depending on their thickness.
- Braid all the way to the tip to ensure the “fringe” stays uniform.
- Use small, snag-free elastics at the ends if your locs are still soft.
- Apply a light rosewater mist before braiding to make the hair more pliable.
Pro tip: If you want a more bohemian feel, leave the very last inch of the locs unbraided so the natural texture of the ends peeks through.
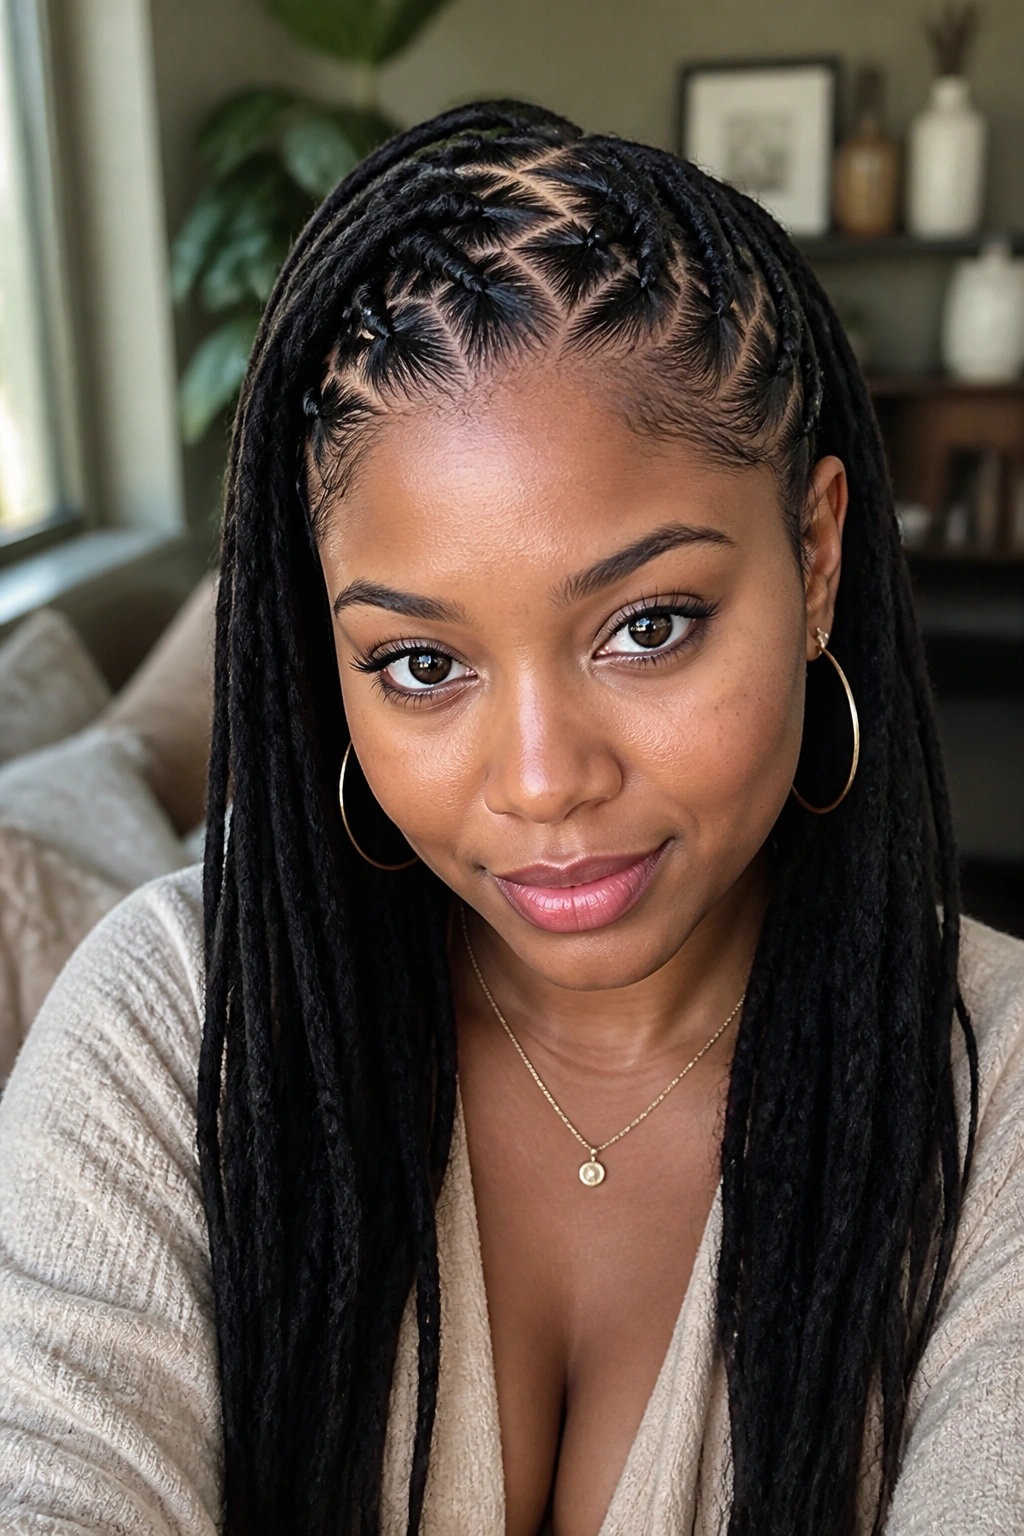
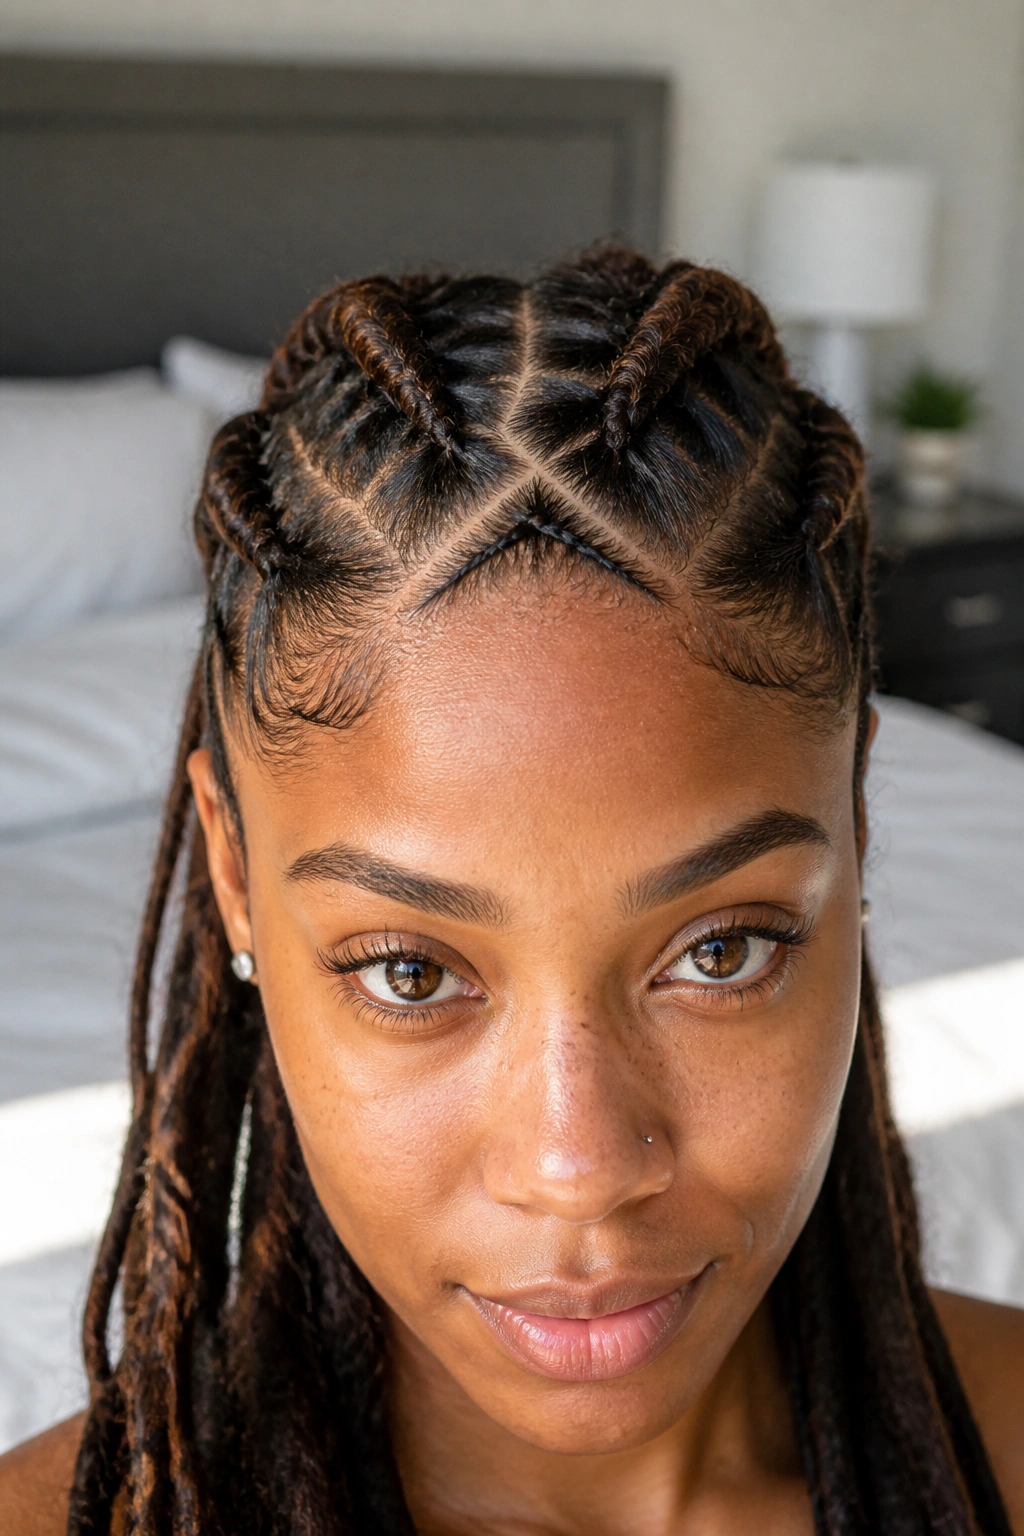
2. Criss-Cross Cornrows
If you want something that looks incredibly intricate but follows a logical pattern, criss-cross cornrows are the way to go. This involves parting the front section of your hair into a grid and braiding locs diagonally across each other. The result is a geometric masterpiece that keeps the hair completely flat and secure.
This style is a favorite for those who active lifestyles. If you’re hitting the gym or spending a lot of time outdoors, you don’t want locs flopping into your face. The criss-cross method locks everything down. It also hides new growth exceptionally well, making it a great “bridge” style when you’re a few weeks away from your next maintenance appointment.
Make sure you aren’t pulling too tight at the intersection points. Where the braids cross, there’s a tendency to crank up the tension to make the “X” shape pop. Resist that urge. Your edges will thank you later. Instead, focus on clean parting and consistent hand pressure.
3. Side-Swept Dutch Braids
Dutch braids are essentially inverted French braids. Instead of crossing the strands over each other, you cross them under. On locs, this creates a 3D effect where the braid sits on top of the hair like a crown. By sweeping this to one side, you create an asymmetrical silhouette that is incredibly flattering for round or heart-shaped faces.
How to Achieve the Look
- Part your hair deeply on one side, using your eyebrow arch as a guide.
- Start the Dutch braid at the heavy side of the part, incorporating 2-3 locs at a time.
- Follow the hairline closely, moving down toward the ear.
- Secure the braid behind the ear or let it merge with the rest of your loose locs.
Why You’ll Love It
- It adds instant height and volume to the top of the head.
- The “under” crossing technique makes the locs look thicker and more defined.
- It’s an easy way to transition from a day at work to an evening out.
4. The Halo Braid with Face-Framing Tendrils
The halo braid is the pinnacle of elegance. It involves one or two large braids that wrap around the front of the head like a literal halo. But to keep it from looking too “done” or stiff, leaving out two or three loose locs near the temples—tendrils—softens the entire look.
Why does this work? It’s about balance. The halo braid provides the structure, while the loose tendrils provide the movement. This is a go-to for weddings or formal gatherings. It feels regal. When you braid locs into a halo, the sheer mass of the hair creates a thick, substantial band that you just can’t get with loose hair. It’s a “power” style.
Make sure you use hairpins that match your hair color to tuck the ends of the braid under the start. You want the circle to look seamless, as if the braid has no beginning and no end. If your locs are very long, you can wrap them twice for an even more dramatic, stacked effect.
5. Front Waterfall Braid
The waterfall braid is often seen as a “loose hair” style, but it translates brilliantly to locs. The concept is simple: you start a horizontal braid across the front, but every time you cross a strand, you drop one loc down and pick up a new one from the top. This creates a “curtain” of locs that looks like it’s flowing out of the braid itself.
This style offers the best of both worlds. You get the security of a braid across your forehead or crown, but you still get to show off the length and texture of your locs. It’s less “tight” than a standard cornrow, which makes it a great choice for anyone with a sensitive scalp.
One thing to watch for is the weight distribution. As you “drop” locs, the braid can become thin if you aren’t picking up enough new hair. Try to keep the sections even. This style looks particularly stunning on ombre locs or hair with highlights, as the braid weaves the different colors together before letting them “fall” back into the main body of hair.
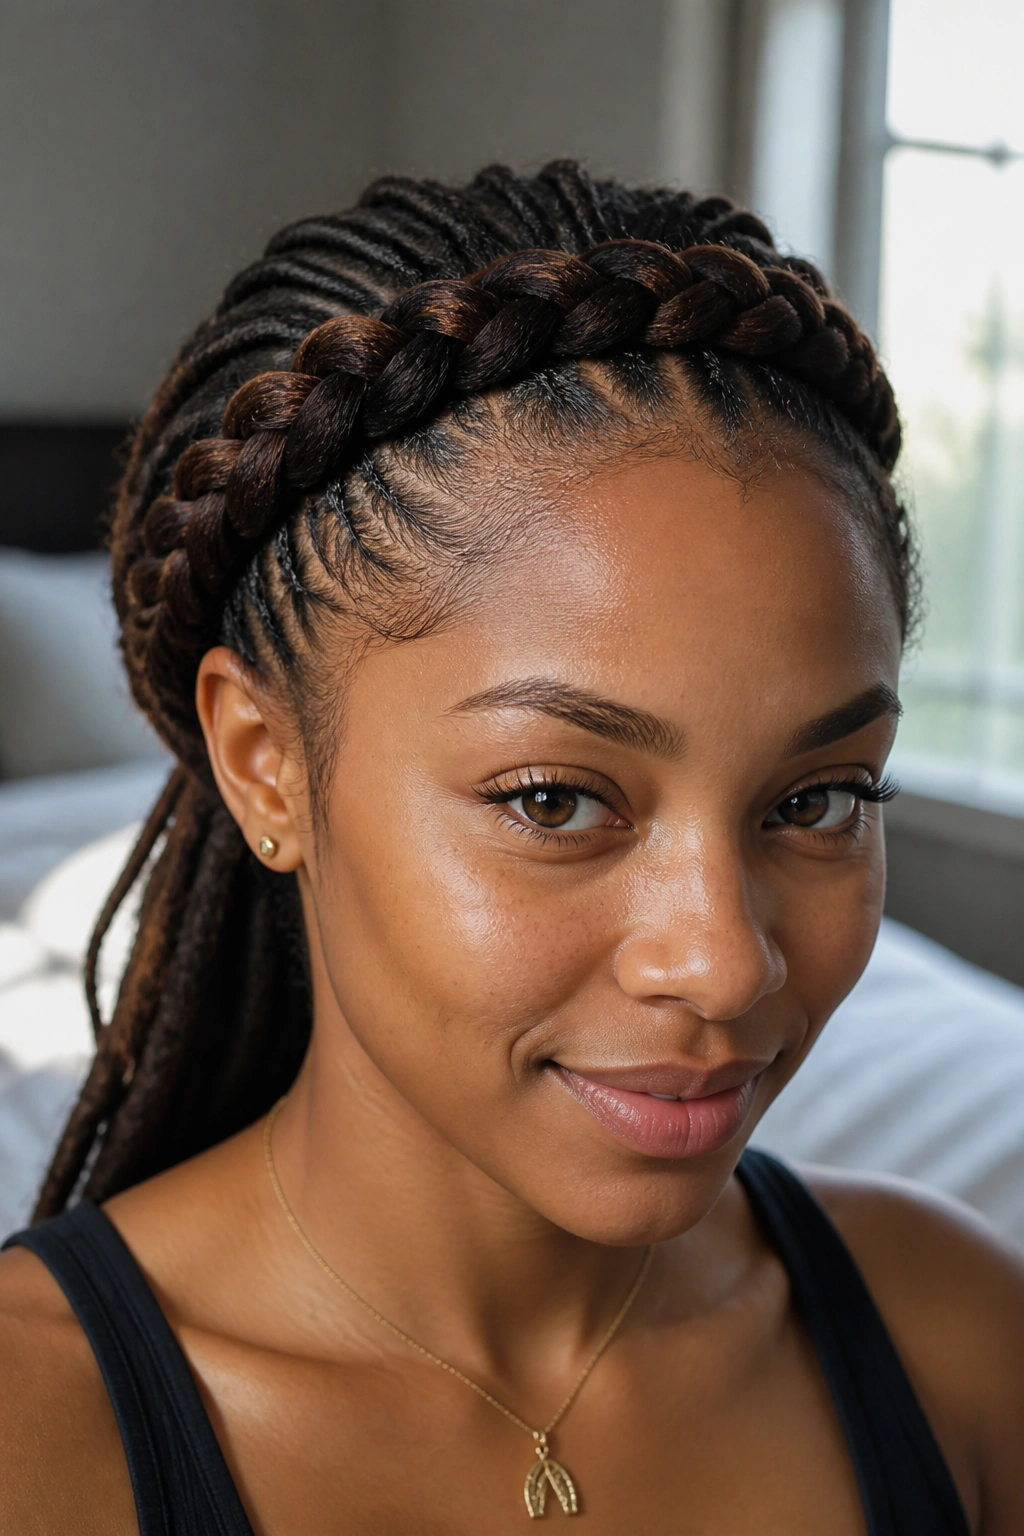
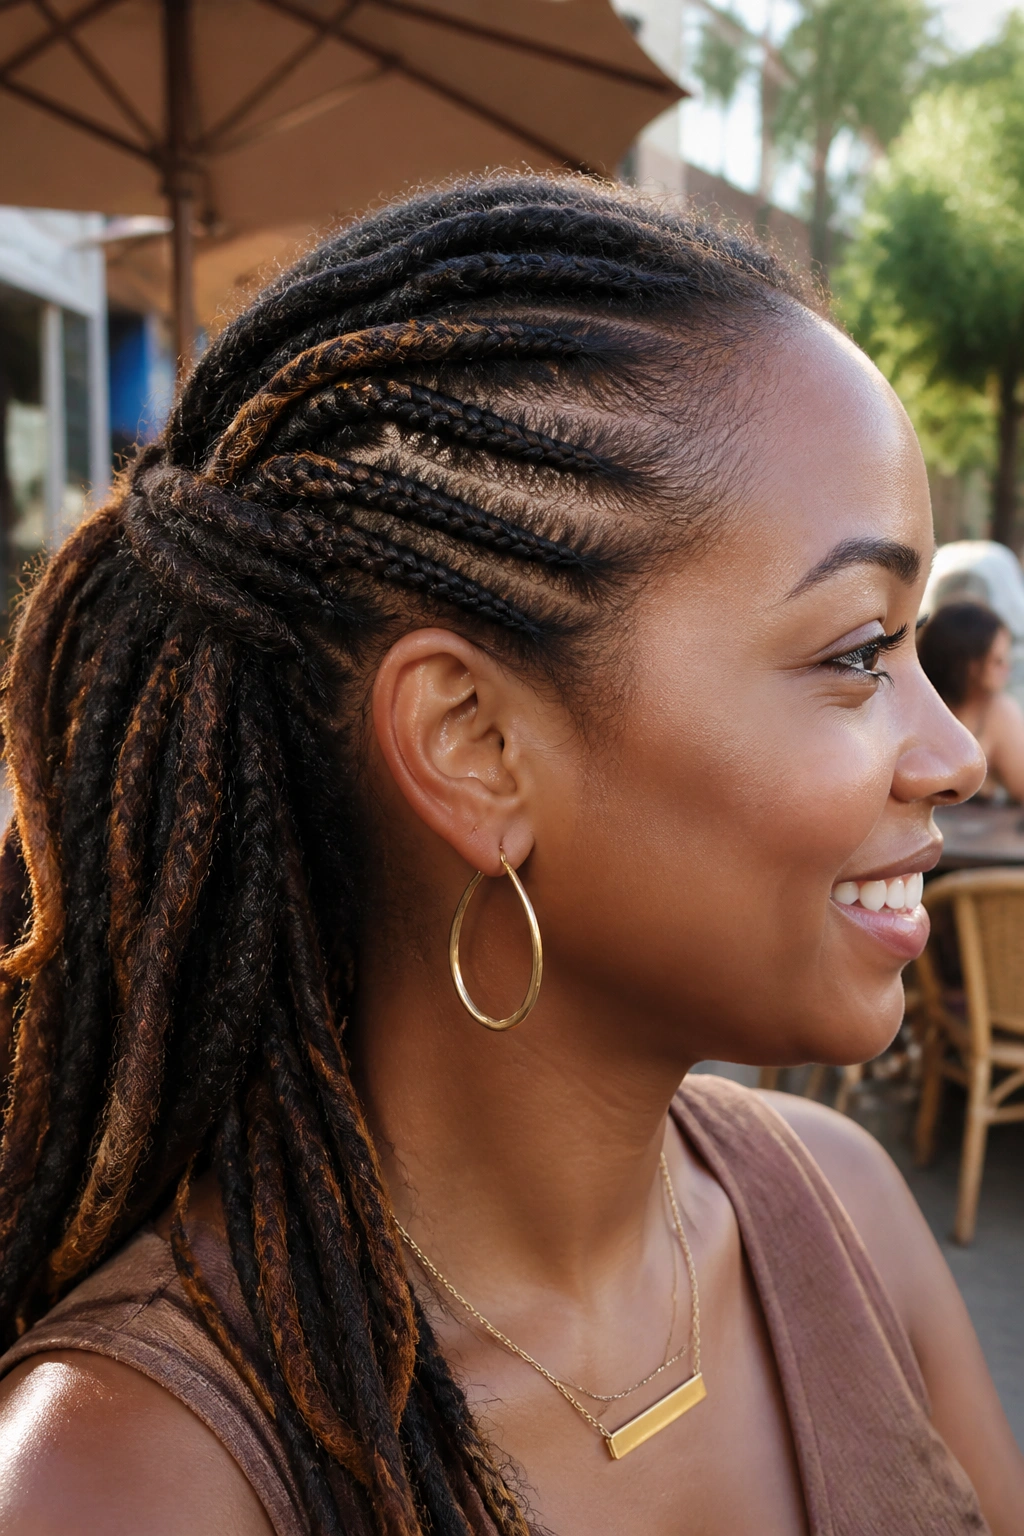
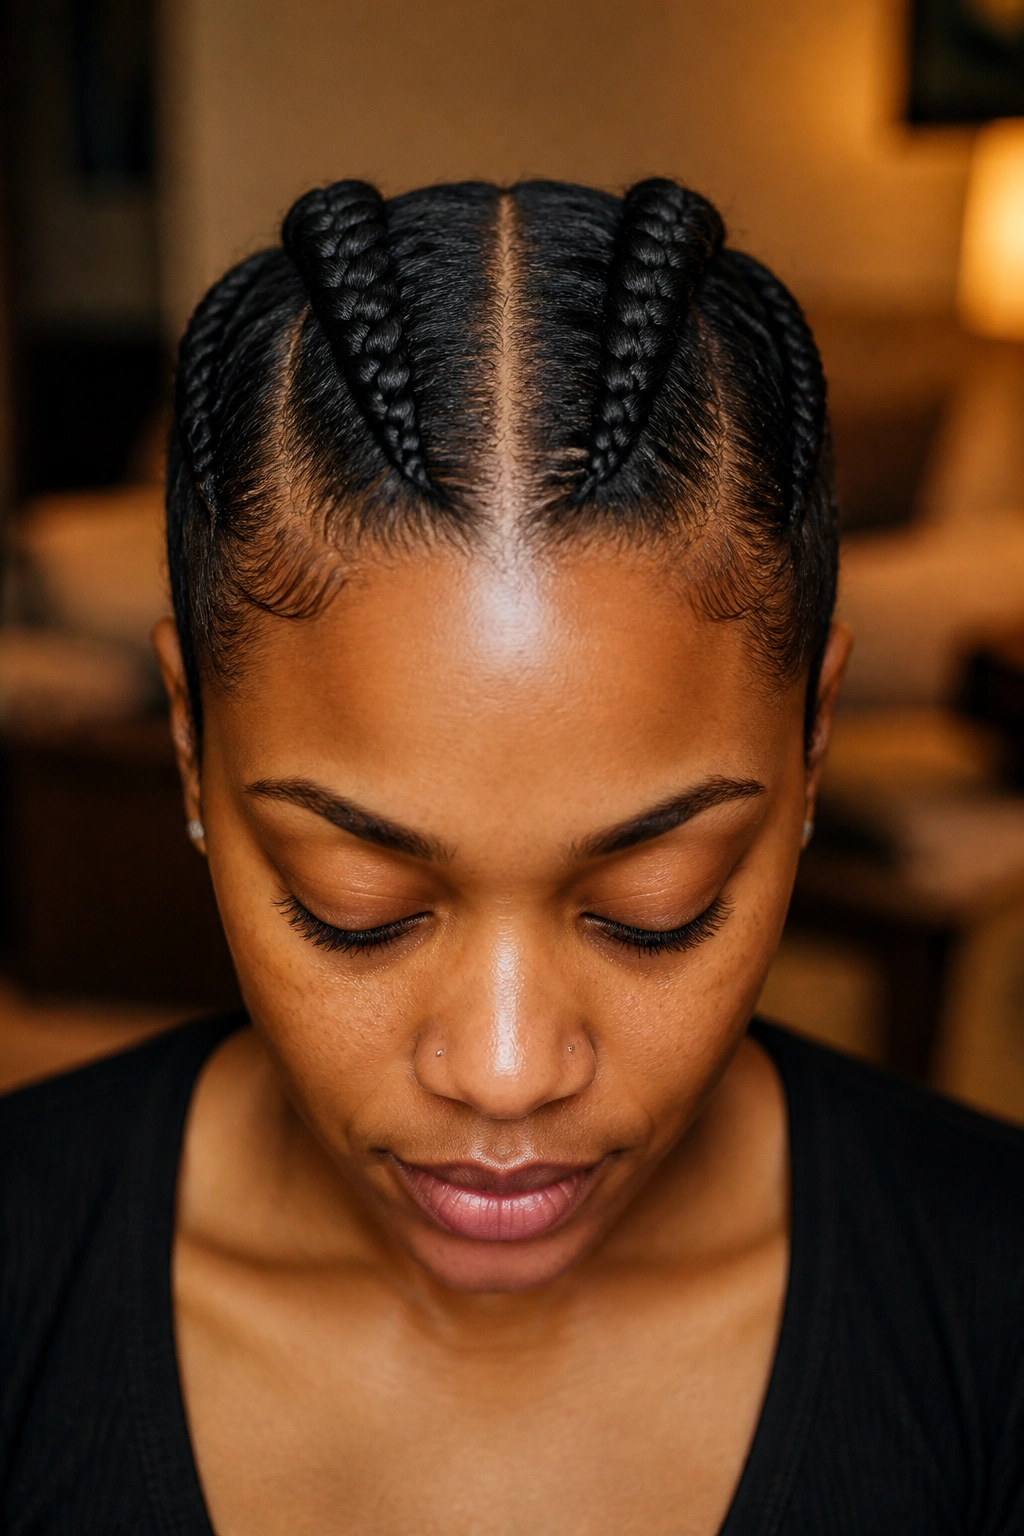
6. Symmetrical Dual Cornrows
Sometimes simplicity is the most striking option. Two thick cornrows starting at the hairline and going straight back to the crown is a classic for a reason. It is clean, symmetrical, and highlights your facial structure.
The Aesthetic Logic
Symmetry signals balance. By splitting the hair down the middle and braiding two identical rows, you draw attention to the center of your face. This is a high-visibility style. If you’ve just done your makeup or have a pair of statement earrings you want to show off, this is the hair to pair them with.
Practical Considerations
- Use a rattail comb to get that center part as straight as possible; on locs, the part is the star of the show.
- Don’t start the braid right at the very edge of your baby hairs. Leave a tiny bit of breathing room to prevent tension.
- If your locs are heavy, you can transition these two braids into a bun at the back to distribute the weight.
7. Zig-Zag Parted Braids
If you’re bored with straight lines, zig-zag parting adds an immediate sense of energy to the hair. Instead of a straight line between your braids, you create a “lightning bolt” path. This works incredibly well with front-facing cornrows or flat twists.
What Makes This Different
The zig-zag part breaks up the scalp’s visual field. It makes the style look more complex than it actually is. On locs, which already have a lot of visual texture, the sharp angles of the part create a really cool, architectural contrast.
Who It’s Best For
- People with smaller to medium-sized locs (easier to get clean angles).
- Those who want a style that lasts for a full week without looking “messy.”
- Anyone looking to add a bit of an “edge” to their look.
Pro tip: Use a light-hold edge control or natural pomade along the zig-zag part to make the lines really “pop.”
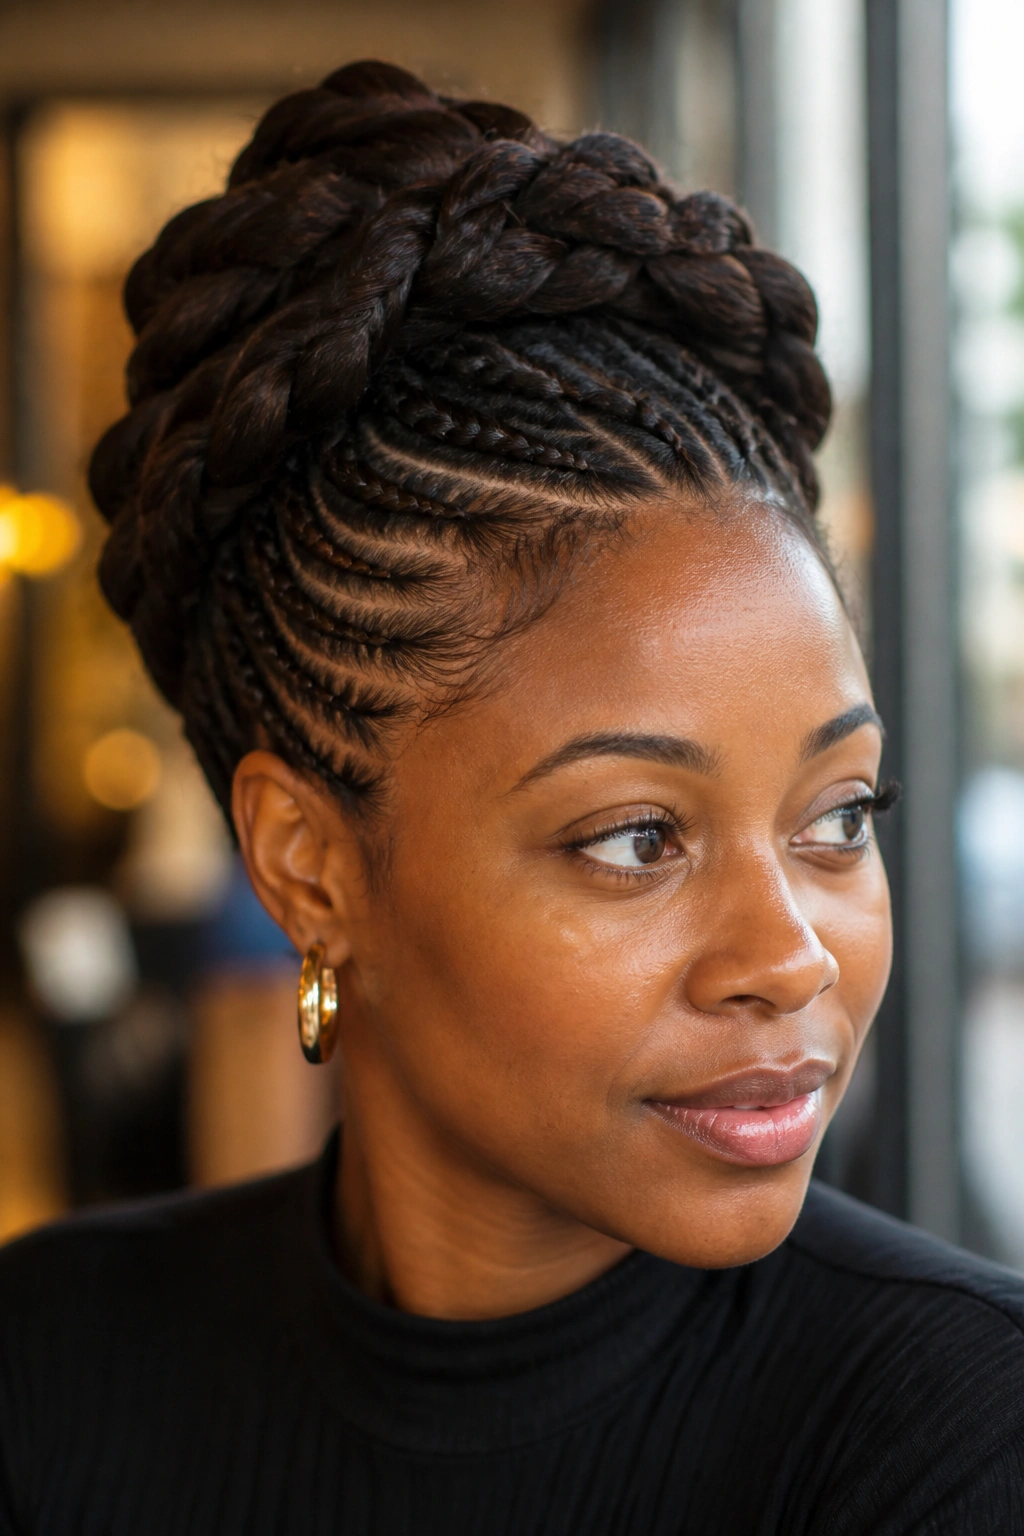
8. Goddess Braid Frontal
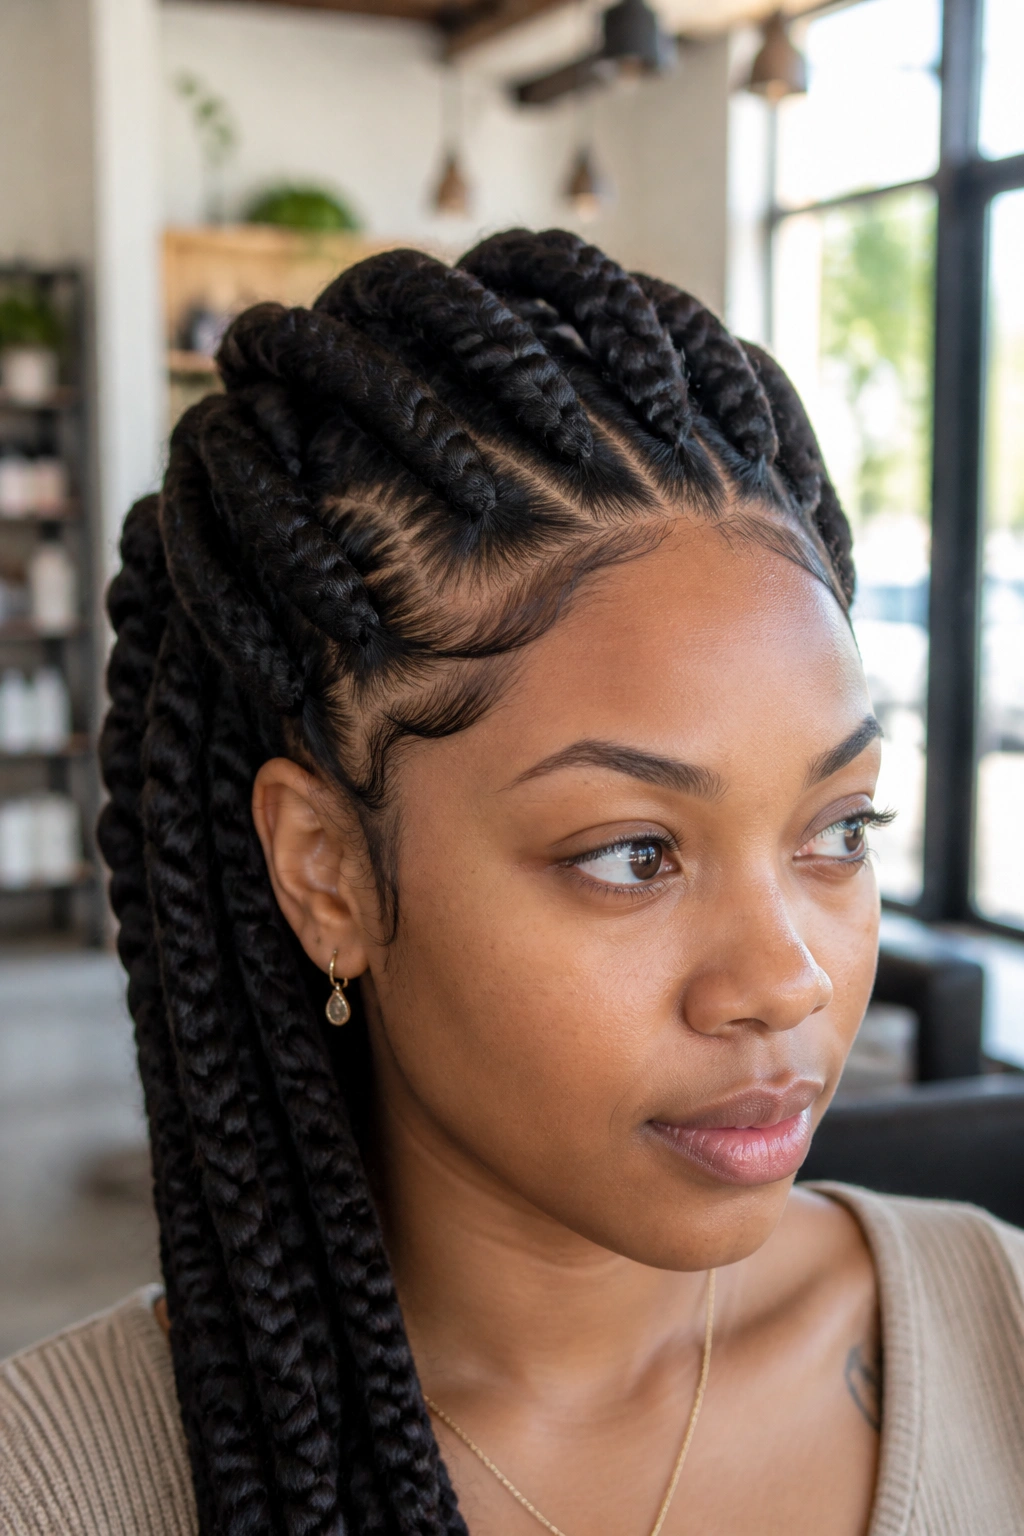
Goddess braids are essentially oversized cornrows. On locs, this means taking large sections—sometimes 5 to 10 locs per strand—and creating thick, chunky braids that sit high on the head. Because the braids are so large, you usually only need two to four of them to cover the front section.
This style is all about volume. It feels luxurious and heavy in the best way. Because the sections are so large, the tension is distributed over a wider area of the scalp, making it one of the more comfortable braided styles you can wear.
The trick here is to ensure the locs inside the braid aren’t tangled or crossing over each other in a way that creates lumps. You want the surface of the goddess braid to look as smooth as possible. If your locs are different lengths, you might need to use a bit of hair thread to secure any ends that try to pop out of the thick braid.
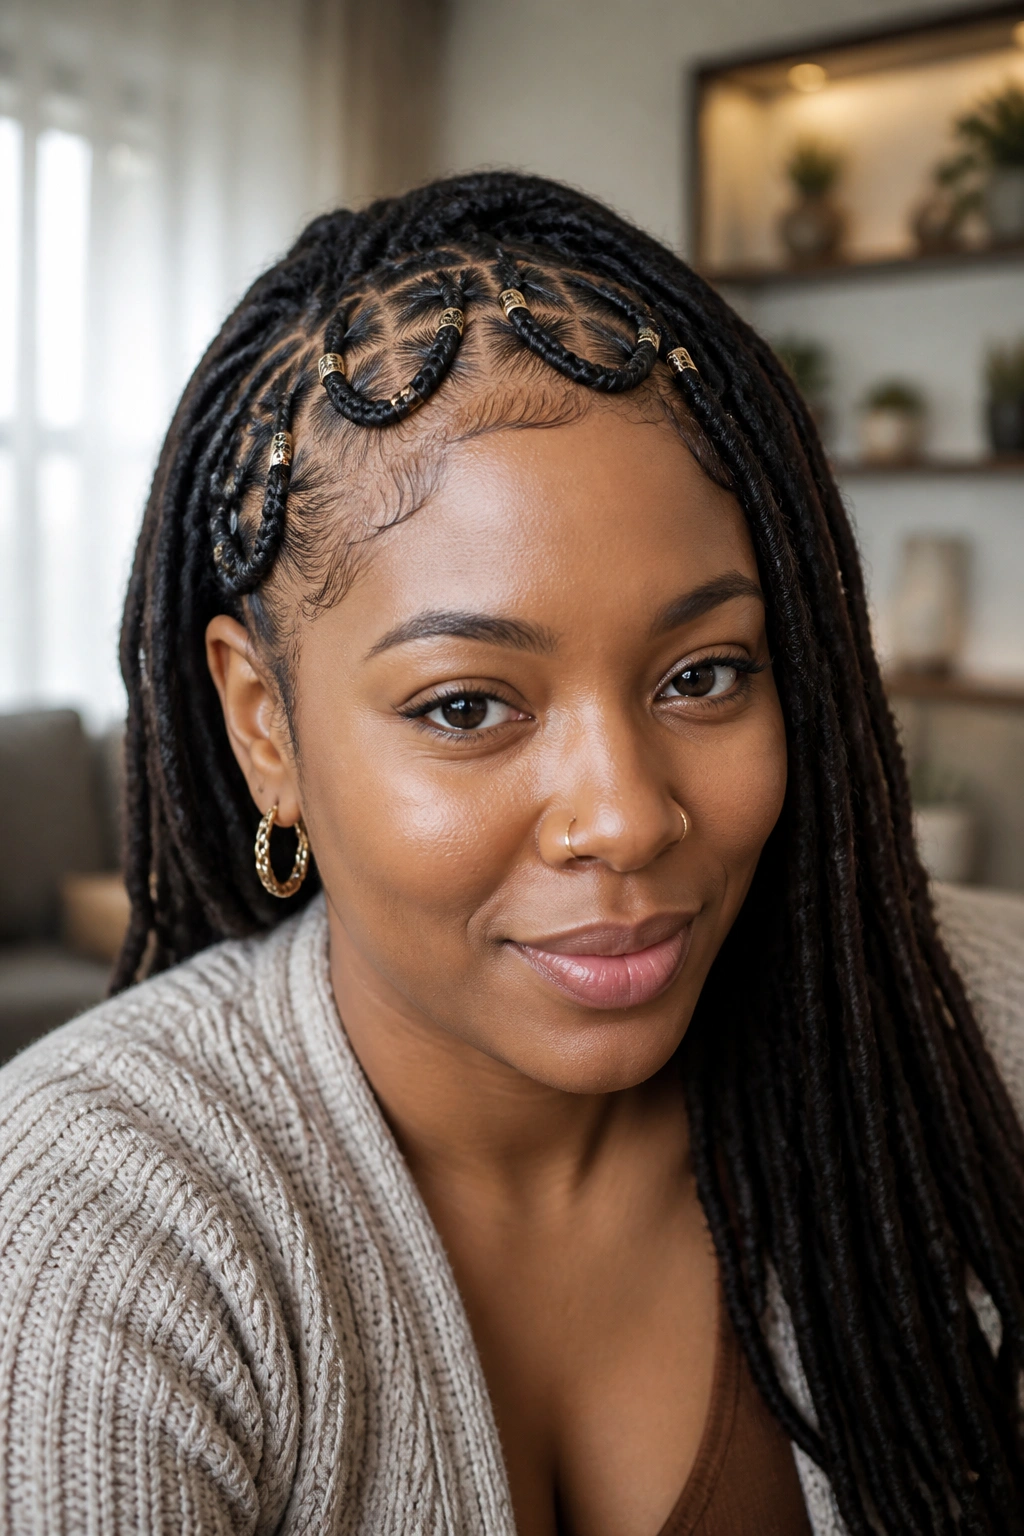
9. Three-Strand Plait Bangs with Beads
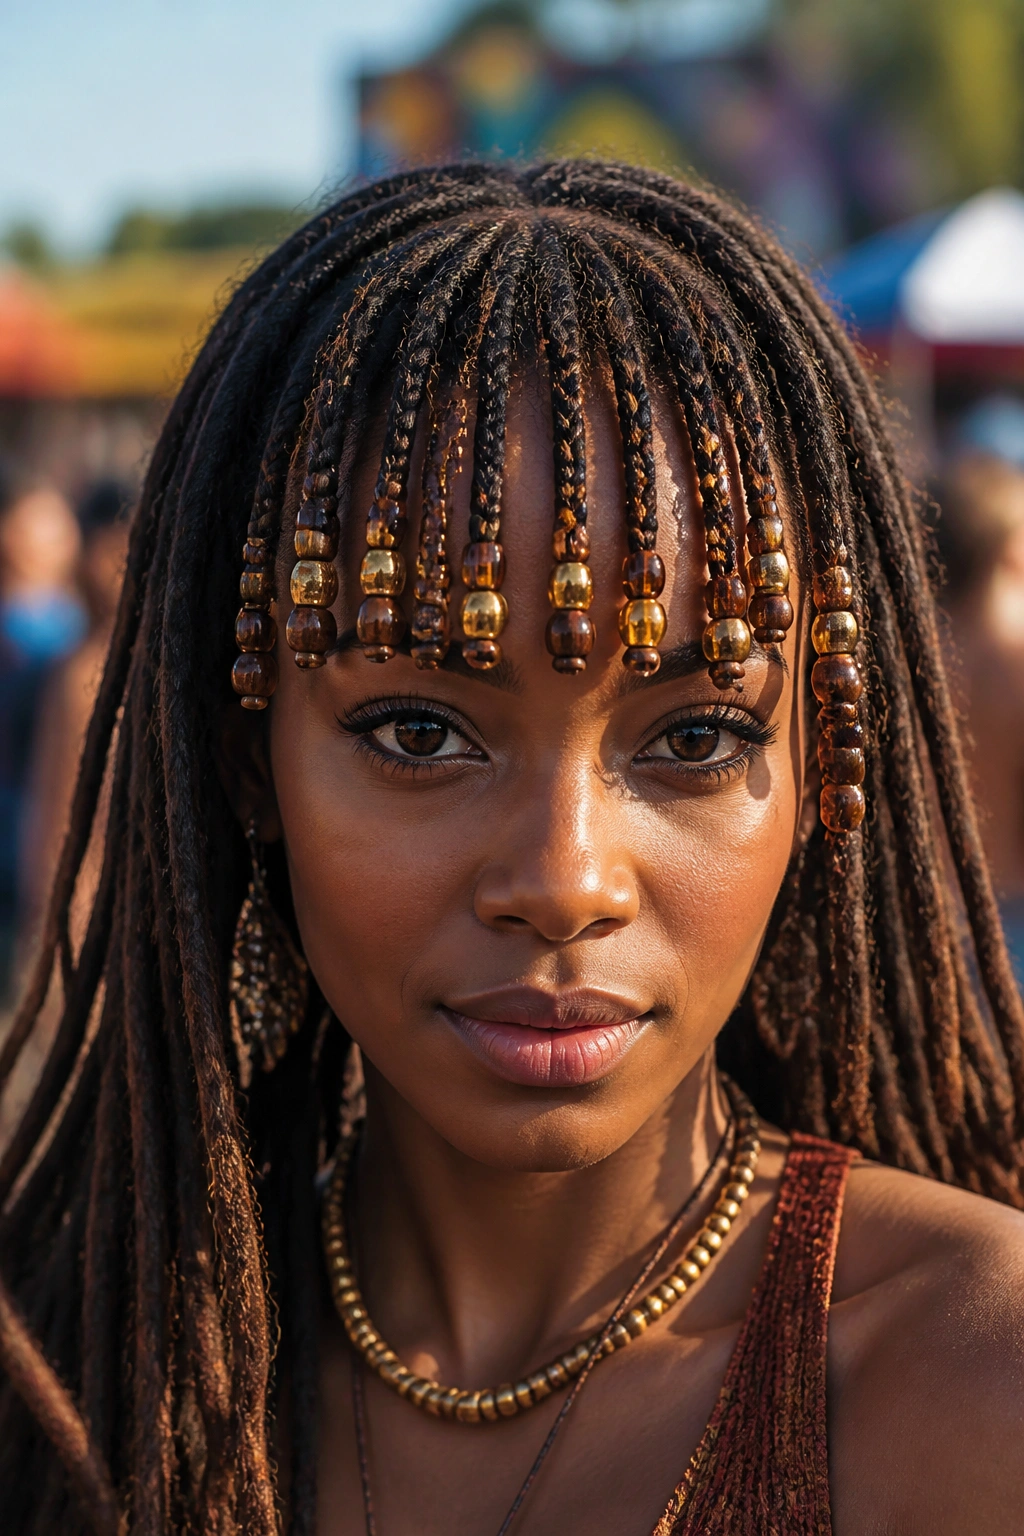
This is a nostalgic look that has been reclaimed by the loc community with a vengeance. You take the front locs, braid them into simple three-strand plaits, and then load the ends with wooden, glass, or gold beads.
The beads aren’t just for decoration; they provide functional weight. That weight helps the braids hang straight down, giving you a very intentional “fringe” look. The sound of the beads clinking together as you move is also a satisfying part of the experience.
When choosing beads, consider the diameter of your locs. You don’t want to force a bead onto a loc and risk thinning it out. Look for beads with large holes or use a beading tool to gently slide them on. This is a fantastic festival style or something to wear when you’re feeling particularly connected to your roots.
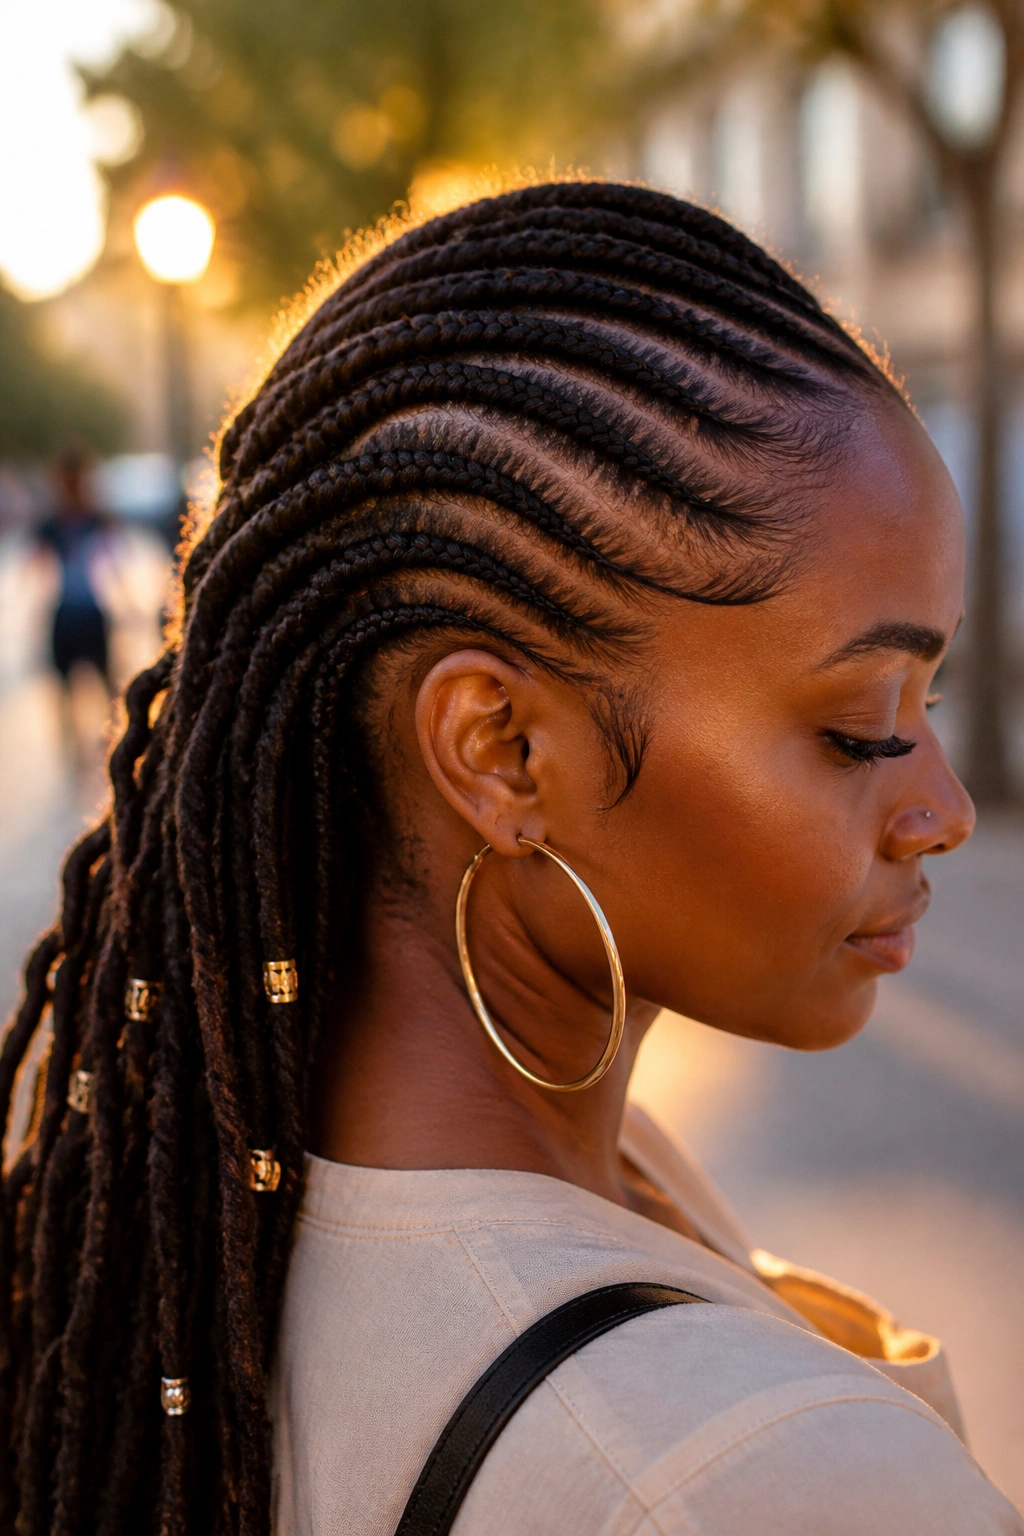
10. Flat Twists (The Front Row)
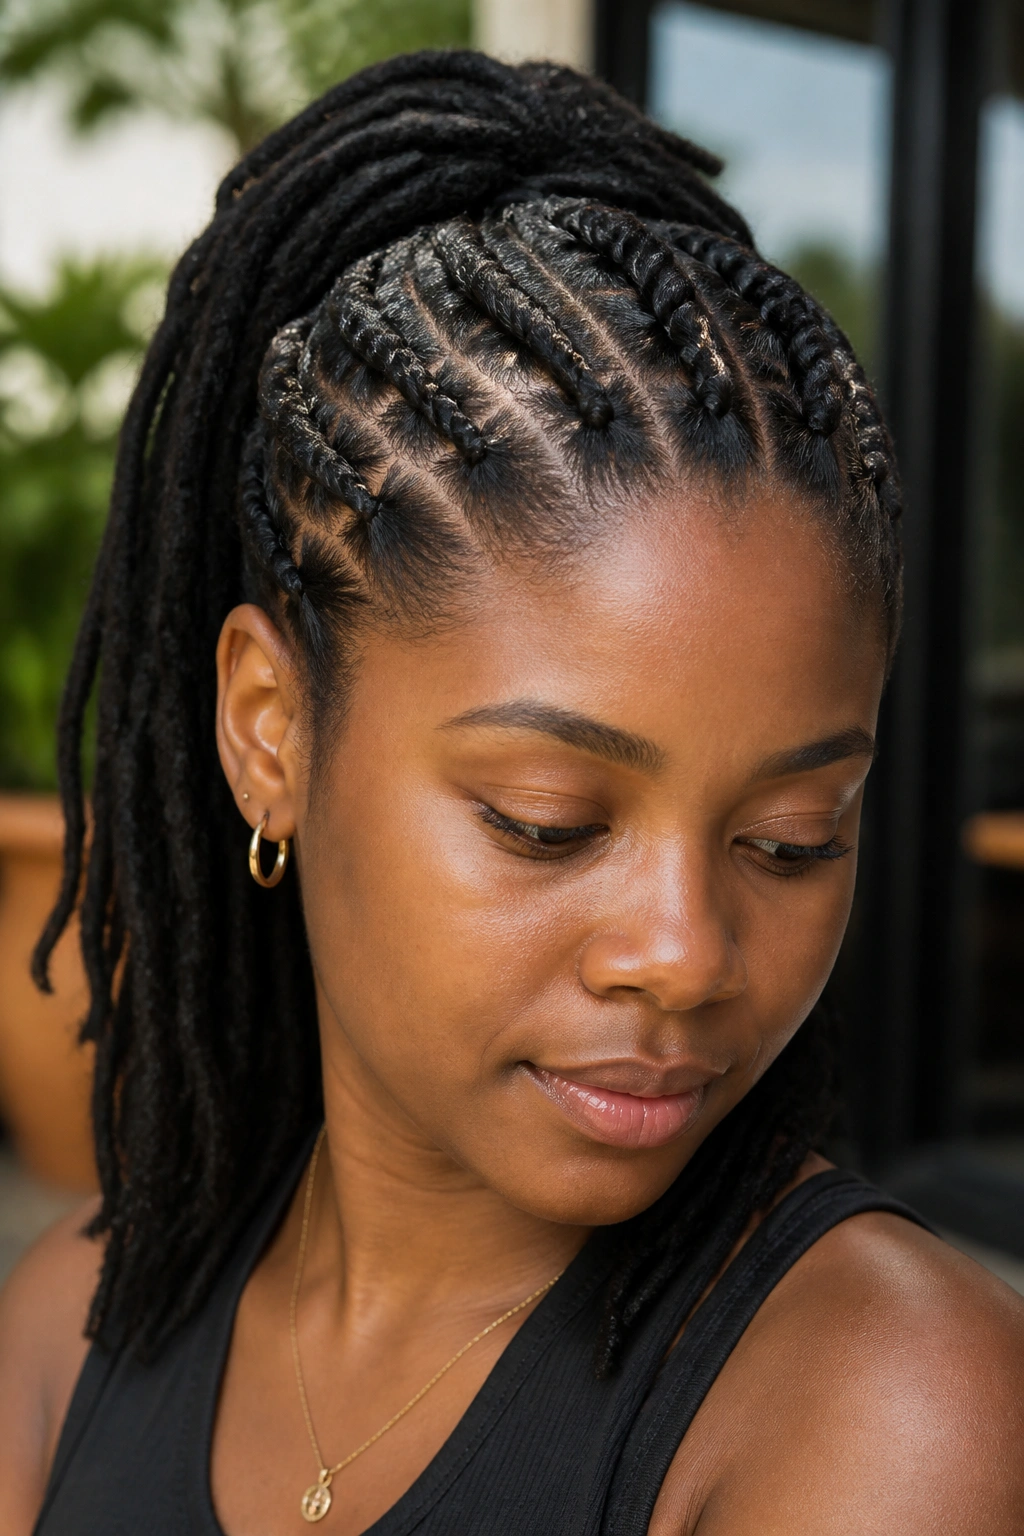
Flat twists are the cousin of the cornrow. Instead of three strands, you use two. On locs, flat twists often look “ropier” and more organic than braids. Doing a single row of flat twists right at the hairline is a soft, beautiful way to pull the hair back.
The Science of the Twist
Flat twists are generally faster to install than braids. They also exert a different kind of pull on the hair. Because you’re only working with two strands, there’s less “knotting” at the base. This makes them a great alternative if you find that cornrows tend to give you a headache.
How to Style Them
- Twist toward the back of the head for a “lifted” look.
- Twist toward the side for a romantic, “swept” vibe.
- Secure the ends with a small decorative clip.
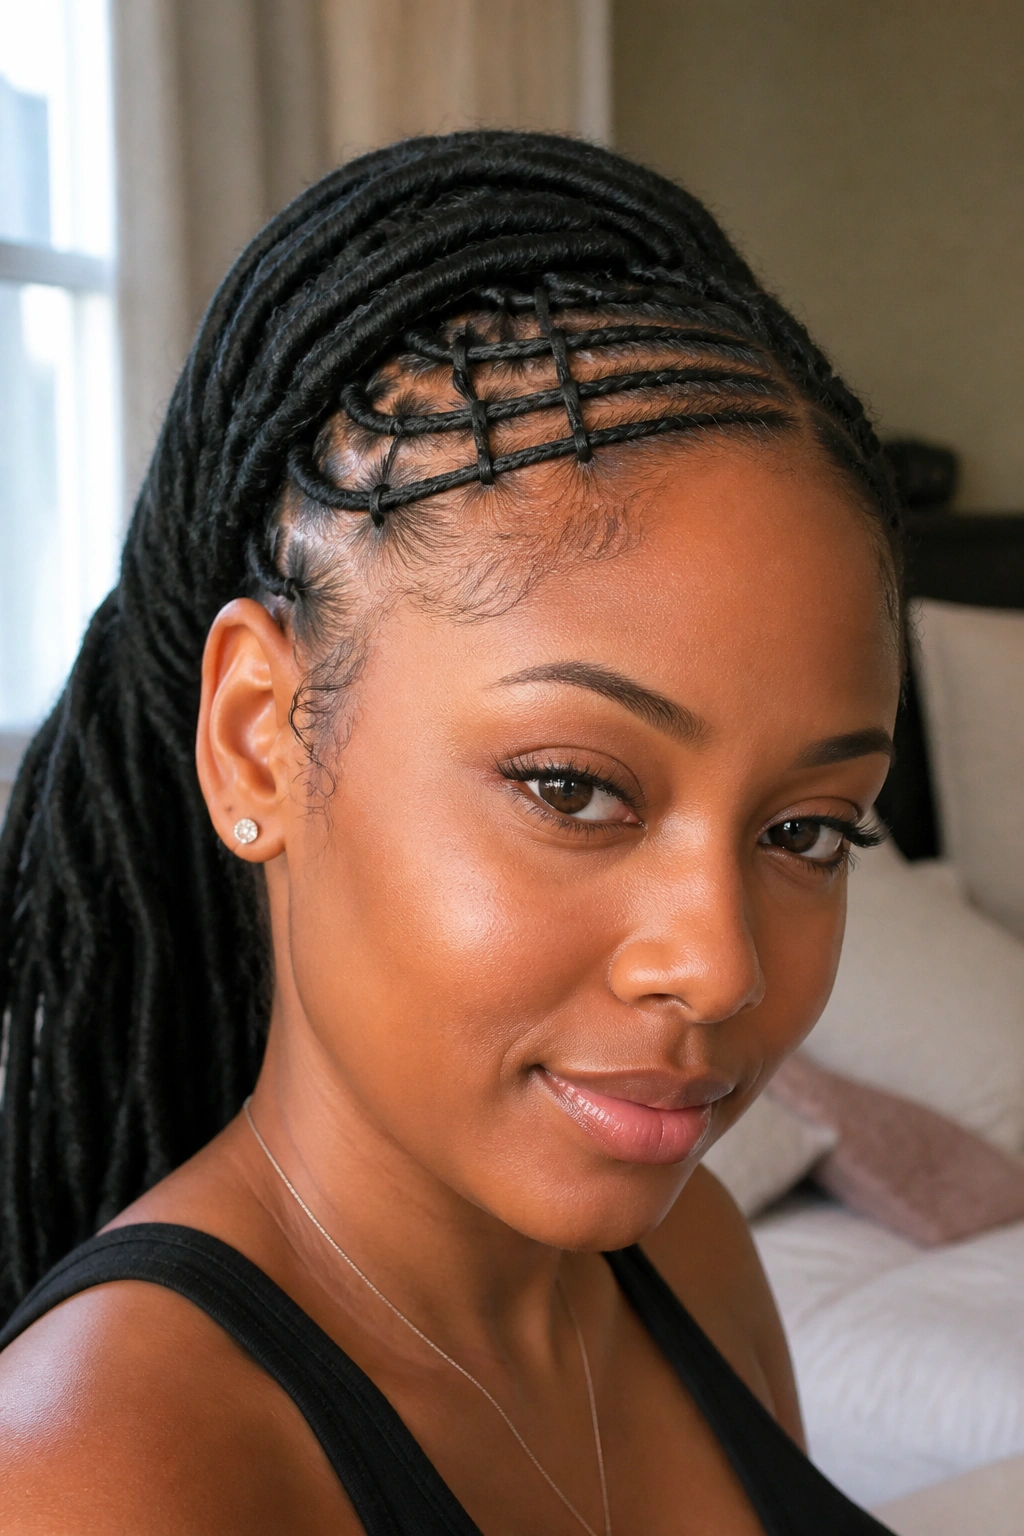
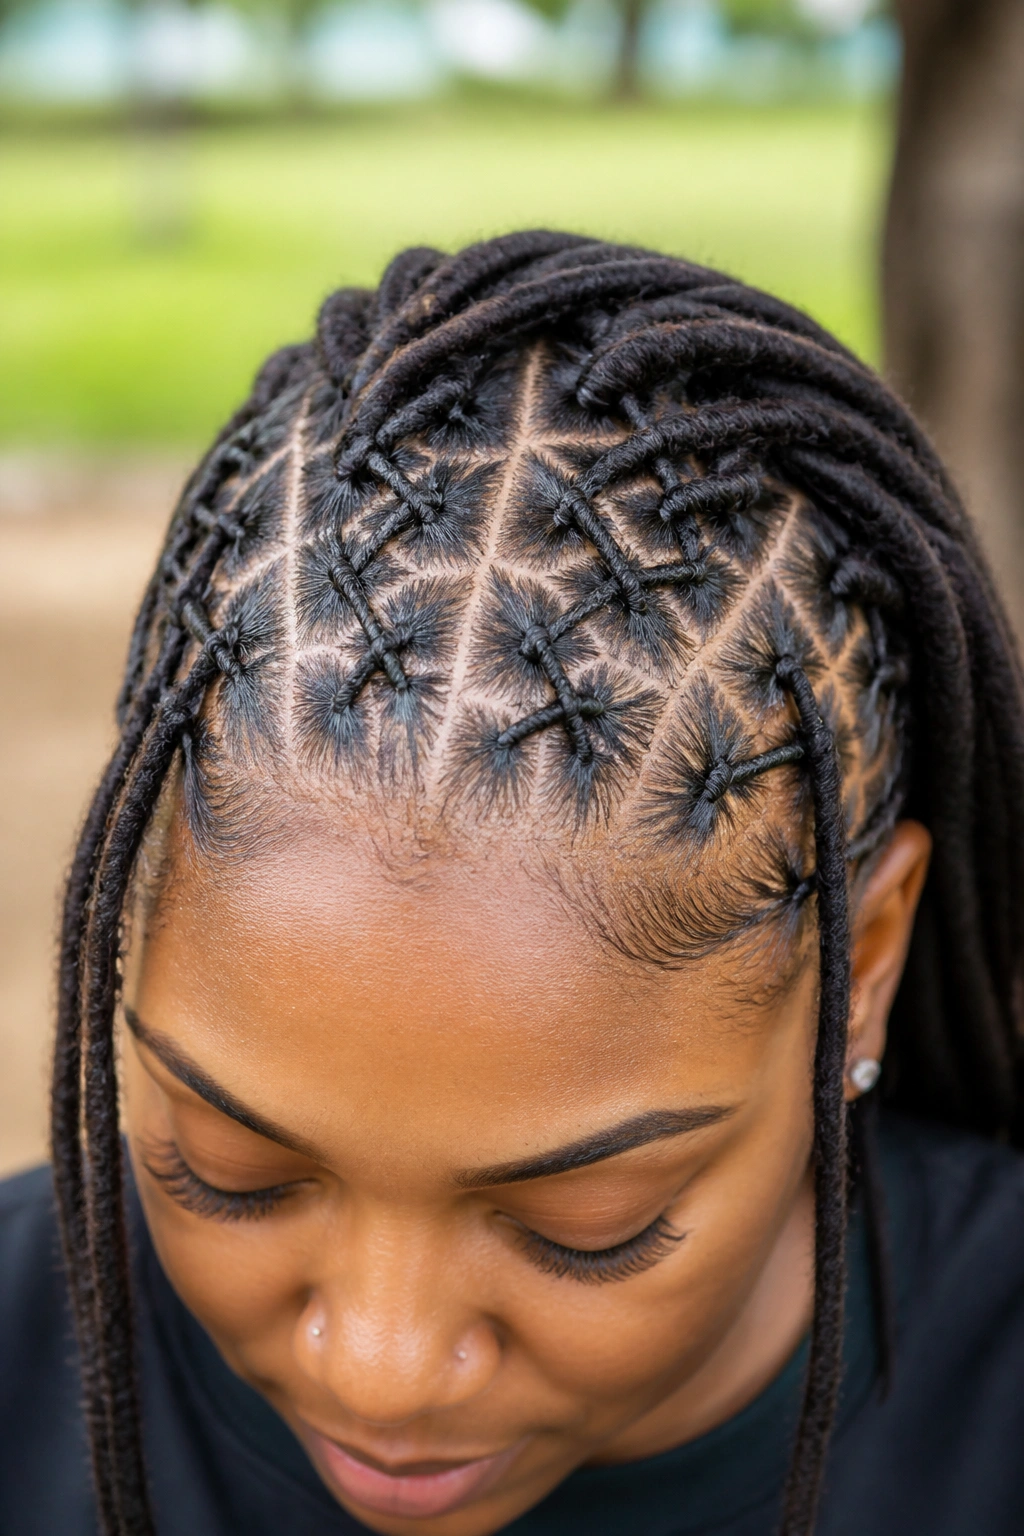
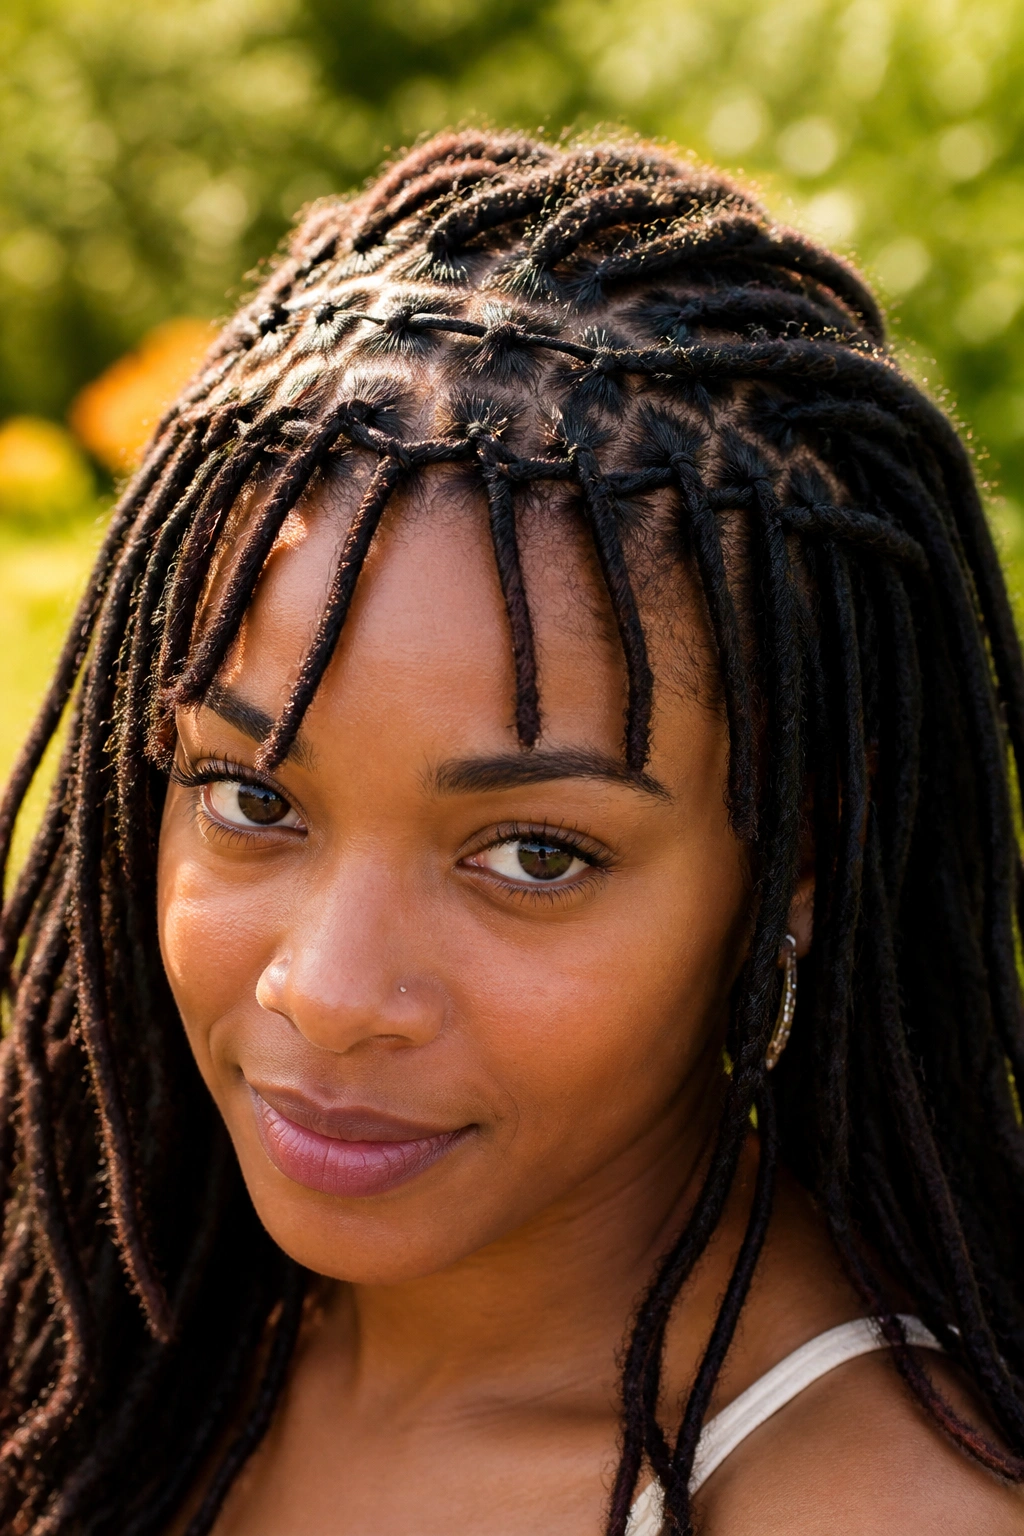
11. Spider Web Braids
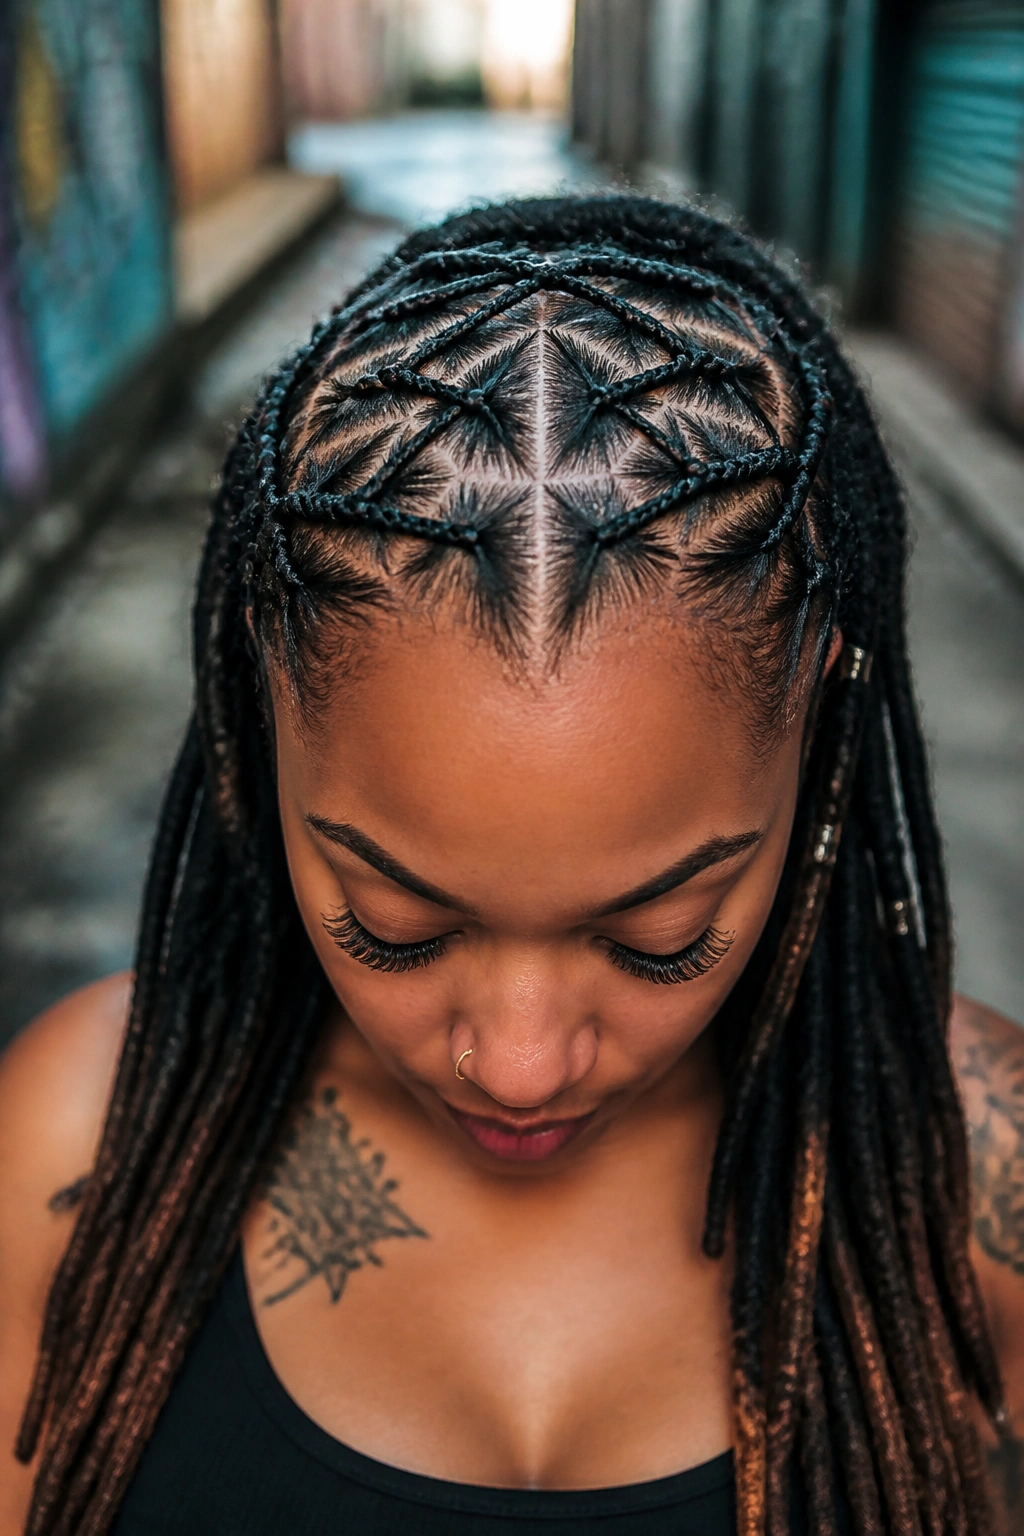
This is for the person who wants their hair to be a conversation starter. Spider web braiding involves taking locs from the hairline and braiding them toward a central point on the crown, but connecting them with small cross-braids along the way. It creates a “web” pattern across the front of the head.
It sounds complicated, and to be honest, it takes some practice. But the visual payoff is massive. It’s like wearing a piece of lace made out of your own hair. Because the “web” covers a lot of the scalp, it’s a great way to manage hair that is in the process of thickening up.
Keep the sections small. This style looks best when the lines are thin and crisp. It’s also a style that benefits from being done on “stretched” locs—meaning locs that have been recently washed and dried in a way that maximizes their length.
12. Diagonal Feed-in Braids
Feed-in braids are a technique where you start with a very small amount of hair and gradually add more as you move down the braid. On locs, this creates a beautiful tapered effect. By running these braids diagonally from one temple across to the opposite side of the crown, you create a dynamic, “moving” look.
The diagonal line is naturally more interesting to the eye than a straight line. It creates a sense of flow. Feed-in braids also tend to lay flatter against the scalp than traditional braids, which gives the style a more “integrated” feel.
Make sure you are adding the locs in at consistent intervals. If you add too many at once, you’ll get a “bulge” in the braid. If you add too few, the braid will look thin and stressed. Balance is key.
13. Horizontal Ladder Braids
Imagine a series of small, horizontal braids that run from one side of your forehead to the other, stacked like the rungs of a ladder. This is the ladder braid. It’s a very modern, graphic way to style the front of your locs.
This style is perfect for keeping “short” locs or layers in check. If you have some locs that are shorter than others near the front, the ladder braid “traps” them in a horizontal pattern, preventing them from sticking out.
It’s a very secure style. You could sleep on this for three or four days and it would still look fresh in the morning. Just be sure to wear a silk or satin scarf to keep the friction down.
14. Fishtail Accent Braids
The fishtail braid uses two strands and a “pinch and cross” method that results in a very intricate, herringbone-like pattern. While doing a whole head of fishtails with locs would be exhausting, using two or three as accents in the front is manageable and gorgeous.
Why It Stands Out
The texture of a fishtail is much finer than a three-strand braid. Against the chunky texture of locs, it looks like a delicate detail. It shows that you’ve put effort into the “micro” level of your styling.
How to Do It
- Split your section into two even groups of locs.
- Take one loc from the outside of the left group and cross it over to the inside of the right group.
- Take one loc from the outside of the right group and cross it over to the inside of the left group.
- Repeat, keeping the tension firm but not tight.
15. The Scalloped Front Braid
A scalloped braid doesn’t follow a straight line; it curves. Think of a series of “U” shapes along your hairline. You braid a few locs, curve the braid down toward the forehead, then curve it back up toward the crown.
This is a very feminine, soft style. It mimics the look of a decorative headband. It’s great for softening a “square” jawline or a high forehead. It feels a bit like a vintage style reimagined for the loc community.
Because of the curves, you will need to use a few “hidden” hairpins to keep the peaks and valleys of the scallops in place. Choose pins that are the same texture as your locs (matte, not shiny) so they disappear into the hair.
16. Double French Braids (Frontal Only)
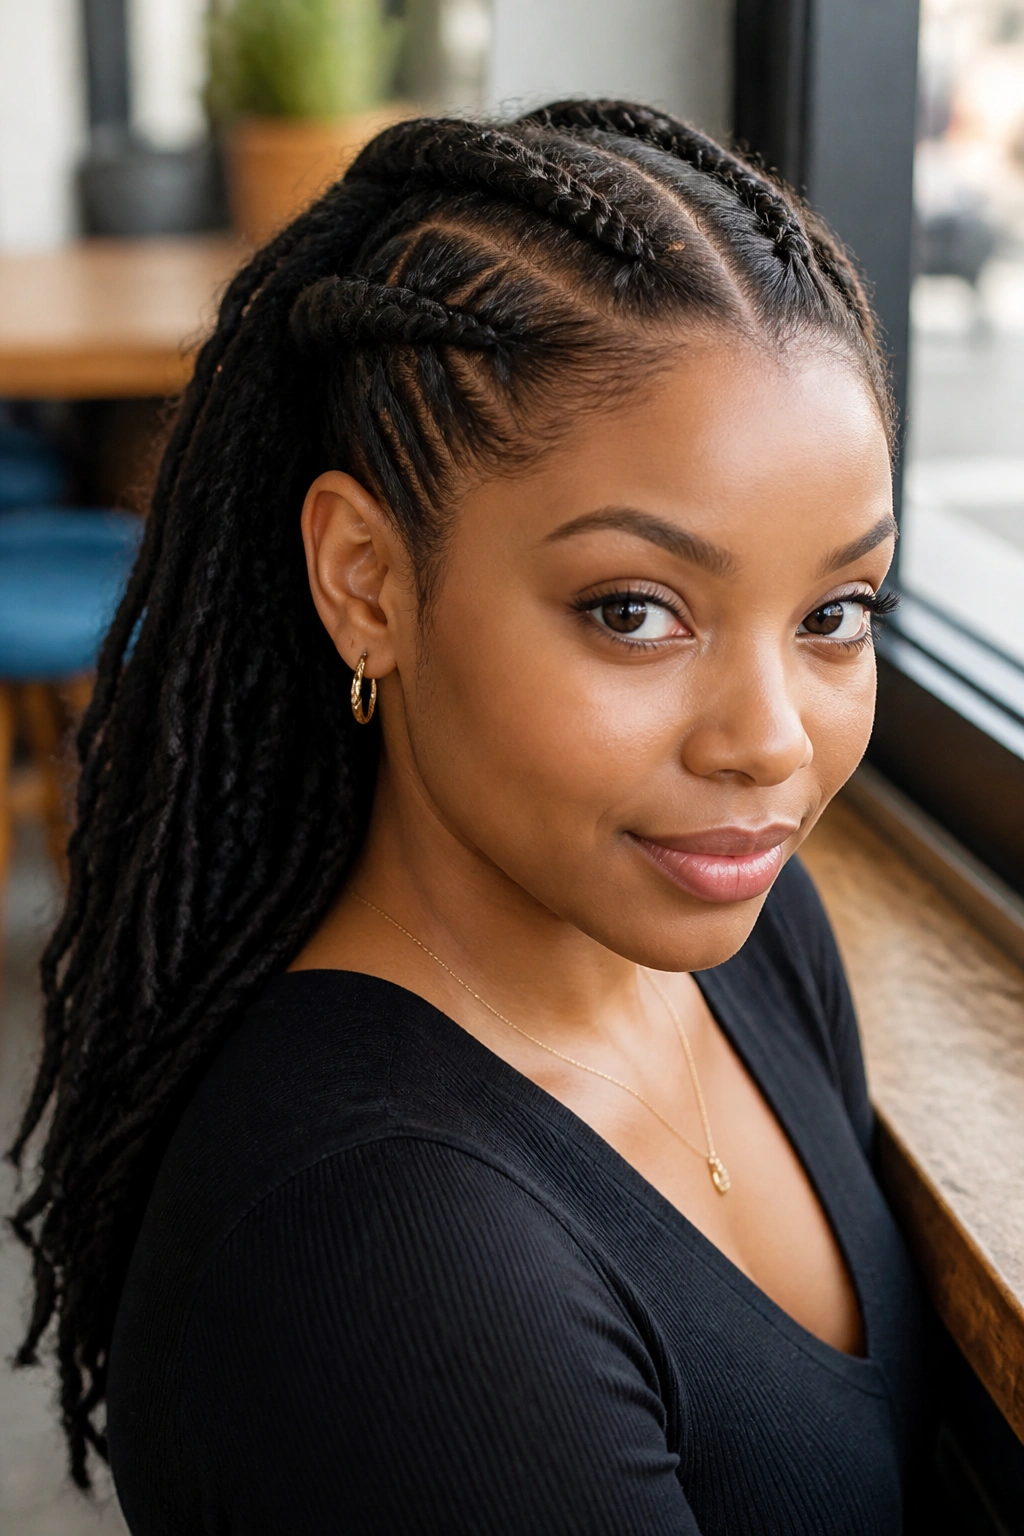
Standard double French braids go all the way to the nape of the neck. This variation stops just behind the ears. The front half of your head is tightly braided into two sleek rows, while the back half is left entirely loose and voluminous.
The Contrast Factor
This is all about the “business in the front, party in the back” vibe. The tight braids show off your face and keep things tidy, while the loose locs in the back provide that signature loc volume. It’s a very popular “everyday” look.
Styling Variation
- Tie the loose back section into a high ponytail for a “sporty” look.
- Let the back hang free for a more “effortless” appearance.
- Add gold cuffs to the braids to elevate the style for a night out.
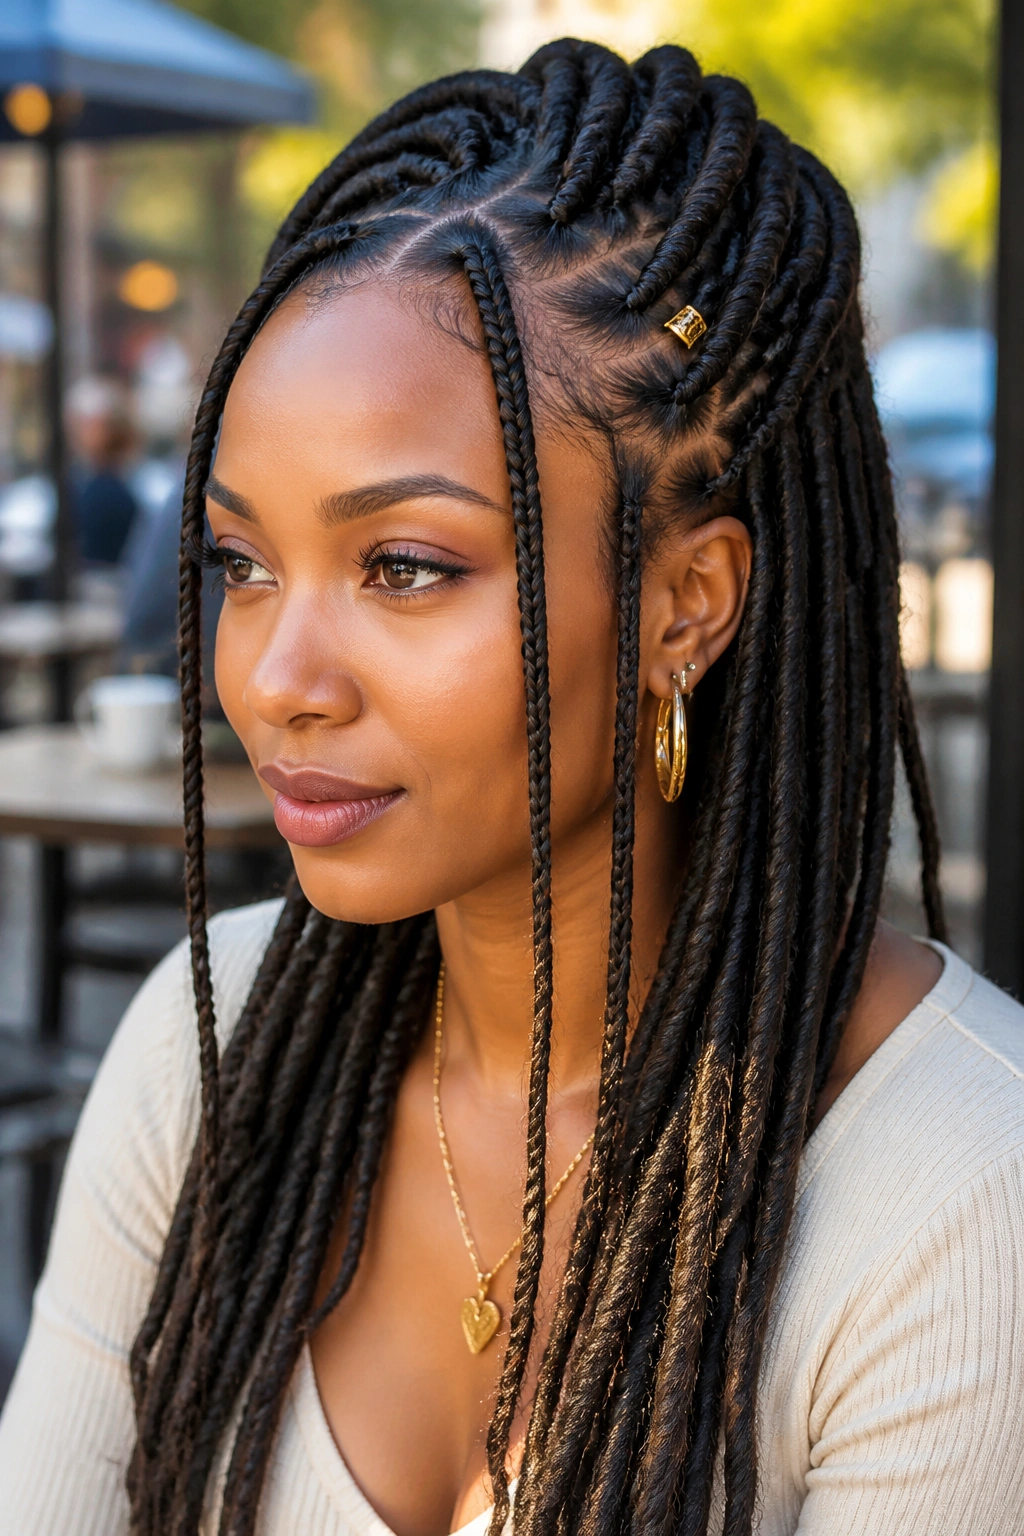
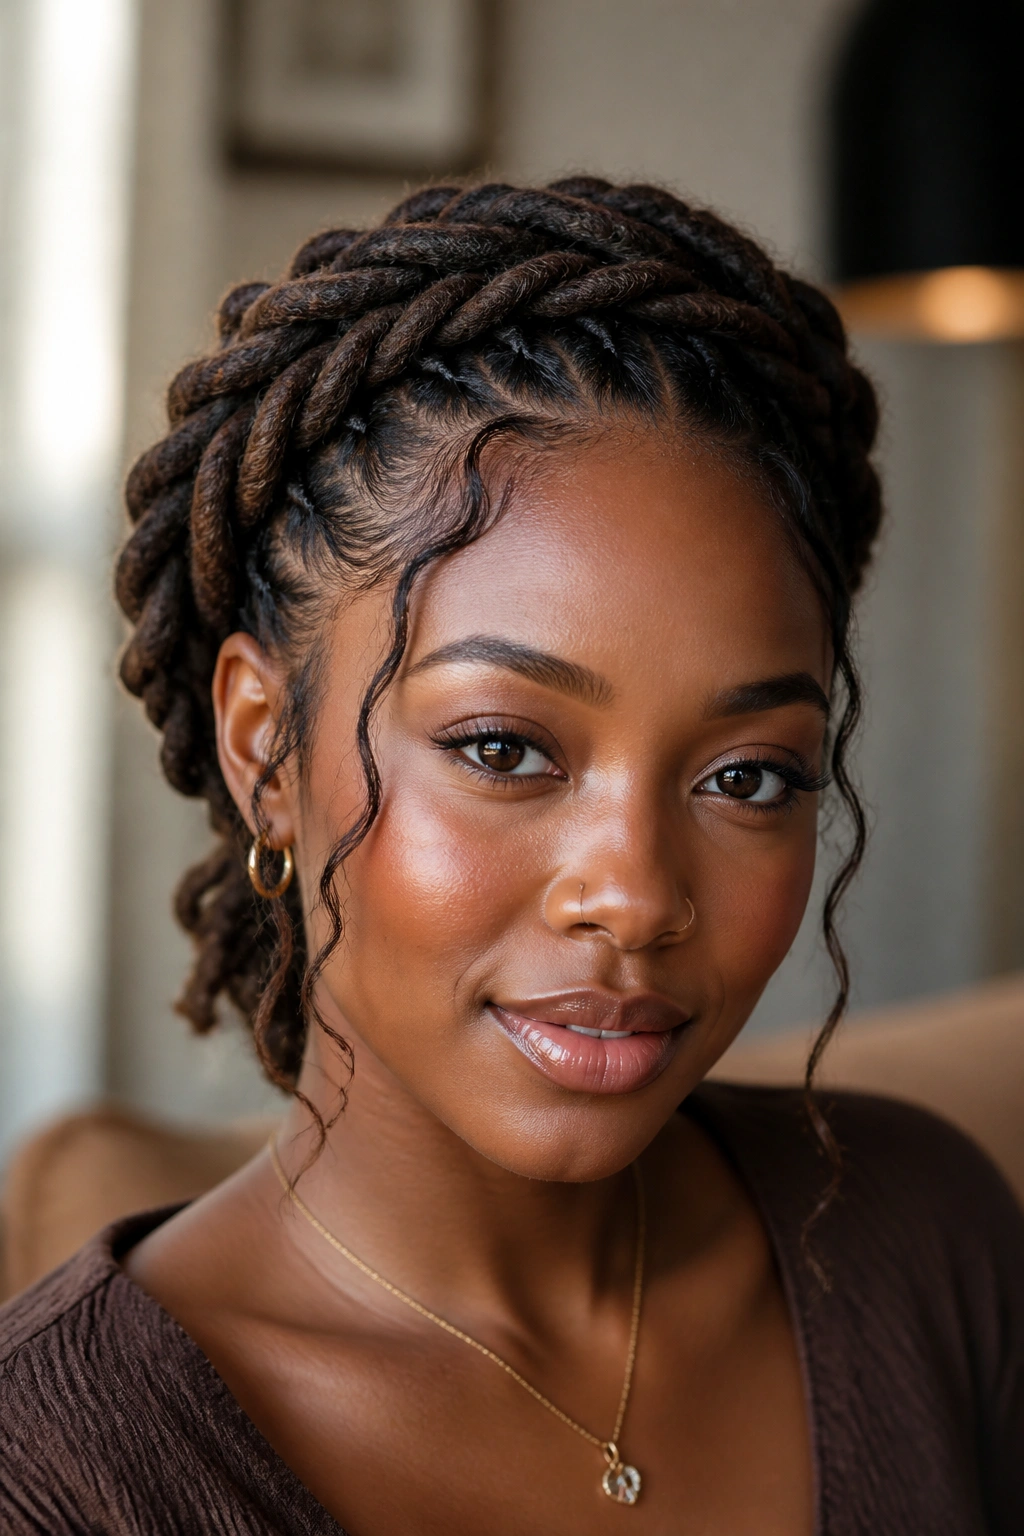
17. Twisted Rope Frontal
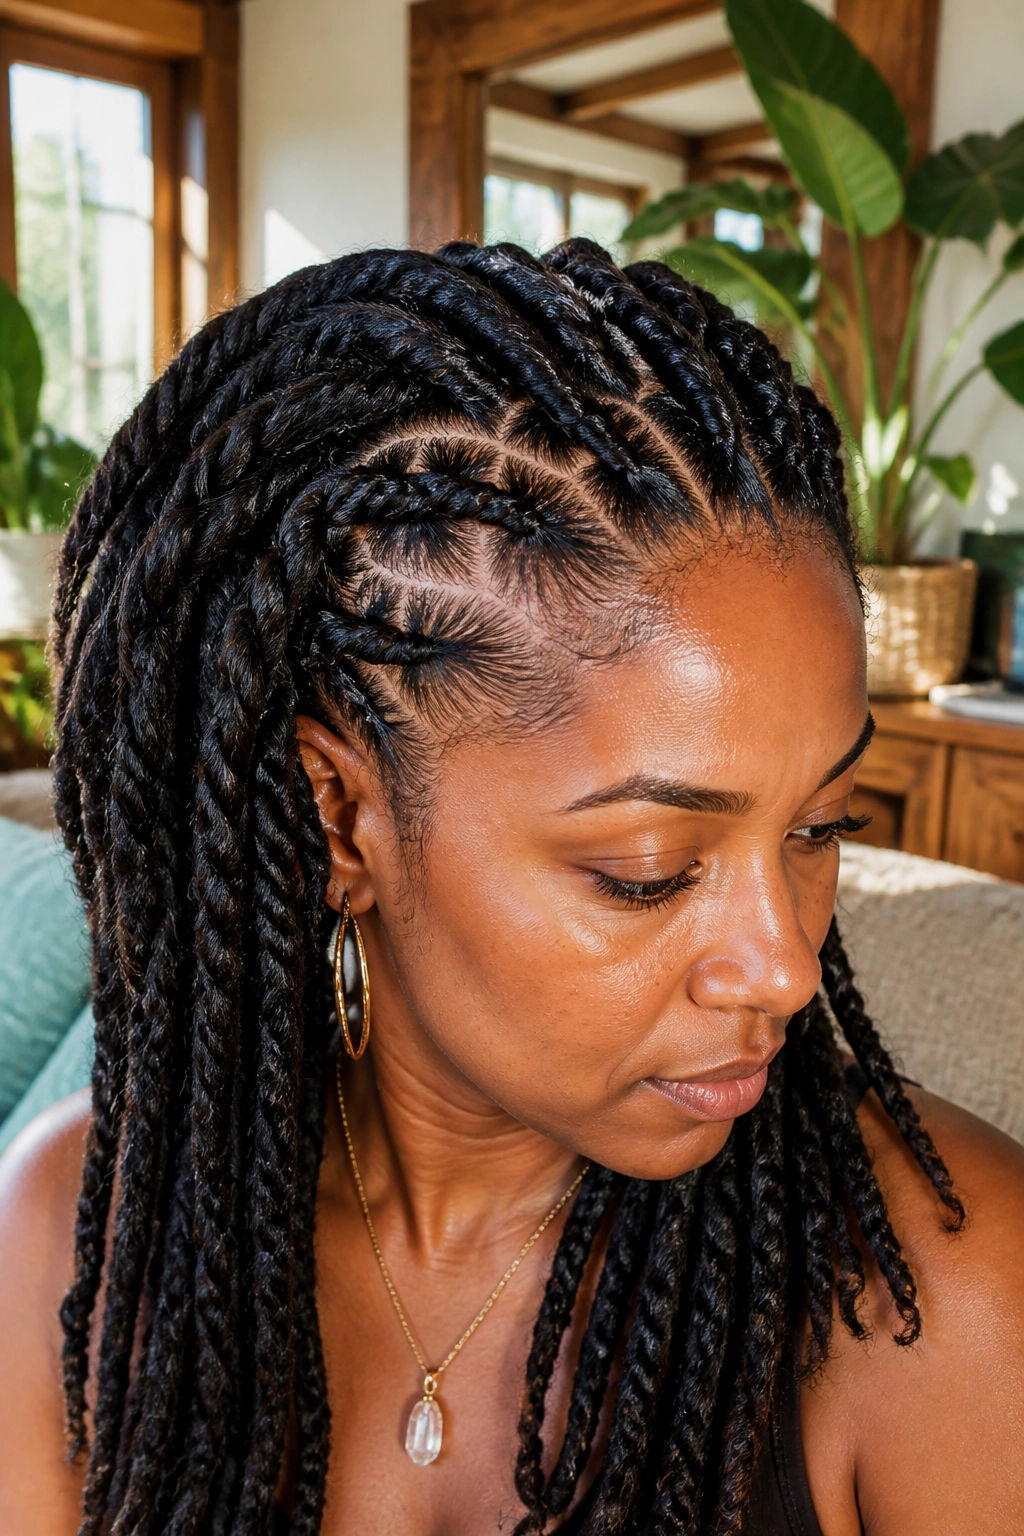
Instead of a three-strand braid, the rope twist uses two strands twisted around each other. When done as a “front row” style—meaning you twist locs along the hairline—it creates a thick, corded look that mimics the shape of the locs themselves.
Rope twists are incredibly durable. They don’t “frizz” as quickly as three-strand braids often do. They also have a certain “bounce” to them. If you pull on a rope twist, it snaps back into place, which makes the style feel very alive.
This is a great option for people with very thick locs. Sometimes three-strand braids become too bulky when the locs are large. The two-strand rope twist keeps the volume under control while still providing that “braided” aesthetic.
18. Faux Hawk Braided Front
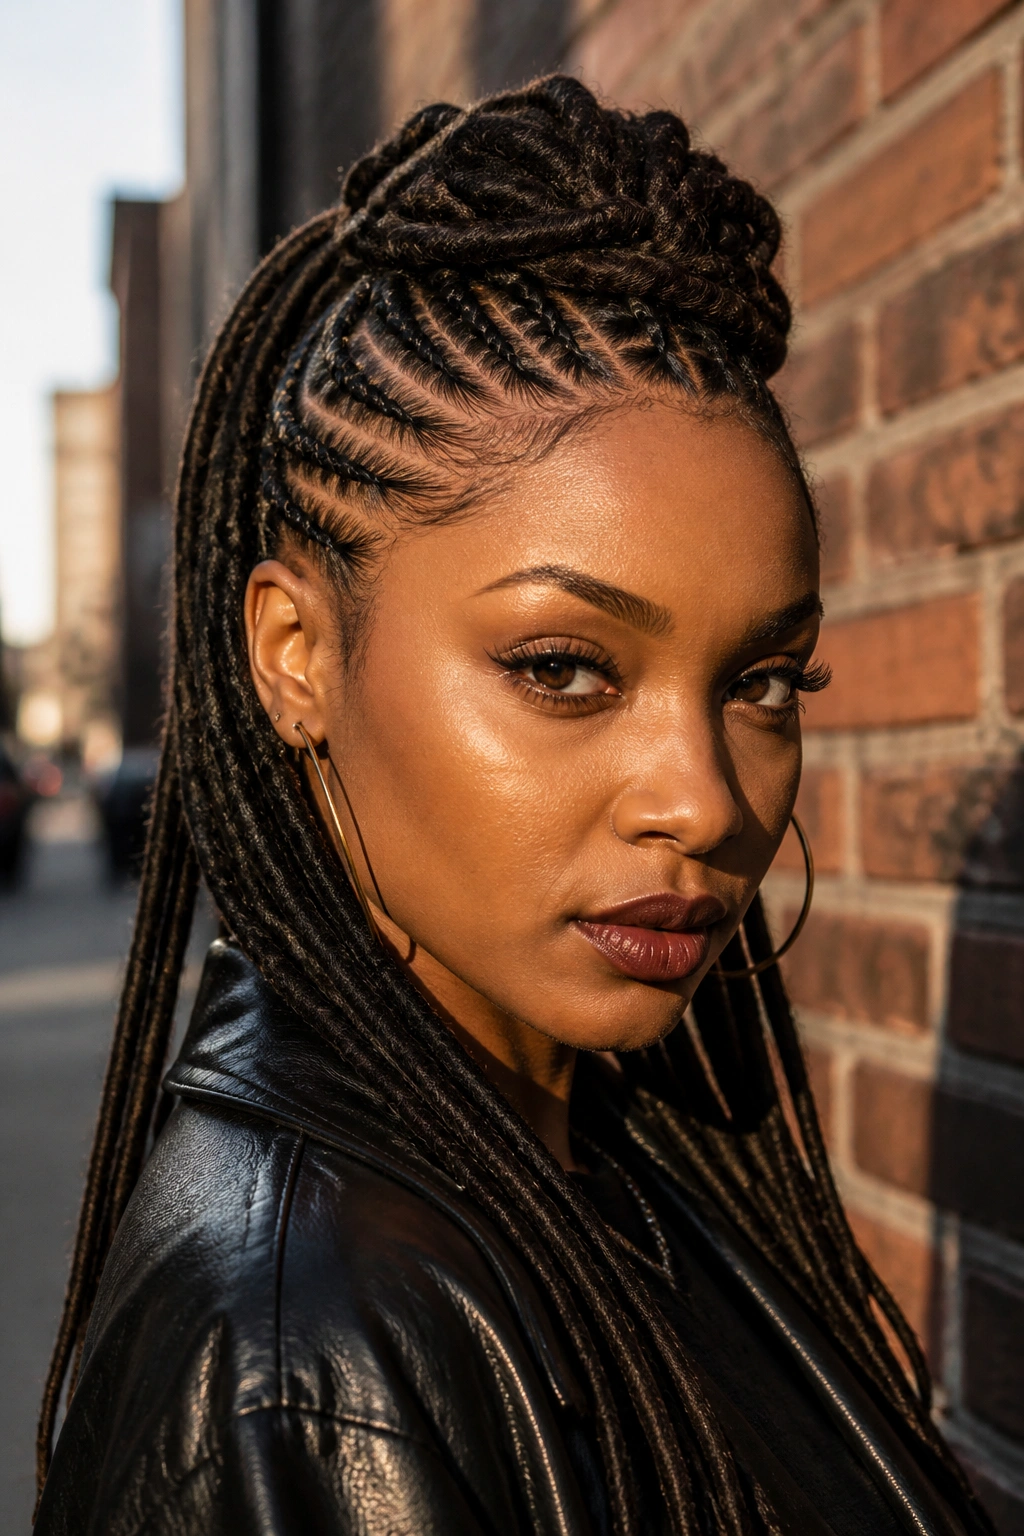
For those who love a bit of drama, the faux hawk uses braids to pull the side sections of the front hair tightly toward the center. This creates a “crest” of locs running down the middle of the head.
You aren’t actually cutting your hair or shaving the sides; you’re using the tension of the braids to mimic that “tapered” look. It’s a bold, high-fashion move. It looks incredible with a leather jacket or a sharp blazer.
To make the “hawk” really stand out, make the side braids as flat and neat as possible. The flatter the sides are, the more the center section will “pop.” You can even braid the center section itself into a series of loose loops to add more height.
19. Bohemian Loose Front Braids
Not every braid needs to be scalp-tight. The Bohemian approach involves taking two large sections from the front and braiding them very loosely, starting about an inch away from the scalp.
This style is the ultimate in “low tension.” If you’re having a day where your scalp feels a bit tender, this is your best friend. It gives you the “look” of a styled front without any of the pull.
Let the braids hang down the sides of your face. It has a very 1970s, “free spirit” vibe. It’s perfect for a day at the beach or just lounging at home. Because they are loose, these braids are also very easy to take out, meaning you aren’t committing to a style for days on end.
20. Horizontal “Tiara” Braid
A tiara braid is a single, thick braid that runs horizontally from temple to temple, sitting about two inches back from the hairline. It creates a “step” in the hair—the hair in front of the braid is flat, and the hair behind it is pushed back and up.
Why This is a “Cheat Code” for Volume
By placing a horizontal braid across the top of the head, you essentially create a “shelf” that supports the rest of your locs. It makes the hair at the crown look much fuller and more dramatic.
How to Personalize It
- Use a “fishtail” technique for the tiara for more detail.
- Wrap a piece of colorful yarn or embroidery thread into the braid for a pop of color.
- Tuck a real or silk flower into the side of the braid.
21. Criss-Crossed Rubber Band Braids
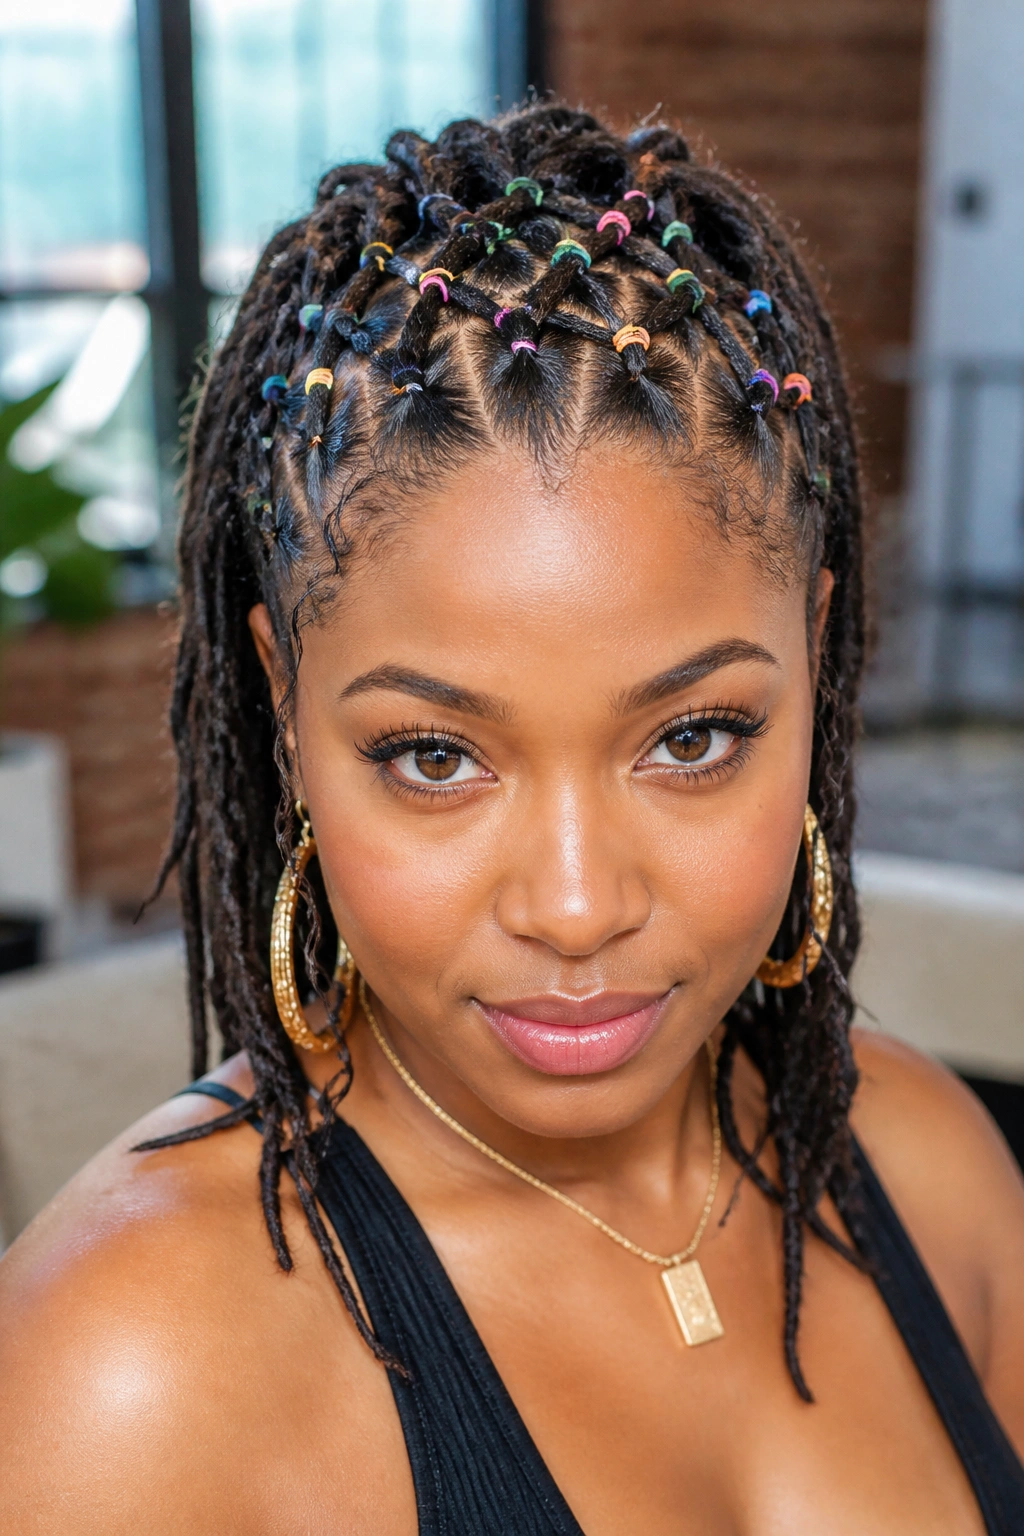
This is a playful, contemporary style that uses small, colorful rubber bands to create a grid in the front. You section off small squares of hair, secure them with a band, then split the locs and cross them into the next square before braiding the ends.
It’s a very youthful, energetic style. It’s also a great way to “distribute” the weight of your locs. Each rubber band section acts as an anchor point, so the pull isn’t concentrated on just one area.
Important Warning: Always use “ouchless” rubber bands or coat your bands in a bit of oil before applying them. You do not want the rubber to “bite” into the loc and cause breakage. This style is best for special occasions and should be taken down after a few days to let the hair breathe.
22. Low-Tension Bubble Braids
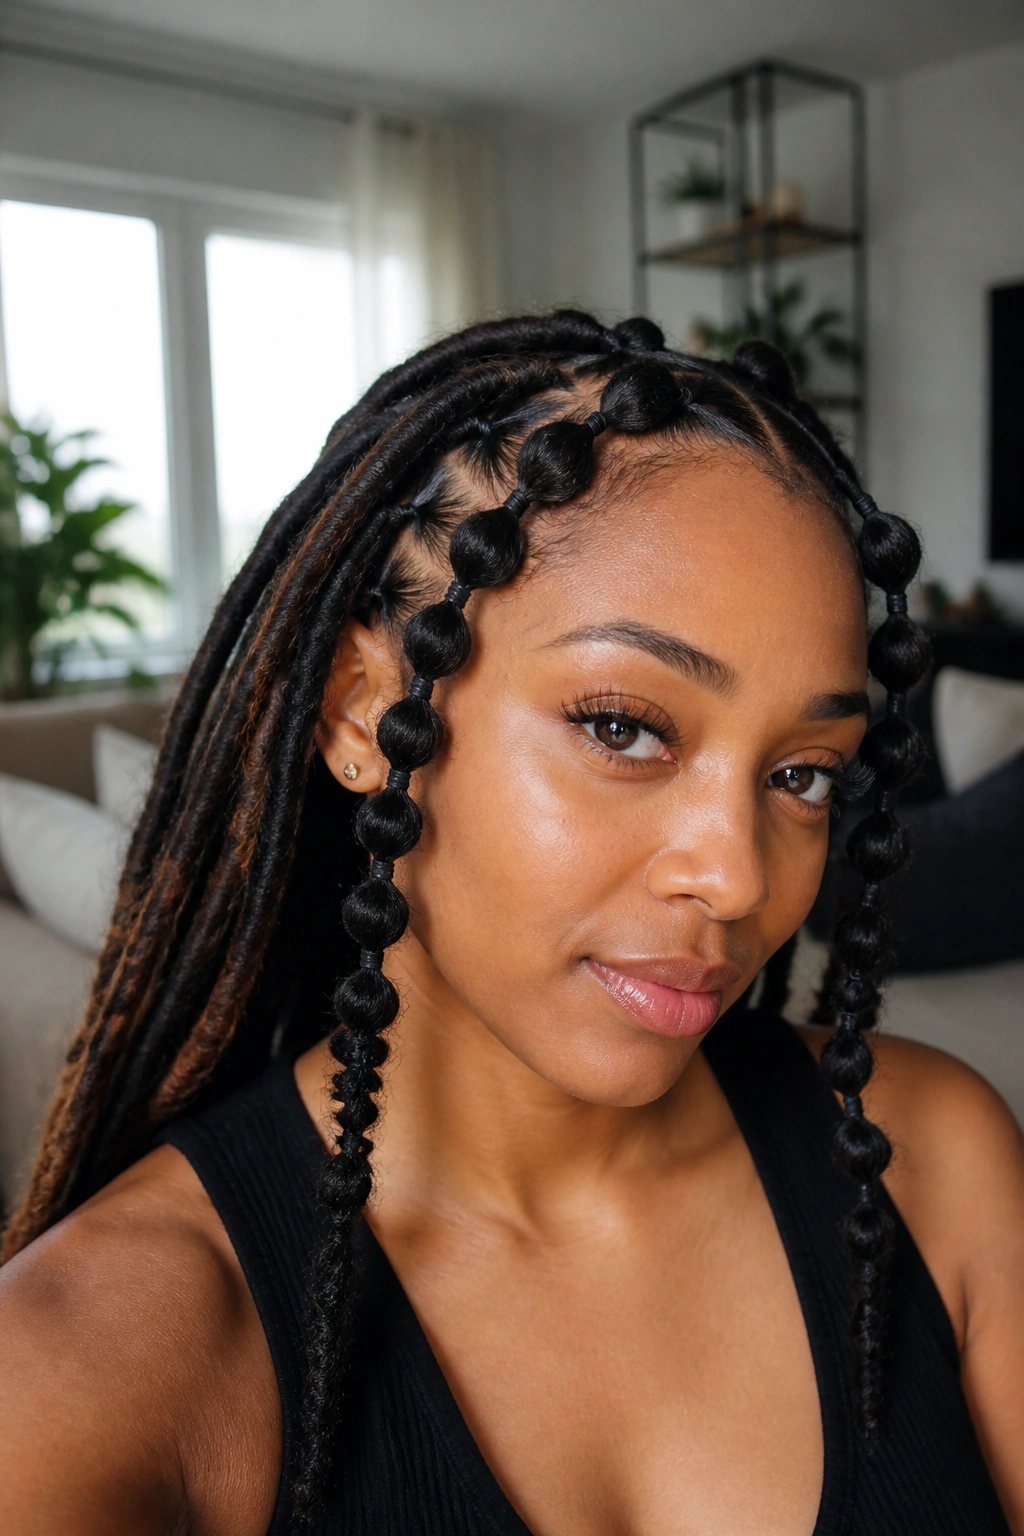
Bubble braids aren’t technically braids—they are a series of “puffs” created by placing elastics down the length of a section of hair. On locs, this looks like a series of interconnected globes.
When you do this in the front, it creates a very 3D, sculptural look. It’s incredibly fast to do. You can “style” the front of your head in under five minutes.
To get the “bubble” look, gently pull the locs outward between each elastic. This creates that rounded, voluminous shape. It’s a fun, modern style that looks great on social media but is also practical enough for a long day at work.
23. The “X” Pattern Feed-in
This is a variation of the criss-cross, but using the feed-in technique. You start two braids at the forehead corners, cross them in the middle of the “front zone,” and then finish them toward the opposite back corners.
The “X” is very bold. It creates a focal point right in the middle of your upper forehead. This is a very symmetrical, “neat” style that looks best when the parts are razor-sharp.
Because it’s a feed-in style, the “X” starts small and gets thicker as it crosses. This “growth” of the braid adds a sense of perspective to the style that makes it look professionally done, even if you did it yourself in the bathroom mirror.
24. Side-Pinned Triple Braid
Instead of one big side braid, you do three smaller ones. They start at the temple and run horizontally back toward the ear, where they are pinned down.
The Visual Effect
This creates a “tucked” look on one side of the head, leaving the other side full and free. It’s an asymmetrical style that feels very sophisticated. It’s often referred to as a “side-shave” look without actually having to shave anything.
Tips for Longevity
- Use “bobby pins” that are long and have a strong grip.
- Criss-cross the pins in an “X” shape behind the ear to lock the braids in place.
- If your locs are slippery, spray a little bit of salt water on the ends of the braids to give them more “grip” before pinning.
25. Half-Up Top Knot with Braided Base
In this style, you take the front section and braid it into 4-5 cornrows that go straight up toward the very top of your head. Once they reach the center, you gather all the ends (plus the loose hair from the middle) and twist them into a high bun or “top knot.”
This style gives you height. It makes you look taller and elongates the neck. The braids provide a “foundation” for the bun, making it feel more secure and less likely to flop over as you move.
It’s a great “second week” style. If your locs are starting to feel a bit heavy or loose at the roots, the cornrows pull everything together and the bun keeps the weight centered over your spine rather than hanging off the back of your head.
26. Elevated Front Bun with Braid Accents
This is the reverse of the previous style. You create a large bun right at the hairline (think “high fashion”) and then take two or three locs from the sides and braid them around the base of the bun.
The braids act like a decorative “scrunchie” made of your own hair. It adds a level of finish to the bun that makes it look “editorial.”
This is a great way to hide a hair tie. If you’ve used a thick elastic to get that bun up, the accent braids wrap around it and conceal it perfectly. It looks like the hair is defying gravity on its own.
27. The Scalloped “Crown” Edge
This is a very delicate style where you braid only the very, very front edge of the hair—the “baby” locs—into a tiny, thin braid that follows the exact contour of your hairline.
It’s almost like wearing a piece of jewelry made of hair. It doesn’t pull back the bulk of your locs; it just “finishes” the edge. This is perfect for someone who loves their hair hanging in their face but wants a little bit of “order” at the very front.
Because this braid is so close to the edges, you must be extremely gentle. Use the lightest touch possible. If you feel any “stinging,” you’ve gone too tight. The goal here is a “whisper” of a braid, not a “shout.”
Managing Tension and Scalp Health
Writing about braids without mentioning scalp care is like writing about cars without mentioning oil. Your scalp is the soil from which your locs grow. If the soil is stressed, the crop will eventually fail. When you are doing front braids, you are working on the most vulnerable part of your head—the hairline.
The skin at the temples and the forehead is thinner than the skin at the back of the head. It is more prone to “traction” issues. This is why I always tell people to follow the “one-inch rule.” Try to avoid starting any high-tension braid within the first half-inch of your natural hairline. By leaving a tiny bit of “fuzz” or loose hair at the very edge, you create a buffer zone that protects your follicles.
Signs You’re Pulling Too Tight:
- Small White Bumps: This is the most common sign of “folliculitis” caused by tension. If you see these, take the braids down immediately.
- Headaches: A braid should not give you a headache. If it does, it’s a structural failure, not a “beauty is pain” moment.
- Itching: While some itching is normal as hair grows, “sharp” itching at the site of the braid usually means the skin is being stretched too far.
Keep your scalp hydrated. A mixture of water, a little bit of aloe vera juice, and a drop of peppermint oil in a spray bottle is a lifesaver for braided locs. The peppermint provides a cooling sensation that relieves tension, and the aloe hydrates the skin.
Tools for Styling Locs
You don’t need a lot of equipment to style locs, but having the right “kit” makes the process much more enjoyable. Locs have different needs than loose hair. You aren’t “brushing” them; you’re “guiding” them.
The Essential Kit:
- Dreadlock-Specific Bands: These are usually larger and have a fabric coating to prevent snagging.
- Heavy-Duty Bobby Pins: Standard “beauty supply” pins often snap when faced with the weight of a mature loc. Look for “industrial” or “heavy-duty” pins.
- Rosewater Spray: This is the “holy grail” of loc hydration. It smells amazing and provides just enough slip to braid without making the hair greasy.
- A Seamless Rattail Comb: You only use the “tail” part for parting. Make sure it’s smooth metal or high-quality plastic so it doesn’t catch on the texture of the locs.
- Microfiber Towel: If you’re styling while the hair is damp, use microfiber to squeeze out excess water. It prevents the lint buildup that cotton towels often leave behind.
The Bottom Line
Styling the front of your locs is an act of self-expression that honors the time you’ve spent growing your hair. Whether you choose a complex “Spider Web” pattern or a simple pair of “Side-Swept Dutch Braids,” the goal is to feel like the best version of yourself. Locs are versatile, durable, and incredibly beautiful—they deserve to be played with.
Remember that hair styling is meant to be fun. If a braid doesn’t look perfect the first time, take it out and try a different “entry” on this list. Your locs are unique; their thickness, length, and “bend” will dictate which of these 27 styles looks best on you. Don’t be afraid to mix and match. Maybe you want a “Tiara Braid” with “Beaded Bangs.” Go for it.
The most important thing is to listen to your scalp. A style that lasts for three days and leaves your hair healthy is infinitely better than a style that lasts for two weeks but causes thinning. Treat your locs with the same respect you’d give a fine textile. Weave them, twist them, and crown yourself with them. You’ve put in the work to grow them; now it’s time to enjoy the versatility they offer.