There is a persistent, annoying myth that natural hair needs significant length to look good in braids. If you have spent any time in the “awkward stage” of a big chop or are simply someone who prefers the ease of a cropped look, you have probably felt that pang of envy watching people with waist-length extensions. But here is the truth: Type 4 hair—with its glorious shrinkage, incredible density, and natural grip—is actually the perfect canvas for short braided styles. Short braids do not just “work” for natural hair; they often look more intentional, chic, and sophisticated than their longer counterparts.
When your hair is short, every choice you make regarding parting, thickness, and accessories carries more weight. You are not hiding behind a curtain of hair. Instead, you are framing your face and highlighting your bone structure. Type 4 hair, specifically 4B and 4C textures, provides a structural integrity that silky hair lacks. This means your braids stay in place longer, your parts stay crisp, and you can achieve a level of architectural detail that is truly stunning. Whether you are dealing with two inches of hair or six, the options for creativity are nearly endless.
One of the biggest advantages of staying short is the health of your scalp and edges. We have all seen the tension that heavy, floor-grazing braids can put on a hairline. By choosing shorter lengths, you are significantly reducing the weight and pull on your follicles. It is a win for your aesthetic and a massive win for your hair’s long-term retention. Plus, the maintenance is a breeze. Washing your scalp and drying your hair becomes a twenty-minute task rather than a weekend-long ordeal.
If you have been told that your hair is “too short” for a specific look, it is likely that the person telling you just hasn’t mastered the right technique. From precision cornrows to mini knotless box braids, the “short” category is vast. It covers everything from ear-length bobs to tapered pixie cuts. Let’s look at the variety available and how you can tailor these styles to fit your specific Type 4 texture.
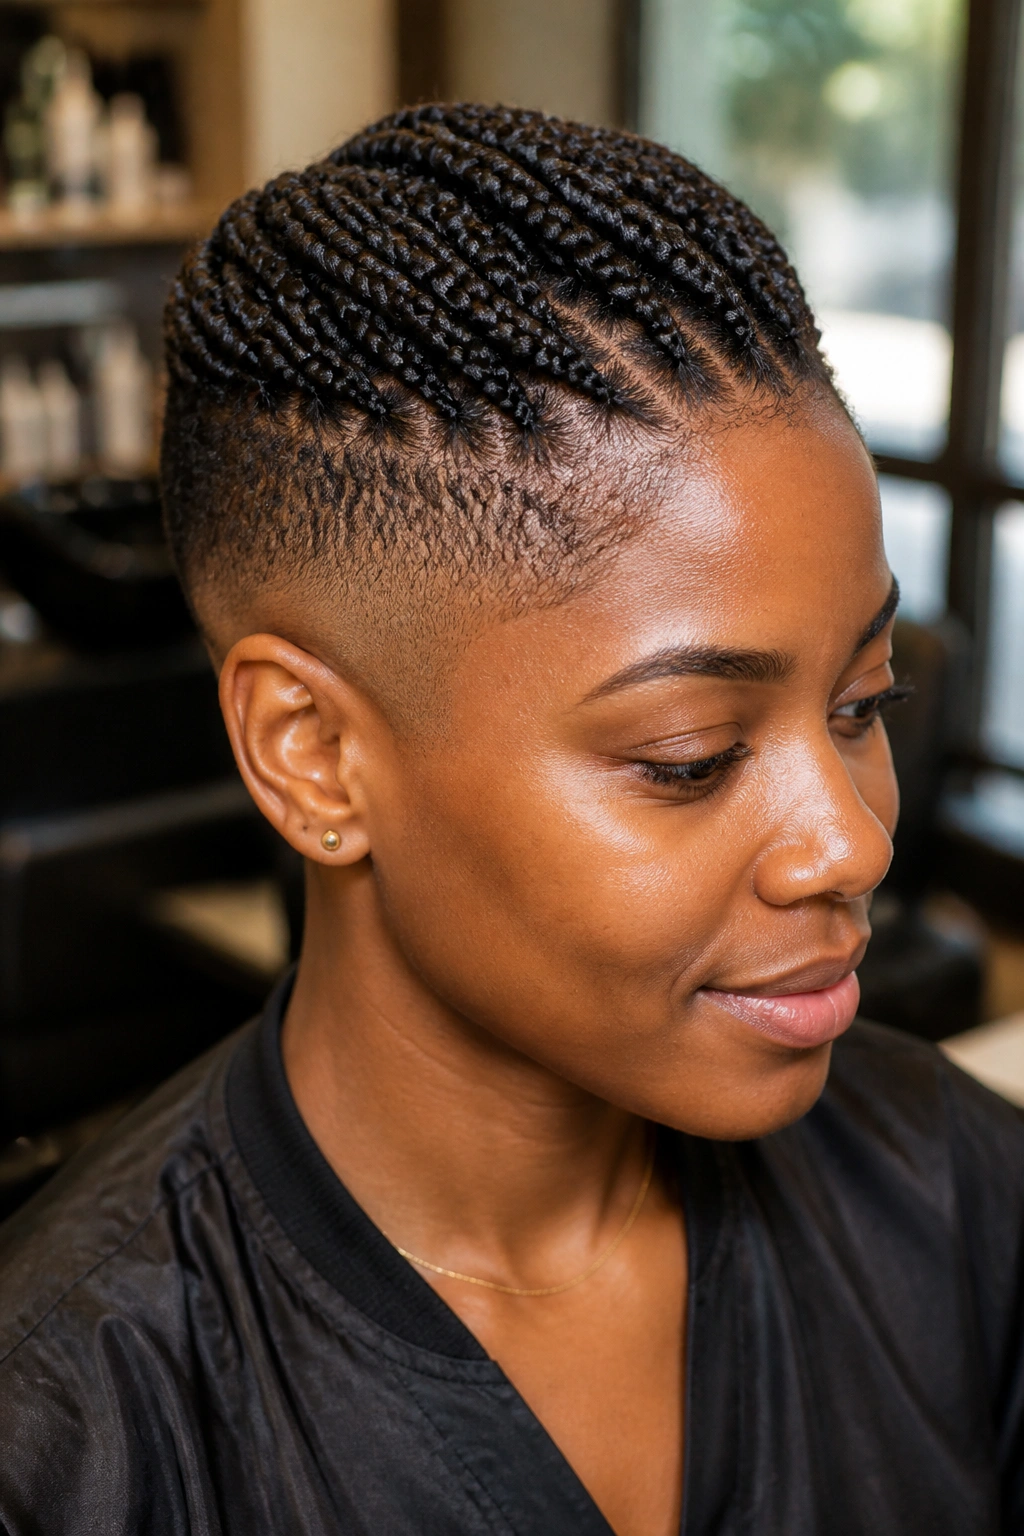
1. Mini Box Braids with Tapered Sides
There is something incredibly powerful about a tapered cut paired with braids. By keeping the hair short or even faded on the sides and back while leaving the top long enough for mini box braids, you create a look that is both edgy and professional. This style works exceptionally well for 4C hair because the natural texture provides enough “grip” to keep those tiny braids from slipping, even at shorter lengths.
Why the Taper Works
When you remove the bulk from the sides of your head, you immediately draw the eyes upward. This creates the illusion of height and elongates the face. For the braided section on top, aim for “micro” or “mini” sizing. If the braids are too thick, they will stand straight up like sprouts; keeping them thin allows them to lay down or move more naturally as they grow.
Styling Details to Consider
- Parting: Ask for a brick-lay pattern to ensure the braids cover any gaps.
- Length: Aim for 3 to 4 inches of extension hair, or stay natural if your hair has reached that length.
- Edges: Keep the tapered sides crisp with a light pomade, but avoid heavy gels that cause buildup.
- Maintenance: Since the sides are exposed, you will likely need a “line-up” or trim every two weeks to keep the look fresh.
Pro tip: Use a soft-bristle brush and a silk scarf at night specifically for the faded sides to prevent the hair from becoming “matted” against the scalp.
2. Chin-Length Bob Braids
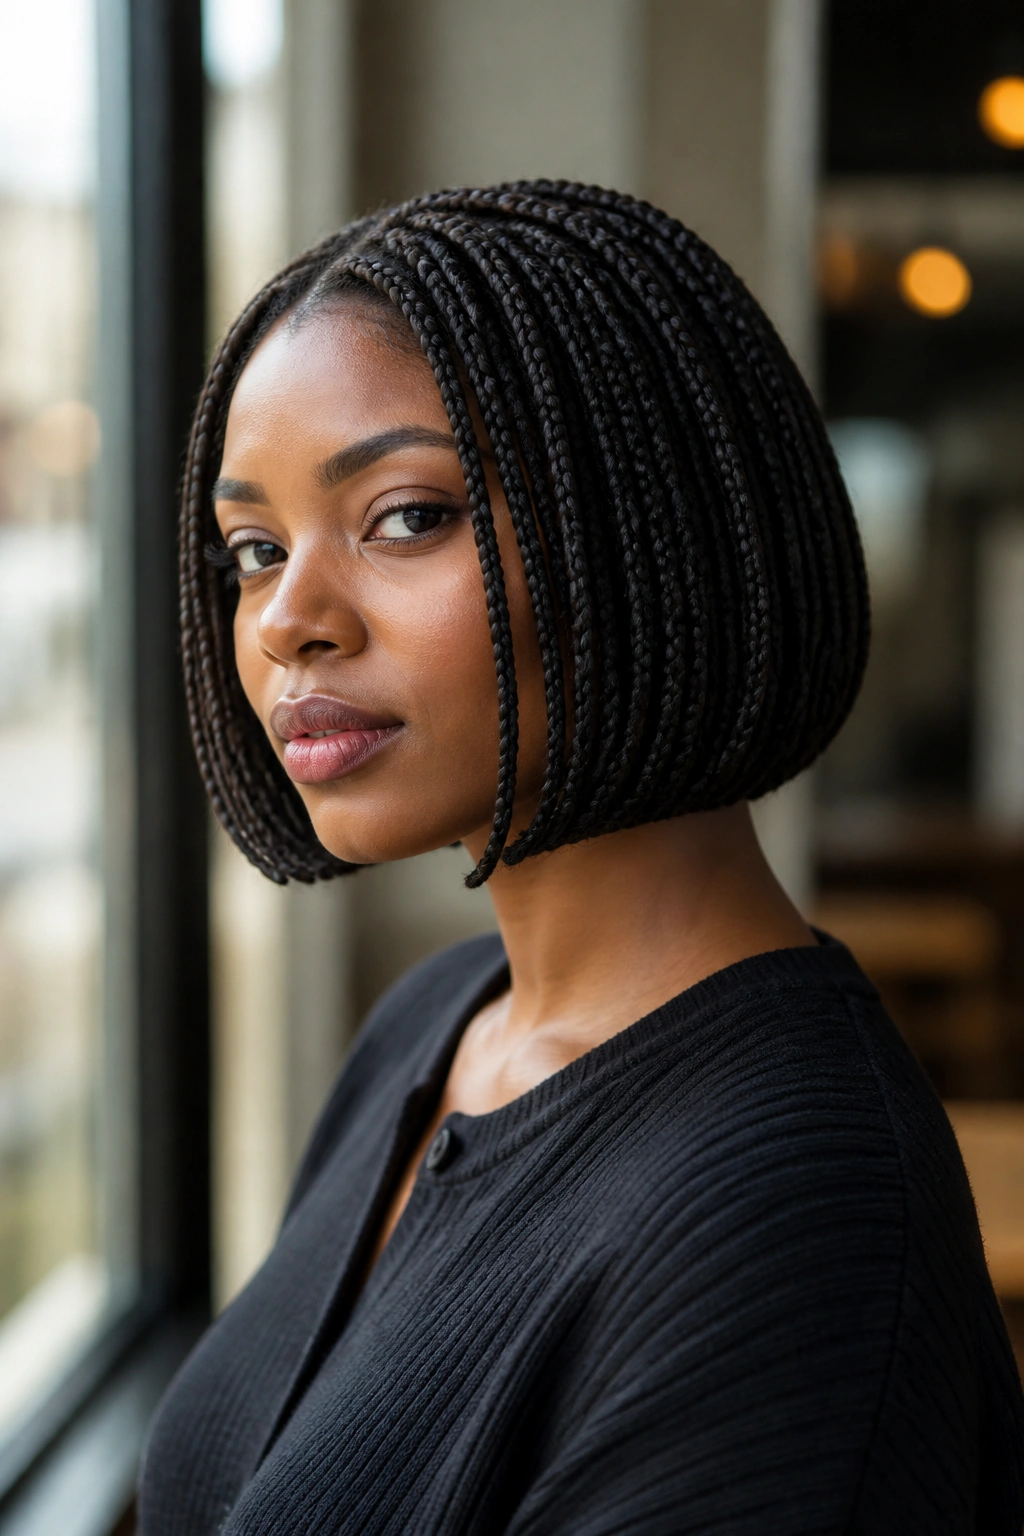
The bob is a classic for a reason. It is the ultimate face-framing silhouette. For Type 4 hair, a braided bob provides a level of volume and “oomph” that straight hair simply cannot replicate. Because our hair has natural density, the bob looks full and lush rather than limp. Keeping the length right at the chin or slightly above creates a sharp, modern line that looks great with everything from a power suit to a t-shirt.
Instead of letting the ends hang loose, many people choose to “burn” or “tuck” the ends of a bob. This prevents the braids from unraveling and gives the bottom of the style a clean, uniform finish. If you want a more bohemian feel, you can leave the last half-inch of the braids unraveled and dip them in hot water to create a soft, slight curl.
To get the most out of this look, consider the “swing” factor. Bobs are all about movement. If the braids are too stiff, the style loses its charm. Use a lightweight synthetic hair or, better yet, use your natural hair if it has reached chin length. If you are using extensions, ensure the stylist does not use too much hair per braid. You want the braids to be flexible enough to move when you turn your head.
3. Fulani Braids on a Pixie Base
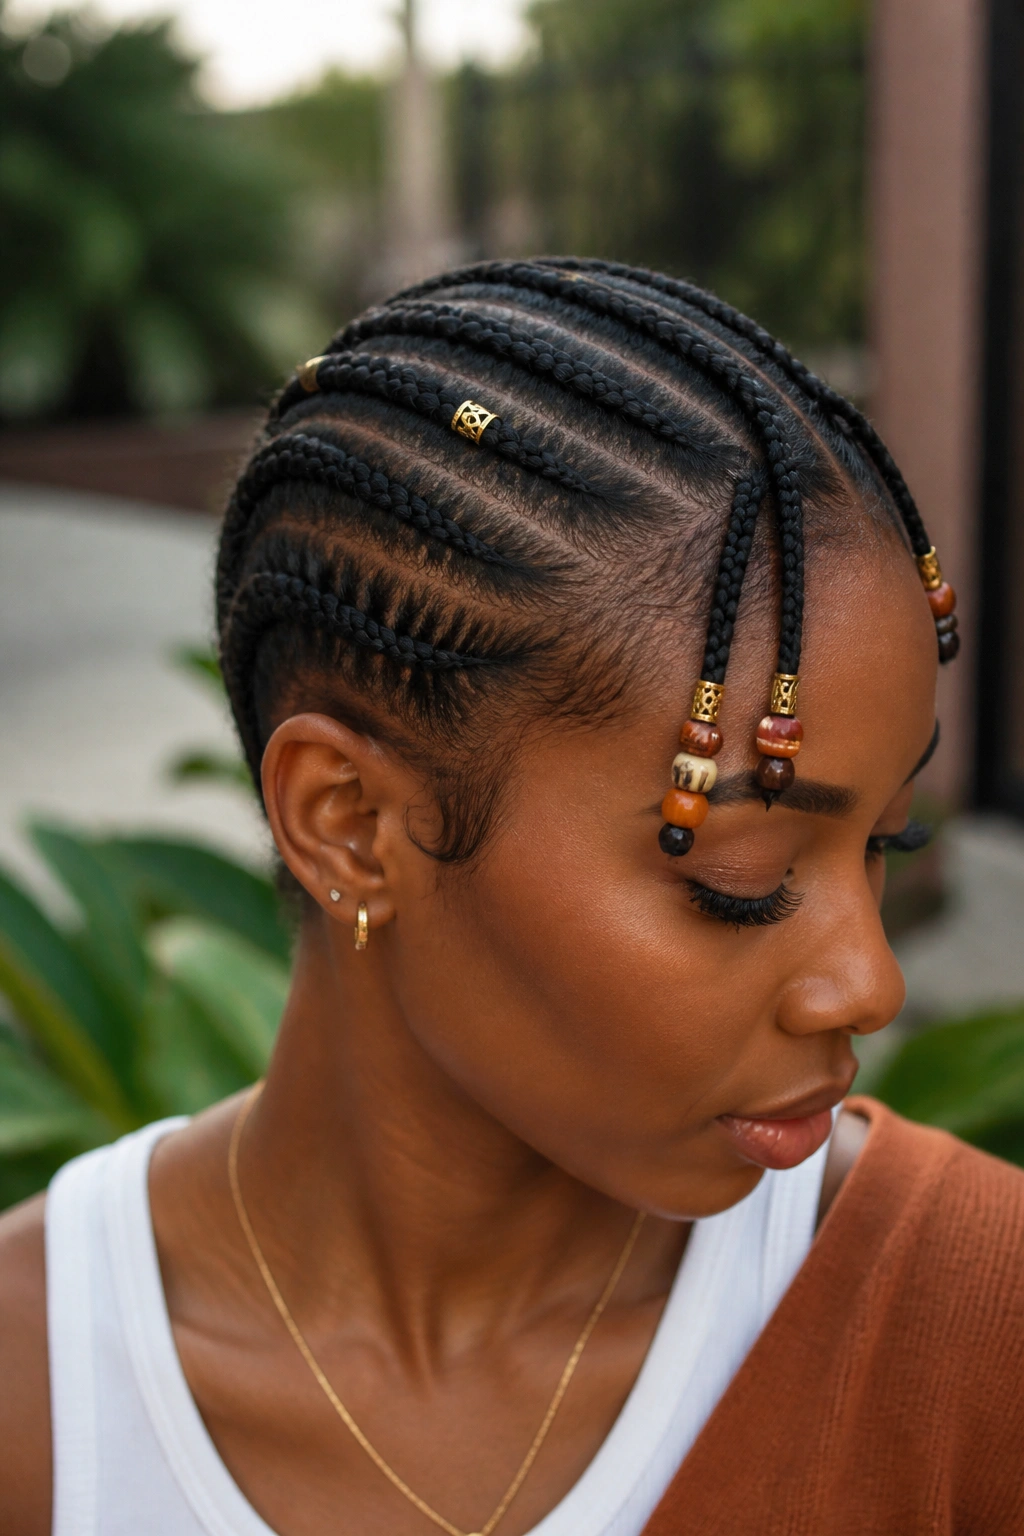
Can you do Fulani braids on short hair? Absolutely. Fulani styles—characterized by a central cornrow, side braids directed toward the front, and often decorated with beads—are traditionally seen as long styles, but they look stunning when adapted for a pixie-length cut. This style is all about the artistry of the parting.
The Anatomy of the Short Fulani
The key to making this work on short Type 4 hair is the tension. Since the hair is shorter, the “anchor” for the cornrow needs to be secure without being painfully tight. A skilled braider will use the “feed-in” method, adding tiny increments of hair to the braid as they go. This creates a seamless look that doesn’t put unnecessary stress on your roots.
Decorative Elements
- Beads: For a short style, choose smaller, lighter beads. Heavy wooden beads might pull too much on short hair.
- Gold Cuffs: These are perfect for short braids because they add “shine” without adding “weight.”
- Symmetry: Ensure the side-swept braids are perfectly mirrored on both sides to maintain the balance of the pixie shape.
How do you keep the back looking neat? If the hair at the nape of your neck is too short to braid, simply have it neatly tapered or use a “tuck and pin” method to secure the ends of the cornrows.
4. Micro Braids with Curly Ends
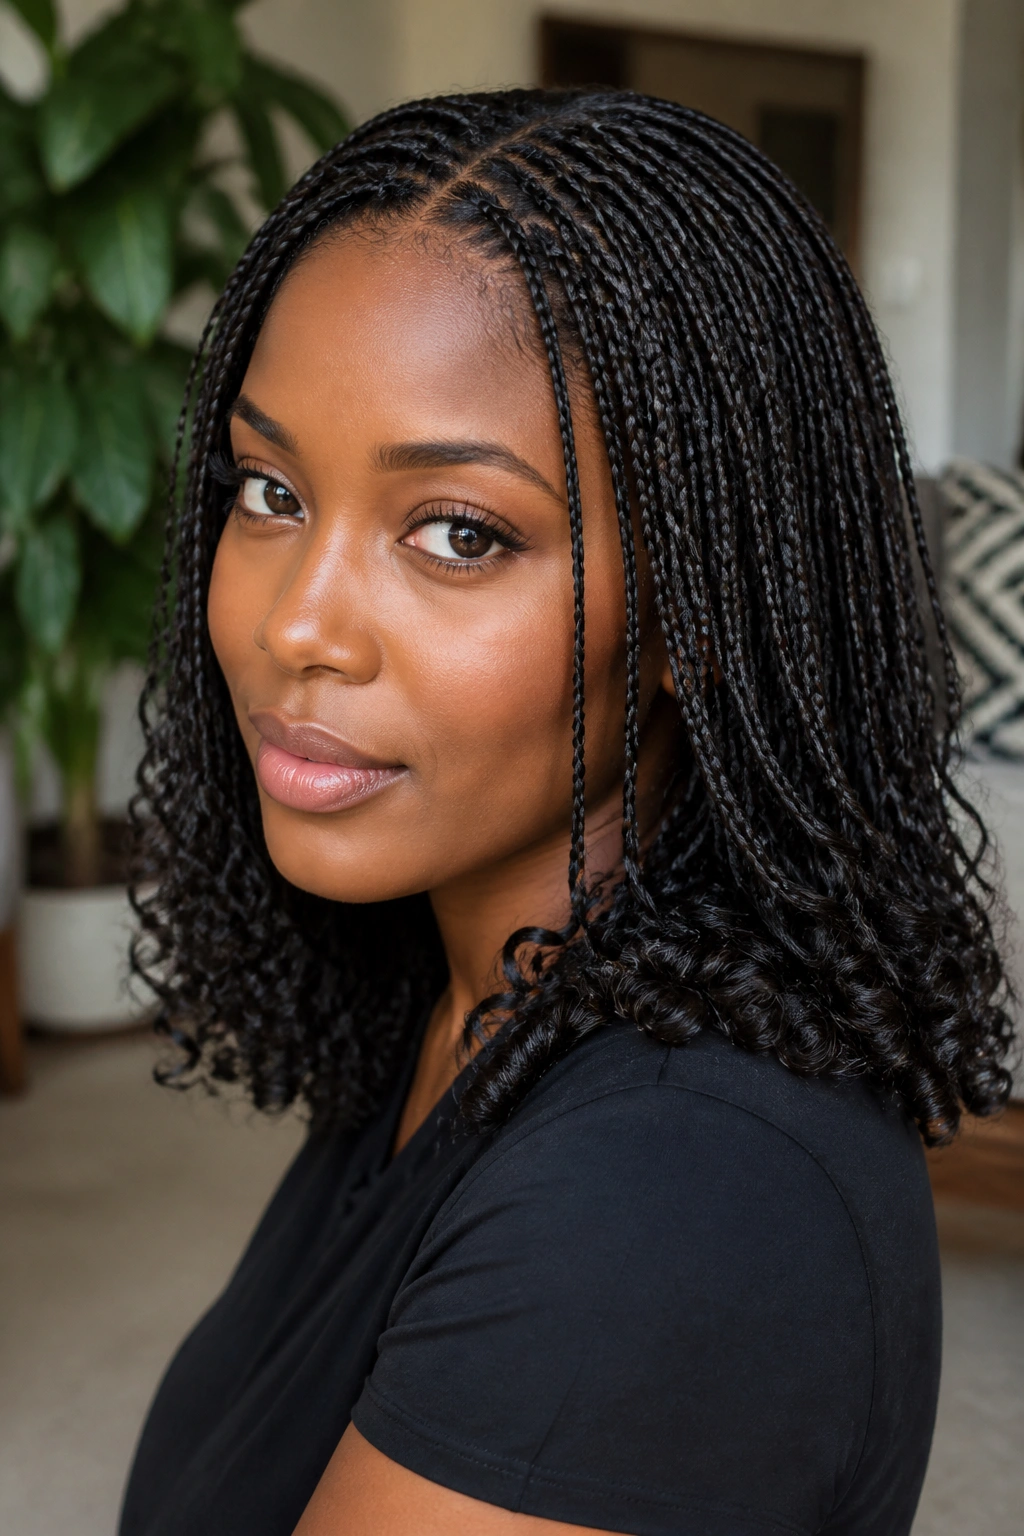
Often referred to as “Goddess” braids when they are long, this style translates beautifully to shorter lengths. Imagine a head full of tiny, shoulder-skimming braids where the bottom two inches are left as soft, bouncy curls. This style is a texture lover’s dream. It combines the neatness of braids with the wild, beautiful volume of Type 4 curls.
Usually, this style requires a mix of braiding hair and a bit of “bulk” curly hair. The braids are done as micro-braids—very thin—and the curly hair is either braided in or crocheted in at the ends. For 4C hair, this is an excellent protective style because the braids shield the majority of the hair shaft while the curly ends allow for a bit of “play.”
This look does require a bit more daily attention than standard box braids. You will need to keep the curly ends moisturized and detangled. A quick spray of water and a light leave-in conditioner every morning will keep the curls from turning into a frizzy mass. It’s a bit of work, but the “ethereal” look of short, curly-ended braids is well worth the five minutes of morning maintenance.
5. Short Knotless Braids with Beads
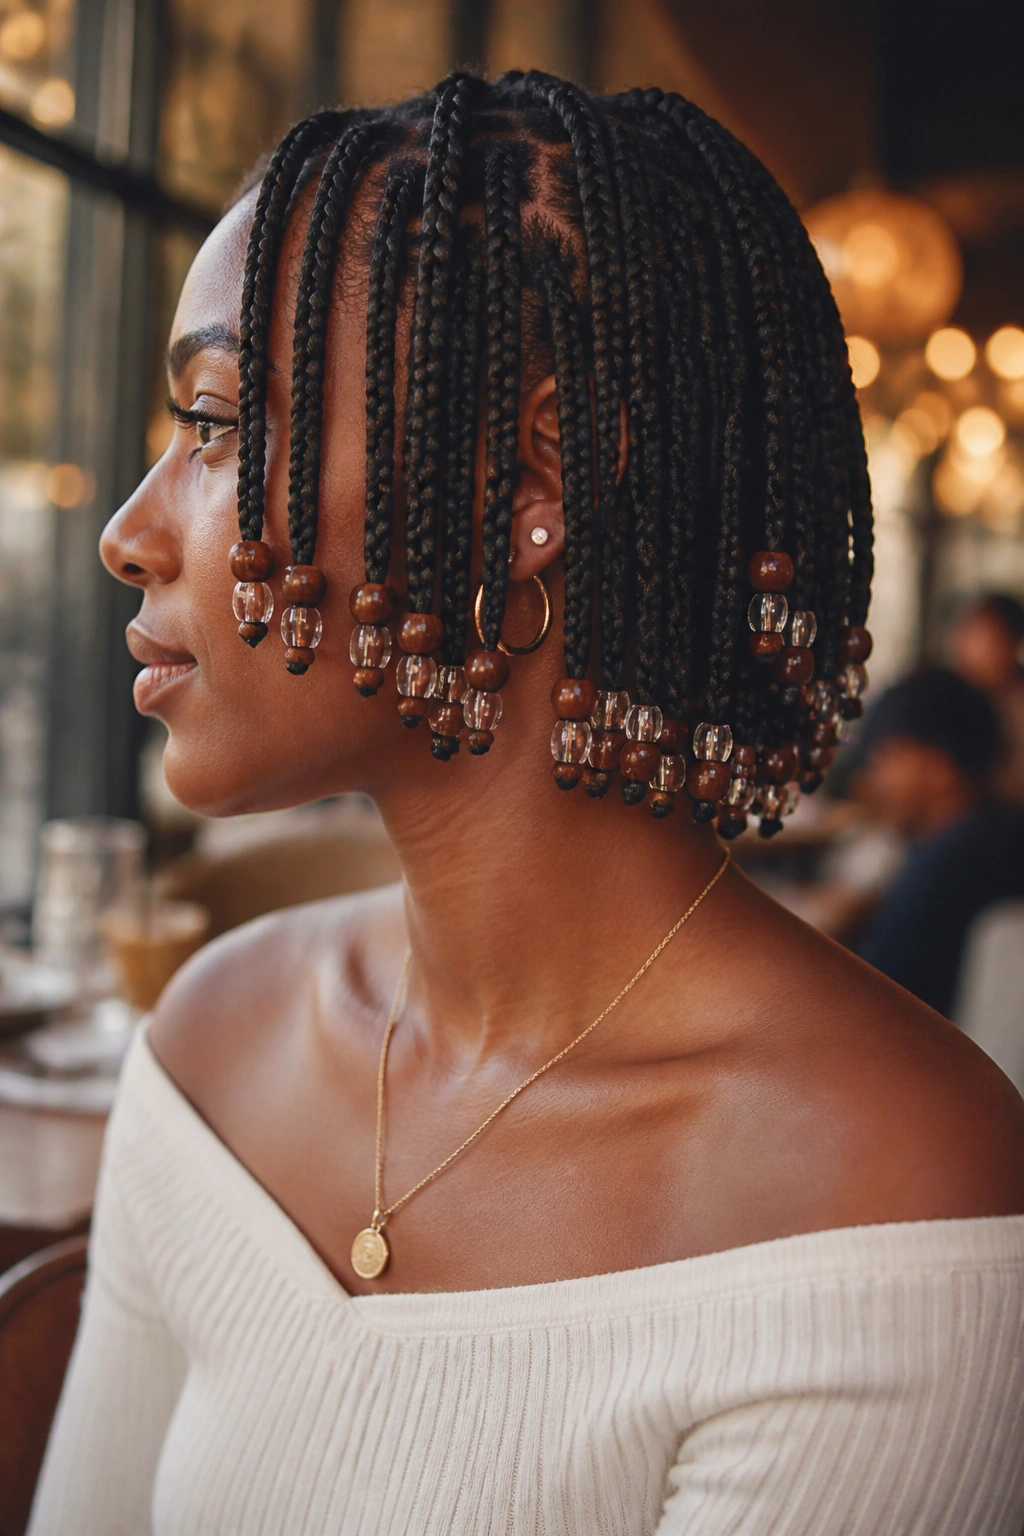
Knotless braids changed the game for the natural hair community by eliminating the heavy “knot” at the base of the braid. This makes them significantly more comfortable and much more natural-looking. When done at a short length—think ear-length or slightly longer—they become the ultimate “cool girl” hairstyle.
Adding beads to the end of short knotless braids serves two purposes. First, it adds a rhythmic, percussive sound when you move, which is undeniably satisfying. Second, the weight of the beads helps the short braids “hang” down rather than sticking out at odd angles. This is particularly helpful during the first week after braiding when the hair is still settling.
The beauty of the knotless technique on Type 4 hair is that the braid starts with your actual hair. As the braider slowly feeds in the extension, the transition is invisible. This means you can wear your hair in a deep side part or even a “half-up, half-down” style without anyone seeing bulky knots or scalp irritation. It is a clean, sophisticated look that highlights the health of your scalp.
6. Zig-Zag Parting French Braids
Sometimes, the simplest styles are the most effective. If your hair is in that middle-ground length—too long for a buzz but too short for a ponytail—two or four chunky French braids (or “Dutch” braids where the braid sits on top) can be a lifesaver. To elevate this from a “gym hair” look to a fashion statement, use zig-zag parting.
The Contrast of the Part
Unlike a straight part, a zig-zag part breaks up the symmetry of the head and adds a sense of “motion” to the style. This is a great way to hide any thinning areas or uneven growth patterns. Because Type 4 hair is so dense, the “peaks” and “valleys” of the zig-zag stay very distinct.
Why It Beats the Standard Braid
- Visual Interest: It looks more “complex” than it actually is.
- Tension Distribution: The jagged line distributes the pull of the braid across more area of the scalp.
- Longevity: Zig-zag parts tend to look “fresher” for longer because as the hair grows out, the line remains interesting rather than just becoming a wide gap.
Unlike long braids that can take eight hours to install, you can get these done in under an hour. It is the perfect “reset” style for when you want your hair out of your face but don’t want to commit to a full day in the stylist’s chair.
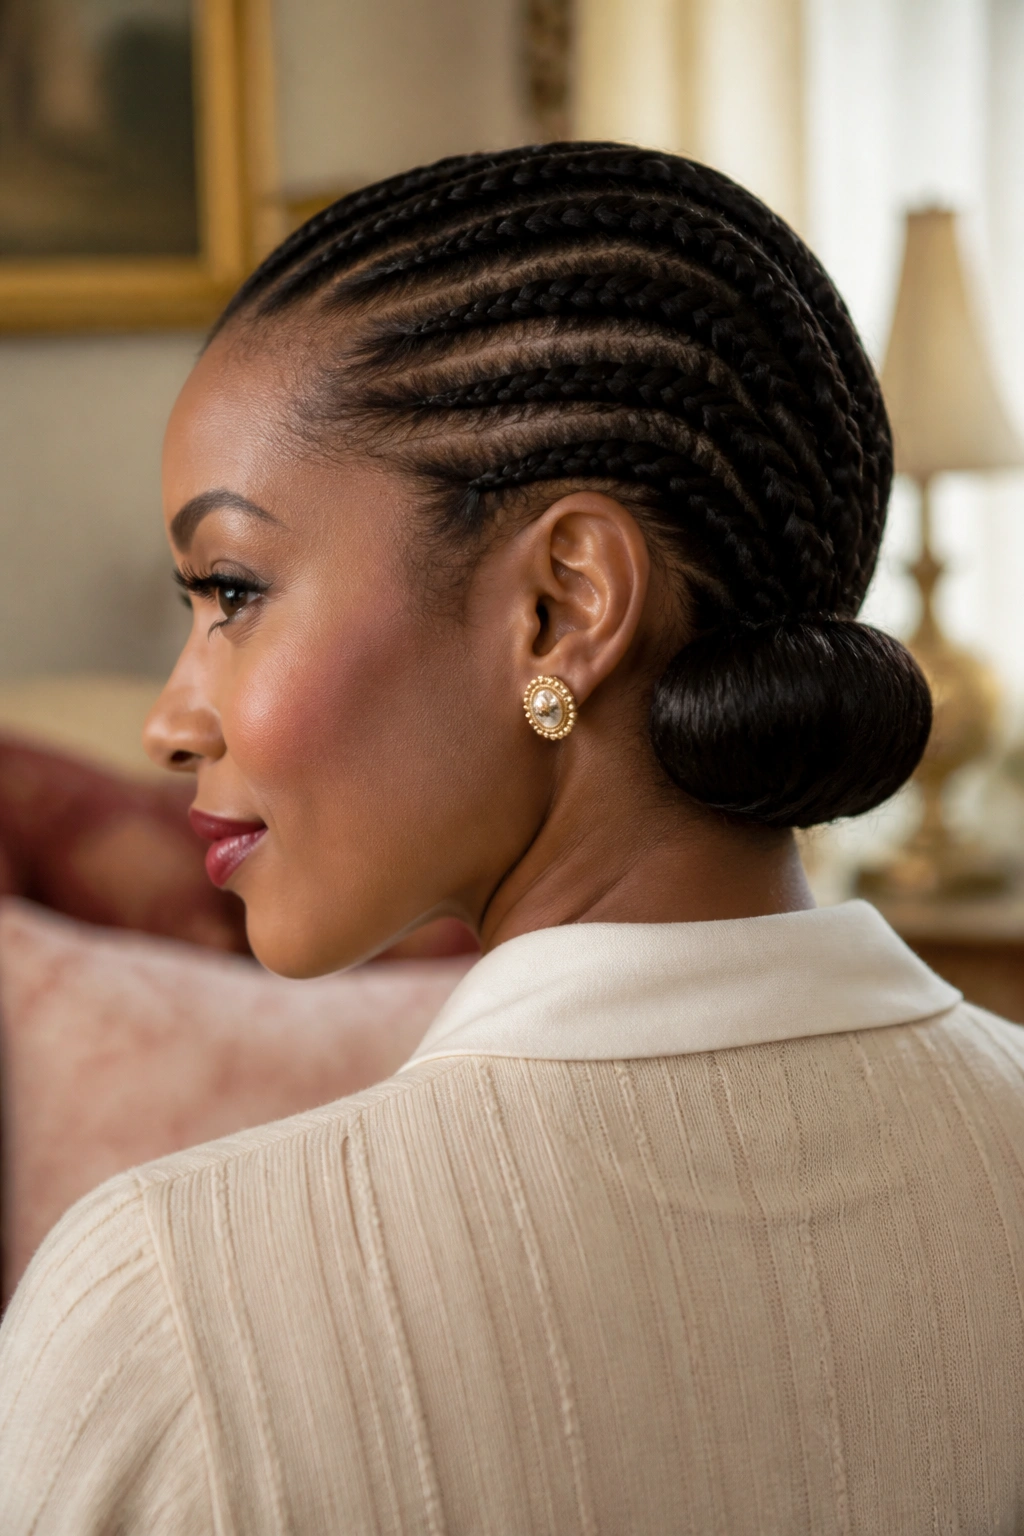
7. Tapered Nape Cornrows
One of the most overlooked areas for short hair styling is the nape of the neck. When your hair is short, the “fuzz” at the back can often make a style look unkempt. Tapered nape cornrows solve this by braiding the hair from the bottom up toward the crown. This creates a “lifted” look that mimics an undercut or a sophisticated updo.
This style is a favorite for people who are physically active. Having the hair off the neck prevents “sweat-matting,” which is a common issue for Type 4 hair during exercise. The braids at the back can meet in the middle or be gathered into a small bun or a series of “knots” at the top of the head.
To keep this looking sharp, you have to be diligent about your “back-of-head” maintenance. Use a hand mirror to check the nape and apply a tiny bit of edge control to any flyaways. It is a small detail that makes a massive difference in how “expensive” the hairstyle looks.
8. Short Passion Braids
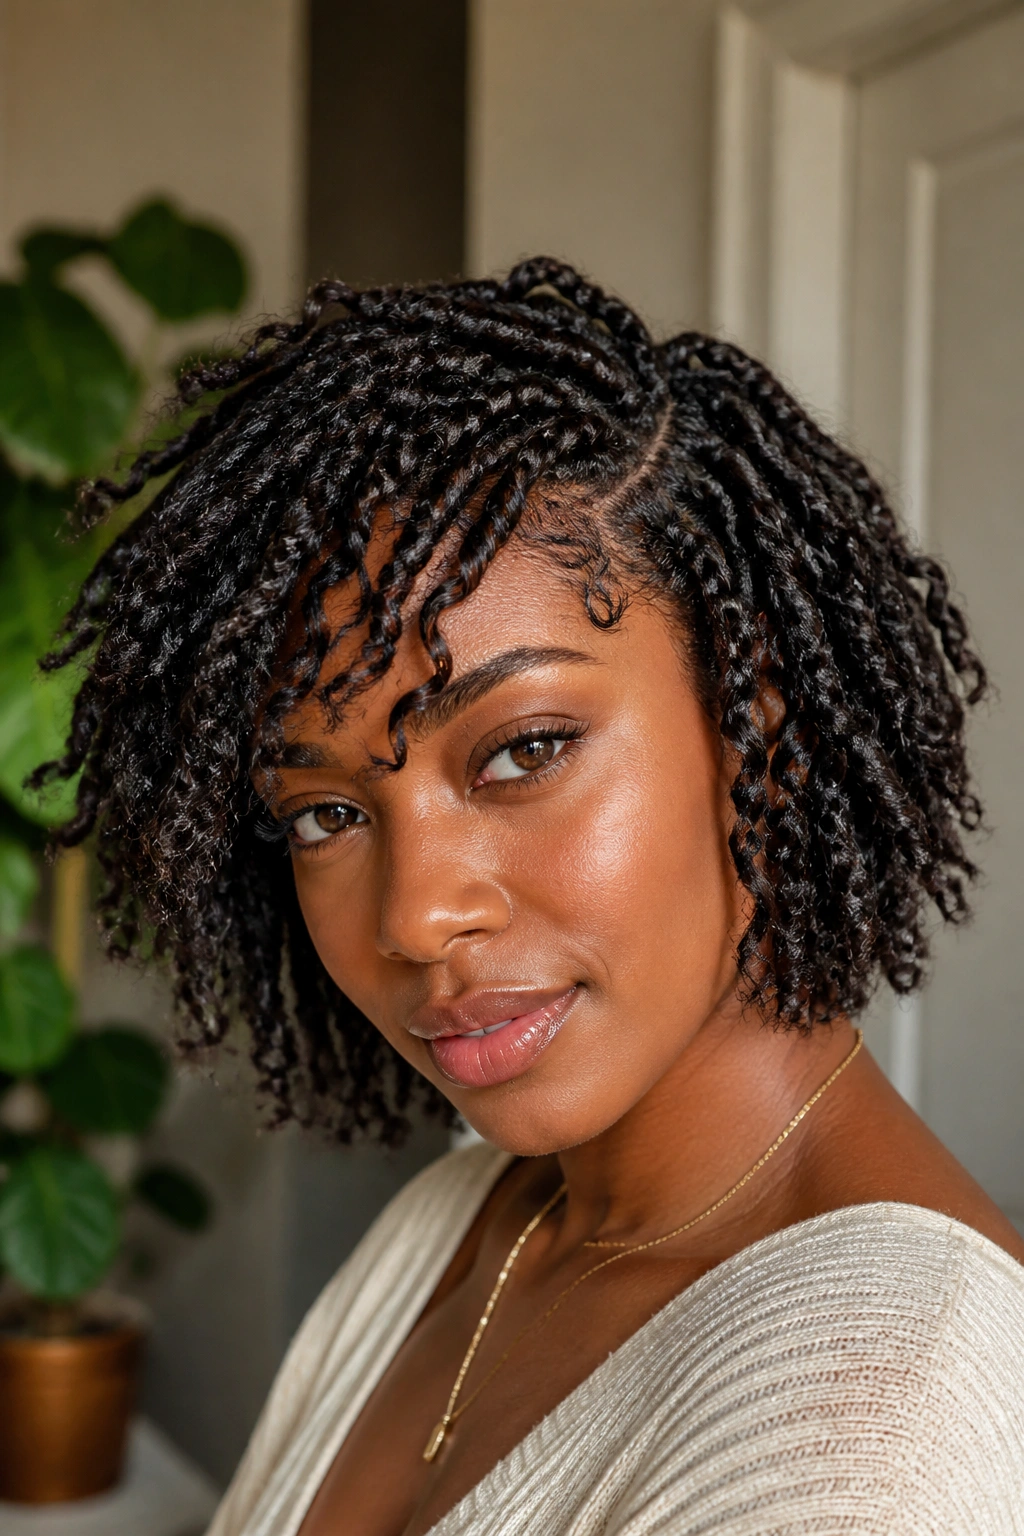
Passion braids are a variation of the two-strand twist, but they use a specific type of wavy/curly hair to create a “distressed” and textured look. While usually seen in long, “boho” lengths, passion braids are actually much more manageable and, arguably, more stylish when kept short.
A short passion braid bob has a “shaggy” quality that is very modern. Because the hair used is intentionally messy and curly, you don’t have to worry about every single hair being in its perfect place. This makes it one of the most low-maintenance styles for Type 4 naturalistas. If a little of your own 4C texture peeks through the “distressed” twist, it actually adds to the look rather than detracting from it.
One thing to watch out for with passion braids is the “frizz factor.” Because the hair is already textured, it can mat together if you aren’t careful. Separate the twists gently with your fingers every few days and use a light oil sheen to keep the synthetic fibers from becoming too “velcro-like” against each other.
9. Mohawk Braid Out
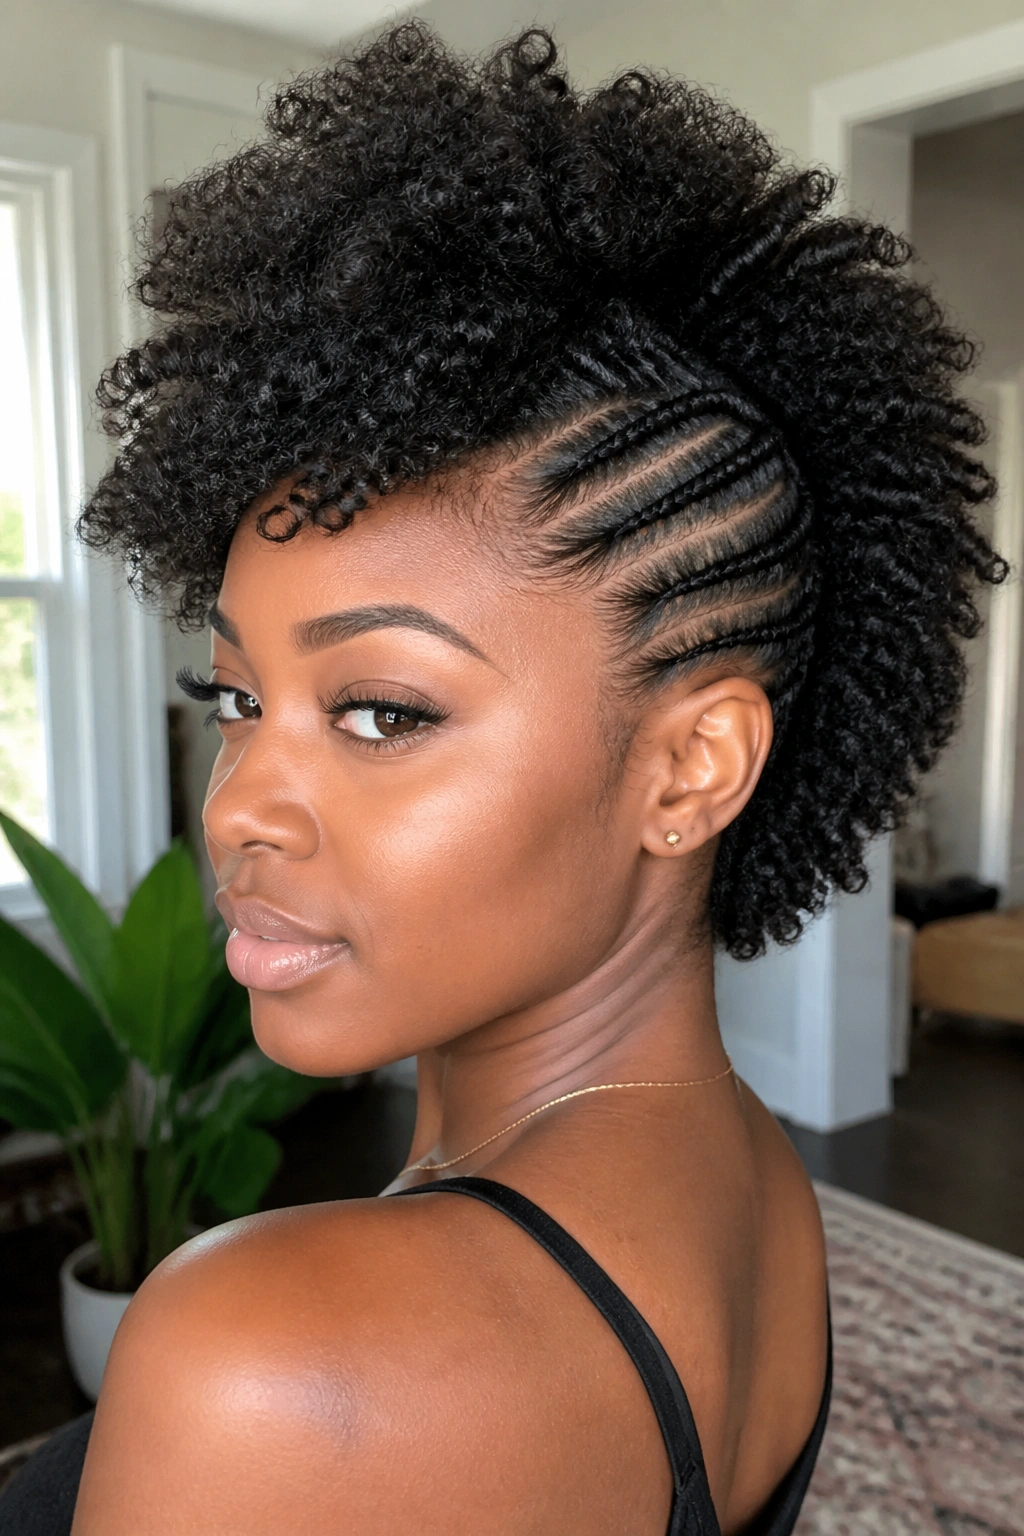
This is a hybrid style that celebrates the versatility of short natural hair. You braid the sides of the head upward into neat cornrows, leaving the center strip of hair loose. You then braid or twist that center section, let it set overnight, and unravel it in the morning. The result is a fierce, braided mohawk with a soft, curly “fro” in the middle.
This style is incredible for 4B and 4C hair because our “shrinkage” actually helps the mohawk stay upright and voluminous. You don’t need a ton of hairpins or hairspray; the texture does the heavy lifting. It’s a “best of both worlds” scenario: you get the intricate detail of the braids on the sides and the full glory of your natural curl pattern on top.
Maintaining the Mohawk
- The “Pineapple”: At night, you can’t really pineapple a mohawk. Instead, use a “buff” or a long silk tube to keep the center section from being crushed.
- Refresh: Use a pick at the roots of the loose section to maintain volume, but stay away from the ends to preserve the curl definition.
- Edge Care: Since the sides are pulled tight into braids, be sure to moisturize the scalp between the braids every other day.
10. Halo Braid for Short Tresses
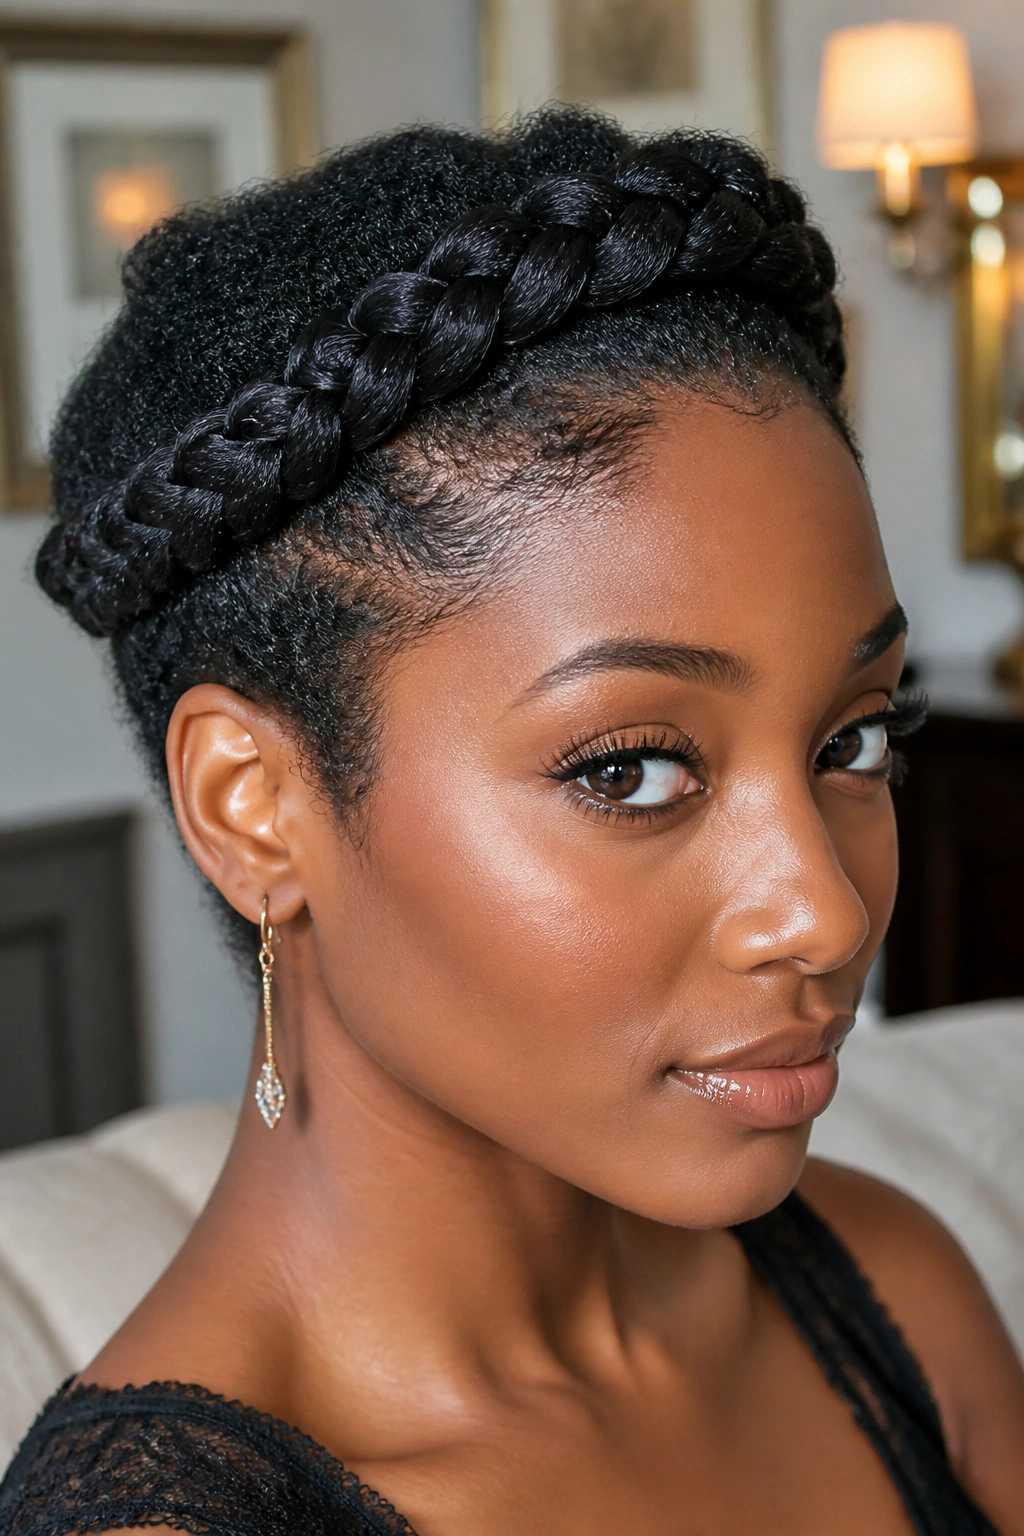
The halo braid—a single or double braid that circles the head like a crown—is often thought of as a “long hair only” style. However, if your hair is at least 3 or 4 inches long, you can achieve a beautiful halo. The trick for short Type 4 hair is to use the “feed-in” method with a bit of Marley or Kanekalon hair that matches your texture perfectly.
A halo braid on short hair looks incredibly elegant. It pulls all the hair away from the face, highlighting your eyes and cheekbones. Because our hair is dense, the “halo” looks thick and substantial. If you have 4C hair, the “tuck” at the end of the braid is easy to hide because the hair blends into itself so well.
This is the ultimate “event” hairstyle. Whether it’s a wedding, a graduation, or a big presentation at work, the halo braid is timeless. It doesn’t scream “extensions”; it looks like a sophisticated way of styling your own crown. To make it even more special, you can weave a bit of gold thread through the braid or tuck in a few sprigs of baby’s breath.
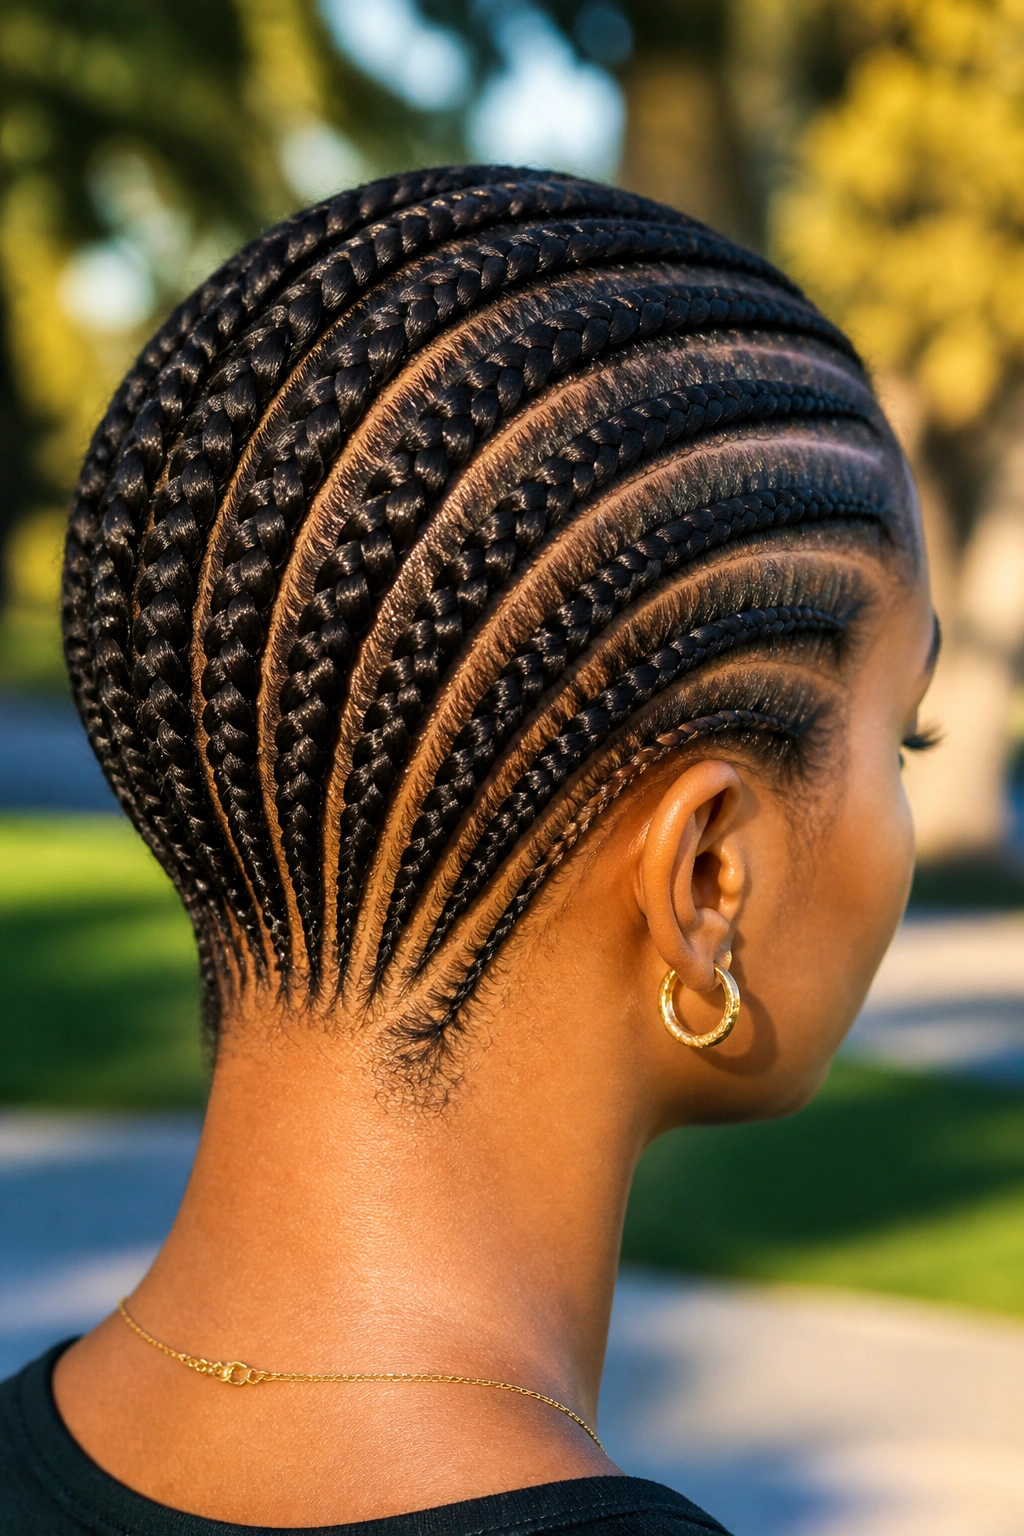
11. Side-Swept Feed-In Cornrows
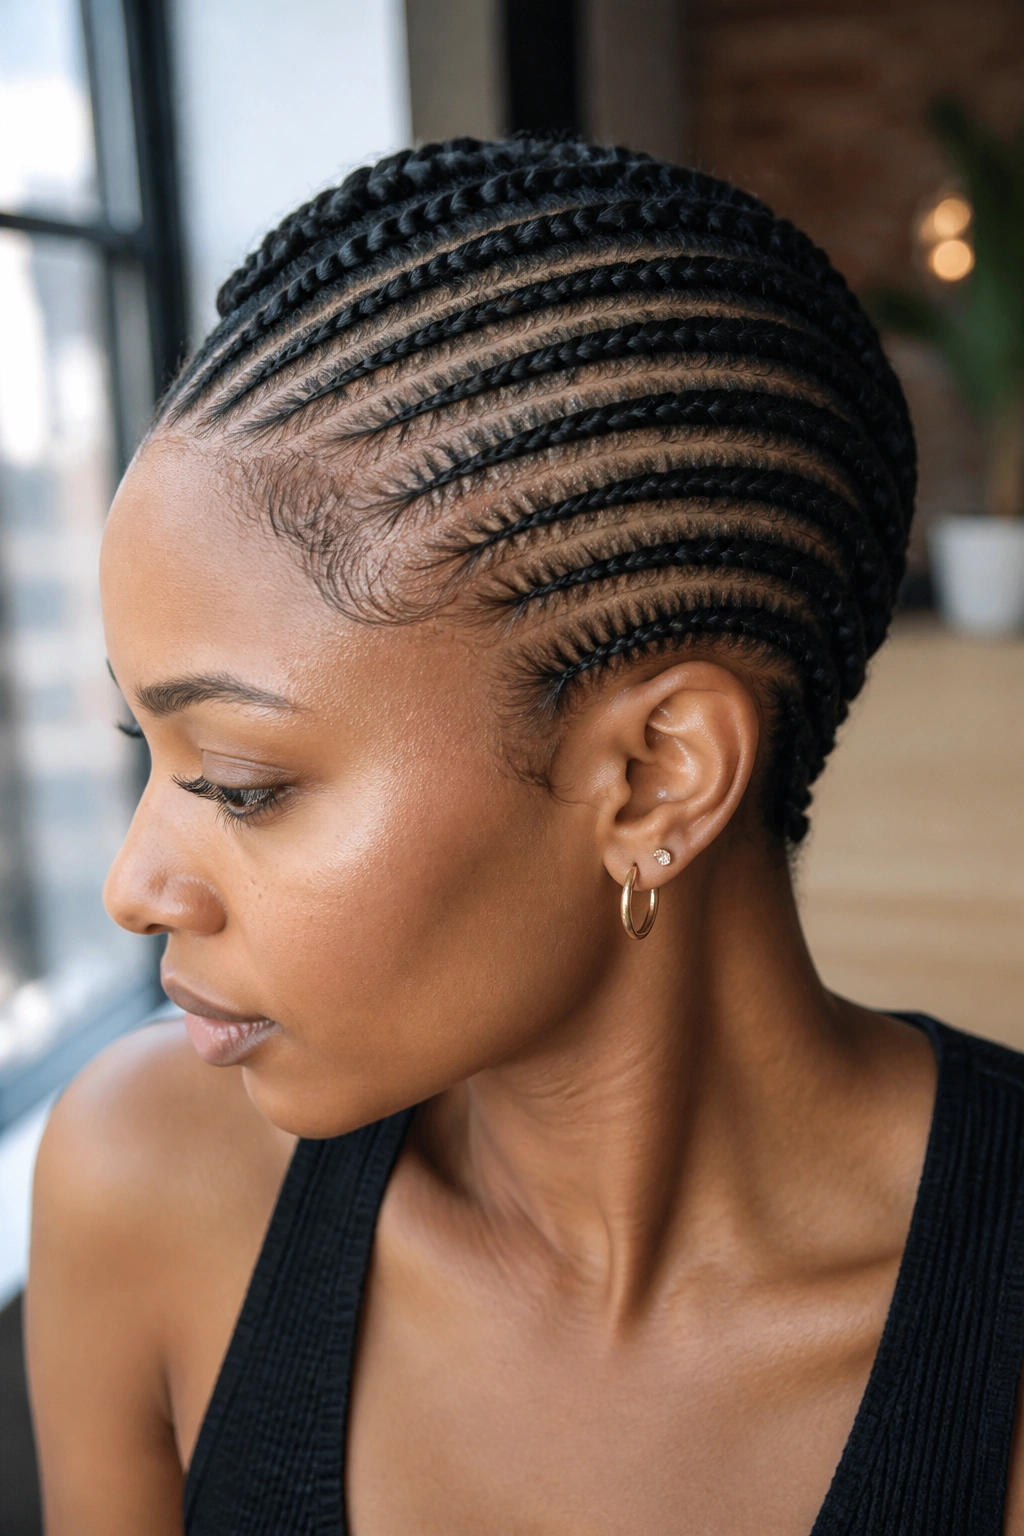
If you want a look that is asymmetrical and dynamic, side-swept cornrows are the way to go. These are cornrows that start on one side of the head and travel across the scalp, ending just past the opposite ear. For short hair, this creates a “faux-shaved” look on one side and a voluminous braided texture on the other.
This style is particularly flattering for heart-shaped and square faces because it breaks up the horizontal lines of the face. The “feed-in” technique is essential here to ensure the braids start thin at the temple and gradually get thicker as they move across the head. This gradient adds a professional, high-end finish to the style.
Because all the hair is being directed one way, you might find that the “tail” of the braids (where the hair hangs loose) is quite short. Embrace it! A row of short, 2-inch braided tails hanging behind the ear is a very chic, “editorial” look. You can secure the ends with tiny clear elastics or even small colorful clips for a bit of personality.
12. Chunky Two-Strand Twist Braids
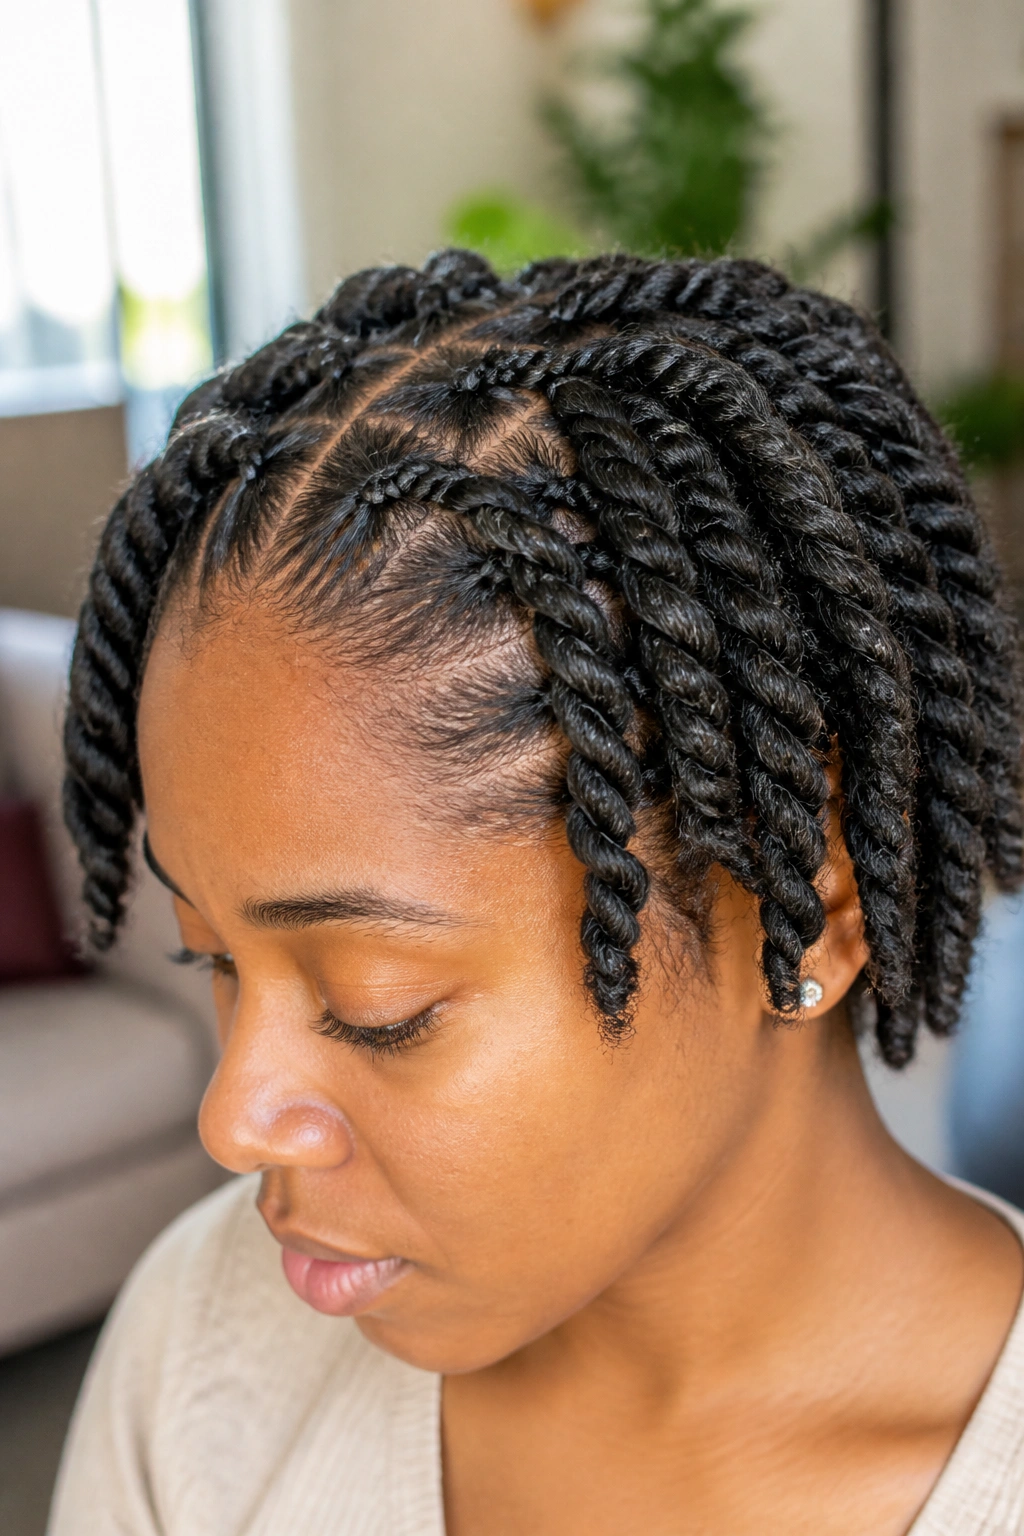
Wait, are they twists or braids? In this case, it’s a bit of both. You start by braiding the first inch of the hair at the root to “anchor” the style and prevent it from puffing up too quickly, then you transition into a chunky two-strand twist. For short natural hair, this provides a level of “swing” and “hang” that twists alone often lack.
Chunky styles are fantastic for Type 4 hair because they showcase the richness of the texture. If you have 4C hair, these twists will look like thick, velvet ropes. Keeping them short—maybe just reaching the tops of the ears—gives the hair a playful, youthful energy.
The maintenance for this is almost zero. In fact, many people find that this style looks even better as it “ages” and becomes a bit fuzzier. It begins to look more like natural locs, which is a beautiful aesthetic in its own right. Just remember to sleep on a silk or satin pillowcase to prevent the twists from drying out.
13. Finger Wave Braids
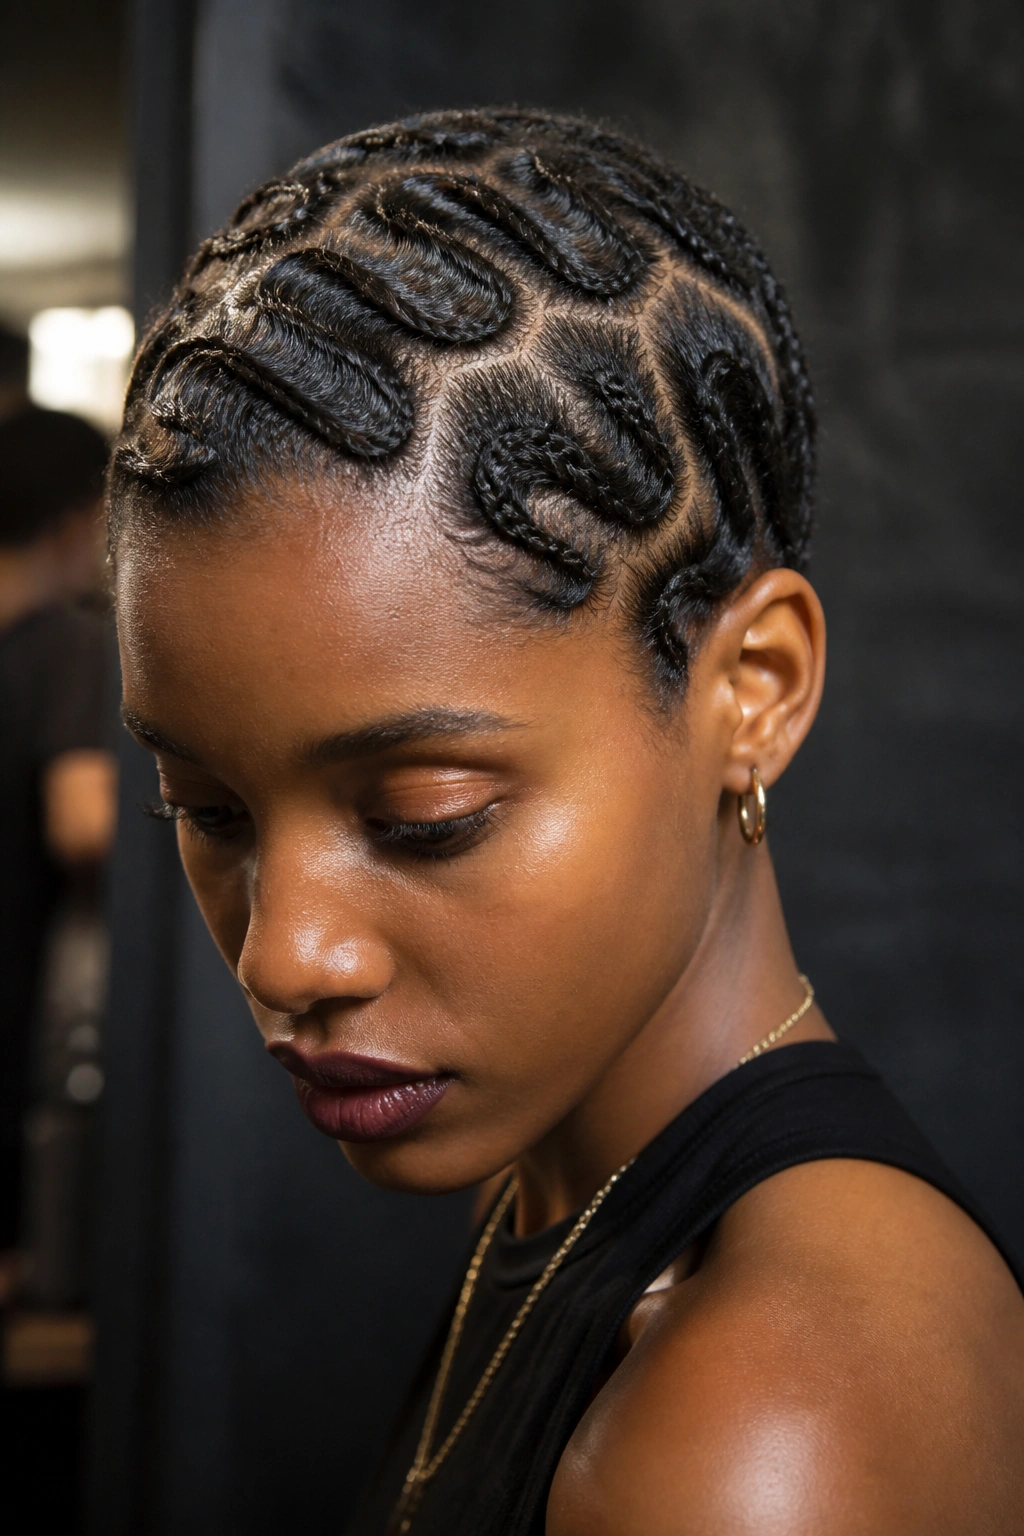
This is a high-fashion, vintage-inspired look that requires a very skilled braider. Instead of braiding in straight lines, the cornrows are braided in a “S” or wave pattern across the scalp, mimicking the classic finger waves of the 1920s. On short Type 4 hair, this is a show-stopper.
The density of 4C hair allows these “waves” to stand in high relief against the scalp. It looks like a piece of art. This is not a “protective style” you keep in for six weeks; it’s more of a “statement style” for a special occasion or a few weeks of looking incredibly sharp.
Why It Works for Short Hair
- No Length Needed: The pattern is all on the scalp.
- Low Tension: Since the braids are often smaller and follow the natural curve of the head, they don’t pull as hard in one direction.
- Unique Aesthetic: It stands out in a sea of box braids and twists.
To keep the “waves” looking crisp, you will need to wear a durag or a very tight silk scarf at night. This “compresses” the braids and keeps the parting lines visible. A light application of oil on the parts will keep the scalp looking hydrated and the “sculpture” looking its best.
14. Short Box Braids with Silver Cuffs
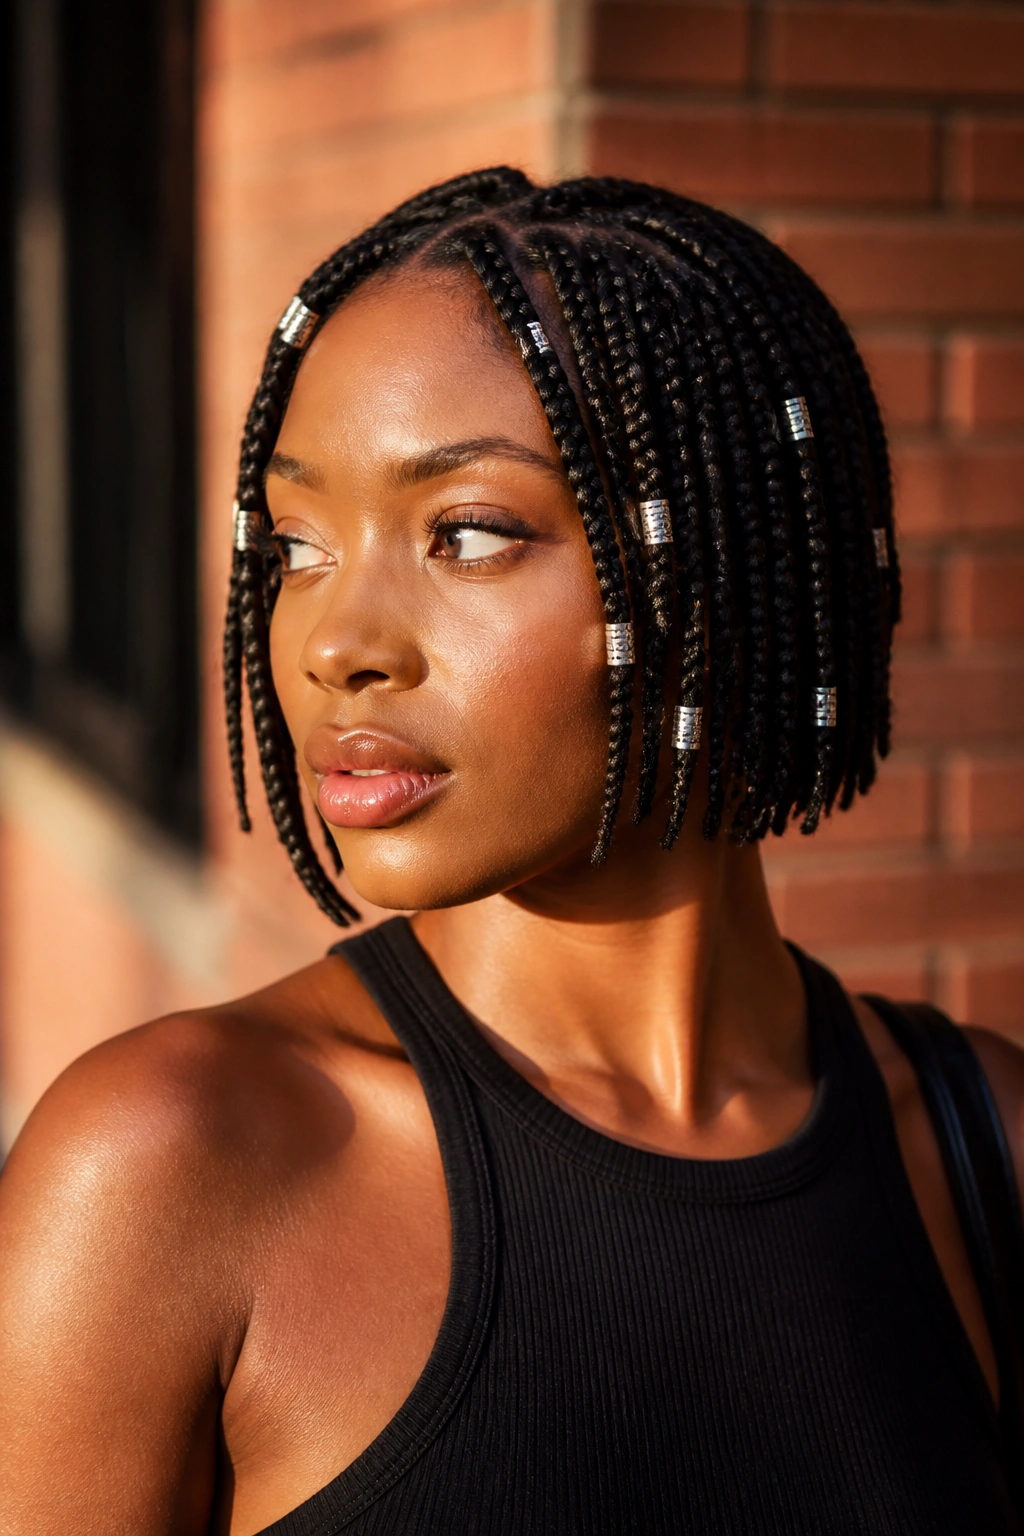
Sometimes, the style is all about the accessories. A simple, chin-length box braid style can be completely transformed by the strategic placement of silver or pewter cuffs. On Type 4 hair, the contrast between the dark, textured hair and the cool, metallic shine of the silver is stunning.
Don’t just throw the cuffs on randomly. Try a “pattern” approach. Maybe place three cuffs in a row on the braids framing your face, or put one cuff on every other braid along the bottom row. For short braids, these cuffs provide a bit of “weight” that helps the hair lay flat, much like beads do, but with a more “grown-up” and sophisticated vibe.
Silver is a particularly good choice if you have any natural grey hairs peeking through. Rather than trying to hide the “sparkles,” the silver cuffs embrace and highlight them. It turns a “transition” into a “choice.”
15. Braided Bantu Knot Accents
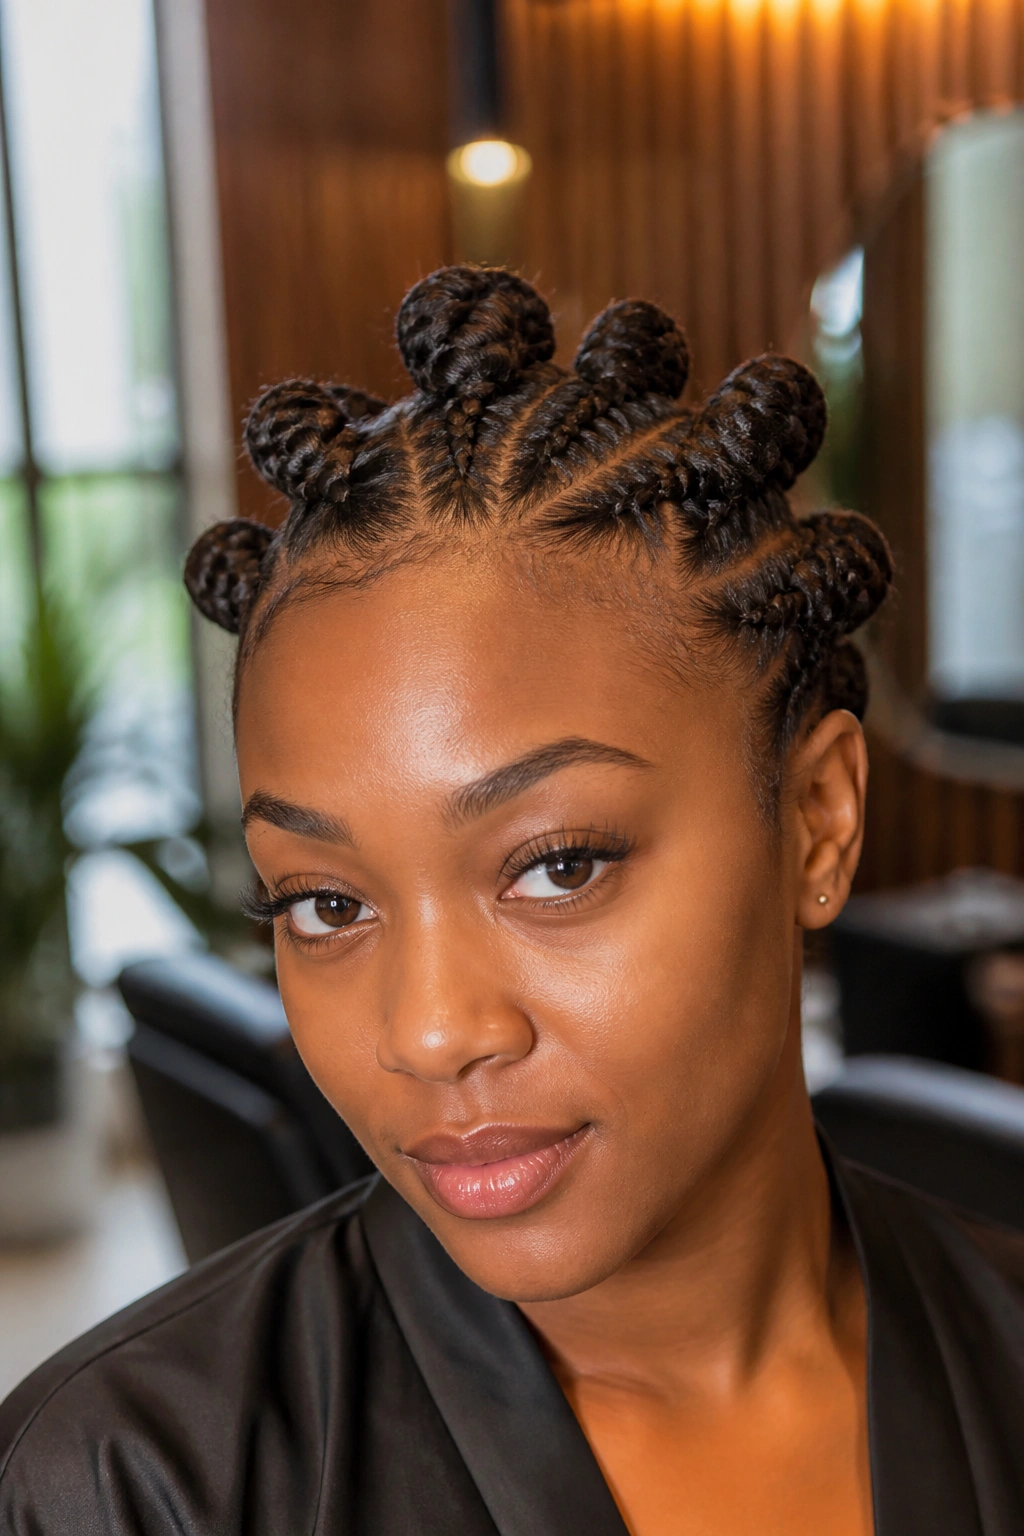
Bantu knots are a staple of the natural hair world, but they can be tricky if your hair is very short. A great workaround is to braid the hair first, then wrap the braid into a knot. This “braided knot” is much more secure and won’t unravel like a traditional twist-knot might on short Type 4 hair.
You can do a full head of braided Bantu knots, or just use them as accents. For example, you could have four small knots at the front of your head and let the rest of your hair stay in short box braids. It adds a bit of “height” and visual interest to the front of the face.
The “Braided Knot” Advantage
The braids give the knots a “ribbed” texture that looks very intricate. When you eventually take the knots down, the braids beneath will have a beautiful “crimped” pattern, giving you a second hairstyle for the price of one. It’s a great way to stretch your style for another week.
16. Asymmetrical Bob Braids
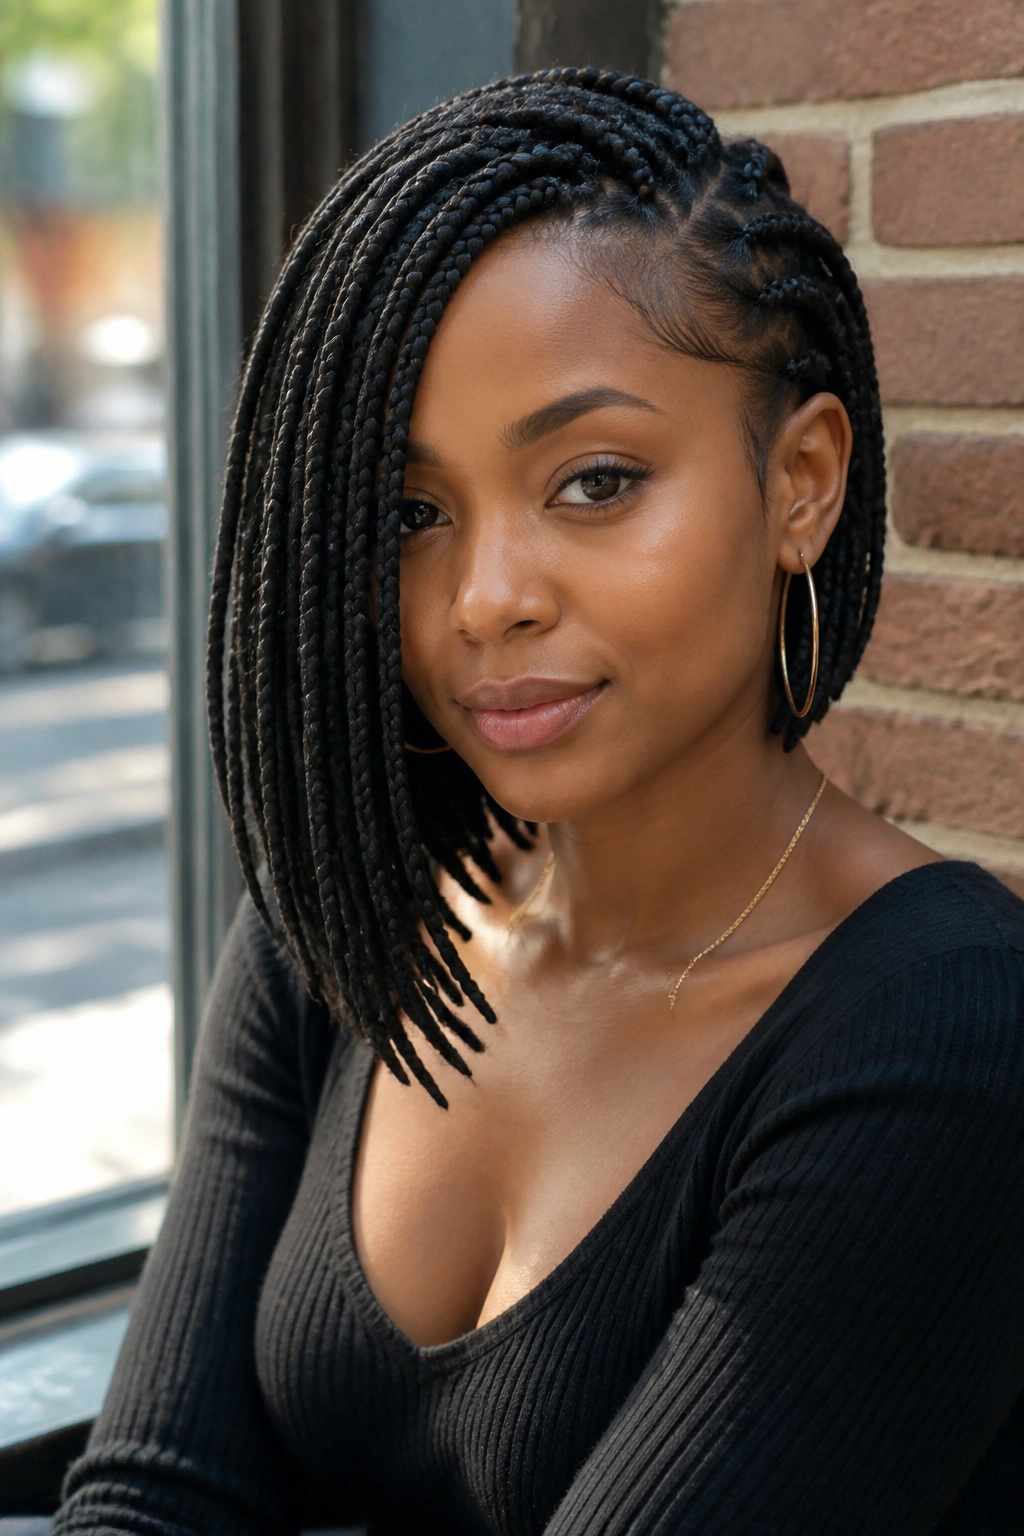
While we talked about the classic bob, the asymmetrical bob deserves its own spotlight. This is where one side of the braids is noticeably longer than the other—perhaps one side hits the jaw while the other grazes the shoulder. This “slant” is incredibly modern and looks amazing on Type 4 hair because the hair’s volume supports the “architectural” shape.
Asymmetry is a great “cheat code” for making short hair look longer. By having that one “long” side, you get the feeling of length without the weight of a full head of long braids. It’s a daring, fashion-forward choice that shows you are confident in your texture and your style.
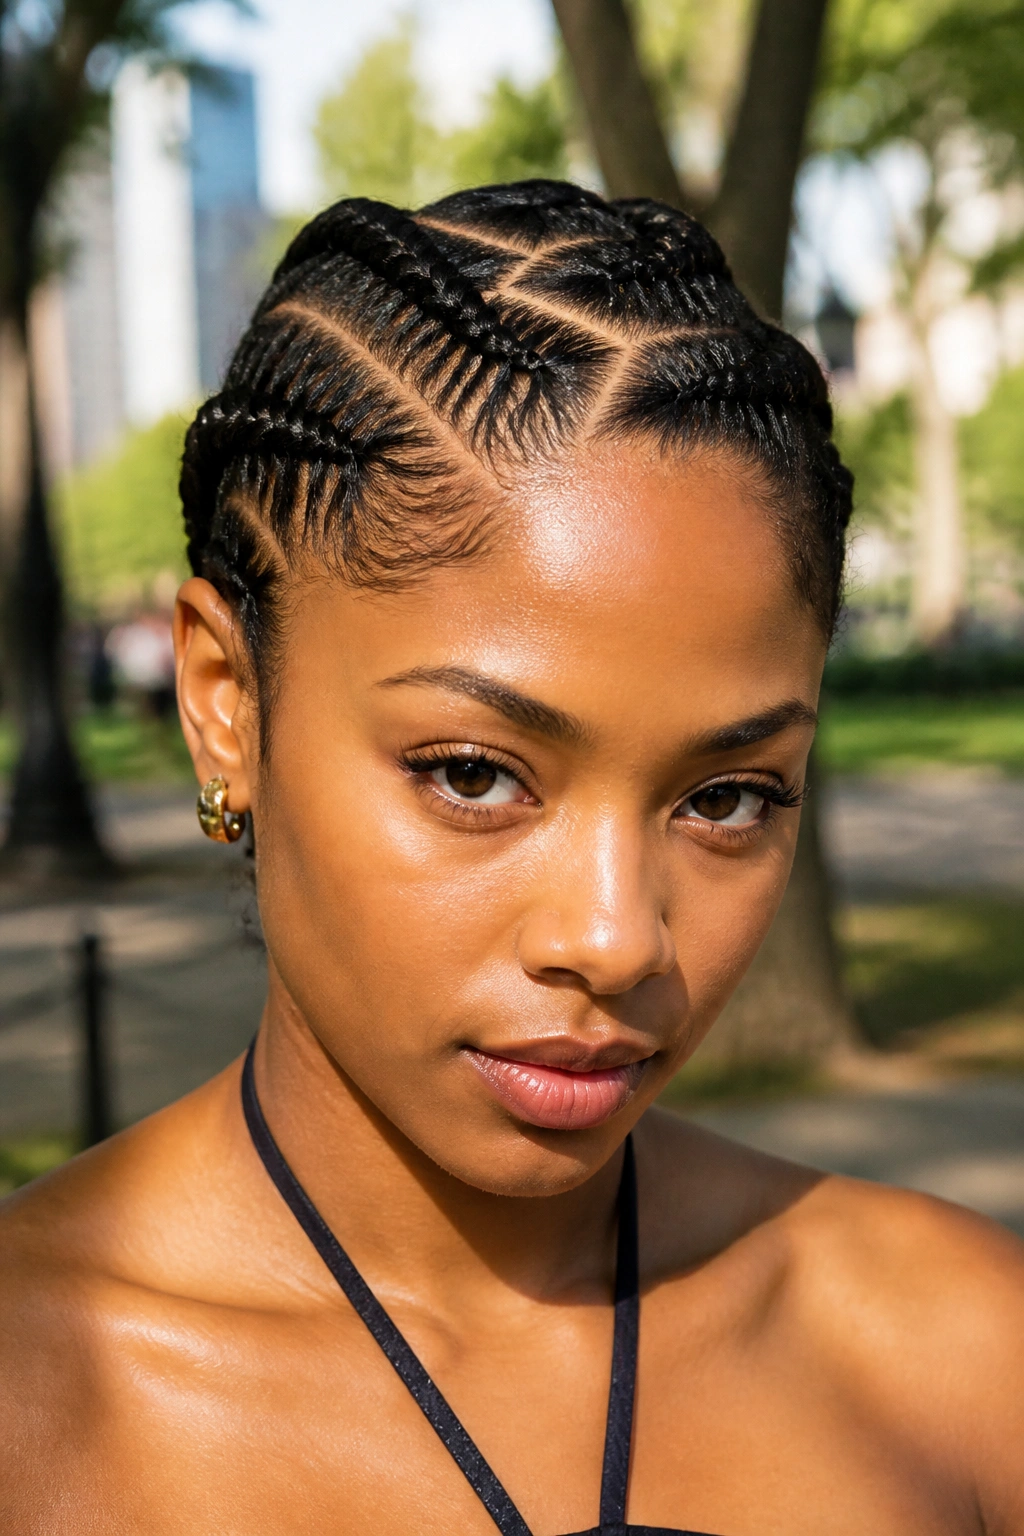
17. Criss-Cross Frontal Braids
In this style, the hair at the very front of the head is braided in a “X” or “criss-cross” pattern before transitioning into standard braids or twists in the back. For short hair, this detail at the hairline is everything. It draws all the attention to your forehead and eyes.
This is a very practical style for 4B and 4C hair because the criss-cross pattern “locks” the hair in place. Even as your hair grows out and you get a bit of “new growth,” the pattern remains visible and neat. It’s a great way to hide a “widow’s peak” or an uneven hairline while still keeping the hair protected and stylish.
18. Short Jumbo Knotless Braids

Usually, people think short braids have to be thin. But jumbo knotless braids on a short base can look incredibly chic—think “90s throwback” vibes. By having only 10 to 15 large braids on your head, you create a look that is bold and graphic.
The key to making jumbo braids work on short Type 4 hair is the “density balance.” Because the braids are thick, they can be heavy. Keeping them short (ear-length or slightly longer) prevents the weight from becoming an issue. This style is also incredibly fast to install—usually under two hours.
Who Should Get Jumbo Braids?
- The Impatient: If you can’t sit in a chair for 6 hours, this is for you.
- The Scalp-Conscious: With fewer parts, it’s much easier to oil and clean your scalp.
- The Bold: It’s a “look-at-me” style that demands attention.
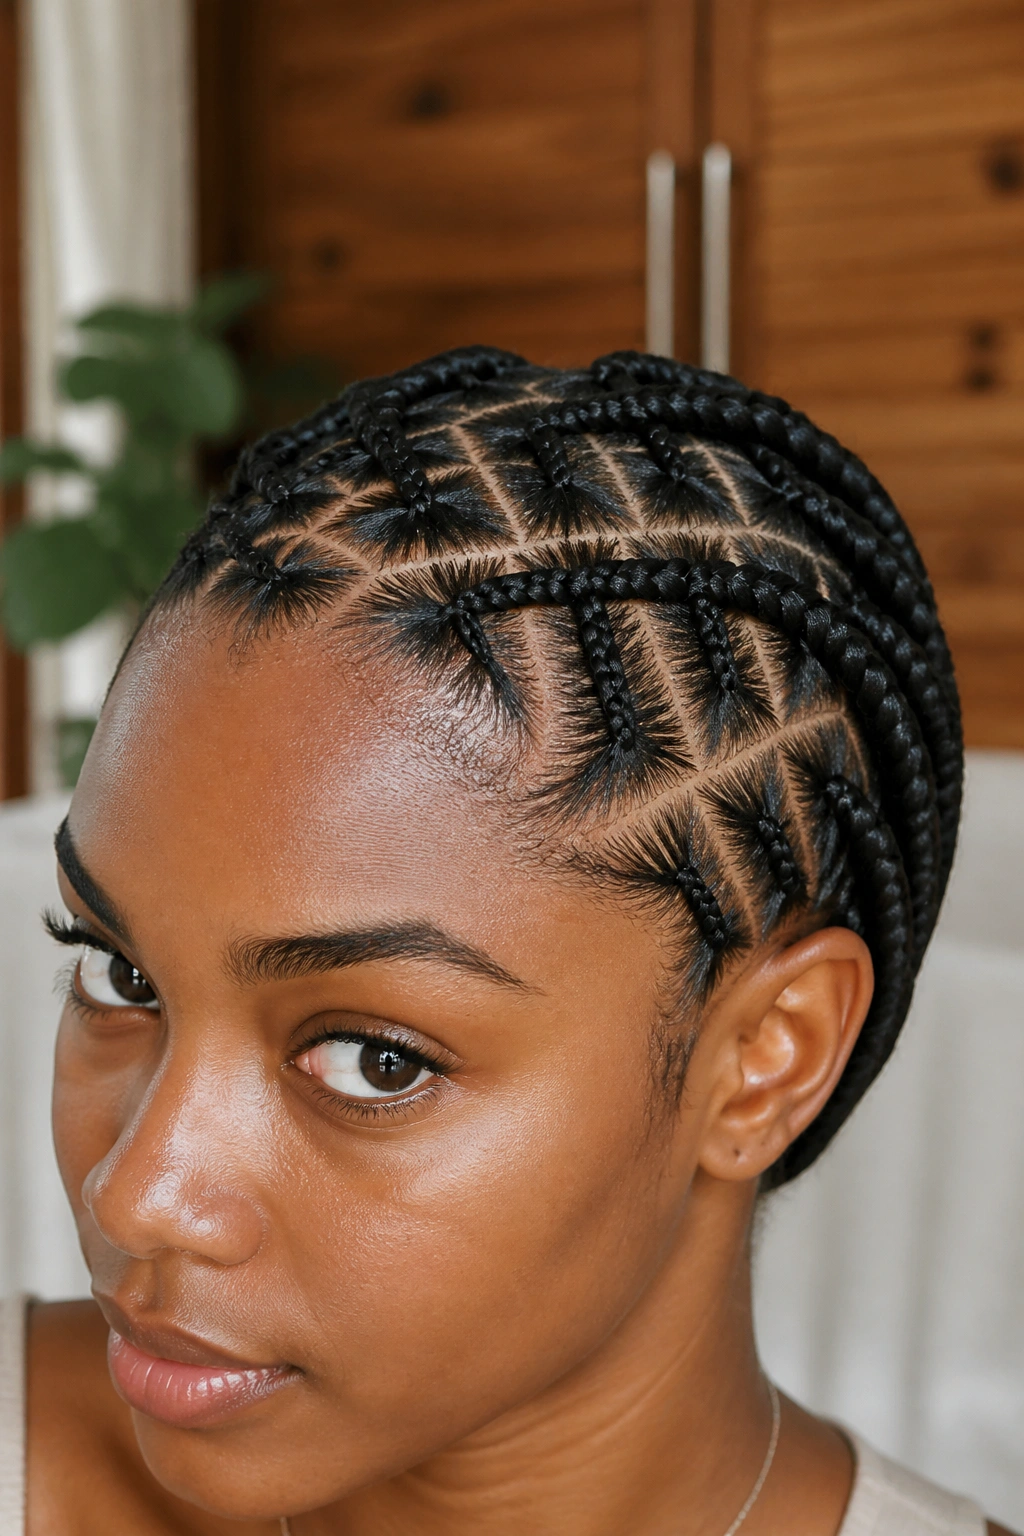
19. Heart-Shaped Parting Cornrows
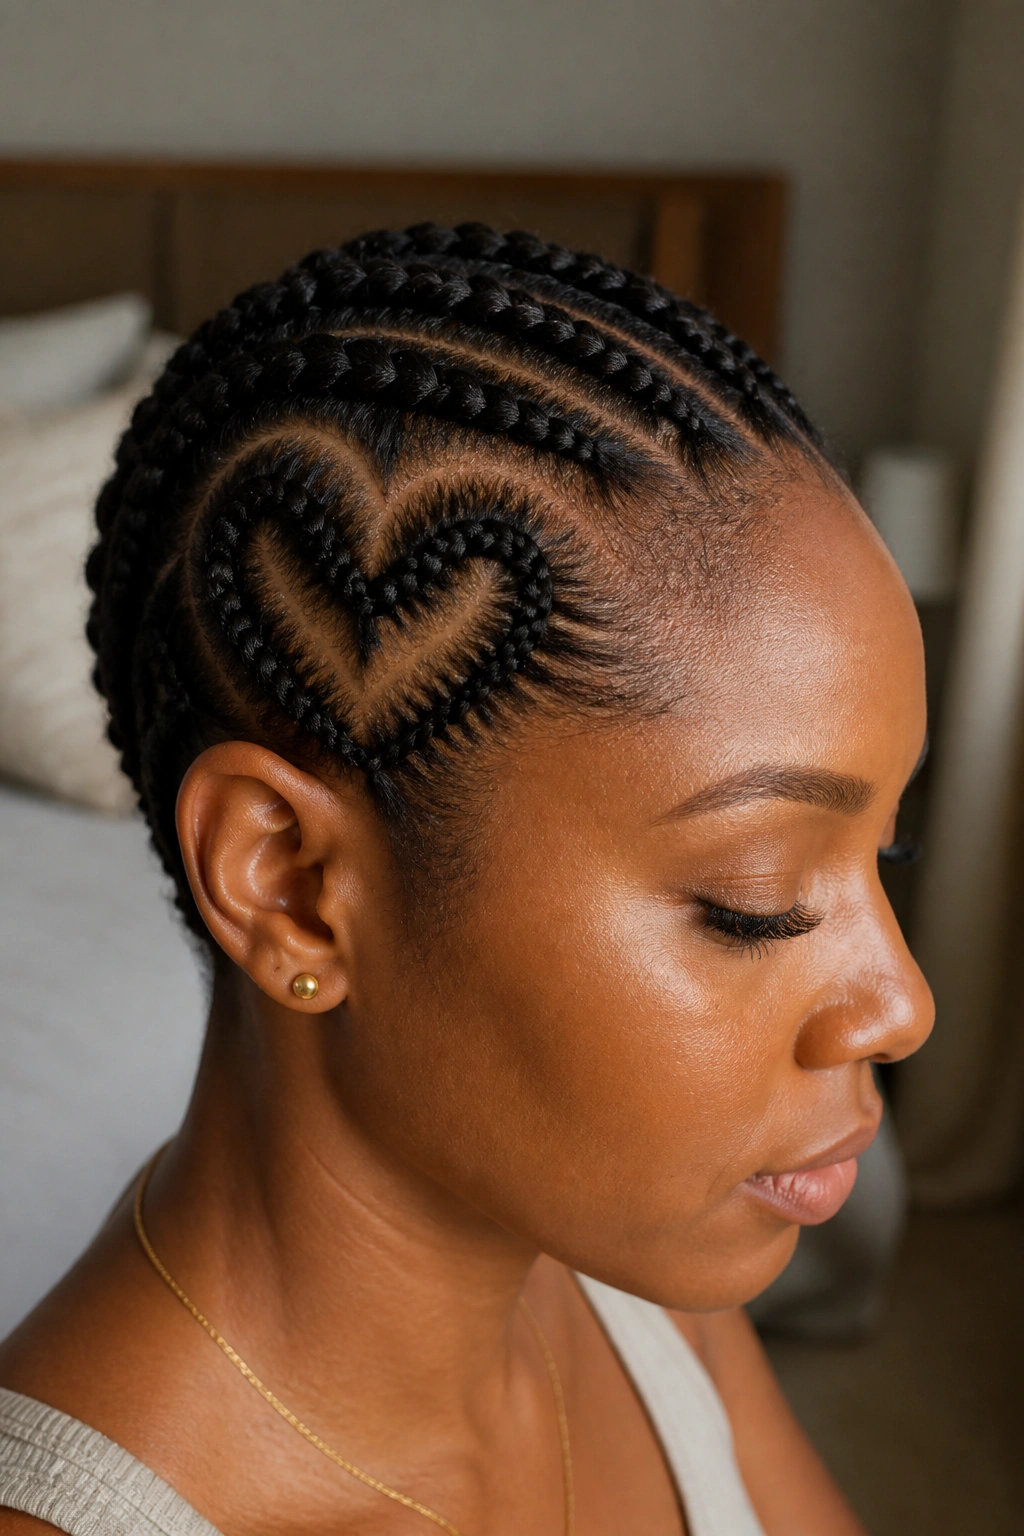
Creative parting is the hallmark of modern braiding. For short hair, where you might not have much “braid” to show off, the “part” becomes the star. Heart-shaped parts—where a small section of the scalp is parted into a perfect heart and then cornrowed—are a beautiful, feminine touch.
On 4C hair, these parts stay exceptionally crisp. You can have one heart on the side of your head as an accent, or a series of them. It’s a “hidden detail” that people only notice when they get close, which makes it feel like a personal secret. It adds a touch of whimsy to an otherwise practical short hairstyle.
20. Layered Lob Braids

The “Lob” (Long Bob) is the elder sister of the classic bob. For braids, this usually means the hair hits the collarbone. By adding “layers”—braiding the back slightly shorter than the front—you prevent the “triangle head” effect that can happen when short, thick braids all end at the same length.
Layers add “air” to the style. They allow the braids to stack on top of each other, creating a beautiful silhouette from the side and back. For Type 4 hair, this layering is essential because our hair is so dense; without layers, a bob can feel like a heavy “helmet.” With them, it feels like a bouncy, moving head of hair.
21. Tucked-Under Braid Ends
For a very vintage, “poodle-bob” or “1950s” feel, you can braid your hair and then literally tuck the ends under and pin them with bobby pins. This creates a rounded, “bubble” effect that is incredibly cute and very protective.
Since the ends of your hair (the oldest and most fragile part) are tucked away and pinned, they are completely shielded from the elements. This is a “powerhouse” protective style for growth. It looks like a sophisticated, short, “curled-under” style, but it’s actually 100% braids.
22. Geometric Grid Box Braids
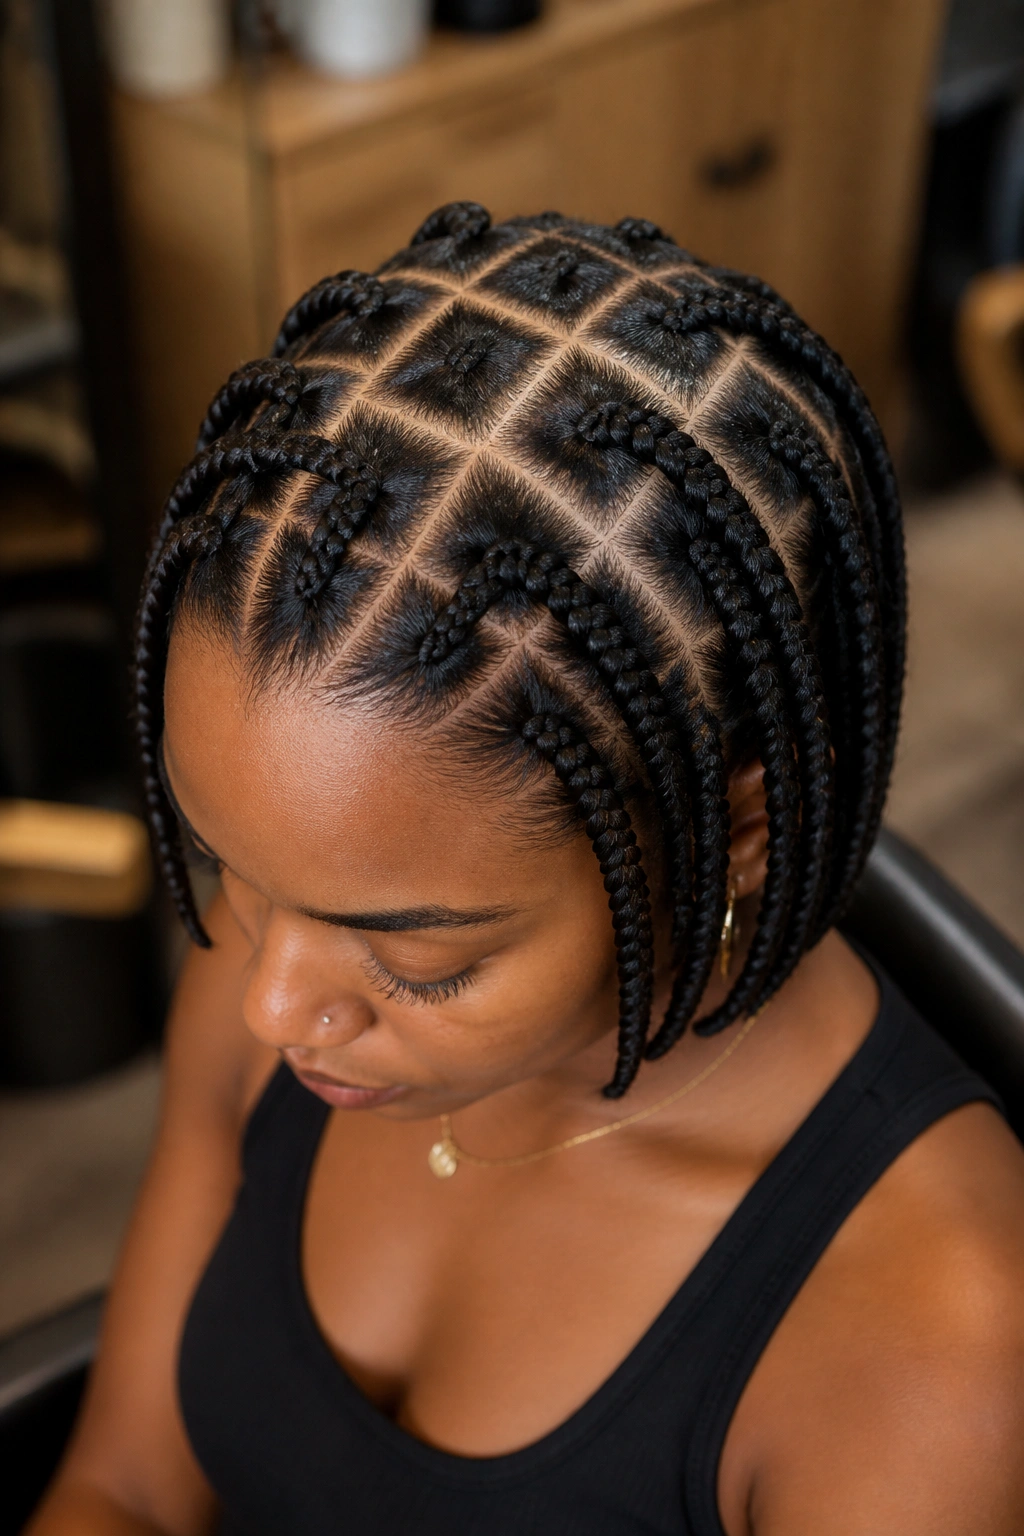
If you love precision, the geometric grid is for you. This is less about the braids themselves and more about the “squareness” of the parts. On a short style, like a “mini-braid” look, having perfectly straight, clean grid lines on the scalp looks incredibly intentional and “high-end.”
Type 4 hair is the only texture that can really hold a grid this sharp. Because the hair doesn’t “leak” or slide out of the parts, the scalp looks like a beautiful mosaic. It’s a clean, minimalist approach to braiding that proves you don’t need length to be stylish.
The Science of Scalp Care and Tension in Short Braids
When you’re dealing with short hair, the temptation is often to “pull” a little harder to make sure the hair stays in the braid. This is the biggest mistake you can make. Type 4 hair, while strong in its “coil,” is actually quite fragile at the root.
If you see “little white bumps” at the hairline or feel a constant throbbing, the braids are too tight. For short styles, longevity shouldn’t come from tension; it should come from the “grip” of your natural texture. A good braider knows how to use the “over-under” technique to secure short hair without pulling on the follicle.
Moisturizing Your Short Braids
Short braids actually need more moisture than long ones. Why? Because the ends of your natural hair are often closer to the tips of the braids, meaning they are more exposed to the air.
- Liquid First: Use a water-based “braid spray” or just water in a misting bottle.
- Seal with Oil: Follow up with a light oil (like jojoba or almond oil) to lock that water in.
- Focus on the “Real” Hair: Make sure you are applying moisture to the length of your actual hair inside the braid, not just the scalp.
The “Itch” Factor
We have all been there—the day three itch that makes you want to pat your head like a drum. Often, this isn’t just “dryness”; it’s a reaction to the “alkaline” coating on synthetic braiding hair. For short styles, where the hair is closer to your scalp, this can be even more annoying.
A quick fix? Before your hair is installed, soak the braiding hair in a mixture of water and apple cider vinegar. This removes the coating and saves you weeks of scratching. If the braids are already in, a “witch hazel” soaked cotton ball dabbed onto the parts can provide instant, cooling relief.
Wrapping Up
Short braids on Type 4 natural hair are not a “compromise.” They are a choice—a choice to embrace your face, your texture, and your time. Whether you choose the precision of a geometric grid, the whimsy of heart-shaped parts, or the classic elegance of a chin-length bob, you are proving that the beauty of natural hair isn’t measured in inches.
The “awkward stage” only exists if you let it. With the right braiding technique and a bit of creativity, every length is a “style stage.” So, next time you feel like you need to wait for your hair to grow before you can try a new look, remember: your 4B or 4C texture is already doing the hard work. All you need is a good braider and the confidence to rock a shorter crown.
The versatility of our hair is our superpower. From the tightest 4C coils to the z-pattern of 4B, our hair was born to be sculpted. Short braids are just one more way to show the world the incredible range of natural hair. Wear them with pride, keep that scalp hydrated, and enjoy the ease of a style that looks as good on day thirty as it did on day one.