Waterfall braids are one of those styles that make highlights do half the work for you. A plain braid can bury the bright pieces under overlapping sections, which is a shame if you paid for balayage, babylights, or a chunky money piece that deserves to be seen.
A waterfall braid does the opposite. It drops strands on purpose, so the lighter ribbons stay visible as the braid moves across the head. The effect is softer than a standard braid, and that softness is exactly why it flatters color so well — the eye keeps following the open spaces, then lands on the brighter strands again and again.
Texture matters more than people admit. Hair with a little grip holds the pattern better and lets the color read from more angles, while slippery freshly washed hair can make even a nice braid look a bit defeated by lunchtime. A mist of texture spray, a rough blow-dry, or a few loose bends from a 1-inch curling iron can change the whole result.
And if your highlights are good, you should show them off. That’s the whole point.
1. Classic Side Waterfall Braid for Blonde Ribbons
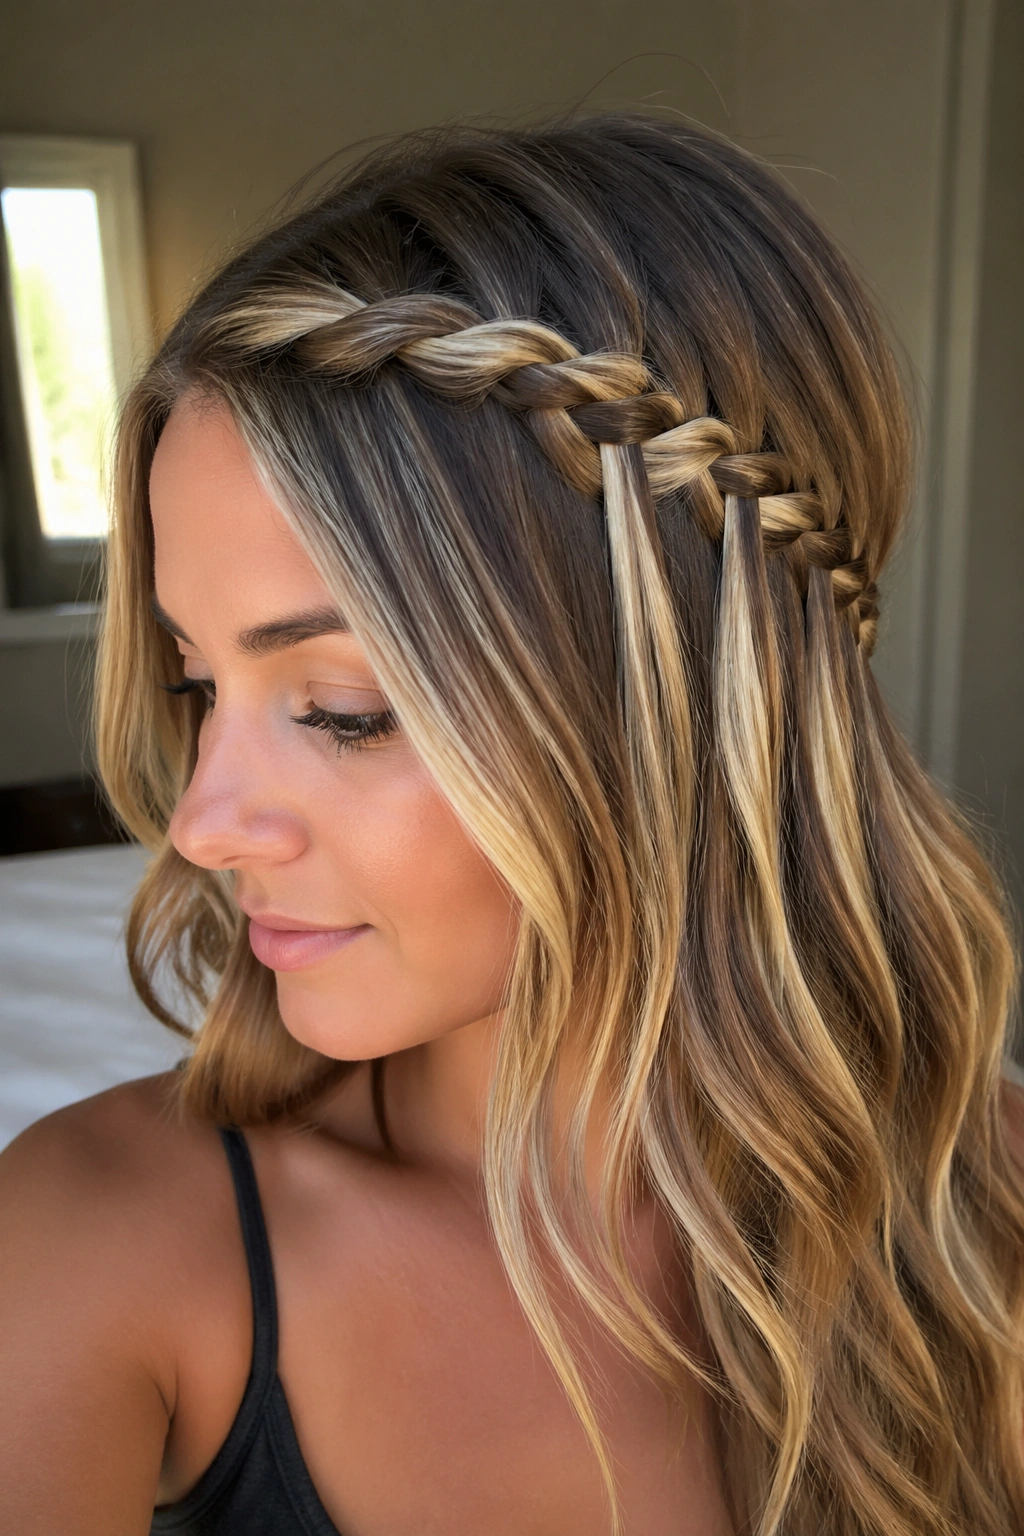
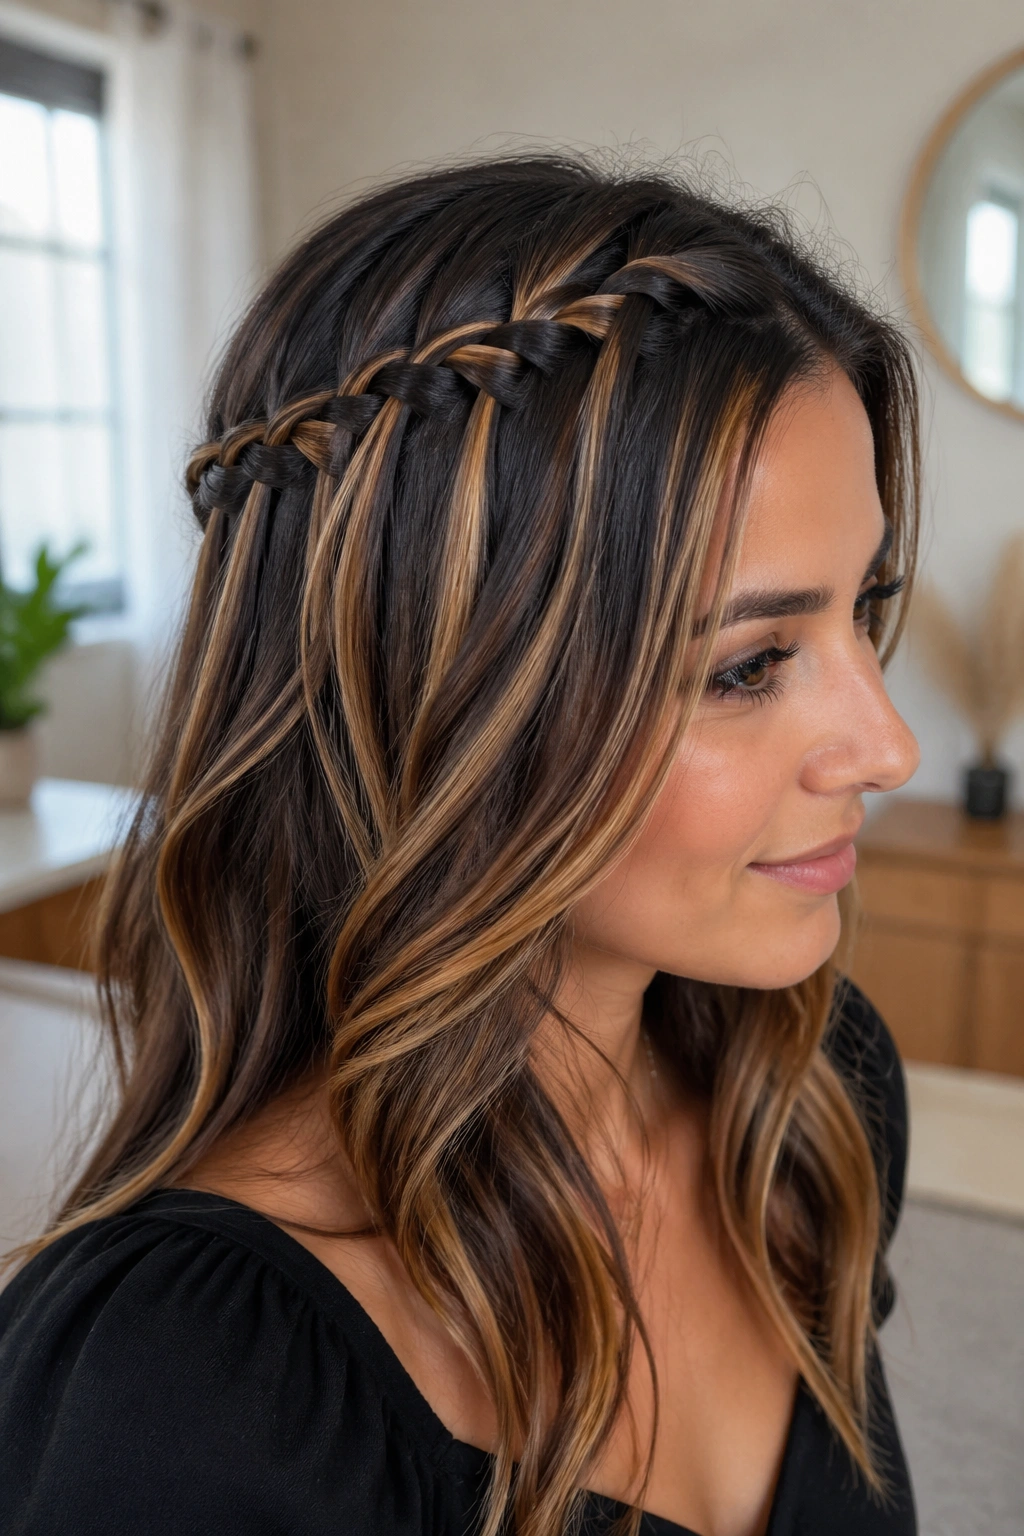
The side-swept waterfall braid is the style I’d hand to someone who wants a clean, easy read on their highlights without turning the whole look fussy. It starts near the temple, cuts across the head at a diagonal, and leaves a trail of loose strands that sit right on top of the darker base color. That contrast is doing real work.
Why It Works
The braid pulls the eye across the head instead of straight down. That diagonal line gives blonde ribbons, caramel streaks, or soft beige pieces a place to stand out, especially if the brightest sections live around the face and through the top layers.
A neat side braid also keeps the top from looking heavy. You still get movement through the lengths, but the front pieces stay controlled enough that the highlight placement looks intentional rather than scattered.
- Start the braid just above the brow bone on your stronger side.
- Keep each dropped section about 1 to 1.5 inches wide so the braid stays readable.
- Use a small clear elastic or one bobby pin tucked under the braid’s end.
- Leave the released strands a little loose; pin-straight tension flattens the color.
Best tip: tug the braid gently at the outer edges after it’s pinned. Not the whole thing. Just the outer loops. That tiny bit of looseness makes the lighter strands sit forward instead of getting swallowed by the braid.
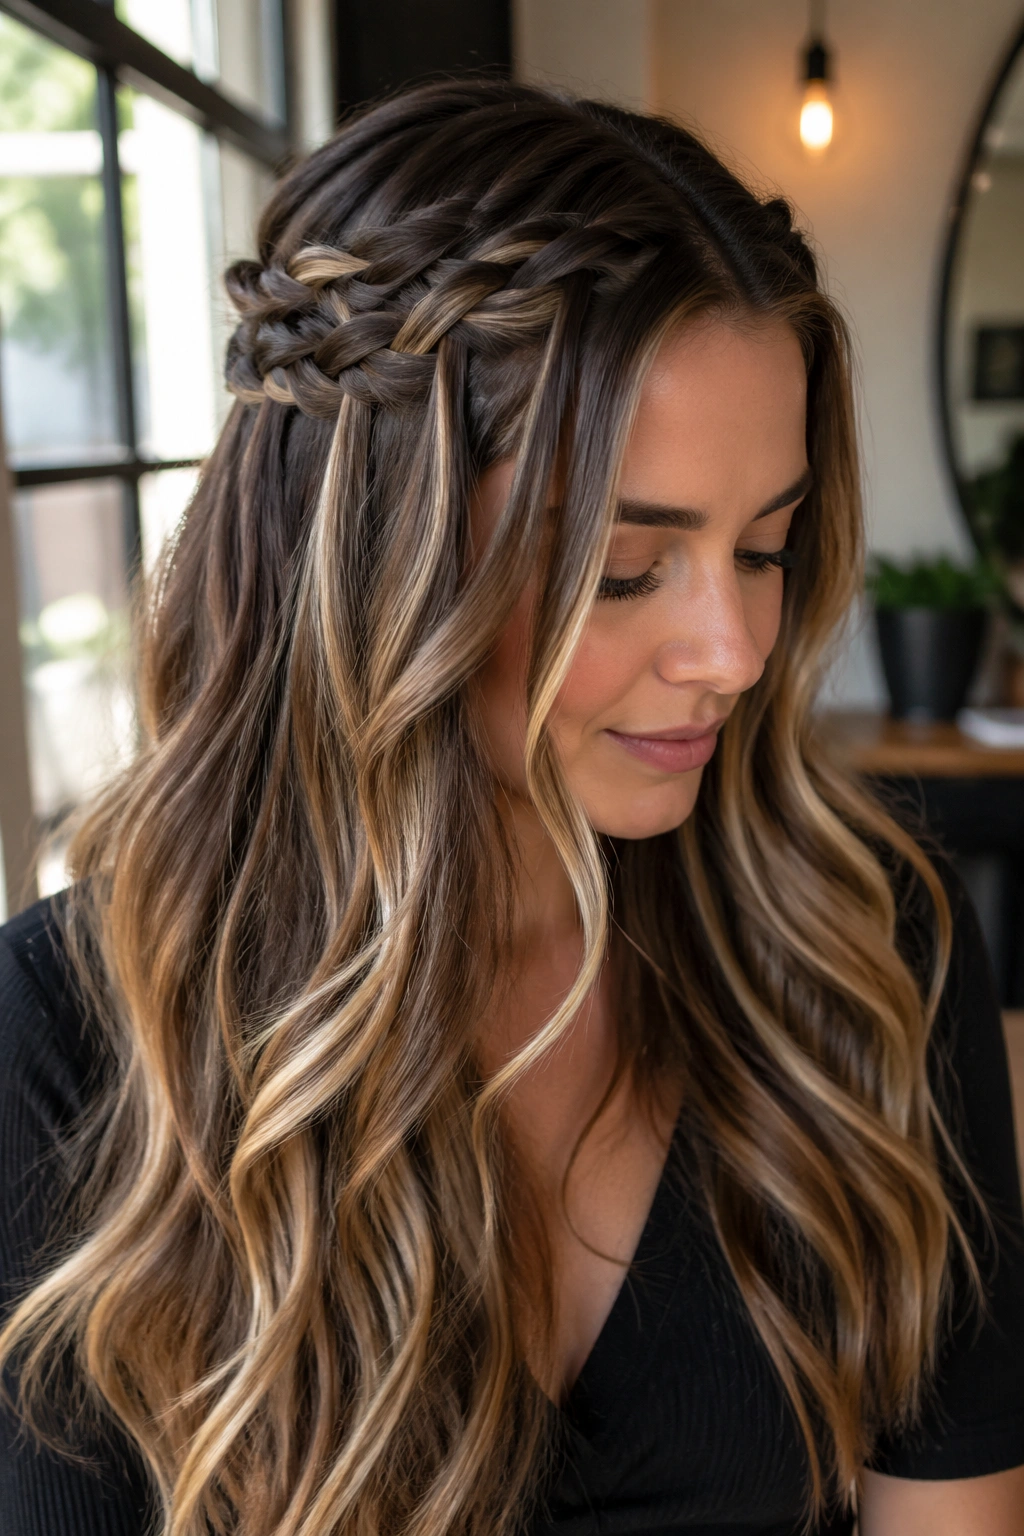
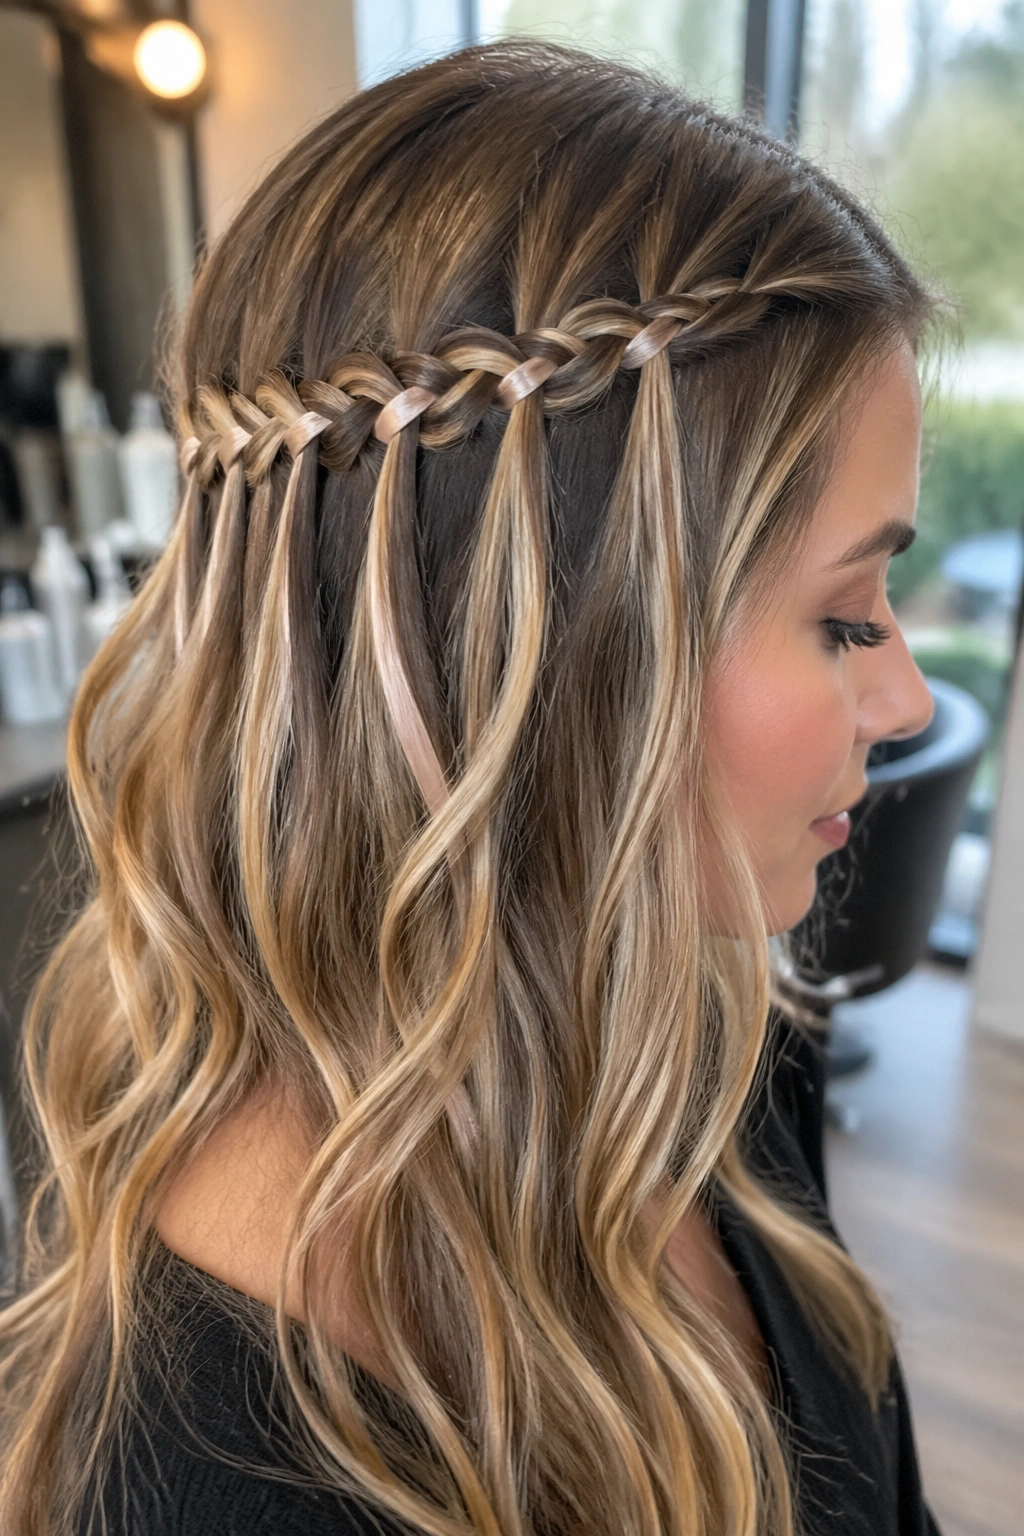
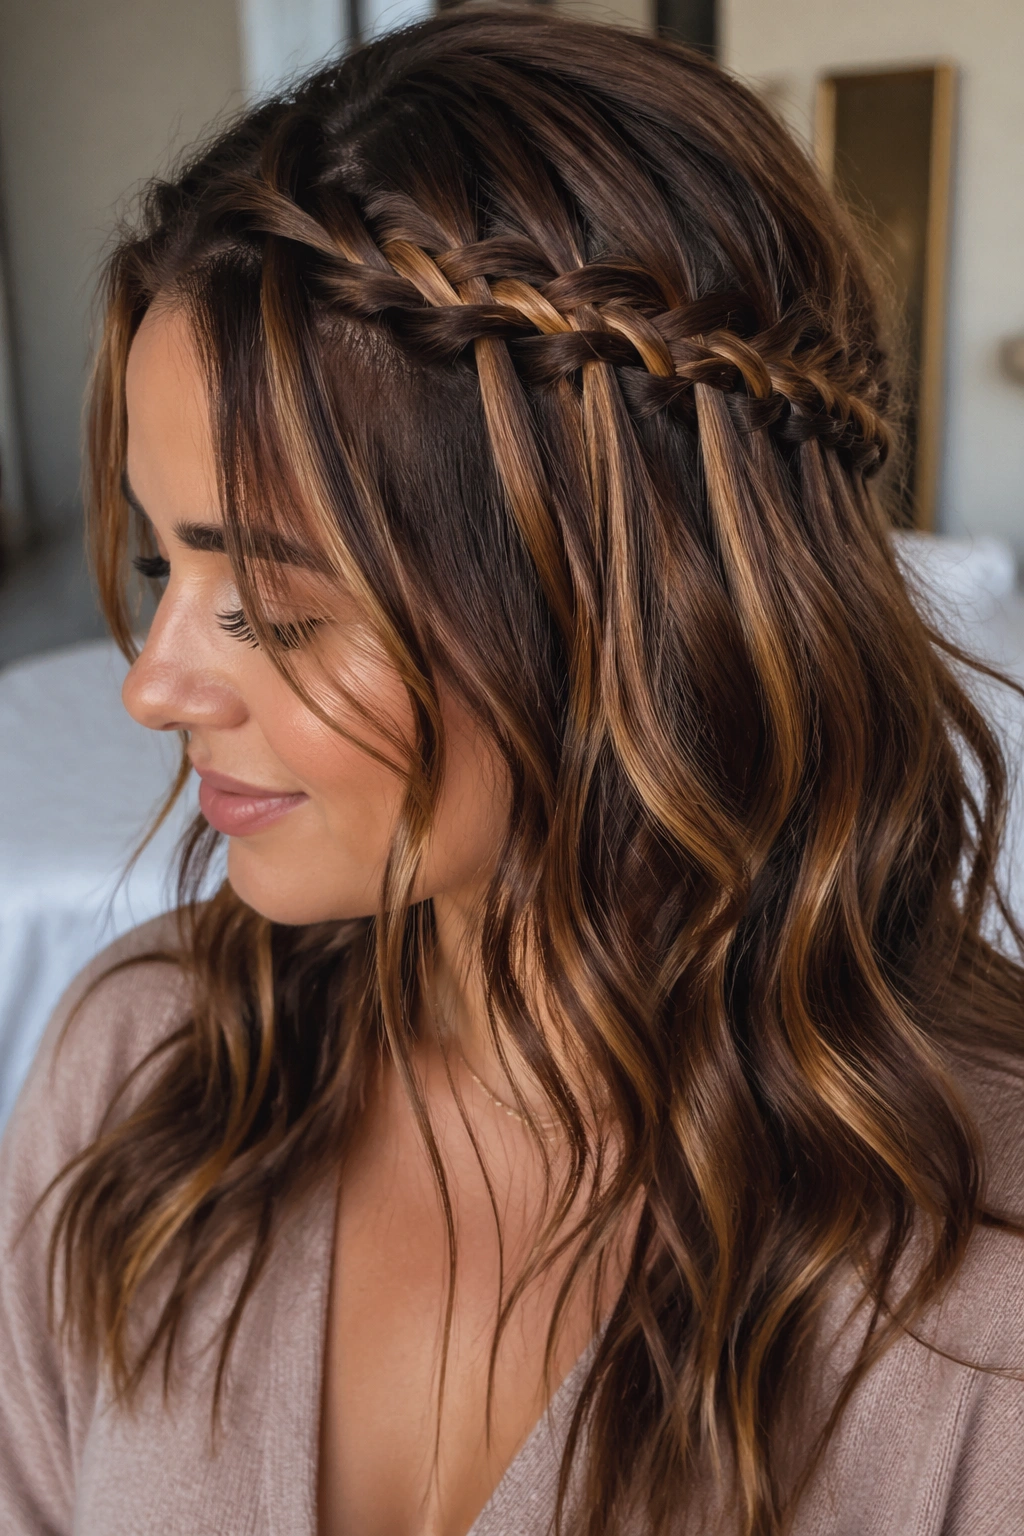
2. Half-Up Waterfall Crown for Balayage
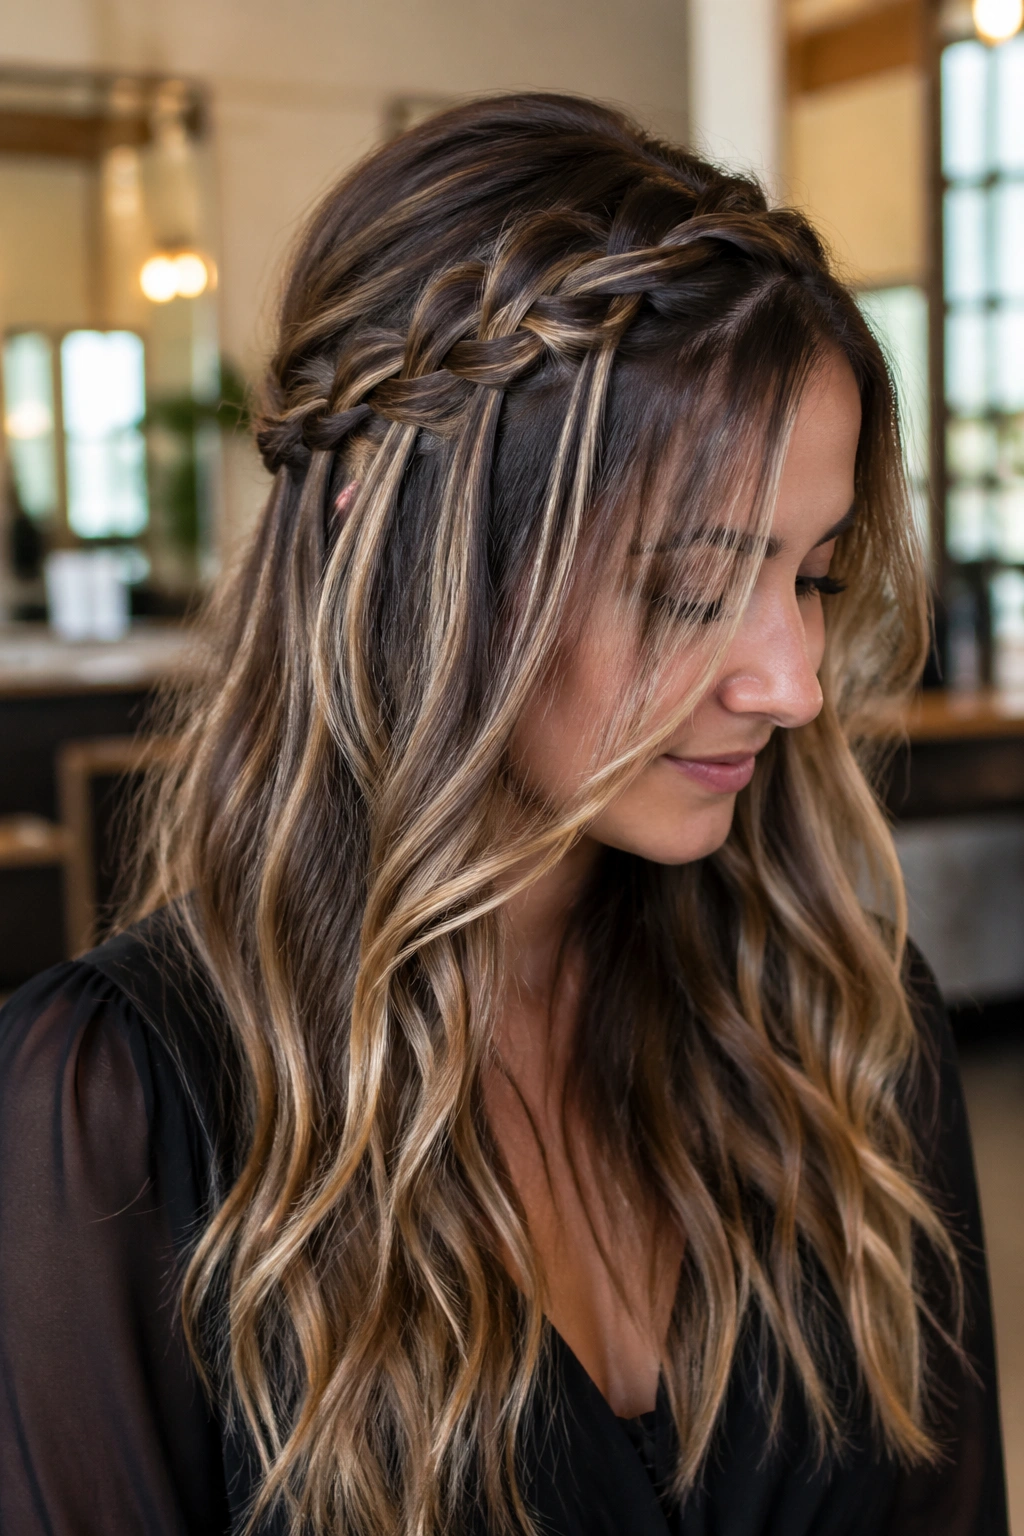
This version earns its keep on balayage. The braid wraps along the crown, which means the painted ribbons through the midlengths get to stay visible while the lower half of the hair stays soft and loose.
It’s one of the prettiest ways to show multi-tonal color without hiding the ends. The braid acts like a frame, not a cover.
If you like hair that feels polished but not stiff, this is the move. Pin the braid behind both ears, let the loose sections fall around the shoulders, and keep the crown a touch airy so the color along the part and sides keeps breathing. A braid that sits too tight makes the top look hard; a slightly relaxed one gives the balayage room to show its depth.
I like this style on hair with at least shoulder length and a few layers. The layers help the waterfall pieces hang at different levels, which makes the color look richer instead of striped. It also works well when the lighter pieces start around the cheekbones and continue toward the ends. That spacing is no accident. It’s what gives the braid movement.
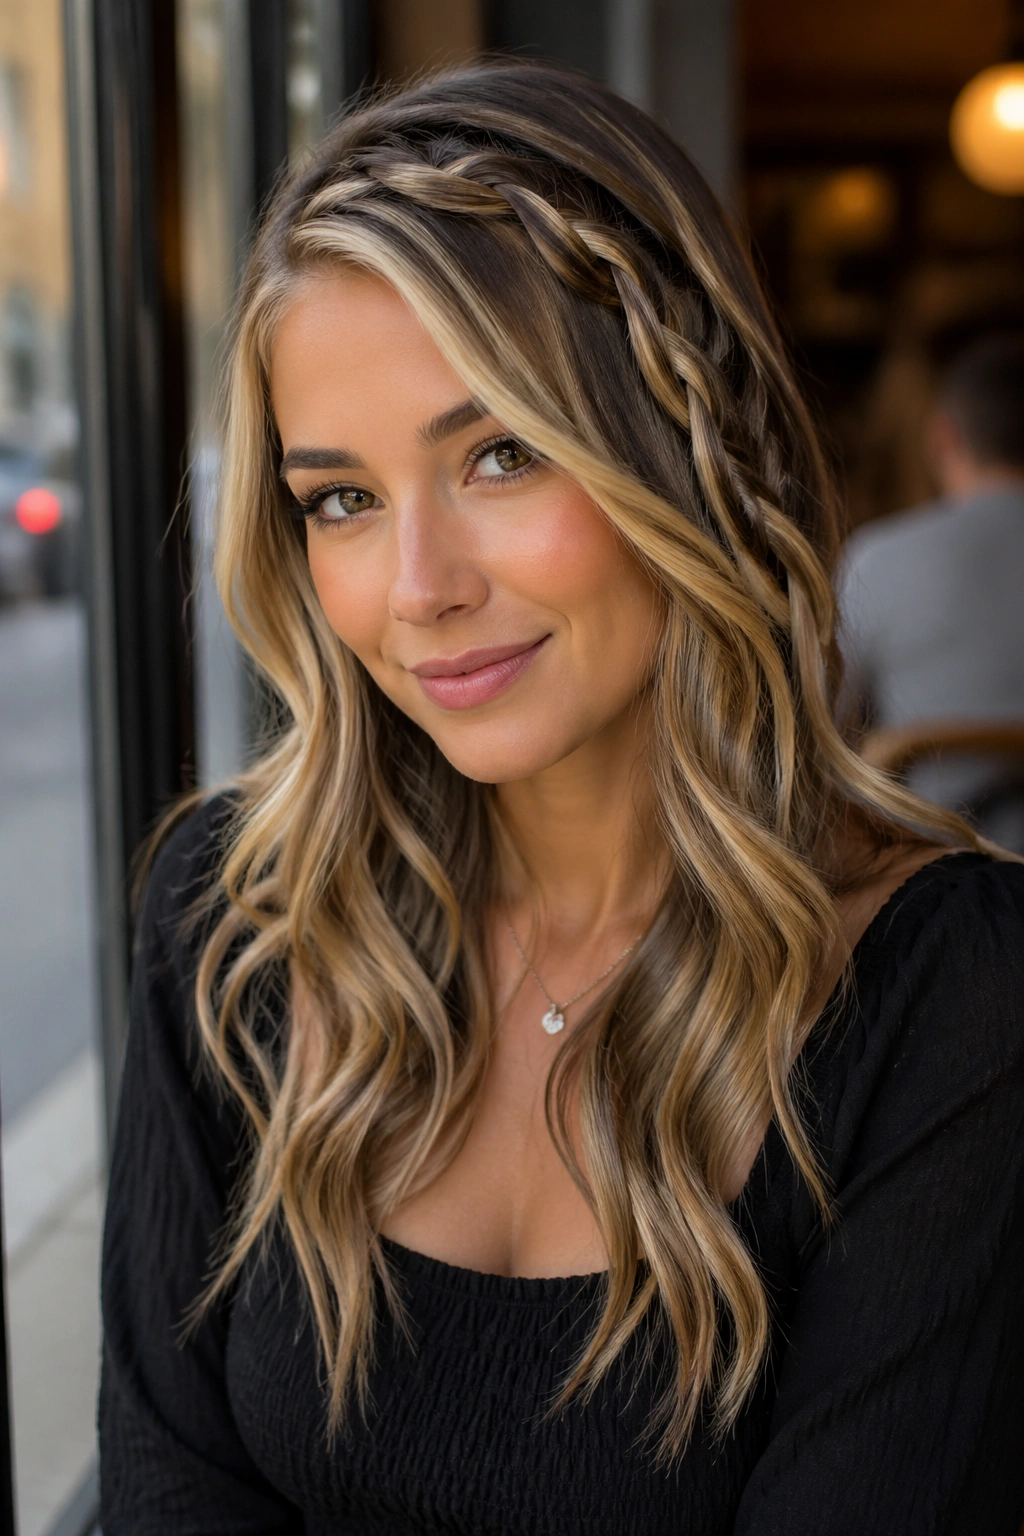
3. Beach-Wave Waterfall Braid for Ash Highlights
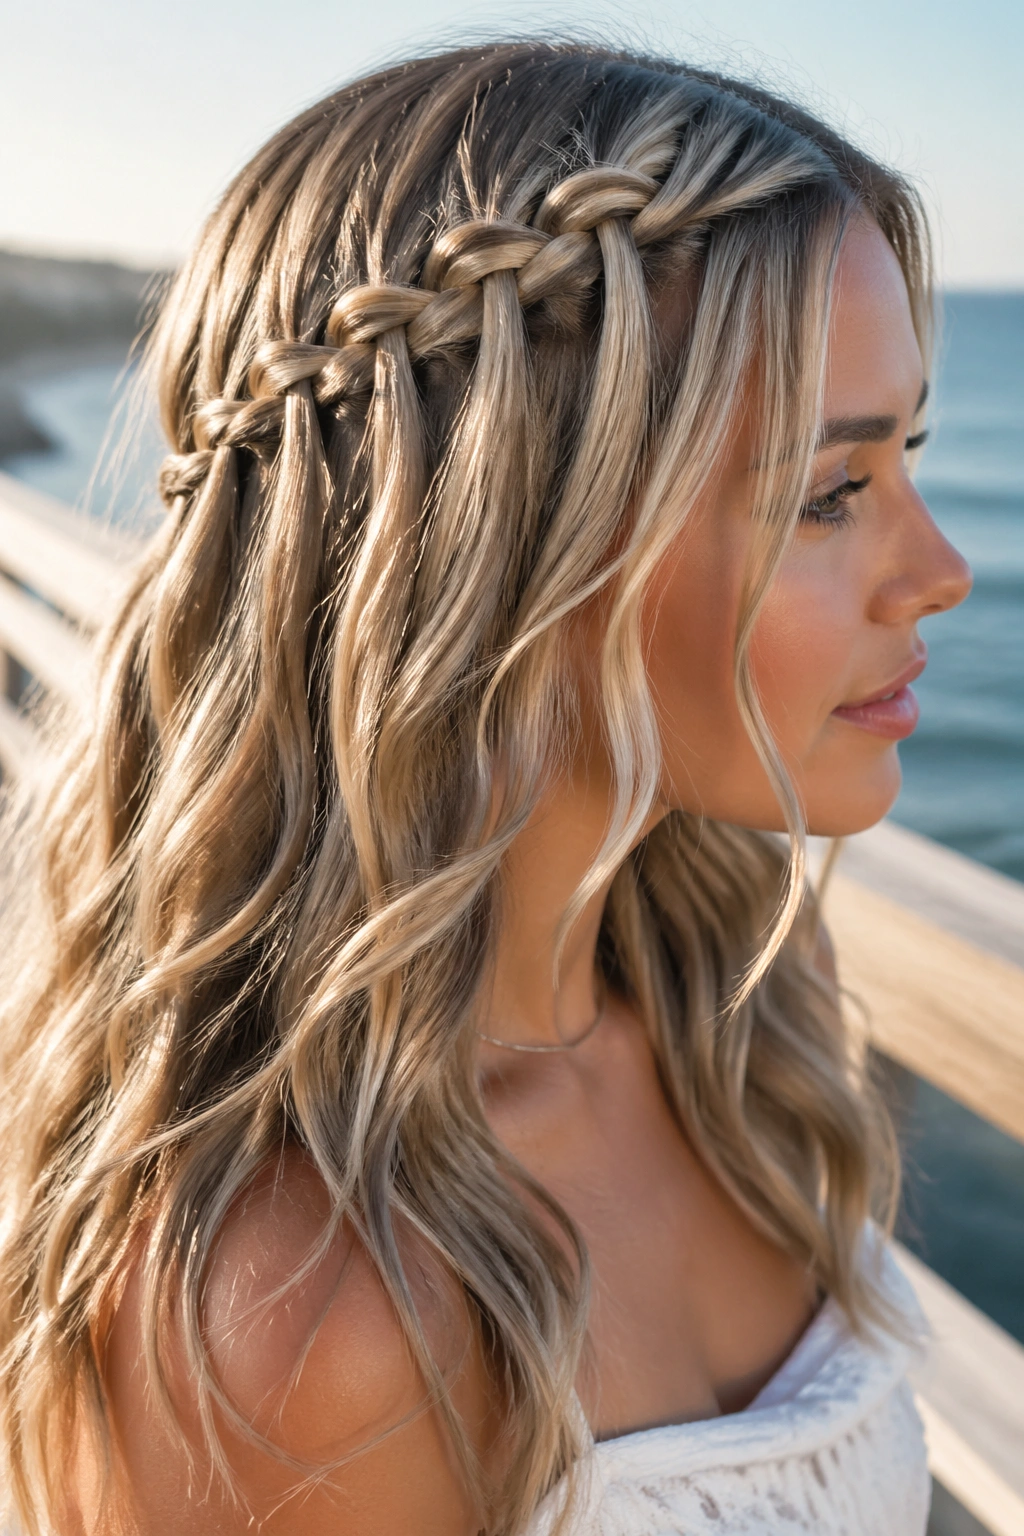
Why does this combo work so well? Because the braid adds shape while the waves keep the lighter strands from lying flat against the head. Ash blonde, silver-beige, and cool taupe tones can look almost smoky when they sit in loose bends instead of straight lines.
The Shape to Aim For
The braid should be the sharpest part of the style, but only by a little. The waves under it need enough bend to break up the shine in the lengths, otherwise the braid can look too neat next to the rest of the hair. That contrast is what makes the color look dimensional.
How to Wear It
Curl the hair with a 1-inch iron, leaving the last inch of each section out so the ends don’t look too curled or too round. Then brush the waves lightly with a paddle brush before braiding. You want soft ridges, not ringlets.
- Use texture spray before braiding, not after.
- Keep the braid close to the hairline so the front highlights stay visible.
- Pull out two tiny face-framing pieces if the top feels too formal.
- Finish with a light mist of flexible hairspray, not a crunchy one.
The cool part is how forgiving this style is. Even if the waves aren’t perfect, the braid makes the color look deliberate.
4. Waterfall Braid into a Low Ponytail for Caramel Ends
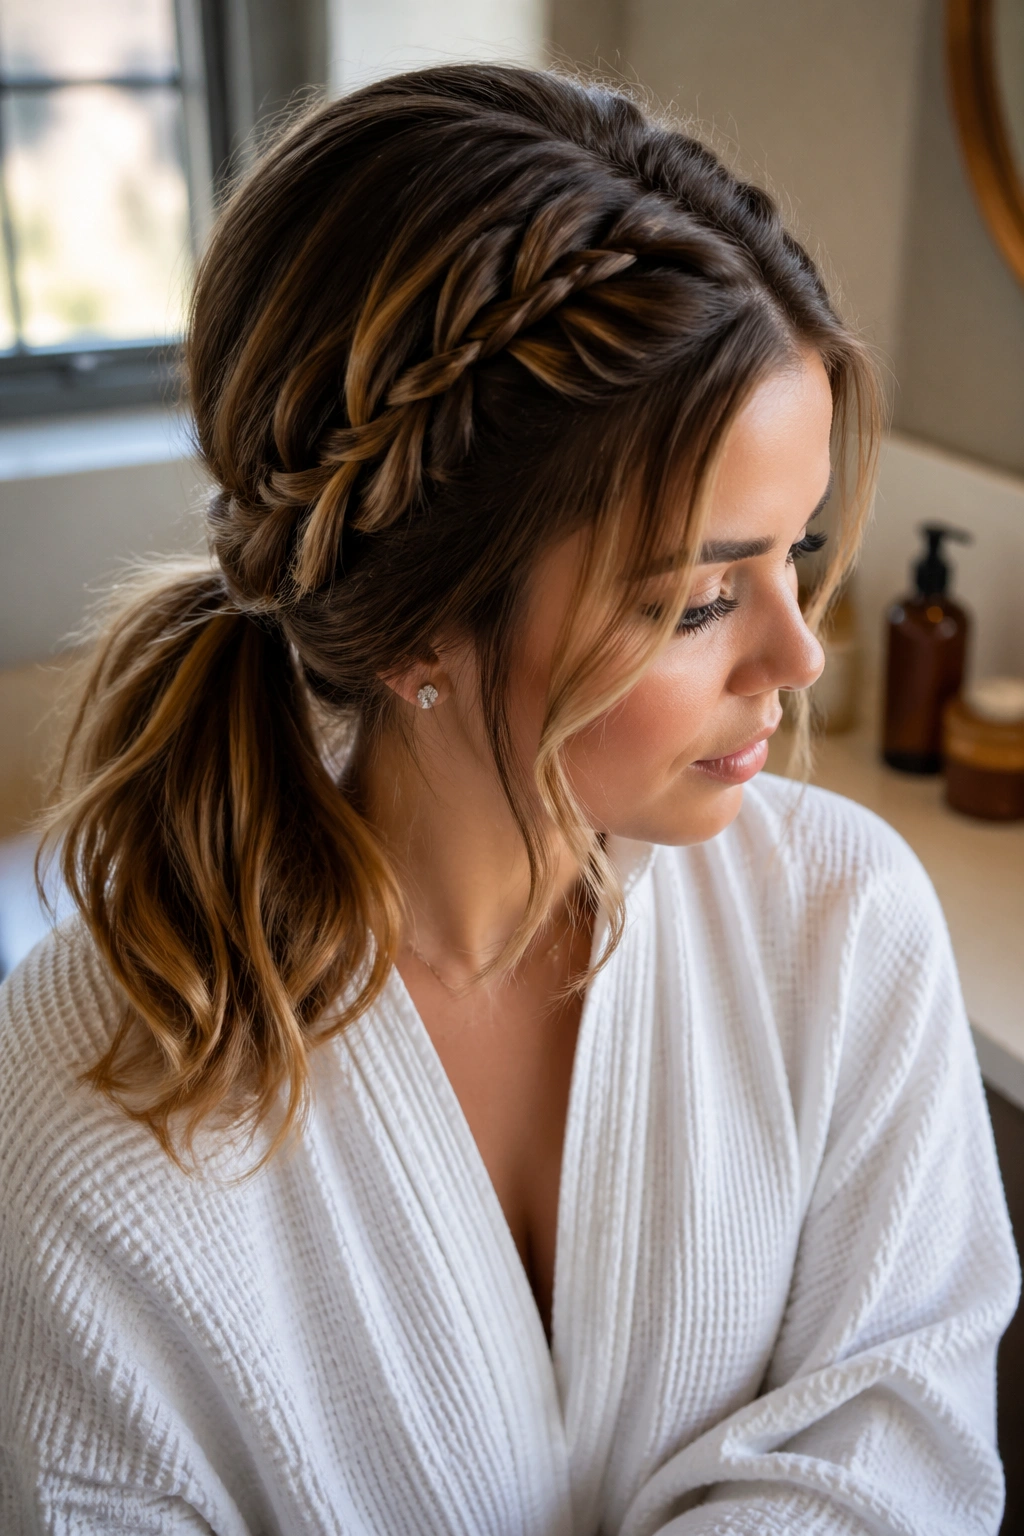
Picture a busy morning, a little too much coffee, and hair that still needs to look like you meant it. A waterfall braid into a low ponytail fixes that quickly, and it gives caramel or honey ends a clean path to show up against darker roots.
The braid starts the story, then the ponytail finishes it. That’s the appeal.
You braid across the front or side, let the waterfall pieces drop through the top section, then gather everything into a low ponytail at the nape. The ponytail keeps the lengths together, while the braid prevents the front from looking plain. On hair with warm brown-to-caramel color, the effect is especially nice because the released strands sit like ribbons over the darker base.
A few details matter here. Smooth the crown before you start, or the ponytail will look lumpy. Wrap a small strand of hair around the elastic if you want the finish to look cleaner. And don’t pull the ponytail too high. Low is better. High ponytails can fight the braid and hide the very color you were trying to show.
5. Waterfall Braid on Curly Hair for Copper Dimension
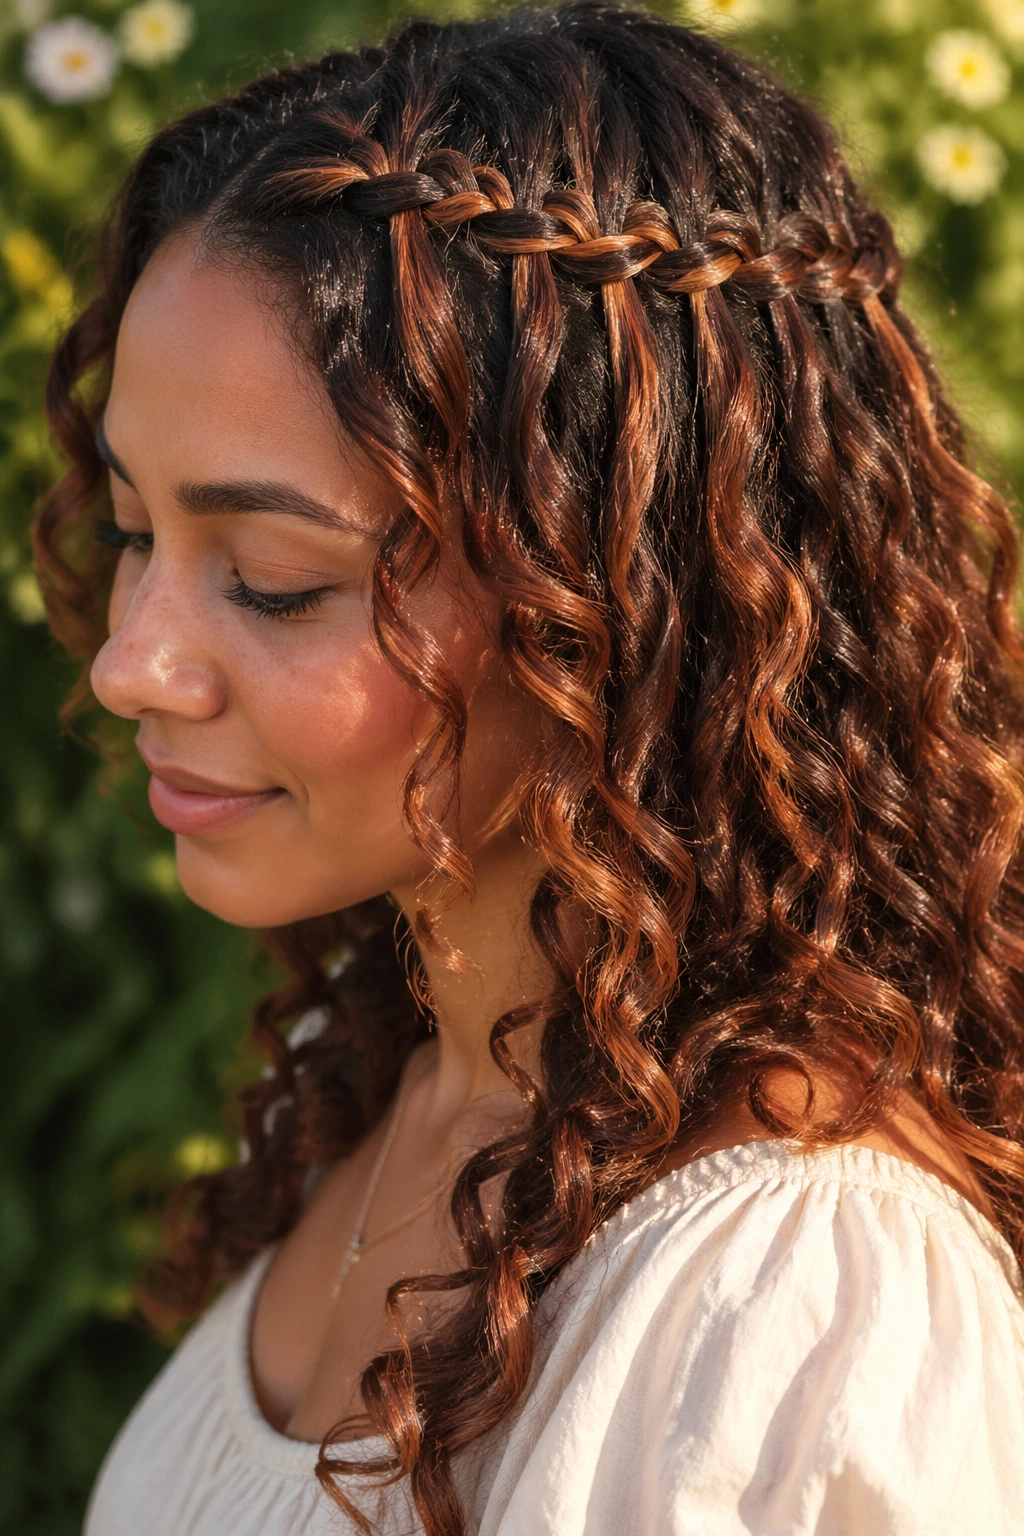
Curly hair does not need to be “tamed” for a waterfall braid. It needs room.
That’s the difference, and it matters. Curls already create depth, so when you add a braid that releases sections through the top, the copper or auburn pieces sit at different heights and catch attention from every angle. The braid doesn’t flatten the texture; it gives the curls a frame.
Work on dry hair and separate the curls with your fingers first. A wide-tooth comb can help at the root, but don’t comb the whole head smooth unless you want the style to lose its shape. The better approach is to pick out the braid line, then leave the rest alone so the curl pattern keeps its spring.
A small amount of cream on the ends can help with frizz, but go easy. Too much product makes the braid greasy, and curly highlights lose that clean, glossy look. The released waterfall strands should blend into the surrounding curls, not look glued in place. When the copper pieces are lifted by the curl pattern, they read brighter than they do in loose straight hair. That’s the magic here.
6. Deep Side-Part Waterfall Braid for Face-Framing Color
A deep side part can do more for face-framing highlights than people expect. Shift the braid over to one side, and the whole front section opens up. Suddenly the money piece, the lighter front streaks, and the brighter crown bits have space to sit above the rest of the hair instead of hiding behind it.
This is the best choice when the front of your color is the star. A center part can split the effect evenly, which is fine, but a deep side part gives the highlight line more drama and makes the braid feel more sculpted.
Keep the braid anchored closer to the heavier side of the part, then let it travel toward the opposite temple. That diagonal shape follows the natural fall of the hair and keeps the front pieces from collapsing over your face. If your highlights start around the cheekbone area, even better. The braid and the color line will echo each other.
I also like this style for rounder faces because the diagonal line can lengthen the look without trying too hard. It’s a small trick. A useful one.
7. Double Waterfall Braids for Long, Layered Hair
Two waterfall braids can show a lot more color than one, especially when the hair has layers and multiple tones through the mids. One braid on each side creates symmetry, but the released strands keep it from looking severe.
What Makes It Different
This style gives you two color paths instead of one. If your hair has blonde at the front, caramel through the sides, and lighter ends, the braids can reveal each band separately. It’s a good fit for long hair because you need enough length for the released pieces to hang with some shape.
How to Keep It Clean
- Start each braid just above the temples.
- Keep the sections matched in size so one side doesn’t look heavier.
- Pin the ends under a small layer of hair at the back of the head.
- Leave the lower lengths loose, curled, or waved so the braids don’t feel too flat.
My honest take: this style looks best when the layers are intentional. If the cut is heavily thinned out, the waterfall pieces can look stringy. Medium to long layers work better because they give the dropped strands some body. The effect is especially good on multi-tonal blonde, brunette, or copper hair where the color changes need a little help being seen.
8. Waterfall Braid on a Lob for Shorter Highlights
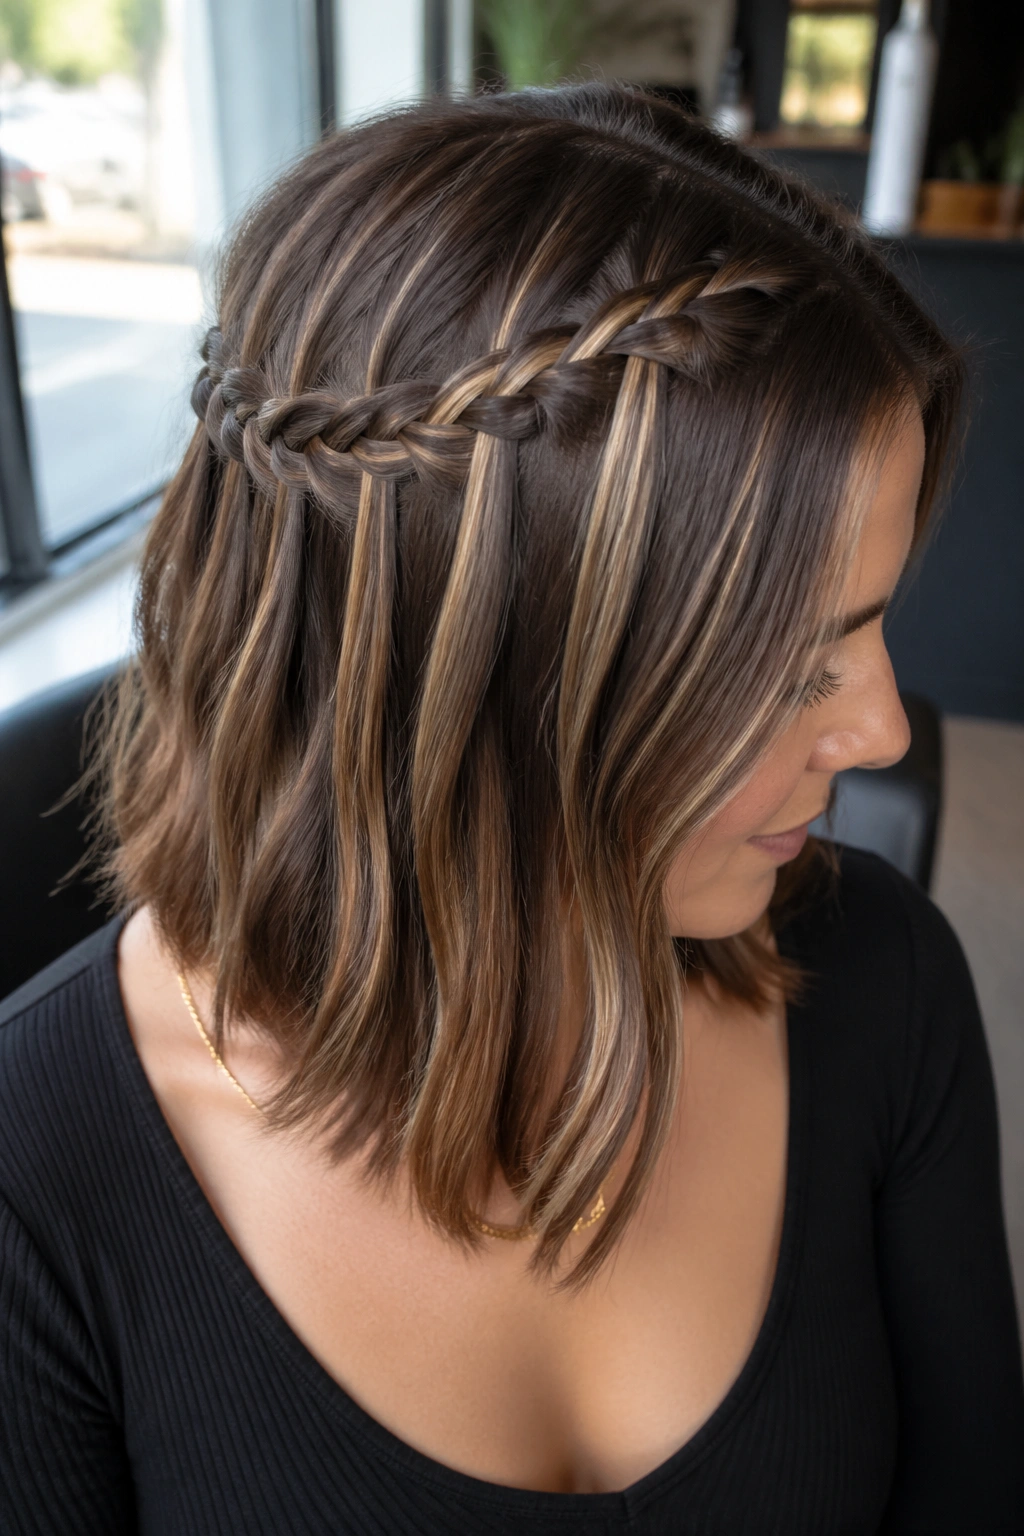
Shorter hair can absolutely pull this off. A lob gives you enough length for the braid line to travel, and the ends still move enough that the released strands don’t get lost in the shape.
The trick is scale. Smaller sections, tighter control, less bulk.
If your hair hits between the jaw and collarbone, start the braid closer to the part and keep each woven piece narrower than you would on long hair. A 3/4-inch curling iron can help create a bit of bend in the lower half, which keeps the ends from sticking straight out once the braid is finished. That bend also helps the highlights show up in layers instead of one flat strip.
I’d skip overly thick braid sections here. They can eat the length and make the haircut look shorter than it is. A finer braid feels lighter and lets the brighter pieces around the crown and face stay in view. If the lob has blunt ends, even better. The clean line at the bottom gives the waterfall pieces a crisp place to sit.
9. Ribbon-Woven Waterfall Braid for Bright Accent Pieces
Sometimes hair color needs a little backup. A thin ribbon woven through a waterfall braid can echo the bright pieces in the hair and make them read from farther away. Not in a childish way. Done right, it looks deliberate and sharp.
What to Pick
Choose a ribbon that matches one of the highlight tones, not the whole hair color. Pale gold works with blonde ribbons, copper satin suits warm brunette highlights, and a soft ivory ribbon can lift cool blonde pieces without fighting them.
How to Place It
Thread the ribbon through the first few braid crossings, then let it trail with the released strands. The ribbon should not overpower the braid. If it’s wider than 1/4 inch, it starts to compete with the hair instead of sitting inside it.
- Tie the ribbon around one anchor section before braiding.
- Keep the tail long enough to reach the end of the braid.
- Flatten satin ribbon with your fingers if it curls too much.
- Secure the finish under the braid with a hidden pin.
The look works best on special days when you want the braid to have a little extra presence. It also makes a simple hairstyle feel finished without needing more color, more curl, or more product. Sometimes that’s enough.
10. Dutch-Edge Waterfall Braid for Chunky Highlights
A Dutch edge gives the waterfall braid more lift, and that lift matters when the highlights are chunky. The raised braid sits on top of the hair instead of sinking into it, so the color stripes stay visible around the braid line rather than disappearing underneath.
This is a strong choice for thick hair or bold highlight placement. Think wider blonde panels, chunky caramel pieces, or even dramatic contrast between dark brown and light honey. The braid needs enough structure to hold all that movement without getting lost.
Unlike a flat waterfall braid, the Dutch edge creates a little shadow underneath the braid, which makes the lighter strands look brighter by comparison. That contrast is doing the heavy lifting. If the hair is very thick, keep the sections slightly smaller than you think you need. Big sections can make the braid bulky fast, and bulky is not the same as pretty.
A texture spray at the roots helps here. So does a firm grip while you braid. Then loosen the outer edges a little at the end. Not much. Just enough to keep the braid raised and readable.
11. Waterfall Braid into a Fishtail Tail for Multi-Tonal Ends
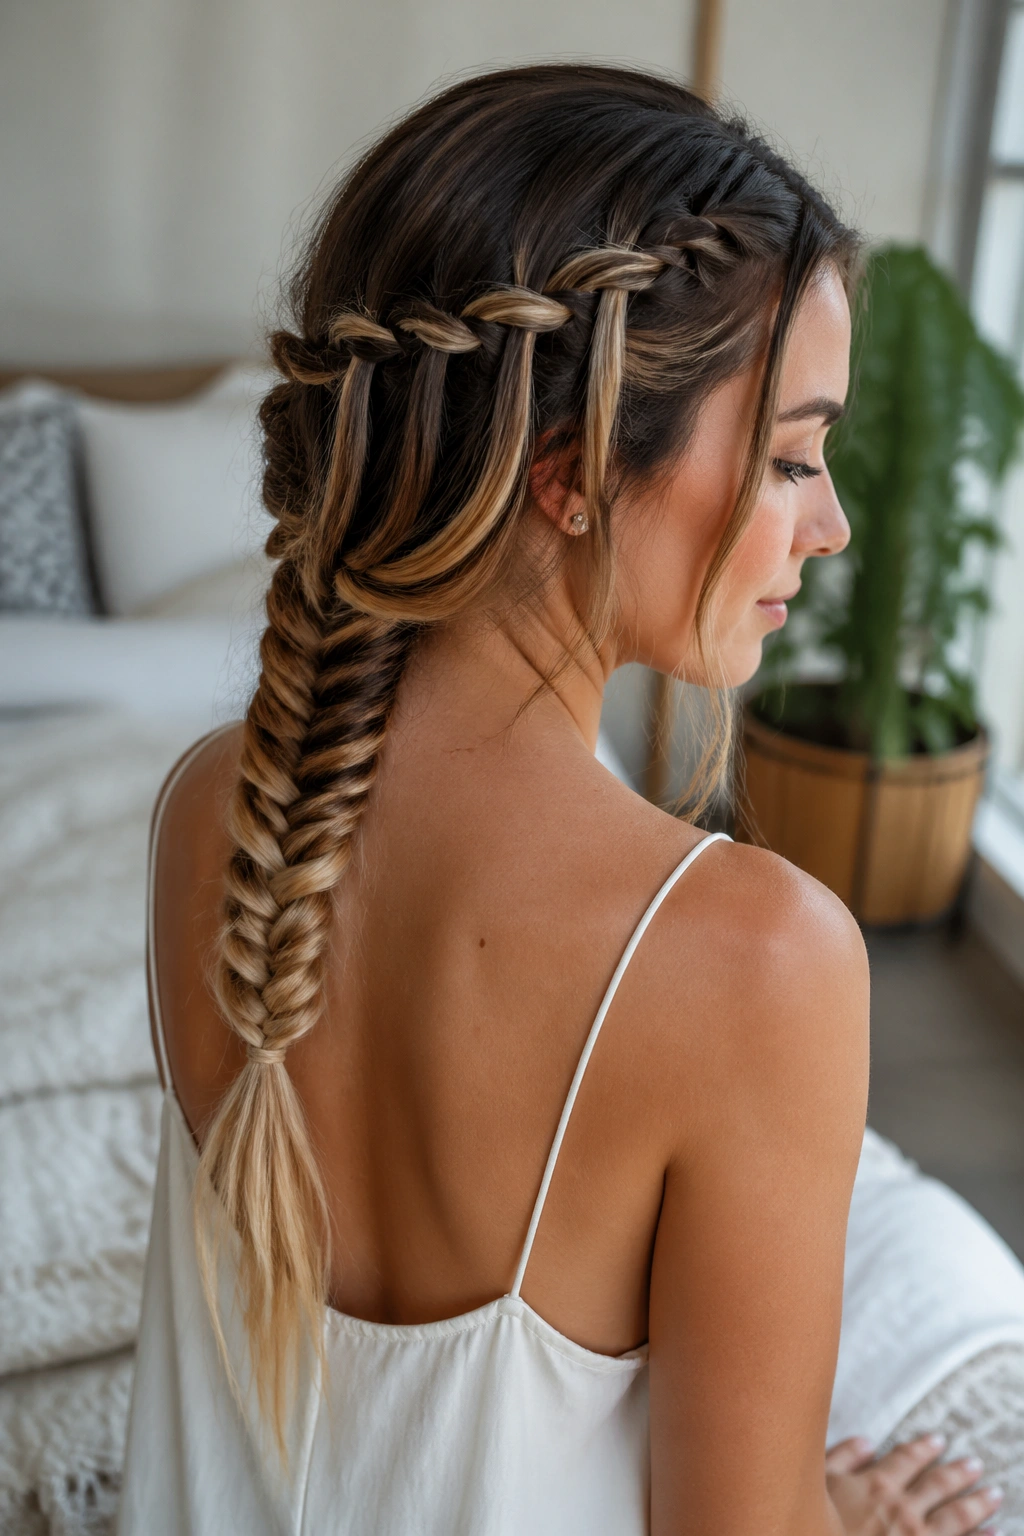
A fishtail tail after the waterfall section is one of my favorite hybrids. The top half stays soft and decorative, while the fishtail at the bottom tightens the look and shows off the ends where a lot of color often lives.
Why It Stands Out
The waterfall opening gives you a soft frame. The fishtail finish gives you detail. Put them together and you get a braid that keeps the eye moving all the way down the hair, which is perfect when the lengths have several color bands.
The style works especially well if the ends are lighter than the roots. That’s common with balayage, and the fishtail lets those lighter tips peek through the woven pattern instead of hanging outside it.
How to Get It Right
- Stop the waterfall braid around the upper back of the head.
- Gather the dropped strands into two sections for the fishtail.
- Keep the fishtail loose if you want the color to stay visible.
- Seal the end with a small elastic and pinch the braid gently to widen it.
If your hair is fine, go easy on the loosening. Too much and the braid turns fuzzy. If it’s thick, you can pull it apart a bit more and still keep the structure. Either way, this style has a nice balance: soft up top, tidy at the end, and plenty of color visible in between.
12. Sleek Waterfall Braid for Straight Hair and Babylights
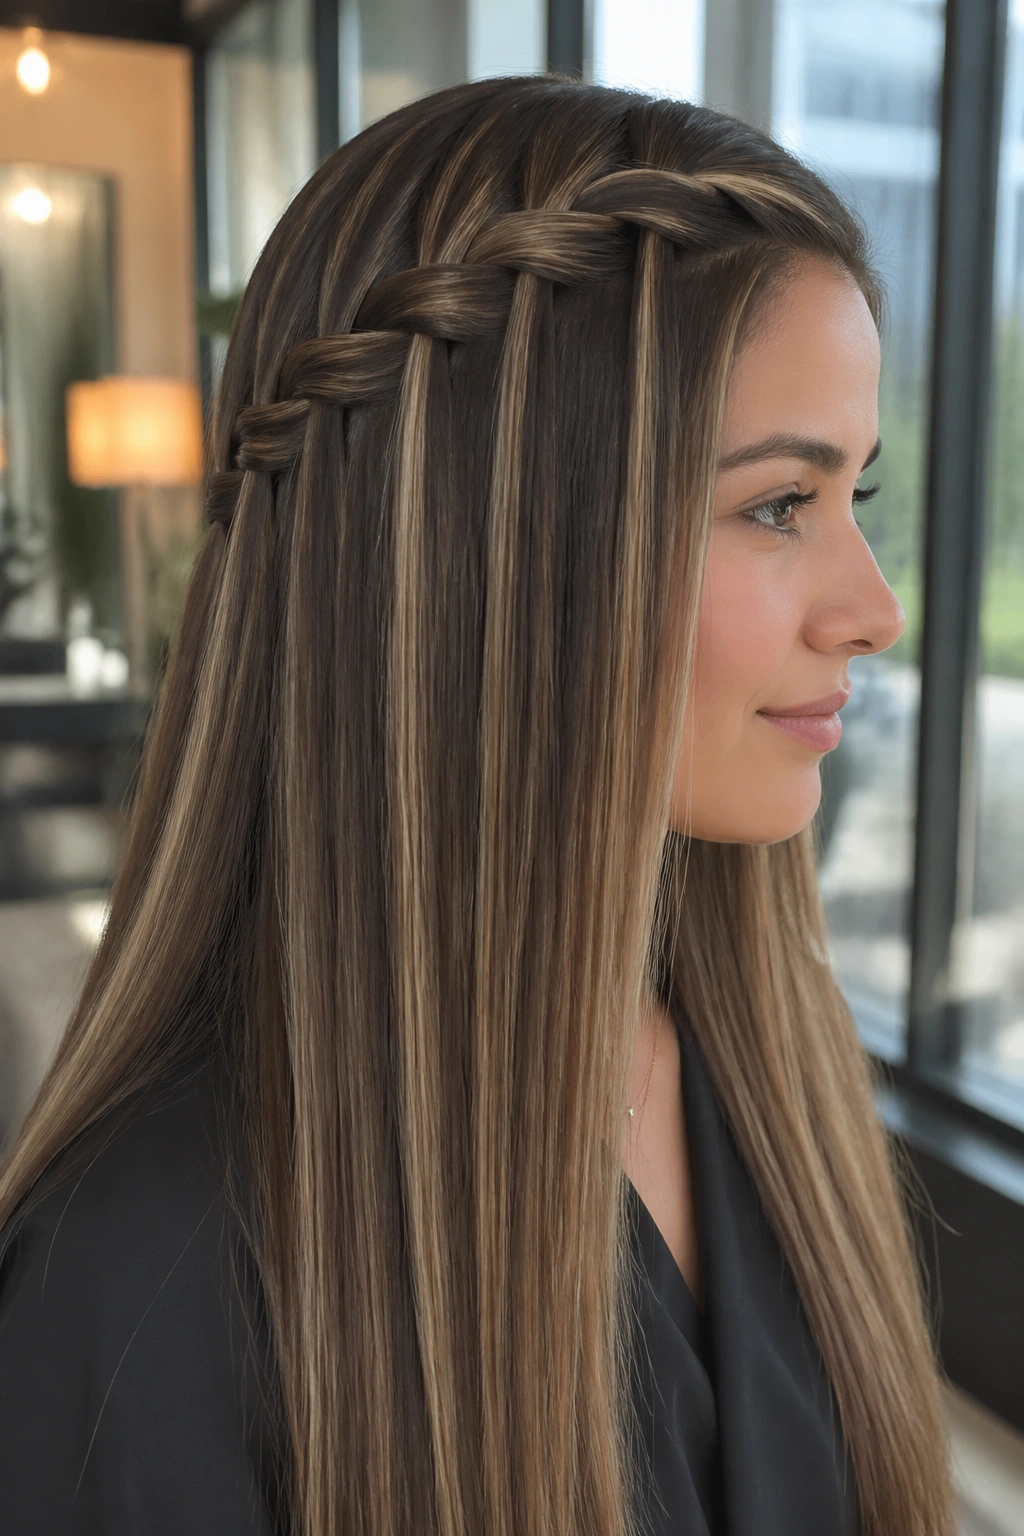
Straight hair doesn’t need a curl to make this style work. It needs shine, control, and just enough texture at the root so the braid doesn’t slide apart. Babylights are perfect here because the finer pieces show up as thin flashes through the braid instead of broad stripes.
The look is cleaner than the beach-wave version. More precise. If you like a smooth finish, this is the one.
Start with hair that’s been blown dry using a round brush or a paddle brush, then mist the top with light texturizing spray before braiding. Skip heavy oil near the roots. It can make the braid slip. A tiny amount of serum on the ends is fine, though, especially if the lighter pieces tend to look dry. The braid should sit snugly enough to keep its line, but not so tight that the released strands poke out.
Babylights read best when the braid is tidy. Every narrow section of color gets its own moment, which is exactly what you want when the highlight work is subtle. If the braid gets too messy, the fine color can disappear. Clean lines help.
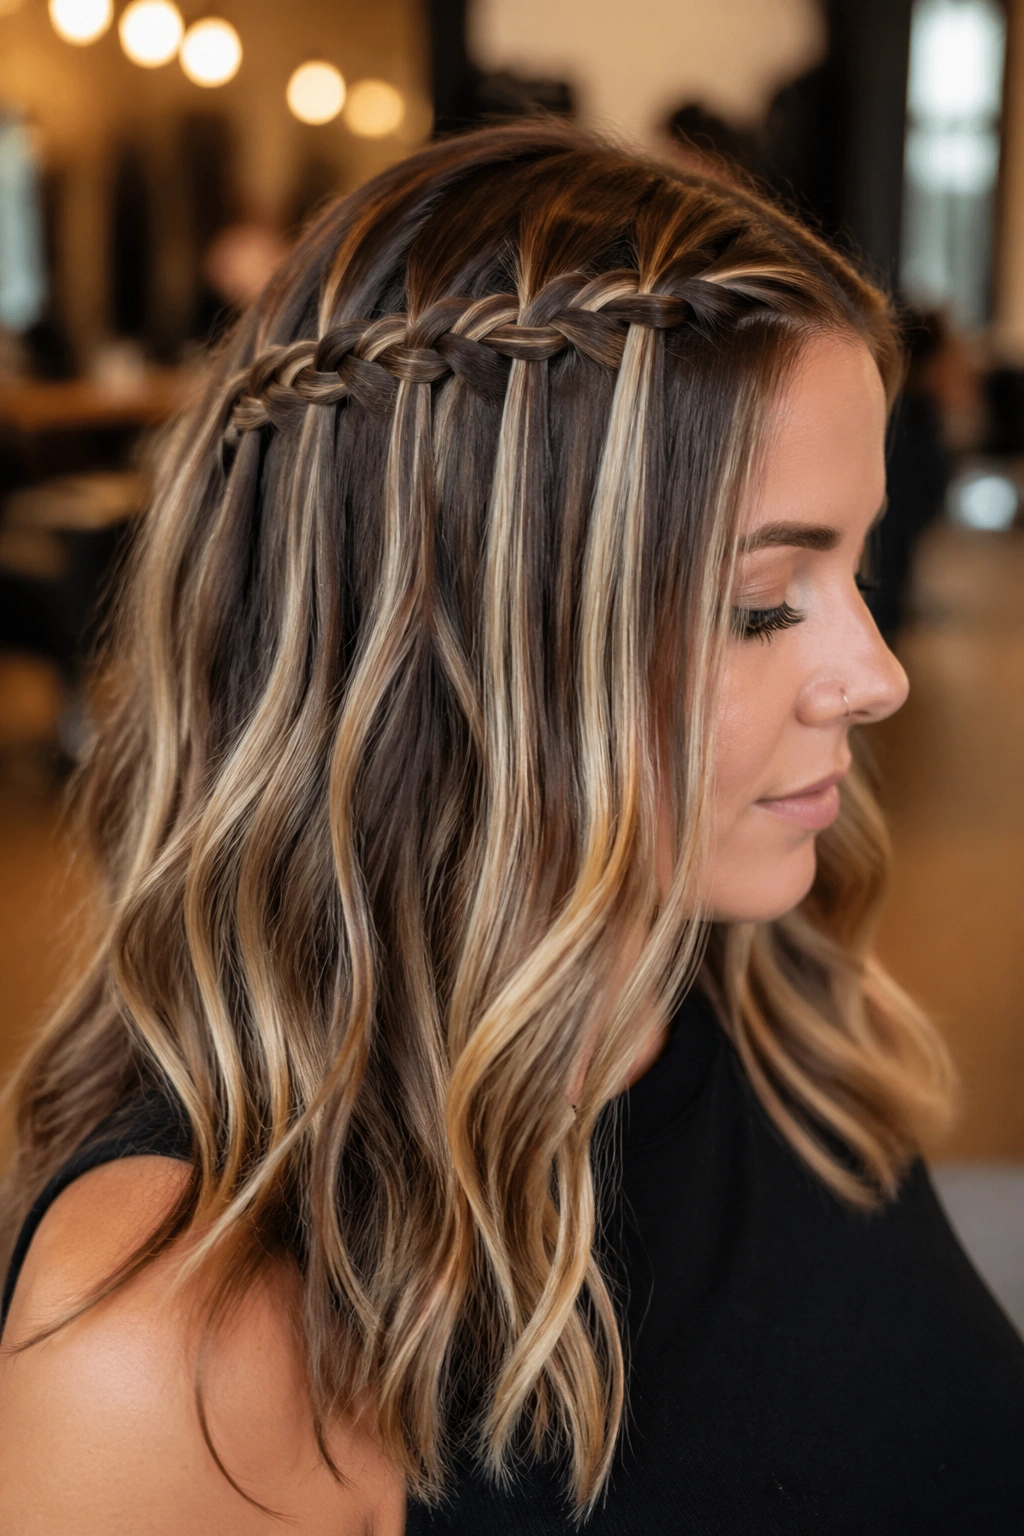
13. Messy Waterfall Braid with Loose Tendrils for Warm Brunette Highlights
Messy can be good. Actually, messy is often better for warm brunette highlights because the loose texture keeps the color from looking blocky. A few tendrils around the face soften the braid and let the lighter brown, copper, or cinnamon pieces show up naturally.
This style is the opposite of stiff formal braiding. It wants movement, soft edges, and a little bit of air around the crown. A rough curl through the lengths helps, but the braid itself should still have shape. That’s the part people get wrong. Messy does not mean shapeless.
Pull out a couple of face-framing strands before you finish securing the braid. Keep them thin, maybe the width of a pencil, so they don’t take over the face. Then pinch the braid open at the outer edges and let some of the lighter pieces sit forward. The result feels lived-in, which is a nice way to show brunette highlights that are more about depth than contrast.
I’d wear this style with soft makeup and a simple neckline. It already has enough going on. No need to fight it.
14. Waterfall Braid Halo for Bridal or Dressy Looks
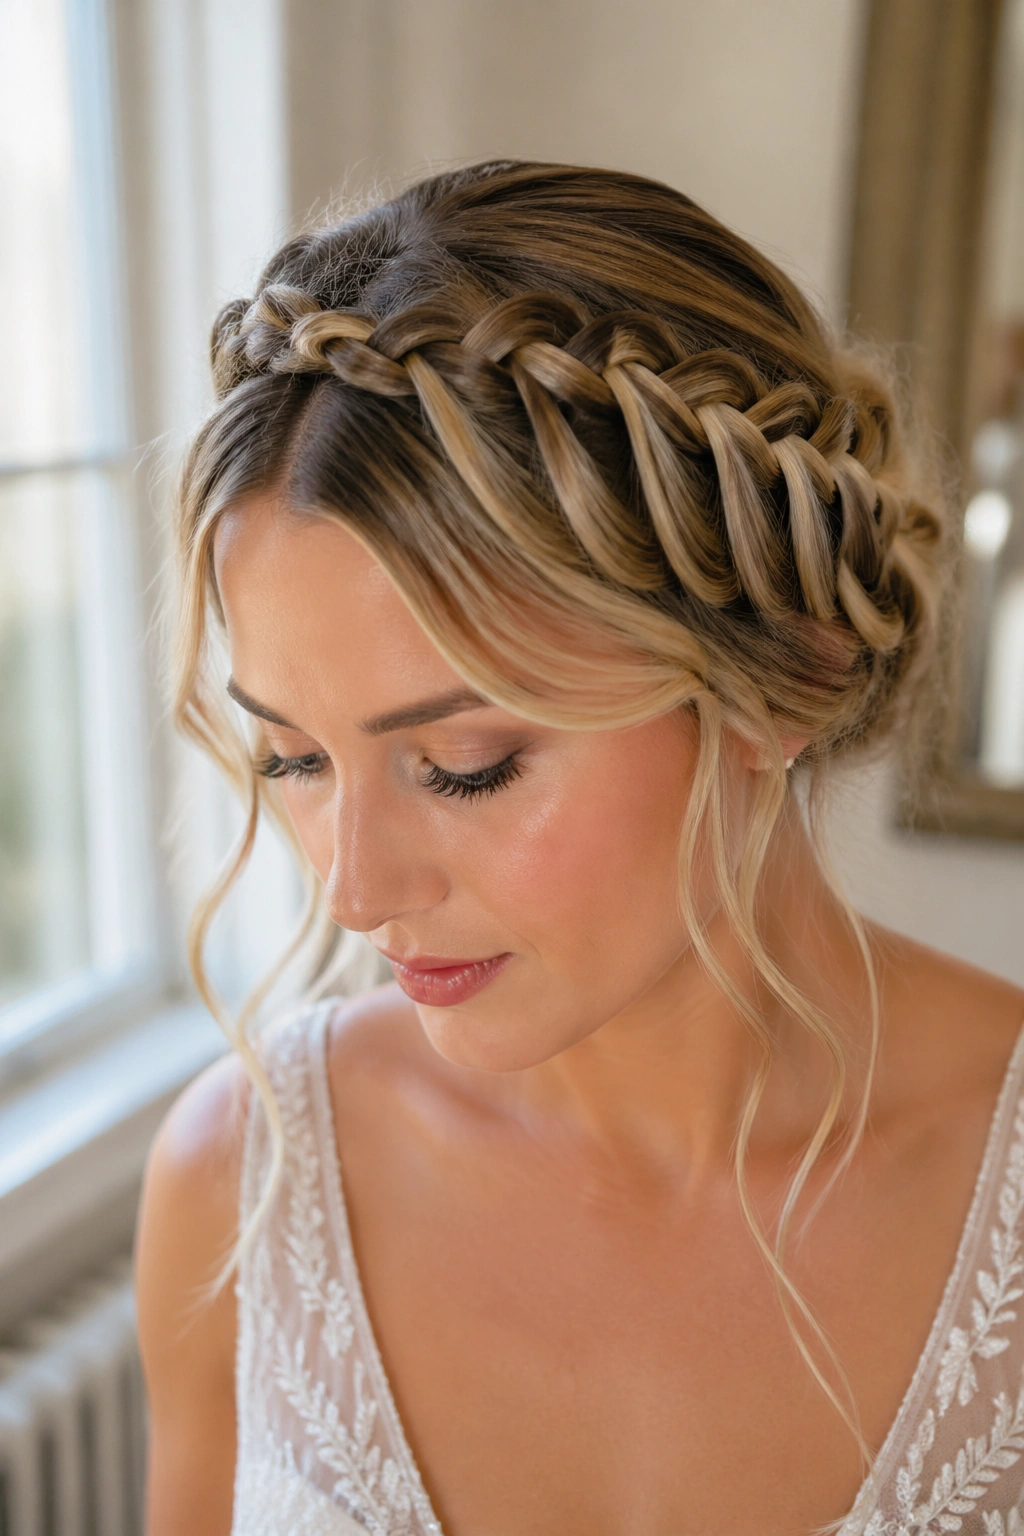
A halo-style waterfall braid is what you reach for when you want the highlights to circle the head instead of traveling in just one direction. The effect is graceful, but not in a precious way. It has enough structure to hold its shape for hours, and enough open pieces to keep the color visible from the front, sides, and back.
The Details That Matter
This style depends on clean sectioning. Start the braid behind one ear, wrap it around the crown, and tuck the end under the opposite side with bobby pins. Keep the braid line even, because a crooked halo looks accidental fast.
- Use 4 to 6 bobby pins matched to your hair color.
- Mist each pinned section lightly before securing it.
- Leave a few waterfall pieces loose near the temples for softness.
- Set the whole style with flexible hairspray, not a stiff shell.
The halo shape is lovely on highlighted hair because it creates a frame around the face while keeping the lighter mids and ends visible around the circumference. It works for events, photos, and any day you want the braid to feel a little more composed than usual. The braid should look like it belongs there, not like it’s trying to be the whole outfit.
15. Tucked-Back Waterfall Braid for the Cleanest Color Reveal
If your highlights are the main event, a tucked-back waterfall braid is hard to beat. The braid starts at the front, moves across the head, then disappears into the back instead of hanging down and competing with the color. That leaves the brightest pieces front and center, which is exactly where you want them if the front streaks, face frame, or crown lights are the reason you booked the appointment in the first place.
This version is especially nice when the color has a lot of contrast. Dark brunette with honey pieces. Black hair with caramel ribbons. Blonding with a stronger money piece. The braid gives the eye a path, then the loose ends keep the style from feeling too formal. It’s clean without being severe.
A tucked finish also solves a practical problem: long waterfall braids can get lost in the back when the hair is very dense. Pushing the ends under a small section keeps the silhouette neat and lets the highlight placement remain the focus. If you want the braid to read from the front, this is the smart choice.
That’s the little secret with waterfall braids and highlights. The braid should frame the color, not fight it. When the sectioning is clean, the tension is light, and the release pieces are sized well, the hair does the thing it’s supposed to do: move, bend, and show its color from more than one angle.