A rope braid can save a day. Not in some dramatic, beauty-ad copy way — just in the plain, practical sense that hair stays off your neck, your ends stop snagging on your jacket, and you don’t spend the afternoon checking a mirror every time you pass a glass door.
That matters more than people admit. A lot of styles look polished for 20 minutes and then collapse the second you lean back in a chair, tuck hair behind one ear, or get stuck in a warm office with dry air blowing at your face. A rope braid behaves differently. Two sections twisted around each other create a pattern that clings to itself, and when you pair that with a small amount of texture or a good anchor point, the style can stay put through typing, commuting, meetings, and the general chaos of a long workday.
The version that works best for you depends on your hair’s habits. Slippery straight hair needs a little grit. Thick hair wants a stronger base and more support near the nape. Layers need strategic pinning so the shorter pieces don’t pop loose by lunch. And if your day includes a scarf, headset, or blazer collar, the placement matters even more than the braid itself.
That’s the real trick: not just making a rope braid, but choosing the right one for the amount of movement your day throws at it.
1. The Low Rope Ponytail With a Wrapped Base
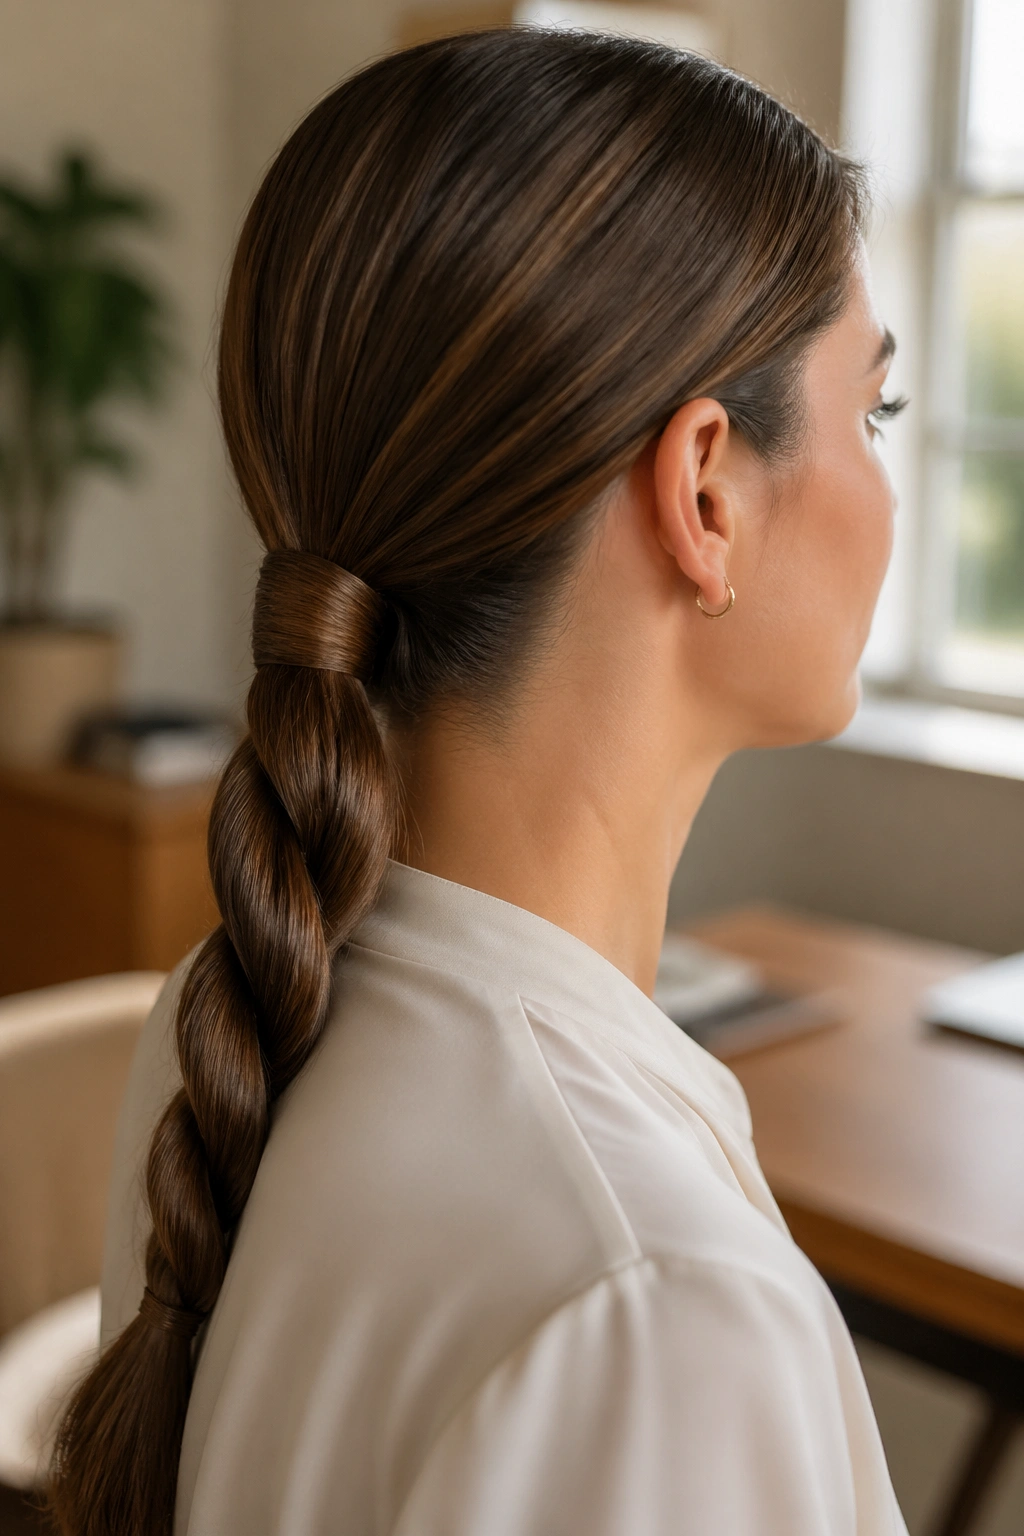
This is the style I recommend when you want the easiest kind of rope braid that still looks intentional at 4 p.m. It starts with a low ponytail, which already gives you a stable anchor, then twists into a clean two-strand rope that moves as one piece instead of flopping around.
Why it stays put
The low placement does most of the work. Hair at the nape gets less tugging from wind, less rubbing against chair backs, and fewer weird dents from headphones. A wrapped base hides the elastic, which keeps the whole thing from looking like you rushed it between emails.
A small amount of mousse or texture spray at the roots helps more than people expect. Not a crunchy helmet. Just enough grip so the ponytail does not slide around every time you turn your head.
How to make it work on a workday
- Use a 1-inch elastic to secure the ponytail tightly at the nape.
- Split the tail into two equal sections and twist each one clockwise before wrapping them together counterclockwise.
- Wrap a 2-inch piece of hair around the elastic and pin it underneath with a flat bobby pin.
- Finish with a light mist of flexible hairspray, especially at the ends.
Best tip: keep the ponytail low enough that your collar can sit over it, not under it. That tiny adjustment saves you from constant friction.
2. The Side Rope Braid That Slides Over One Shoulder
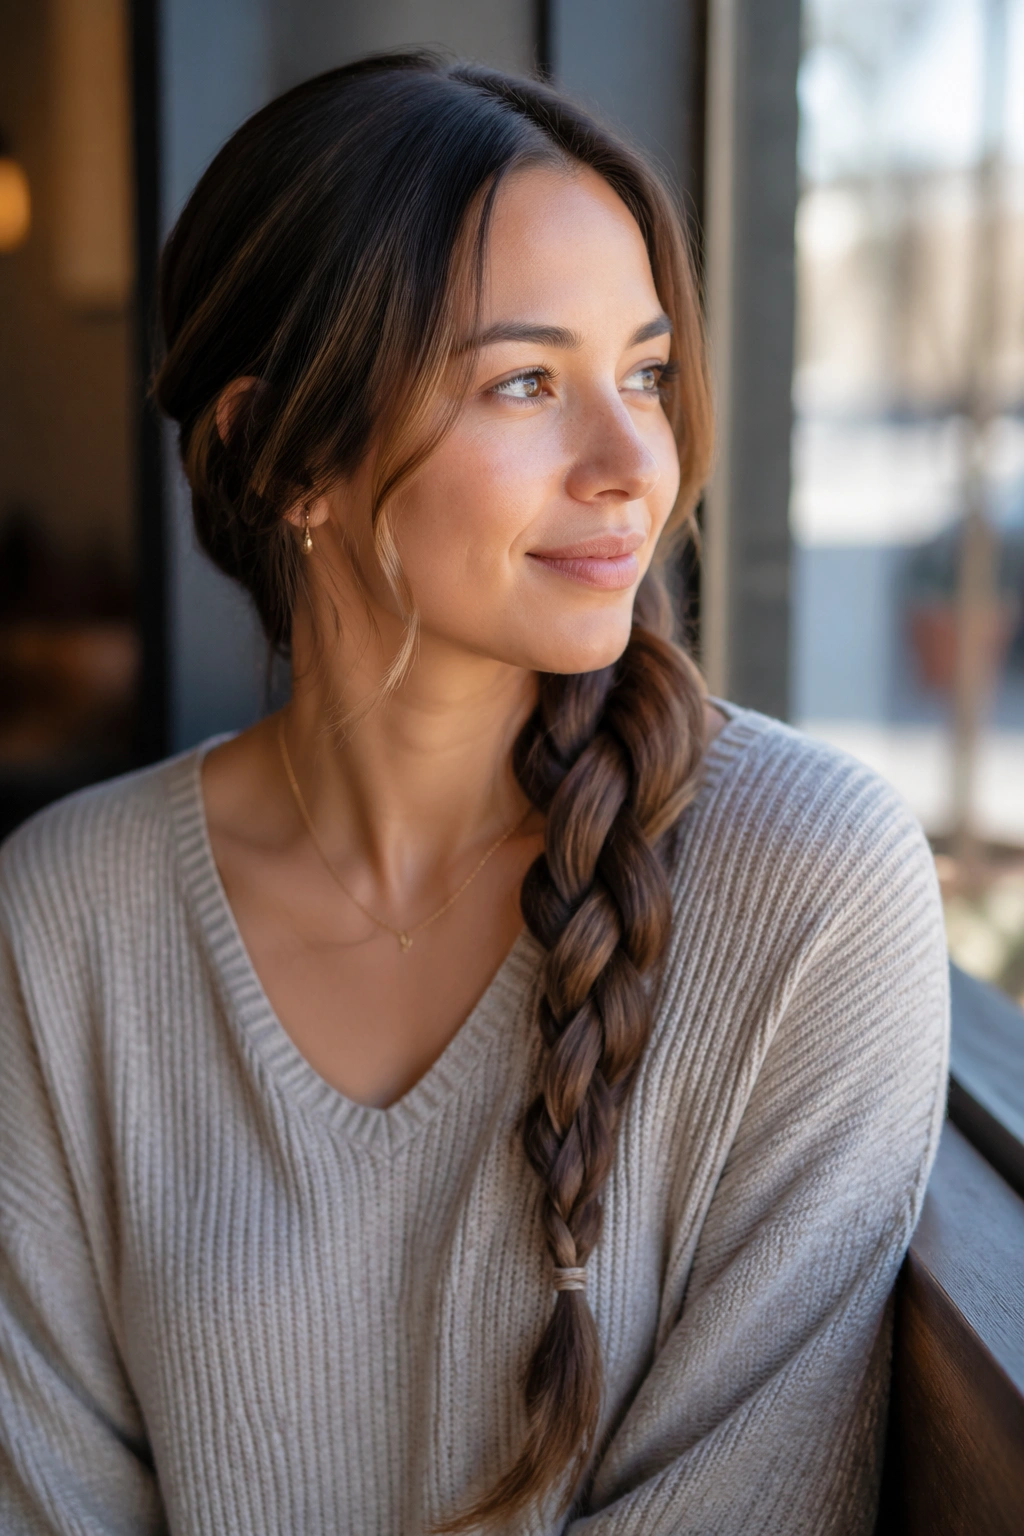
Why does a side rope braid last longer than the version sitting right down your back? Because it gets less punishment from your chair, your bag strap, and the constant back-and-forth of a workday. Hair tucked over one shoulder tends to move less, and that means fewer stray pieces escaping.
It also gives you a little breathing room if your hair is medium to long and likes to puff out when it gets warm. The side placement makes the style feel softer, but the braid itself can still be tight at the root and secure through the ends.
What makes it different
A side braid is one of those styles that looks more styled than it actually is. The trick is to start with a clean part, then bring all the hair across to the heavier side before you twist. That shift of weight helps the braid hang neatly instead of pulling flat against your scalp.
If your hair is very layered, pin the first 2 inches near the shoulder side with one hidden bobby pin before you start twisting. That keeps the shortest pieces from slipping out when you lean forward.
How to wear it
Keep the braid slightly loose in the middle and tighter at the top and bottom. That balance matters. Too tight everywhere and the style feels stiff. Too loose and the side braid puffs out before lunch.
3. The Double Rope Braids Fused Into One Low Knot
Two braids beat one when your hair is heavy. That’s the whole story here.
A pair of rope braids gives thick or long hair more control, because each side carries less weight before you bring them together into a knot. The shape holds better than one big twist that’s trying to support all your hair at once, and it feels more secure when you’re moving around a lot.
Why this version lasts
The split lets you manage the tension in stages. First you secure each side near the temple or just behind the ears. Then you twist each side and join them low at the back of the head. By the time you pin the knot, most of the movement has already been contained.
A workday with this style is easier on your scalp, too. The load is spread out instead of pulled from one point. That matters if you get headaches from tight ponytails or if your hair is dense enough to turn a simple braid into a small weight-lifting problem.
Quick placement notes
- Keep the part centered or slightly off-center.
- Twist both sides with the same direction so the finish looks even.
- Pin the knot with 2 to 4 crossed bobby pins.
- If the ends are short, tuck them under the knot instead of trying to force them into a tiny elastic.
This one feels polished without being precious. Good office hair.
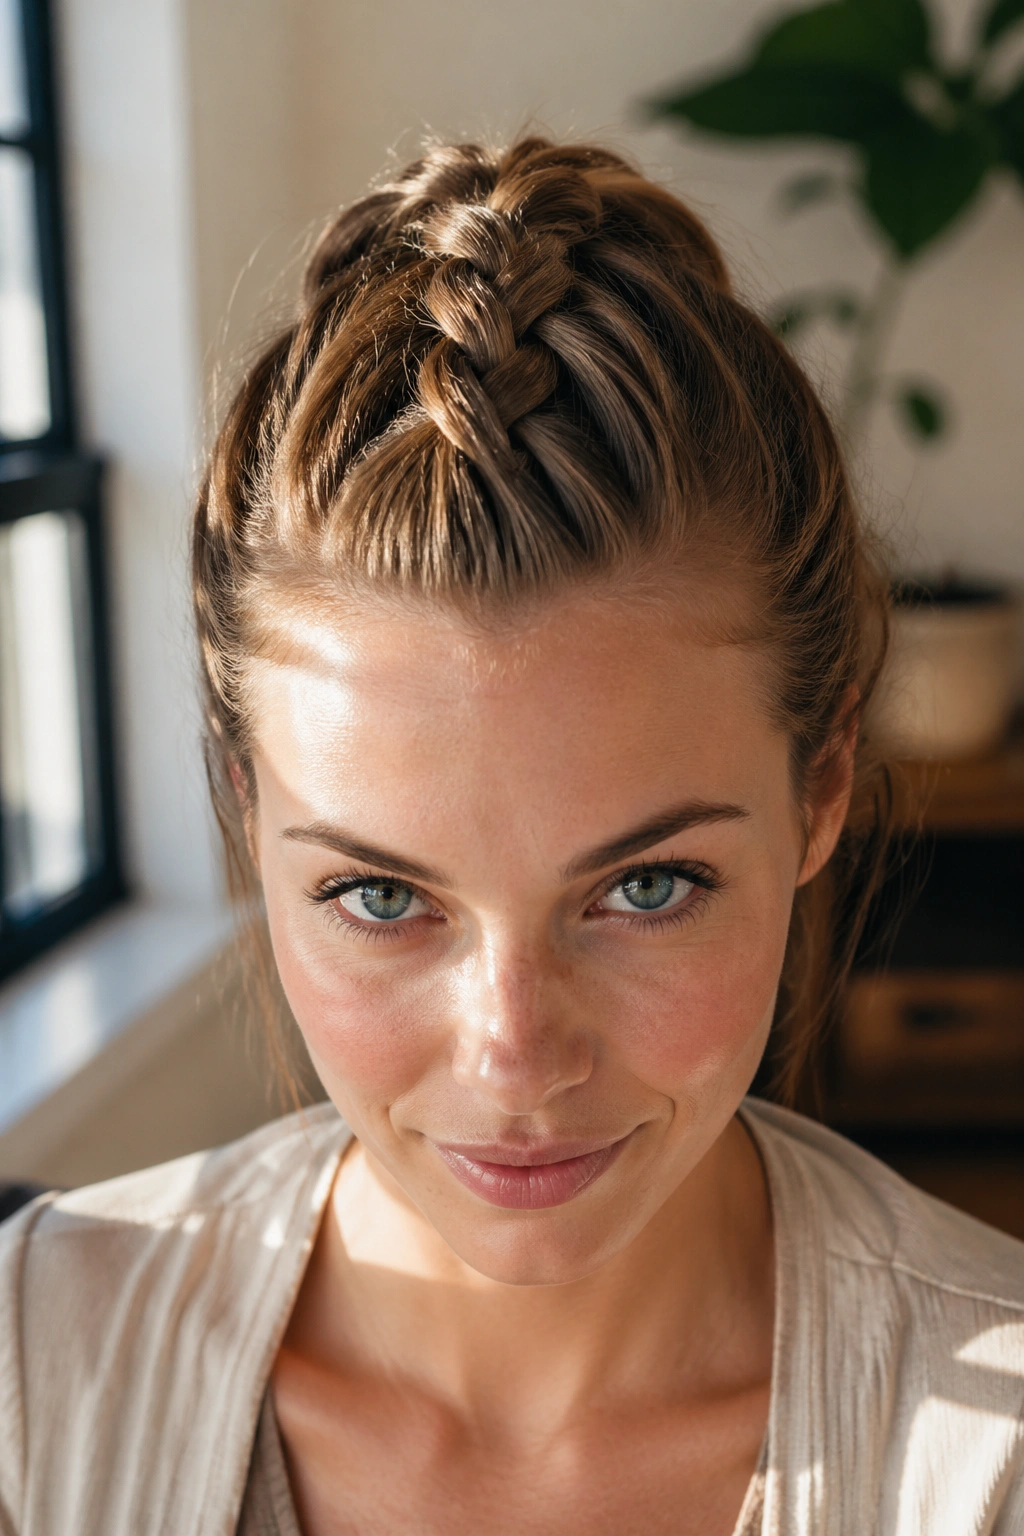
4. The Half-Up Rope Braid Crown

If your front layers keep falling into your eyes by lunchtime, a half-up rope braid crown solves the annoying part without flattening the rest of your hair. It’s one of the better rope braid options for people who want movement left in the lengths but need the top half under control.
The crown section keeps the face clear, and the loose back hair keeps the style from feeling too severe. That balance is useful when you’re going from a desk to a dinner plan and do not want to redo your whole head halfway through the day.
What to watch for
The crown needs a firm base. If the first section is floppy, the whole style drifts backward. Take the top half from temple to temple, or slightly deeper if you have thick hair, and secure it with a small elastic before you begin the twist.
Then braid each side toward the back and pin them where they meet. One hidden pin on each side is usually enough if the hair is coarse. Fine hair may need two on each side, crossed in an X.
Best use case
This style works especially well when you want your hair down but not in your face. It’s also a solid option for second-day hair, because the braid gives a little grit to strands that might otherwise slip around.
A soft wave underneath helps, but straight hair can wear it too. Just keep the crown tight.
5. The Rope Braid Bun at the Nape
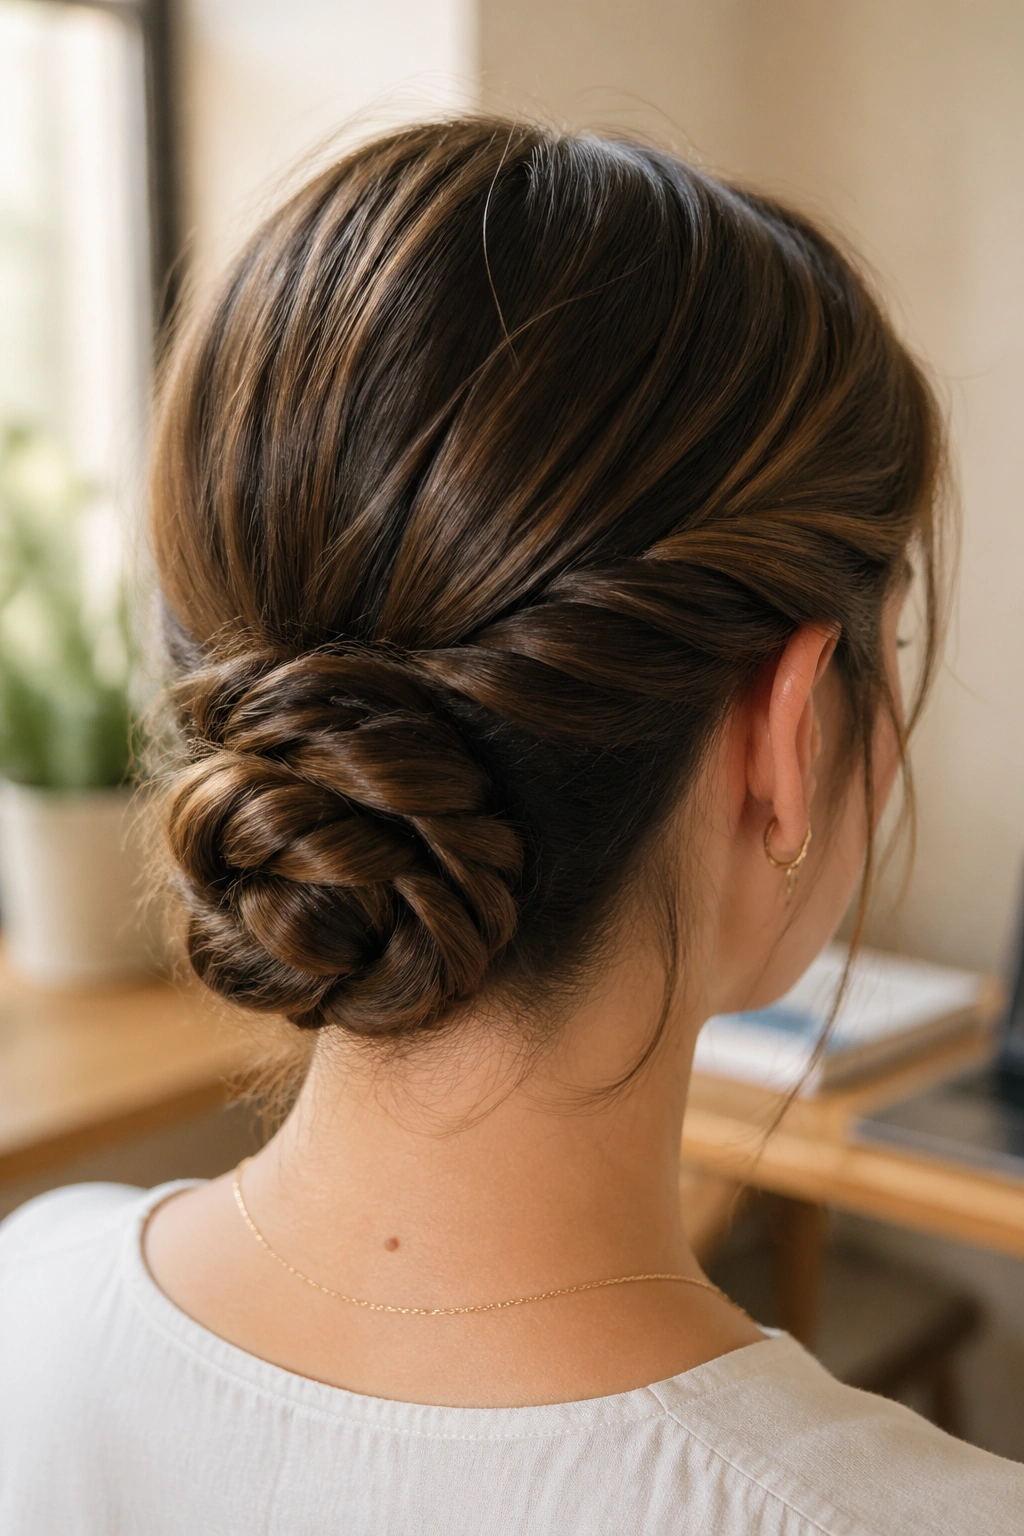
A bun can be calmer than a ponytail. Strange but true.
When you twist the hair into a rope braid first, then coil it into a bun at the nape, the strands lock together before they get tucked away. That makes the finish feel less likely to unravel than a plain bun made from loose hair, especially if your workday includes lots of head movement or a long stretch in a car.
The low placement also means you can lean against a chair without flattening the whole style. That sounds minor until you’ve spent half a day with your hair trying to escape the back of your head.
Why this version is worth the extra minute
The rope texture gives the bun more body, which means it doesn’t need to be huge to look full. If you have fine hair, that matters. You can build a decent-looking bun without teasing the life out of your roots.
Small details that help
- Twist the tail until it feels springy, not limp.
- Coil it in the same direction every time so the shape stacks cleanly.
- Pin through the center of the bun, not just around the edges.
- Leave the ends tucked under if you want a neater finish.
Do not place it too high unless you enjoy headrest conflict. A low bun is the whole point.
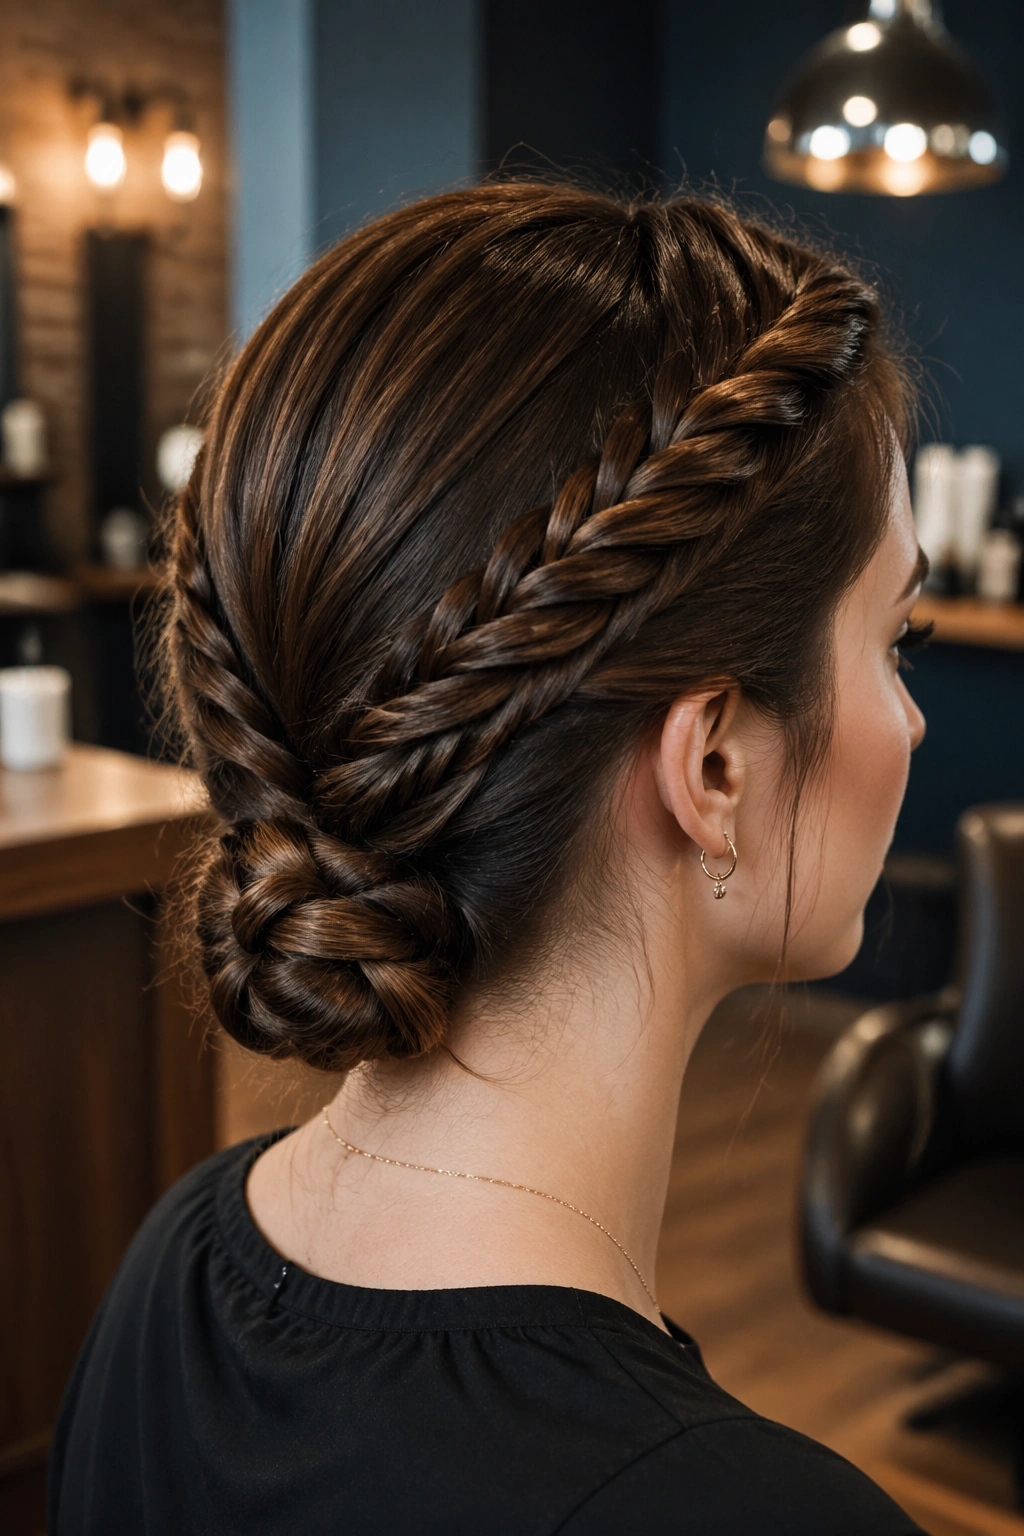
6. The French Rope Braid That Starts at the Crown
The version I reach for on humid days is the rope braid that picks up hair as it goes. It behaves like a French braid, except you’re working with two sections instead of three, and the result feels a little sleeker at the top.
That matters because the crown is where most styles fail first. If the roots are loose, the braid starts sagging before lunch. If the crown is tight and the grip is clean, the rest of the braid has a much better chance of holding through the day.
What makes it hold
You’re adding hair gradually, which keeps the braid anchored to the scalp instead of hanging off it. That gives the style more staying power than a simple rope braid made only from the lengths.
The sections should stay even. If one side starts getting bigger than the other, the braid rolls off-center and becomes harder to keep tight. Use your index finger to separate clean slices, about the width of a lipstick tube, then add them in as you twist down the head.
A few practical notes
- Start with dry hair; damp hair can stretch and loosen later.
- Use a light smoothing cream near the roots if flyaways are an issue.
- Keep tension firm at the top and medium through the rest.
- Secure the end with a small elastic and hide it with a pin if you want a cleaner finish.
This is one of those styles that looks more complicated than it is. Good for days when you want your hair to do the convincing for you.
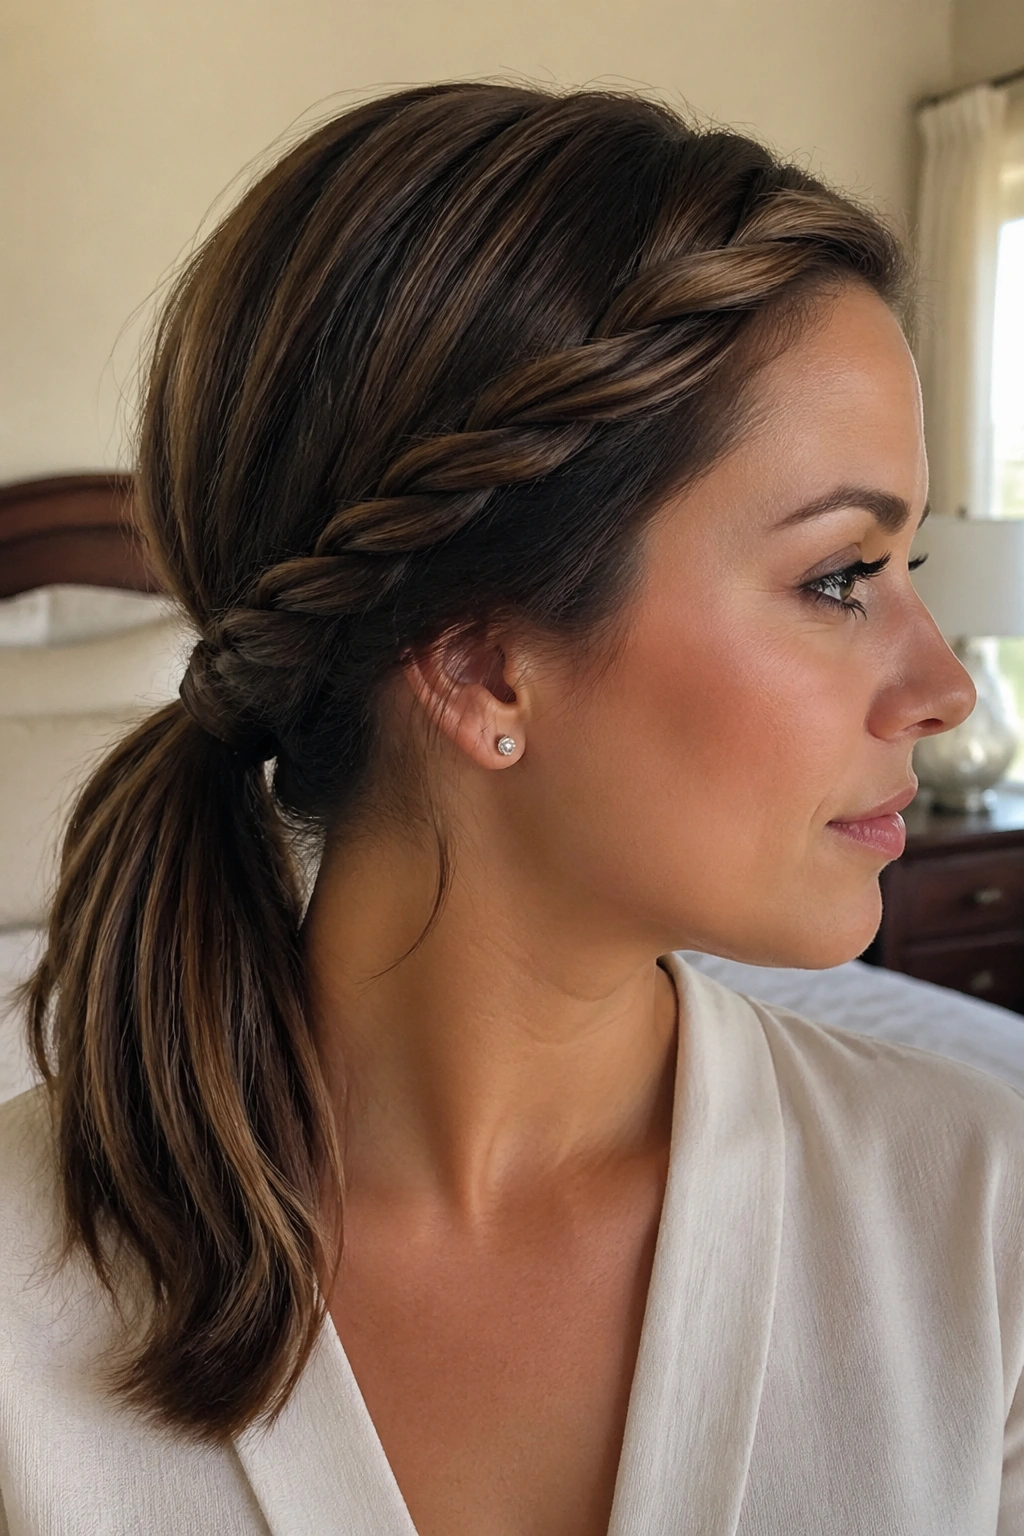
7. The Side-Swept Rope Braid Into a Low Ponytail
What if you want something polished without pulling everything tight? This is the one.
A side-swept rope braid starts with a deep side part, gathers the front pieces across the head, and then falls into a low ponytail or loose tail at the back. It gives you the clean look of control without the hard lines that can make a style feel severe by mid-afternoon.
The movement is a little softer than a centered braid, which is useful if your face shape likes a bit of softness near the cheekbones. More than that, it keeps the front section from collapsing the moment you tuck it behind your ear.
Who it suits
This braid is good for medium to long hair, especially if you wear glasses or hate having too much hair right in the center of your field of view. It also plays nicely with a blazer collar because the sweep creates one smooth line instead of a bulky knot right at the back.
Make it last
- Use a deep side part.
- Smooth the front with a pea-size amount of cream.
- Anchor the braid behind the opposite ear with two pins.
- Tie the lower tail with a firm elastic, then wrap a thin strand around it.
One small warning: if your hair is very slippery, the side sweep can slip back. A little texturizing spray near the part fixes that fast.
8. The Rope Braid Pigtails That Act Like One Job-Safe Style

Pigtails are not childish when the twists are tight and the placement is low.
Two rope braids split the weight in half, which makes this style a gift for thick hair, naturally curly hair, and anyone who is tired of one giant braid pulling at the scalp all day. The style also gives you a lot of control over pieces near the nape, since each side is anchored separately.
It looks casual, sure. But casual does not mean sloppy.
Why it works for long days
Each side has less hair to hold, so the braid stays neater longer. That’s especially helpful if one side of your hair is heavier than the other — which happens more than people admit. The pigtails keep the load balanced and reduce the constant drifting that can ruin a single braid.
A little grip at the roots matters here. Dry shampoo, mousse, or even a mist of sea-salt spray can make the sections easier to twist without slipping through your fingers.
Keep the finish tidy
- Place the part where you actually like it, not where you think you should.
- Start each pigtail at ear level or slightly below.
- Secure the ends with small elastics that match your hair color.
- Pull the braid edges out only a little; over-pancaking makes the style wobble.
This is one of the easiest rope braids to refresh at a bathroom mirror. That counts for a lot.
9. The Rope Halo Braid Wrapped Around the Head
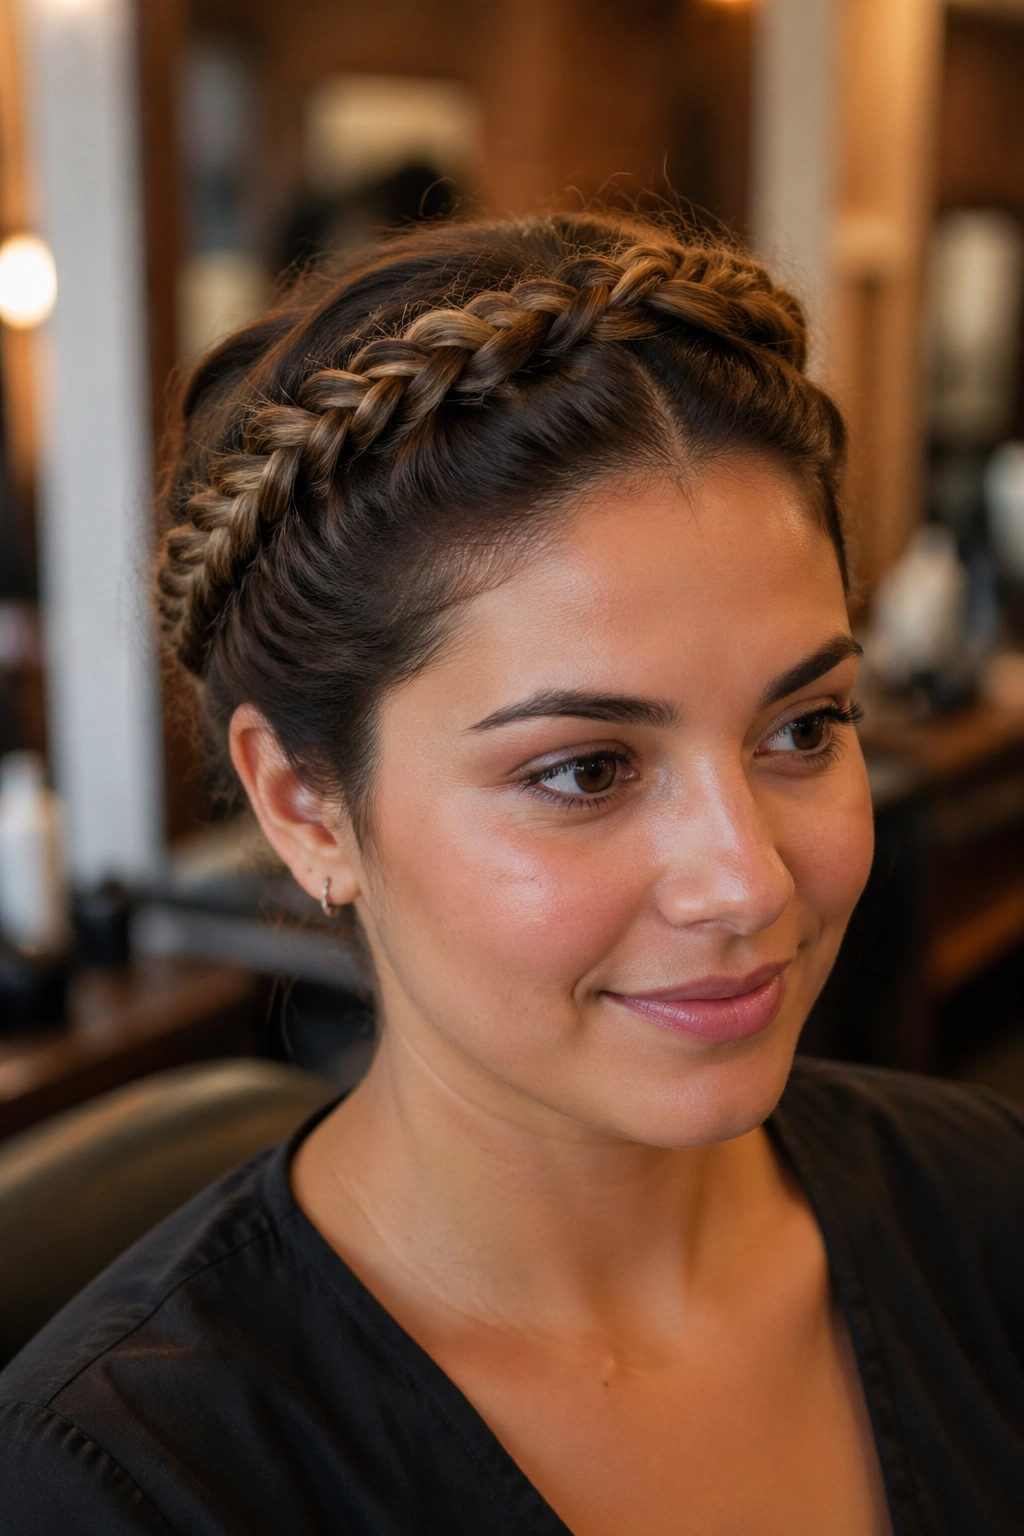
A halo braid looks fancier than it feels to build. That’s one of the reasons I like it for long workdays that end with something a little nicer than the office chair.
Instead of letting the braid hang, you wrap it around the head, pinning it along the hairline or just behind it. The shape keeps every strand tucked close, which means fewer flyaways, fewer collar snags, and almost no temptation to touch your hair every 10 minutes.
What makes the halo hold
The magic is in the anchor points. You’re not relying on the braid’s length to carry the style. You’re pinning it in place at several points around the head, so the weight gets distributed instead of hanging from one spot.
That’s why it works well for medium-thick hair and for hair that tends to puff out. Once it’s pinned, there’s not much room left for movement.
How to keep it from slipping
- Prep the hair with a light hold spray before braiding.
- Twist the braid snugly, but not so tight that it starts to coil on itself.
- Use 3 to 6 bobby pins, depending on length and density.
- Hide the ends under the braid rather than trying to force a neat little tuck at the first try.
Nope, it does not need to look perfect from every angle. The whole point is that it stays put while you get on with your day.
10. The Rope Braid Threaded With a Ribbon or Slim Scarf

Need the braid to stay, or just need it to look like it stayed? A ribbon or narrow scarf can help with both.
Threading fabric through a rope braid changes the feel of the whole style. It adds thickness, disguises uneven ends, and gives slippery hair a little extra grip because the braid has more bulk to hold onto. The fabric also keeps the style from looking too plain when you want something that reads a bit more finished.
The practical side
Use a slim ribbon, around 1/4 to 1/2 inch wide, or a scarf cut long and narrow. Anything too wide turns into a wrestling match. Start by tying the ribbon near the base, then twist it along with one of the sections so it stays integrated instead of floating on top.
If your hair is fine, the ribbon makes the braid look fuller. If your hair is thick, it helps break up the weight so the braid doesn’t feel like a single heavy rope by late afternoon.
Best ways to wear it
This style works well with low ponytails, side braids, and half-up looks. It is less friendly to very sporty days because fabric can snag on coats and bag straps. Still, for a desk day or a presentation, it gives just enough polish without trying too hard.
Pick satin for shine, cotton for grip. That choice changes the whole mood.
11. The Bubble Rope Braid That Keeps Its Shape

A bubble braid layered over a rope braid is one of those styles that sounds fussy until you try it. Then you realize the elastic sections are doing half the work for you.
The rope braid creates the backbone. The bubble ties, spaced every 2 to 3 inches, keep the shape from loosening and give the braid visible structure all day. It’s a good option when you want something playful but still controlled enough to wear to work.
Why it lasts
Each elastic acts like a checkpoint. Even if a section loosens a little, the braid below it is still held in place. That makes it more forgiving than a single long twist that can unravel from the bottom up.
The bubbles also help if your hair has layers. Shorter pieces have less chance to pop free because each section is cinched before the next one starts.
The cleanest way to do it
- Create a rope braid first and secure the end.
- Add small clear elastics every 2 to 3 inches.
- Gently tug each section outward so it forms a rounded bubble.
- Keep the top section tight so the style does not drift.
This is not the braid for a day when you want zero attention. It is, however, a very solid choice when you want the style to look intact from morning to evening.
12. The Rope Braid Twisted Into a Claw-Clip Finish
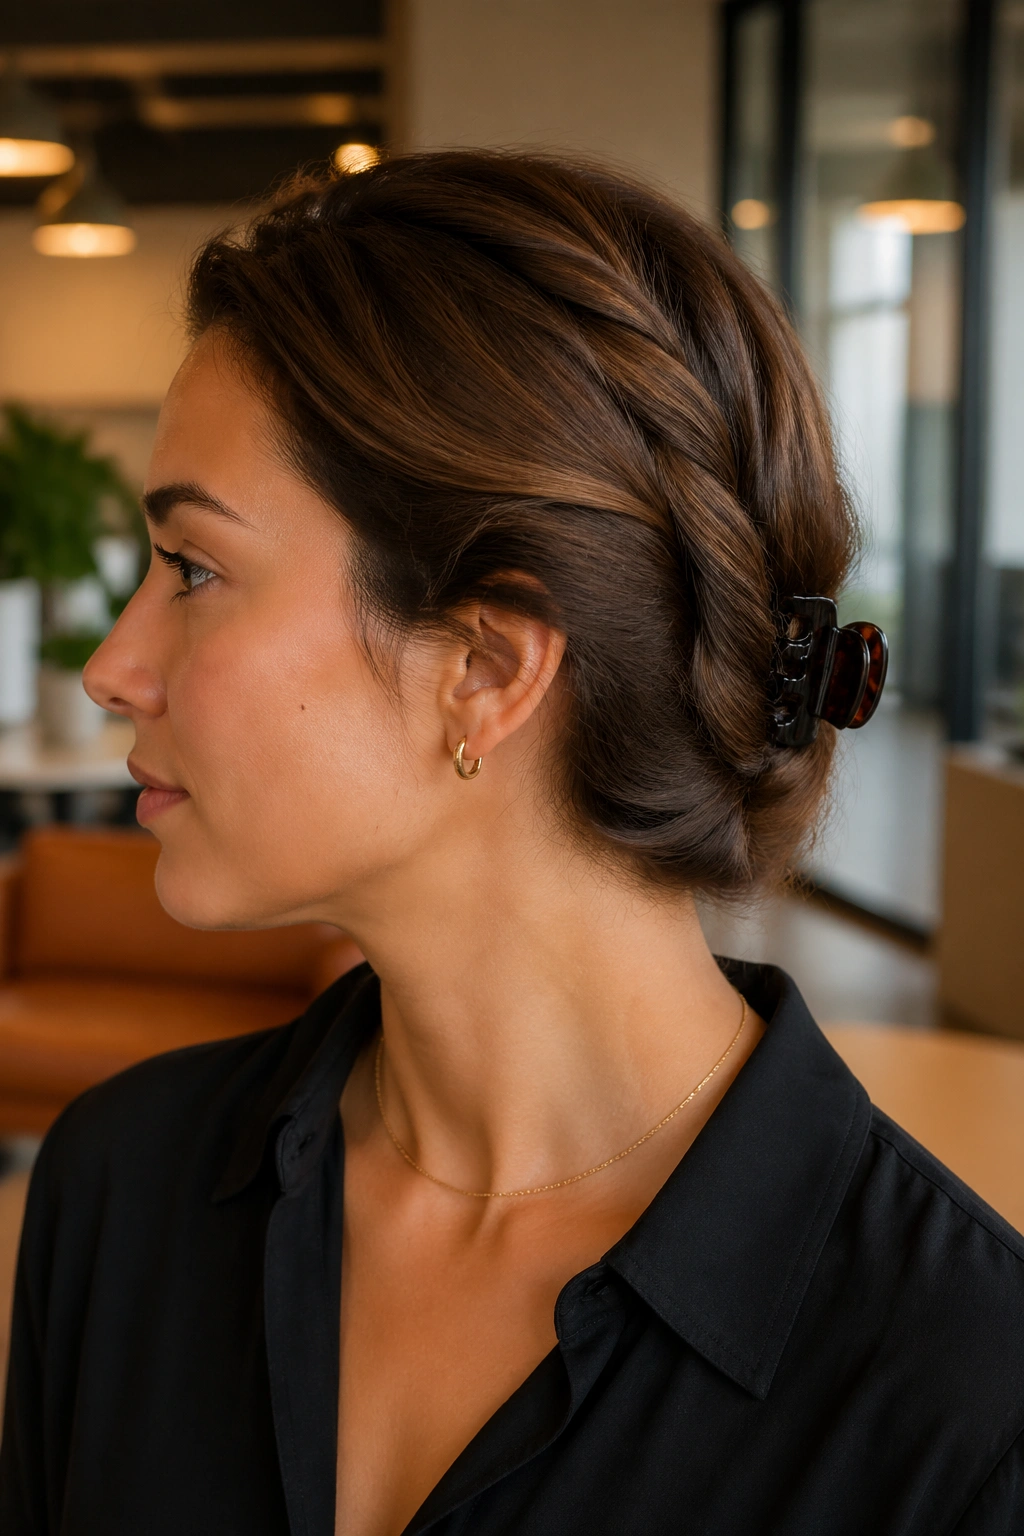
Unlike a standard rope braid, this one trades a long tail for a tucked finish that takes almost no extra effort to maintain.
You twist the braid down the back or side, then fold the length upward and secure it with a medium or large claw clip. That keeps the ends away from your collar and gives you a style that can survive a desk chair, a lunch run, and the awkward moment when you need your hair off your neck right away.
Why it’s better than it sounds
The braid provides the grip. The clip provides the structure. Together, they create a shape that feels looser than a tight bun but steadier than a ponytail with too much bounce.
This is especially good for thick hair that usually overwhelms clips. The rope braid compresses some of that volume before the clip goes in, so the clip has less to fight.
Best clip shape
A claw clip with curved teeth and a strong spring works better than flat decorative versions. You want a clip that bites into the twist, not one that just sits on top of it looking cute.
- Use a medium clip for shoulder-length hair.
- Use a large clip for longer, denser hair.
- Tuck the ends up and under before clipping.
- Leave a few pieces loose near the face if you want the style to feel softer.
It’s a good desk-to-dinner fix. And yes, that still counts as a workday style.
13. The Mini Rope Braids That Save Short Hair and Layers
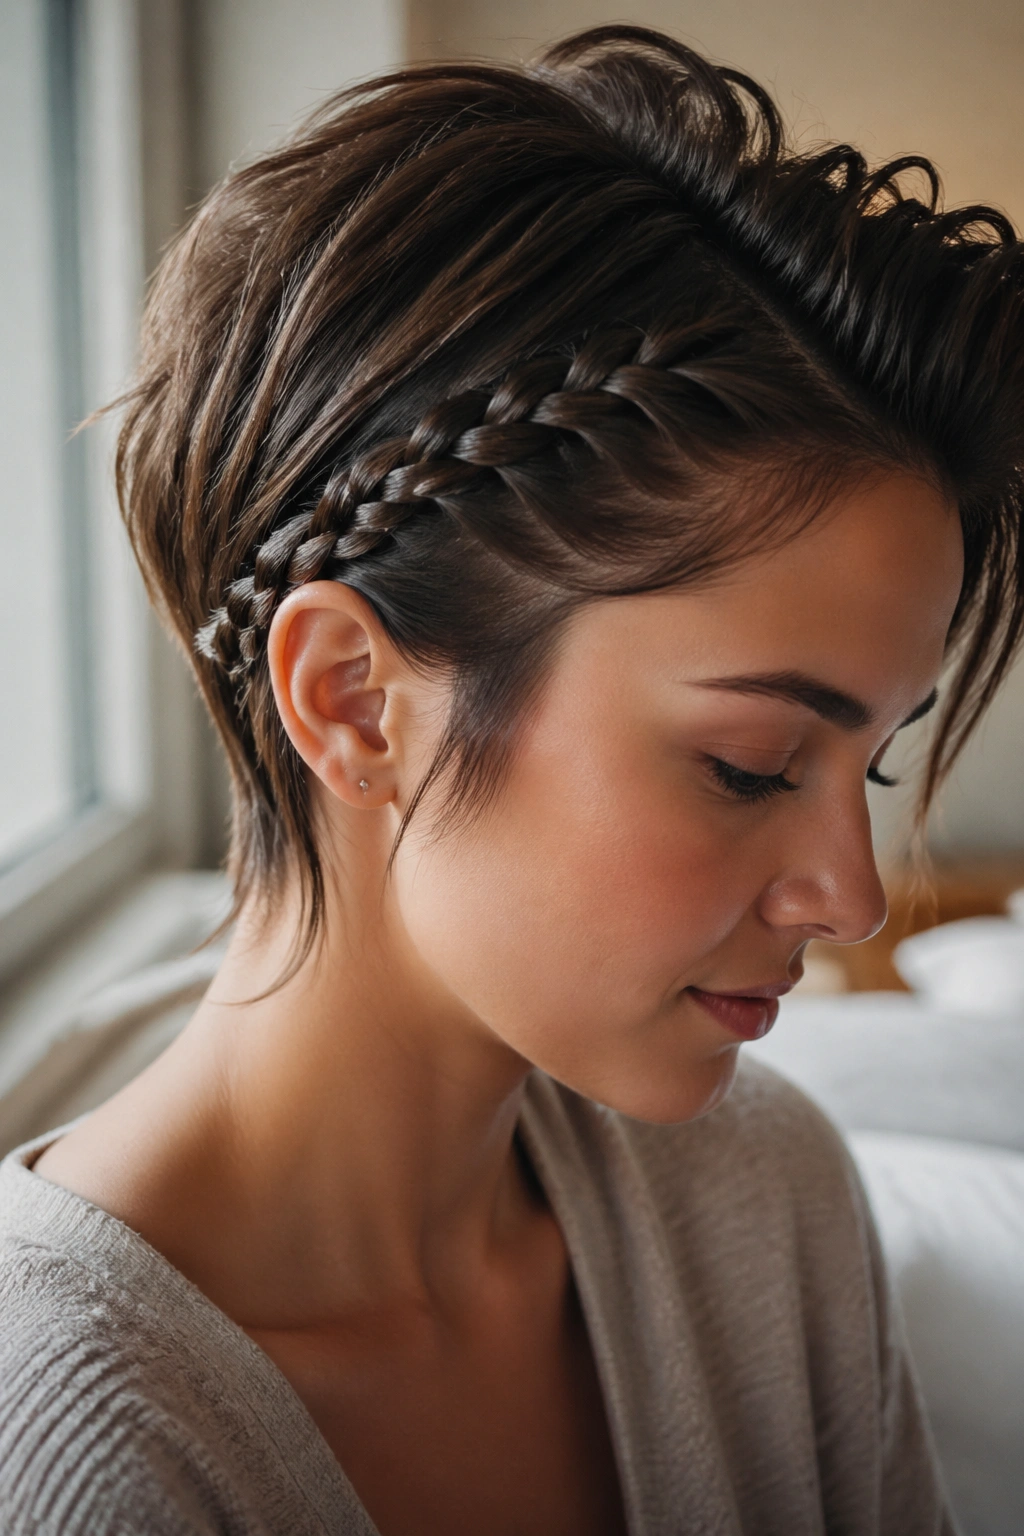
Short hair does not need to miss out. Mini rope braids are one of the best ways to keep layers, bobs, and collarbone cuts under control without trying to force them into a style built for waist-length hair.
The idea is simple: take smaller sections at the temples, crown, or nape, twist them into mini rope braids, and pin or tie them into the rest of the hairstyle. Because each braid is lighter, the shorter pieces don’t get dragged down by the weight of a big full-head braid.
Why this version matters
People with layered cuts know the problem. The long pieces cooperate, and the shorter pieces act like they have their own agenda. Mini rope braids handle that by isolating the annoying sections and giving them their own anchor point.
They also work well when you need a polished top half and don’t care what the back is doing. That may sound a little blunt, but some mornings that is the honest answer.
Good placement ideas
- Two mini rope braids at the temples, pinned back over the ears.
- One small braid on each side, joined into a half-up style.
- A tiny nape braid tucked under a low bun.
- Shorter front layers twisted away from the face and hidden under the longer top section.
Use a tiny elastic or one small pin per braid. Anything bigger starts to look heavy. And if your hair is very fine, a touch of dry shampoo at the roots gives the minis enough grab to last past the lunch break.
Rope braids are at their best when they match the day, not when they try to overpower it. A low ponytail gives you speed. A crown braid gives you control. Mini braids handle the awkward layers that refuse to behave. Pick the version that fits the job, secure the base properly, and don’t skip the little things — the pin placement, the elastic size, the bit of texture at the roots. That’s usually where the difference lives.