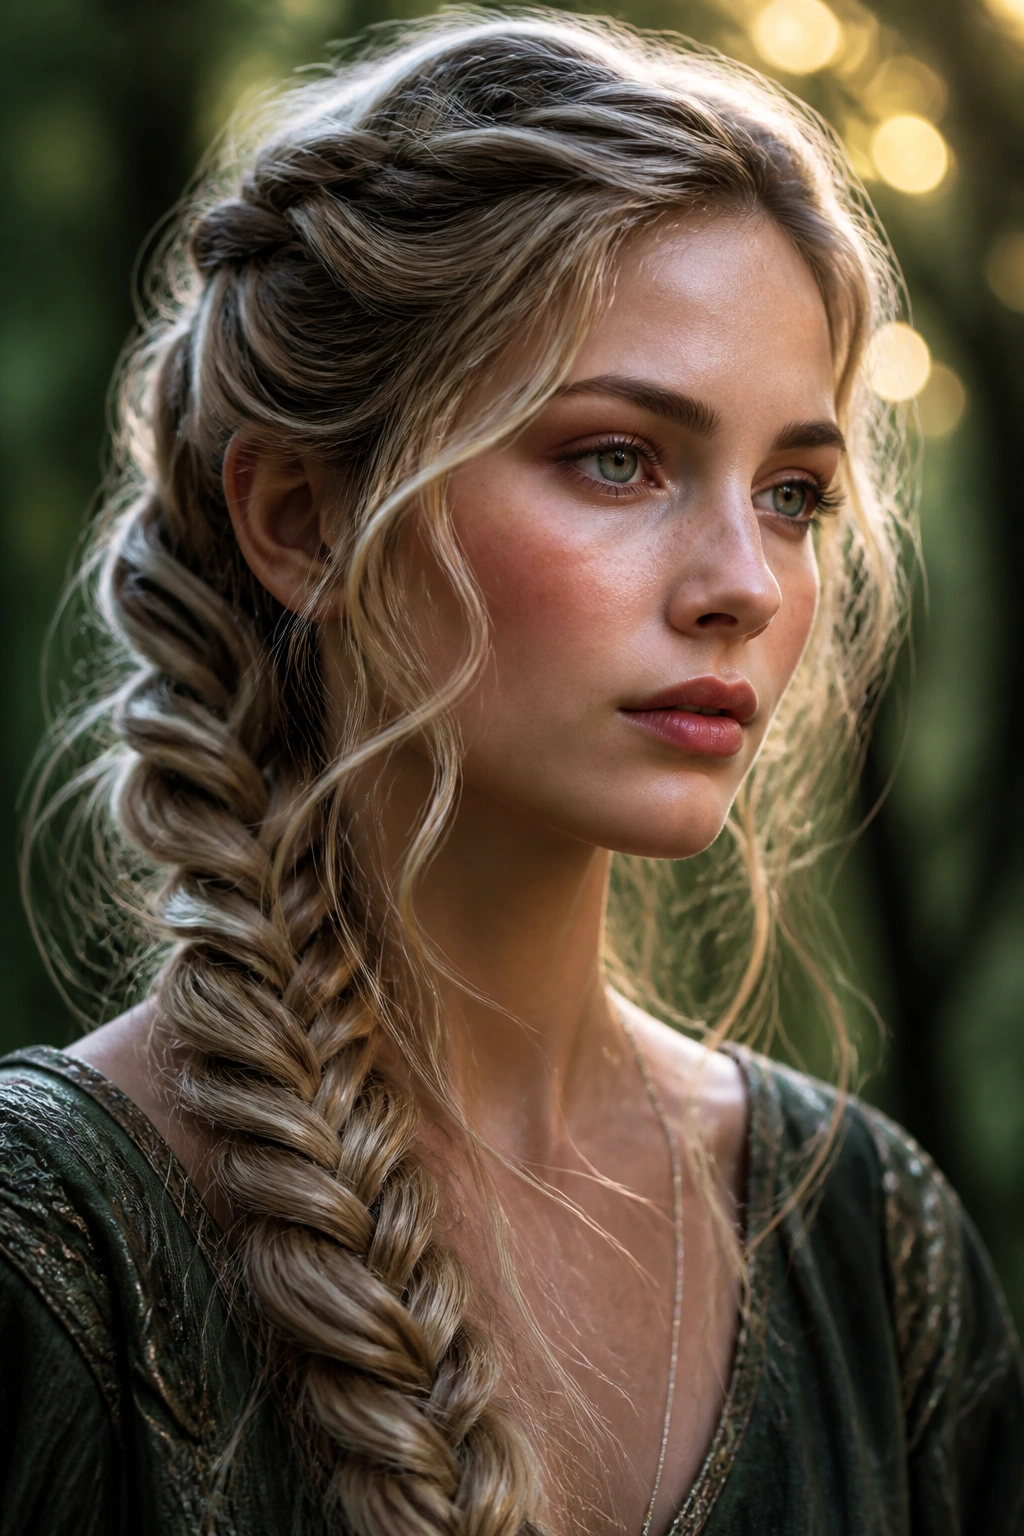
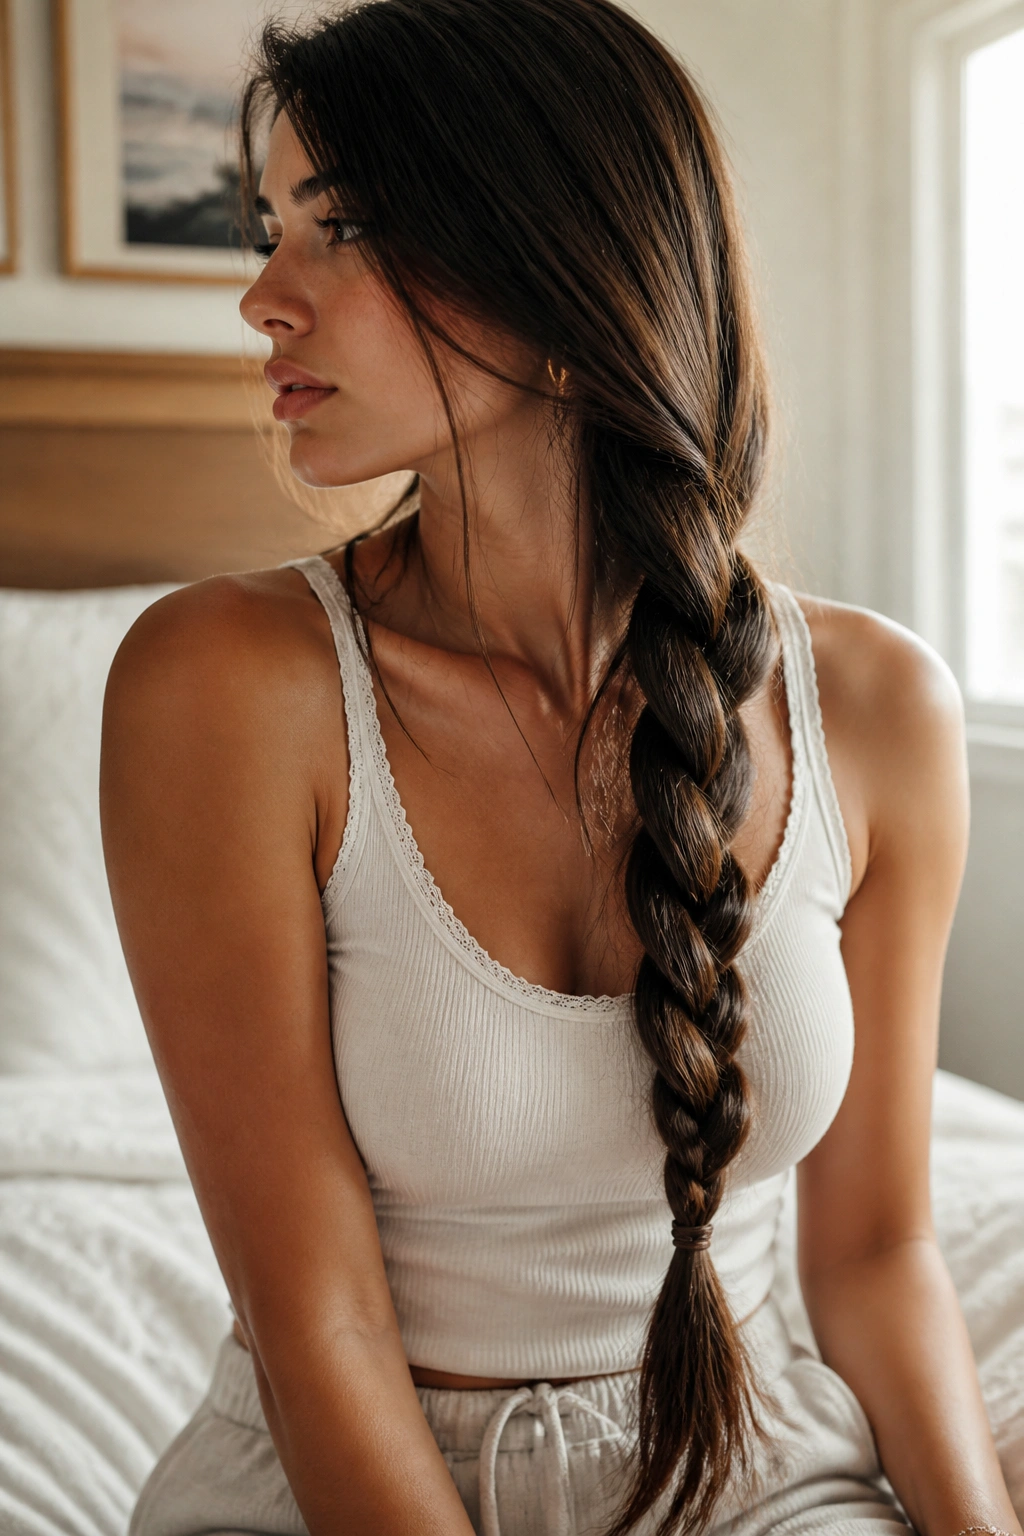
Having long hair is a lifestyle choice that comes with its own set of triumphs and frustrations. It is a glorious feeling when your hair reaches mid-back or even your waist, but the weight alone can be a challenge. You find yourself constantly searching for ways to keep it managed without hiding all that hard work in a messy bun. Braids are the logical solution, providing a perfect balance between control and display. They act as a canvas where the sheer length of your hair becomes the star of the show rather than an afterthought.
There is something inherently timeless about a long braid. Over the years, people have used them for everything from practical protection during labor to ornate symbols of status. When you have significant length, you aren’t just making a hairstyle; you are creating a structural piece of art. The way a braid catches the light—showing off the highlights and lowlights of every single strand—is something that shorter hair simply cannot replicate. It requires patience and a bit of arm strength, but the payoff is a look that feels both grounded and ethereal.
The real magic of braiding long hair lies in the physics of it. Longer hair allows for more “repeats” of a pattern, which means the visual impact of a fishtail or a four-strand braid is multiplied. You can see the evolution of the weave as it travels from the nape of your neck down to the tips. This article is about celebrating that length through styles that don’t just “contain” your hair, but actively highlight how much of it you have. We are looking for styles that move when you move and turn heads because of their scale.
Mastering these styles takes a bit of practice, especially if you are working on your own head. The sheer volume of hair can sometimes feel like it has a mind of its own. However, once you understand the rhythm of each weave, the process becomes meditative. Whether you are looking for something sleek and professional or a bohemian style that looks like you just stepped out of a forest, these long hair braids offer a way to wear your length with pride and purpose.
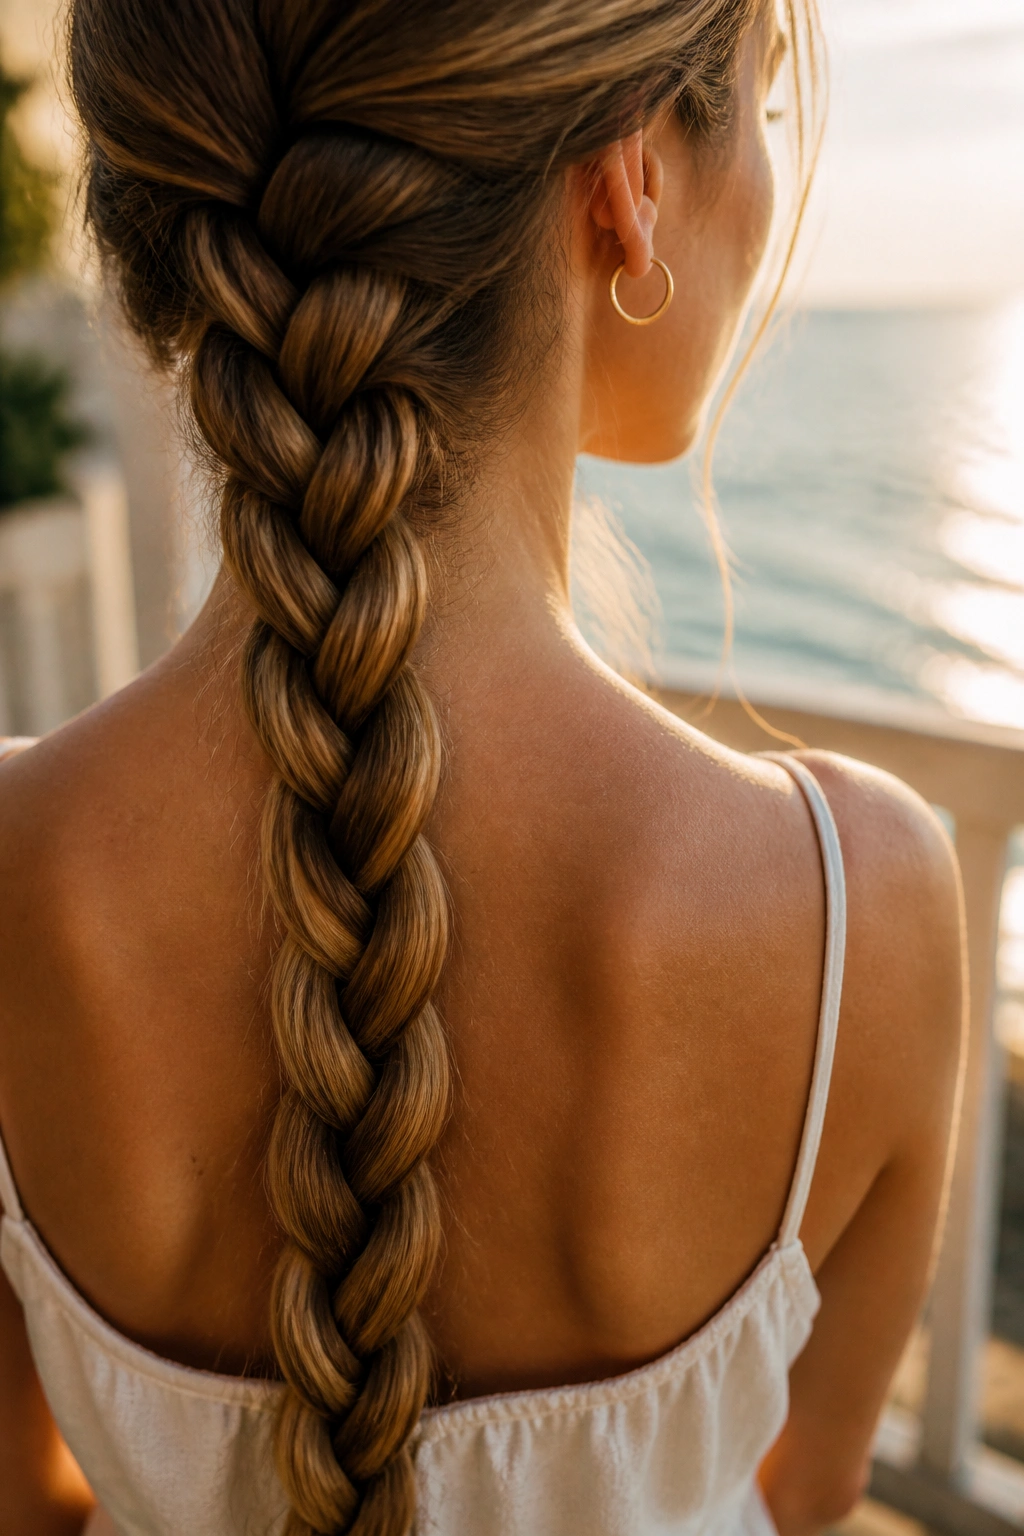
1. The Classic Low Three-Strand Braid
Most of us learned how to braid using the classic three-strand method, but when applied to waist-length hair, this simple style becomes incredibly impactful. The trick to making it look sophisticated rather than school-girlish is all about the tension and the starting point. By starting at the very nape of the neck and keeping the weave slightly loose, you allow the braid to drape naturally over one shoulder. This shows off the thickness of your hair and the full trajectory of the length.
Why This Basic Style Works
When hair is exceptionally long, a complex braid can sometimes get lost in its own detail. The three-strand braid stays clear and readable. It provides a solid, rope-like structure that emphasizes the density of your hair from top to bottom. Because there are fewer “crossings” than in a fishtail, the individual sections are larger, which reflects more light and makes the hair look shinier.
Quick Success Tips
- Use a small amount of lightweight oil on your hands before starting to tame flyaways.
- Avoid using a bulky elastic at the top; start the braid directly from the loose hair for a softer look.
- Pancake the edges by gently pulling on the outer loops once the braid is finished to add width.
- Secure the end with a clear polyband to let the hair itself be the focus.
Pro tip: For a more “grown-up” vibe, wrap a small piece of hair around the bottom elastic to hide it, pinning it in place behind the braid.
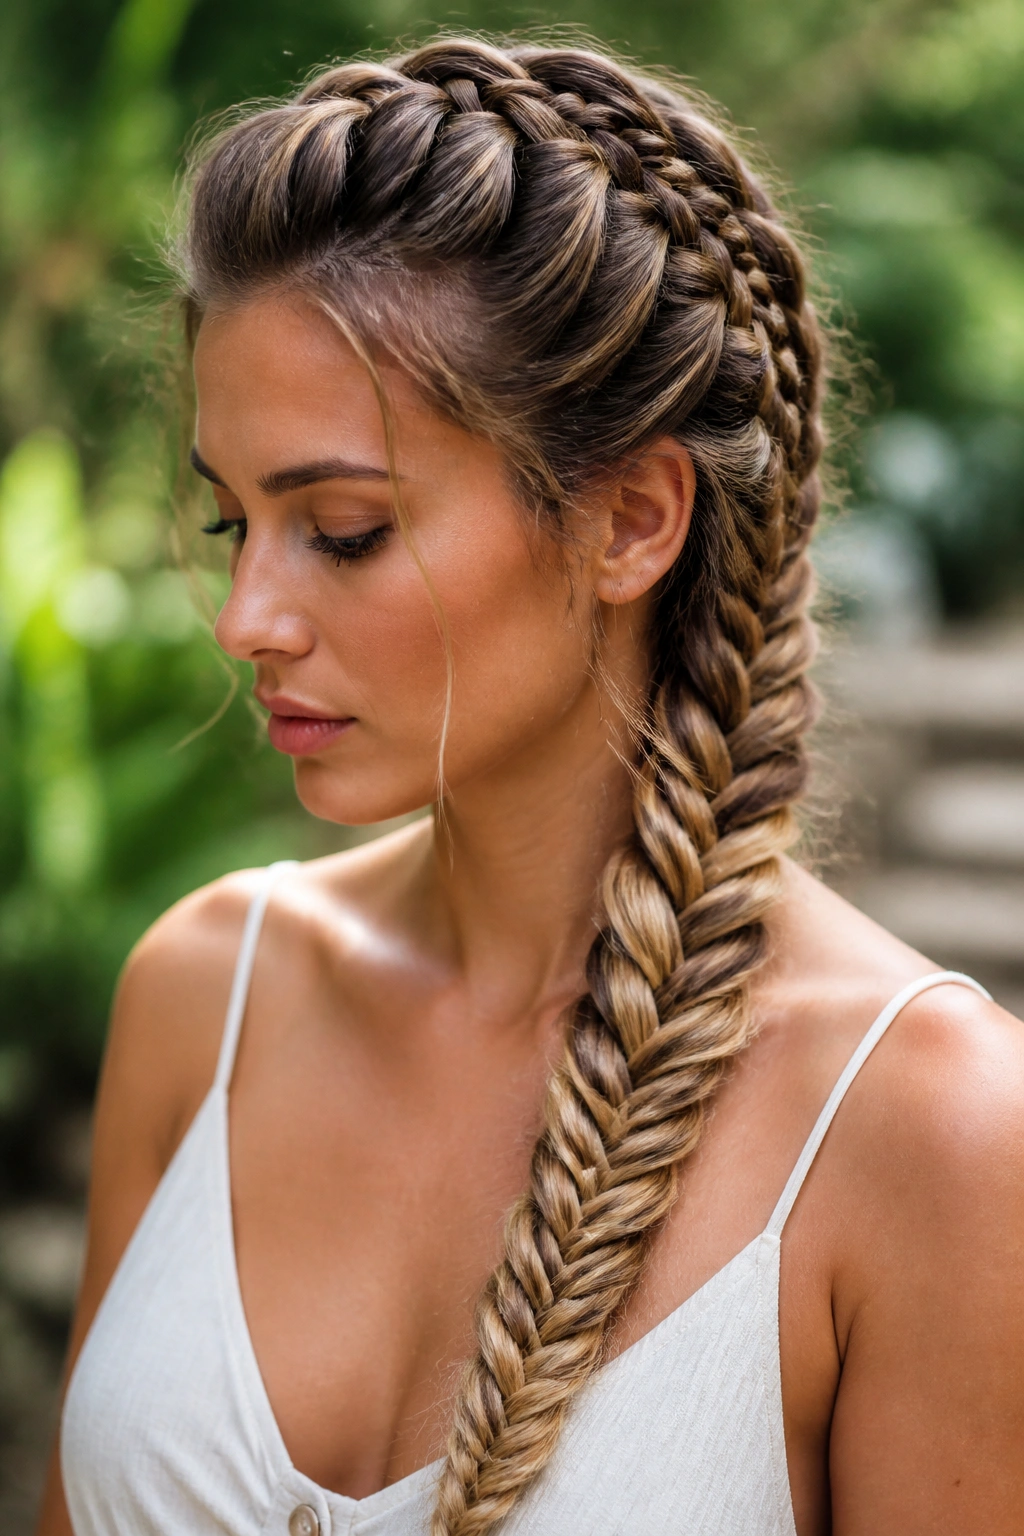
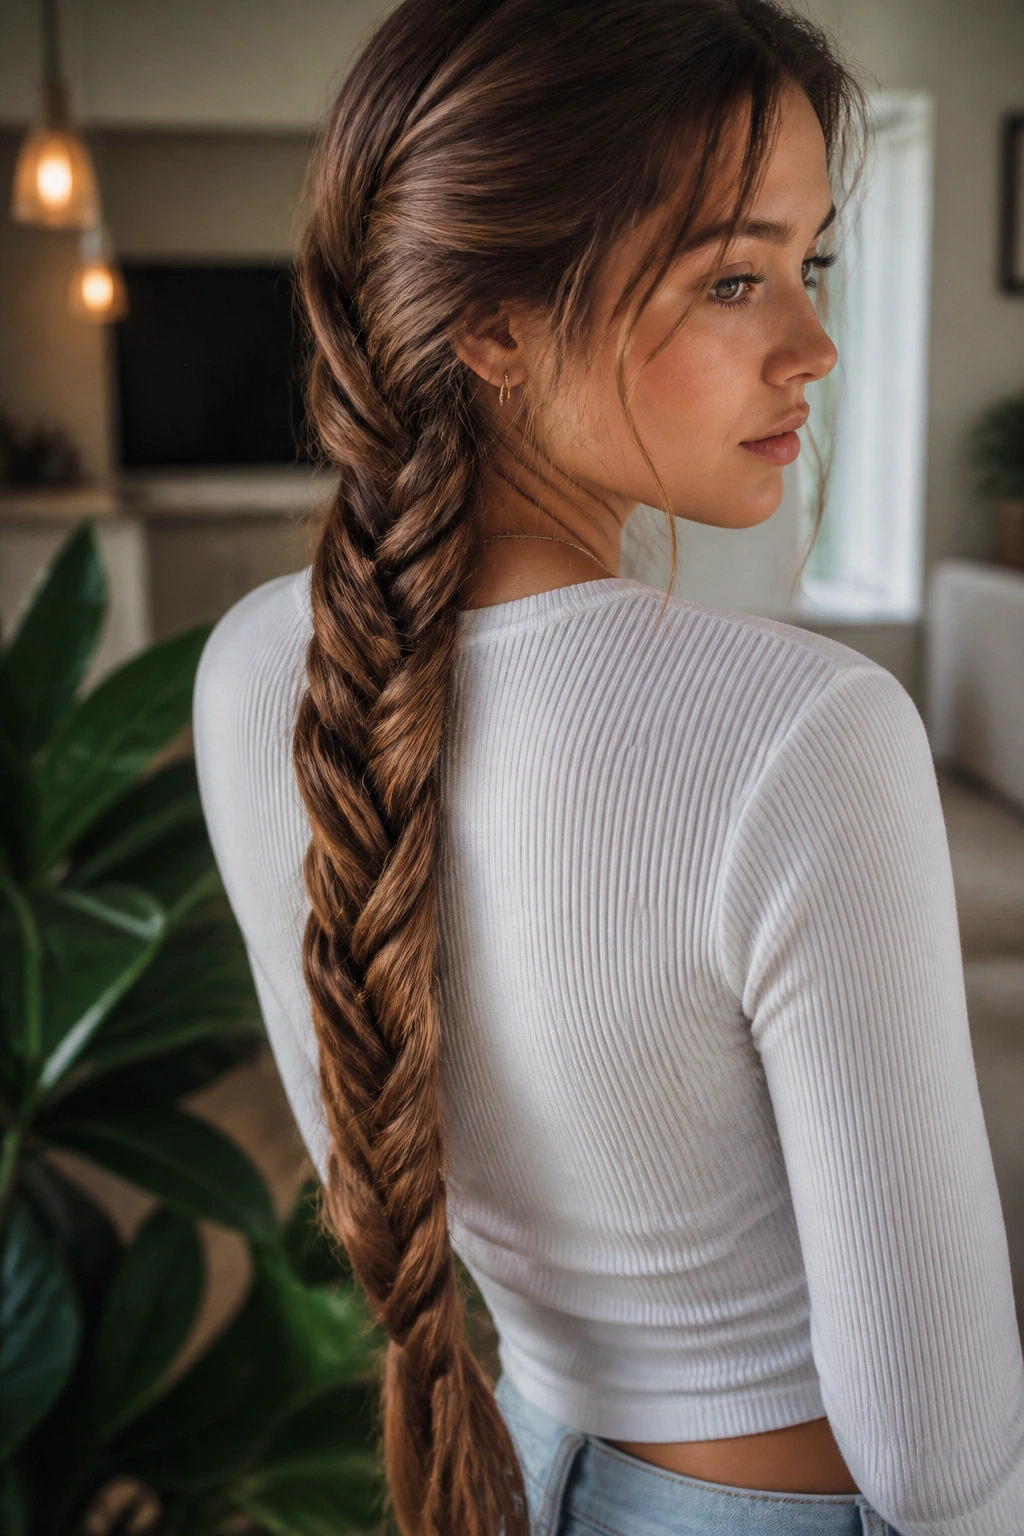
2. The Intricate Fishtail Braid
Fishtail braids are essentially the royalty of long-hair styling. Unlike a standard braid, a fishtail uses only two main sections, with tiny slivers of hair being crossed over from one to the other. On long hair, this creates a stunning, woven texture that looks like a mermaid’s tail. It is a slow process—your arms might get a workout—but the result is a dense, detailed pattern that remains stable throughout the entire day.
A common misconception is that fishtails have to be tight. In reality, a long fishtail looks its best when it has been “deconstructed.” Once you finish the weave, you can tug at the sides to make it twice as wide. On long hair, this creates a massive, voluminous column of hair that feels heavy and luxurious. It is the kind of style that people will stop you in the street to ask about because the detail looks far more complicated than it actually is.
The weight of long hair actually helps a fishtail stay in place. While shorter hair might poke out of the sides, the length provides enough overlap to keep everything tucked in. If you have layers, you might see some “shingling” where ends stick out, but a quick mist of flexible-hold hairspray or a dab of pomade usually fixes that. This is a go-to for outdoor events because even if the wind blows it around, the “messy” look only adds to the bohemian charm.
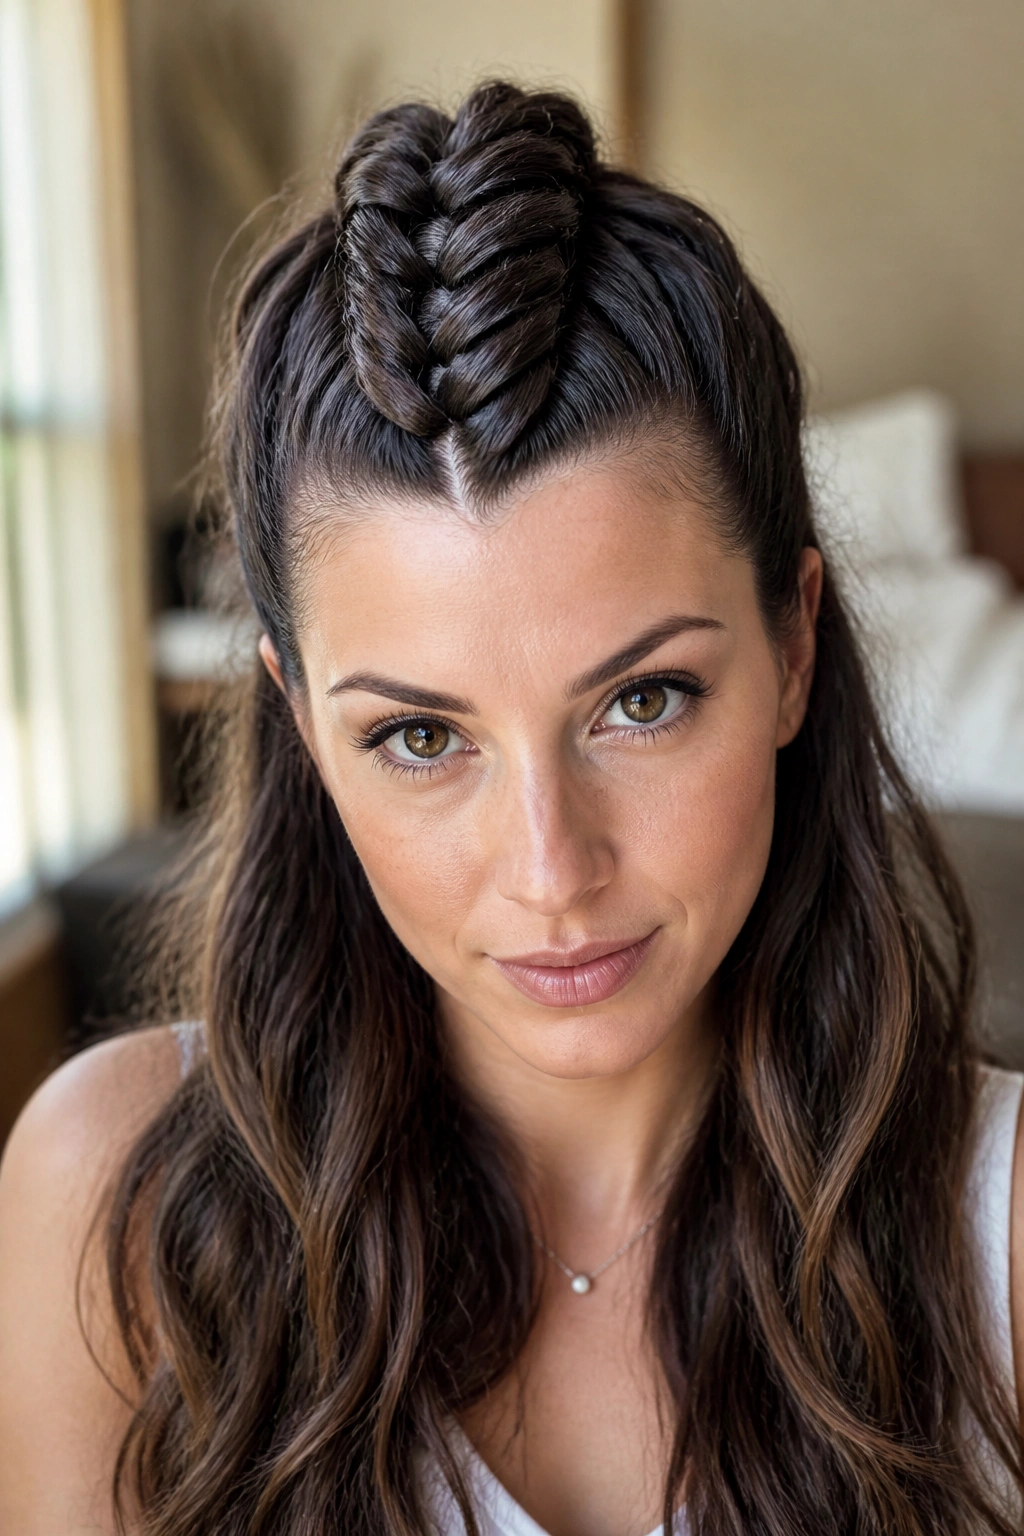
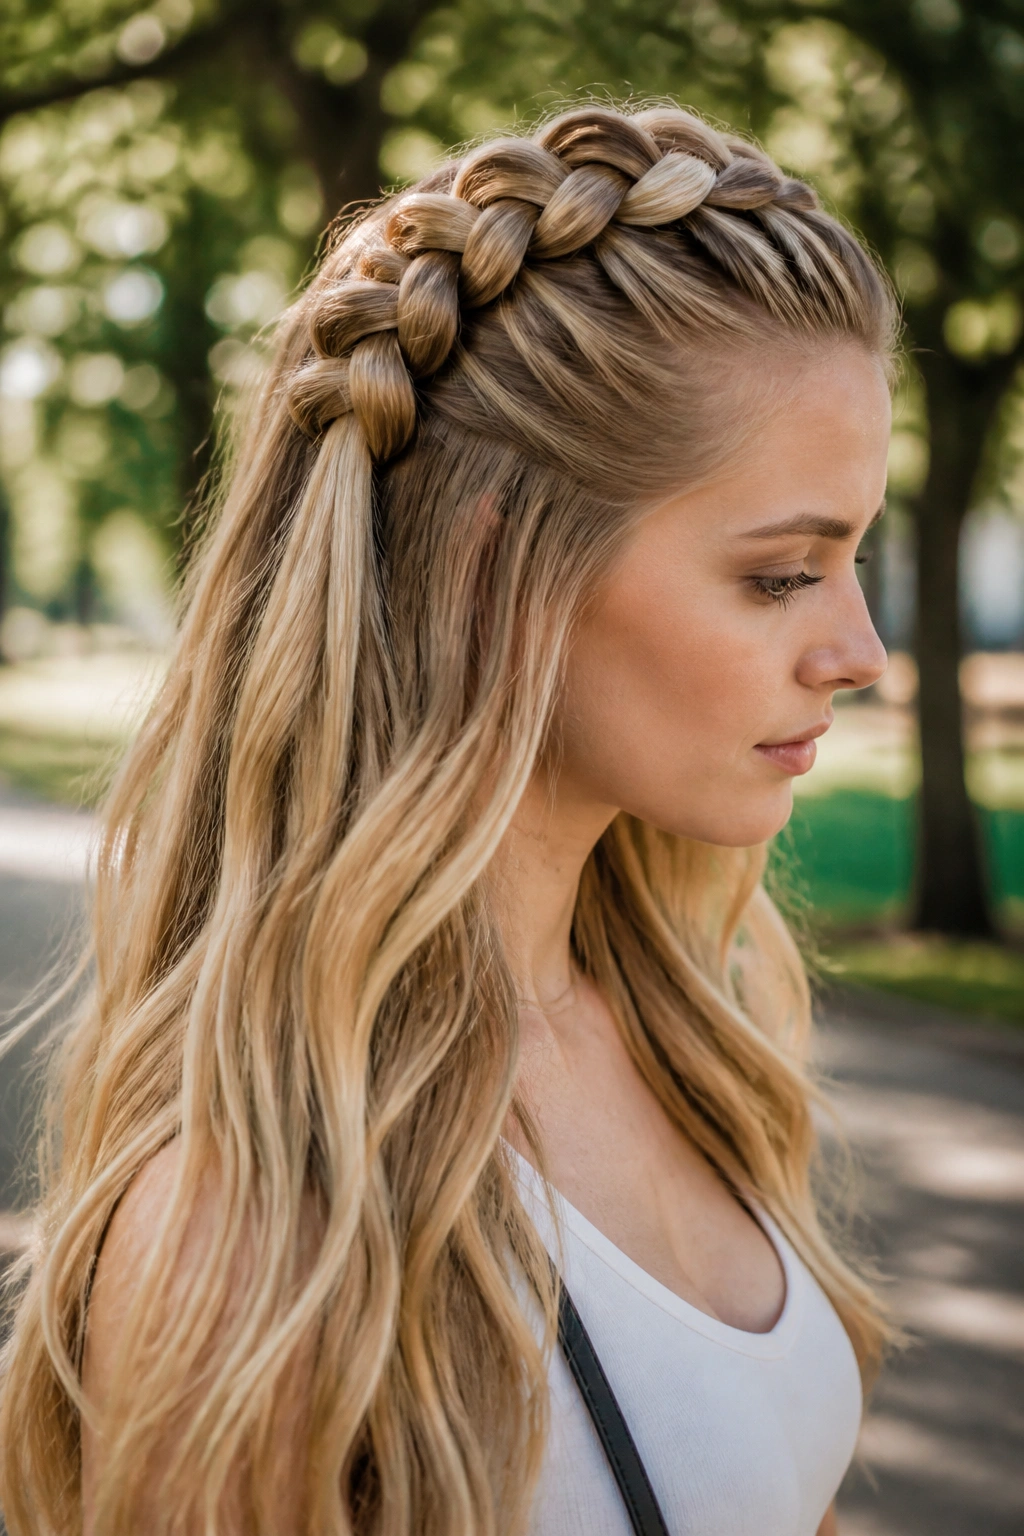
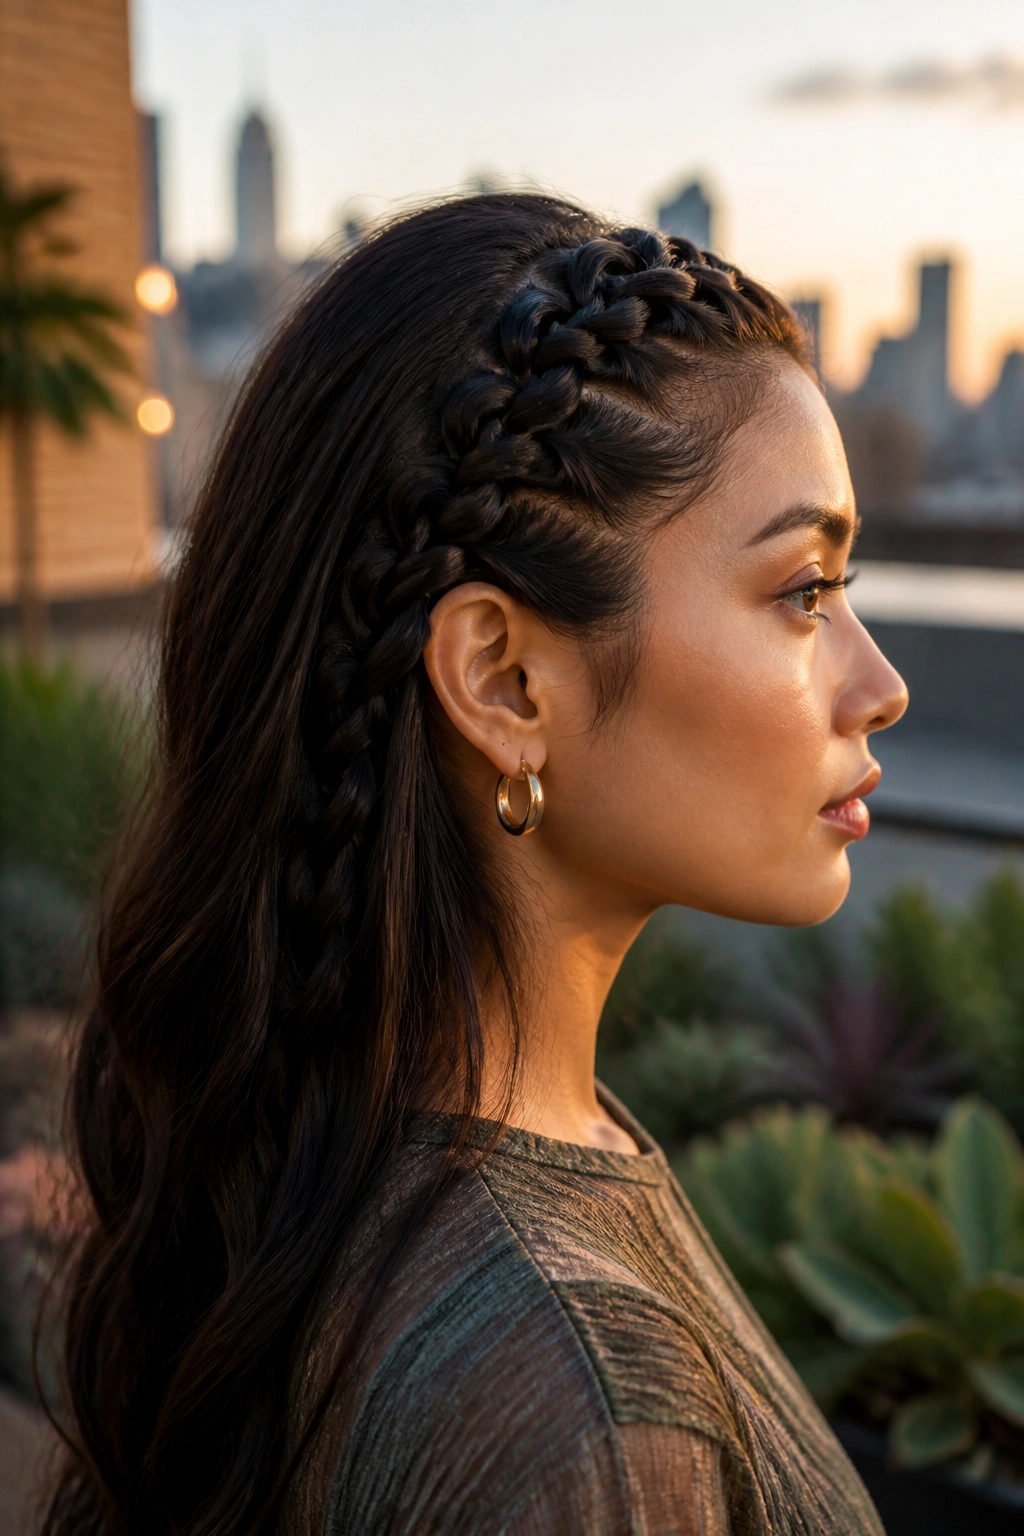
3. The 3D Dutch Braid
Does your hair ever feel flat when you braid it? The Dutch braid is the antidote to that. While a French braid tucks the hair under to create a flat look, the Dutch braid crosses sections over, making the braid sit on top of the hair like a crown. On long hair, this creates a literal 3D ridge that runs down your back. It is bold, athletic, and shows off the sheer mass of your hair in a way few other styles can.
How to Achieve Maximum Volume
The “pop” of a Dutch braid comes from the underhand technique. By feeding hair into the braid from beneath, you are essentially lifting the structure away from the scalp. This creates a shadow underneath the braid, which makes the hair look thicker than it actually is. For those with long hair, this is the best way to prevent the “sleeked-back” look that can sometimes make your head look small in comparison to your body.
Common Questions
Is a Dutch braid harder than a French braid? No, it is simply the inverse. If you can do one, you can do the other with about ten minutes of practice. Your hands just need to learn the “under” motion instead of the “over” motion.
How do I keep it from sagging? The key is to keep your hands close to the scalp as you move down. If you pull the hair away from your head while braiding, it will create a gap when you let it go. Maintain firm tension until you reach the nape.
Structural Variations
- Double Dutch: Two braids that merge into one at the neck.
- Side Dutch: A diagonal braid that showcases length over one shoulder.
- Tucked Dutch: Folding the long tail up and under for a shorter look (though we are here to show off the length!).
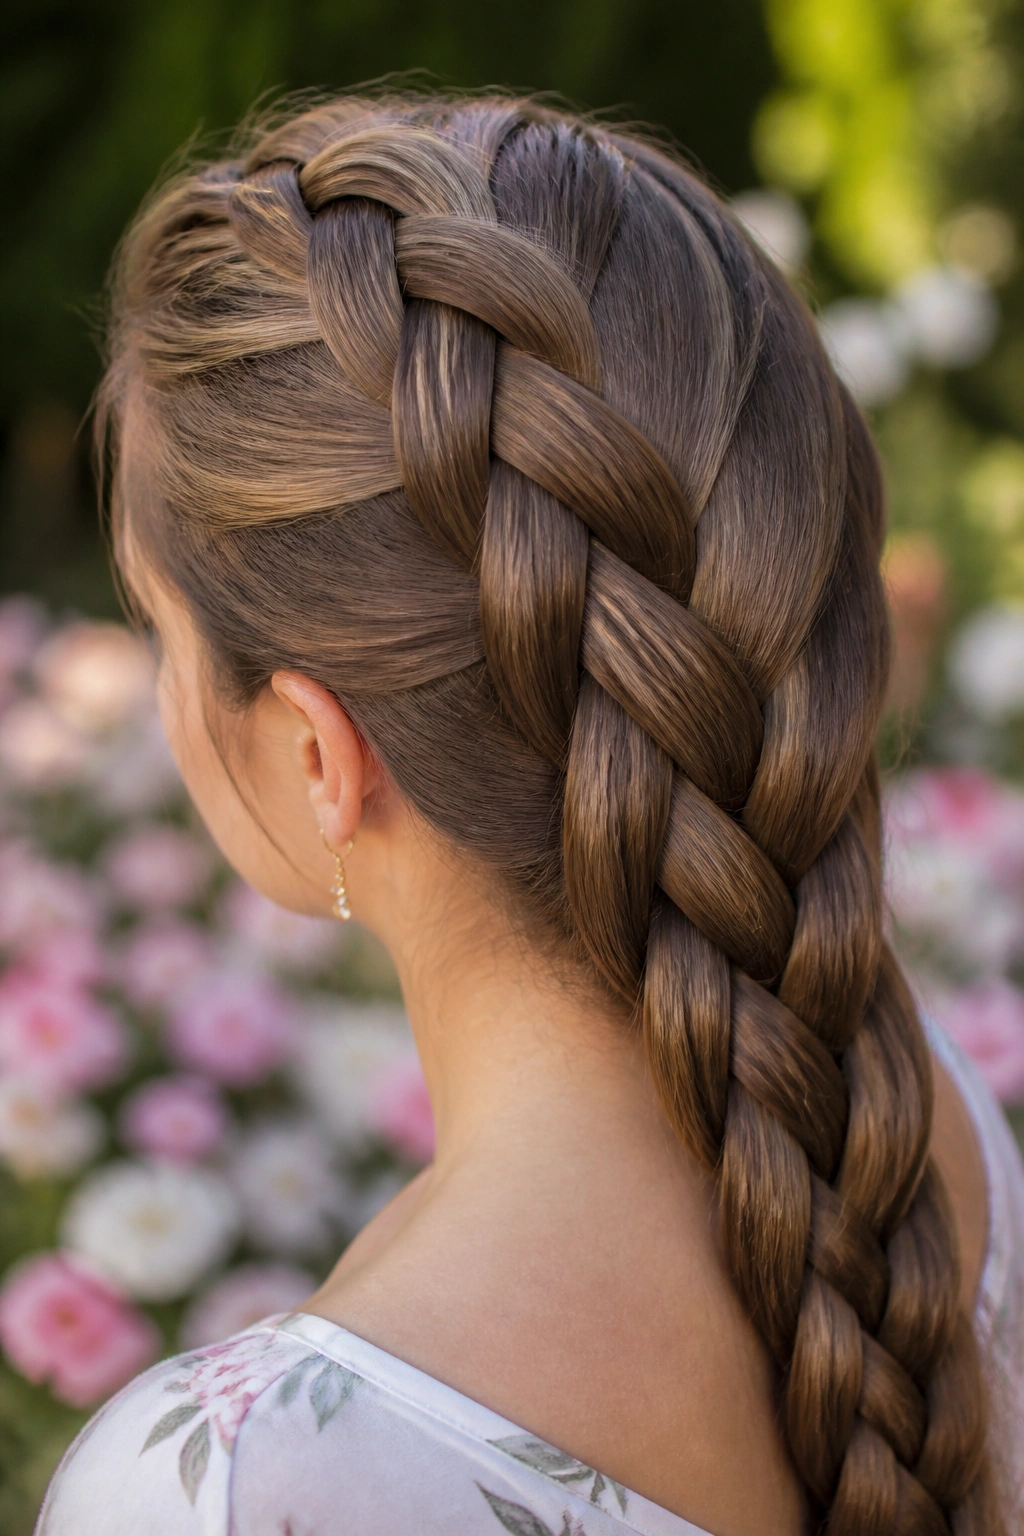
4. The Four-Strand Rope Braid
If you want something that looks like a piece of nautical equipment or a medieval tapestry, the four-strand braid is the answer. Adding that fourth strand changes the geometry of the braid entirely. Instead of a flat weave, you get a rounded, square-edged braid that has incredible structural integrity. It is an excellent choice for anyone whose hair is so long it tends to “unravel” or lose its shape in a standard three-strand weave.
I remember the first time I tried this on a friend with waist-length hair. We were both shocked at how much more “expensive” the hair looked. There is a complexity to the four-strand weave that signals effort and skill. It creates a pattern that looks like a chain, and because it is four sections instead of three, the braid doesn’t taper as aggressively toward the bottom. It keeps its width much further down the length of the hair.
The Mechanics of the Four-Strand
- Divide the hair into four equal sections.
- Cross the outer right strand over the one next to it, then under the next.
- Take the outer left strand and go under the one next to it, then over the next.
- Repeat this “over-under, under-over” rhythm all the way down.
- Secure the ends and lightly massage the braid to loosen the fibers for a softer appearance.
This style is a conversation starter. It looks like a “box” braid but with natural hair, and it provides a very distinct silhouette that stands out in a crowd of standard braids.
5. The Mermaid Braid
The mermaid braid isn’t actually a single braid; it’s a technique used to create the illusion of a massive, wide, flowing weave that covers most of the back. It usually starts with a thin French or Dutch braid down the center, but the trick is that you only “lace” in very small sections from the far edges of your hair. This leaves much of the hair’s length visible underneath the braid, creating a layered, ethereal look that truly looks like something from a myth.
This is the style you choose when you want to show off both the length and the loose flow of your hair. It offers the control of a braid but the visual impact of wearing your hair down. It is particularly effective on hair with waves or curls, as the loose “veils” of hair that feed into the braid will retain their texture. It’s a favorite for weddings or photography because it captures the light so beautifully from every angle.
6. The Infinity Braid
The infinity braid is named after the figure-eight pattern that the hair follows. It involves taking a small “traveling” strand and wrapping it around two larger sections in a continuous loop. On long hair, this creates a very intricate, flat, and wide braid that looks like a piece of jewelry. It is a bit more advanced, but the unique “infinite” look is well worth the learning curve.
What Makes It Stand Out
The infinity braid is exceptionally flat. While a Dutch braid pops out, the infinity braid lies close to the head and the back, showing off the sleekness of your hair. It is a great choice for people with very straight hair who want a “high-fashion” look. The repetitive loop pattern is hypnotic and emphasizes the consistency of your hair color and texture over a long distance.
Who It Is Best For
This style works best for those with hair that is at least mid-back length. Because the traveling strand has to go around the two main sections hundreds of times, you need a lot of length to complete the braid without running out of hair in that small section. If your hair is very layered, you might find this difficult, but for one-length hair, it is a masterpiece.
7. The Pull-Through Braid (The Volume Cheat)
Let’s be honest: some of us have the length, but not the thickness. The pull-through braid is the ultimate “cheat” for creating massive volume. It isn’t actually a braid in the traditional sense; it’s a series of interconnected ponytails. By looping one ponytail through the next and “pancaking” the loops, you can create a braid that looks four times thicker than your actual hair.
The Mechanism of the Pull-Through
- Create two ponytails, one above the other.
- Split the top ponytail in half and wrap it around the bottom one.
- Join the two halves together with a new section of hair and a new elastic.
- Repeat this all the way down.
- The Magic Step: Pull on the sides of each section until they are wide and rounded.
Because this style is secured with elastics at every step, it is incredibly durable. You could go for a run, sleep on it, or dance all night, and it will not budge. For long-haired individuals, this is a lifesaver because it manages the weight of the hair by distributing it across multiple anchor points along the back of the head.
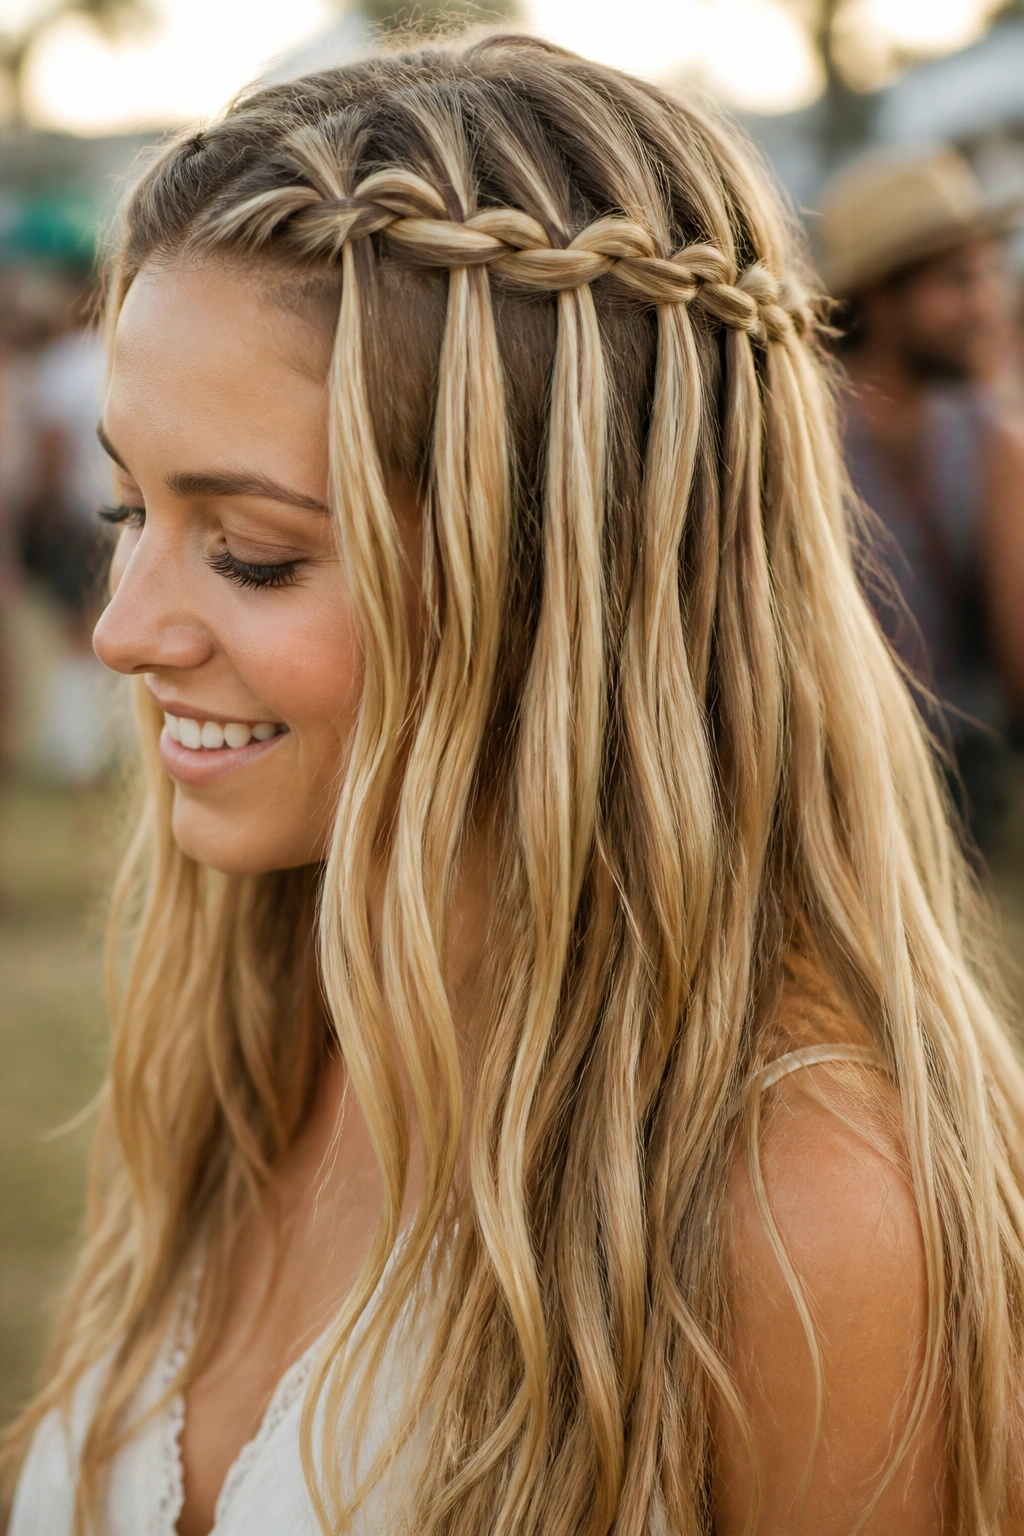
8. The Waterfall Braid
The waterfall braid is the perfect compromise for those who hate having hair in their face but love the look of long, flowing locks. It’s a French braid technique where you “drop” the bottom strand and pick up a new one next to it. This creates a braided “rim” around the head with “streams” of hair falling through it, like water over a ledge.
On very long hair, the waterfall effect is dramatic. The “dropped” strands can be curled or straightened to create a stark contrast with the braided crown. It is a very romantic look, often associated with festivals or spring events. The key to making it look good on long hair is to ensure the “dropped” strands are long enough to blend back into the rest of the hair seamlessly. It provides a structured frame that highlights the health and shine of the loose hair below.
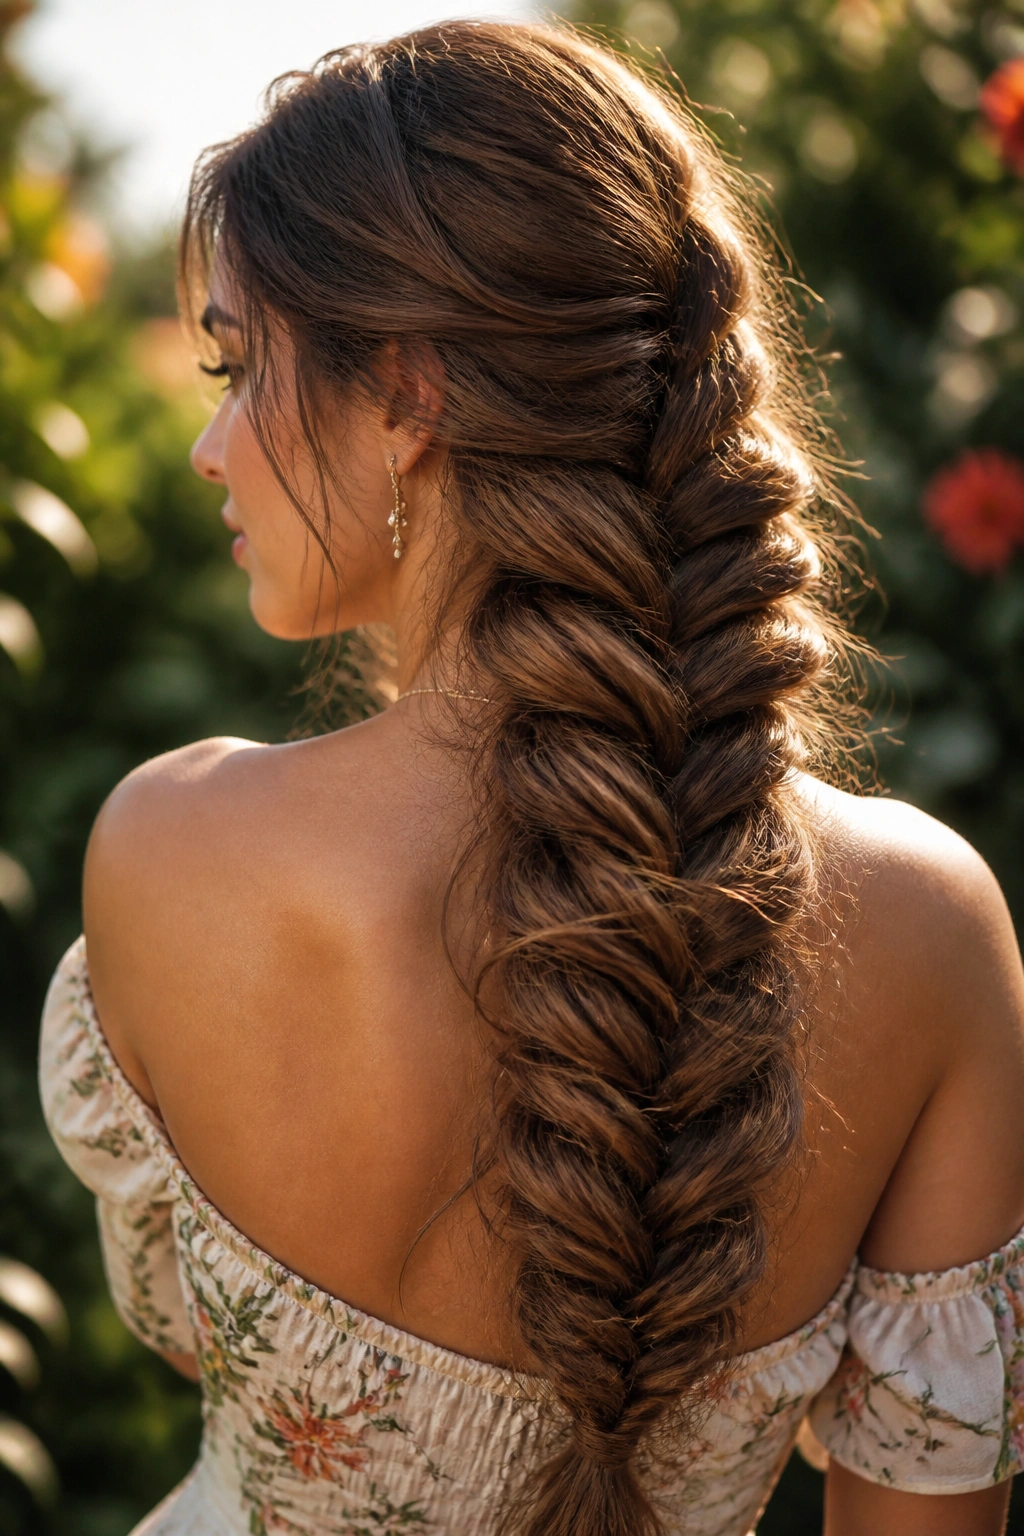
9. The Five-Strand Braid
If the three-strand is a hobby and the four-strand is a craft, the five-strand braid is a professional discipline. It creates a very wide, flat, woven ribbon of hair that looks like a piece of fabric. On long hair, a five-strand braid is breathtaking because it covers so much surface area. It turns your hair into a literal tapestry.
Why Five Strands?
The odd number of strands allows for a “weaving” pattern (over-under, over-under) that creates a very stable and symmetrical look. It is much wider than a standard braid, which is great for showing off hair that has a lot of volume. It prevents long hair from looking like a “thin tail” at the bottom, maintaining a sense of width almost all the way to the ends.
How to Practice
Don’t try this on your own head first. Practice on a friend or a styling head. You need to keep track of five distinct sections, which can be tricky for your fingers to hold all at once.
- Label them 1 through 5 in your mind.
- Always move the outer strands toward the center.
- Use a “weaving” motion: 1 goes over 2 and under 3. Then 5 goes over 4 and under 1 (which is now in the middle).
- Keep the tension even to avoid a lopsided look.
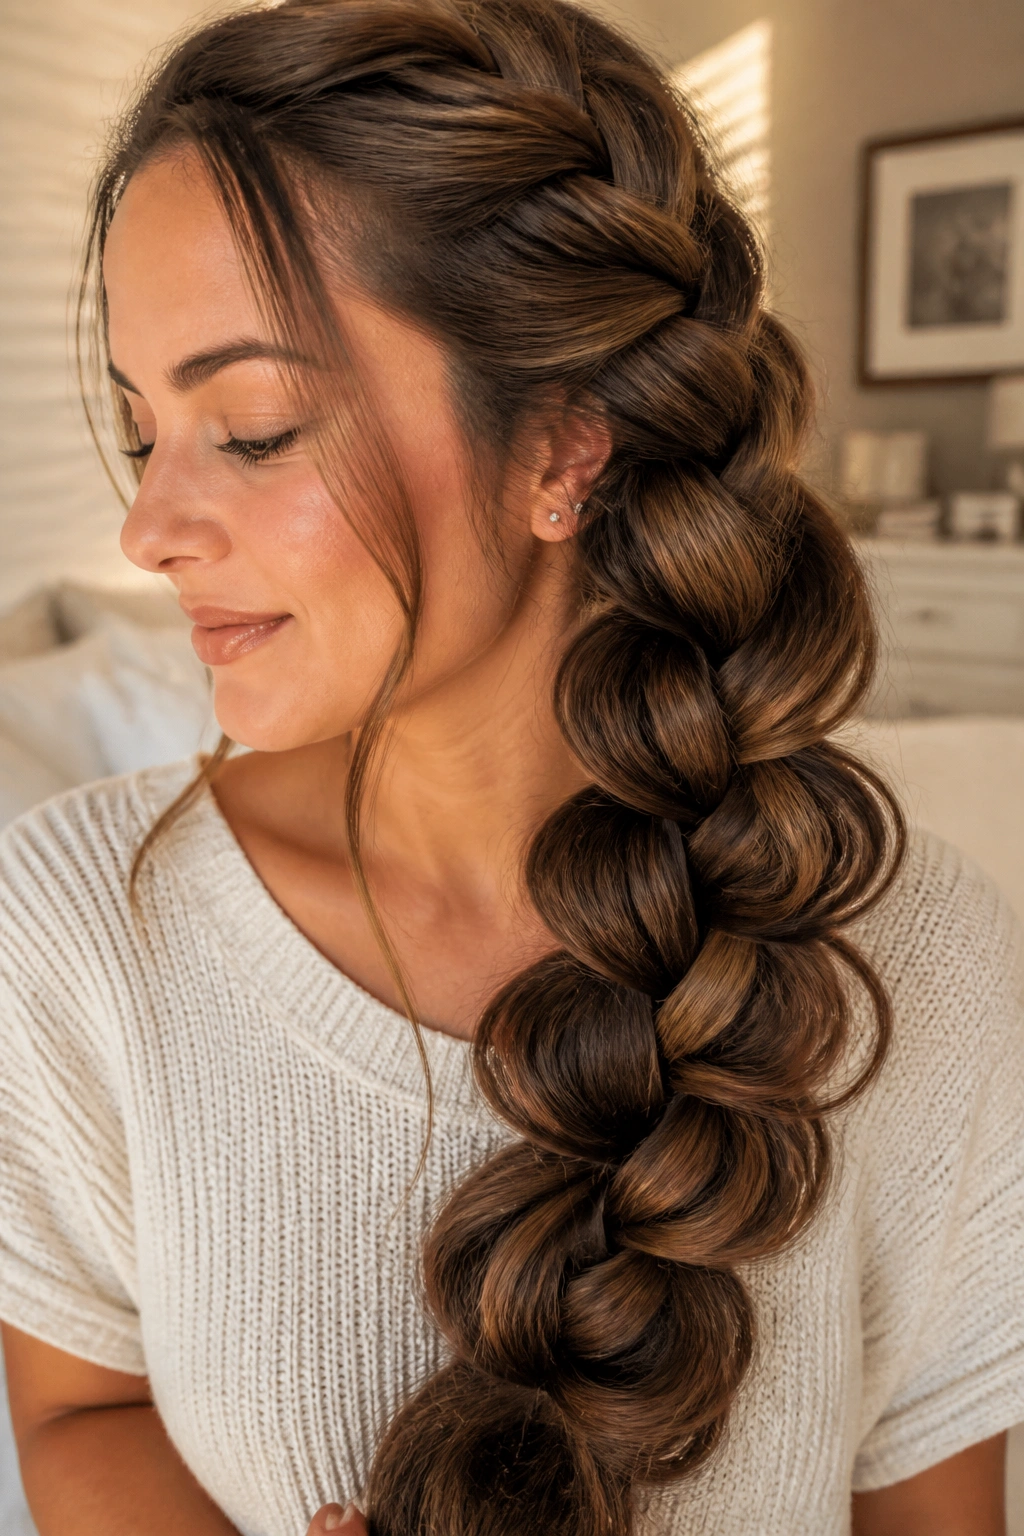
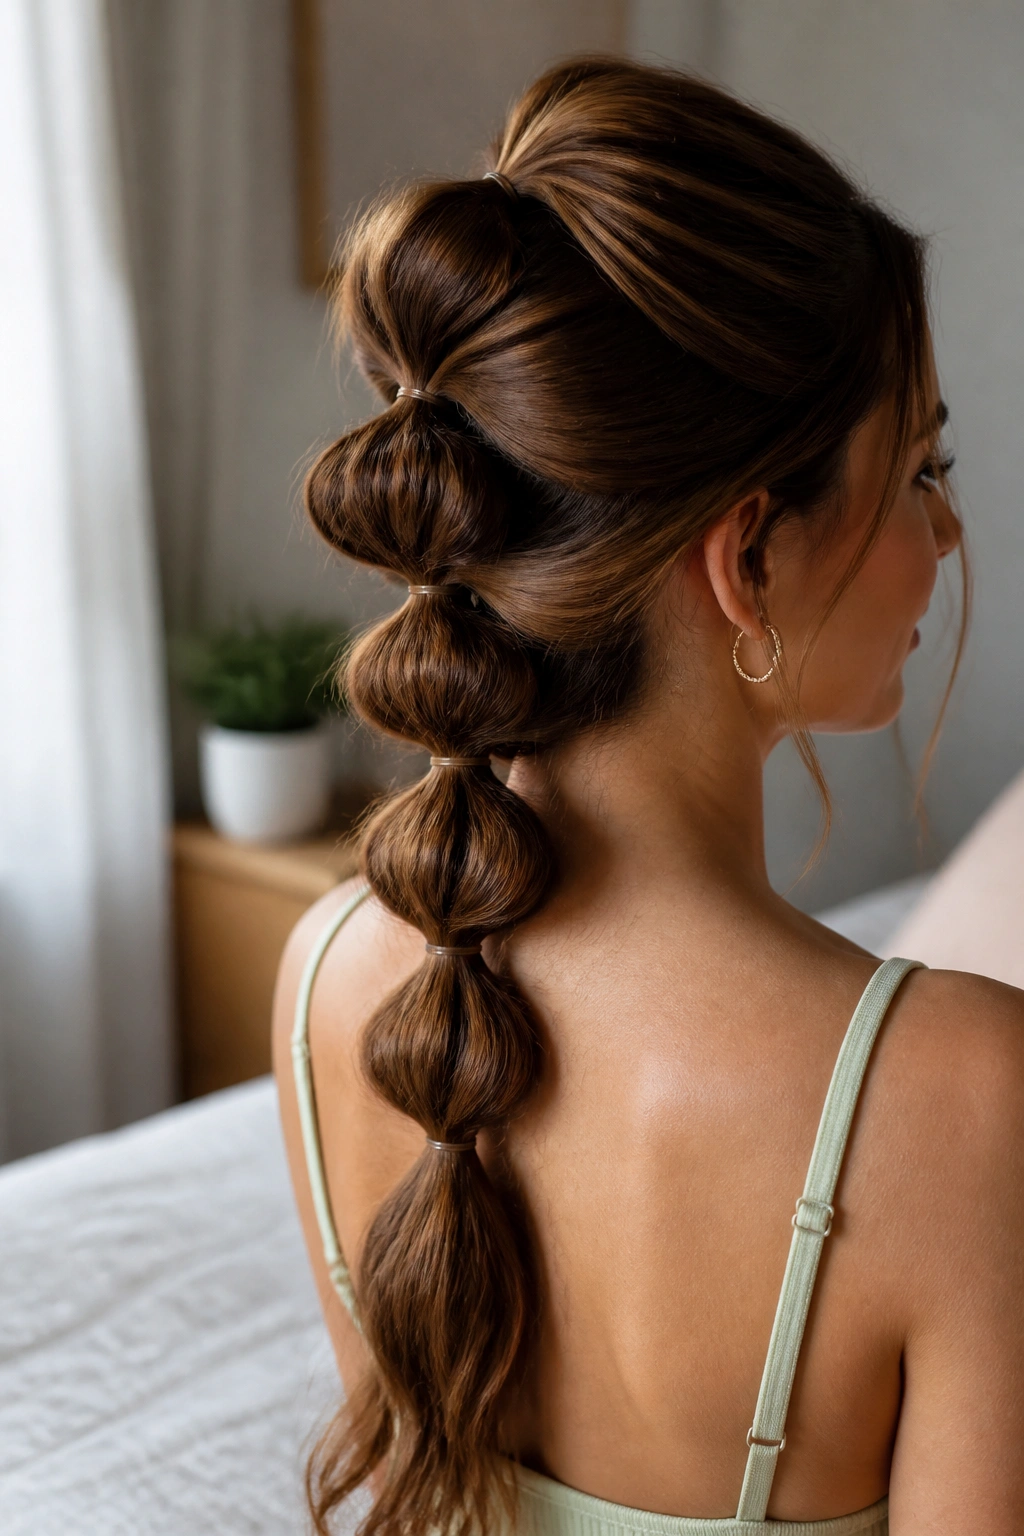
10. The Bubble Braid

The bubble braid has seen a massive resurgence because it is incredibly easy and looks fantastic in photos. Like the pull-through braid, it uses elastics to create “bubbles” of hair down the length of a ponytail. On long hair, you can have ten or fifteen bubbles, creating a playful, futuristic silhouette that shows off the full extent of your length.
Creating the Perfect Bubble
- Start with a high or low ponytail.
- Place an elastic every two to three inches down the hair.
- After placing each elastic, pull the hair between the two elastics outward to create a rounded “bubble” shape.
- Ensure all bubbles are roughly the same size for a polished look, or vary them from large to small for a “tapered” effect.
This style is perfect for long hair because it prevents tangling. When you wear a long ponytail, the hair often gets knotted at the nape or mid-length. The elastics in a bubble braid keep the hair sections isolated, meaning you can enjoy your length without the “birds’ nest” at the end of the day.
11. The Dutch Fishtail Hybrid
This is for the person who wants it all. It combines the 3D “pop” of a Dutch braid with the intricate texture of a fishtail. You start a Dutch braid at the top of the head but use a fishtail weaving technique (two sections, crossing small bits under) as you move down. On long hair, this creates a massive, raised braid that looks like a piece of sculpture.
The hybrid approach is particularly effective for showing off hair color transitions, like balayage or ombré. The Dutch start highlights the roots and crown, while the fishtail length shows off the color gradients in the mid-lengths and ends. It is a heavy style, so make sure your starting section is secure. It is the ultimate “wow” braid for long hair enthusiasts.
12. The Rope Twist Braid

Sometimes, you don’t want a “weave” at all; you want a sleek, twisted look. The rope braid (or Senegalese twist style) uses two sections of hair that are twisted individually and then twisted around each other. On long hair, this looks like a literal silk rope. It is incredibly shiny because the hair isn’t being “interrupted” by a weave; the flat surface of the hair is wrapped around itself.
The Secret to a Rope Braid
The most common mistake people make is twisting both sections in the same direction as the overall braid. This will make it unravel immediately.
- Twist both individual sections to the right.
- Cross the right section over the left section (moving the whole braid to the left).
- By twisting one way and crossing the other, you create a mechanical lock that keeps the braid tight.
This is a great professional look for long hair. It’s polished, stays out of the way, and reflects light beautifully. It’s also one of the fastest “braids” to do once you have the technique down.
13. The Ladder Braid
The ladder braid is a structural masterpiece that looks like a “ladder” of hair is floating over a loose style or another braid. It usually involves a waterfall braid where the “dropped” strands are then picked up by a second braid running parallel below it. On long hair, this creates a “cage” effect that is visually stunning.
This style is all about precision. It shows off the length by creating horizontal lines that contrast with the vertical fall of the hair. If you have very long, straight hair, the ladder braid looks like something out of a high-end fashion magazine. It requires a steady hand and a bit of patience, but the geometric result is unlike anything else.
14. The Snake Braid
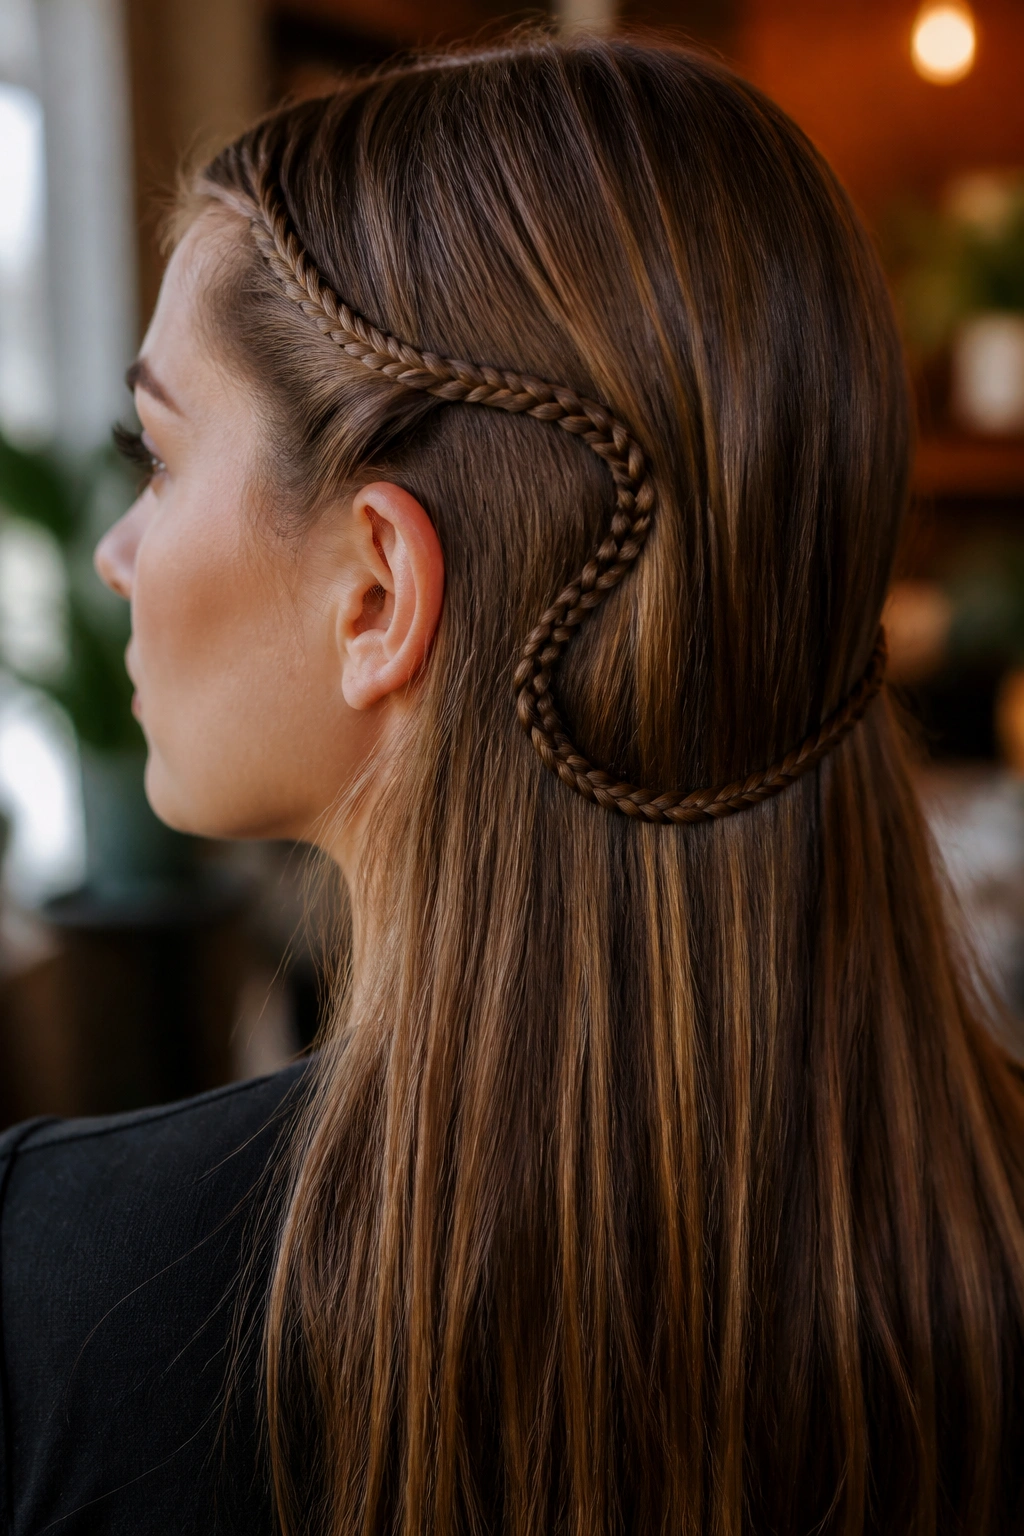
The snake braid is a “hack” that turns a simple three-strand braid into an S-shaped curve. You braid a small section of hair normally, then hold one strand firmly while sliding the other two strands up toward the head. The braid bunches up into a “serpentine” shape. On long hair, you can pin this “snake” across the back of the head or let it dangle within a larger style.
It’s a delicate, subtle detail that adds a bit of “edge” to a look. Because long hair provides so much “track” for the snake to follow, you can create very long, winding patterns. It’s a great way to add interest to a half-up, half-down style without needing any accessories.
15. The Dragon Braid
The dragon braid is essentially a Dutch braid where the “scales” have been pulled out to be sharp and pointed rather than rounded. This gives a fierce, powerful look that is very popular in fantasy-inspired styling. On long hair, the “spine” of the dragon can travel all the way down to the waist, creating a very strong vertical line.
How to Get the “Scale” Look
- Create a tight Dutch braid down the center of the head.
- Starting from the bottom, use your thumb and forefinger to “pinch” only the very outer edge of each braid loop.
- Pull it outward and slightly upward.
- Use a firm-hold hairspray on each “scale” to keep the pointed shape.
This style is fantastic for showing off the “thickness” of your hair. Even if your hair is fine, the “pinching” technique creates the illusion of massive, dense sections. It’s a bold choice that looks incredible from the side profile.
16. The Box Braid (Natural or Extended)
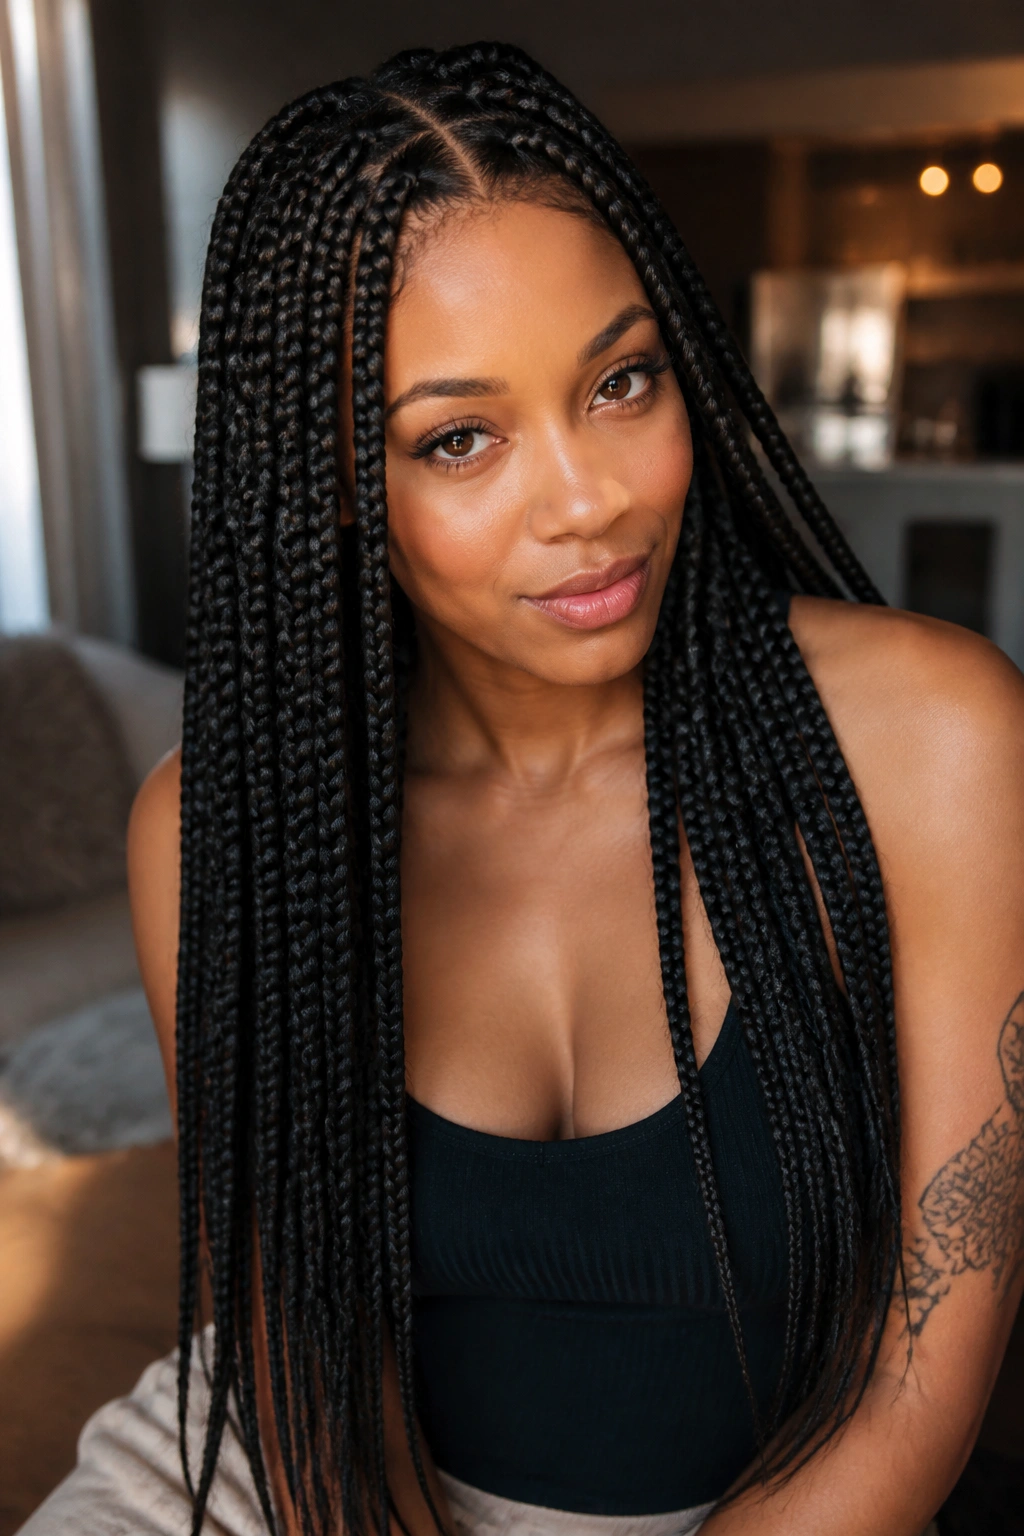
Box braids are a classic protective style that truly shines when taken to extreme lengths. Whether you are using your natural hair or adding extensions for “butt-length” braids, the result is a clean, graphic look. The “box” refers to the square-shaped sections of the scalp, and on long hair, these braids have a beautiful “swing” and weight to them.
The Beauty of Length in Box Braids
Long box braids offer incredible versatility. You can wear them down to show off the sheer number of braids, or you can wrap them into a giant bun that sits like a crown. The length allows for more movement; when you walk, the braids have a rhythmic “clack” and sway that feels very intentional. They also protect your natural ends from friction and environmental damage, helping you maintain that length over time.
Maintenance Insights
- Wash your scalp rather than the length of the braids to prevent them from getting too heavy when wet.
- Use a silk or satin scarf at night to prevent frizz at the roots.
- Moisturize the scalp regularly with a lightweight oil like jojoba or almond oil.
- Don’t keep them in too long—six to eight weeks is usually the limit to avoid tension on the roots.
17. The Lace Braid
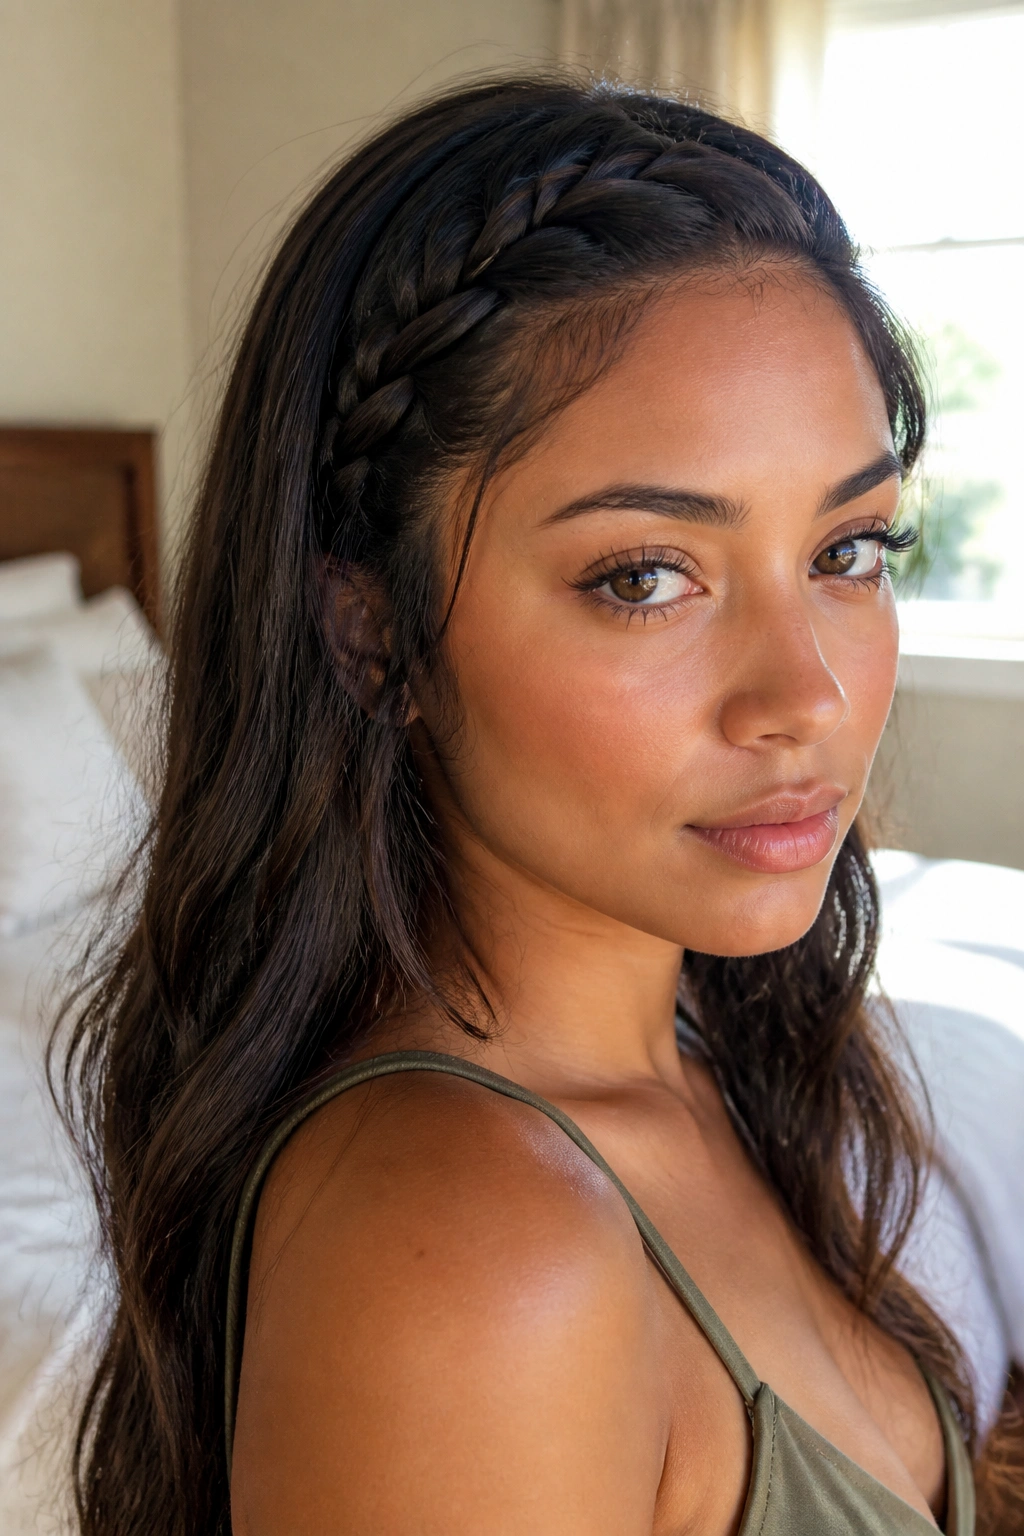
A lace braid is a French braid where you only add hair from one side. This creates a “rim” effect that looks like a piece of lace trim. On long hair, you can use a lace braid to frame the face and then let the rest of the length flow freely behind it. It is a very soft, feminine style that highlights the hairline and the length simultaneously.
I find that lace braids are the best solution for “growing out” bangs or managing layers around the face. Because you are only picking up hair from the front, the back of the braid stays neat and doesn’t “pull” on the rest of your hair. It looks particularly stunning when the braid is wrapped around the back of the head like a half-crown, with the long ends blended into the loose hair.
18. The DNA Braid
The DNA braid is a specialized version of the fishtail that naturally twists into a double helix shape, looking exactly like a DNA strand. This is achieved by using three sections but only ever crossing hair from the outer sections to the middle in one specific direction. On long hair, the “spiral” has enough room to turn several times, making the “science-meets-style” look very obvious.
Creating the Helix
- Start with a ponytail.
- Divide into three sections: two large ones on the outside and a very thin one in the middle.
- Always take a small piece from the far left, go over the left section, and add it to the middle.
- Always take a small piece from the far right, go over the right section, and add it to the middle.
- The “middle” section will eventually grow, so you have to redistribute it.
- The twist happens naturally. Do not fight the rotation; let the braid spin as you work.
This is arguably the most “advanced” looking braid on this list. On waist-length hair, a DNA braid is a showstopper. It looks like a piece of complex machinery and is a great way to show off the consistency and strength of your hair.
19. The Topsy-Tail Braid
The Topsy-Tail was a popular tool in the past, but the “flip-through” technique is timeless. A topsy-tail braid is made by creating a ponytail, splitting the hair above the elastic, and “flipping” the tail through the hole. By repeating this down the length of the hair, you create a series of twisted “loops” that look like a complex weave but require zero actual braiding skill.
On long hair, the topsy-tail braid looks very voluminous and “fluffy.” It creates a lot of air between the sections, making the hair look massive. It’s an excellent choice for a “lazy” day where you want to look like you spent an hour on your hair but only had five minutes. It also works very well on “second-day” hair that has a bit of texture and grip.
20. The Lattice Braid
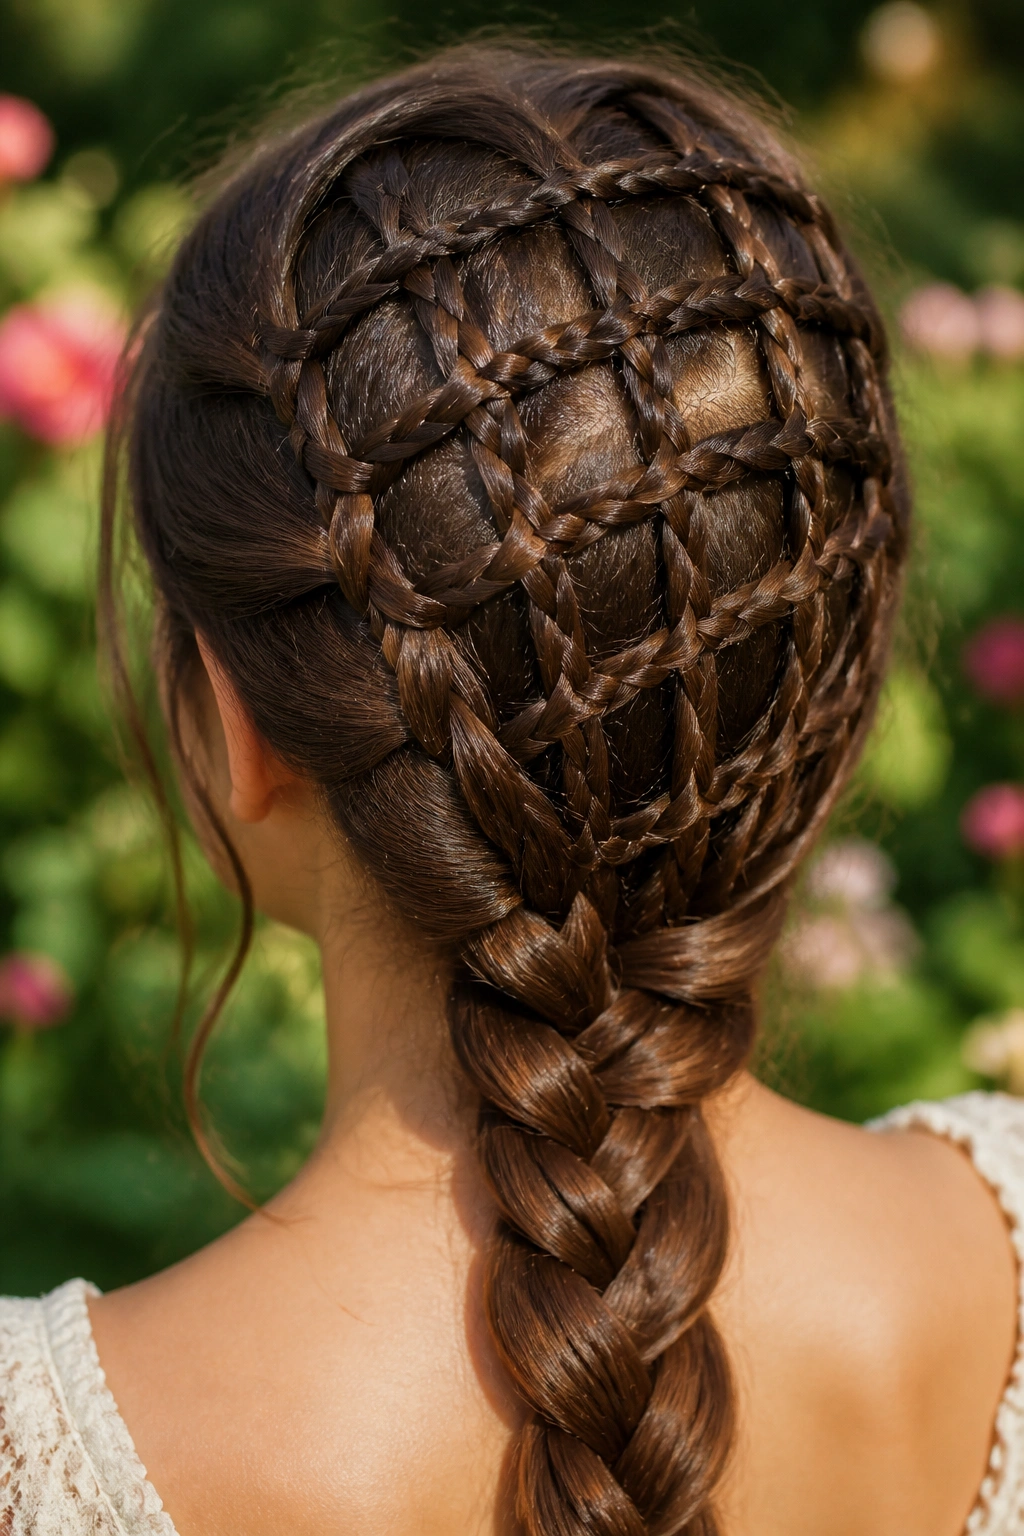
The lattice braid involves weaving multiple small braids together to create a “grid” or “basketweave” pattern. On long hair, this can be done on the back of the head, with the loose ends gathered into a single large braid at the nape. It looks incredibly intricate, like a piece of woven furniture or a Celtic knot.
This style is all about the “negative space” between the braids. It shows off the scalp and the hair in equal measure. It is a very stable style, making it great for active days or events where you’ll be moving a lot. The lattice provides a “grip” that keeps the hair from shifting, while the long tail at the bottom shows off the length.
21. The Skeleton Braid

The skeleton braid (sometimes called a “spine” braid) is a variation of the fishtail where the “ribs” are pulled out significantly further than the center. This creates a wide, flat, and somewhat “spooky” look that resembles a ribcage or a leaf. On long hair, the “ribs” can be very long, creating a massive amount of horizontal width.
I love this style for costume events or “alternative” fashion looks. It’s very graphic and looks amazing against a contrasting shirt color. To make it work, you need hair that is very smooth—use a straightener beforehand for the best “skeleton” effect. The contrast between the tight center “spine” and the long, flowing “ribs” is a great way to display length and texture.
22. The Scarf Braid
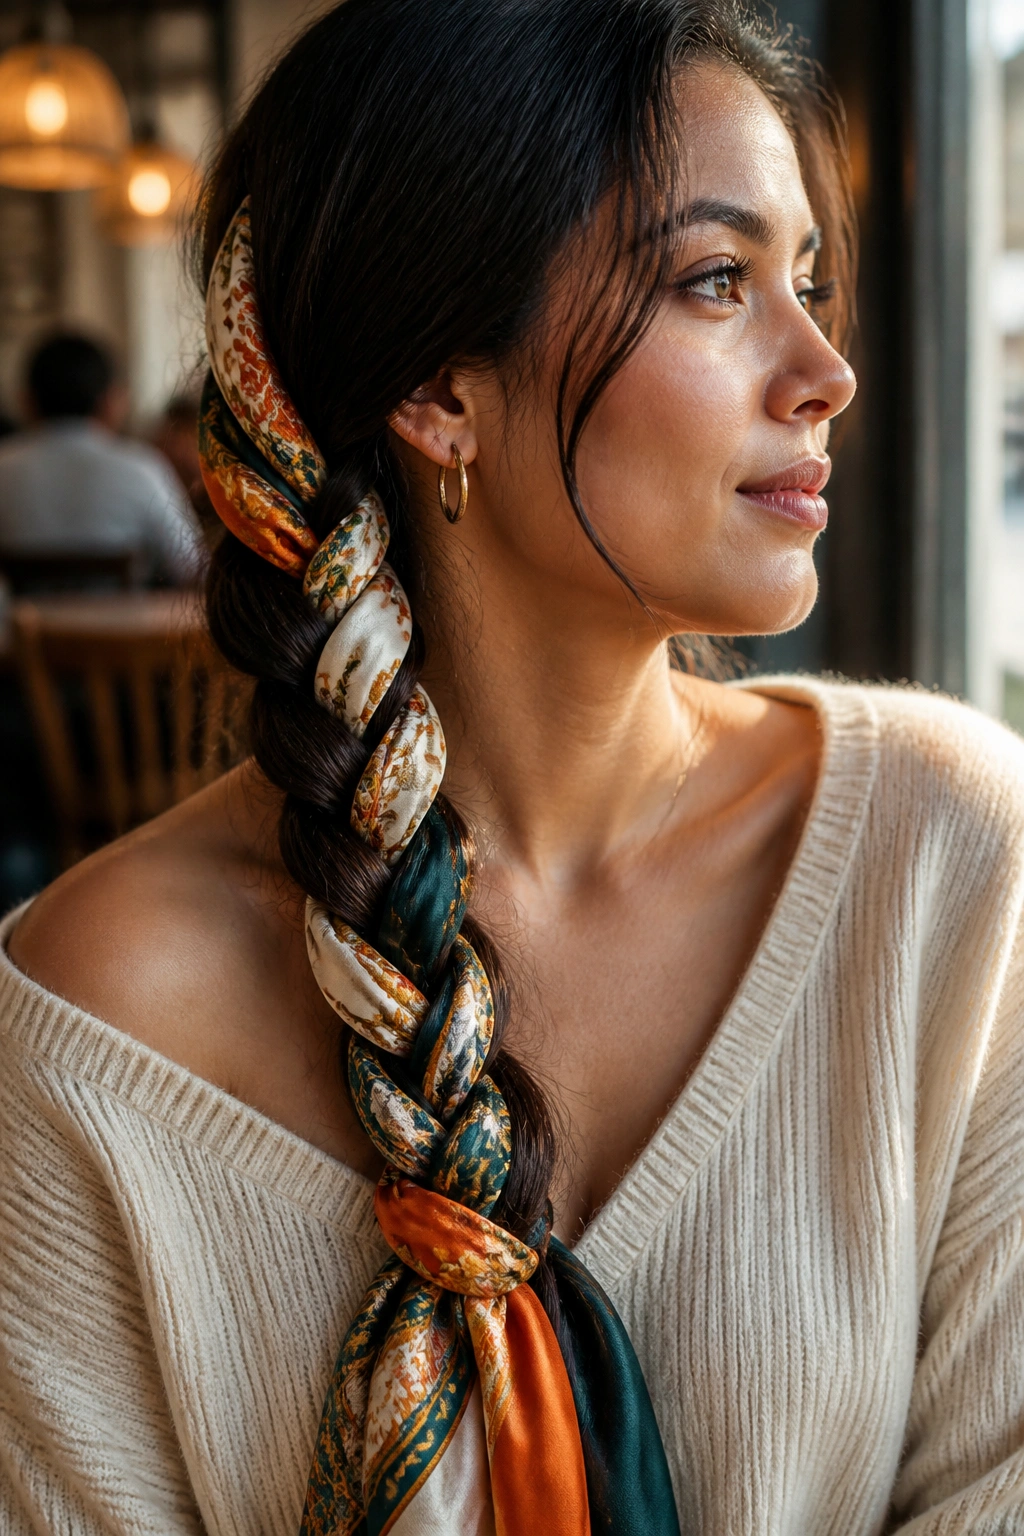
When your hair is very long, adding a scarf into the braid doesn’t just add color—it adds structural length and a bit of “flair.” You can treat the scarf as one of the three strands in a classic braid or wrap it around a ponytail before braiding. The scarf flows through the hair, highlighting the length and adding a pop of pattern.
Why Use a Scarf?
- It makes the braid look much thicker.
- It protects the hair from the environment by acting as a “buffer.”
- It allows you to match your hair to your outfit perfectly.
- It adds a “weightless” volume that hair alone can’t achieve.
For those with very long hair, a long silk scarf is a perfect accessory. As you move, the scarf and the hair flow together, creating a beautiful, multi-textured effect that is very eye-catching.
23. The Knotted Braid
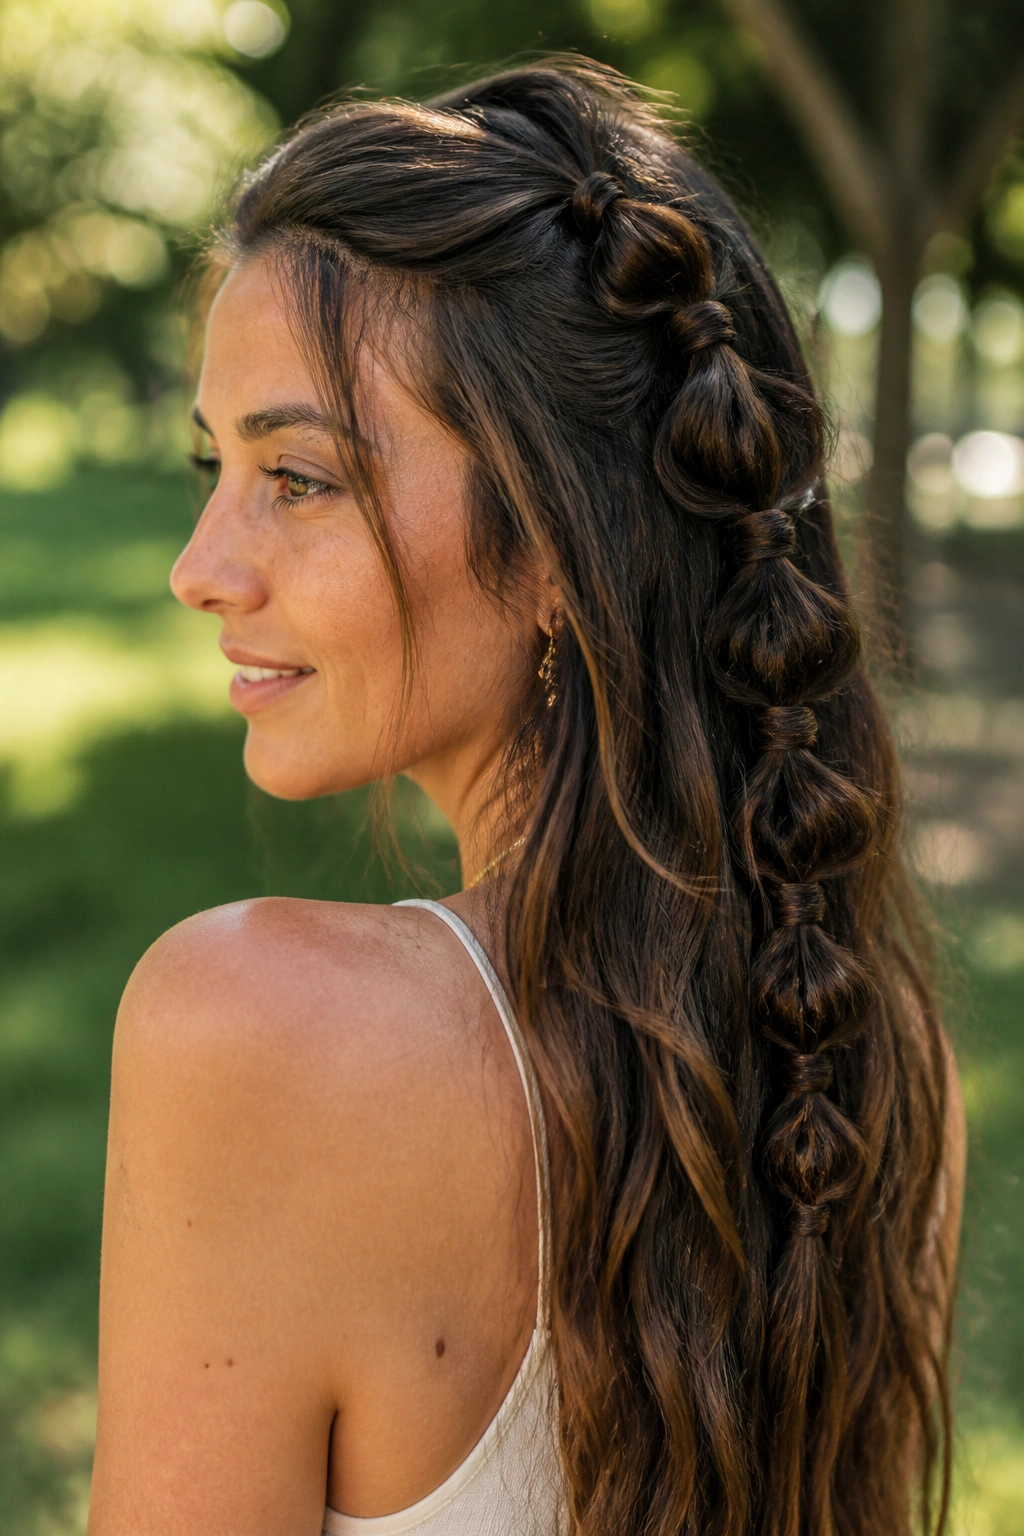
The knotted braid is made by literally tying “half-knots” in the hair, much like you would tie a shoelace. On long hair, this creates a series of “bumps” and “loops” that have a very organic, bohemian feel. It doesn’t look like a traditional braid; it looks like a series of macramé knots.
This style is very forgiving. If a piece falls out, it just adds to the “messy chic” vibe. It is a great way to manage long hair that is naturally wavy or frizzy. The knots provide a lot of “anchor” points, which helps keep the weight of the hair from pulling the style down throughout the day.
24. The Feather Braid
The feather braid is similar to a waterfall braid, but instead of “dropping” a whole strand, you only pull a tiny “feather” of hair out of the side of each braid section. This creates a “fringe” of hair that floats alongside the braid. On long hair, these feathers look like delicate wisps of silk.
This is a very “high-detail” style. It’s not meant for distance; it’s meant to be seen up close. It shows off the fine texture of your hair and the health of your ends. It is often used in “elfin” or fantasy-inspired photography because of its ethereal, delicate appearance.
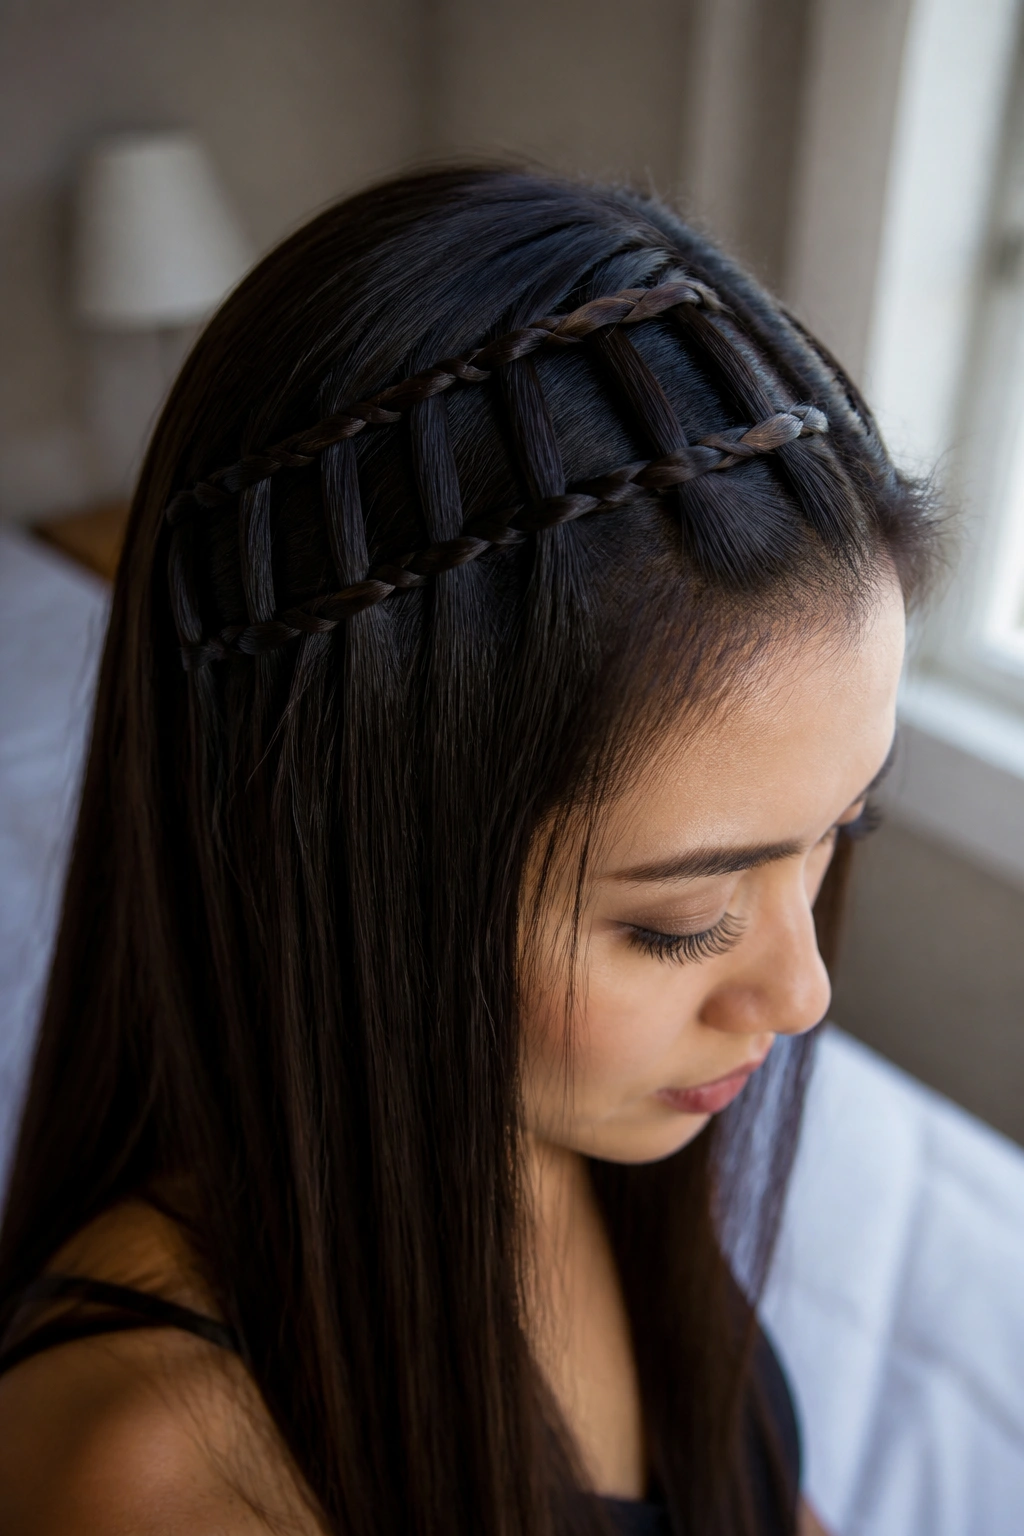
25. The Zipper Braid
The zipper braid is a very tight, flat, and wide braid that looks like—you guessed it—a zipper. It involves three sections and a “weaving” motion that keeps the hair very close together. On long hair, the zipper braid is incredibly durable and looks like a solid “band” of hair running down your back.
The Zipper Technique
- Start with a small section at the crown.
- The side strands always go under the middle strand.
- You must “hold” the middle strand in your teeth or with a clip while you cross the others (this is a “three-hand” braid).
- The result is perfectly flat. There is no “bump” to this braid at all.
This is the ultimate style for long-haired athletes. It doesn’t move, it doesn’t snag, and it keeps every single hair in place. It also looks incredibly “cool” and technical, like something from an action movie.
26. The Viking Stacked Braid
Viking-inspired styles are all about “stacking” multiple braids on top of each other. You might have two small three-strand braids on the sides and one massive Dutch braid in the center. On long hair, these “stacks” create a very powerful, warrior-like silhouette.
The key to the Viking look is contrast. You want some parts to be very tight (the side braids) and the center part to be very voluminous. The length is crucial here; the longer the hair, the more “regal” the Viking stack looks. Adding small metal rings or “hair cuffs” to the braids can enhance the “historical” feel of the style.
27. The Cage Braid
A cage braid is a 3D structure that literally “cages” a ponytail inside a series of braided loops. It is made by taking small sections from the outer edges of a ponytail and braiding them around the center mass of hair. On long hair, the “cage” can be very long and intricate.
This style is about architectural interest. It makes the hair look like a solid object rather than a collection of strands. It is a very sophisticated look that is perfect for formal events where you want to show off your length in a way that feels “contained” and intentional.
28. The 3D Split Braid
This braid looks like a standard three-strand braid that has been “split” down the middle, revealing another braid or a different texture inside. It is achieved by braiding around a central “core” section. On long hair, the “reveal” is very dramatic because of the distance the braid travels.
This is a very clever way to show off highlights. If you have a different color on the “under-layer” of your hair, the 3D split braid will bring that color to the surface in a very structured way. It’s a great example of how long hair allows for more “play” with depth and dimension.
29. The Pipe Braid
The pipe braid is a modern, minimalist style where hair is wrapped around a central “pipe” or “core” of hair in a spiral fashion. It looks very smooth and “round,” unlike the flat weave of most braids. On long hair, the pipe braid looks like a long, flexible cord.
This style is very “clean.” There is no frizz, no loose ends, just a smooth spiral of hair. It is a great choice for showing off the shine and health of your hair. It’s also very easy to “un-do” at the end of the day, as the hair isn’t actually woven together, just wrapped.
30. The Heart Braid
For a playful or romantic look, you can use two lace braids to create a “heart” shape on the back of the head. The braids meet at the bottom and are then braided together into one long tail. On long hair, the “tail” of the heart can reach all the way to the waist, emphasizing the length.
This is a favorite for younger people or for Valentine’s Day events. It shows a high level of skill and attention to detail. The contrast between the “graphic” heart shape at the top and the long, simple braid at the bottom is very aesthetically pleasing.
31. The Four-Strand Round Braid
Unlike the flat four-strand braid, the round version creates a thick, “tubular” braid that looks like a high-end leather cord. It is incredibly strong and keeps its shape no matter what. On long hair, this braid feels heavy and substantial, like a physical accessory.
This is the braid you want if you have hair that is so long it usually “disappears” when braided. The round structure keeps the volume high from the nape to the ends. It is a very “tactile” braid—it feels great to touch and has a beautiful, symmetrical appearance from every angle.
The Bottom Line
Taking care of long hair is a journey that requires the right tools and techniques. When you choose to braid your hair, you aren’t just managing the length; you are choosing to highlight it. Braids offer a way to protect your ends from the daily wear and tear of the world while showcasing the density, color, and texture that you have spent so much time growing. From the simplest three-strand to the most complex DNA helix, every braid tells a story of patience and care.
The most important thing to remember when braiding long hair is to listen to your scalp. Long hair is heavy, and braids can add tension. Always ensure your starting sections are secure but not “tight” enough to cause pain. Use silk elastics or “ouchless” bands to prevent breakage at the bottom. Most importantly, don’t be afraid to experiment. The beauty of having long hair is that you have the “material” to try styles that most people can only dream of.
Whether you are heading to a formal event or just want to keep your hair out of the way while you work, these 31 styles provide a library of options. Each one offers a different way to display your length and express your personality. Long hair is a gift, and a well-executed braid is the ribbon that ties it all together. Keep your hair moisturized, keep your tension even, and wear your long braids with the confidence that comes from knowing you’ve mastered the art of the weave.