Braids that survive a nap have one job: stay neat when a head sinks into a pillow and the hair shifts against fabric.
That sounds simple. It isn’t. A style can look tidy at 9 a.m. and come apart the second someone lies down, rubs a cheek on a blanket, or spends ten minutes half asleep in the car. The sweet spot is a braid that sits close enough to the scalp to hold, but not so tight that it leaves marks or makes the hair look stiff and overworked.
The styles that hold up best usually share the same quiet little tricks: small sections, a clean part, a grip-friendly finish, and ends that are secured without a lot of bulk. A tiny mist of water or leave-in conditioner can help fine hair behave. Coarser or curlier hair often needs less product and more careful sectioning. First up is the simplest version.
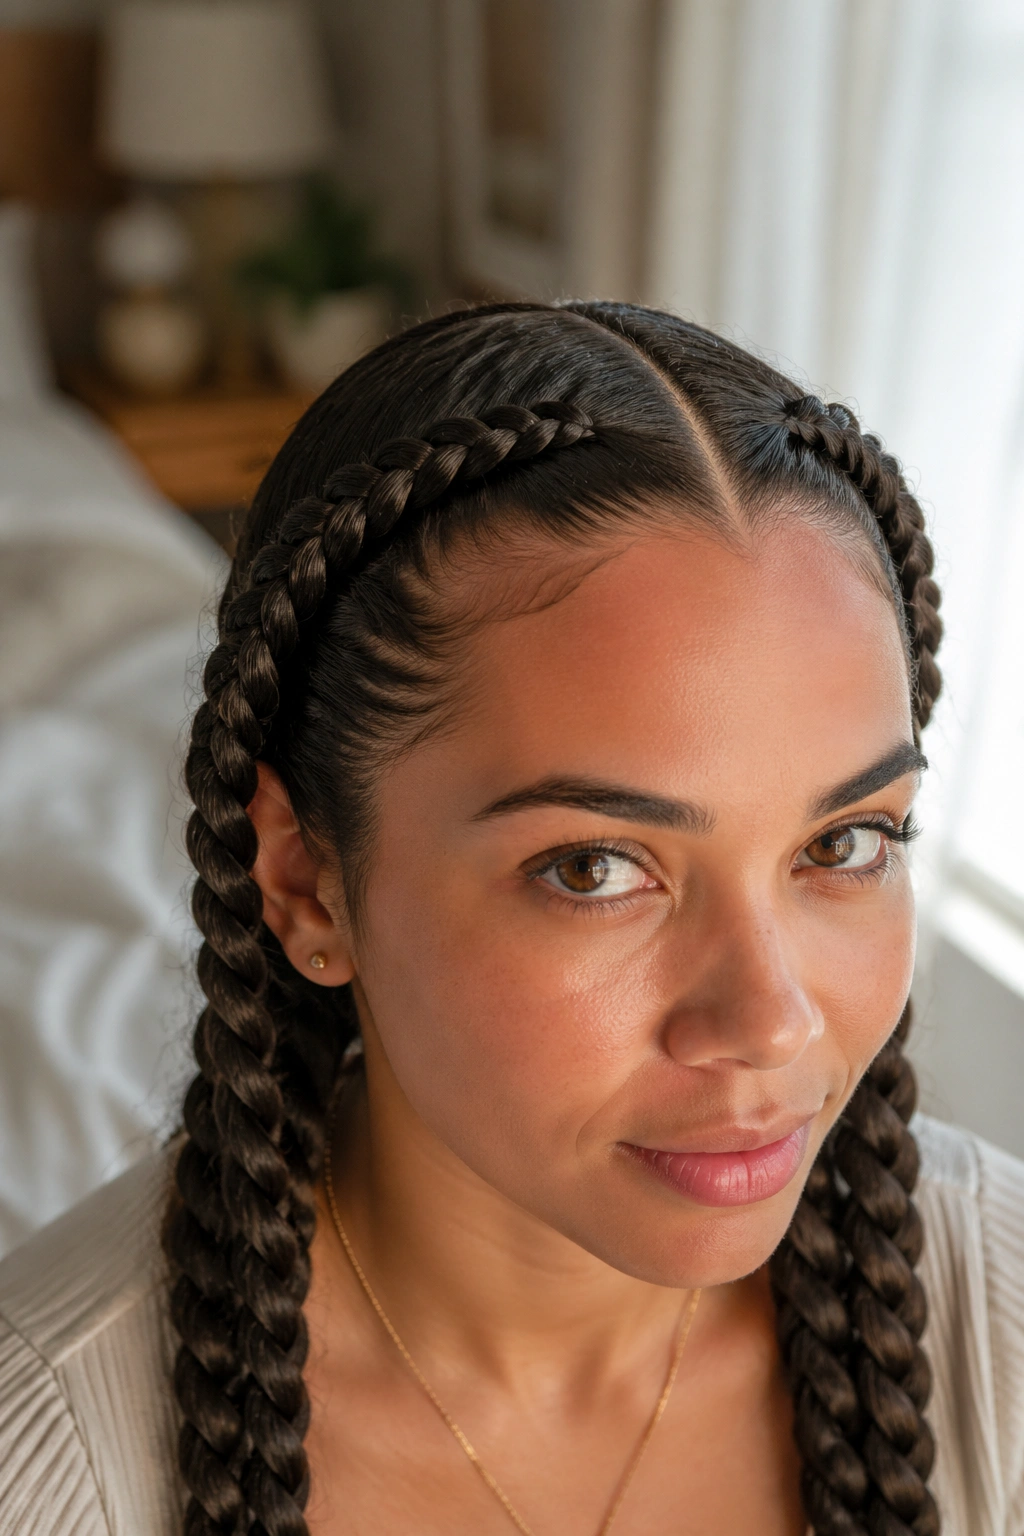
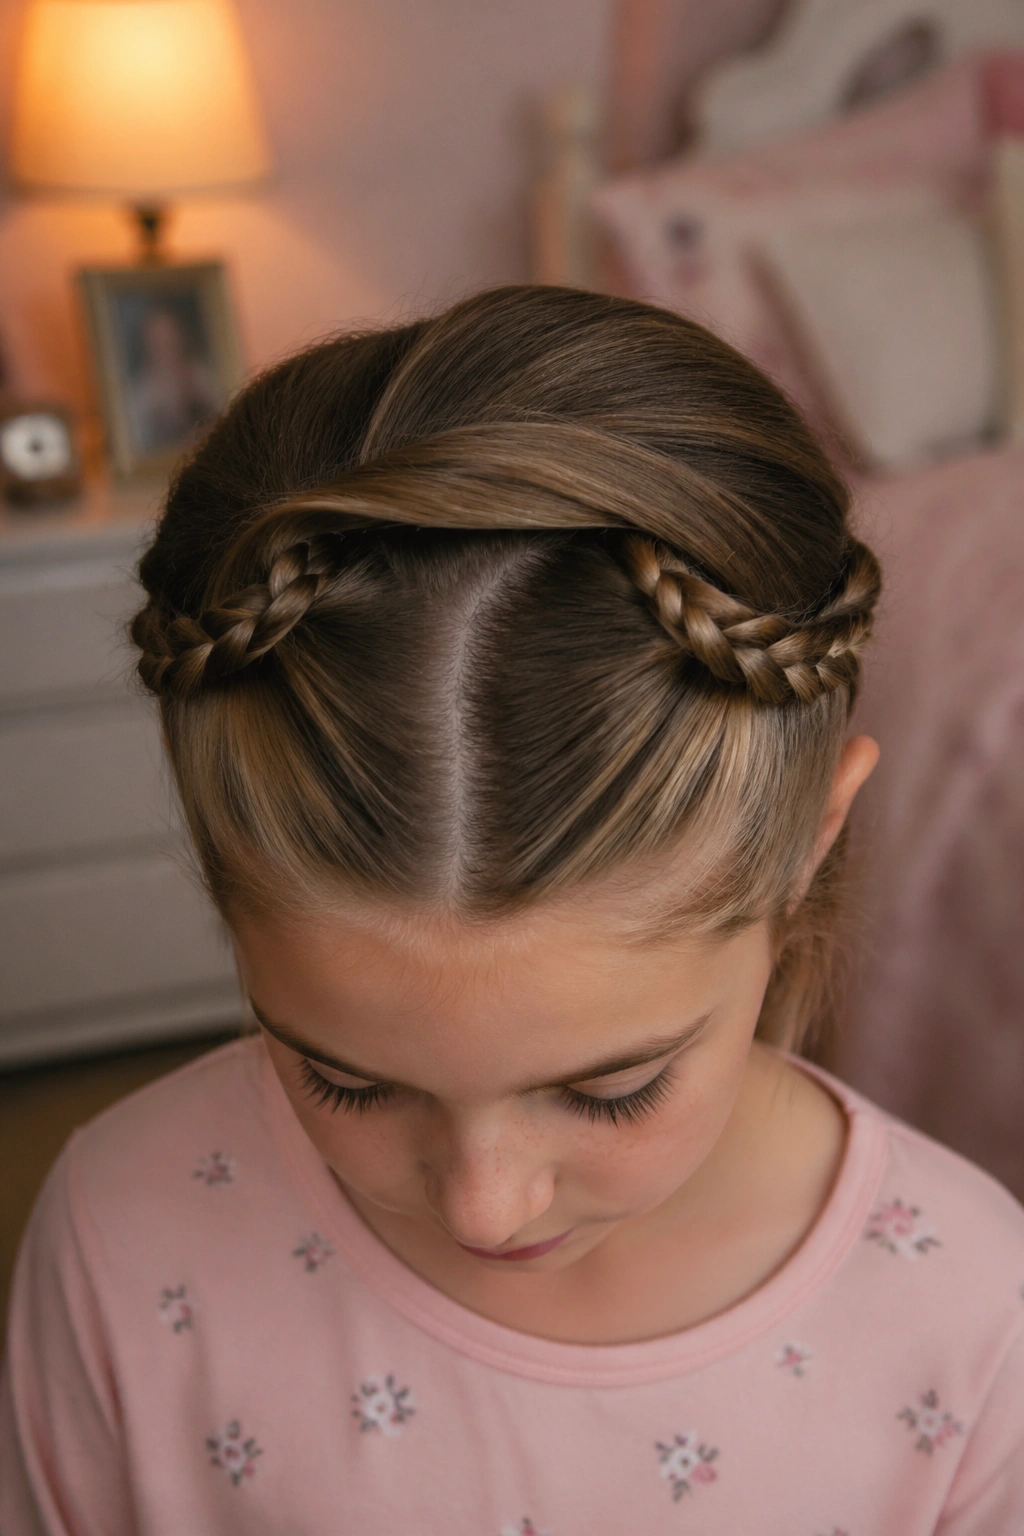
1. Mini Center-Part Twin Braids
This is the easiest place to start because it gives you structure without much fuss. Split the hair straight down the middle, then take two slim sections from the front and braid each one back toward the ears. The finished look is tidy, low-profile, and close enough to the head that it usually survives a nap better than loose pieces.
Why it holds so well
The center part anchors the style. Once each braid has that first inch locked in, it has less chance of shifting around on a pillow. That matters more than people think.
- Keep each section about ½ inch to 1 inch wide.
- Start braiding at the hairline, not two inches back.
- Use a small snag-free elastic at the end.
- Finish with a tiny drop of styling cream on the palms if the hair is slippery.
Best tip: braid the two sides slightly downward instead of straight back; the angle helps them sit flat during sleep.
2. Temple Braids Pinned Back
This is the braid I reach for when face-framing layers keep escaping. Take a slim section from each temple, braid it toward the back, and pin it behind the ears with a flat bobby pin. The rest of the hair can stay loose, which makes this one feel soft and easy instead of overdone.
It works because the braids take the loose front pieces out of the way before they get crushed under a pillow. The pins do the rest. If you use a bobby pin with the wavy side against the scalp, it grips better and slips less.
For extra hold, cross two pins in an X. Sounds fussy. It isn’t. It takes five seconds and keeps the braid from sliding out when the hair gets warm and flattened.
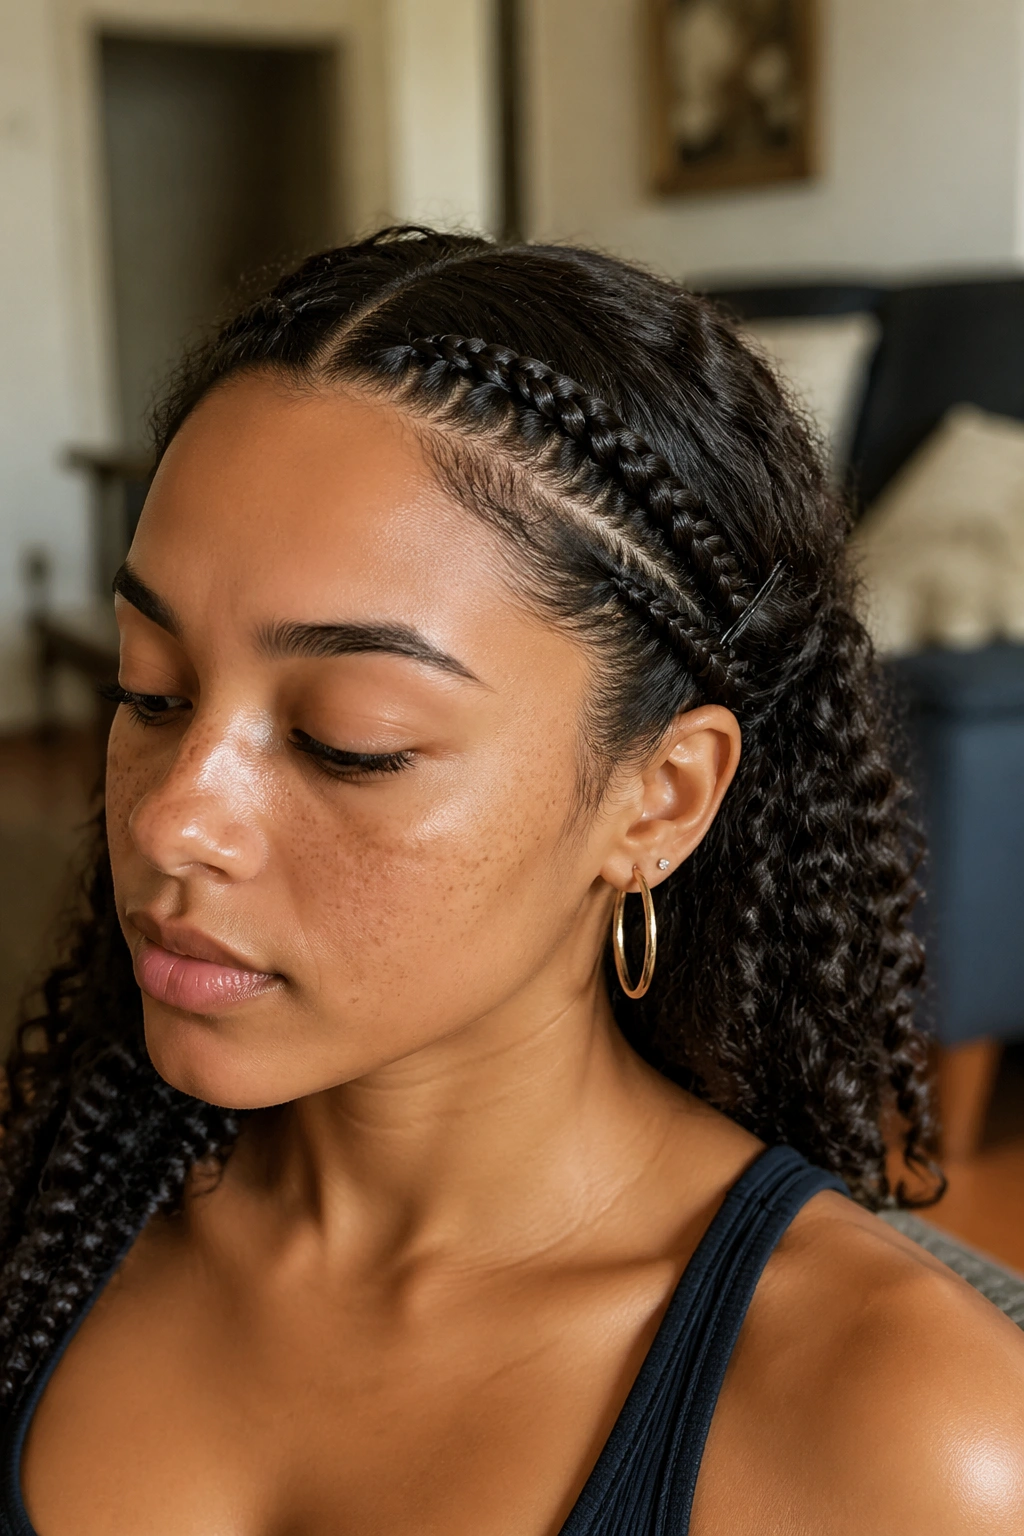
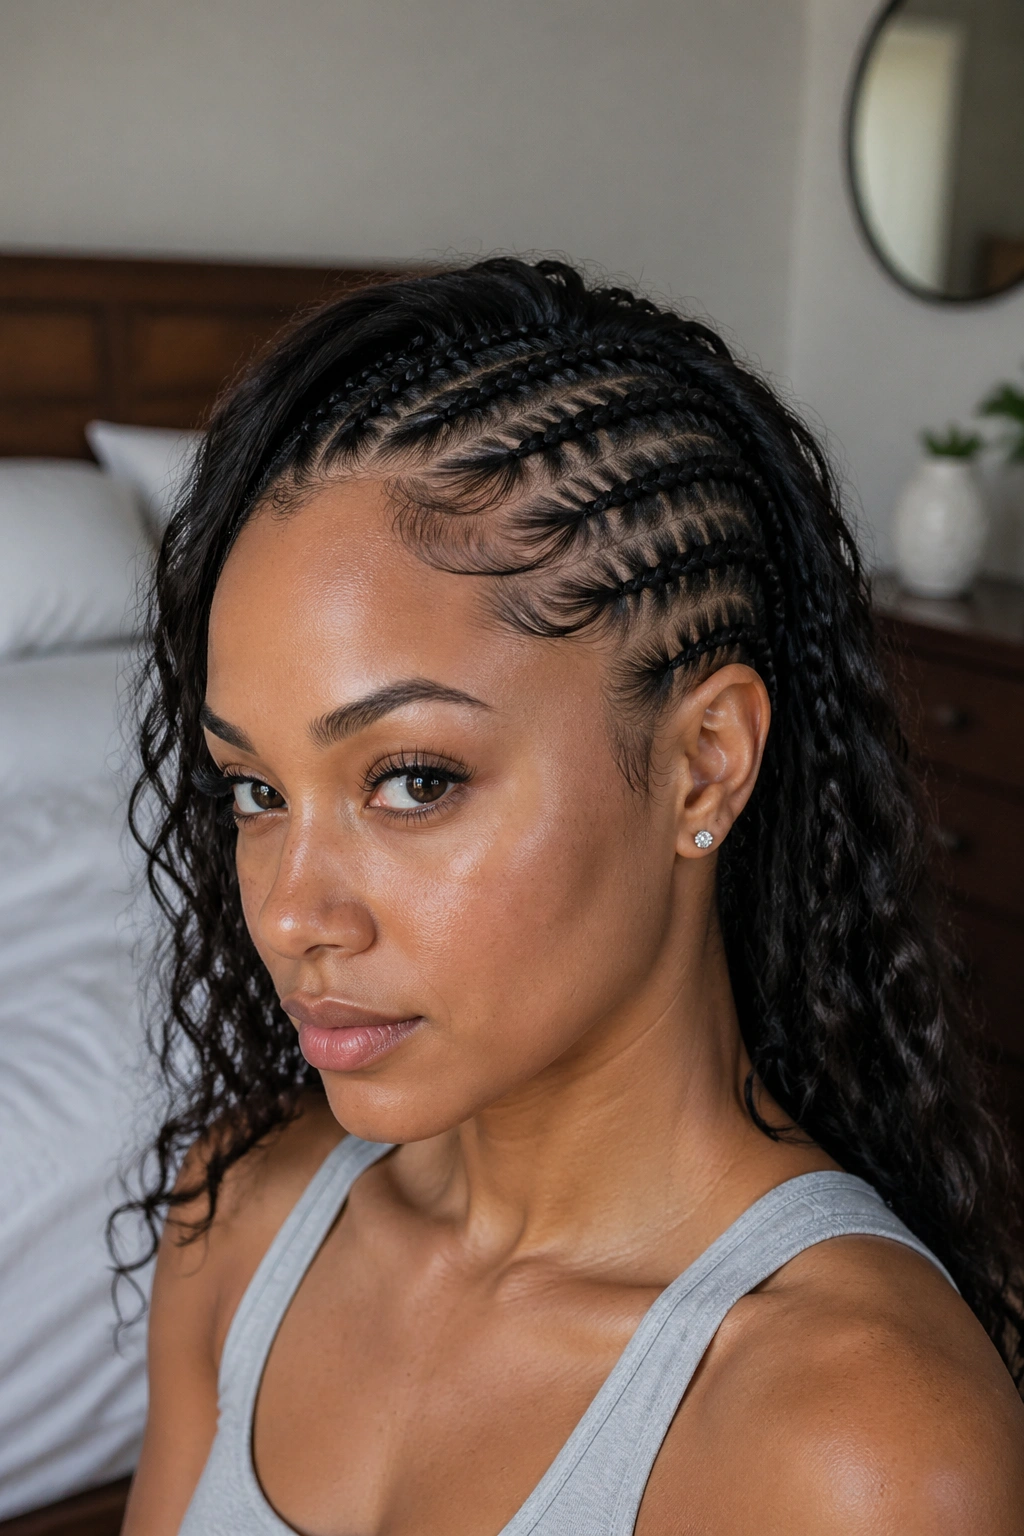
3. Tiny Dutch Braids Along the Hairline
Why do Dutch braids stay put so well? Because they sit on top of the hair instead of disappearing into it. That raised shape gives them a little more grip, which is exactly what you want for nap-friendly hair.
Start with two tiny sections near the front hairline and braid under, not over, as you work back. The braid will look more defined than a standard three-strand braid, but it does not need to be thick to hold. In fact, the smaller the section, the easier it is to keep neat.
How to use it
- Best for fine, medium, or straight hair that slips out of ordinary braids.
- Works well when the front layers are the problem, not the whole head.
- Add a touch of dry texture spray if the hair is freshly washed.
- Stop the braid around the ear and finish with a tiny elastic.
4. French-Braided Bang Sweep

A fringe in your eyes during a nap is annoying in the worst way. It tickles before sleep, then falls flat and lopsided after. A French-braided bang sweep fixes that without turning the whole head into a formal style.
Take the bang section, start at the heavier side, and braid it across the forehead line toward the opposite temple. The braid picks up new hair as it moves, so it stays attached to the head instead of hanging loose. That makes it a smart choice for short layers that love to escape.
A little patience helps here. Keep the section narrow, pull only gently, and pin the tail under a side layer so the end doesn’t poke out. If the hair is very silky, a quick mist of water gives the braid enough grip to hold its shape.
5. Side-Swept Baby Braid
A side-swept baby braid is the kind of style that looks like you spent effort when you didn’t. Part the hair slightly off-center, grab a small section from the heavier side, and braid it diagonally toward the opposite ear. That diagonal line is doing quiet work. It keeps the braid out of the face and gives it a place to rest while someone naps on a pillow or blanket.
I like this one for shorter hair, because it does not demand a long tail or a lot of leftover length. The braid can end near the jawline and still look intentional. If the last inch wants to unravel, a clear elastic is fine, but a tiny black elastic often disappears better in darker hair.
One extra thing: let the braid sit a little loose at the hairline. Too much tension makes the front look sharp and fussy.
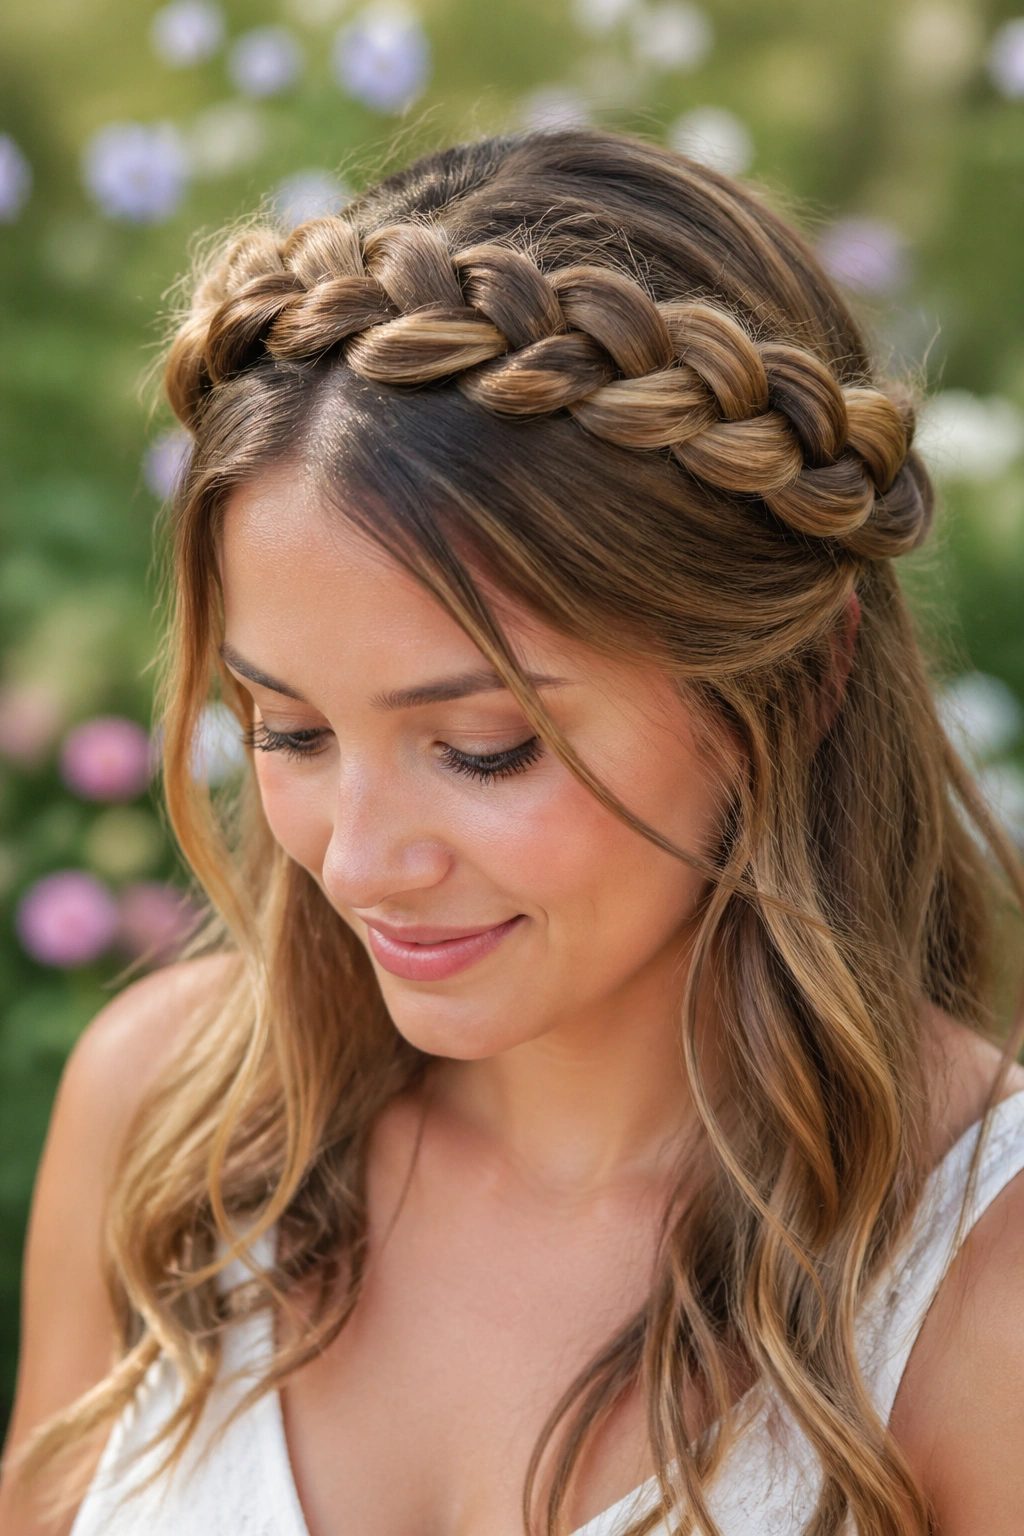
6. Half-Up Braid Crown
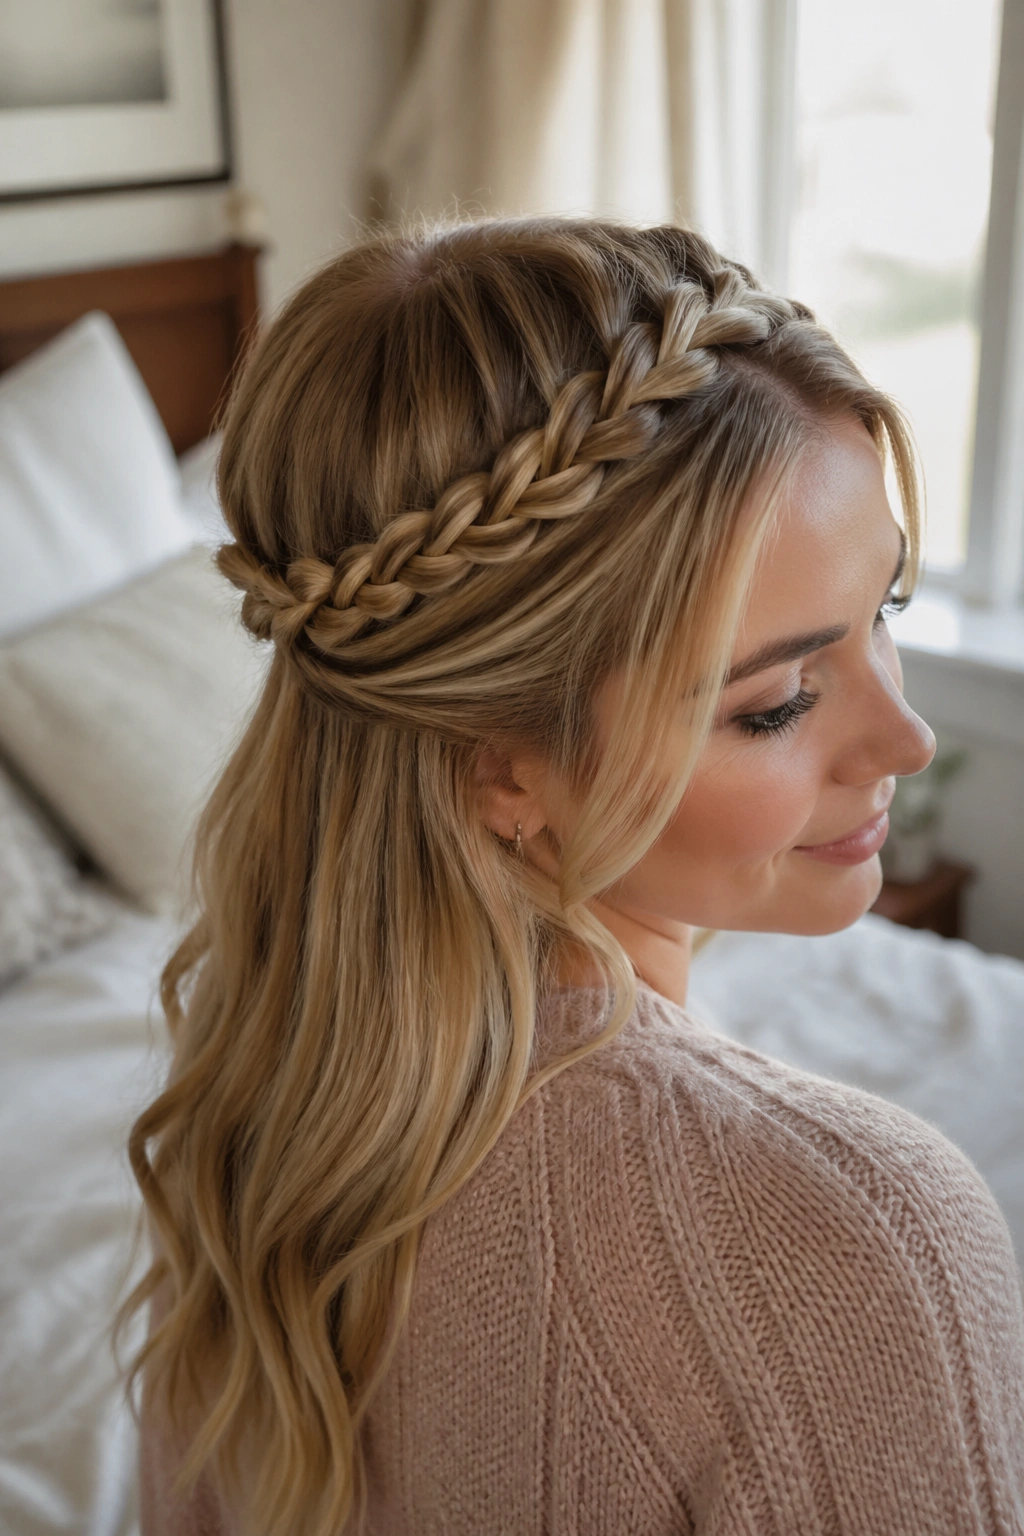
A full crown braid can be lovely, but it can also be a bit much when the goal is easy and sleep-safe. A half-up braid crown gives you the shape without hauling all the hair around the head. You braid a section from each side, sweep them back, and connect them at the crown or just behind it.
What makes this version better for naps is the lower bulk. The back stays mostly free, so the head can lie flat without pressing into a thick twist of hair. That matters more on small heads and shorter naps than people usually admit.
I’d choose this style for medium or long hair with layers. It keeps the top clean, pulls the front away from the face, and still feels light enough to wear all day. If the ends are short, tuck them under with two pins instead of forcing a tiny elastic into place.
7. Low Braided Pigtails

Low pigtails are old-school for a reason. Put the braids low, and they stop fighting the pillow. Put them high, and they jab into the back of the head. The nap-friendly version sits right at the nape, with each braid starting just behind the ears and hanging down neatly.
What makes them work
The low placement keeps pressure off the scalp. The two sides balance each other, which helps the style stay even after sleep. And because the braids are separate, one side can get flattened without ruining the whole look.
- Part the hair cleanly down the middle.
- Start each braid just below the ear.
- Keep the braid snug for the first 2 inches.
- Finish with soft elastics, not metal ties.
Tip: if one side is shorter, braid it a little tighter so both tails land at about the same length.
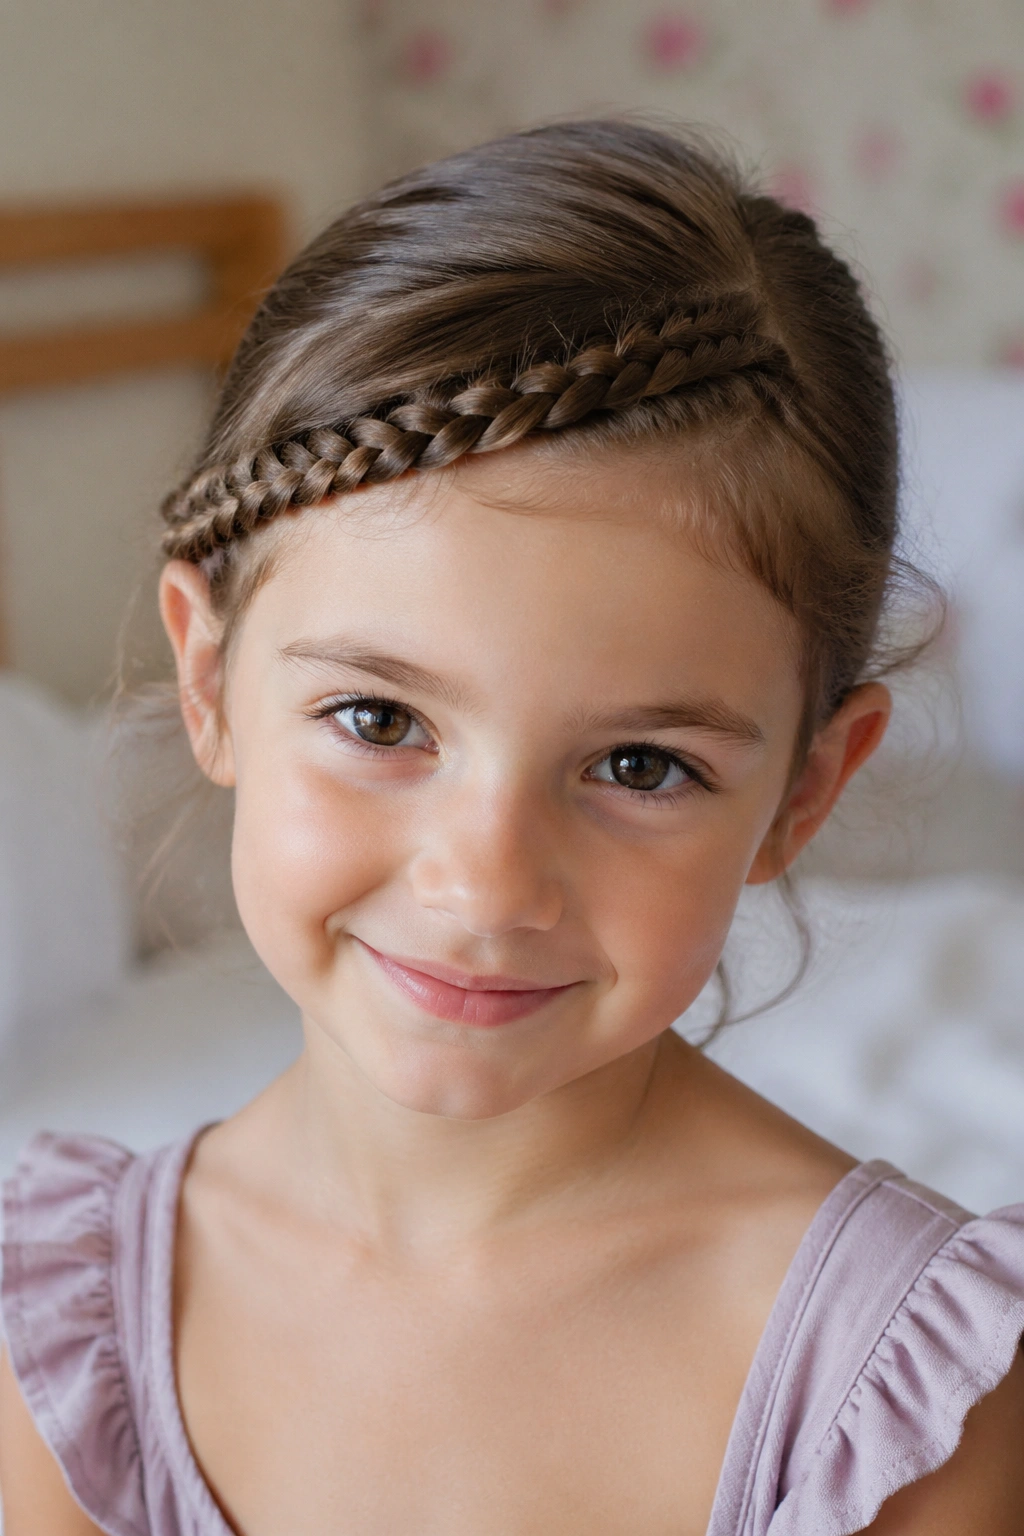
8. Slim Braid Headband
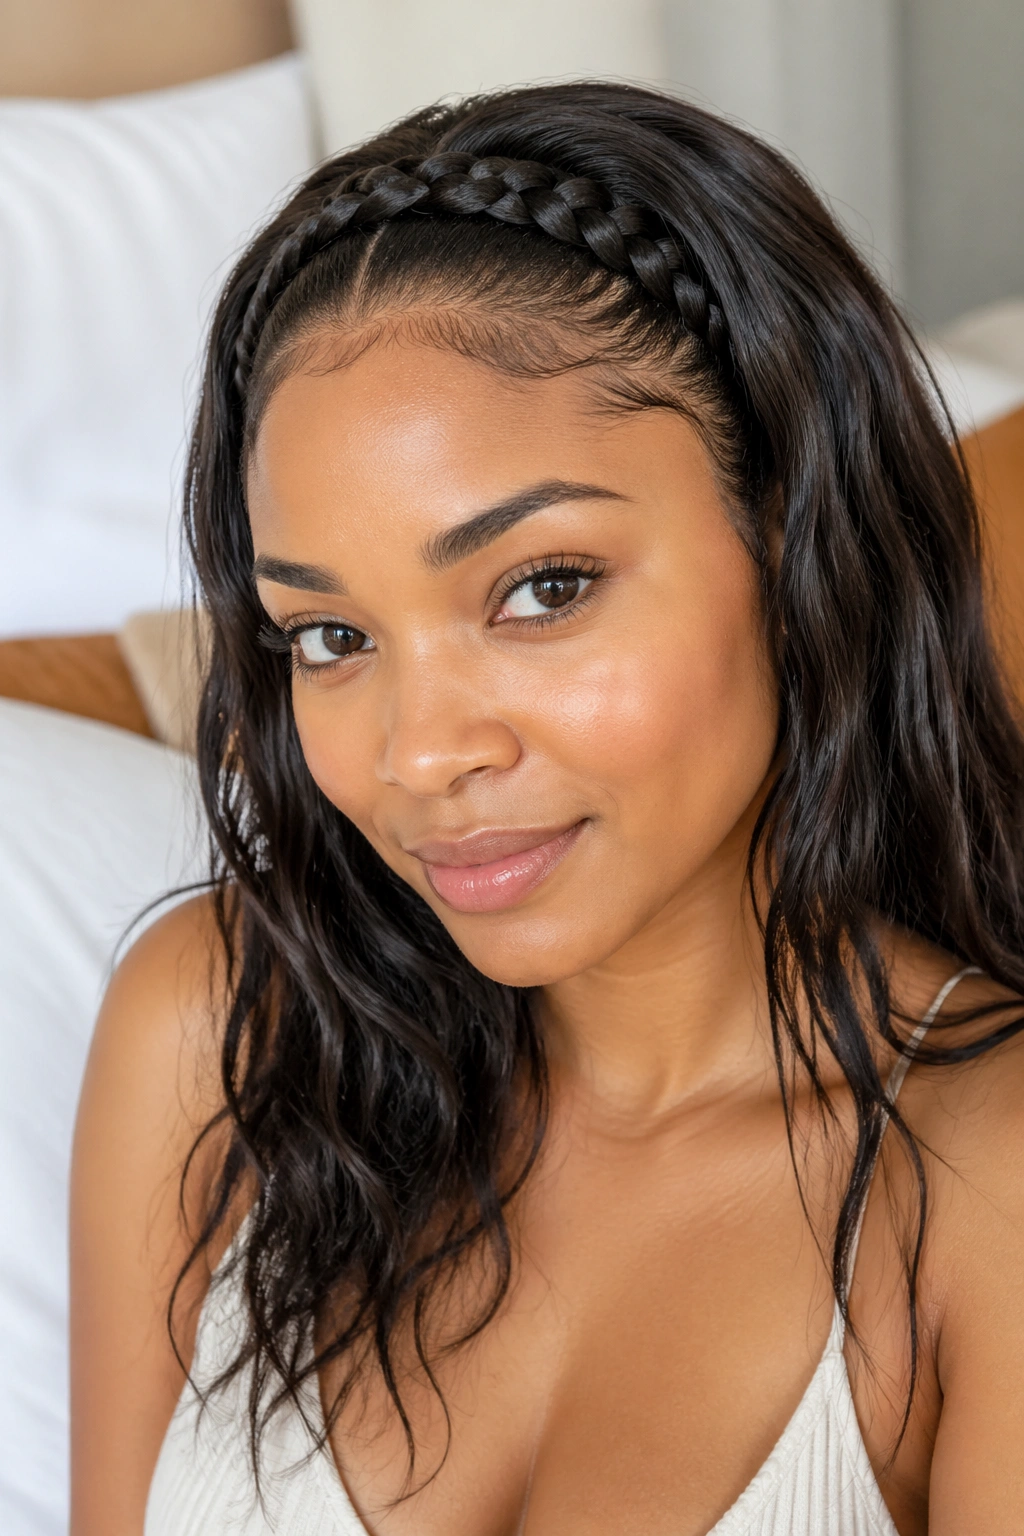
A braid that works like an accessory is a nice little cheat. Instead of wearing a separate headband that can slide around, take a thin front section from one ear, braid it across the top of the head, and pin it behind the opposite ear. The hairline stays neat, the face stays clear, and the style looks finished even when the rest of the hair is loose.
This is especially good for hair that gets fuzzy at the temples. Those baby hairs are often the first thing to collapse during a nap, and the braid keeps them contained without needing a full updo.
The best part is comfort. Because the braid sits flat and uses only a narrow section, it doesn’t leave much pressure on the scalp. If you want more hold, hide the end under a top layer and pin it there instead of leaving a tail exposed.
9. Mini Fishtail Braid
Why does a tiny fishtail braid stay neat when a regular braid goes soft? Because the smaller cross-over pattern locks the strands together more tightly. It looks delicate, but it usually holds its shape better than it seems like it should.
Start with a small section, split it into two, and keep taking slivers from the outside edges until you reach the end. A mini fishtail works best on hair that already has a little texture, because super-slippery strands can slide apart before you finish. If the hair is clean and glassy, add a bit of dry shampoo at the roots first.
How to keep it tidy
Use your thumb and index finger to take the tiniest possible sections. Bigger chunks make the fishtail look clunky. And don’t pull too hard; that flattens the braid and makes it look stiff rather than soft.
10. Rope-Twist Braids
On rushed mornings, rope twists save the day. They are not a classic three-strand braid, but they live in the same family and hold up in a very similar way. Twist two sections in the same direction, then wrap them around each other in the opposite direction. It sounds odd until your hands learn it.
The reason this style is nap-friendly is simple: the twist hugs itself. It doesn’t loosen as quickly as a standard braid, especially on hair that has a little bend or wave. For short lengths, it also gives the illusion of more shape than you actually had to create.
A small clip at the end helps if the hair is fine. For thicker hair, a tiny elastic is enough. If you want a neater finish, smooth the front with a bit of water on your fingertips before twisting.
11. Boxer-Style Mini Braids
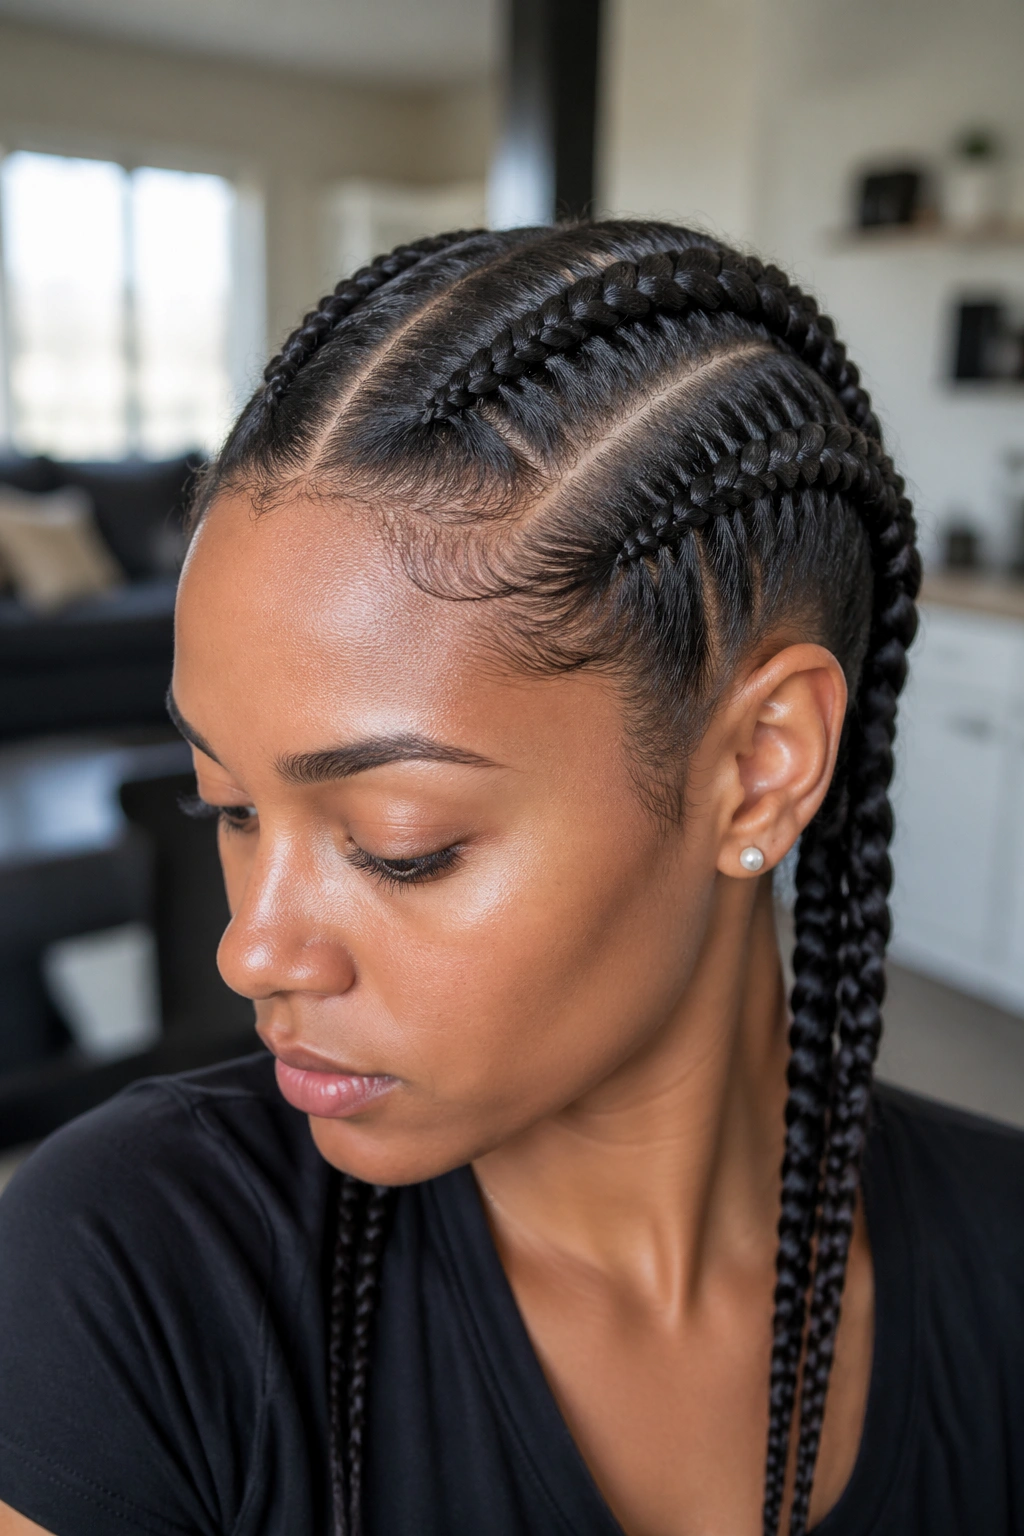
Boxer braids are usually thought of as bold and sporty, but the mini version can be very soft and easy to wear. Keep the braids narrow, place them close to the scalp, and stop them before they get bulky at the ends. Two simple rows can do a lot of work if the parting is clean.
I like this style for thick hair because it controls the sides without making the crown puff up. It also keeps strands from knotting when someone sleeps with their head turned one way for an hour. That is the real headache with long hair: not the style falling apart, but the tangles that follow.
If you want a gentler look, loosen the braid slightly after securing it. That tiny tug makes it flatter and softer without losing the hold.
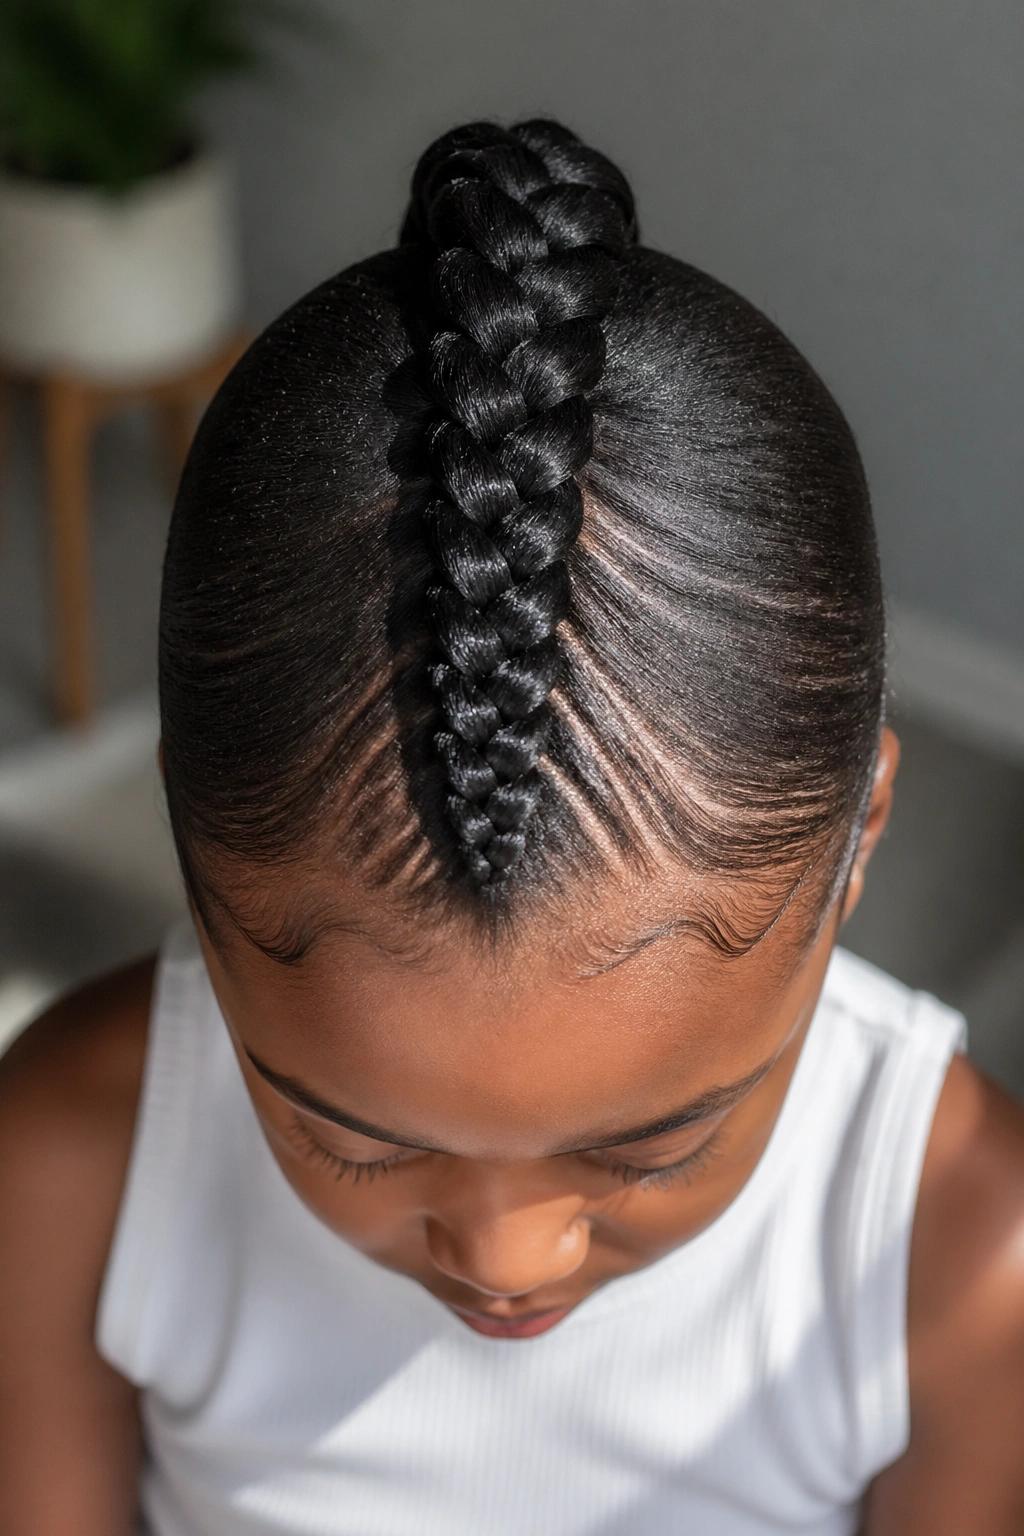
12. Braided Ponytail Base
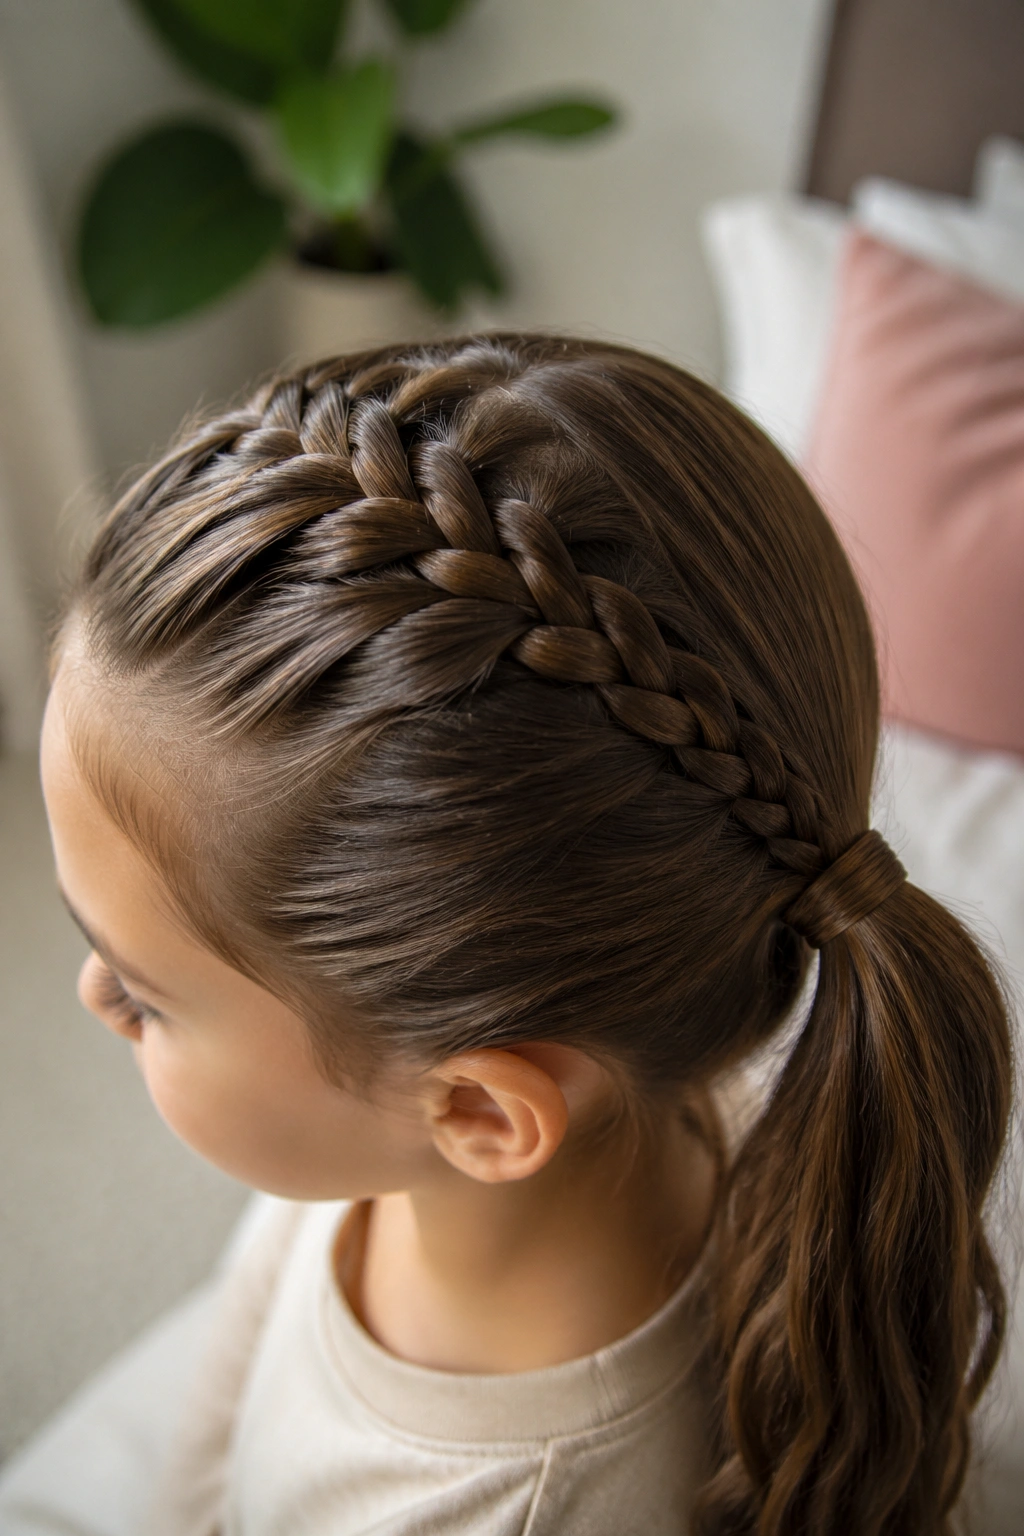
Unlike a plain ponytail, a braided base keeps the elastic from sliding around as much. Gather the hair into a low ponytail, braid just the top few inches of the tail, then secure the rest. It is a small detail, but it makes the whole ponytail feel more locked in.
This one is especially useful for layered hair. Layers tend to escape the base first, and the braid gives them something to cling to before the ponytail starts to droop. If the hair is long enough, you can keep braiding the full tail. If not, even a short braid at the top helps.
It’s a good middle-ground style for a nap because it keeps the face clear without asking the hair to sit in a full updo. There’s room for comfort here. That matters.
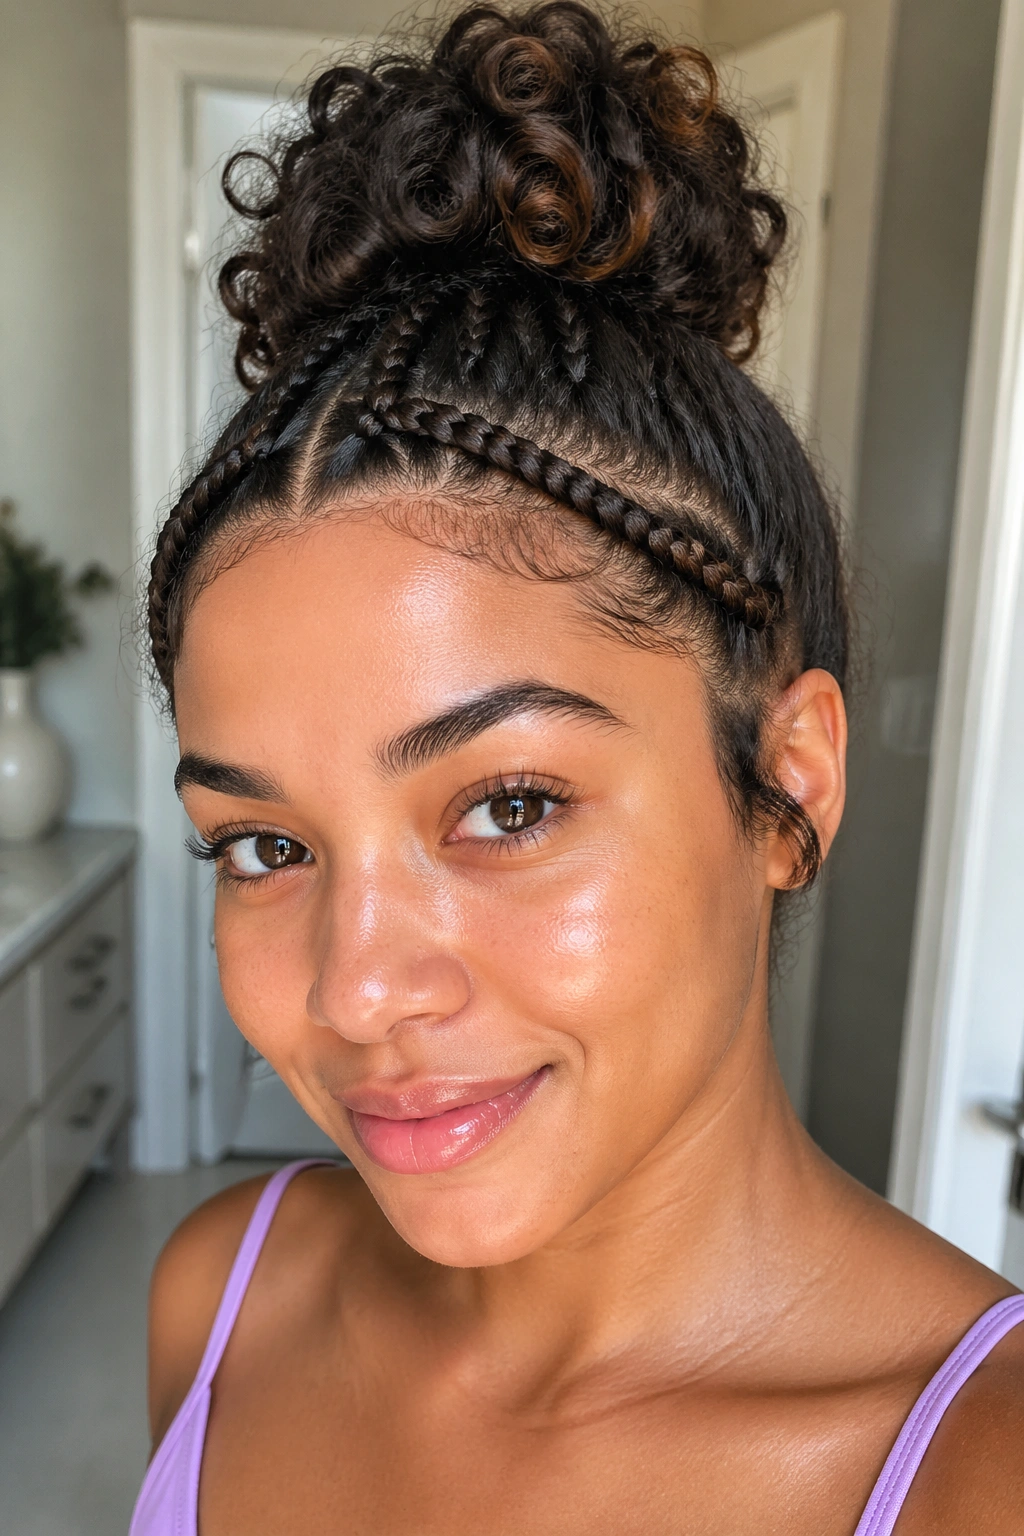
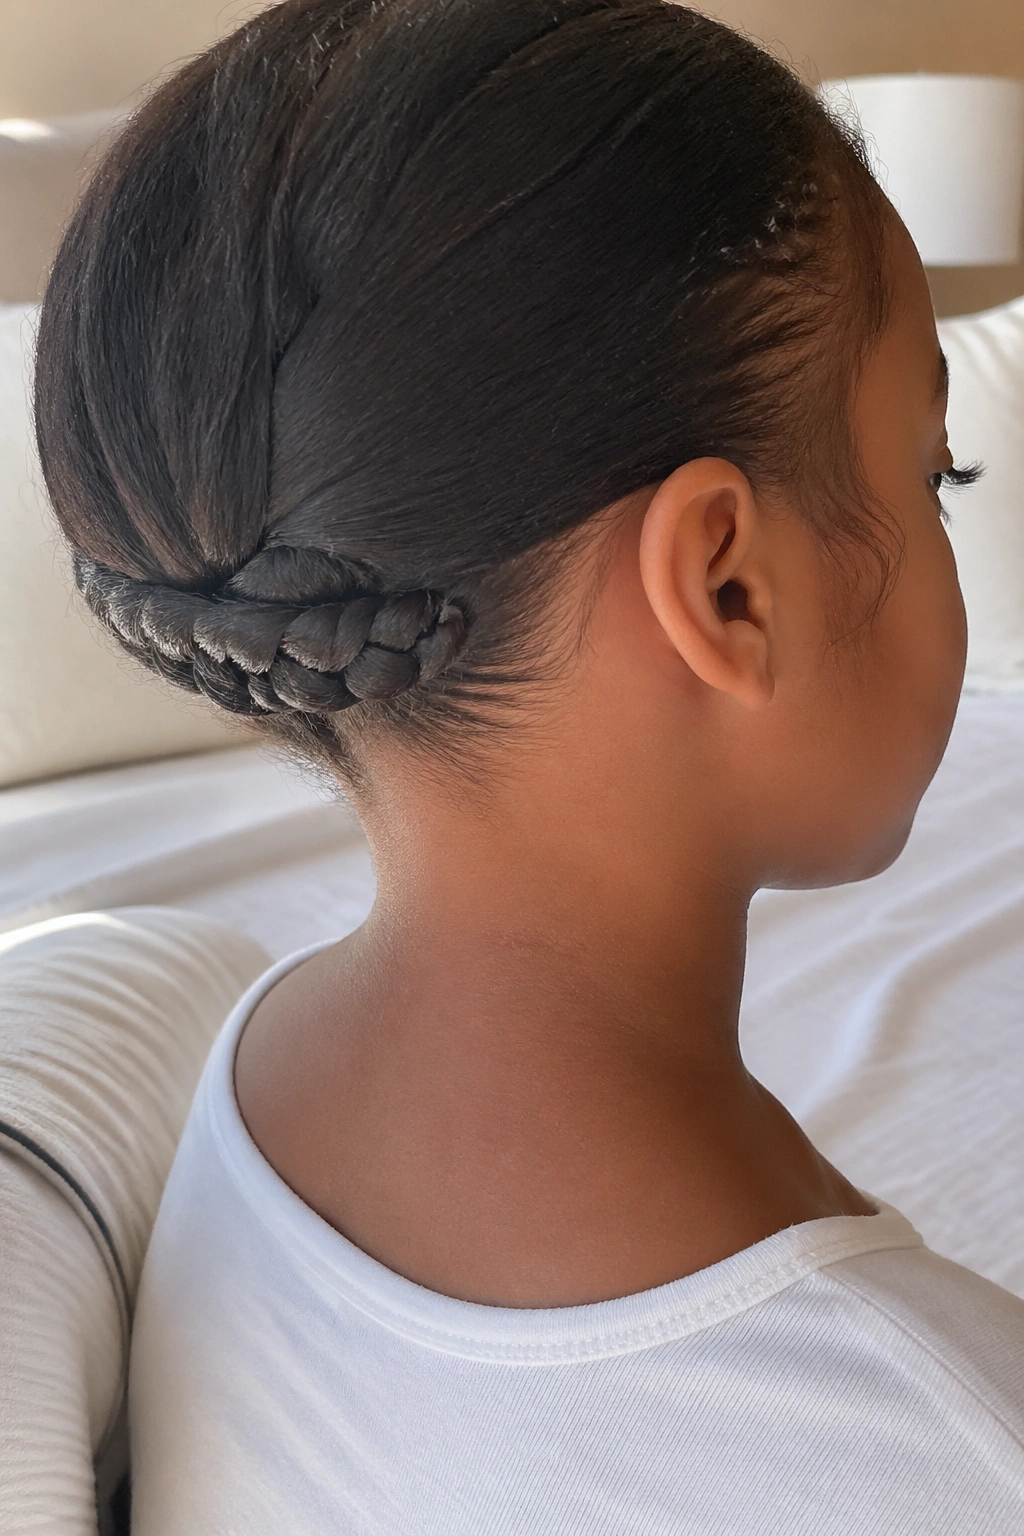
13. Tiny Braided Bun Wrap
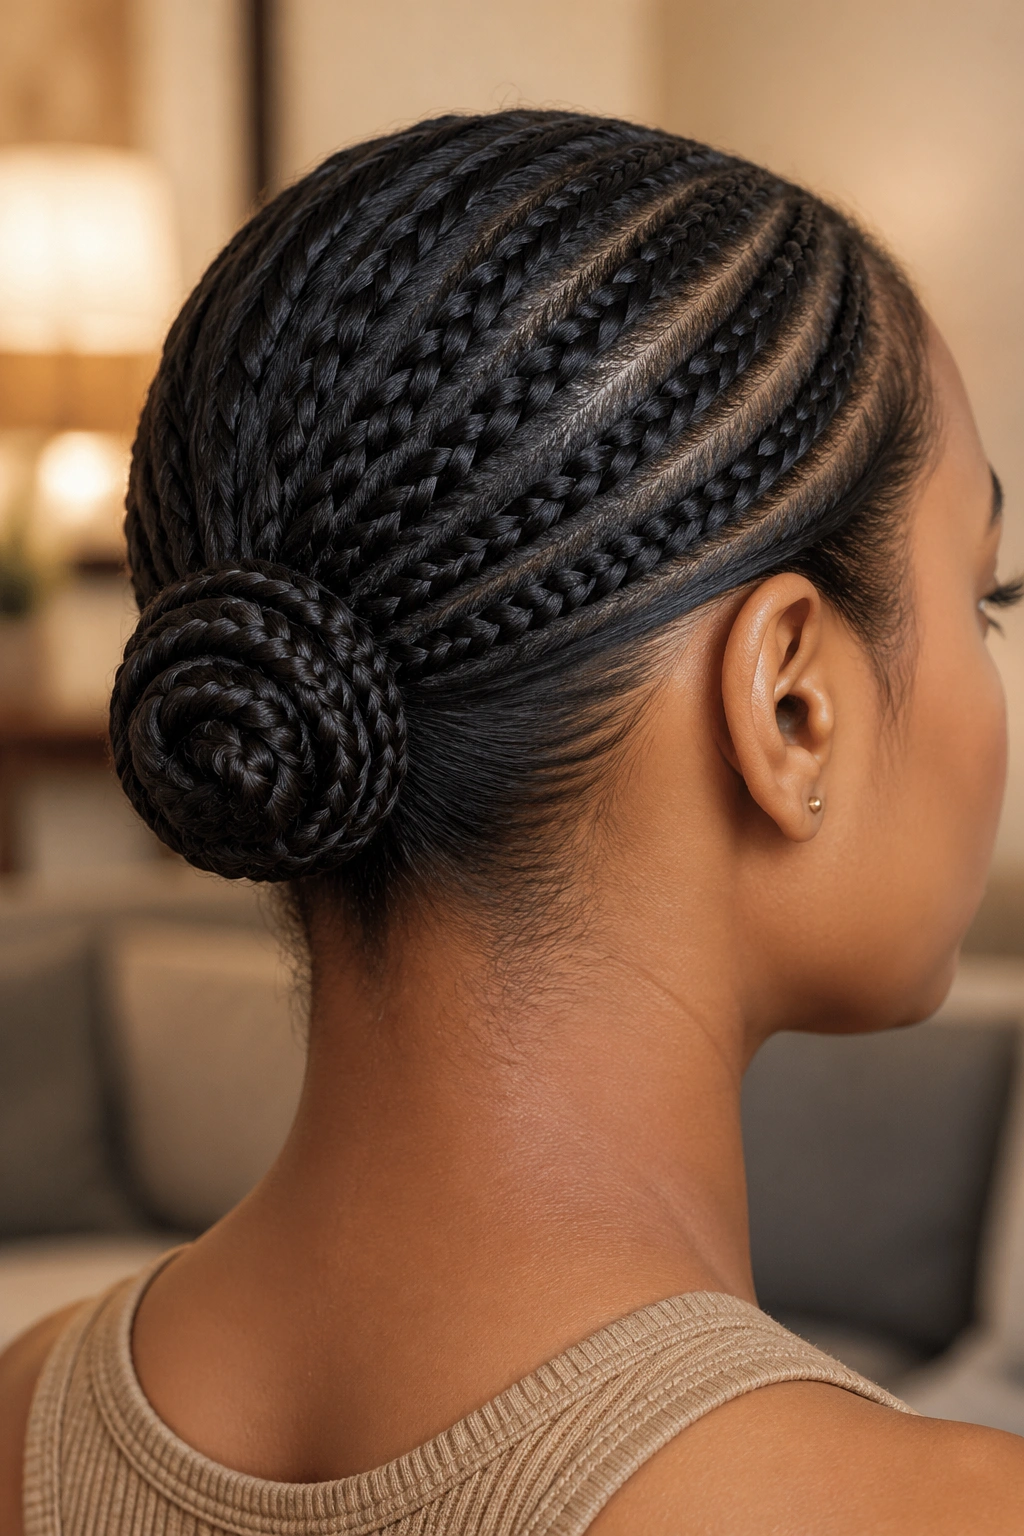
A braid wrapped into a bun is one of those styles that looks fancier than it feels. Start with a small braid at the nape or crown, then coil it into a tiny bun and pin it flat. The braid gives the bun extra grip, so the shape does not unravel the second the head hits a pillow.
What to pay attention to
The coil should be snug, not tight. If you wrap it too hard, the bun gets lumpy and uncomfortable. If you wrap it too loose, it falls apart. The sweet spot is somewhere in the middle, with enough give to flatten slightly during sleep.
- Use two crossed bobby pins for better hold.
- Keep the bun small enough to lie flat.
- Hide the ends underneath the coil.
- Add a silk scrunchie if you want less crease.
Best for: medium to long hair that needs to stay off the neck.
14. Milkmaid Mini Braids

This style looks fussy and is easier than it seems. Take two slim braids, one from each side, then cross them over the top of the head and pin them in place like a soft headband. Because the braids sit high and wrap around the head, they tend to stay put even when the hair underneath gets pressed flat.
It works well for hair that has some length at the sides but maybe not enough for a full crown braid. The visual effect is tidy, almost sweet, and it keeps the front of the hair off the face in a way that feels useful, not decorative for the sake of it.
I would not pull this one too tight. Leave a little slack around the temples so it does not feel severe. A few loose wisps are fine. They make the whole thing look less rigid.
15. Zigzag-Part Baby Braids
Why bother with a zigzag part? Because the part itself gives the braid a little more visual interest, and it helps disguise the flat spots that show up after sleep. Straight parts can look harsh after a nap. Zigzags soften that edge.
Use the tail of a comb to draw a zigzag from the front hairline toward the crown, then braid the sections that fall on either side. The braid does not need to be large. Even two narrow rows can look deliberate if the part has shape.
How to draw it well
Keep the comb shallow and the angles loose. If the zigzags are too sharp, the style starts to look overworked. A soft, uneven line usually looks better and lies flatter.
The best part is that it works on a surprising number of hair types. Straight hair gets structure. Wavy hair gets more grip. Curly hair gets a part that does not fight the pattern.
16. Three-Row Side Braid Panel
I’ve always liked this style on hair that needs a little more control at the front. Instead of one braid, you make three slim rows side by side along one temple or across one side of the crown. That creates a small panel of texture that stays put better than a single loose braid.
The rows do not have to be perfect. In fact, they look better when they are just a touch irregular, because the shape reads as handmade rather than rigid. For nap wear, the key is to keep the braids flat and close to the scalp so they do not press awkwardly under the head.
- Start the first row near the part.
- Leave each braid narrow, around ¼ inch to ½ inch.
- Secure each one with a tiny clear elastic.
- Pin the tails together if they start to poke out.
That’s enough. No drama.
17. Waterfall Accent Braid
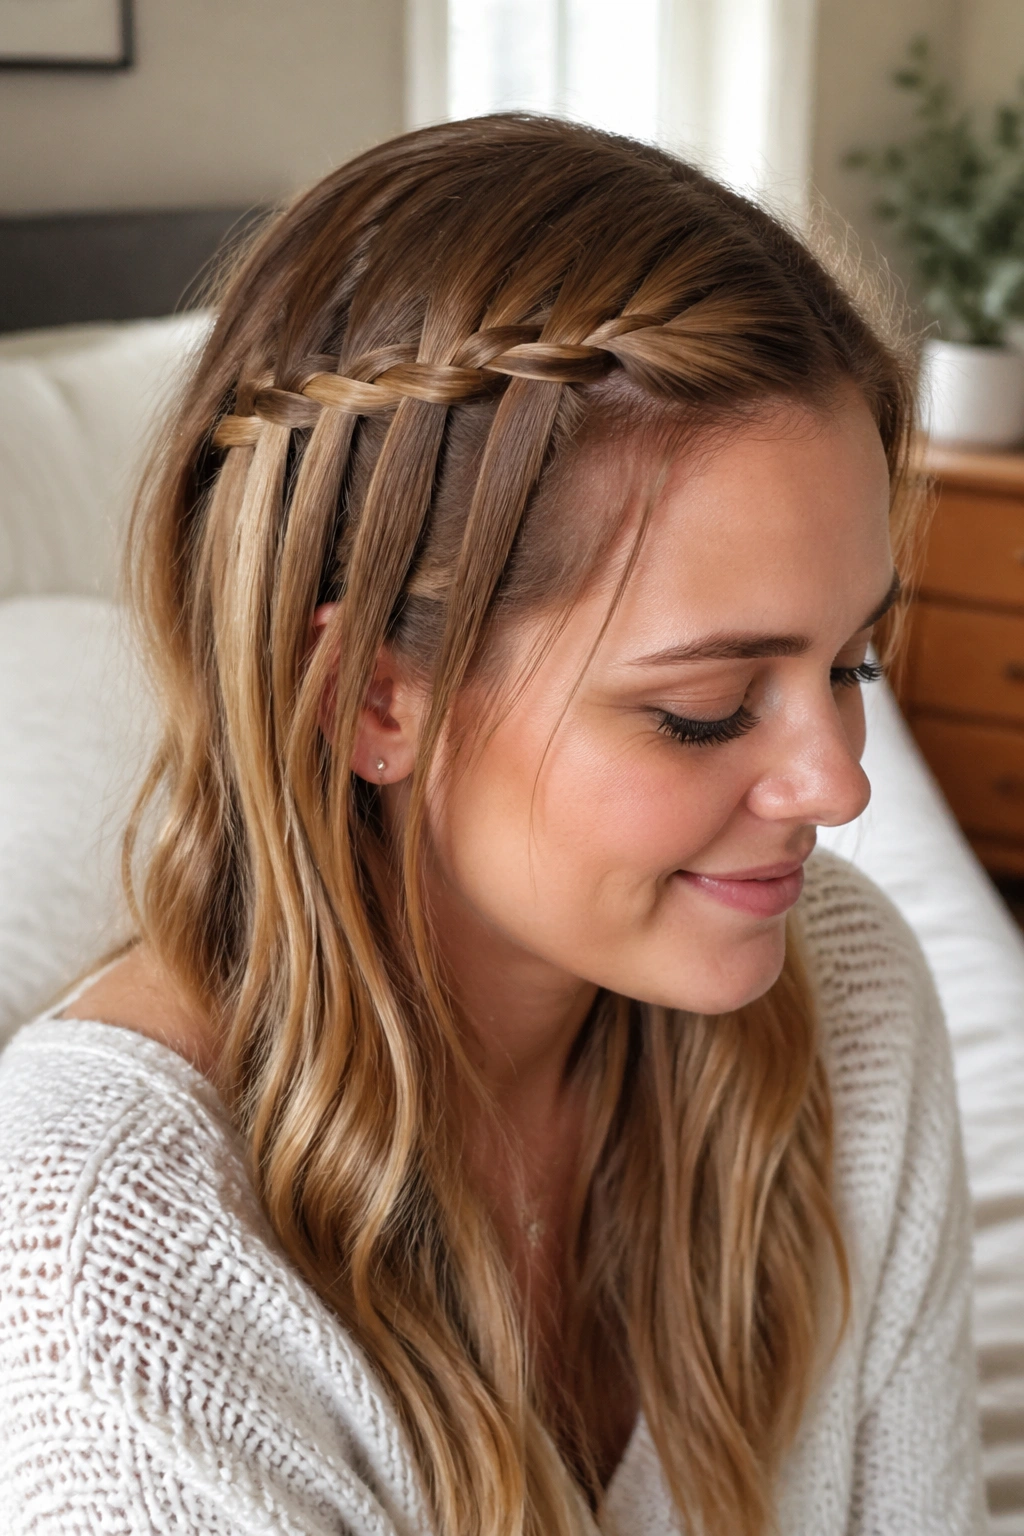
A waterfall braid is more decorative than most of the styles here, but a small version can still be sleep-friendly if you keep it tight enough at the anchor points. The braid drops sections as it moves, which gives you a pretty, broken line through the hair without making the whole head feel heavy.
I like it when the hair needs to look done but not formal. The loose sections can be left soft and brushed through after the nap, while the braid itself keeps the top from going flat all at once. If you pin the end under a layer, it stays more secure than if you leave it hanging.
This is not the strongest hold on very silky hair. A tiny bit of texture at the roots helps a lot. If the hair is already curly or wavy, the waterfall shape tends to sit nicely with less effort.
18. Underbraid Nape Tuck
This is one of the sneakiest nap-friendly styles around. The braid lives under the top layer of hair, at the nape, so it is hidden from view and less likely to catch on clothing or pillow seams. You braid a low section, then tuck the tail inward and pin it flat.
Compared with a visible side braid, this one feels calmer. There’s less movement, less swinging, and less chance of the braid getting pulled loose by accident. It is a smart choice for longer hair that needs to stay neat without looking overly styled.
If the hair is heavy, use two pins instead of one. If it is fine, a small elastic plus one pin is often enough. The trick is keeping the braid close to the base of the neck where the head can rest naturally.
19. Ribbon-Tied Mini Braids
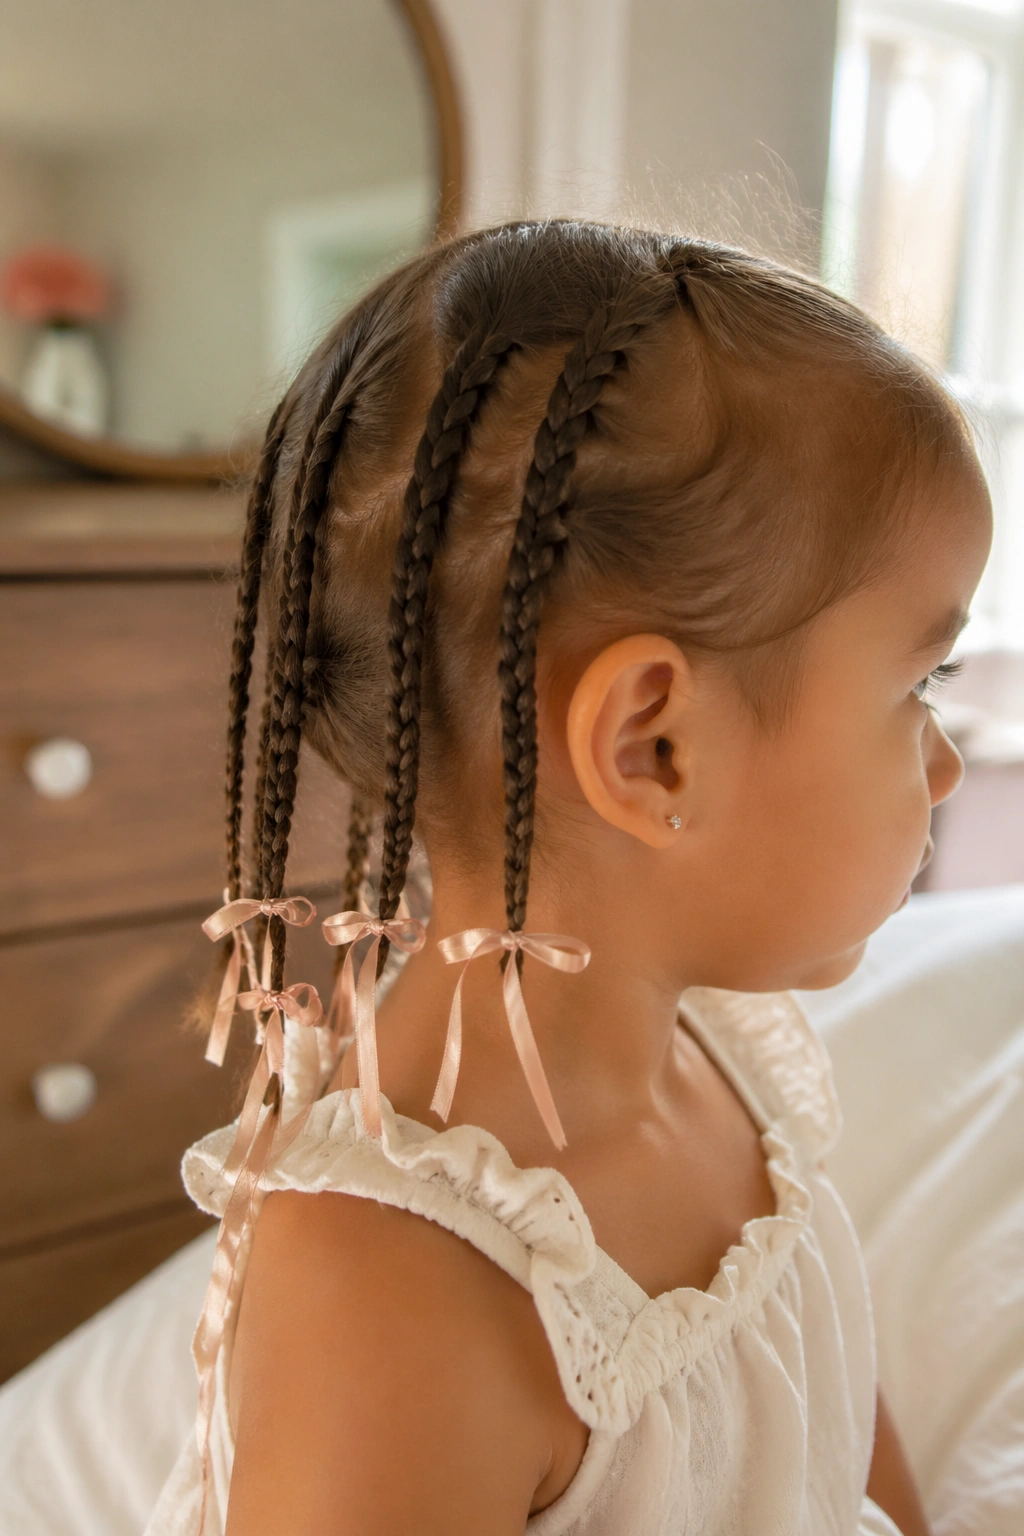
A ribbon tie sounds decorative, and it is, but it also solves a practical problem: some elastics leave dents or slide on finer hair. A narrow ribbon tied at the end of a baby braid can hold gently without digging into the strand.
A few useful details
- Choose satin or grosgrain ribbon about ¼ inch wide.
- Tie it snug enough to hold, but not so tight that it creases the hair.
- Leave the ends a little longer if you want a softer finish.
- Match the ribbon to the outfit or keep it neutral so it blends in.
My favorite part: ribbon ties make the braid feel lighter. That matters when the whole point is sleeping in it. A bulky elastic can press harder than you’d expect.
This works especially well on shorter braids that don’t need a heavy-duty hold. The ribbon adds charm without much weight.
20. Braided Bang Sweep

If bangs are the problem, this braid solves the problem directly. Sweep the fringe to one side, braid it back along the hairline, and pin it just above the ear or under a front layer. That keeps short pieces from collapsing into the eyes during a nap.
What I like here is the clean line. It draws the hair away from the face without pulling everything into a full updo. The style feels light, which is rare for something that does so much work.
This is a strong choice for shorter cuts, layered bobs, and anyone with fringe that splits in weird directions after resting. Keep the braid close to the scalp at the beginning, then let it loosen slightly as it moves back. That gives it a little softness while still holding the front in place.
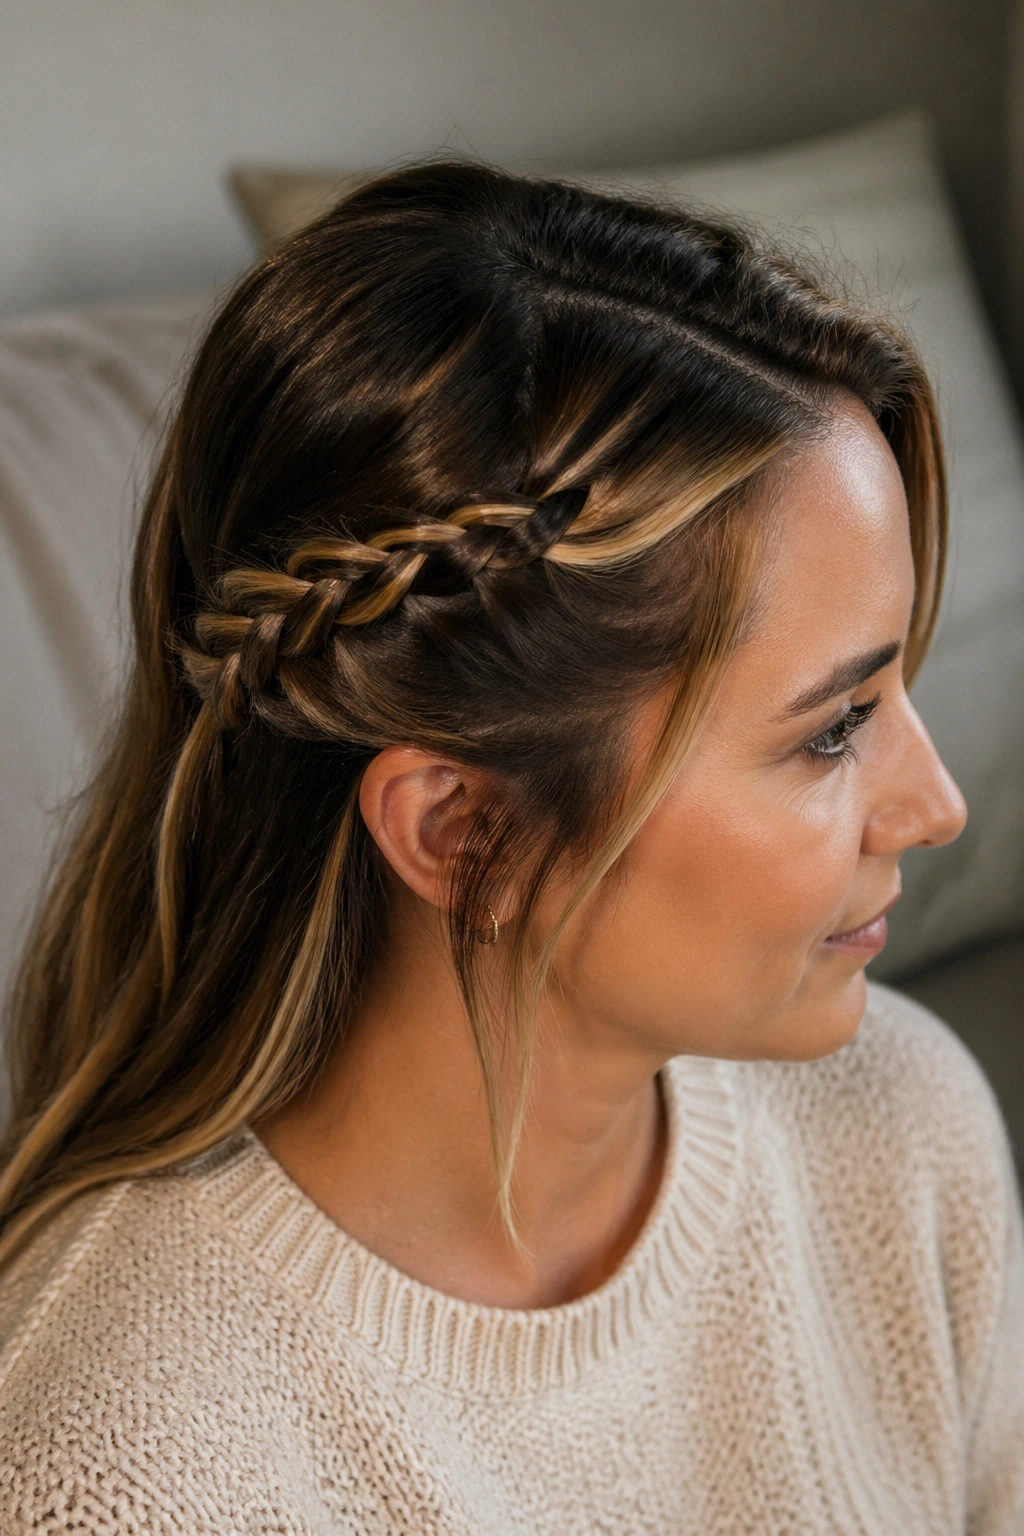
21. Crown Braid Halo
Why does a crown braid hold so well? Because the braid wraps around the head like a built-in frame. Once it is pinned, there isn’t much room for the style to shift. That makes it one of the best nap-ready options when the hair is long enough to go around.
Start with a braid behind one ear, curve it over the top, and pin it as you travel around the head. The shape can be neat or a little loose. Both work. What matters is that the braid sits flat and the pins are hidden under the overlapping sections.
How to keep it comfortable
Do not pull the braid too tight at the temples. A crown style that bites into the scalp will not feel good after twenty minutes on a pillow. A softer wrap is usually better and still looks polished.
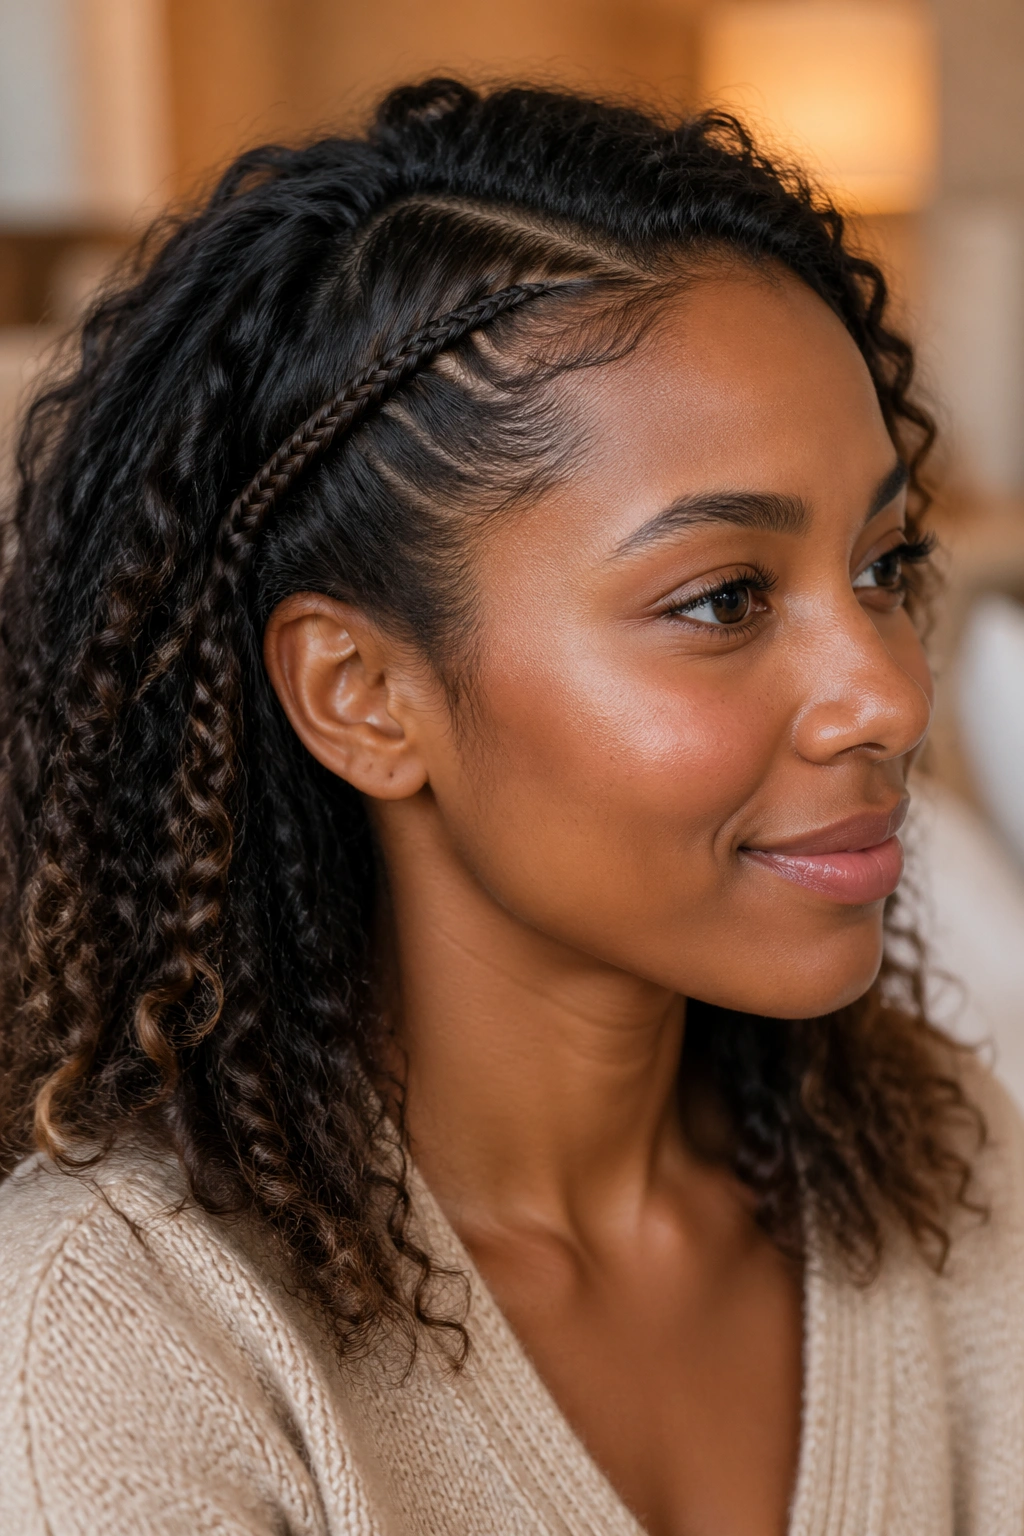
22. Cornrow-Inspired Mini Rows
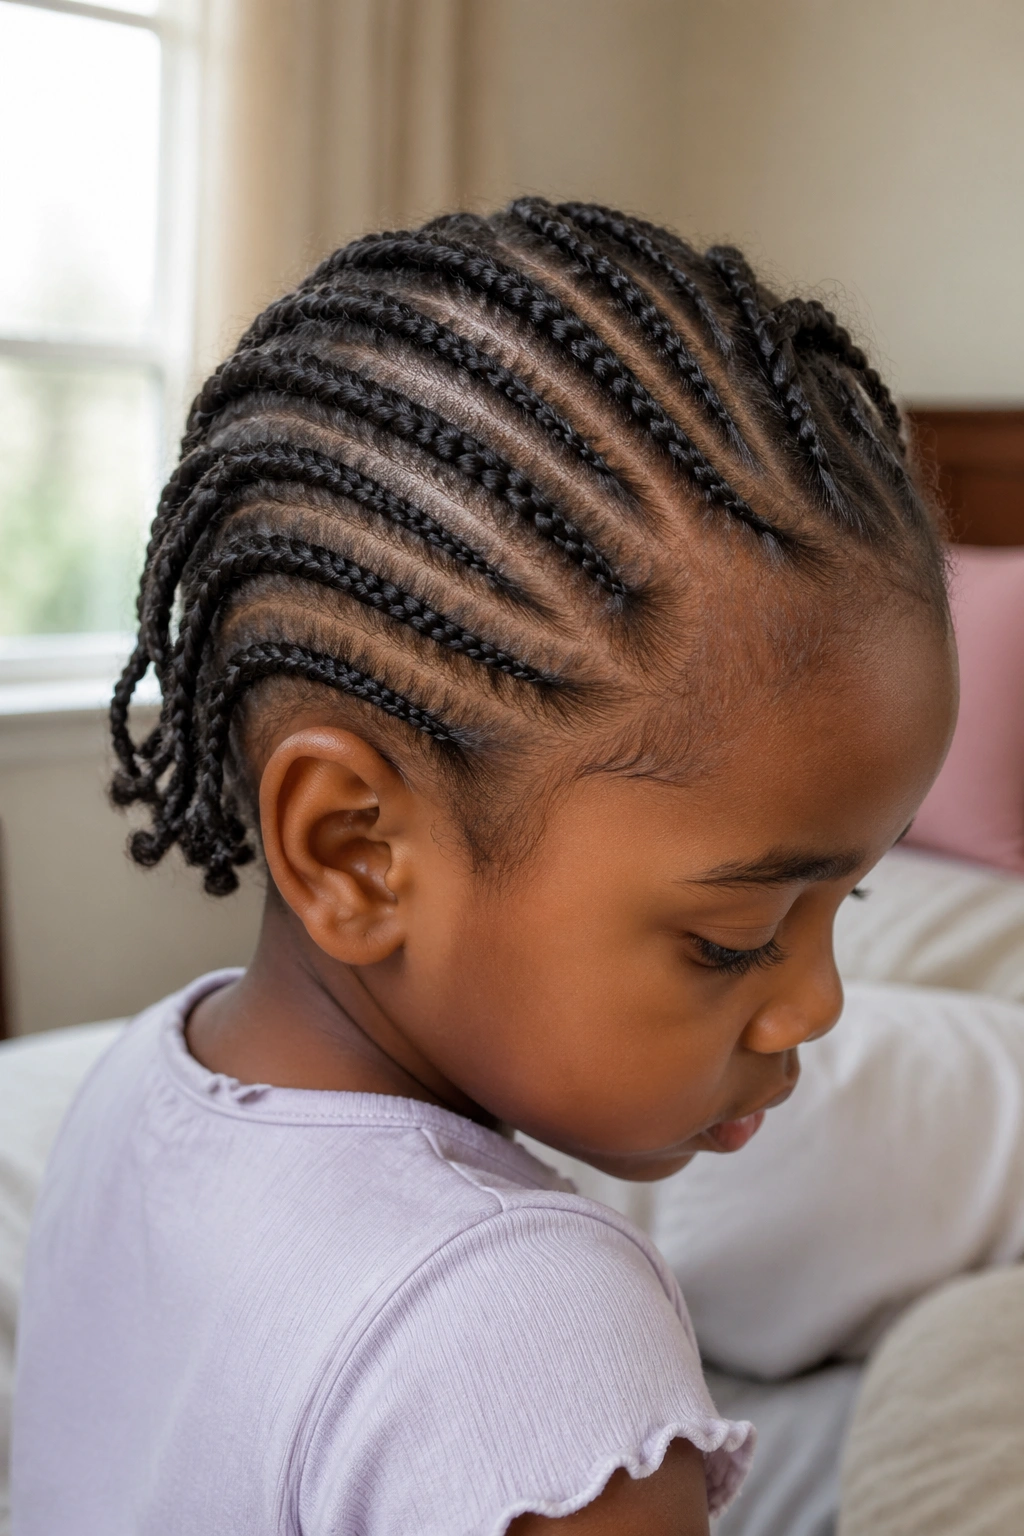
For coily or tightly textured hair, small rows can be one of the most dependable sleep styles around. The braid hugs the scalp, the hair stays organized, and the shape holds up better than a loose braid that can puff apart overnight.
This does not have to be intricate. Short, straight rows or gently curved rows across the crown can be enough. The goal is clean sectioning and gentle tension, not a tiny masterpiece. If the rows are too tight, they can feel sore. If they’re too loose, they will fuzz out. There’s a middle ground, and it’s worth finding.
- Use a rat-tail comb for clean sections.
- Keep the rows short if the hair is very dense.
- Finish each row with a small elastic or tucked end.
- Smooth the parts with a little leave-in, not heavy grease.
That balance tends to hold best.
23. Side Braid Into a Claw Clip
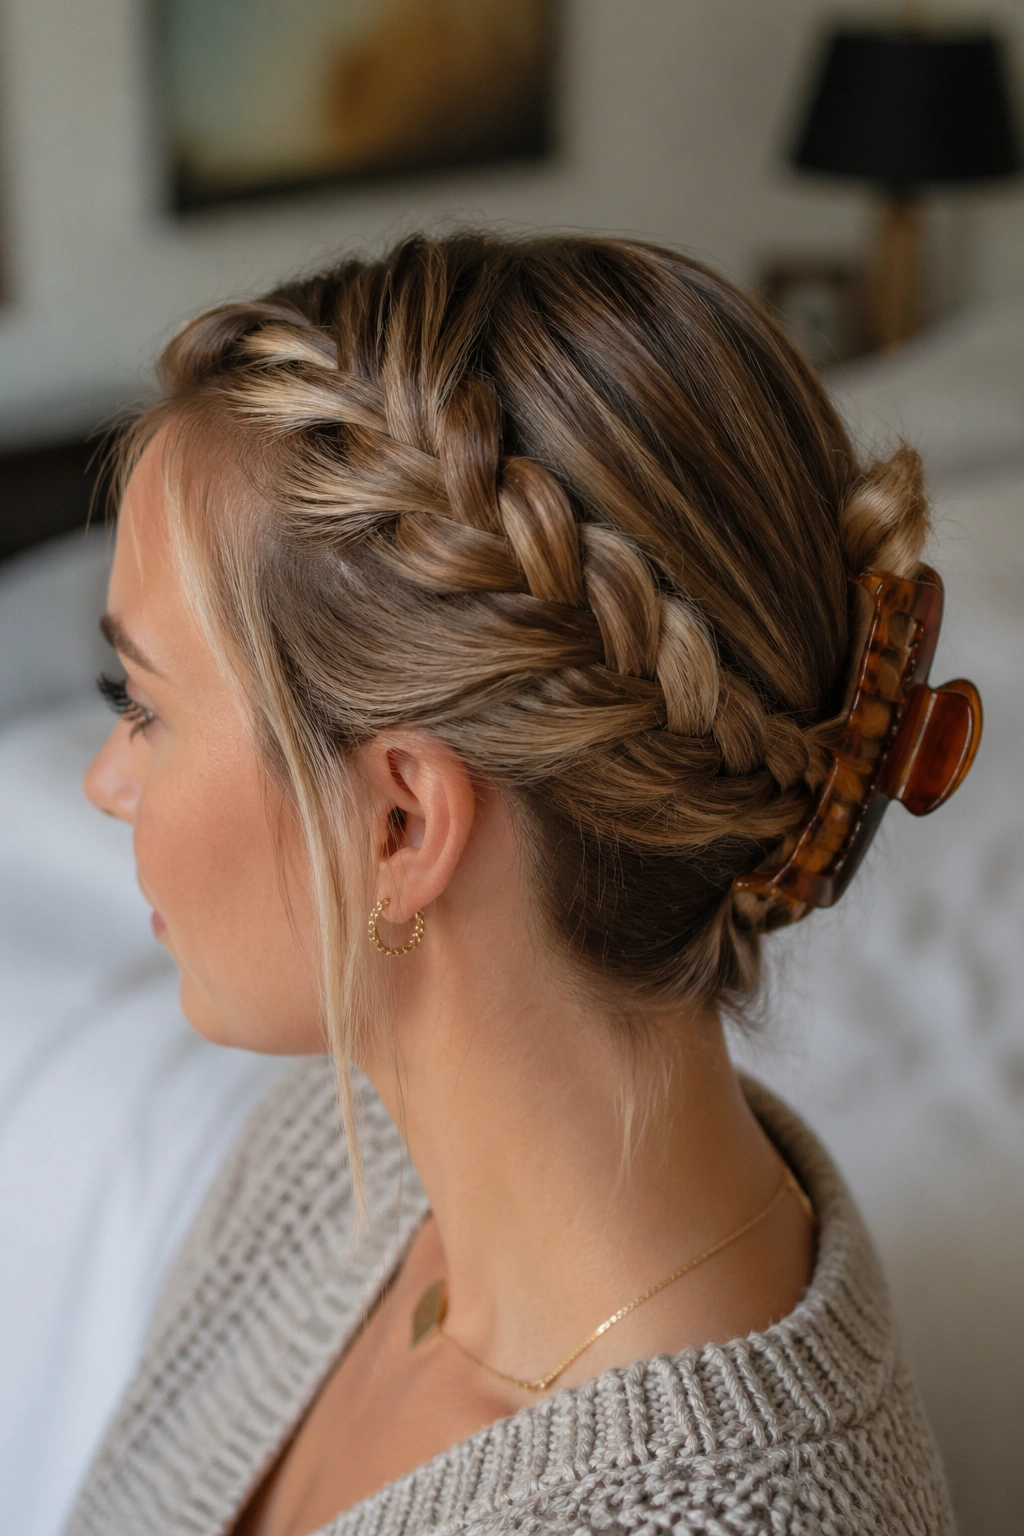
A side braid into a claw clip is useful when the hair is long enough for a braid but not long enough for a full wrap. Braid one side down toward the nape, then twist the rest of the hair loosely and clip it. The braid acts like an anchor, and the clip handles the bulk.
This style is easier than it sounds. The braid gives shape; the clip gives lift. Together they keep the hair from spreading everywhere during a nap. I especially like it for medium hair that tends to puff out at the ends. It keeps the whole shape compact.
Choose a medium claw clip with smooth edges. Cheap clips with sharp teeth snag too much, and that gets annoying fast. If the braid is thin, tuck it under the clip so it disappears into the rest of the style.
24. Braided Mohawk Strip
Unlike pigtails, a braided mohawk strip keeps the weight centered. That makes it a clever choice when the sides of the head need to stay flat and the top needs a little structure. The braid runs from the front hairline toward the nape through the middle section only.
It works especially well on thick hair, because the center strip can handle the density without spreading out. The sides stay smooth, the top stays controlled, and the style still feels practical for sleep. There’s also less chance of the braid rubbing against the face when someone turns onto one side.
This is one of the stronger-looking styles in the group, but it does not have to feel severe. Leave the section width moderate, not narrow, and you’ll get a clean line without a hard edge.
25. Double Braid and Tuck
Two braids can do more than one, especially if you tuck them instead of letting them hang. Braid two small sections from the front or sides, then bring them back and tuck the ends under a central layer or a low bun. The result is compact, soft, and much more nap-safe than long tails.
What makes it hold
- The first braid anchors the front.
- The second braid balances the other side.
- Tucking the ends removes the part most likely to fray on a pillow.
- A couple of pins stop the whole thing from drifting.
Best use: when you want the hair out of the face, but you do not want a bulky updo pressing into the back of the head.
This one is easy to adjust for different lengths. Shorter hair can stop at the ear. Longer hair can travel farther back before tucking.
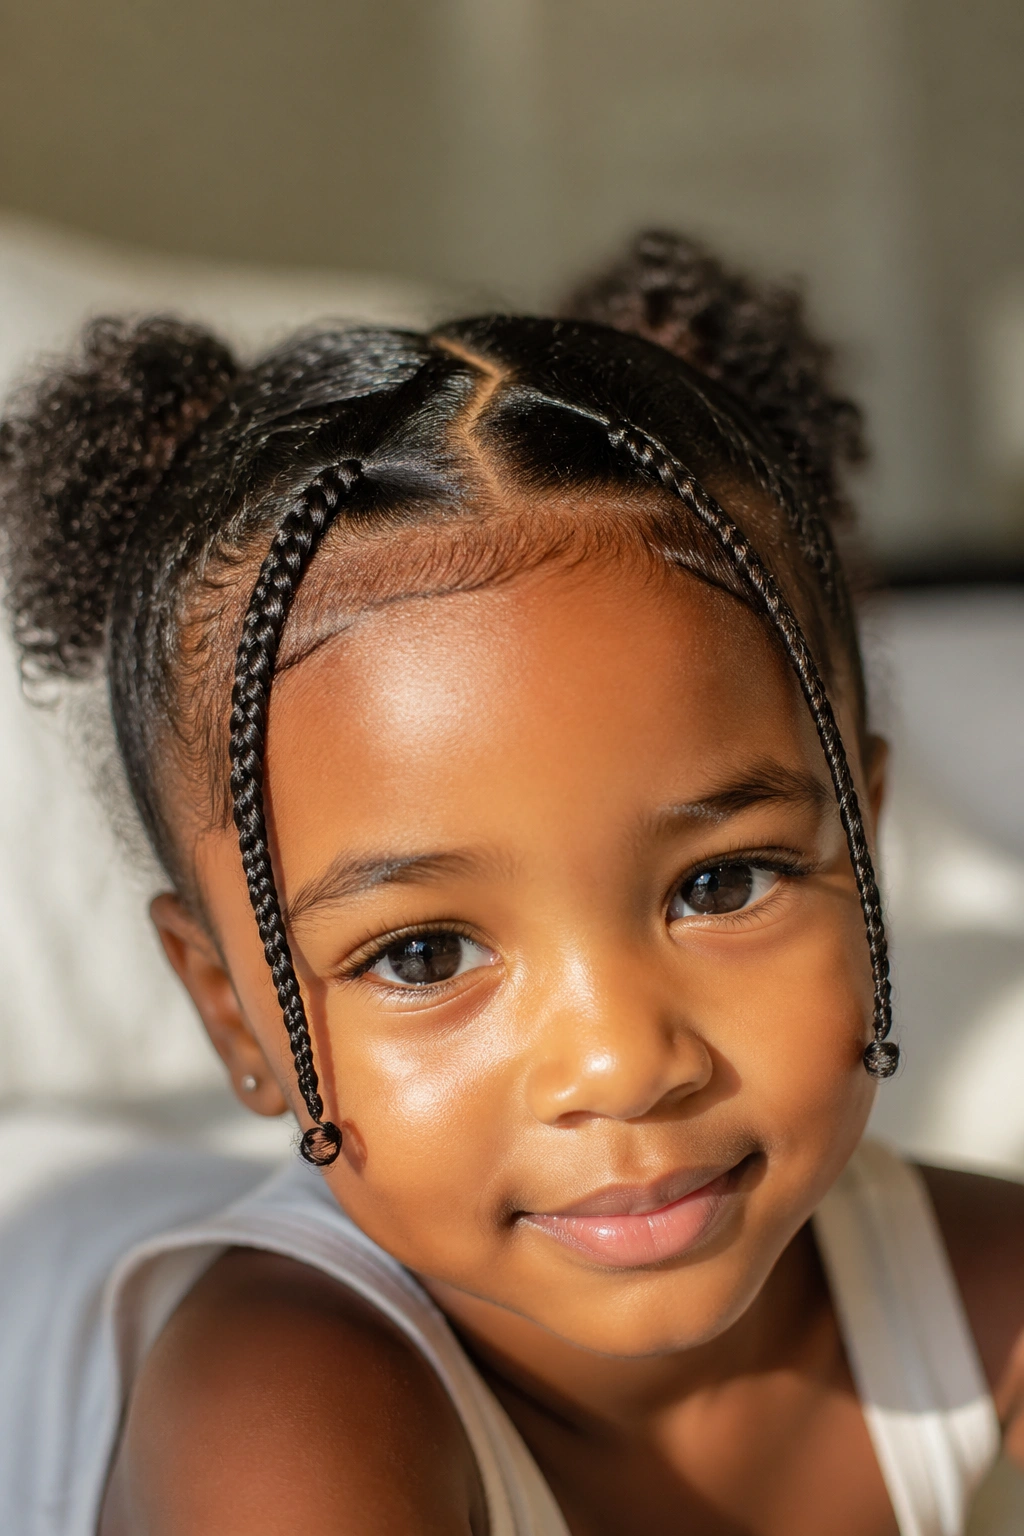
26. Braided Pigtail Buns
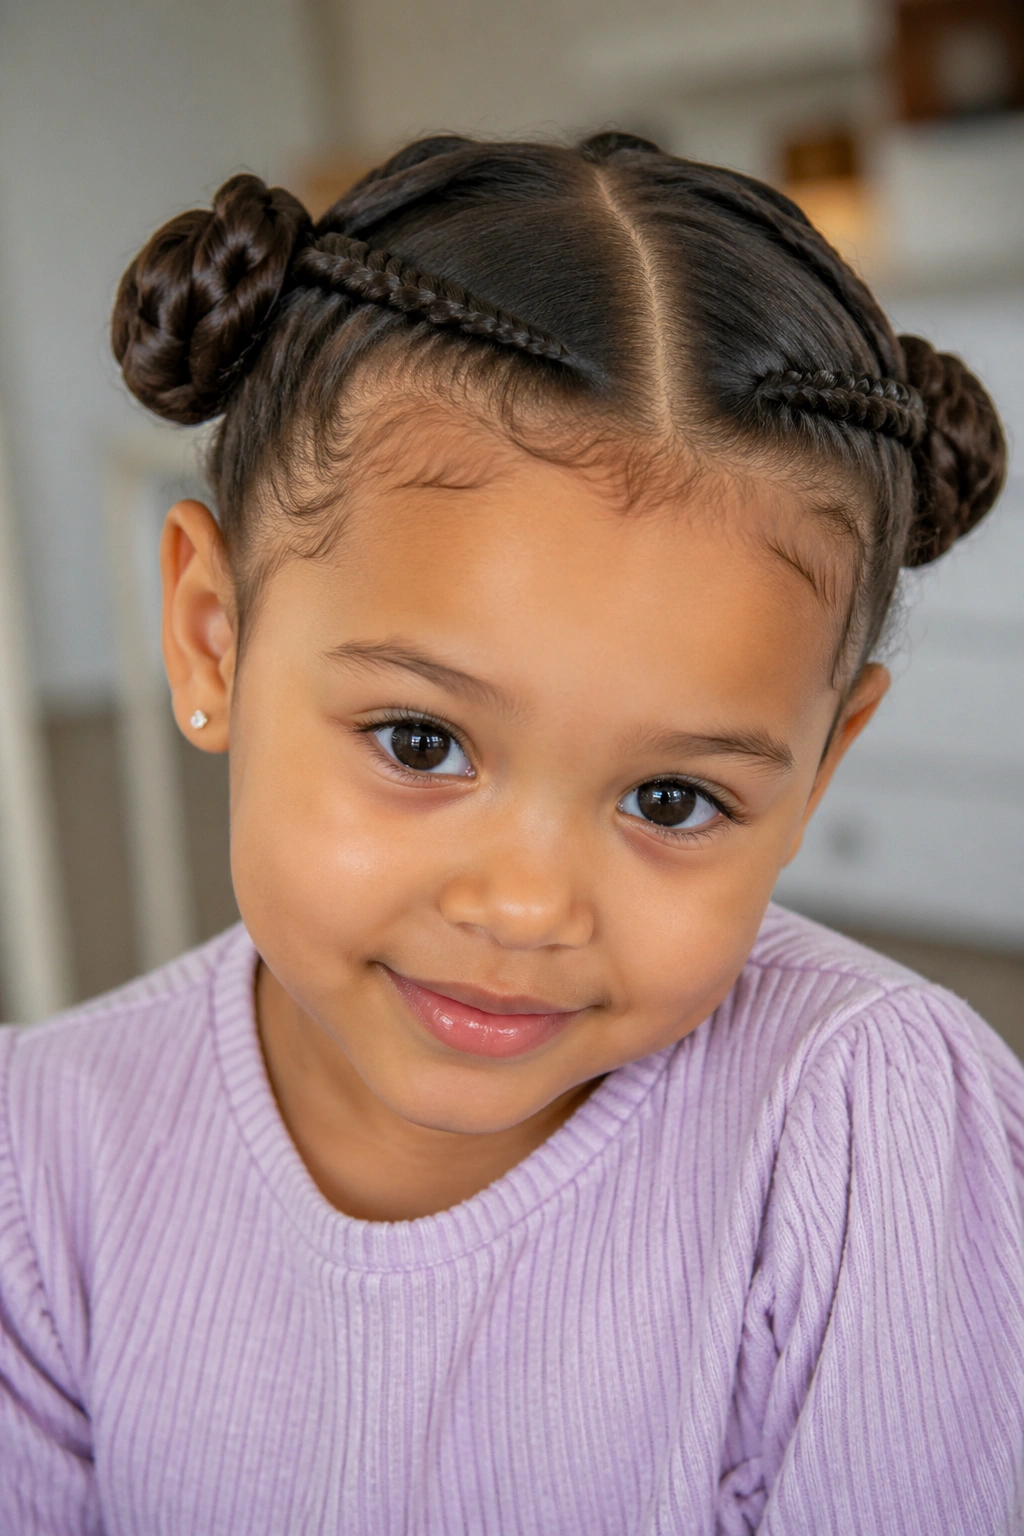
These are a little playful and a lot practical. Start with two low pigtail braids, then wrap each one into a tiny bun and pin it close to the head. The braid helps the bun stay together, which is why this version lasts longer than a plain twisted bun on slippery hair.
I like it for children, but it works on adults too. The main advantage is that the hair stays compact and off the neck. During a nap, that means less shifting, less pulling, and fewer loose ends to wake up tangled.
If the hair is very long, braid only halfway before coiling. That keeps the buns from getting too large. If the hair is fine, keep the buns smaller and flatter so they do not lean sideways.
27. Soft Single Braid Down the Back
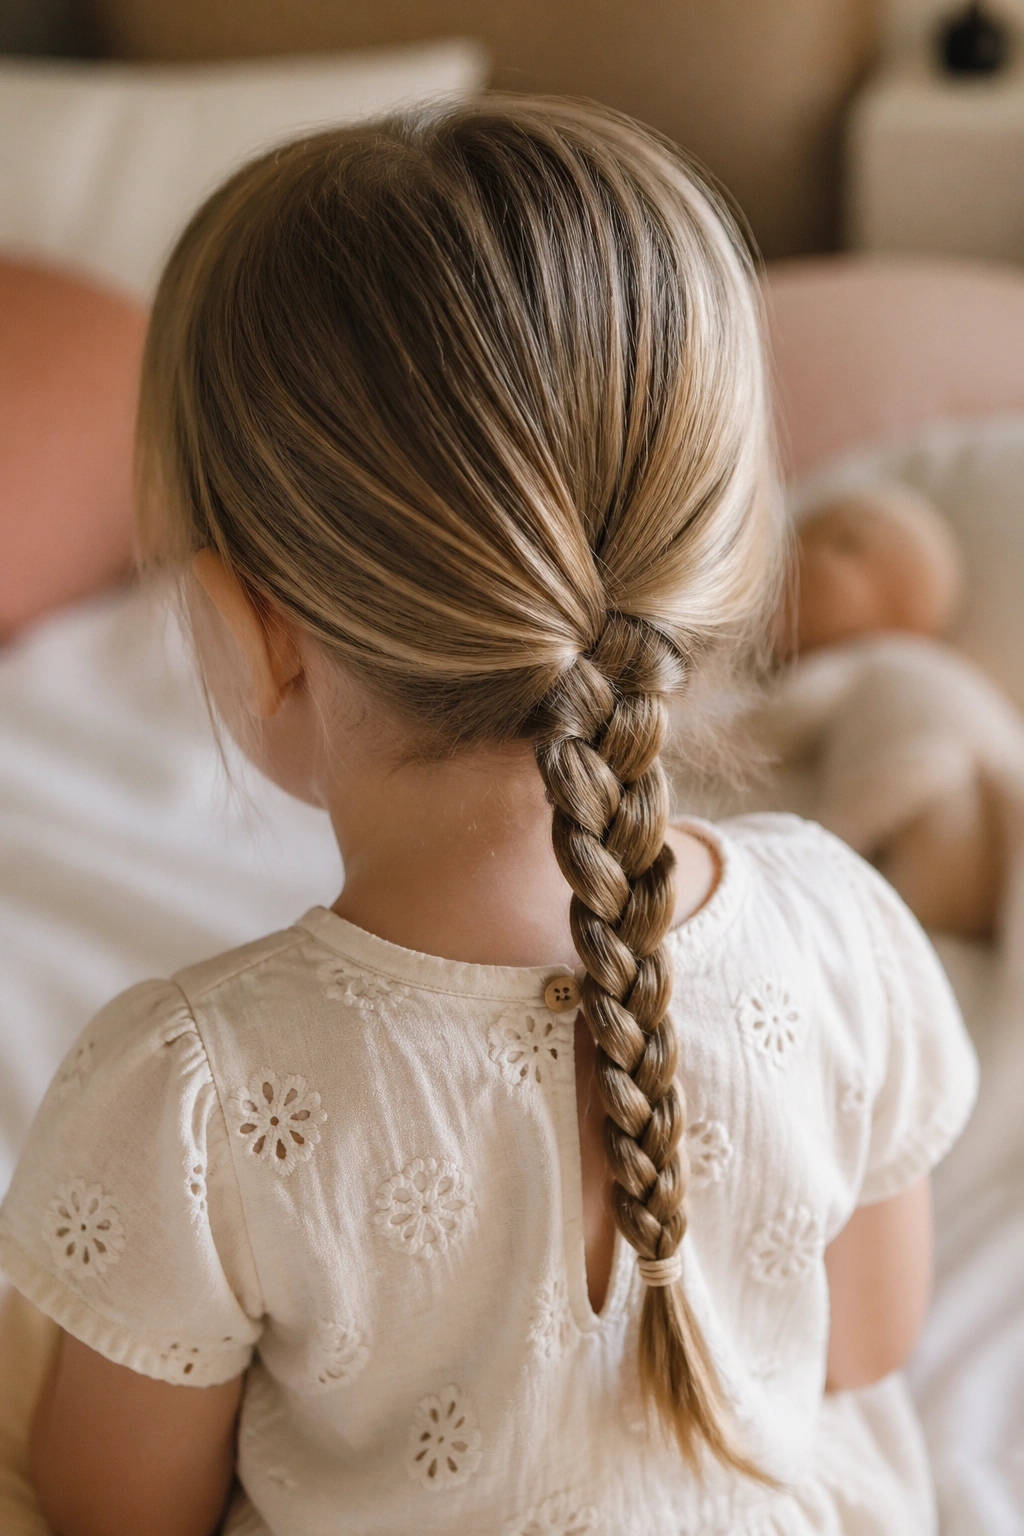
When all you want is one style that behaves, this is the one. A single soft braid down the back is the easiest nap-ready choice because it keeps the hair gathered in one place without stacking it up around the head. It lies flatter than a bun, tangles less than loose hair, and takes about two minutes once you’ve done it a few times.
The trick is not to overthink it. Start at the nape, braid evenly, and secure the end with a small elastic. If the hair is layered or very fine, a little grip spray at the roots helps. If it is curly, braid it while it’s dry so the texture stays intact instead of frizzing into a cloud while it sleeps.
For the softest result, leave the braid a touch loose. Tight braids can leave the hair looking striped and stiff after a nap. A gentler braid still holds, and it’s kinder to the scalp. That’s the version I trust when I want the hair to wake up looking calm, not combed into submission.