Bubble braids are one of those bridal styles that look fussy on a screen and behave far better in real life.
For bubble braids for garden wedding brides, that matters. A ceremony on grass, stone, or gravel asks a lot from hair: a little wind, a little heat, a hug from every aunt in the family, and sometimes a veil that wants to snag on everything except your actual dress. A bubble braid handles that better than a loose curl cascade, because the style is built in sections and each section can be pinned, puffed, or tightened until it holds its shape.
What I like most is the mix of softness and structure. The braid reads romantic, but the elastics keep it from collapsing halfway through dinner. You can make it sleek, airy, floral, ribboned, or a little undone without losing the shape.
The trick is matching the bubble size to your dress and your hair texture. Tiny bubbles near the crown feel refined; bigger, fuller bubbles down the back feel dreamy and a touch more bohemian. The styles below cover both, because a garden wedding can mean anything from a vine-covered backyard to a polished estate lawn.
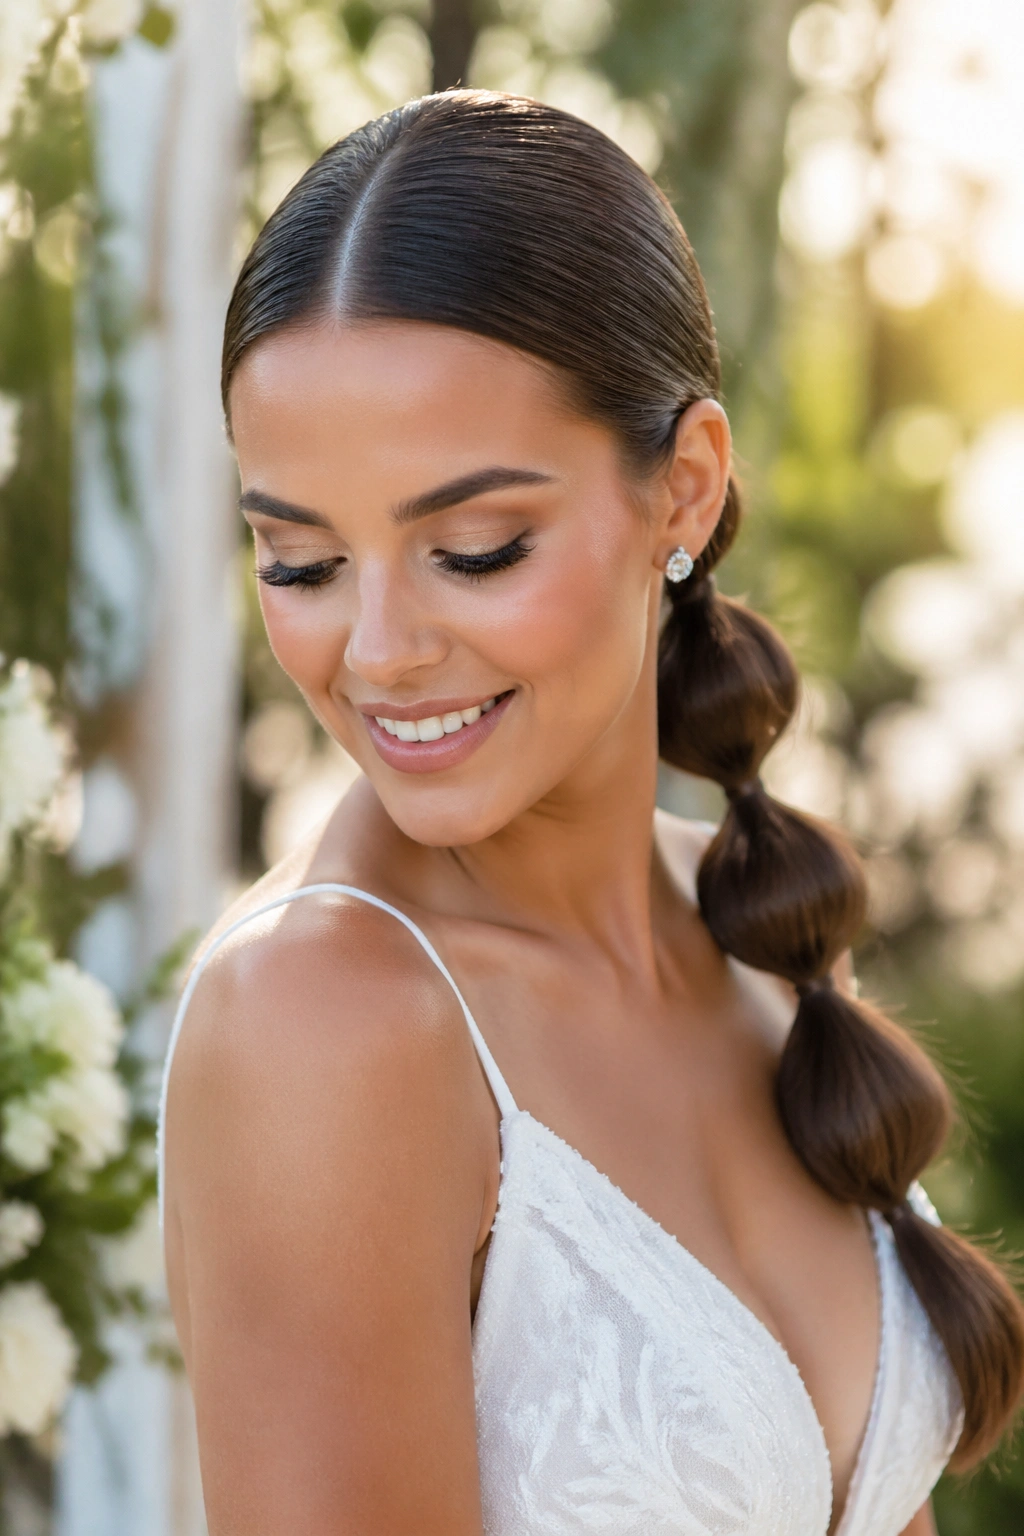
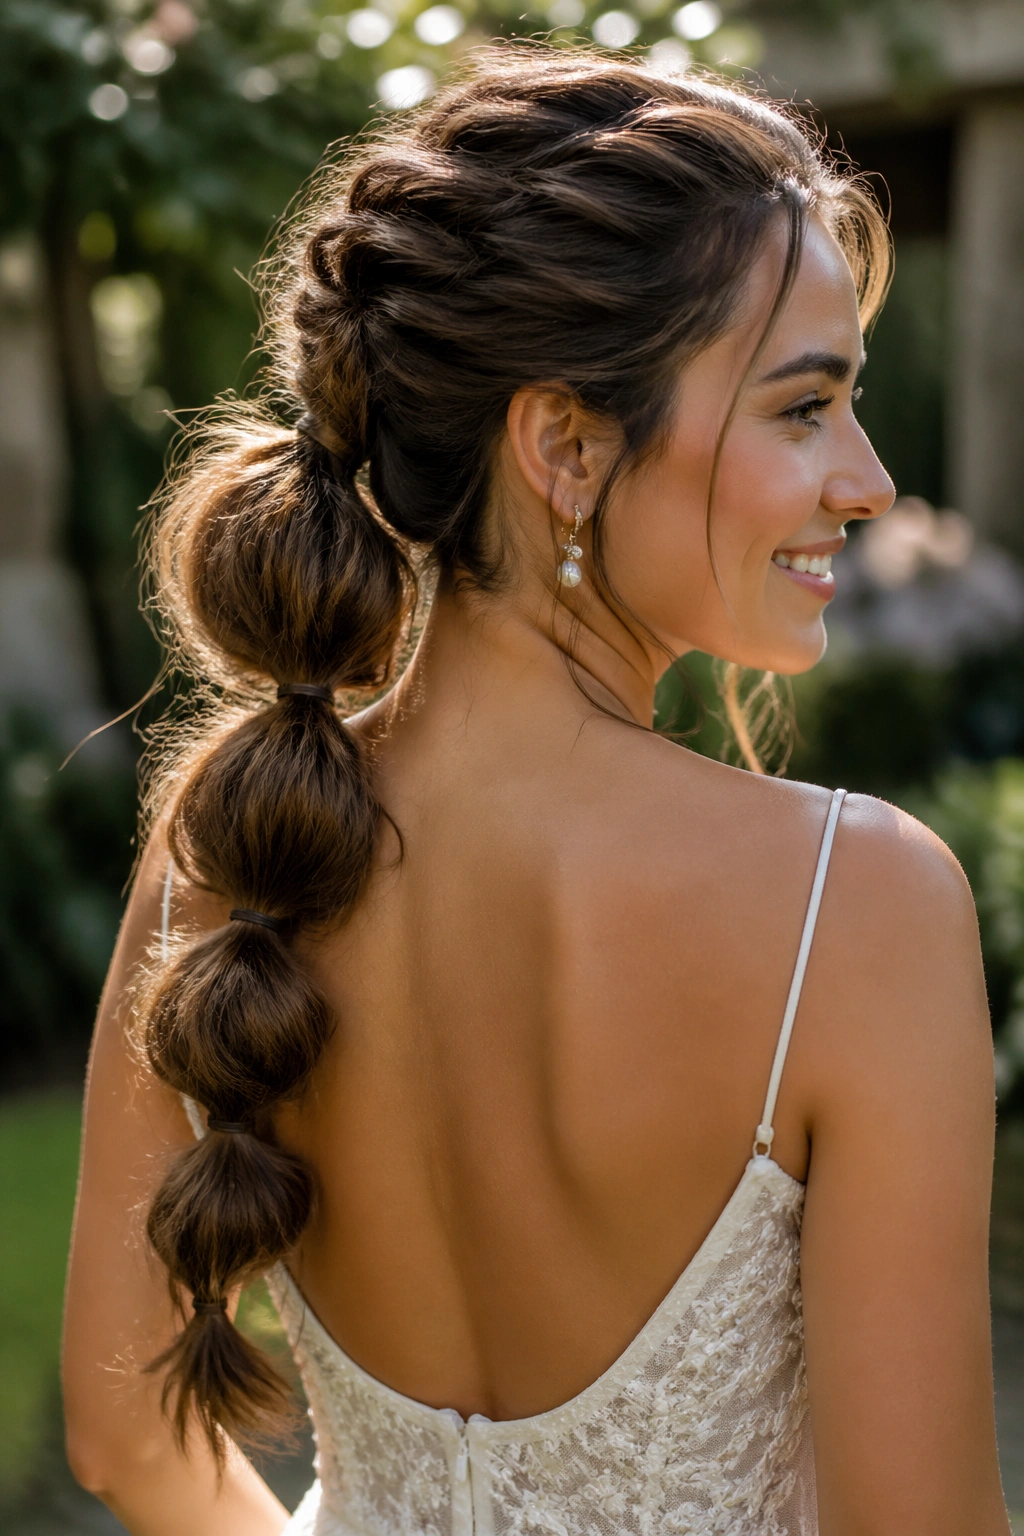
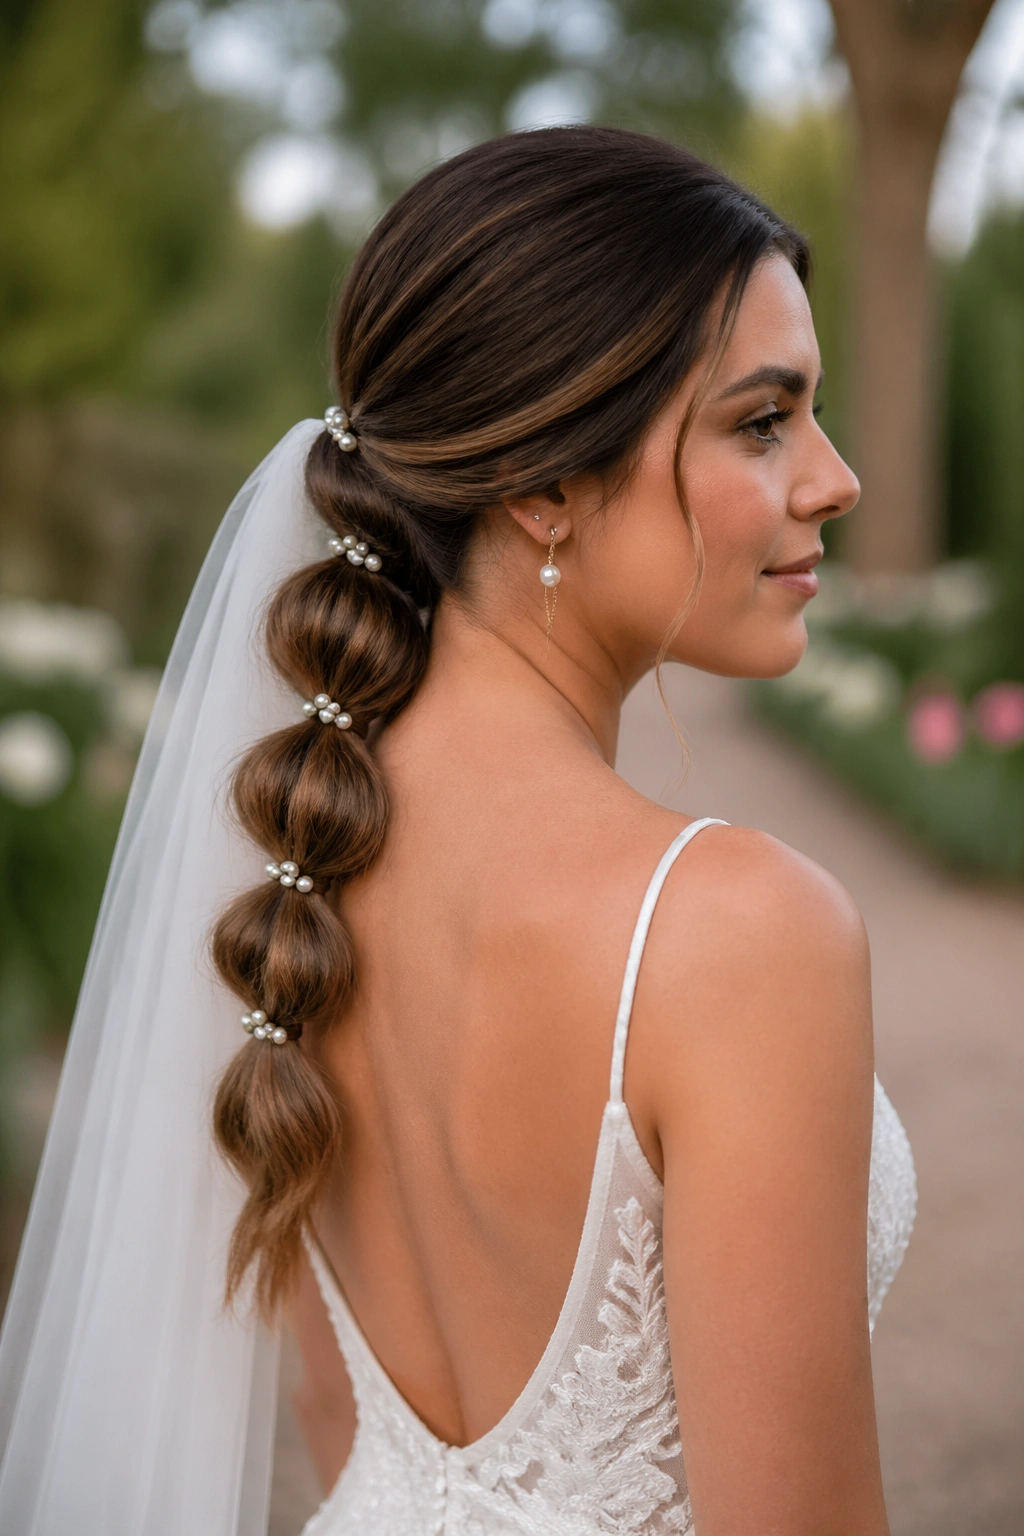
1. The Low Bubble Ponytail With Pearl Pins
This is the bubble braid I’d point a nervous bride toward first. It sits low, it stays put, and it doesn’t fight with a veil, a necklace, or a dress that already has a lot going on at the top.
Why It Sits So Well With a Veil
A low ponytail keeps the whole shape anchored under the occipital bone, which is the sweet spot for comfort. The hair doesn’t swing around your shoulders every time you turn your head, and that makes it easier to wear from the ceremony to the last slice of cake.
Pearl pins work here because they break up the line of each elastic without looking flashy. A few small pins tucked near the base and one or two scattered through the lower bubbles are enough. More than that starts to crowd the braid.
- Works well on medium to long hair.
- Looks clean with fingertip-length veils and chapel-length veils.
- Keep each bubble about 1.5 to 2 inches apart.
- Use matte pearls if the dress fabric has a soft finish.
Tiny tip: pull each bubble out just enough to round it. You want shape, not bulk.
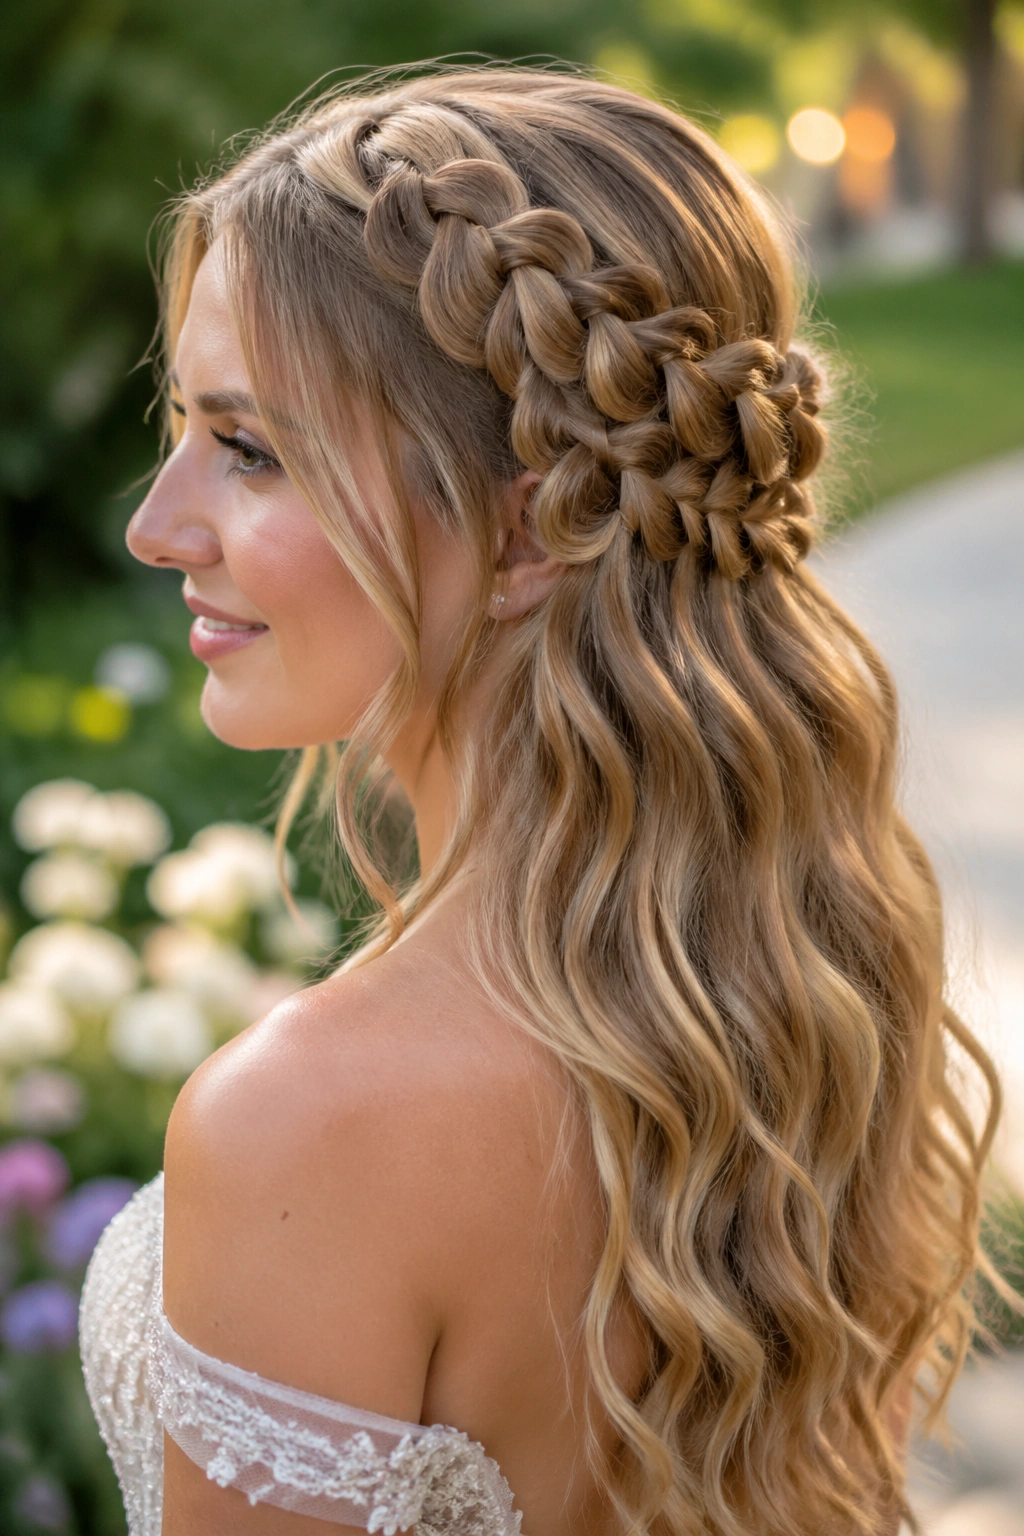
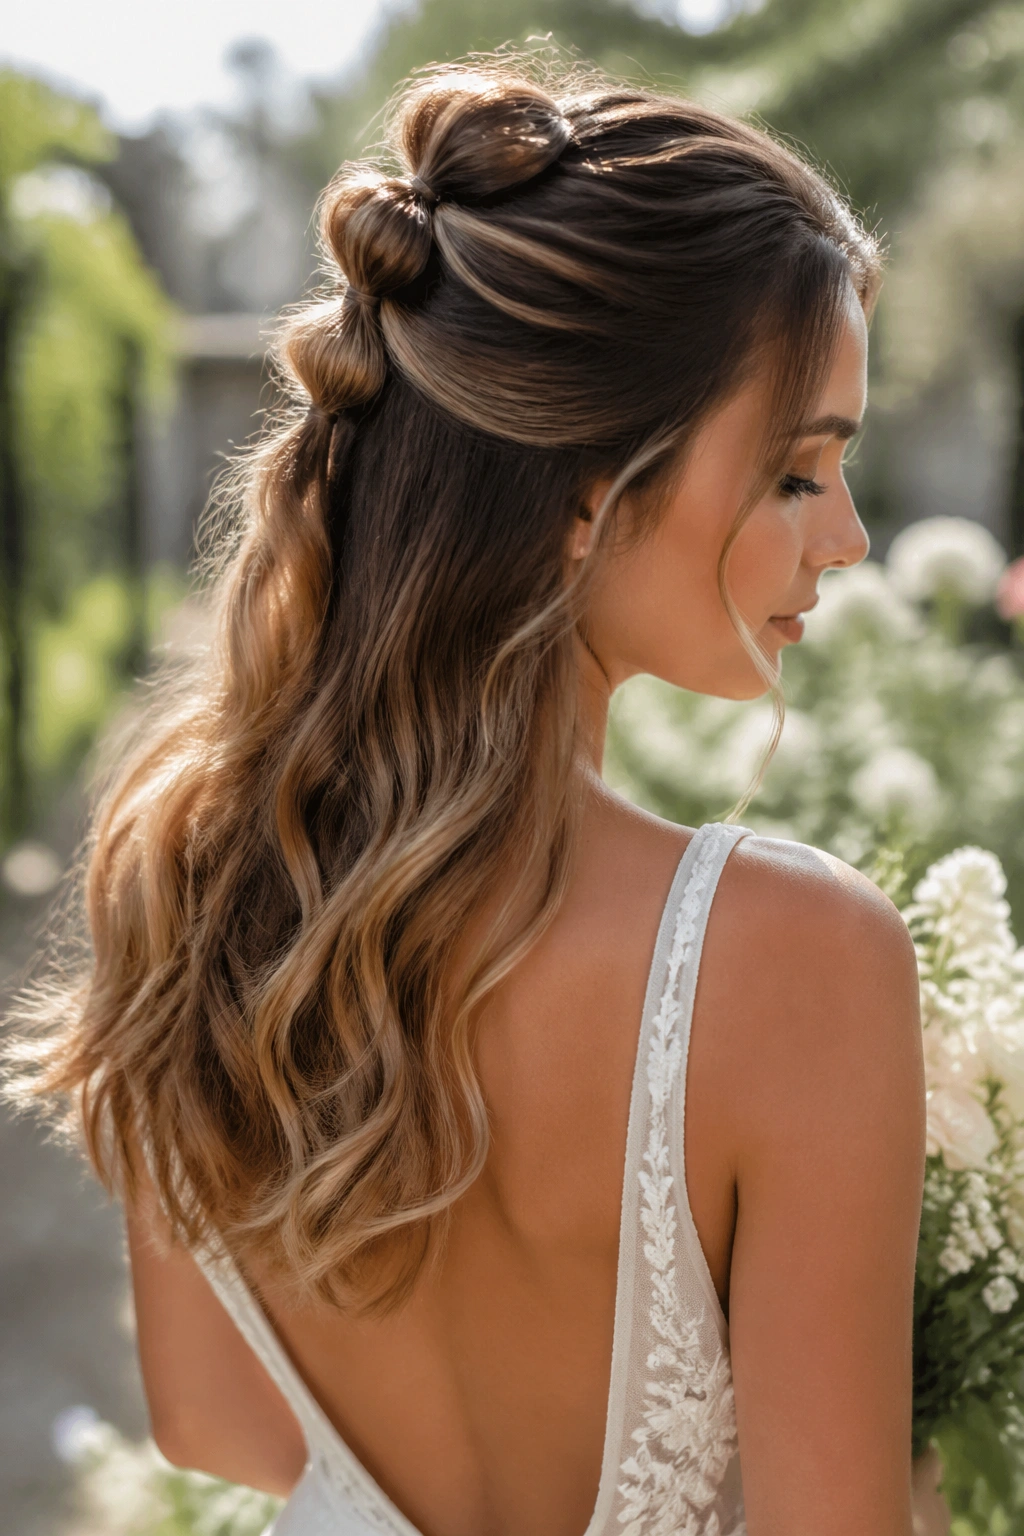
2. Half-Up Bubble Waves That Leave the Ends Free
This style says you want romance, but you do not want your hair in your face all day. It’s the easiest way to keep the front tidy while letting the rest of your hair move a little when you walk.
The top section is gathered into two or three small bubbles at the crown, then the remaining hair falls in waves. I like this for brides wearing open necklines, because it shows off the collarbone and keeps the back from looking too heavy.
The key is restraint. If the crown gets too tight, the whole thing starts looking formal in the wrong way. Loose waves underneath soften the shape, and they also make the bubble sections look fuller than they are.
A useful rule: curl the ends first, then make the bubbles. If you build the braid before you shape the waves, the whole style tends to flatten.
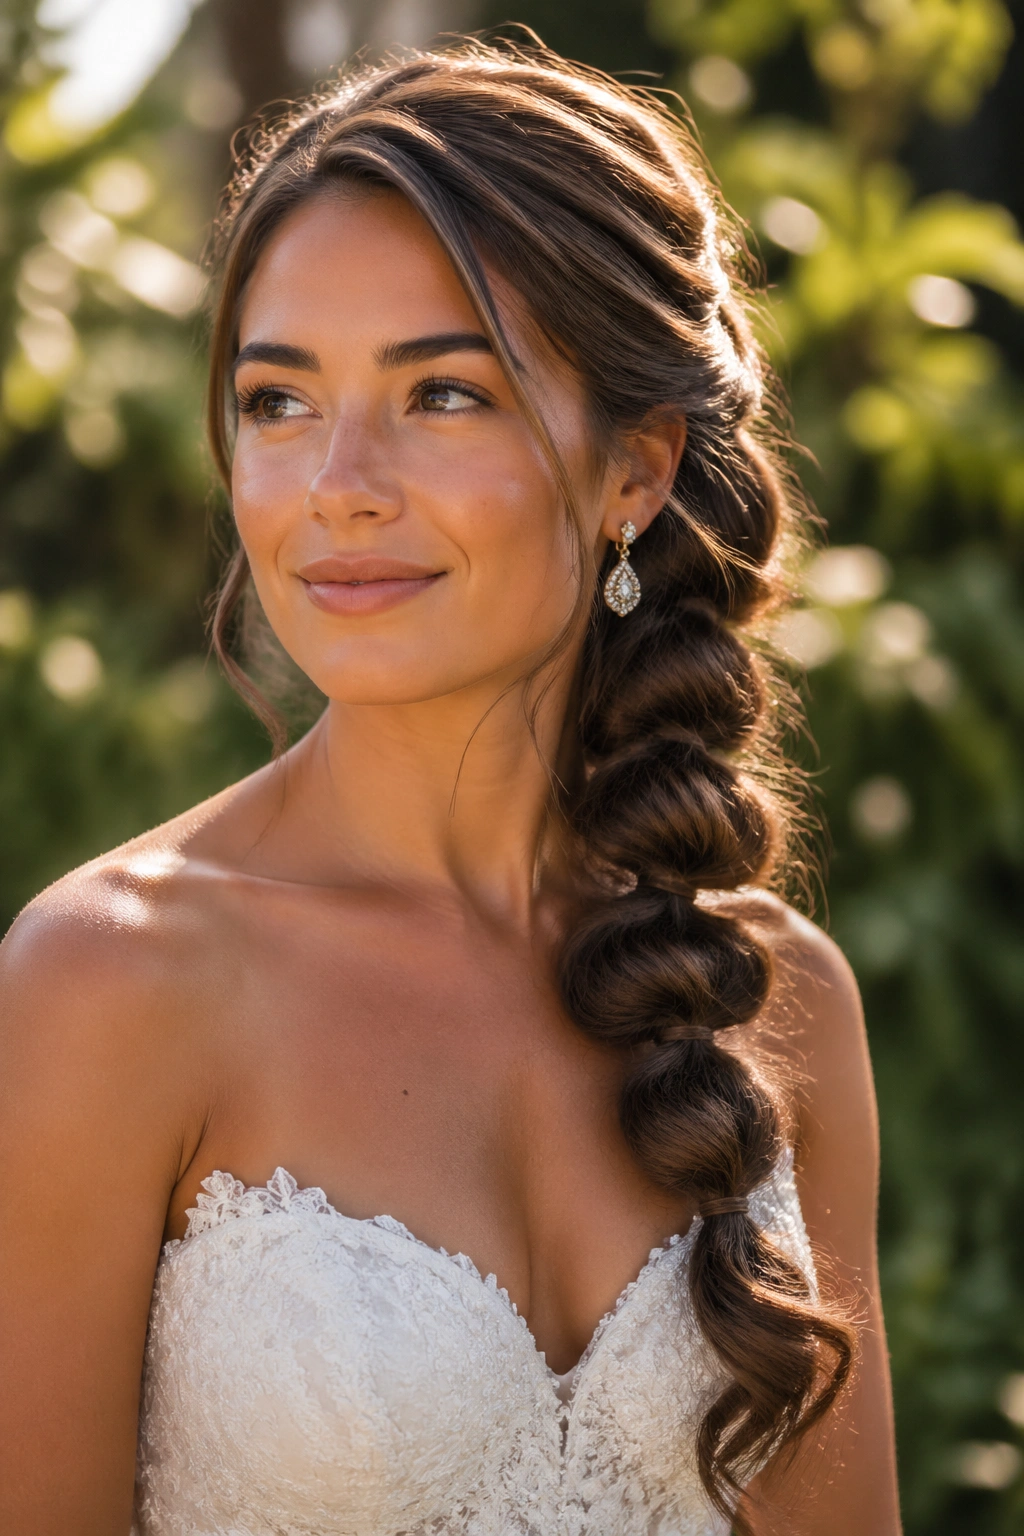
3. Side-Swept Bubbles Over One Shoulder
Want something that feels a little old-world without turning stiff? A side-swept bubble braid gives you that with almost no fuss.
The whole braid starts off-center and drops over one shoulder, which lets one side of the dress and one side of the earrings get their moment. It’s a nice match for asymmetrical necklines, but it also works with a simple strapless gown because the hair becomes the detail.
How to Wear It With Earrings
Choose one strong earring or a pair that moves a little. A side braid and chunky chandelier earrings can fight each other if both are doing too much. Smaller drops, pearls, or slim gold shapes tend to look cleaner.
The braid itself can be gently tugged wider at the sides, especially near the shoulder, so it doesn’t look like a tidy school photo. That tiny bit of looseness matters. So does the direction of the curl at the ends — aim them toward the front, not straight down.
If you want the style to feel more bridal, wrap a thin strand of hair around the first elastic. It hides the rubber band and makes the whole thing look finished.
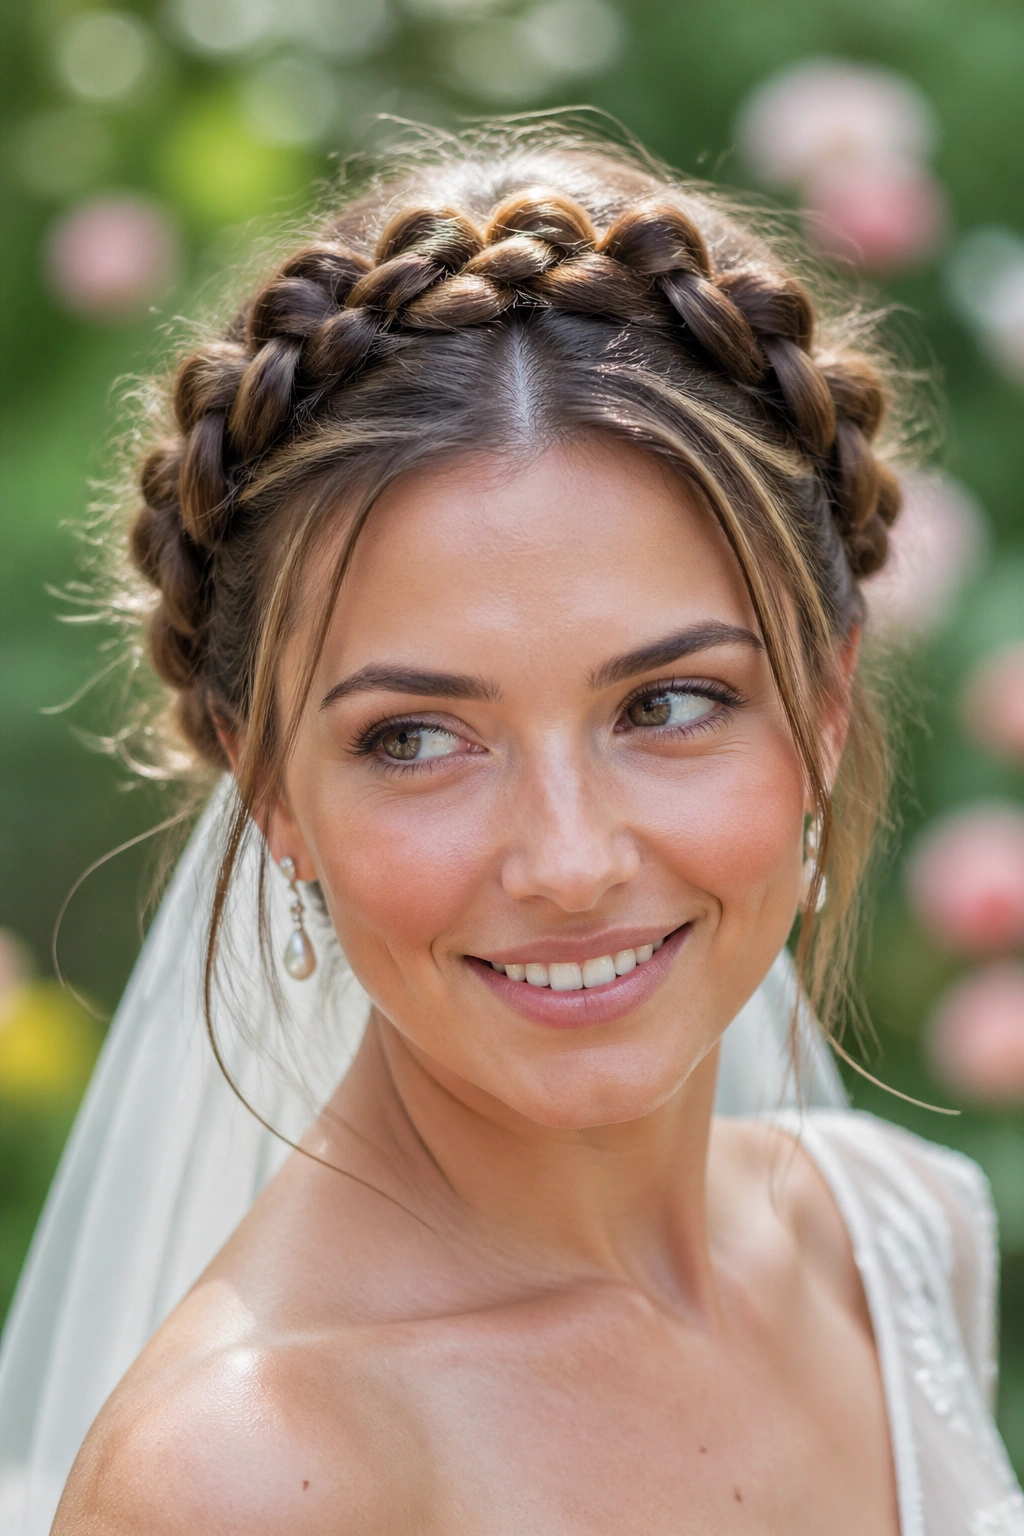
4. The Bubble Crown Halo
Picture a bride walking down a garden path with a soft halo of bubbles sitting just behind the hairline. That’s the mood here, and it works because the style frames the face without covering it.
This one is gorgeous for square necklines and off-the-shoulder dresses. The hair wraps around the crown and meets at the back, where the bubbles can fall into a short tail or a tucked twist. It has a little Greek goddess energy, but it stays modern if you keep the bubbles small and even.
What Makes It Work
- Use a center part if you want symmetry.
- Use a side part if you want a softer, less formal feel.
- Keep the top sections close to the head.
- Add only a few tiny flowers if the dress already has texture.
A halo braid is one of those styles that looks complicated and is really about patience. Clean sectioning matters more than volume. The stronger the parting, the prettier the final circle.
5. Double Bubble Braids for a Soft Boho Feel
Two bubble braids can look bridal if you keep them low, soft, and a little uneven in the right places. Done badly, they look teenage. Done well, they feel fresh and airy, which is a nice match for a wedding under trees or beside climbing roses.
I like this style most when the dress is simple and the bouquet carries the color. Two braids on either side of a center part create balance, then the bubbles take over and give the hair movement without needing a lot of curling. The trick is to keep the roots smooth and the lower sections relaxed.
A bride with thick hair gets a lot of help from this style because the structure spreads the weight out. A bride with finer hair can still wear it, but the bubbles need a little extra support from light teasing inside each section. Nothing wild. Just enough to keep the shape from collapsing.
Leave a few soft pieces near the cheekbones if you want it to feel less strict. That tiny release of hair changes the whole mood.
6. The Fishtail-to-Bubble Hybrid
Unlike a full fishtail braid, this version gives you detail without making the whole morning feel like a marathon. You start with a few fishtail passes at the top, then switch to bubble sections once the braid has enough shape to stand on its own.
That shift is the point. Fishtail texture at the crown looks intricate from the front, while the bubble sections keep the length from disappearing into a narrow plait. It’s a smart move for brides who want something more interesting than a plain ponytail but less fussy than a long woven braid.
This works especially well with lace gowns and dresses that have a lot of handwork, because the braid has enough texture to echo the dress without competing with it. If the dress is sleek, the hybrid braid can carry the visual interest by itself.
My recommendation: keep the fishtail portion short, maybe 3 to 5 crosses, then start the bubbles. That keeps the style from getting too busy before it even reaches the back.
7. A Ribbon-Woven Bubble Ponytail
Ribbon is one of the easiest ways to make bubble braids feel wedding-ready. It softens the elastic lines, adds color, and gives the braid a more personal finish than pins alone.
Choosing the Right Ribbon
Silk ribbon is the most forgiving. It drapes well, it doesn’t fight the hair, and it moves a little when you turn your head. A 1/2-inch to 3/4-inch width usually looks right; anything wider can start to overpower the braid unless the hair is very thick.
I’d use a color pulled from the bouquet or the dress embroidery, not a bright contrast unless the whole wedding is leaning playful. Ivory, blush, dusty blue, and sage all work because they echo garden colors without shouting.
- Thread the ribbon under the first elastic before you start the next bubble.
- Let both tails trail at the bottom or tuck them under the final wrap.
- Keep the ribbon flat so it doesn’t bunch and wrinkle.
The whole style reads most polished when the ribbon looks woven in, not tied on as an afterthought.
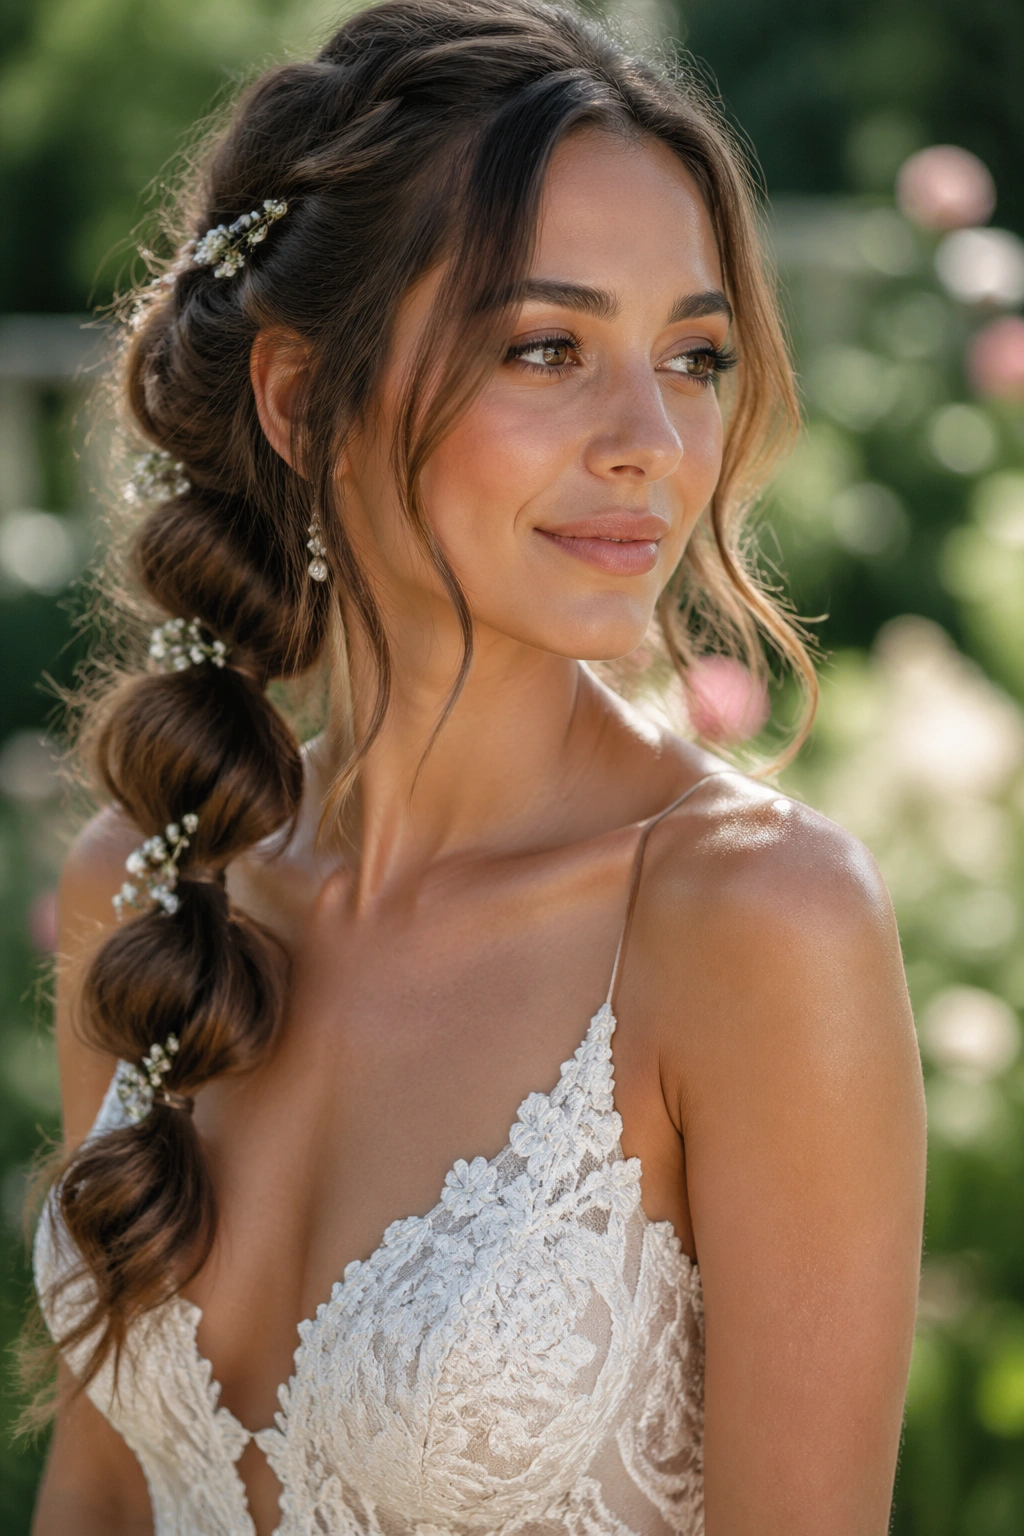
8. Baby’s Breath Tucked Through the Bubbles
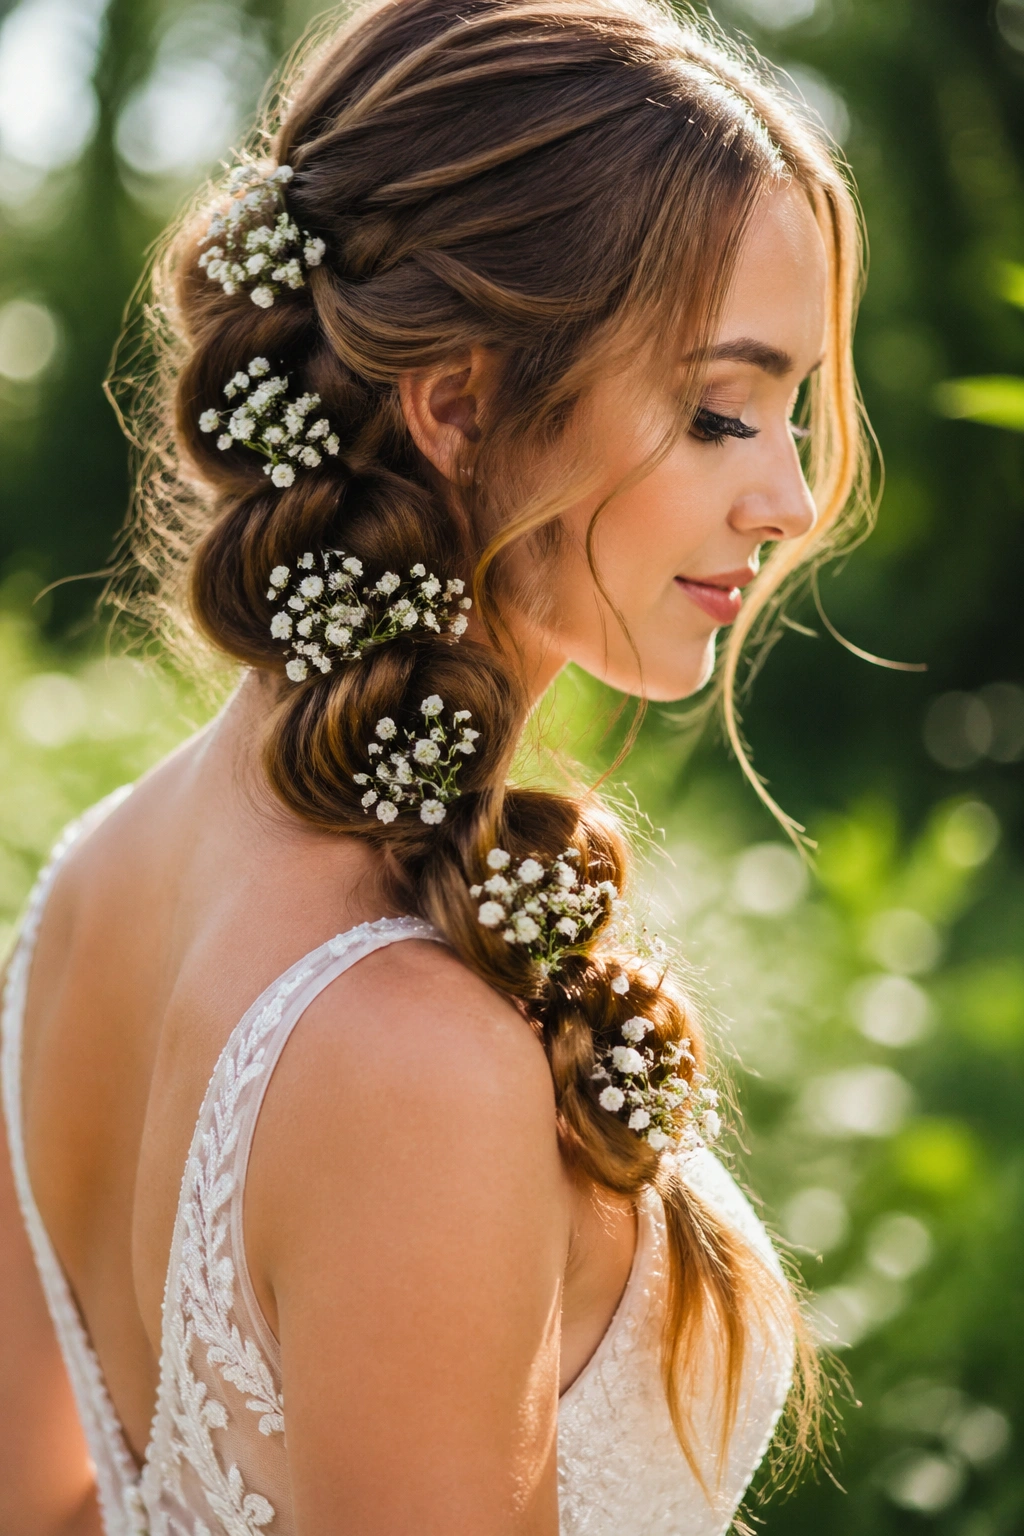
Tiny flowers usually beat big ones here. Baby’s breath looks right because each spray is light, delicate, and small enough to nestle between the rounded sections without turning the braid into a bouquet on your head.
What matters is placement. Tuck the stems after the braid is built and after hairspray has dried a little. If you add fresh flowers too early, they can get squashed while you adjust the bubbles. A few stems at the top and then one or two lower down are enough to make the braid feel like part of the garden setting instead of a separate object.
A florist can prep the stems with water tubes if you need the flowers to last through a long day. That matters more than people think. Fresh blooms dry out faster than brides expect when they’re pinned into warm hair.
If baby’s breath feels too sweet, use tiny waxflower or sprigs of jasmine. Same delicate effect. Slightly different mood.
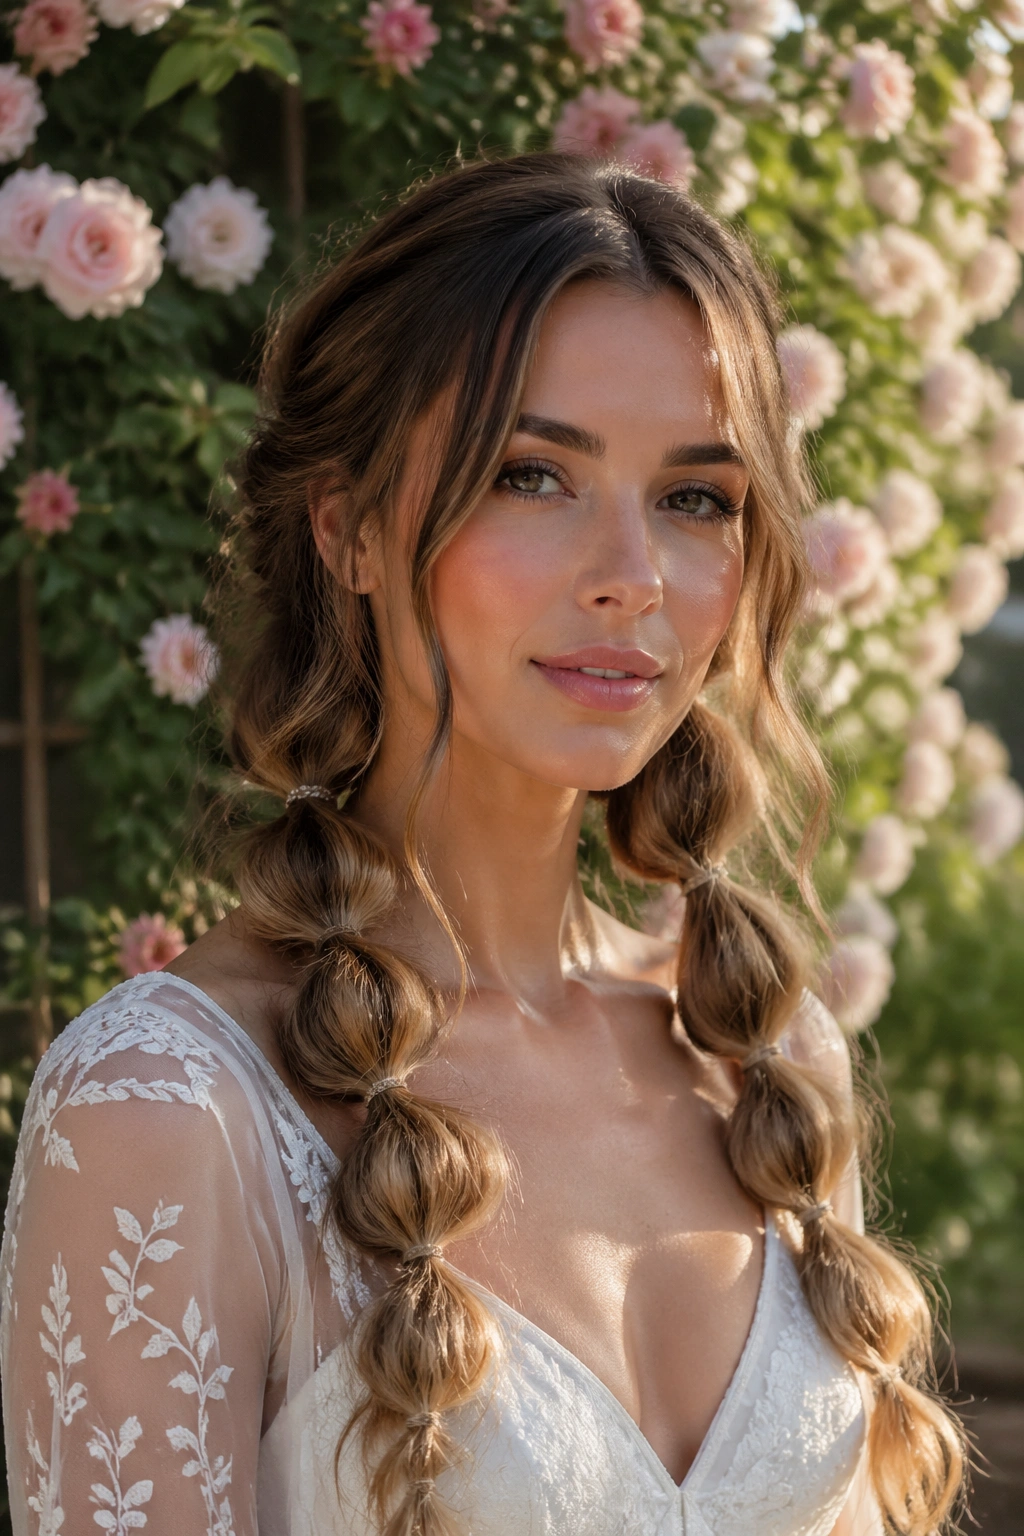
9. The Sleek Center-Part Bubble Ponytail
Can a bubble braid feel formal? Yes. The sleek base does most of the work.
A sharp center part and a smooth crown make the braid read cleaner from a distance, which is useful if your dress has a lot going on in the fabric or the neckline. The bubbles then become the main visual detail instead of the hairline, and that shift gives the style a more tailored look.
Why the Sleek Base Matters
When the top is smooth, the bubbles look intentional, not accidental. The part becomes a frame. The shine at the roots makes the braid feel groomed, and the lower sections can be puffed a little more to keep the style from feeling severe.
Use a light cream or gel at the roots, then brush the hair straight back with a boar-bristle brush. You want the crown to lie flat, but not wet. Wet hair at the hairline can separate in odd ways once it dries.
This style is especially good with satin gowns, structured bodices, or a dress with a strong seam line. It looks crisp. That’s the whole appeal.
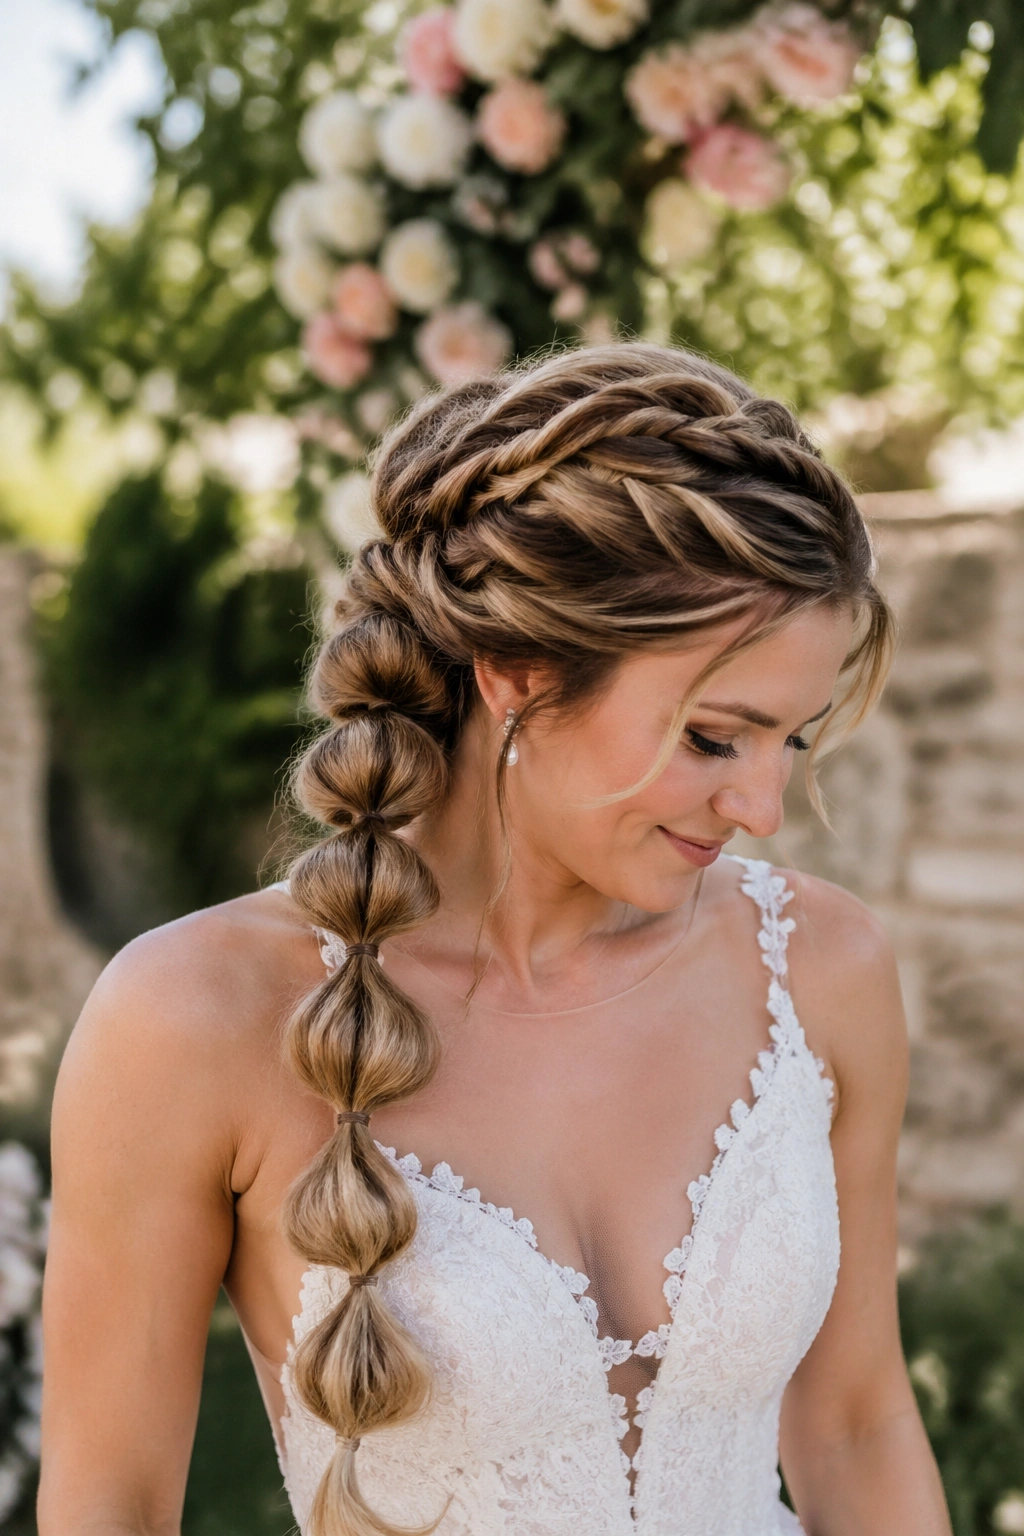
10. The Messy Romantic Bubble Braid With Face-Framing Pieces
A little looseness changes everything here. Pull out a pair of thin front pieces, curl them with a 1-inch iron, and let the rest of the braid stay softly imperfect. The result feels more relaxed than a clean ponytail and less precious than a traditional updo.
This is the style I’d pick for a bride who wants the hair to move when she laughs. The bubbles can be slightly uneven — not sloppy, just human — and the face-framing bits soften the edges around the jaw and cheekbones. That matters in outdoor light, where hard lines can look harsher than they do in a salon mirror.
A few practical details help:
- Curl the front pieces away from the face.
- Keep the bubbles a little smaller near the crown.
- Tug the sides gently after each elastic is in place.
- Don’t drown the tendrils in hairspray.
The goal is a braid that looks touched by the wind without actually falling apart. There’s a line there, and it’s a good one.
11. The Bubble Braid Chignon at the Nape
This style starts as a bubble braid and ends as a knot at the nape, which gives it a more formal finish without losing the braid texture entirely. It’s a smart choice when the dress has a detailed back and you don’t want the hair competing with the fabric.
The braid begins low, with a few evenly spaced bubbles, then gets folded into a soft chignon and pinned in place. That transition from round sections to a tucked coil gives the style a bit of architecture. Not rigid architecture. Just enough to feel finished.
The nape is the part to watch. Leave a little softness there instead of pulling every hair tight. A nape that’s too slick can make the bun look separate from the rest of the hair, and that breaks the illusion.
I like this shape for evening receptions, especially if the ceremony took place outdoors and the air is still warm. It holds the neck open and keeps the silhouette neat from behind, which photographers tend to love because it stays clean in profile.
12. The Bubble Braid with Gold Cuffs
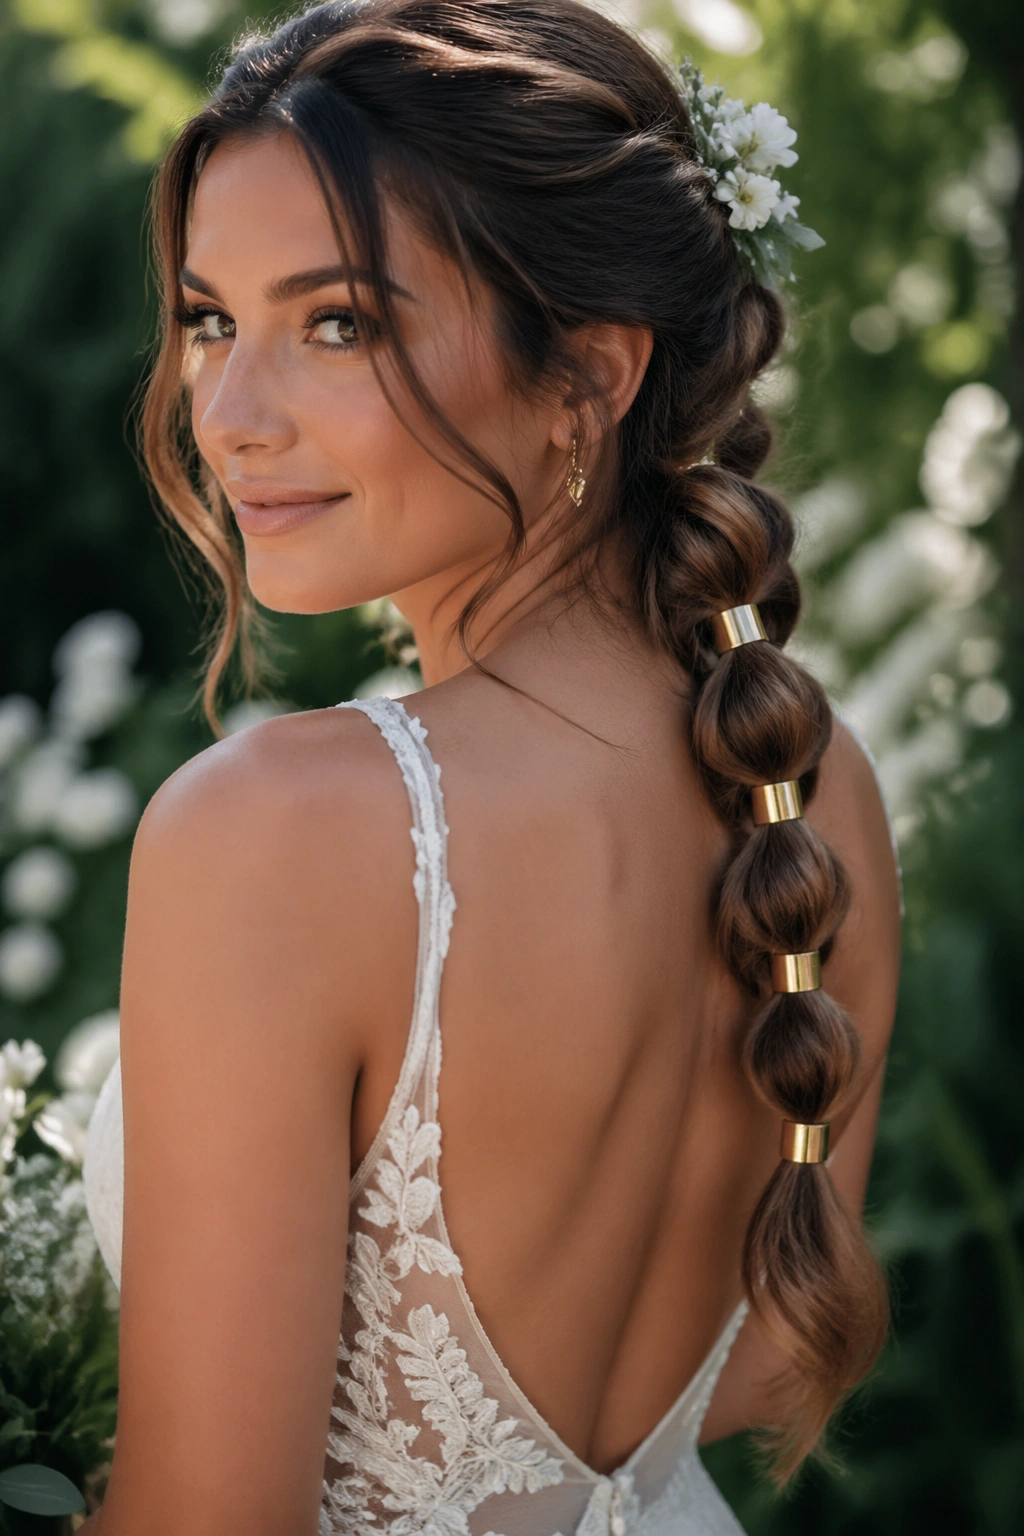
Gold cuffs give bubble braids a sharper read than pearls do. That’s not better or worse — it’s just a different mood. Pearls feel soft. Gold feels edged, a little more tailored, and a little less dreamy.
This style suits brides wearing warm-toned jewelry, embroidered dresses with metallic thread, or gowns with a clean satin finish. A few slim cuffs placed on the lower half of the braid are enough. Too many start to look costume-y, and that’s not the direction you want for a wedding.
What Makes It Different
The cuffs create hard little points of shine against the rounded hair sections. That contrast is what makes the braid interesting in photos. The hair itself can stay simple: a low ponytail, a half-up shape, or a longer side braid all work.
I’d place the cuffs irregularly instead of spacing them too perfectly. A little variation feels more natural and keeps the line from looking too planned. If the dress is already ornate, keep the cuffs minimal. If the gown is clean, the cuffs can carry more of the design.
It’s a tidy style. No fluff needed.
13. The Waterfall Bubble Braid
A waterfall bubble braid is a good choice for brides who want movement. The top sections are controlled, but the lower hair keeps spilling out in soft waves, which gives the whole style a light, floating feel.
Where It Works Best
This shape works especially well on long hair, because the length gives the bubbles room to stretch without getting crowded. The first few sections sit at the crown or upper back, then the rest falls away in loose curls. If the hair is very straight, the contrast between bubble and wave gets sharper. If the hair is naturally wavy, the style looks even softer.
- Best with long veils that lift off the hair instead of sitting on top of it.
- Nice for square or off-the-shoulder necklines.
- Keep the top bubbles neat and the lower length looser.
- Add one floral pin near the transition point, not all the way down.
The style is useful when you want bridal hair that still feels like hair. It moves. It sways. It doesn’t stay frozen in place, which is partly why it feels right for a garden setting.
14. The Textured Bubble Ponytail for Humid Garden Weather
Humidity punishes sleek hair. It also makes overworked curls look tired by the middle of the day. A textured bubble ponytail handles that better because the style likes a little grit in the hair.
Start with dry shampoo at the roots or a texturizing spray through the mid-lengths. Then build the bubbles with slightly rougher hair instead of trying to force a glossy finish that the air will undo later. The result often lasts longer because the hair has something to grip.
The spacing matters here. Keep the elastics closer together at the top if your hair slips easily, then open the bubbles out more toward the ends. That gives the braid enough structure even if the weather turns damp.
Skip heavy oils at the roots. They make the braid slide. If you want shine, add it only on the mid-lengths and ends after the style is secured. That little distinction makes a real difference when the ceremony happens outside and the air feels like soup.
15. Twin Bubble Pigtails for a Playful Bridal Look
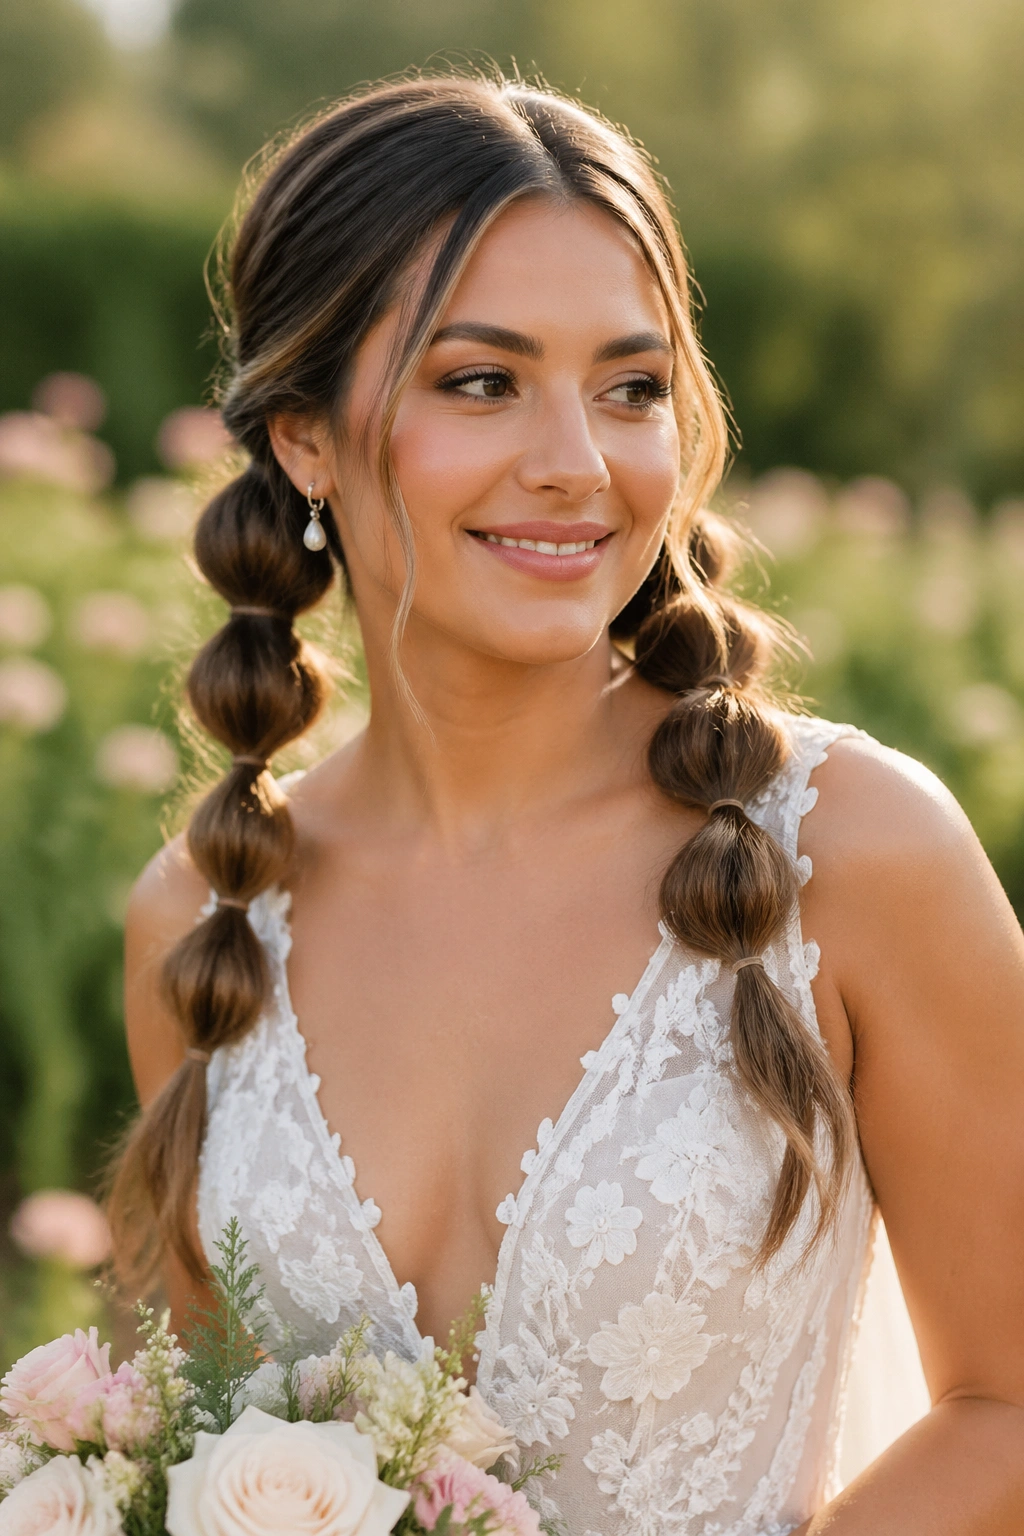
Yes, pigtails can be bridal. The trick is keeping them low, polished, and intentional, not cute for the sake of cute.
Twin bubble braids work especially well for a bride who wants movement and a touch of whimsy. They can sit behind the ears or start from a center part and fall along the sides of the neck. If the outfit is minimal, the hairstyle becomes the statement. If the dress is detailed, keep the bubbles smaller and the roots smoother so the look stays balanced.
How to Keep Them Grown-Up
Use a satin ribbon, pearl ties, or clear elastics covered with hair. That alone shifts the style away from a casual weekend braid. The parting should be clean, and the bubbles should be the same width on both sides.
This is a strong choice for a second-look hairstyle too. Take the veil off, loosen the front a touch, and the braids suddenly feel fresh again. That kind of flexibility is useful when you want a style that changes with the day.
16. The Floral Vine Bubble Crown
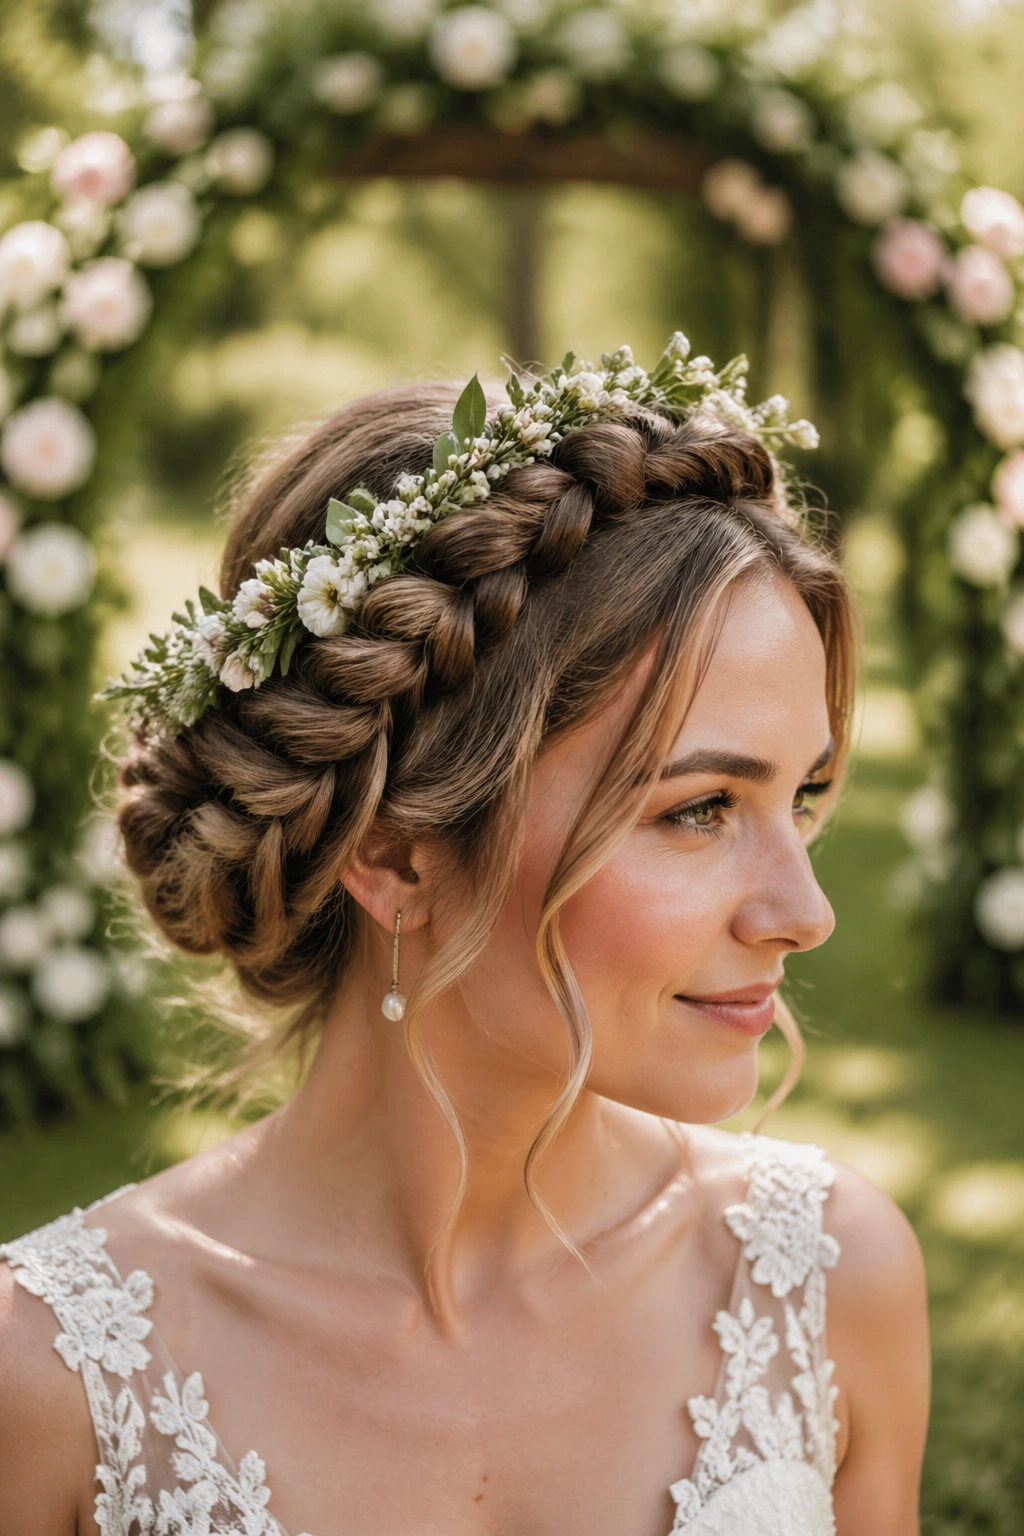
This one looks like a braid that wandered through the garden and picked up a few stems on the way.
The bubbles arc around the head in a crown shape, then a thin floral vine or greenery runs along the outer edge. It works because the braid provides structure while the vine adds motion and softness. Ivy, jasmine, and fine eucalyptus can all work, but the greenery needs to be light. Heavy stems pull the shape down and make the crown feel droopy by the time photos start.
Details Worth Watching
- Use floral tape to secure delicate sprigs before pinning them in.
- Keep the greenery on one side if the dress neckline is already busy.
- Avoid thick leaves that poke out from the braid.
- Small blooms read better than large clustered flowers.
The whole style feels most at home in a ceremony framed by arches, climbing roses, or anything with a lot of leafy background. It’s the kind of hair that belongs in the setting instead of sitting beside it.
17. The Bubble Braid with Micro Braids Running Through It

Micro braids tucked into a bubble braid give the style a layered, hand-built look. They add grip, detail, and just enough complexity to keep the braid from looking flat.
I like this option for brides with thick hair, because the smaller plaits help control bulk before the bubbles are formed. They also help the sections hold shape without a ton of teasing. If the hair is finer, the micro braids can be hidden under the surface so the overall look still stays soft.
The best part is that the tiny braids don’t have to show everywhere. A few tucked near the temple, one through the middle section, and another near the base can do the job. That’s enough to make the braid feel more textured in person and more interesting in close-up photos.
This style is smart when the dress is plain and the bouquet is loose and garden-heavy. The hair can carry more of the detail, which keeps the whole look from falling flat.
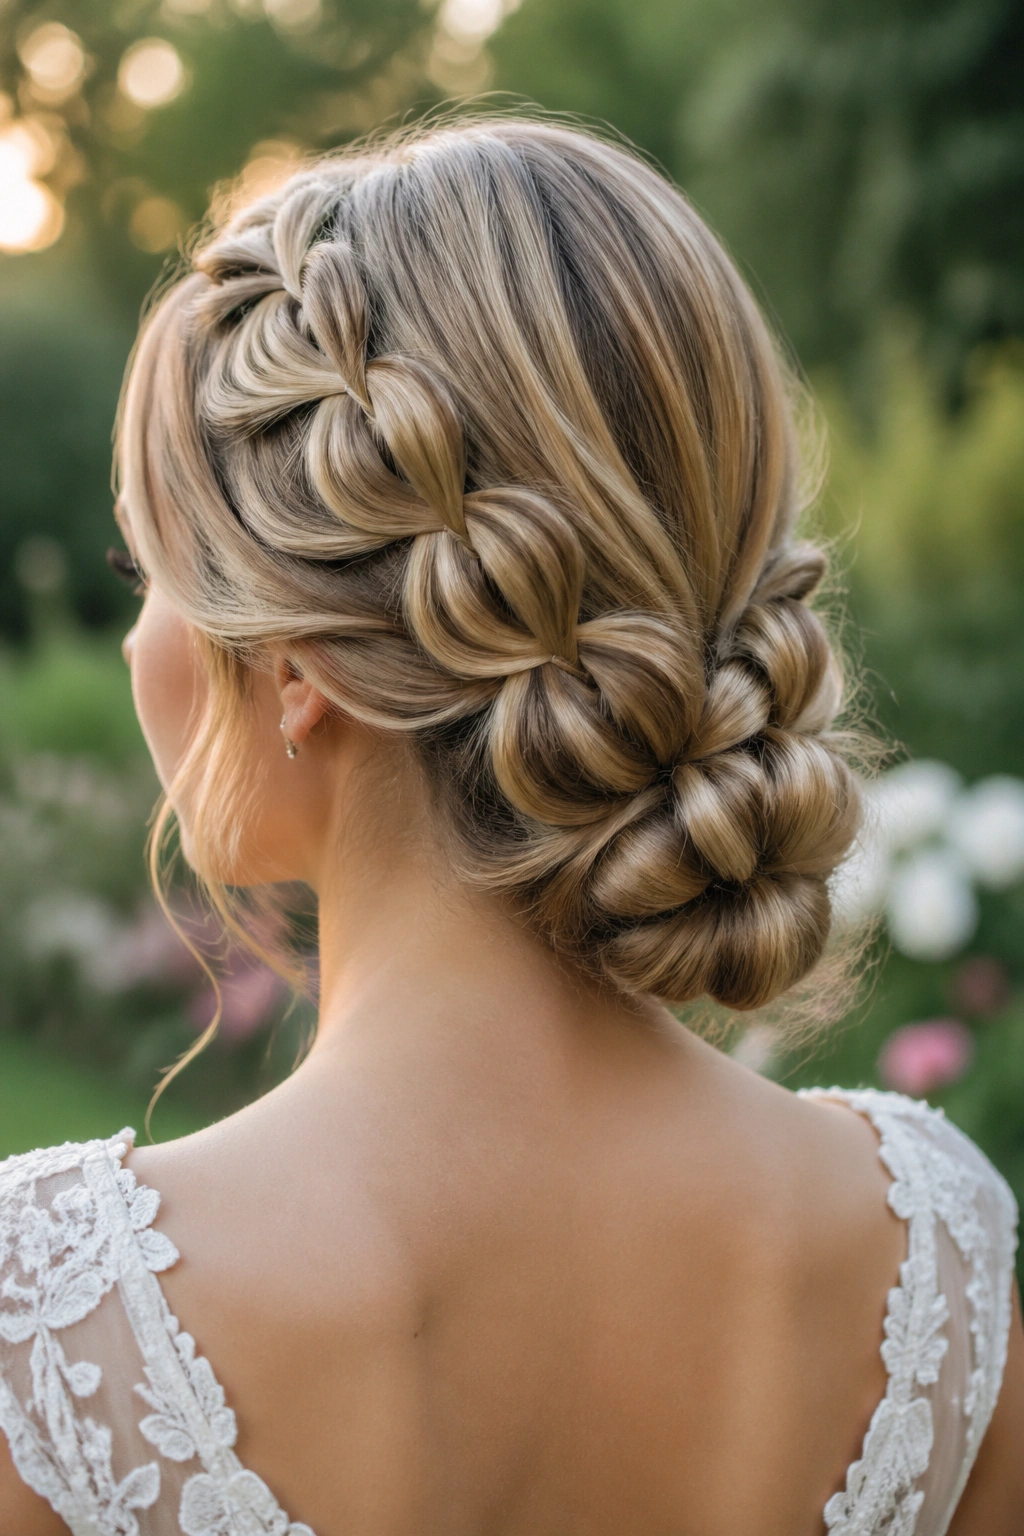
18. The Bubble Bun with Wrapped Loops

A bubble bun gives you structure at the back of the head without the stiffness of a classic chignon. You build a few bubble sections first, then fold the remaining hair into a bun and pin it low or mid-height.
That extra looped shape makes the bun feel less formal and a little more dimensional. It also lets the back of the dress show off more cleanly, which matters with illusion backs, lace backs, or any gown that has a line worth seeing.
Why It’s Different From a Standard Bun
A standard bun can flatten from the front and disappear from the side. A bubble bun keeps some roundness in the silhouette, so the hairstyle still has visible shape from several angles. That helps in candid photos, especially when the bride turns her head or hugs someone.
This version is good for dresses with high necks too, because it clears the collar and keeps the profile neat. If the bun feels too tight, pull a few small strands around the temples to soften it. A little movement around the face goes a long way.
19. The Short Hair Bubble Accent With Extensions
Shoulder-length hair can still wear a bubble braid. It just needs a little help in the right places.
Clip-in extensions give you enough length for two or three clean bubble sections, and they also let the braid sit lower so the style doesn’t look stubby. The safest move is to blend the extensions into the lower half of the head, then build the bubbles once the hair has enough length to hold the shape.
What the Stylist Needs to Know
- Tell them the dress neckline before the trial.
- Bring the veil or hairpiece to the appointment.
- Ask for extensions that match both color and texture.
- Make sure the first elastic sits low enough to hide the attachment points.
This style is a practical answer for brides who love bubble braids but don’t have long hair. It also tends to hold better than people expect, because the shorter length can make the braid feel lighter. Less pull. Less sag. That matters when you’re wearing it for hours.
20. The Cathedral Veil Bubble Braid
A cathedral veil and a bubble braid can look cleaner together than a cathedral veil and loose curls. That’s because the veil comb has room to sit, and the braid gives the back of the head a tidy anchor.
The braid should stay low enough that the veil can rest above it without fighting the bubbles. If the bubbles sit too high, the veil can bunch in awkward spots and flatten the top of the style before the ceremony is over. A low ponytail with wide, soft sections solves that problem.
The length of the veil matters too. A long veil wants a stable base, not a wispy one. The bubble braid gives you a place to pin the comb without pulling too hard on one small section of hair.
I’d keep the embellishment modest here. Maybe one pearl pin, maybe a wrapped strand, maybe a tiny floral comb. The veil already brings enough drama. The braid just needs to do its job and stay calm.
21. The Soft Bubble Ponytail for Curly Hair
Curly hair does not need to be forced straight for a bubble braid to work. That would be a waste of texture, and honestly, the braid often looks better when the curls are allowed to do some of the talking.
The key is to stretch the curl pattern just enough to build the bubbles without crushing the natural shape. A gentle blowout, a soft diffused stretch, or even a partial smooth-out at the crown can give you the control you need while leaving the ends alive and full.
How to Preserve Curl Pattern
Use a silk tie or a covered elastic at each section so the hair doesn’t snag. Then widen the bubbles with your fingers instead of a comb. Fingers are kinder to curls. They also let you decide how much shape to keep.
If the curls are tight, space the bubbles farther apart. If they’re loose and airy, bring the elastics a little closer together so the braid doesn’t disappear. Either way, the goal is not a straight ponytail with a few rings in it. The goal is a braid that respects the curl and still reads bridal.
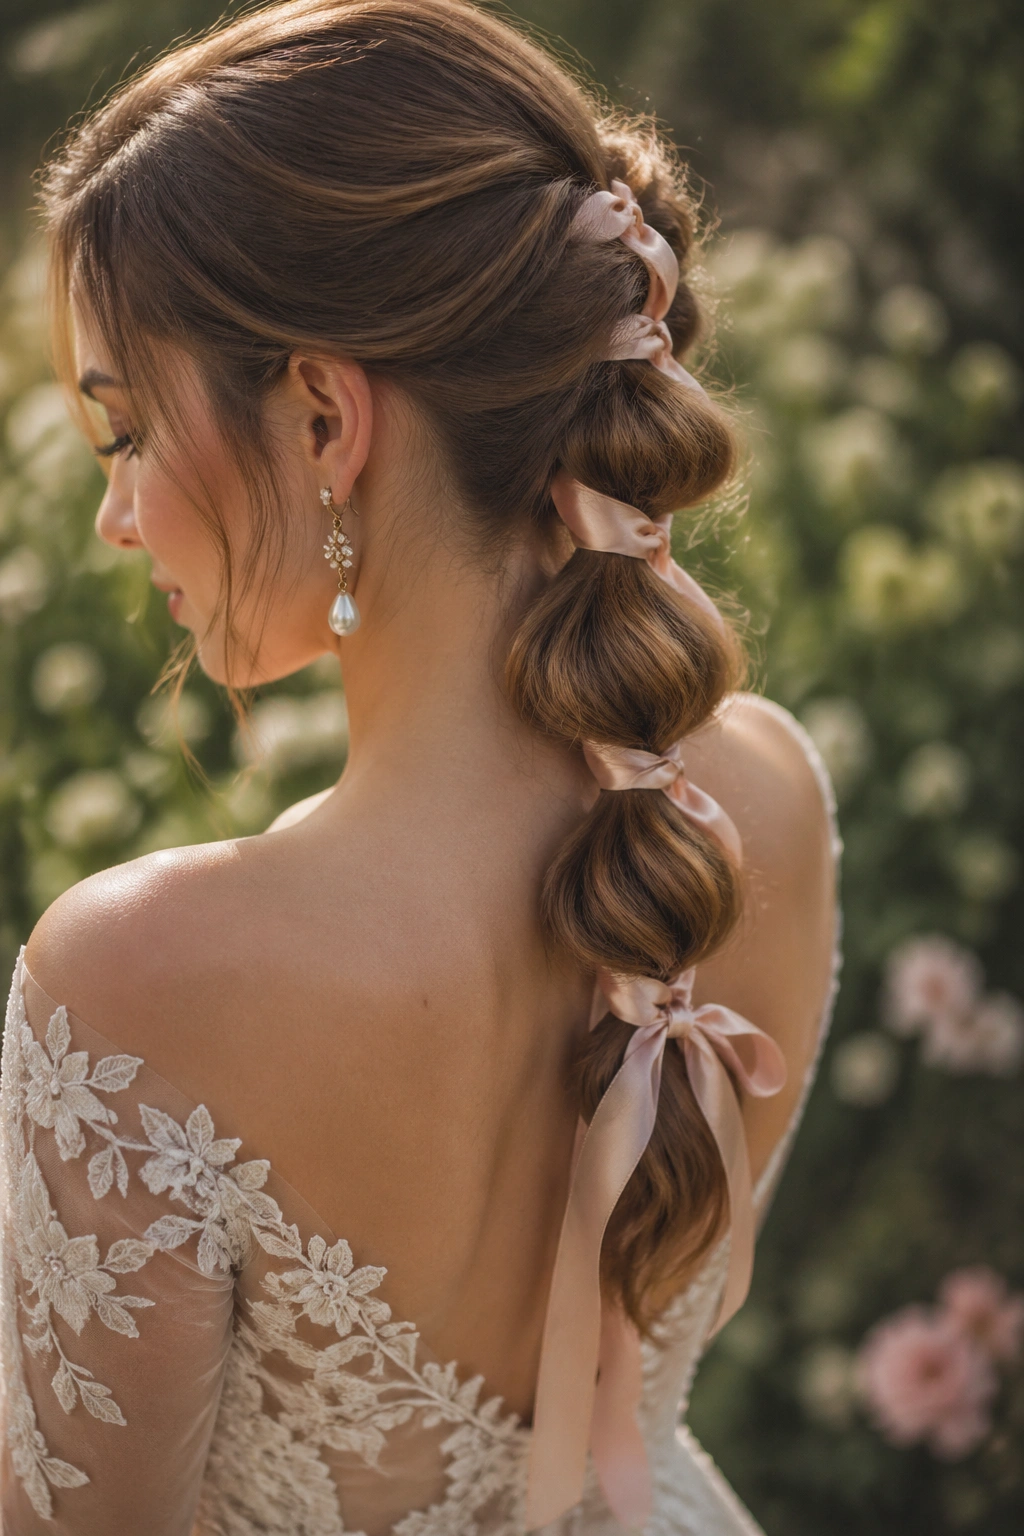
22. The Pearl-and-Ribbon Bubble Braid for the Last Dance
This is the style I’d choose for a bride who wants the hair to stay pretty after a long day, not just at the first look. Pearls give it a soft finish, ribbon gives it movement, and the bubble shape keeps the whole thing from looking flat once the ceremony is over.
The ribbon can start near the crown or sit lower in the braid, depending on how formal you want the look to feel. A narrow silk ribbon in ivory, blush, or pale sage usually works best. Pearls then sit near the elastics or cluster near the final bubble, where they catch the eye without taking over the braid.
A few small things make this style hold up:
- Keep the bubbles slightly wider than usual so they don’t collapse later.
- Place the ribbon under the first elastic so it doesn’t slip.
- Use lightweight pearl pins, not heavy clustered pieces.
- Let a few soft strands escape near the face if the air is warm.
A garden wedding gives you flowers, leaves, and light for free. This braid knows how to work with that instead of fighting it. If the dress is busy, keep the braid simple. If the dress is plain, let the braid carry more of the visual weight. Use the setting, and let the hair do its part.