Messy bubble braids have a very specific charm: they look like you spent almost no time on them, even when you absolutely did. That’s the appeal. The soft, puffed sections, the loose ends, the little flyaways around the hairline — all of it gives the braid that undone texture people keep trying to fake with curling irons and hairspray.
Perfect hair is the wrong goal.
What makes messy bubble braids work is the tension between structure and looseness. You still need the elastic spacing, the little tug at each bubble, and enough control at the roots so the style doesn’t collapse by noon. But the finish should never look over-sorted. A slightly uneven bubble, a face-framing piece that falls out on purpose, a section that sits a little fuller than the one before it — that’s the good stuff.
And yes, second-day hair usually behaves better here than freshly washed hair. Dry shampoo at the roots, a light mist of texturizing spray through the lengths, and clear elastics that don’t snag make the whole thing easier. The styles below lean into that lived-in feeling in different ways, from low and soft to high and playful, because bubble braids get much more interesting once you stop trying to make them look crisp.
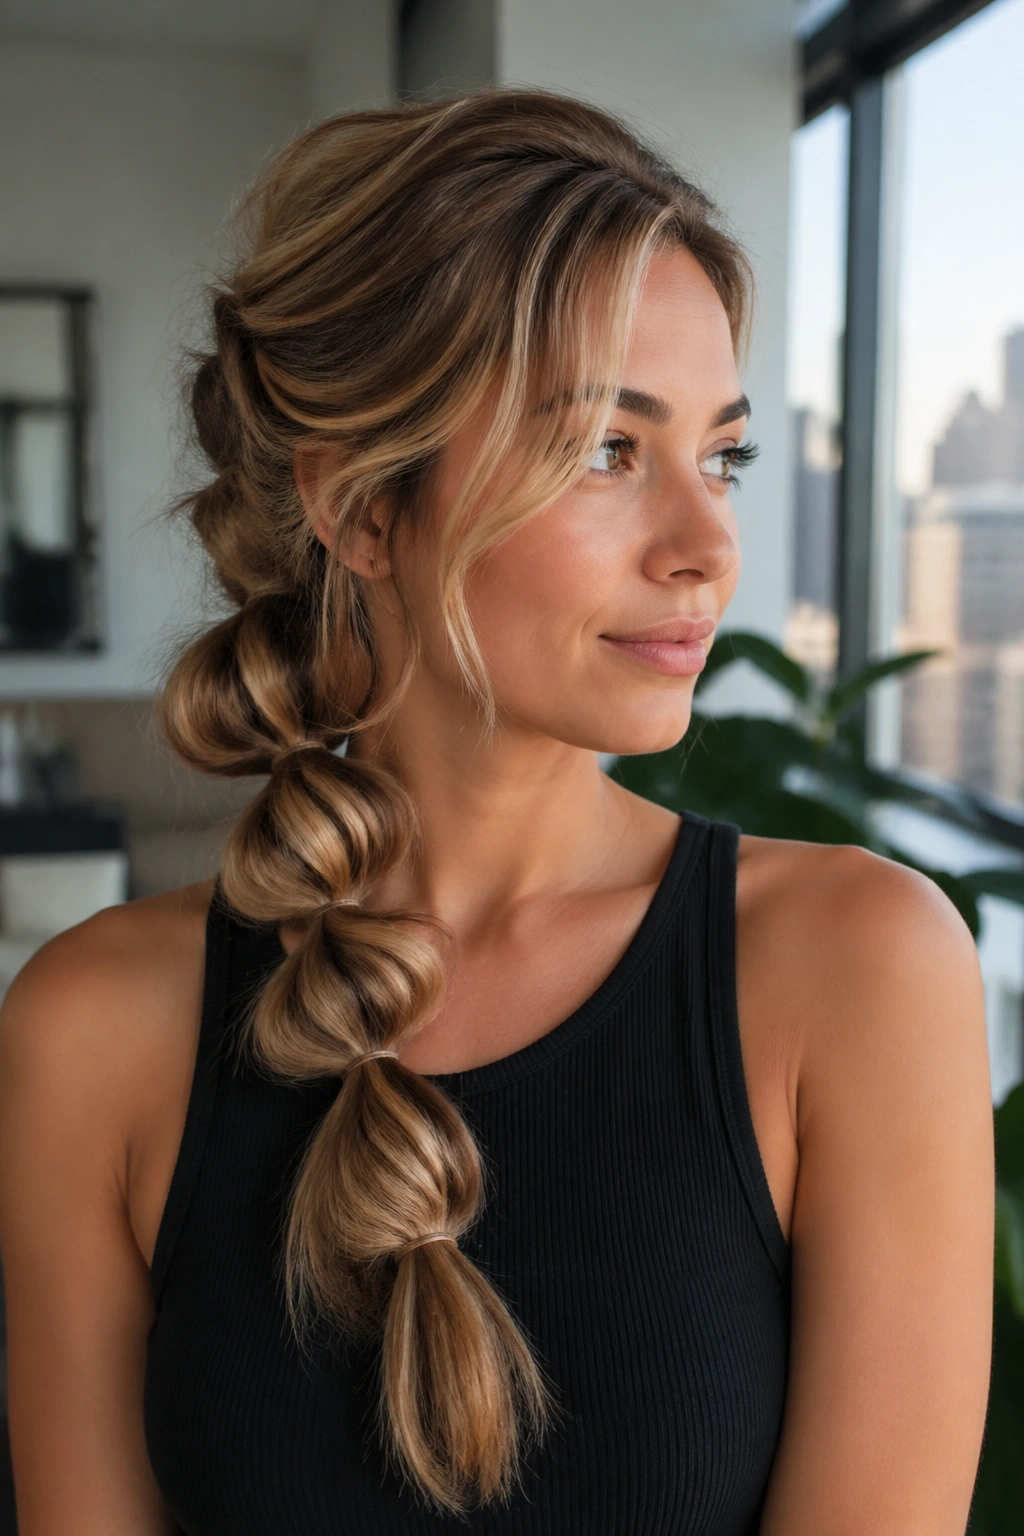
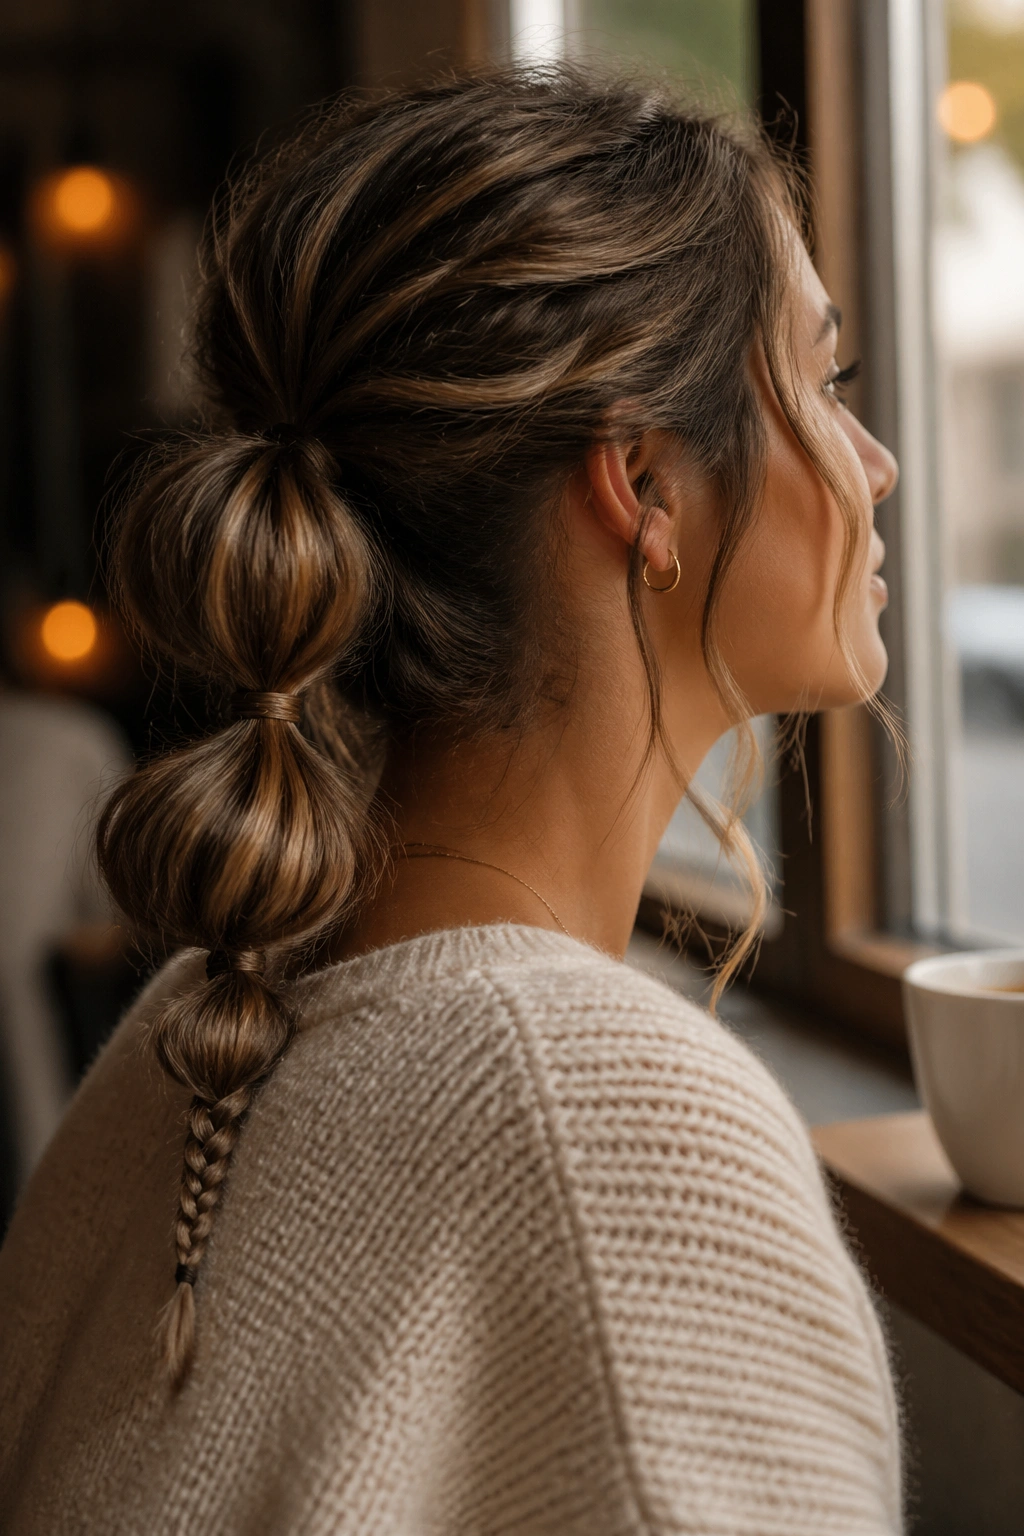
1. Low Messy Bubble Braid With Face-Framing Pieces
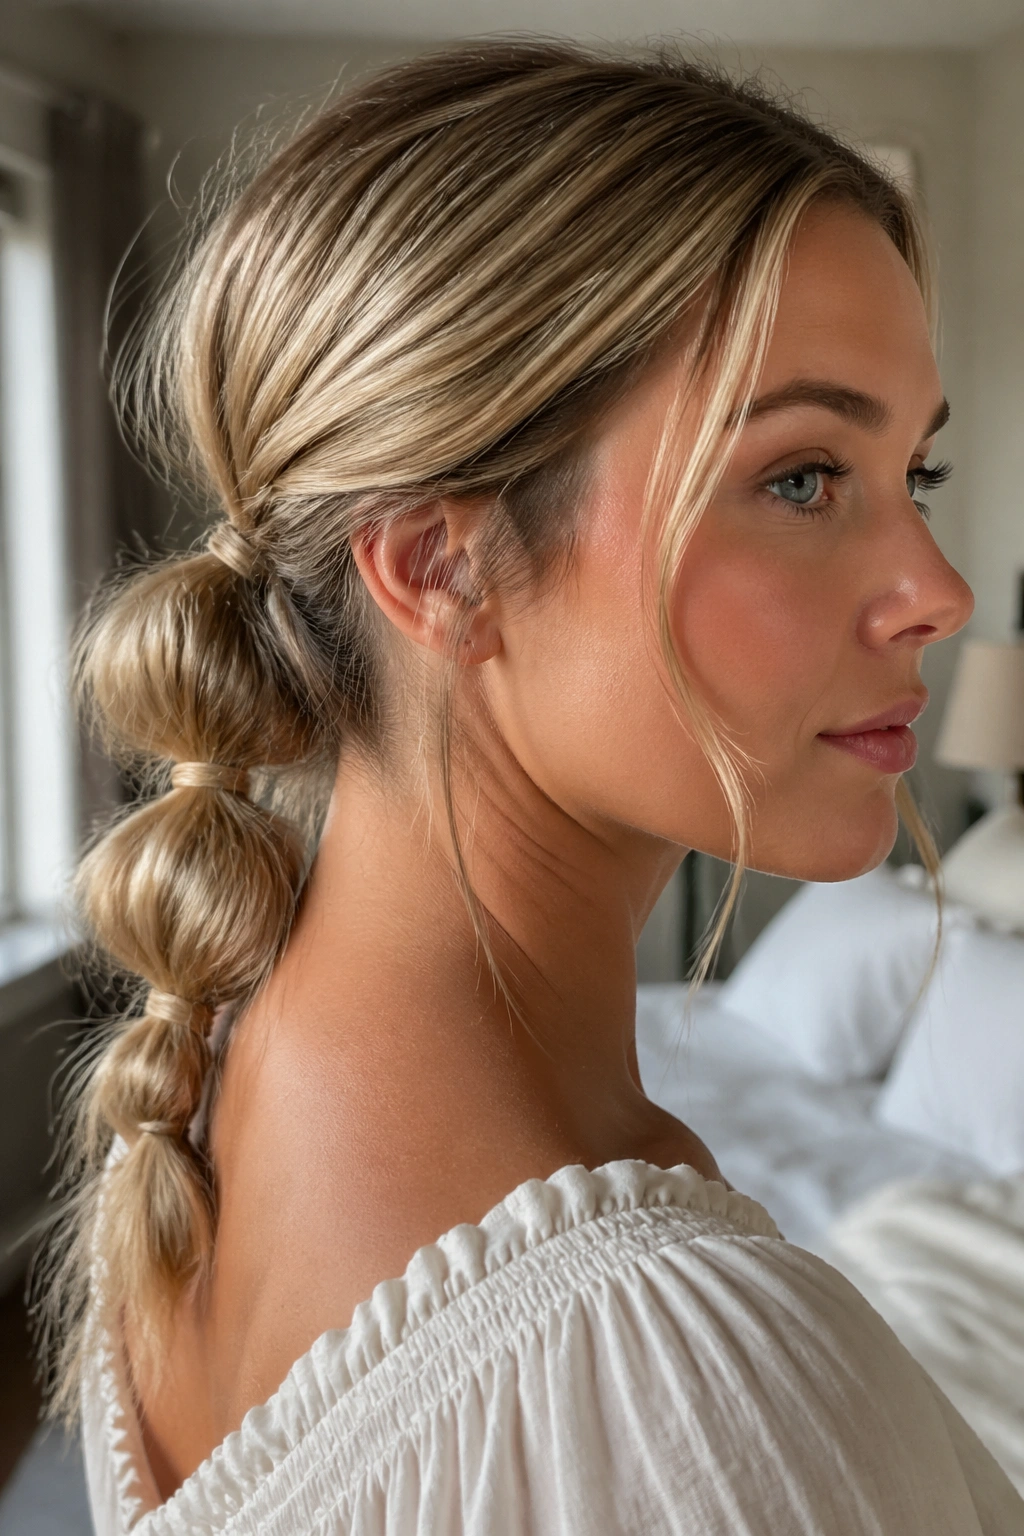
This is the easiest place to start because the shape does half the work for you. A low ponytail gathered at the nape, then split into bubble sections with a few gentle tugs, gives you that soft, tucked-in look without turning the style stiff. Leave two thin pieces out at the front, and don’t chase symmetry too hard.
Why It Works So Well
The low placement keeps the braid calm and wearable. It sits close to the head, so even when the bubbles are loose, the style still feels controlled. That makes it a good match for fine hair that needs a little extra body or for thicker hair that you want to keep off your neck without pulling it into a severe updo.
- Use clear elastics every 2 to 3 inches for a clean base.
- Pull each bubble outward a little, not a lot.
- Keep the face-framing strands thin so they don’t swallow the whole style.
- Mist the ends lightly with texture spray if they keep slipping flat.
Best move: pinch the top of the ponytail once before you split it into bubbles. That tiny lift makes the whole braid look fuller from the side.
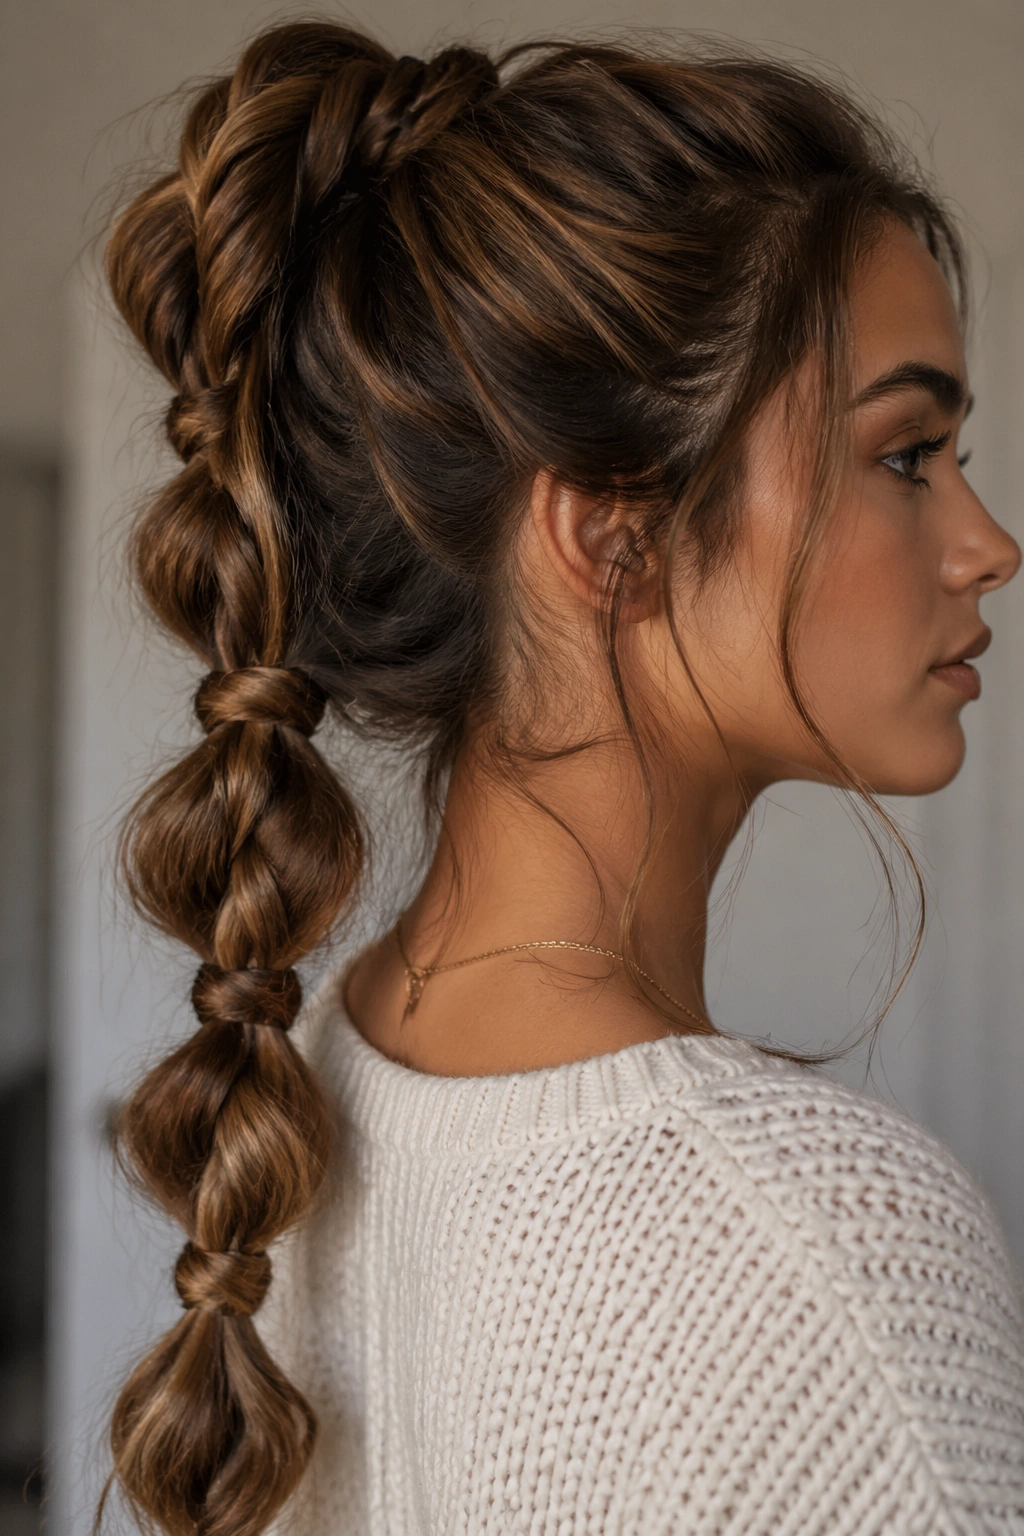
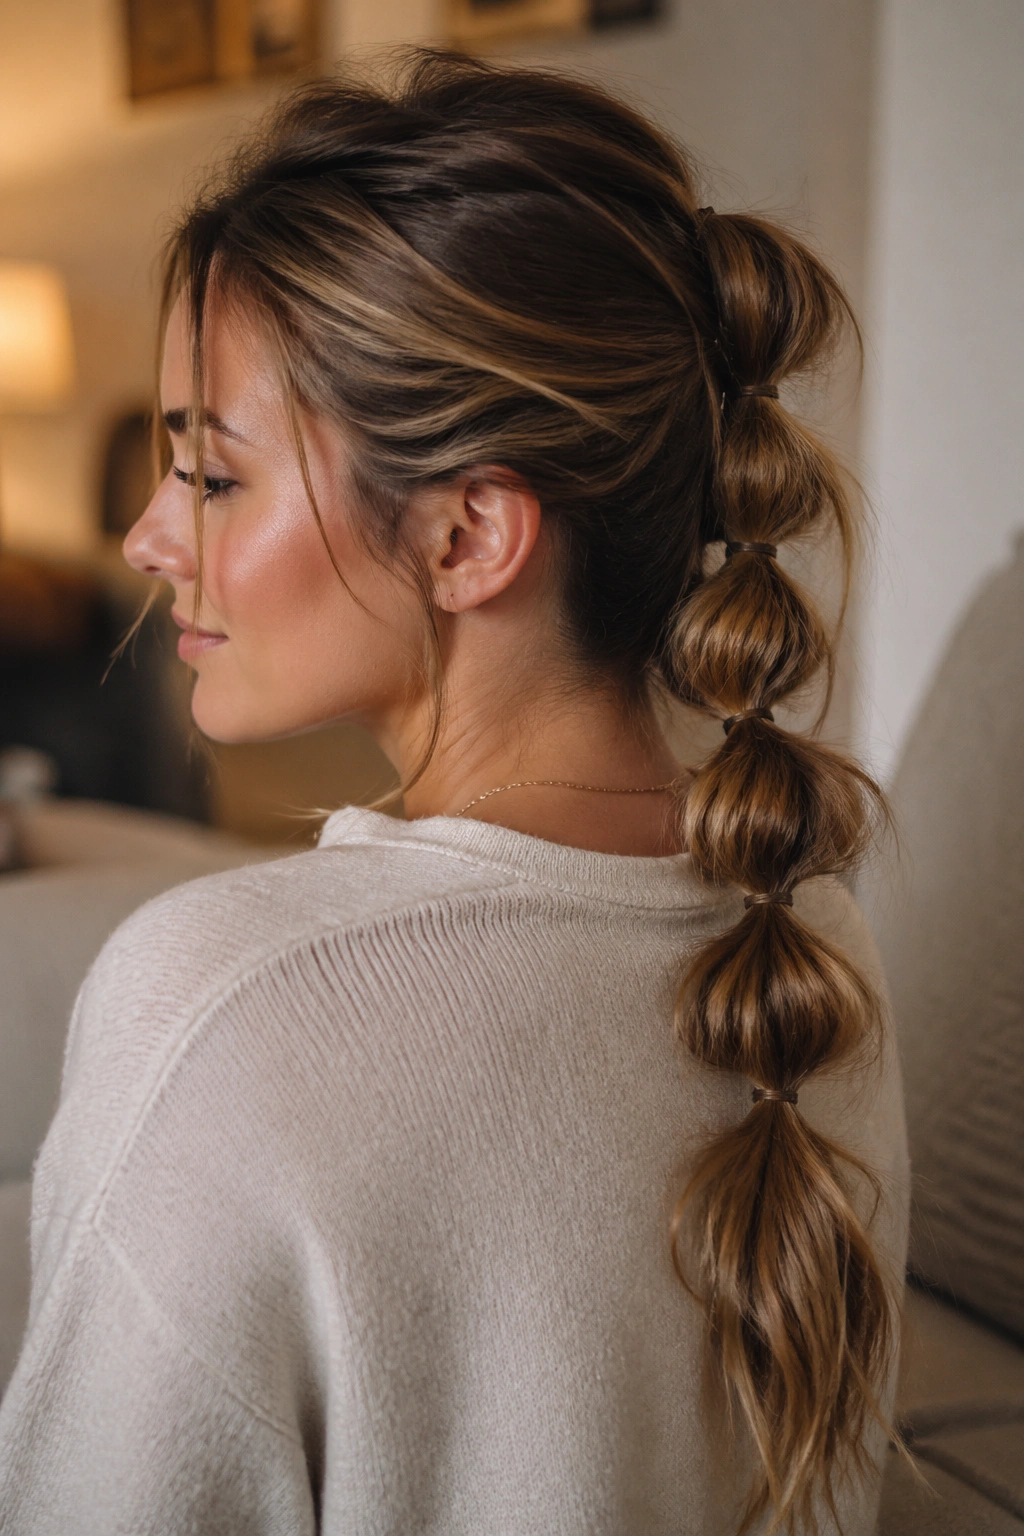
2. High Pony Bubble Braid With Loose Ends
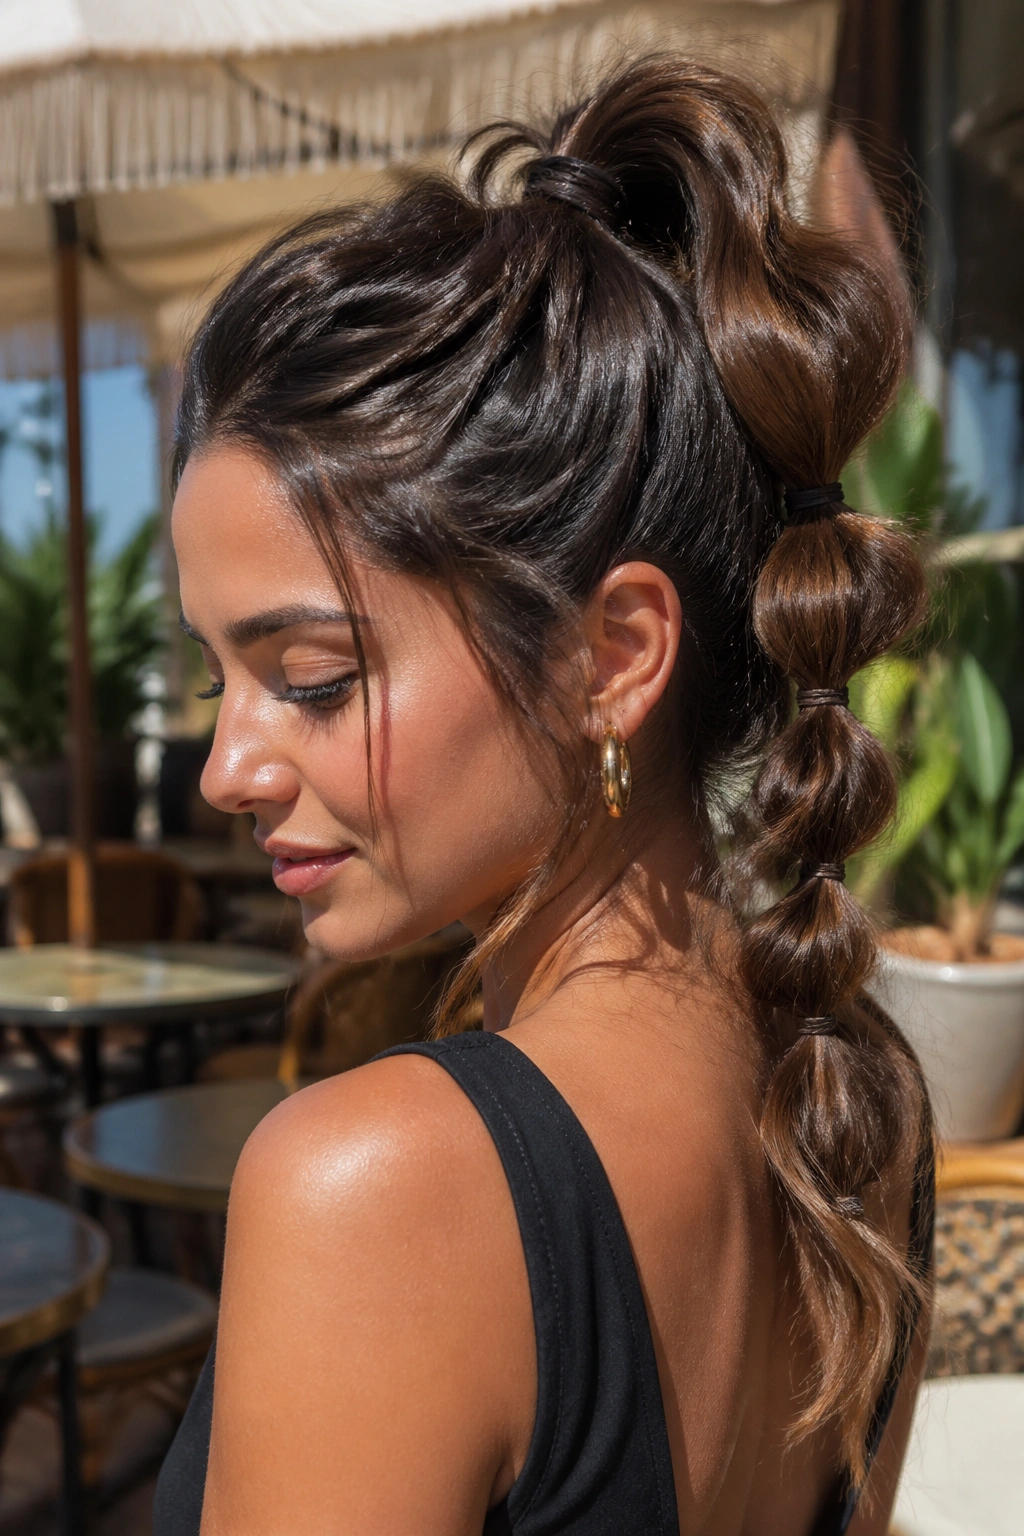
A high bubble braid has a little swagger to it. The height gives the style lift, but the messy texture keeps it from looking too strict or too gym-ready, which is exactly why it works so well with undone outfits, hoop earrings, and a bit of volume at the crown. It feels confident without getting polished to death.
The trick is not to pull the ponytail too tight when you start. If the base is glued down, the bubbles can look stiff and the head shape gets harsh. Leave a touch of softness at the hairline, then build the bubbles down the length of the ponytail with uneven spacing. You want movement.
Wear this one when you want hair off your face but still want the shape to feel lively. It’s especially good if your hair has a bit of wave, because the loose ends break up the line and keep the braid from reading as flat. If your hair is pin-straight, bend the ends with a curling iron for 5 to 10 seconds per section. That tiny bend matters.
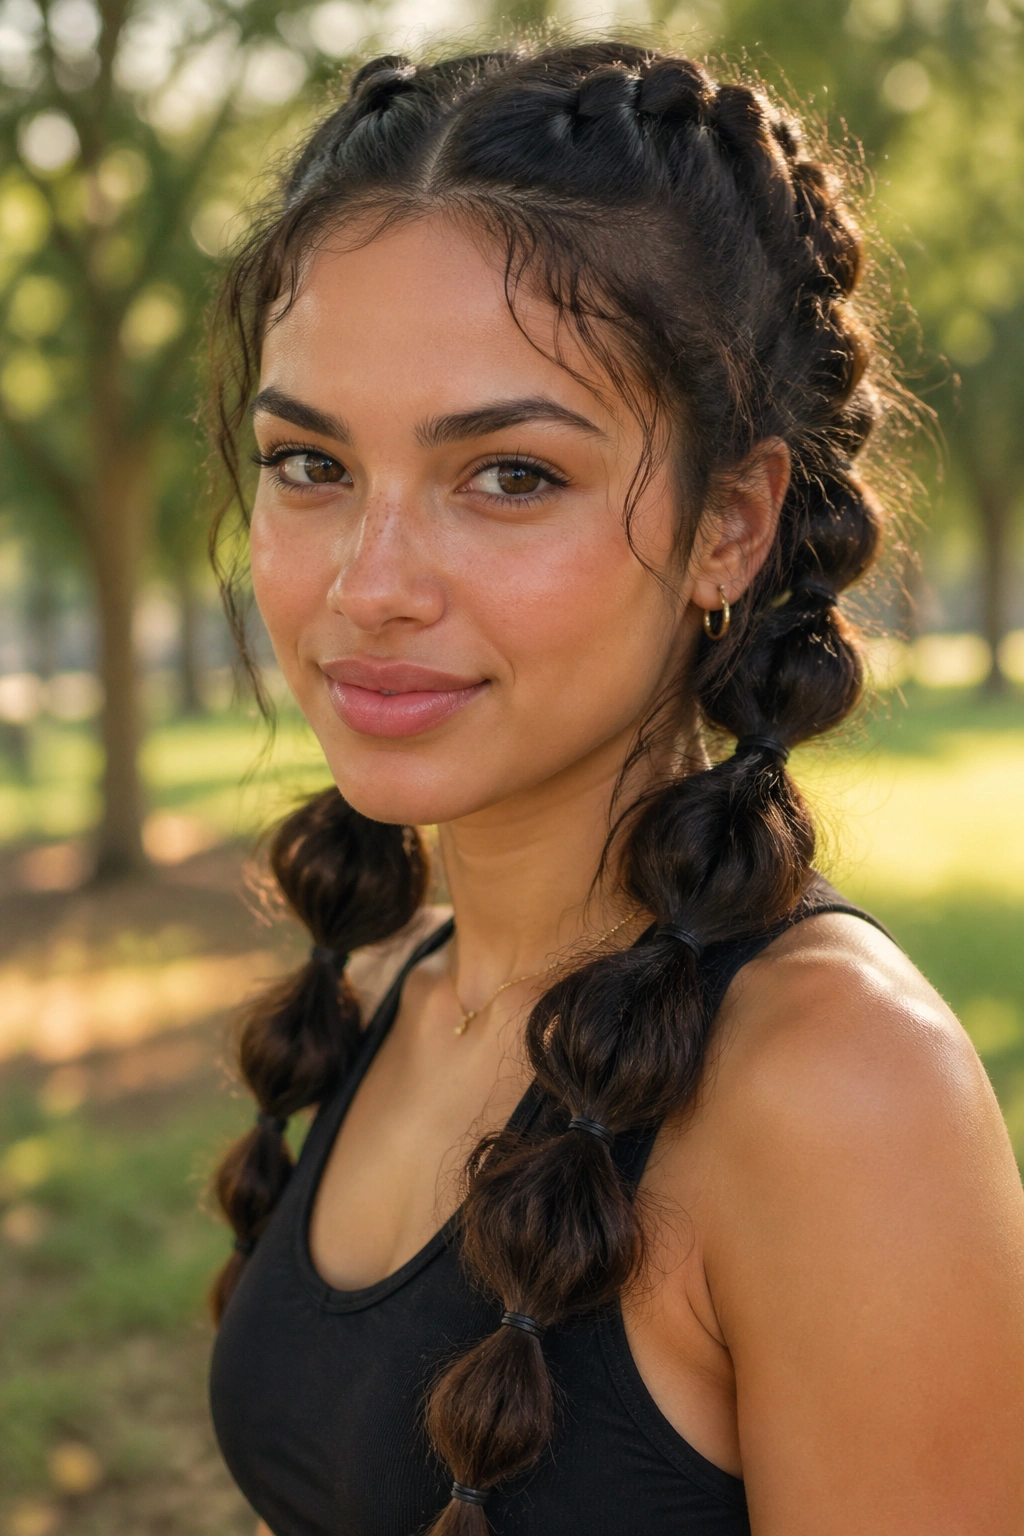
3. Double Bubble Pigtails With Uneven Volume
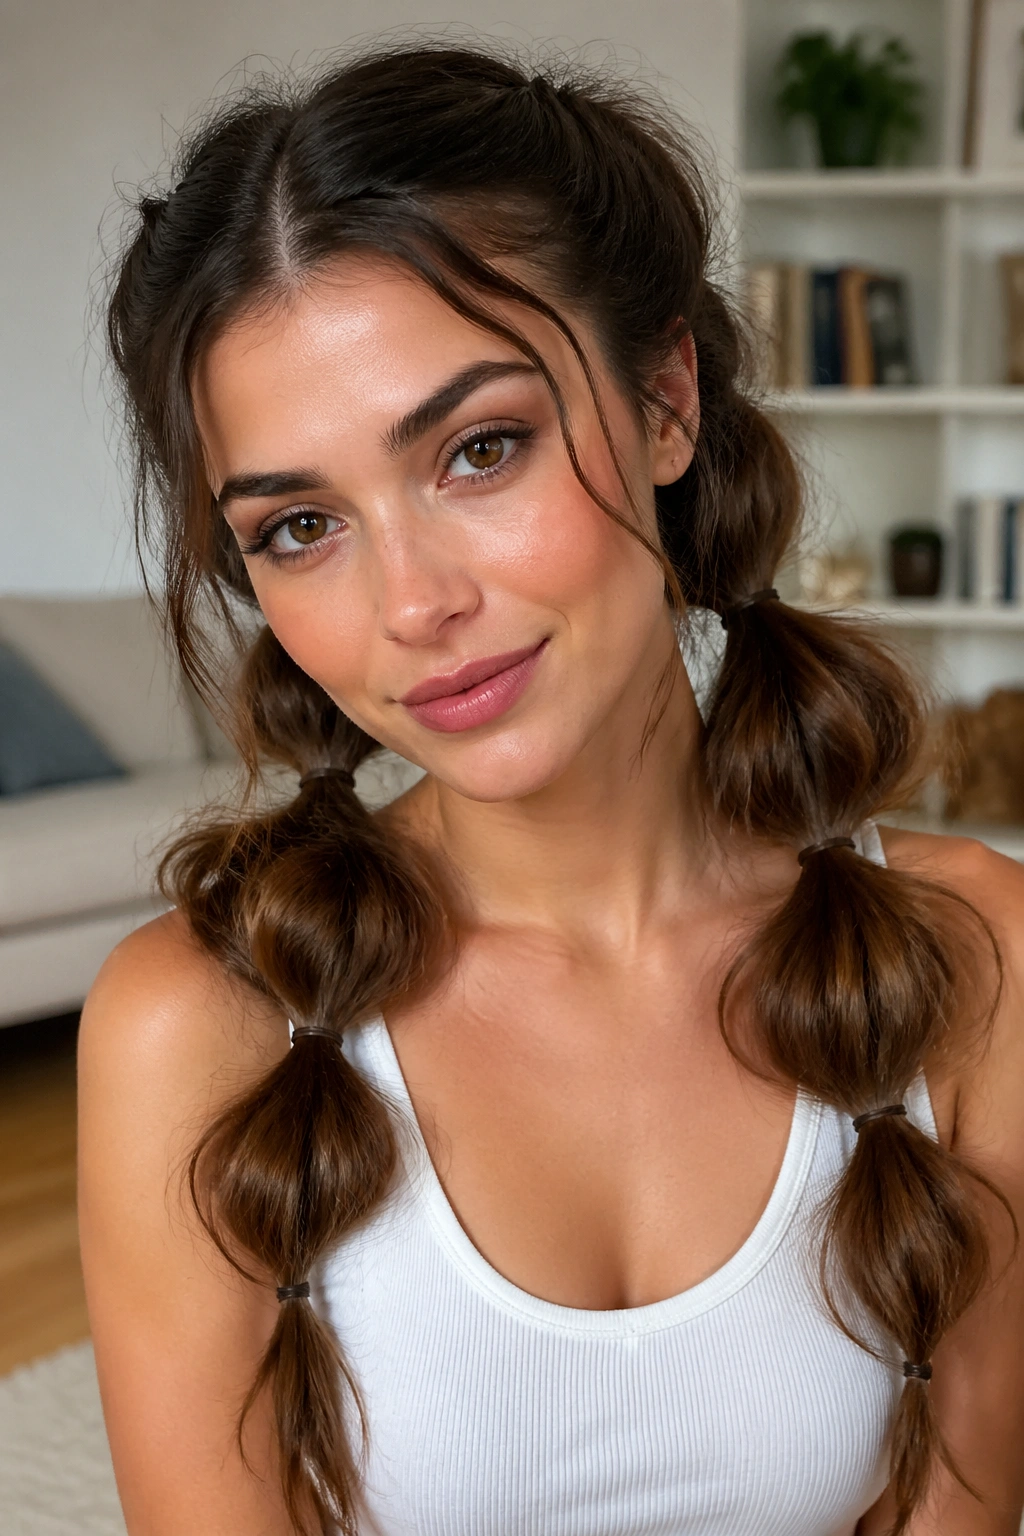
Two bubble braids can look playful or a little fierce, depending on how you wear them. I like them best when they’re not mirror images. Let one side sit slightly fuller or start the bubbles at a different point, because that small imbalance makes the style feel human instead of staged.
What Makes Them Different
Pigtails give you more visual movement than one single braid, especially if you leave the part line a bit imperfect. A center part is fine, but a slightly off-center part looks softer and less school-uniform. Keep the bubbles medium-sized so the style doesn’t turn cartoonish.
- Part the hair with your fingers instead of a comb if you want a softer line.
- Secure each side at the same height, then build 4 to 6 bubbles per side.
- Tug the outer edges of the bubbles unevenly for a more relaxed finish.
- Let the ends fall in different directions. That helps.
These are especially nice on thick hair because the volume fills out fast. On finer hair, backcomb the ponytails lightly at the base before you add the first elastic. Not much. Just enough to cheat the fullness.
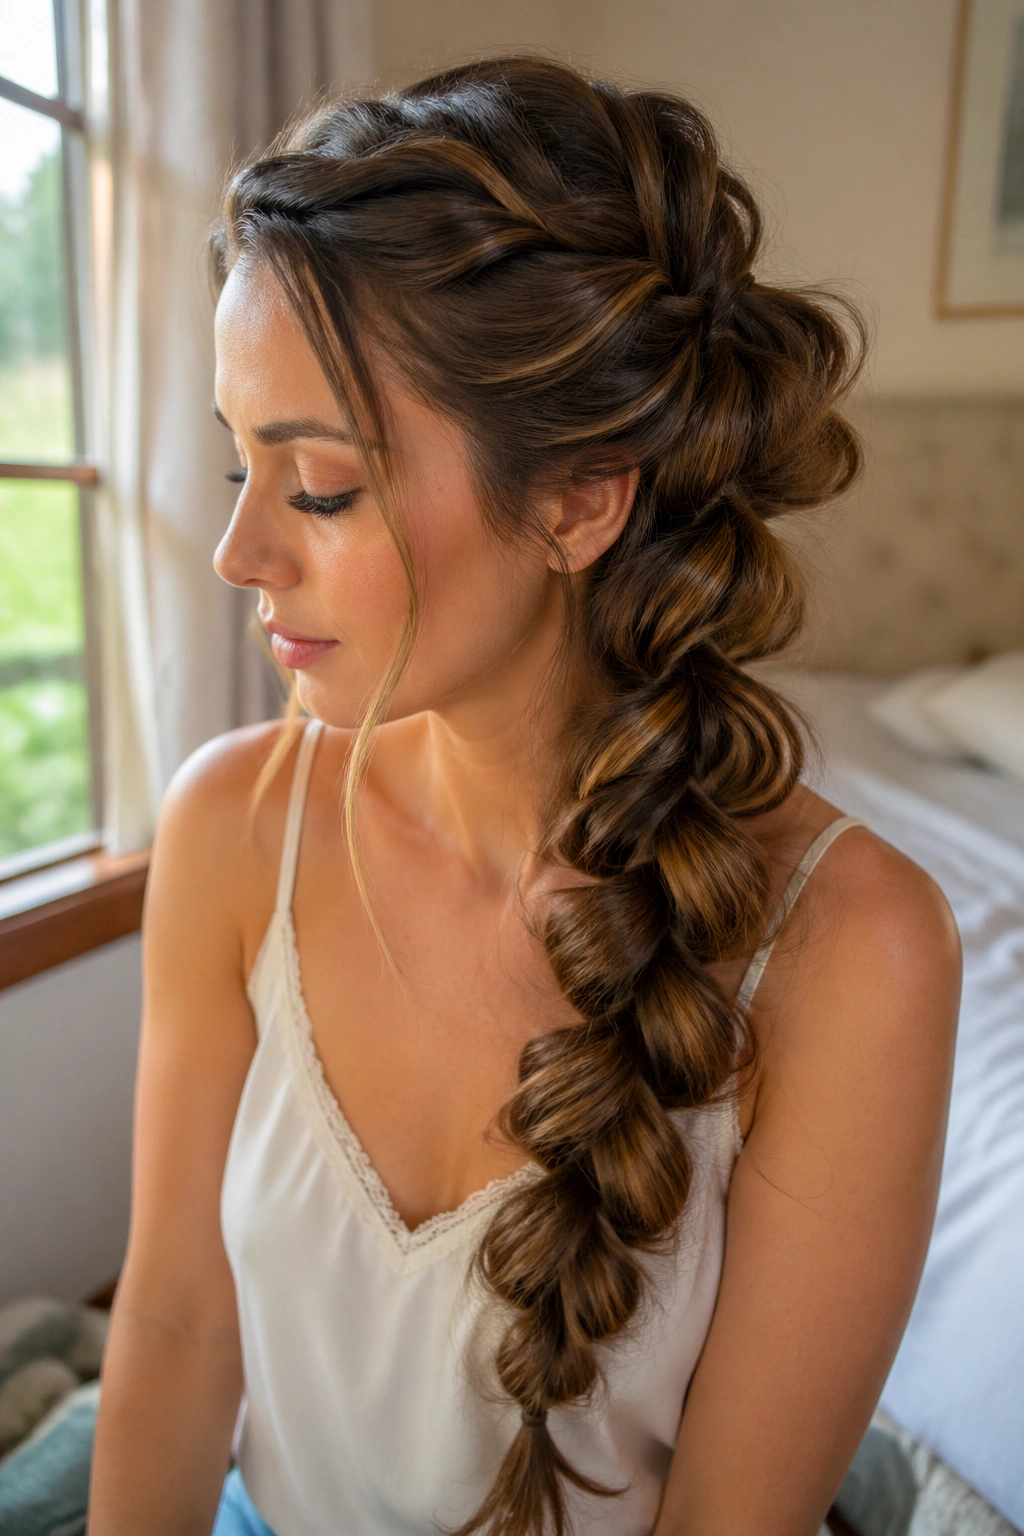
4. Half-Up Messy Bubble Braid on Wavy Hair
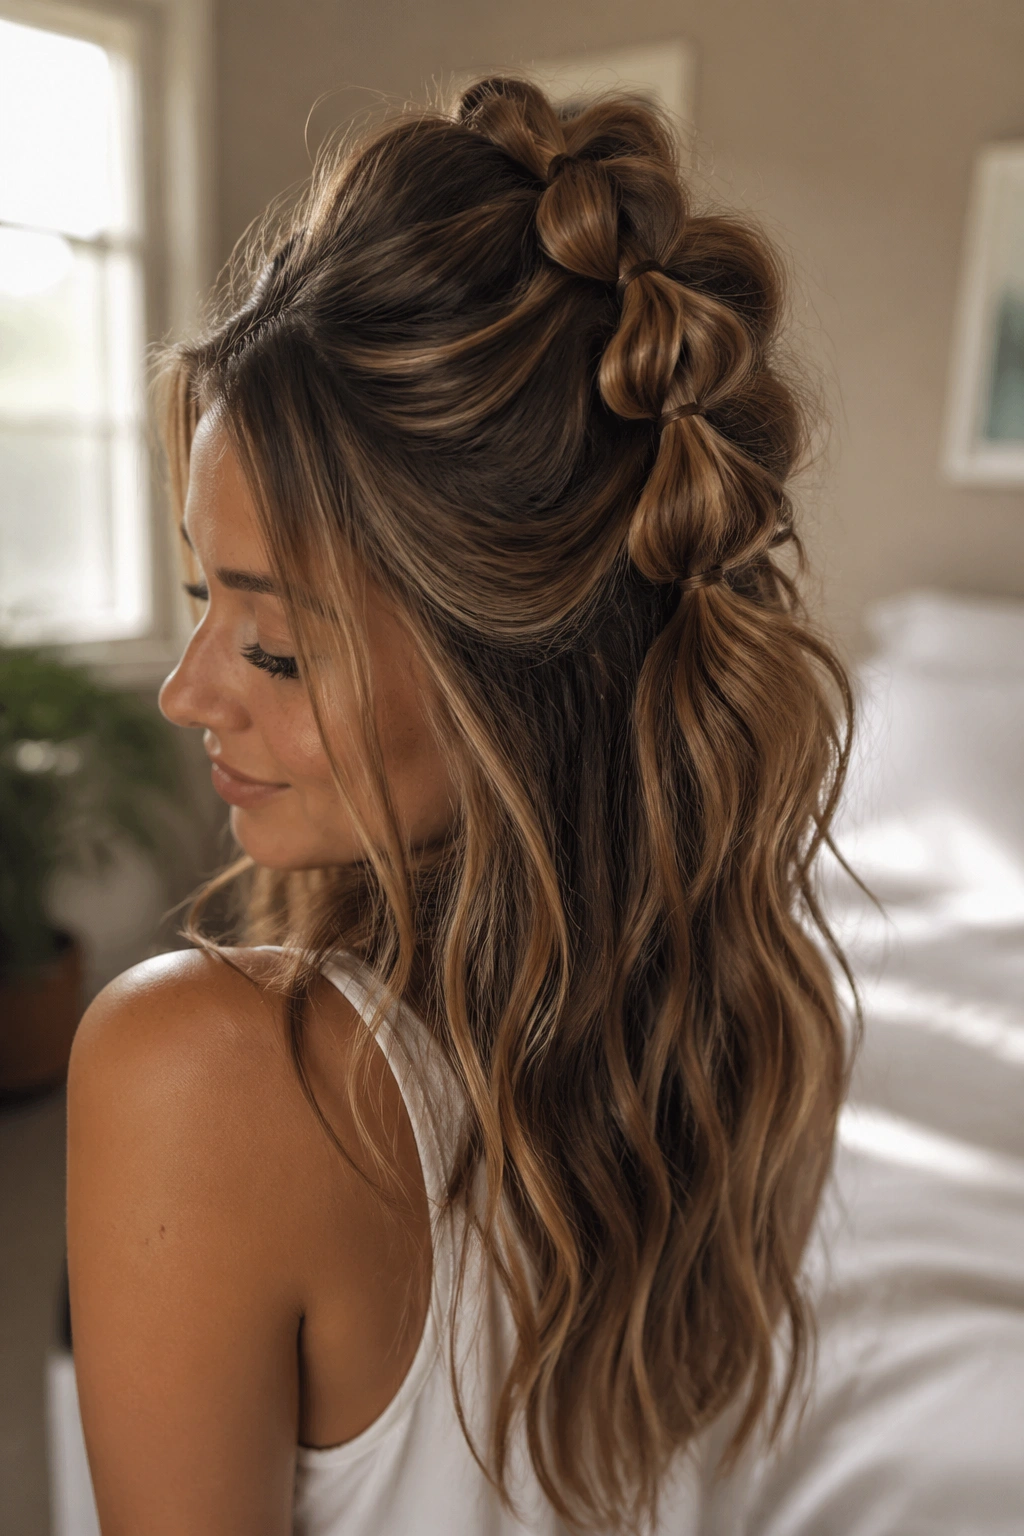
A half-up bubble braid is the one I recommend when you want texture but still want your length to show. It keeps the crown and front pieces contained, then lets the rest of the hair fall loose underneath, which is a smart move if your hair already has bend or wave.
You can keep the top section as a mini ponytail and then divide it into bubbles, or you can pull the half-up section into a short braid that ends around the shoulder blades. Either way, the contrast between the sculpted top and the loose lower layers is the point. That contrast is what makes the style feel undone rather than tidy.
This look also behaves well with layers. If your hair has shorter pieces around the face, they can fall naturally without ruining the shape. Spray the lower half with a little sea-salt mist if you want the ends to feel piecey instead of smooth. That tiny detail keeps the style from looking too neat.
5. Side-Swept Bubble Braid With Asymmetrical Texture
A side-swept bubble braid has a more relaxed attitude than a center-parted one. The whole style shifts across the head, so the bubbles land in a way that feels slightly off-kilter, which is exactly what you want if you like your hair to look intentional but not engineered.
The side part does the heavy lifting here. Make it deep enough that one side has a little lift at the root, then gather the hair behind the opposite ear or just below it. The bubbles can be larger near the top and smaller near the ends, or the other way around. I actually prefer changing the bubble size as you go; it keeps the eye moving.
This shape works well with long bangs, curtain pieces, and layered cuts because the side sweep lets those pieces break up the front. If the braid feels too tidy, loosen the first two bubbles only. That one move softens the whole silhouette.
6. Rope-Twist Bubble Braid Hybrid
This one has a bit more texture to it because you twist the sections before each elastic. The result is part rope braid, part bubble braid, and that extra twist gives the hair more grip, which is useful when the strands are slippery or freshly blown out.
Start by dividing the ponytail into two sections near the base, twist them loosely, then secure with an elastic. Continue down the length of the ponytail, adding bubbles every few inches and twisting the strands between each tie if the hair needs more detail. It sounds fussy, but it’s not once you get the rhythm.
How to Keep It Soft
If you twist too tightly, the braid starts to feel ropey in a bad way. Loose twisting is better. You want the strands to show movement, not tension.
A rope-twist hybrid is also one of the best choices for long hair that tends to fall flat after an hour. The texture holds. The braid looks fuller from the side. And because the twists break up the pattern, you don’t need to puff every bubble as aggressively.
7. Pull-Through Bubble Braid With Big, Fluffy Sections
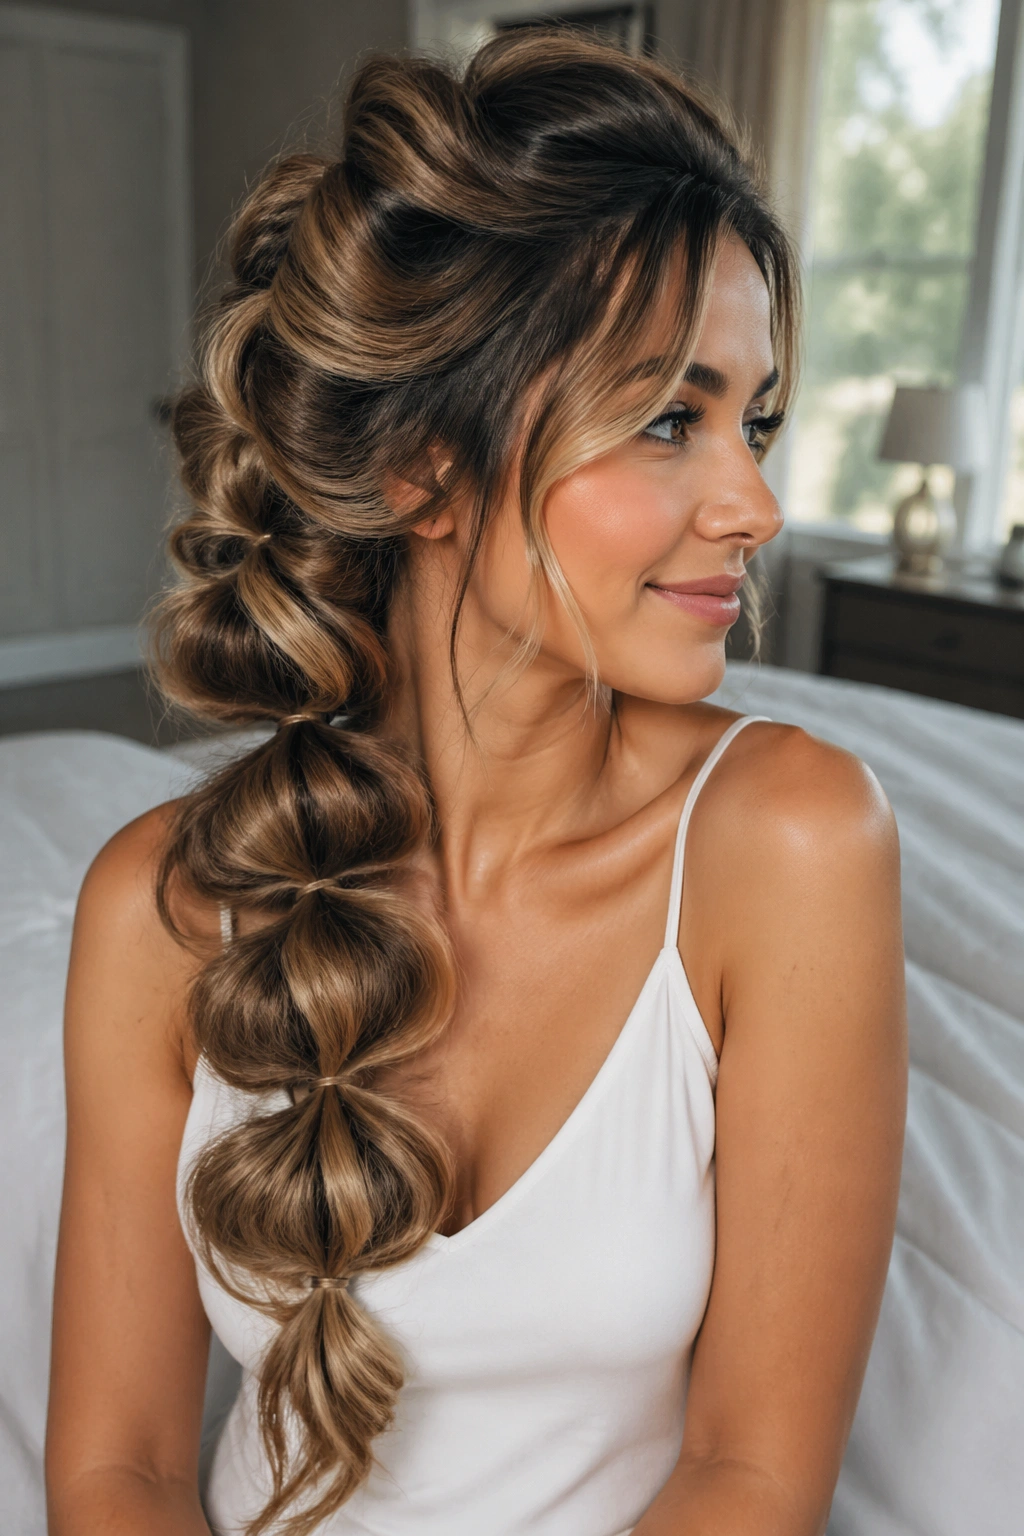
Pull-through braids are the drama queens of the bubble-braid family. They use stacked ponytails to create oversized loops, and when you pull them apart a little, the whole style looks plush and full of air. If you like hair that makes a visible shape from across the room, this is the one.
The messy version is better than the ultra-clean version, no contest. Leave the sides slightly loose, then pancake each loop with your fingers so it spreads wider across the head. The key is to stop before it gets too round. You want fullness, not a perfect series of balloons.
This style takes more elastics than a basic bubble braid, but the payoff is worth it when you want something that feels special without using hot tools. It’s also surprisingly good for long, layered hair because the stacked sections hold the shorter pieces inside the shape instead of letting them escape. A little mess makes the pull-through braid look richer.
8. Crown Bubble Braid That Wraps the Head
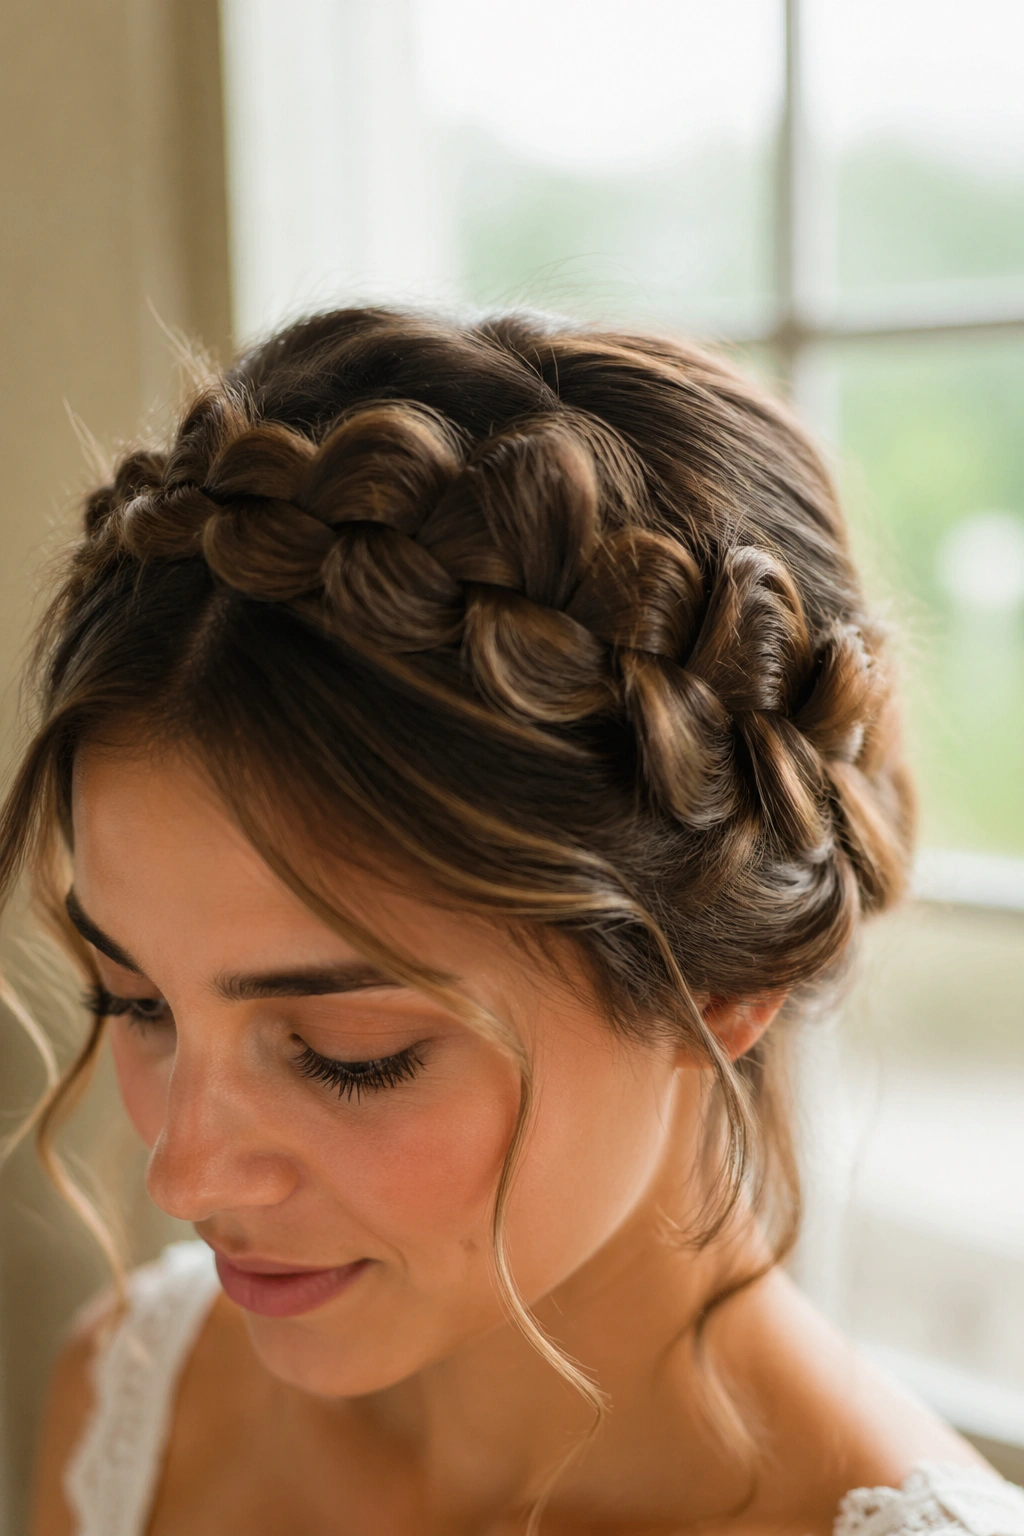
A crown bubble braid has a softer spirit than a tight halo braid. Instead of sitting flat and polished, it wraps around the head with a little looseness at the temples and a few airy pieces near the nape. It feels romantic without trying too hard, which is rare.
You can start at one side near the temple and work around the hairline, or create a loose braid that travels from ear to ear. Either way, keep the bubbles small and the parting soft. The style should frame the face, not pin it in place. That’s where most people overdo it.
What to Watch For
The crown shape can get bulky fast if each bubble is too large. Smaller sections keep it balanced. If you have heavy hair, pin the braid at two or three points so it doesn’t slide backward. And if you like a slightly messy finish, let a few wisps escape around the ears. Those little pieces keep the braid from looking stiff or bridal in the wrong way.
9. Bubble Braid Into a Low Bun
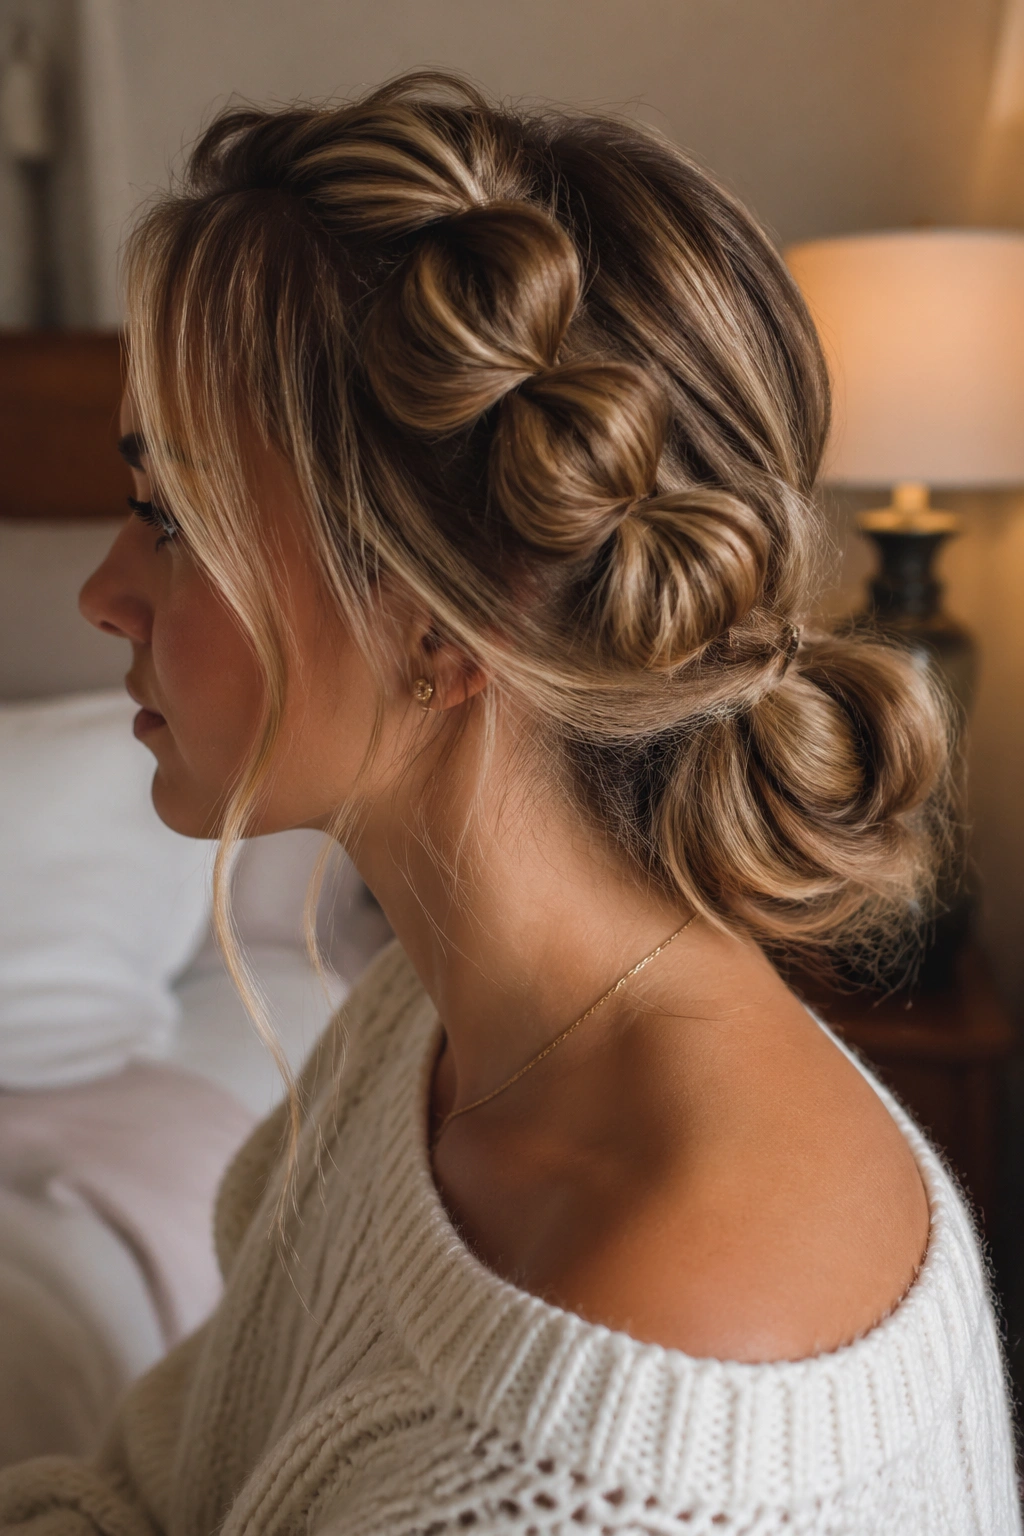
This is one of my favorite ways to make a bubble braid feel finished without losing the undone texture. The braid starts low, moves through a few soft bubbles, then gets tucked into a bun at the back of the neck. It’s casual, but not lazy.
Think of it as a braid that changes its mind halfway down. The top stays loose and textured, the middle keeps the bubble rhythm, and the ends disappear into a knot or twist. That makes it useful for medium-length hair that doesn’t always have enough length for a long bubble tail. You can still get a strong shape without waiting for inches you don’t have.
Pin the bun loosely. Seriously. If you cinch it down too hard, the whole style loses the airy feel that makes bubble braids appealing in the first place. A few hidden bobby pins and one elastic are usually enough.
10. Ribbon-Wrapped Bubble Braid With Soft Color
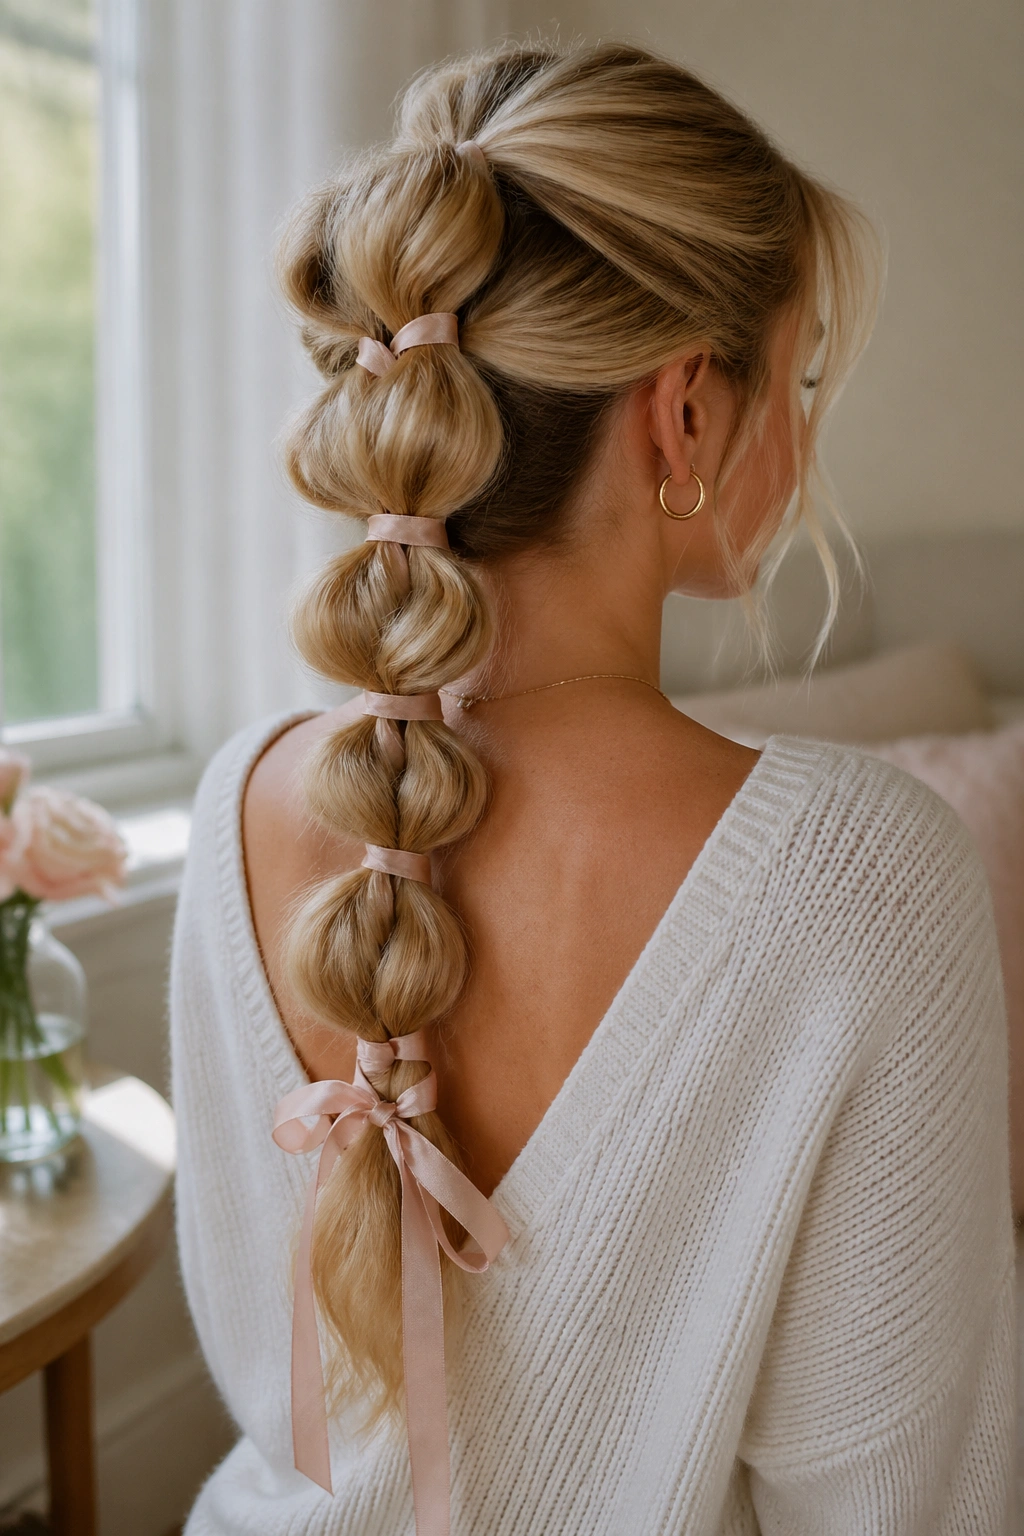
A ribbon changes the mood fast. Satin makes the braid feel prettier, grosgrain looks more casual, and velvet gives it a heavier, richer shape. The ribbon can sit alongside the elastic ties or weave through the braid itself if you want a more detailed finish.
Use a color that lives near your hair tone if you want a quiet effect, or pick a contrast if you want the ribbon to stand out. Deep red against dark hair looks sharp. Cream on blonde hair looks softer. Even a narrow black ribbon can make a simple bubble braid feel more deliberate.
The messy part still matters here. Keep the bubbles relaxed and the ribbon a little uneven so it doesn’t seem too precious. If the ribbon lays perfectly flat, the braid can start to feel stiff. Let it twist. Let a tail end trail off. That slight disorder is what keeps the look grounded.
11. Bubble Braids on Curly Hair

Curly hair and bubble braids get along better than people expect. The curls already bring shape, so the braid doesn’t need much help to look full. In fact, if you try to smooth the texture too much, you lose the best part of the style.
The safest move is to work with the curl pattern, not against it. Gather the hair gently, secure each bubble with a tie that won’t snag, and leave the lengths a little imperfect. The bubbles can sit between curl clusters, which gives the style a broken-up, dimensional look that straight hair has to fake.
How to Style It
- Use a moisturizing curl cream first if the hair feels dry.
- Add elastics every 2 to 3 inches, depending on length.
- Pull only the outer edges of the bubbles, not the whole section.
- Leave the ends curly instead of forcing them straight.
That last point matters. Curly ends make the style look lived-in in the best way. The braid doesn’t need to fight the hair’s natural shape; it just needs to guide it.
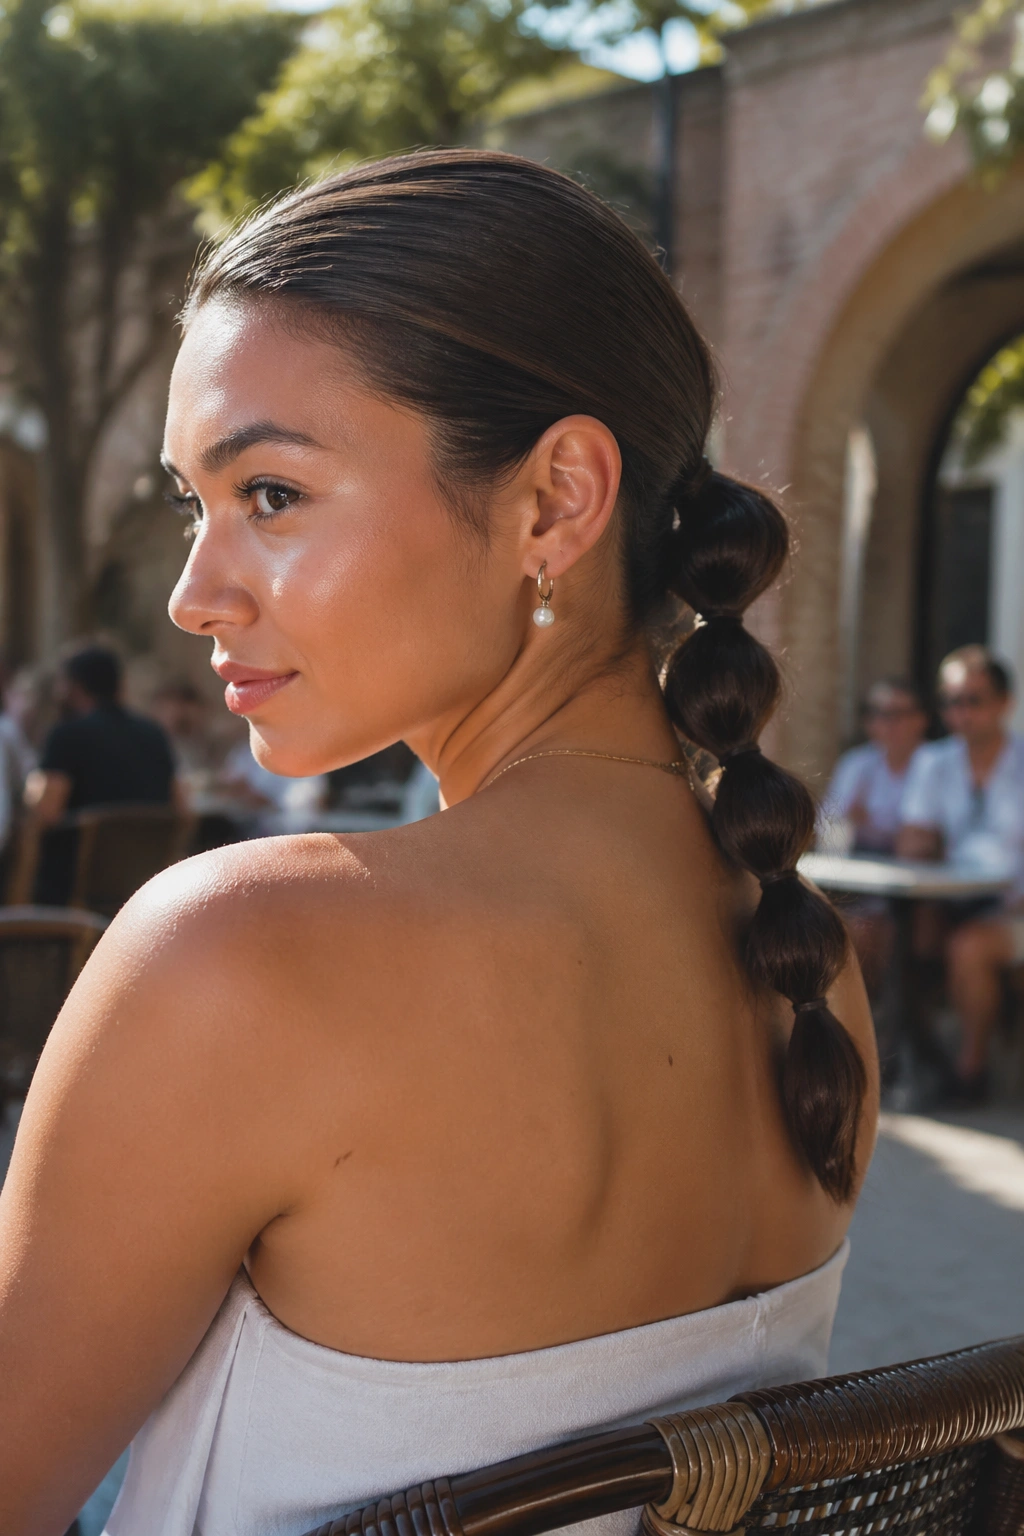
12. Sleek Roots, Messy Bubbles

This version has a sharper contrast than most of the others. The roots are smooth and polished, then the bubble sections get loose and airy farther down the length. That contrast makes the texture stand out more because the eye notices the shift from clean to undone.
Use a brush or comb to smooth the top section, then stop trying so hard once you reach the ponytail. The bubbles should still be soft, maybe even a little irregular, so the sleek root doesn’t make the rest of the braid feel harsh. It’s a smart style for events when you want hair to look neat at the scalp but not rigid everywhere else.
I like this one with a middle part and a bit of shine serum on the top only. Keep the product away from the bubbly sections or they’ll collapse. The finished look is a little polished, a little careless, and that tension is what gives it personality.
13. Mini Accent Bubble Braids Hidden in Loose Hair
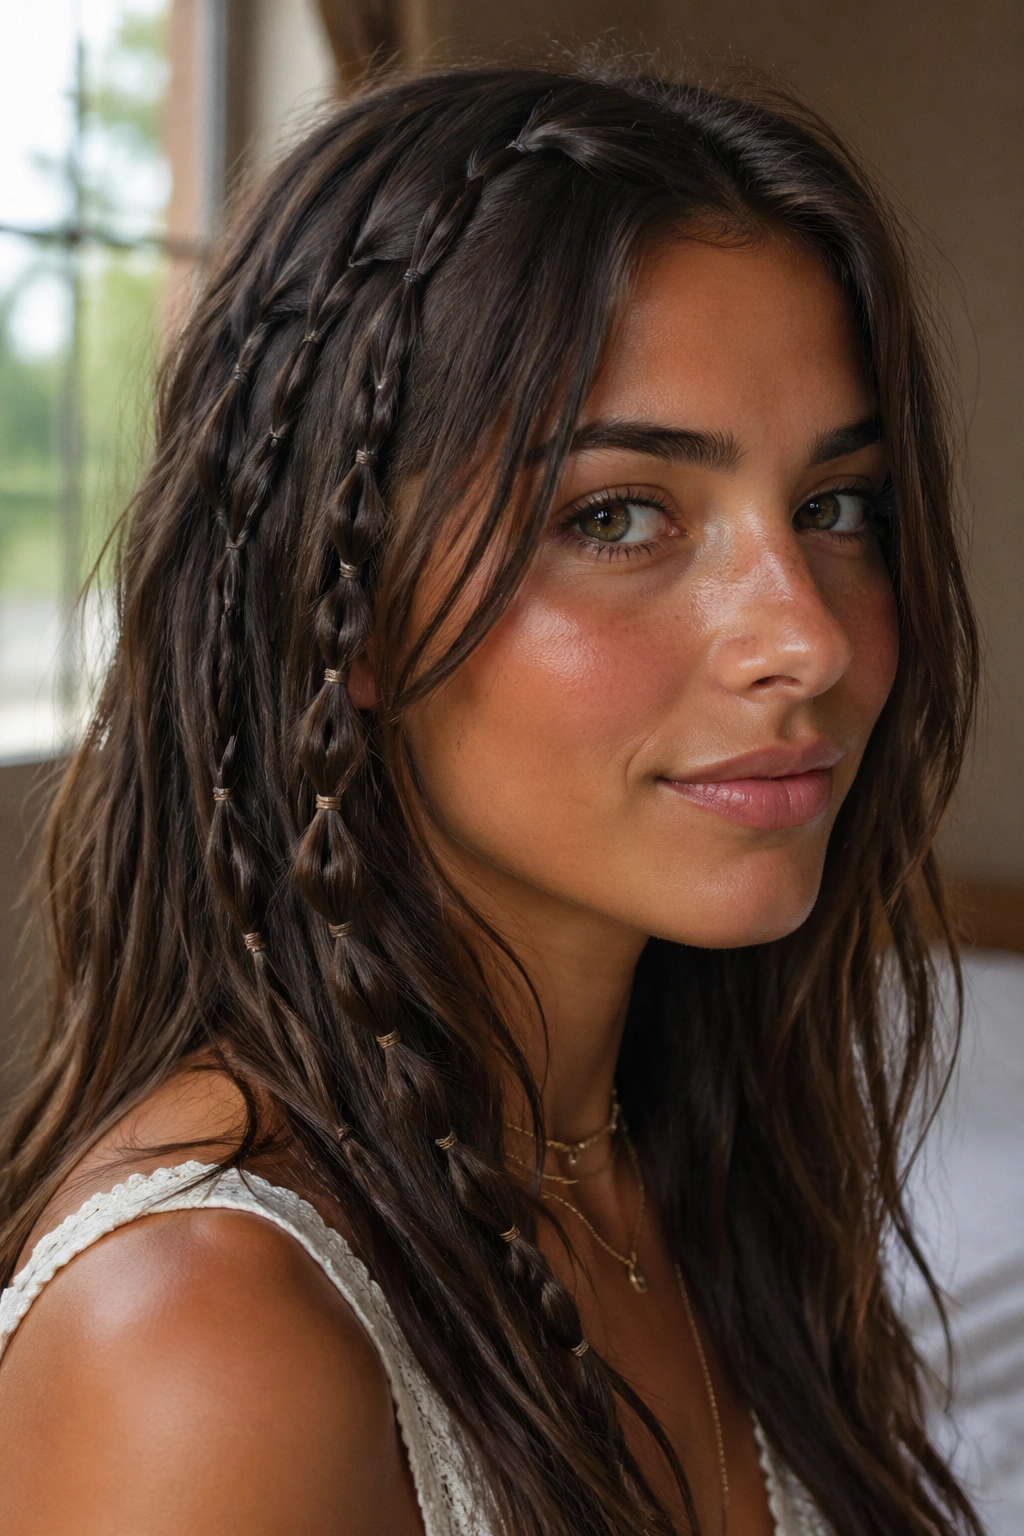
Not every bubble braid needs to take over the whole head. Mini accent bubbles tucked into loose waves can be a better move if you want detail without losing length. They work almost like hair jewelry, except the texture is built in.
You can place one small bubble braid near the temple, several tiny sections along the side, or a pair of mini braids on each side of a half-up style. The bubbles don’t need to be large. A few elastics spaced close together can make a short section of hair look interesting fast.
Where This Style Shines
It’s excellent for layered cuts because the accent braid can sit on top without needing the whole head to cooperate. It also gives fine hair a little lift, since the sectioning creates the illusion of density.
If the rest of your hair is straight, add a bend with a wand or braid the lengths overnight for a softer backdrop. The contrast between the loose hair and the tiny bubble details is what makes this style feel fresh. Without that contrast, it can disappear.
14. Boxer Bubble Braids With Soft Looseness
Boxer braids usually read as athletic and tight, but the bubble version softens the whole thing in a way I prefer. Start with a center part, braid or twist each side into a ponytail, then add bubble sections down the lengths. Once the bases are set, pull at the sides a little so the braids stop looking severe.
The charm here is in the tension between sporty and messy. You still get the face-framing structure of boxer braids, but the bubble sections break up the line and make the hair feel lighter. That makes them easier to wear beyond the gym, which is probably why they keep showing up in more casual styling.
You can keep the bubbles small if you want the style to stay tight near the head, or spread them wider if you like a fuller finish. Either way, don’t flatten the crown too much. A little lift keeps the style from looking over-controlled.
15. Bubble Braid With Braided Ends
A tiny three-strand braid at the end of a bubble ponytail solves a practical problem: layers love to slip out. Once you’ve built the bubbles, braid the last few inches and secure the ends with a small elastic. It gives the style a neat finish without making the top half feel formal.
This works especially well on hair that is shoulder-length or cut in long layers. The braided tail helps the shorter pieces stay together instead of spraying out in every direction. If you want the whole braid to feel messier, tug the bubble sections but leave the tiny end braid a bit tighter. That difference in texture makes the style more interesting.
I also like this version when the ponytail starts to fray late in the day. The braid at the bottom acts like an anchor. It keeps the style readable even after the bubbles have softened. Practical. Pretty. Not a bad combination.
16. Claw-Clip Bubble Braid
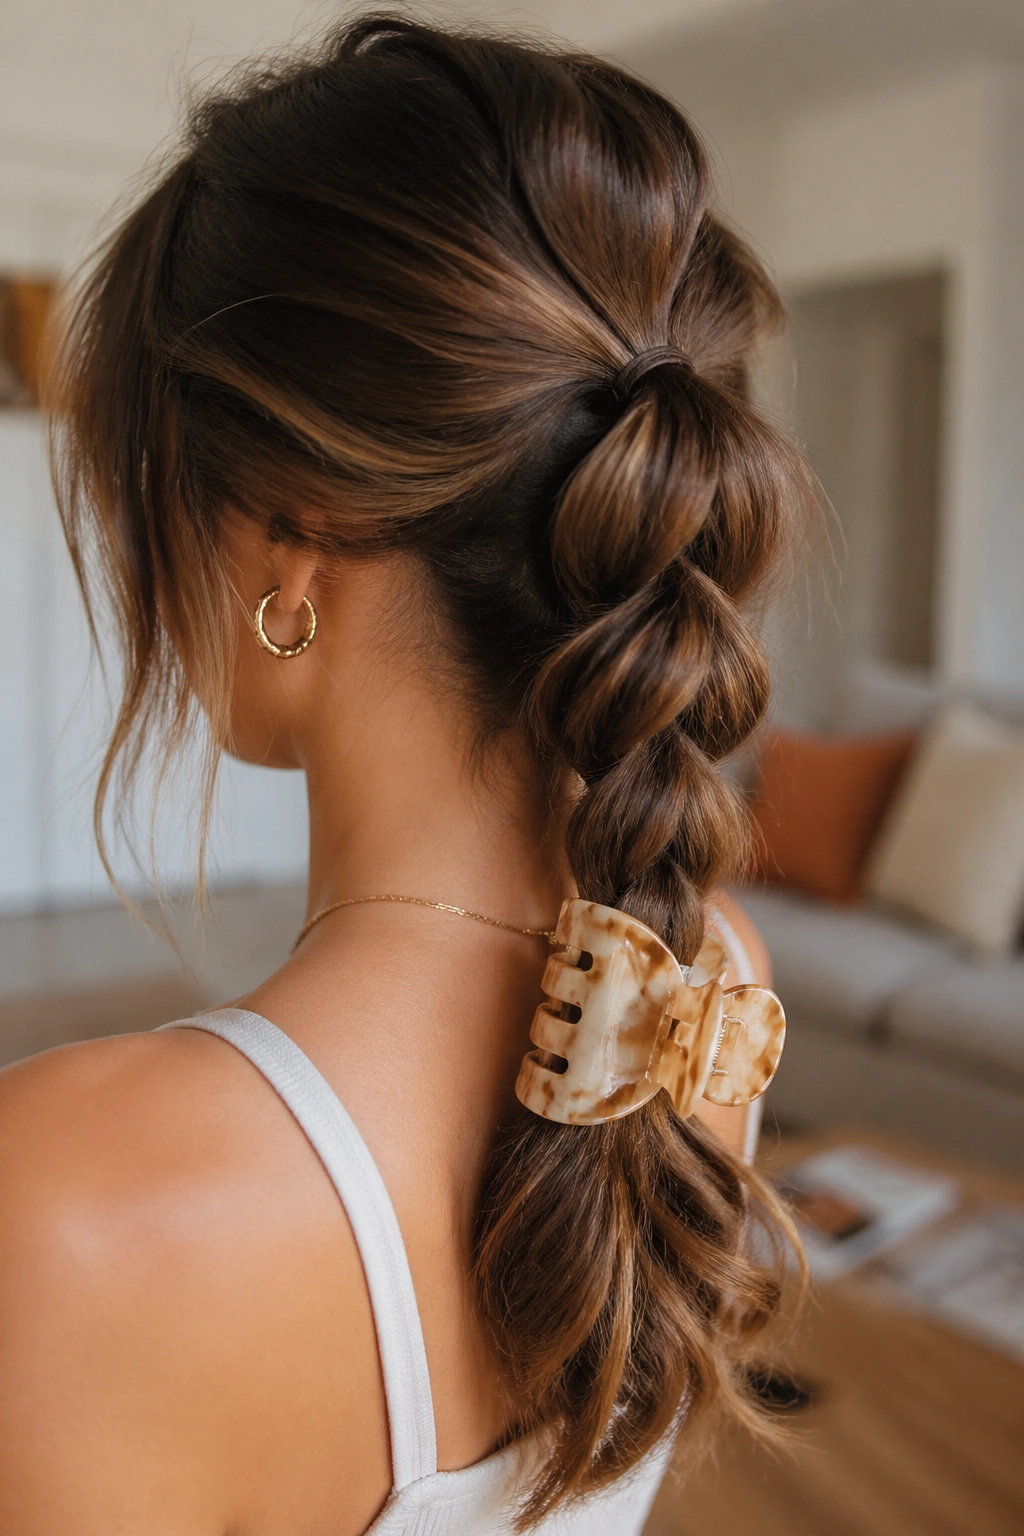
A claw-clip bubble braid is one of those styles that looks more effortless than it actually is. You create a loose ponytail or partial braid, build a few soft bubbles, then finish the base with a clip instead of an elastic tuck or a pinned bun. The clip gives the style a casual, slightly undone ending.
Choose a clip that can hold the hair without crushing it. Bigger clips handle thick hair better; smaller clips are fine if you’re only grabbing a half-up section. I like this version when I want the braid to stop somewhere mid-length instead of dragging all the way down the back.
The finish should feel a little imperfect. Let one side of the clip sit higher than the other if that’s what the hair wants. Let a few pieces fall out around the nape. If the point is undone texture, a neat, centered clip can work against you.
17. Short-Hair Friendly Mini Bubble Ponytail
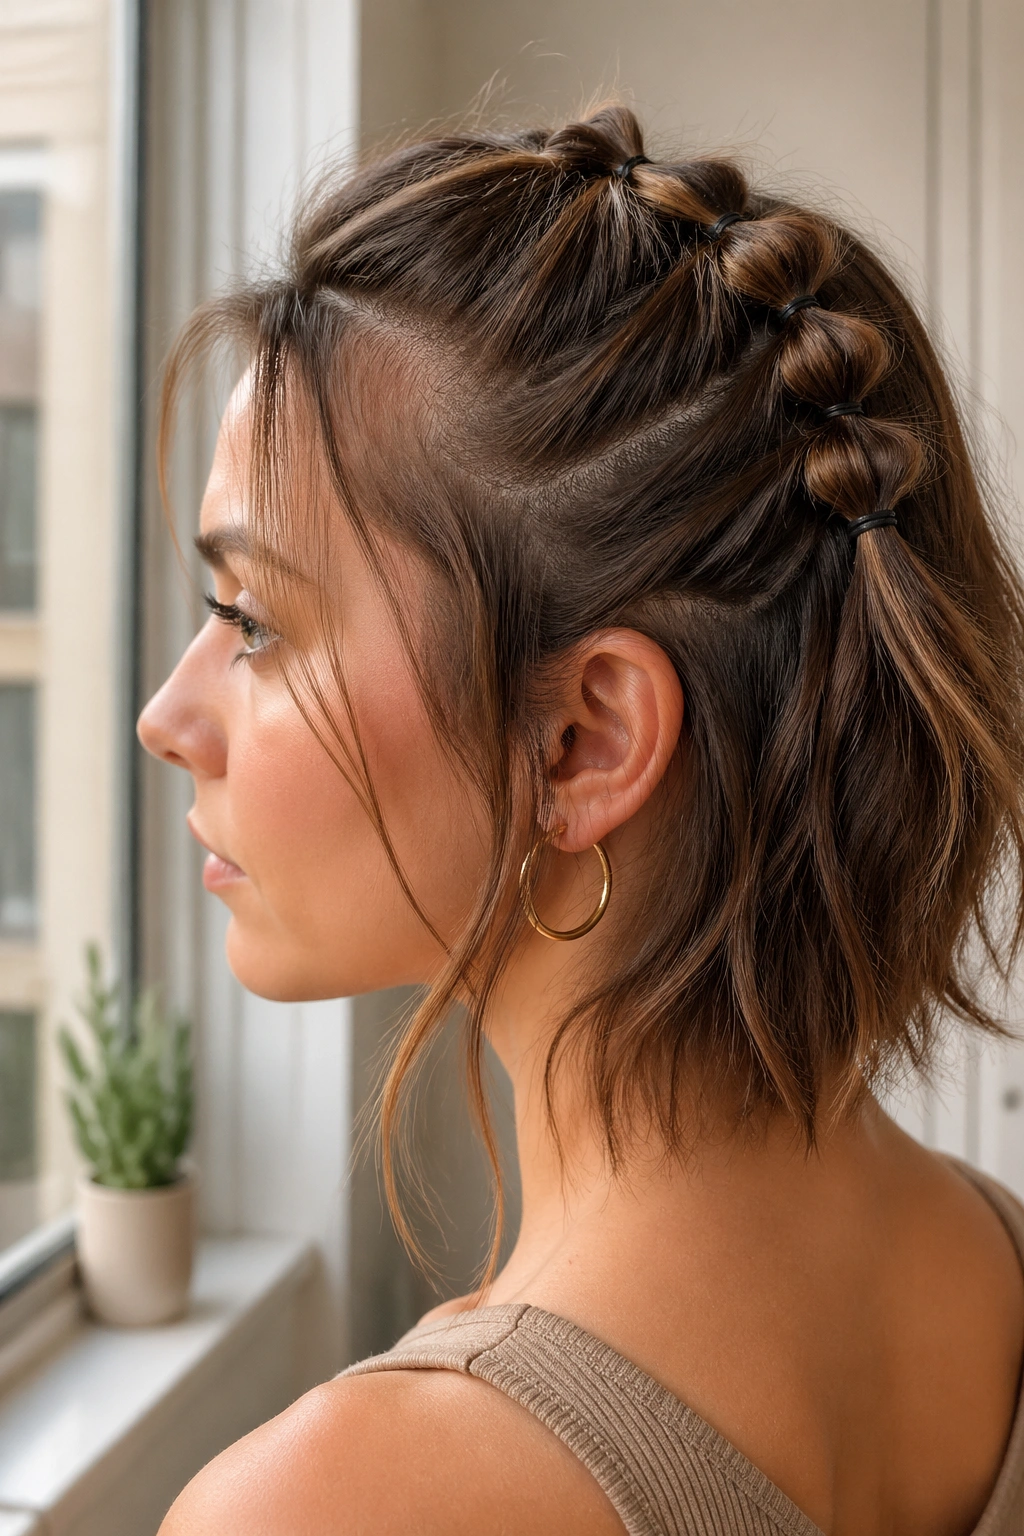
Shorter hair can absolutely play this game. You just need smaller bubbles and tighter spacing between elastics. A mini bubble ponytail on shoulder-length hair or even slightly above-the-shoulder cuts can still look full if you keep the sections compact and the pull-outs gentle.
Use one ponytail at the crown or nape, then add 3 to 5 small bubble sections depending on length. If the tail is too short for many bubbles, stop early and finish with a tiny knot, ribbon, or clasp. That’s better than forcing extra elastics onto hair that doesn’t have room.
A lot of people think bubble braids only look good on long hair, and that’s not true. Shorter lengths can look sharper because the bubbles sit closer together and read as deliberate. The result is cute, yes, but also a little chic if the parting is neat and the texture is soft.
18. Mixed-Texture Bubble Braid With Micro Braids
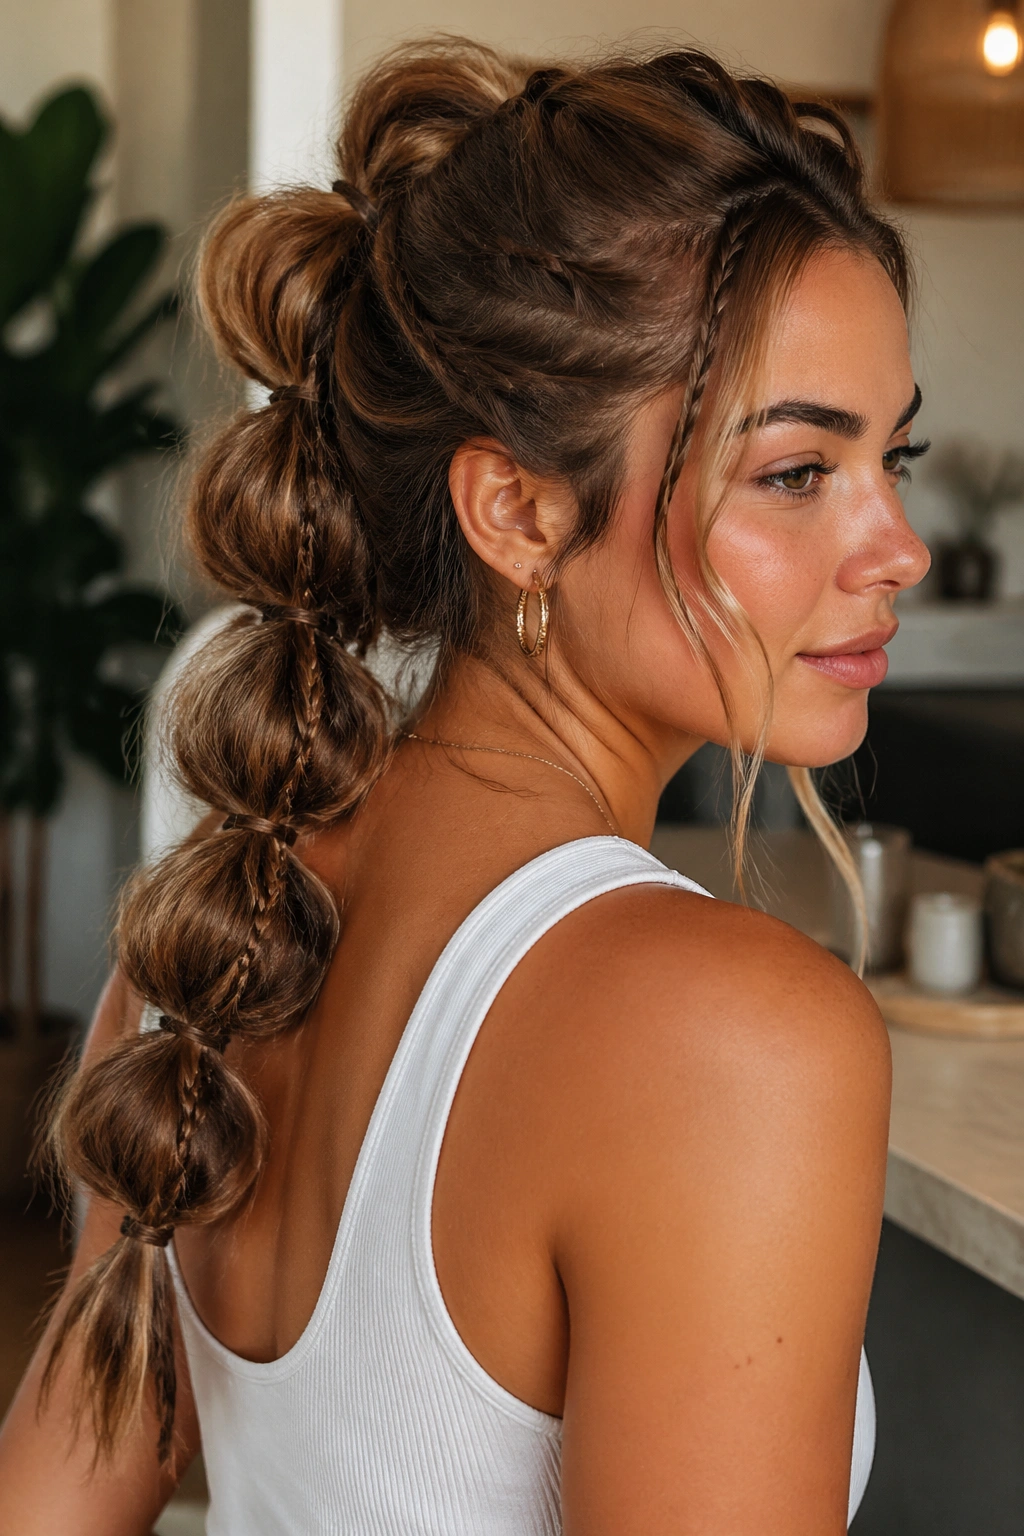
This is the style for anyone who likes hair with layers of detail. Add one or two micro braids into the ponytail before you create the bubble sections, and the whole braid starts to feel more textured even if the base shape stays simple. The tiny braids peek through the bubbles and give the eye something extra to catch.
The contrast matters here. Smooth sections, tiny braids, puffed bubbles — that mix keeps the style from looking flat. You don’t need many micro braids either. Two is enough in a lot of cases. More than that and the braid can start to feel busy.
Small Details That Help
- Keep the micro braids thin, about the width of a shoelace.
- Place them near the outer edges so they show when the bubbles open.
- Use one clear elastic for each bubble, then one tiny braid hidden inside.
- Finish with a light mist, not a heavy spray.
This style is good when you want the braid to feel a little more styled without losing the loose, hand-done look.
19. Pancaked Bubble Braid That Fans Out
Pancaking sounds odd, but it’s one of the easiest ways to make a bubble braid look fuller. You tug the outer edges of each bubble outward so the braid spreads wider and flatter instead of staying narrow and tubular. The effect is soft, airy, and slightly messy in a good way.
This version works best once the bubbles are already secure. Then you go back and shape them by hand. Pull from the sides first, not the middle, or the elastic can show too much. If a bubble gets lopsided, leave it. That asymmetry is part of the look.
I like this style on hair that needs volume at the sides of the head, because the spread creates more width around the face. It also softens strong layers. A little tea-light messiness goes a long way here. Too much tugging, though, and the braid starts to look collapsed, which is a bad trade.
20. Day-Long Bubble Braid That Handles Frizz
Some styles are pretty. Some styles survive. This one does both reasonably well. A low or mid-height bubble braid with firmer elastics and a touch of texturizing spray can hold up through a long day, especially if your hair tends to frizz at the ends or lose shape after a few hours.
The trick is to keep the structure solid at the base while leaving the surface soft. Smooth the roots, secure each bubble with a small but dependable elastic, and stop obsessing over perfect symmetry. If the air is damp or your hair is naturally puff-prone, a tiny bit of anti-frizz cream on the ends can help. Not much. Too much product makes the braid limp.
What Makes It Last
- Start with hair that has a little grip, not freshly washed silk.
- Add a light hold spray near the crown.
- Keep the bubbles compact enough to survive movement.
- Re-puff the braid with your fingers if it settles during the day.
That balance between hold and looseness is the whole point. The style should age well.
21. Boho Bubble Braid With Wispy Ends
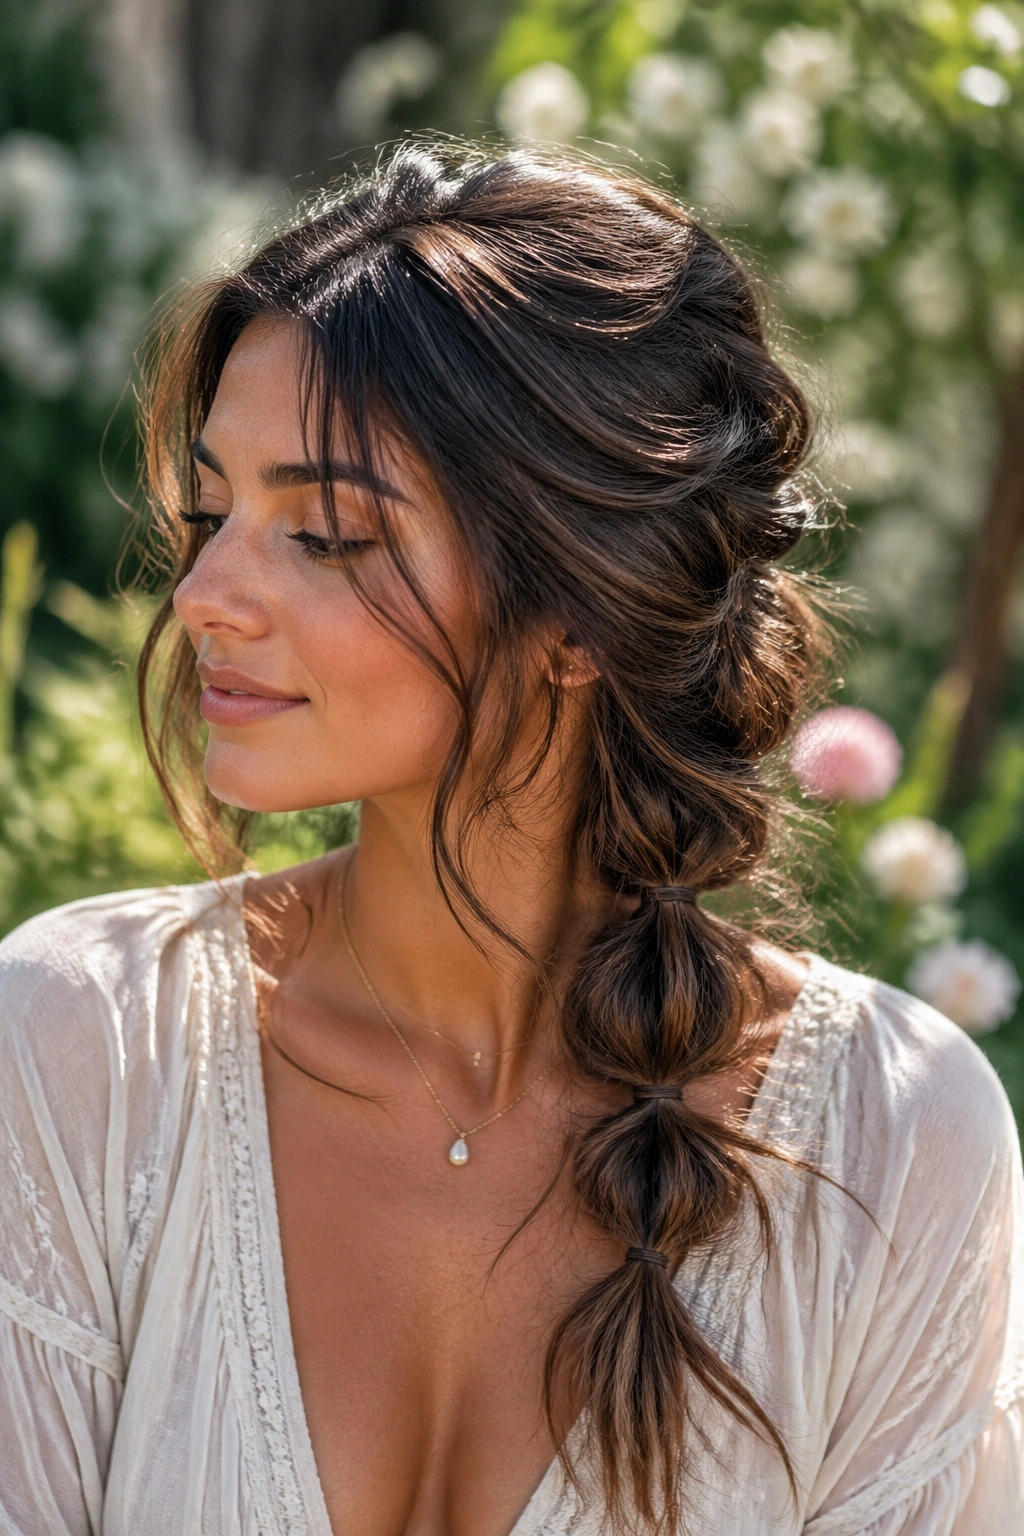
This is the prettiest mess of the group, and I mean that in a good way. The boho version leans into wispy pieces, loose crown volume, and bubbles that look almost hand-shaped rather than precisely measured. It has a softer, more romantic feel than the sharper styles.
Tease the crown a bit before you gather the hair. Leave a few strands out around the temples and ears. Build the bubbles with enough space that they can puff up, then tug them unevenly so they don’t all sit in the same shape. The ends can stay soft and slightly separated, which helps the whole braid look relaxed instead of tidy.
This works especially well with waves, but straight hair can do it too if you add texture first. Dry shampoo near the roots, a few bends through the lengths, and a little finger-combing can carry a lot of weight here. Keep it light. That’s the whole charm.
22. The Leave-It-Lived-In Bubble Braid
This is the one that reminds people the style is supposed to look a little imperfect. Not sloppy. Imperfect. The braid sits where it wants, the bubbles aren’t identical, and a few pieces escape around the hairline because that’s what hair does when you let it breathe.
The funny thing is, this version often ends up looking better than the more controlled ones. It feels lived-in because nothing is overworked. You can do a low pony, a mid pony, or even a half-up shape; what matters is that you stop fussing before the braid loses its softness. If one bubble is bigger, leave it. If the part shifts a little, fine. If the ends flip out, even better.
That’s the real trick with messy bubble braids for undone texture. They look best when you leave a little room for accident. Pin down only what needs pinning, puff only what needs puffing, and let the rest stay a little wild. That’s the part people notice first, anyway.