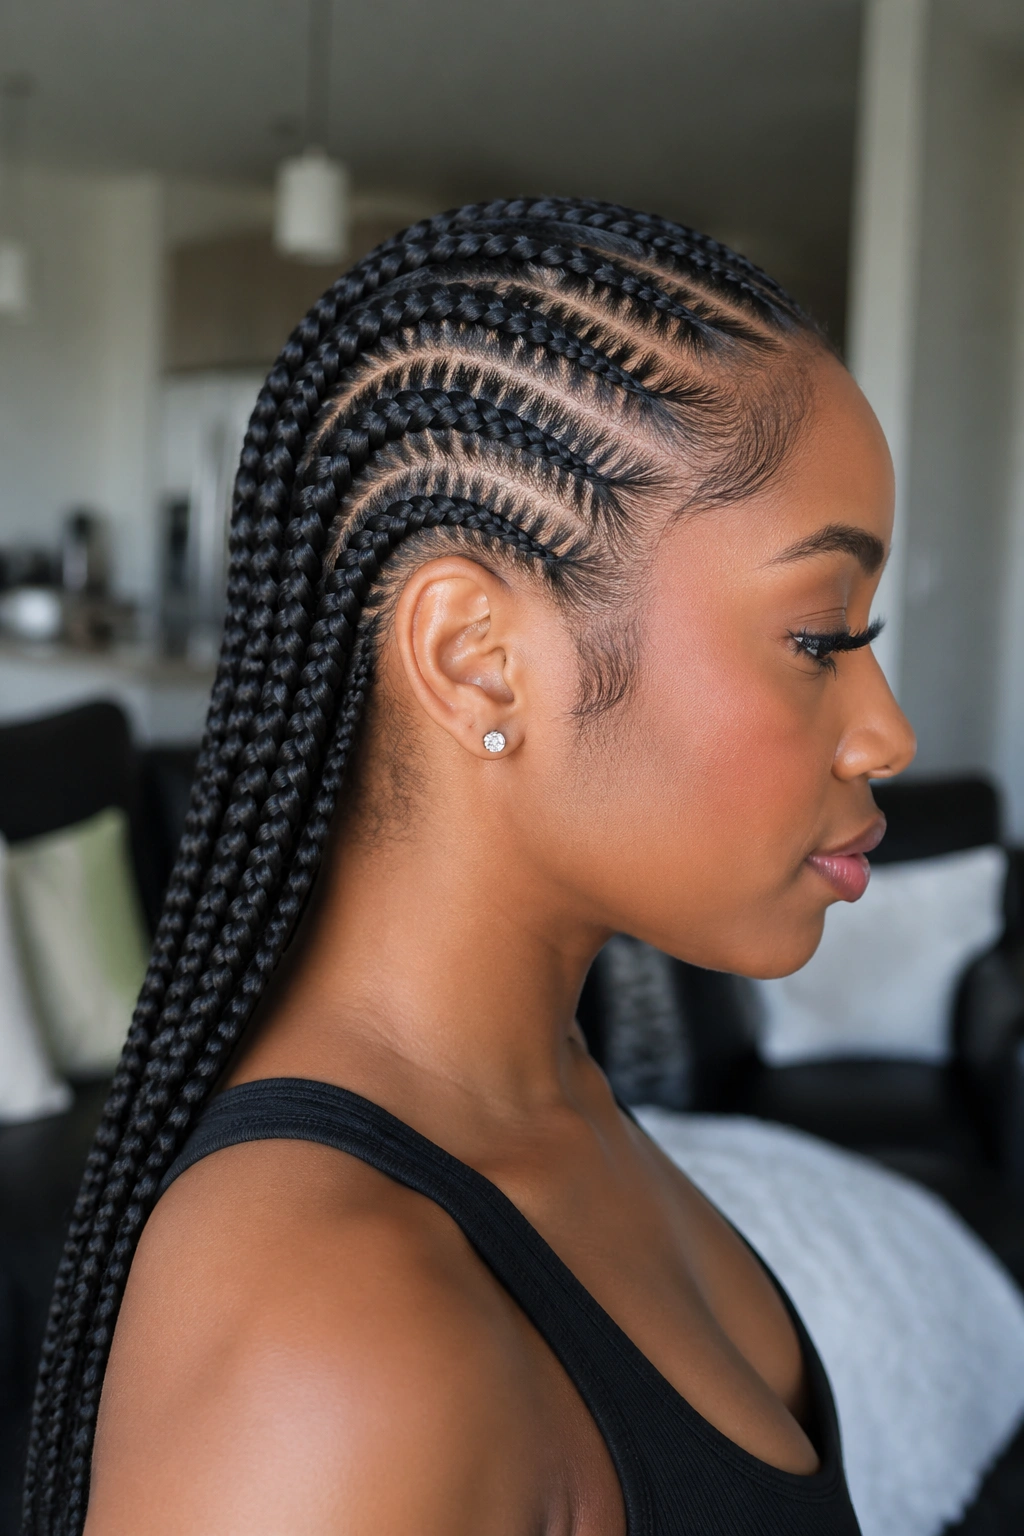
The braid pattern underneath a sew-in weave decides more than people think. It changes how flat the install sits, how much tension you feel along the hairline, where the part falls, and whether the whole style still feels good after a few days of sleeping, sweating, and moving your hair around.
I’ve seen a gorgeous bundle install ruined by a lazy base. I’ve also seen plain hair look expensive because the foundation was clean, balanced, and mapped with care.
Tight is not tidy. That’s the part a lot of people learn the hard way.
Some braid patterns are built for a dead-flat crown. Others make room for a middle part, a side part, a closure, a frontal, or a flip-over style that needs more freedom. The right choice depends on how you wear your hair when you are not sitting in the chair, which is why the braid map matters just as much as the hair you buy.
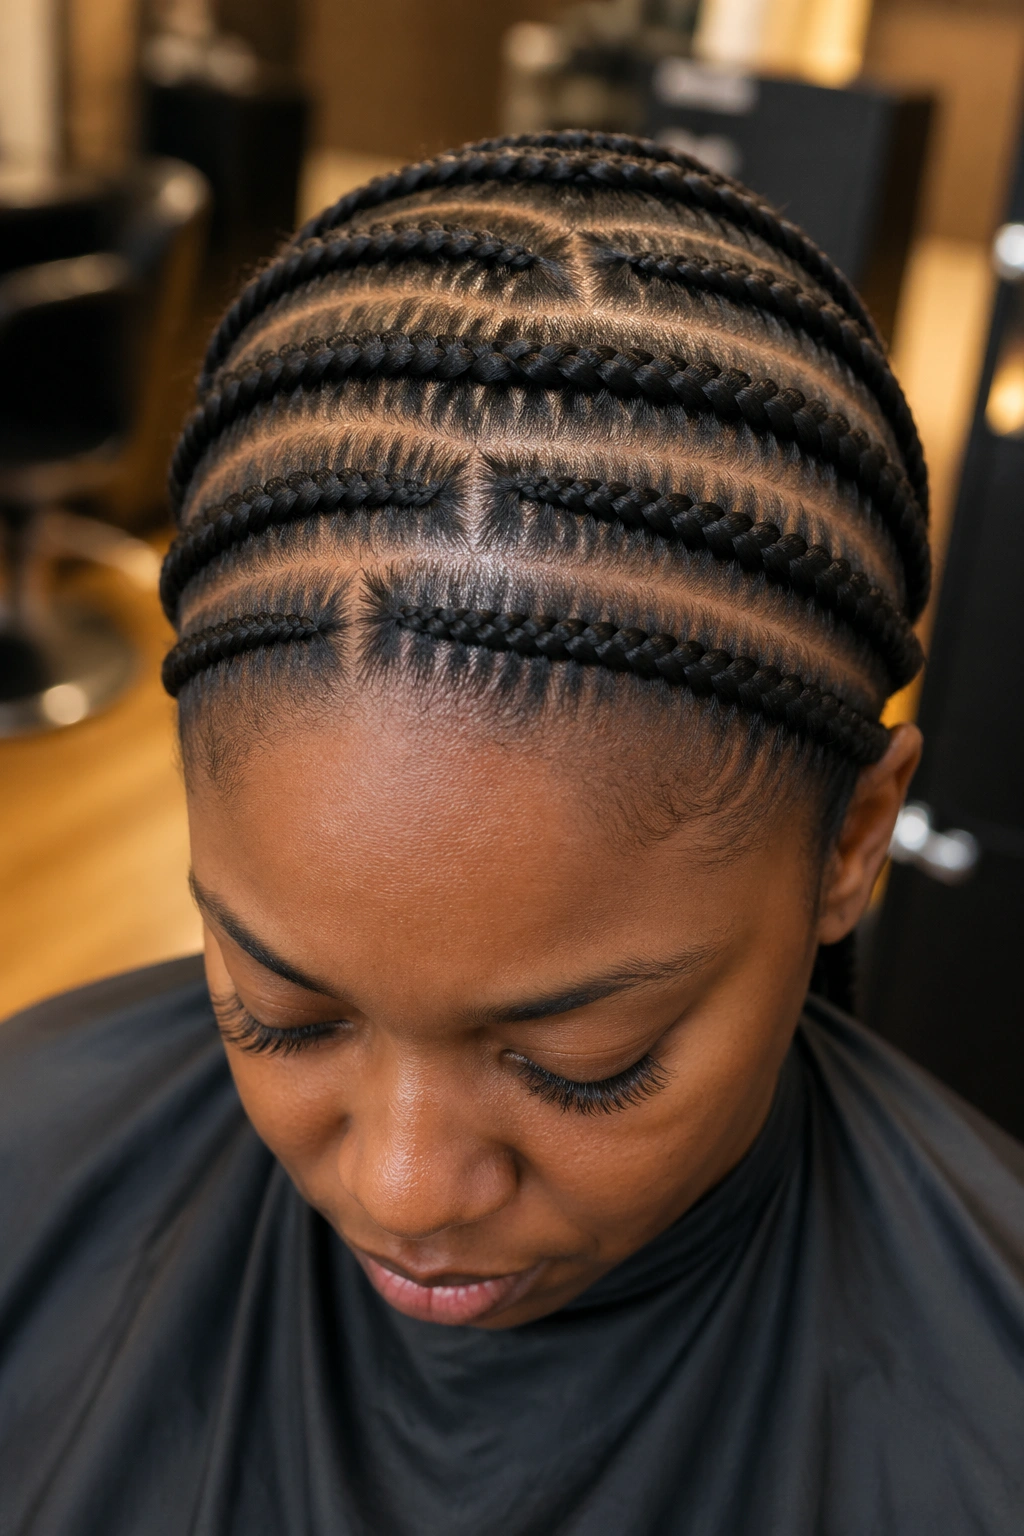
1. Straight-Back Cornrows for a Flat Sew-In Base
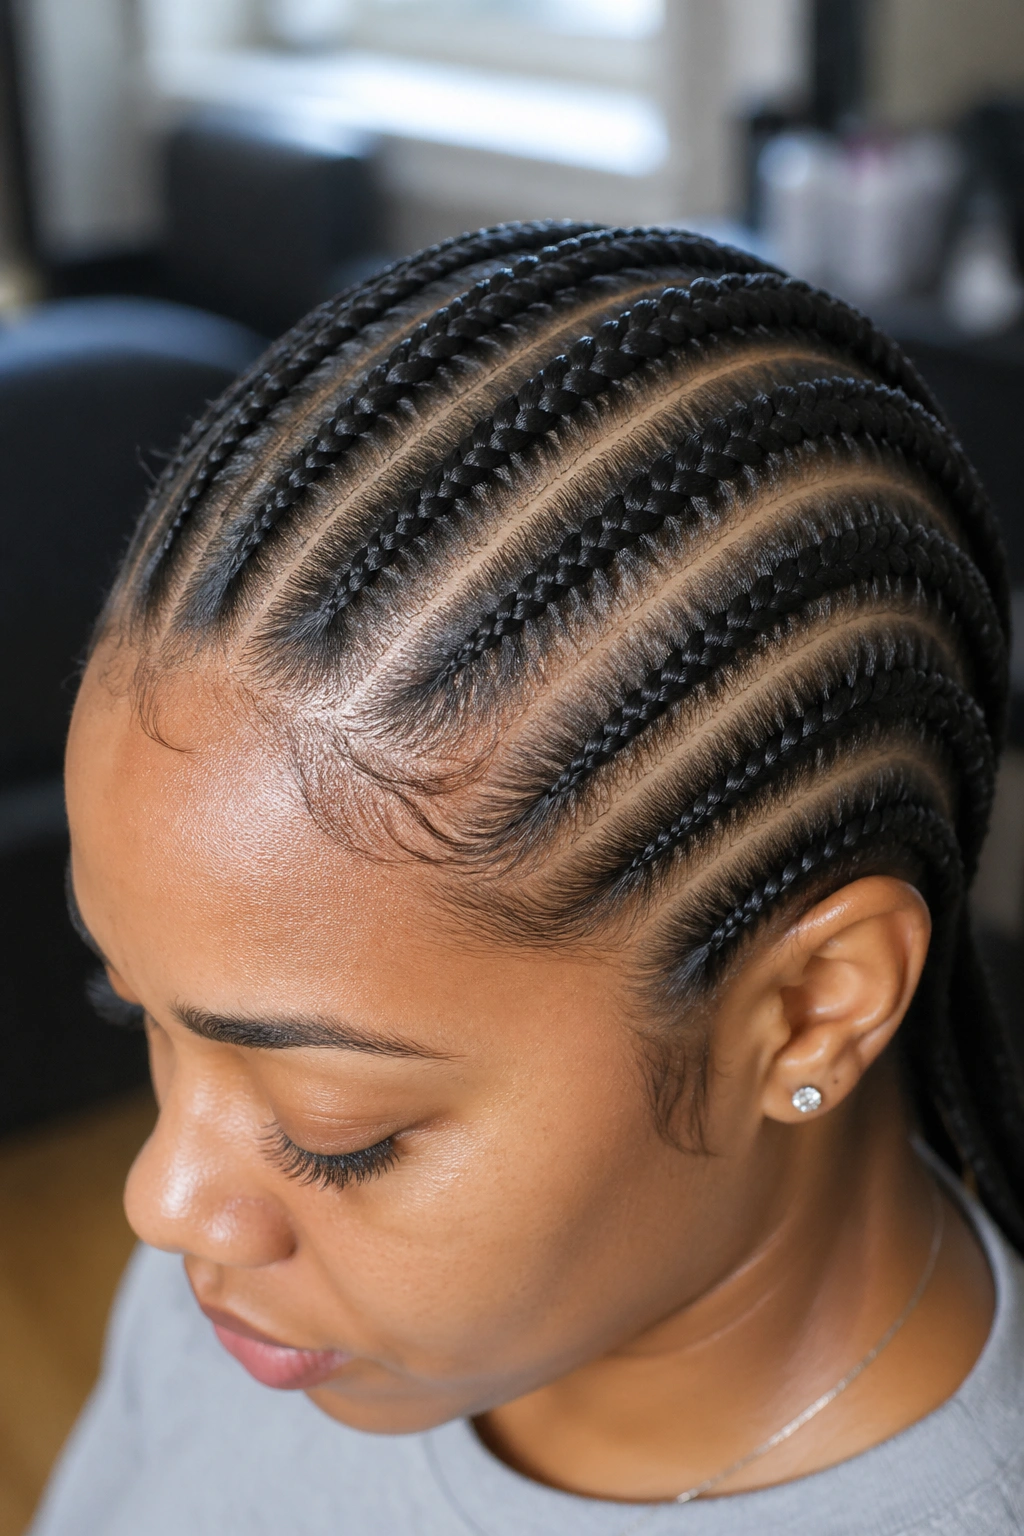
Straight-back cornrows are the pattern most people picture first, and honestly, that’s because they work. The rows run from the front hairline toward the nape in clean, parallel lanes, which makes them easy to section, easy to sew onto, and easy to remove later.
I reach for this pattern when the goal is a simple, stable sew-in weave with very little drama. It’s a good fit for a full install, a closure sew-in, or any style where you want the tracks to sit in a predictable direction. On most heads, you’ll end up with about 6 to 10 braids, depending on density and head size.
Why It Works
The straight path gives each weft a clear road to follow. That means fewer weird bends, fewer bumps at the crown, and less guesswork when it’s time to stitch the hair down.
A clean straight-back pattern also makes maintenance easier. You can feel the structure with your fingertips, and that matters when you’re trying to tell whether a braid has loosened or a track has shifted.
- Rows usually sit 1/2 inch to 1 inch apart depending on the install.
- The front row should not sit on the edge of the hairline.
- Shorter braids at the nape help the weave lay lower.
- The pattern is easy to match with closure pieces or simple leave-out.
Best tip: keep the first braid a little behind the hairline. If it starts too close to the edge, the style may look neat for a day and feel too tight by the end of the week.
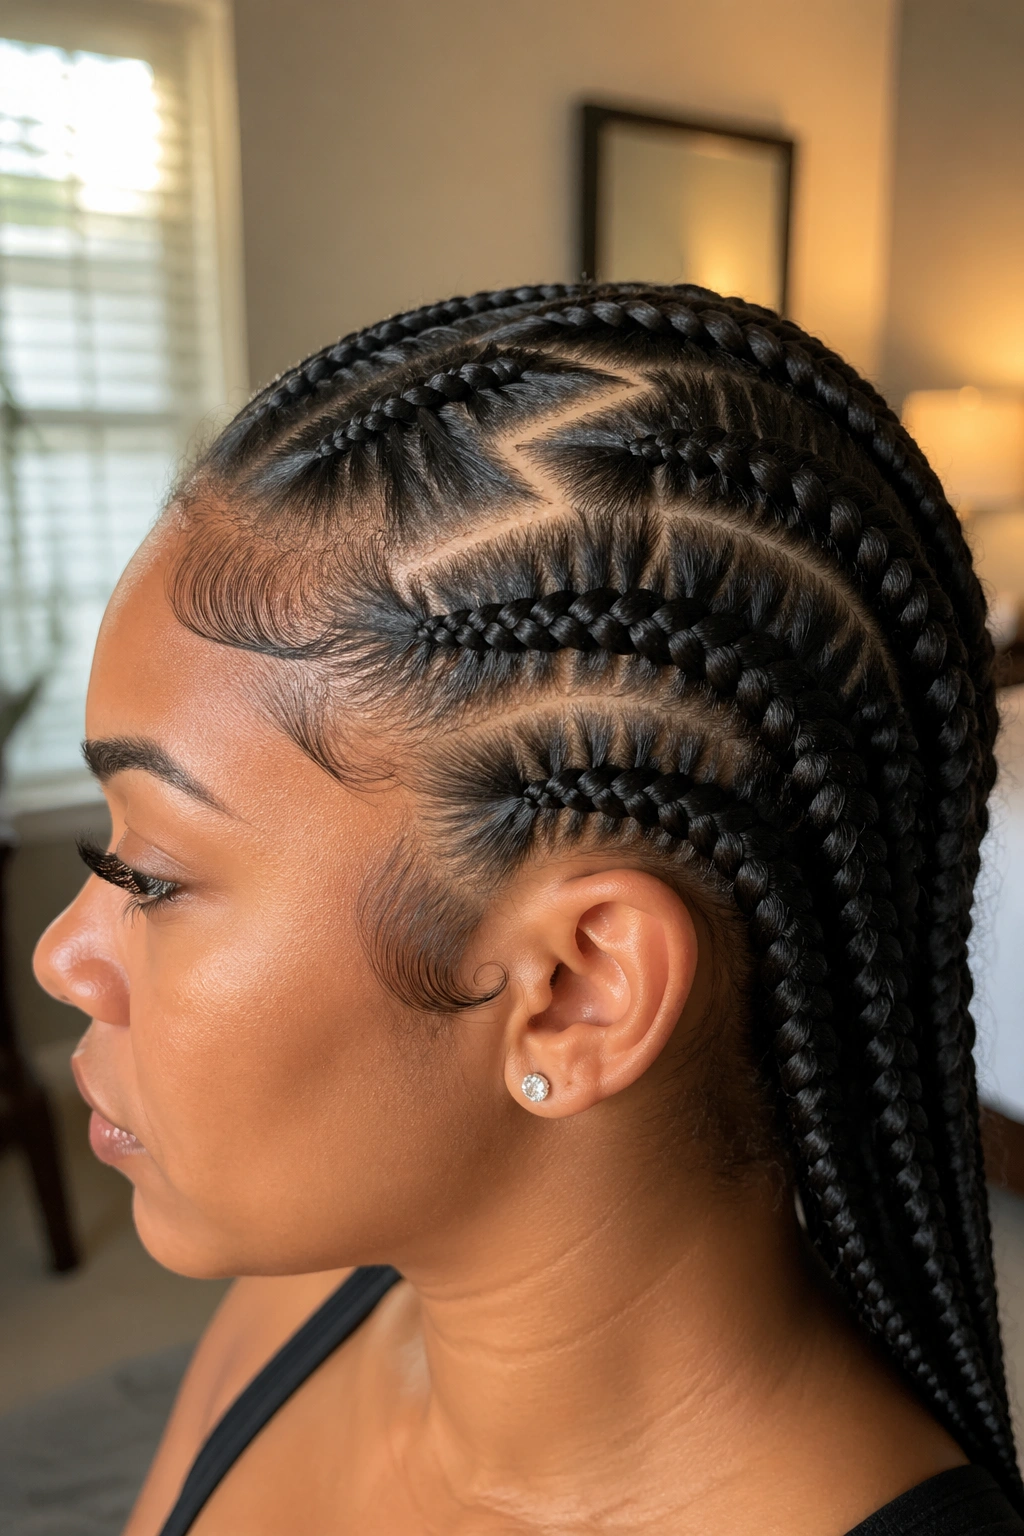
2. Curved Cornrows That Follow the Head
Straight lines are tidy, but they are not always the smoothest choice. Curved cornrows bend with the shape of the head, which helps the base settle more naturally around the crown, temple, and nape.
This pattern is one of my favorites for people who hate that little shelf some sew-ins create near the back. The curved sections hug the head better, so the finished style often feels less boxy and more balanced. The difference is subtle when you look at the braids alone. Once the weave is sewn in, though, it shows.
The head is round. The braid path should be, too.
A curved pattern also helps when the final style has movement — soft waves, curls, layered cuts, or anything that needs the hair to fall instead of sit in one hard direction. The braids underneath are doing a quiet job, but they affect how the top moves.
One thing I like about this pattern is the way it softens the nape. Straight-back rows can leave a visible ridge if the sections are too thick or too stacked. Curved rows usually ease that pressure because the braid path opens and closes with the shape of the scalp instead of fighting it.
If you wear a lot of low ponytails or half-up looks, this pattern feels less obvious under the hair. It’s not flashy. It just lays better.
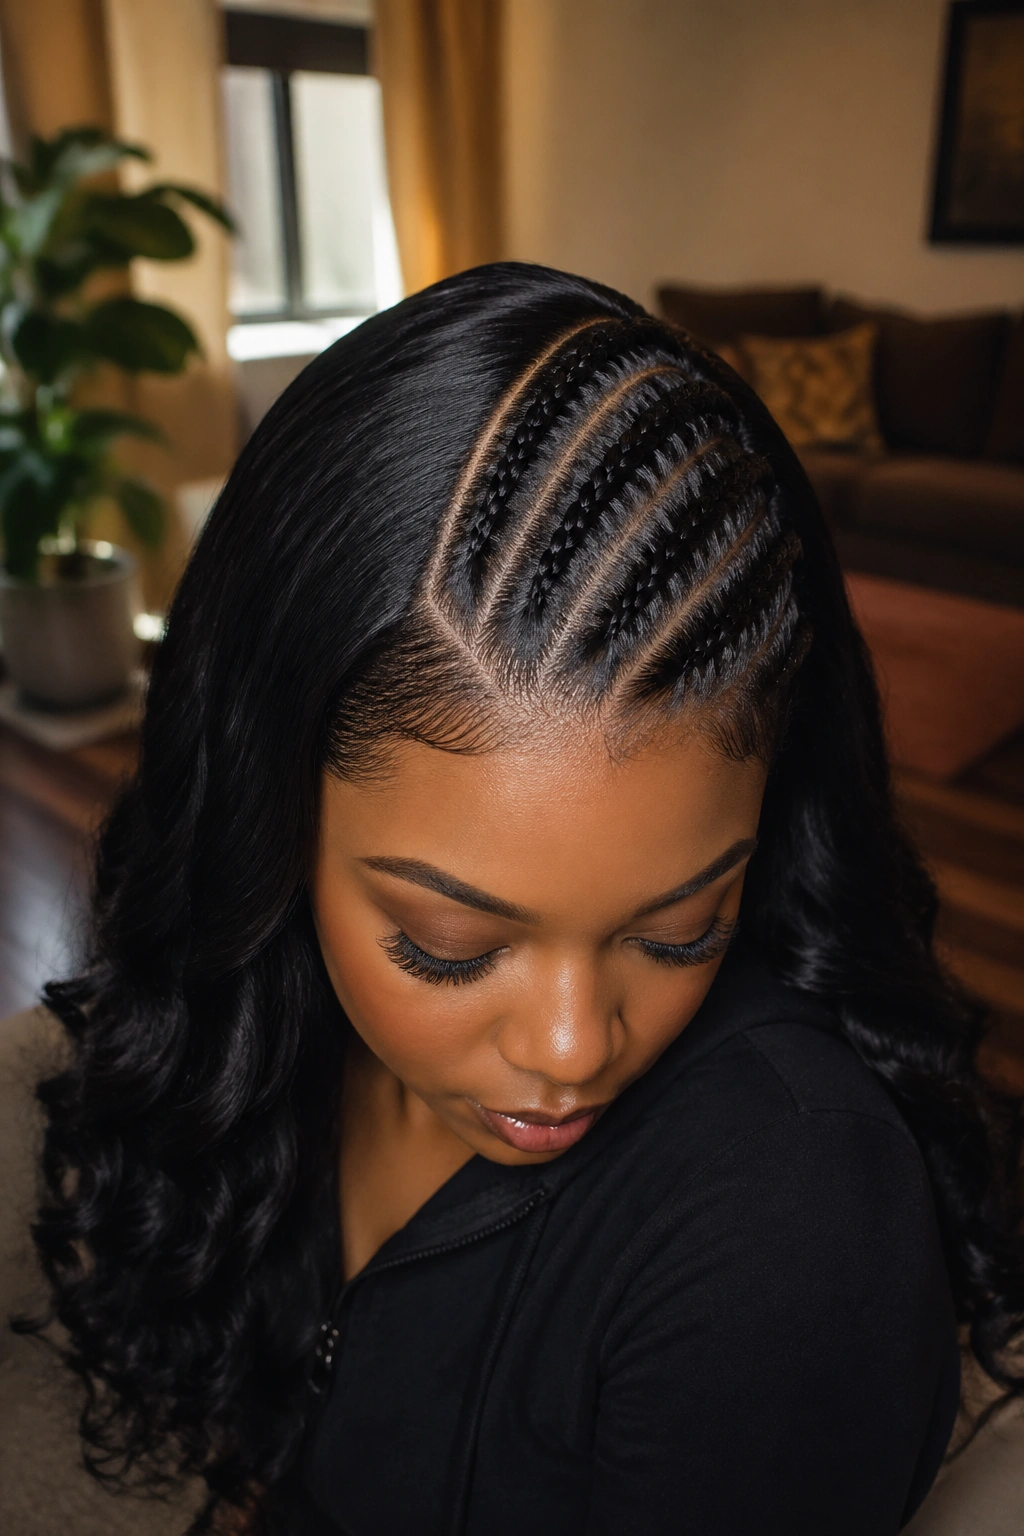
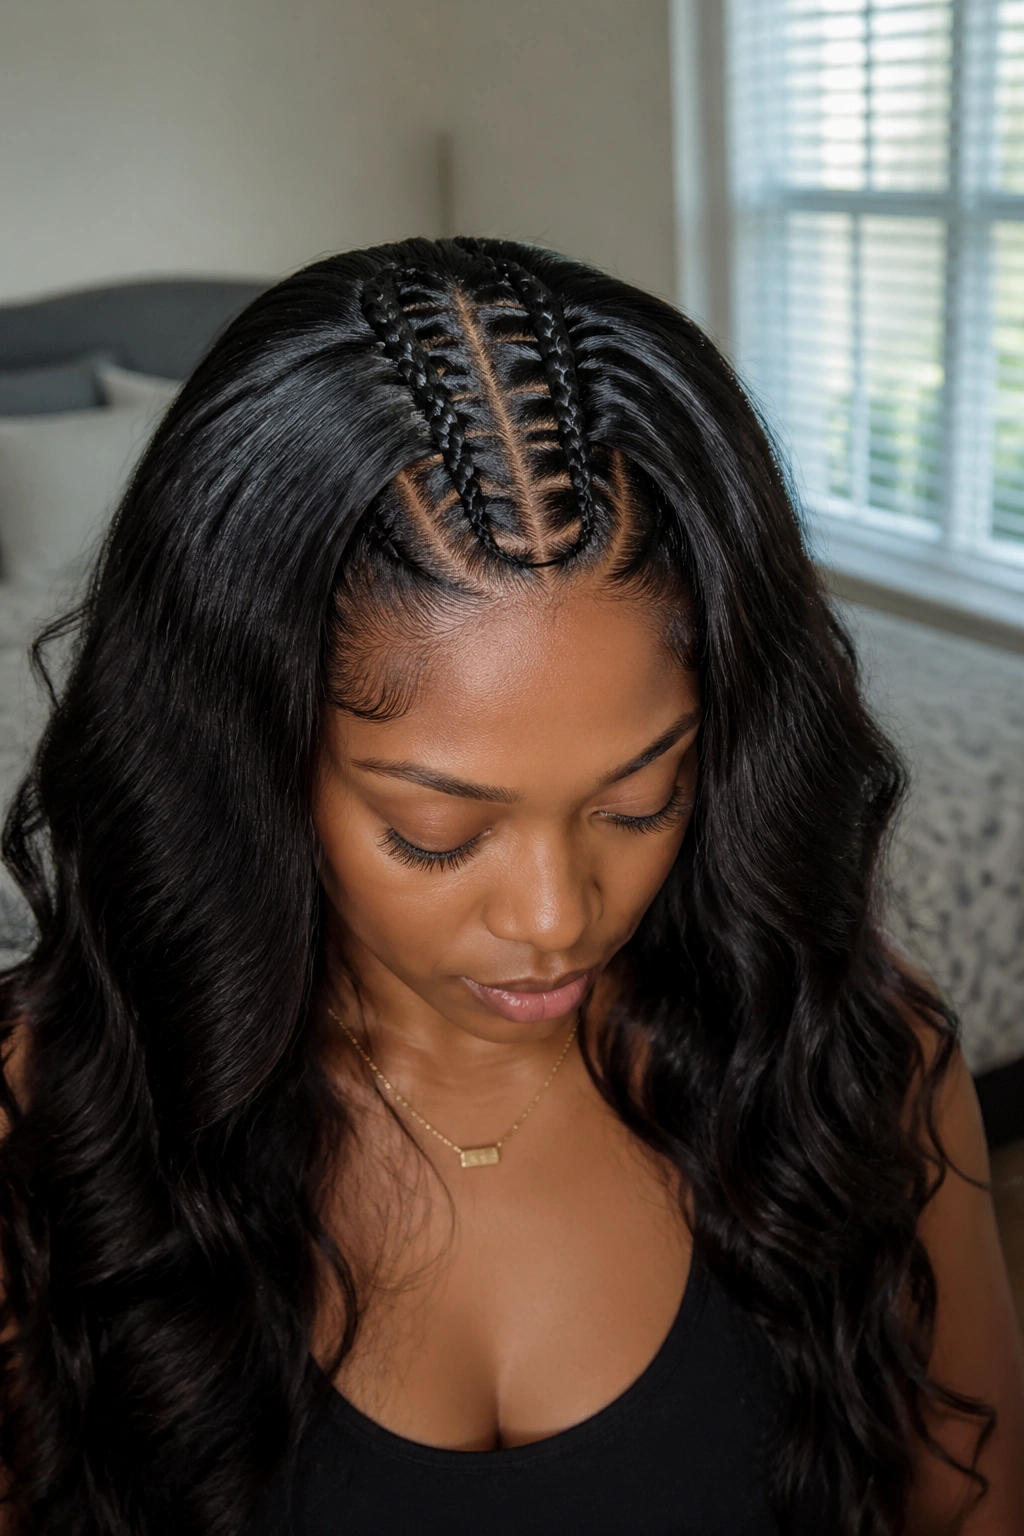
3. Middle-Part Braids for a Leave-Out Sew-In
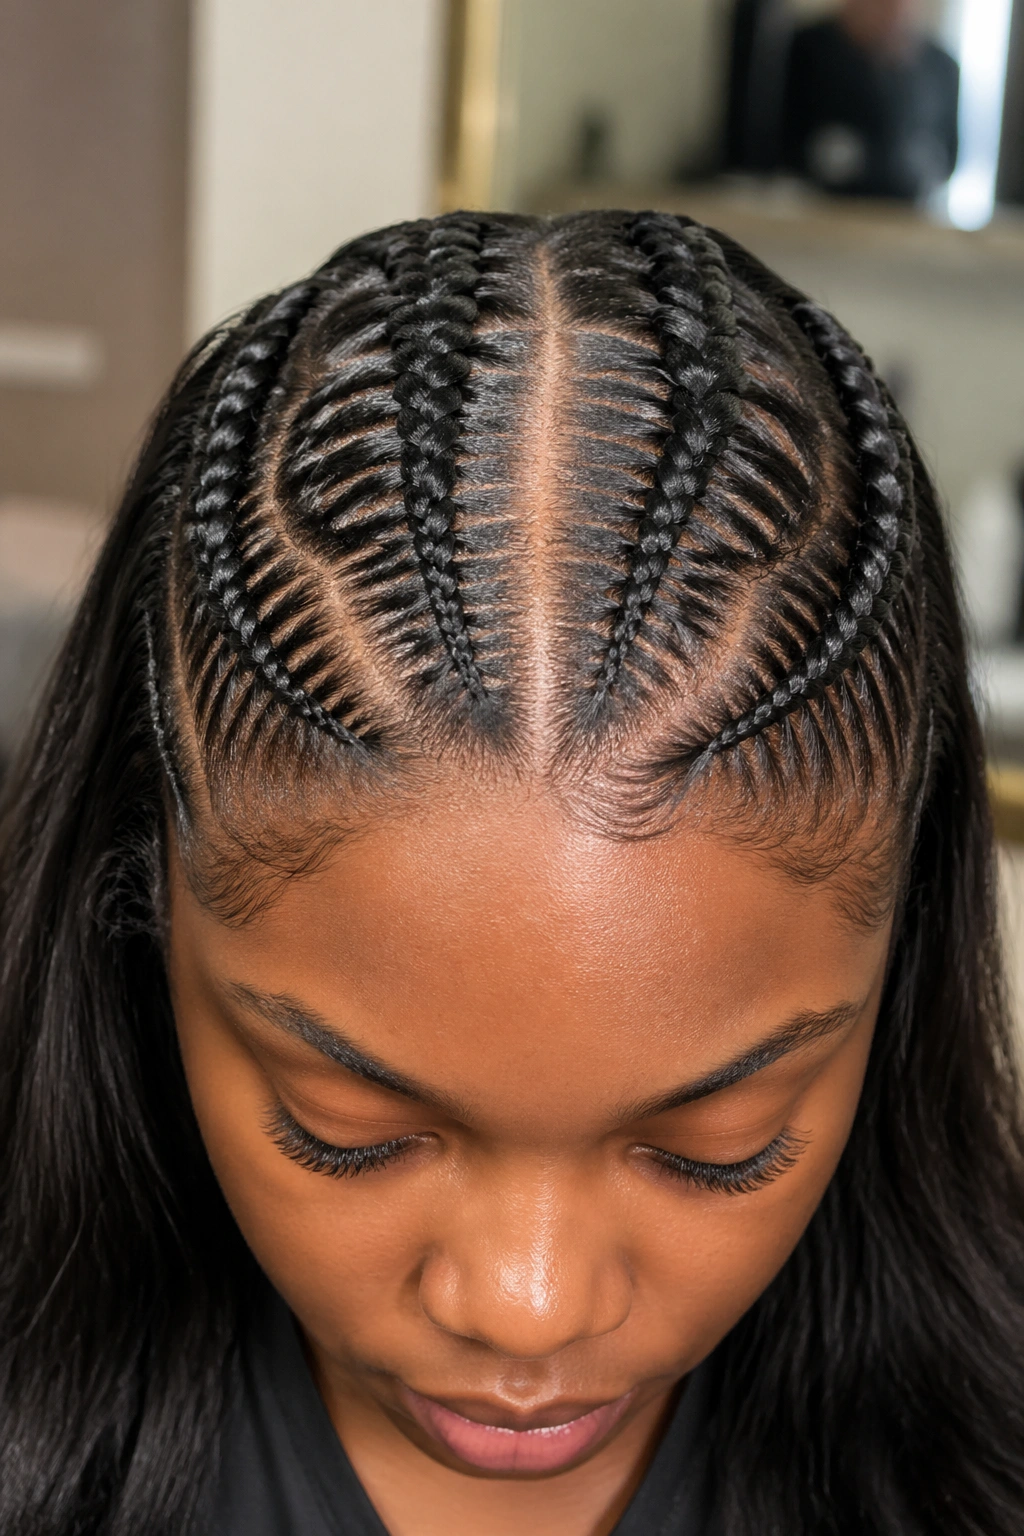
Why do some center-part sew-ins look like the hair grew there, while others look like they were placed on top of the head and hoped for the best? The braid pattern is usually the answer.
A middle-part braid pattern creates a clean lane down the center and mirrors the braids on both sides. That lane gives your leave-out, closure, or frontal a clear place to sit. It’s especially useful if you wear a middle part most of the time and do not want to fight the style every morning.
How the Part Should Sit
The center part does not need to be wide. In most installs, 1/2 inch to 1 inch is enough for the visible section, with enough hair around it to protect the braid line underneath. If the part is too wide, the tracks start showing through. Too narrow, and the hair on top has to work too hard to cover the seam.
- Keep the part clean from front to back.
- Braid both sides evenly so the middle lane stays straight.
- Leave enough natural hair out if you plan to blend with a silk press or blowout.
- A closure can cover the part, but it still needs a stable base under it.
Do not put a center part over weak density and expect the style to hide it. A thin leave-out shows fast, especially when the hair moves or gets humid.
This pattern is calm, practical, and easier to live with than people expect. It’s not the most flexible choice if you love switching parts every day, but if a center part is your default, the braid map should honor that.
4. Side-Part Braids for Deep Part Styling
If you always wear your hair swept to one side, the braid pattern should match that habit. Fighting your usual part is a waste of time and usually ends with a seam that shifts or pops up at the worst possible moment.
Side-part braids angle the foundation so the visible part sits off-center instead of down the middle. That gives a deep side part more support, which matters a lot for frontal installs, closure pieces, or leave-out styles that depend on a strong part line. The heavier side of the style gets more visual space, while the lighter side can stay flatter and less crowded.
I like this pattern for styles with a soft swoop at the front or a dramatic side fall. It keeps the part from looking stiff. It also lets the bundle hair move in the same direction your styling usually goes, which makes blending easier on busy mornings.
A deep side part does have one catch: it asks the braid base to stay true to one lane. If you move the part too far from your natural growth pattern, the leave-out can look strained, and the install starts asking for heat or extra product just to behave. That gets old fast.
A good side-part braid map feels almost invisible once the hair is sewn in. You should be able to run your hand over the top and feel the shape without feeling a lump.
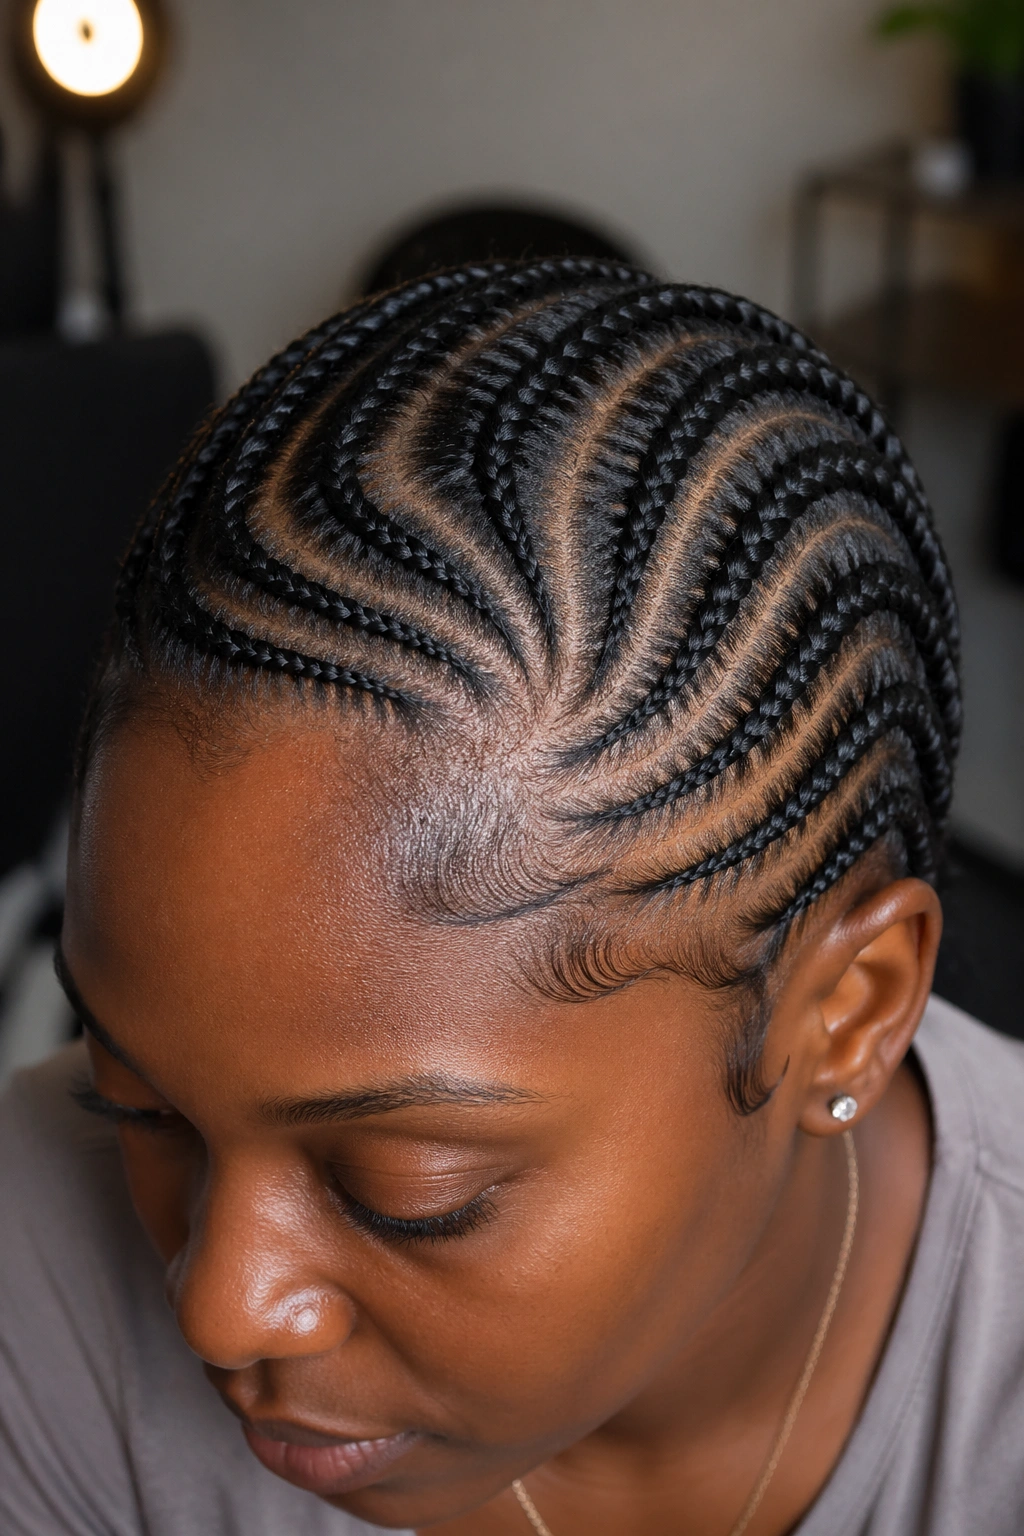
5. Beehive Braids for a Seamless Crown
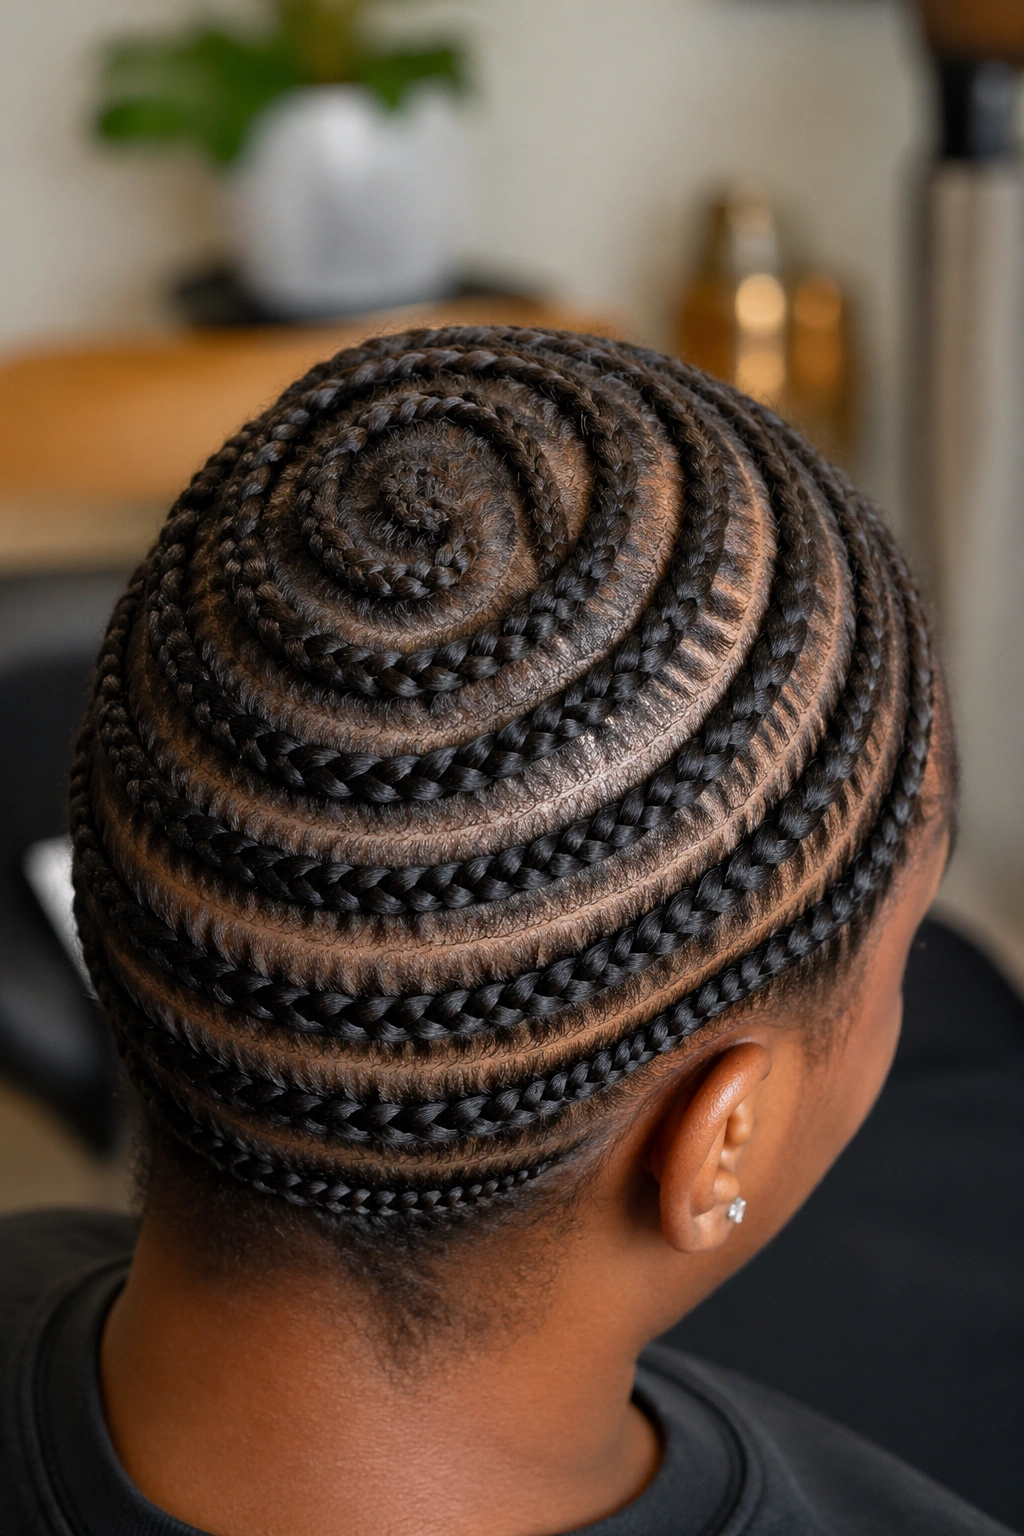
Beehive braids are a classic for a reason. They curve around the head in a spiral, usually moving toward the center or around the crown, which helps the top lay flat and reduces those obvious ridges that can show through straight, silky installs.
The braid pattern looks a little old-school when it’s finished alone, but under a sew-in weave it makes sense. Tracks follow the circular path, so the weight of the hair spreads out across the head instead of stacking in a straight ladder. That can make the crown sit lower and smoother.
The crown should feel soft, not stacked.
When done well, a beehive base feels balanced under your fingers. The braids are snug, but they do not feel like little walls. That matters if you’re wearing the style for more than a few days, because a base that feels bulky on day one usually feels annoying by day three.
The downside is time. A beehive takes more patience than straight-back braids, especially around the turns near the ears and crown. Rushed curves leave bumps, and bumps show through straight hair more than people expect. If the sections are sloppy, the install will tell on them.
I tend to recommend beehive braids for clients who want a polished top and do not mind spending a little longer in the chair. It is not the fastest pattern, but it can be one of the cleanest when the sectioning is sharp.
6. Circular Beehive Braids for a Centered Crown
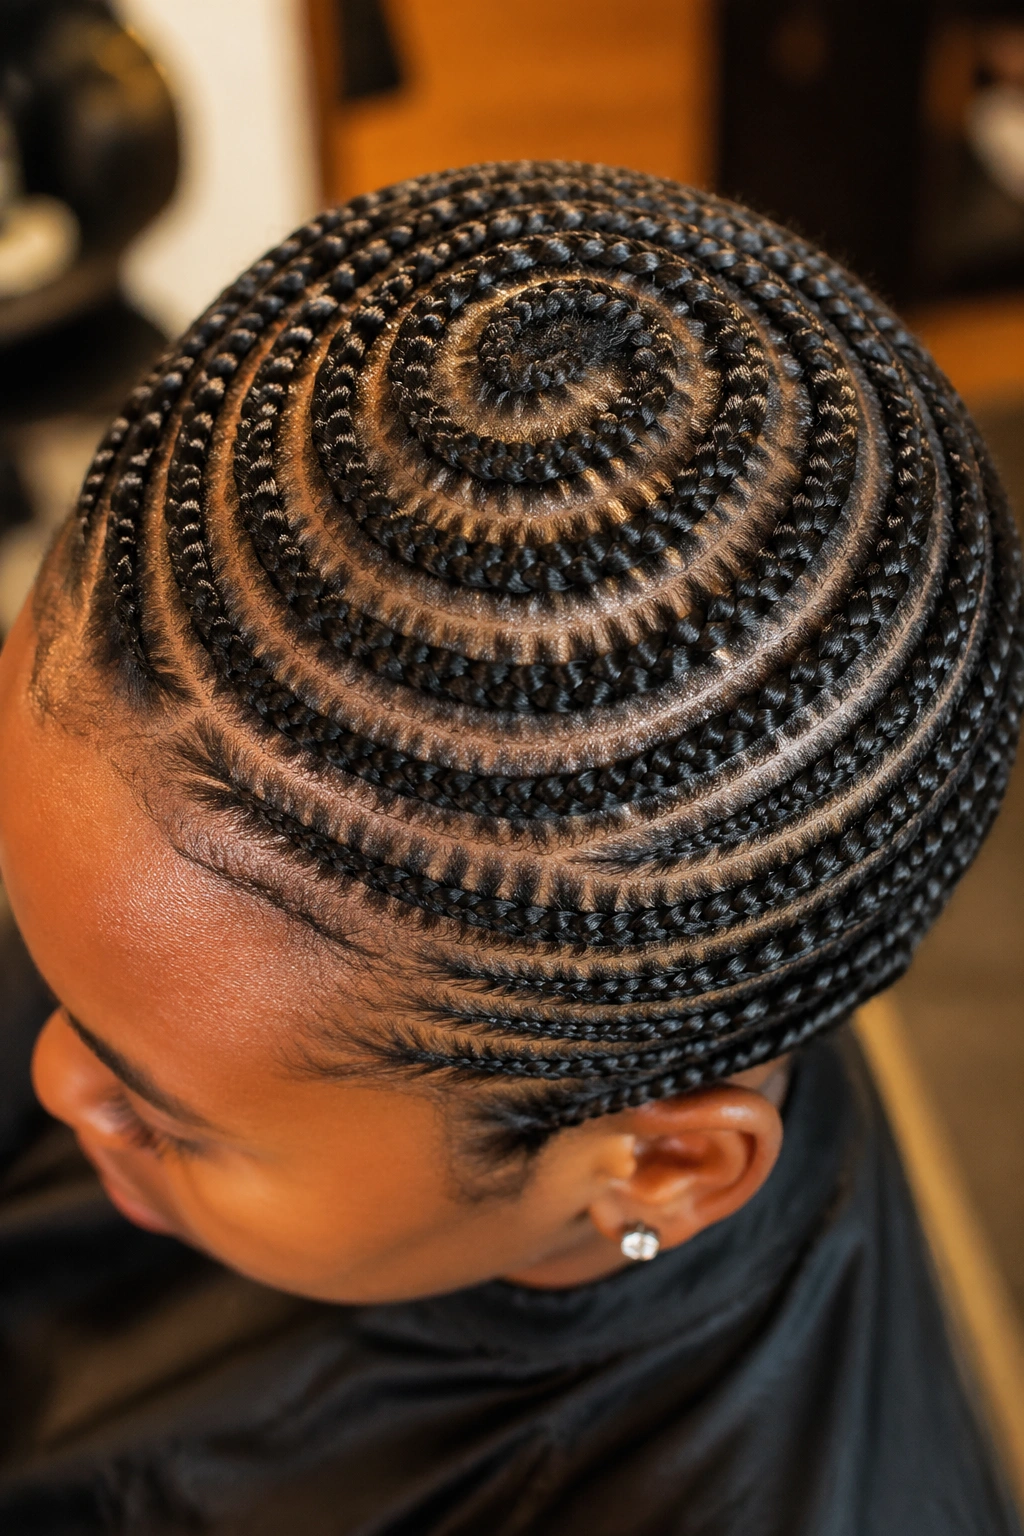
A circular beehive is the more centered cousin of the regular beehive. Instead of just spiraling around the head in broad curves, the rows move in a tighter circle and settle toward a center point. That tiny change makes a real difference when you want the hair to fall evenly from the crown.
This pattern works well for curly sew-ins, layered cuts, and closure installs where the top needs to sit naturally without a hard directional line. It also helps if you like styles that flip a little on their own instead of forcing every strand into one side or one lane.
The best thing about the circular version is how it handles movement. Hair tends to shift in a round pattern anyway, especially when you style it with curls or a soft blowout. A circular braid map respects that movement instead of pushing against it.
Compared with a standard beehive, this pattern can hide the crown a little better under textured hair because the tracks are less likely to stack into one obvious ring. That does not mean it works for every install. Bone-straight hair and very blunt cuts will still expose sloppy parting. But on wavy or curly hair, it often disappears in a nicer way.
I like this one when the style needs body at the top and a softer fall through the sides. It’s a small detail on paper. On the head, it changes the whole shape.
7. Vixen Braids for Flip-Over Coverage
The vixen braid pattern is for people who want styling freedom and are willing to do a little more maintenance. It usually leaves multiple sections open or lightly braided so you can part, flip, or pin the hair in different ways without locking yourself into one fixed part.
That flexibility is the whole appeal. A vixen base can work for a flip-over sew-in, a half-up style, or a look where you want more than one direction to feel natural. The perimeter is often kept more open, which helps the install look less boxed in.
Where It Shines
- It gives you more parting options.
- It works well with textured hair that blends easily.
- It can support ponytails, side flips, and loose styling.
- It leaves more room for movement than a standard full sew-in.
The trade-off is upkeep. More leave-out means more blending, more styling, and more chance that your own hair will need to cooperate every morning. If your hair texture changes a lot with humidity or heat, the vixen pattern can become annoying faster than expected.
I do not love this pattern for someone who wants a low-maintenance install and forgets about their hair between salon visits. It’s better for people who actually use the styling freedom they’re paying for.
8. U-Part Braids for a Small Leave-Out
What if you want your own part to do most of the work? That’s where a U-part braid pattern comes in. The braids leave a U-shaped opening at the top or crown, so your natural hair can sit in the middle while the weave frames it from the sides and back.
This pattern is useful when you want a visible scalp line without a full closure. It also makes sense when your leave-out blends well with the extension hair and you want to keep the install looking personal, not pasted on.
Who It Suits
- People who wear a regular part and want it to stay visible.
- Clients with enough leave-out to cover the seam.
- Styles that match a silk press, blowout, or relaxed texture.
- Install wearers who do not want a full closure in the front.
The U shape should be wide enough to hide the edges of the weave, but not so wide that the top loses support. That balance matters. Too much opening, and the hair starts to look thin across the crown. Too little, and the leave-out has to stretch or strain to cover the tracks.
One thing I’ve noticed over and over: a U-part looks best when the leave-out is healthy and matches the weave closely. If the textures clash, you end up reaching for heat more often, and that can wear the leave-out down faster than you planned.
9. Horseshoe Braid Pattern for a Soft Front Hairline

A horseshoe pattern gives the front more room to breathe. The braid path curves from one temple, around the top, and back to the other side in a broad arc, leaving a wide open section where the top hair or front piece can sit.
It’s a smart choice when you want volume near the hairline or when the front needs to stay soft for a frontal, closure, or leave-out blend. The shape looks gentle on the scalp because it does not force the front into a hard line. Instead, it frames the face and leaves the center free enough to style.
That broad opening also helps with styles that need lift at the crown. If your goal is a more lifted top or a little extra space for a deep part, this pattern gives you room to work without crowding the front.
A Few Things to Watch
- The arc should stay even from temple to temple.
- The open front needs enough hair to cover the seam.
- The braid density near the temples should not be too thin.
- It pairs well with frontals, side sweeps, and fuller blowout looks.
The catch is simple: if the horseshoe is drawn too wide on a sparse hairline, the opening can show more than you want. Keep it clean, but keep it modest. A neat curve beats a dramatic one every time.
10. Zigzag Part Braids for a Softer Scalp Line
Straight parts are not the only way to keep a sew-in looking neat. A zigzag braid pattern breaks up that hard line and makes the scalp line look less drawn on, which can help with leave-out installs, closures, and styles that move around a lot.
This pattern is useful when you want the top to look softer rather than sharply divided. The zigzag part makes the eye work a little less. Instead of one obvious line, the part shifts just enough to blur the seam and make the style feel less rigid.
What Changes
- The part line is less obvious under movement.
- The top can look softer when hair is swept aside.
- It helps hide a little scalp exposure in textured styles.
- It works well when the goal is a more casual finish.
What It Doesn’t Fix
- It will not hide mismatched texture.
- It will not cover a bad color match.
- It will not save an install that is too tight or too bulky.
A zigzag part is one of those small styling choices that can make a sew-in feel less obvious. On fine hair, I would keep the zigzags subtle. Tiny, busy turns can look fussy. On thicker or textured hair, though, the soft break in the line can be a nice touch.
If you like hair that moves and doesn’t look pinned into place, this pattern earns its keep.
11. Brick-Layer Braids for Even Weight Distribution
Heavy bundles sit differently on the head than light ones. If the braid rows stack directly on top of one another, the crown can feel ridged, and the weave may press in a way that gets uncomfortable sooner than you expect.
Brick-layer braids solve that by shifting each row so it starts between the gaps of the row below it. The pattern looks a little like stacked bricks, which is where the name comes from. That offset layout spreads the weight more evenly across the head and gives the sew-in a smoother base.
I like this one for dense natural hair, larger installs, or any sew-in that uses thicker hair and needs a little extra balance. It can also help when the head shape makes straight rows feel too bunched in one area.
The install process takes more planning because the sections have to be mapped before the braids go in. Once it’s done, though, the finished foundation often feels steadier. The tracks have room to sit without piling on the same line over and over.
Stacked braids can make a lumpy crown. Brick-laying is the fix when you want the braid base to disappear under the weave instead of announcing itself.
12. Diagonal Feed-In Braids for a Cleaner Lay
Straight-back is tidy. Diagonal is softer.
Diagonal feed-in braids angle the rows across the head instead of running perfectly front to back. The feed-in part means the braid starts small and picks up hair gradually, which helps the base look smoother at the root and keeps the install from feeling bulky right away.
This pattern is a good choice when you want the finished sew-in to move with the head instead of sitting in rigid lanes. Side-swept looks, layered bundles, and styles with a little flip at the ends all tend to sit better over diagonal rows.
How to Get the Most From It
- Keep the angle consistent on both sides.
- Feed the hair in gradually, not all at once.
- Match the diagonal line to the direction you plan to wear the style.
- Avoid making one side much tighter than the other.
The main mistake I see here is overcorrecting the angle. If the diagonal gets too steep, the rows start fighting the natural shape of the head and the weave can shift awkwardly. A shallow angle is usually cleaner and easier to sew onto.
This pattern is a good middle ground between plain straight-back braids and a more sculpted beehive. It gives you shape without making the foundation feel busy.
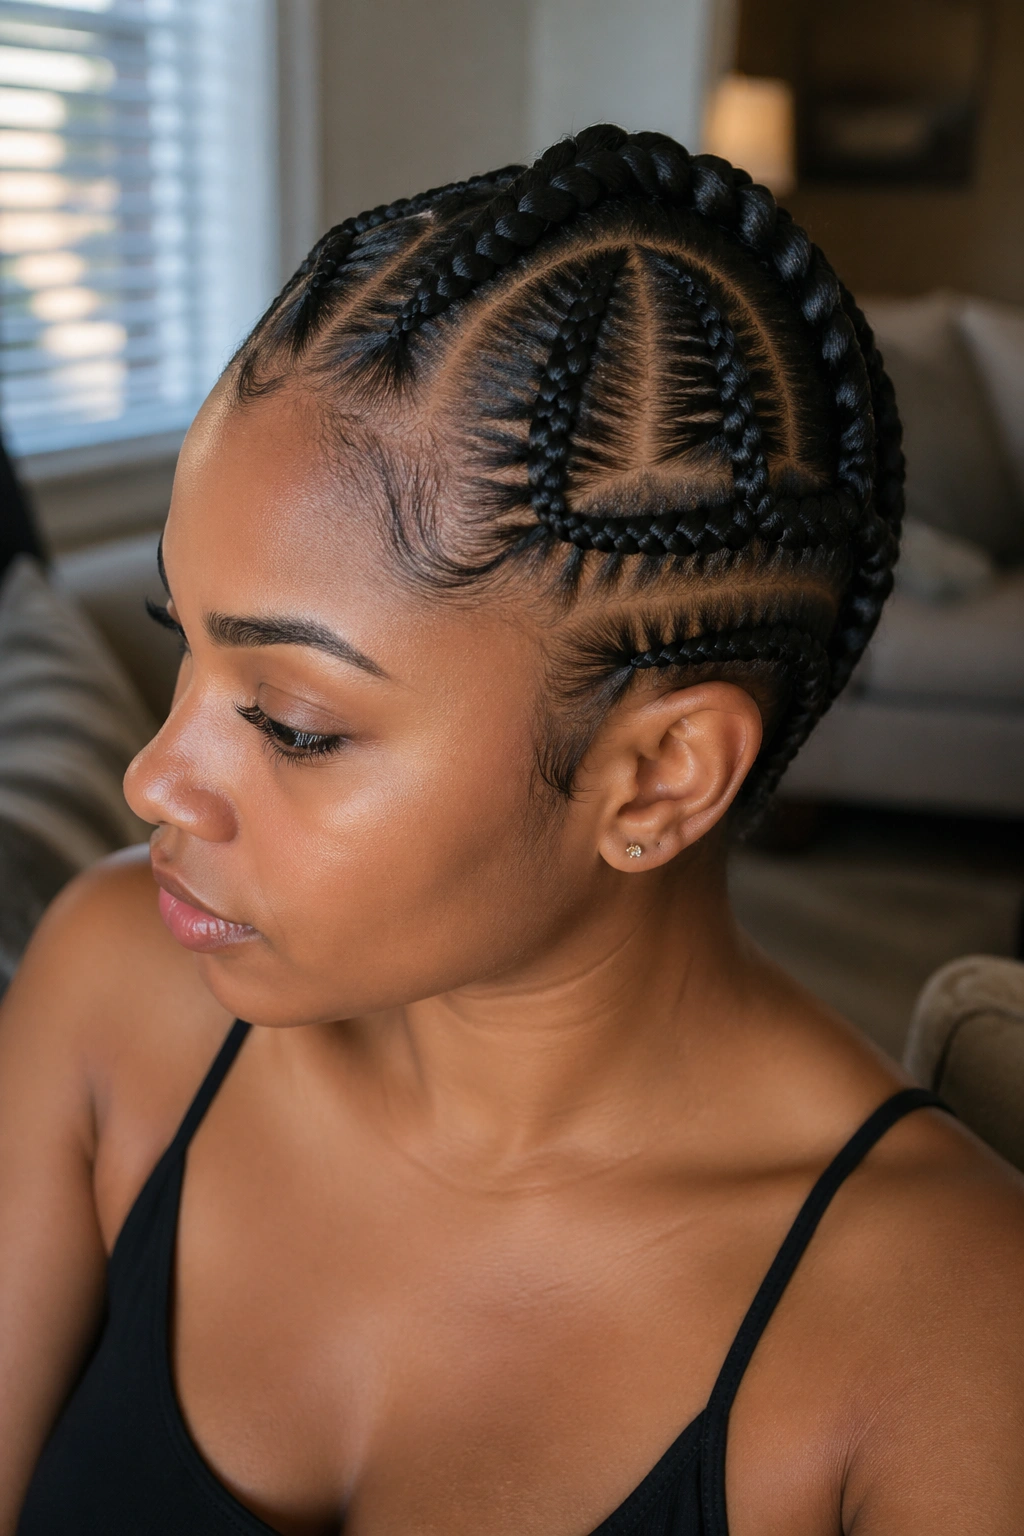
13. Mohawk Braids for Half-Up Sew-Ins
Half-up styles need a different backbone. A mohawk braid pattern keeps the sides flat and leaves a central lane for volume, which makes it a smart choice when you want a sew-in that can move into a ponytail, bun, or lifted top without looking cramped.
The center line usually runs from the front toward the nape, while the sides are braided down and kept neat. That gives the style a tall, visible spine and more room for the hair to sit up top. It’s especially useful for clients who wear half-up looks often and want the foundation to support that shape instead of fighting it.
This pattern is not subtle. That’s part of the point.
A mohawk base gives the crown more height, which can be great for bold styling, but it is not the right call if you want a super-low, super-flat install. If the center section is braided too large, the top can feel bulky. If it’s too small, the style loses the lift that makes the pattern useful in the first place.
For me, this is one of the more personality-driven braid patterns for a sew-in weave. It works when the hair needs attitude, room, and a bit of structure in the middle. If your daily style is a top knot, a half-up pony, or a lifted crown with movement around the sides, it fits the job better than a plain straight-back map ever will.
Pick the braid pattern that matches the way you actually wear your hair. Not the way it looks in a mirror for five minutes. The install that feels right on day one is nice, but the one that still feels comfortable after a week is the one that matters.