Round faces and front braids get along better than a lot of people think. The trick is placement, not length. A braid that sits low and flat can widen the face; a braid that starts higher, travels on a diagonal, or leaves a little height at the crown does the opposite.
That is why the best front braids for a round face do not hug the widest part of the cheeks. They pull the eye up and away from the center line, which makes the whole style feel longer and lighter. A few inches of lift can change the read of the entire face.
Tiny details matter more here than people expect. Move the part one inch off center. Start the braid above the temple instead of at the edge of the forehead. Tug the roots loose just enough to create air, not so much that the braid falls apart. Small moves, big difference.
The styles below all do that work in different ways, and some are better for curls, some for straight hair, and some for protective styling. Placement is the whole game. Honestly, it usually is.
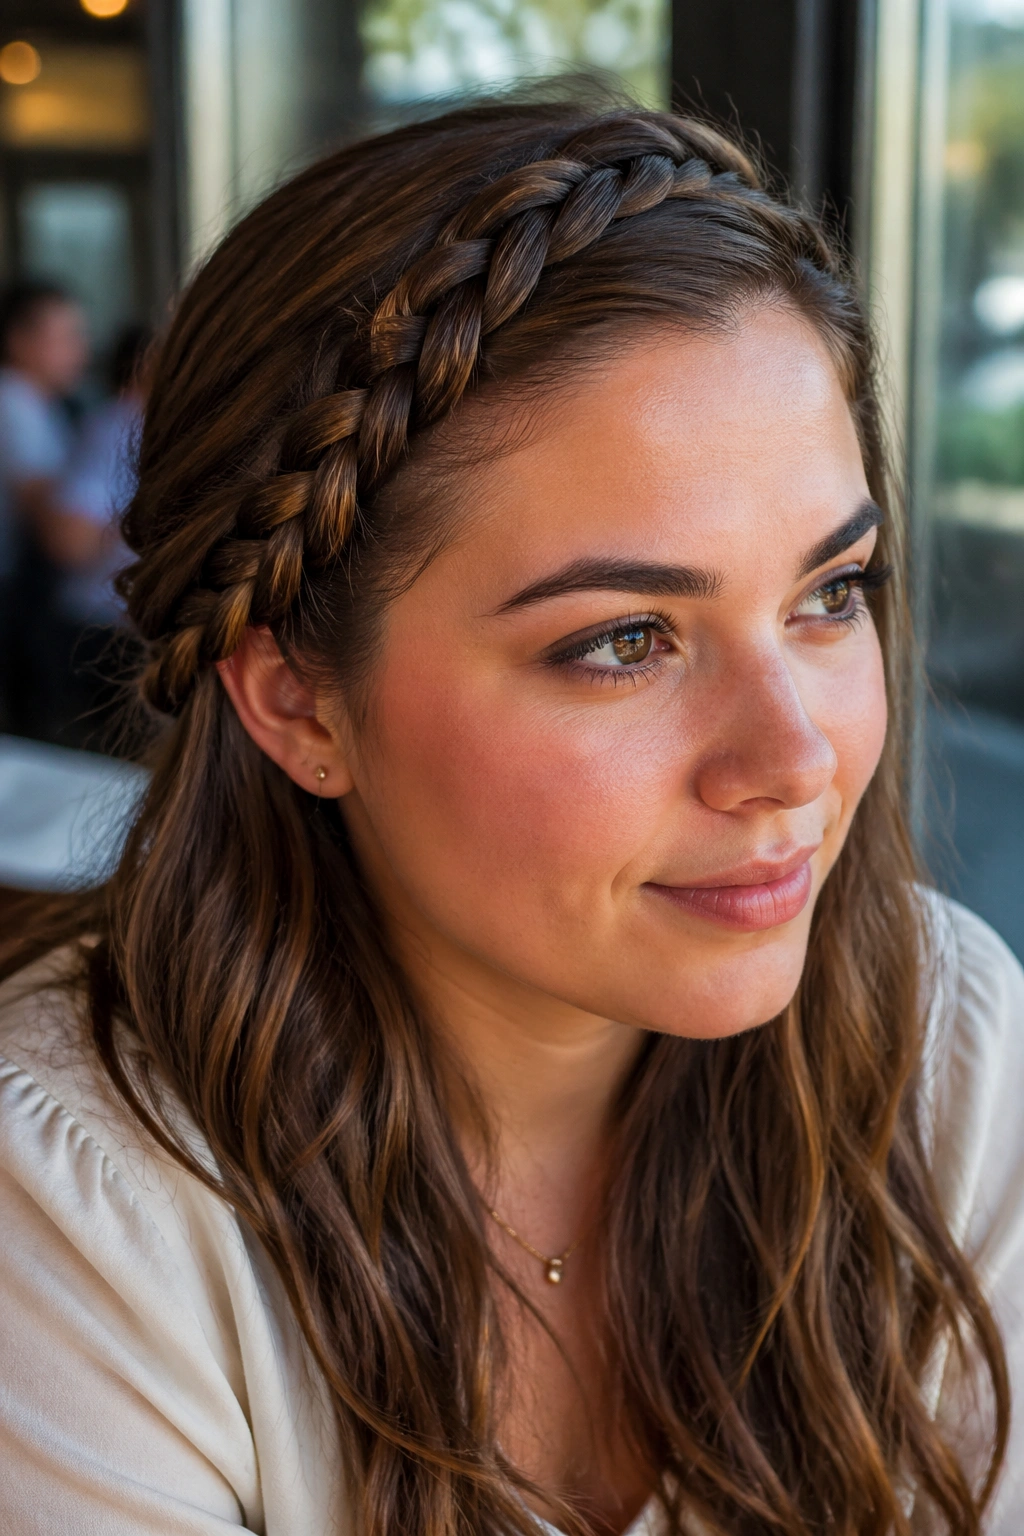
1. Deep Side Braid With a Lifted Crown
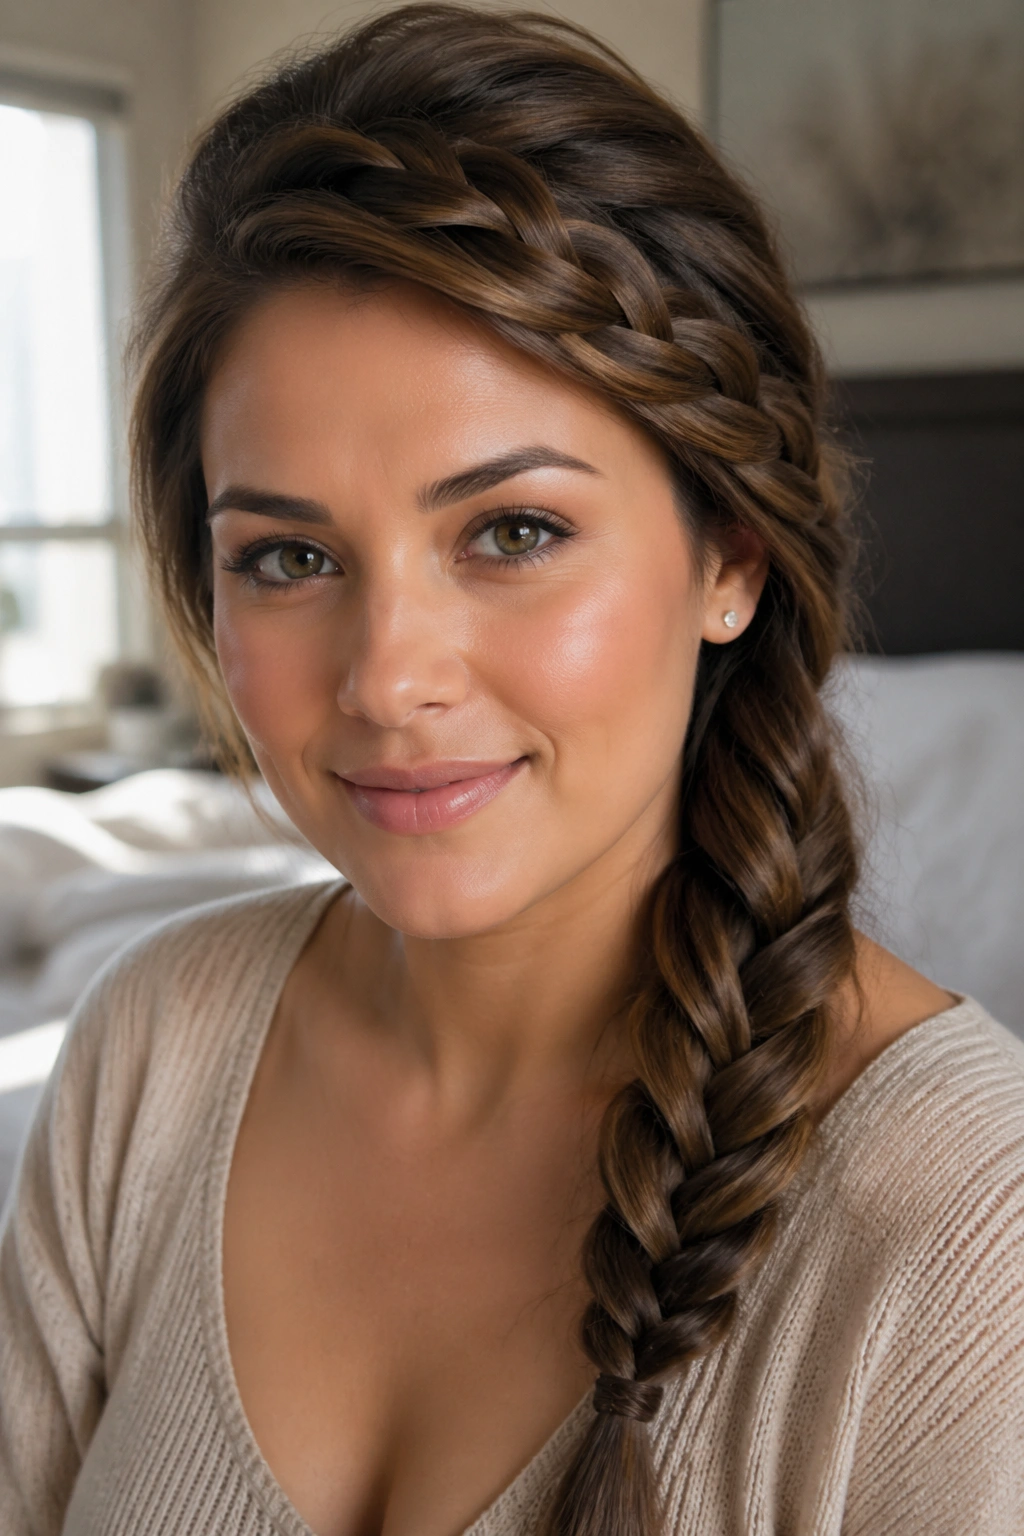
A deep side braid is one of the easiest ways to build a longer line through a round face. The braid starts well off center, so the eye has somewhere to travel other than straight across the cheeks.
Keep the crown a little loose. Not messy, just airy. If the roots are too slick, the braid sits like a strip across the head and loses the lifting effect.
Why the angle matters
The diagonal line does two jobs at once: it narrows the widest part of the face and gives the top of the head more presence. That is why this style works even when the braid itself is simple.
- Start your part about 2 to 3 inches off center.
- Backcomb a 1-inch section at the crown if your hair is fine.
- Braid from the heavier side toward the opposite ear.
- Pin the tail low and hidden so the eye stays up top.
Tip: Keep the braid loose enough to puff slightly at the crown, but not so loose that it loses its shape by lunchtime.
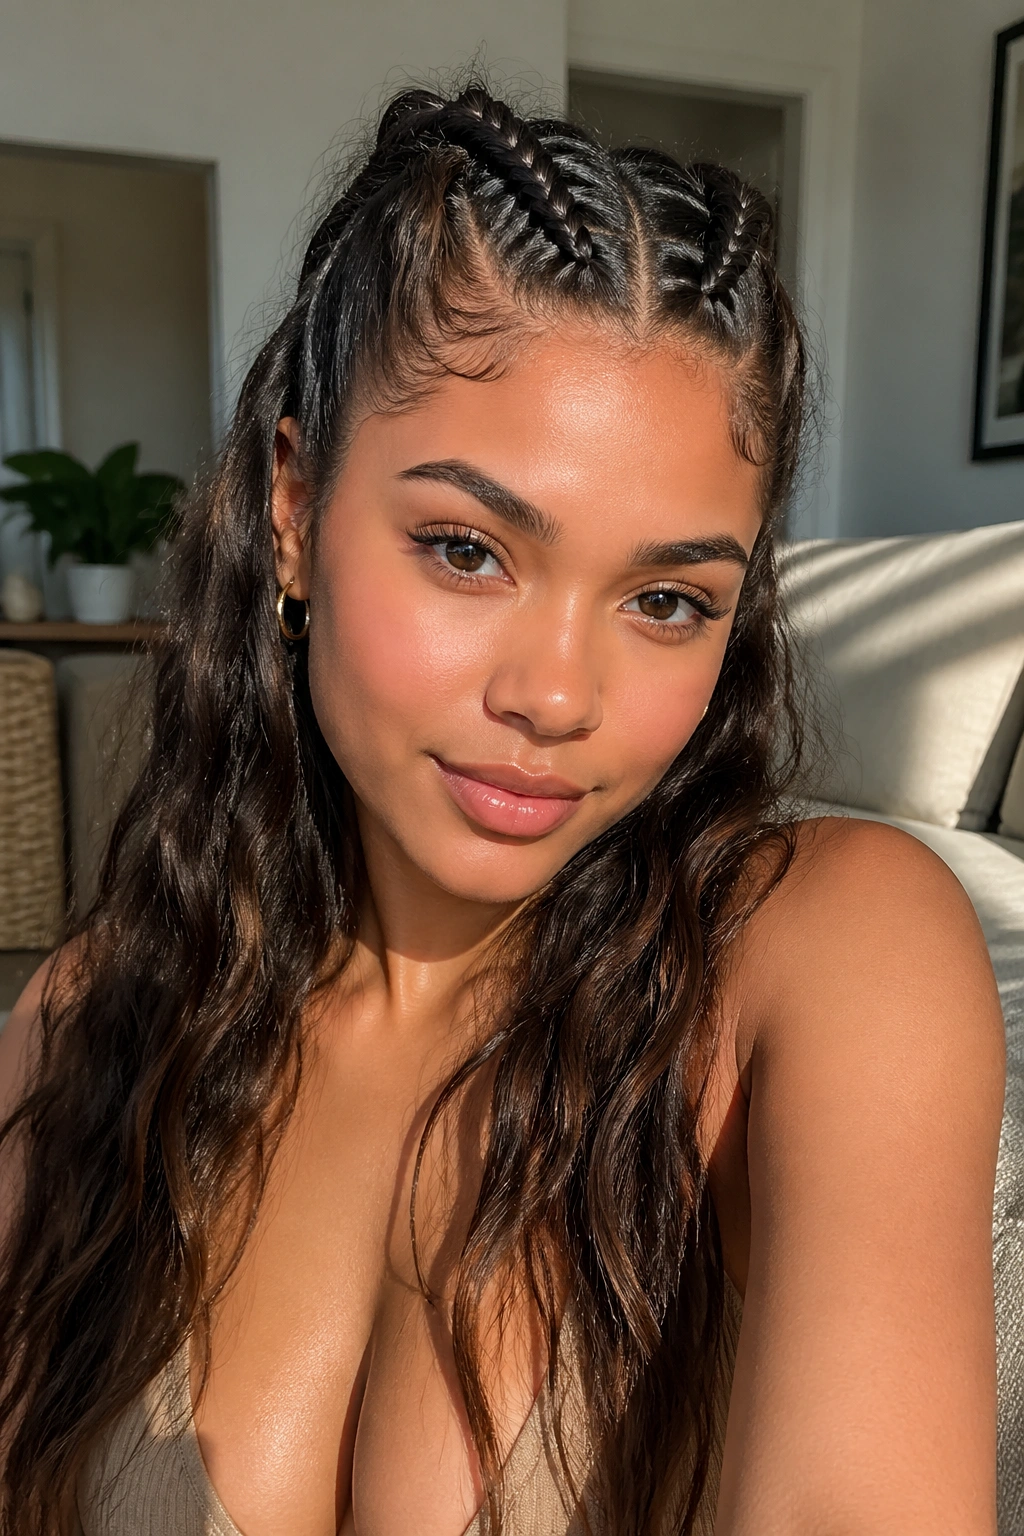
2. Temple Dutch Braid That Sweeps Back
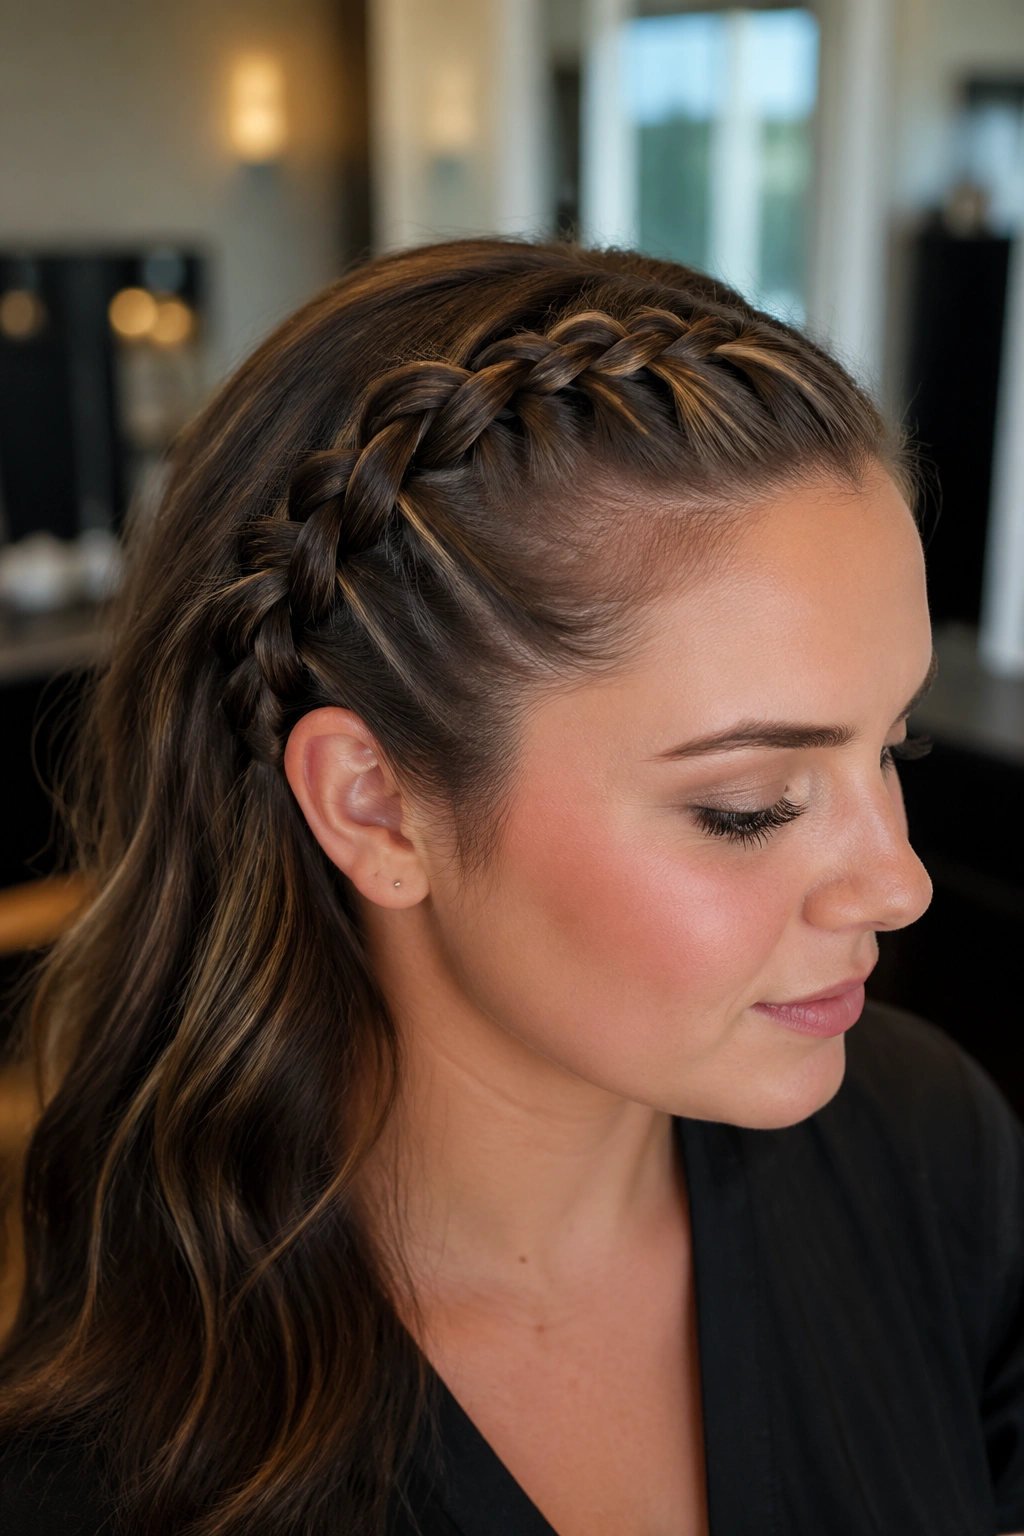
A temple Dutch braid looks sharper than it sounds. Because the braid sits on top of the hair rather than disappearing into it, you get a raised line right where a round face benefits most: along the upper edge of the face.
It is a clean little cheat.
The braid should begin right at the temple, then angle back instead of dropping down the side of the head. That backward motion pulls attention away from the cheeks and gives the front of the hair more structure. If you have fine hair, this braid is especially useful because the raised stitch pattern creates the look of thickness without needing a ton of product.
I like this one for straight hair that needs a little shape, but it also works on blown-out curls. The one thing to watch is tension. Too tight, and the braid starts to feel severe. Too loose, and the lifted line disappears. You want a snug hold through the first few inches, then a softer finish toward the back of the head. That balance keeps the style crisp without turning it into a helmet.
3. Braided Bangs With Loose Length
Can braided bangs work on a round face without making the forehead feel boxed in? Yes, if the braid stays narrow and the rest of the hair has room to fall.
The idea is to braid just enough hair from one side of the front hairline to create a diagonal sweep, then leave the remaining length loose and soft. That loose length matters. It keeps the front braid from becoming the only thing people see, and it gives the face a longer outline.
How to wear it
Start the braid a little behind the hairline, not right on the edge of the forehead. A braid that begins too far forward can shorten the face visually. Aim for a slim section — about the width of a thumb — and guide it toward the opposite side.
The best version of this style uses two face-framing pieces that sit below the cheekbone. Those pieces interrupt the roundness without clinging to the jaw. If your hair is layered, even better. The shorter pieces near the temples give the braid something to rest against, and the longer lengths soften the whole look.
This one feels light. Not fussy. That is a big part of why it works.
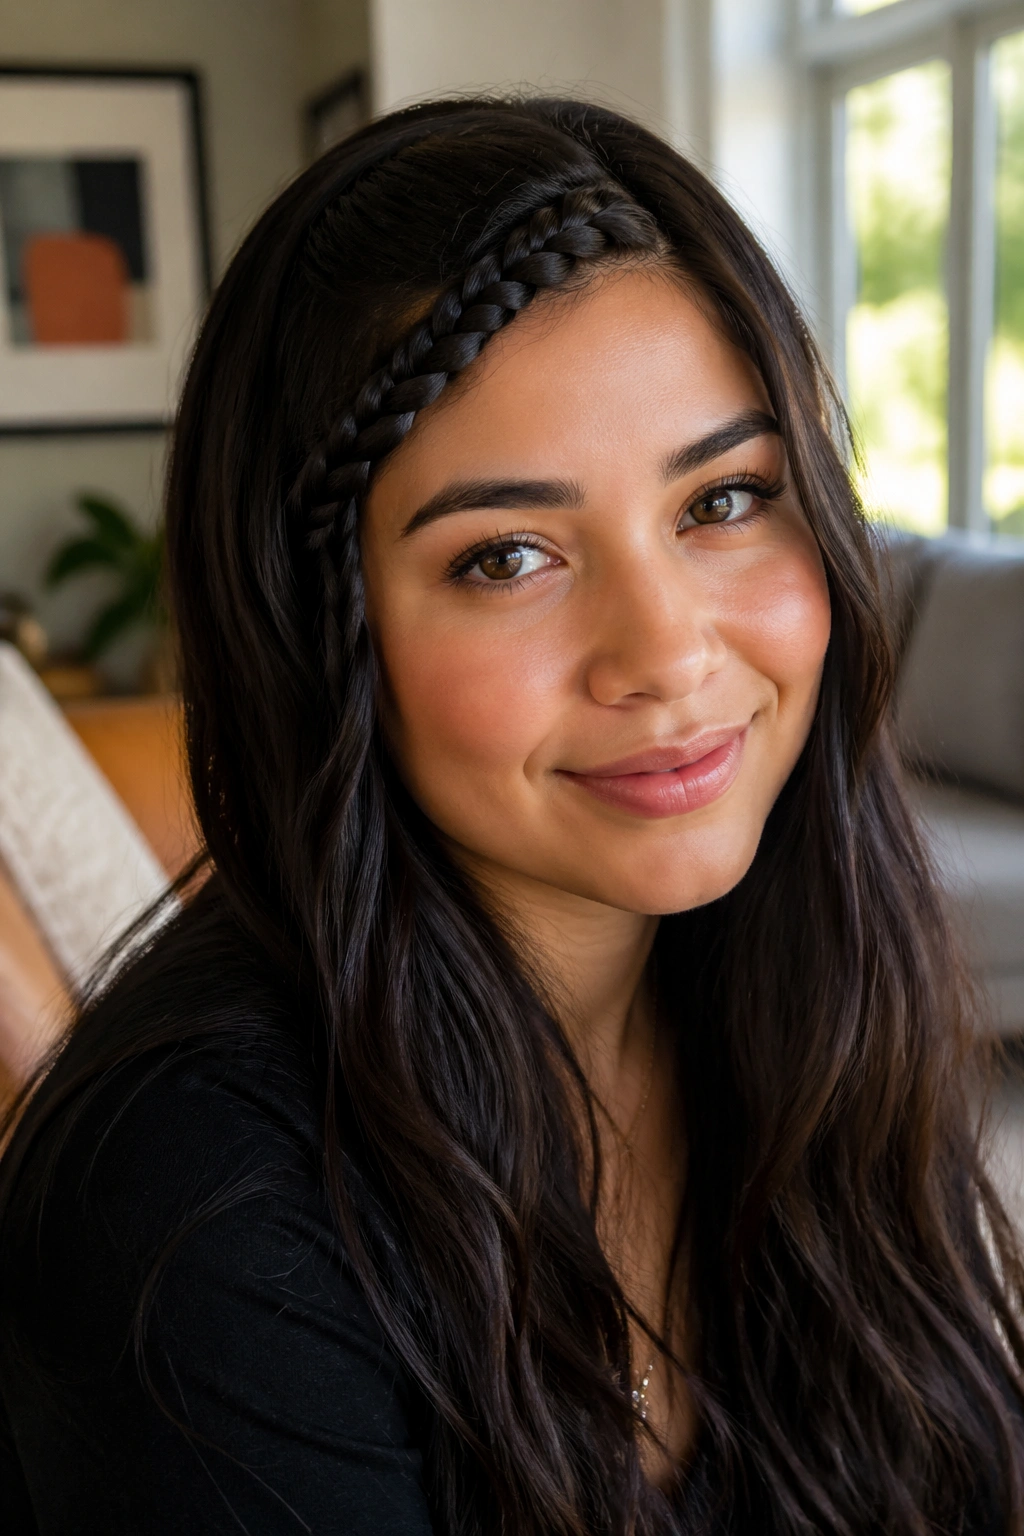
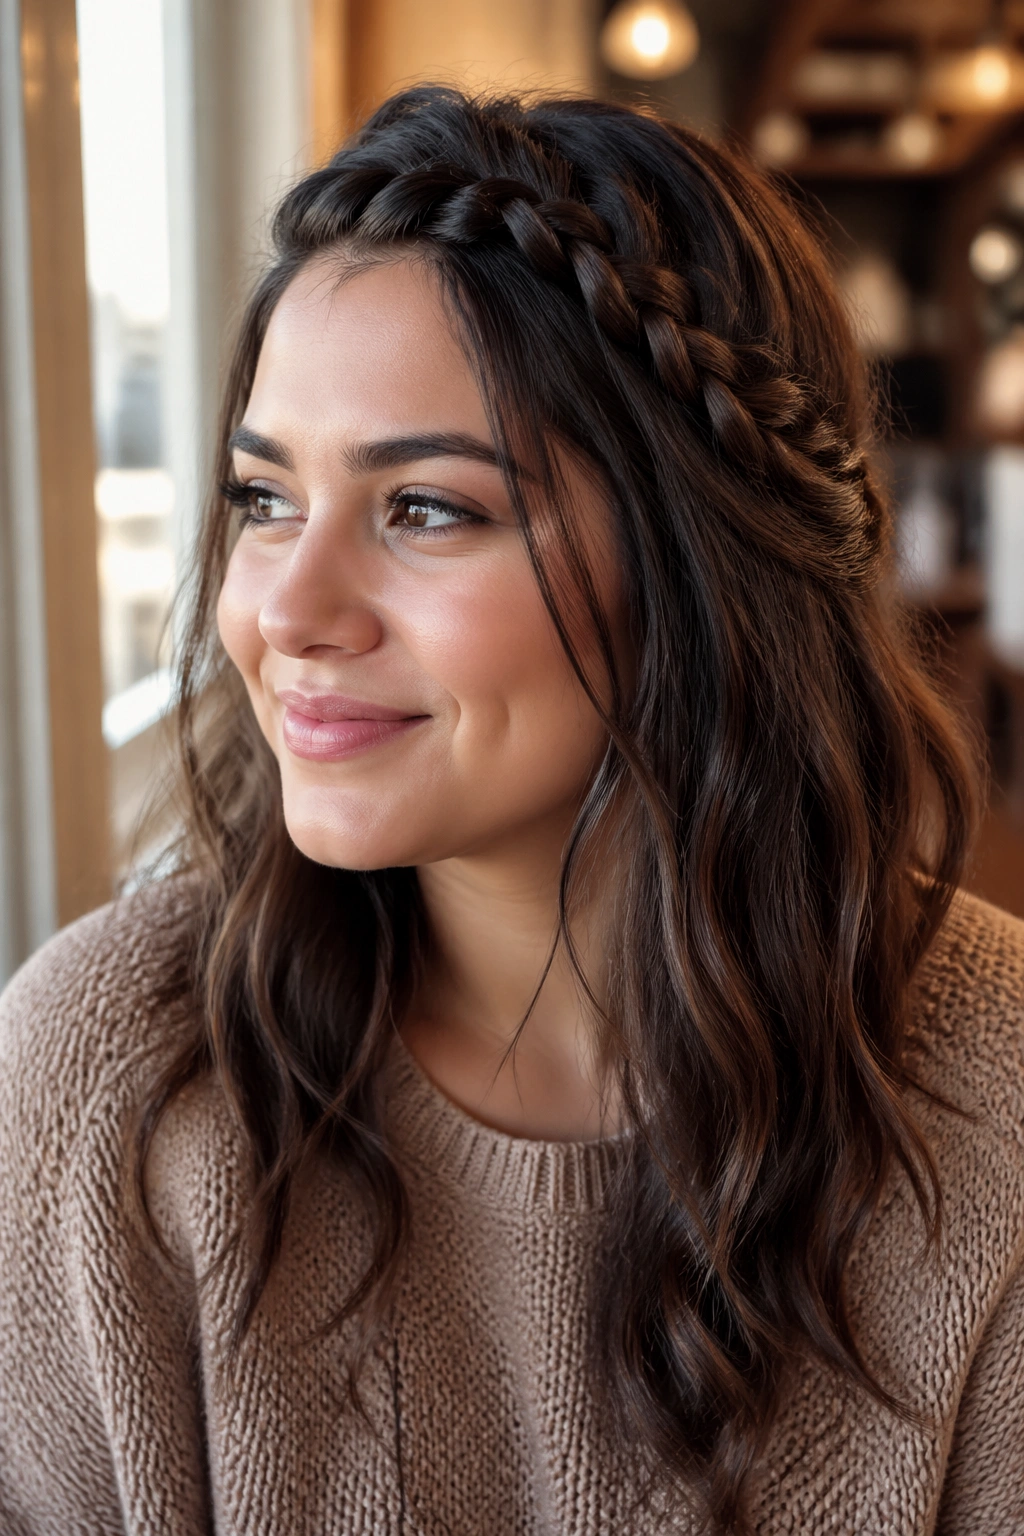
4. High Headband Braid Across the Hairline
Picture a braid that starts high near the part, travels just above the brow line, and ends behind the opposite ear. That placement lifts the face before the rest of the hairstyle even enters the picture.
A high headband braid is a better choice than a low band because it does not cut straight across the widest part of the face. It sits higher, where it creates height instead of width. On a round face, that higher track changes everything.
- Start the braid about 1 inch back from the hairline.
- Keep the section thin; thick braids eat up too much forehead space.
- Pull the braid slightly upward as you work, so it does not droop.
- Secure it behind the ear with a small pin, not a bulky clip.
If your hair is silky, add a dry texture spray first. The braid will hold its shape longer and the front section will not slide down by noon. If your hair is coarse or curly, a light cream is usually enough. The braid should still feel secure, but not stiff.
5. Side-Swept French Braid That Starts at the Brow
A side-swept French braid can be a soft answer to a round face when it begins at the outer brow instead of the middle of the forehead. That shift moves the braid off the widest part of the face and turns the line into a gentle diagonal.
The big mistake is starting too low or too centered. Then the braid runs flat across the front and makes the face feel broader. Start higher, and it becomes a shape-maker instead of a shape-flattener.
What I like here is the way the braid blends into the rest of the hair. It does not have to be tight or polished to work. A little looseness near the hairline gives the front some air, while the braid itself stays structured enough to hold the eye upward. If the ends are waved or curled, even better. That softness near the shoulders keeps the style from feeling top-heavy.
This is one of those styles that looks more deliberate than it is. A few careful stitches at the front, a smooth turn toward one side, and you have a braid that does more work than it lets on.
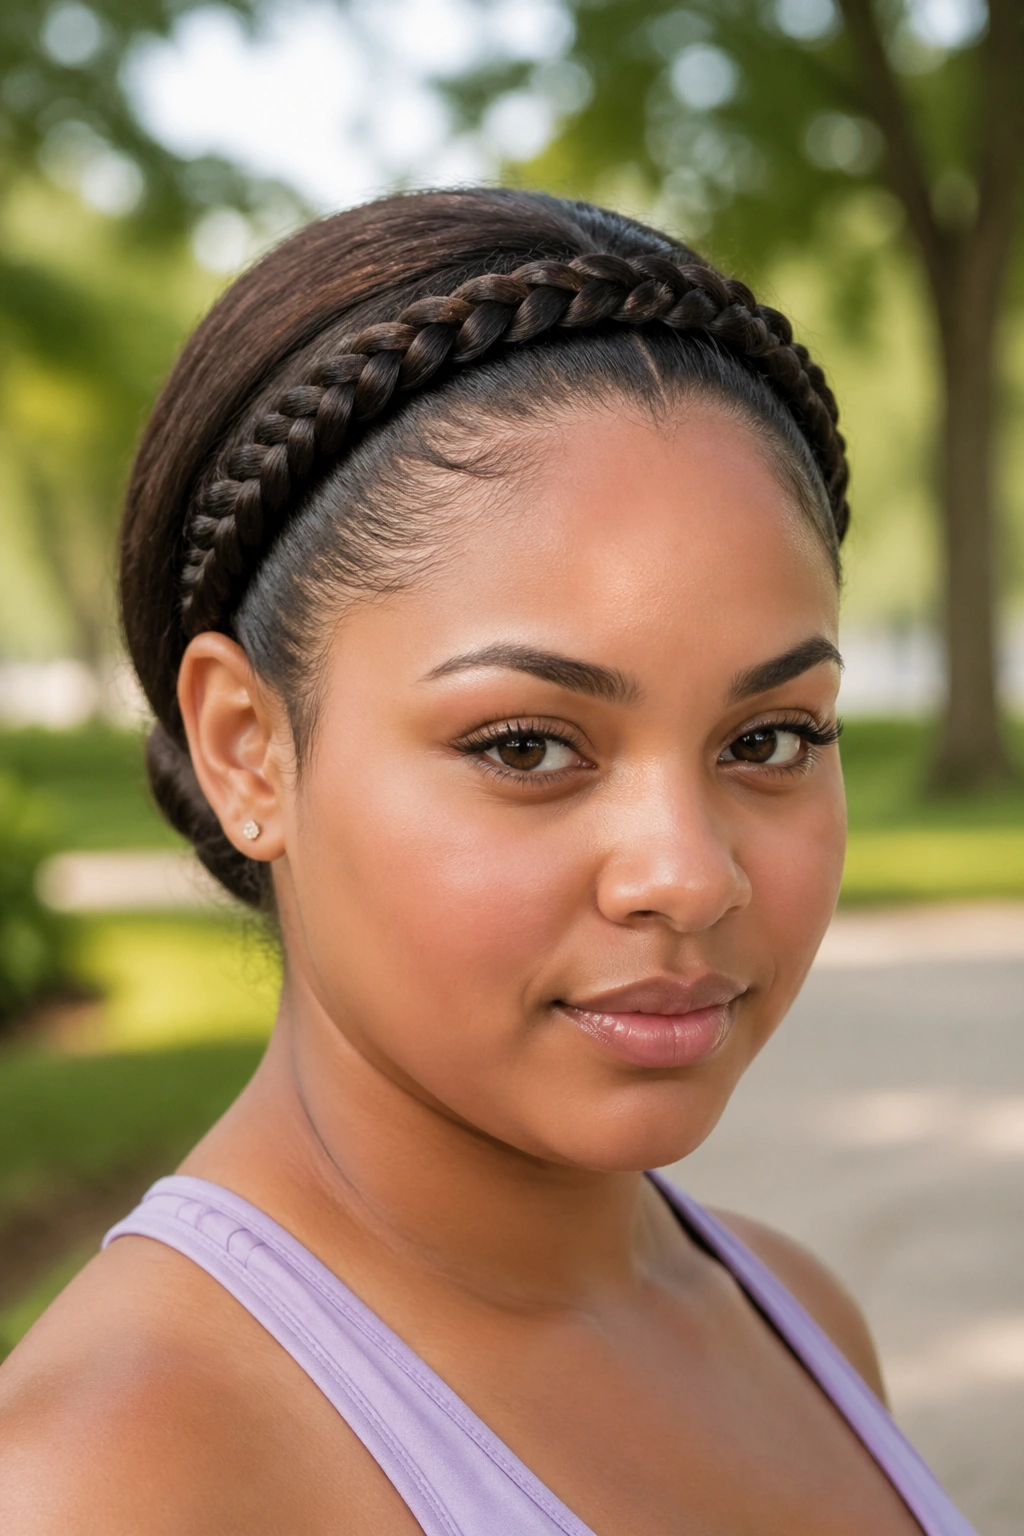
6. Mini Feed-In Braids Angled Toward the Crown
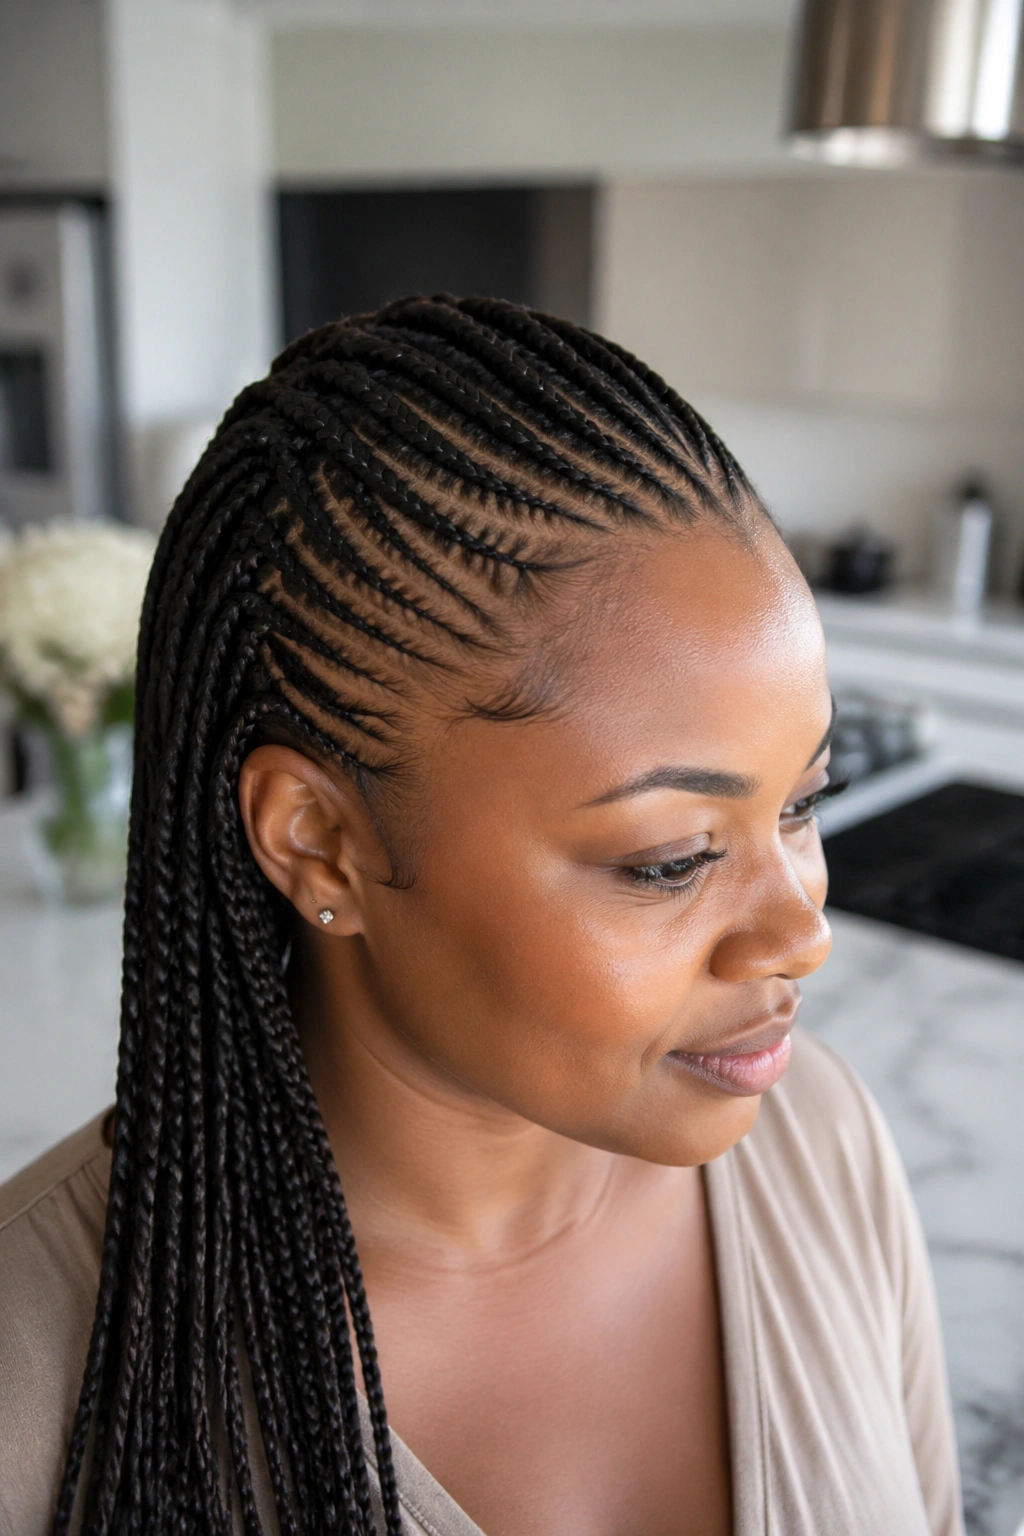
Unlike straight-back feed-ins, these do not sit flat against the widest part of the head. They angle upward, which gives a round face a little extra height and keeps the front open.
That angle matters more than braid size. A tiny feed-in braid that points downward can still widen the face if it follows the wrong line. Turn it toward the crown, and the whole style starts lifting. Three to five slim braids usually do the trick. More than that, and the front can begin to look crowded.
This style is especially good for natural hair because the scalp braids create a clean line while still leaving room for volume through the middle and back. If you like protective styles but want something that feels less heavy around the cheeks, this is a smart move.
The neat part is how adjustable it is. You can keep the braids razor-thin for a minimal look, or make them slightly thicker if you want more visible texture. The one rule I would not break: keep the first section angled up and back, not straight down. That small shift is what makes the face look longer.
7. Braided Faux Hawk With Soft Edges
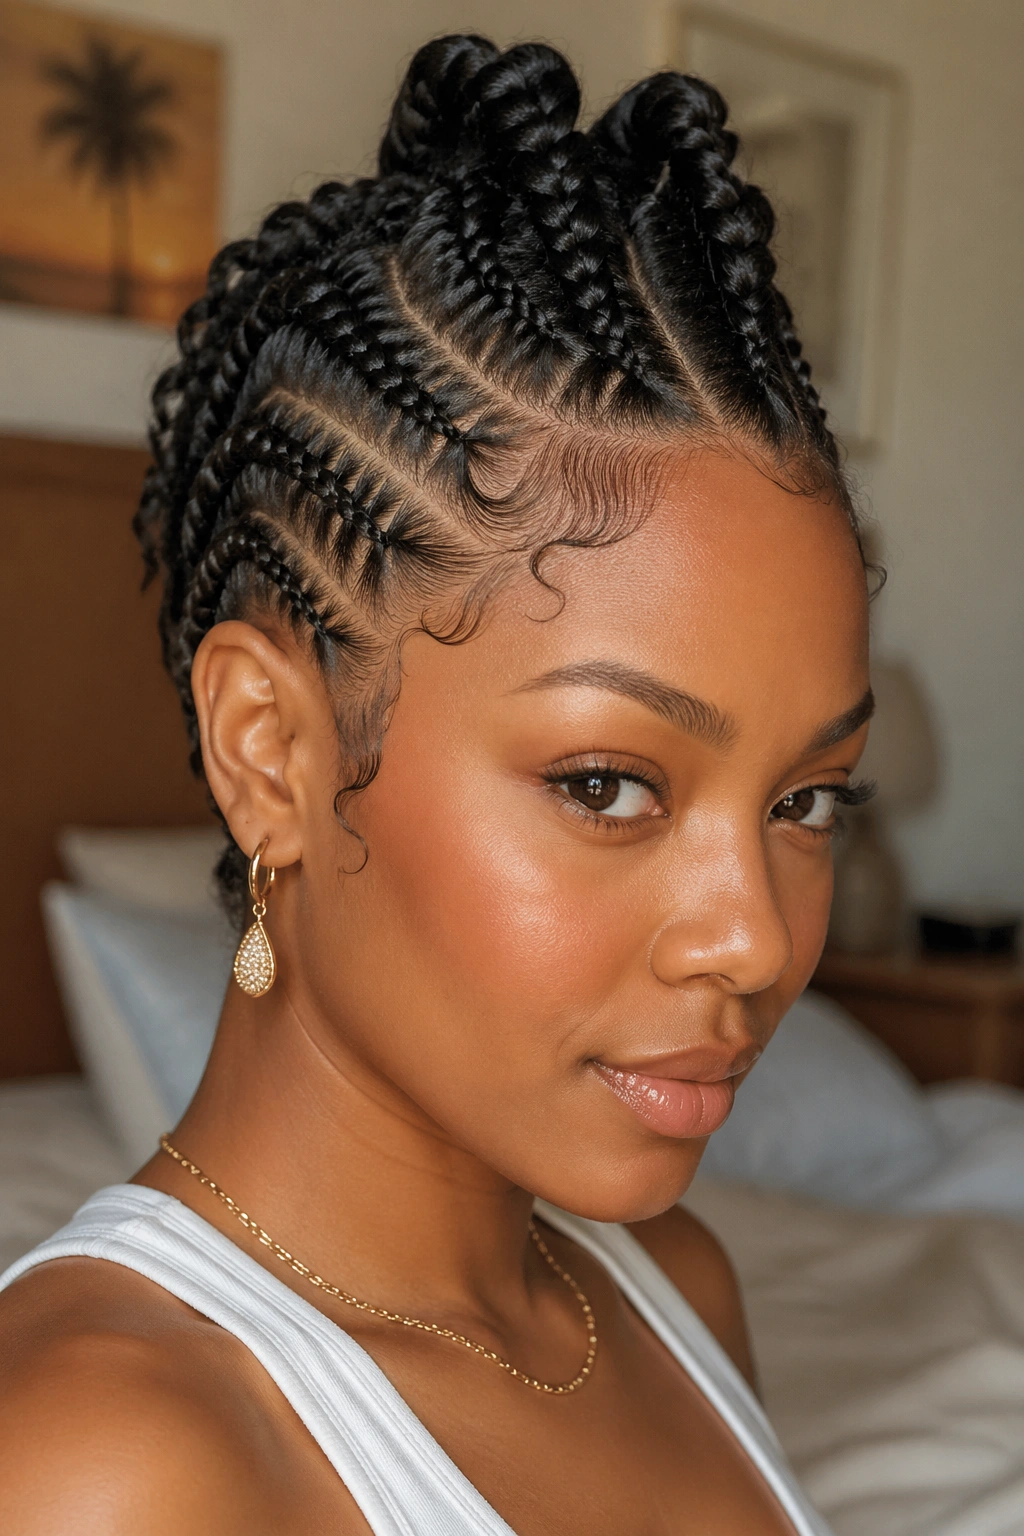
If you like a little edge without going full mohawk, this is the braid pattern to try. A braided faux hawk works on a round face because it creates a strong vertical line through the center of the head while keeping the sides controlled and close.
The style usually starts with tight side braids or pinned sections near the temples, then gathers into a lifted center strip. That center strip does the visual heavy lifting. It gives the head more height and breaks up the width that a round face naturally carries through the cheeks.
What to watch for
- Keep the top section no wider than 2 to 3 inches at first.
- Braid or twist the sides tight enough to stay put, but not so tight that the hairline pulls.
- Pancake the center braid only a little; too much widening can make it bulky.
- Leave a few soft pieces around the hairline so the finish does not look severe.
The style is strong, but it should not feel hard. A few wisps around the temples keep the whole thing wearable. That softness matters more than people think, especially if you want the look to work for daytime and not only for a night out.
8. Waterfall Braid With a High Part
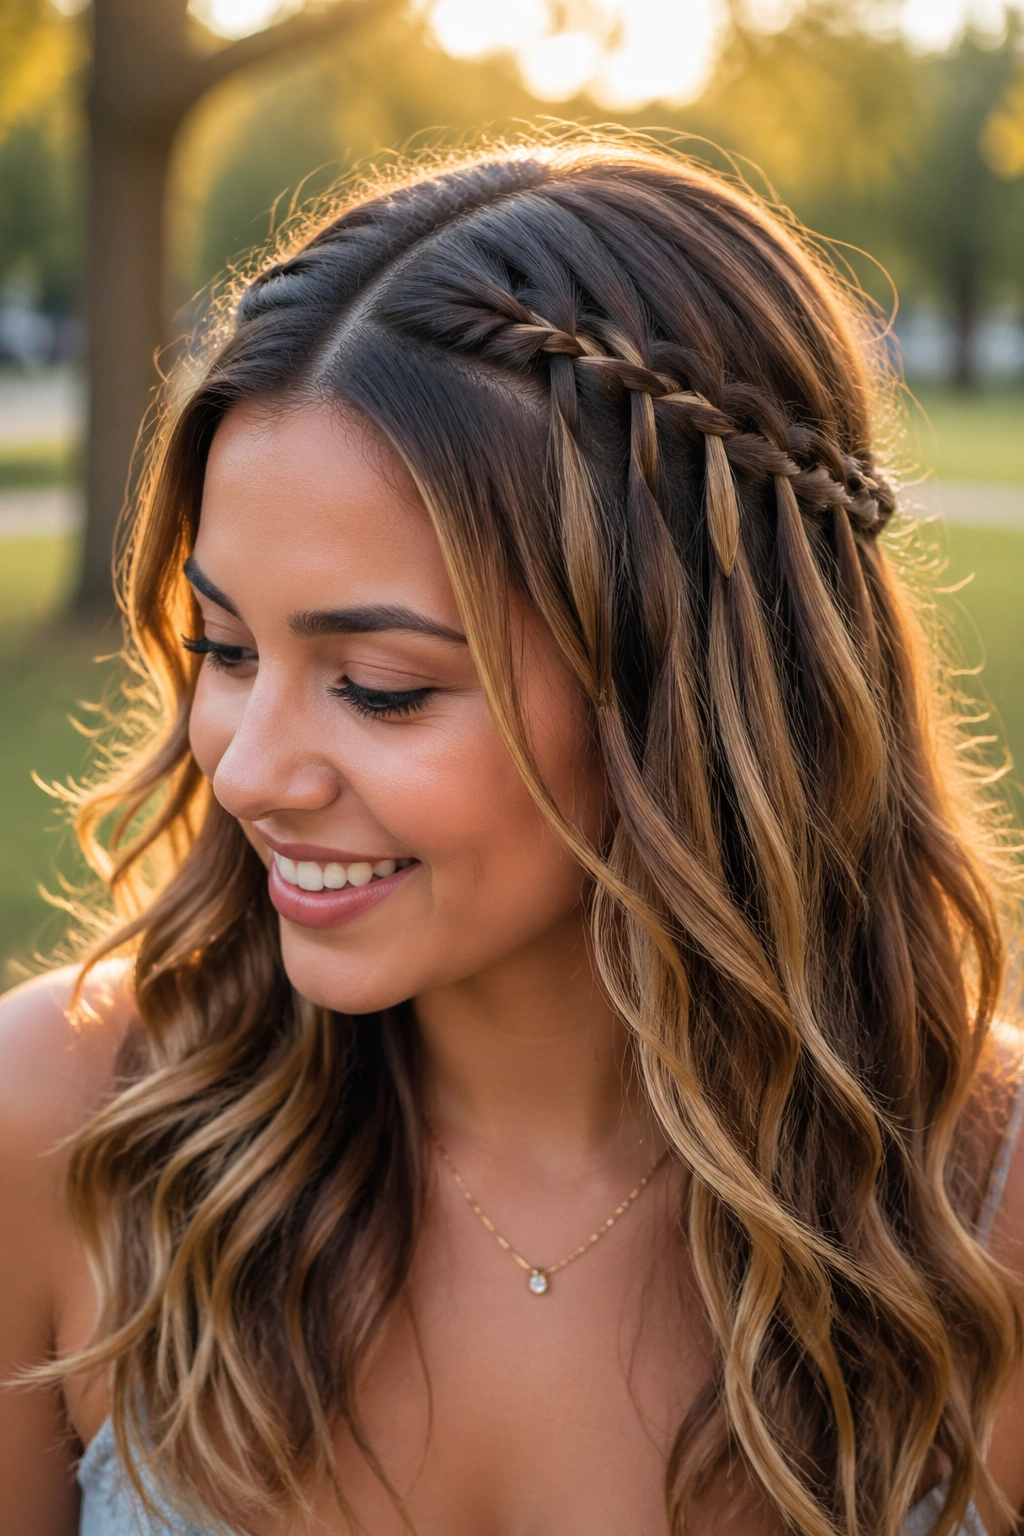
Why does a waterfall braid help more than a plain side braid? Because it keeps the front open while still drawing a curved line through the hair.
A waterfall braid lets sections drop out as you work, so the braid never becomes a heavy curtain. On a round face, that matters. You want movement across the front, not a thick block that swallows the forehead. The braid should sit high enough to create lift, then release enough hair to keep the style soft.
How to keep it lifted
Start the braid on a high part, usually a little above the arch of the eyebrow. From there, take small sections and keep the drops consistent. If the braid starts to sag toward the cheekbone, stop and reposition it. That lower line tends to widen the face more than it flatters it.
The best waterfall versions are lightly curled through the loose lengths. Straight ends can make the braid feel disconnected, while soft bends help the whole front section blend. I would also keep the braid narrow. Waterfall braids get bulky fast if the sections are too thick, and bulk is not your friend here.
This one has a pretty, open feel. That openness is the whole point.
9. Half-Up Boxer Braids That Pull Upward
A half-up style can still lift the face, and this one does it with almost no fuss. Two slim boxer braids at the front pull the eye upward, while the loose bottom length keeps the face from feeling boxed in.
The structure is simple. The effect is not. When the braids start at the hairline and climb toward the crown, they create a visible diagonal that narrows the cheeks. Then the open bottom half adds length below, which balances out the roundness in front.
This works well on medium to long hair, especially if the texture has a little grip. Freshly washed hair can be slippery, so a touch of texturizing spray or a bit of matte pomade at the roots helps the braids stay put. Keep the front sections narrow and purposeful. If they get too wide, the style starts to read like a full face frame, and that can flatten the lift.
The half-up part should land at the upper back of the head, not mid-head. That higher anchor point is what keeps the braid line moving upward instead of sideways. A small adjustment, sure. But it changes the whole shape.
10. Rope Braid Sweep With Pinned Ends
A rope braid gives you a cleaner line than a three-strand braid, and that clean line can be a gift on a round face. The twist looks sleek at the front, then sweeps back in a way that keeps the eye moving.
It is also one of the easiest styles to control when you want lift without a lot of bulk.
- Split the front section into 2 equal pieces.
- Twist both sections away from the face, then wrap them over each other.
- Keep the twist snug for the first 2 to 3 inches so it holds the front.
- Pin the finished rope braid behind the opposite ear with 2 bobby pins crossed in an X.
That pinning step matters. If the end hangs too low, the braid drags the eye downward and steals some of the lifting effect. Tuck it up and back, and the line stays cleaner.
I reach for rope braids on second-day hair a lot because the texture helps the twist stay defined. On silky hair, a little dry shampoo near the roots can make the sections easier to grip. Nothing fancy. Just enough hold to keep the twist from slipping apart.
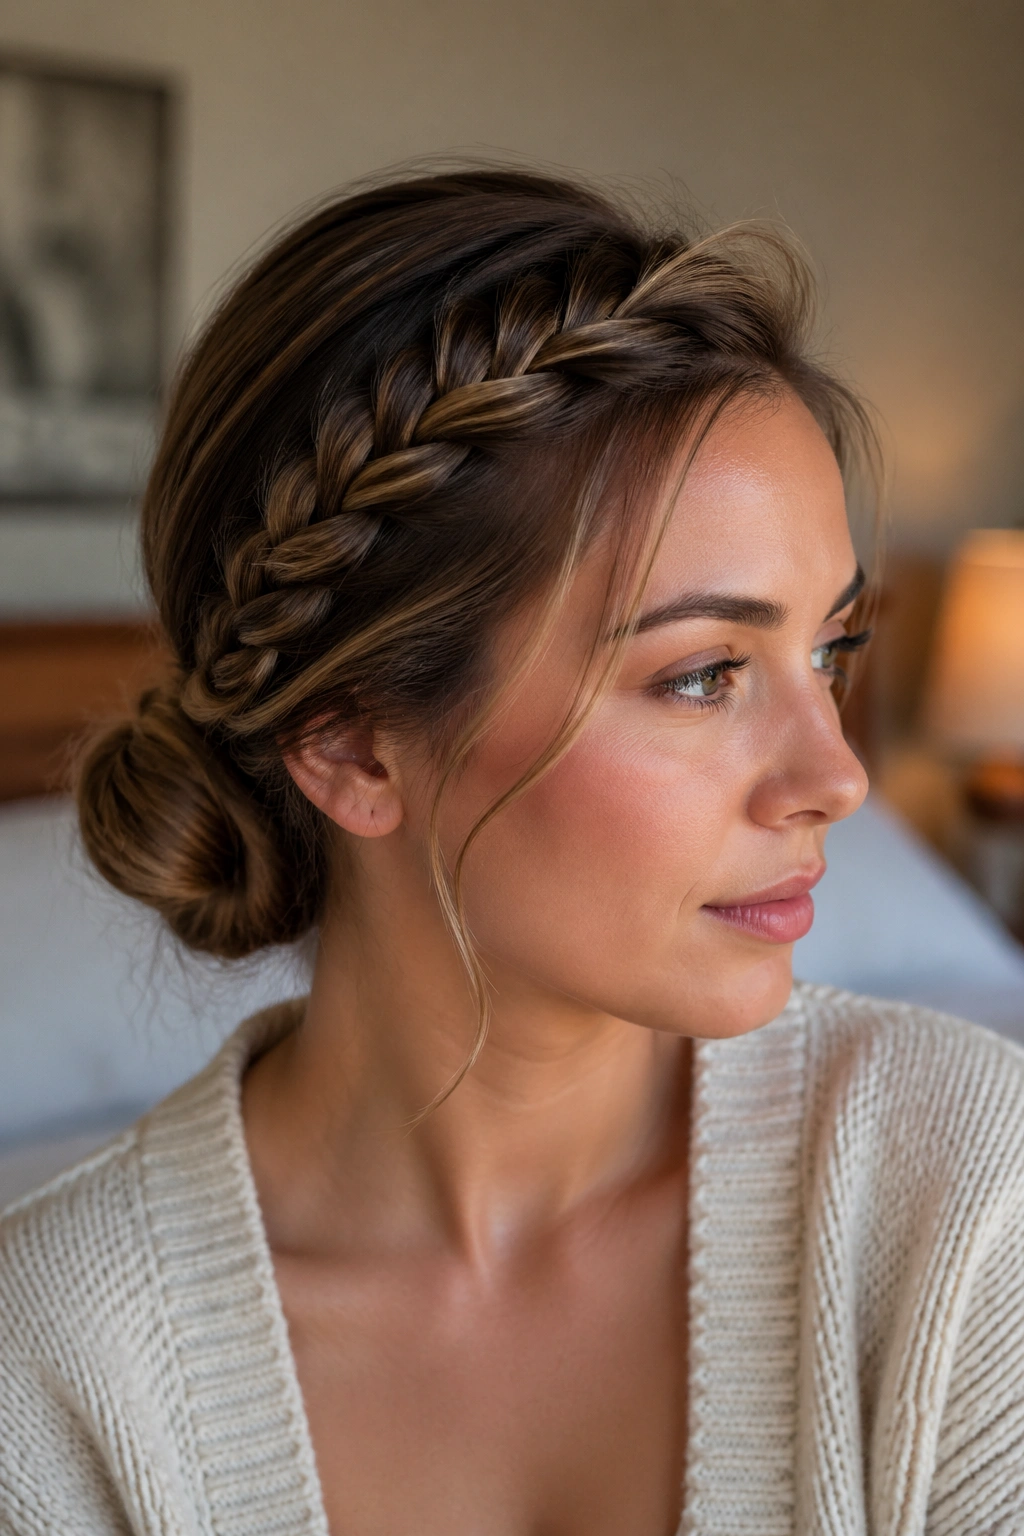
11. Crown Braid Placed Above the Widest Point

A crown braid can be tricky on a round face, and I do not think people say that enough. Put it too low, and it creates a heavy ring around the widest part of the head. Put it higher, and it becomes one of the nicest ways to add shape.
The goal is not to wrap the braid around the whole head at eyebrow level. Keep it above the cheekbone line, where it can read more like a lifted arc than a band. That small difference helps the forehead look taller and the face look a little narrower.
One-sentence truth: low crown braids are the problem.
A higher crown braid also gives you room to loosen the roots at the top without losing the structure. That little bit of lift is what keeps the style from feeling flat. If you want the braid to look softer, pull the outer edges of the braid open by a few millimeters after you finish. Not much. Just enough to create texture.
This style is a good fit if you want something polished but not stiff. It works at weddings, work events, or any day when you want the front of the hair to do more than sit there.
12. Accent Braids Paired With Teased Roots
Accent braids are the quieter option, and that is why they work so well. Instead of pulling the whole front of the hair back, you braid a slim section near one temple and leave the rest open. The face stays visible, but the braid still creates a diagonal line that lifts the shape.
Unlike a full braided front, this style does not compete with your features. It frames them. That makes it a smart choice if you want a round face to look a little longer without making the hairstyle feel busy. Two small accent braids are usually enough. Three can work, but after that the front can start to look crowded.
A clean way to place them
Tease a 1-inch square of roots at the crown, then braid a section no wider than a finger from the temple toward the back. Keep the braids close to the hairline at first, then let them move up and away. That upward angle is what creates lift.
This style is also forgiving if your hair changes through the day. A loose accent braid can look better as it softens. A full front braid often needs more maintenance. Accent braids do not. They can loosen a little and still look intentional.
13. Twisted Front Braid Into a Low Bun
The braid does the lifting; the bun just gives it somewhere to land. That is why a twisted front braid into a low bun can flatter a round face so well when it starts high and stays clean across the front.
Here, the front section is braided or rope-twisted from the temple back toward the crown, then gathered into a low bun near the nape. The top of the head keeps its height, which elongates the face, while the bun sits low enough to keep the shape from spreading sideways.
The important part is leaving the front open around the opposite side. If you braid both sides tightly into the bun, the style can become too symmetrical and too wide. Let one side stay softer. Let a few pieces skim the cheeks. That asymmetry is doing a lot of the visual work.
This is a useful style when you want a face-lifting braid that still feels neat and controlled. It works with office clothes, with dressier outfits, and with days when you want your hair out of the way but not flattened against your head. A small braid at the front and a low bun at the back is a simple combo. Simple, but not plain.
14. Diagonal Face-Framing Braid With Open Sides
If you only try one front braid on a round face, make it this kind of diagonal sweep. A braid that starts near the temple, crosses the front on an angle, and leaves both sides open creates lift without crowding the cheeks.
That open space matters. A round face usually looks its best when the hair does not close in too tightly around the sides. The diagonal braid gives structure, but the loose hair around it keeps the whole shape from feeling boxed. I like this especially when the braid is narrow at the start and slightly fuller near the back. It feels balanced without going stiff.
A simple mirror test helps here. Stand back and check where the braid lands in relation to the cheekbone. If it crosses low and straight, move it up or start it farther back. If it rises at an angle and leaves room around the face, you are in the right zone.
That is the real lesson with front braids for a round face: you are not trying to hide the shape. You are changing the line. A few inches of direction, a little height at the roots, and a braid placed with intention can do more than a pile of product ever will.