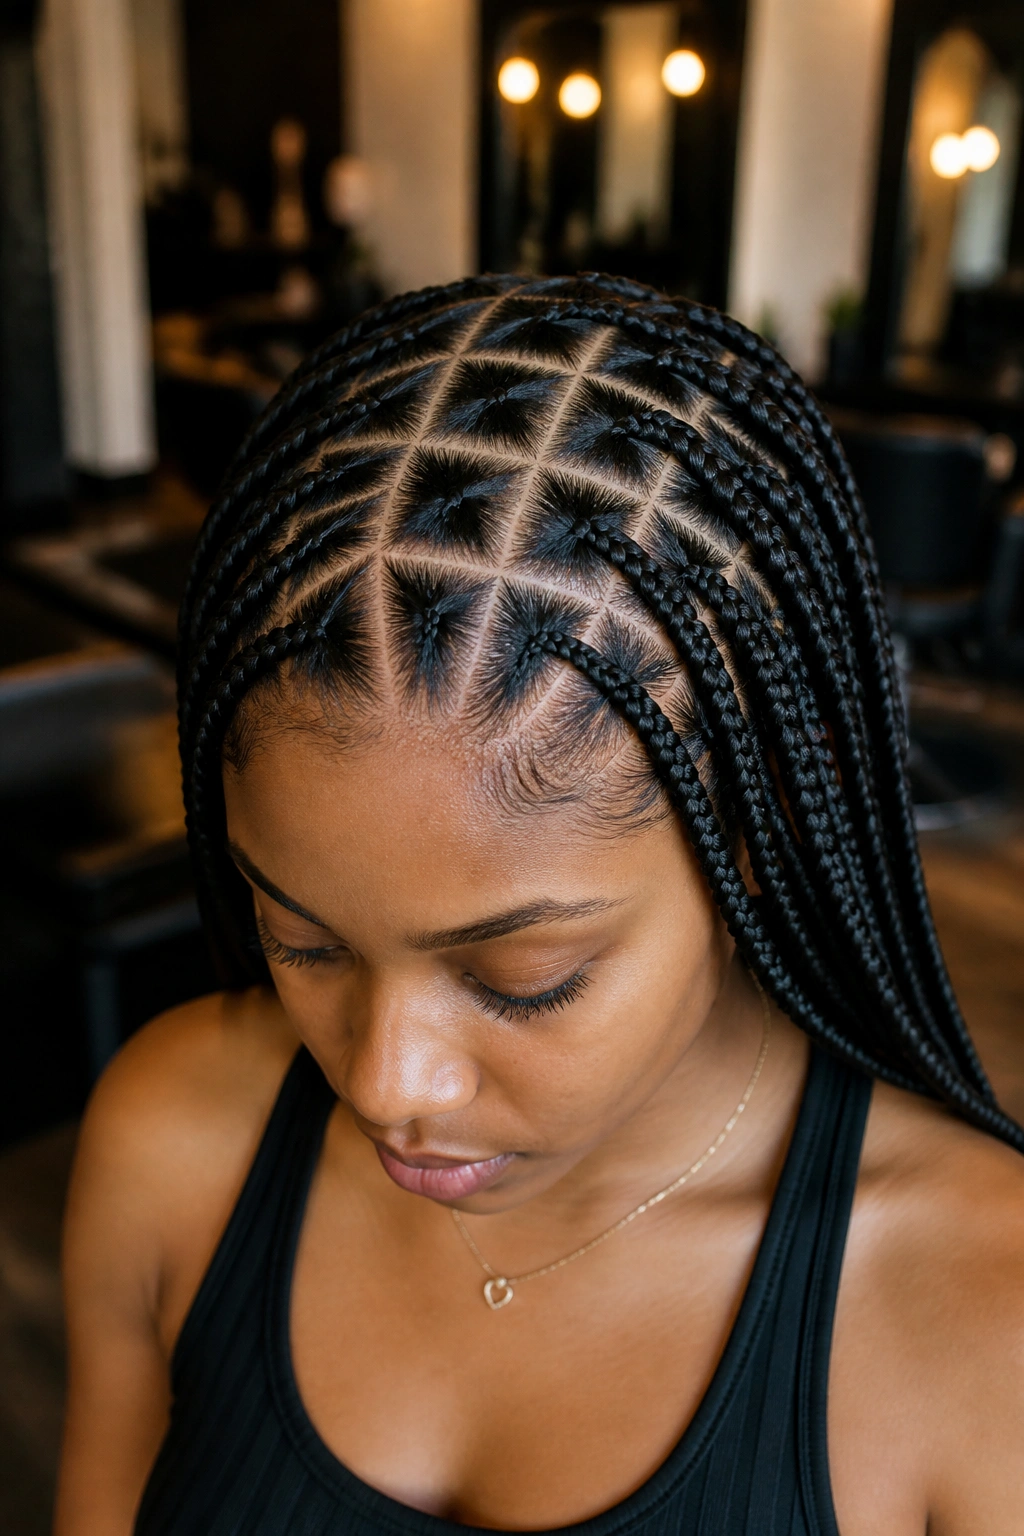
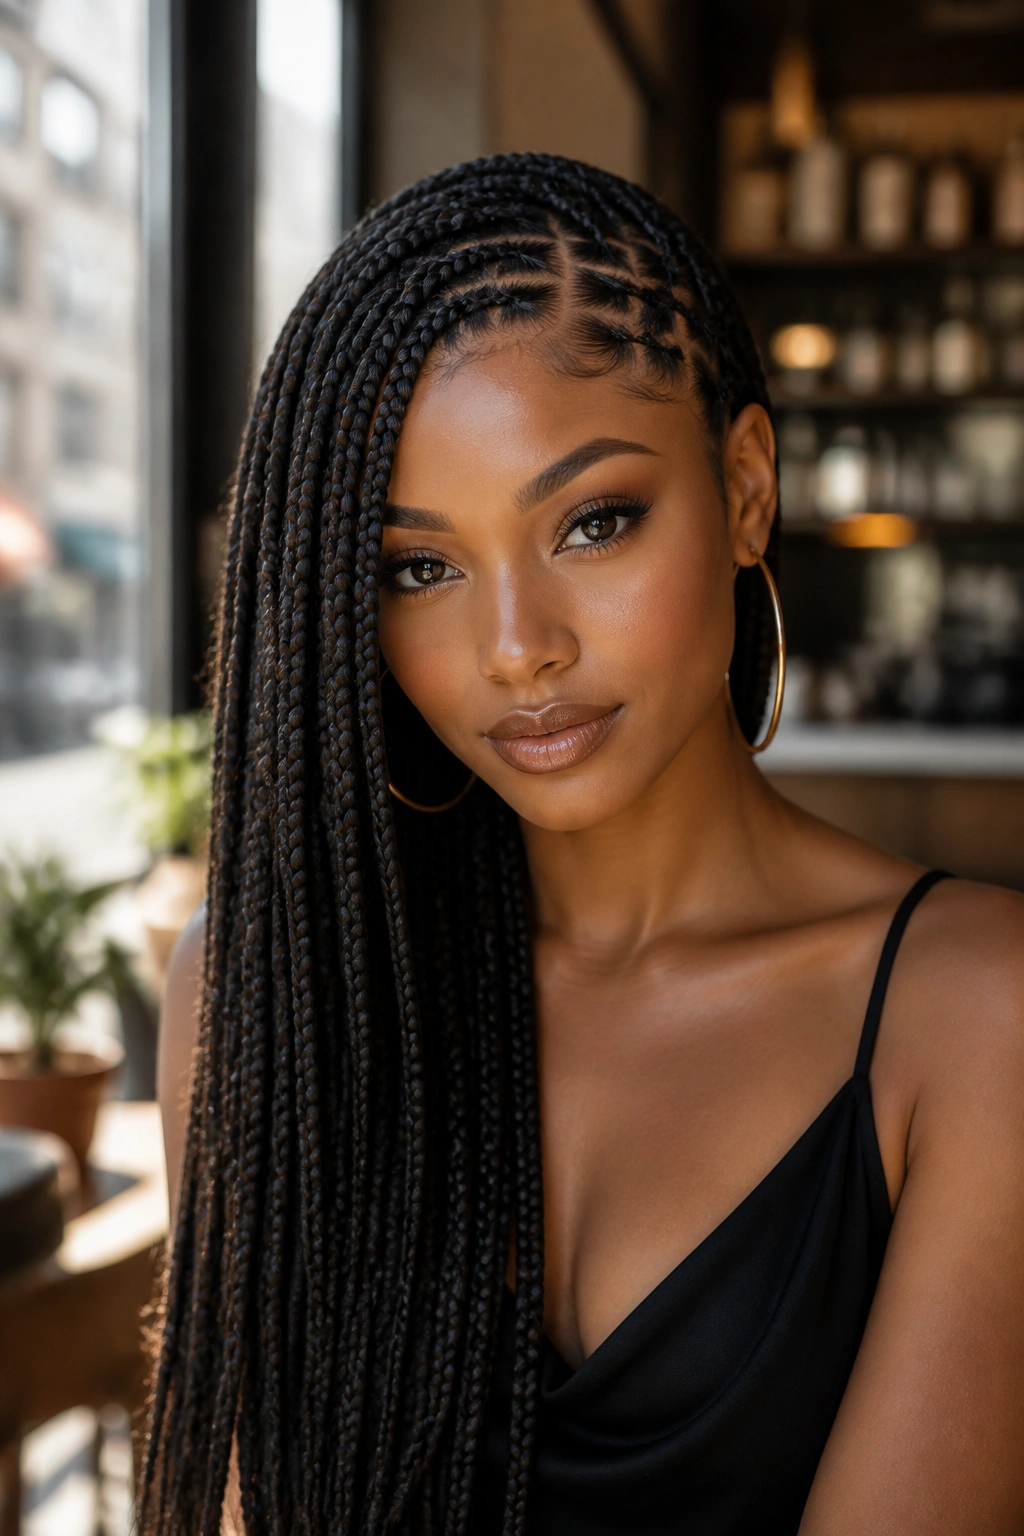
There is something deeply satisfying about a perfectly straight line carved into a scalp. For anyone who has spent hours in a stylist’s chair or hunched over a mirror with a rat-tail comb, the appeal of square braid patterns isn’t just about the braid itself—it is about the architecture of the sectioning. These crisp, geometric partings provide a rhythmic symmetry that makes even the simplest hairstyle look like a deliberate work of art. While many protective styles rely on the texture of the hair to do the heavy lifting, square braids lean into the beauty of the grid.
When you look at a well-executed set of square braids, you are seeing a balance of tension, volume, and scalp health. Historically, these patterns have served as the foundation for what many call box braids, a staple in the world of protective styling. The “square” refers to the base of the braid where it meets the scalp. If those squares are uneven, the entire look feels off-balance. But when they are uniform, the braids fall with a specific kind of grace, allowing for movement that doesn’t feel cluttered or heavy.
Choosing the right pattern is about more than just aesthetics. It is a decision that impacts how long the style lasts and how much stress is placed on your follicles. I have seen many people rush the sectioning process, only to end up with braids that pull too tightly on the edges or look sparse in the back. Taking the time to map out the geometric layout is the difference between a style that looks “just okay” and one that stops people on the street. It is about precision, patience, and a genuine appreciation for the geometry of hair.
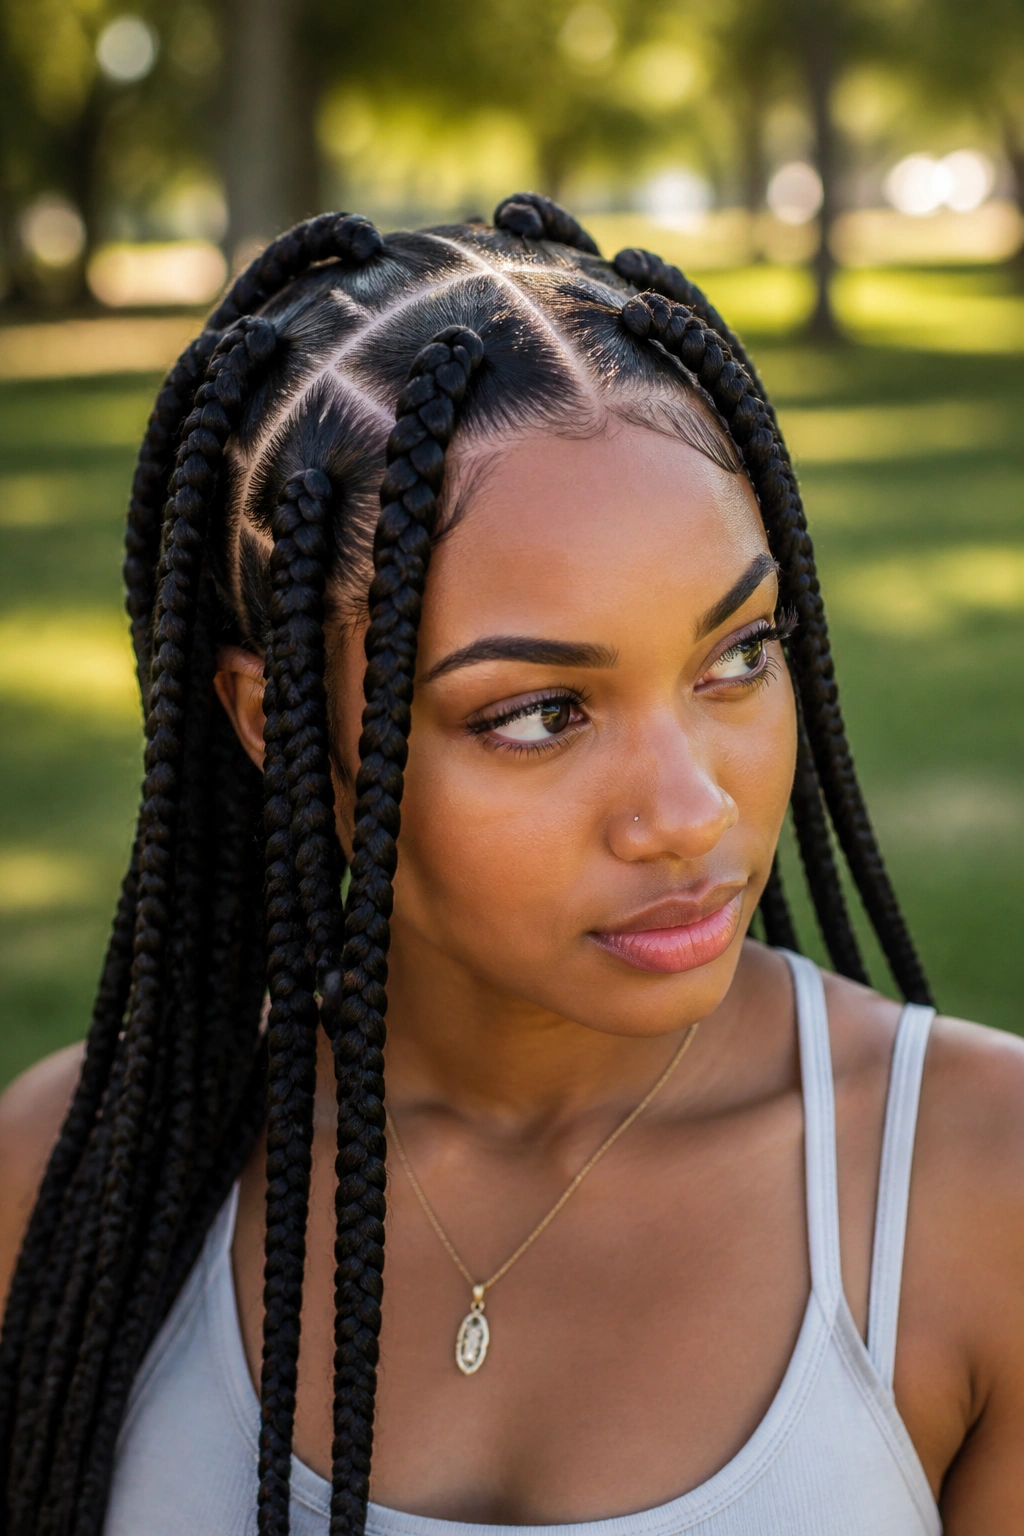
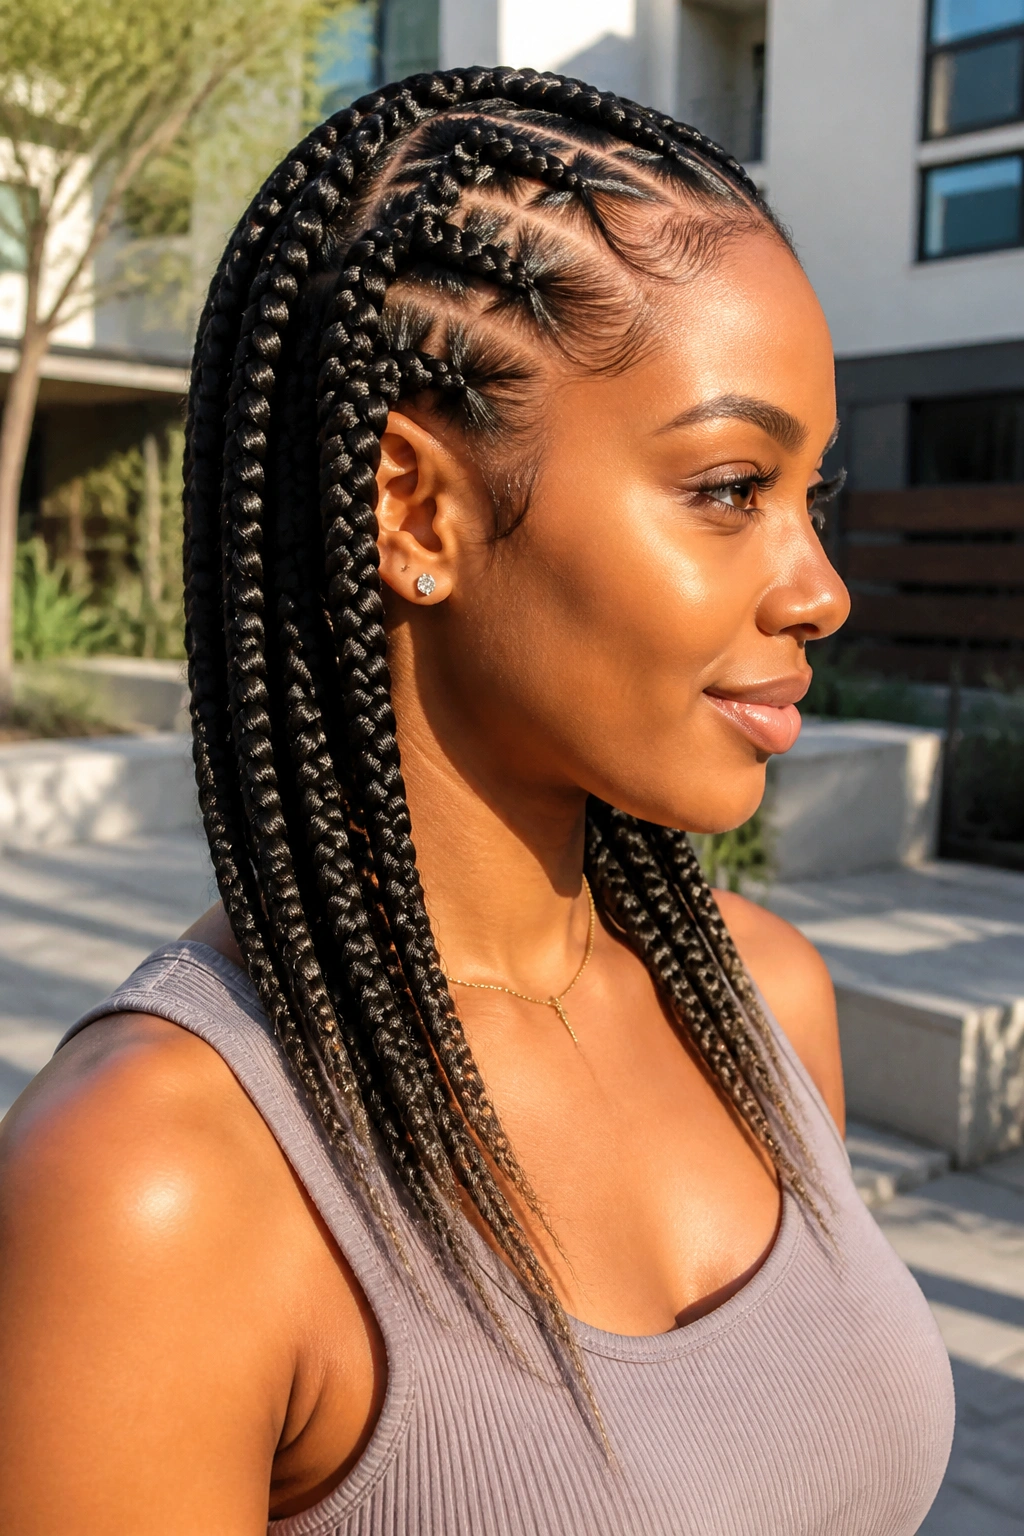
1. Classic Mid-Back Square Braids
The classic mid-back square braid is the gold standard for a reason. It offers a length that is manageable for daily life while still providing enough hair to play with different updos. The sectioning usually involves a standard grid of medium-sized squares, which creates a full, voluminous look without the excessive weight of longer extensions.
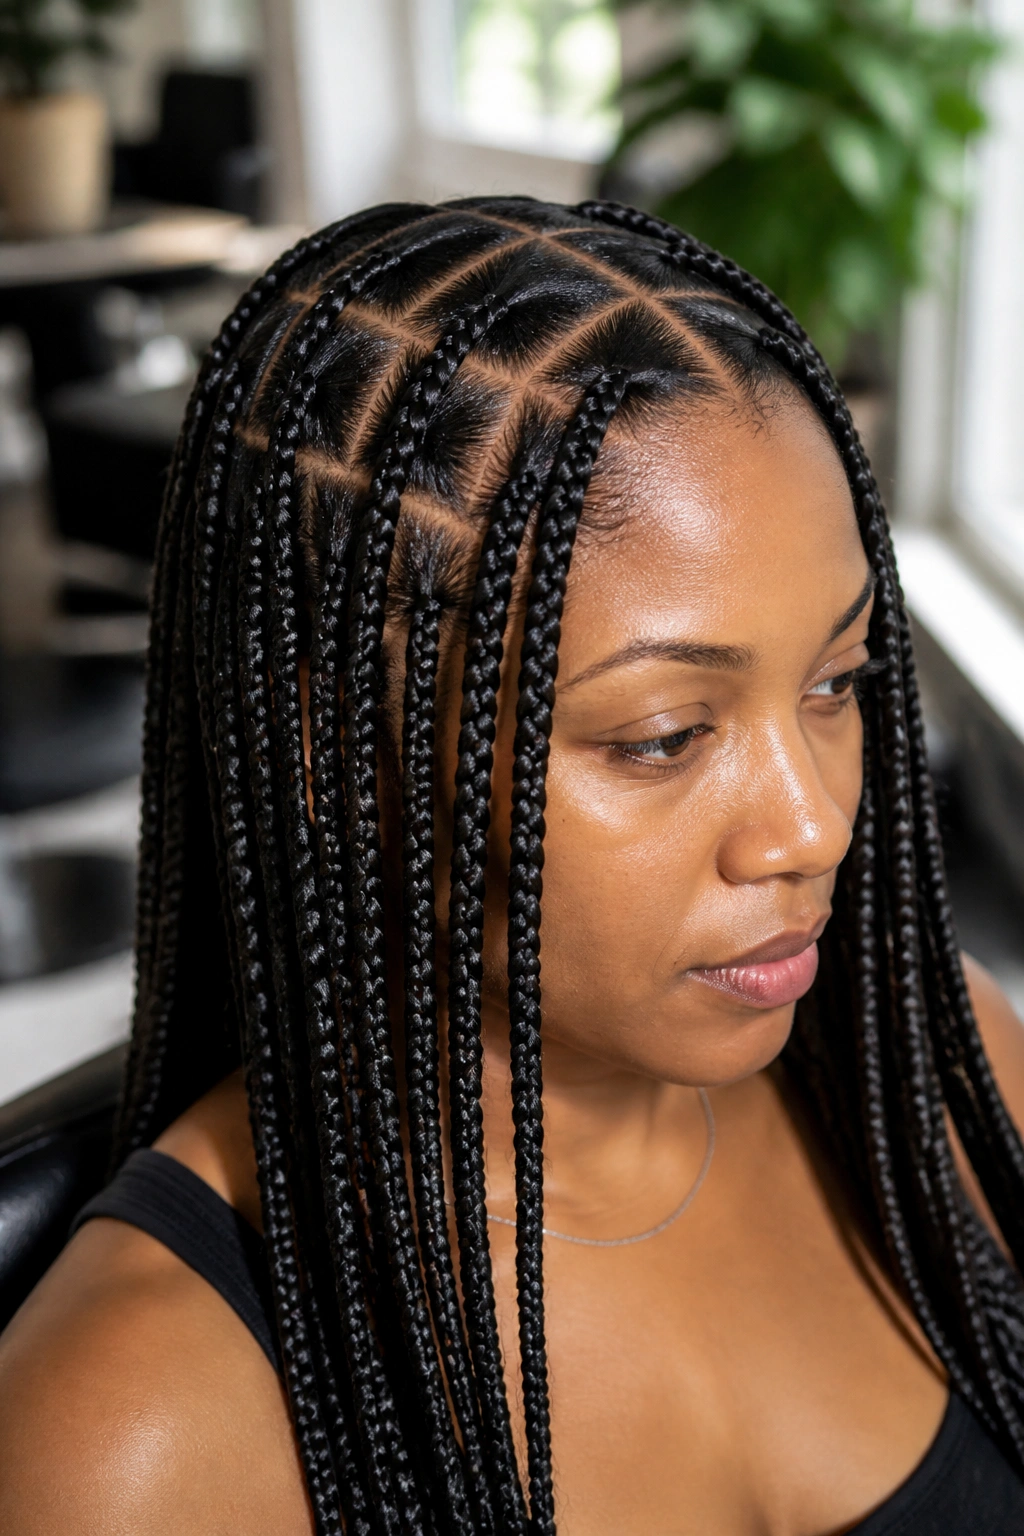
Why the Mid-Back Length Works
Medium squares are the “Goldilocks” of the braiding world. They are small enough to allow the scalp to breathe and large enough that the installation doesn’t take two full days. In a typical mid-back style, each square is roughly one inch by one inch. This size provides enough base support for the added hair, preventing the braid from feeling like it is “hanging by a thread” as it grows out.
Maintenance Essentials
- Apply a light peppermint oil to the partings every three days to soothe the scalp.
- Wrap the braids in a silk or satin scarf at night to keep the squares crisp.
- Avoid heavy gels at the roots, as these can lead to buildup in the geometric crevices.
- Refresh the edges every two weeks to maintain the “fresh out of the chair” appearance.
Pro tip: Use a high-quality edge control with a tiny brush to sharpen the lines of your squares every few mornings for a perpetually polished look.
2. Jumbo Square Partings
If you want a high-impact look that doesn’t require ten hours of sitting, jumbo square braids are the answer. These are characterized by large, bold sections—sometimes two or three inches wide. Because the squares are so prominent, the geometric pattern becomes the focal point of the entire hairstyle. It is a look that screams confidence and intentionality.
The biggest challenge with jumbo squares is the weight distribution. Because each braid uses a significant amount of extension hair, the tension on that large square of scalp is higher than with smaller patterns. I always recommend using the knotless method for jumbo squares. It starts the braid with your natural hair before gradually feeding in the extensions, which significantly reduces the immediate pull on your roots.
When you go jumbo, you are making a statement. The thickness of the braids combined with the wide, clean lanes of the scalp creates a graphic, almost architectural vibe. It is a popular choice for those who want a quick turnaround time or a style that feels modern and “chunkier” than traditional braids. Just be sure to keep the number of braids relatively low—usually between 10 and 18—to ensure the weight remains manageable for your neck and scalp.
3. Micro Square Braids
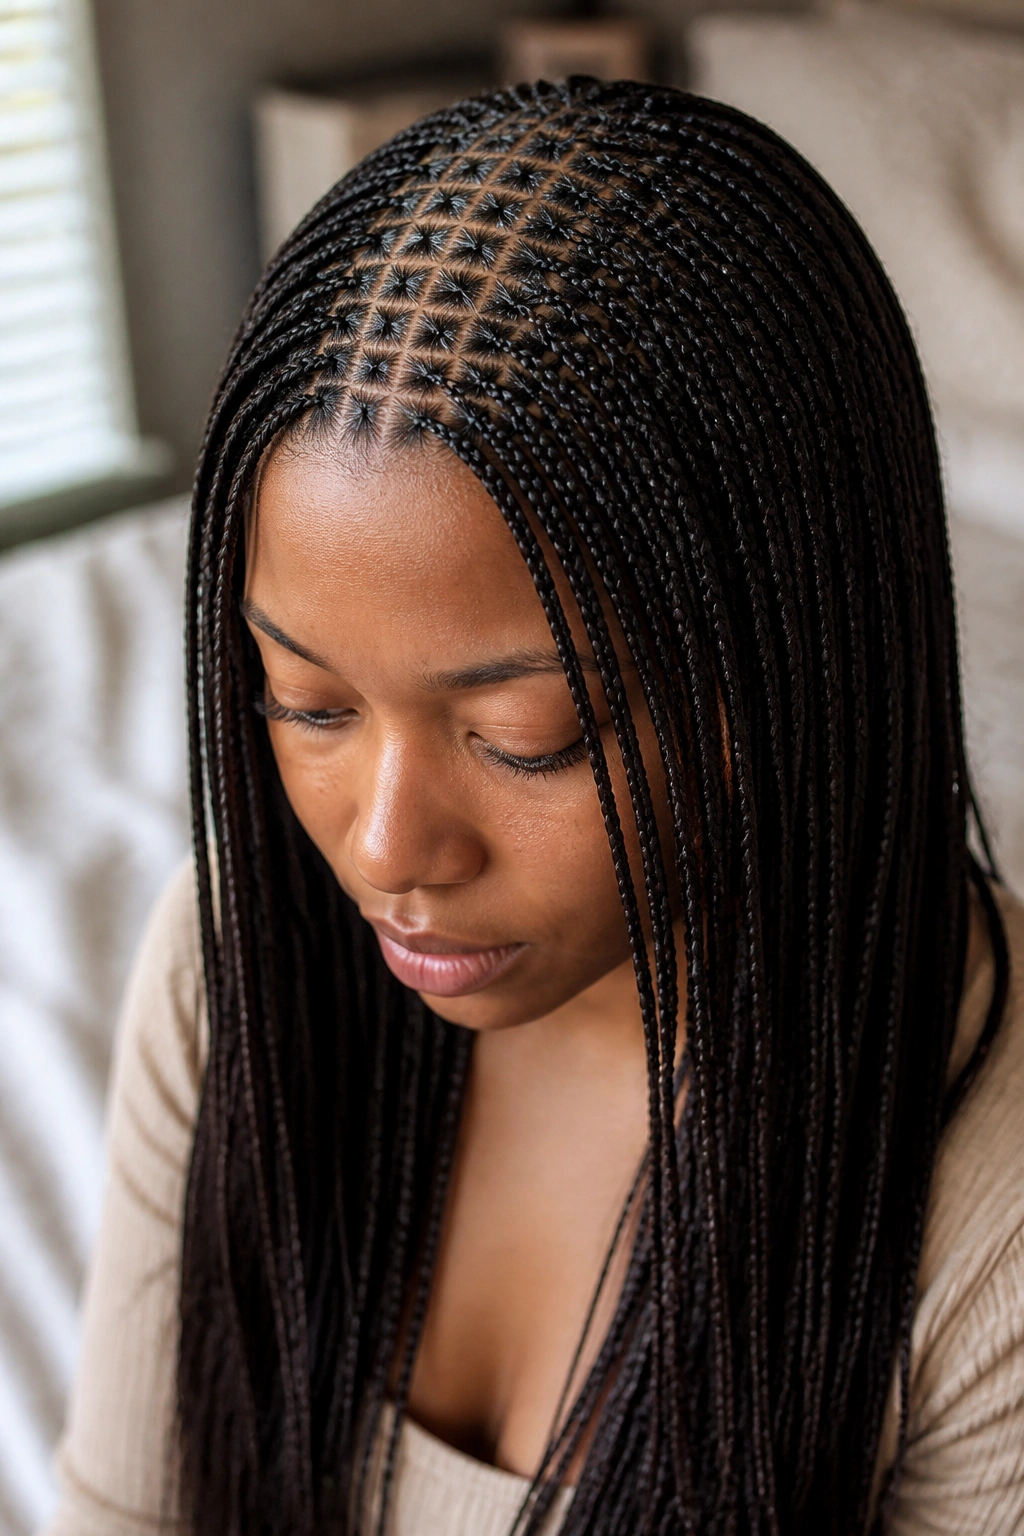
On the opposite end of the spectrum, we have micro square braids. These are for the patient souls who want maximum versatility. The squares are tiny—often less than a quarter-inch wide—creating a texture that almost looks like loose hair from a distance.
Does the Time Investment Pay Off?
Micro braids can take anywhere from eight to fourteen hours to install, depending on the length. Why would anyone do this? Because the styling options are infinite. You can curl them, braid them into larger plaits, or wear them in intricate buns that would be impossible with thicker braids. The tiny squares create a “fabric” of hair that moves naturally.
How to Style Micro Squares
- The High Pony: Gather them all at the crown for a sleek, fountain-like effect.
- The Fishtail: Braid the micro braids themselves into a massive, textured fishtail.
- Deep Side Part: Because the squares are so small, you can flip the hair in any direction without showing “gaps” in the pattern.
4. The Beaded Square Finish
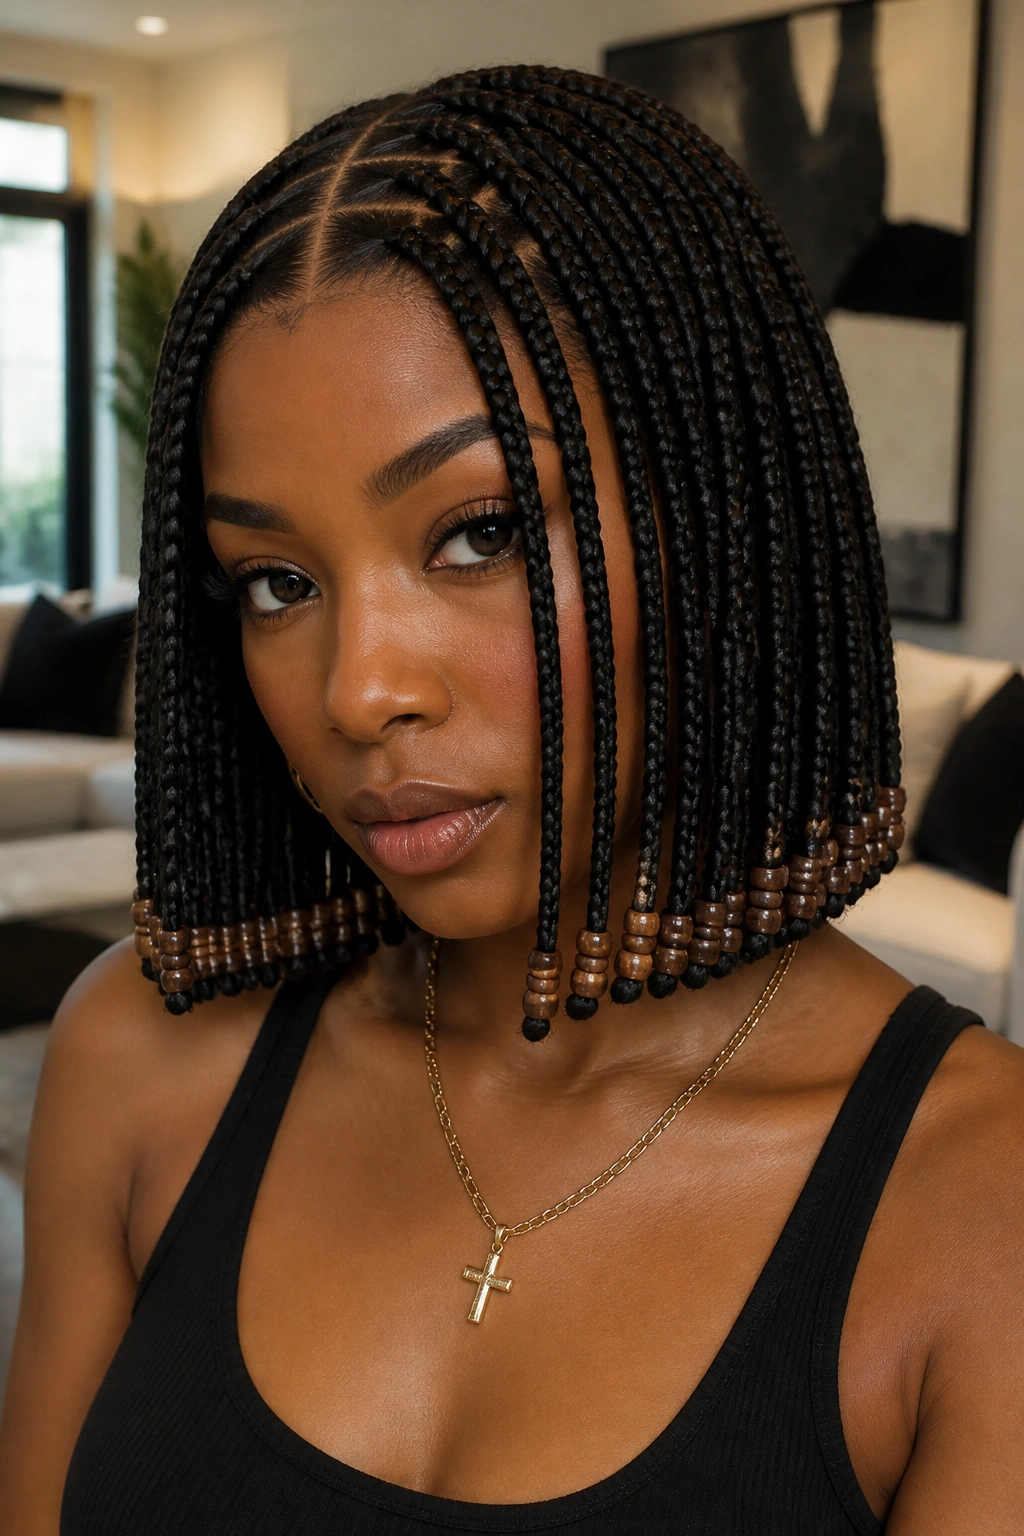
Adding beads to the ends of square braids takes the geometric theme to another level. The straight lines of the scalp partings are mirrored by the hard, round or cylindrical edges of the beads. It creates a satisfying contrast between the soft texture of the hair and the solid ornaments. This isn’t just for kids; with the right choice of wood or transparent beads, this is a sophisticated, high-fashion look.
Unlike styles that leave the ends wispy or curled, the beaded finish provides a physical weight that keeps the braids hanging straight. This weight actually helps maintain the integrity of the square partings because the braids don’t fly around as much, reducing friction at the roots. When choosing beads, I recommend mixing textures—perhaps a few matte wooden beads mixed with clear acrylic ones—to add depth to the visual pattern.
For a truly crisp look, ensure the beads are secured at exactly the same length across the bottom. This horizontal line at the ends acts as a “frame” for the vertical lines of the square sections on the head. It is a cohesive, intentional approach to braiding that feels finished and expensive.
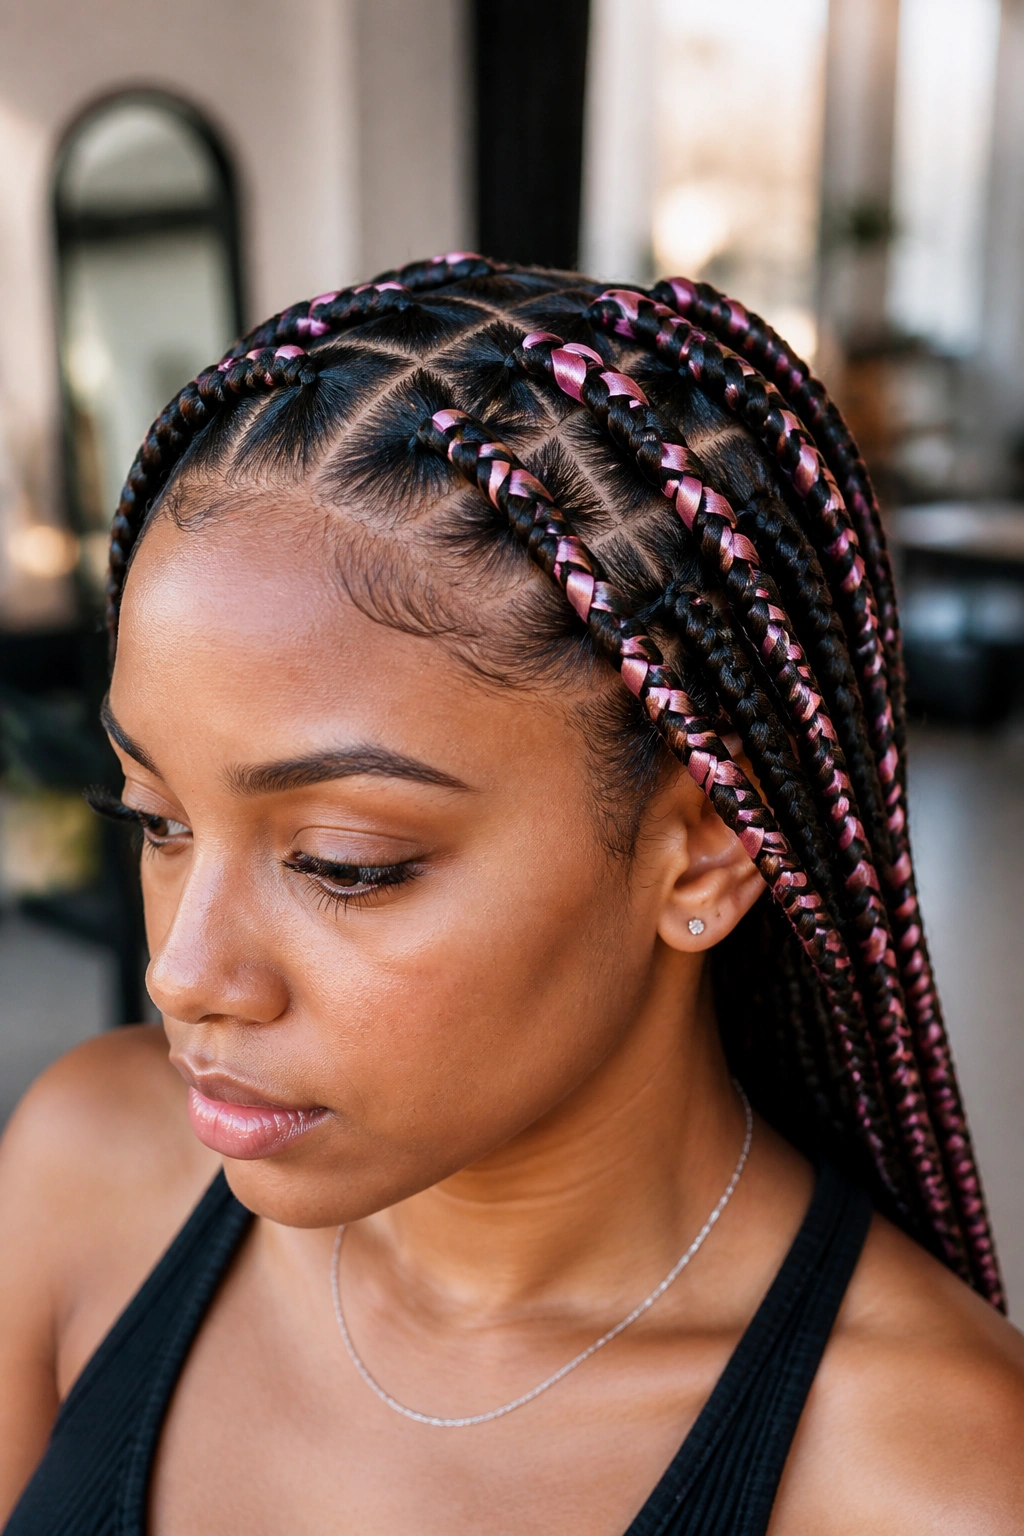
5. Ombré Geometric Braids
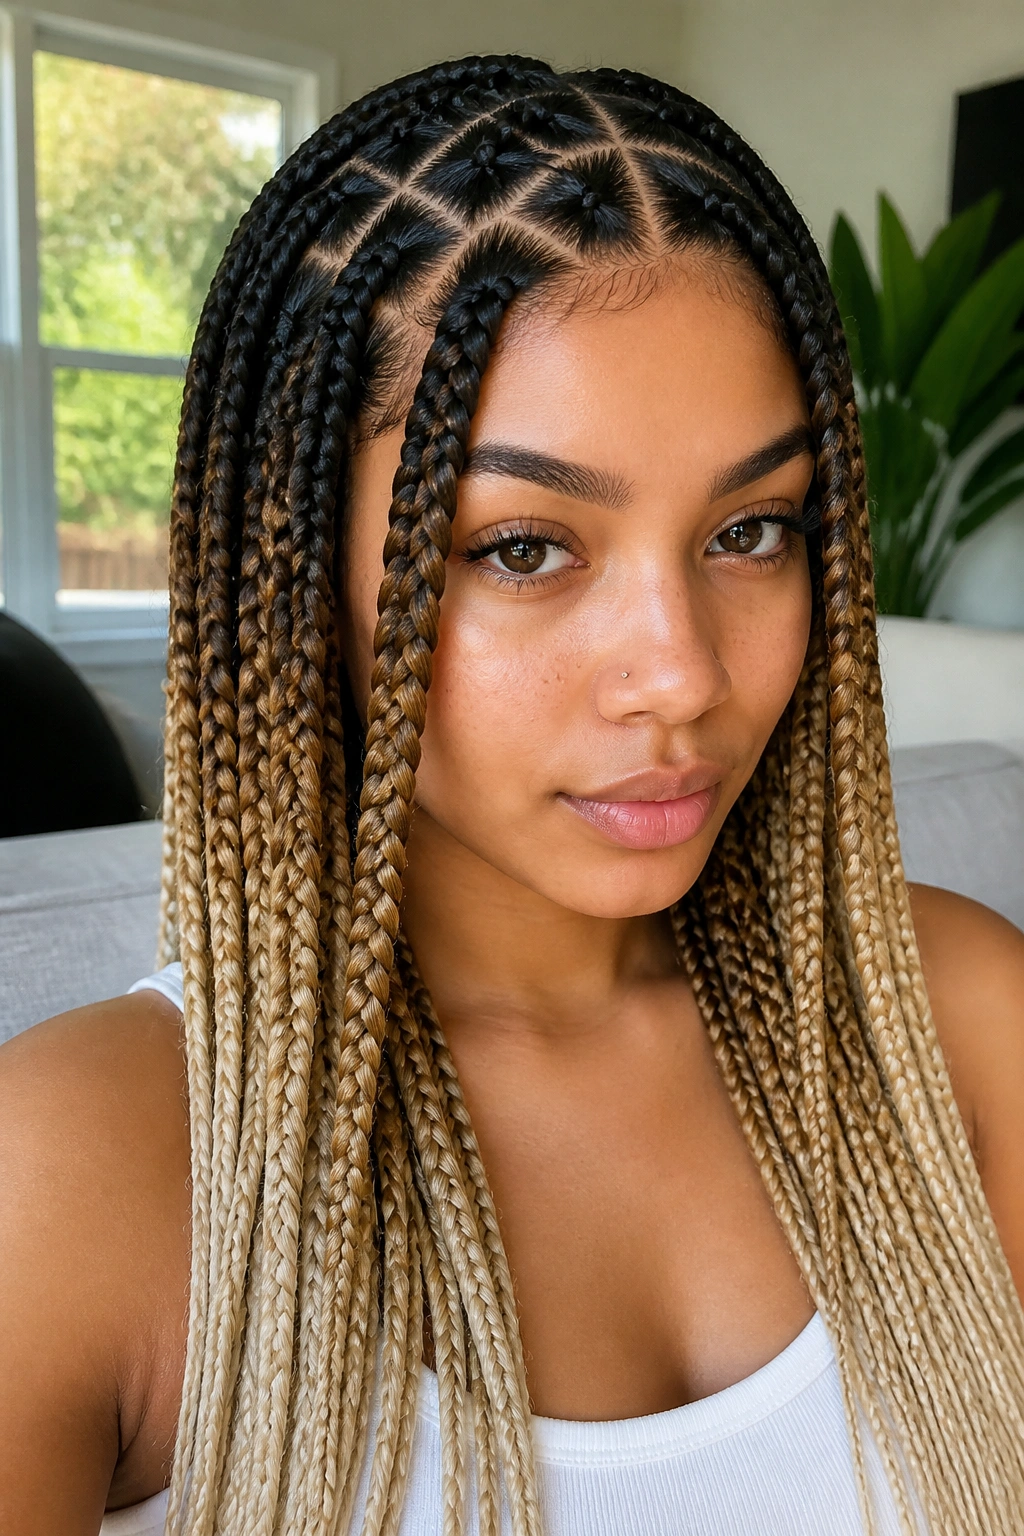
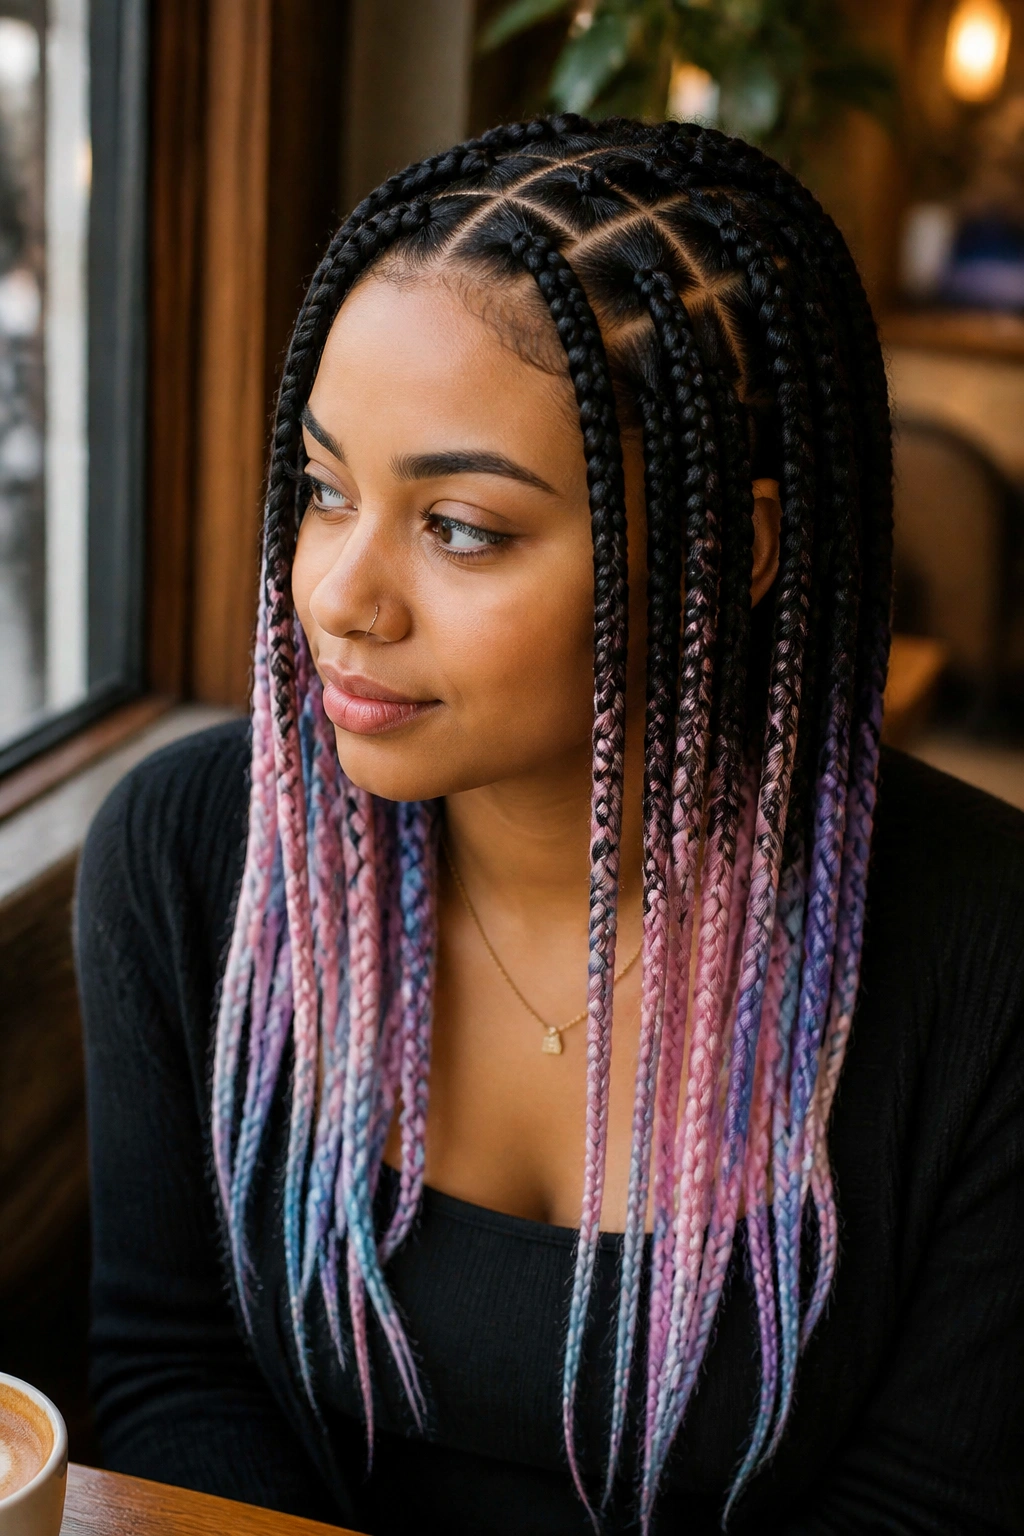
Color is a fantastic way to highlight the geometry of square braids. An ombré effect, where the color shifts from dark at the roots to a lighter shade at the tips, draws the eye down the length of the braid. However, the most interesting part of this look is the root. Because the natural hair color is typically darker, the square partings remain the most defined part of the style.
The Science of Color Placement
When you use ombré hair, the transition point matters. If the color changes too close to the scalp, it can “muddy” the look of the squares. Most stylists prefer to start the color shift about three to four inches down. This keeps the geometric grid at the top looking uniform and sharp.
Why It Stays Popular
- It allows you to experiment with blonde or copper without dyeing your natural hair.
- The darker roots hide new growth better than lighter roots would.
- It adds a sense of “length” to the hair because the eye follows the color gradient.
- The shift in tone makes the individual plaits of the braid more visible.
6. Square Braids with Curly Ends

Often referred to as “Goddess Braids,” this pattern combines the structured look of square partings with the romantic, soft texture of loose curls at the ends. It is a hybrid style that works beautifully for formal occasions or vacations. The “crisp” part is all at the scalp, while the “flow” is at the bottom.
To keep this look from becoming a tangled mess, the quality of the curly hair is paramount. I suggest using human hair bulk for the curly ends rather than synthetic. Synthetic curls tend to mat after a few days, which can pull on the square sections and ruin the geometry you worked so hard to achieve.
The contrast here is what makes it work. You have these very masculine, sharp, defined squares at the base, transitioning into soft, feminine curls. It is a balanced aesthetic. When you are sectioning for this style, aim for medium squares. Too large, and the curls look like an afterthought; too small, and the volume of the curls will overwhelm the delicate partings.
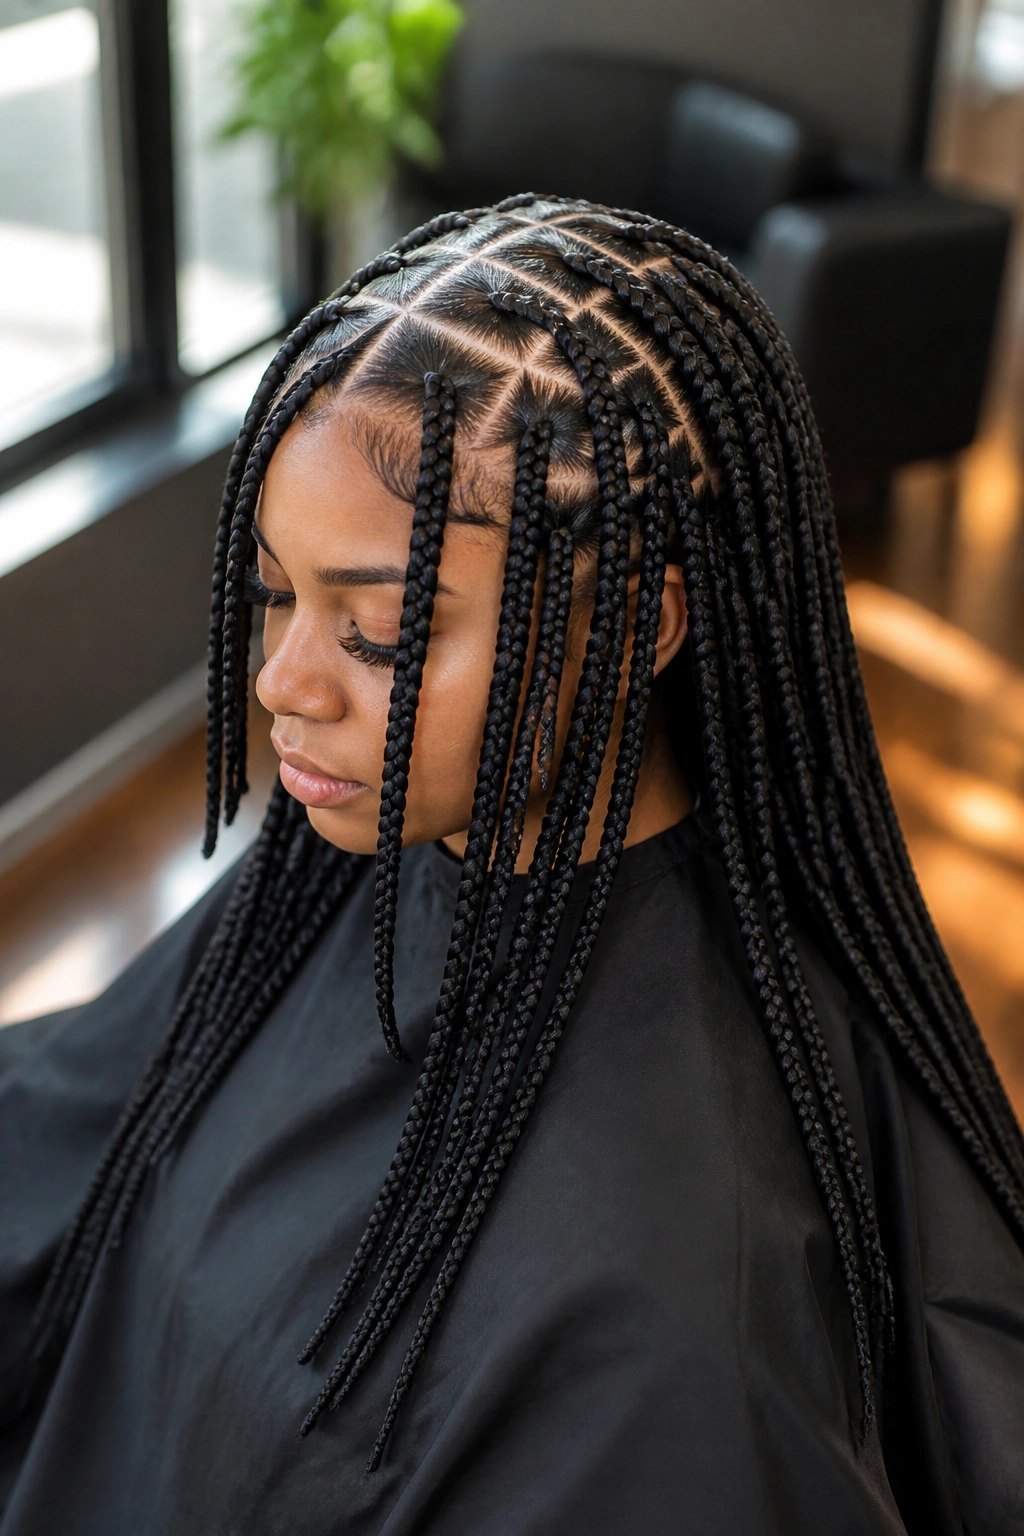
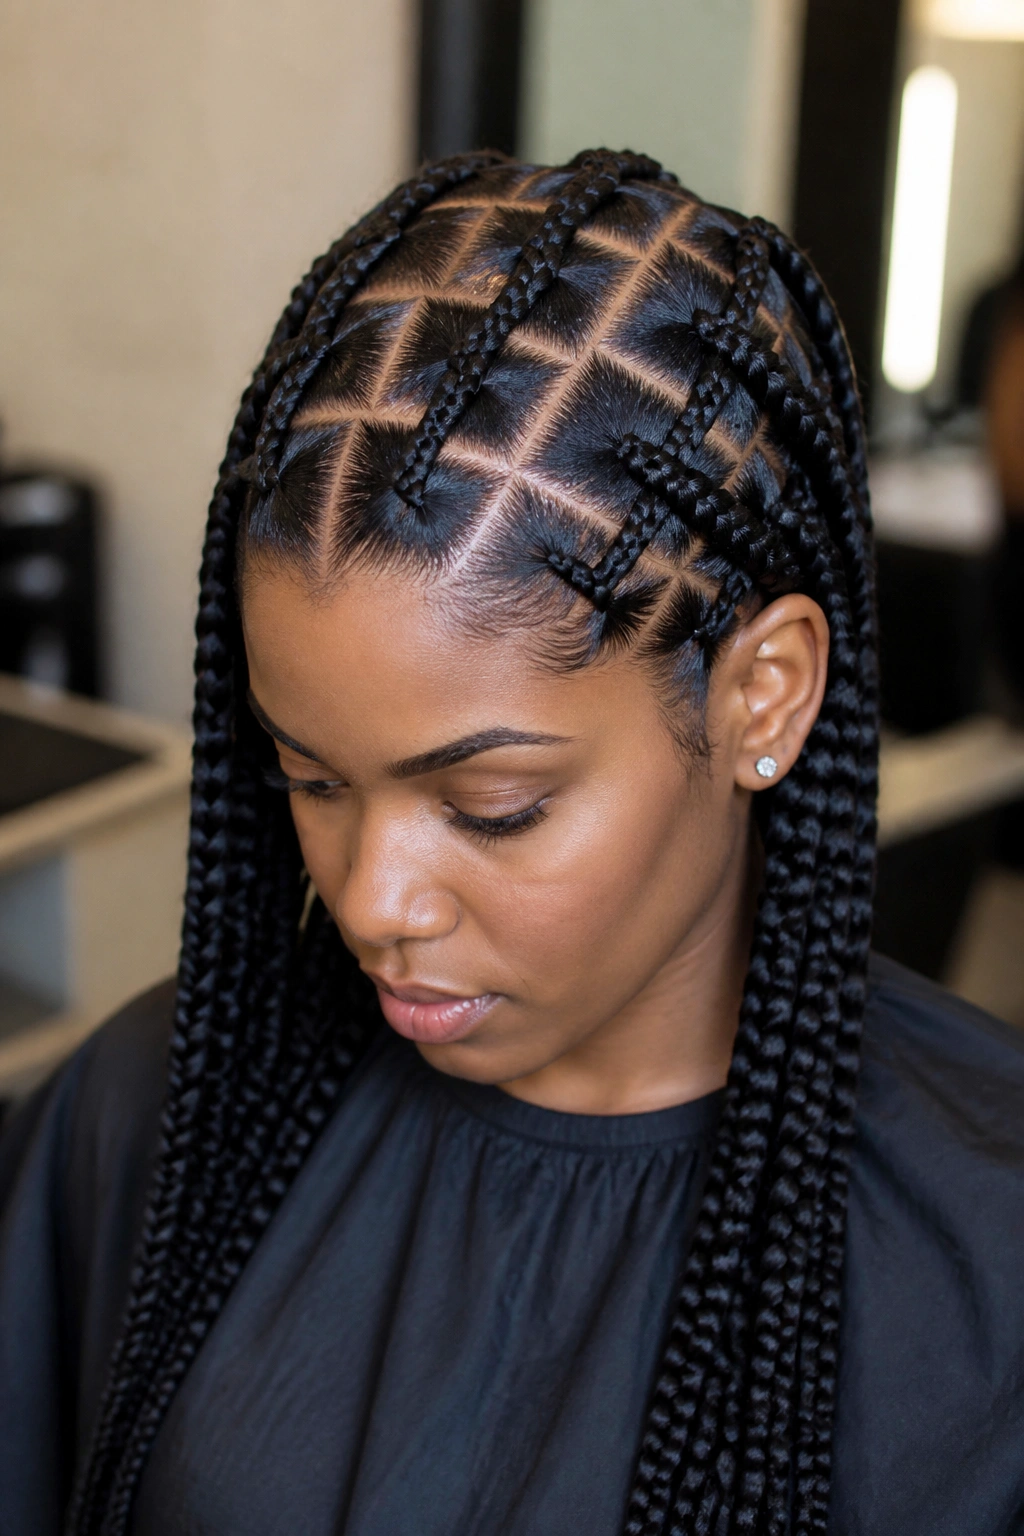
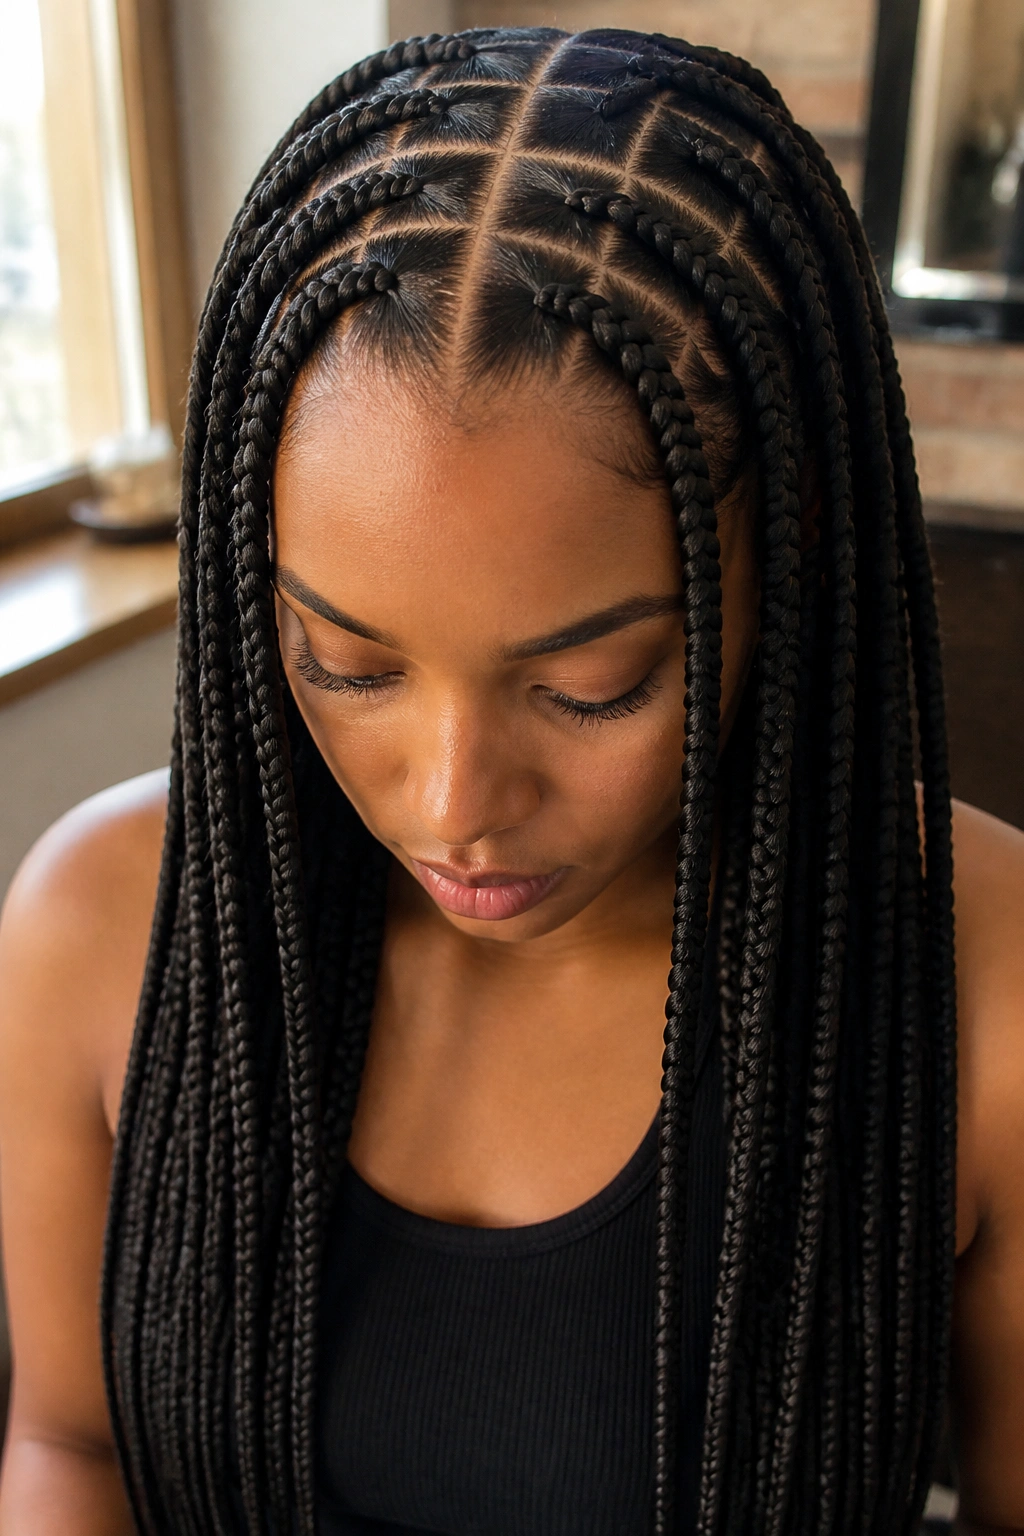
7. Knotless Square Braids
Knotless braids have fundamentally changed how we think about square patterns. In a traditional box braid, there is a visible “knot” at the base of the square where the extension hair is anchored. In a knotless pattern, the braid starts with your own hair, and the extension is fed in an inch or two down. This results in a flatter, more natural-looking square.
Why Choose Knotless Over Traditional?
The primary benefit is scalp health. Without that heavy knot sitting right at the root, there is significantly less tension. From a geometric standpoint, knotless braids allow the square partings to be the star of the show. There is no bulky anchor obscuring the clean lines of the scalp.
Practical Application
- Start with a clean, blown-out head of hair for the sharpest parts.
- Use a “stitch” technique with your pinky or a comb to ensure the squares are perfectly level.
- Feed in small increments of hair to keep the braid’s diameter consistent from the square base to the tip.
8. Pastel-Tipped Geometric Rows
For those who want to play with a more “ethereal” look, pastel tips on dark square braids create a striking visual. Think lavender, mint green, or baby blue. This style relies on the contrast between the disciplined, dark squares on the scalp and the playful, airy color at the bottom.
How to Select Your Pastel Shade
- Lavender: Works beautifully with cool undertones and looks stunning against dark brown or black roots.
- Mint: A bold choice that feels fresh and stands out in photos.
- Peach: Great for warmer skin tones and provides a softer transition.
Pro tip: When using pastel extensions, make sure the “tuck” is perfect. You don’t want your natural dark hair poking out of the pastel braid, as it breaks the illusion of the color and distracts from the clean lines of the style.
9. Square Braids in a High Bun
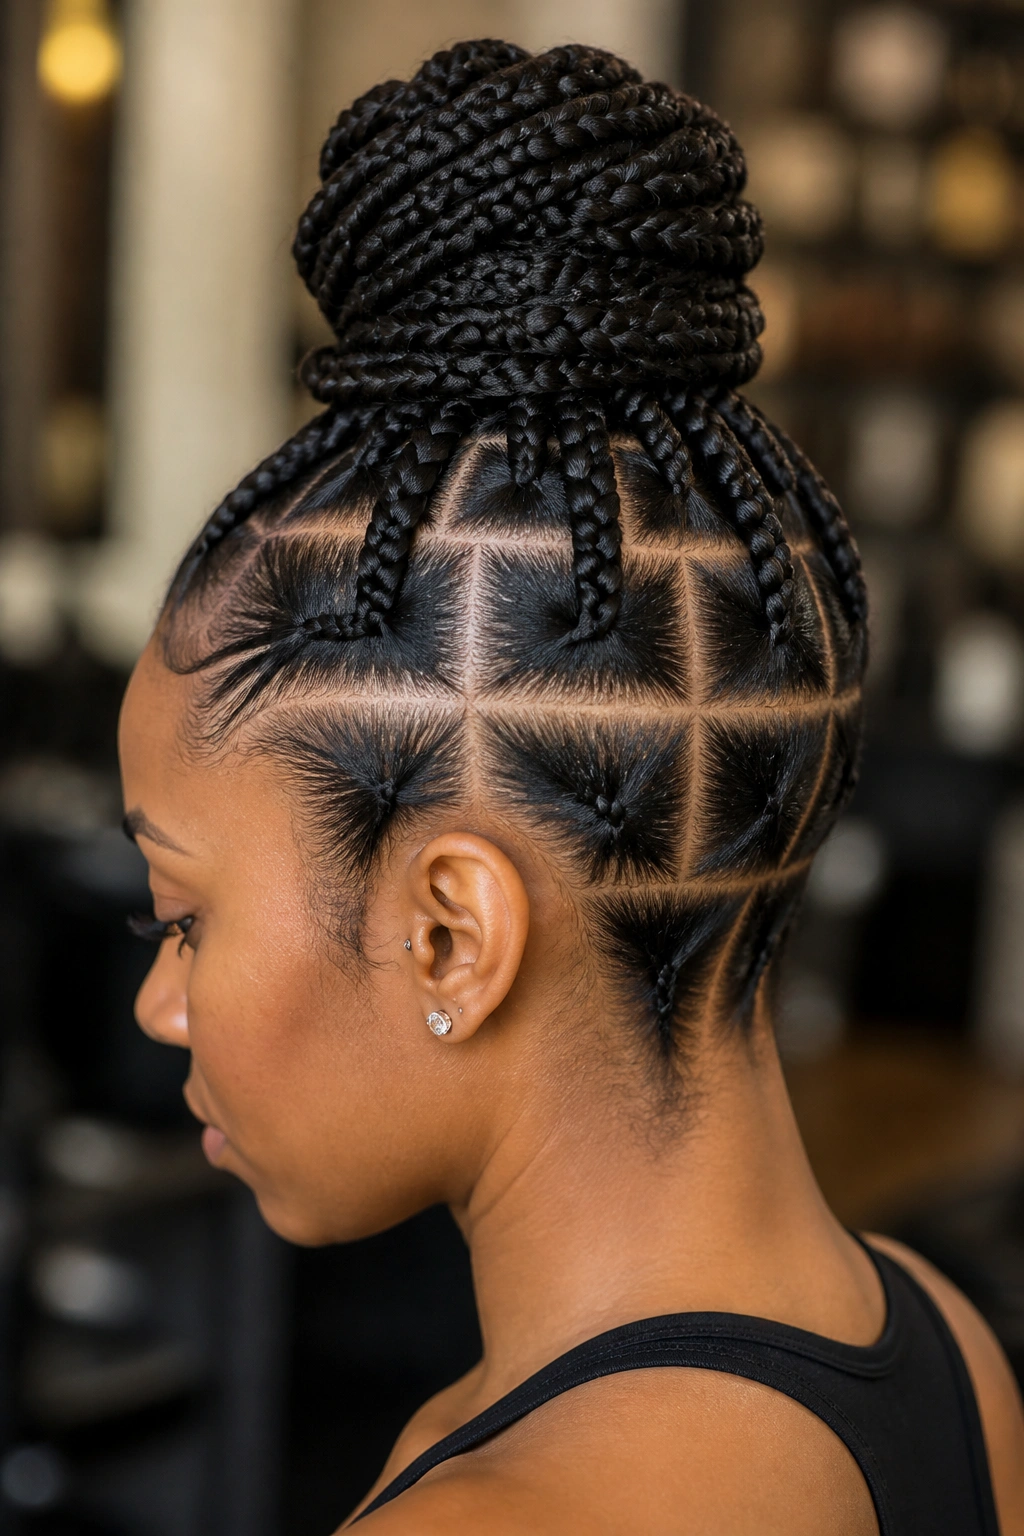
The high bun is the ultimate “power move” for square braids. When you pull the hair up to the crown, the geometric partings at the nape and the sides are revealed. This is where a stylist’s skill really shows. If the squares at the back of the head are messy, the bun will look haphazard. But if they are perfectly aligned, the updo looks incredibly sophisticated.
I love this look because it highlights the three-dimensionality of the braiding pattern. You aren’t just seeing the top; you are seeing how the squares wrap around the curve of the skull. To achieve a great bun, you need braids that are flexible. This is another reason to opt for medium-sized or knotless squares—they have the “bend” necessary to be gathered at the top of the head without causing a headache.
When the hair is up, the “lanes” between the squares become very visible. This is a great time to use a scalp serum with a bit of shine. It makes the skin look healthy and highlights the precision of the parting. It is a look that works as well in a boardroom as it does at a black-tie event.
10. Half-Up Half-Down Geometric Braid Look
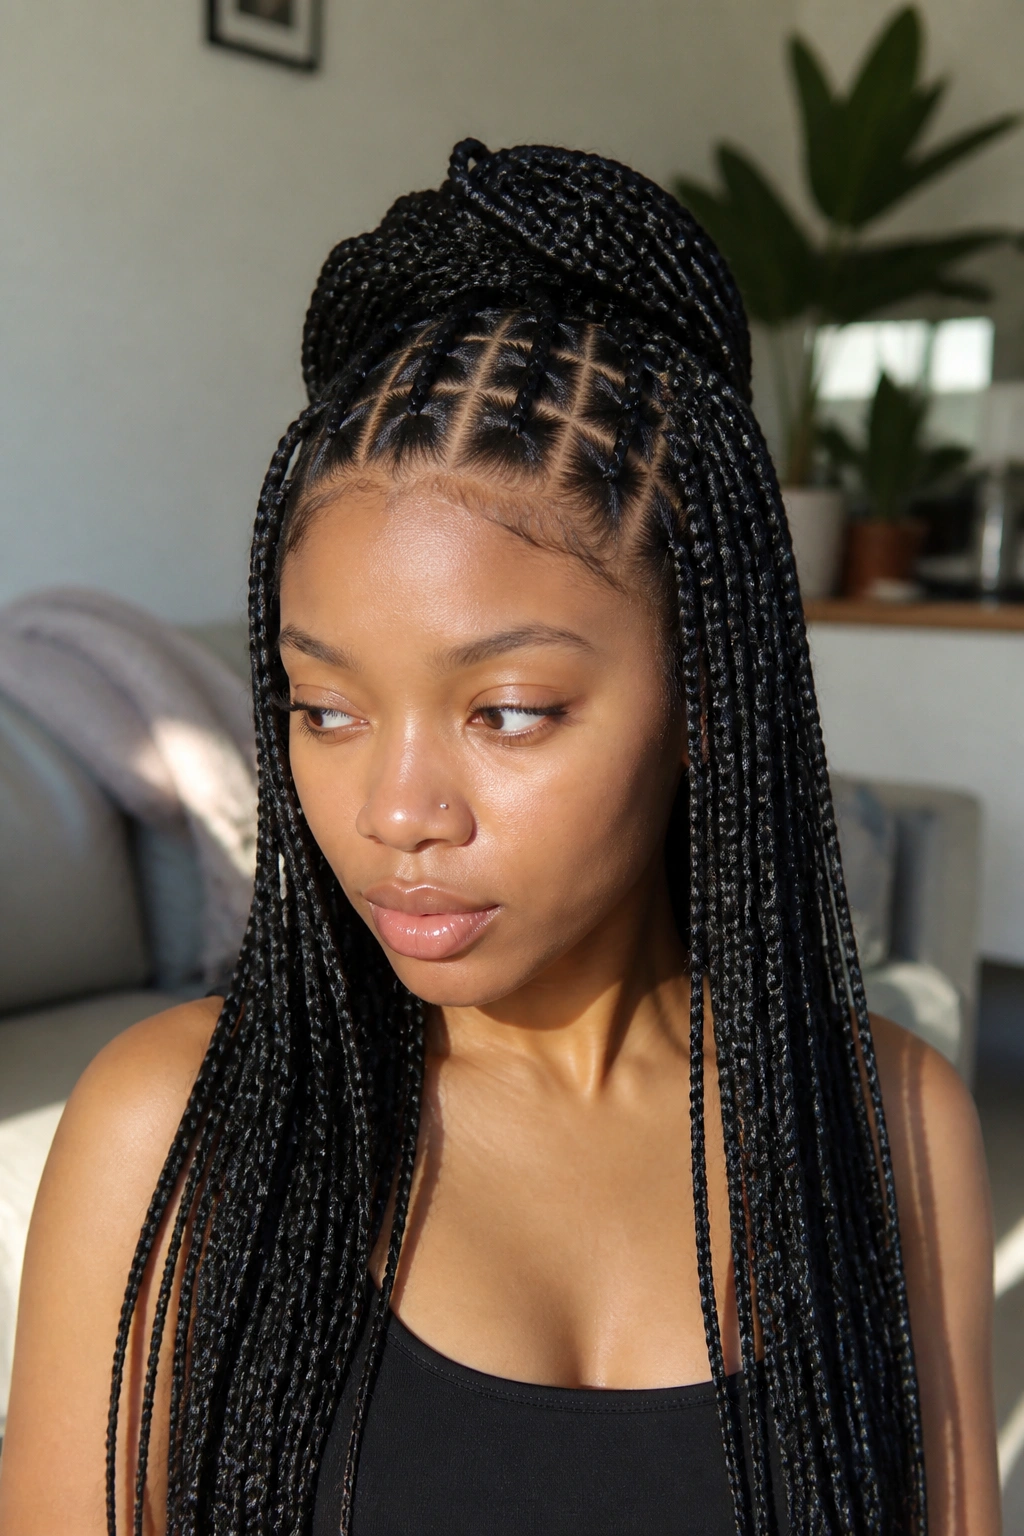
The half-up, half-down style is the best of both worlds. It allows you to show off the length of your braids while keeping the hair out of your face. More importantly, it creates a “horizon line” across your head that interacts with the vertical and horizontal lines of your square partings.
Why This Style Is a Favorite
It provides a natural lift to the face. By pulling the top half of the braids back, you create a tension that mimics a mini-facelift. Meanwhile, the braids hanging down provide a frame for your shoulders. The squares at the front of the hairline are the most visible here, so they must be perfectly symmetrical.
How to Get the Most From It
- Use a thick silk scrunchie to secure the top section to avoid snapping the braids.
- Allow two or three braids to hang forward near the ears to soften the look.
- Ensure the parting that separates the “up” from the “down” follows the existing square grid precisely.
11. Triangle-to-Square Transitional Pattern
Sometimes, a single geometric shape isn’t enough. A transitional pattern starts with triangle partings at the hairline and moves into square partings toward the crown and back. This is a clever way to add visual interest to the front of the face where people notice it most, while keeping the ease of squares for the bulk of the hair.
Why do this? Triangles at the hairline can be more flattering for certain face shapes, as they create “points” that can elongate the forehead. Squares, however, are much easier to maintain in the areas you can’t see easily in the mirror. Mixing the two shows a high level of technical skill and gives the hairstyle a custom, “couture” feel.
The key to making this look cohesive is the “transition row.” There should be one row of hair where the triangles and squares meet and seemingly blend into one another. It requires a stylist who has a great eye for spatial awareness. When done right, it looks like a complex tessellation moving across your scalp.
12. Bob-Length Square Braids
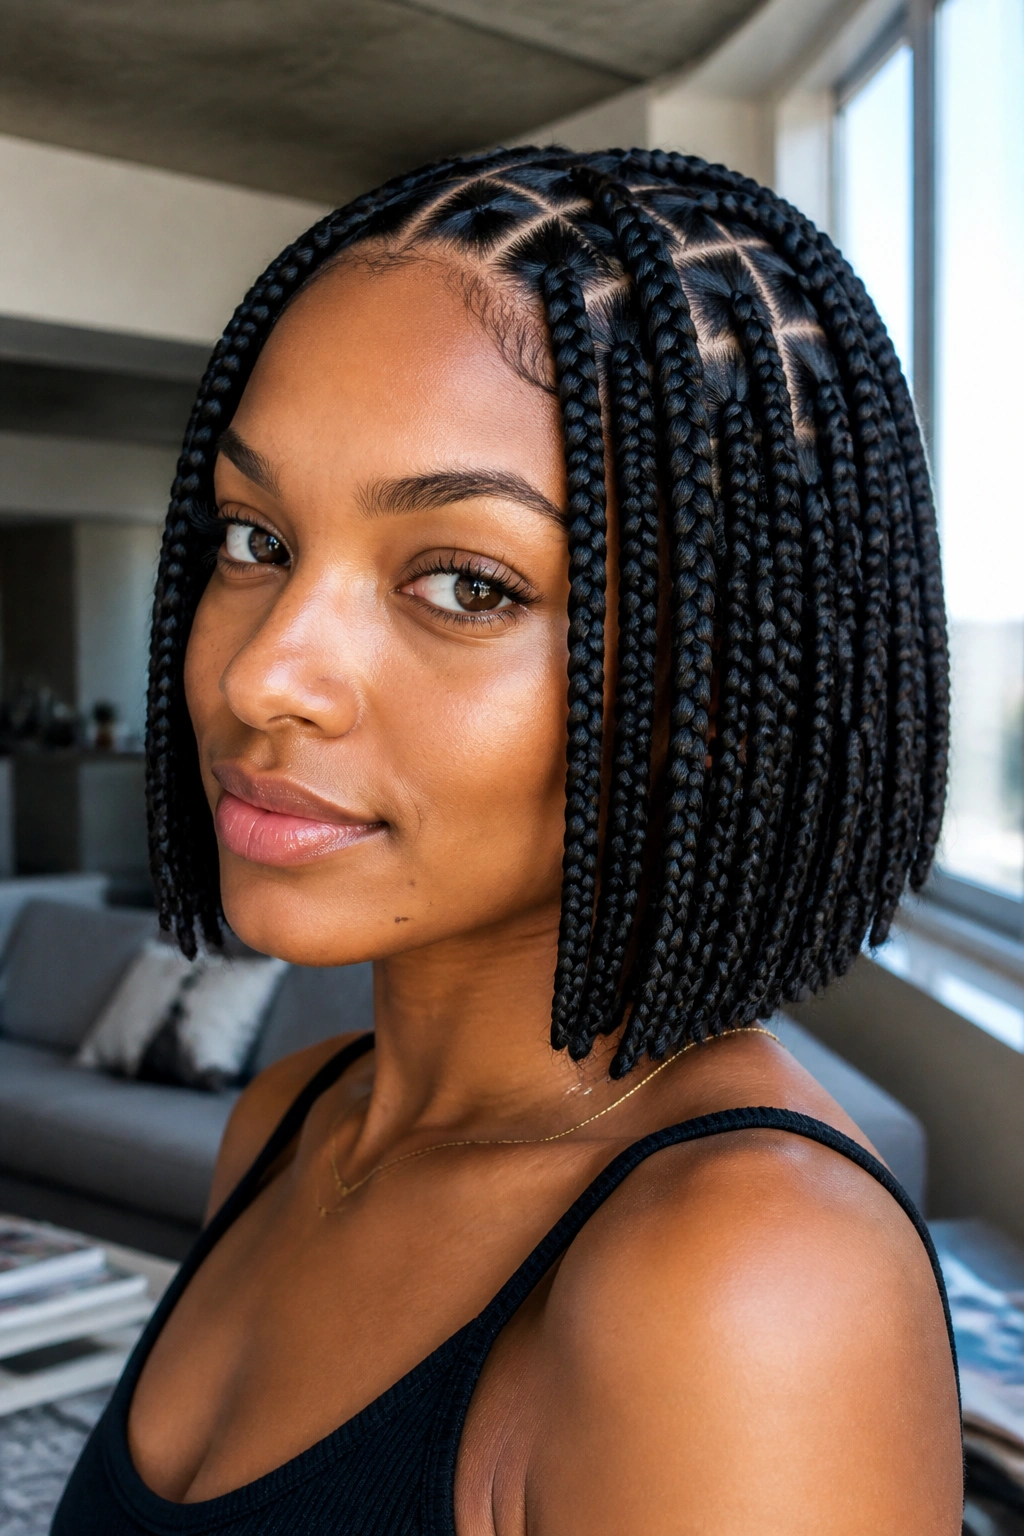
The bob-length square braid is a chic, timeless choice. It usually hits right at the jawline or slightly above the shoulders. Because the hair is shorter, the weight is minimal, making it one of the most comfortable ways to wear square braids.
The Benefits of the Bob
Unlike long braids that can get caught in zippers or heavy bags, the bob stays out of the way. It is incredibly “light” on the head. From a style perspective, the shorter length emphasizes the volume. Each square base supports a braid that doesn’t have the downward “pull” of a waist-length extension, so the braids often have more “swing” and “bounce.”
Choosing Your Bob Style
- The A-Line Bob: Shorter in the back, longer in the front to frame the face.
- The Blunt Bob: Cut straight across for a modern, edgy look.
- The Tucked Bob: The ends are burned or secured inward to create a rounded silhouette.
13. Neon Accent Square Braids
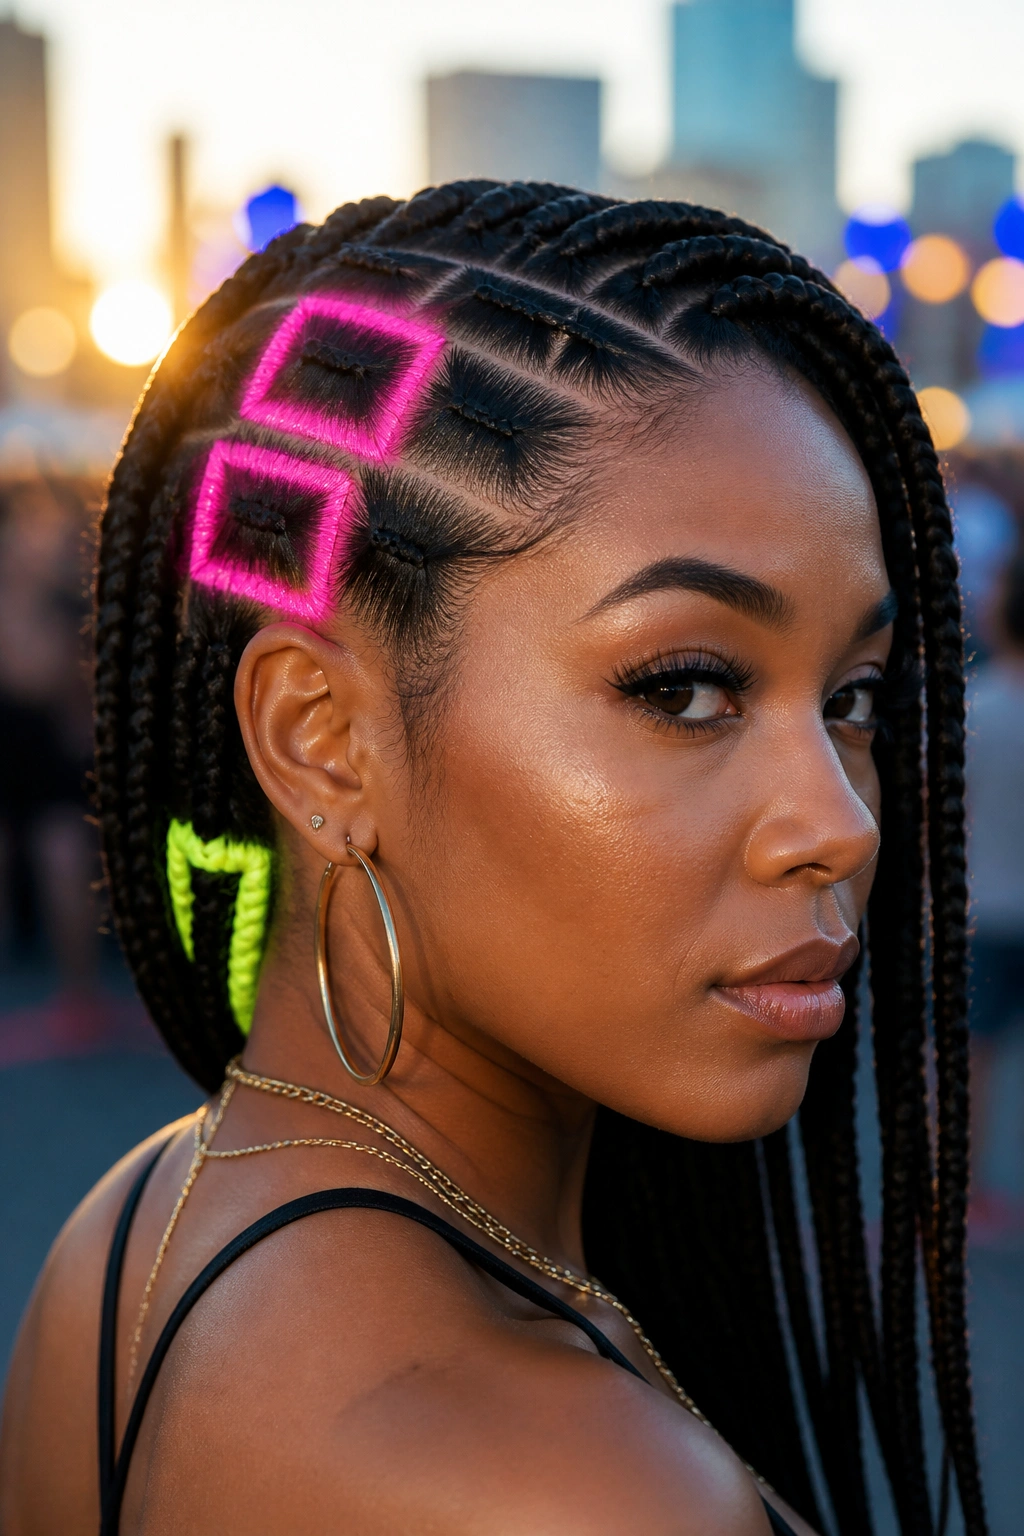
Sometimes you don’t want a whole head of color; you just want a spark. Neon accents involve taking three or four specific square sections and using a vibrant color—like “electric yellow” or “hot pink”—while the rest of the head remains a natural tone.
This is a masterclass in focal points. By placing the neon braids strategically (perhaps two near the temple and one at the nape), you draw attention to the geometry of those specific squares. It makes the entire head of hair look more intricate. It is a popular choice for festivals or for someone who works in a creative field and wants to show some personality without committing to a full head of bright color.
The neon hair should be the same texture and thickness as the rest of the braids. If the accent braids are thinner or thicker, it ruins the “grid” effect. The goal is for the eye to see a perfect square pattern where only the color changes, not the structure.
14. Square Parted Space Bun Braids
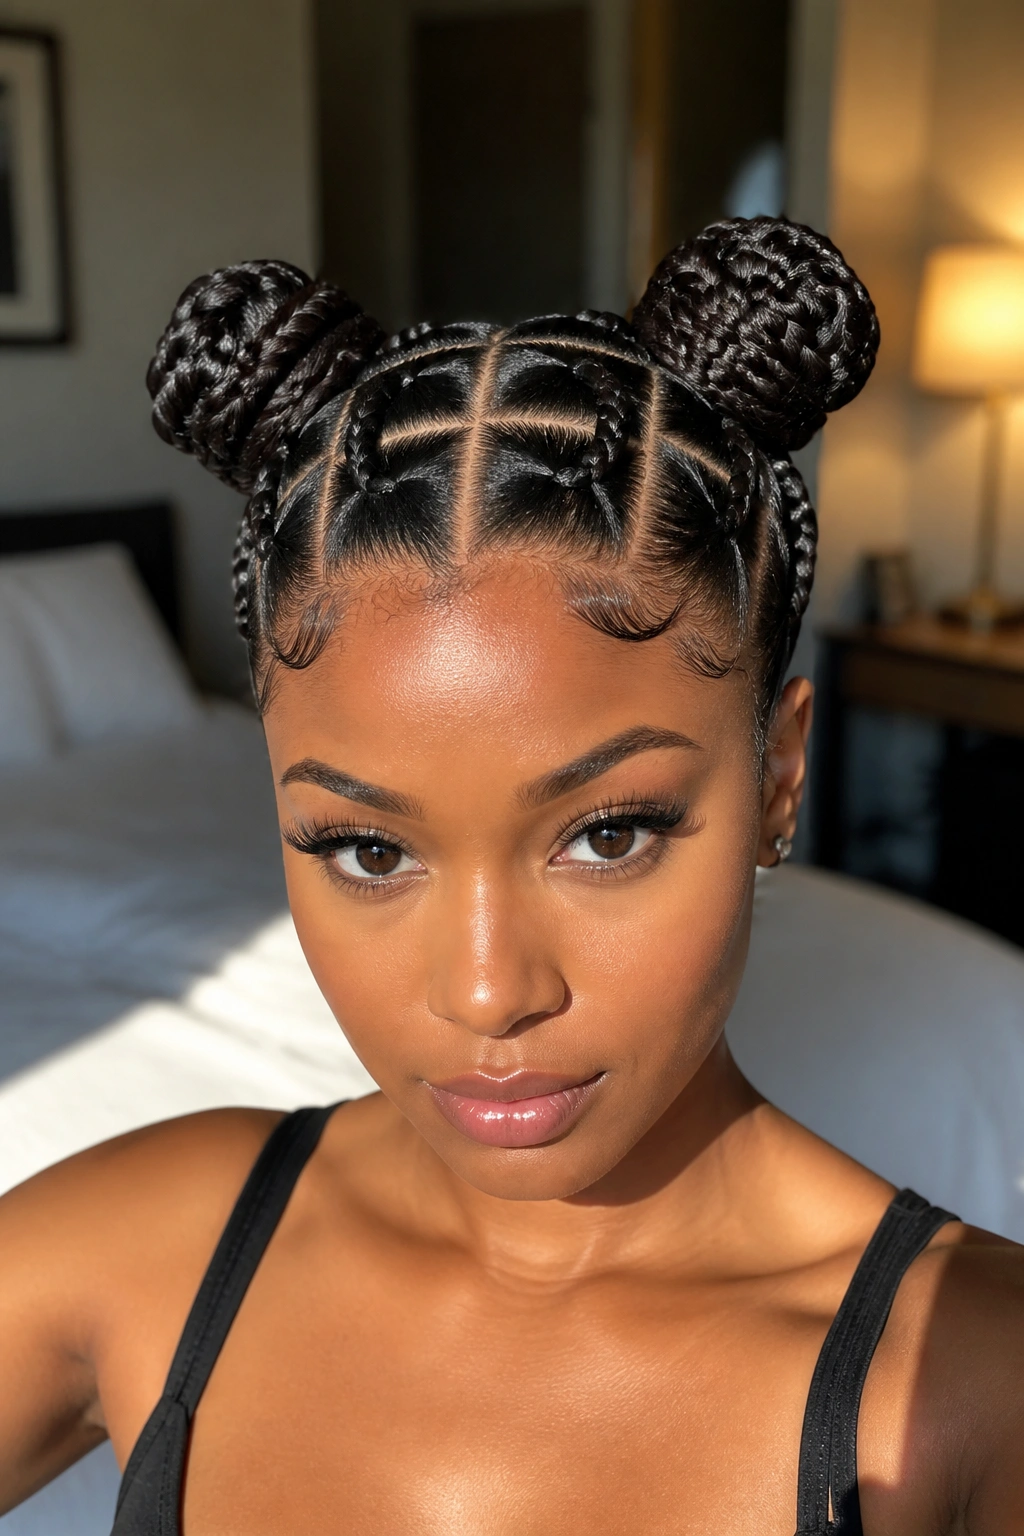
Space buns are a playful, youthful way to wear square braids. By parting the hair down the center and creating two buns on either side of the head, you create a symmetrical look that emphasizes the central “spine” of your square pattern.
The Importance of the Center Part
In this style, the center part is the most important line on your head. It must be perfectly straight from the forehead to the nape. The squares should “mirror” each other on either side of this line. If you have a square that is 1cm off-center, the space buns will look lopsided.
How to Create Perfect Space Buns
- Divide your braids into two equal sections.
- Secure each section with a hair tie at the desired height.
- Wrap the braids around the base, tucking the ends under the bun.
- Use large bobby pins to secure any “stray” braids that want to pop out.
15. Metallic Cuffs on Geometric Braids

Metallic cuffs are the jewelry of the hair world. They are small, adjustable rings that clip onto the body of the braid. When applied to square braids, they act as “anchors” that highlight the verticality of the style.
Unlike beads, which sit at the bottom, cuffs can be placed anywhere. I find that placing them at varying heights—some high, some mid-length, some low—creates a “rhythm” that complements the square partings. If you place a cuff right at the base of a square, it draws the eye to the precision of the parting itself.
Gold cuffs look exceptional on warm-toned hair (like copper or honey blonde), while silver or “gunmetal” cuffs pop against jet black or cool-toned hair. Because they are removable, you can change your “jewelry” to match your outfit. It’s an easy way to elevate a standard set of braids for a special night out.
16. Side-Swept Square Braids
There is a certain “Old Hollywood” glamour to side-swept braids. By training your square braids to fall over one shoulder, you create an asymmetrical silhouette that is incredibly flattering.
Why the Side-Sweep Works
It breaks up the “blocky” nature of square partings. While the squares themselves are rigid and geometric, the way the hair falls is fluid. This creates a “soft vs. hard” aesthetic. The side-sweep also exposes the neck and jawline on one side, which can be very elegant.
Maintaining the Sweep
- When sleeping, pin the braids to the side you want them to fall on.
- Use a decorative “statement” clip to hold the hair behind one ear.
- Don’t pull too hard when sweeping; you want the squares to remain flat against the scalp, not lifted at an angle.
17. Thick Rope-Style Square Braids
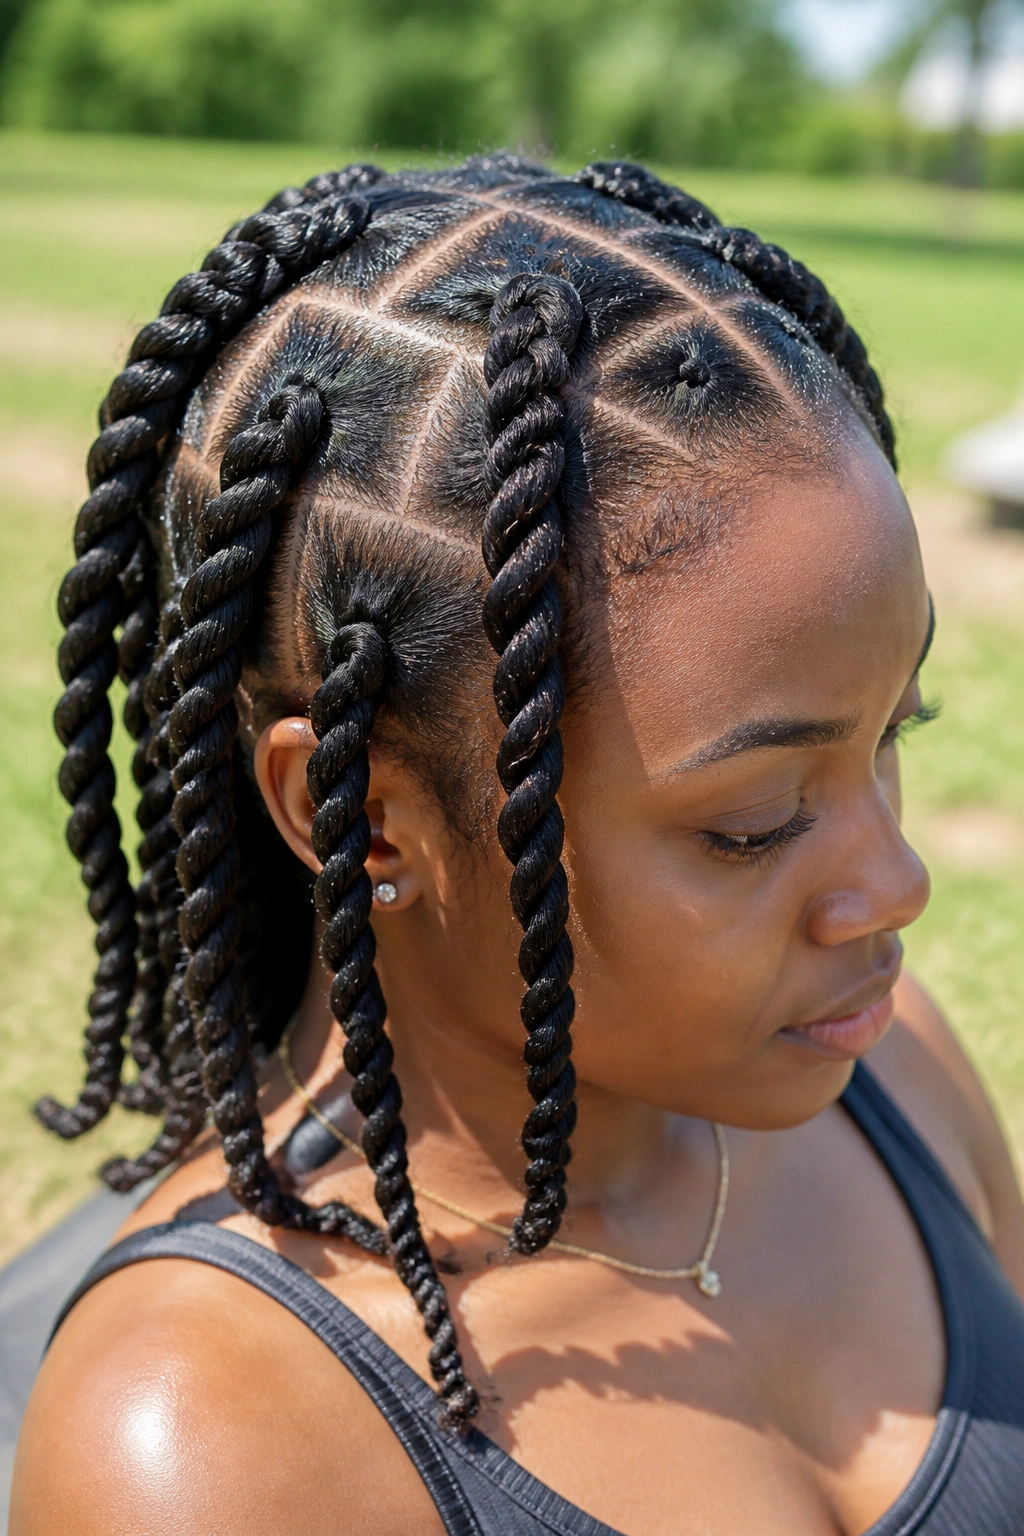
Rope braids, or two-strand twists, can also be done with square partings. While they aren’t “braids” in the three-strand sense, they rely on the same geometric foundation. Rope twists have a different texture—they look like thick, luxurious cords.
Because rope twists are generally “chunkier” than three-strand braids, the square sections need to be slightly larger to accommodate the volume. If the squares are too small, the twists will look crowded and lose their individual “rope” definition. These are a great option for those who find traditional braids too “scratchy” or “heavy,” as the two-strand method often feels softer.
The visual appeal here is the spiral. The spiral of the twist contrasts with the straight lines of the square base. It is a very tactile look that invites touch. Just be aware that twists can sometimes “unravel” at the roots faster than braids, so you may need to visit your stylist for a “root touch-up” sooner than you would with standard box braids.
18. Peek-a-Boo Color Squares
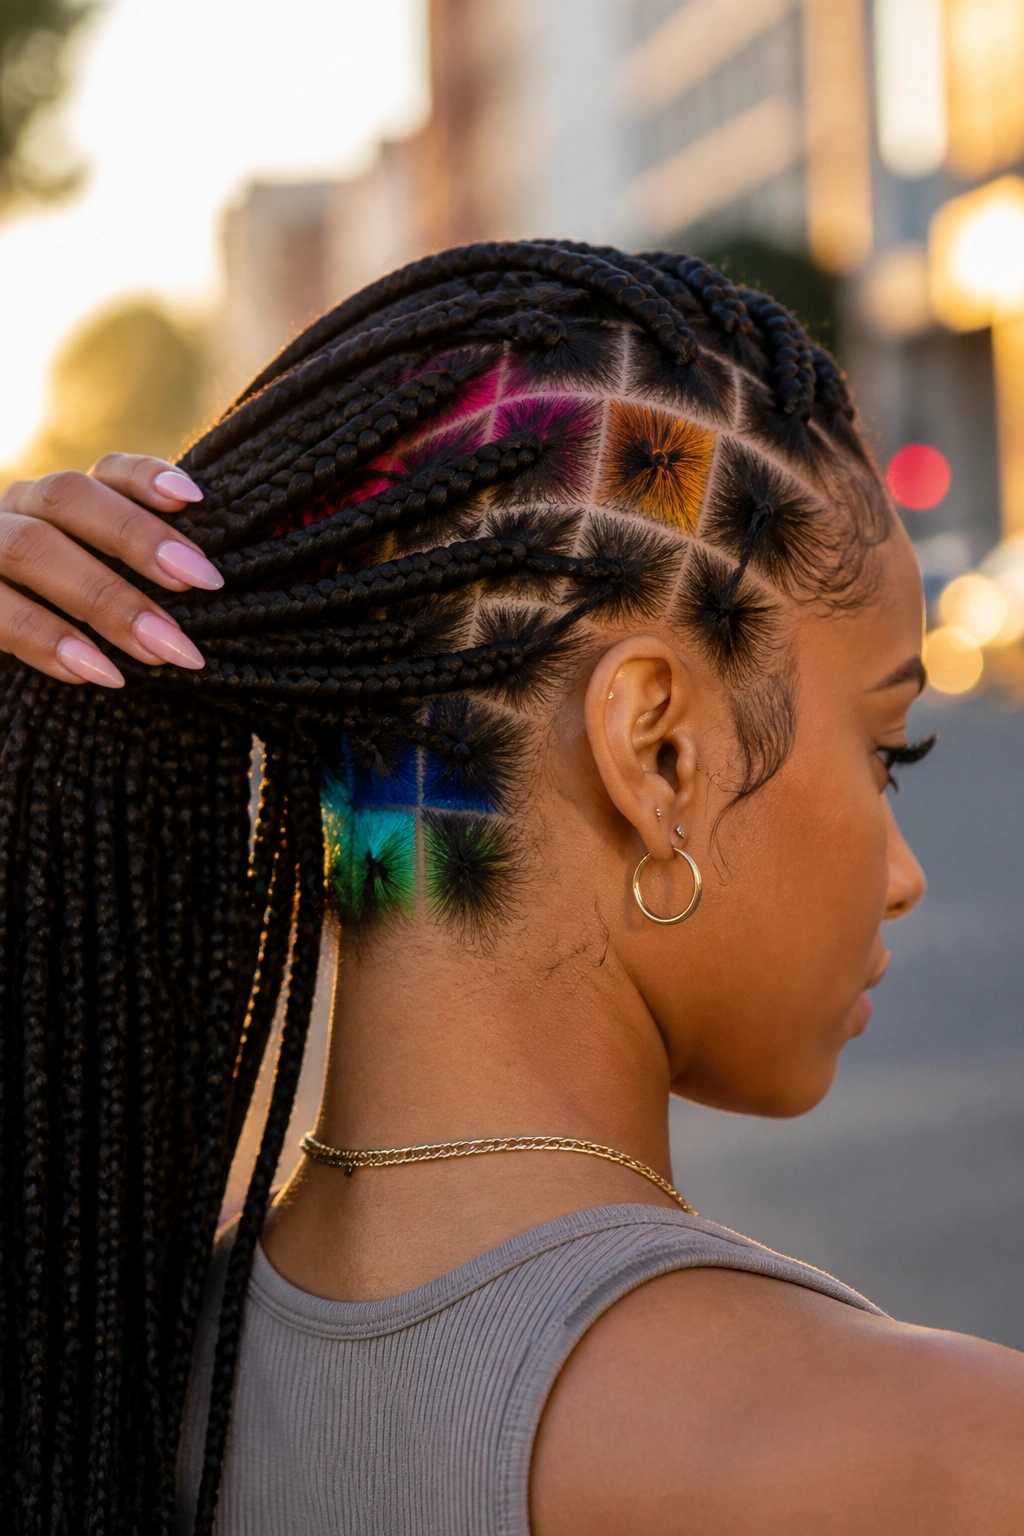
The “peek-a-boo” trend involves hiding a layer of colored braids underneath a top layer of natural-colored braids. When you stand still, the hair looks “normal.” But when you move, walk, or put your hair up, the vibrant colors underneath are revealed.
The Strategy Behind the Peek-a-Boo
The “hidden” layer usually starts about two rows up from the nape and ends two rows down from the crown. This ensures that the colored squares are always covered by the top layer. It is a “secret” style that adds an element of surprise to your look.
Best Color Combinations
- Black and Deep Purple: Subtly “regal” and sophisticated.
- Brown and Honey Blonde: Natural-looking but adds incredible “dimension” when the hair moves.
- Jet Black and Silver: High-contrast and very “modern.”
19. Layered Geometric Braids
Just like a standard haircut, braids can be layered. This involves cutting the extensions at different lengths—shorter at the front and longer at the back—to create a “shag” or “step” effect.
This style is particularly good for those with a lot of natural hair volume. The layers prevent the “triangle head” effect where the braids bunch up at the bottom and look too wide. By layering, you distribute the weight and the volume more evenly. From a geometric standpoint, it creates multiple “levels” of squares that peek through from underneath.
It is important to “seal” the ends of layered braids carefully. Since the ends are at different heights, they are all very visible. Most stylists will dip the ends in hot water to ensure they are smooth and won’t fray, which would distract from the “crisp” look of the overall style.
20. Square Braids with Ribbon Weaves
For a look that is truly unique, you can weave thin silk or organza ribbons into the square braids themselves. This isn’t just about wrapping the ribbon around the braid; it’s about treating the ribbon as one of the three strands of the braid.
The result is a braid that has a constant “stripe” of color and texture running through it. When this is done across a whole head of square braids, it creates a “woven” effect that looks like a high-end textile. It is time-consuming, but the visual payoff is massive.
I recommend using ribbons that contrast with the hair color—white ribbon on black hair, or gold ribbon on dark brown hair. This makes the “weave” stand out. Because the ribbon is flat, it doesn’t add much bulk to the square base, keeping the geometric partings clean and visible.
21. The Zig-Zag Square Hybrid
If you can’t decide between the traditional square and something more “organic,” the zig-zag hybrid is a great middle ground. This involves making the horizontal parts straight but the vertical parts “zig-zagged.”
This creates a “diamond-like” effect while still maintaining the structural integrity of a square base. It is a way to “soften” the grid. To the casual observer, it looks like a standard box braid, but upon closer inspection, the “movement” of the parts becomes clear.
This style requires a stylist with a very steady hand. If the zig-zags aren’t consistent, it just looks like messy sectioning. But when they are uniform, it adds a level of “visual vibration” to the scalp that is very modern and “forward-thinking” in terms of hair design.
22. Ultra-Long Floor-Length Square Braids
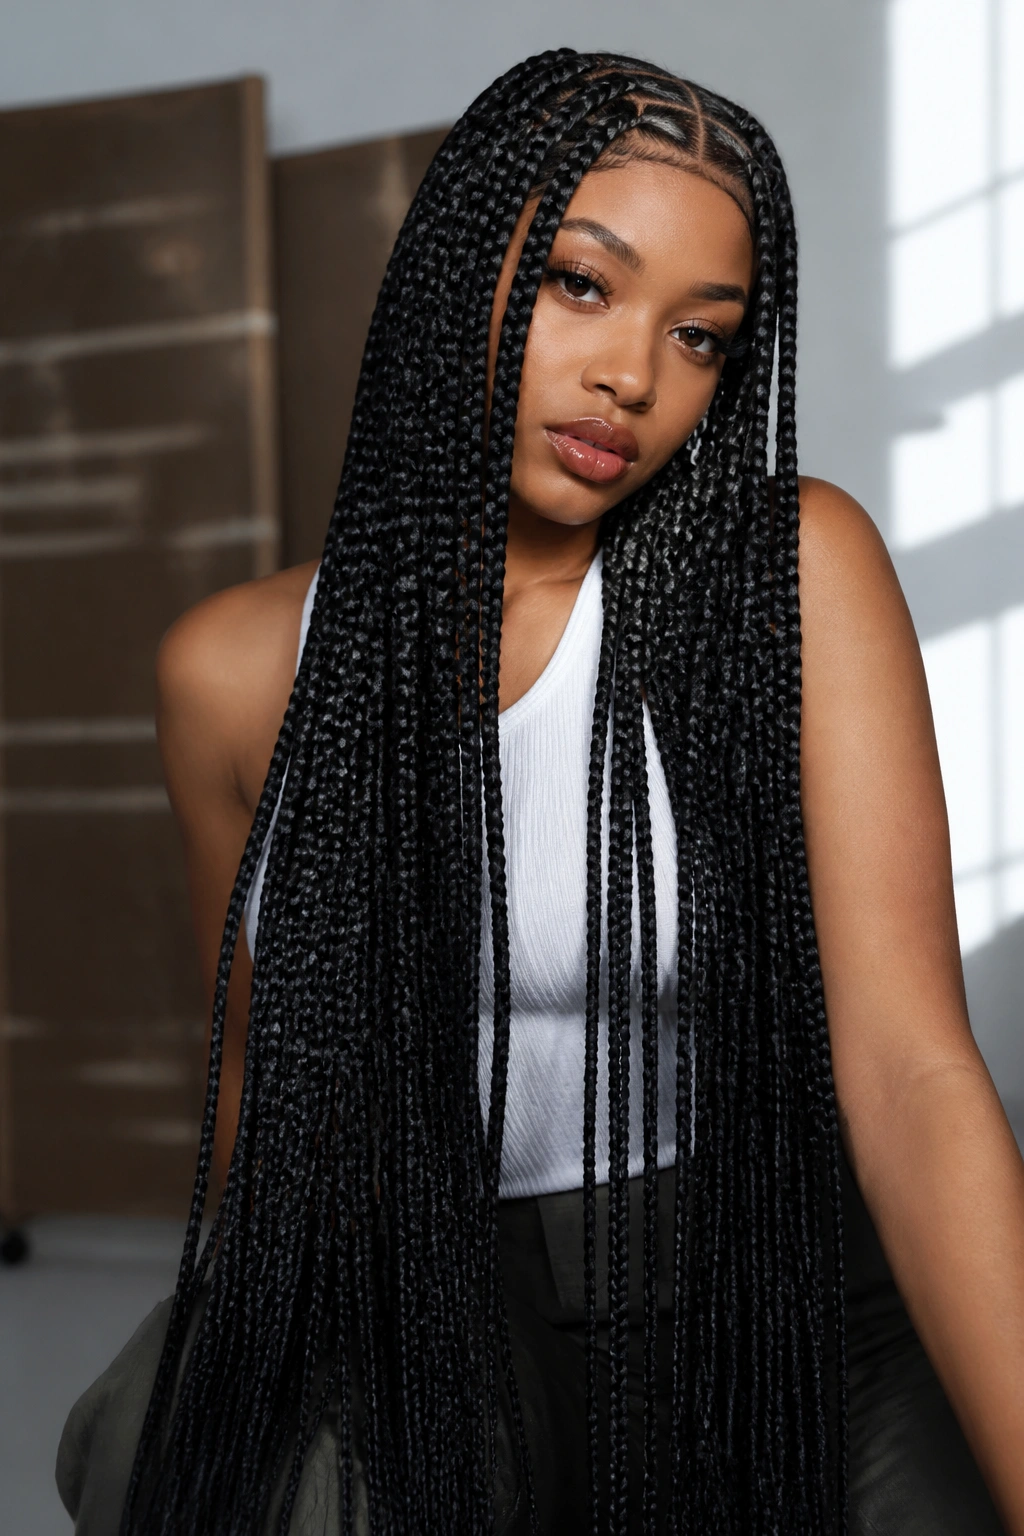
Floor-length (or “kneel-length”) braids are a statement of luxury and patience. They are essentially a “maximalist” version of the square braid pattern. Because of the extreme length, the square sections must be small to medium to ensure there is enough hair to support the weight of the long extensions.
The Logistics of Ultra-Long Braids
Let’s be honest: these are heavy. You will feel them in your neck and shoulders. However, the “drama” they provide is unmatched. They create a vertical line that elongates the entire body.
Survival Tips for Long Braids
- The “Arm-Drape”: When sitting, drape the braids over the arm of the chair to take the weight off your neck.
- The “Braid-Scarf”: Wrap the braids around your neck like a scarf to keep them from dragging on the ground in “busy” environments.
- Weight Awareness: Never wear these in a high ponytail for more than an hour; the “leverage” of the long hair can cause significant scalp strain.
23. Face-Framing Square Accents
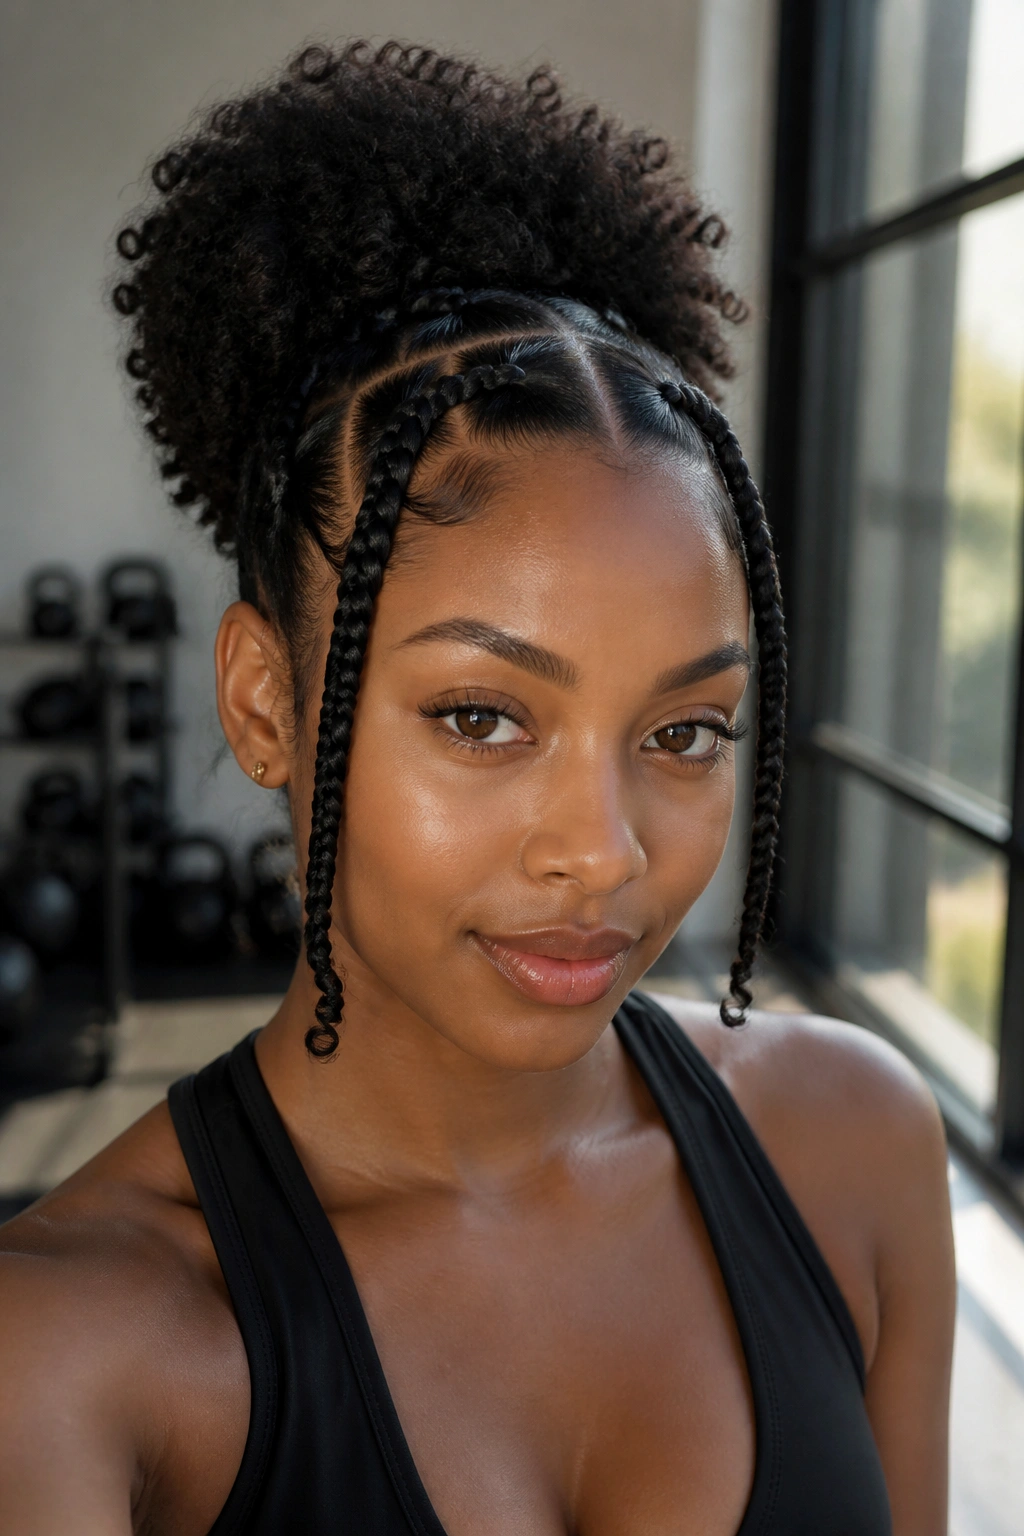
You don’t always need a full head of braids to enjoy the square pattern. Face-framing accents involve braiding only the front “fringe” of the hair—usually two or three rows—into crisp square braids, while the rest of the hair is left natural, in a puff, or in a bun.
This is a fantastic “gateway” style for those who are new to braids. It gives you the “look” of the geometric partings around your face (where it counts for photos) without the time or weight commitment of a full head. It’s also a great way to “tame” edges and keep the hair out of your eyes during a workout or a busy day.
The squares at the hairline are the most scrutinized, so they need to be “perfection.” I recommend using a bit of styling mousse on these braids after they are done to “lay” them flat against the forehead for that extra-crisp finish.
24. Tapered Square Braids
A tapered look involves braids that are thicker at the top (at the square base) and become significantly thinner toward the ends. This mimics the natural growth pattern of hair and creates a “wispy,” lightweight feel at the bottom.
How to Achieve the Taper
The stylist starts with a full amount of hair and “drops” small sections of the extension as they move down the braid, or they use extensions that are naturally pre-layered. This results in a “v-shaped” silhouette for each individual braid.
Why It Is Popular
- It reduces the overall weight of the style.
- It makes the braids easier to tie into buns and knots.
- The “thin” ends have a delicate, almost “feathery” appearance.
- It highlights the “strength” of the square base compared to the “lightness” of the ends.
25. Square Braids with Wrap-Around Thread
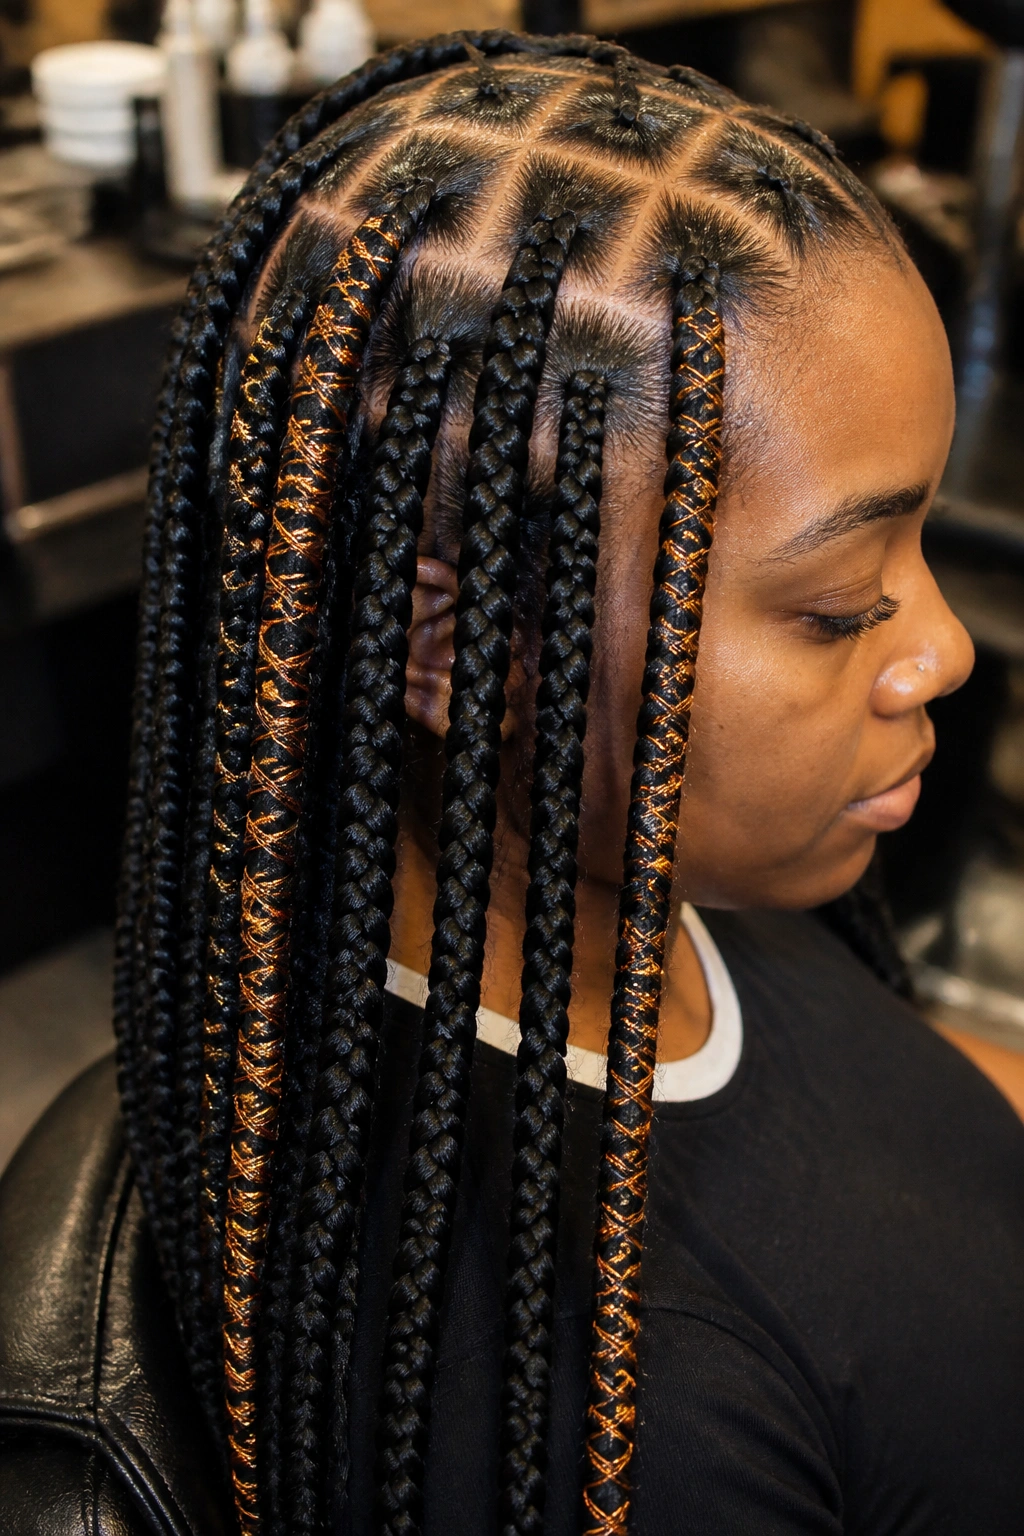
“Hair wrapping” involves taking a colored embroidery thread and wrapping it tightly around the exterior of a finished braid. When applied to square braids, you can “color-code” your grid. For example, you could wrap every third braid in a silver thread.
This adds a “cylindrical” geometry to the braids. The thread creates a different “sheen” than the hair itself, catching the light in a “metallic” or “matte” way depending on the thread you choose. It is a very “bohemian” take on the otherwise rigid square pattern.
If you are doing this yourself, ensure the thread isn’t too tight. If you compress the braid too much, it can become “stiff” and won’t hang naturally. You want the thread to “sit” on the surface of the braid, adding color without changing the braid’s fundamental shape.
26. The Geometric Crown Braid
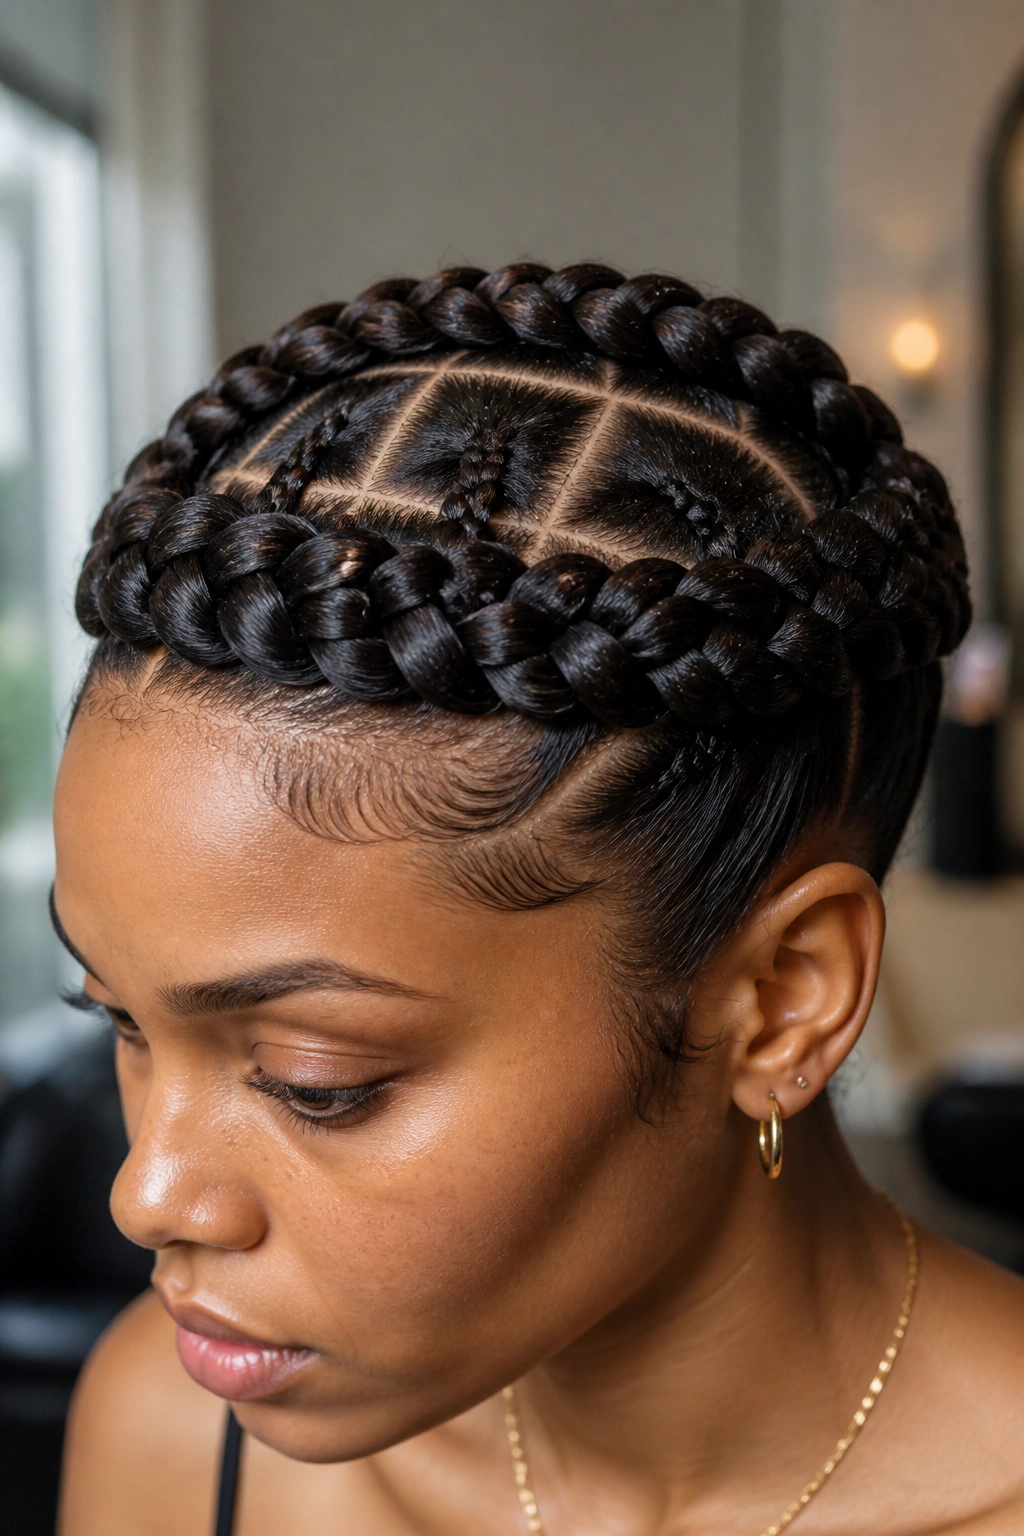
The crown braid (or “halo”) involves taking all your square braids and wrapping them around the circumference of your head, pinning them into a continuous circle. This is the ultimate “structured” look.
In this style, the square partings at the top of the head are fully exposed, acting as the “filling” for the “frame” of the crown. It looks like a complex “tapestry.” It is a favorite for weddings or “gala” events because it is regal and keeps the hair completely off the neck.
To make the crown look seamless, you need to “tuck” the ends of the braids under the beginning of the next braid. It’s a bit like a “puzzle.” When done correctly, you can’t see where the “circle” starts or ends. It is a beautiful, “holistic” way to finish your geometric braid journey.
The Bottom Line
Square braid patterns are the ultimate marriage of form and function. They provide a structural integrity that protects your natural hair while offering a “canvas” for endless geometric creativity. Whether you choose the “boldness” of jumbo squares or the “delicacy” of micro-partings, the key is the precision of the lines.
When you sit down for your next braiding session, remember that you aren’t just getting a “hairstyle”—you are getting a “system.” Those squares are the foundation. Treat them with care, keep your scalp hydrated, and don’t be afraid to experiment with color or “jewelry.” The “crisp” look isn’t just about the first day; it’s about how you maintain that geometry over the weeks to come.
Ultimately, the best pattern is the one that makes you feel “confident” and “put-together.” There is a specific kind of “mental clarity” that comes from knowing your hair is perfectly in order. In a world that can often feel “chaotic,” a perfectly straight part and a uniform square can be a small, “satisfying” rebellion. Lean into the geometry, embrace the lines, and wear your “squares” with pride.