The chin-length bob is a classic for a reason. It is sharp, it frames the face beautifully, and it has a certain “cool girl” energy that longer hair often misses. But anyone who has lived with this length for more than a week knows the specific frustration that comes with it. You wake up on a Tuesday morning, your ends are flipping in three different directions, and you just want it out of your face. You reach for a ponytail holder, only to realize that half of your hair is too short to reach the elastic. The struggle is real.
Most people assume that once you chop your hair to your jawline, you are resigning yourself to a life of flat-ironing or loose waves. Braids are usually filed away in the “long hair only” category, reserved for those with waist-length locks and hours of patience. This is a massive misconception. In fact, short hair can actually make certain braid styles look more intentional and edgy. You aren’t dealing with the heavy weight of long hair that pulls braids down; instead, you have the lightness and “grip” that makes intricate styles stay put.
The key to braiding a bob is realizing that you are playing a different game. You aren’t going to get a thick, swinging Rapunzel braid. Instead, you are looking for texture, detail, and functional styling that keeps layers from falling into your eyes. You need a few specific tools—think tiny clear elastics, a high-quality dry texture spray, and perhaps a matte pomade to keep those “sprouted” ends from poking out.
Braiding short hair is about precision and finding the right anchor points. Whether you are trying to hide a growing-out fringe or you just want to add some personality to your daily look, there is a way to make it happen. We are looking at styles that range from thirty-second accents to more complex “event-ready” crowns. Here is how you can transform that chin-length cut into something entirely new.
1. The Deep Side Dutch Braid
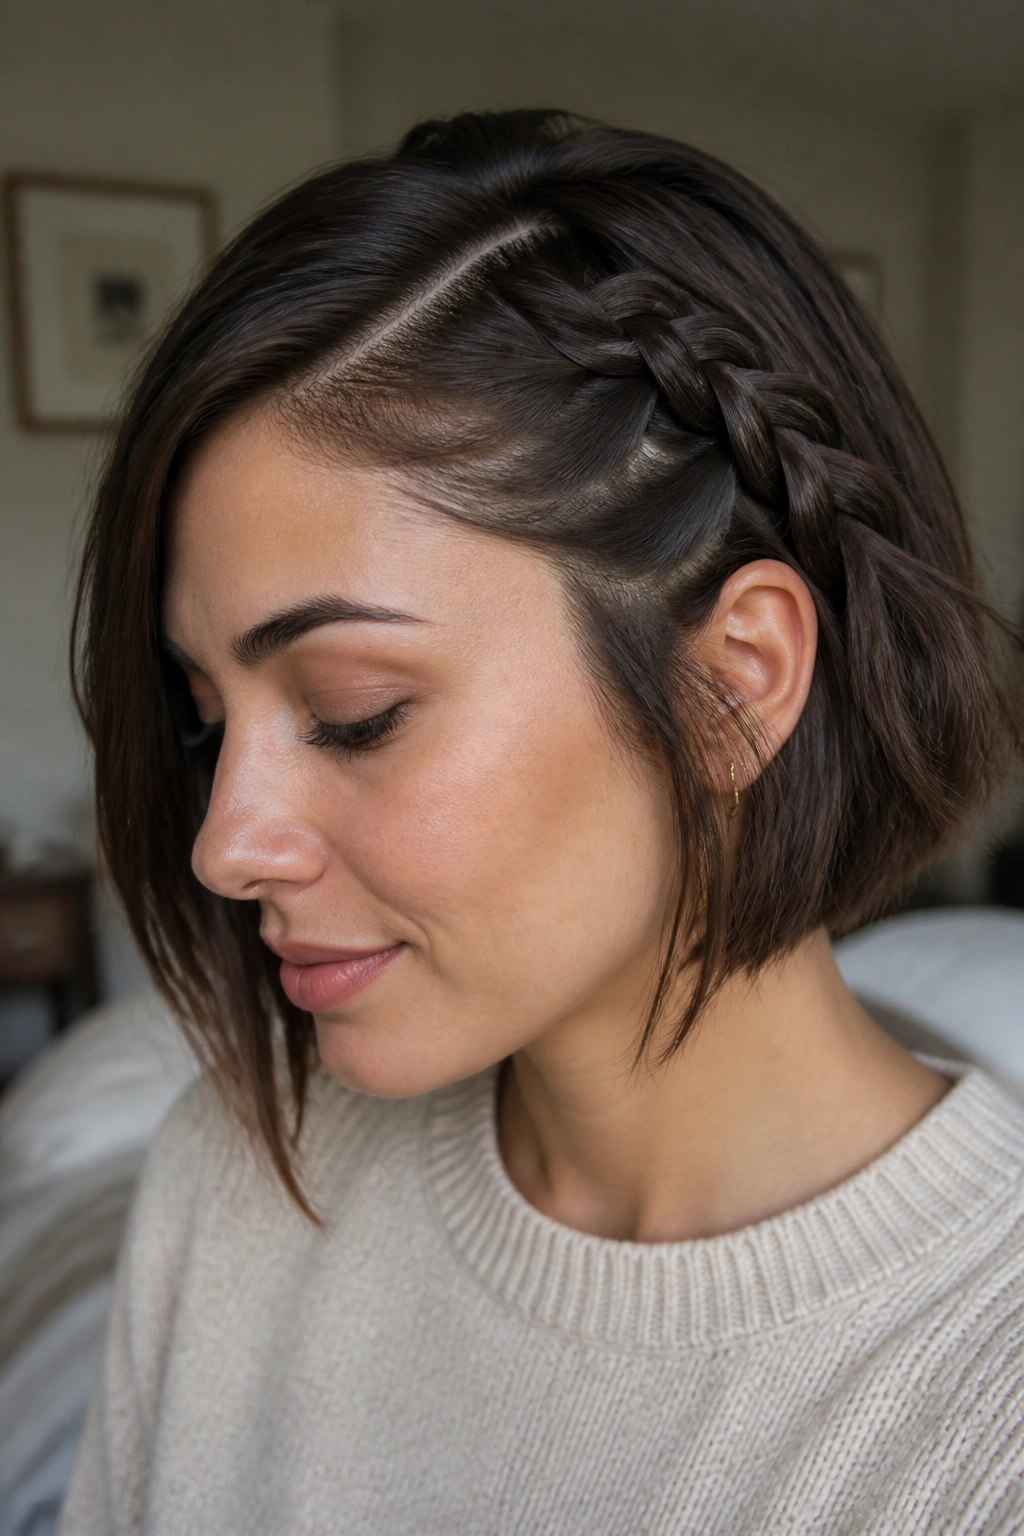
If you have a bob, you likely have a favorite side. This style plays into that. A Dutch braid is essentially an inside-out French braid, where you cross the strands under rather than over. This creates a 3D effect that sits on top of the hair, making even thin or short hair look significantly thicker. By starting a deep side part and braiding just one side of your head, you create an asymmetrical look that is both sophisticated and a little bit rebellious.
Why the Dutch Technique Works for Bobs
When hair is short, a traditional French braid can sometimes look a bit flat or get lost in the layers. The Dutch braid “pops” against the rest of your hair. Because you are pulling hair tightly from the hairline, it acts as a natural face-lift, pulling the hair back and showing off your cheekbones. It is the perfect solution for those days when your bangs are being uncooperative.
Essential Steps for Success
- Start with a sharp side part using a rat-tail comb.
- Apply a small amount of styling wax to your fingertips to catch the baby hairs.
- Keep your hands close to the scalp to maintain tension.
- Secure the end behind your ear with two bobby pins crossed in an “X” shape. Pro tip: Once the braid is secured, gently “pancake” it by pulling at the outer loops to make it look twice as thick.
2. Tiny Face-Framing Accent Braids
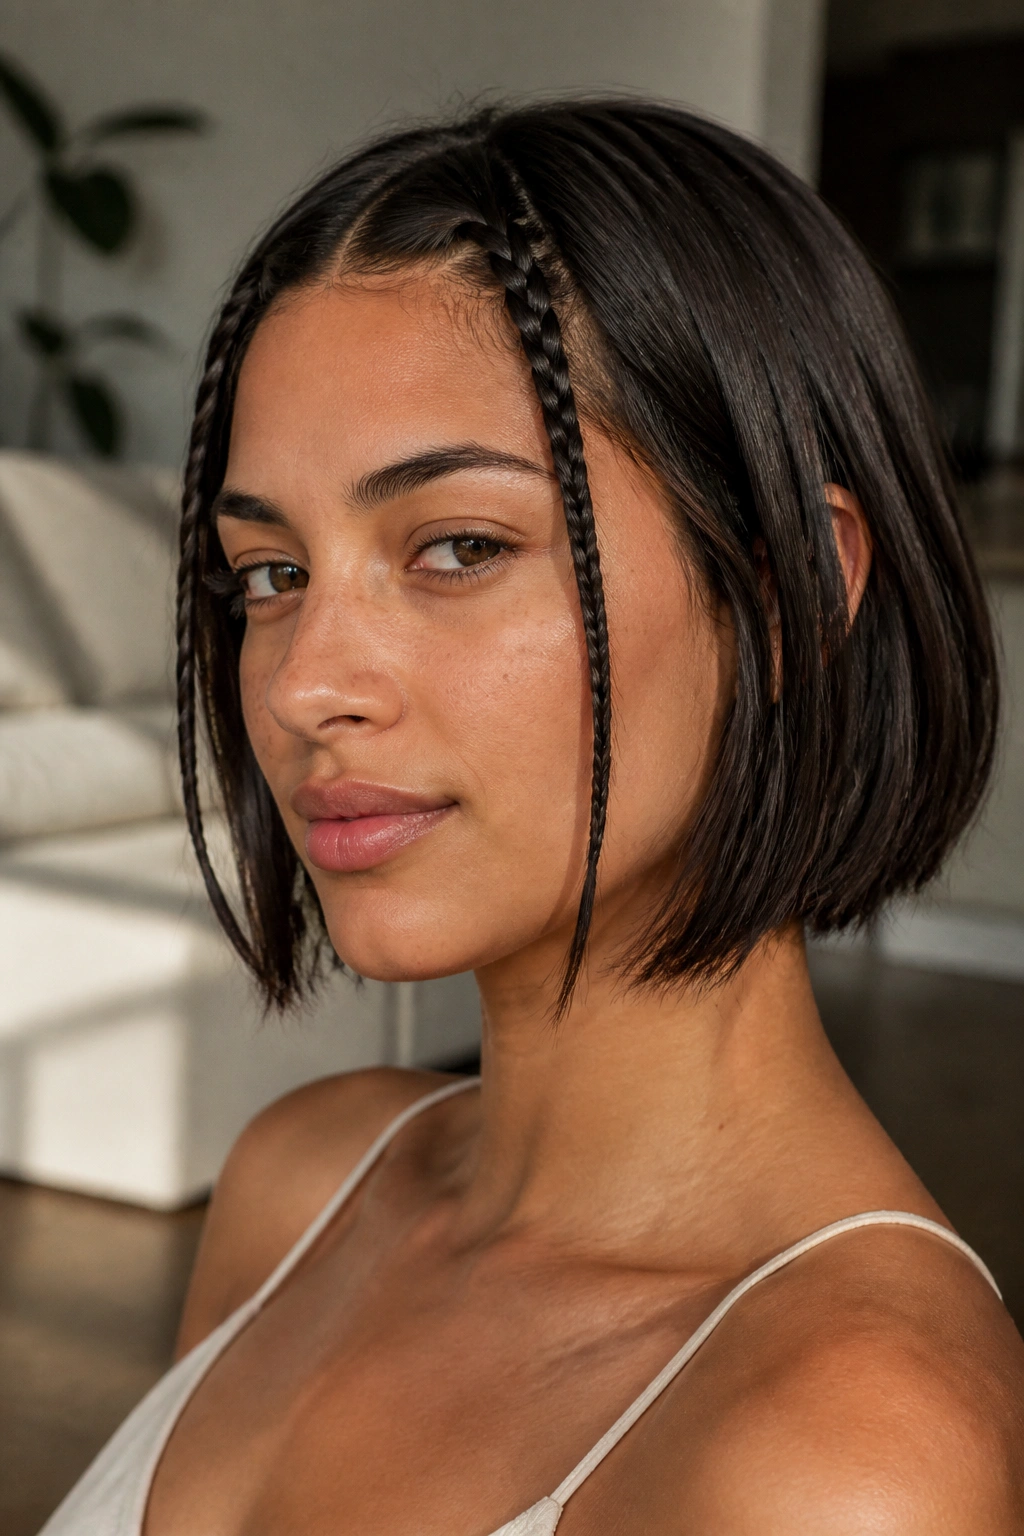
There is a certain nostalgia to this look, harkening back to effortless styles seen throughout various decades. It involves taking two very small sections of hair right at the front—the pieces that usually fall into your mouth when you’re trying to eat—and turning them into simple three-strand braids. It takes less than two minutes and completely changes the vibe of a standard bob.
This style is particularly great because it doesn’t require any “gathering” of hair as you go. You just braid the section straight down. Because the braids are so small, they don’t need much hair to look complete. They add a frame to your face and keep the hair back without needing a headband or a clip.
For a more modern feel, don’t braid them all the way to the very bottom. Leave about an inch of unbraided hair at the tips and secure them with the smallest clear elastics you can find. If you want a more “undone” look, you can even skip the elastics and just back-comb the ends slightly to hold the braid in place, though this works better on hair with a bit of natural texture or “grit.”
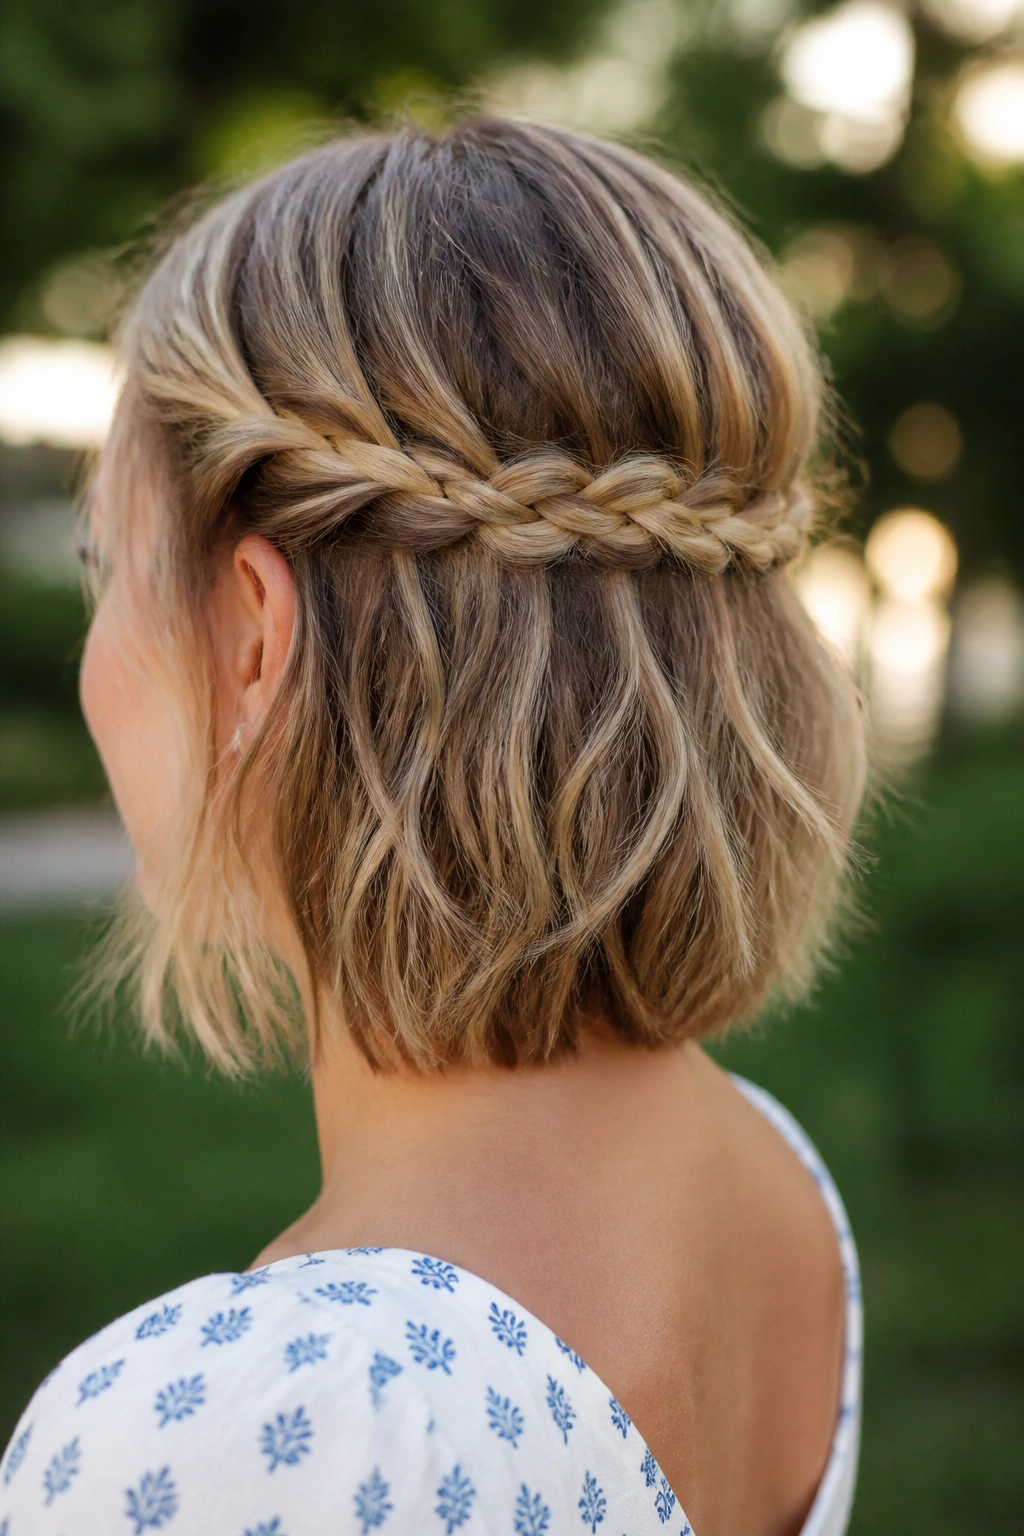
3. The Half-Up Waterfall Braid
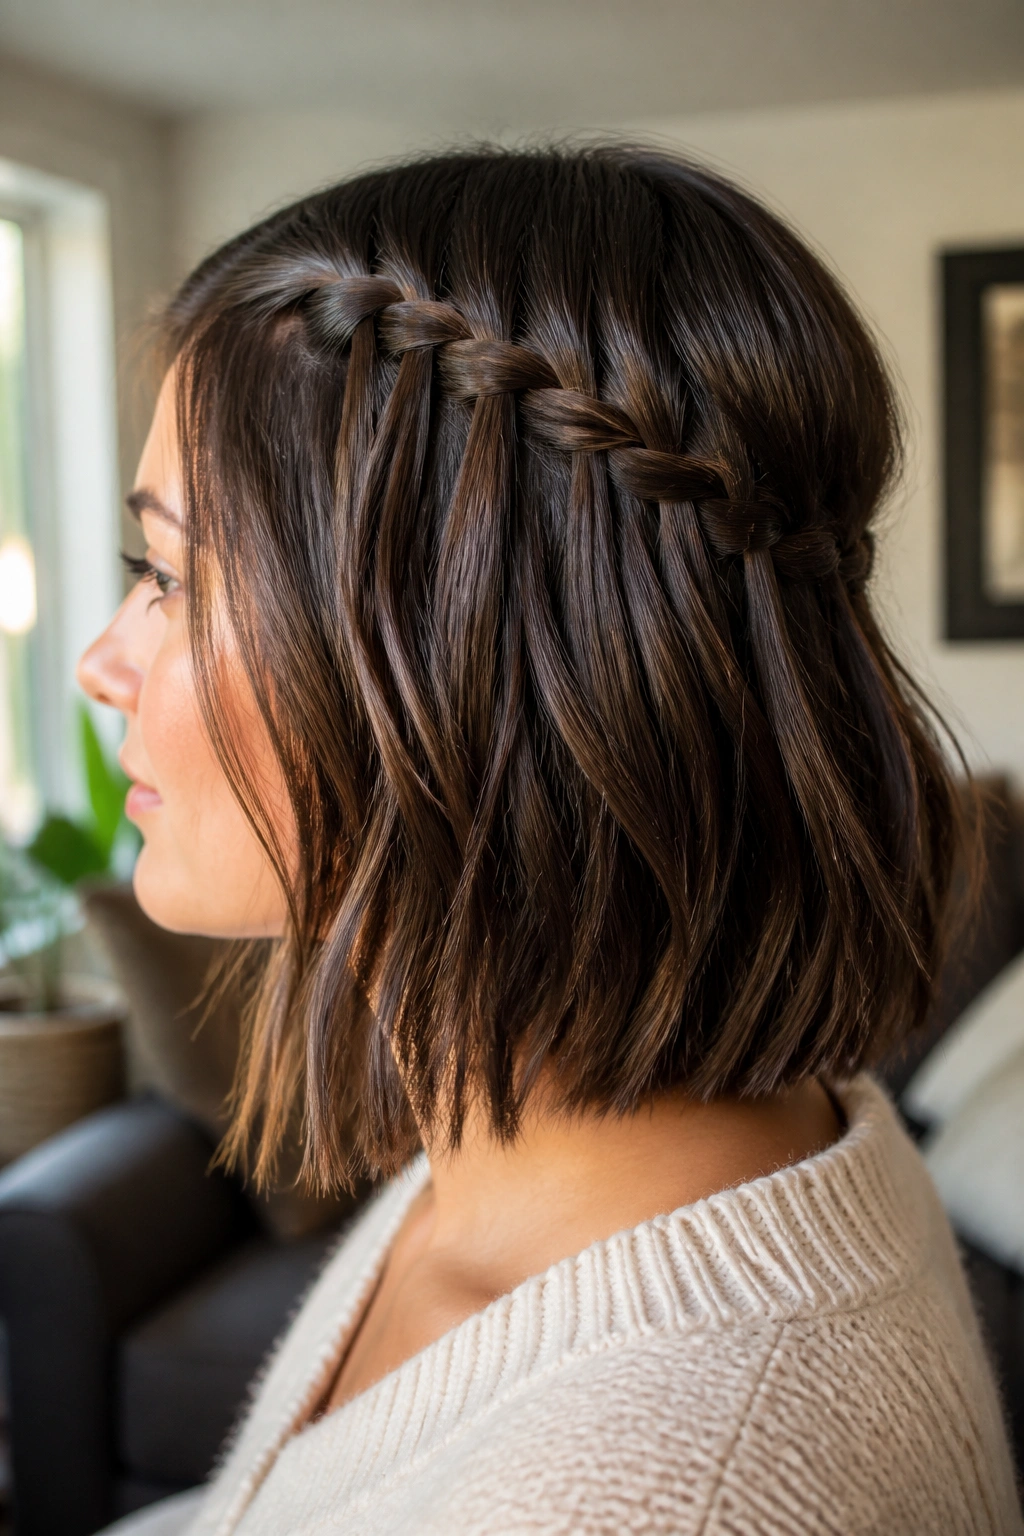
The waterfall braid is often considered the “final boss” of braiding because it looks incredibly complex, but on a bob, it is actually quite forgiving. The concept involves letting one strand of the braid drop down (like water over a fall) while picking up a new strand to continue the chain. It creates a beautiful horizontal or diagonal line across the back of your head.
The Illusion of Length
What makes this so good for chin-length hair is that it doesn’t require you to tuck the ends away. Since most of the hair is left hanging, you don’t have to worry about short layers popping out of a tight bun or a tail. It highlights the blunt edge of a bob while adding a delicate, feminine detail.
How to Manage Short Layers
- Use a texturizing spray before you start to give the hair some “stick.”
- If a layer is too short to be dropped through, simply pin it underneath the next section.
- Work in smaller sections than you would with long hair to keep the “drops” looking clean.
4. Double French Braid Pigtails
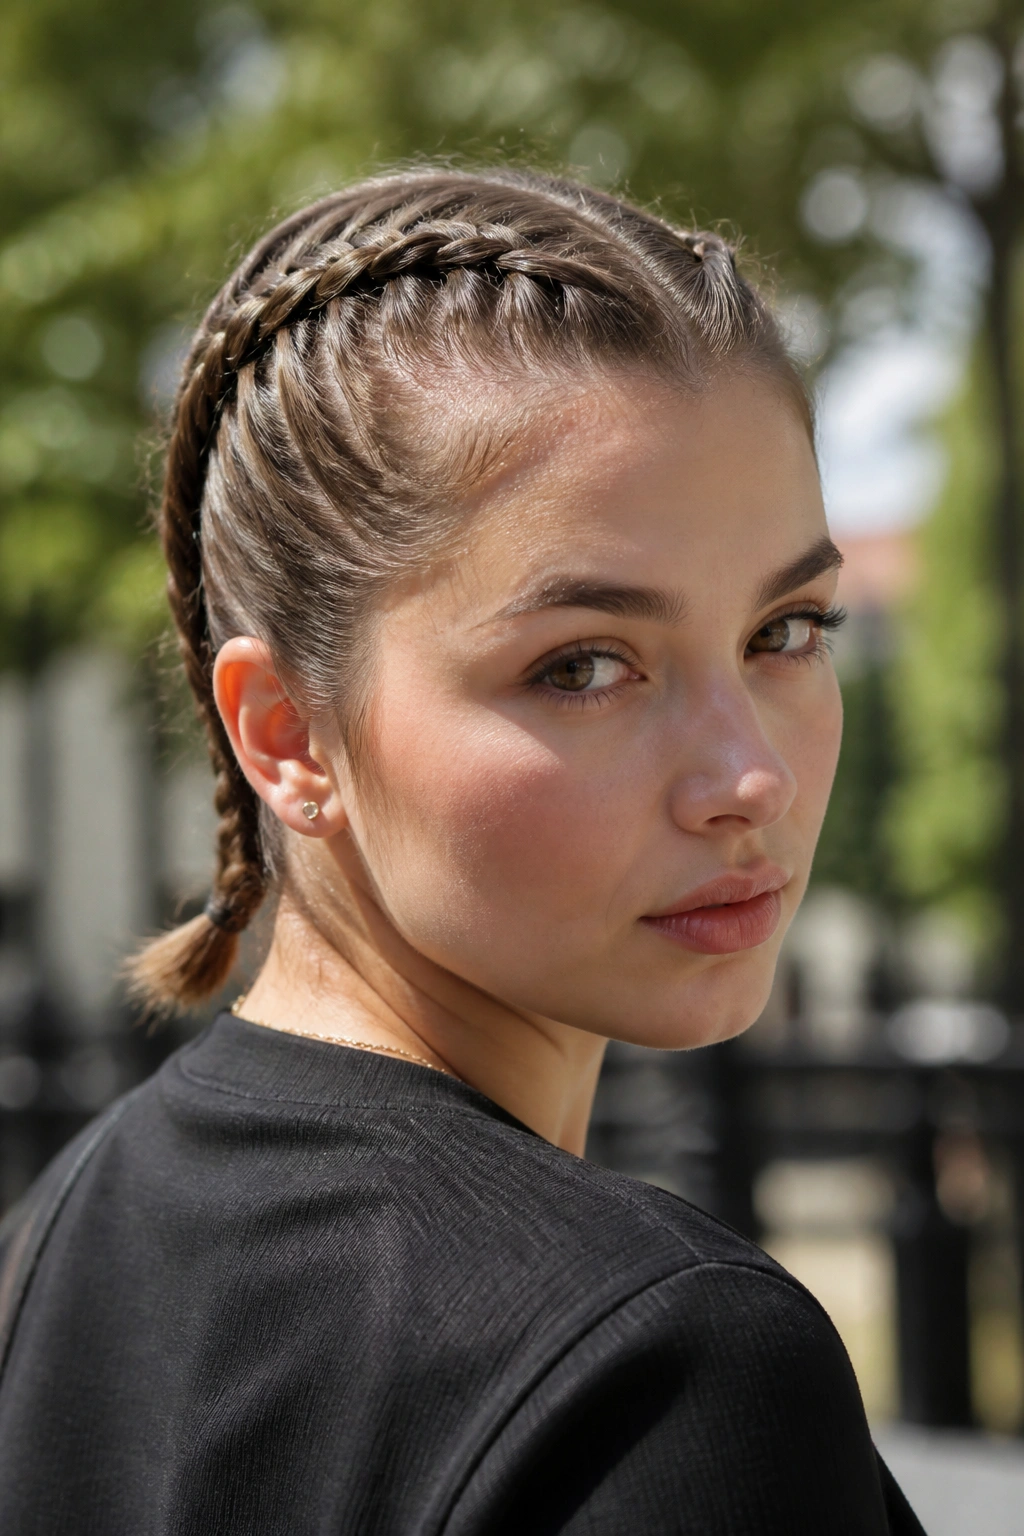
Don’t let the word “pigtails” scare you off. On a chin-length bob, double French braids look sporty and intentional rather than juvenile. The trick is to braid them all the way down to the nape of the neck. Because your hair is short, the “tails” will be cute, tiny stubs that can either be left out or tucked under for a “faux-hawk” look.
This is a functional powerhouse. If you are heading to a workout or spending a day outdoors, this is the style that will actually stay in place. Long hair in pigtails often tangles; short hair in pigtails stays exactly where you put it.
The biggest challenge here is the back of the head. When you reach the nape of the neck, you might find that the very bottom hairs are too short to stay in the braid. The secret? Use a bit of hairspray on a clean toothbrush and brush those tiny hairs upward into the braid as you secure it. It creates a clean, professional finish that looks like you spent an hour in a stylist’s chair.
5. The Messy Mohawk Braid
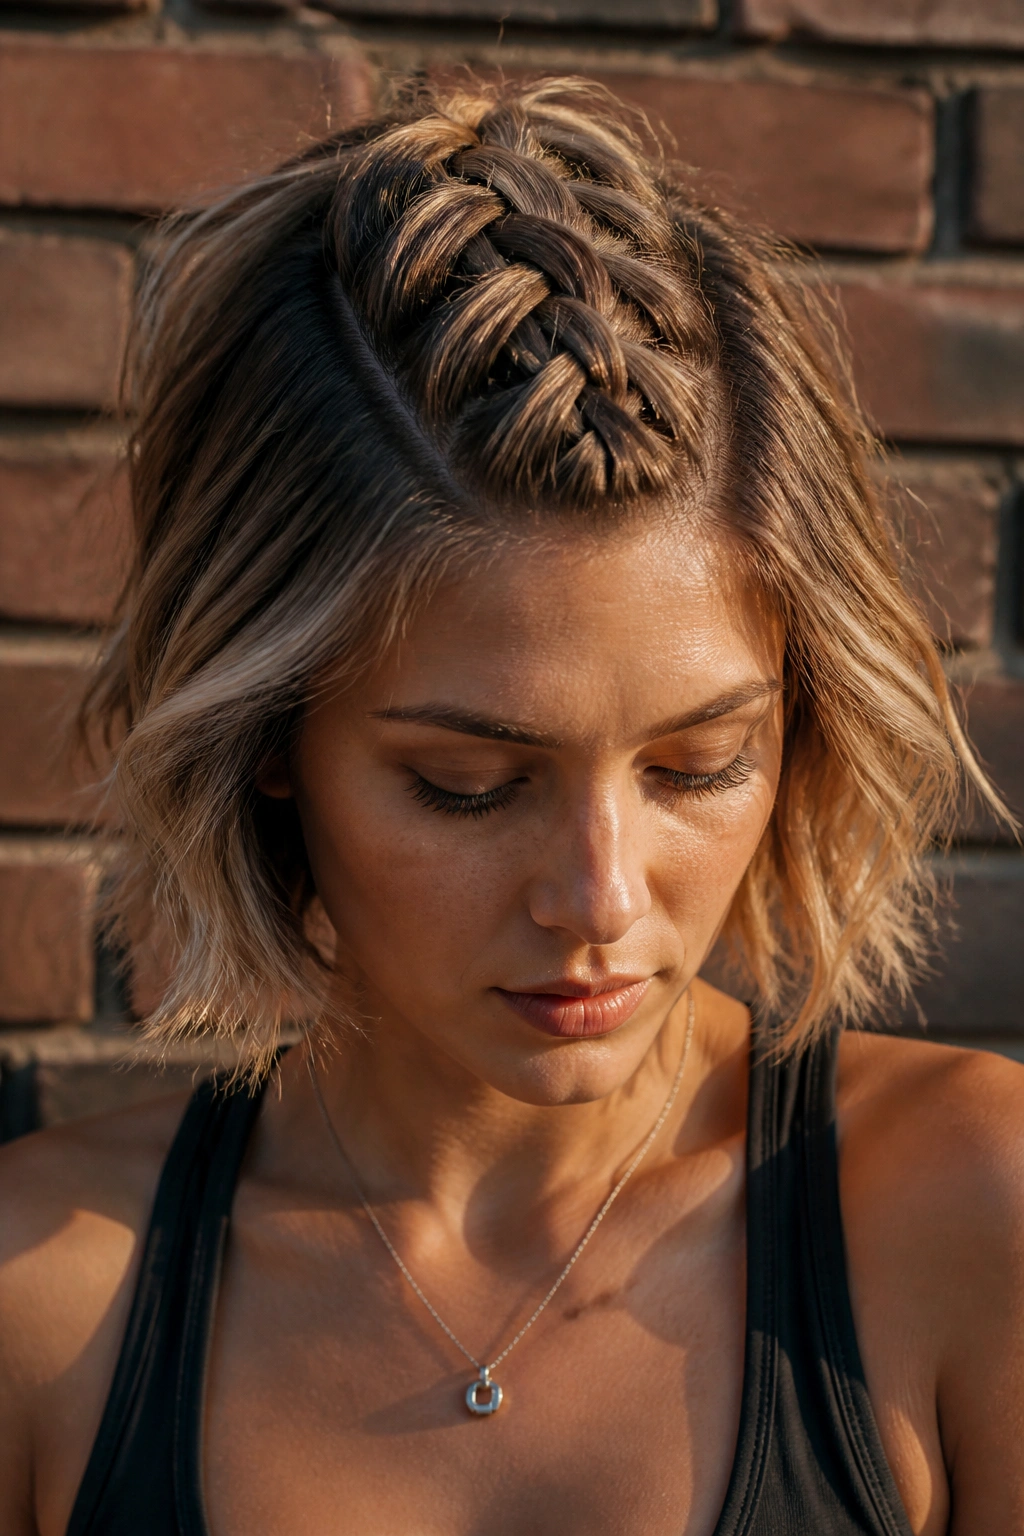
If you want something with a bit more “edge,” the mohawk braid is the answer. This style involves braiding a single, thick Dutch or French braid right down the center of your head, from the forehead to the crown. The sides are left loose, which creates a sharp contrast in volume.
This works exceptionally well for bobs because it focuses all the “action” on the top of the head where the hair is typically longest. You don’t have to worry about the shorter hair at the sides or back because they aren’t part of the braid. It’s a great way to add height and drama to a look without needing a ton of length.
To keep it from looking too stiff, pull the loops of the braid apart quite aggressively. You want it to look lived-in and voluminous. If you have a lot of layers, some ends might poke out of the top of the braid—embrace this. It adds to the “messy mohawk” aesthetic. If you’re worried about it falling flat, a puff of volumizing powder at the roots before you start braiding will give you a sturdy foundation.
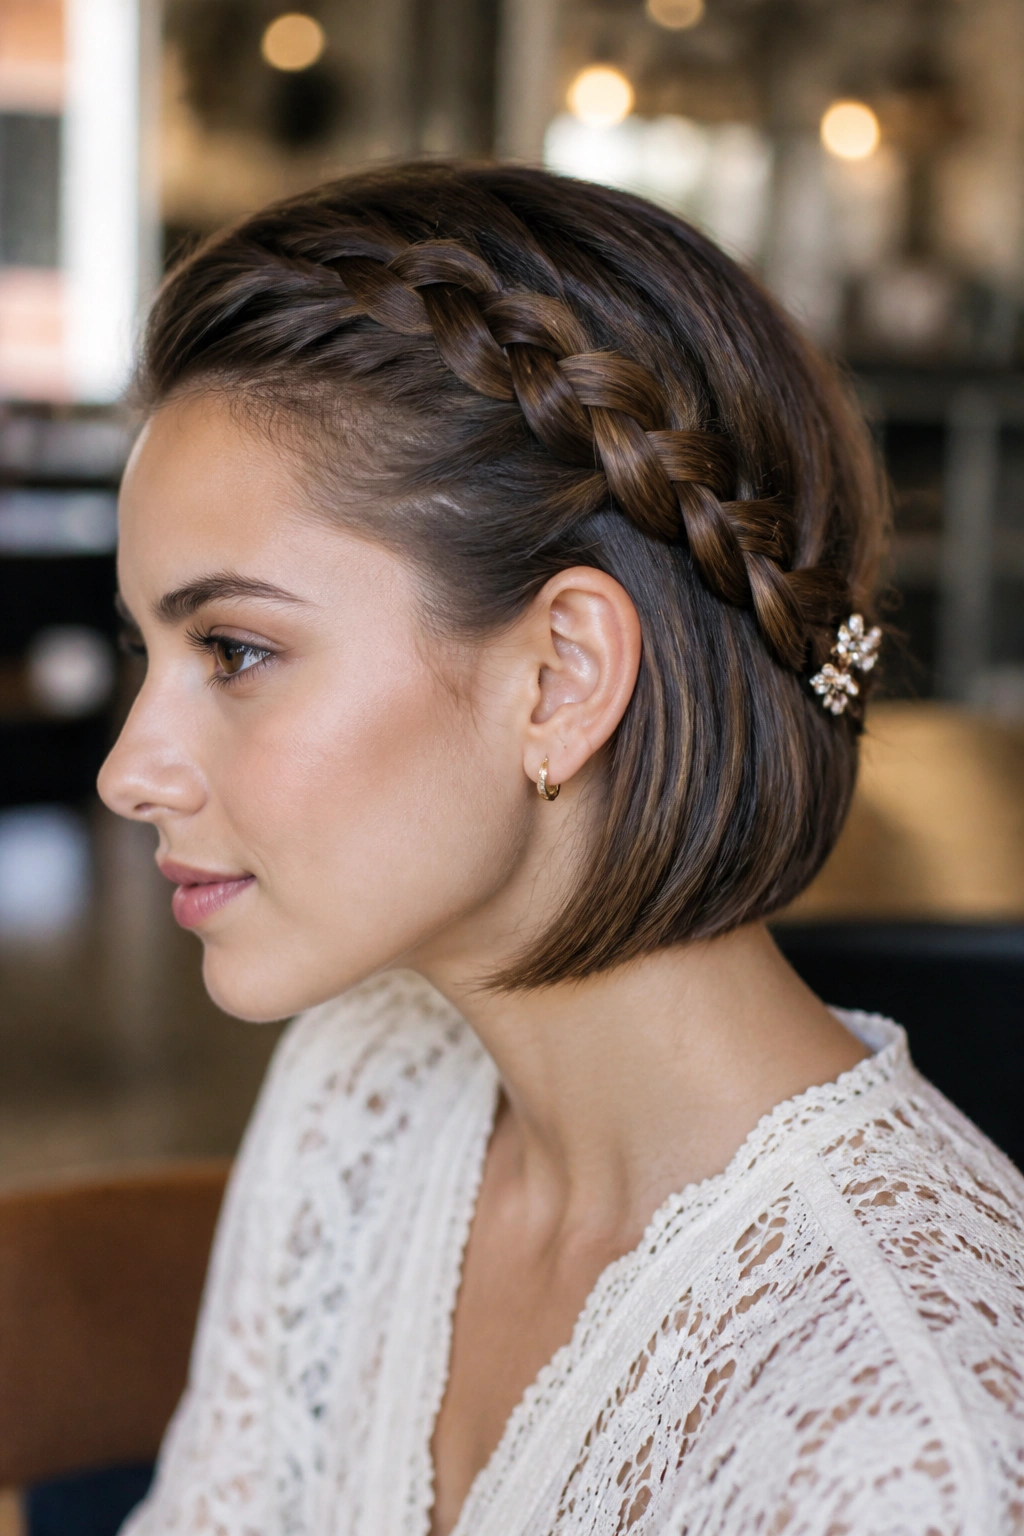
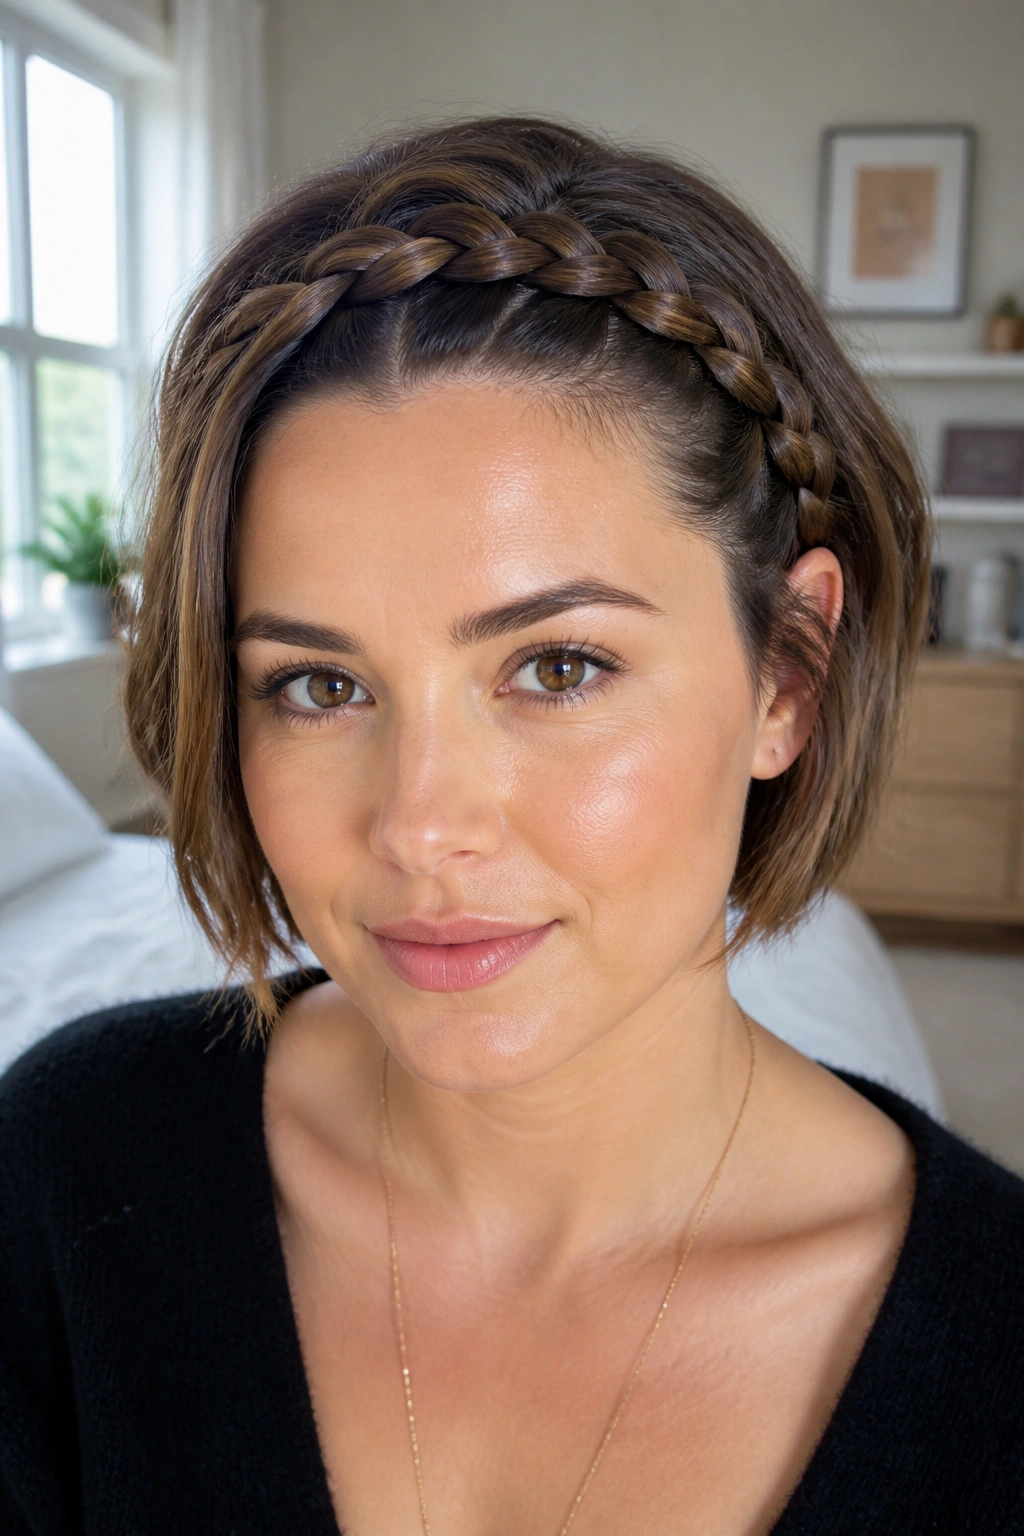
6. Horizontal Crown Braid Accent
A full milkmaid braid or halo braid is usually impossible with a chin-length bob because the hair simply isn’t long enough to wrap all the way around. However, you can achieve the look of a crown by doing a horizontal braid that starts behind one ear and travels across the back to the other.
This is a great “cheat” for short hair. It keeps the bottom half of your hair down while the middle section is intricately braided. It acts like a permanent hair accessory. Because you are gathering hair as you go, you can incorporate all those middle layers that are usually too short to do much with.
Breaking Down the Horizontal Move
- Start a three-strand braid behind your left ear, pointing your hands toward the right.
- Only add hair from the top section of your head.
- As you reach the right side, secure it with a small elastic and hide the tail under the loose hair.
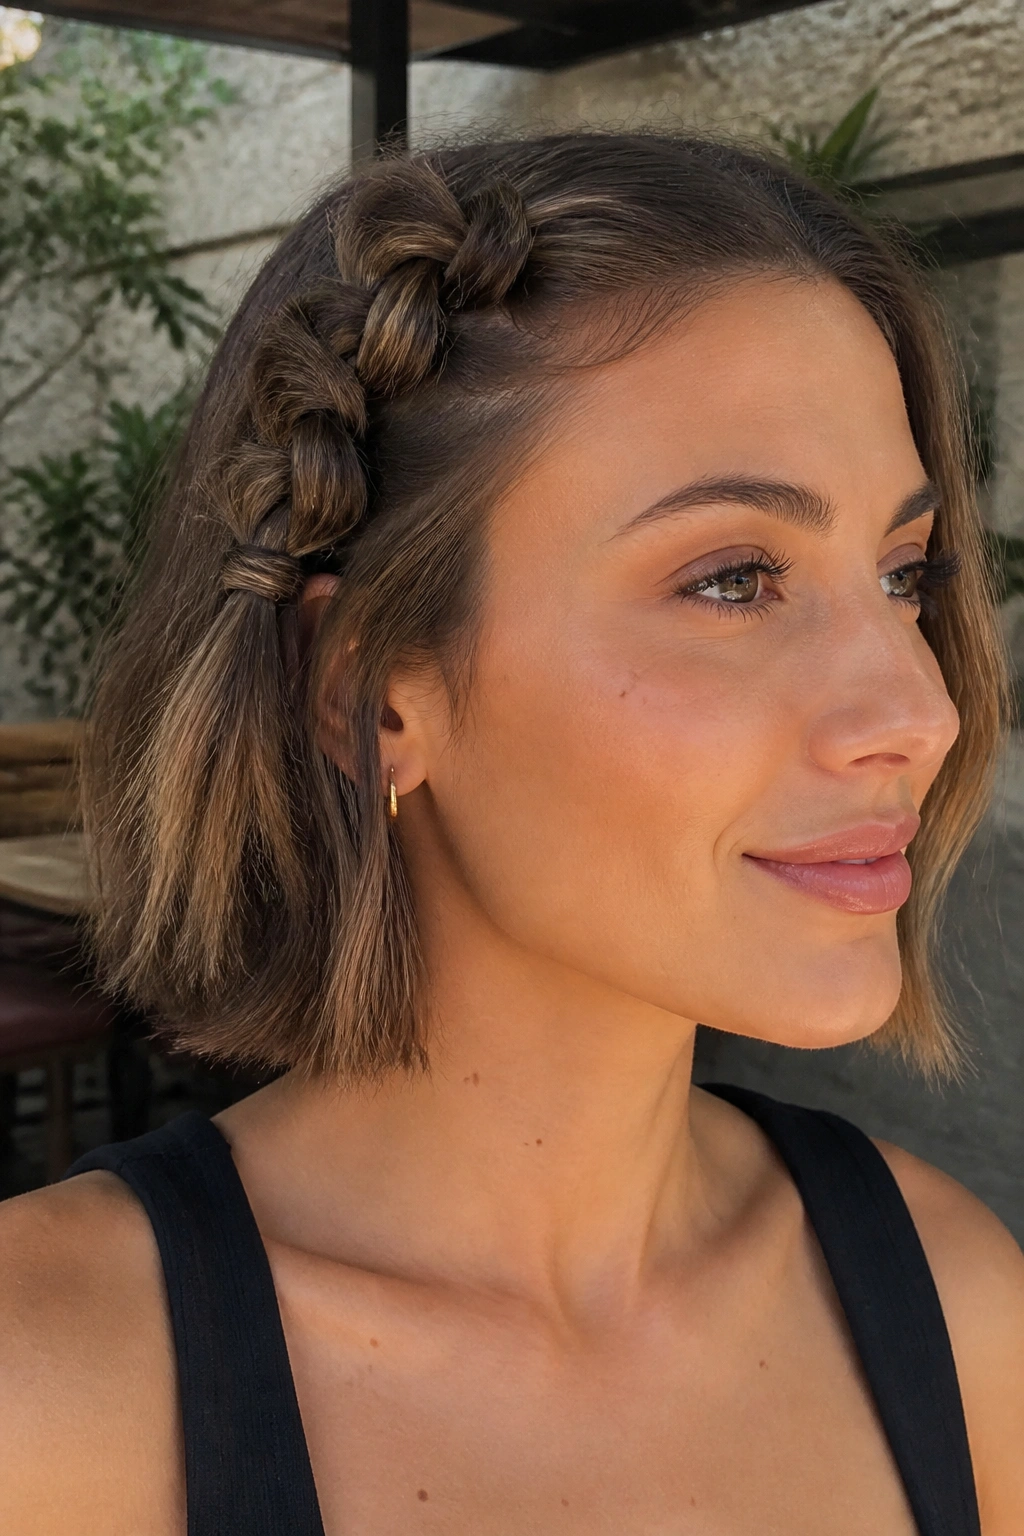
7. The Rope Twist Side Style
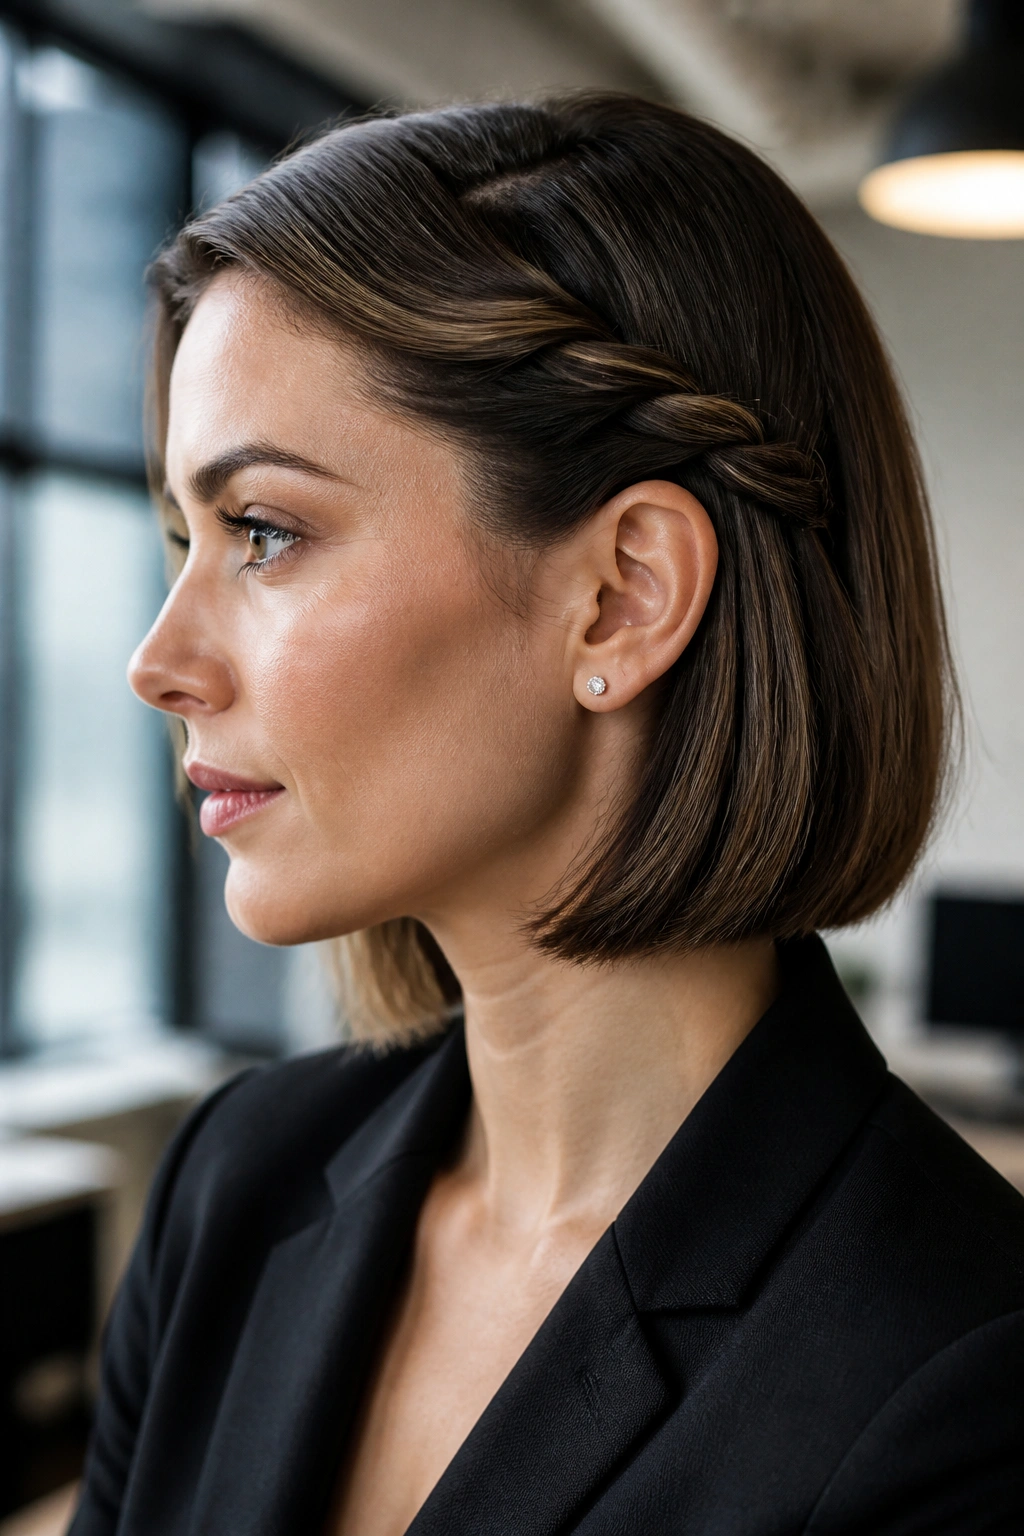
Technically, a rope twist is a two-strand braid, but it is often grouped with braids because it serves the same purpose. It is arguably the easiest style for beginners to master on short hair. You take two sections, twist them both in one direction, and then wrap them around each other in the opposite direction.
The beauty of the rope twist is that it is much tighter and more secure than a three-strand braid on short hair. It doesn’t “unravel” as easily when a short layer decides to escape. It looks sleek, modern, and almost architectural.
This style is perfect for a professional setting. A tight rope twist along the side of a bob, pinned neatly behind the ear, looks incredibly polished. It is the “no-makeup makeup” of the hair world—it looks like you put in a lot of effort, but it’s actually very simple. It works best on hair that has been blown out straight, as the “rope” texture really shines when the hair is smooth.
8. Diagonal Dutch “Swoop”
Instead of going straight back or straight down, try a diagonal path. Start the braid at one temple and work your way diagonally across the back of the head toward the opposite nape. This creates a dynamic sense of movement that long-haired people actually struggle to achieve because their hair is too heavy.
The diagonal line is visually lengthening. It draws the eye across the head, making the bob look more voluminous. It is also a very practical way to gather hair if you have an asymmetrical bob where one side is significantly longer than the other. You start the braid on the long side and use that length to carry the braid across to the shorter side.
To finish this off, don’t just use a plain elastic. A small, decorative clip or a silk ribbon tied around the tiny tail can turn this into a “look” for a wedding or a party. It’s a subtle detail that makes a big impact.
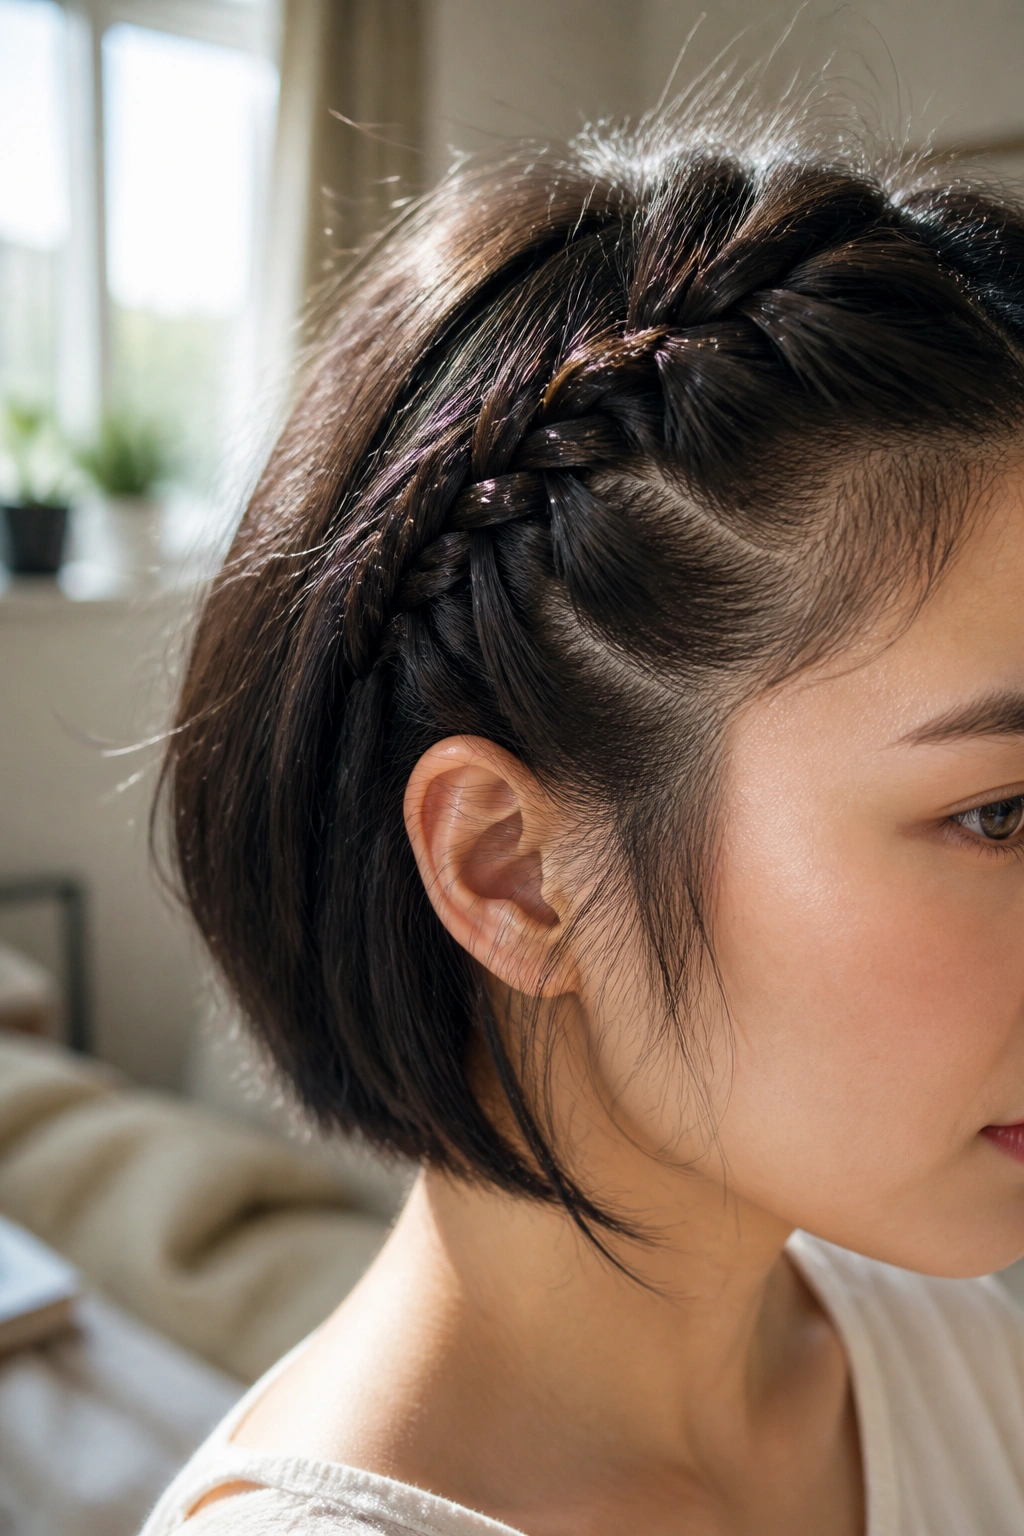
9. The Hidden Peek-a-Boo Braid
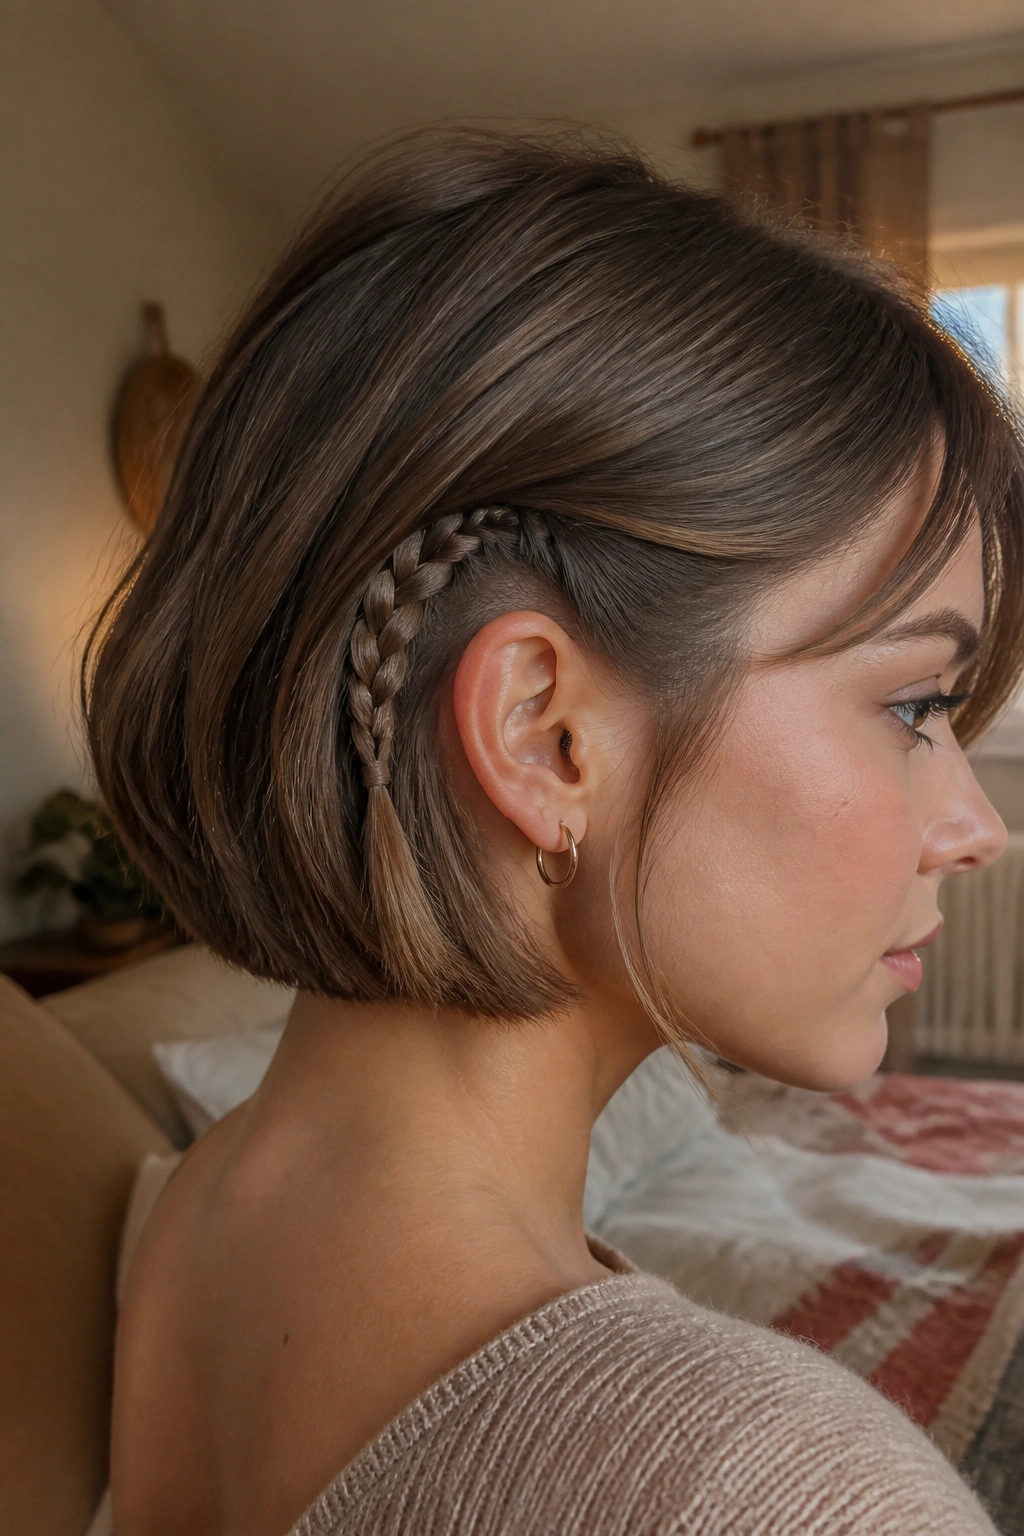
Sometimes the best detail is the one you don’t see immediately. The peek-a-boo braid involves taking a section of hair from the underneath layer of your bob—near the nape or just behind the ear—and braiding it. The top layer of your bob then falls over it, so the braid only shows when you move your head or tuck your hair.
This is the ultimate “cool girl” braid. It’s subtle, unexpected, and very easy to do. It doesn’t require any French or Dutch braiding skills; a simple three-strand braid will do. It works best if you have a blunt bob, as the contrast between the sharp straight edge and the textured braid is very striking.
Why You Should Try the Under-Braid
- It adds an element of surprise to your style.
- It’s a great way to practice braiding your own hair without the pressure of it being front and center.
- It stays secure because the weight of the hair on top keeps it in place.
10. Bubble Braid “Cheat”
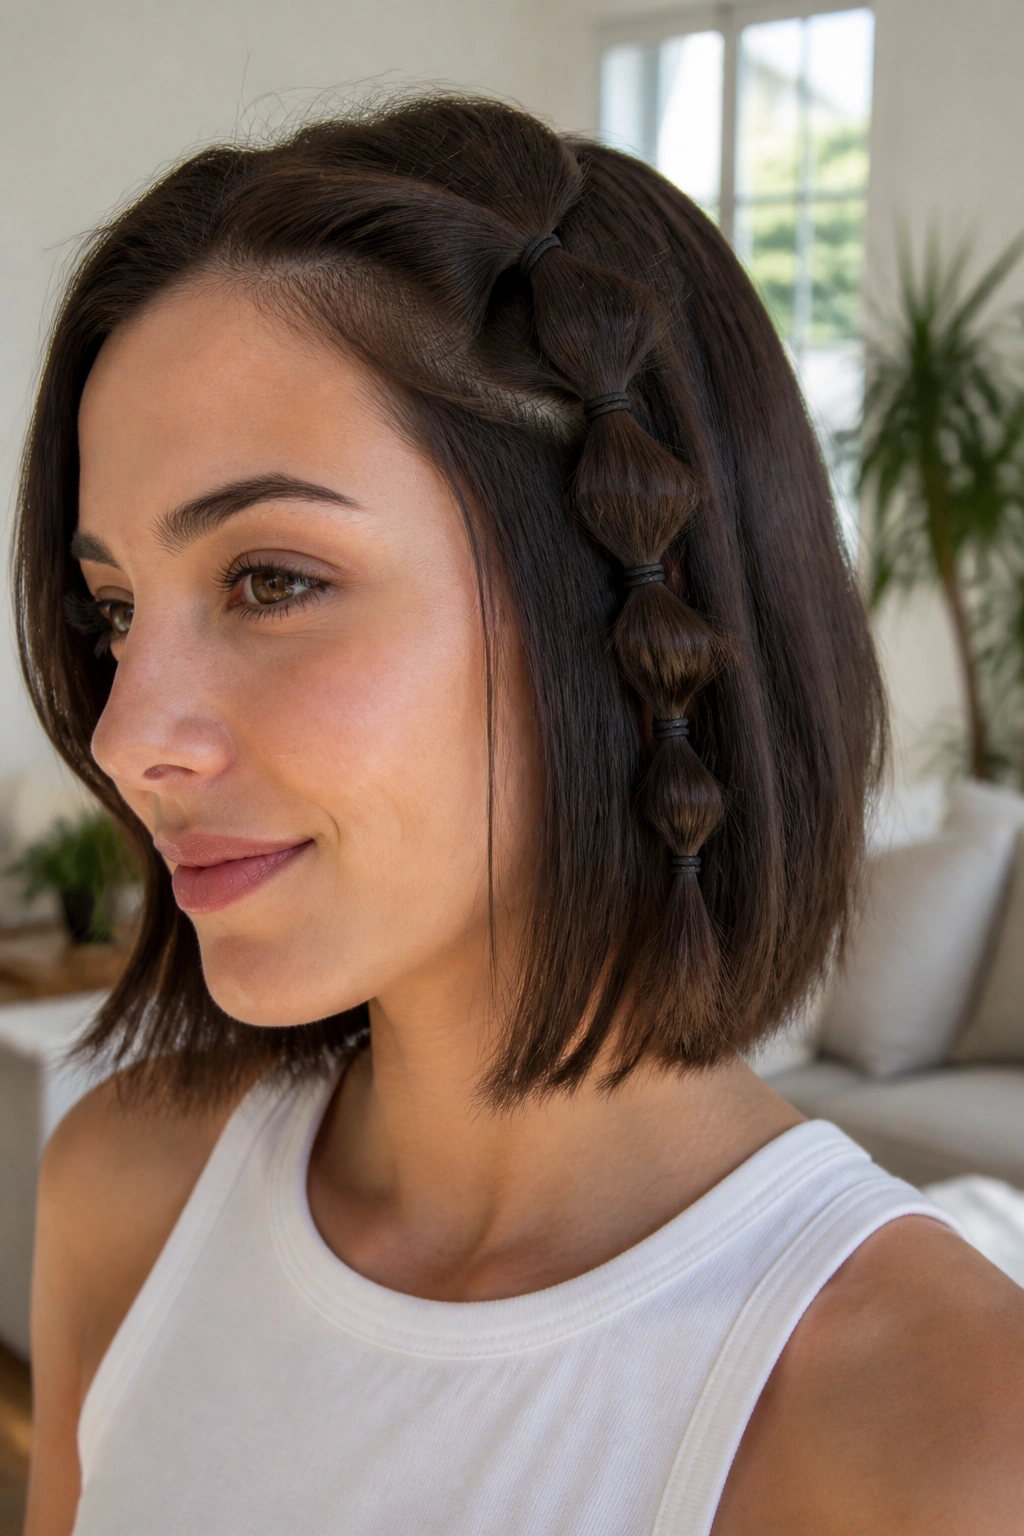
If you find traditional braiding difficult, the bubble braid is your best friend. It isn’t actually a braid, but it mimics the look perfectly. You use a series of small elastics to create “bubbles” of hair down a section. On a chin-length bob, this looks incredibly modern and high-fashion.
You can do this as a single accent or as double “pigtail” bubbles. Because you are using elastics every inch or so, this is the most secure style for short hair. There is zero chance of layers popping out because they are constantly being caught by a new elastic.
Pro tip: To make the bubbles look like a braid, you must “fluff” them. Once all the elastics are in, use your fingers to pull the hair between the elastics outward. This creates the rounded, bubbly shape. If you have very dark hair, use colored elastics for a pop of interest; if you want it to look more sophisticated, stick to elastics that match your hair color exactly.
11. The Fishtail Accent

The fishtail braid has a reputation for being time-consuming, and that is true—if you have long hair. But on a chin-length bob? A fishtail accent only takes about three minutes. The intricate, “herringbone” look of a fishtail adds a level of detail that a standard braid just can’t match.
Because a fishtail uses very small sections of hair, it actually holds onto short layers better than a three-strand braid. The strands are constantly overlapping in a way that “locks” the hair in. It’s a great choice for someone with fine hair, as the tight weave makes the section appear more substantial.
Don’t worry about making it perfect. A slightly “shredded” fishtail—where a few wisps are escaping—looks intentional and bohemian. It’s the perfect accompaniment to beachy waves. Just braid a small section near the temple, secure it, and then tug at the edges to soften the look.
12. Triple Micro-Braids (Side Detail)
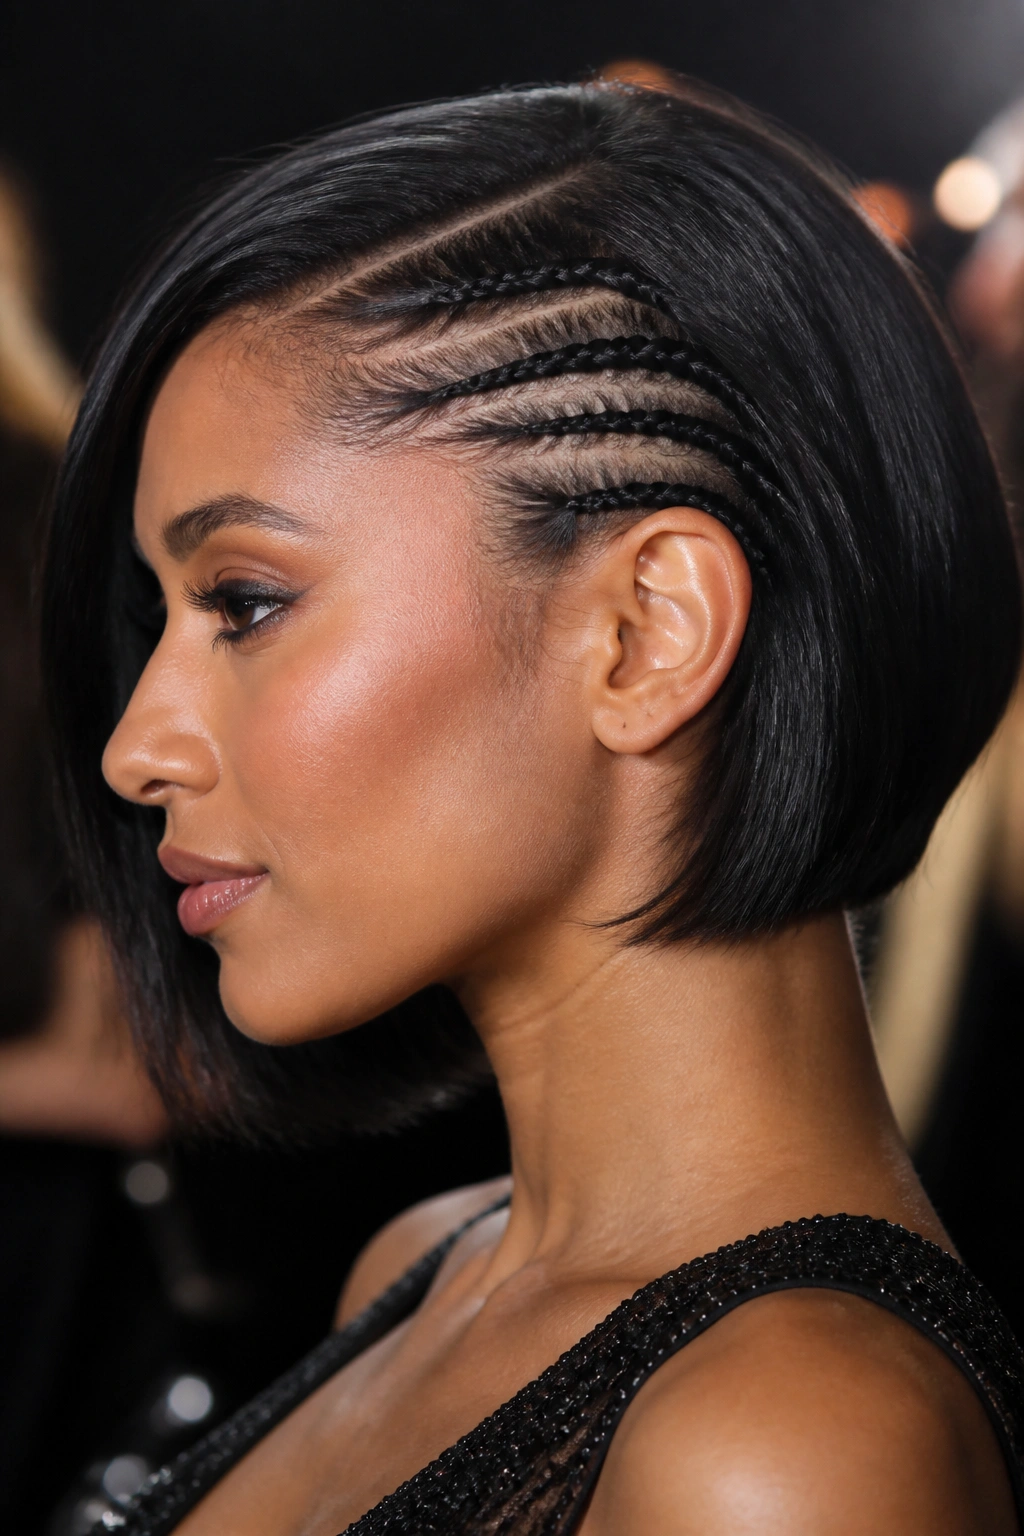
Instead of one braid, why not three? This involves creating three very thin, parallel braids along one side of the head, usually starting at the temple and ending just behind the ear. It creates a “faux-undercut” look that is very edgy and modern.
This is a fantastic way to deal with one side of a bob that just won’t lay flat. By braiding it tightly against the scalp, you remove the bulk and create a sleek profile. It’s often seen on red carpets because it gives the illusion of a much more daring haircut without actually having to pick up the clippers.
To get the best results, use a tail comb to ensure your sections are perfectly straight. The geometry of the three parallel lines is what makes this style work. If the lines are crooked, the whole thing will look messy. Use a tiny bit of gel on each section before you start to keep it looking sharp and “wet” for a high-fashion finish.
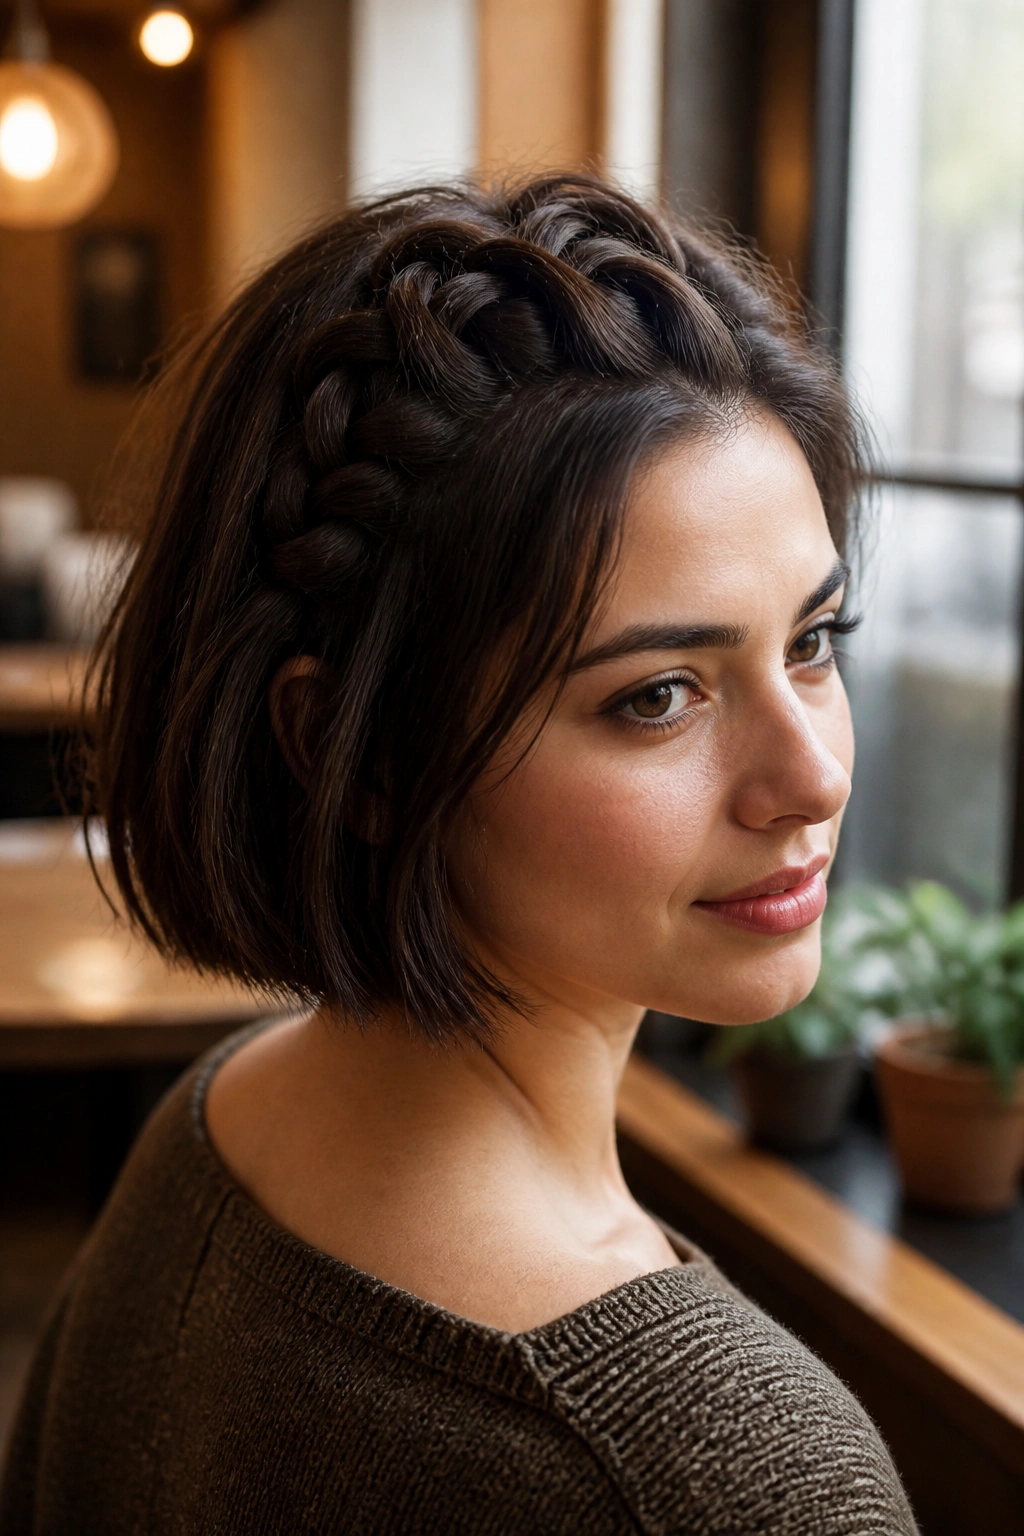
13. The Half-Up Dutch Crown

This is the “shorter version” of the classic halo. You braid two Dutch braids starting at the center part, following the hairline down to the ears. Instead of trying to wrap them around the back, you simply pin them where they meet at the back of the head.
It gives you the beautiful face-framing effect of a crown braid but accommodates the shorter length of a bob. The rest of the hair is left down, providing a nice balance. It’s a very romantic style, perfect for a date or a morning brunch.
If your hair is very silky, the pins might want to slide out. A quick trick is to spray the bobby pins with hairspray before putting them in. This gives them a bit of “tack” so they stay put against your scalp. You can also hide the pins by tucking them underneath the bulk of the braid.
14. Reverse French Braid (Nape Up)
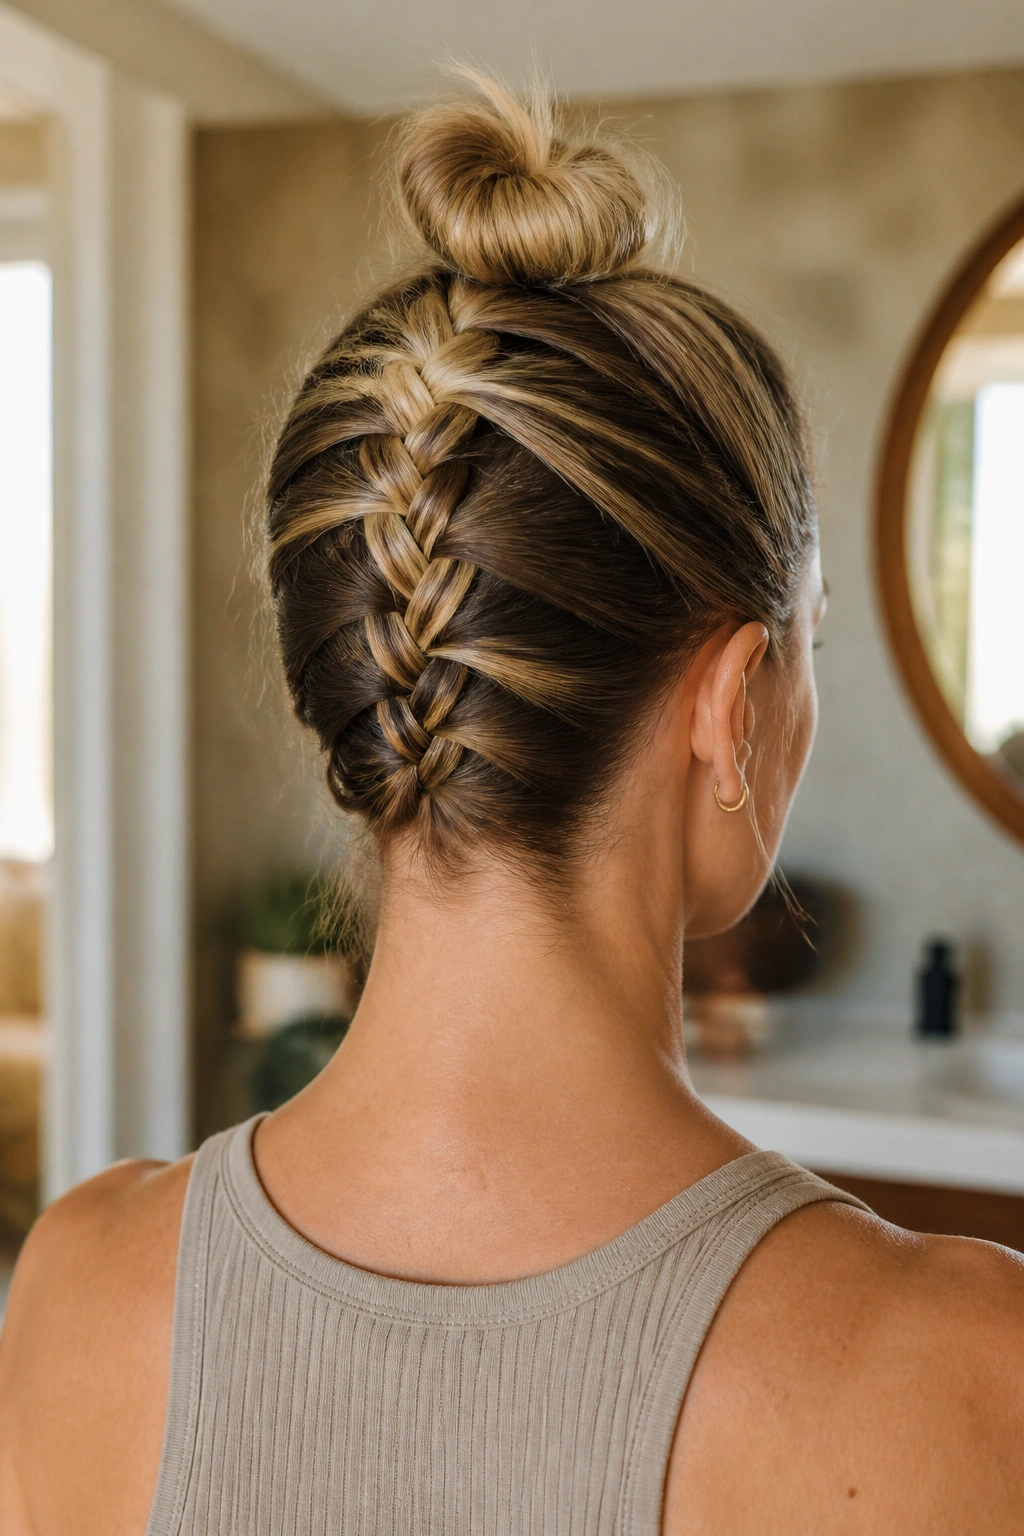
This is perhaps the most challenging style on the list, but it is a game-changer for bobs. You tilt your head forward and braid from the nape of your neck upward toward the crown. Once you reach the top, you secure the rest of the hair into a tiny “top knot” or a messy bun.
This is the ultimate solution for those annoying hairs at the back of the neck that always fall out of high ponytails. By braiding them up, you keep the back of your neck clean and cool. It looks incredibly intricate and impressive from behind.
Since you’re braiding “upside down,” it helps to sit on a chair and lean your head between your knees. It takes a bit of practice to get the hand positioning right, but once you master it, it will become your favorite way to wear your bob on hot days.
15. The “Snake” Braid
The snake braid is a clever trick that looks far more complicated than it is. You start with a standard three-strand braid. Once you reach the end, you hold one strand firmly and push the other two strands back up toward the top. The hair “bunches” up into a wavy, S-shaped pattern that looks like a snake.
On a bob, this is a great quick-fix accent. It adds a unique texture that people will definitely ask you about. Because you are pushing the hair up, it effectively “shortens” the braid, making it fit perfectly within the length of your bob without having a long tail hanging down.
It works best on hair that has a bit of “slip.” If your hair is too dry or textured, the strands might not slide easily. A drop of hair oil or a silicone-based serum on the section before you braid will make the “sliding” part of the snake braid much smoother.
16. Front-to-Back French Braid Headband
If you hate headbands because they give you a headache behind the ears, why not braid one? This style involves a French braid that runs from one ear, across the top of the forehead (right along the hairline), to the other ear.
It is the most effective way to keep every single hair off your face. For people with chin-length bobs who are trying to grow out their bangs, this is a lifesaver. It’s functional, it’s cute, and it won’t slip off like a plastic headband.
Make sure you are picking up very small sections as you go across the forehead. This keeps the braid tight to the hairline and prevents it from looking like a bulky “loaf” on top of your head. When you reach the other ear, you can either pin it or continue the braid down into a tiny accent.
17. The “Knotted” Braid
The knotted braid is a modern variation where you essentially “tie” the hair in simple overhand knots as you go, rather than traditional crossing. It creates a chunky, textured chain that looks very different from a standard braid.
On short hair, the knotted braid is great because it is very forgiving. If a layer is too short, it just blends into the “knot” rather than sticking out of a braid loop. It has a very organic, boho feel to it.
This style looks best when it’s a bit “lived-in.” Don’t worry about making the knots perfectly even. The charm is in the irregularity. It’s a great way to add volume to the sides of a bob, especially if you have fine hair that tends to look flat.
Preparing Your Bob for Braiding
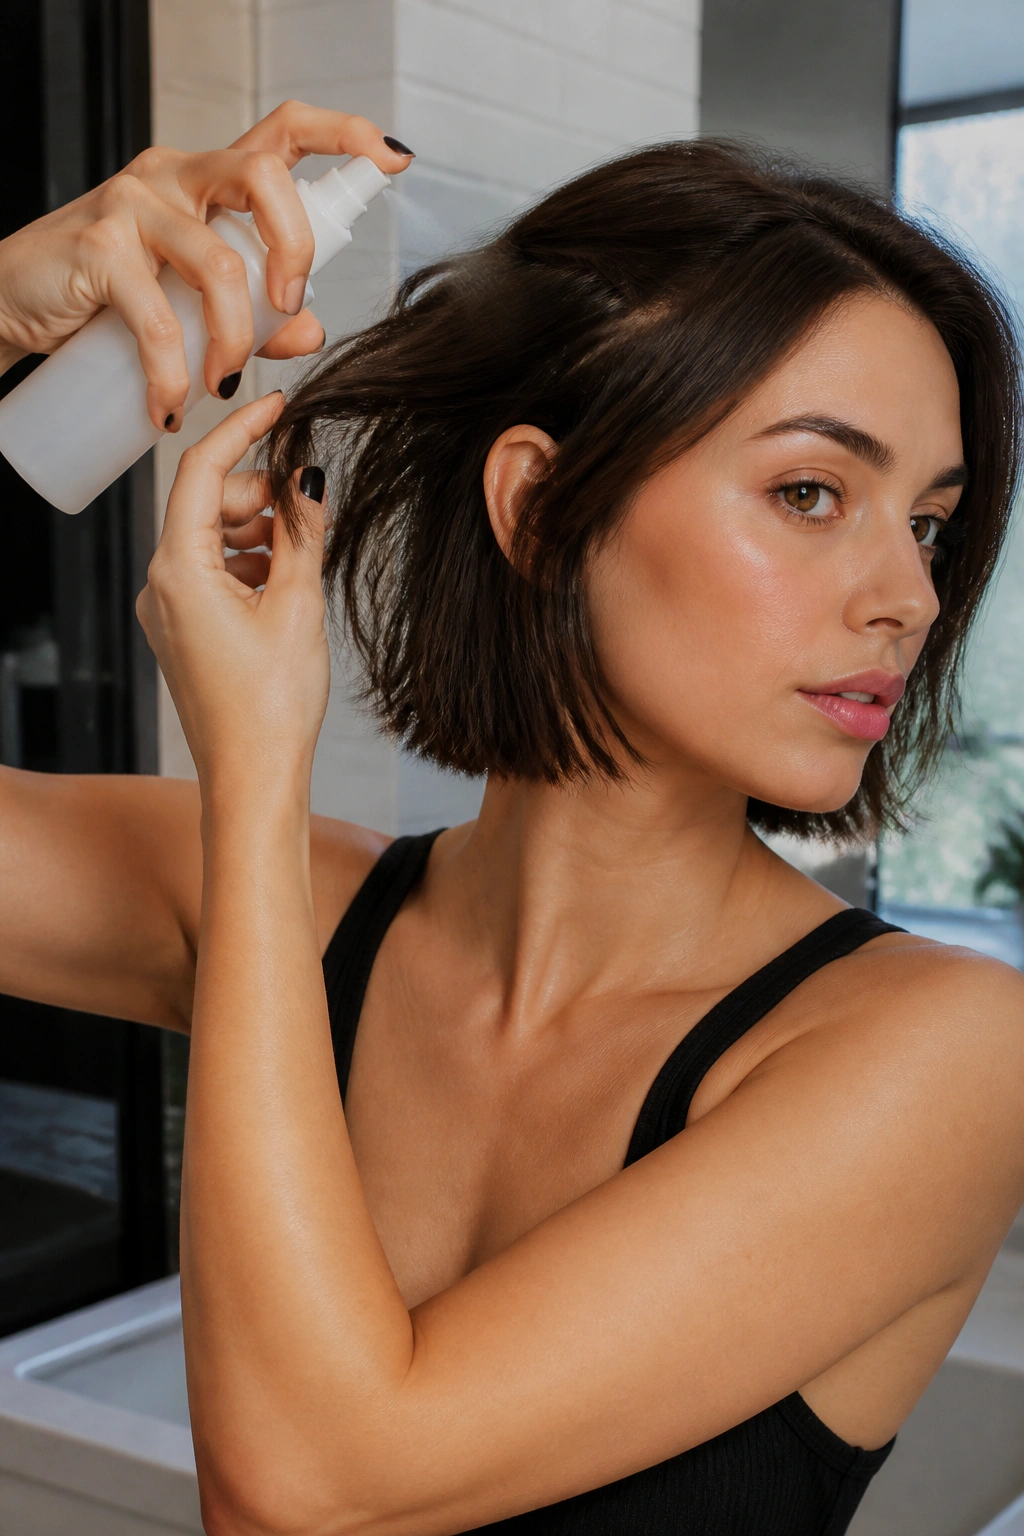
You cannot approach a bob with the same “wash and go” attitude as long hair when it comes to braiding. Short hair needs a foundation. If your hair is too clean or too soft, the braids will simply slide out within twenty minutes. The goal is to create “grit” and “grip.”
Before you even think about sectioning, reach for a dry texture spray or a sea salt spray. You want the hair to feel a bit “dusty” or “rough” to the touch. This creates friction between the strands, which is what keeps a braid from unraveling. If you have particularly thick or slippery hair, a light dusting of volumizing powder at the roots will act like an anchor for your French or Dutch styles.
Another key factor is the “end game.” With long hair, you can just keep braiding until you run out of hair. With a bob, you are going to run out of hair much sooner than you think. This means your “tails” are going to be short. Instead of fighting this, lean into it. Invest in high-quality, miniature elastics. The standard-sized hair ties will look bulky and awkward on a tiny braid tail. Clear or hair-matched elastics are the way to go.
Common Pitfalls and How to Avoid Them
The most common complaint when braiding short hair is “the sprouts.” These are the tiny ends of layers that poke out of the sides of the braid, making it look like a pinecone. This usually happens because the sections are too large or the tension is too loose.
To fix this, try taking smaller sections. The more often you cross the hair, the more “lock points” you create to hold those short layers down. Additionally, keep your hands as close to the scalp as possible. When you pull the hair away from the head while braiding, you create slack, and slack is where layers escape.
If you still have “sprouts” after finishing, don’t panic. You don’t have to start over. Take a tiny bit of hair wax or pomade on your finger and “smooth” the sprouts in the direction of the braid. If they are particularly stubborn, a well-placed bobby pin (tucked inside the braid so it’s invisible) can pin that layer down.
The Essential Tool Kit for Short Hair Braiding
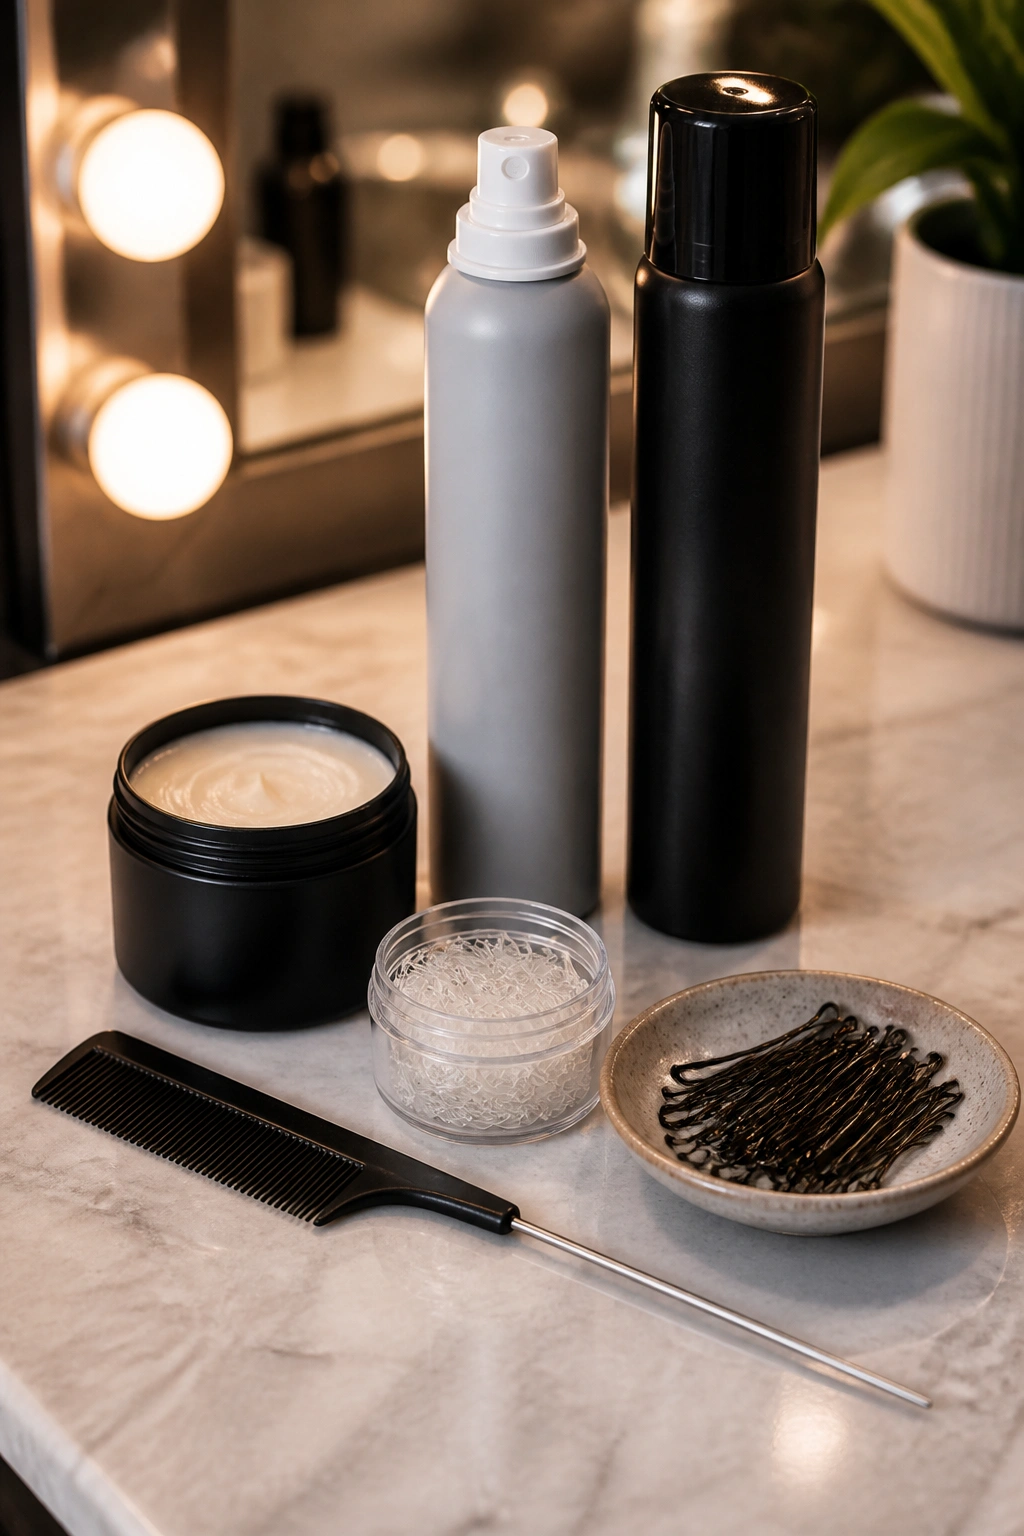
If you are going to make braids a regular part of your bob-styling routine, you need a few non-negotiables. You can’t just wing it with a standard brush and a drugstore elastic. Precision styling requires precision tools.
- Rat-Tail Comb: For those sharp, clean parts. A clean part is the difference between an accidental-looking braid and a professional style.
- Dry Texture Spray: This is your best friend. It provides the grip that short hair lacks.
- Small Clear Elastics: The “invisible” way to secure tiny tails without the bulk.
- Matte Pomade or Styling Wax: Essential for taming flyaways and “sprouts.”
- Mini Bobby Pins: Standard bobby pins are often too long for short hair styles and will stick out. Mini pins are easier to hide.
- Hairspray (Medium Hold): You want something that holds the style but doesn’t make it look like a plastic helmet.
The Bottom Line
A chin-length bob is not a limitation; it is a canvas for a different kind of creativity. While you might not be doing a five-strand Dutch braid down to your waist, the styles available to you are arguably more versatile and modern. Braiding short hair allows you to play with texture, control volume, and add personality to a cut that can sometimes feel repetitive.
The trick is to stop trying to make your hair act like it’s long. Embrace the tiny tails, the wispy edges, and the architectural lines that only a bob can provide. With a little bit of practice and the right products, you’ll find that those “short hair days” are actually your best hair days. Whether you’re looking for a way to survive a workout or you want a sophisticated look for a night out, these seventeen styles prove that the bob is the ultimate chameleon of the hair world.