Long layers can be a blessing and a nuisance in the same breath. They move well, they frame the face, they make a ponytail swing with a little more life — and then they slide out of place the second you want them to behave.
A butterfly braid ponytail fixes that mood swing nicely. The braid gives those shorter pieces something to cling to, the ponytail keeps the length visible, and the pulled-out sections add that soft, winged texture that plain elastics never manage. If you’ve ever tied your hair back, looked in the mirror, and thought, well, half of it has already escaped, this is the style that makes the escape look intentional.
The trick is matching the braid to the haircut. Fine layers need a lighter hand and a bit more grip at the crown. Thick, heavy layers can take firmer tension and a more dramatic pull-apart finish. Either way, the details matter more than the name, and the right version can make long layers look fuller, cleaner, and much more polished without feeling stiff.
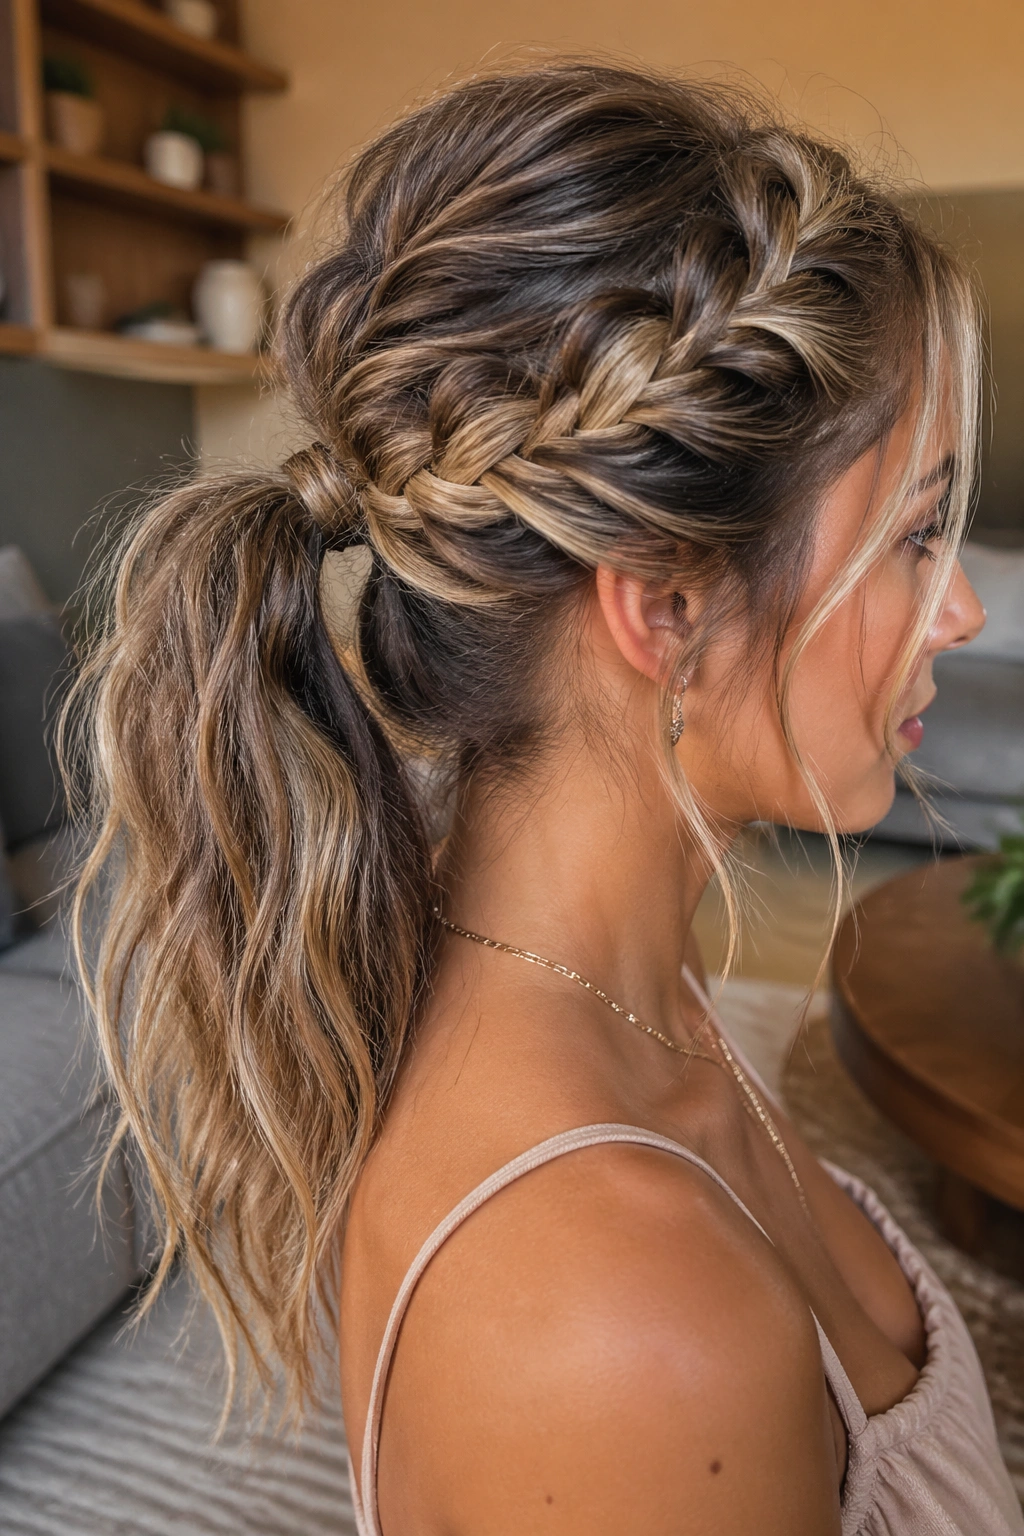
1. High Butterfly Braid Ponytail for Long Layers
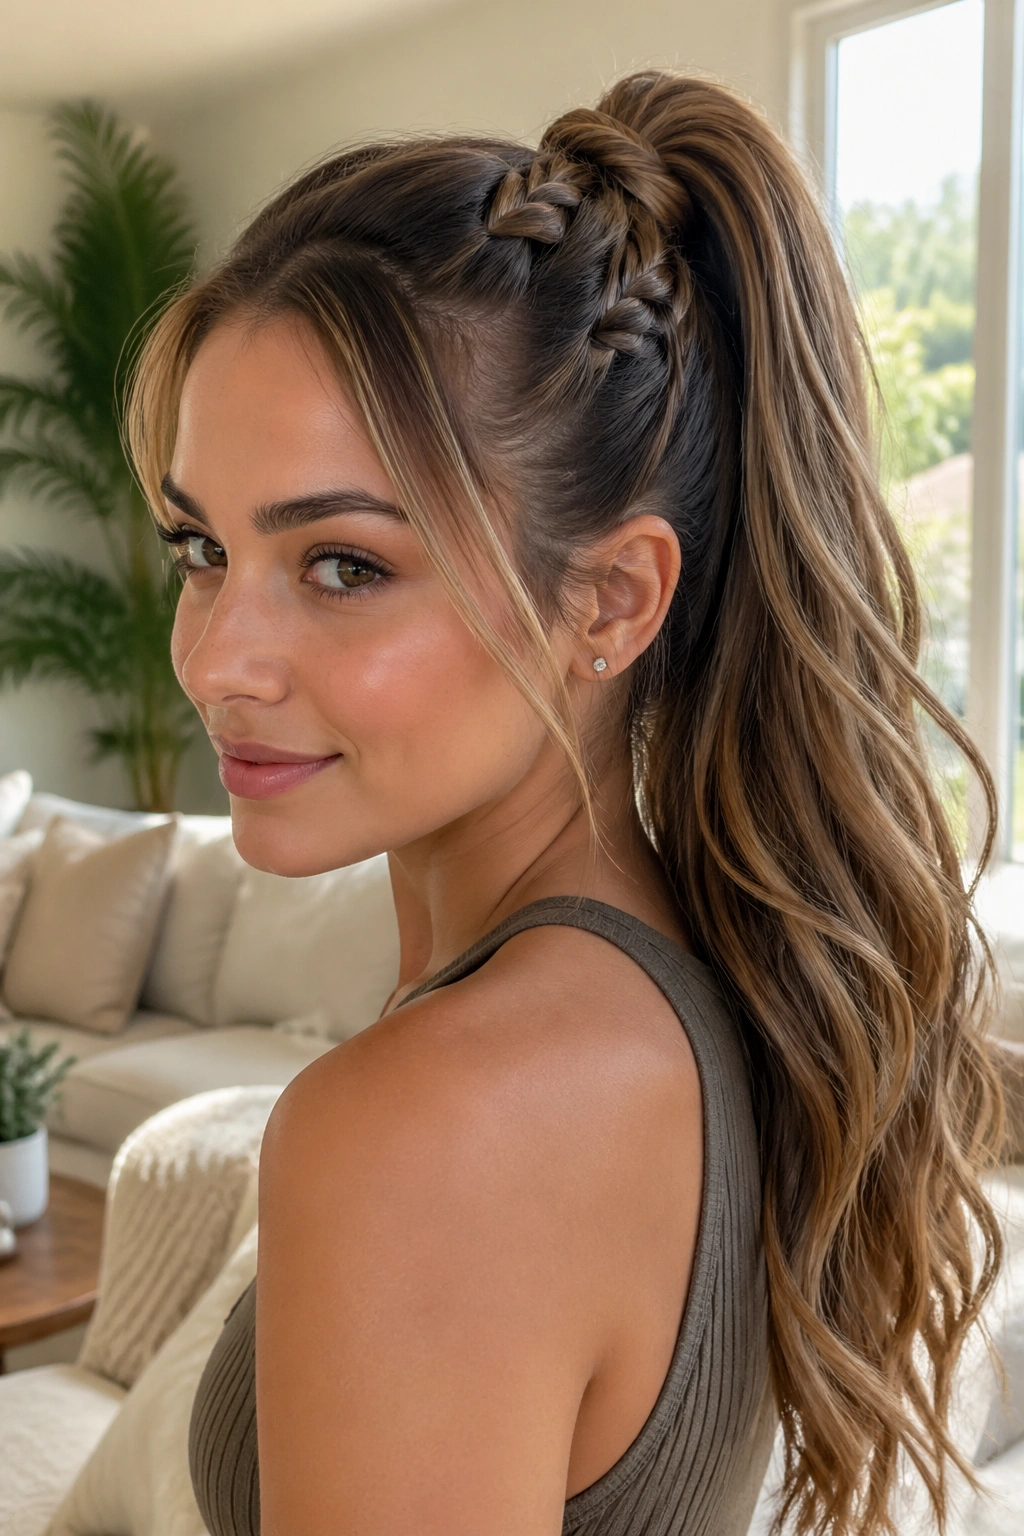
A high placement does a lot of the work for you. It lifts the crown, keeps the layer ends off the shoulders, and makes the butterfly sections look fuller because the hair falls downward instead of spreading flat across the back. On long layers, that shape is money.
Why it flatters long layers
The high tie point helps the shorter pieces around the face blend into the braid instead of sticking out near the nape. That matters more than people realize. When the ponytail sits too low, long layers often collapse into a loose tail with a few stubborn ends poking out at odd angles. High and slightly back from the hairline, the whole style feels cleaner.
Best for: oval faces, strong cheekbones, and anyone who wants a little extra height at the crown.
Use this setup: a tail comb, a soft bristle brush, one clear elastic, and a light mist of texturizing spray at the roots.
Watch for: if your hair is very silky, the first elastic can slip. Wrap it twice, then pin the base with a bobby pin tucked under the ponytail.
A tiny detail makes a big difference here. Leave the first face-framing pieces out before you tie everything up, then pull them back in after the braid is set. That keeps the front soft instead of helmet-straight. High ponytails can look a little severe if you’re too neat about the hairline. They don’t need that energy.
Pro tip: keep the butterfly “wings” widest in the middle third of the braid. That’s where the eye goes first, and it gives long layers the most movement.
2. Low Butterfly Braid Ponytail with a Clean Center Part
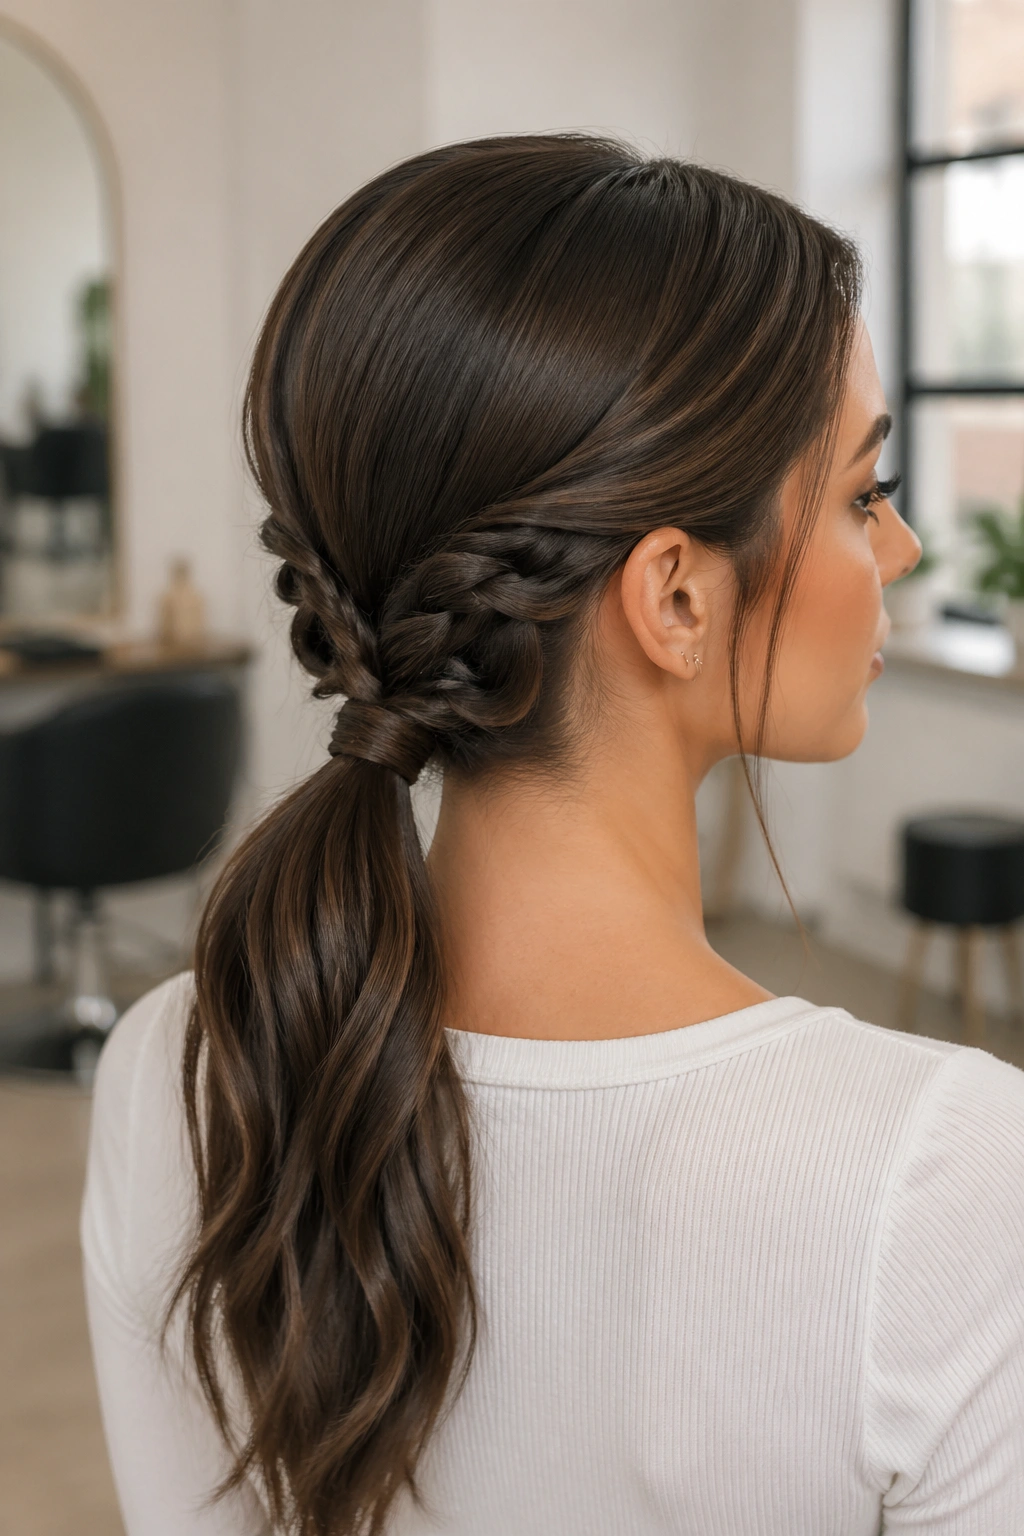
A low ponytail is the version that looks the most polished, and it is also the easiest to wear for a full day. The center part gives the style symmetry, which is helpful when your layers are different lengths on each side. Everything gets pulled into the same direction.
A low butterfly braid ponytail sits close to the nape, so the shorter pieces don’t have to travel far before they’re secured. That means less popping out, less frizz around the crown, and fewer weird little flips behind the ears. It’s calm hair. I love calm hair.
The finish works best when the top is brushed flat first, then softly loosened after the braid is secured. Don’t chase perfection in the part line. A clean part is enough; a razor-straight one can make the whole thing feel too sharp if your layers are already soft and airy.
One thing people miss: the low placement makes the ponytail look longer. It sounds backwards, but it works. You’re letting the length hang from a lower anchor point, which creates the illusion of even more hair.
If you want this style to hold, use a tiny bit of lightweight gel or styling cream on the temples. Not much. Just enough to stop flyaways from lifting before lunch.
3. Side-Swept Butterfly Braid Ponytail for Curtain Bangs
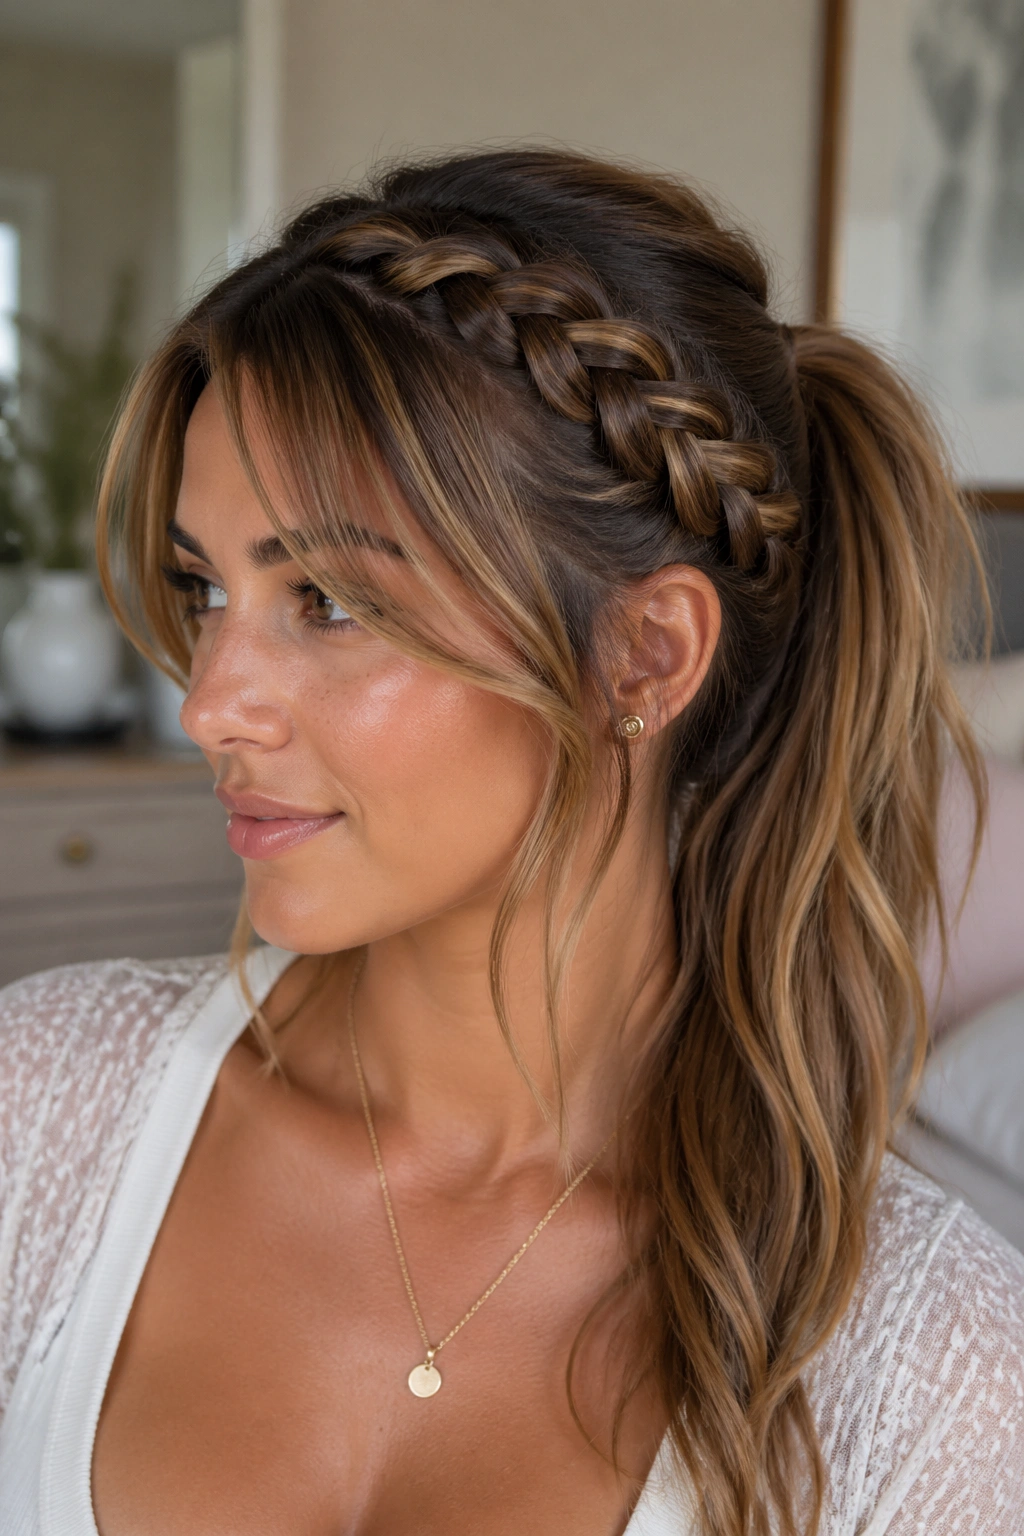
Got curtain bangs or side layers that keep falling into your eyes? This is the one. A side-swept butterfly braid ponytail gives those pieces a place to blend instead of fighting against them, and the result feels softer than a strict middle-part version.
How to keep the sweep soft
Start the part a little off-center, then guide the heavier side across the crown at a shallow angle. The braid doesn’t need to sit directly on top of the head. In fact, it looks better when it starts just above the eyebrow arch and curves toward the back ear. That angle lets the layers follow the movement instead of breaking away from it.
A side-swept braid is especially good if the front of your haircut is the prettiest part. Some layer cuts need a little room to show off the curve around the cheekbones. This style gives them that space.
- Keep the braid tension light at the front and firmer near the ponytail base.
- Leave one small piece near the temple loose until the end, then tuck it in if needed.
- Pin the underside of the braid with one hidden bobby pin if the side pieces slip.
- Finish with a mist of flexible-hold spray, not a hard lacquer shell.
Best for: curtain bangs, long side layers, and hair that parts itself unevenly no matter what you do.
Watch for: if the sweep is too low, it can drag the face down. Keep it lifted enough that the braid still has shape.
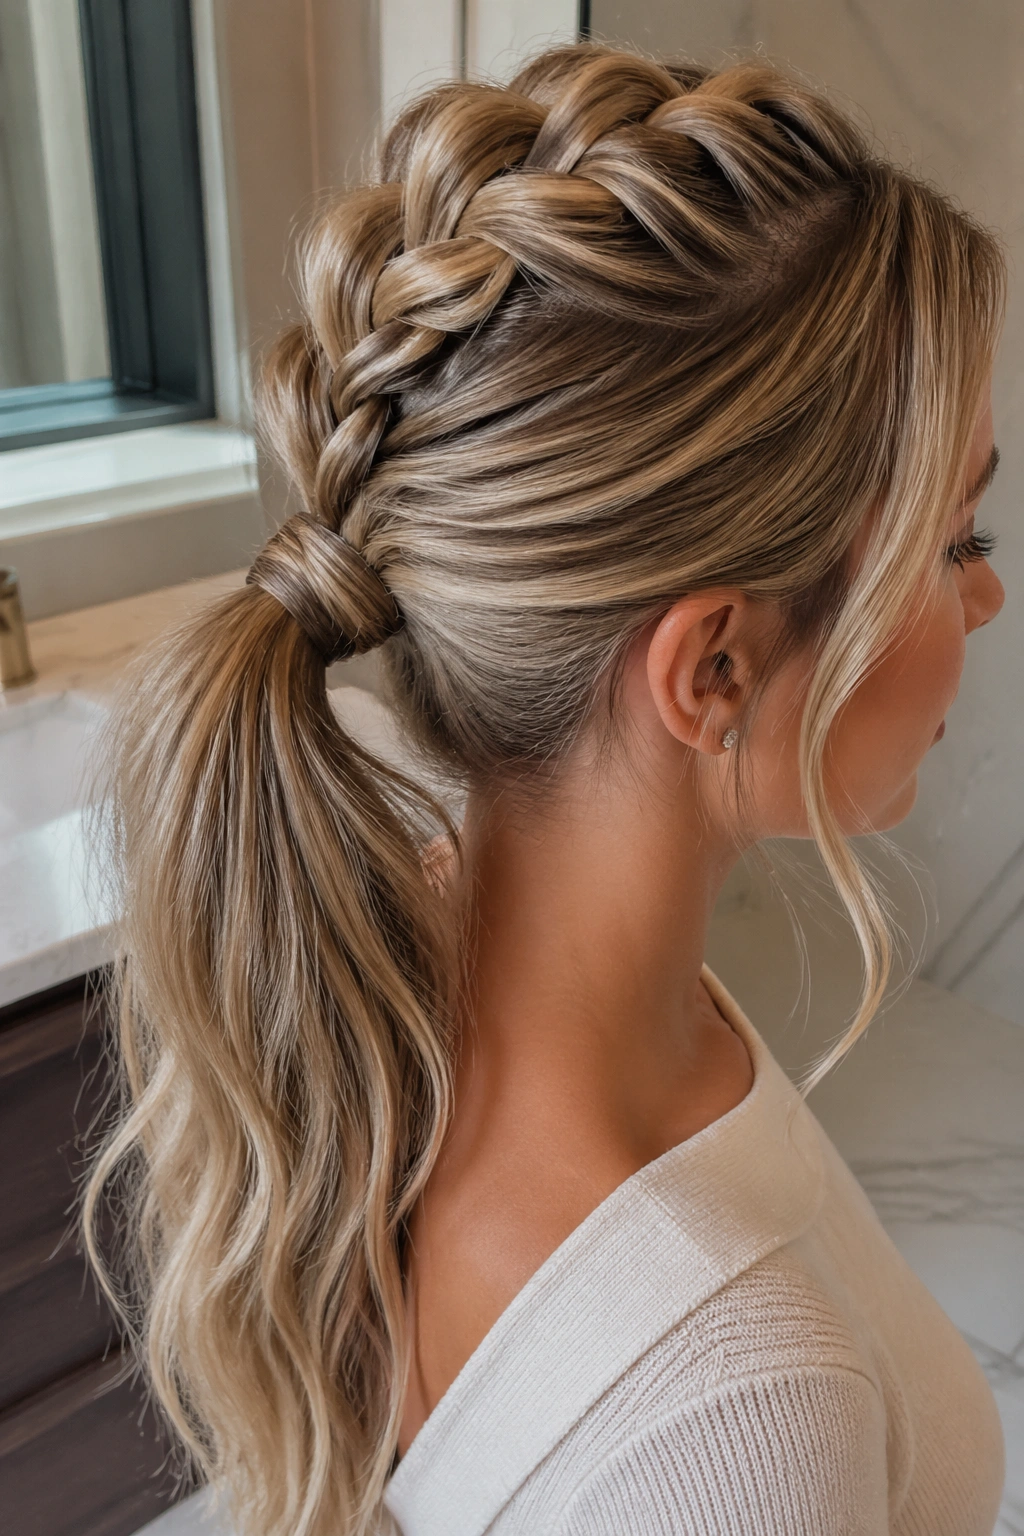
4. Bubble-Stack Butterfly Braid Ponytail for Heavy Layers
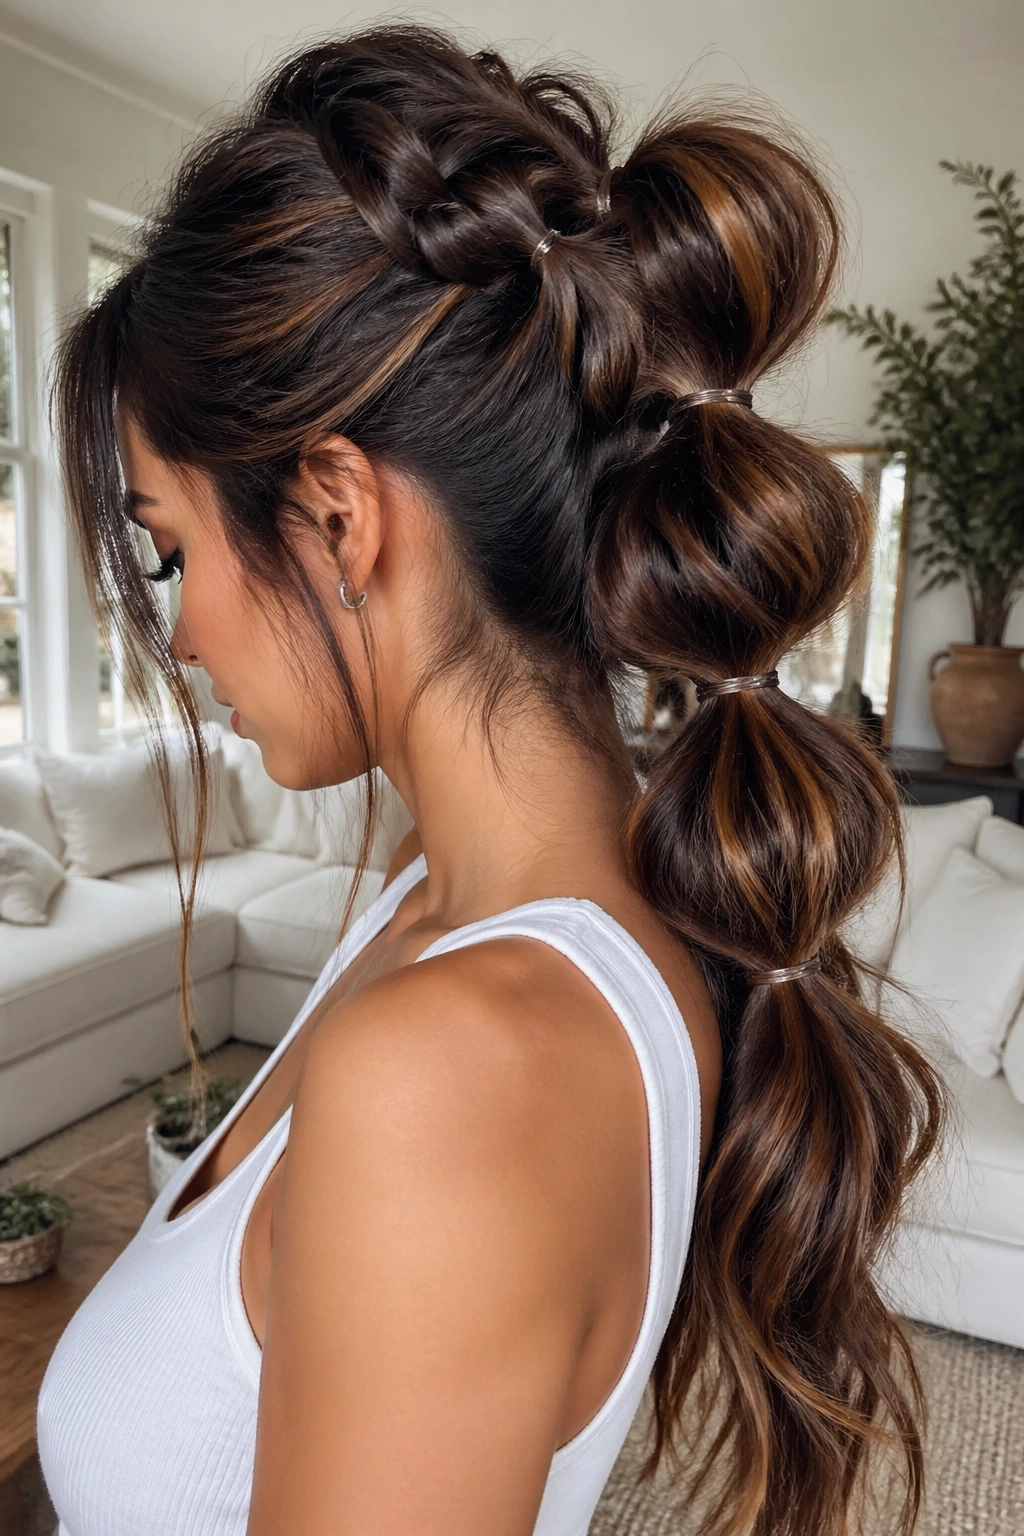
If your hair is thick and your layers have a mind of their own, bubble stacking makes life easier. The little elastic sections act like checkpoints, so the hair doesn’t slide into one heavy block by the end of the day.
The style reads playful, but the structure is doing the real work. Each bubble gives the pulled-apart braid more grip, and the layers tuck into the spaces between the elastics instead of flaring out around them. That’s why it works so well on long, layered hair. It breaks up the weight.
What the bubbles do for layered hair
A plain braid can look long and flat on dense hair. Bubble sections give it shape from root to tail. They also hide the fact that some layers are shorter than others, because the eye reads the repeated sections before it notices individual ends.
I’d reach for this one when hair feels too heavy for a soft romantic braid but too textured for a sleek finish. It lives somewhere in the middle, and that middle is useful.
- Space clear elastics about 2 to 3 inches apart.
- Tug each section outward after tying it so the bubble looks round, not flat.
- Use second-day hair if you can; it gives the bubbles more hold.
- Skip heavy oils near the root, or the bubbles lose shape fast.
A small warning: if every bubble is puffed out the same amount, it can look stiff. Vary the size a little. That small unevenness makes the style look worn, not manufactured.
5. Half-Up Butterfly Braid Ponytail for Face-Framing Pieces
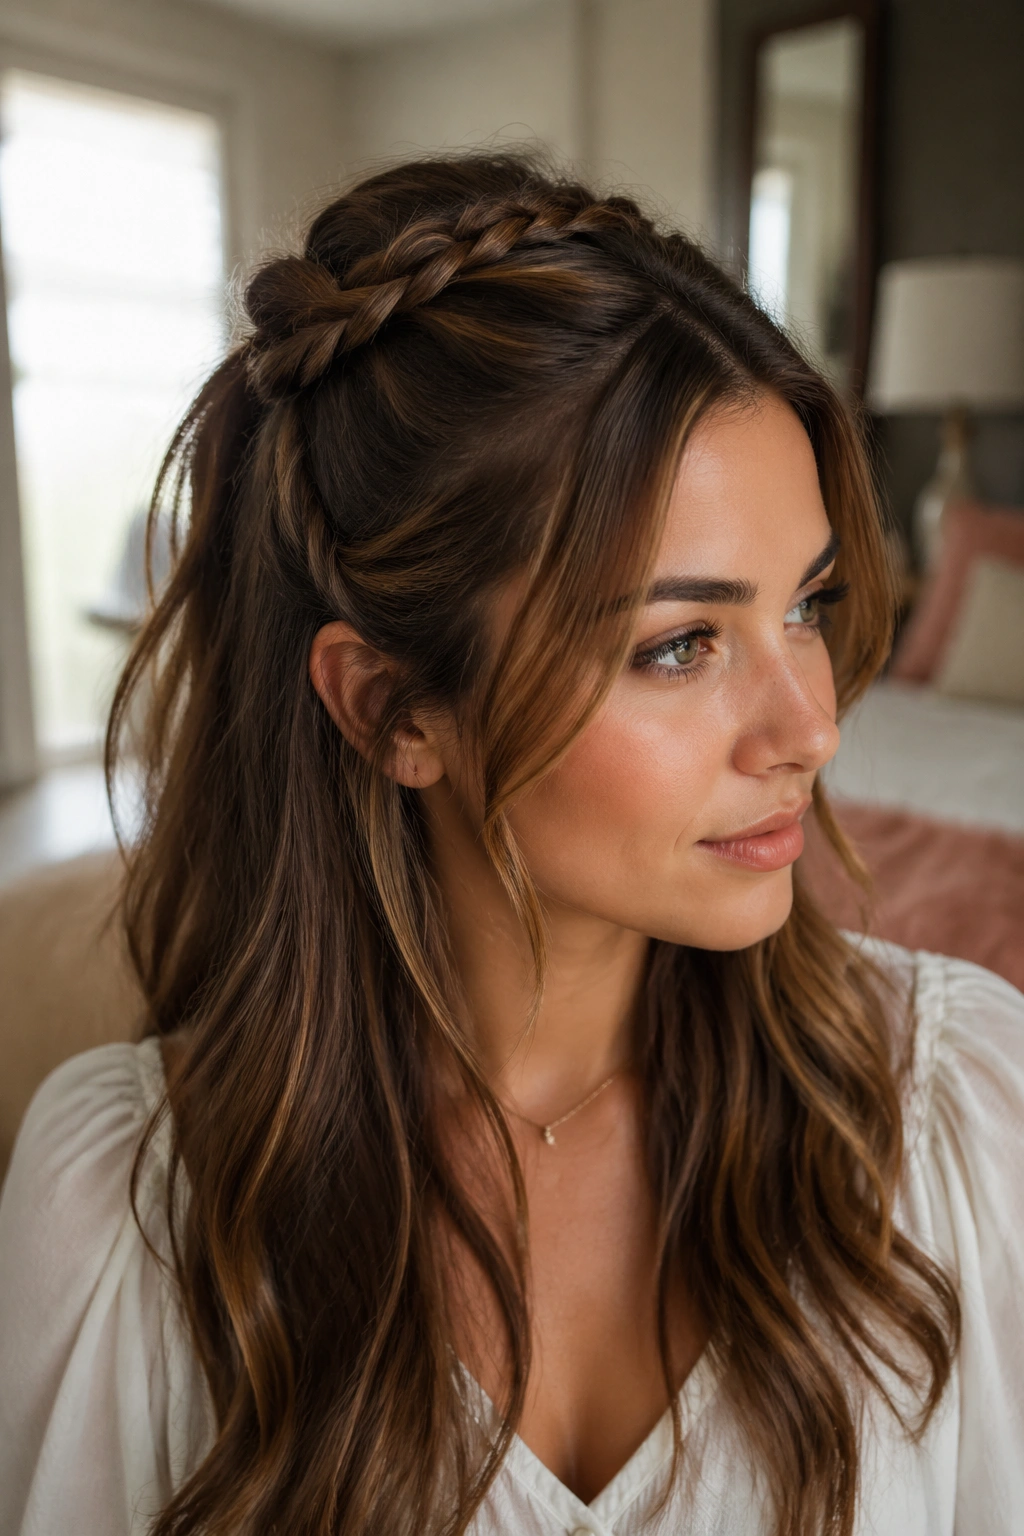
Half-up is the calmest version of this style. You keep the length down, which is useful when your layers are cut through the mid-lengths and you don’t want them all trapped at the back. The top section gets the braided treatment, and the rest of the hair stays loose and moving.
That split is flattering on long layers because it lets the haircut show from both angles. The crown gets lift. The lower length keeps its swing. And those face-framing pieces that usually fall flat in a full ponytail get to stay soft around the cheeks.
This is the version I like when the day needs to look put together but not “I spent an hour on my hair.” It’s the sweet spot. A small butterfly braid across the top, then a loose tie at the back, and suddenly the whole style feels more deliberate.
If your shortest layers end around the jaw or cheekbone, this is especially useful. You’re not forcing those pieces into a ponytail that’s too tight for them. You’re giving them a supporting role instead of making them do all the work.
A few curls through the loose length help, but they’re not mandatory. What matters more is the top section: keep it smooth at the crown and soft through the braid so the shape doesn’t compete with the layers underneath.
6. Wrapped-Base Butterfly Braid Ponytail with Hidden Pins
A plain wrapped ponytail always looks fine. A wrapped-base butterfly braid ponytail looks finished. The difference is in the base — one hides the elastic and gives the style a more deliberate shape, the other leaves the tie exposed and can feel a little unfinished on layered hair.
Why hidden anchors matter
Long layers love to escape at the base of a ponytail. A wrap gives you another layer of control. You can also pin the wrap strand underneath the ponytail, which keeps the whole style from loosening as the day goes on. That tiny pinning trick matters when the hair is slippery.
This version works well for workdays, dinners, and anything that asks for a clean silhouette. It’s not fussy, but it does look cared for. That’s the part I like.
A few specifics help:
- Take a thin strand from beneath the ponytail, about 1/2 inch wide.
- Wrap it around the elastic two times, then pin it underneath with two crossed bobby pins.
- Use matte pins for thick hair and grip pins for fine hair.
- Keep the butterfly sections slightly narrower than you would on a loose style, or the base gets bulky.
Unlike a fluffy casual braid, this style depends on a neat anchor. If the base is messy, the wrap draws attention to the mess. If the base is clean, the whole ponytail looks more expensive than it really is. Funny how that works.
7. Double Butterfly Braid Ponytails with a Split Crown
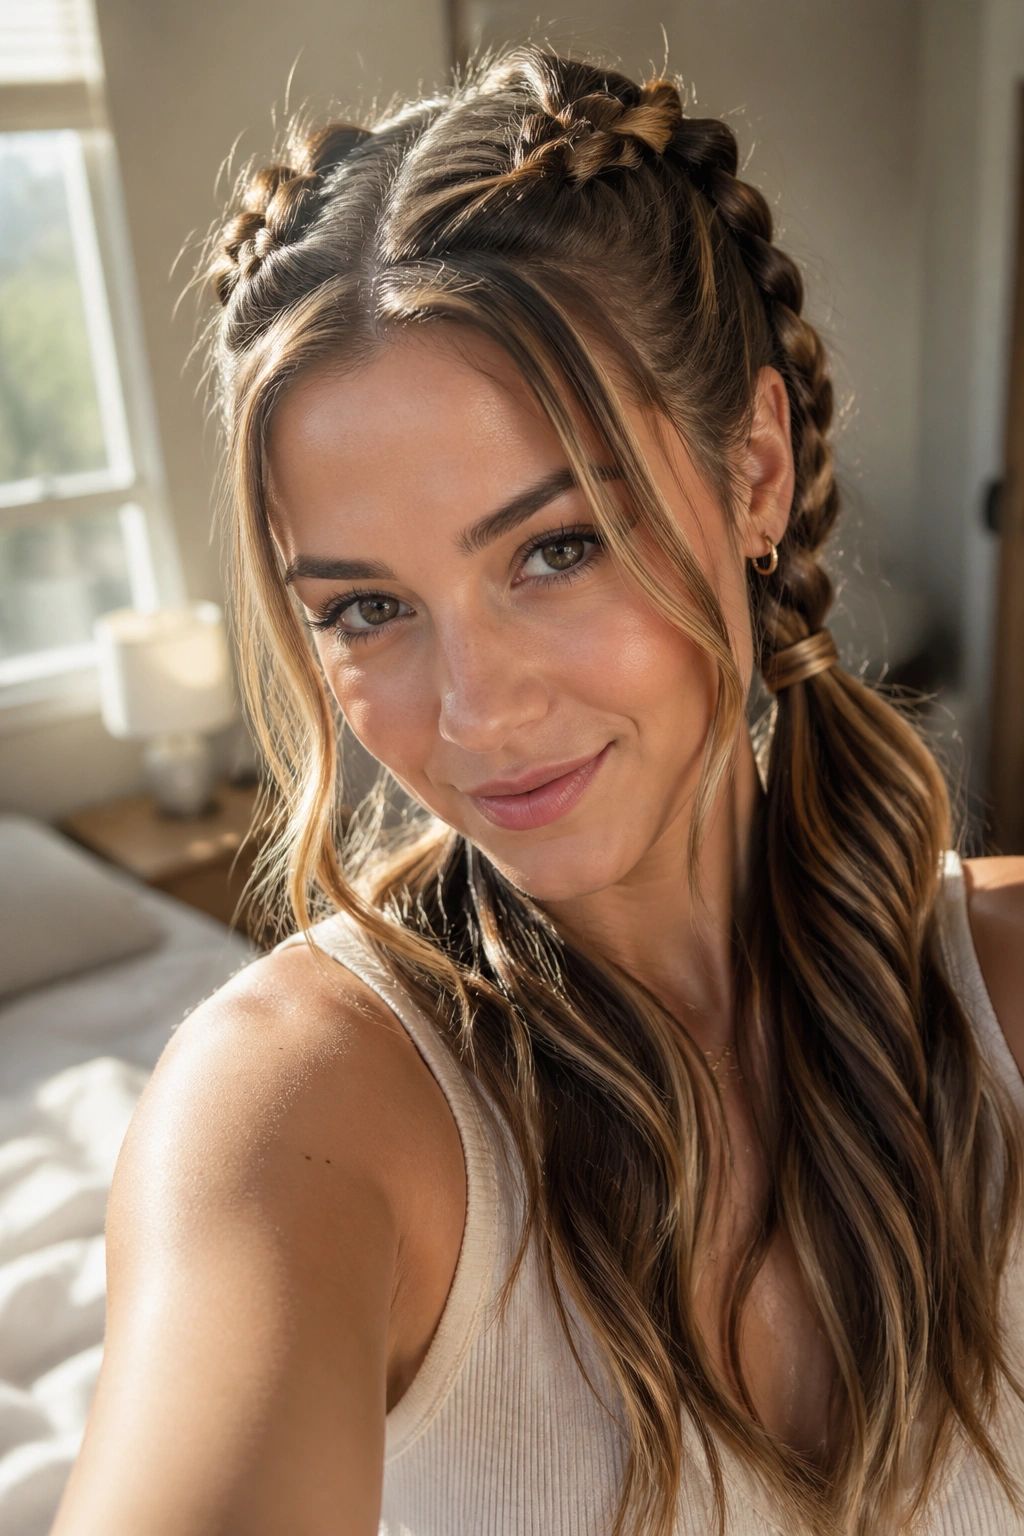
Two braids can be easier than one, especially if your hair is dense and your layers don’t sit evenly on both sides. A split crown gives each side its own lane, which keeps the front from ballooning or slipping.
This style has a built-in balance that a single ponytail sometimes lacks. The left and right sides get equal tension, so the layers near the temples don’t end up fighting for space. For long hair, that means less sag at the back and less puff at the sides.
It also looks unexpectedly good with thick, layered cuts. The two braids give the hair a little rhythm. The eye moves across the part, down the braid on one side, then over to the other, and the whole thing feels intentional instead of accidental.
You can join the two braids into one low ponytail at the back, or keep them separate if you want a more playful finish. I prefer the joined version. It looks cleaner and keeps the ends from tangling into each other.
Best for: very long hair, dense layers, and anyone who wants the style to last past a long day without constant fixing.
One caution: don’t place the split too far back. If the part starts near the crown, the braid loses the shape that makes it interesting in the first place.
8. Sleek Butterfly Braid Ponytail with a Glassy Finish
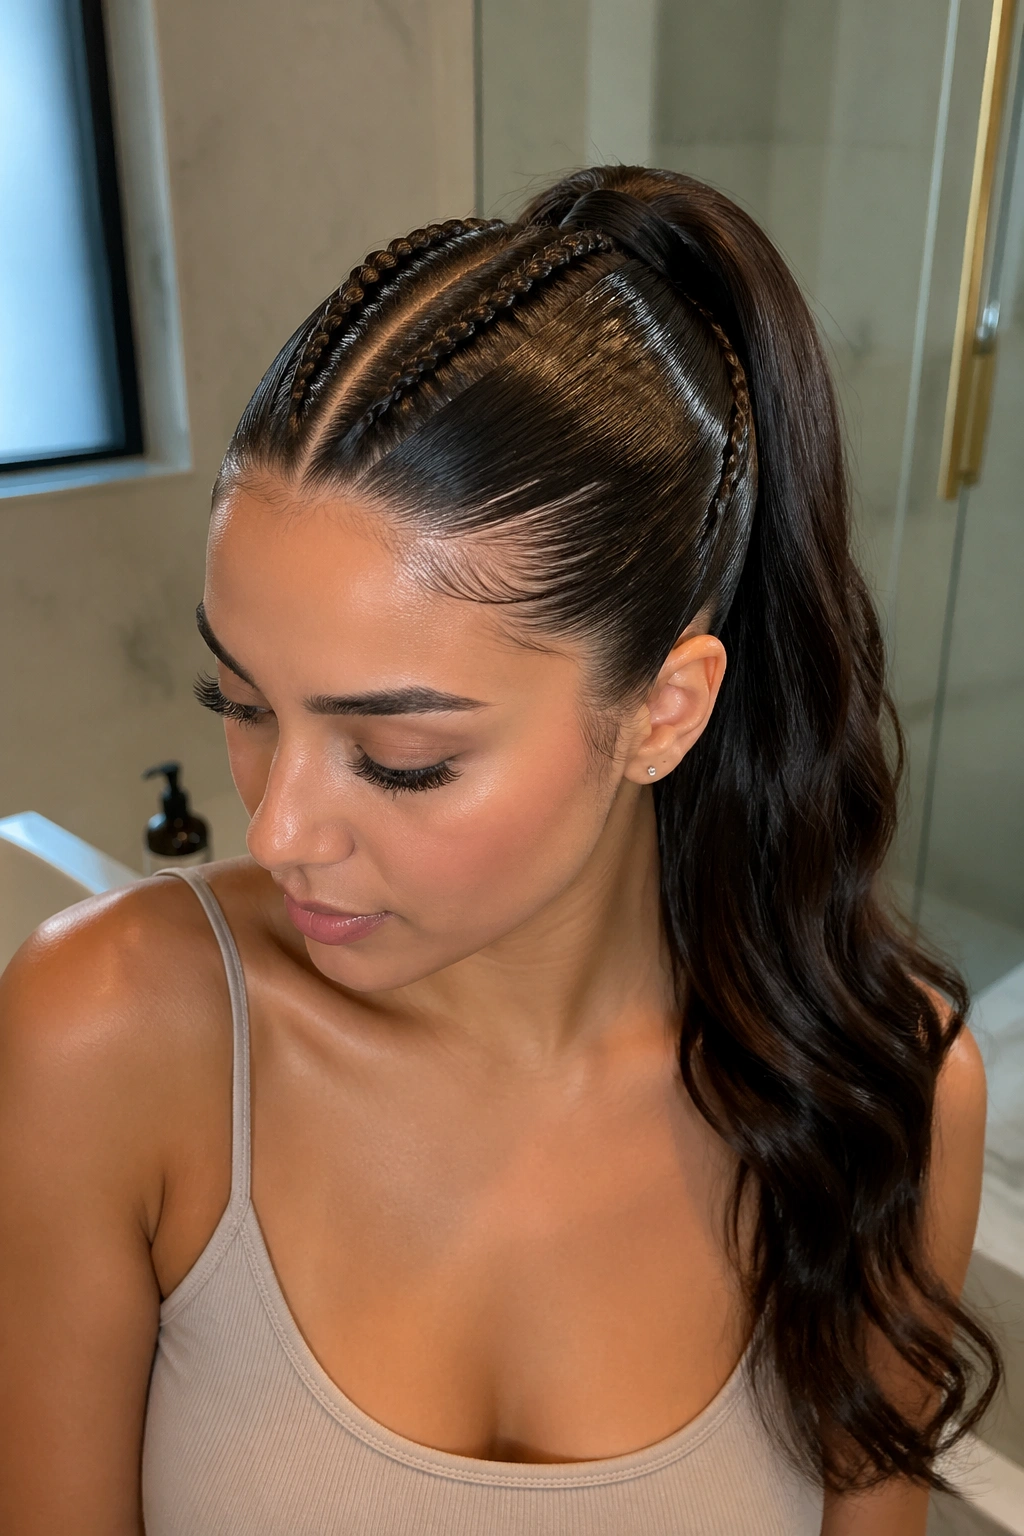
Can a butterfly braid look smooth and sharp? Yes, if you keep the surface controlled and save the texture for the braid panels, not the crown. That’s the trick. Sleek on top, soft in the middle, glossy through the tail.
The part that keeps it polished
Work a pea-sized amount of gel or cream along the hairline, then brush the surface flat with a boar bristle brush. After that, set the ponytail and braid it with firm tension. The braid can be puffed out later, but the base needs to be tight first. If you start loose, the whole style turns fuzzy by the time you leave the mirror.
This version suits straight hair especially well, though wavy hair can wear it too. The important part is the finish. Use a shine spray on the lengths, not the roots, or the crown can look greasy.
- Smooth the part with the tail of a comb.
- Keep the first 2 inches around the hairline flat.
- Pull the butterfly loops out only after the braid is fully secured.
- Press any baby hairs down with a tiny bit of gel on a fingertip, not a big glob.
A sleek butterfly braid ponytail works when you want the braid texture without the mess. It feels cleaner, more precise, and a little more grown-up. Still soft. Just not shaggy.
9. Messy Butterfly Braid Ponytail with Dry Texture
If your hair frizzes the second humidity shows up, stop trying to make it glassy. That battle gets old fast. A messy butterfly braid ponytail looks better when the texture is part of the plan.
This style works especially well on second-day hair, because the strands already have a little grit. The braid holds faster, the loops stay puffed, and the ponytail doesn’t slide around while you’re shaping it. Clean hair can do it, too, but you’ll need a touch more dry shampoo at the crown.
The point here is controlled looseness. Not chaos. A little extra lift at the roots, a few wisps around the temples, and a braid that’s pulled apart enough to show the sections without collapsing. That’s the sweet spot.
- Spray dry shampoo at the roots and let it sit for 30 seconds before brushing.
- Tease the crown once or twice with a fine comb, not ten times.
- Leave the ends slightly wavy instead of curling them rigidly.
- Don’t over-pancake the braid; it should look airy, not shredded.
This style is best when you want hair that looks touched, not overworked. It’s one of the few cases where a bit of frizz doesn’t ruin the finish — it actually helps. The braid looks lived in, and that suits long layers well.
10. Curled-End Butterfly Braid Ponytail with a Satin Ribbon
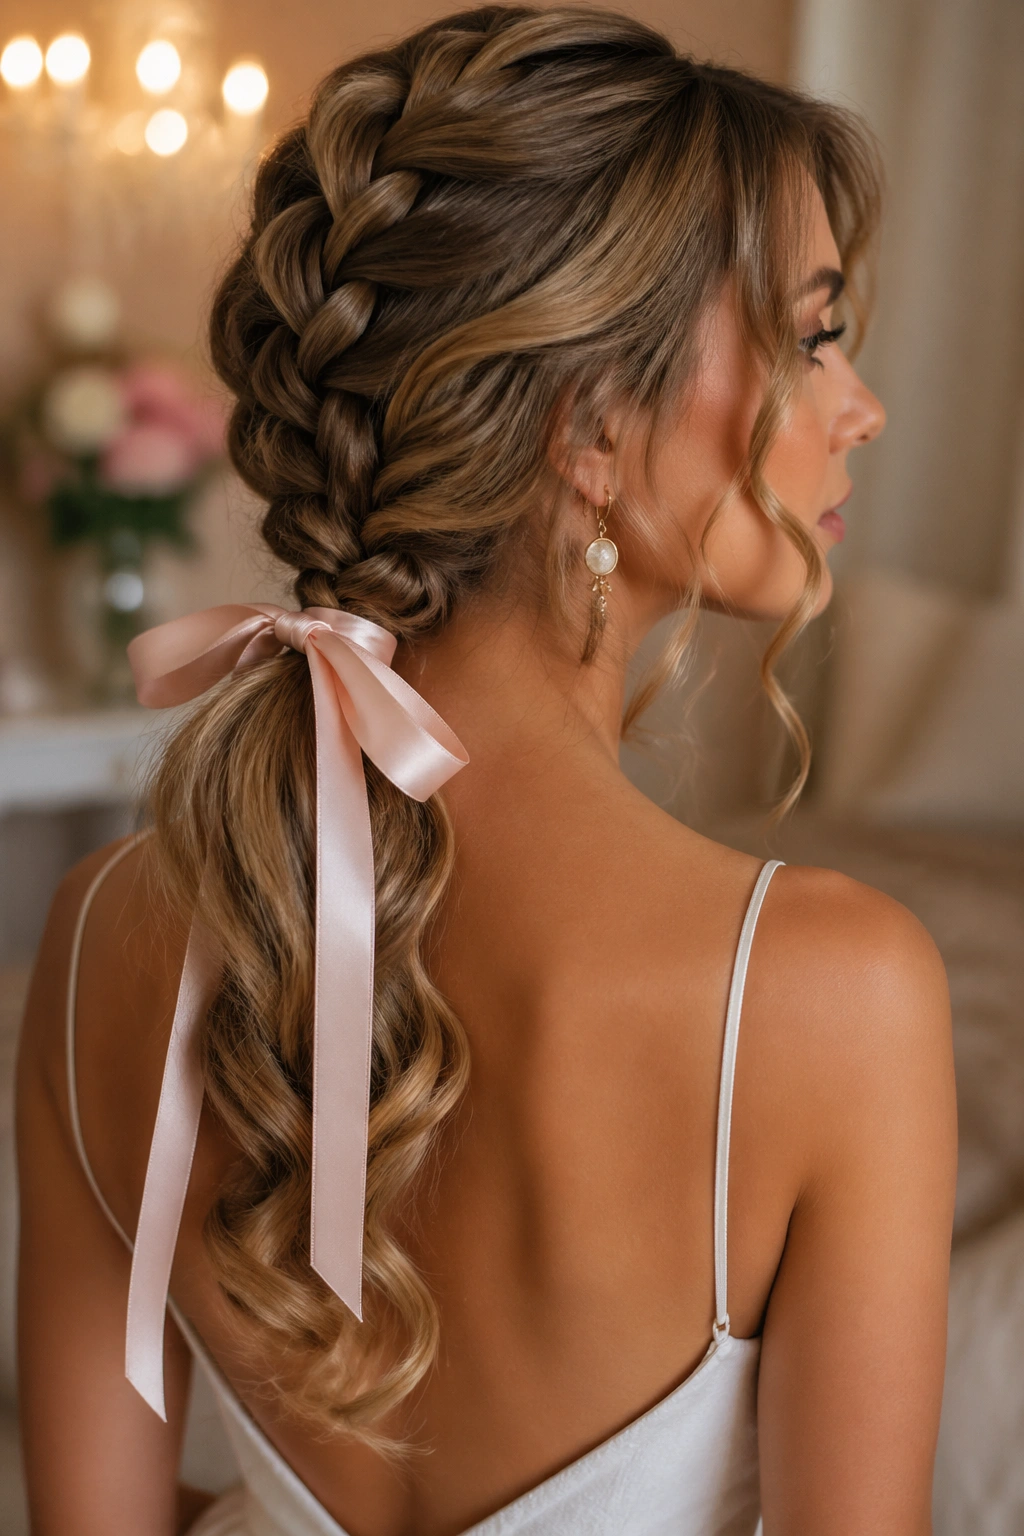
Curled ends make layered hair look deliberate. Without them, the ends can sometimes feel a little blunt against the softness of the braid. A curling iron fixes that fast. A ribbon finishes the whole thing with one small move that changes the tone immediately.
I like this style when the hair needs to feel a little more romantic than sporty. Curl the lower half of the ponytail with a 1-inch or 1 1/4-inch iron, focusing more on the ends than the roots. You do not need perfect spirals. You want bend and movement, not ringlets that bounce like corkscrews.
A satin ribbon tied under the elastic keeps the braid base neat while softening the look. Black, cream, deep burgundy, or a muted jewel tone all work well. Keep the tails of the ribbon long enough to hang 6 to 8 inches so they move with the ponytail instead of disappearing into it.
This is the style that makes long layers look expensive without trying too hard. The braid gives structure. The curls give softness. The ribbon makes it feel finished.
One little thing: if the ribbon is too wide, it can swallow the braid base. Stick with a narrower ribbon unless the ponytail itself is thick enough to support it.
11. Crown-Braided Butterfly Ponytail for Windy Days
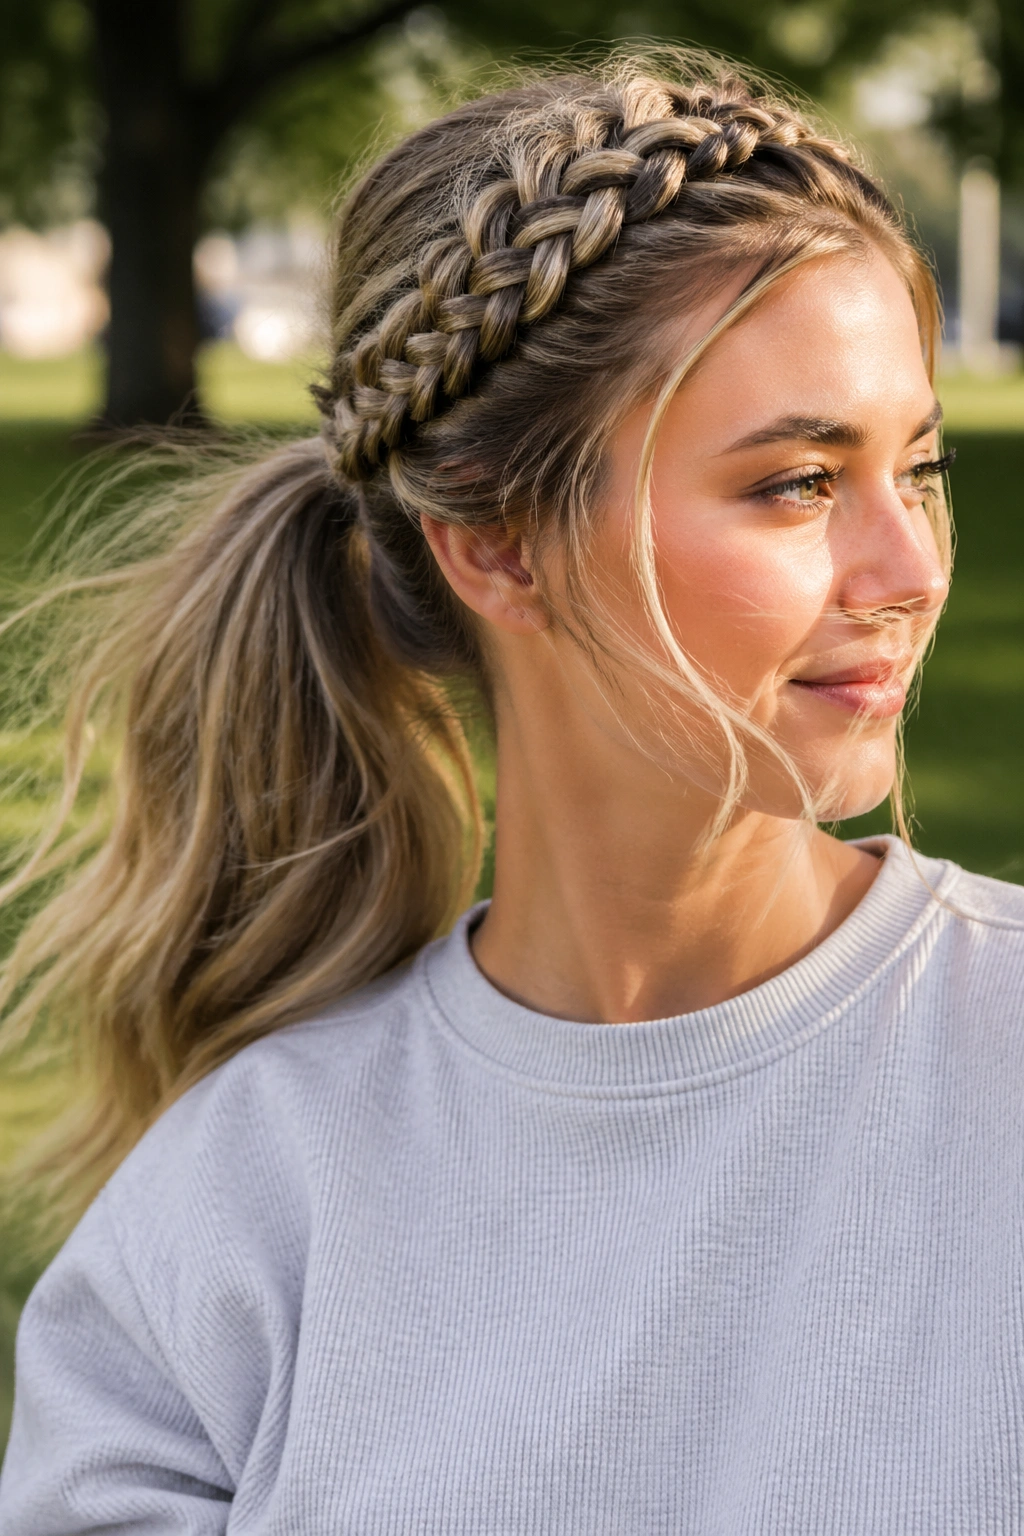
A crown braid solves the problem of loose front pieces better than almost anything else. It keeps the hairline controlled, lifts the top, and gives the butterfly sections a strong anchor before the ponytail even begins.
Why the crown matters
Long layers around the temple and cheek can be stubborn. They slip. They puff. They escape the second you turn your head. A crown braid catches those pieces early and feeds them into the style before they get a chance to separate. That makes the ponytail feel calmer from the start.
This is a strong choice if your layers are cut high near the face or if your hair tends to expand around the crown. The braid follows the shape of the head, then drops into a ponytail at the back. It has a little more shape than a simple elastic, which is why it holds so nicely.
- Start the braid at the front hairline and follow the curve of the head.
- Keep the braid close to the scalp until you reach the back.
- Use a pair of crossed bobby pins behind each ear if the braid slips.
- Finish the ponytail low or mid-height; high placement can make the crown feel too busy.
I’d skip this one if you want something super fast. It takes a few extra minutes. Still, the payoff is real, and the shape is hard to beat when the weather is fighting your style.
12. Fishtail-Blend Butterfly Braid Ponytail for Thick Hair
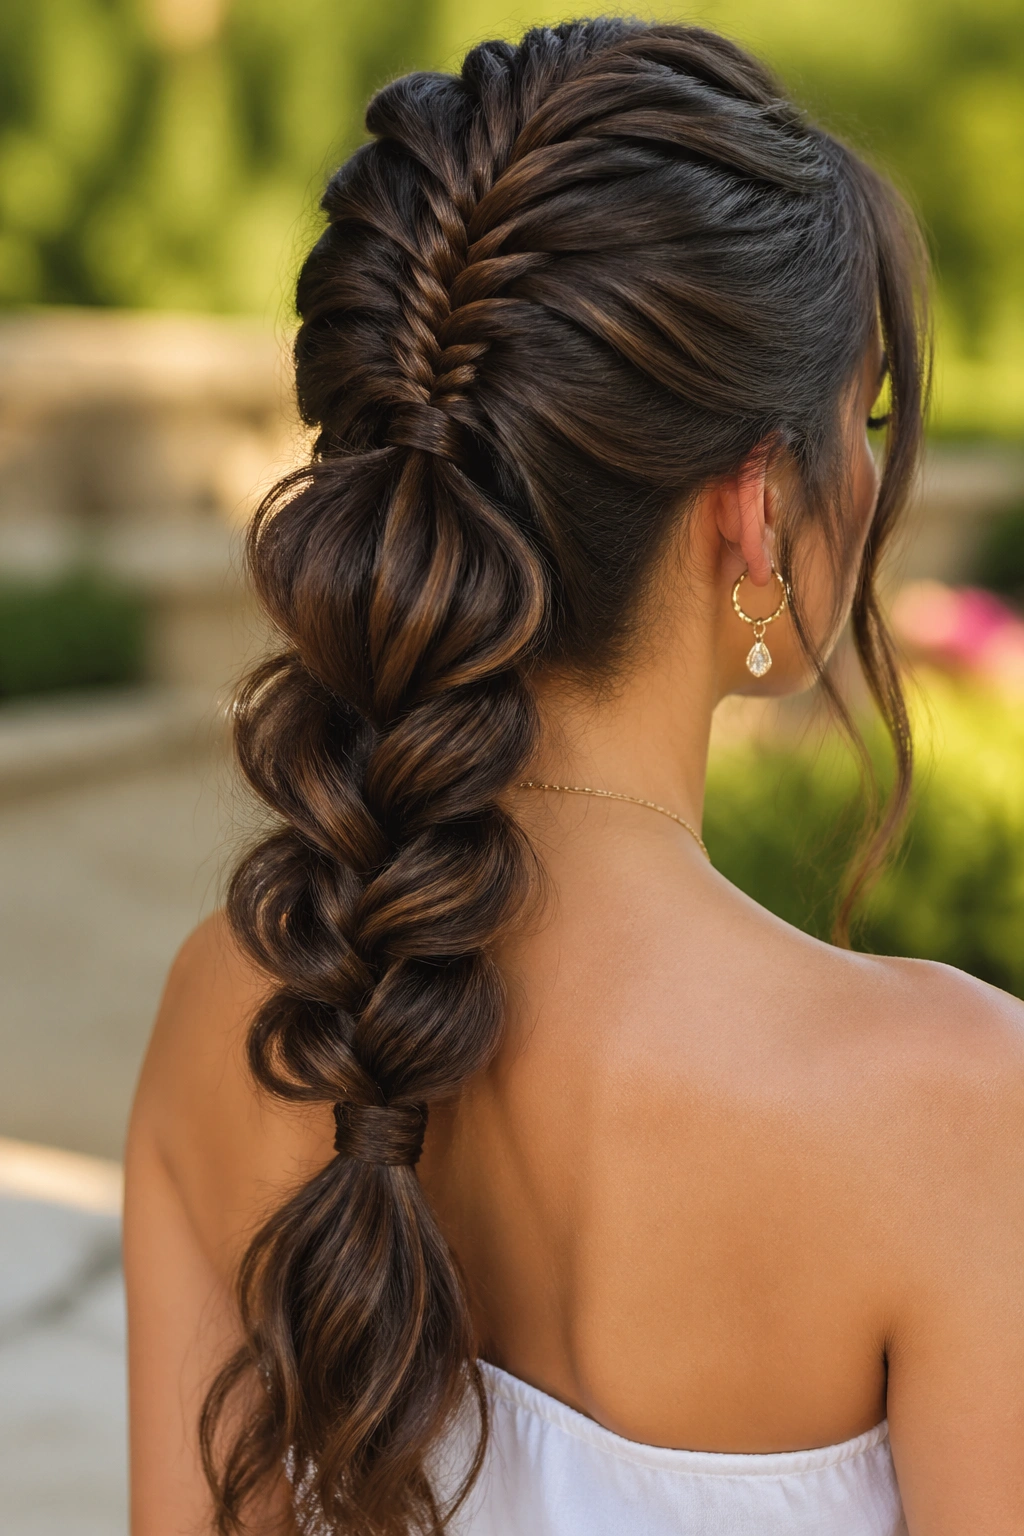
A fishtail base gives butterfly sections a sharper look. The texture is finer, more detailed, and a little more interesting than a standard three-strand braid. On thick, layered hair, that extra detail helps the style look deliberate instead of bulky.
The braid itself doesn’t need to be perfect. That’s the nice part. Take small outer pieces, cross them over, and keep moving. Once the fishtail is secure, pull it apart gently so the woven pattern opens up. The butterfly effect shows up even more because the sections are already busy.
This version is especially good when your layers are heavy enough to collapse a softer braid. The fishtail weave grabs onto the strands and keeps the braid from slipping down the back of the head. It also looks a little sharper from the side, which is handy if you wear your hair over one shoulder.
A dry texture powder at the root can help if the hair feels too smooth. Not much. Just enough to keep the sections from sliding. Too much and the braid starts looking dusty, which nobody needs.
Best for: thick hair, long layers, and people who like a braid that has a bit more edge.
My take: if your hair is fine and slippery, this style can still work — but start with a light spray wax or texture mist. Otherwise the weave loosens before you’re halfway through.
13. Low Side Butterfly Braid Ponytail for Formal Wear
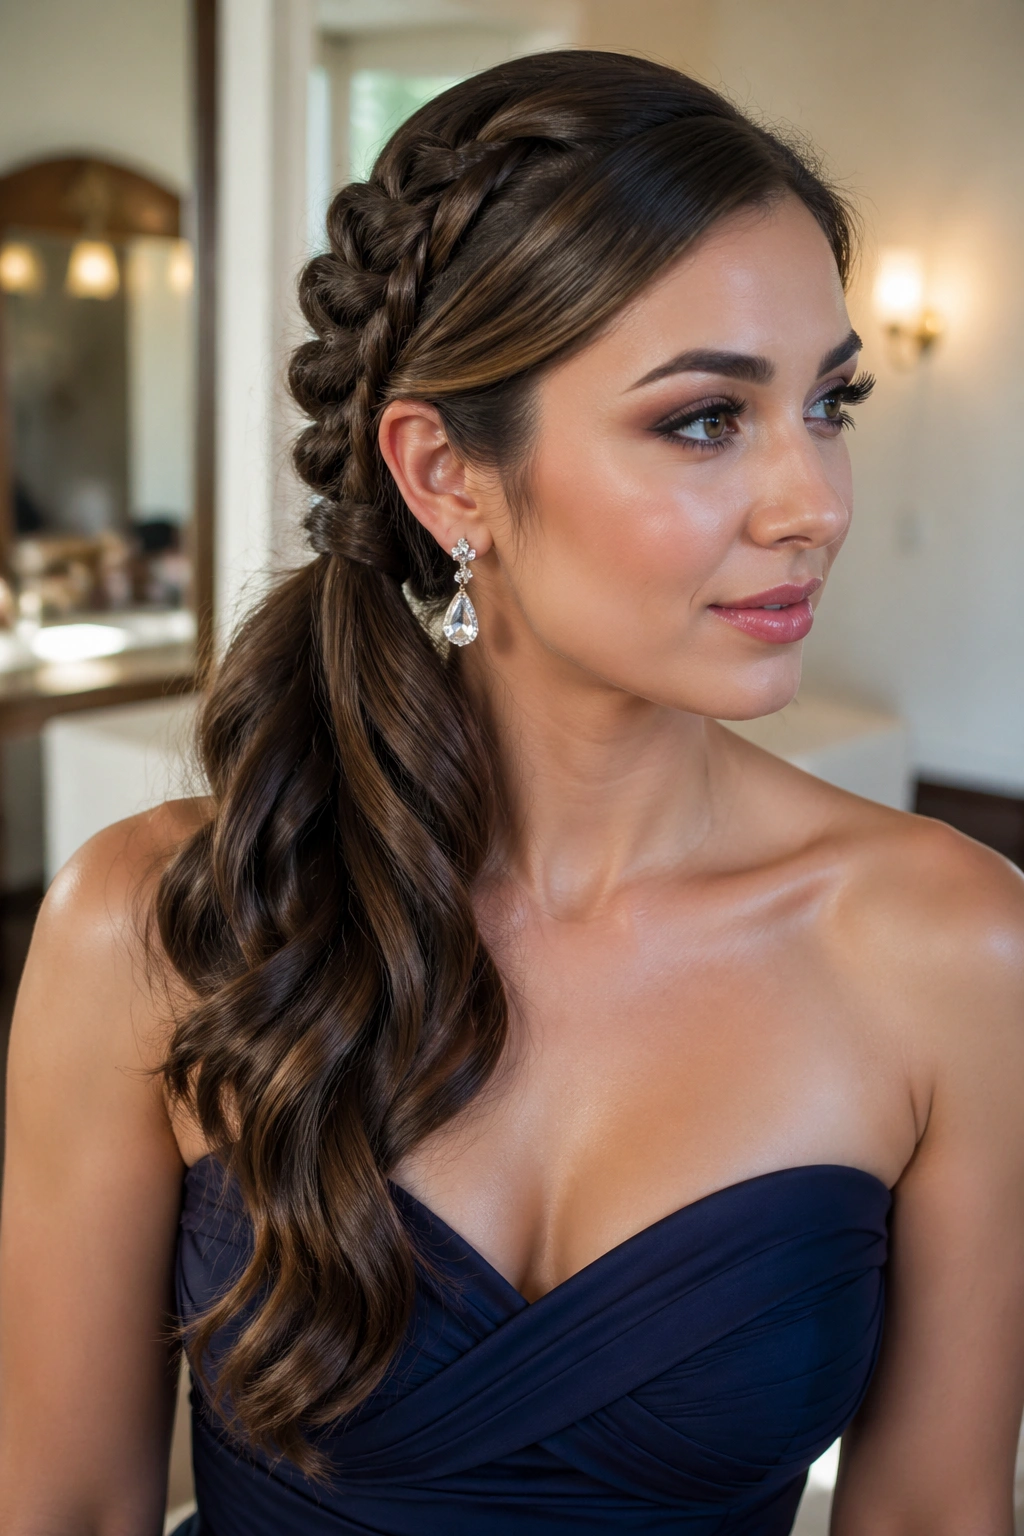
Why does a side ponytail feel dressier than a straight-back one? Because the asymmetry makes the face look softer and the neckline look more open. It also gives layered hair a place to fall naturally instead of forcing every strand into one flat lane.
How to keep it from collapsing
The side sweep needs support at the base. Use a strong elastic tucked just behind the ear on the heavier side, then secure the opposite side with a hidden pin if the braid starts to twist. If the ponytail sags, the whole style loses that graceful line.
This is a lovely pick for long layers that are cut through the front and mid-lengths. The side placement helps the shortest pieces blend into the braid instead of sticking out in the middle of the back. It also works well if you want one shoulder to stay clear for earrings, a collar, or a neckline that deserves a little space.
- Tuck one side behind the ear and keep the other side soft.
- Use two small elastics 1 to 2 inches apart if the braid needs more hold.
- Curl the tail slightly so it falls in one direction.
- Finish with a light mist of flexible-hold spray, not a heavy shell.
This style has a formal feel without looking stiff. That balance is hard to get, and it’s why I keep coming back to it.
14. Soft Romantic Butterfly Braid Ponytail for Everyday Wear
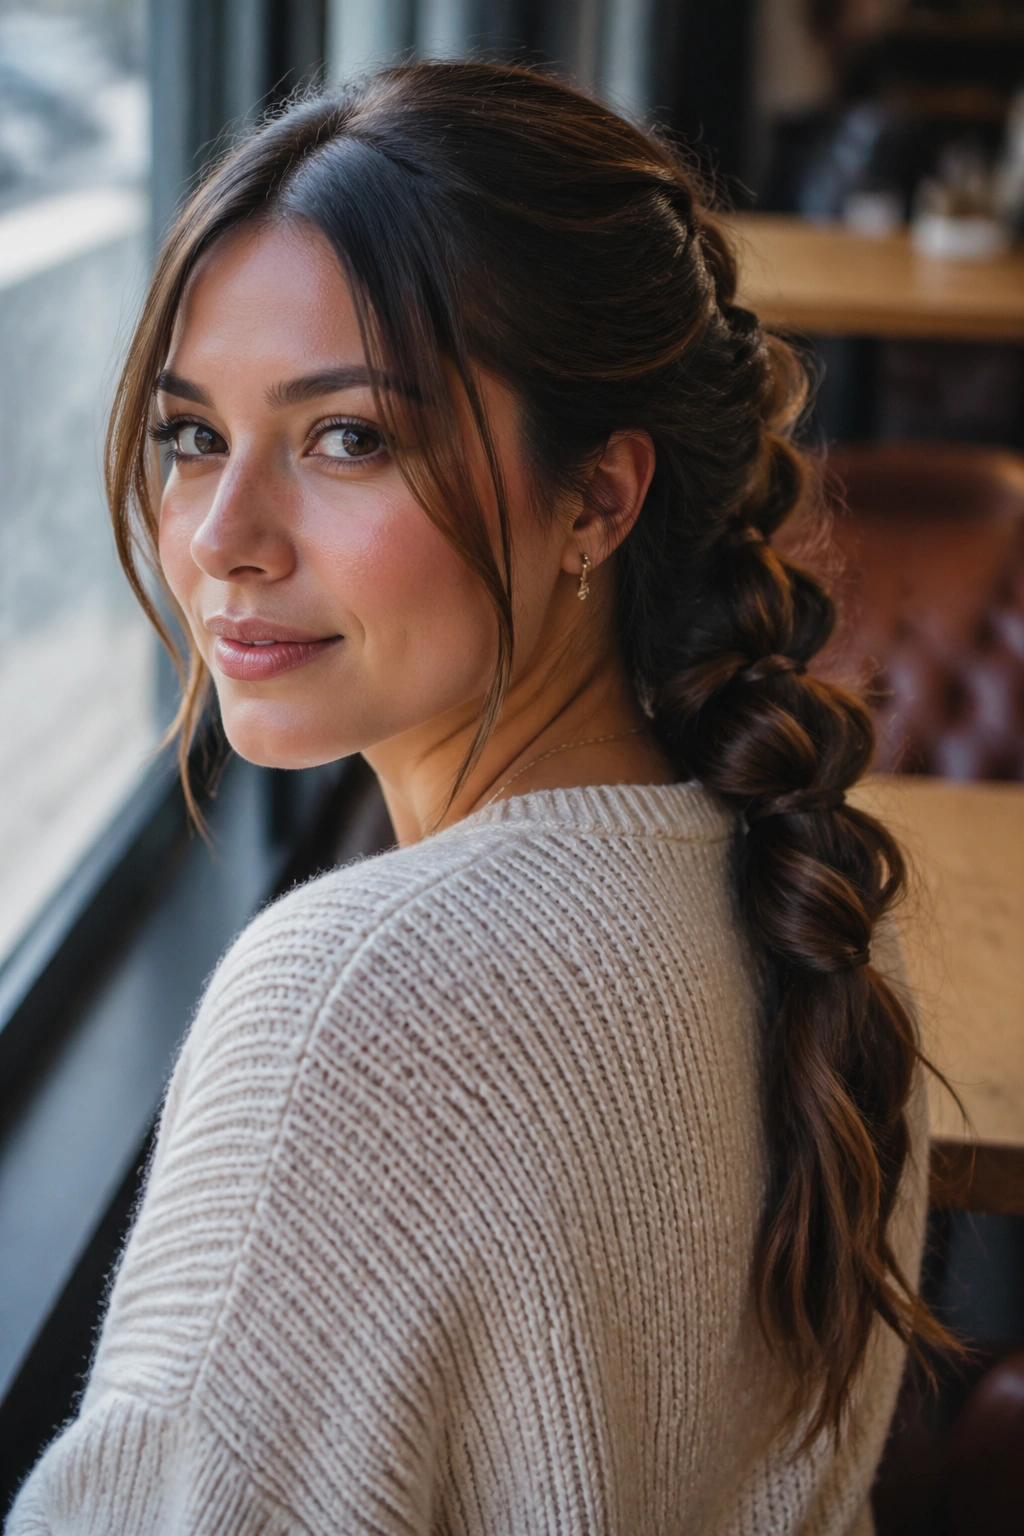
This is the version I like when hair needs to look pretty without acting precious. It’s loose, a little airy, and forgiving enough for real life — errands, school runs, dinner plans, whatever the day throws at you.
The braid starts softly, the butterfly sections are pulled out just enough to show shape, and the ponytail hangs with movement instead of sitting in one frozen line. Long layers look especially good here because the cut can breathe. You see the shape around the face, the sweep through the sides, and the softness at the ends all at once.
If you want this one to work, keep the details light. The crown should be smooth but not flattened. The braid should be secure but not cinched down like a knot. And the face-framing pieces should stay loose enough to move when you turn your head.
- Leave two thin front pieces out before you tie the ponytail.
- Pull the butterfly loops to about the size of a nickel, not a quarter.
- Secure the tail with a satin scrunchie if you want a softer finish.
- Let the ends stay slightly uneven; that’s part of the charm with long layers.
A quick final note: the prettiest butterfly braid ponytail is usually the one that leaves a little room for the haircut to show. If your layers are the reason you like your hair, don’t hide them under a tight finish. Let them do their job.