Cap day is not the moment for a hairstyle that only behaves in the mirror. The cap presses the crown, the tassel brushes the sides, and every little pin that felt invisible at home has a way of showing up in the photos.
That is why graduation braids make so much sense. Braids can sit low, stay neat, and still look like you meant every strand to be there, even after the cap comes off and the hugging starts.
The trick is thinking about the cap first. A braid that looks gorgeous from the front can still turn into a bulky bump under the mortarboard, and a style that stays flat at the top usually wins on stage, in group shots, and in the parking lot when everyone is fixing their hair in car mirrors.
Some of the looks below lean sleek. Some feel softer and more romantic. A few are protective styles that hold up well if your graduation morning is going to be long, noisy, and slightly chaotic, which, honestly, is most graduation mornings.
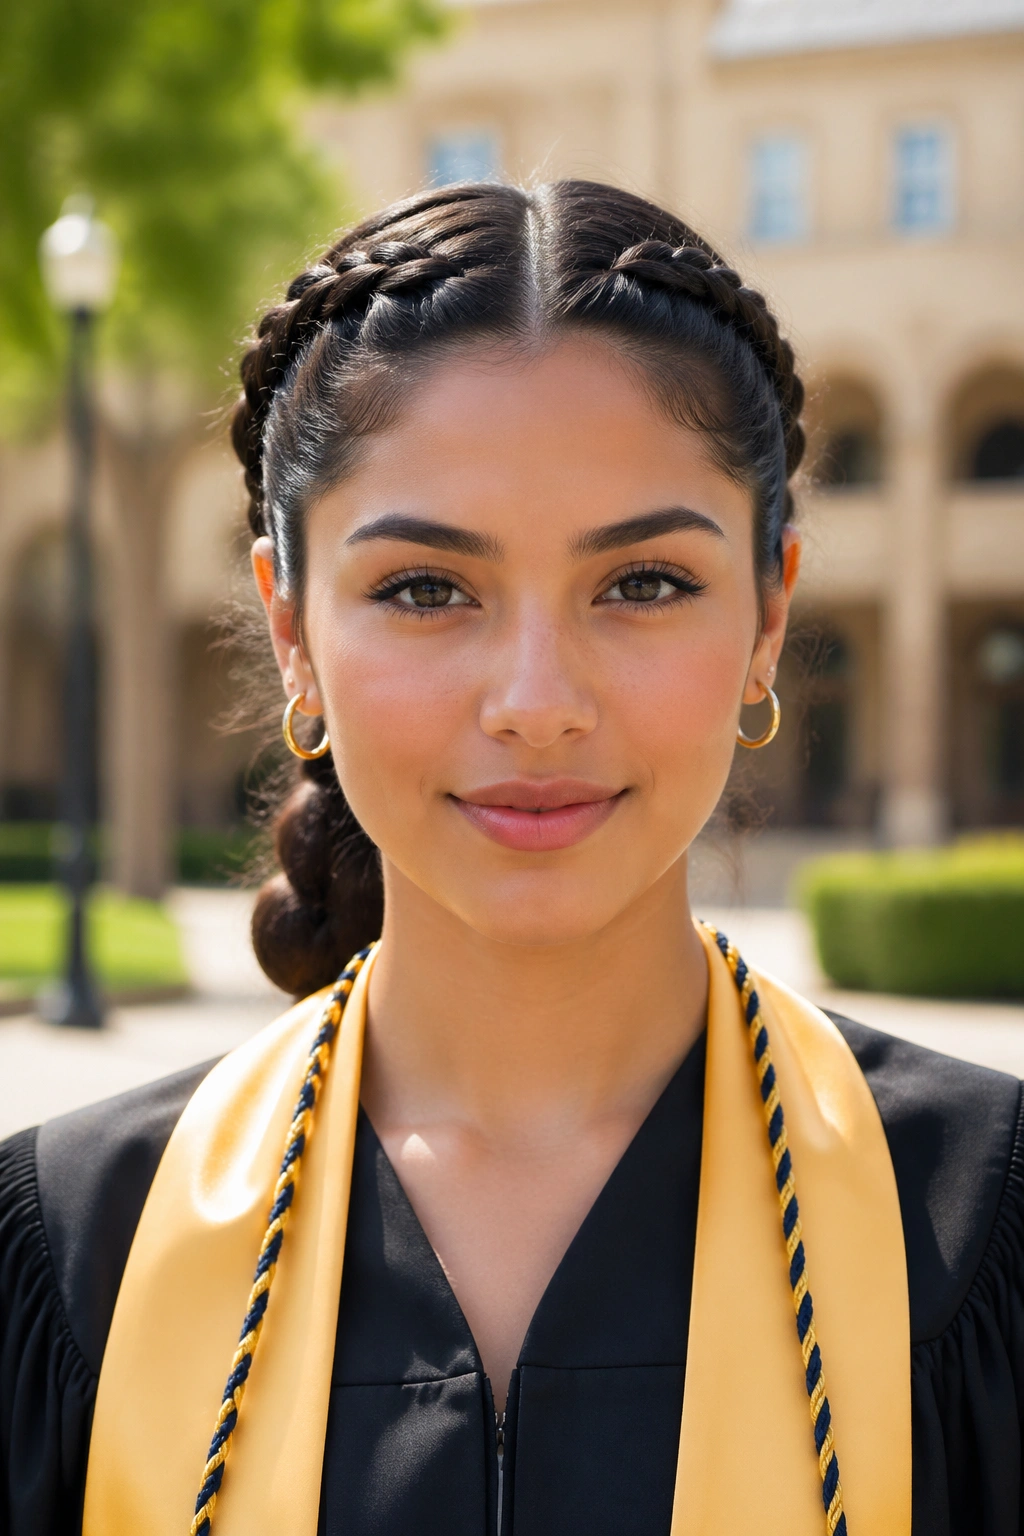
1. Sleek Graduation Braids With a Center Part
A clean center part is the quiet workhorse of cap day. It gives the cap a balanced place to sit, and it keeps the whole style looking deliberate even when the mortarboard flattens the top a little.
Why It Works Under the Cap
The middle part creates symmetry, which matters more than people think. If the cap band sits evenly on both sides, the braid line looks tidy instead of lopsided, and that makes the photo after the ceremony much easier to love.
Keep the braid low and the crown smooth. A small amount of gel at the roots and a fine-tooth comb are enough; you do not need to drown the hair. If your hair is fine, a tiny bit of texturizing spray at the roots helps the braid grip without puffing up later.
- Best for straight, wavy, or stretched textured hair
- Works well with one braid down the back or two braids over the shoulders
- Use two to four bobby pins to anchor the cap band if it slides
- A light shine serum on the lengths helps the braid look neat in photos
Tip: put the cap on during the final styling check, not after you have already left the house. That one move saves a lot of panic.
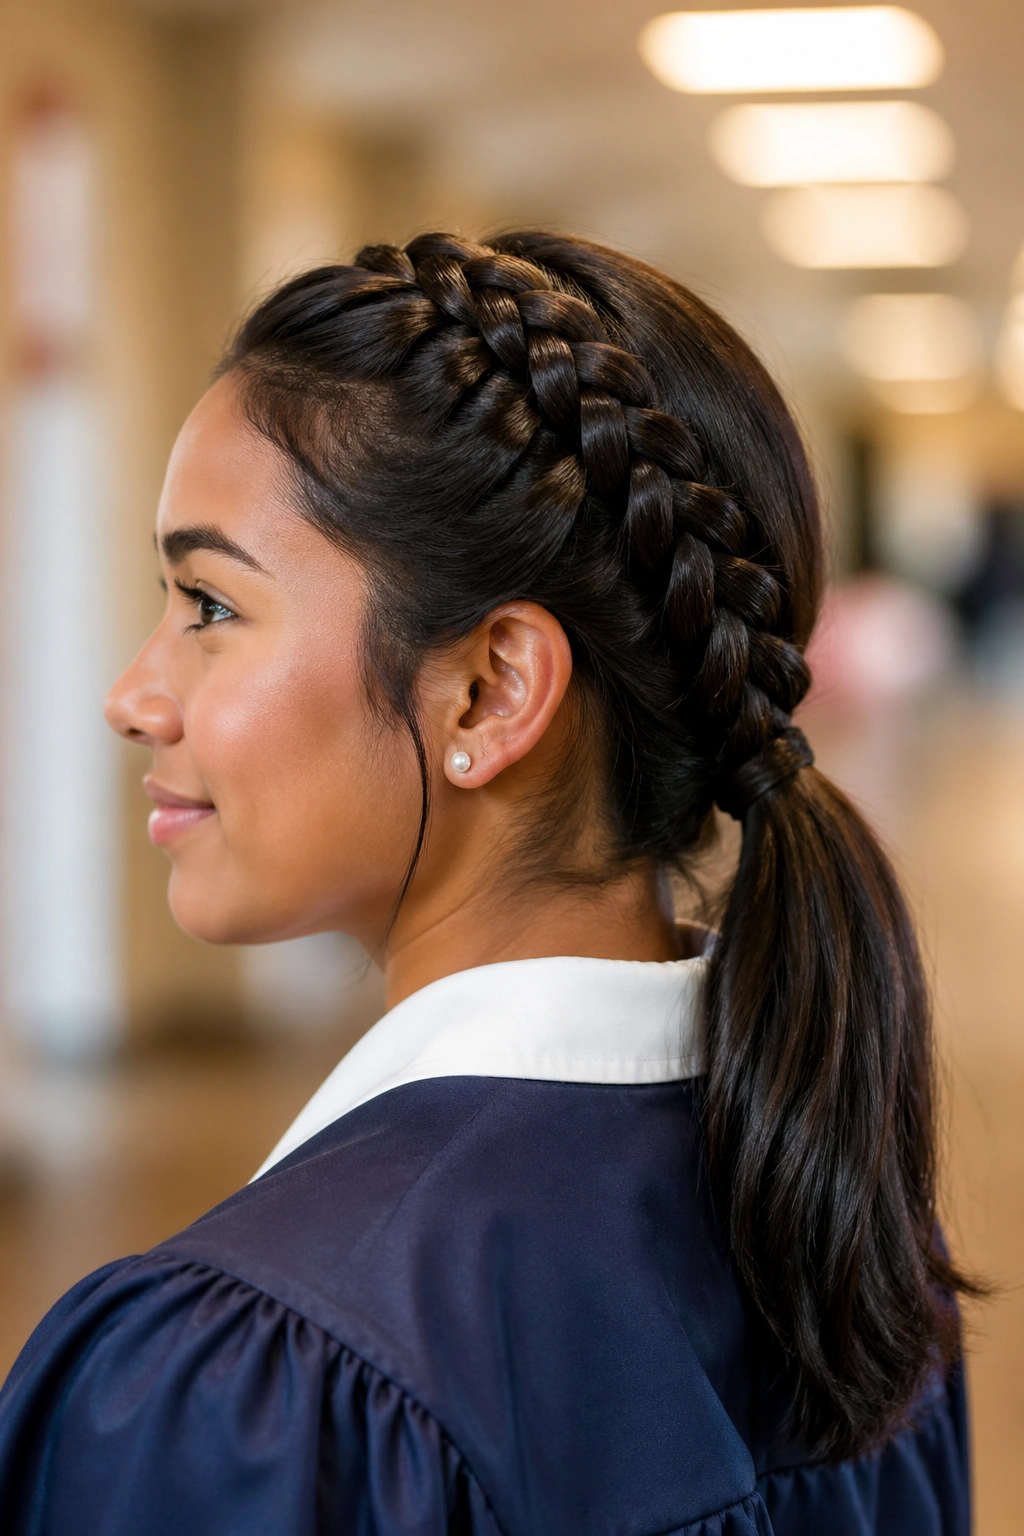
2. Low Dutch Braid Ponytail
This one has a little more structure than a simple braid, and that matters when you want the style to survive a long ceremony, a handshake line, and a hundred photos in bad parking-lot light.
A Dutch braid sits raised from the scalp, so the detail shows up even when the cap is on. Pulling it into a low ponytail at the nape keeps the top flat, which is the part the cap cares about most. The ponytail can be tucked over one shoulder after the tassel turn, or left down the back if you want a cleaner silhouette.
I like this style for people who want something that feels polished but not stiff. It has a little shape, a little movement, and none of the “I spent two hours fighting my hair” energy. That matters.
Use a medium-hold edge gel if you want the front smooth, then tie the ponytail with a snag-free elastic. If your hair is thick, wrap a small strand around the elastic and pin it underneath. Tiny detail. Big difference.
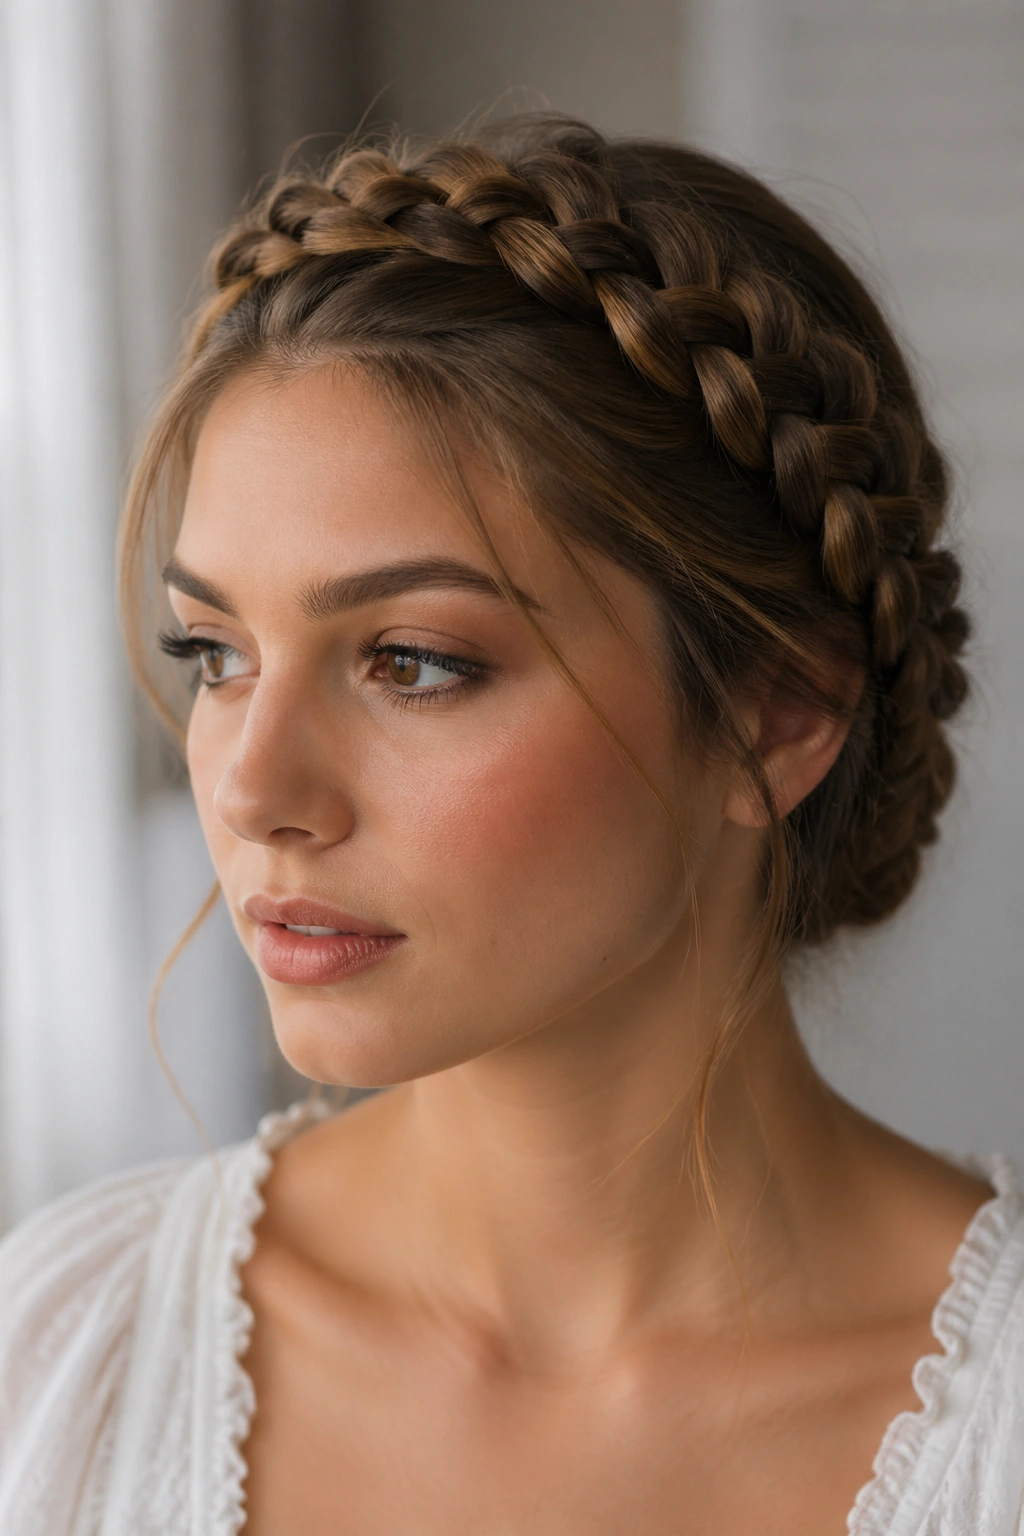
3. Halo Crown Braid
Why does the halo braid keep showing up on cap day? Because it solves the two biggest problems at once: it keeps hair away from your face, and it leaves the crown area flatter than a big top knot ever will.
The braid traces the hairline, then tucks low at the back, which gives the cap a calm, even surface to sit on. That is the part people miss. They think the style has to be dramatic to look special, but the halo braid gets its impact from the shape around the face, not from bulk on top.
How to Wear It With a Mortarboard
Keep the braid snug, not tight. If it bites into the scalp, you will feel it by the middle of the ceremony, and that headache is not worth the photo. Pin the end under the nape section and smooth the braid with a touch of styling cream so flyaways do not stick up under the cap band.
This style is especially good if your cap tends to sit high. The braid gives the illusion of a finished crown while keeping the actual crown area flat enough to behave.
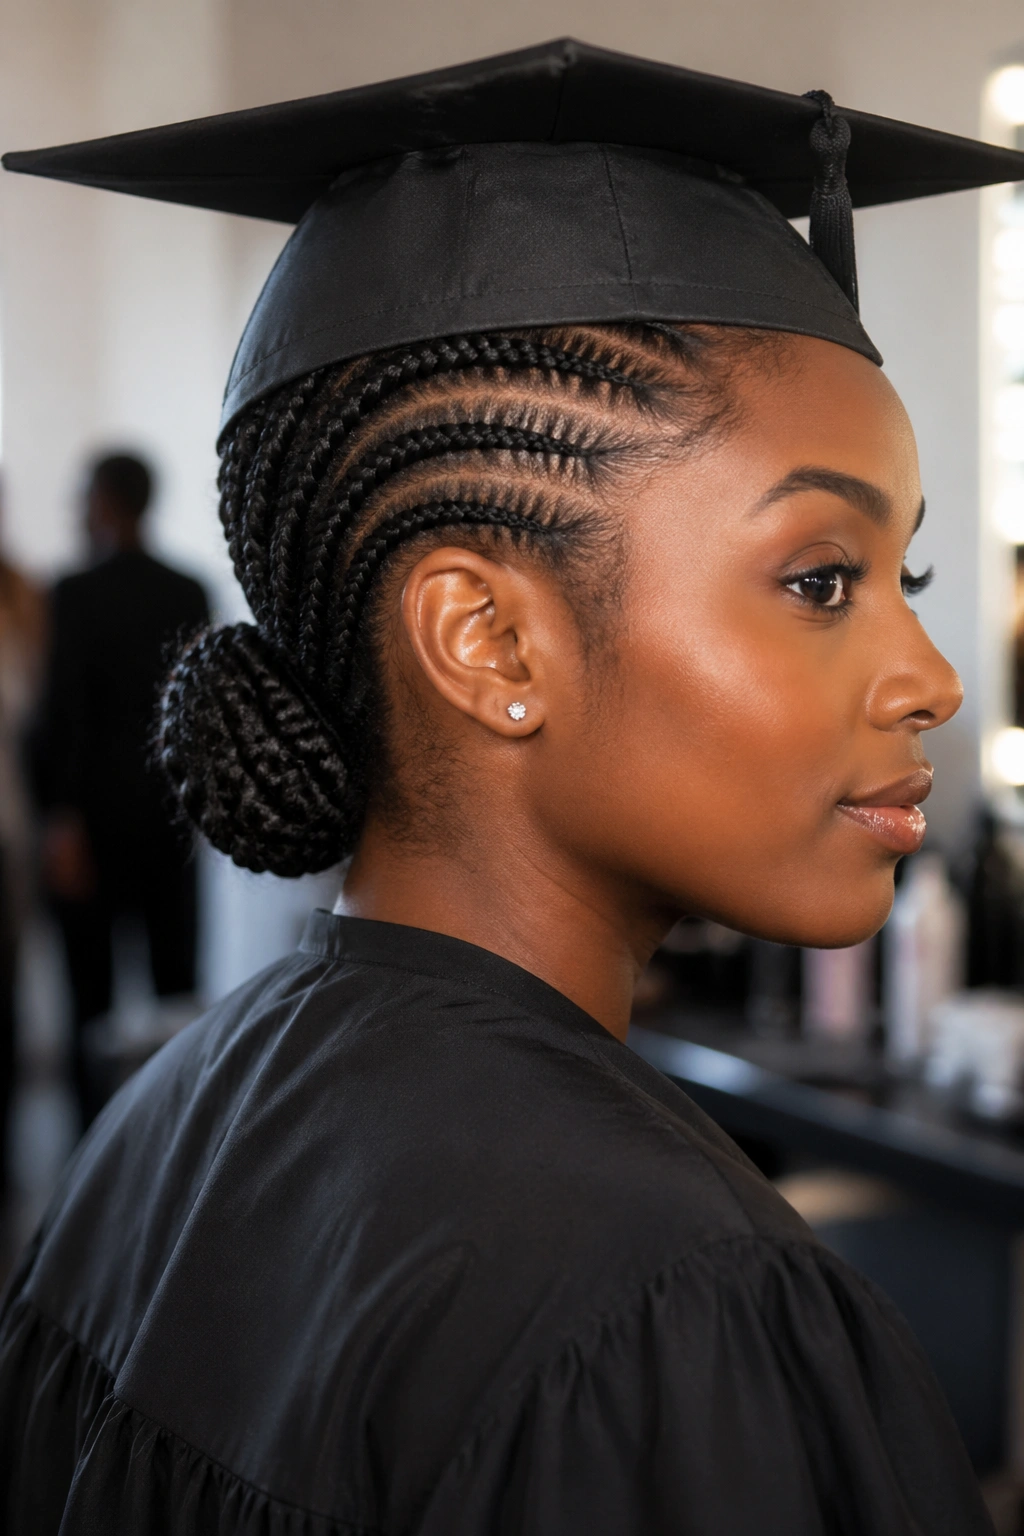
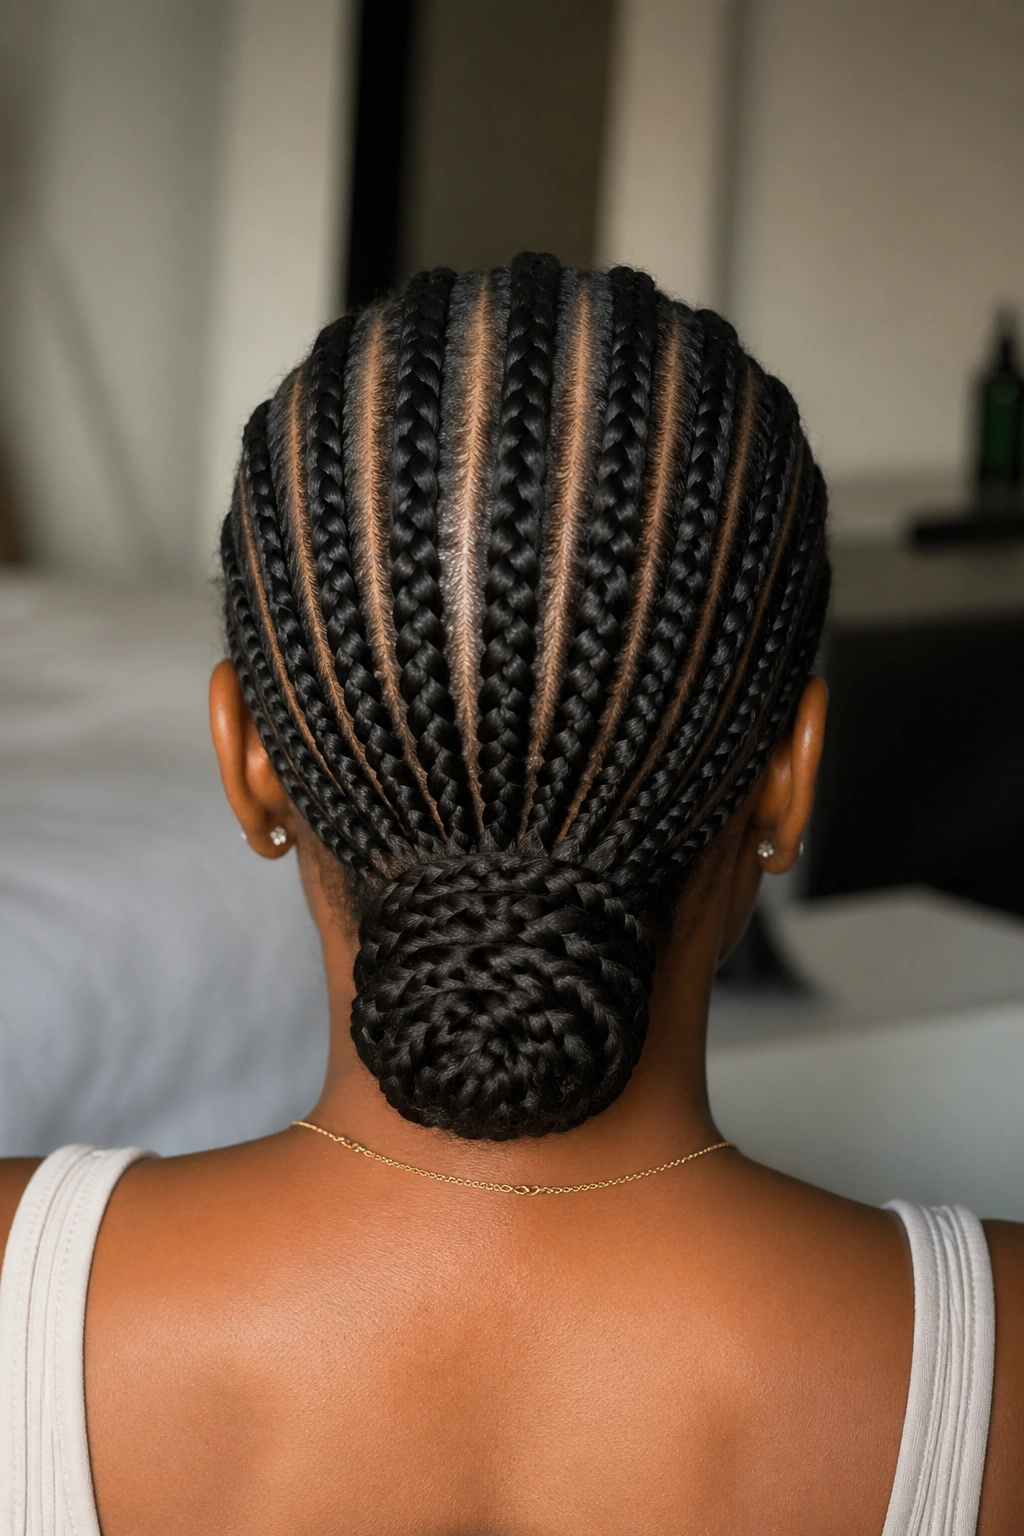
4. Straight-Back Cornrows Into a Low Bun
If your cap always seems to slide, straight-back cornrows are one of the smartest fixes. They create neat rows that stay put, and the low bun keeps the weight away from the top of your head where the cap needs space.
The parting has to be clean. That is half the look. Use a tail comb, section the hair carefully, and keep the rows even from front to back so the finished bun does not lean one way. A little braid gel helps each row stay smooth, but go easy; too much product can make the roots look shiny in a greasy way, not a polished one.
- Works well for natural hair, relaxed hair, or extensions
- A low bun at the nape keeps the cap from bouncing
- Use satin-lined pins or a satin scrunchie if the hair is very dense
- Ask for the bun to sit just below the cap band, not directly under it
There’s a nice bonus here too: once the cap comes off, the cornrows still look strong and intentional. No emergency restyling. No fuss.
5. Side-Swept Single Braid
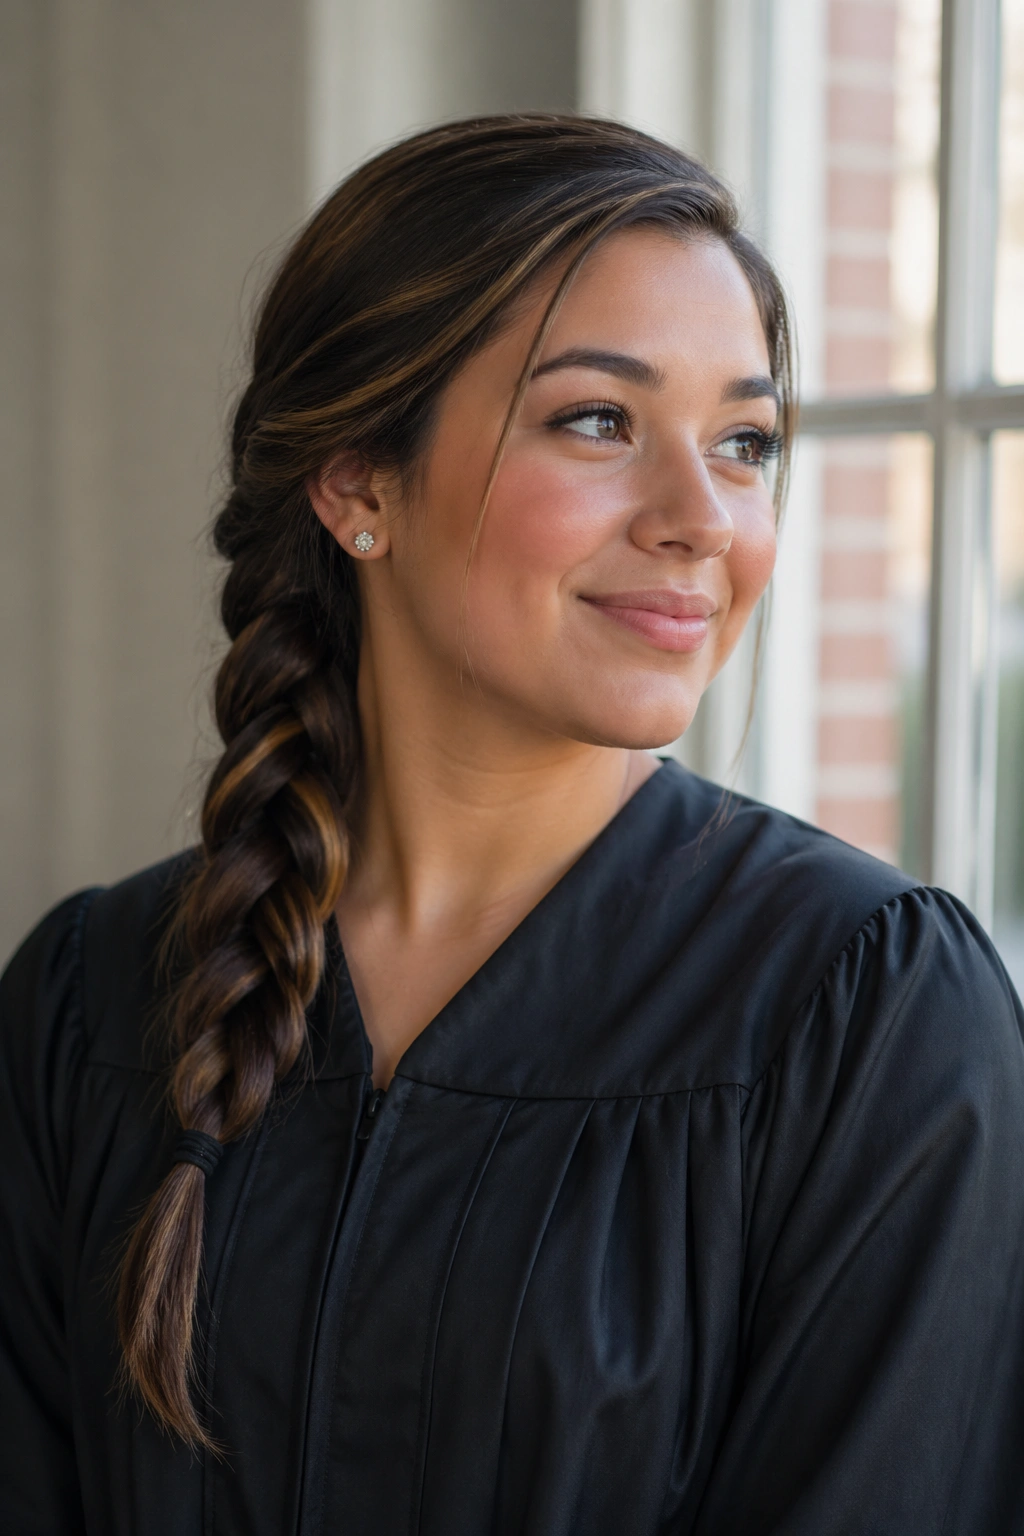
A side braid is one of those styles that looks easy until you try to do it neatly. Then you realize the placement matters more than the braid itself. Put it too far back and it disappears under the cap. Put it too far forward and it fights the tassel.
The sweet spot is a braid that begins slightly behind the ear and falls over one shoulder. That angle gives the front of the hair some soft shape while leaving the crown area free for the cap. It also photographs well when you turn your head after the ceremony, which is probably when someone will snap the best picture of the day.
I prefer this on longer hair or on hair with extensions because the braid reads better when it has length. A thin side braid can look a little lost under a gown collar. A fuller one has more presence.
If your hair tends to puff up at the nape, smooth that section with a small amount of cream before braiding. It keeps the side line neat, and the braid will look cleaner once the cap gets lifted off.
6. Fishtail Braid With a Polished Finish
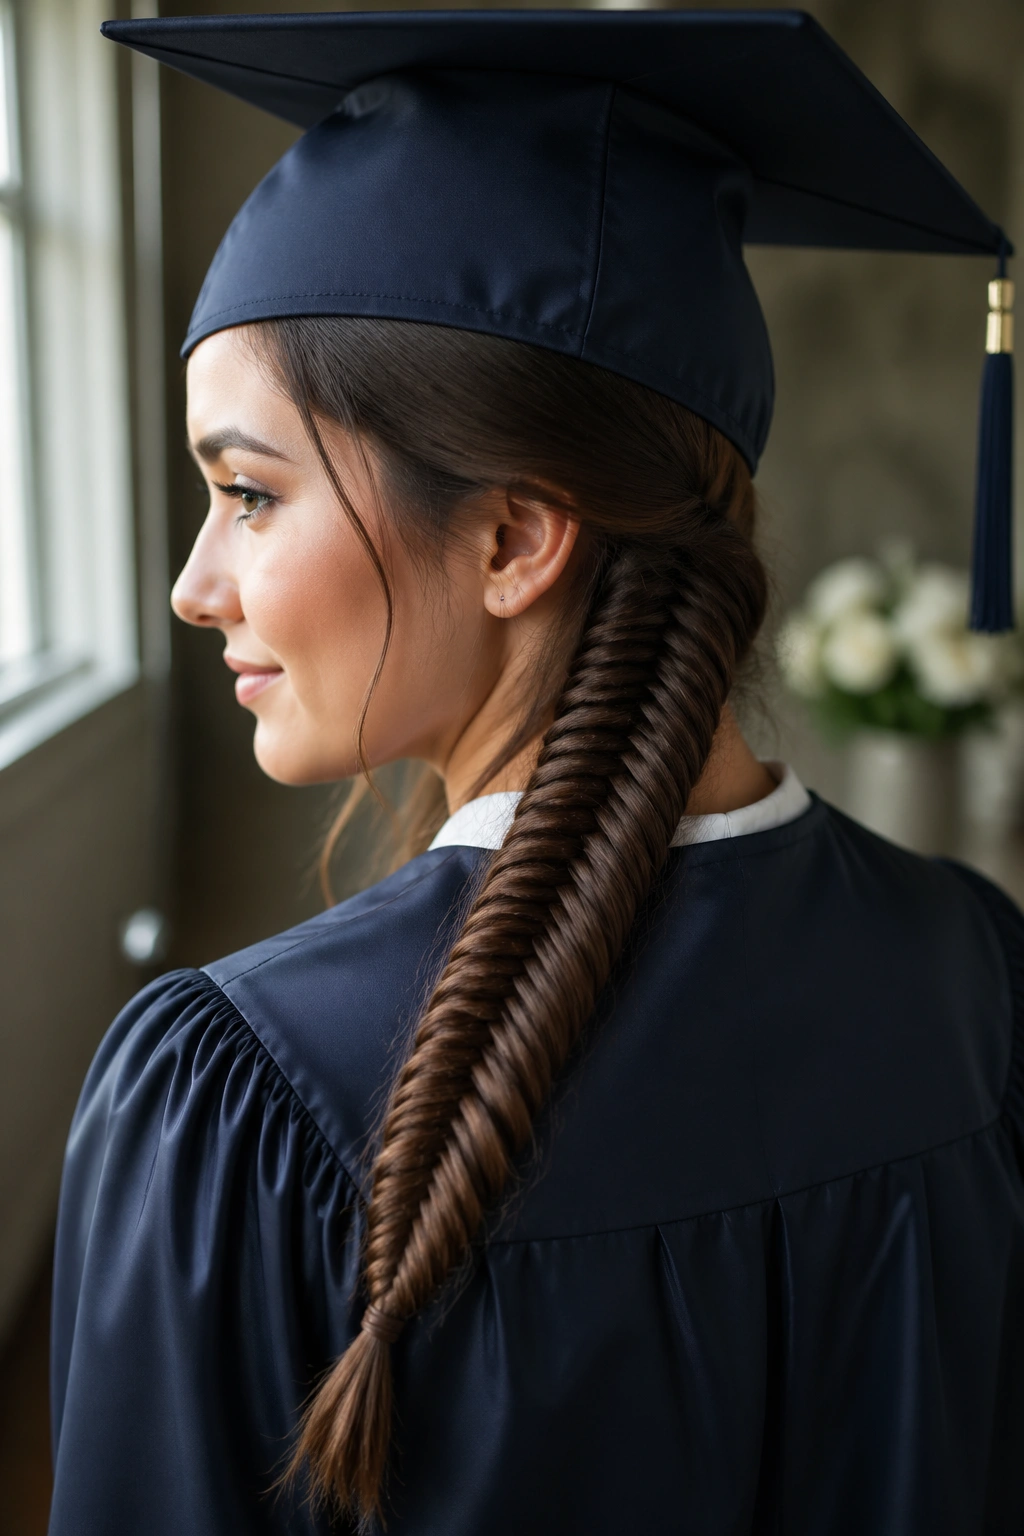
A fishtail braid has a tighter, finer texture than a classic three-strand braid, and that detail is exactly why it works so well for cap day. The pattern looks intricate in close-up shots, but the braid itself stays compact enough to sit under a mortarboard without making the crown bulky.
Unlike a regular braid, the fishtail looks best when the sections are pulled evenly all the way down. If one side gets loose, the whole thing can start to look half-finished. Take your time on the first four inches; after that, the braid usually settles into its own rhythm.
This style is a good pick if you want something a little more dressed up than a standard braid without drifting into fussy territory. The cap flattens the top anyway, so the texture needs to do the talking.
A dab of serum on the ends helps keep them from looking dry under stage lights. And if your hair is layered, braid a touch tighter near the middle so the shorter pieces stay tucked in instead of popping out around your neck.
7. Box Braids Gathered Into a Low Knot
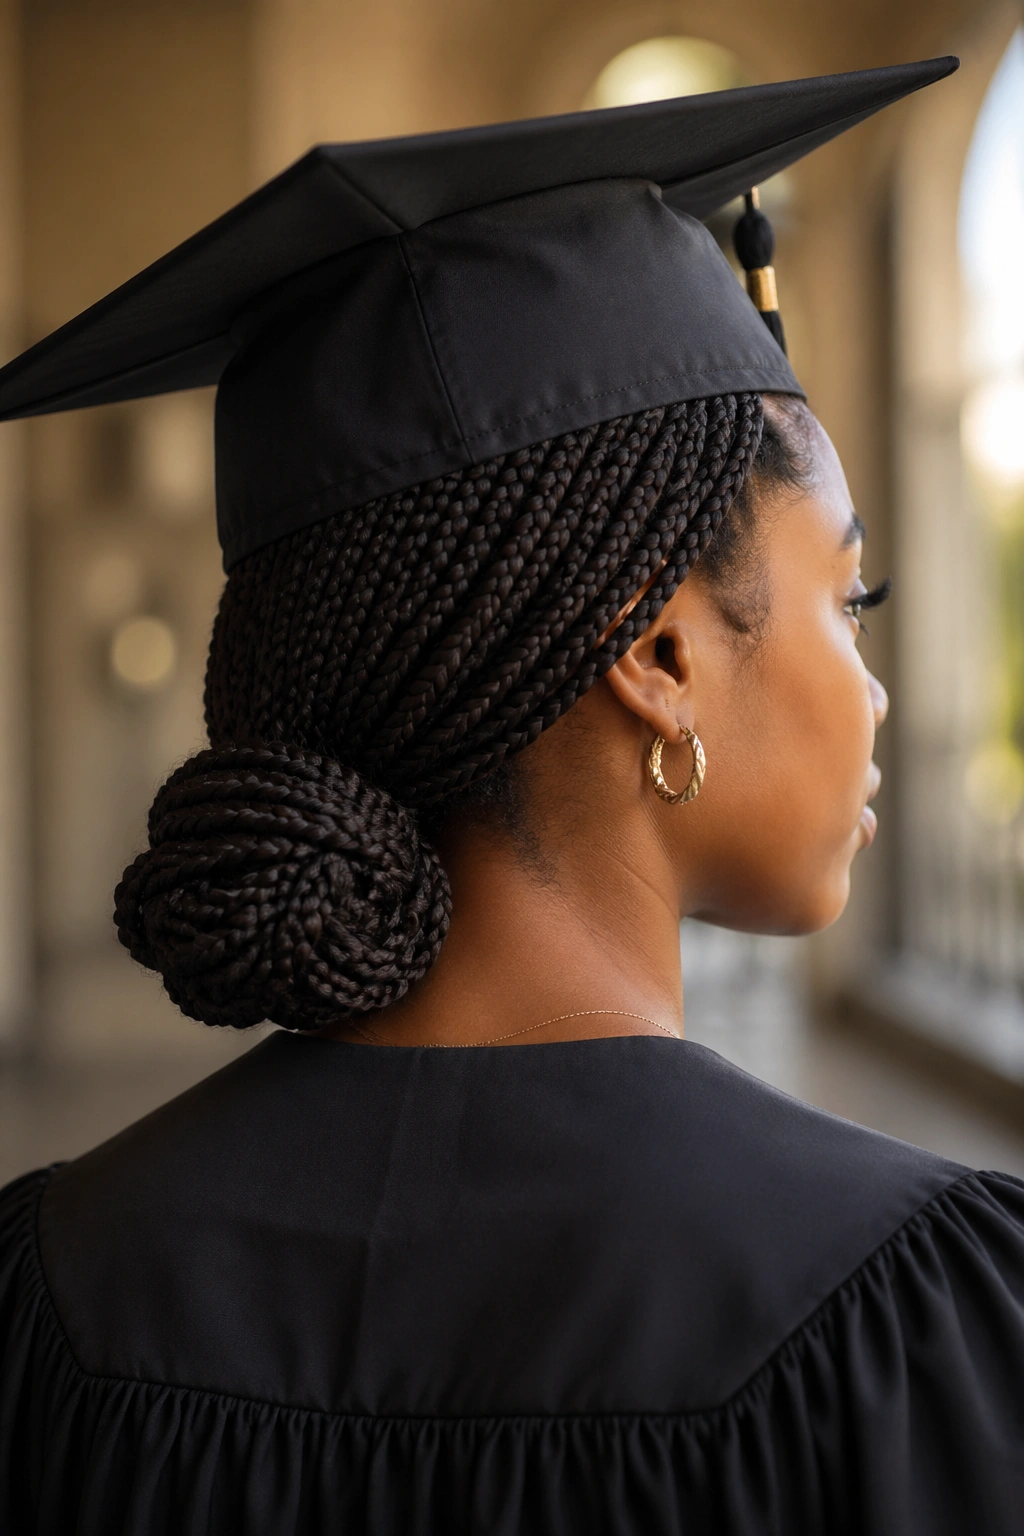
Box braids and graduation caps get along best when the braids are pulled low and kept close to the head. A high bun looks neat for about five minutes, then the cap starts climbing up on top of it and the whole thing feels awkward.
A low knot at the nape avoids that. It keeps the silhouette clean from the front and gives you enough shape in the back that the style still feels special. If the braids are long, fold the lengths under once, then wrap the ends around the base and pin them flat.
The whole point is to reduce bulk where the cap sits. That sounds obvious, but a lot of people forget it when they get excited about fullness. Fullness is lovely. Just not right under the cap band.
Use a satin scrunchie or a wide elastic so the knot holds without snagging. If your braids have fresh curl ends, pin those inward first so they do not stick out from under the gown collar.
8. Feed-In Braids Into a Braided Bun
Feed-in braids are great when you want the scalp to look smooth and the finish to look neat from every angle. The braids start small and gradually build, which keeps the top of the head flatter than a lot of other braided styles. That matters on cap day.
The braided bun at the nape gives the style its shape without forcing the cap to sit on a lumpy base. If you have ever tried a bun that was just a little too high, you know the cap can end up tilted like it is hanging on for dear life. This avoids that problem.
What To Ask For
- 4 to 8 feed-in braids, depending on hair density
- A low braided bun instead of a twisted bun if you want extra hold
- Soft, even parting lines so the style stays neat after the cap comes off
- Slightly tighter roots at the front if your hair is very fine and slips easily
This is one of those styles that looks like it took effort without looking overworked. That balance is rare. And useful.
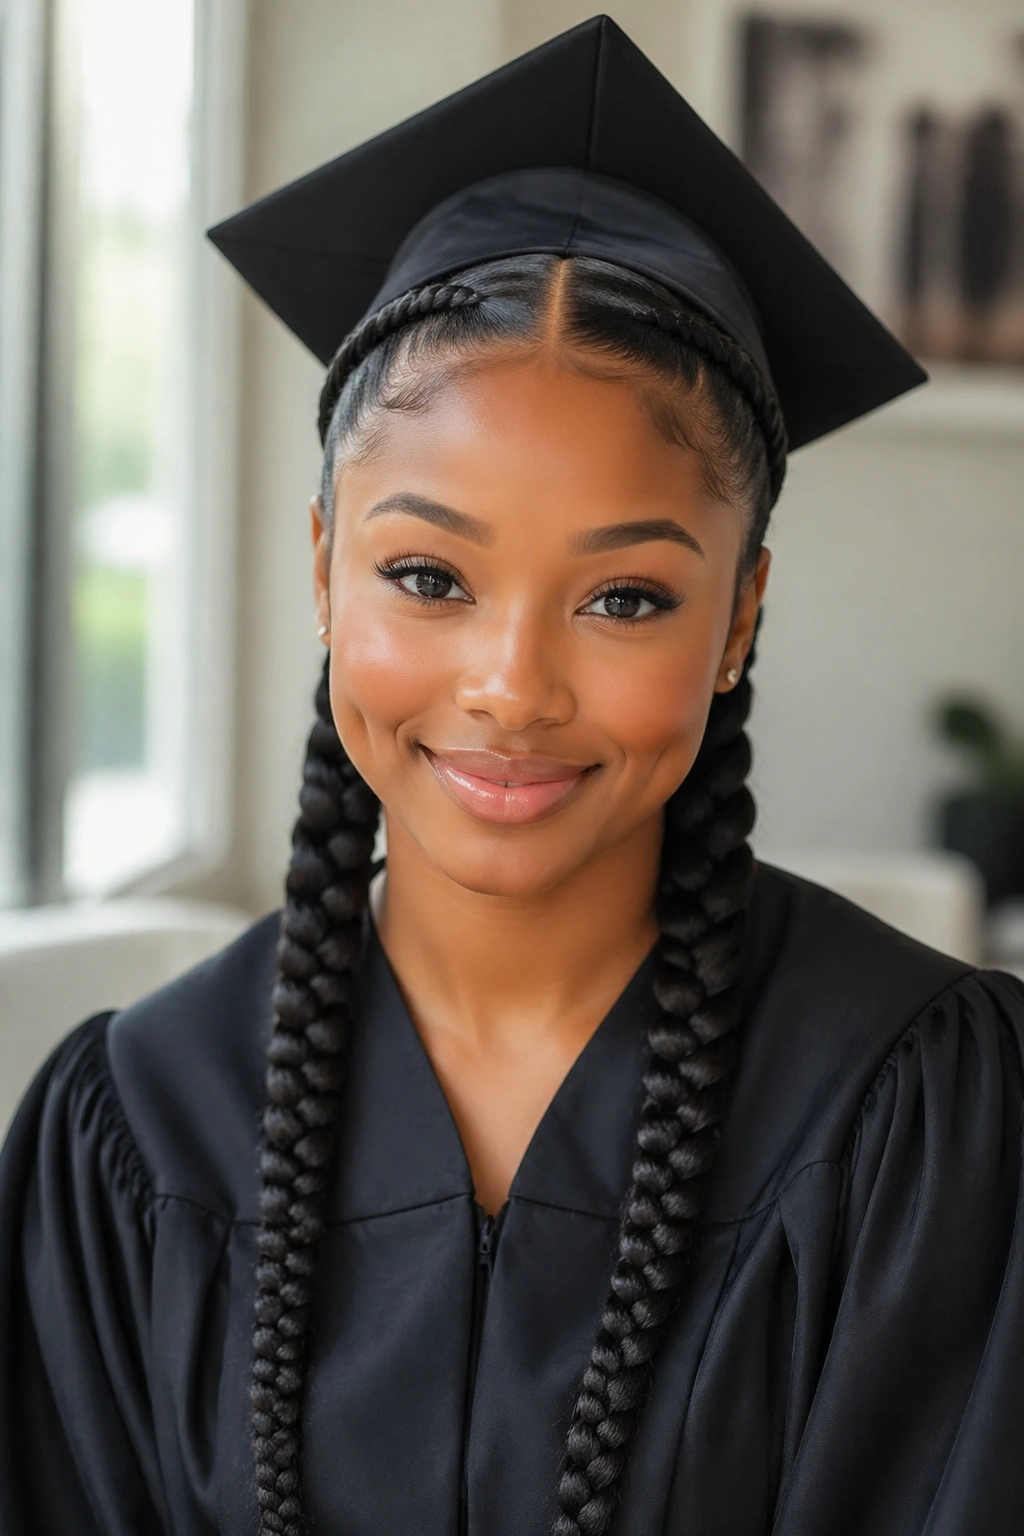
9. Twin Braids Into a Low Braided Ponytail
Two braids can be more flattering than one when the cap is doing its best to flatten everything. They create symmetry, hold the hair securely, and keep the style from feeling too heavy at the back.
Start with a center part, braid each side, then join them into a low ponytail at the nape. If the hair is long enough, you can braid the ponytail too, which gives the style a tidy finish and makes it less likely to fray by the end of the day. It also keeps the ends from tangling with the gown collar, which is a small mercy.
This works especially well if you want a style that reads clean from the front and still feels a little more interesting than a single braid. The twin-braid structure gives the style shape, even under the cap.
- Best with medium to long hair
- Use one elastic per braid and a final elastic at the nape
- A small amount of mousse helps the braid hold if the hair is slippery
- Tuck the tail slightly to one side if your cap tassel lands awkwardly in the middle
10. Braided Chignon
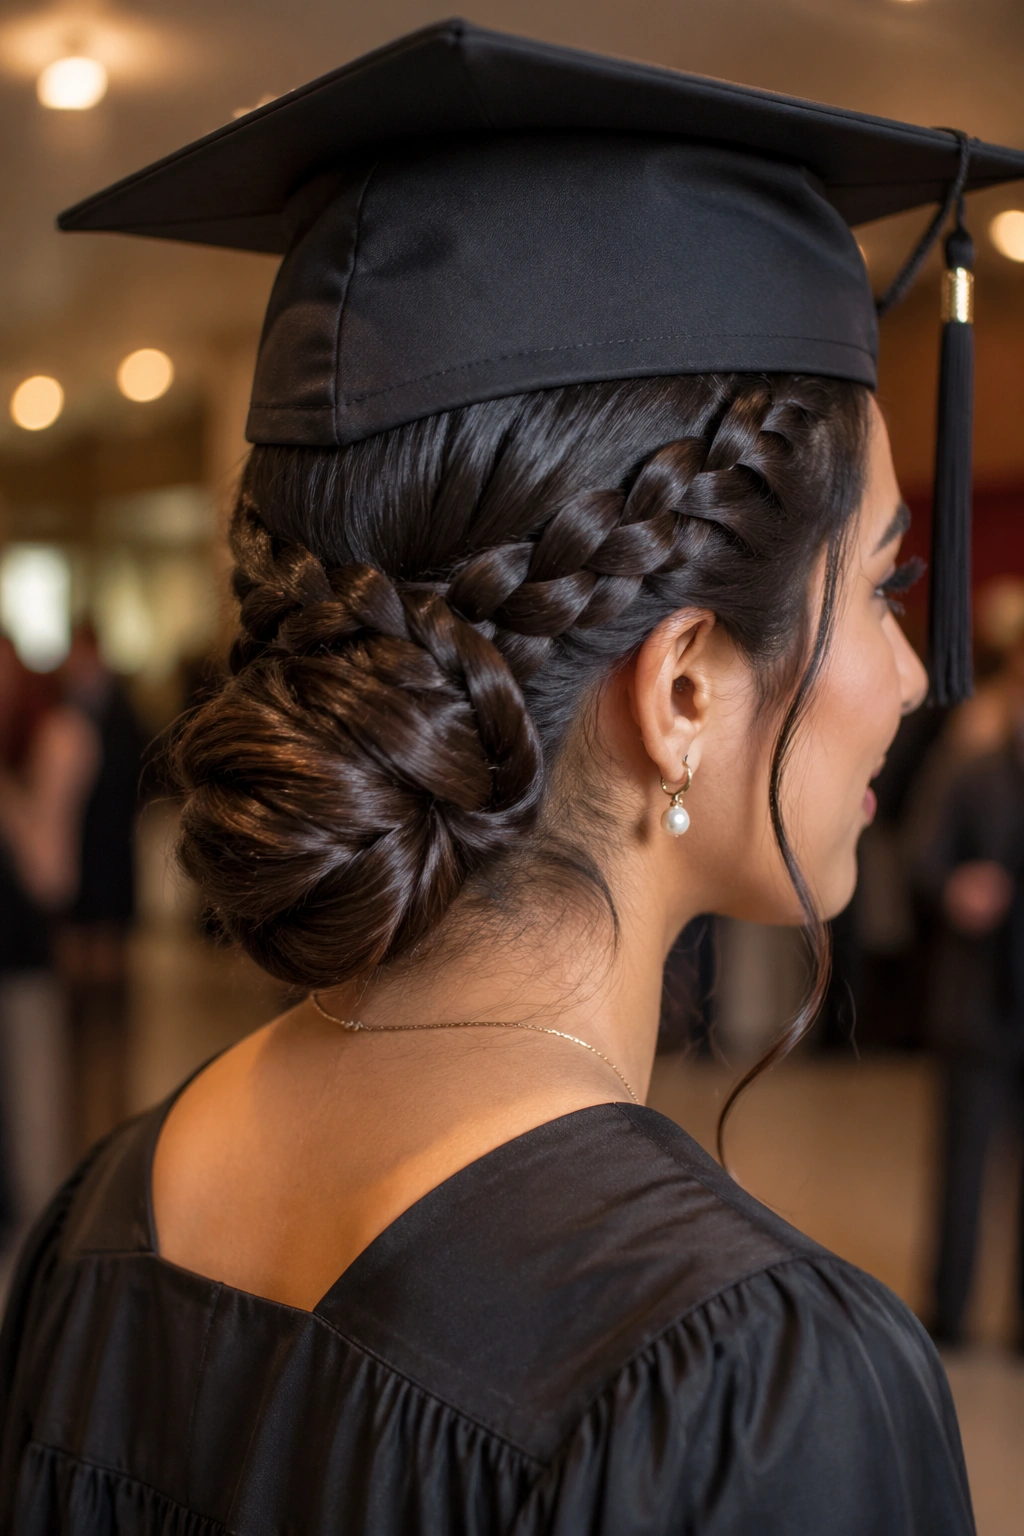
A braided chignon has that old-school polish that never seems to go out of place on a formal day. It sits low, which is the main thing, and the braided wrap around the bun gives it more texture than a plain knot.
The shape matters here. Keep the chignon compact and pinned close to the nape, not floated away from the head. If it sits too loose, the cap will catch on it and tilt. If it sits tight, the whole profile looks smoother and the front of the hair stays controlled.
I like this style for people who wear dresses or suits with higher necklines. The low bun balances those shapes nicely, and it keeps the focus on the face instead of the hair fighting the gown collar.
A few hidden pins are better than one giant elastic. Pin the braid in sections as you wrap it so the bun feels anchored, not mashed. The goal is control, not stiffness.
11. Micro Braids With a Deep Side Part
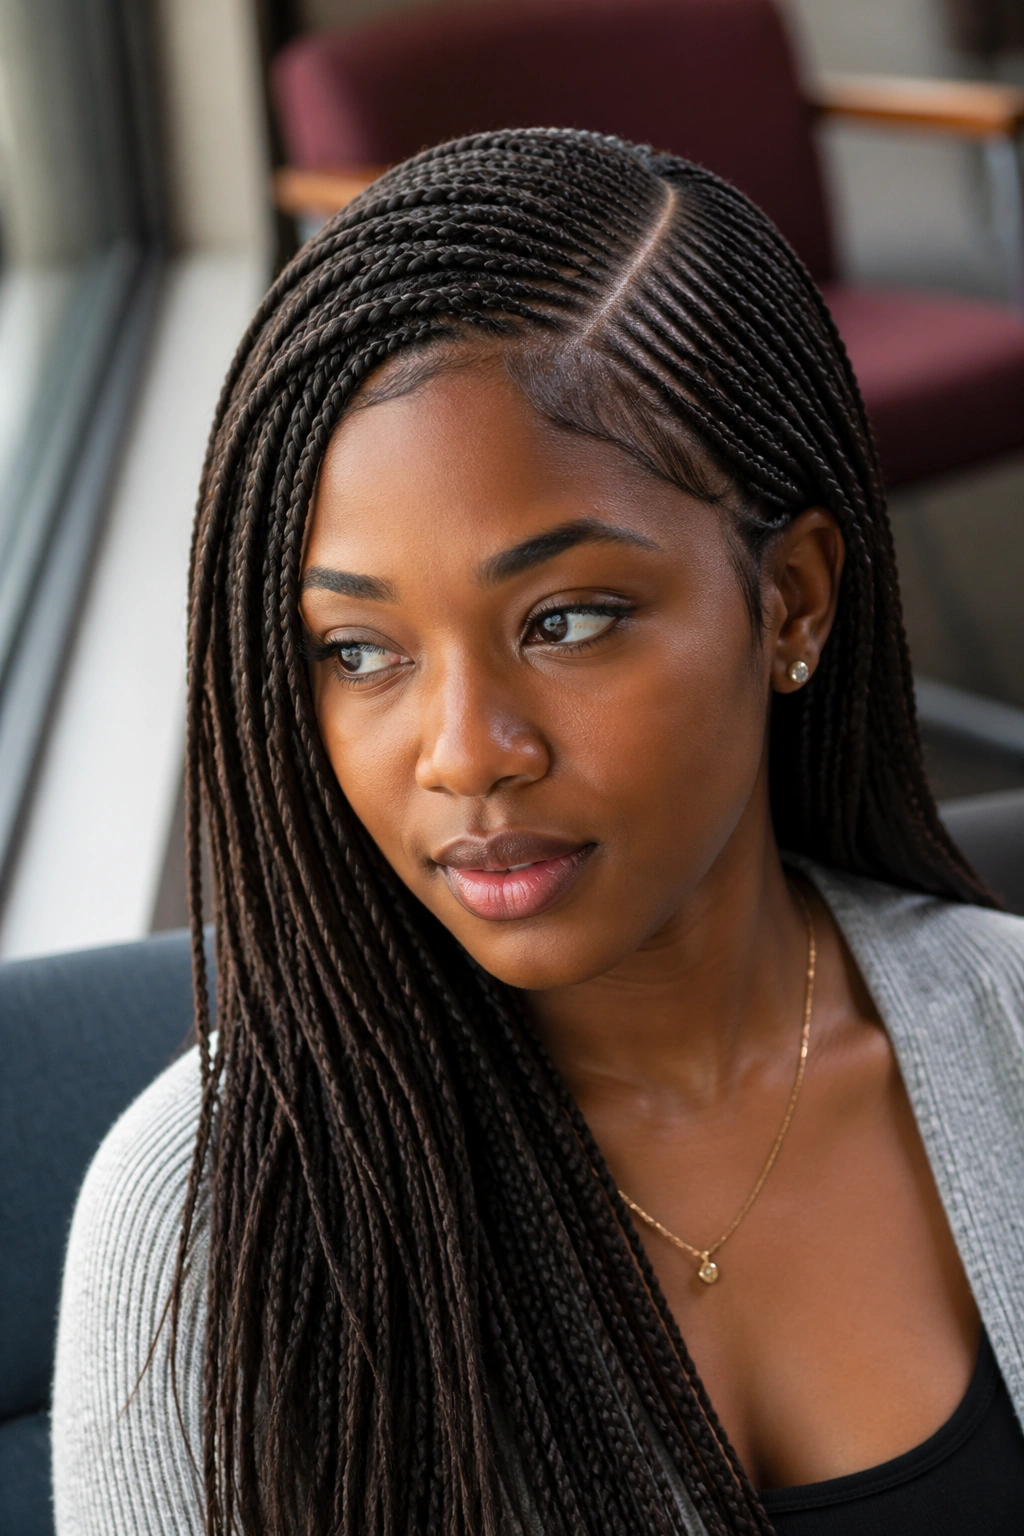
Micro braids give you a lot of texture without a lot of bulk, and that is a gift on cap day. The deep side part adds drama, while the tiny braid pattern keeps the head shape smooth enough for the cap to sit properly.
Compared with chunkier braids, micro braids lie flatter and give you more movement when you turn your head for photos. They also handle the cap band well because there is less thickness at the roots. That means fewer weird dents when the cap finally comes off.
This style is especially strong if you like a sleek finish. A little braid sheen product at the lengths keeps the braids looking fresh without making the roots greasy. If your part is sharp, even better. The side line helps frame the face and stops the style from feeling too severe.
One warning: if your braids are very long, make sure the ends are secured so they do not catch on the gown zipper, the collar, or the tassel. Long braids have a way of finding trouble.
12. Knotless Graduation Braids With Curled Ends

Knotless braids are a smart choice when you want the scalp to feel lighter and the cap to sit closer to the head. The braid starts with a small, flexible base instead of a bulky knot, so the top looks smoother right away.
The curled ends soften the whole look. Once the cap comes off, those ends give the style movement without asking for extra styling time. If the ends are too loose, though, they can frizz fast, so this is one of those styles that benefits from a little planning the night before.
How To Keep the Ends Clean
Set the ends with flexi rods, perm rods, or a small curling iron, then let them cool fully before you touch them. A light mousse works better than heavy cream here. Heavy products can weigh the curls down and make the braid ends look limp by the time you reach the stage.
This style sits nicely under a cap because the bulk is distributed down the length rather than piled at the crown. That is the whole appeal, really. Less pressure at the top, more shape at the bottom.
13. Braided Faux Hawk
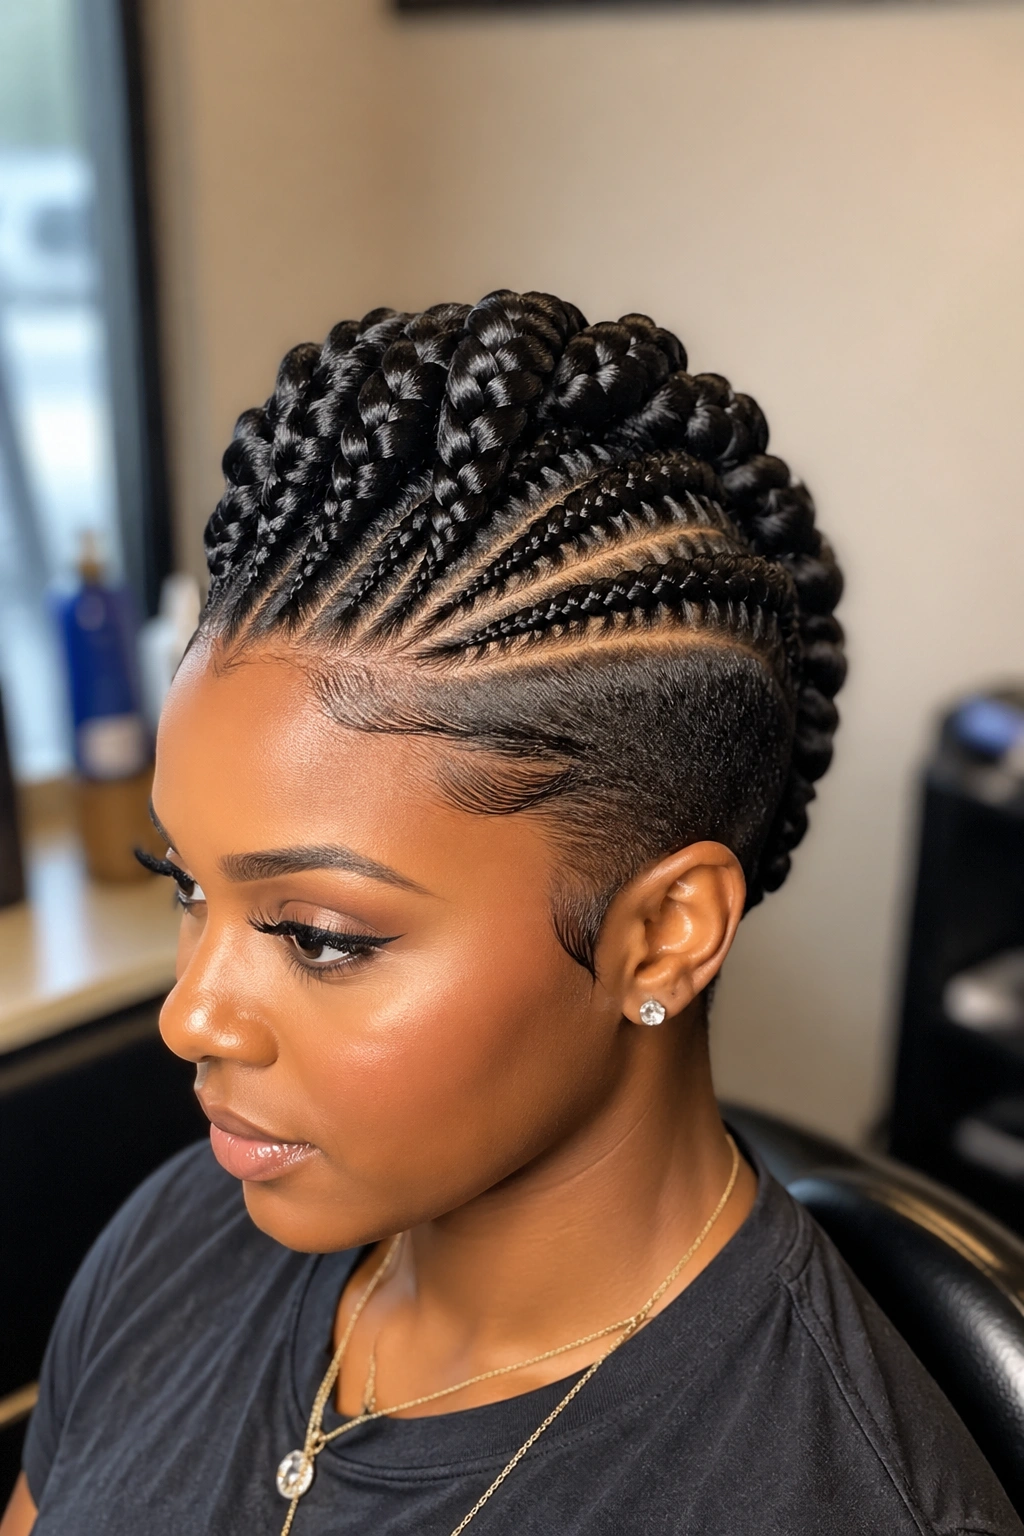
A braided faux hawk looks dramatic, but it is surprisingly cap-friendly when it is built the right way. The sides stay braided or slicked flat, and the center ridge carries the style without creating a huge bump under the cap.
That middle line gives you height without the mess of a full updo. The cap can rest over the flatter sides, and the shape still shows once you step out of the ceremony. It is a nice choice if you want something with edge and you are not afraid of a stronger profile.
The key is keeping the sides smooth. If the side sections puff out too much, the cap will sit crooked. A good mousse, a firm brush, and a few small pins keep everything tight. Not rigid. Tight.
This is one of those styles that looks especially good with bold earrings and a simple neckline. The hair is already making a statement. Let it.
14. French Braid Into a Low Twist
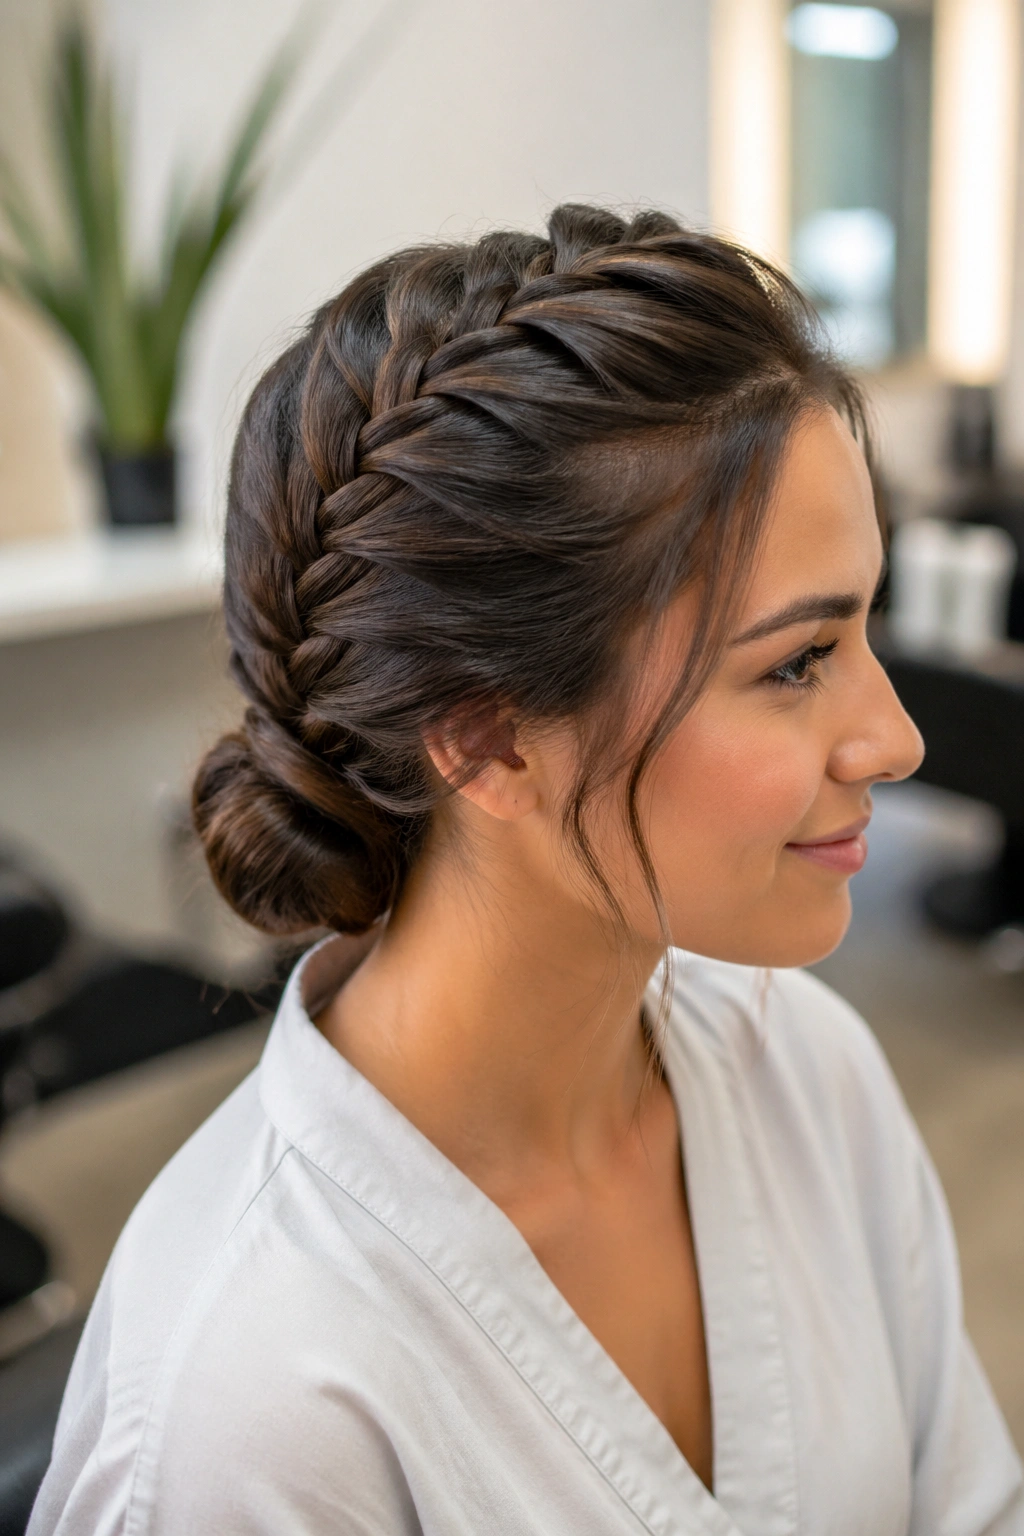
A French braid that ends in a low twist has a nice balance of neatness and softness. It keeps the top anchored from the start, which helps the cap sit where it should, and the twist at the nape gives you a clean shape without a lot of extra bulk.
I like this one for the person who wants a style that survives the day without much touching. You braid from the front toward the crown, keep the sections even, then pin the length into a twist just under the cap band. When it is done well, the braid line looks tidy even after a few hours of hugging and photo taking.
The style works on many hair types, but it is especially useful for hair that slips out of clips easily. Braids hold better than loose twists in that case. There is less chance of a strand escaping and sticking up under the cap.
A little smoothing cream at the hairline makes the front look finished. Keep it light. Too much and the braid starts to lose grip.
15. Bubble Braid With a Braided Base
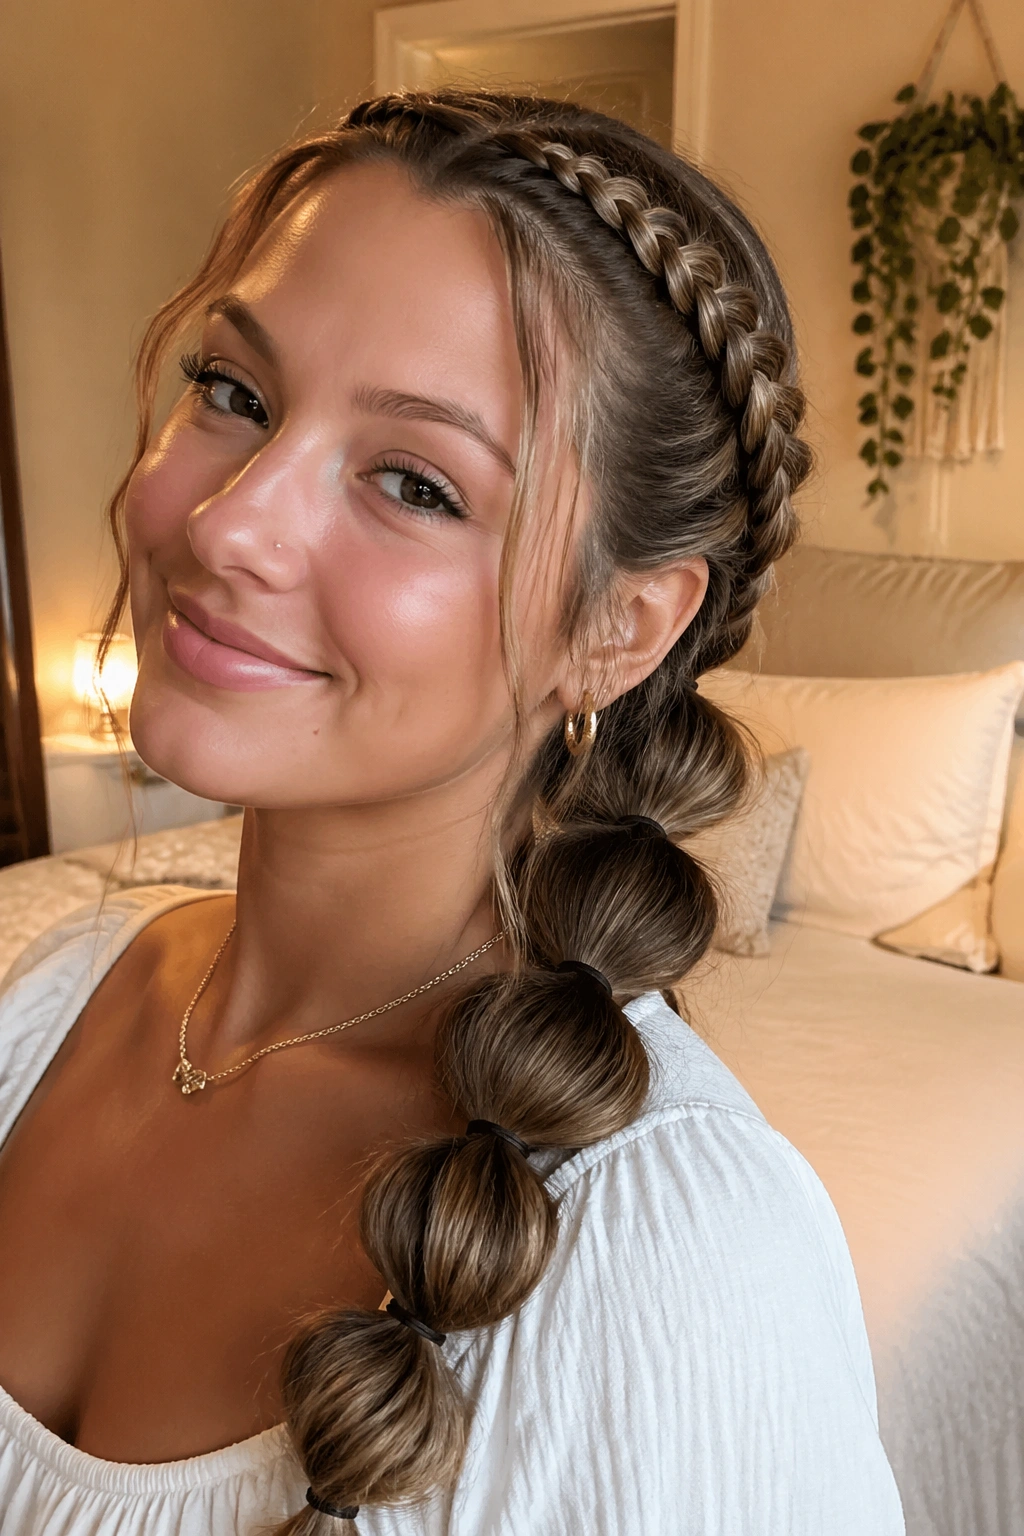
A bubble braid has a playful feel, but the braided base keeps it from looking too casual for graduation. That base matters because it gives the top enough structure to sit under the cap, while the bubbles add shape lower down where the gown can actually show them.
Spacing is the whole trick. Use clear elastics every 1.5 to 2 inches, then gently pull each section outward until it looks rounded instead of flat. If you pull too hard, the hair starts to split. Too soft, and the “bubble” disappears. There is a narrow middle ground, and it’s worth taking the time to find it.
This style works well on medium to long hair and on extensions that can hold shape. It also gives a nice silhouette from the side, which matters more than people think once the ceremony is over and everyone is lined up for photos.
If your hair is fine, tease the sections lightly before tying each elastic. Just a little. Enough to give the bubbles some shape without turning them fuzzy.
16. Braided Crown With a Sleek Low Bun
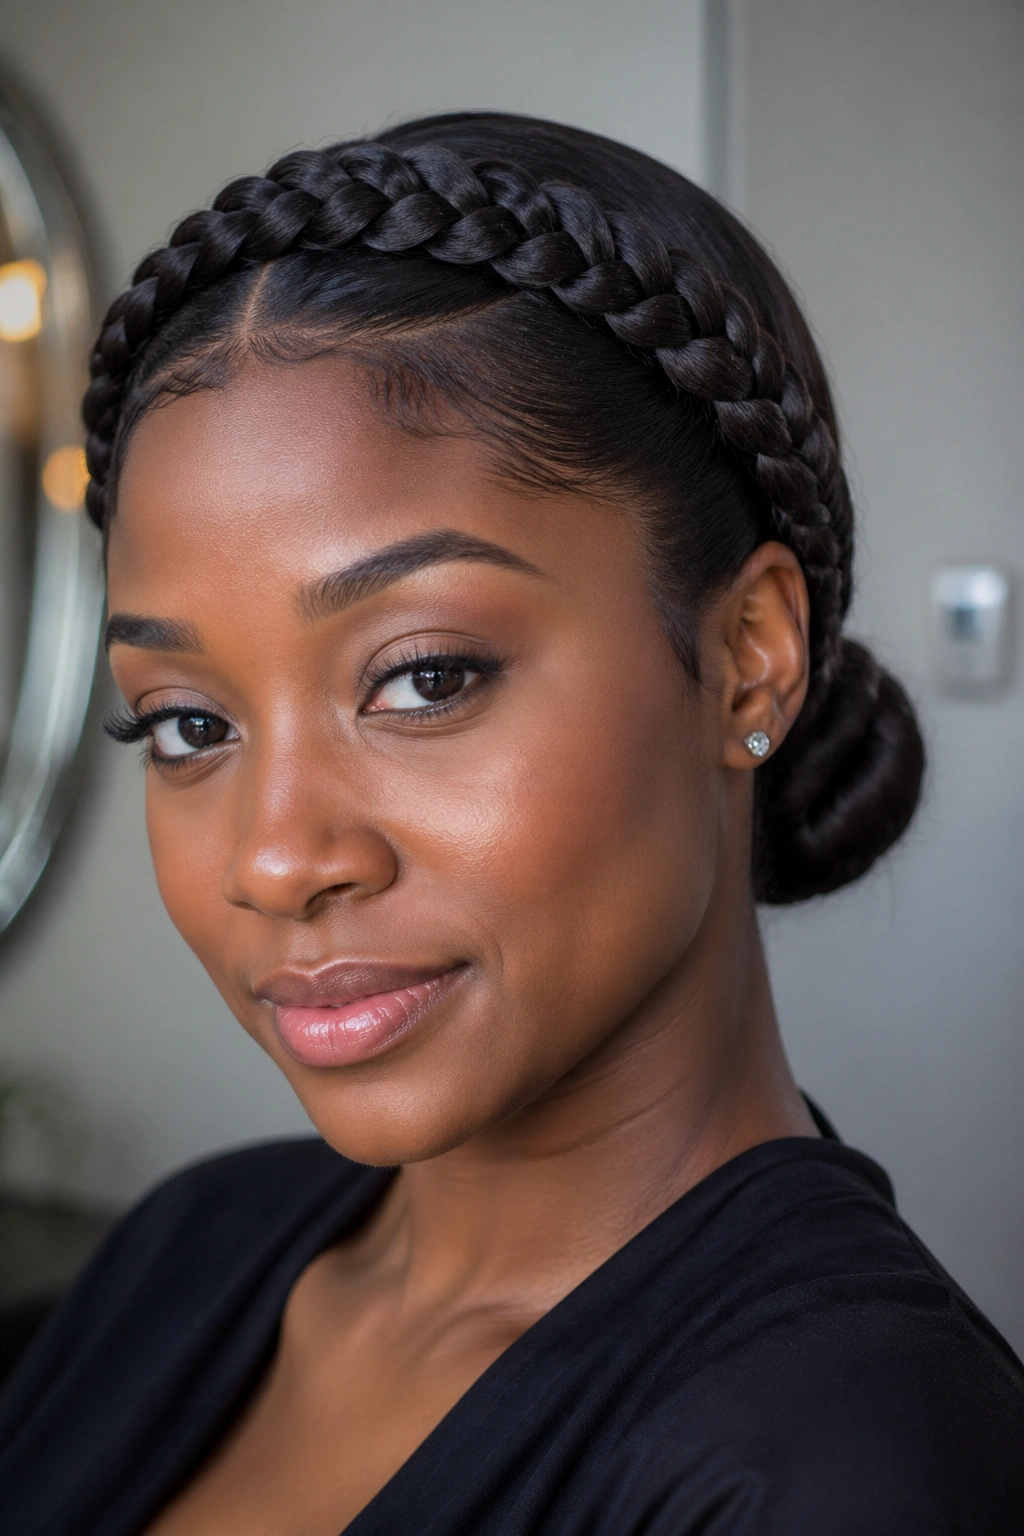
This is the sleeker cousin of the halo braid. The crown section runs around the head, but instead of staying airy and soft, it feeds directly into a low bun that keeps the whole style close to the nape.
That lower placement makes a huge difference under the cap. The crown braid gives the style interest at the front, while the bun stays out of the way where the mortarboard needs room. If you’ve ever had a cap sit on top of a tall bun and wobble through the entire ceremony, you already know why this matters.
Unlike a full halo style, this version feels a little sharper and more formal. It is a good match for minimal makeup, tailored gowns, or any outfit where you want the hair to stay calm and clean.
Use hidden pins in a crisscross pattern to hold the bun. The crisscross is small work, but it keeps the bun from slipping downward when you move your head.
17. Ghana Braids Into a Ponytail
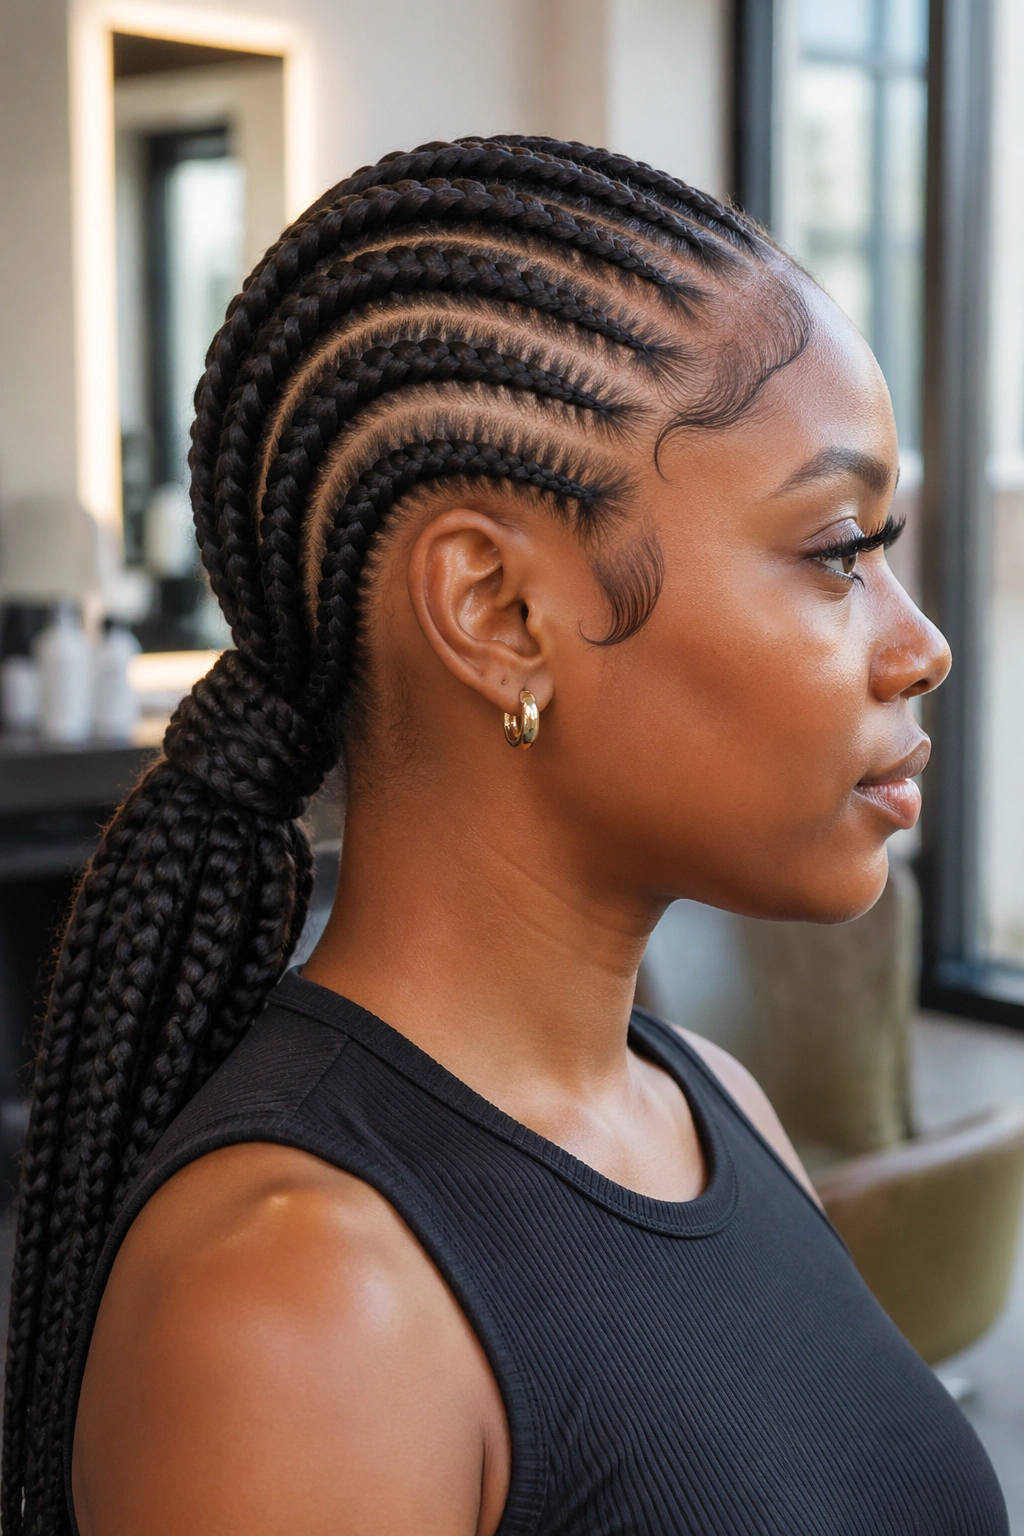
Ghana braids are thick, clean, and built to stay put, which makes them a strong option for cap and gown day. The feed-in pattern keeps the roots tidy, and the ponytail at the back leaves the top of the head flat enough for the cap to sit properly.
What Makes Them Stand Out
The sections usually start smaller and grow thicker as they move back, so the front stays smooth while the back carries more shape. That balance is useful when you want a style that looks finished from the front but still has enough weight to feel special from behind.
A low ponytail is the safest version here. High ponytails and graduation caps do not get along. They fight for the same space, and the cap usually loses in the worst way.
This style is especially good if you want the braids to stay neat for the rest of the day without a lot of retouching. A little scalp oil on the parts, a satin wrap the night before, and you are in decent shape.
18. Waterfall Braid With Pinned-Back Length
A waterfall braid can look delicate, but it does not have to be fragile. The trick is pinning the loose pieces back enough that the cap and tassel do not chew them up during the ceremony.
The braid itself should stay close to the head, usually across the crown or just above the ear. Then the hanging sections can be tucked or pinned where they will not tangle with the gown collar. If the cap band sits right over the waterfall drop, it will flatten the braid and hide the pretty part, which is a shame. Keep it a little lower or a little farther back.
This style works best when you want softness around the face without going full updo. It leaves room for earrings and keeps the neckline open, which reads nicely in photos.
A few tiny pins behind the braid can hold the loose pieces in place without making them stiff. That balance is the whole point here.
19. Braids With Ribbon or Satin Cords
A thin ribbon threaded through a braid changes the whole look without adding much bulk, and bulk is the enemy on cap day. Satin cords are even better if you want a smoother finish that does not snag the hair.
The color choice can be subtle or bold. A neutral ribbon keeps the braid soft, while a school-color ribbon gives the style a little ceremony-day personality. Keep the width narrow—around 1/4 to 1/2 inch—so the ribbon does not overwhelm the braid or make it hard for the cap to sit neatly.
- Thread the ribbon through the braid at the start, not halfway through
- Keep the ribbon flat so it does not twist into a knot inside the plait
- Tie the ends low and trim them cleanly if they will show
- Use a satin finish if your hair tends to snag easily
This is a small change, but it photographs well because the ribbon catches the eye without forcing the braid to look overdone.
20. Curly Braid-Out Hybrid With an Accent Braid
A braid-out with one or two accent braids is a good answer if you want texture that still survives the cap. The accent braid gives the style structure near the front, and the curls show off once the cap comes off, which is usually when the best pictures happen anyway.
The crown should stay stretched and smooth enough for the mortarboard to rest on it. If the roots are too fluffy, the cap lifts. If the curls are overworked, they lose shape fast. So the goal is controlled texture, not total volume everywhere.
I like this look for natural hair because it lets the texture be part of the style instead of something you have to hide. A little oil on the ends, a light foam on the braid-out, and a clean part at the front are enough to make it feel finished.
If you want the accent braid to show, keep it narrow and place it where the cap edge won’t hide it. That sounds obvious, but cap placement can swallow a pretty detail in a second.
21. Half-Up Braids With Open Ends
A half-up braid style is a smart compromise when you want to keep some length visible and still leave room for the cap. The top section gets braided or twisted back, while the lower lengths stay down and soft.
Unlike a full updo, this keeps the style from feeling too formal. Unlike loose hair, it gives the cap something more stable to sit against. The braid or twist should stay low enough that the cap band does not press into a bulky knot. That is the part that makes or breaks the look.
This style works especially well on long hair, layered braids, or extensions that you want to show off after the tassel turn. It also gives you a little movement at the ends, which keeps the whole silhouette from looking stiff in photos.
A small hidden pin at each temple helps the top section stay put. Use more if your hair slips easily. There is no prize for using fewer pins.
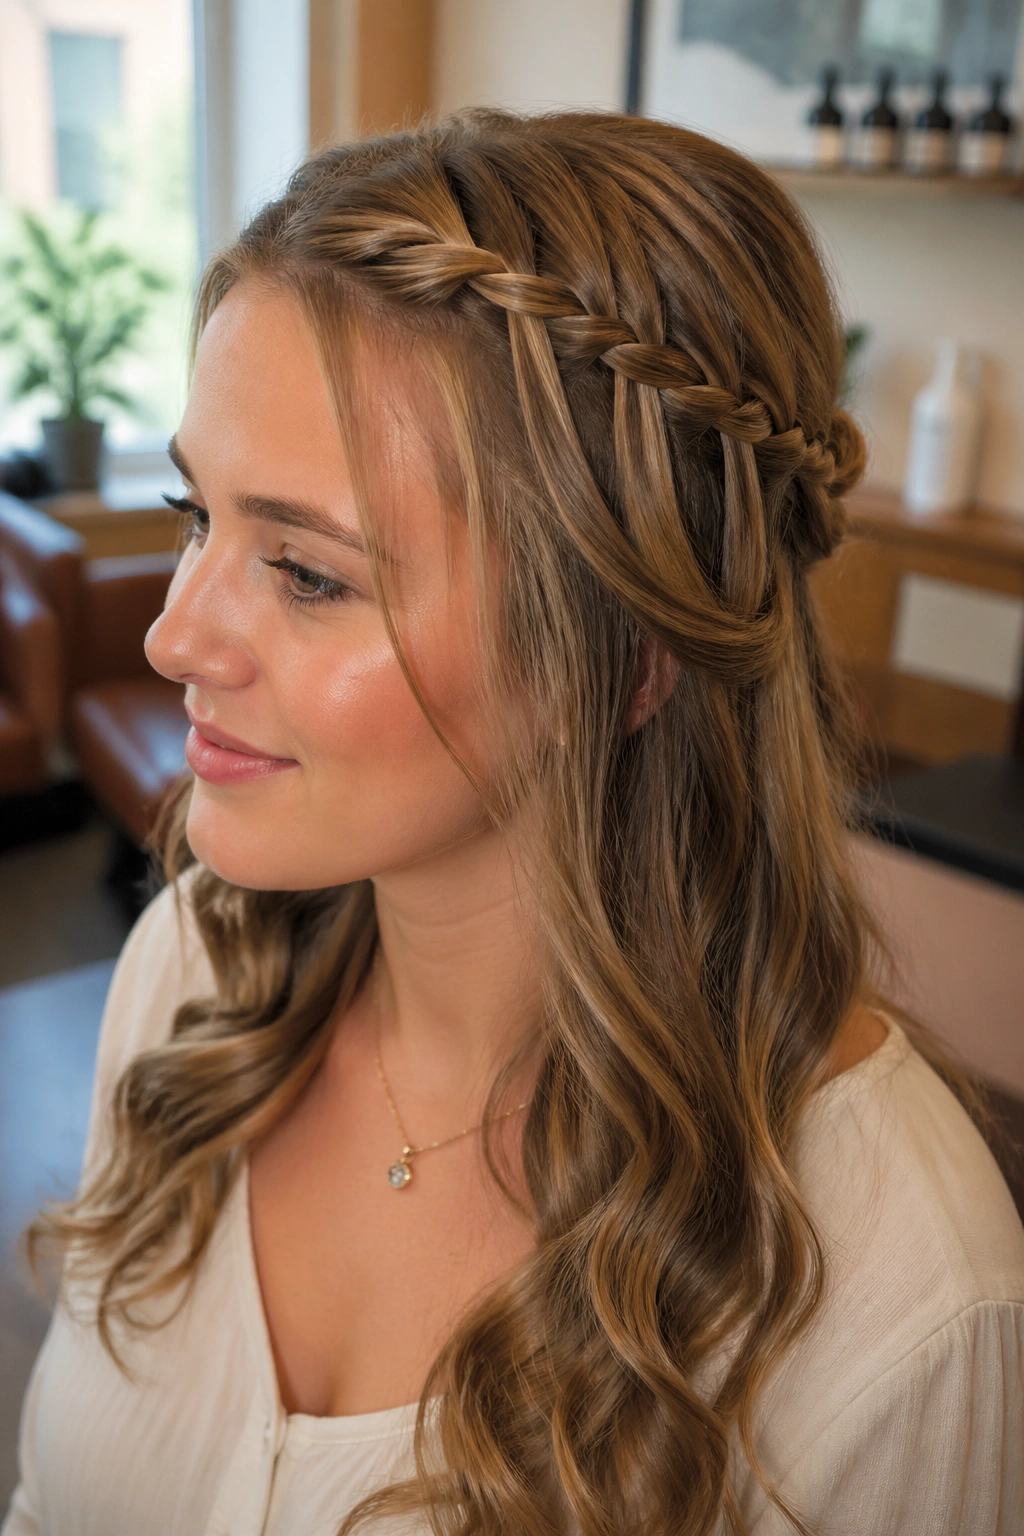
22. Soft Graduation Braids With Face-Framing Pieces
If you want one style that feels gentle, neat, and easy to wear all day, this is the one I’d put near the top of the list. Soft graduation braids with face-framing pieces keep the hair low and calm under the cap while leaving just enough shape around the face to stop the style from looking severe.
The braids can be two low plaits, a braided ponytail, or a loose braided wrap at the nape. The face-framing pieces matter because they soften the line of the cap and make the style look lived-in instead of rigid. Keep those front pieces smooth, but not plastered down. A little movement helps.
This is also one of the most forgiving looks if your cap sits awkwardly or if you will be wearing the style for hours before the ceremony starts. It handles a slight dent better than a tall bun and usually needs less touch-up than anything with a lot of height.
Pin the braid below the cap band, check the profile from the side, and take one last look in natural light. That little check catches the problems the mirror misses.