Fresh flowers in braids can look delicate, but the real trick is structural. The bloom has to sit where the braid already wants to hold shape — at a crossover, a pin, a bun edge, a knot. Put a dainty flower in the wrong place and it droops in twenty minutes. Put it on a ridge of hair and it behaves.
Weight matters. So does stem length. A long stem pokes, a wet stem slips, and a flower head that is too big can flatten the braid like it was never there. The best braid-and-flower pairings usually use small blooms, trimmed stems, and a little restraint. That sounds boring. It isn’t. It’s the difference between hair that looks pretty in theory and hair you can actually wear without checking a mirror every five minutes.
Once you start looking at braid styles with fresh flowers tucked in, the pattern becomes obvious: the braid gives the flower a home, and the flower gives the braid a pulse. Some styles want misty, tiny blossoms. Others need one firm bloom and a few pins. The right match changes the whole mood.
Keep that in mind, because the first style below is a good place to start if you want something soft and easy to wear.
1. Soft Crown Braid with Baby’s Breath
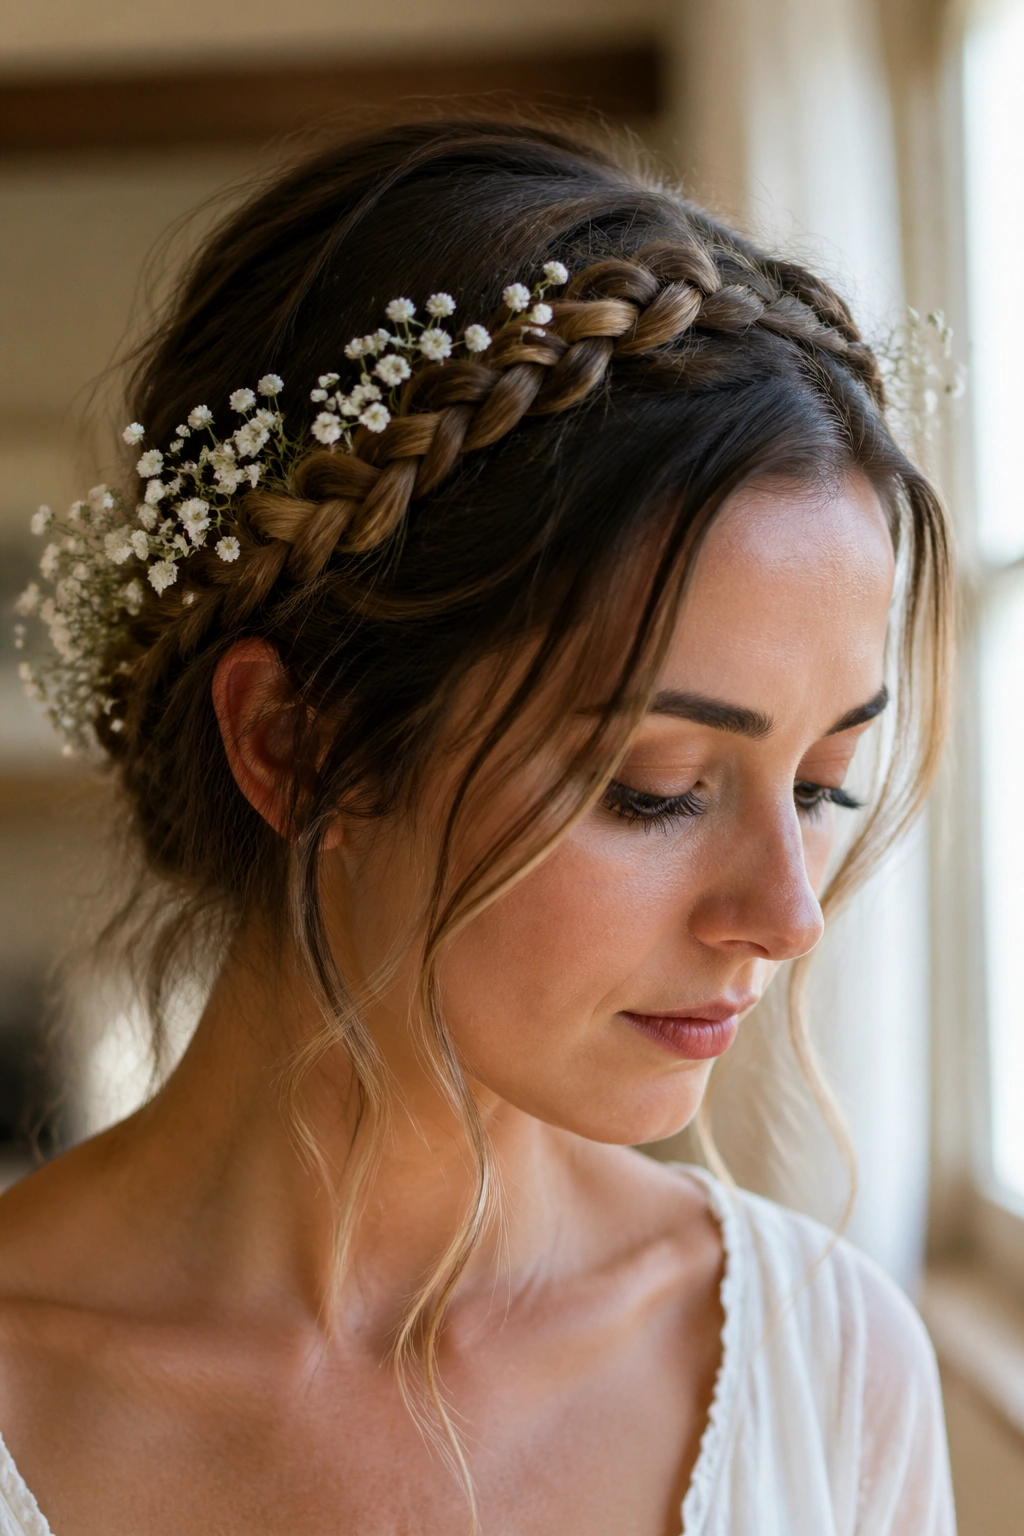
Baby’s breath is the easiest flower to trust in a crown braid. The blooms are tiny, the stems are light, and the whole thing looks like a soft cloud resting against the hairline instead of a bouquet trying to escape. That matters. A crown braid already has a gentle shape, and baby’s breath fills the open spaces without stealing the show.
Why Baby’s Breath Works Here
The braid does most of the visual work, so the flowers only need to whisper. Baby’s breath behaves like texture, not decoration, which is why it sits so well along the arc of the head. I like tucking it where the braid crosses near the temple and again near the back of the ear, then leaving the rest bare.
A few tiny clusters go farther than a crowded row. Three or four sprigs is usually enough for one side, and you can mirror that on the other side if you want symmetry. The braid stays readable. That’s the whole point.
- Trim each stem to about 1 inch before tucking it in.
- Slide the stem under a braid crossover, not into the center of a braid segment.
- Use two crossed bobby pins over the stem if the hair is slippery.
- Keep the clusters small; anything bulky starts to look like a garnish.
Best trick: mist the flower heads lightly after the braid is finished, not before. Wet petals bend faster than people expect.
2. Loose Dutch Braid with Mini Roses
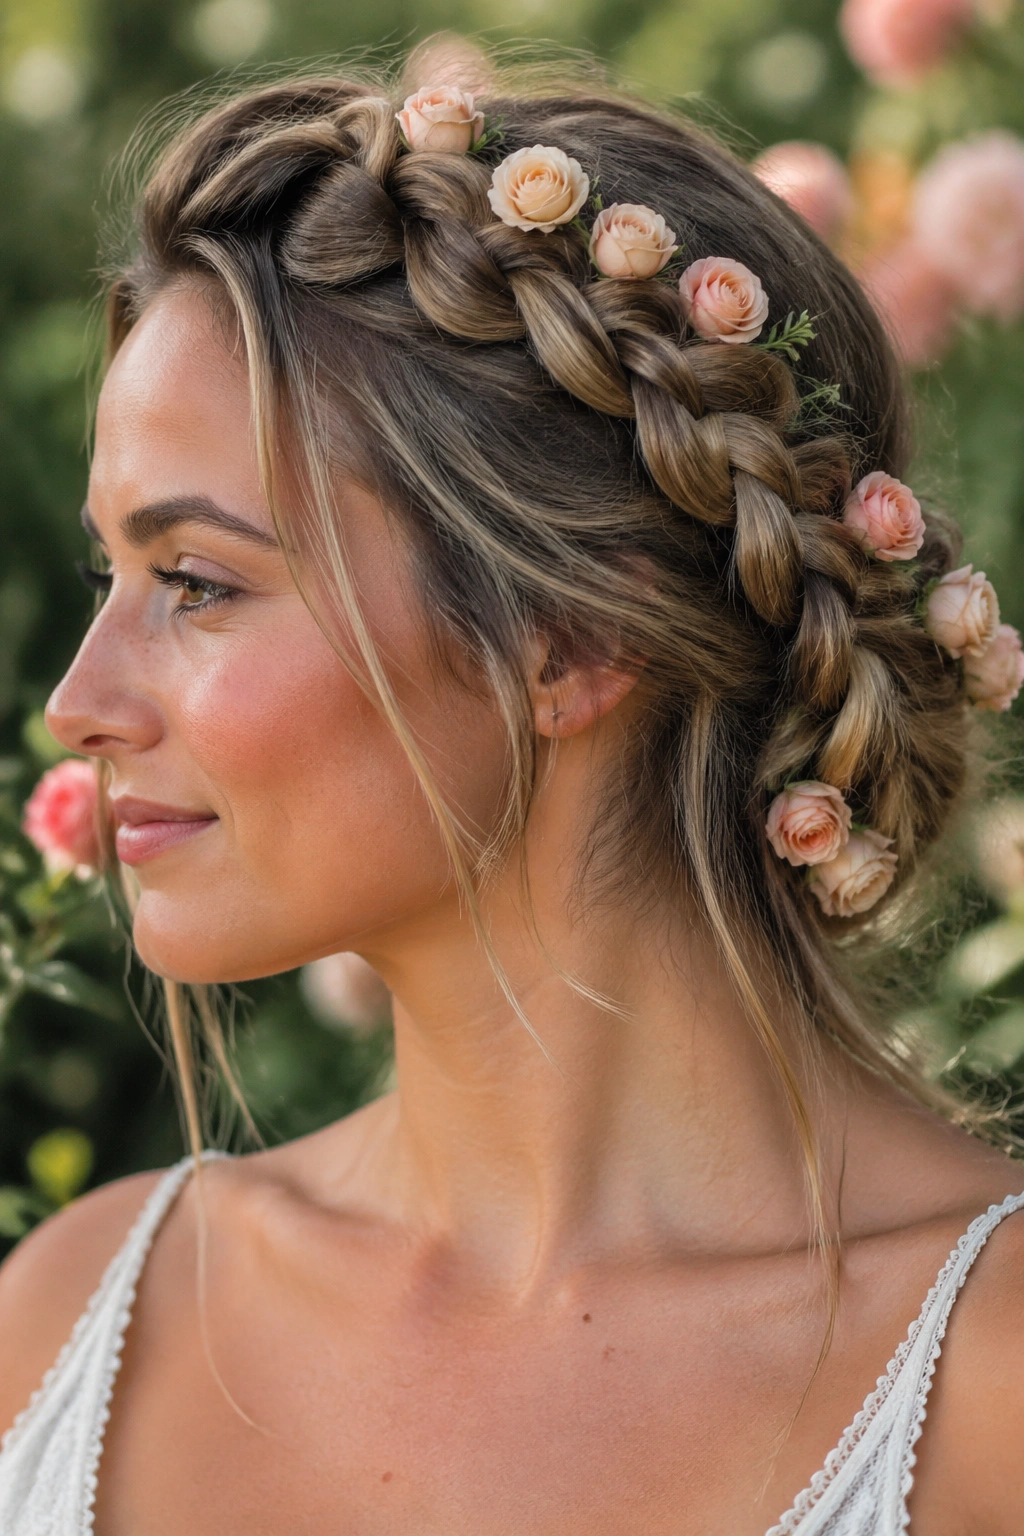
Mini roses can handle more than they look like they can. That surprises people every time. A loose Dutch braid gives the rose heads a little ledge to sit on, and the braid’s raised pattern keeps the flowers from disappearing into the hair. It’s a strong pairing because the braid is structured and the flower is plush.
Use small spray roses or single mini blooms, not full-size roses with heavy open heads. A rose the size of a plum is too much for this style unless you want the braid to sag on one side. A bloom about the size of a 50-cent coin sits much better and feels intentional rather than overloaded.
The placement matters as much as the flower choice. Put one rose near the top section, one near the nape, and maybe a third just above the collar line if the braid is long enough. That spacing keeps the eye moving down the braid without making it look like you raided a florist bucket.
And yes, the braid can be a little loose. It should be. A tight braid crushes petals.
3. Side Fishtail Braid with Orchids
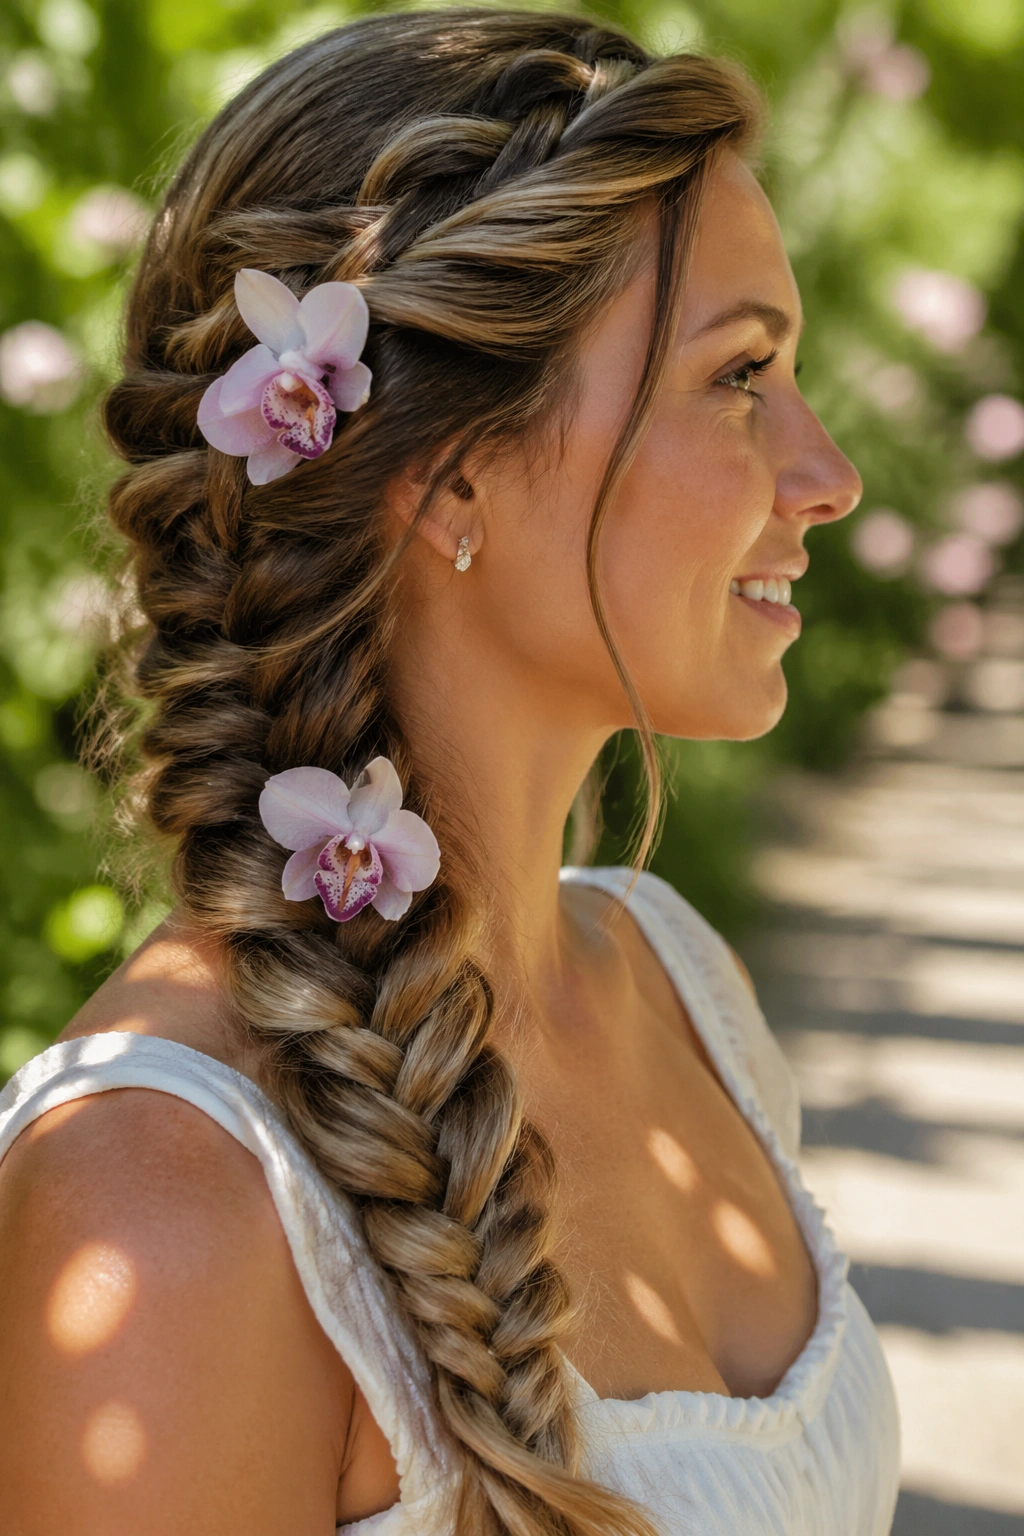
Why do orchids look so good against a fishtail braid? Because the braid has all that fine, crosshatched detail, and orchids bring a clean, smooth shape that cuts through it. The contrast is doing the heavy lifting. A fishtail braid also lies flatter than a chunky plait, which gives those petals a calm little surface to rest on.
How to Use Orchid Blooms
Use small orchid florets or detached blossoms, not a long trailing spray. A full stem can overpower the braid and flop toward the shoulder. Two blooms is often enough, especially if one sits just behind the ear and the second lands near the braid’s midpoint. If you want a more finished look, tuck the stems into the braid and hide the ends with a pin.
Orchids feel a bit formal, but not stiff. That’s why they work on a side braid. The style already has motion, and the flower adds polish without turning the whole thing into a bridal helmet. That line matters. Nobody wants a braid that looks like a centerpiece.
- Keep the braid slightly off-center for a softer fall.
- Choose orchid blooms with firm petals and short stems.
- Pin the flower where the braid changes direction.
- Avoid packing in too many blooms; one or two is enough.
If you want one style that reads clean from across the room, this is it.
4. Milkmaid Braids with Daisies
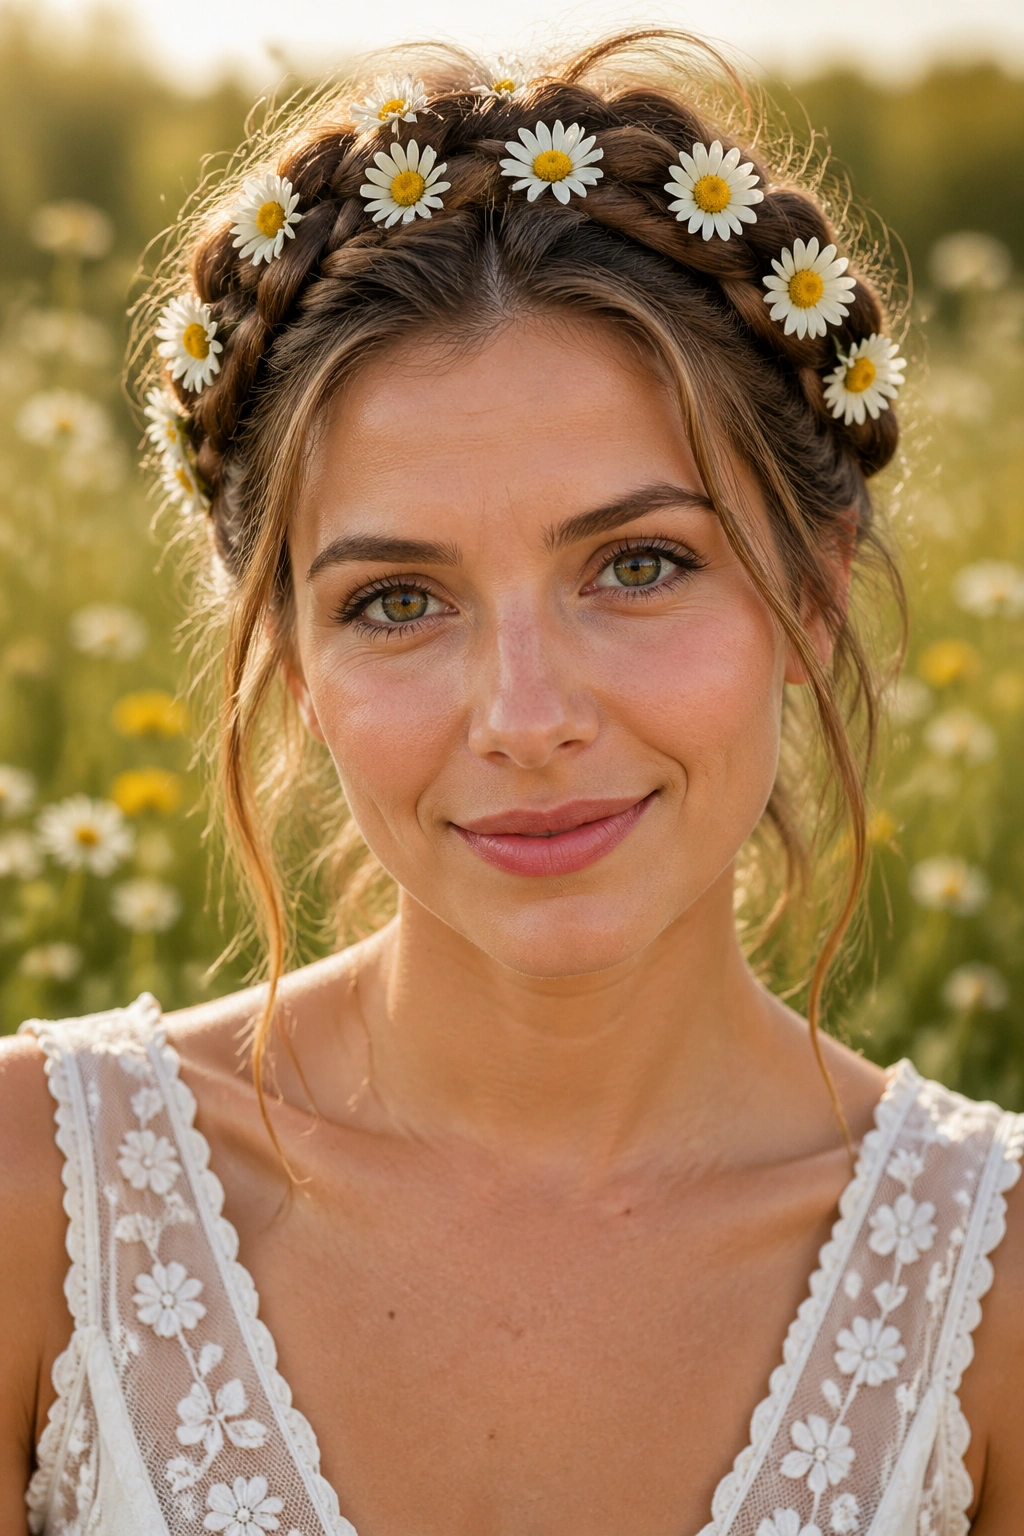
Milkmaid braids and daisies feel like they were invented at the same table. Two braided bands wrapped across the head give the flowers a natural place to land, and the daisy faces keep the look from getting too precious. It’s sweet, yes, but it also has a little shape and a little texture, which saves it from drifting into costume territory.
I’d start by tucking one daisy near each temple, then adding one or two more where the braid curves around the crown. That keeps the flowers centered instead of scattered. Balance is what makes this style work; if one side gets three blooms and the other gets one, the whole thing starts to feel accidental.
A fresh daisy also holds up better than people think if you shorten the stem and let the braid take the weight. Use the braid seam as the anchor point. Don’t try to force the flower through the middle of the plait. That’s how petals get crushed.
- Use daisies with compact centers, not oversized heads.
- Match the flower count on both sides of the head.
- Hide pins behind the ears or under the braid wrap.
- Let one petal angle forward if you want a softer finish.
This is one of those styles that looks easy only when it’s done well.
5. Waterfall Braid with Pansies
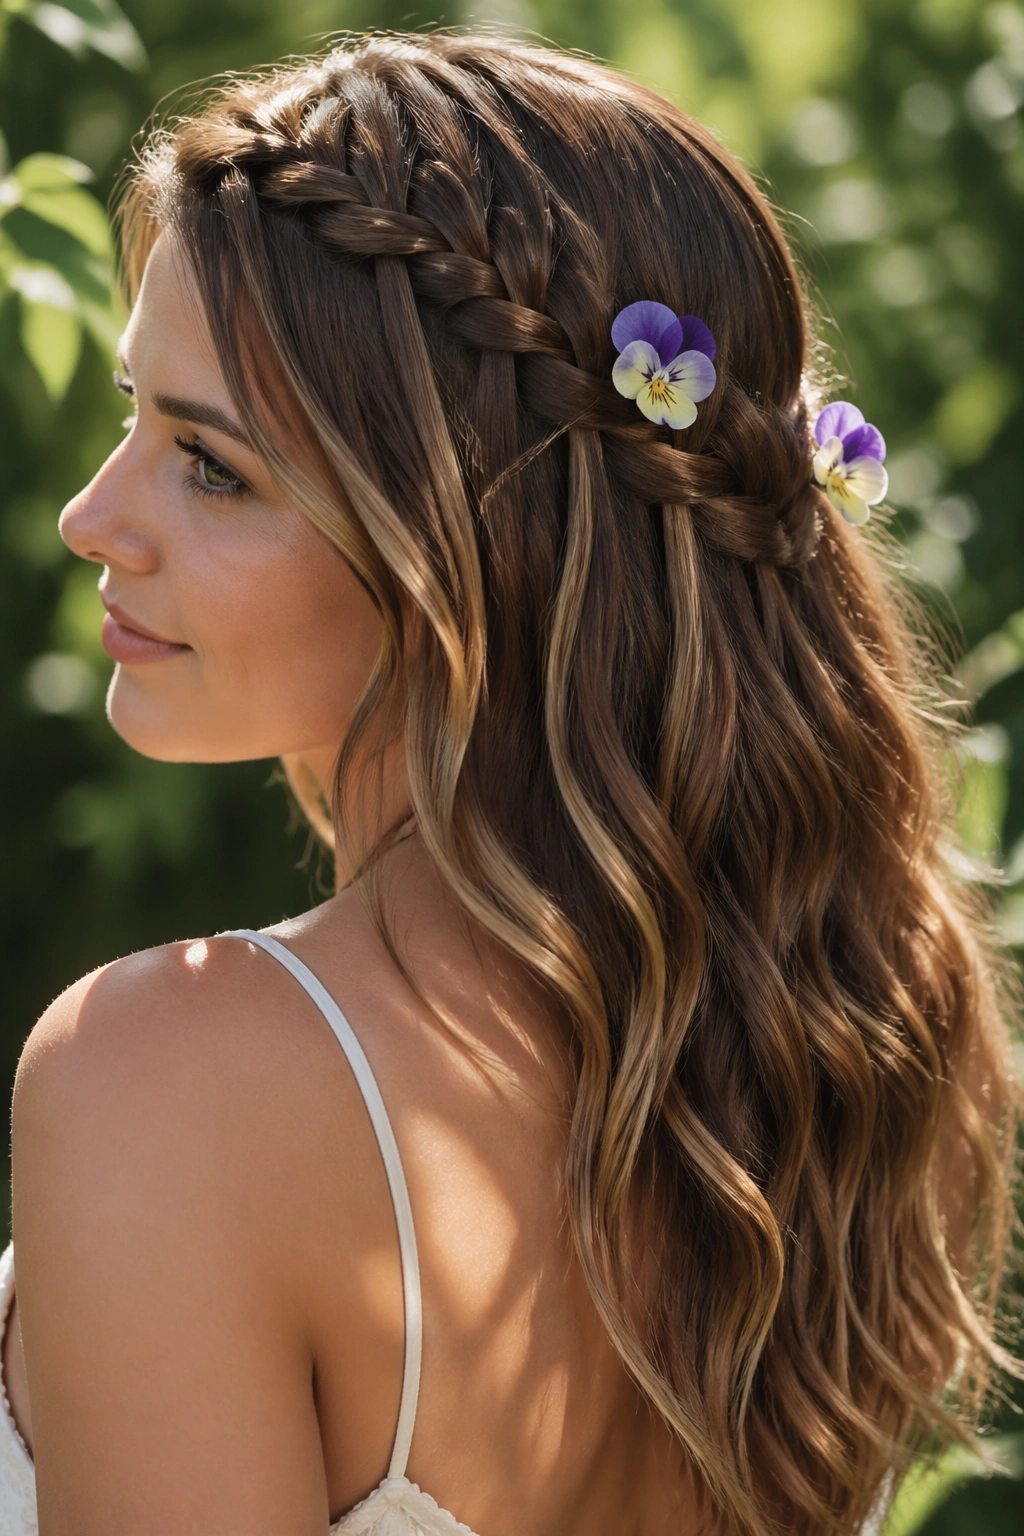
Pansies are little faces. That’s why they work so well in a waterfall braid, where pieces of hair drop through the pattern like little ribbons. The flowers echo that movement instead of fighting it, and the result feels light rather than crowded. A waterfall braid already has open spaces, so it gives the petals room to breathe.
The best place for a pansy is just below one of the falling sections, where the flower can sit against the hair instead of floating on top of it. I like one bloom near the temple and another closer to the back of the head. That’s enough. Pansies have enough color on their own, so you do not need a lot of them to make the braid read as floral.
Pansies bruise fast if you pinch them, which is annoying but not hard to work around. Hold them by the stem base, trim the stem short, and tuck the flower with the gentlest hand you can manage. The petals look velvety when they’re fresh, almost painted. Once they start to dry, they lose that softness.
A deep purple pansy on dark hair looks dramatic. A pale yellow one against blonde hair reads softer and more airy. That’s the sort of detail that changes the whole mood.
6. Boxer Braids with Tiny Spray Roses
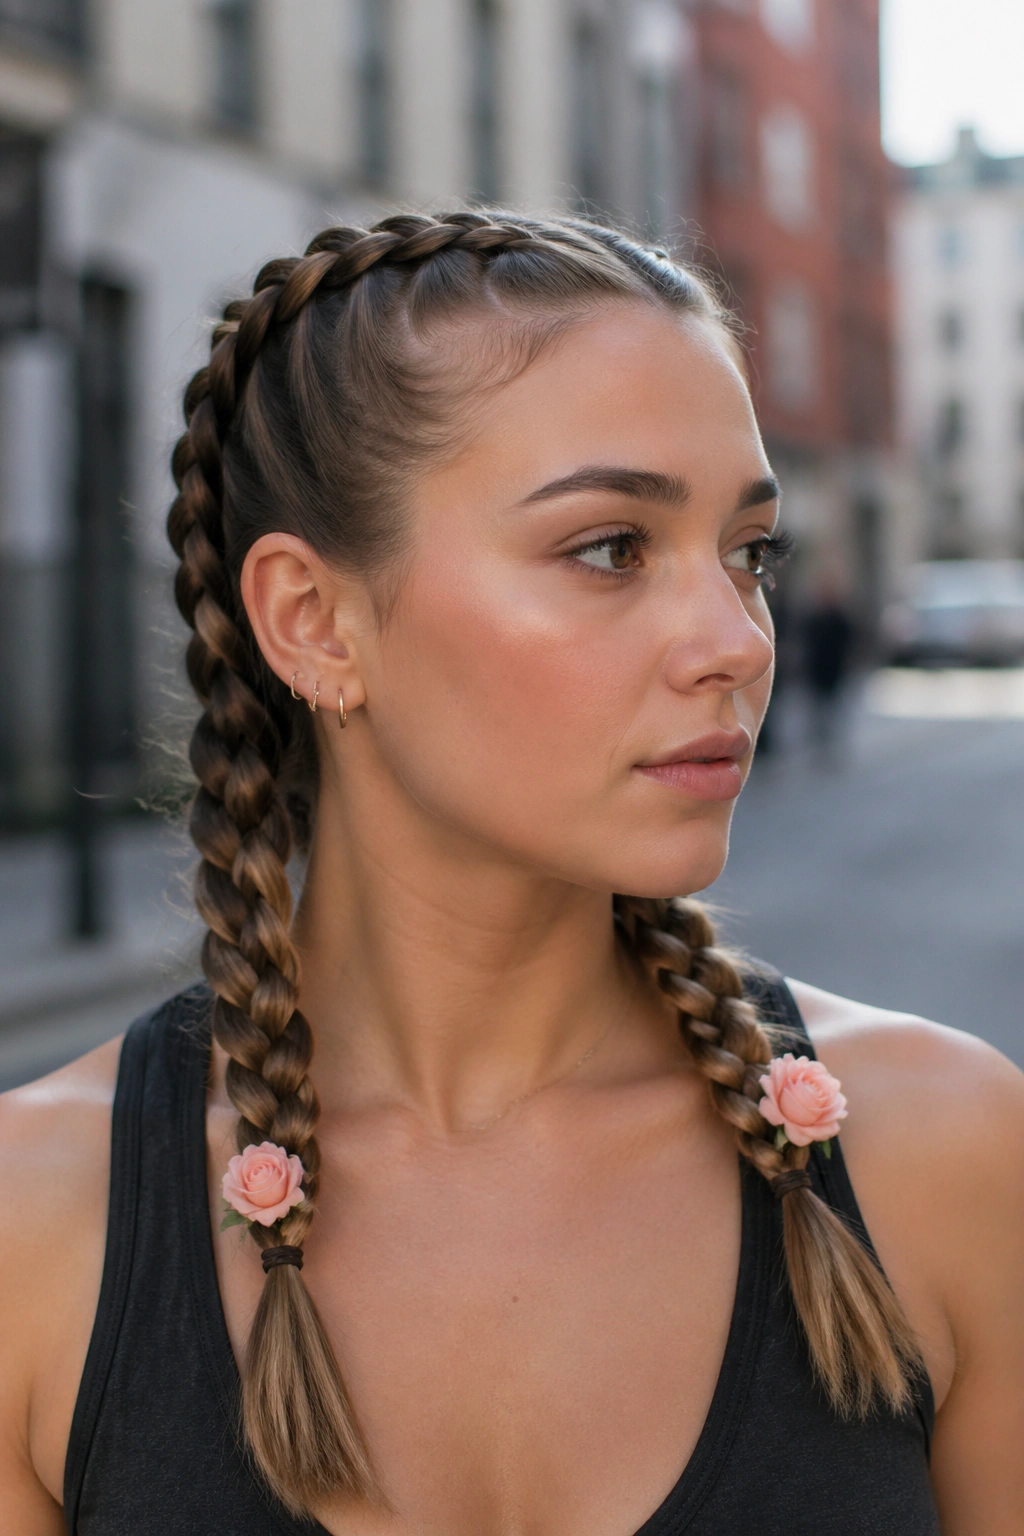
Boxer braids are not the first style people think of when they picture fresh flowers, which is exactly why they’re fun. The look is sharper, cleaner, and more grounded than the usual romantic braid. Tiny spray roses soften that edge without wrecking the shape. Big blooms would be a mistake here. They’d fight the braids.
Use the flowers sparingly. One small bloom near the base of each braid is enough, especially if the rest of the hair is tight and smooth. If you add too many petals along the length, the style loses its clean line and starts to look fussy. Less is the whole game here.
This is a good choice if you want the braid to stay practical while still feeling dressed up. The style works for long walks, outdoor plans, and any setting where you do not want loose tendrils getting in your face. A tiny rose tucked behind the ear or close to the nape gives you the floral note without changing the braids’ purpose.
And that’s the point. The flowers should feel like an accent, not a takeover.
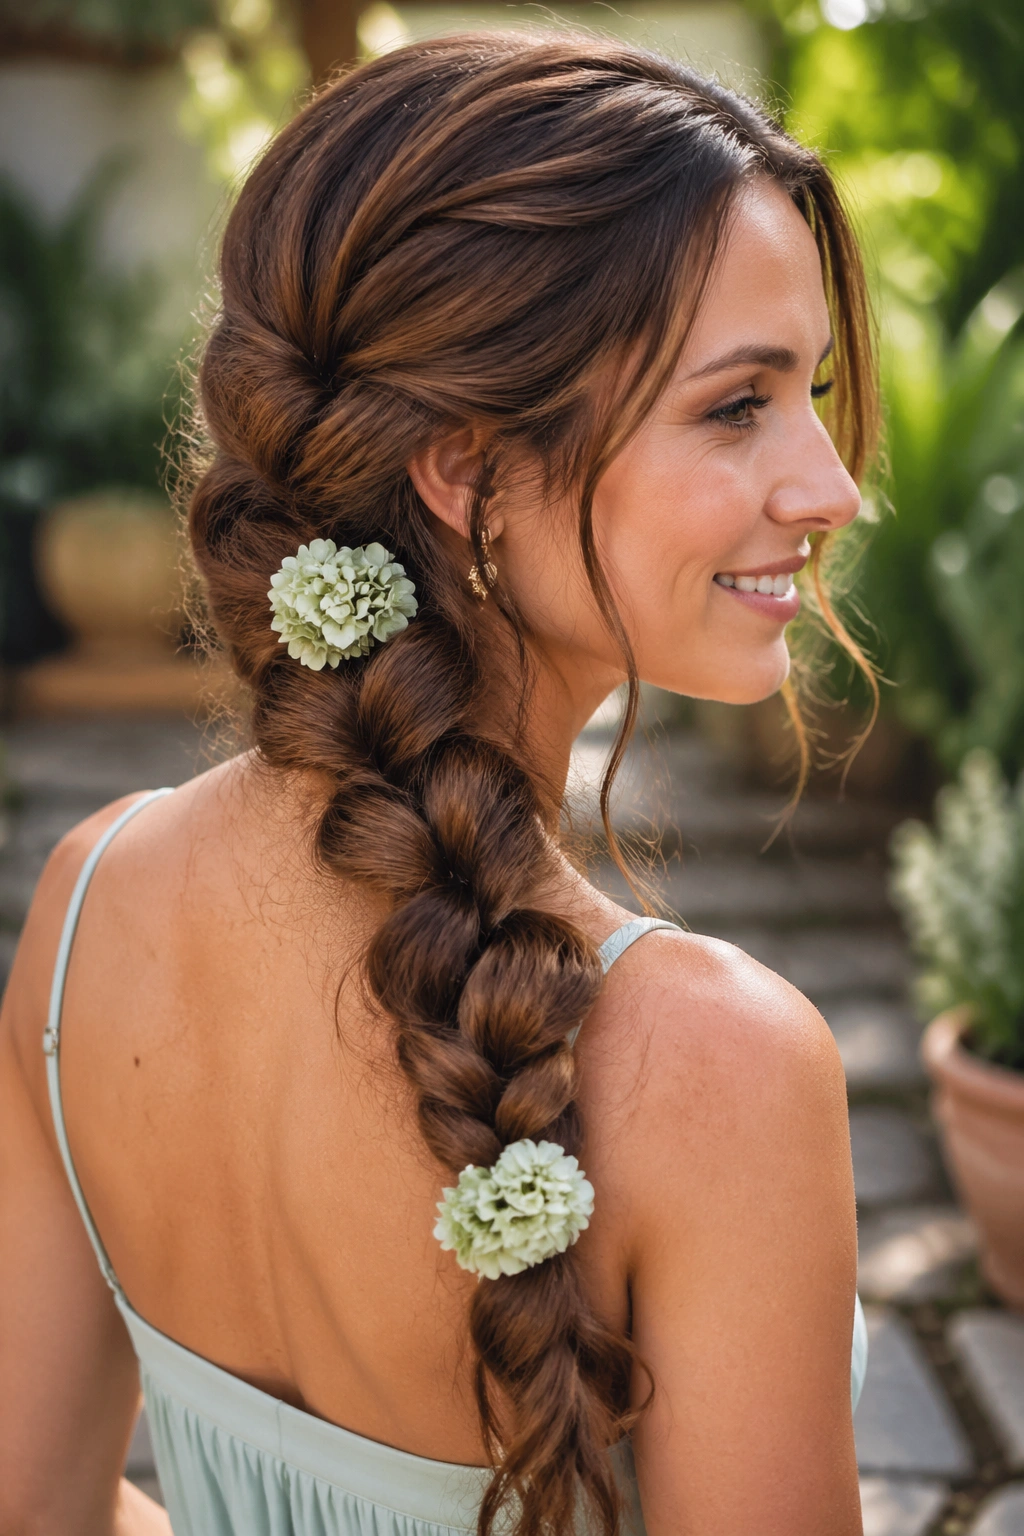
7. Braided Low Bun with Ranunculus
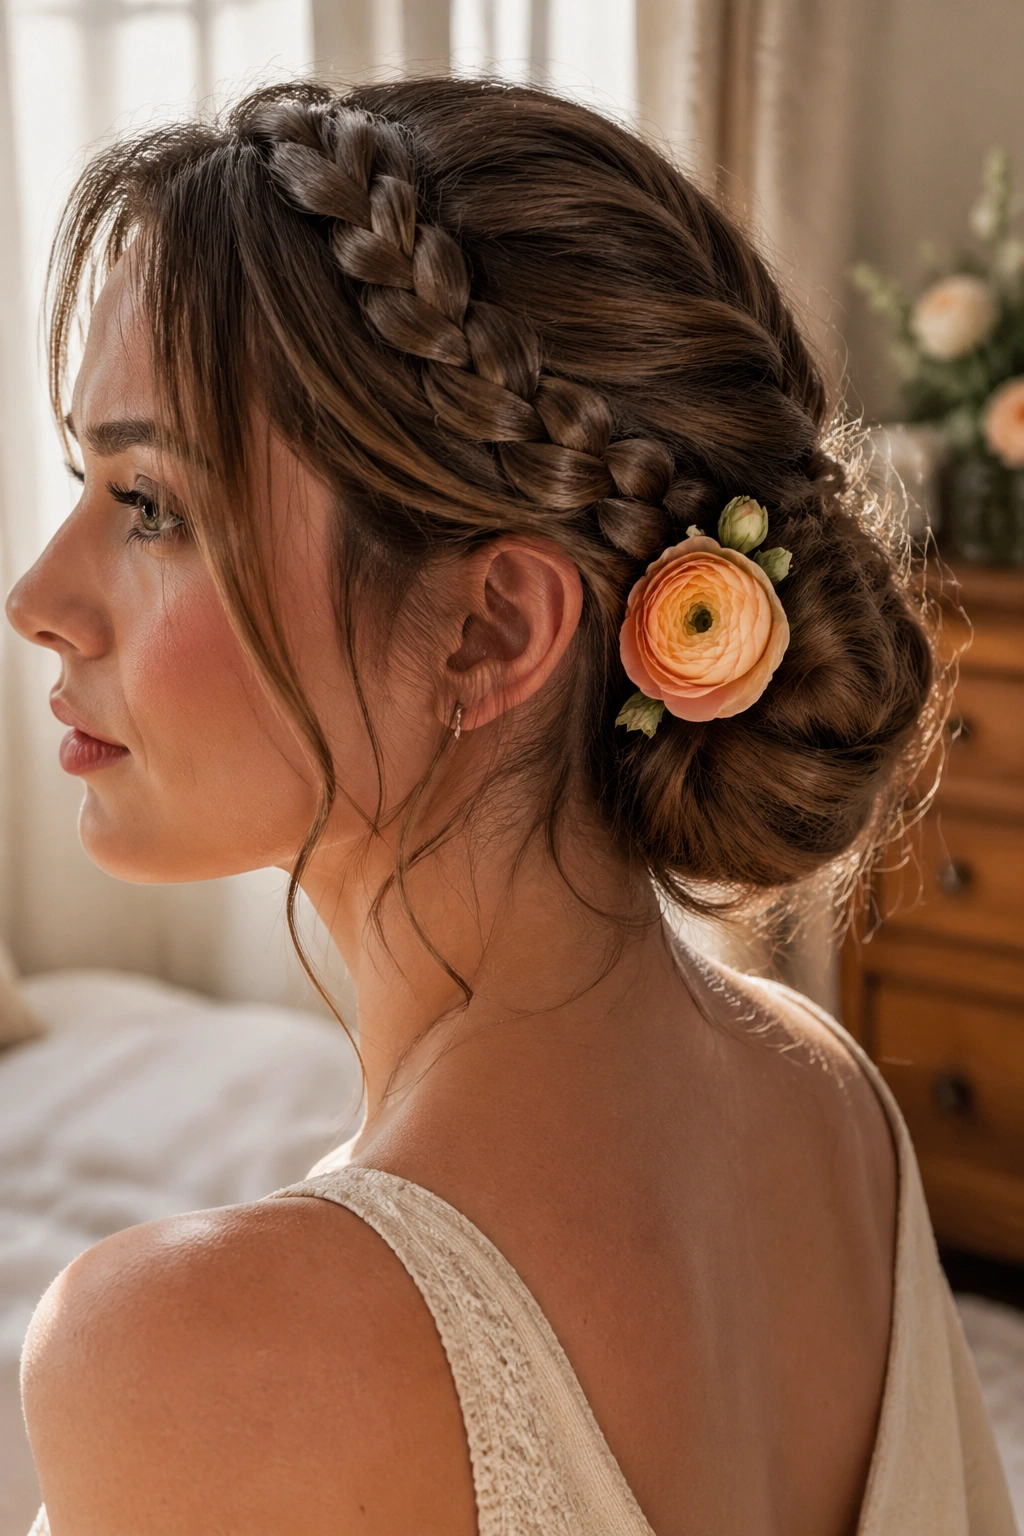
Ranunculus and a braided low bun are a good match because both have a rounded, layered feel. The bun gives the flower a base, and the flower gives the bun a little movement at the edge. When this works, it looks expensive in the nicest, least fussy way.
Where Ranunculus Sit Best
The side of the bun is usually better than the center. A ranunculus perched at the rim can show off all those tight petals without getting crushed by the twist of the bun itself. Put the bloom where the braid wraps into the bun, not on the very top where it has to compete with the shape of the knot.
Small to medium blooms are easier to wear than the big, heavy ones. A ranunculus the size of a quarter is manageable. A bloom the size of a plum starts to dominate the whole style. If you want two flowers, keep one larger and one smaller so the eye has a clear starting point.
- Anchor each stem with a hidden U-pin or two small bobby pins.
- Choose blooms with firm outer petals.
- Tuck the flower where the bun already has tension.
- Leave a little space between blossoms so the petals can open.
Tiny warning: ranunculus bruise if you squeeze them into the bun too hard. Let the braid hold them, not your fingers.
8. Halo Braid with Wildflowers
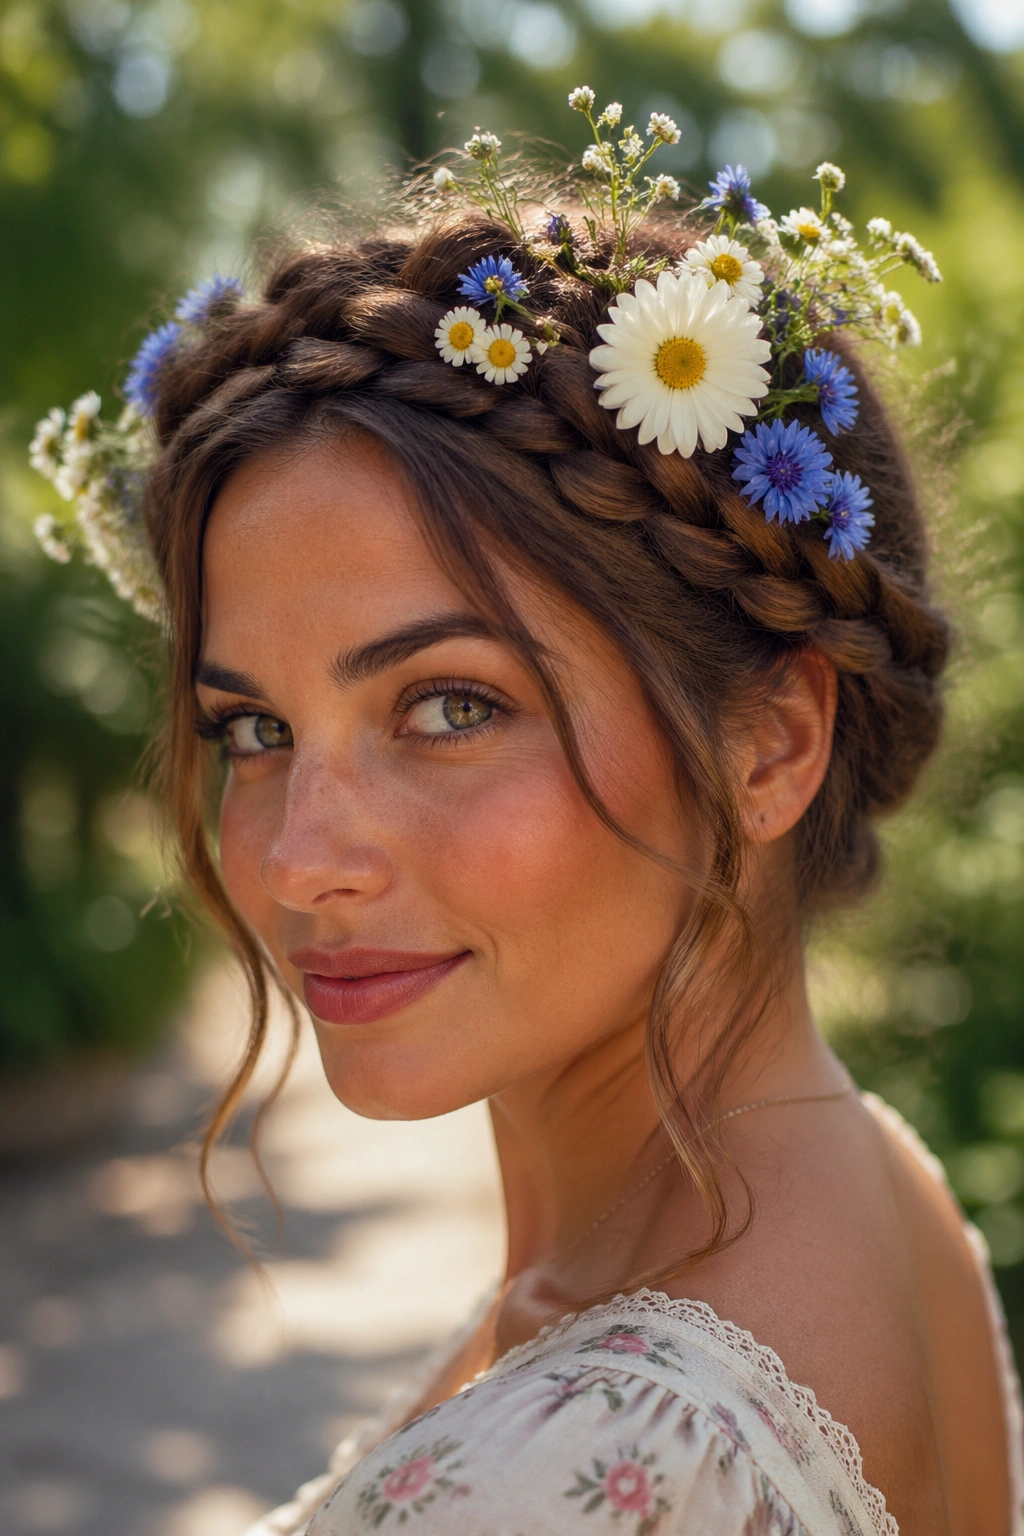
The halo braid already has that soft, wrapped-around-the-head shape, so wildflowers feel right at home. The best version isn’t stuffed full. It’s loose enough to show the braid and scattered enough to feel like you picked the flowers and tucked them in on the walk back inside.
The charm is in the mismatch. A halo braid can carry a mix of small blooms — think chamomile, cornflowers, tiny daisies, a sprig or two of greenery — and still look neat, because the braid creates a circular boundary. That boundary keeps the style from turning into chaos. Without it, the flowers would just float away from the hair.
A few longer stems can be useful at the back of the head, where they’re less likely to poke your face. Near the temples, keep the flowers smaller and flatter. Wildflowers have a way of getting unruly fast, which is part of the appeal, but the braid needs to stay visible under all that softness.
No need to overthink the mix. A halo braid with one dominant bloom and a couple of tiny supporting flowers is often stronger than a full rainbow of petals. Too many colors start to blur. Two or three tones feel cleaner.
9. Rope Braid Ponytail with Tulips
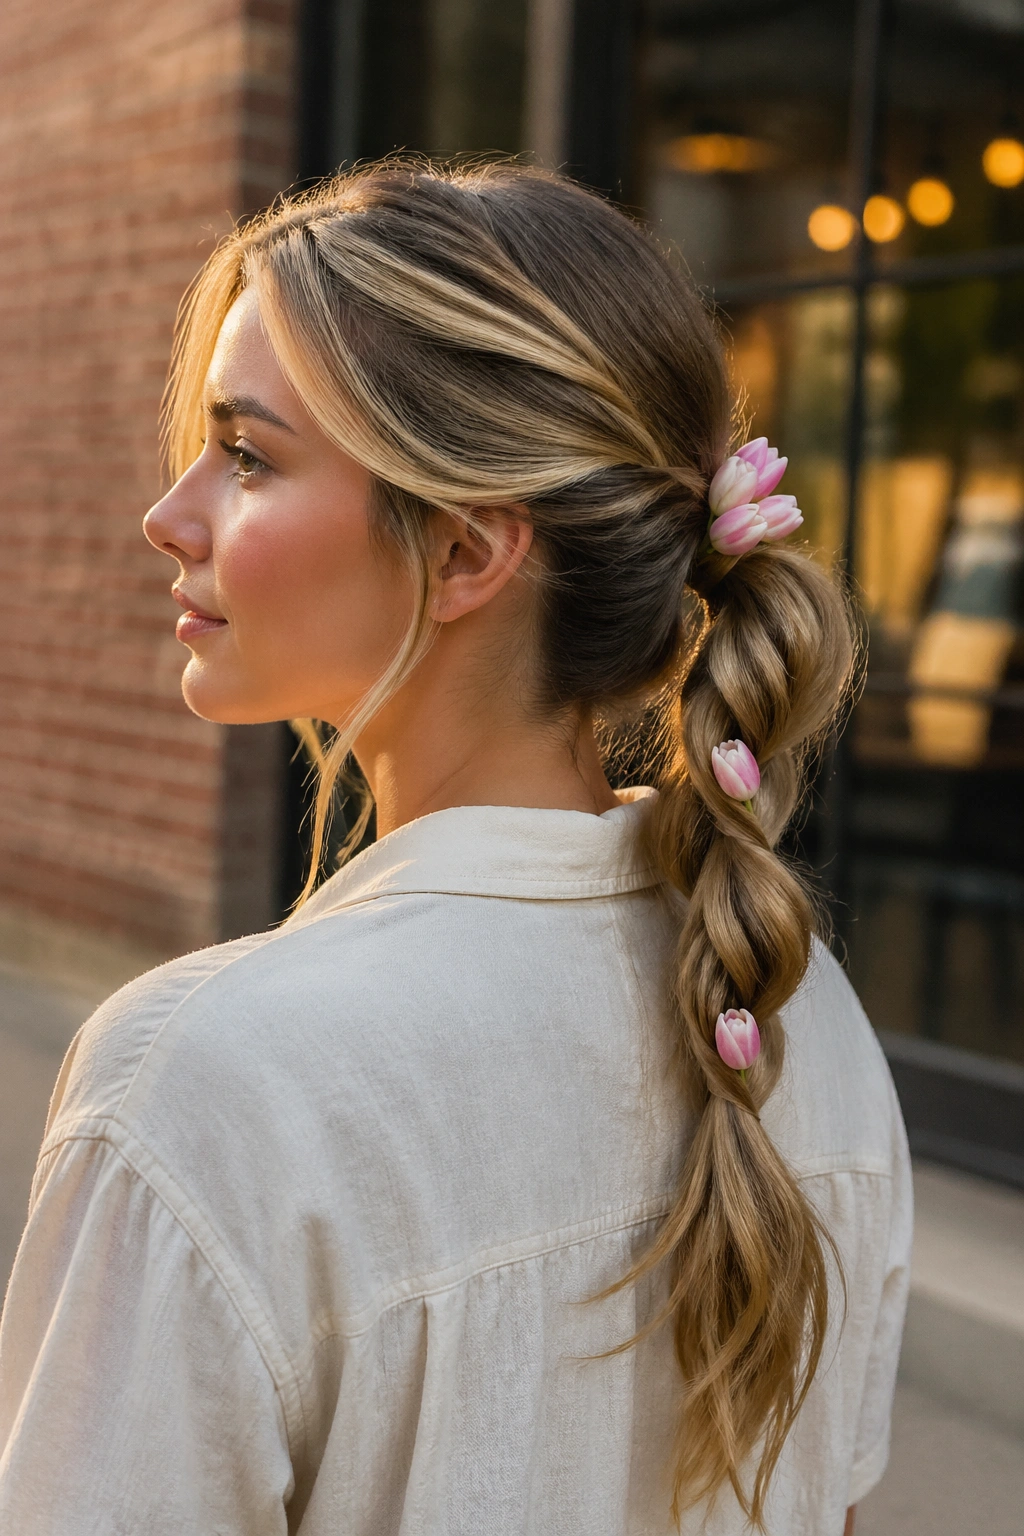
Why does a rope braid play so nicely with tulips? Because the twist gives you a long, straight line, and tulips have that sleek, upright shape that doesn’t want to be buried in a thick plait. The braid stays tidy, the ponytail stays easy, and the flowers become the focal point near the base or along the upper length.
Keep the Stems Short
Tulips are graceful, but they’re not the most obedient flower. Their stems bend, their heads nod, and they can start to lean if you give them too much length. Short stems solve half the problem. I’d tuck one tulip at the ponytail base and, if you want a second, place it a few inches lower where the rope braid has already tightened into place.
The flower should look like it belongs there, not like it was balanced on top. That means using the twist of the braid as a holder. If the bloom is too heavy, the ponytail droops. If the stem is too long, it pokes your neck. Neither one is worth the trouble.
A rope braid also suits a cleaner, more modern look. You can wear it with a smooth center part or pull a few soft pieces loose around the face. Both work. The flowers just need to stay compact and fresh.
A small tulip bud can be even easier than a fully open flower, especially if you want the shape to stay crisp for longer.
10. Pull-Through Braid with Hydrangea Clusters
A pull-through braid is already plush, which makes hydrangea a natural partner. The braid has volume in every section, and hydrangea brings that same round, full shape to the surface. If you’re after a braid that looks full from every angle, this is one of the stronger pairings.
The main thing to watch is weight. Hydrangea heads can be bigger than they seem, and a full bloom can drag the braid down if you pack in too many. I like using either one small cluster or a few clipped florets instead of a whole head. That keeps the style lifted and the flowers readable.
The Small Details That Keep It Neat
- Place the flowers at the elastic points, where the braid already has grip.
- Use a hidden comb or two pins to support any larger cluster.
- Keep the upper sections of the braid slightly tighter than the lower ones.
- Dry the stems before tucking them in; wet ends slide.
The pull-through braid gives you pockets. Use them. A flower tucked into a pocket sits better than one pressed flat against the hair. That small shift makes the whole style last longer and look less crowded.
If you like big hair without a lot of fuss, this one earns its keep.
11. French Braid into a Low Chignon with Jasmine Sprigs
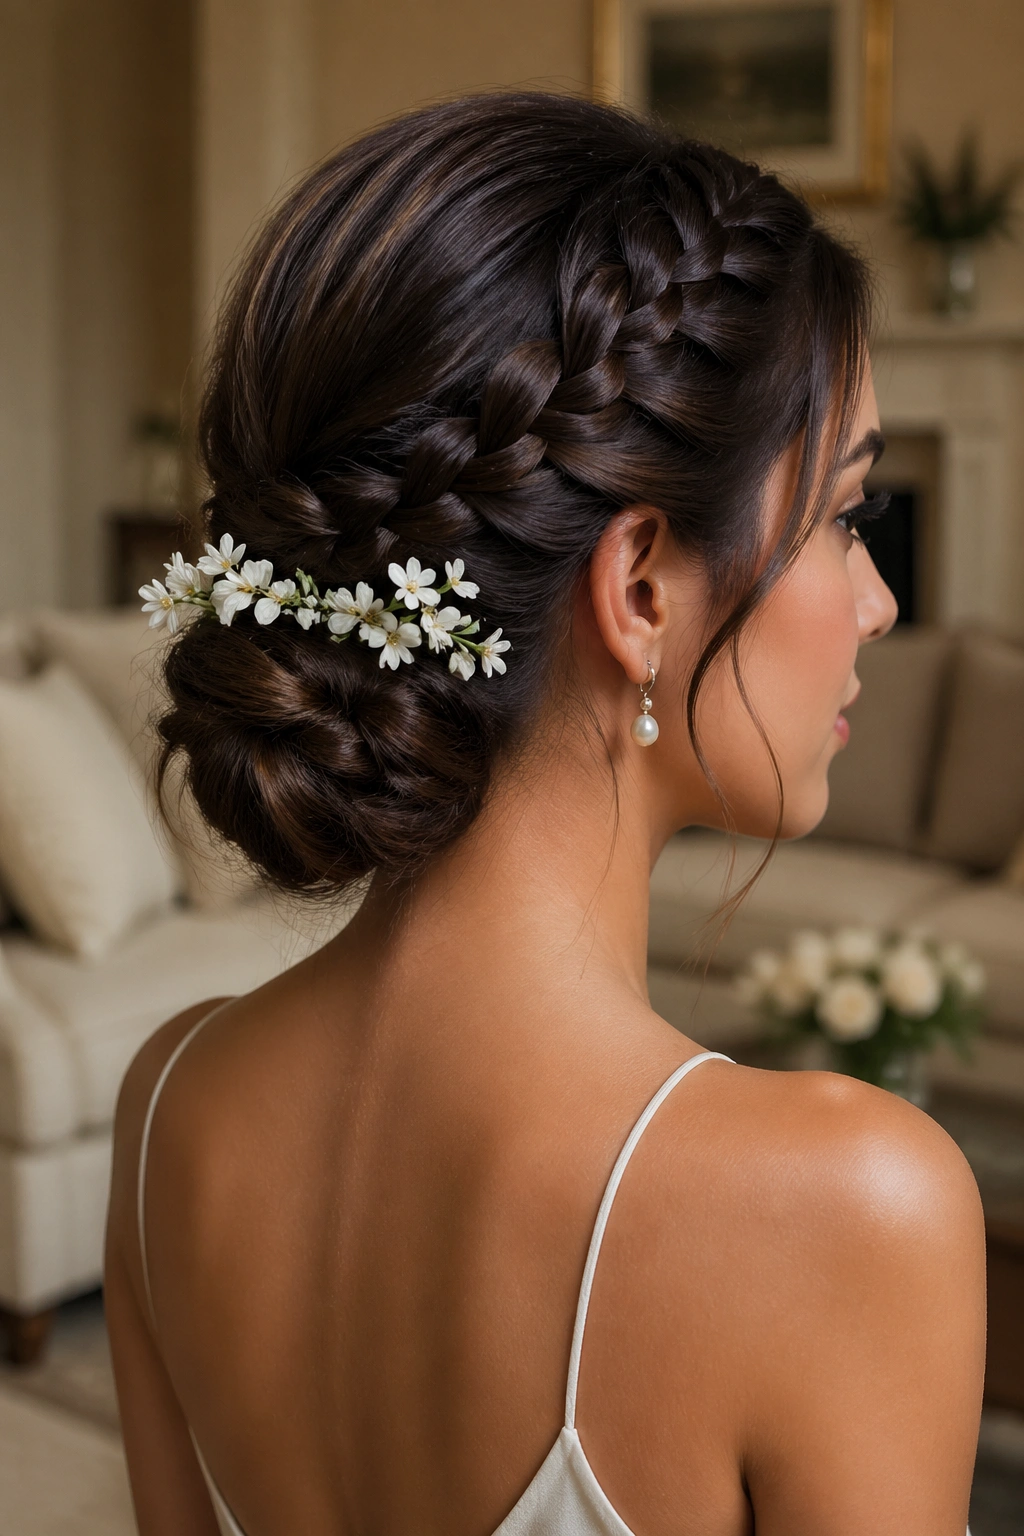
A French braid feeding into a low chignon has a clean line on top and a softer knot at the base, which gives jasmine sprigs two good places to live. The flowers can trail near the braid’s end or sit right where the chignon begins. That little shift from structured braid to wrapped bun creates a nice pause for the eye.
Jasmine is small, fragrant, and easy to overdo if you’re not careful. One or two sprigs are enough. I’d place them just above the chignon seam so the blossoms feel woven into the style instead of pasted on top. The braid itself keeps the hair controlled, which is useful because tiny blooms can get lost in a more open style.
The scent helps, too. Not in a dramatic way. Just enough that when you turn your head, there’s a faint floral note instead of a flat hairstyle. That sort of detail matters more than people admit.
A low chignon also gives you room to use pins without ruining the shape. Hide the stems under the twist, pin the ends flat, and let the flowers sit where the braid stops and the bun starts. That boundary is the sweet spot.
12. Bubble Braid with Peonies
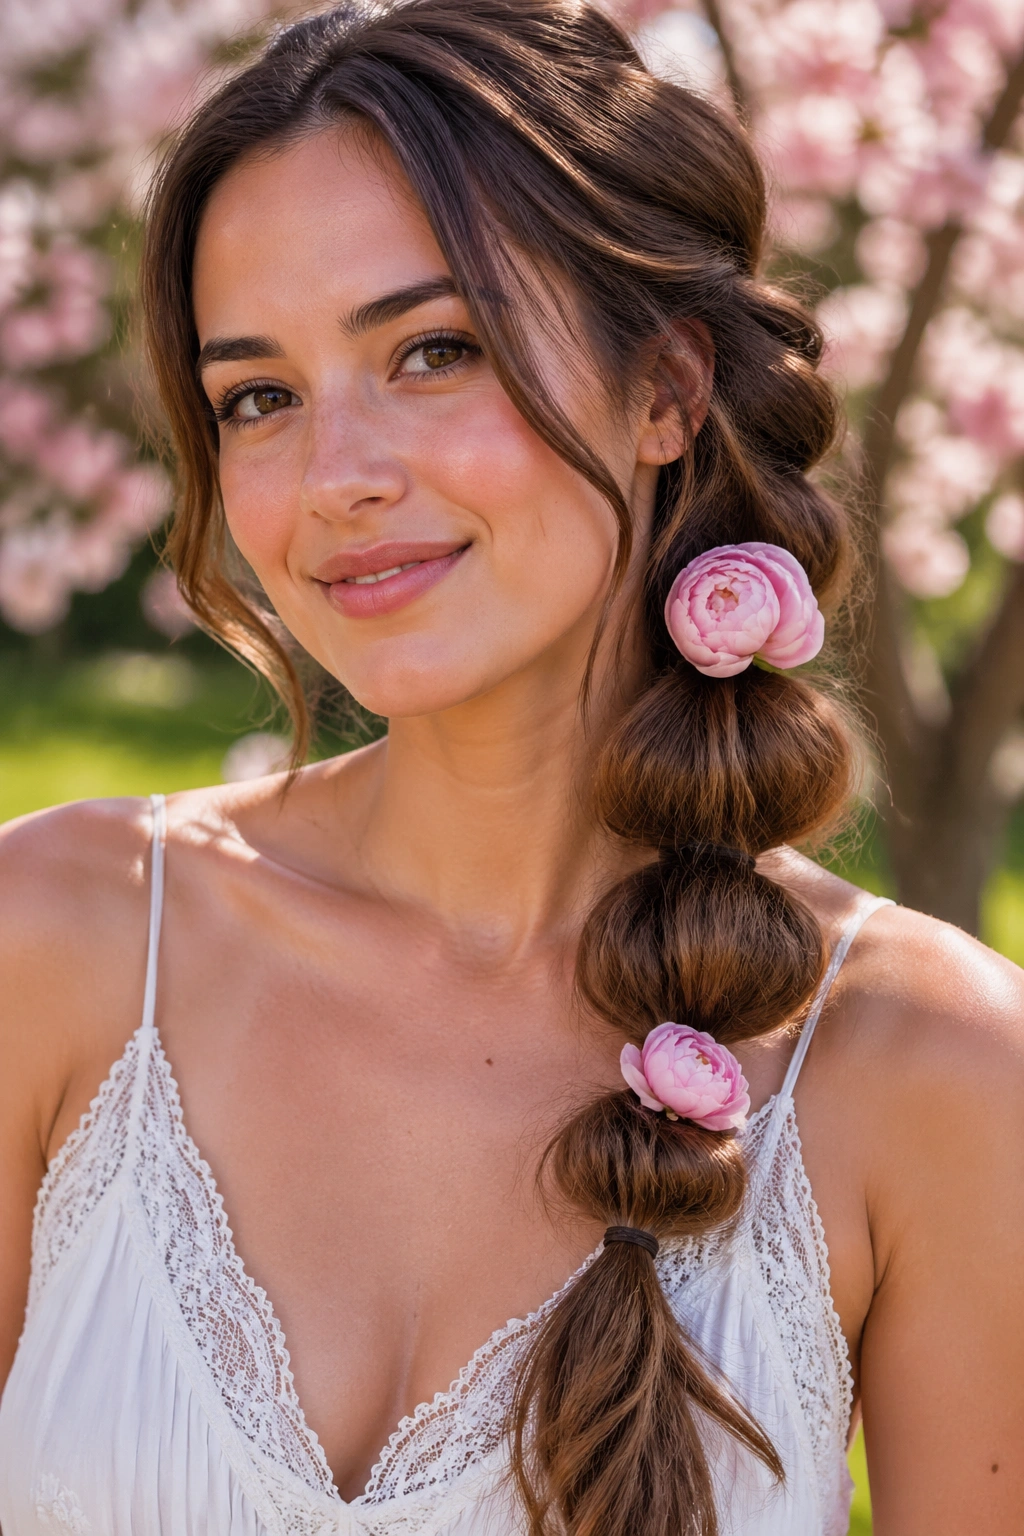
Bubble braids and peonies make sense together because both are about round shapes. The braid has those puffed-out sections, and peonies bring soft fullness on top. When the proportions are right, the style looks playful without feeling childish. When they’re off, it gets crowded fast.
Peonies are larger than most flowers people tuck into hair, so you have to be selective. A small bud or a half-open bloom is easier to wear than a giant open flower. One bloom near the top bubble can be enough, and a second smaller one lower down keeps the eye moving. More than that starts to flatten the braid’s shape.
The nice thing about bubble braids is that the elastics give you natural anchor points. You can tuck the flower between two bubbles and let the nearest section hold it. That’s much easier than forcing it into the middle of a tight braid. It also keeps the peony from sitting too close to the scalp.
This style feels especially good when you want something a little sculptural. The braid stays obvious. The flowers stay soft. That contrast is the whole appeal.
13. Feed-In Cornrow Braids with Tiny Blooms
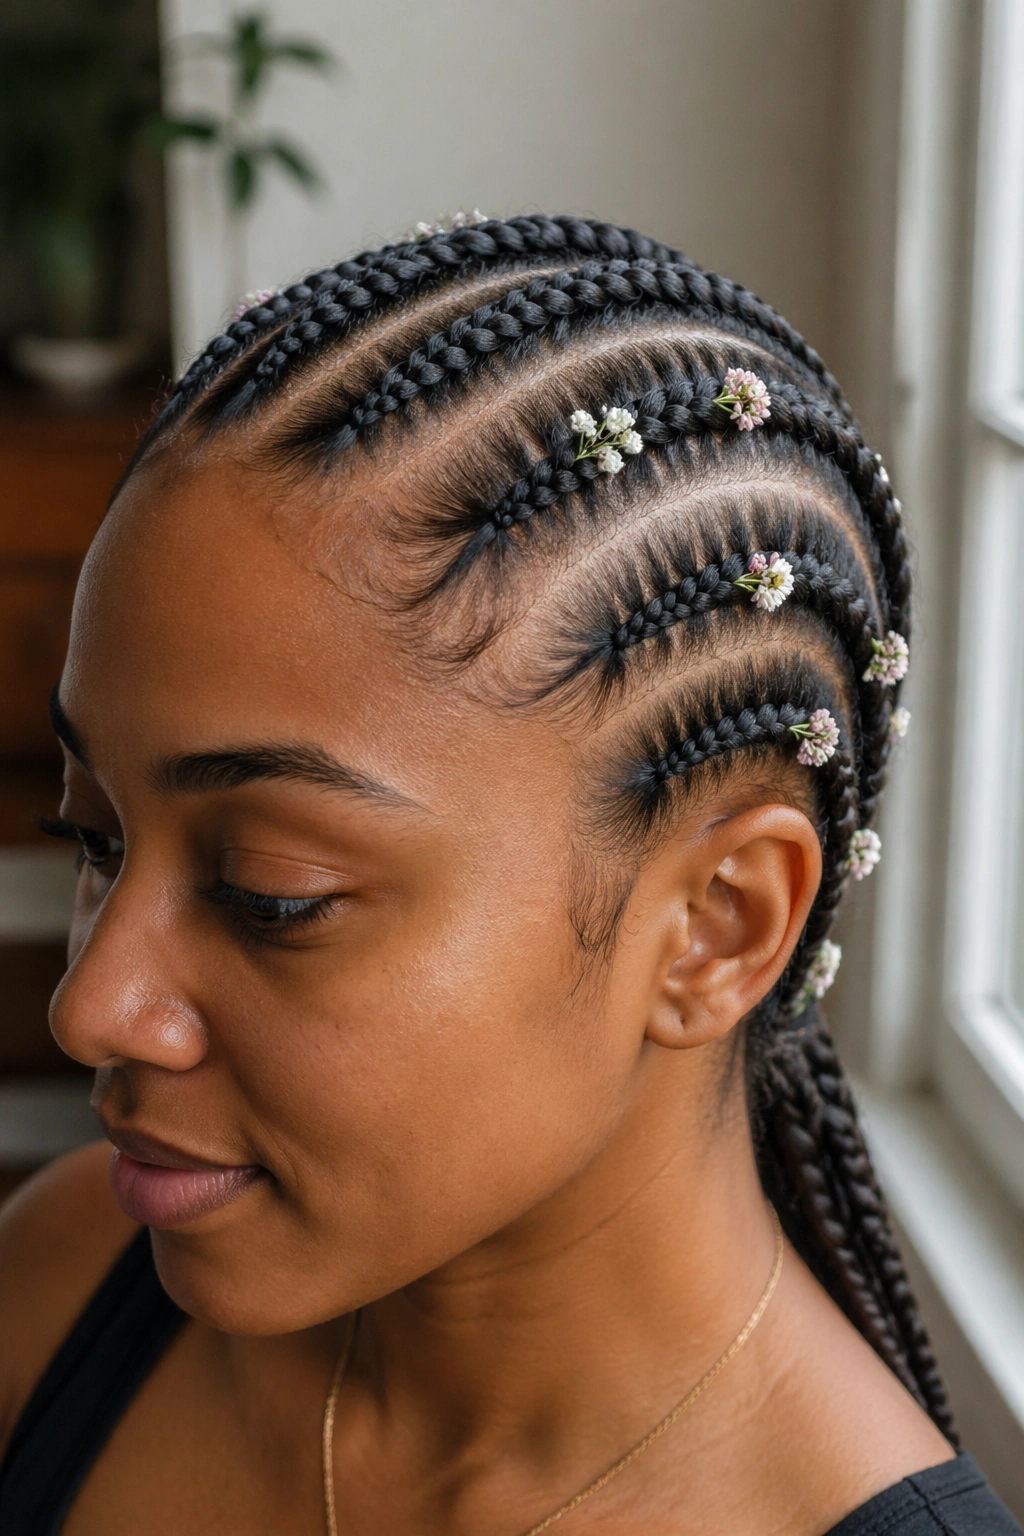
Feed-in cornrow braids can take flowers, but only if the blooms stay tiny and the placement stays smart. The scalp needs room. The braid needs tension. The flower needs to sit on top of the finished pattern, not under it. That distinction matters more here than in almost any other style.
What to Pin and What to Skip
Use the smallest blossoms you can find: baby’s breath, waxflower, chamomile, tiny spray roses. Skip anything heavy or wide. A big bloom can pull at the braid and make the style feel too dense. A few tiny flowers, on the other hand, can trace the lines of the braids and make the pattern easier to read.
- Clip the stems very short before placement.
- Pin flowers along the braid line after the braids are finished.
- Avoid stuffing anything under the cornrow at the scalp.
- Keep the flowers close to the outer surface so they don’t catch on clothing.
This style looks best when the blooms are spaced out. One near the temple, one behind the ear, maybe one more near the nape. That’s enough. The goal is a clean braid with floral accents, not a flower wall.
And if the scalp feels tight, stop. Comfort comes first. A pretty braid that hurts is a bad braid.
14. Half-Up Lace Braid with Freesia Sprigs

A half-up lace braid is one of those styles that gives you room to breathe. Hair falls loose through the bottom, the braid sits across the top like a ribbon, and the flowers can rest where the braid meets the loose lengths. Freesia sprigs fit that shape beautifully because the blooms are small, the stems are flexible, and the scent adds a little lift without taking over.
The best placement is usually near the temple or just above the ear, where the braid curves back. That spot lets the flower face outward instead of disappearing into the hair. A second sprig can sit near the opposite side if you want balance, but I would keep the total count low. Freesia already has a lot of presence for such a small flower.
This is the kind of style that works when you want your hair to feel dressed up but not pinned into place. The braid gives structure, the loose hair softens the edges, and the flowers keep the whole thing from feeling flat. A couple of freesia blooms, a clean braid line, and a few invisible pins are usually enough.
If you want a braid that still looks good after the flowers relax a little, this is the one I’d reach for first.