Rubber band braids for toddler birthdays are one of those styles that look far fancier than the effort they actually take. That matters on a day when you’re juggling a cake, a wriggly child, party clothes, and about ten photos you hope will turn out before the frosting goes everywhere.
The trick is not to pull the hair too tight and not to get cute with the wrong kind of bands. Use small, snag-free elastics, not office rubber bands, and work on detangled hair that has a little slip from leave-in conditioner or a light styling cream. Toddler scalps are sensitive. So are toddler moods. A style can be adorable and still be a bad choice if it takes forever or leaves the child fidgeting before the candles are lit.
What makes these braided looks useful is the combination of structure and playfulness. The bands give the braid shape, the braid gives the bands purpose, and the finished style stays neat through cake, hugs, running around, and the general chaos that follows a birthday song. The best versions feel soft at the hairline, sit securely without a lot of tension, and still let the child look like a child — not a miniature pageant model who has been overworked by a comb.
Start with the styles that fit the child’s hair length, patience level, and the amount of time you actually have before guests arrive. That part matters more than people admit.
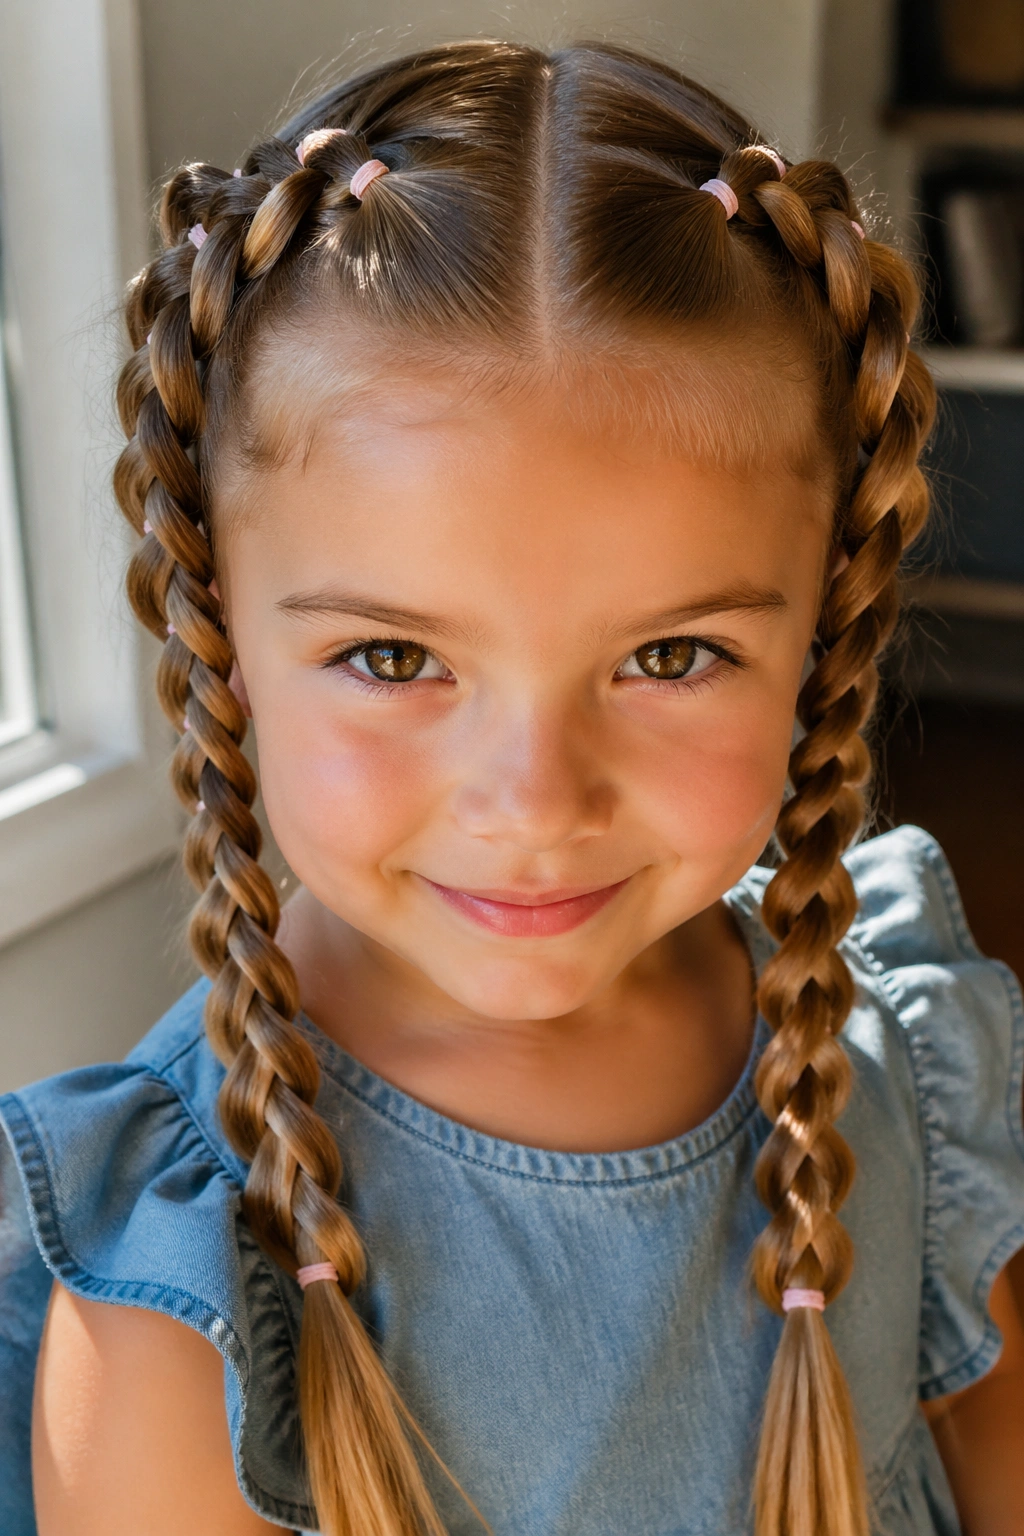
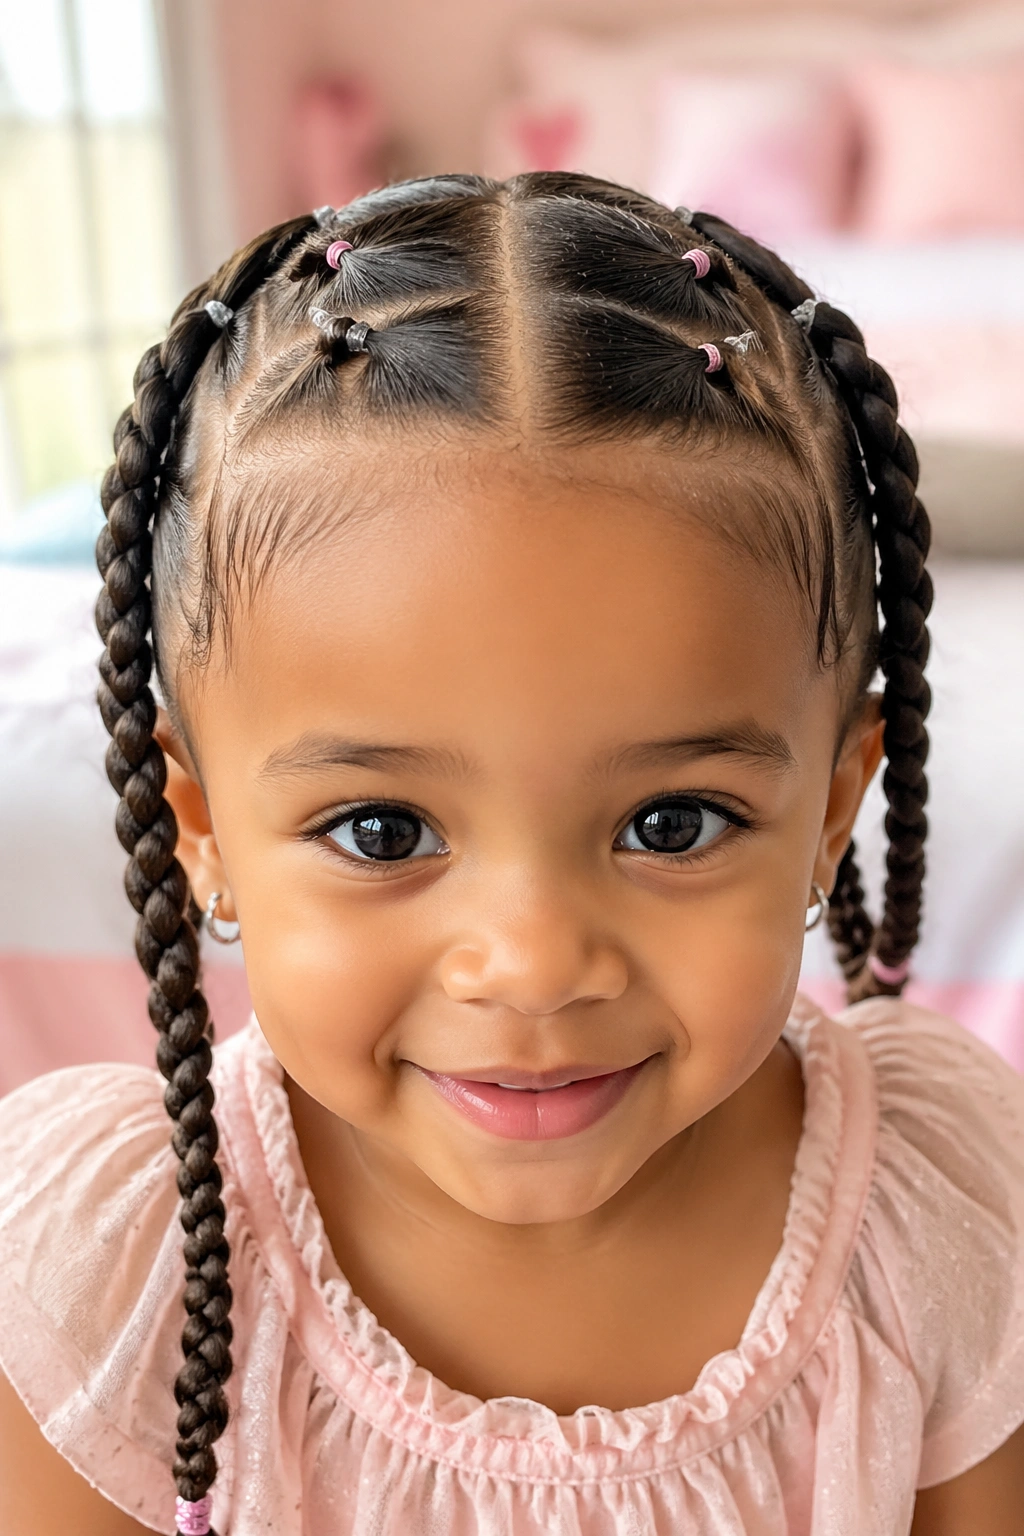
1. Classic Rubber Band Braids with a Center Part
This is the style I reach for when I want the hair to look intentional from every angle without getting fussy. A clean center part, two neat rows of tiny elastics, and a pair of simple braids down each side give you that birthday-ready look that still feels soft and age-appropriate.
Why It Works So Well
The center part gives the whole style balance. Once the hair is split evenly, the small banded sections create a tidy pattern that reads clearly in photos and doesn’t collapse the second the child starts moving around. It’s a calm style, which sounds boring until you’re styling a toddler who has better things to do than sit still.
A nice bonus: this works on straight, wavy, curly, and coily hair. The look changes a little with texture, but the idea stays the same. On finer hair, keep the sections a touch wider. On thicker hair, make the parting cleaner and the elastics a little closer together so the braids don’t puff out too fast.
- Best for shoulder-length hair and longer.
- Use 6 to 10 small elastics per side, depending on hair density.
- Keep each banded section about ½ inch to 1 inch wide.
- Finish with a satin bow, a tiny ribbon, or no accessory at all if the outfit is already busy.
Pro tip: stop tightening the braid the moment the hair feels secure. A style that looks neat but feels soft at the scalp will last longer than one that’s pulled too hard.
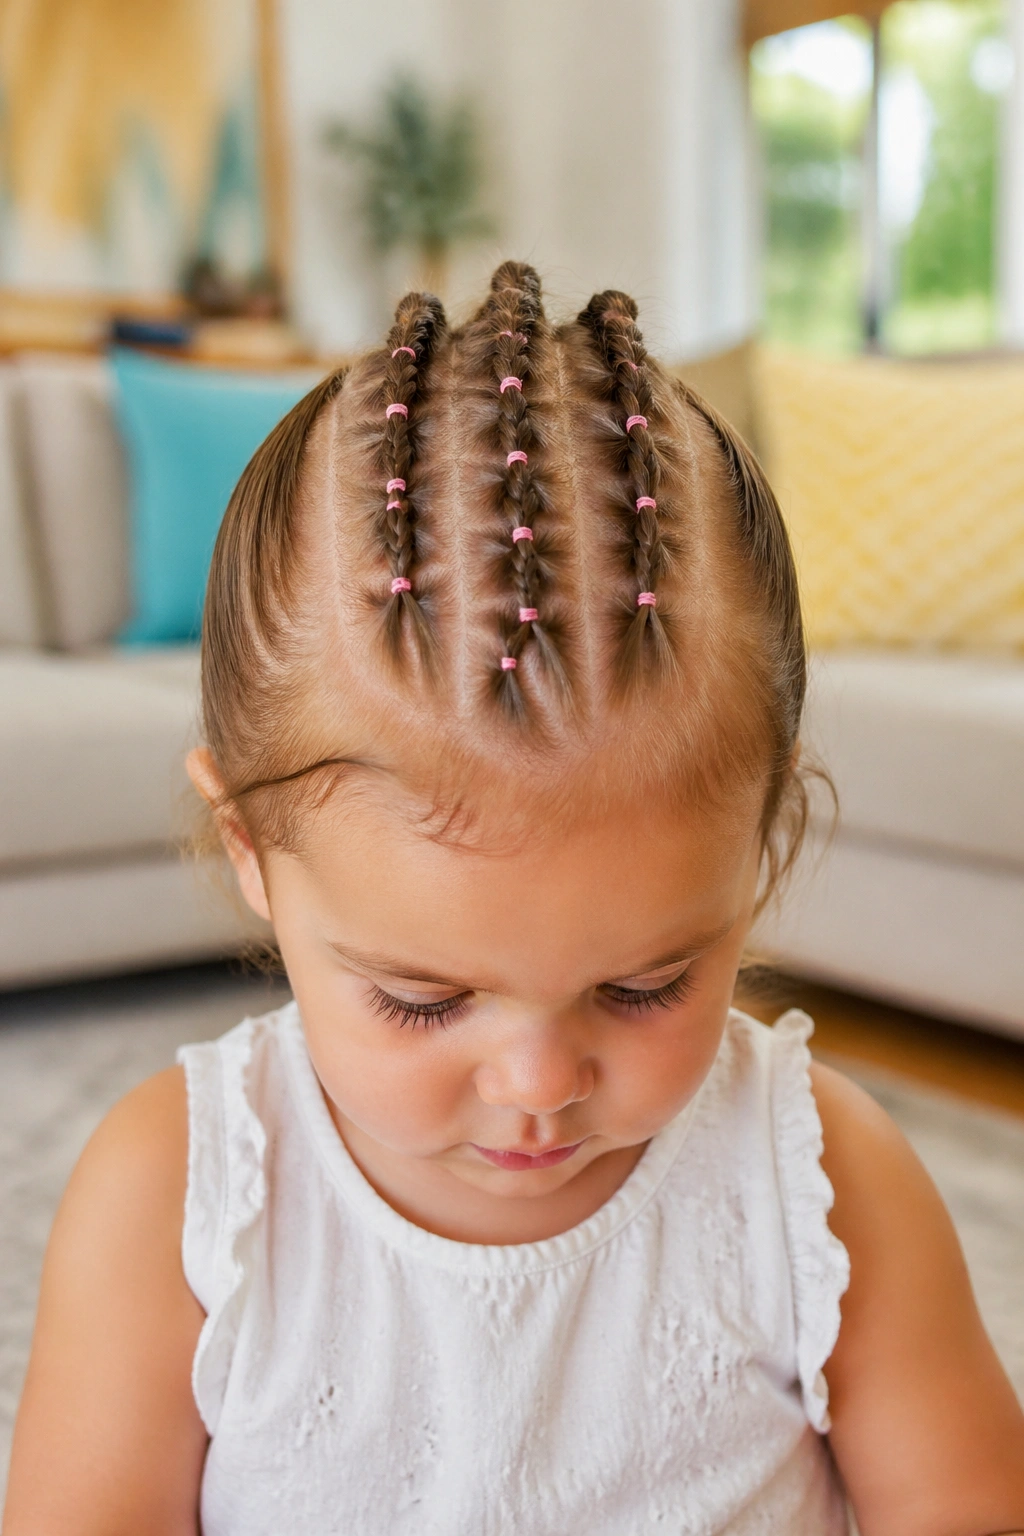
2. Zigzag Rubber Band Braids for a Busy Birthday Morning
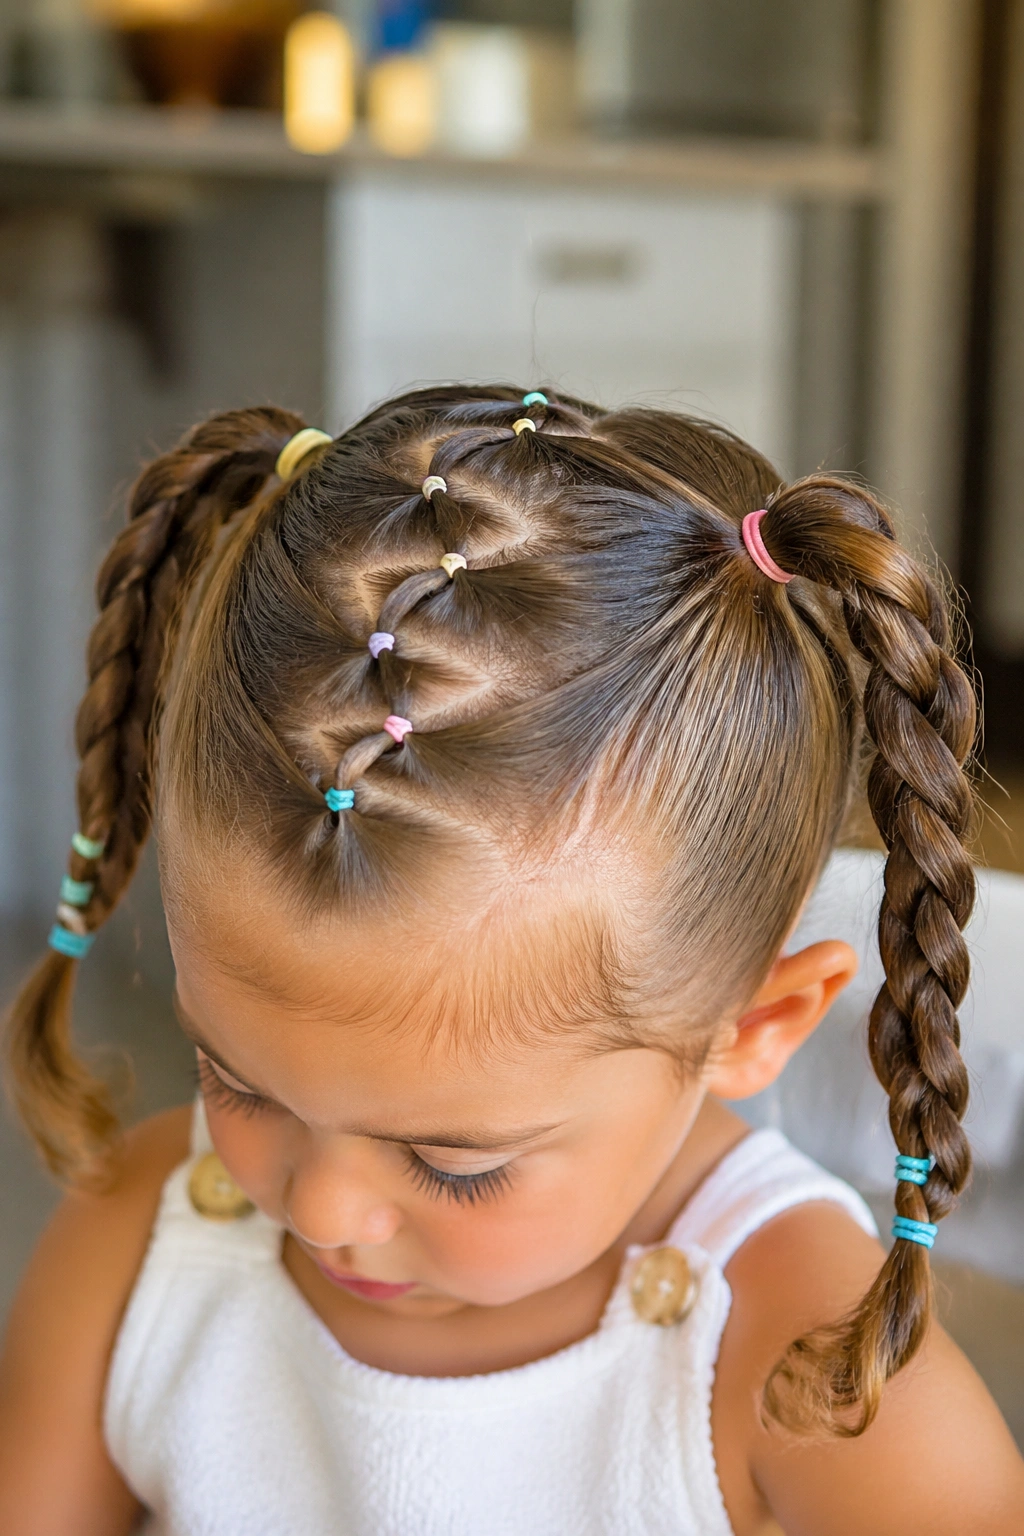
A zigzag part can save the whole morning. Seriously. If the child won’t stay still, or if the front hair keeps separating in odd places, this style turns that “mess” into the design.
The broken part line gives the braid a playful shape without needing a lot of extra styling. Instead of one straight part that exposes every uneven section, you create a zigzag down the crown and split the hair into two pigtail braids. The rubber bands do the visual work for you, so the finish looks deliberate even if you had to pause twice to hand someone a snack.
What I like most is how forgiving it is. If one side has a little more puff than the other, the zigzag part hides it. If a curl pops out near the temple, it looks like part of the style instead of a mistake. That is the sort of birthday styling that earns its keep.
For the cleanest result, make the zigzag with the tip of a rat-tail comb and clip each section as you go. Four or five points are enough; too many turns start to look sharp instead of sweet. Once the sections are set, add the bands at even distances and braid the lengths loosely so the style doesn’t feel stiff.
Birthday hats can flatten this one a bit, so if the party includes a crown, tiara, or paper hat, place it after the braids are finished and don’t smash the top too hard. The style still works fine. It just needs room to breathe.
3. Heart-Track Rubber Band Braids
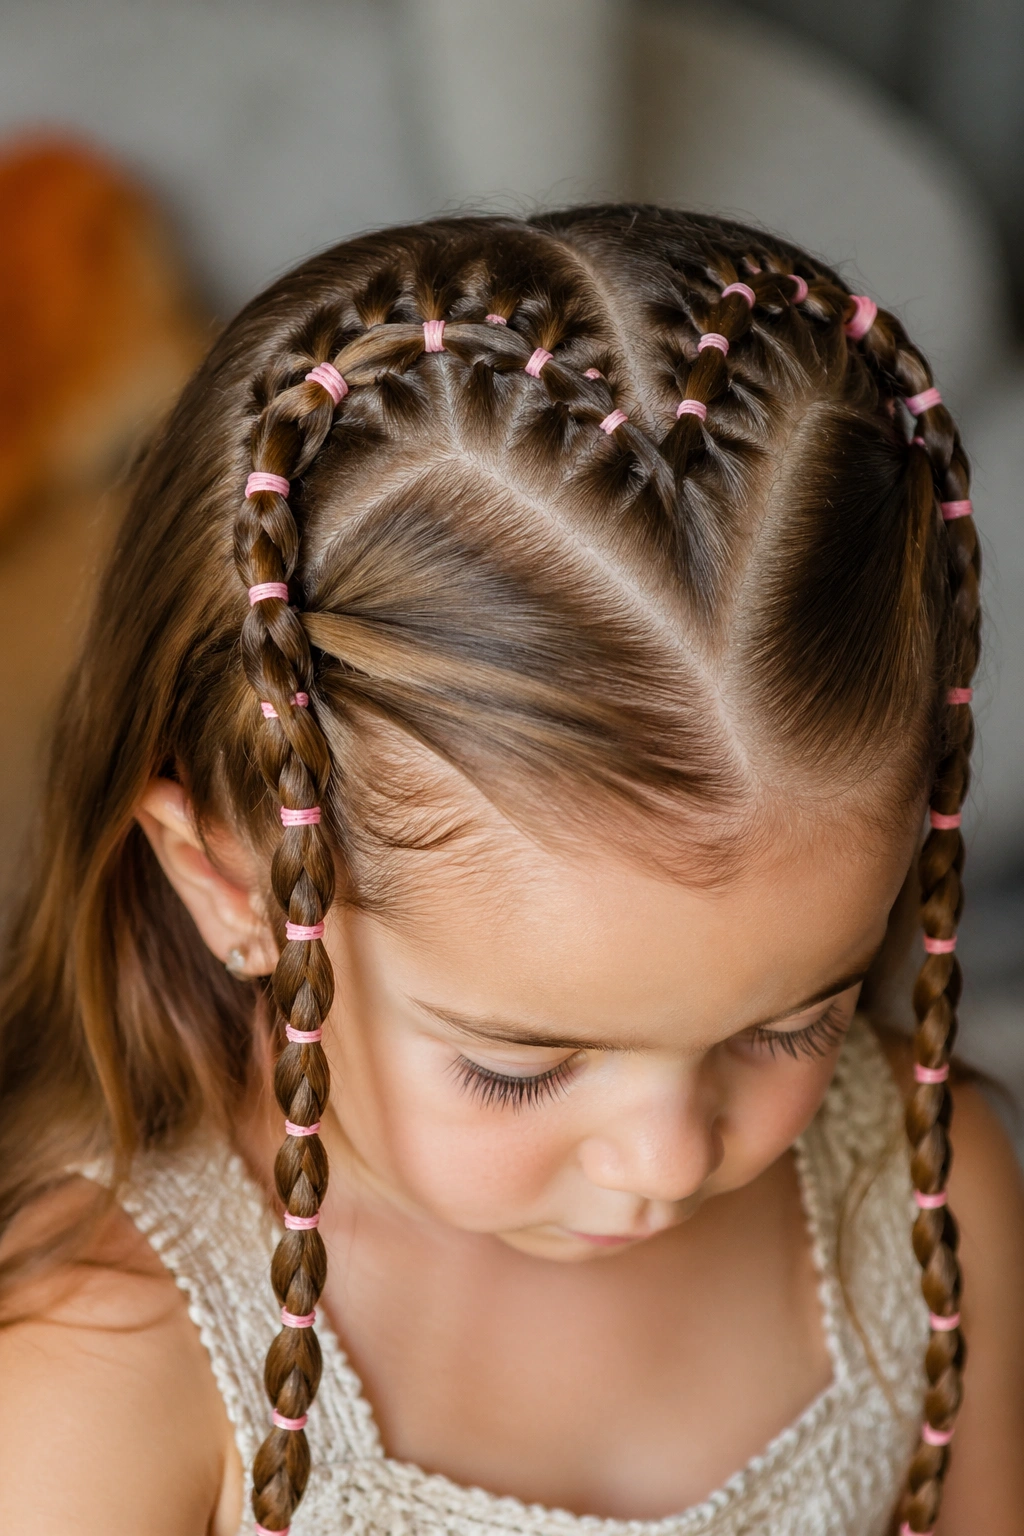
Why does this style look so special? Because the parting itself becomes part of the birthday look. A heart-shaped track around the crown, then tiny elastics tracing the shape into braids or twisted rows, gives you a style that feels thoughtful without being too precious.
The first time I saw this on a toddler, what stood out was the shape, not the size of the braids. The heart draws the eye right up to the face, which is lovely for photos and cake-smile moments. It also makes a simple outfit look dressed up enough for a party without adding sparkles, clips, and all the other stuff that tends to disappear under a car seat strap twenty minutes later.
How to Shape the Heart
Start at the center front and work outward with your comb, creating the two top curves of the heart first. Then bring the part down to a narrow point near the top of the crown. Keep the shape soft. It does not need to be perfect, and honestly, a too-sharp heart can look stiff on a little child.
From there, secure each side with tiny elastics placed about ¾ inch apart. If the hair is very fine, use fewer sections and let the braid sit flatter. If it is thick or curly, you may need extra clips while you work so the part does not disappear.
This one takes a little more time than a standard braid, so it’s best when you’ve got an extra ten minutes and a child who can tolerate being paused and repositioned. The payoff is a style that feels special without needing a giant bow to explain itself.
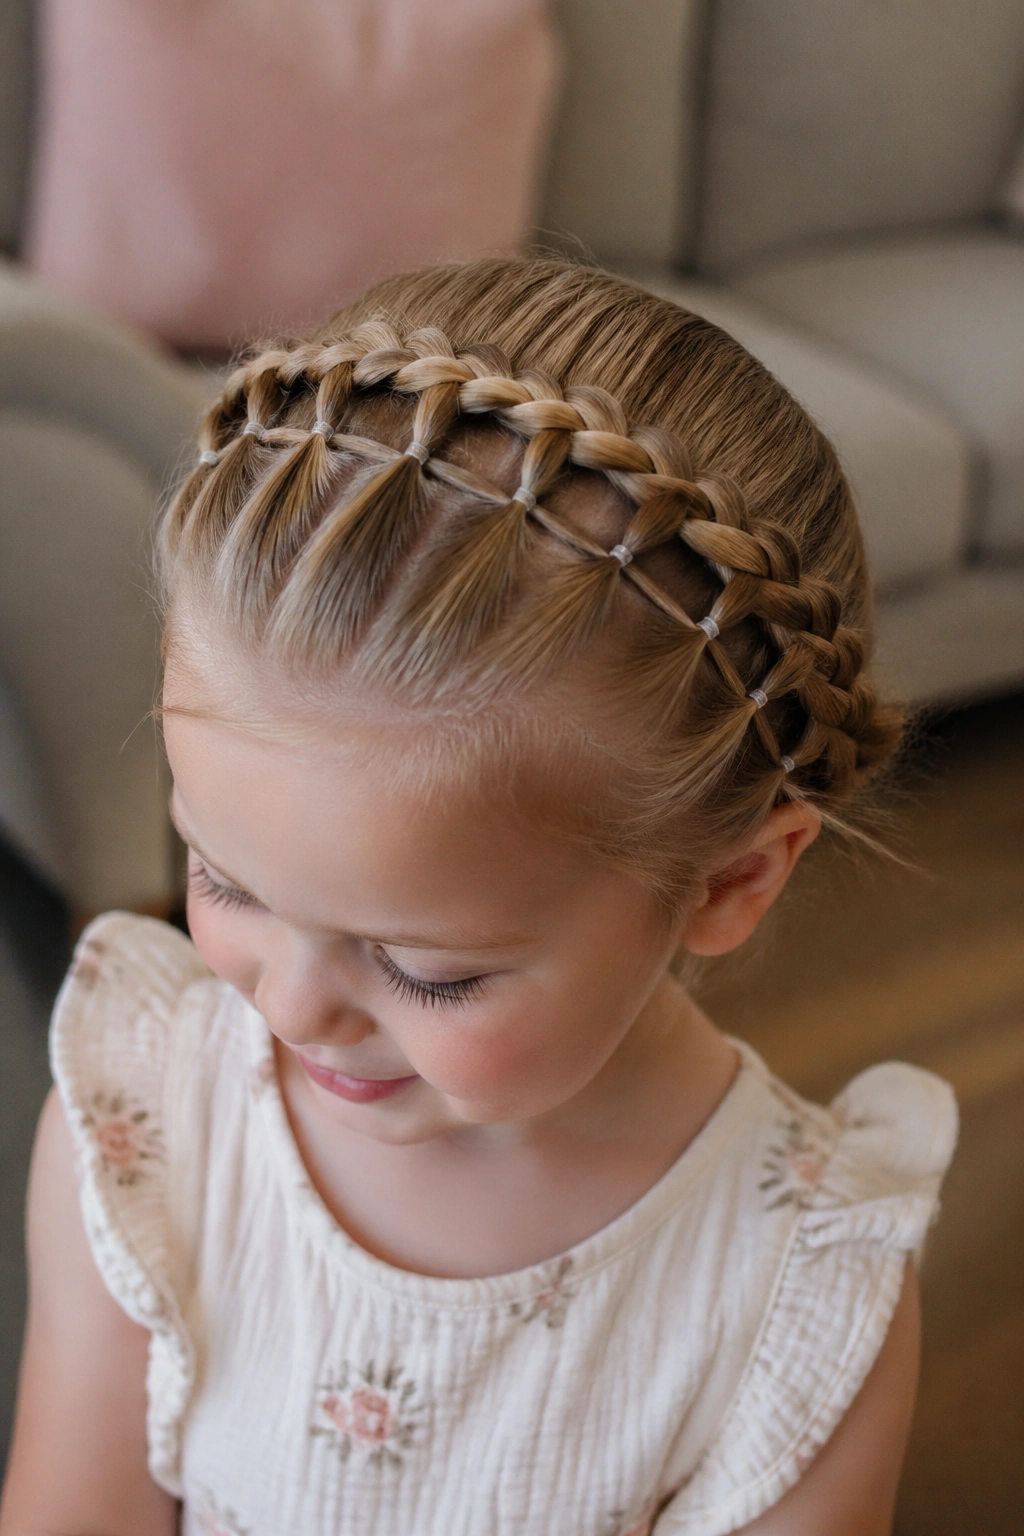
4. Crisscross Crown Braids with a Low Finish
If the child keeps brushing the front of their hair away from their face, this is the style that answers the problem fast. The crisscrossed section across the front pulls the hair back in a way that looks playful, and the low braid in the back keeps everything grounded.
The style usually starts with two or three front sections on each side of the part. You cross them over, secure each crossing with a small elastic, then continue until the front area forms a neat little lattice. After that, gather the remaining hair and braid it low at the nape. It sounds more complicated than it is.
- Works especially well when you want the forehead clear for a birthday crown.
- Use 8 to 12 elastics total, depending on how many crisscross points you make.
- Keep the crossings low enough that the child can still move their eyebrows without feeling pinched.
- A soft low braid at the back keeps the style comfortable in a car seat.
The best part is the way it handles real life. Little pieces can escape around the hairline and the style still looks good. A crown of crisscross bands has enough structure to stay neat, but the low braid keeps it from feeling too “done.” That balance matters on birthday mornings, when the child may be thrilled, sleepy, or both.
If you want to dress it up, add one ribbon at the braid end instead of scattering clips all over the head. Less clutter. Better result.
5. Side-Swept Rubber Band Cornrow Braids
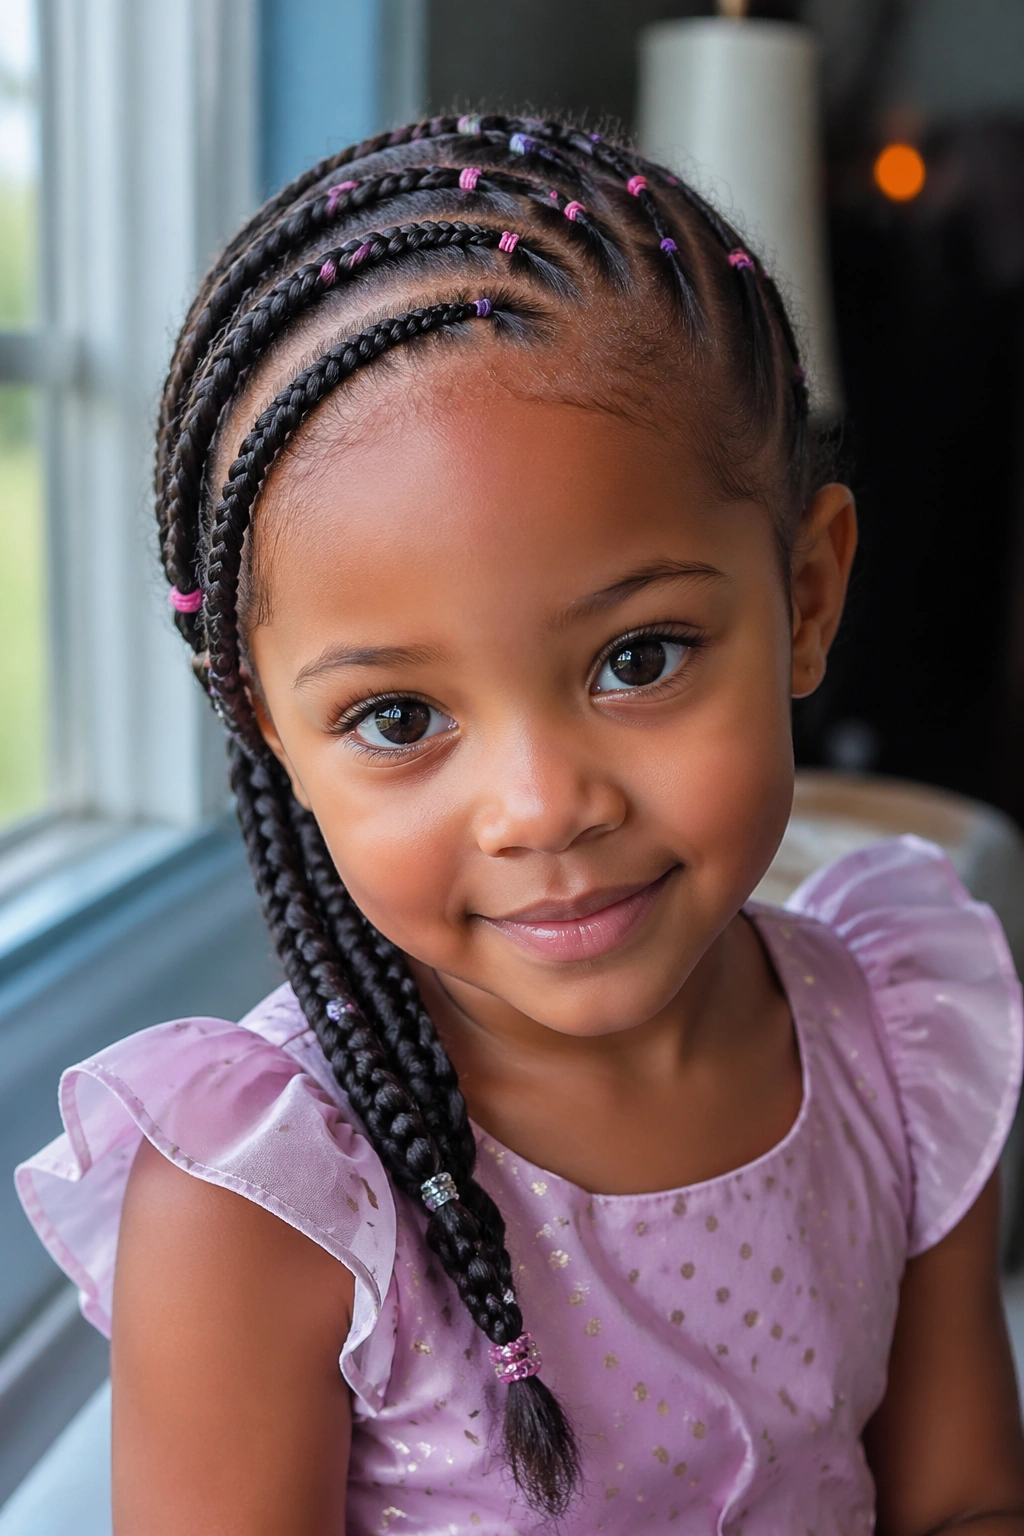
A side-swept braid has a different mood from the more symmetrical styles. It feels softer, a little more relaxed, and it’s a smart move when one side of the hair has cowlicks, shorter layers, or pieces that refuse to cooperate.
The side part lets you control where the eye goes. Instead of fighting the hairline, you work with it, angling the banded sections across the head and bringing the braid over one shoulder or straight down behind the ear. That shape can be lovely on toddlers with fine hair because it stops the style from looking flat. On thicker hair, it creates a clean frame around the face.
The main thing to watch is tension. A side-swept style can start to feel tight if you keep pulling the front hair too firmly to one side. Leave a little softness at the edges, especially near the temple and behind the ear. If the child tends to tug at tight styles, this is one of the better choices because you can keep the back secure while easing up at the front.
I also like this for birthday outfits with one statement collar or shoulder detail. The braid does not fight the clothes. It works with them. If the outfit already has a lot going on, keep the banding simple and skip extra clips. If the outfit is plain, a side-swept braid gives the whole look enough shape on its own.
And yes, it holds up well for cake. That part matters.
6. Double Dutch Braids with Tiny Rubber Band Sections
Unlike a plain Dutch braid, the banded version lets each section stand out. You see the braid pattern more clearly, which gives the style a crisp, layered look that reads well from the front and stays tidy even after a few rounds of running around.
This style is best when the hair is thick enough to support a bit of structure. If you’ve got a child with lots of hair, Dutch braids can sometimes puff up too quickly or get bulky near the neck. Tiny elastics placed along the braid help control that volume and keep the braid from sliding out of shape. The result is cleaner and a little more festive.
Best for Hair That Gets Puffy Fast
That’s the real advantage here. The banded sections act like checkpoints. Each one keeps the braid from loosening too much, which means the style still looks fresh after the present opening, the snack table, and the part where the birthday child decides to crawl under a chair for reasons only toddlers understand.
If the hair is finer, widen the braid sections slightly and use fewer bands. Too many tiny sections on fine hair can look busy instead of polished. On dense or curly hair, the extra elastics make the shape read more clearly, which is a welcome thing when you’re trying to get photos before the candle smoke clears.
My recommendation is simple: choose this style when you want staying power first and decoration second. It is not the flashiest option in the group, but it is one of the most dependable. A ribbon at the ends is enough. The braid itself does the rest.
7. Bubble Ponytail Rubber Band Braids

This is the style for the child who wants movement. The bubble ponytail has energy in it. The banded sections make the ponytail look playful and full, and the braided base gives it a little more structure so it doesn’t feel thrown together.
Why Kids Tend to Like It
It bounces. That’s the main reason. Every step makes the bubbles shift a little, and toddlers seem to love hairstyles that move when they move. The style also feels lighter than a full set of braids, which is useful if the child gets restless with too much hair around the neck.
To build it, start with a small braid or banded section at the crown, then pull the rest into a ponytail and add elastics every 1 to 1½ inches down the length. Gently puff each section between the bands so the ponytail looks round instead of pinched. Don’t yank. Ease the hair outward with your fingers.
- Use 4 to 6 bubbles for short or medium hair.
- Use 6 to 8 bubbles if the hair is longer.
- Match the band spacing to the hair’s thickness; denser hair can handle closer bubbles.
- A satin ribbon at the base softens the whole look fast.
The best thing about this style is how forgiving it is if the braid at the top is not perfectly symmetrical. The ponytail carries the look. If a few front pieces shift during the party, the bubbles still give you a finished result.
One warning: don’t place the ponytail too high if the child will spend time in a car seat or high chair. A slightly lower placement is usually comfier and less likely to get flattened.
8. Faux Hawk Rubber Band Braids
This one has attitude, and toddlers can pull it off better than most adults. A faux hawk braid uses banded rows or small braids down the center of the head, while the sides stay smoothed back. The shape gives height without making the hair feel heavy.
It’s a strong choice for active birthday kids. If the child likes climbing, spinning, or generally treating the party like a small obstacle course, a faux hawk keeps the hair contained while still looking fun. The style works especially well when you want something a little sharper than pigtails but not as formal as a halo braid.
The best version starts with three to five central rows. The rows can be braided, banded, or both. Keep the sides brushed back gently and secure them with tiny elastics that sit close to the scalp. The point is to create a ridge down the middle, not a tight helmet effect.
A little softness at the crown makes a big difference. If the top is pulled flat, the style loses its shape. If it’s too high, it starts to look stiff. Somewhere in the middle is the sweet spot, and that’s where this one looks best.
I like this style with outfits that have sneakers, bright colors, or a little denim jacket. It has a sporty feel without being plain. A single bow at the end or a small clip near the crown is enough. Anything more can crowd the shape.
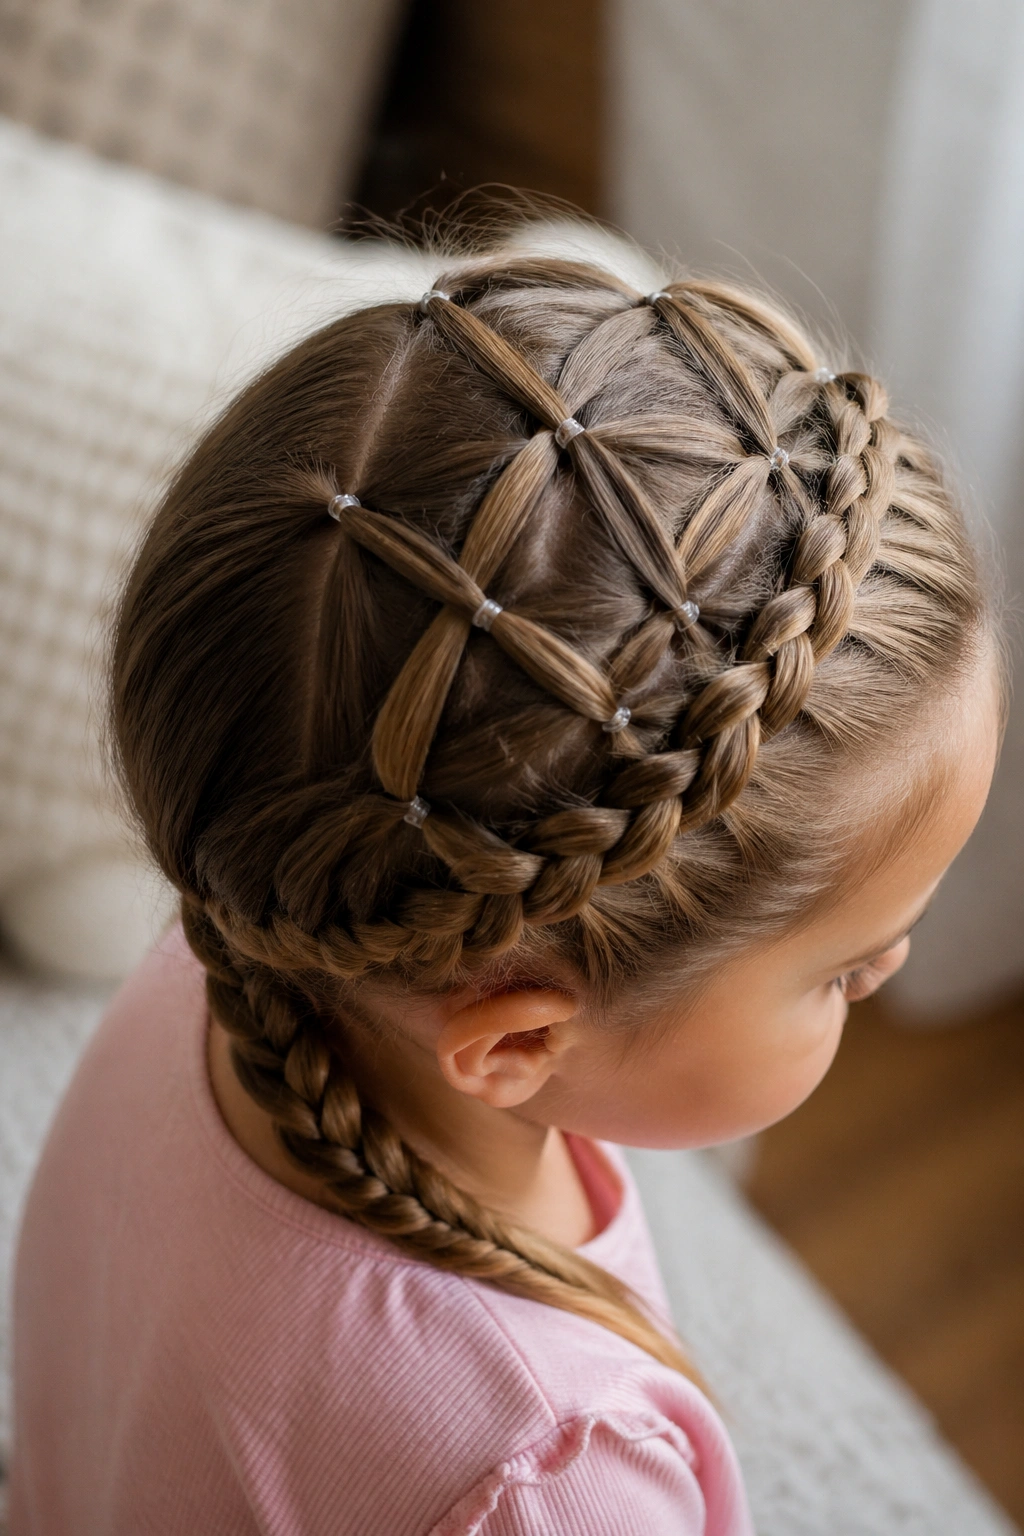
9. Braid-and-Bun Combo with Band Ladders
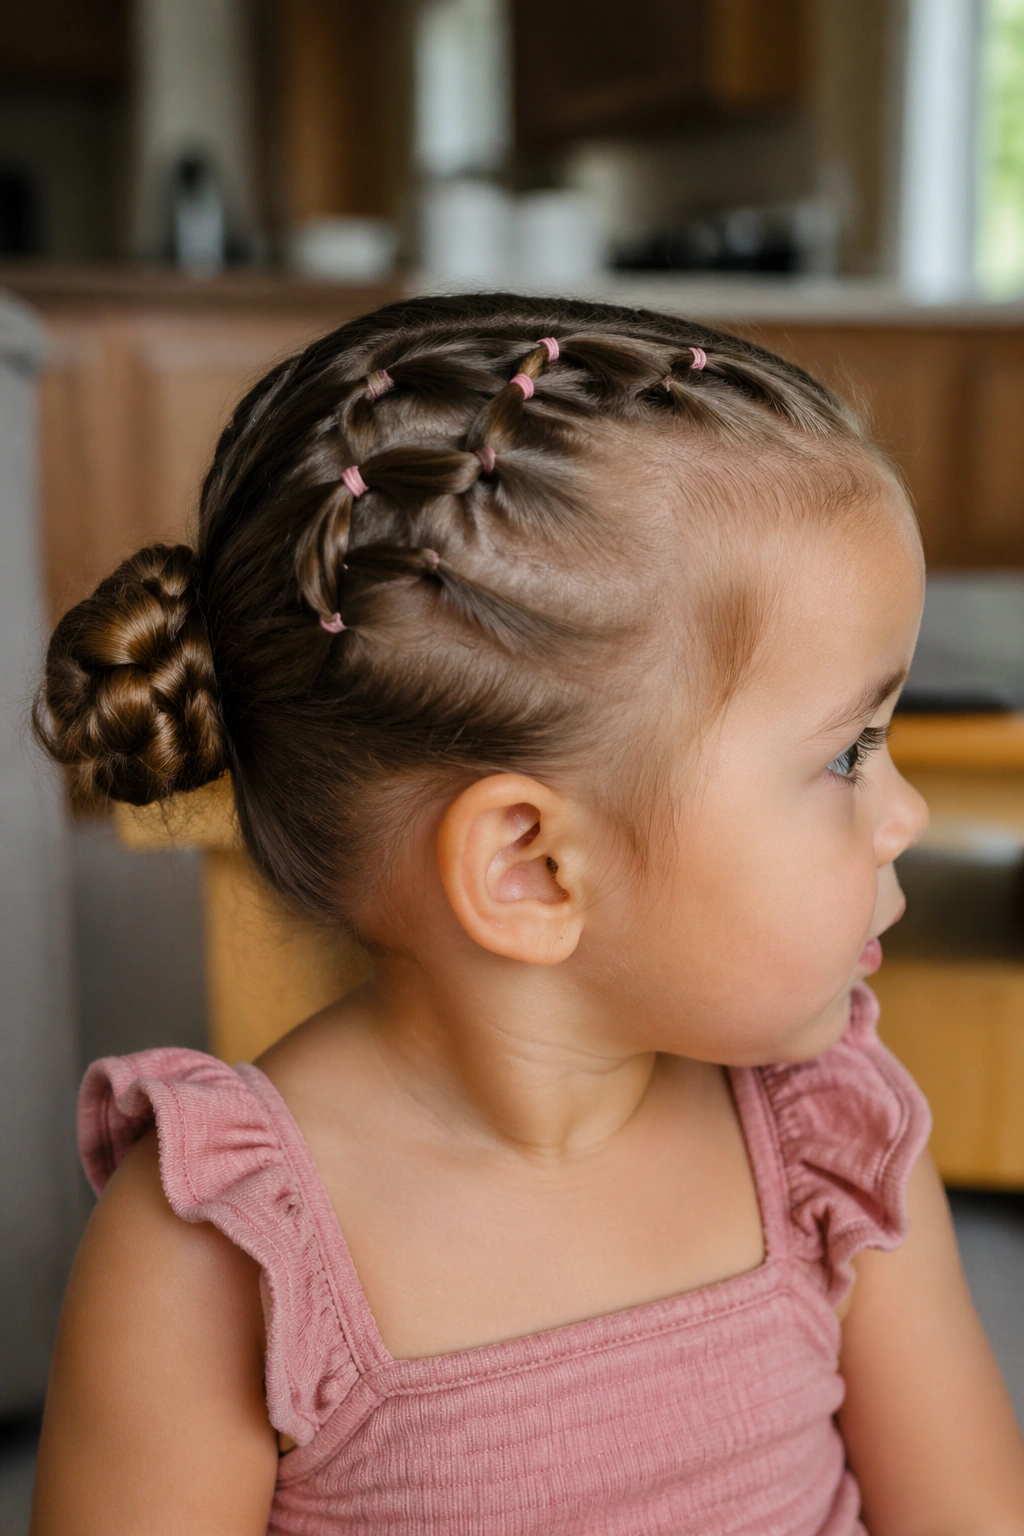
A braid that ends in a bun is one of those styles that can save you when the birthday outfit has a collar, a sash, or a lot happening around the neckline. The hair stays up, the bun keeps it compact, and the banded ladder at the top makes the whole thing feel thoughtful.
Think of it as a practical style dressed up for the party. The ladder sections give the braid texture, and then the bun keeps the finish neat. It’s especially handy if the child’s hair tends to frizz at the ends, because the bun hides the part that usually puffs out first.
- Best when you want the neck clear.
- Use 2 to 4 small elastics to secure the bun base before tucking.
- A low bun sits more comfortably than a high one for most toddlers.
- Keep the ladder section short if the child gets bored during styling.
The way this style behaves during the party is the reason I keep coming back to it. It stays put under party hats better than a tall ponytail. It also avoids the droopy look that some loose braids get after an hour of movement. If you add a soft bow at the bun base, the style feels complete without needing extra clips around the face.
If the child has fine hair, the bun can be tiny and still work. If the hair is thick, split the tail in two and twist before wrapping so the bun does not become too bulky. That little adjustment makes a real difference.
10. Low Pigtail Rubber Band Braids with Ribbon Ties
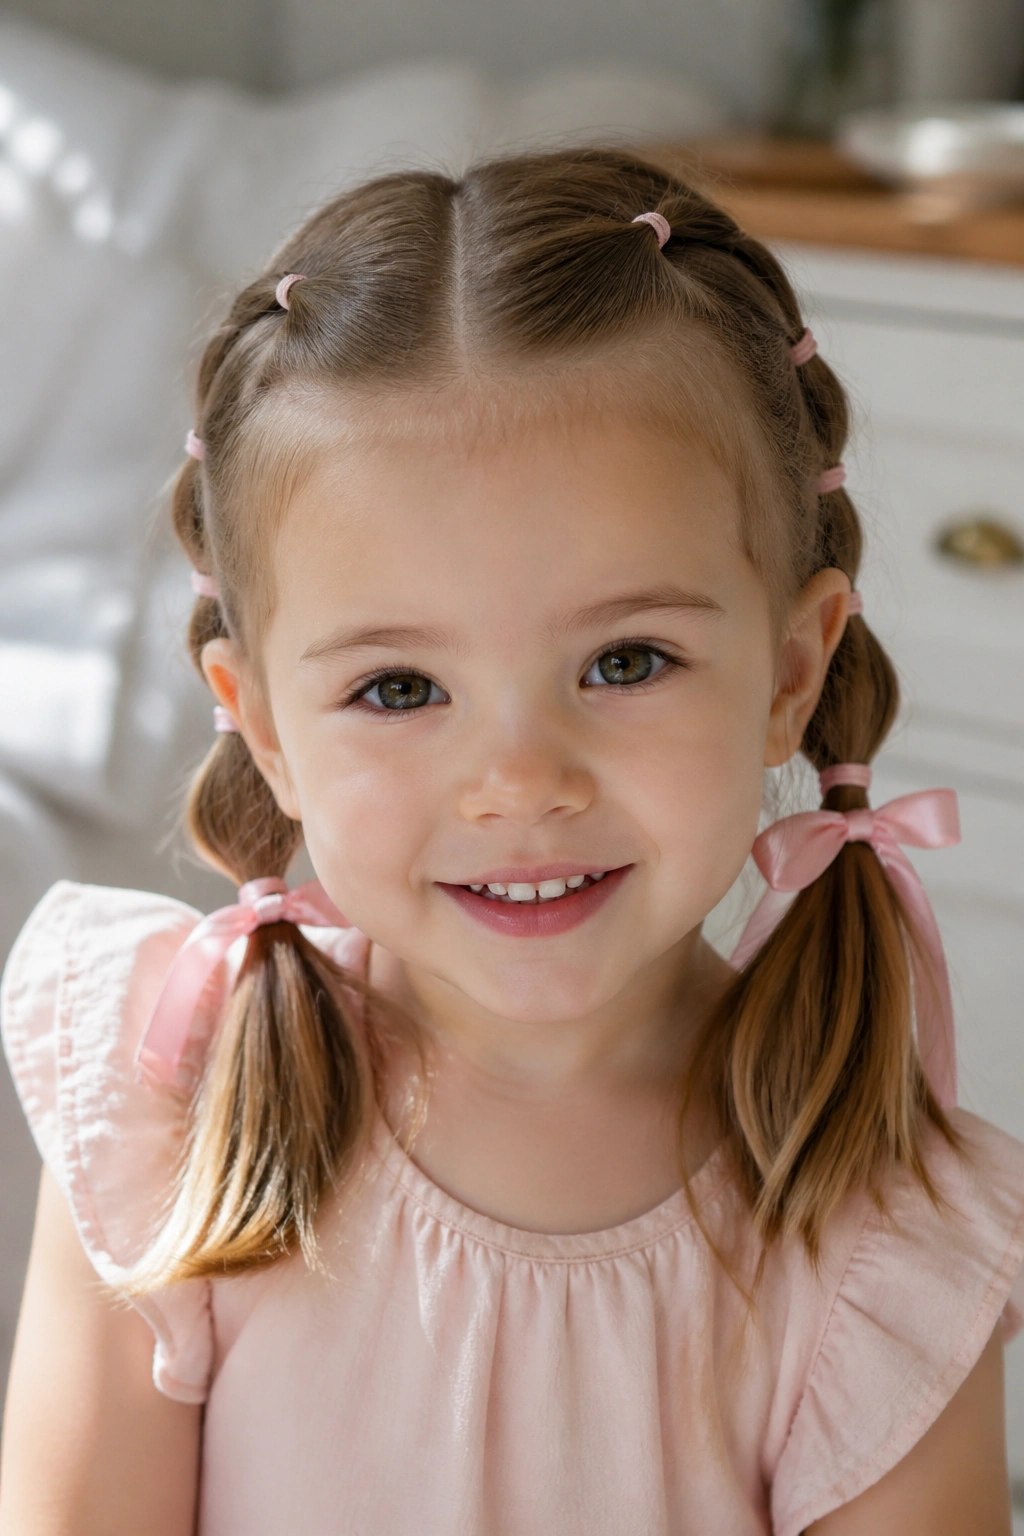
Sometimes the nicest birthday style is the one that sits low, feels light, and doesn’t ask much from the child. Low pigtail braids with banded sections do exactly that. They look sweet, they’re easy to manage, and they don’t drag on the scalp the way tighter crown styles sometimes can.
The low placement is what makes this one feel relaxed. The braids rest near the shoulders, the elastics stay out of the face, and the ribbons or bows add the birthday touch without needing more structure. If the child has a sensitive scalp, this is often the style I’d reach for first.
There’s also a nice visual line here. Low pigtails keep the focus around the cheeks and jaw, which suits kids who have rounder faces or soft curls around the edges. A center part with tiny banded sections leading into the braids keeps the style neat, and the ribbons do a lot of the decorating work.
You do not need a big ribbon. A narrow satin ribbon tied in a simple bow is enough. If you use something too wide, it starts to overpower the child’s head and the hairstyle stops looking soft. Small is better here.
This style is also a good backup if the child hates being styled for long periods. You can work one side, pause, then do the other without ruining the final look. It is one of the few birthday hairstyles that can survive a distracted morning and still come out looking intentional.
11. Halo Rubber Band Braids with Band Ladders
Unlike a full halo braid that takes a lot of patience and a fairly calm child, this version can be stopped halfway and still look finished. That makes it one of the smartest options for toddler birthdays, especially when you want a storybook look without spending forever at the combing station.
The band ladder around the hairline gives you the pretty frame, then the braid travels around the head or across the crown before tucking into the rest of the style. The effect is soft and neat at the same time. It’s a little more dressed up than a simple pigtail braid, but not as fussy as a tightly woven crown.
Best for Longer Party Days
If the birthday includes church, photos, dinner, and a second outfit, this style holds up nicely. The braid stays close to the head, so it won’t snag on chair backs or slide under a hoodie. It also works well for children with thicker hair because the banded sections help keep the volume under control.
For fine hair, keep the ladder section broader and the braid flatter. Too many tiny sections can make the hair look sparse. On dense hair, you can add a little more spacing between elastics and still keep a strong shape. The style doesn’t need to be exact to be pretty.
I like this one with a simple dress or a neat shirt and skirt combo. It frames the face and leaves the rest of the outfit free to do its job. If you want an accessory, use one small flower clip near the tuck point instead of loading the whole head with decorations. The braid already carries enough visual weight on its own.
Final Thoughts
A birthday hairstyle for a toddler has one job above all: it has to survive real life. That means movement, cake, hugs, car seats, and a child who may decide halfway through the morning that hair is suddenly a problem. The styles that hold up best are the ones that look tidy without feeling tight.
I’d pick the simpler banded styles for children who dislike long styling sessions, and save the more detailed hearts, halos, and faux hawks for kids who can sit still for a bit. That’s the honest tradeoff. A beautiful style that makes the child miserable is not worth it.
If you want the safest starting point, do a quick test run the day before the party. Not the full party version — just the parting, the section size, and the band tension. That tiny rehearsal tells you more than guessing ever will, and it makes the birthday morning feel a lot less frantic.