The Freaknik braid look never tried to be subtle. Crisp parts, long swing, beads that clicked when you moved, and edges laid down clean enough to survive a full day in Atlanta heat — that was the point.
What made those styles feel so alive was the balance. The braids had to stay put through long rides, crowded sidewalks, dancing, pictures, and a whole lot of motion, but they still needed to move when somebody turned their head or laughed too hard. That mix of control and swagger is why these looks still land.
A lot of the magic sits in the details. Feed-in sections that start tiny and grow fuller. Triangle parts that break up the grid. Cuffs and beads used like punctuation instead of decoration piled on top of decoration. Get those details wrong and the style turns heavy fast.
These 23 looks stay close to that Atlanta 90s energy — some classic, some cleaner, some dressed up a little differently — and each one has its own way of carrying the attitude without turning into a costume.
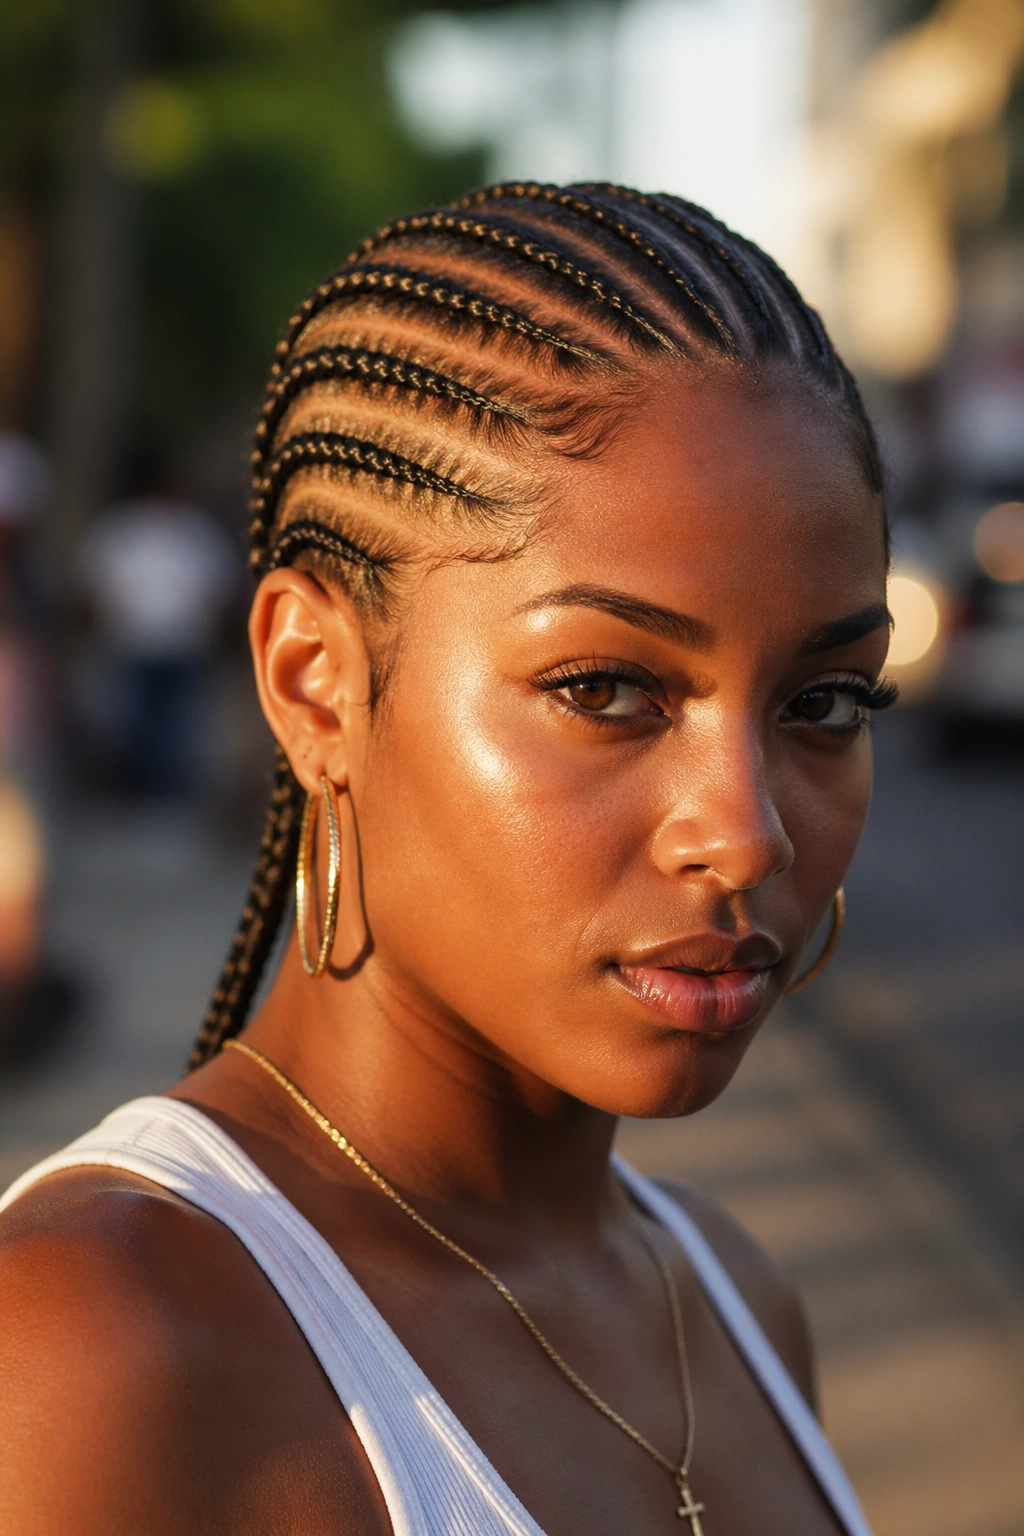
1. Straight-Back Cornrows
Straight-back cornrows are the backbone of the whole Freaknik braid story. They are clean, direct, and a little unforgiving, which is exactly why they work so well. If the parts are straight and the rows are even, the style looks sharp from the front and the back.
Why they mattered in Atlanta
The appeal is practical before it is pretty. Straight-back rows keep the hair off the neck, hold up in heat, and make it easy to add beads, cuffs, or a ponytail later. That matters when you want the hair to stay neat through a long day, not just for the first hour.
- Keep each row about ½ to 1 inch wide if you want a crisp, tidy finish.
- Use a rat-tail comb and parting clips so the rows stay clean while you work.
- Freshly detangled hair gives you smoother rows and less tugging at the scalp.
- A little braid gel at the root helps the rows stay flat without making them hard.
Best tip: if the first row at the hairline is crooked, the whole style reads off. Fix that row before you keep going.
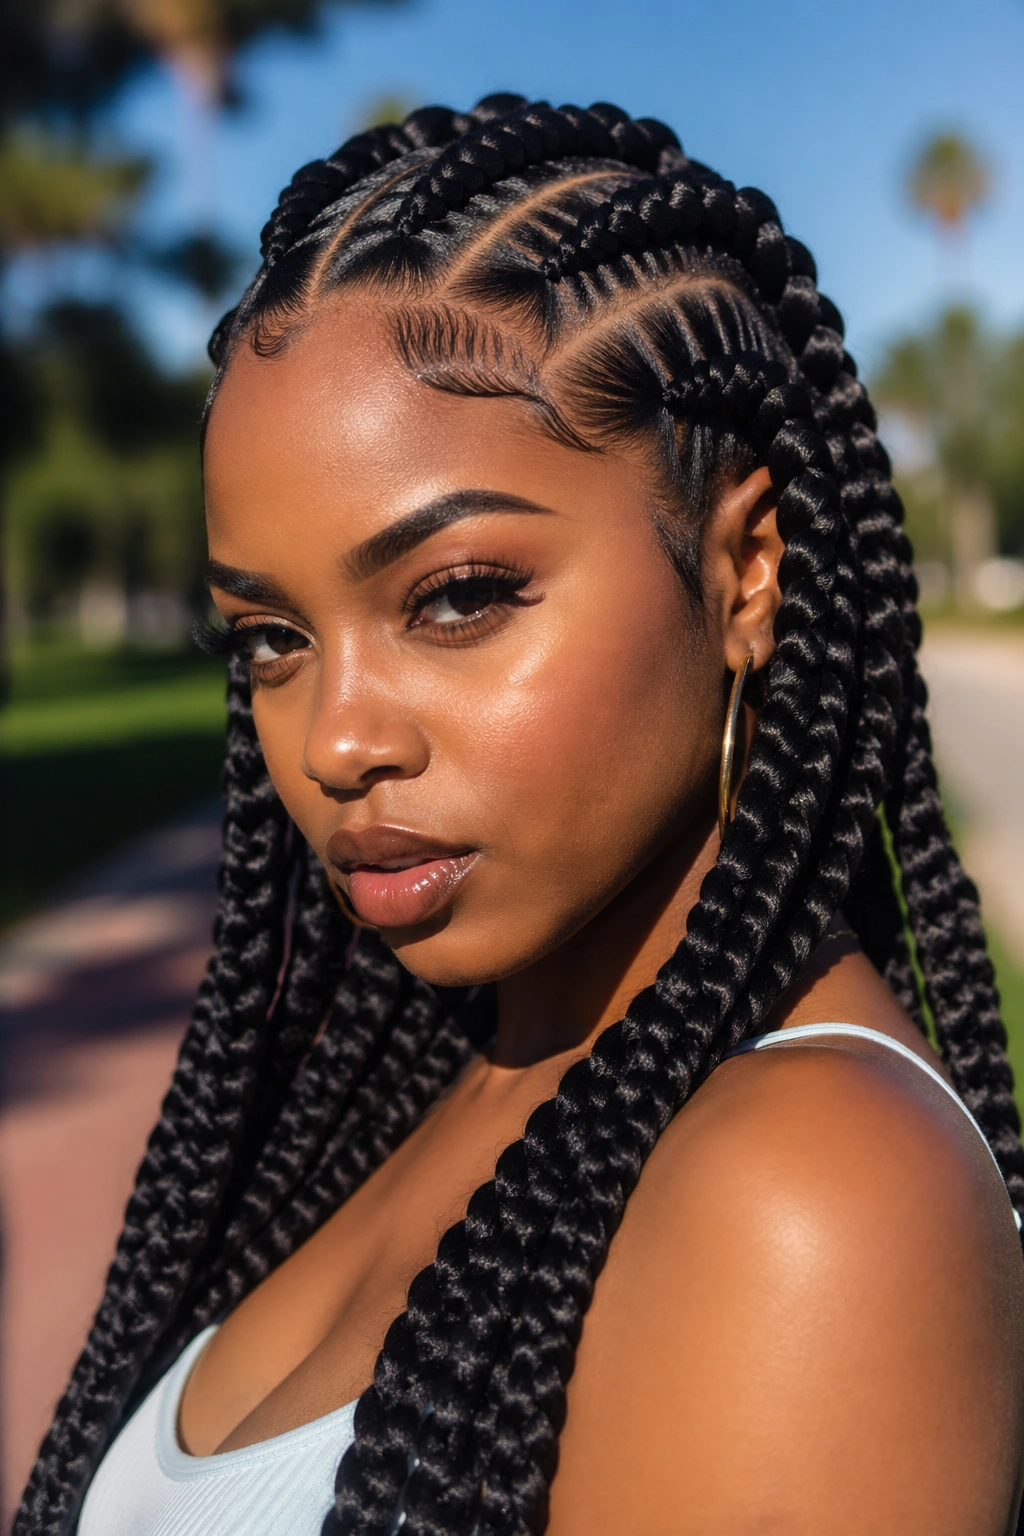
2. Jumbo Feed-In Braids
Jumbo feed-in braids bring more drama with less clutter. The braid starts thin near the scalp and grows fuller as you add hair, so the finished style looks sleek at the root and bold through the length. That taper is a big reason this style feels so tied to the Atlanta street look.
The best version of this style has a smooth start, not a bulky knot. You should be able to see the braid building gradually over the first couple of inches, almost like the hair is unfolding instead of being stacked on top of itself. That’s the difference between a braid that looks modern and one that looks stiff.
I like these when the goal is impact. They read from across the room. They also cut down on the boxy look that some large braids get when the extensions are added too fast. If you want the ends to hang loose, leave them long and blunt. If you want a cleaner finish, braid them all the way down and dip the ends so they seal flat.
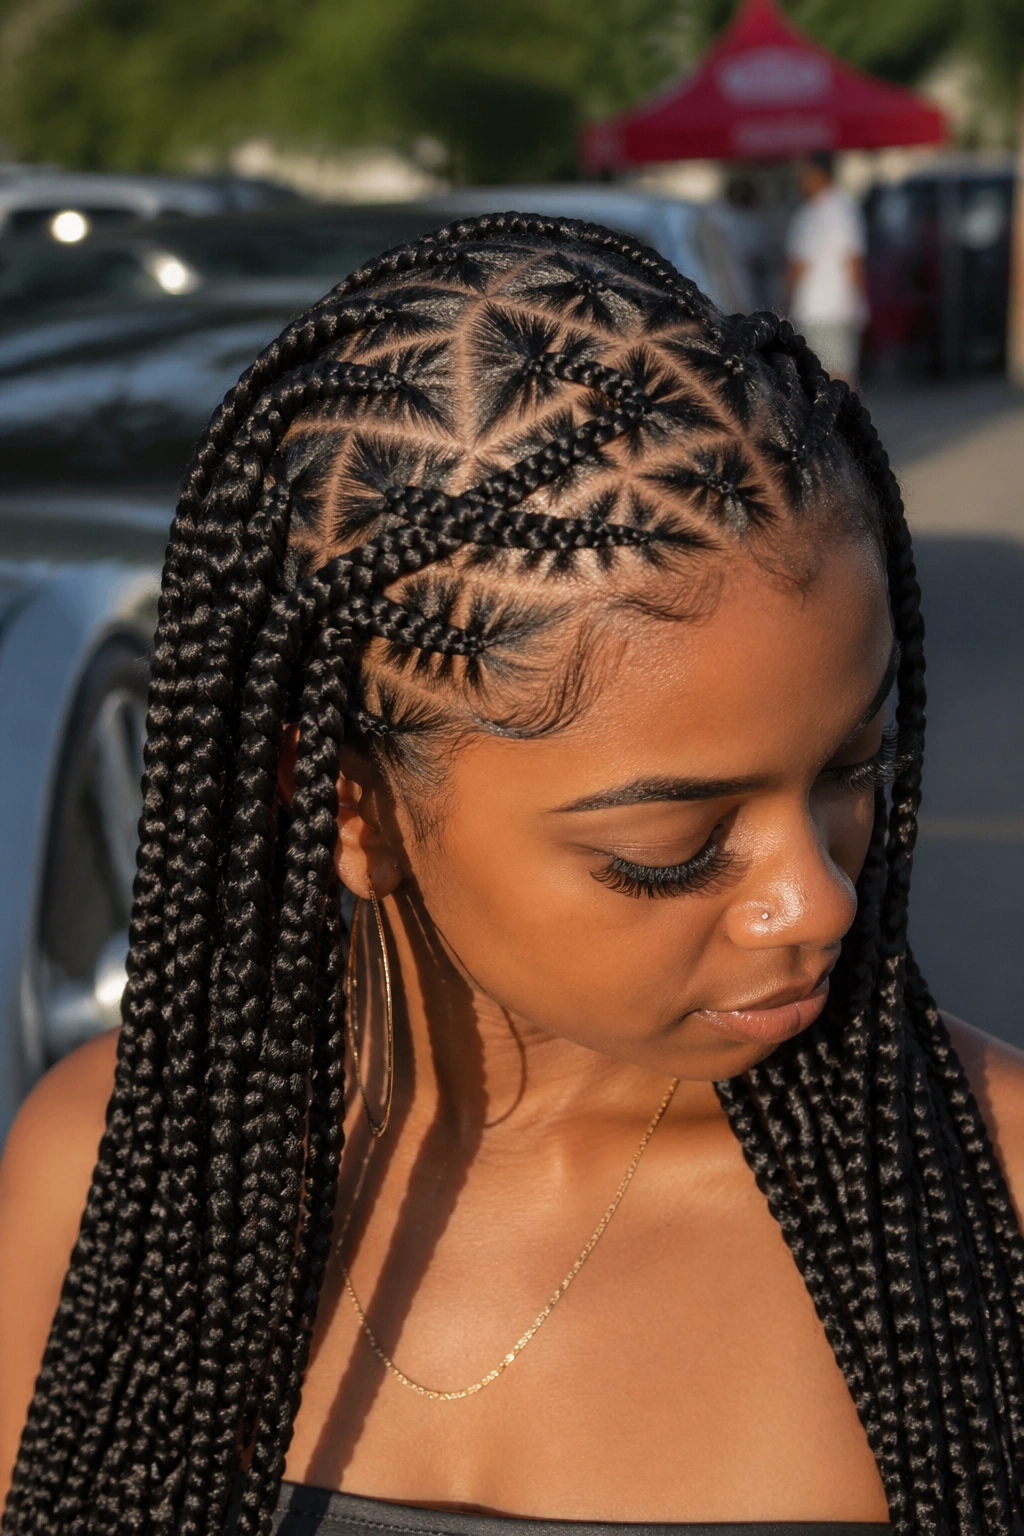
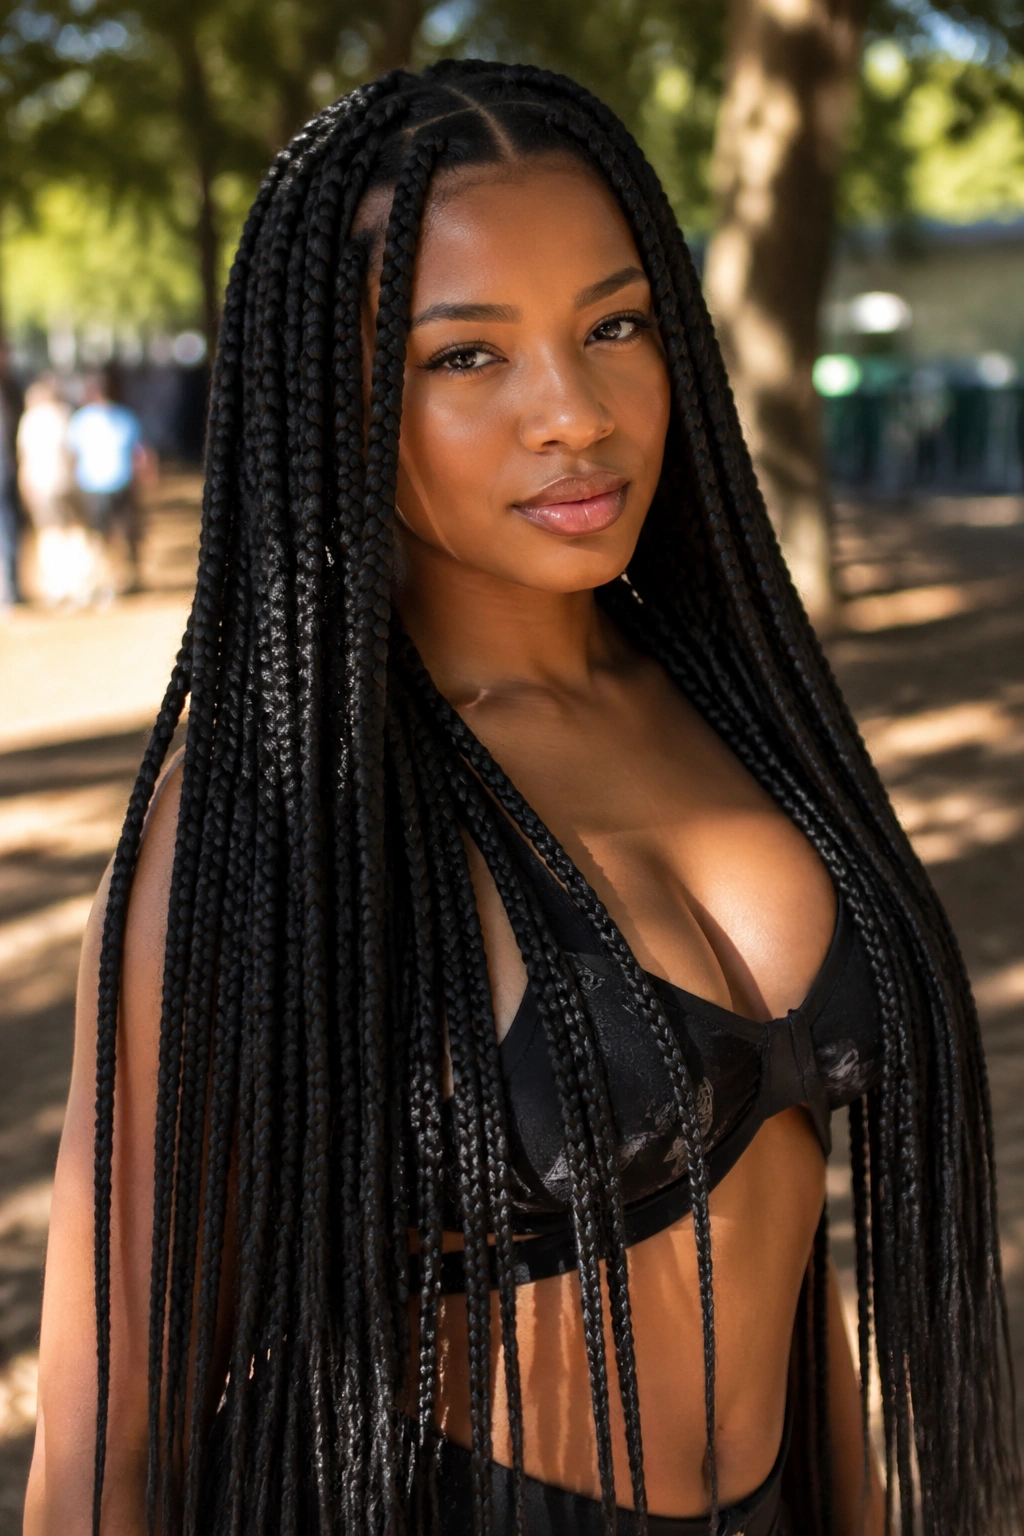
3. Triangle-Part Box Braids
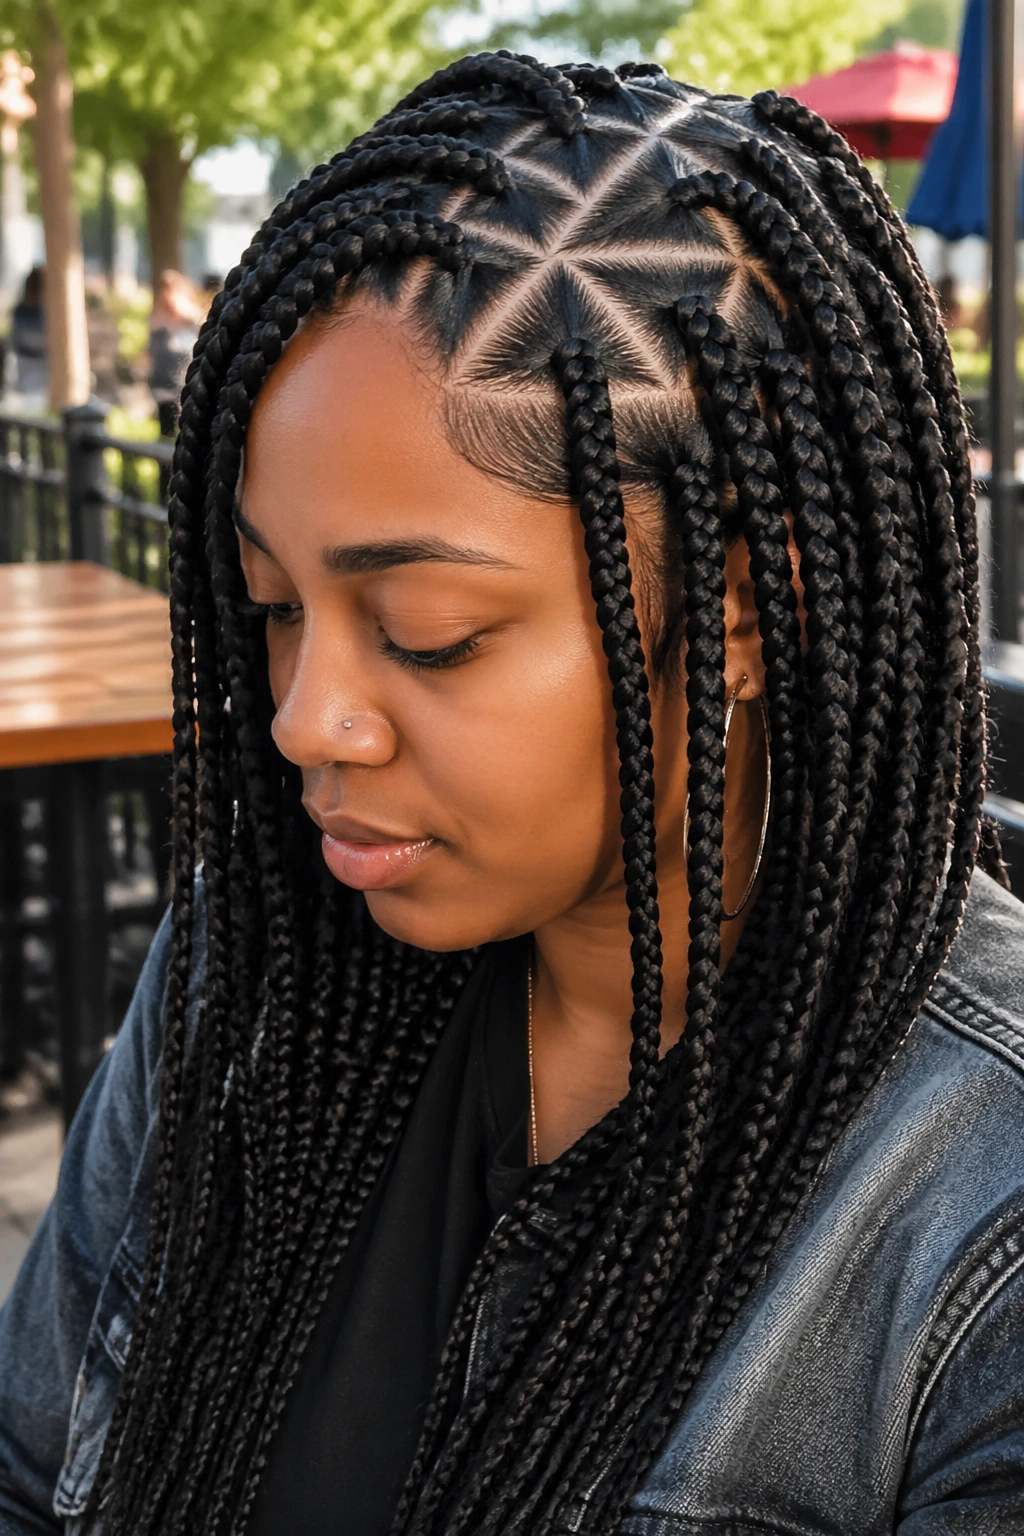
Why do triangle parts change the whole mood? Because the eye expects a grid, and triangle sections break that expectation right away. The braid itself may be familiar, but the parting pattern makes it feel more custom and a little more styled.
Triangle-part box braids work especially well when the braids are medium thickness. If the sections are too small, the triangle shape gets lost. If they are too large, the parts start to look busy. Somewhere around 1 to 1½ inches per section is the sweet spot for most heads.
How to wear it now
Ask for parts that angle cleanly from one row to the next, not tiny triangles squeezed into a corner. The shape should still be visible once the braids are installed. A center part can make the whole look feel more deliberate, while a side part gives it more movement.
These braids are a good fit if you like structure but do not want the style to feel flat. The part itself does a lot of the work, and honestly, that is half the fun.
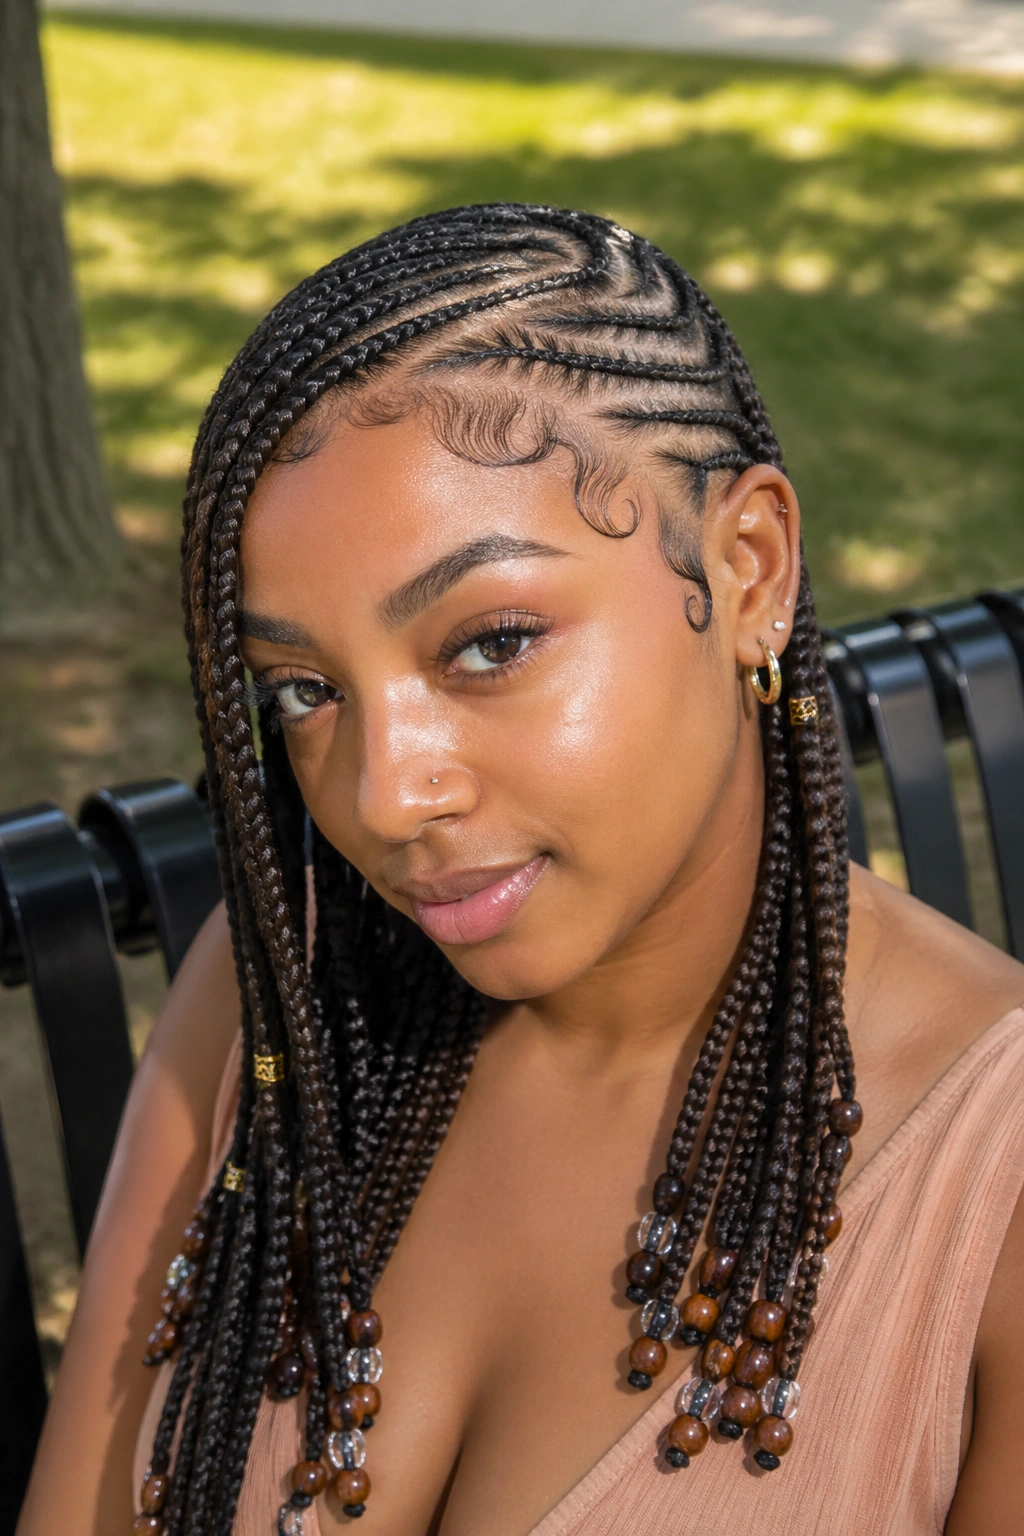
4. Beaded Braids
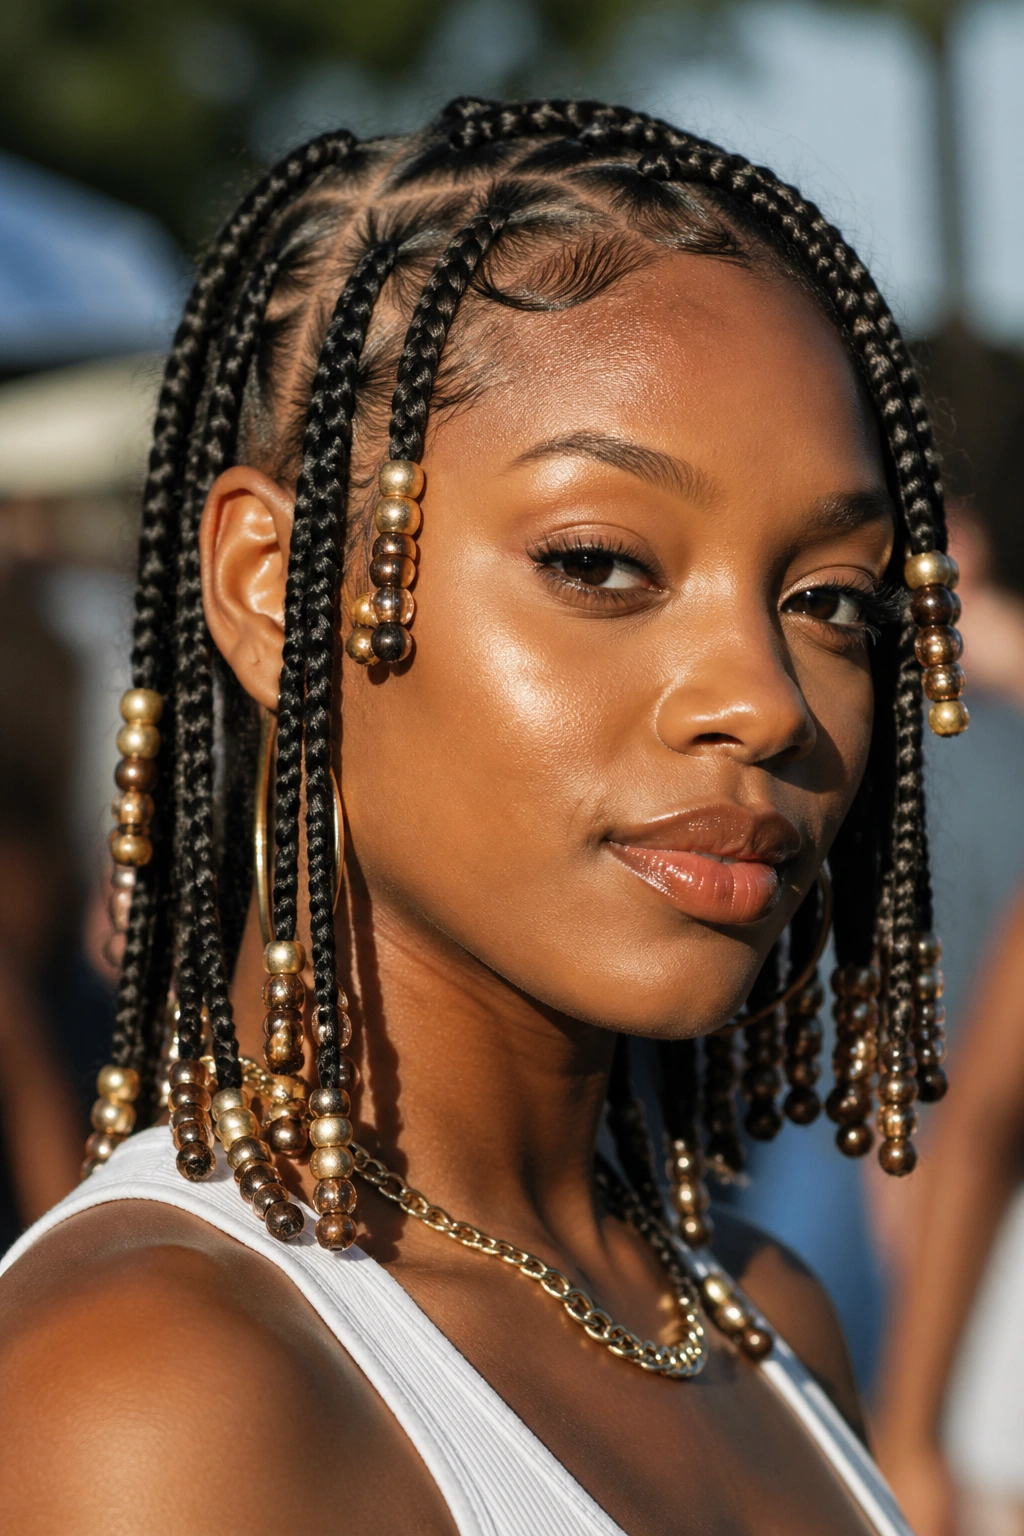
Beaded braids are one of those styles you can hear before you see. The soft clack of the beads gives the whole look a little rhythm, and that sound matters more than people think. It turns movement into part of the style.
I always think of beads as the punctuation mark at the end of the braid. Too few and the ends can look unfinished. Too many and the braid gets weighed down, especially if the hair is fine. The sweet spot is usually 2 to 4 beads per braid, depending on the length and thickness of the plait.
What to pay attention to
- Choose beads that fit the braid without forcing the strands apart.
- Seal the ends well so the beads sit neatly and don’t slide.
- Use clear, amber, black, or bright plastic beads when you want a stronger 90s feel.
- Wood beads look softer, but they read less loud.
Small caution: if the braids are thin, heavy beads can pull. That tug shows up fast around the temples, and nobody needs that.
5. Braided Ponytail
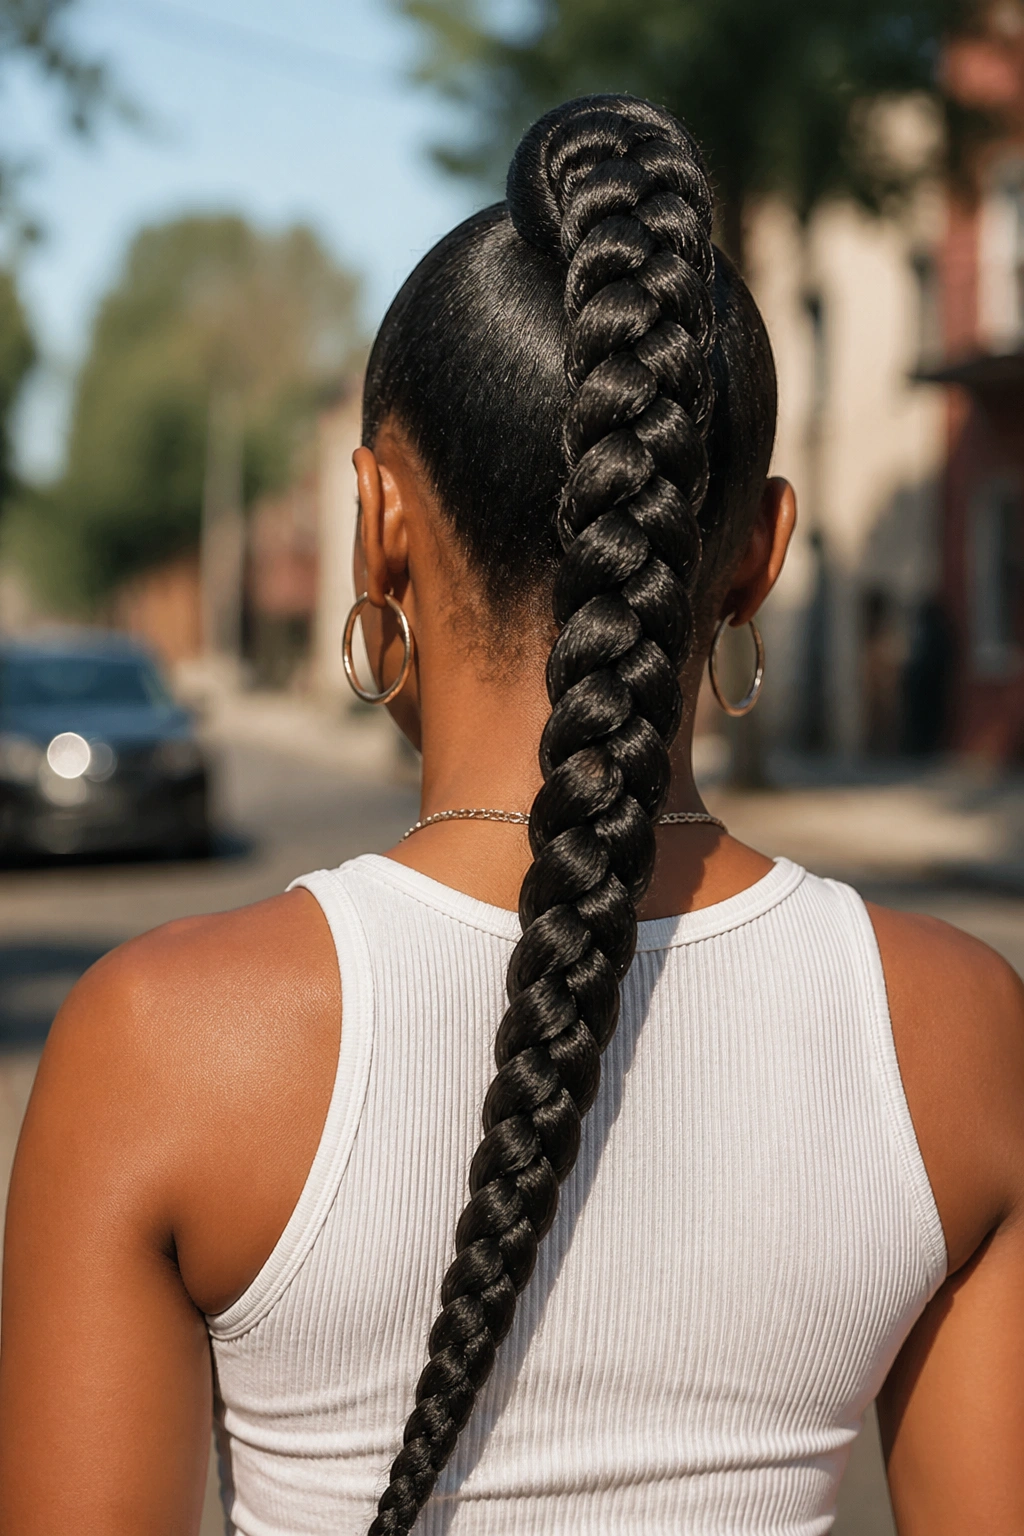
A braided ponytail is the cleanest kind of confidence. The hair is pulled away from the face, the crown is smooth, and the whole style gets its energy from the line of the pony itself. High, mid, or low, it always says the same thing: neat, direct, and ready to move.
What I like most is how the shape changes with placement. A high ponytail lifts the face and feels sharper. A mid ponytail sits a little more relaxed and lets the length do more of the talking. A low ponytail reads polished without looking stiff, which is useful if you want something that stays comfortable for hours.
The base matters. If the ponytail is too tight, the whole thing starts to feel harsh. If it is too loose, the style drops and loses that pulled-together line. You want enough tension to keep the crown smooth, but not so much that your scalp starts complaining by noon.
A wrapped base or a braided tail makes the finish look deliberate. That last step changes everything.
6. Goddess Braids
Unlike tiny cornrows, goddess braids give you room to show shape. They are thicker, more sculptural, and easier to style into a look that feels dressed up without getting fussy. That extra width is why they keep showing up whenever people want a braid that reads from a distance.
Most goddess braid sets use 4 to 8 larger rows rather than a tight run of narrow ones. That means less visual noise and more room for the eye to follow the curve of each braid. If you add a few curly pieces at the ends or around the face, the whole style softens up fast.
This is a strong pick when you want a style that feels finished on its own. You do not need a pile of extra accessories. The braid pattern already carries enough weight. If your hair is thick, the style sits beautifully. If your hair is finer, the braid count can be adjusted so the rows still look substantial without dragging.
Goddess braids have that old-school glamour people love, but they never feel overworked. That is the charm.
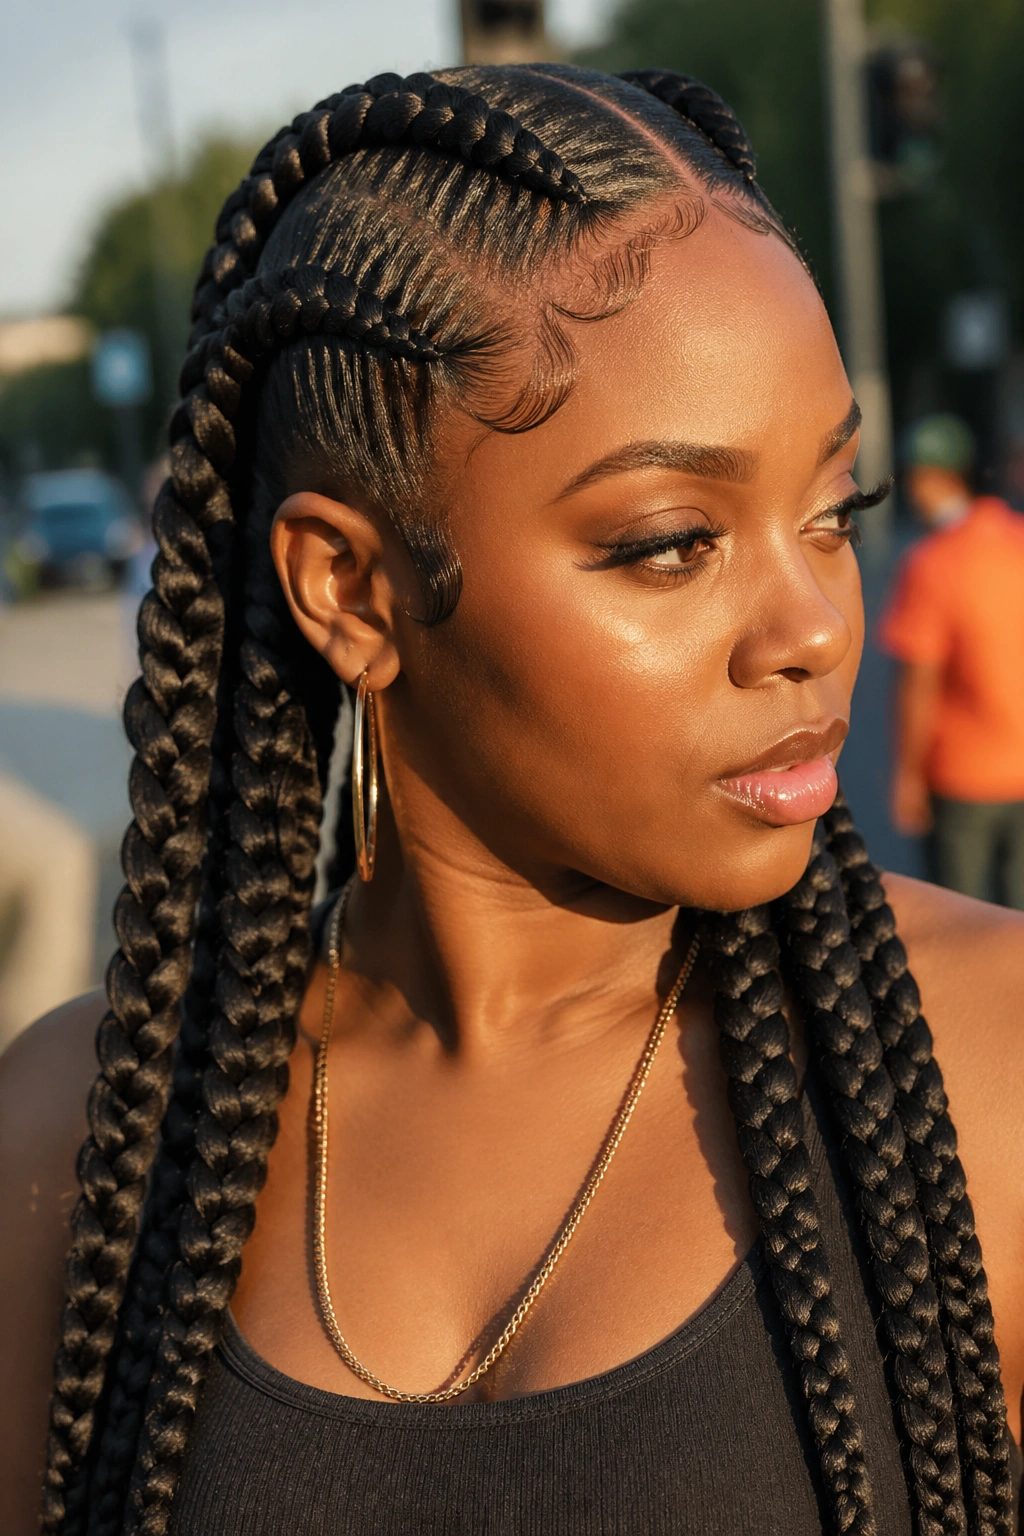
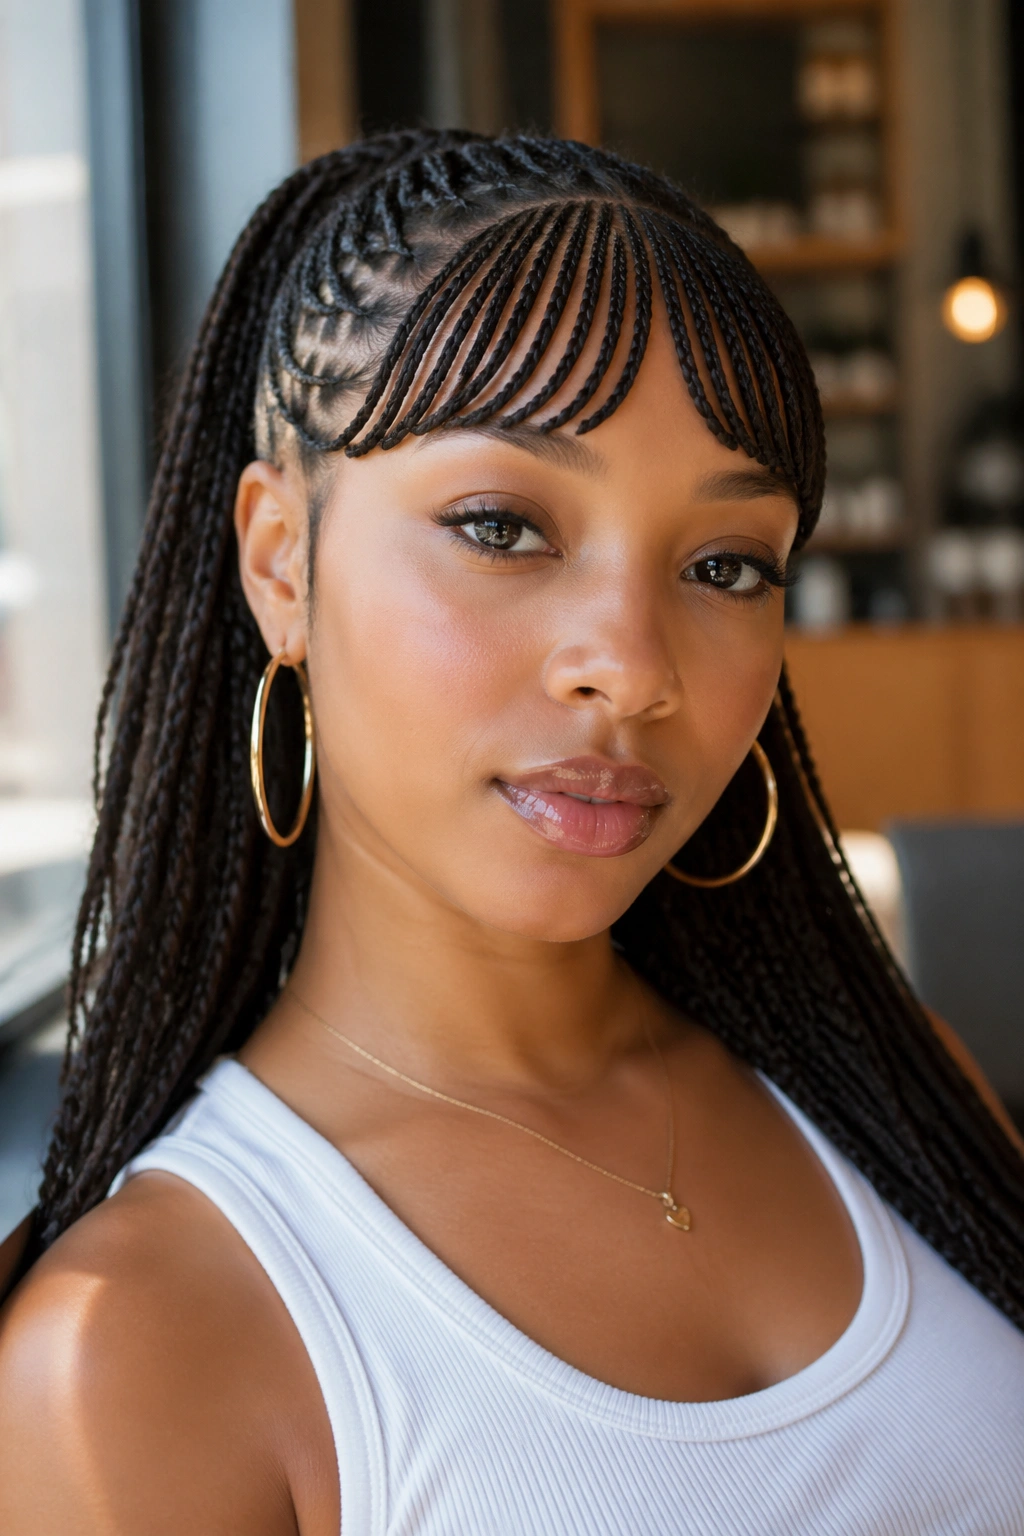
7. Stitch Braids
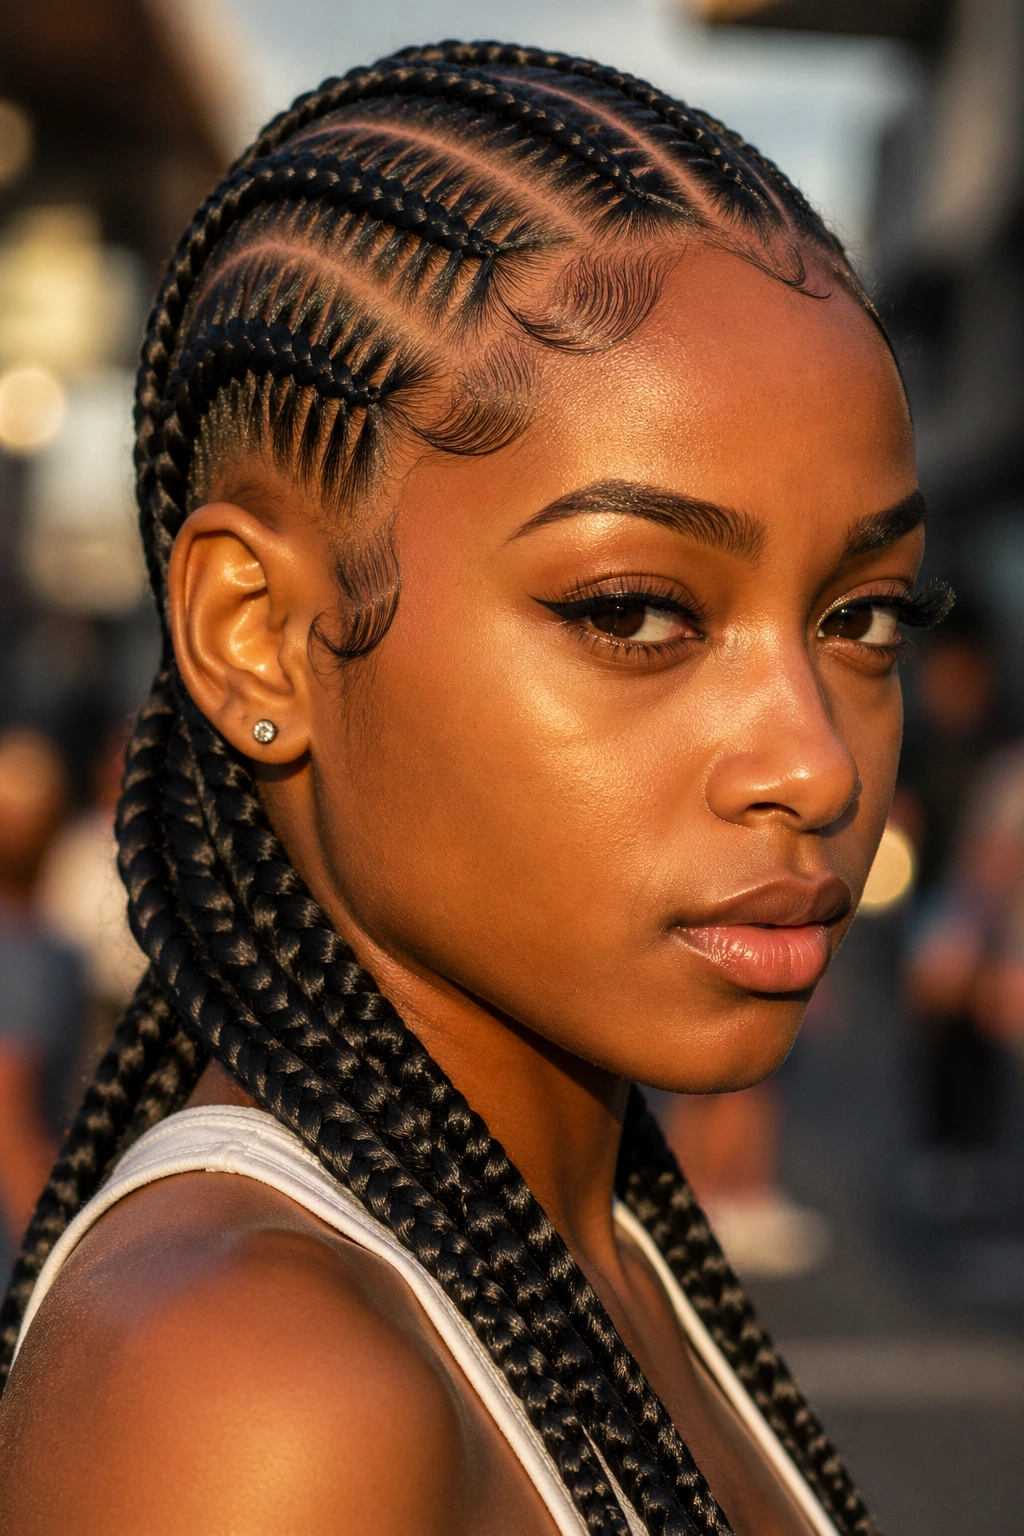
What makes a stitch braid look so crisp? The parting. The braid itself matters, sure, but the tiny stacked sections along the scalp create the signature effect. It looks almost drawn on at first glance, which is why it reads so clean in photos and in real life.
The braid starts with a short horizontal or slightly curved part, then another, then another, so the row has a segmented look before it flows into the full braid. That repeated spacing gives the style a sharp, graphic quality. It is one of the more polished choices in the Freaknik braid family.
The science behind the look
The trick is control. Each section has to be even, and the feed-in has to stay smooth so the braid does not puff up at the root. A little styling gel helps, but too much turns the scalp greasy and messy. You want the parts to stay visible, not drown in product.
Stitch braids work best when the rows are medium-sized. Too thick and the stitched detail disappears. Too small and the style turns fragile. Keep the parting deliberate, and the braid will do the rest.
8. Side-Swept Fulani Braids
A side-swept braid pattern brings motion to the face before the hair even moves. One side carries more weight, the other side opens up, and the whole look gets a little attitude from that imbalance. That is part of why Fulani-inspired braids sit so well in this style family.
The signature piece is usually a braid that runs along the hairline or across the temple, then feeds into longer rows that drop back or down the shoulder. Beads at the ends sharpen the look, but they are not required. A few cuffs near the front can do the job too.
The shape matters more than the extras. If the front section is too crowded, the style loses that elegant sweep. If the side is too bare, it feels unfinished. A nice middle ground is a central braid or two, then smaller rows that fan out cleanly toward one side.
This style works especially well when you want the face framed without having bangs hanging in your eyes all day. It is a smart braid for long wear and movement.
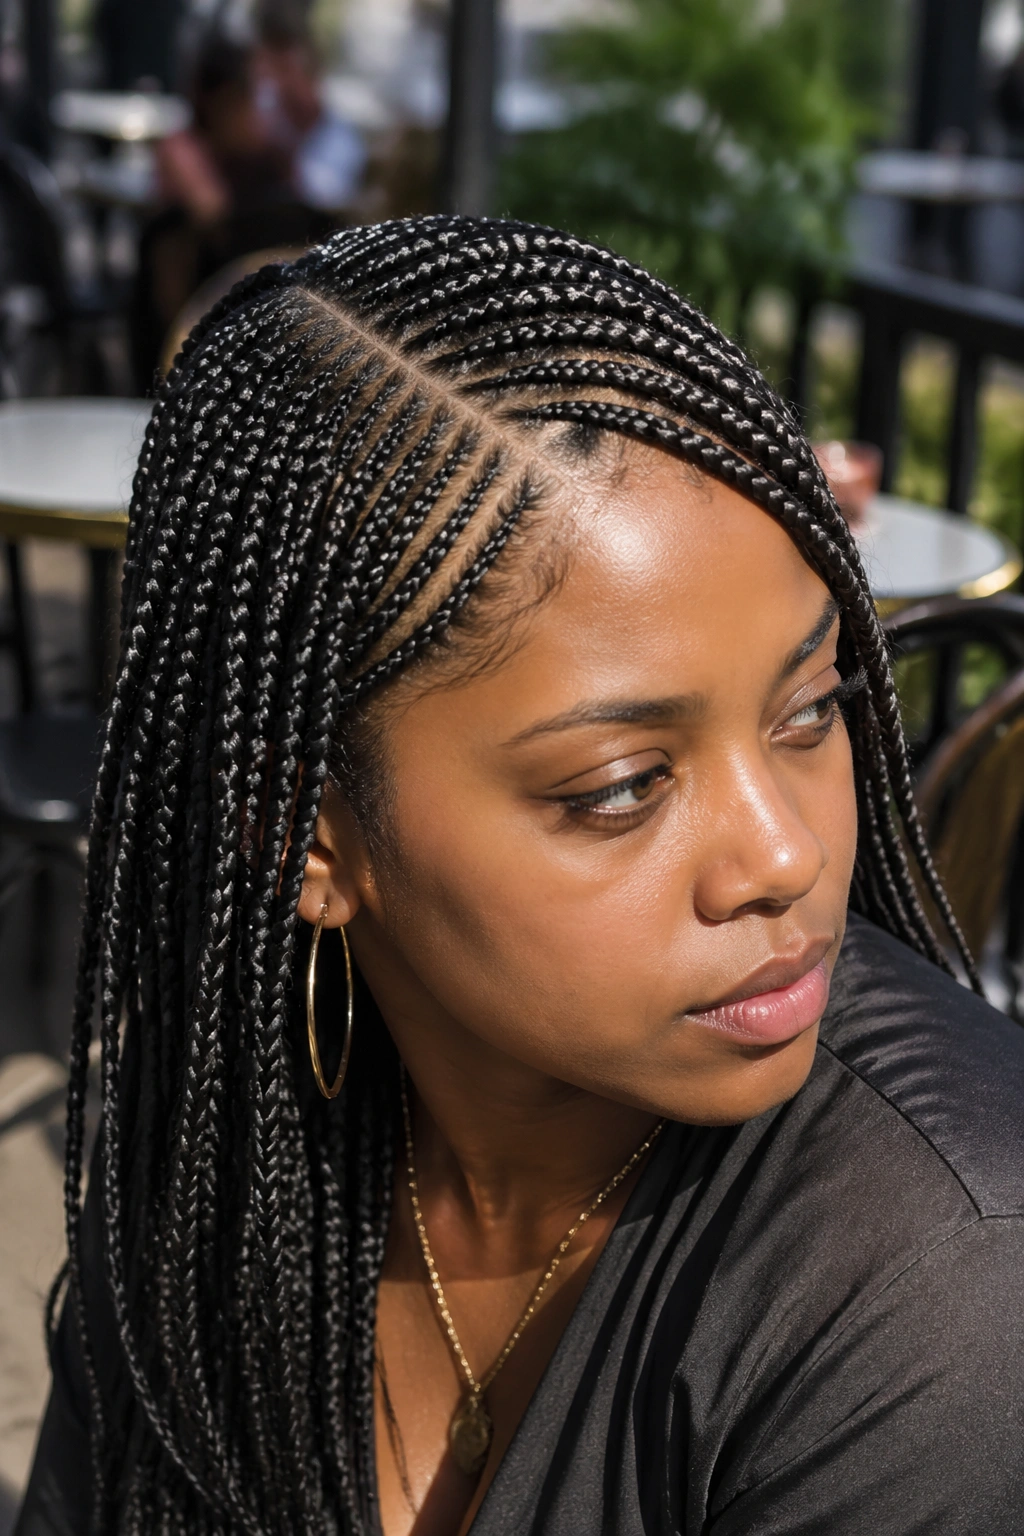
9. Micro Braids
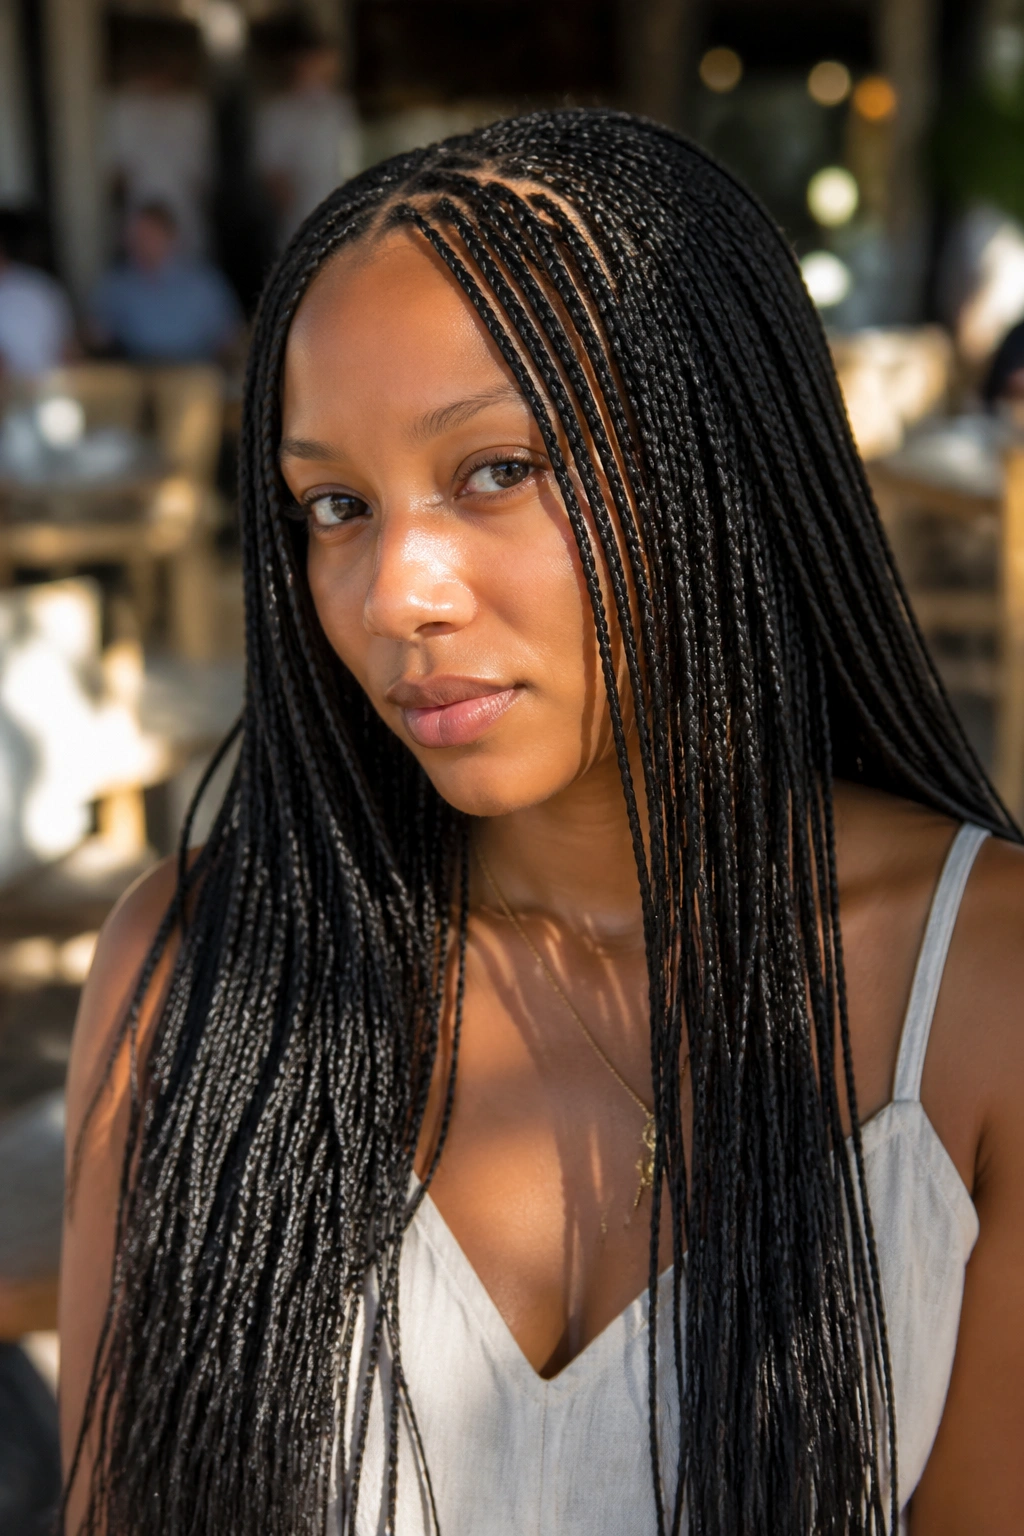
Micro braids are patient people’s braids. They take time to install, and they are not the quickest style to live with, but the payoff is the amount of movement you get from such tiny strands. They fall like a curtain of thread when they are done well.
The size is the whole point. Each braid is pencil-thin or even slimmer, which means the style can look soft and airy instead of chunky. That also means the installation has to be careful. If the sections are too tight at the root, the scalp will let you know. Fast.
Micro braids have a different feel from larger box braids. They are lighter on the head, but they can tangle if you ignore them. A silk scarf at night and a little light oil on the scalp go a long way. If you want the ends to stay neat, keep them trimmed or sealed when needed.
These braids suit someone who likes length and movement more than big, loud shape. They are subtle until they start swinging.
10. Criss-Cross Braids
Criss-cross braids are for people who want the parting to do some of the talking. The braid lines overlap in a way that makes the scalp pattern look intentional and a little intricate, even when the actual braid size stays simple. It is one of those styles that looks more complicated than it really is.
Why it works so well
The visual trick is the crossing. Braids move over and under one another near the crown or front section, so the eye keeps following the path instead of landing in one place. That gives the style energy without piling on extra length or accessories.
This is a good option if you want the front of the style to stand out more than the back. It is especially strong on medium to thick hair because the parts hold their shape better. A small amount of braid cream at the roots helps the crossings stay neat, but too much product makes the overlaps mushy.
I like criss-cross braids when the rest of the look stays simple. Let the pattern be the headline. That is usually enough.
11. Braided Bun
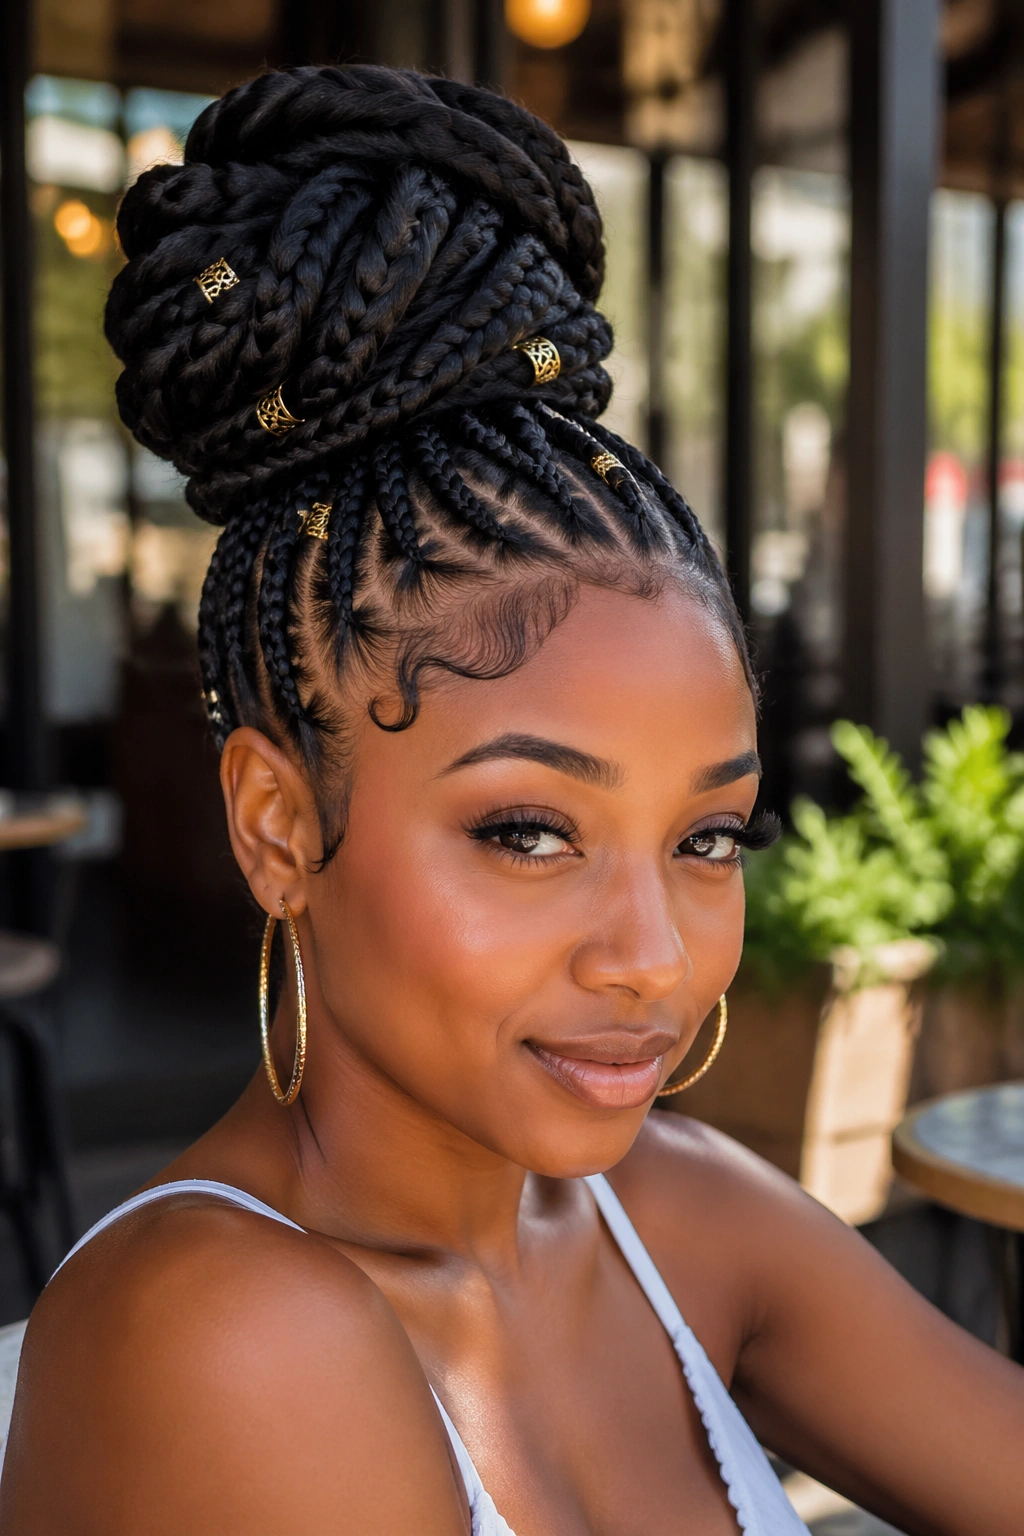
Why do braided buns keep coming back? Because they solve a real problem. Hair up, neck clear, style still visible. That is a solid deal. When the bun is made from braids instead of loose hair, the shape has more body and stays put longer.
The bun can sit high for a sharper look or low for something softer and more restrained. Either way, the texture of the braids gives it a thicker finish than a plain wrap. You can spiral the braids into a tight coil or fan them around the base for a fuller shape. Both work.
How to keep it soft
Do not crush the bun too hard into the scalp. A helmet-like finish makes the style look rigid and can pull at the edges. Leave a little lift near the crown so the bun has room to breathe. A few pin placements matter more than a lot of tension.
This style was made for long days, and that is still the reason it works. It looks done, but not precious.
12. Half-Up Half-Down Braids
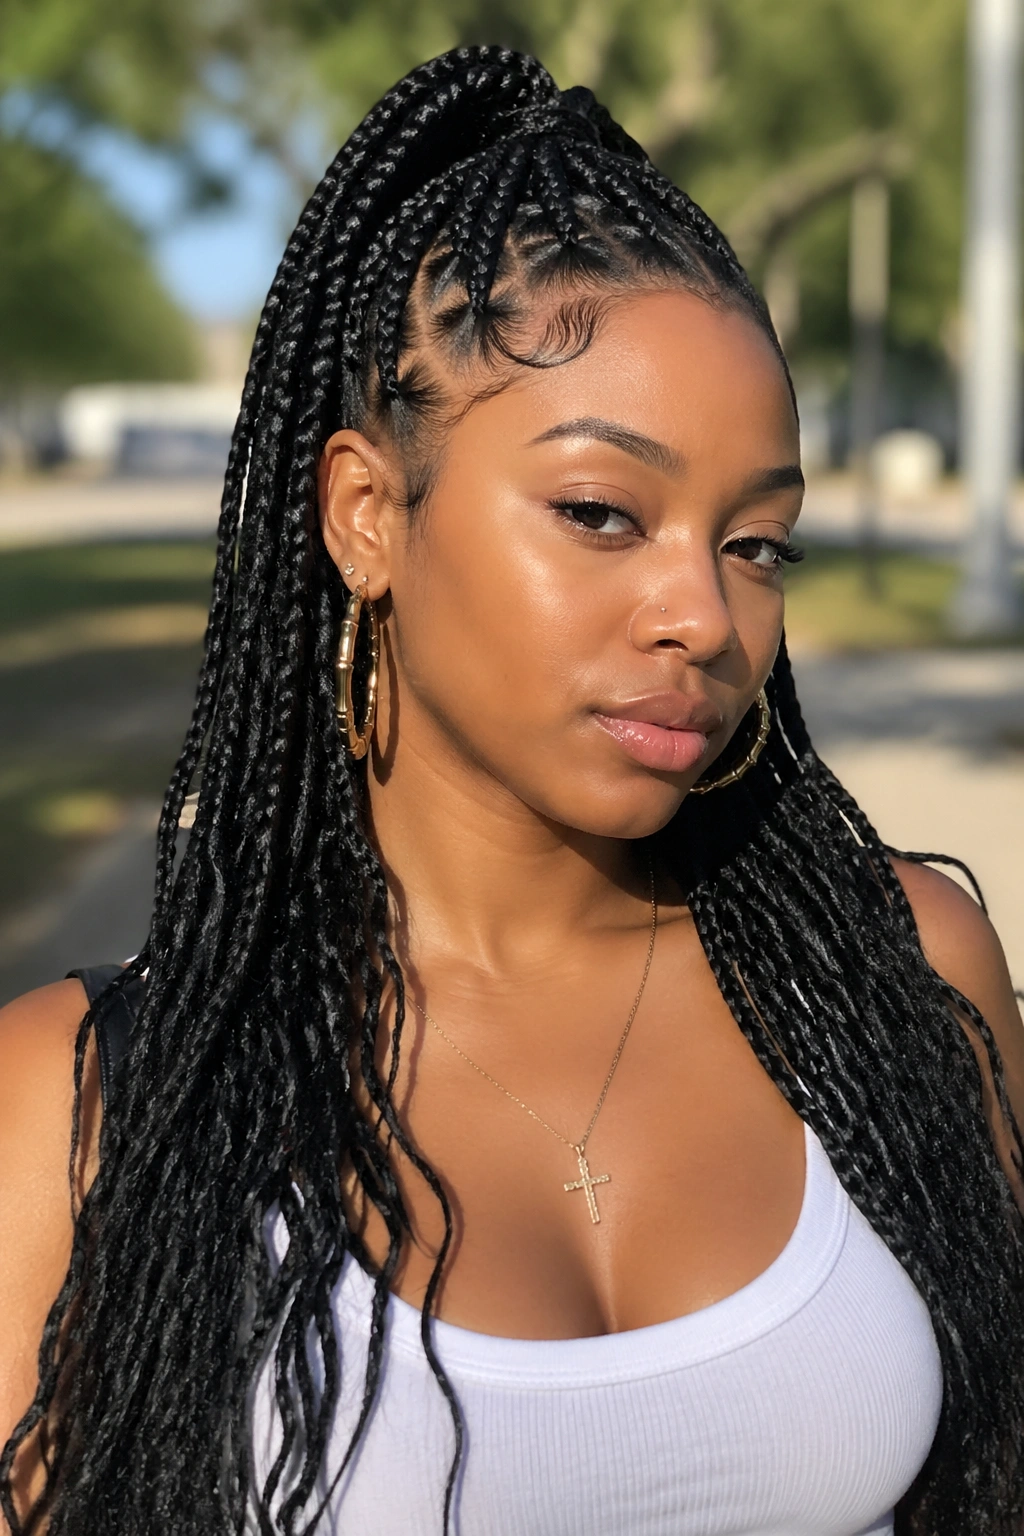
Half-up half-down braids carry the best parts of both worlds. The top section gets pulled back, which keeps the face open, while the lower half hangs loose and gives the style movement. That balance is why it shows up so often in braid inspiration from the Atlanta scene.
A good version starts with a clean top section, usually from temple to temple, and lets the rest of the braids fall naturally. The top can be twisted into a bun, tied into a ponytail, or gathered into a small knot. If you want more softness, leave two slim face pieces out near the front.
- Keep the top section smooth, not puffy.
- Let the back keep its length; that is where the motion lives.
- Add beads or cuffs only if the front is still easy to read.
- A silk scarf at night helps the top stay flat.
This is one of the easiest ways to wear long braids without feeling buried in hair. It is tidy where it needs to be and loose where it counts.
13. Braids with Curly Ends
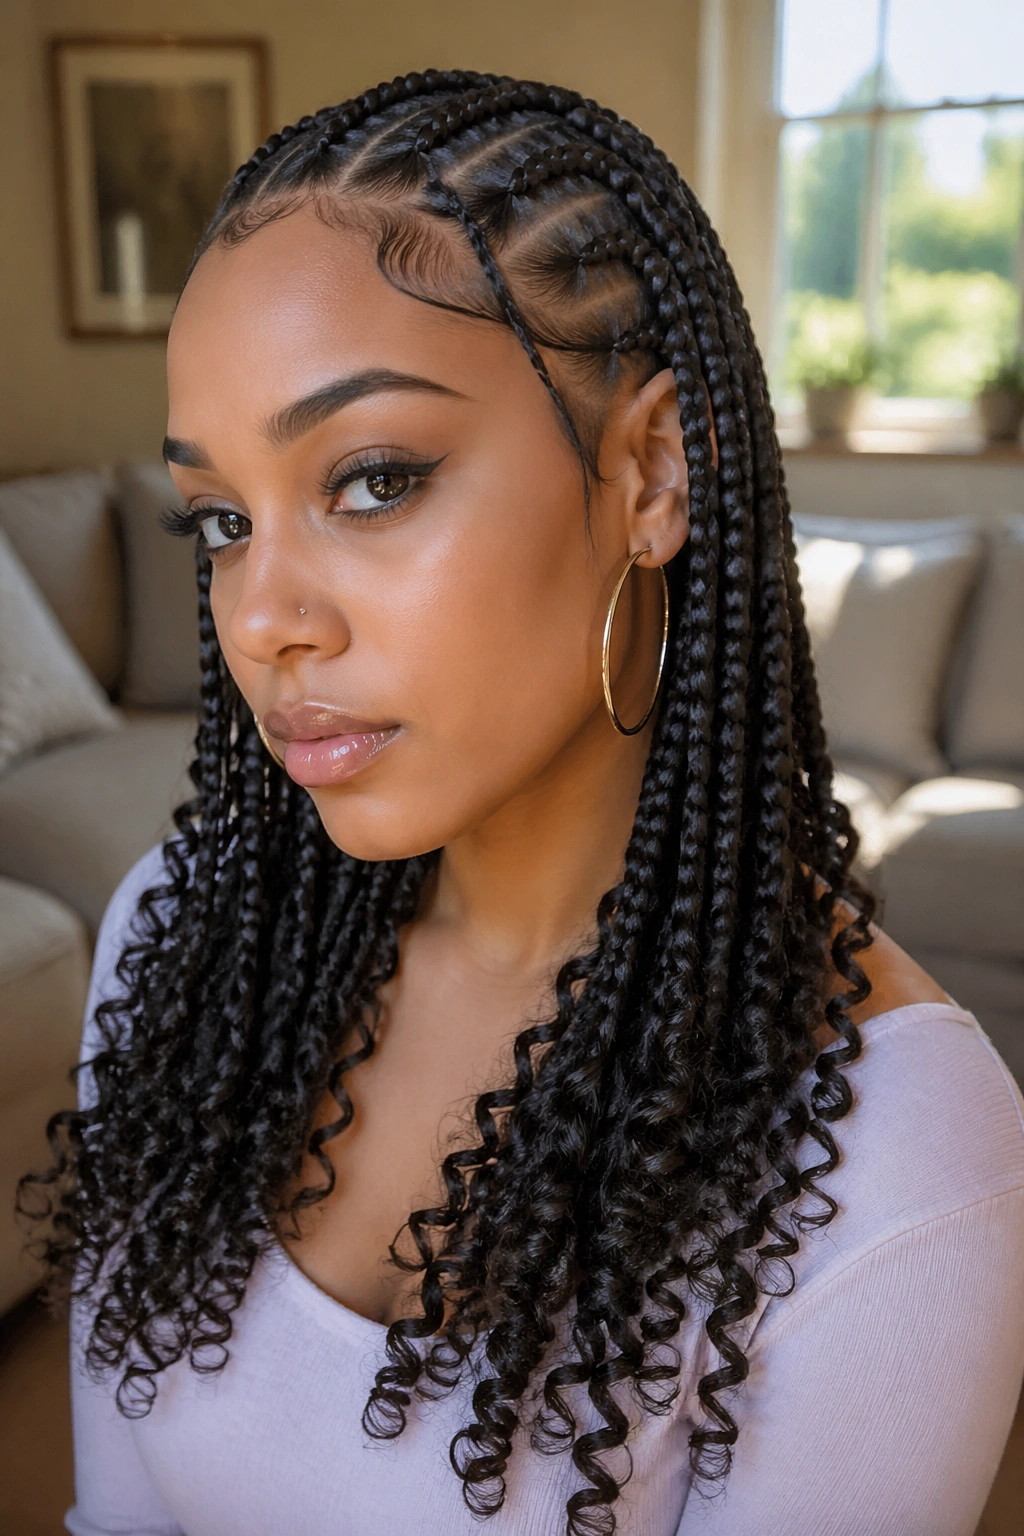
Braids with curly ends soften the whole style in one move. The roots still give you the structure of a braid, but the ends break into curls, which keeps the finish from feeling too hard or boxy. That contrast is what makes the look feel alive.
The curl can come from a hot water set, flexi-rods, or a wrapped-then-dipped finish, depending on the hair type and the braid fiber being used. The important part is that the ends keep their shape. A little mousse helps, but the curl pattern has to be set properly first or it falls apart fast.
I like this style on medium and long braids because the curl has room to show. Short braids can get swallowed by the movement. Long braids let the curl sit at the edge like a final note, and that looks better than forcing the hair to do too much.
This is one of the easiest ways to take a straight braid set and make it feel softer without losing the edge.
14. Waist-Length Box Braids
Waist-length box braids are not shy. They swing, they catch air, and they carry a whole lot of presence. Unlike shoulder-length braids, which can read neat and practical, waist-length braids are about movement first and everything else second.
That length changes the care routine too. More length means more time spent separating, wrapping, and keeping the ends from tangling under sweaters, seat belts, and jacket collars. It also means the braids pull more weight at the scalp if they are too thick. The sweet spot is usually a medium section with enough extension hair to give shape without turning the head heavy.
These are the braids for someone who wants the drama of length. They look excellent when worn loose, but they also work in a half-up pony or a high bun if you need a break from the weight. I would not call them low effort. I would call them worth it if you like long, swaying hair and don’t mind the upkeep.
Long is beautiful. Long is work, too.
15. Braided Bangs
Do braided bangs work? Yes — if the front section is treated like part of the style, not like a leftover. Braided bangs can sit straight across the forehead, sweep to one side, or tuck into a front braid that frames the face without covering it completely.
The trick is to keep the bang area small enough to lie flat. A section that is too thick will flip up and fight you. A section that is too thin can disappear into the rest of the style. Somewhere around 1 to 2 inches back from the hairline usually gives enough room for shape without swallowing the face.
How to keep them from collapsing
Set the front with enough tension to hold, then soften the finish with a little mousse or wrapping foam. Sleep with a scarf tied snugly along the hairline so the braid direction stays in place. If the bang area starts to frizz, clean the roots lightly instead of piling on gel. Heavy product makes the front stiff and dull.
Braided bangs are a strong choice when you want a little attitude near the face. They do a lot with a small area.
16. Double Braided Ponytails
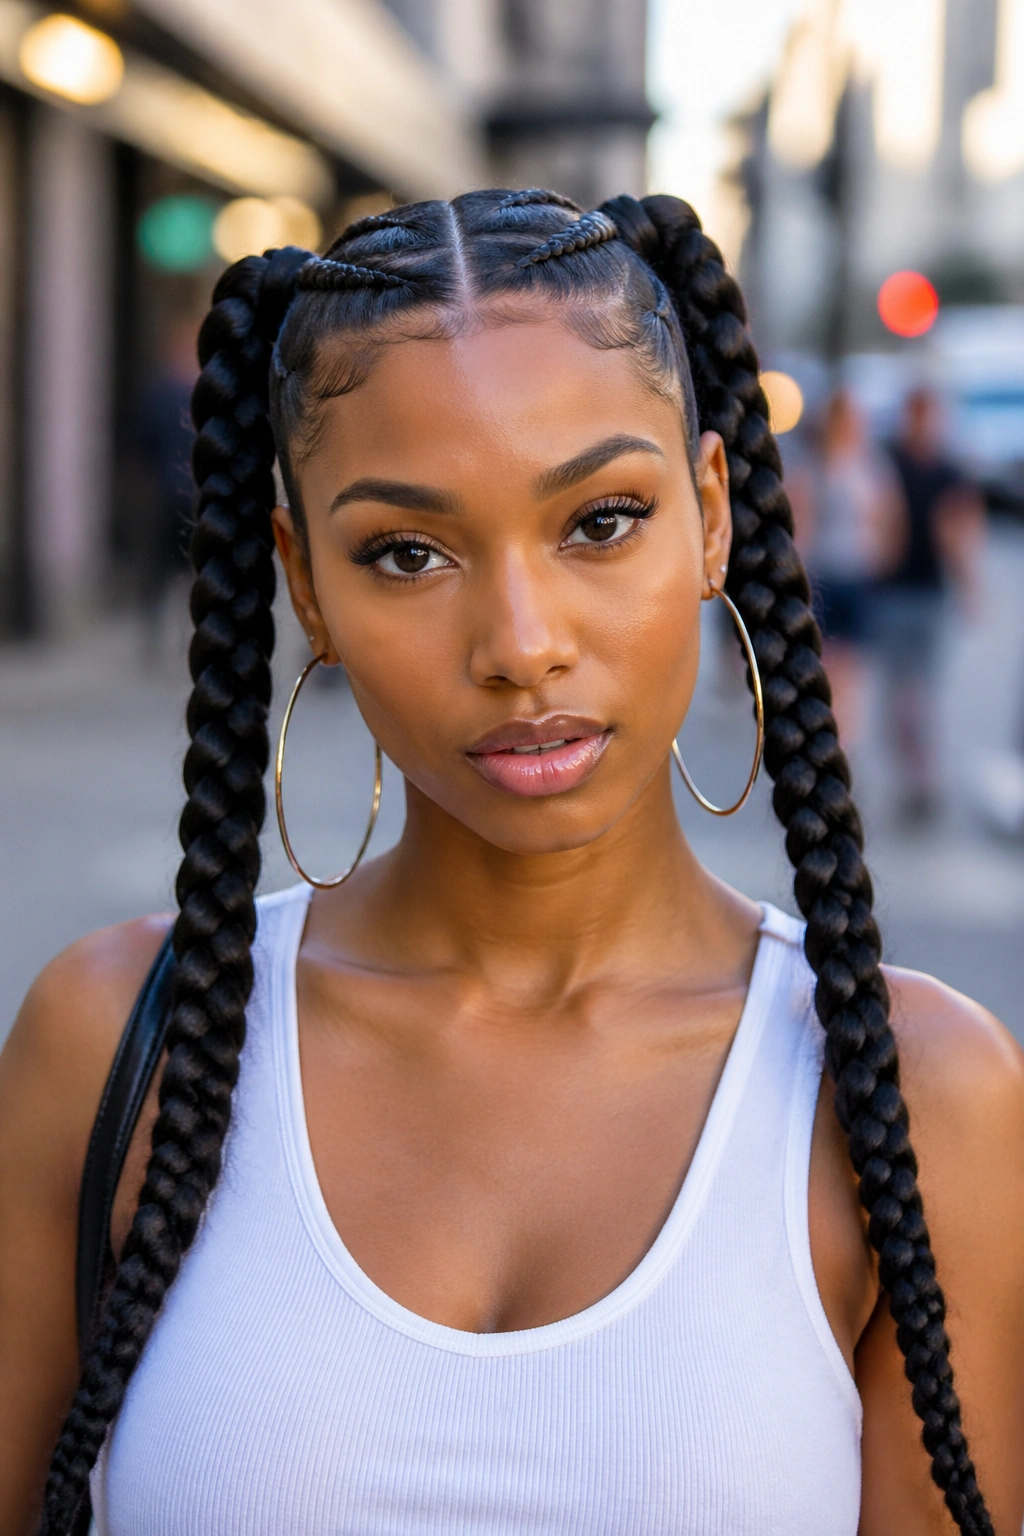
Double braided ponytails bring a playful symmetry that feels instantly familiar. Two ponytails, two braids, same clean line on both sides. The look has a sporty edge, but it still works as a street-style braid because the parting and the finish can be made neat enough to feel grown.
What matters here is balance. If one ponytail sits higher than the other, the style reads off right away. You want the sections to line up evenly and the braids to hang with the same length. That precision is what gives the style its snap.
This is a good choice if you want something that feels active and structured at the same time. The style keeps the hair away from the face, and the twin shape gives you more movement than a single ponytail. It also gives you a chance to use beads or cuffs without overloading the whole head.
I like this better when the parts stay simple. Let the twin shape do the work.
17. Heart-Part Braids
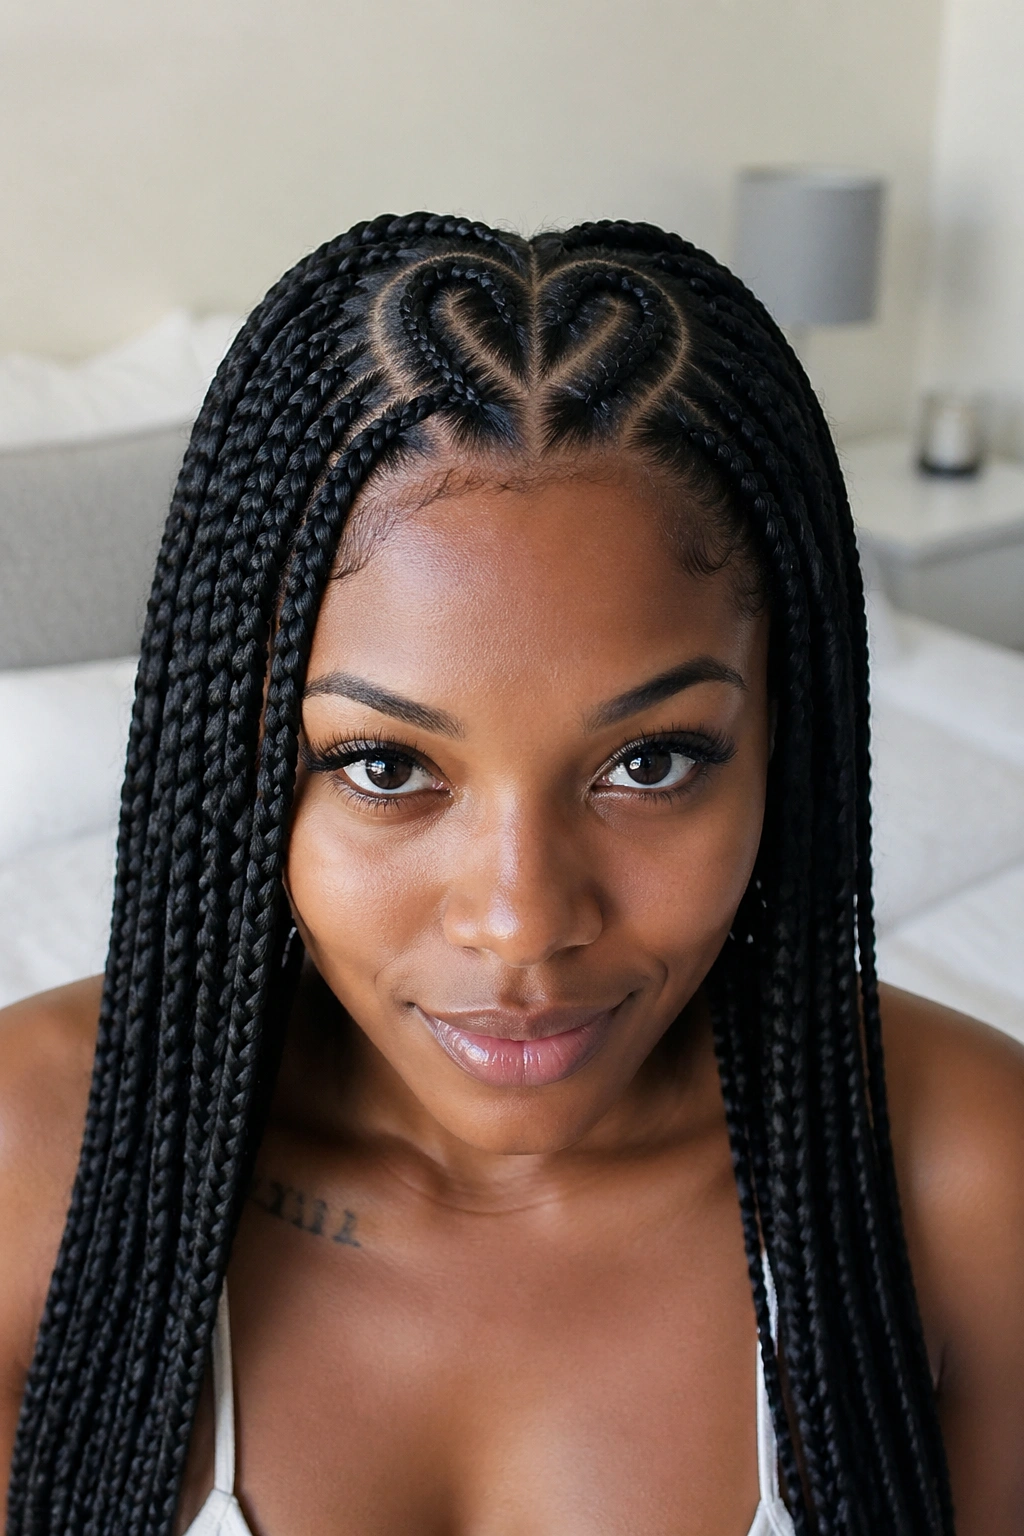
Heart-part braids are a little extra, and that is exactly why they belong here. The part itself becomes the feature. A heart shape at the crown or front gives the whole set a personal touch, even if the braids are otherwise plain.
The shape works best when the rest of the parting stays calm. If you put hearts, zigzags, criss-crosses, and small stars all in one set, the style starts fighting itself. One strong design element is enough. The heart is a good pick because it feels playful without turning the head into a puzzle.
This style usually looks best when the heart sits in a clean central spot and the surrounding braids are medium or thin. That gives the shape room to show. A slick root helps too, because the heart lines need definition to stand out.
It is not the most understated braid on the list. It is one of the most memorable.
18. Braids with Gold Cuffs
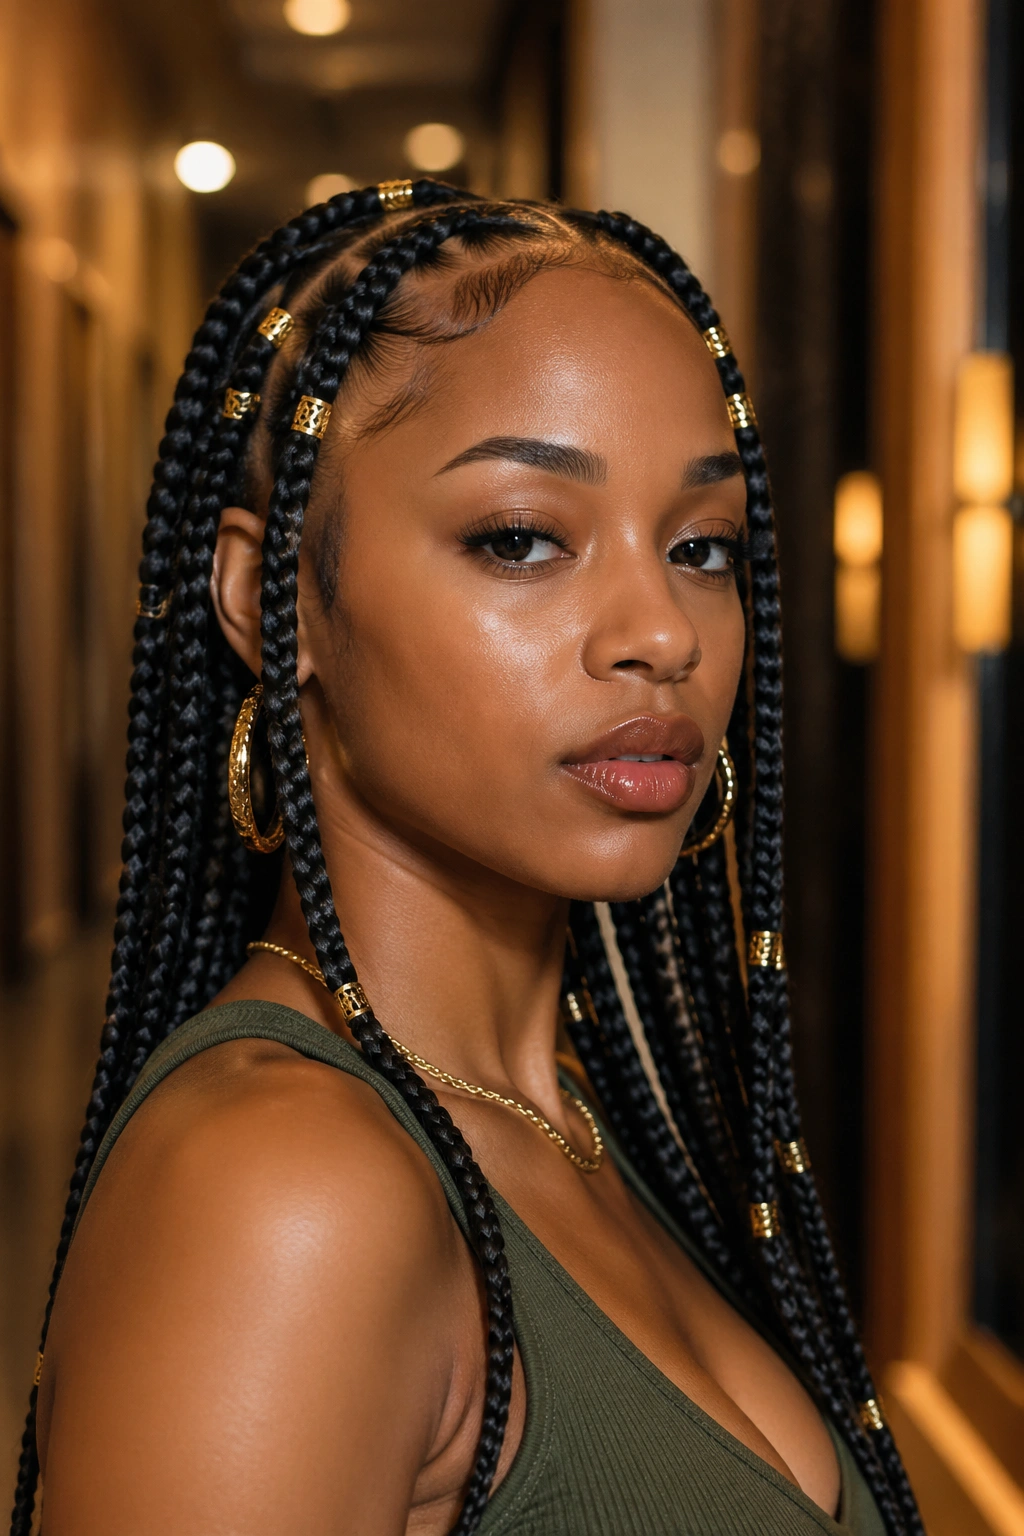
Braids with gold cuffs can change a plain set in seconds. The metal adds shine, but the real effect is structure. One cuff near the face tells the eye where to look. Three cuffs down the length create rhythm. Scatter too many, and the braid starts to feel cluttered.
How to place them well
- Put cuffs on dry braids so they grip instead of sliding.
- Space them 2 to 3 inches apart if you want the line to read clean.
- Mix one small cuff with one medium cuff rather than stacking several big ones together.
- Place the first cuff near the face or collarbone so the style gets an anchor point.
Gold cuffs work especially well on dark braids because the contrast is strong. They also fit the Freaknik mood without needing much else. A few cuffs, clean parts, and good length can carry the entire look.
I prefer this over too many accessories. It has more restraint, which makes it look sharper.
19. Feed-In Braids to a Low Ponytail
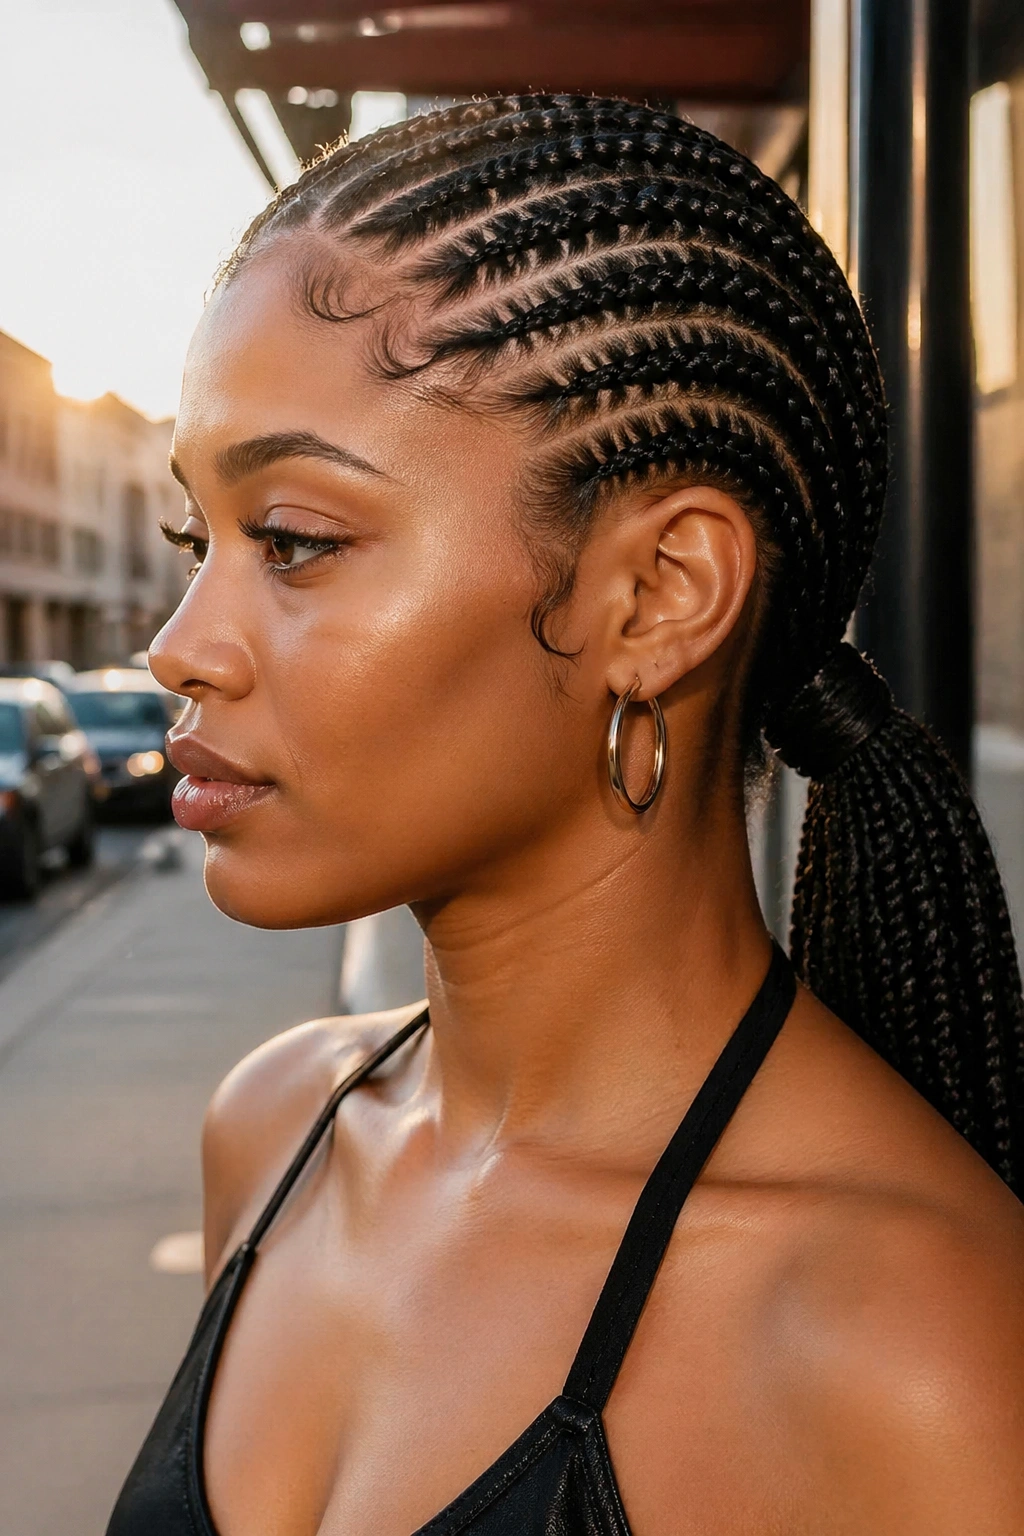
Feed-in braids to a low ponytail feel grounded in the best way. Unlike a high ponytail, which lifts the whole look up toward the crown, the low ponytail keeps the braid line close to the nape and gives the style a calmer finish.
That lower placement also changes the silhouette. The head looks longer, the neck stays visible, and the style feels polished without trying too hard. If the feed-in sections are smooth at the root, the ponytail almost disappears into the braid line, which is a nice trick when you want a clean transition.
This is a strong option for long wear because the weight sits lower on the head. It can feel easier on the scalp than a high tie, especially if the hair is thick or the ponytail is full. I also like it when the ends are wrapped with one braid or a small extension piece so the tie point does not look bulky.
It is a neat style. No extra noise.
20. Deep Side-Part Braids
Why do deep side-part braids keep showing up in braid inspiration from the Atlanta era? Because the part changes the whole face shape before the braids even start. A strong side split gives the style a little attitude and softens the center line without making the set messy.
A clean side part usually lands somewhere around a 6:4 or 7:3 split, depending on the face and the braid count. The larger side gets more visual weight, and that asymmetry makes the braids feel less rigid. If the front rows follow the side sweep, the whole style picks up a little drama.
This works especially well with medium-length braids or cornrows because the side part has room to show. Pair it with a tucked side, a few face pieces, or a single bead cluster if you want the front to read even clearer. The key is not to crowd the part with too many extras. Let the line stay visible.
Deep side parts are simple, but they rarely look boring.
21. Zigzag-Part Braids
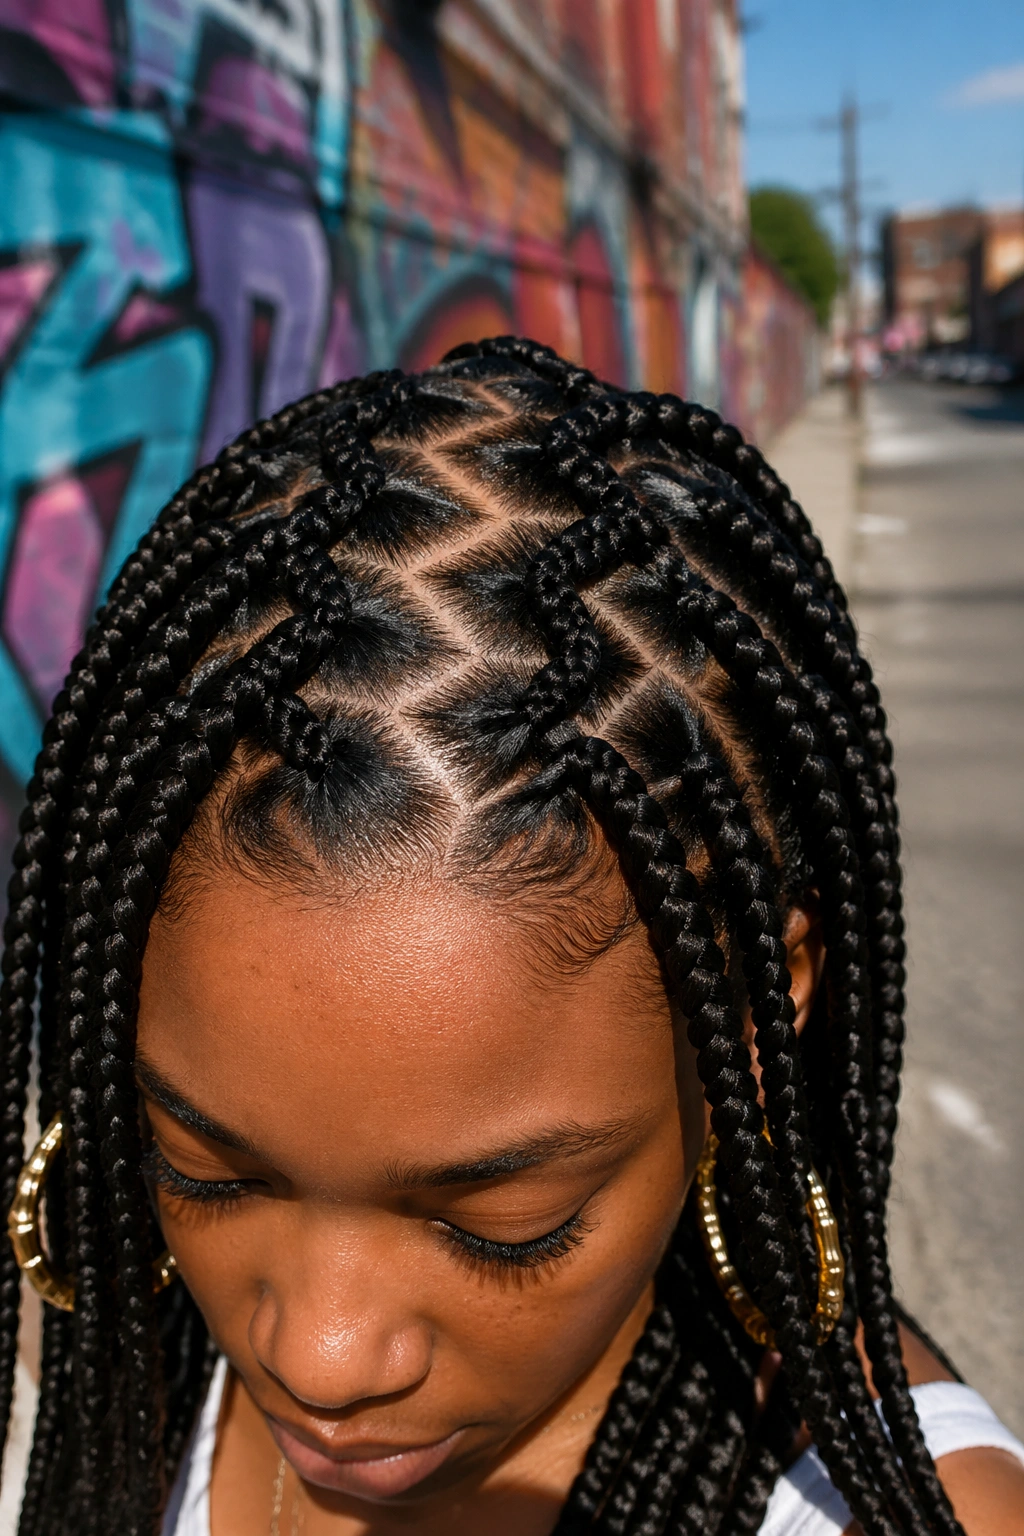
Some people remember the part before they remember the braid. Zigzag-part braids do exactly that. The parting cuts across the scalp in angled sections, and the result feels playful without becoming loud. It is one of the most recognizable part designs from that whole braid era.
What to watch for
- Keep each zigzag point broad enough to see from a few feet away.
- Use medium braids so the parting can stay visible.
- Let the zigzag run through the front or crown, not every inch of the head.
- Clean edges matter here because the part pattern has no place to hide.
The style works best when the rest of the braid set stays fairly calm. If you add too many accessories, the zigzag loses its sharp line. If the parts are too small, the pattern turns into a blur and the whole point disappears.
I like zigzag parts when the goal is a little flash without a lot of extra length. They add movement at the scalp, which is often where the most interesting braid work happens anyway.
22. Braided Bob
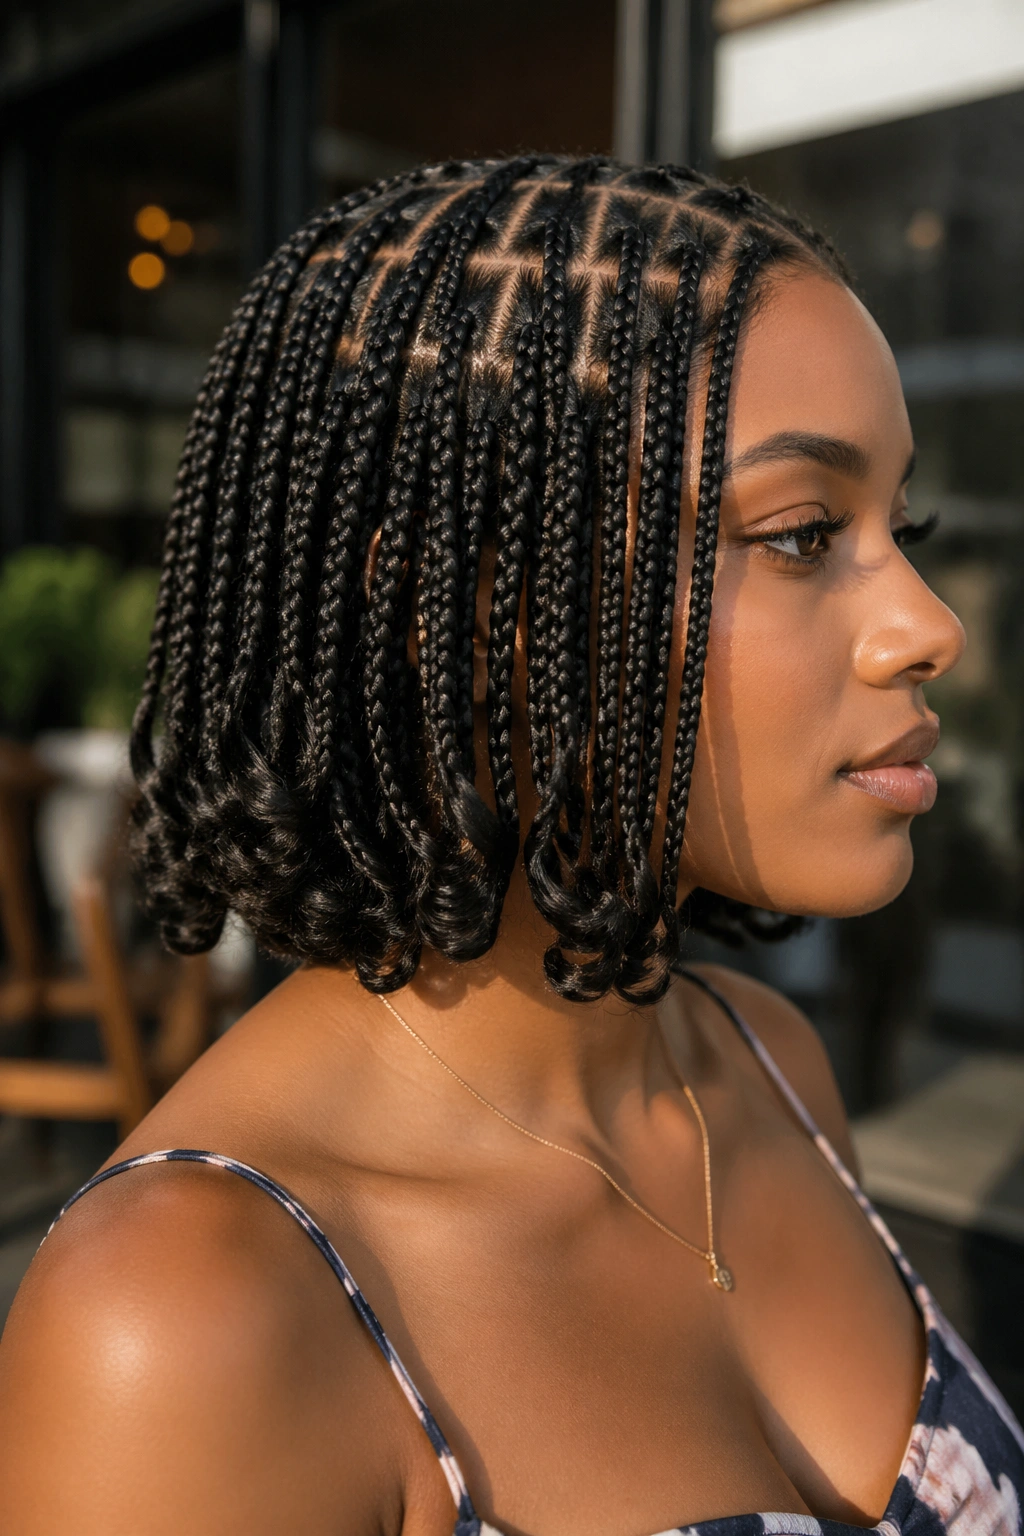
A braided bob gives you shape without weight. The length lands around the chin, jaw, or shoulder, and that shorter line makes the whole style feel crisp. It is one of the easiest ways to get a strong braid look when you do not want hair hitting your back all day.
The bob shape also changes how the braids move. They bounce instead of drag. That makes the silhouette feel tighter and more modern, even when the braid pattern itself is pure old-school Atlanta energy. If the ends are blunt and even, the bob reads neat. If the ends are curled, it gets softer right away.
This is a smart pick for warm weather, busy schedules, and anyone who wants lower maintenance than a waist-length set. There is still care involved, of course, but the sleep routine is easier and the overall weight is lighter. That matters more than people admit.
A braided bob has less drama than extra-long braids. It makes up for it with shape.
23. Mixed-Texture Braids with Wavy Ends
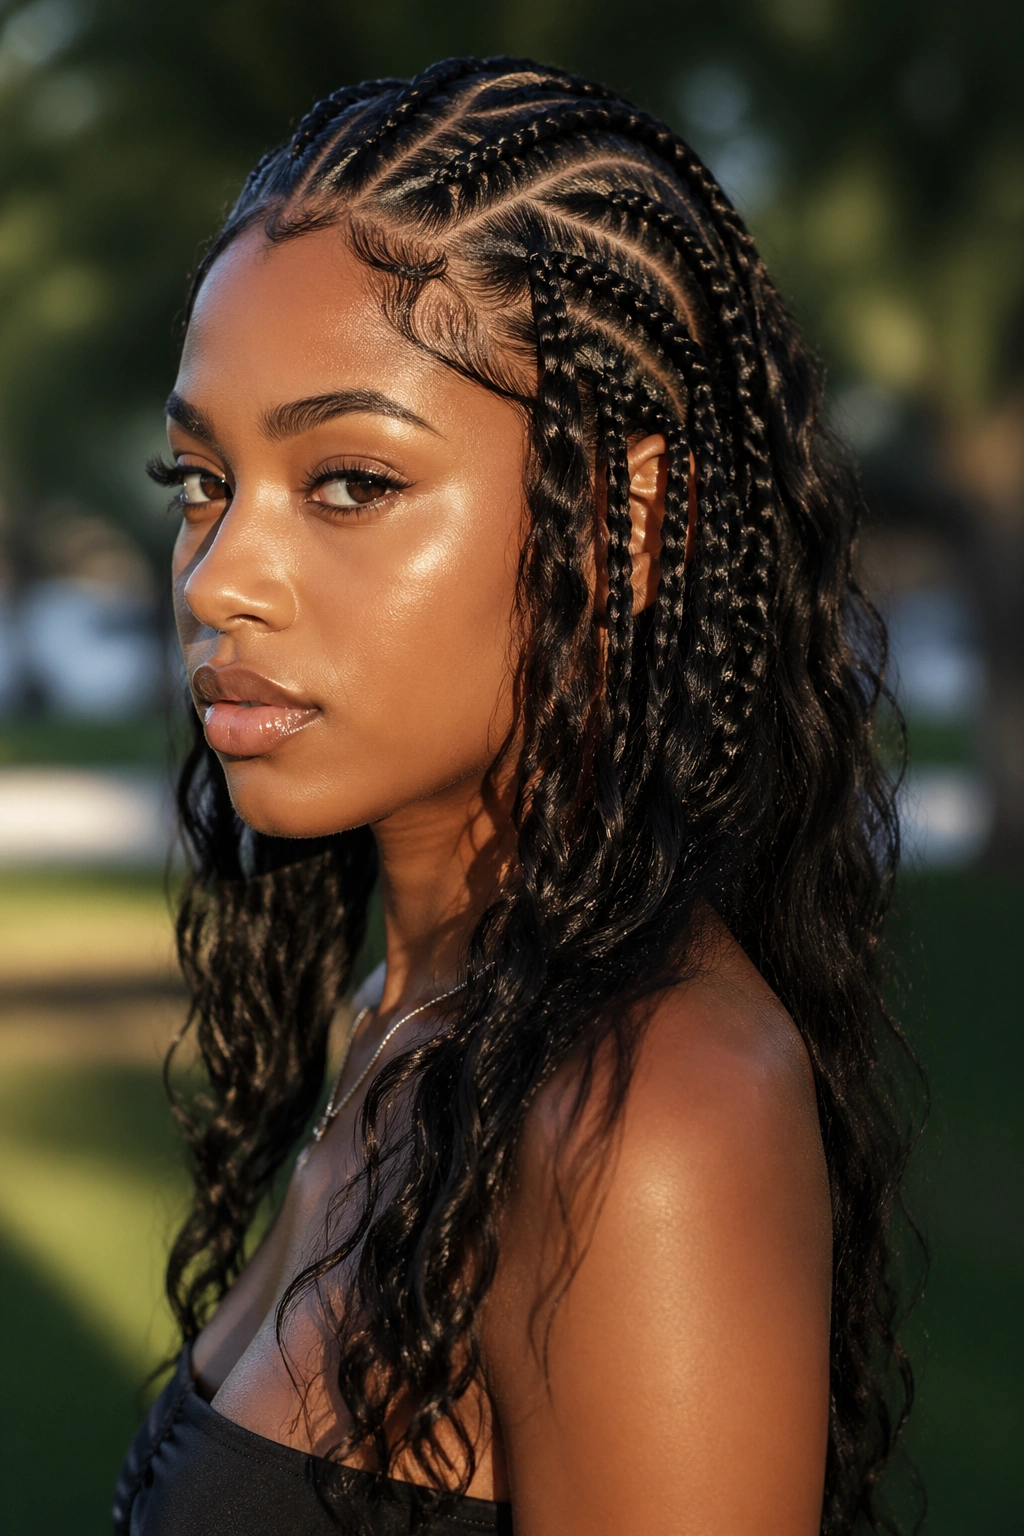
Mixed-texture braids with wavy ends are the closest thing on this list to a built-in mood shift. The root stays braided and controlled, then the ends loosen into soft waves, so the style moves from structured to relaxed in one step. That contrast is the whole appeal.
The finish can come from rod sets, hot water shaping, or a braid pattern that leaves the last few inches free enough to wave naturally. The important thing is keeping the transition smooth. If the braid ends too abruptly, the wave looks pasted on. If the wave starts too high, the braid loses its shape.
This style works well when you want length but not a blunt, heavy finish. It feels lighter at the edges and gives the hair a softer swing. That matters if you like braids that move when you walk instead of hanging like ropes.
I save this look for people who want the classic braid base with a little bend at the end. It has enough structure for the Freaknik mood, but it does not lock the style into one note.
Final Thoughts
The strongest Freaknik braids always had a point of view. They were neat, but not timid. Decorative, but not overloaded. That balance is what keeps the Atlanta 90s braid look from feeling stale.
If you want the style to read right, start with clean parts and a shape that makes sense on your head, not just in a picture. The braid pattern does more work than most people think, and a good parting job will save you from trying to fix the finish with extra beads or extra hair later.
One row of cuffs. A sharp side part. A braid that moves when you turn your head. That is usually enough.