Boho braids for music festival outfits work because they look like you dressed on purpose without looking stiff about it. That’s the sweet spot. The hair feels lived-in, a little wind-tossed, and a little romantic, which is exactly why these styles hold up so well beside fringe jackets, crochet tops, denim cutoffs, satin slips, and all the other pieces people reach for when they want something easy but not lazy.
There’s also a practical side people sometimes skip over. A good festival braid keeps hair off your neck, survives a few hours of dancing, and still looks decent after you’ve shoved sunglasses on your head three times and pulled a tote bag over one shoulder. Polished blowouts can collapse fast in that kind of setting. Braids usually just get better.
The trick is texture. You want enough grip for the braid to stay put, but not so much product that the hair turns crunchy or flat. A light mist of dry shampoo at the roots, a little texture spray through the mids, and a few hidden pins can change everything. Not fancy. Just smart.
Some of these styles take five minutes. A few need more patience. All of them are built for that relaxed, slightly undone look that makes boho hair feel right with music festival outfits instead of fighting them.
1. Loose Fishtail With Face-Framing Pieces
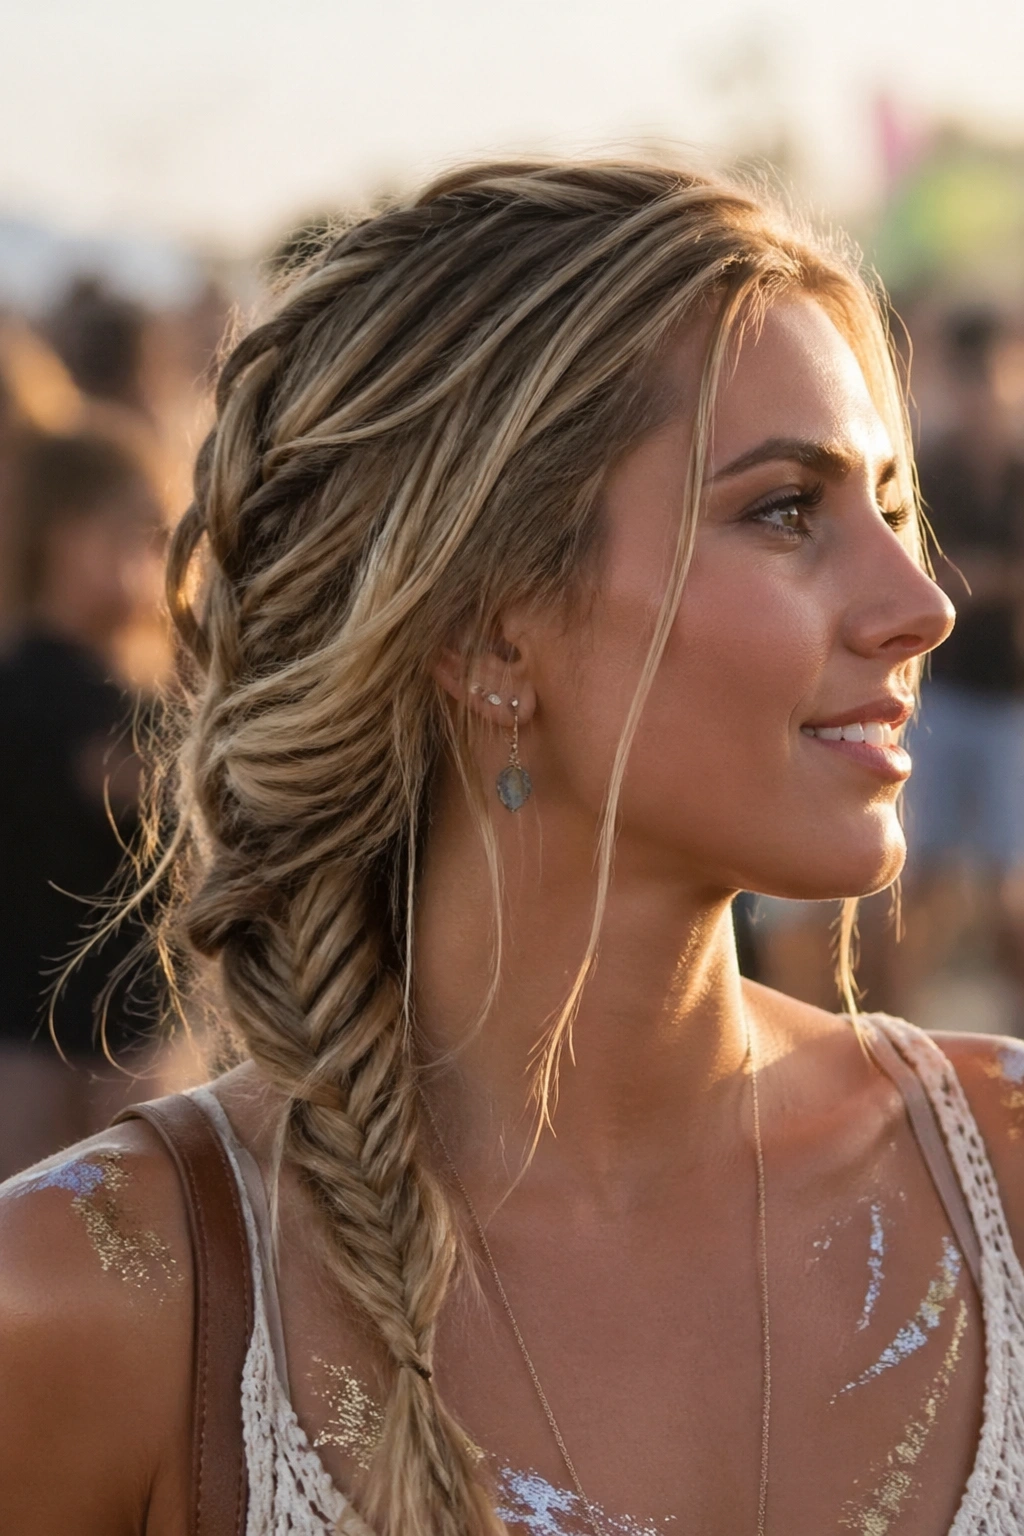
A loose fishtail braid is one of those styles that looks far more intricate than it really is. The braid itself has that woven, almost rope-like texture, and when you keep it soft instead of tight, it sits beautifully with flowing dresses, crochet tops, or anything with a deep neckline.
Why It Works
The fishtail gives you pattern without stiffness. That matters. A regular three-strand braid can read a little school-uniform if it’s too tidy, while a fishtail has that softer, irregular texture that feels more boho. It also flatters layered hair because the little pieces that escape the braid add movement instead of making the style fall apart.
Leave two slim face-framing pieces out near the temples, then pull the braid apart gently once it’s secured. Don’t drag it to bits. Just widen it enough that it looks relaxed and a touch fuller.
- Start with dry hair and a light mist of texture spray.
- Keep the braid low, around the nape or just below it.
- Use a clear elastic, then cover it with a tiny wrap of hair.
- Tug the outer edges of the braid after securing it.
Best tip: pancake the braid only after it’s tied off. If you pull too early, the whole thing loosens in the wrong place.
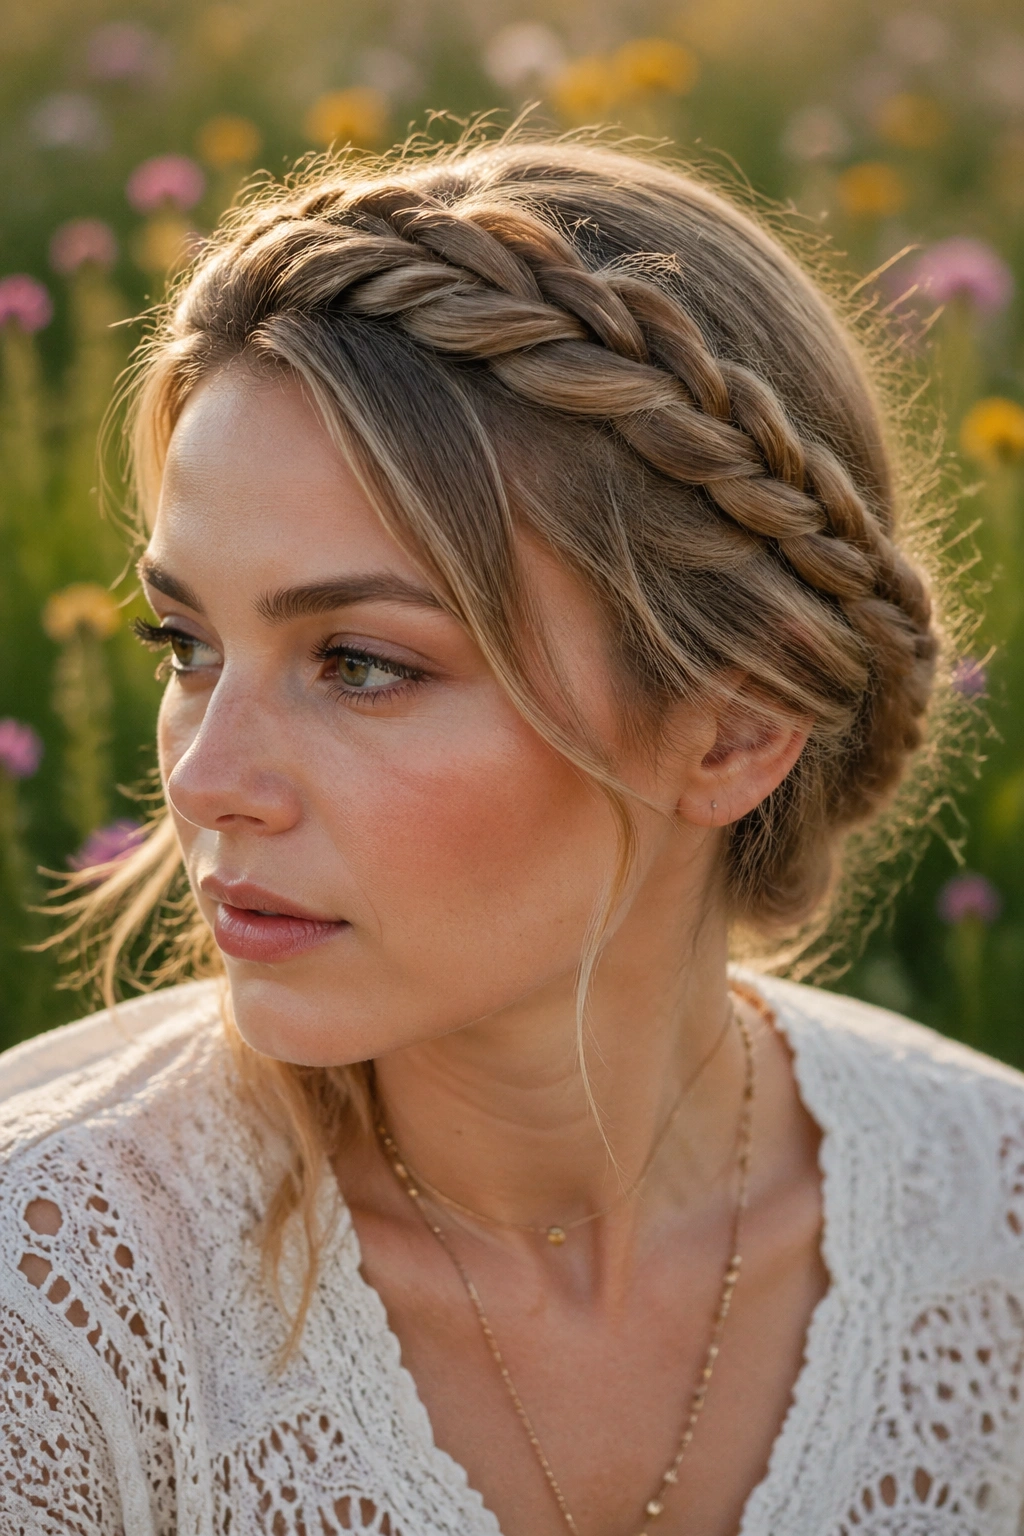
2. Half-Up Crown Braid
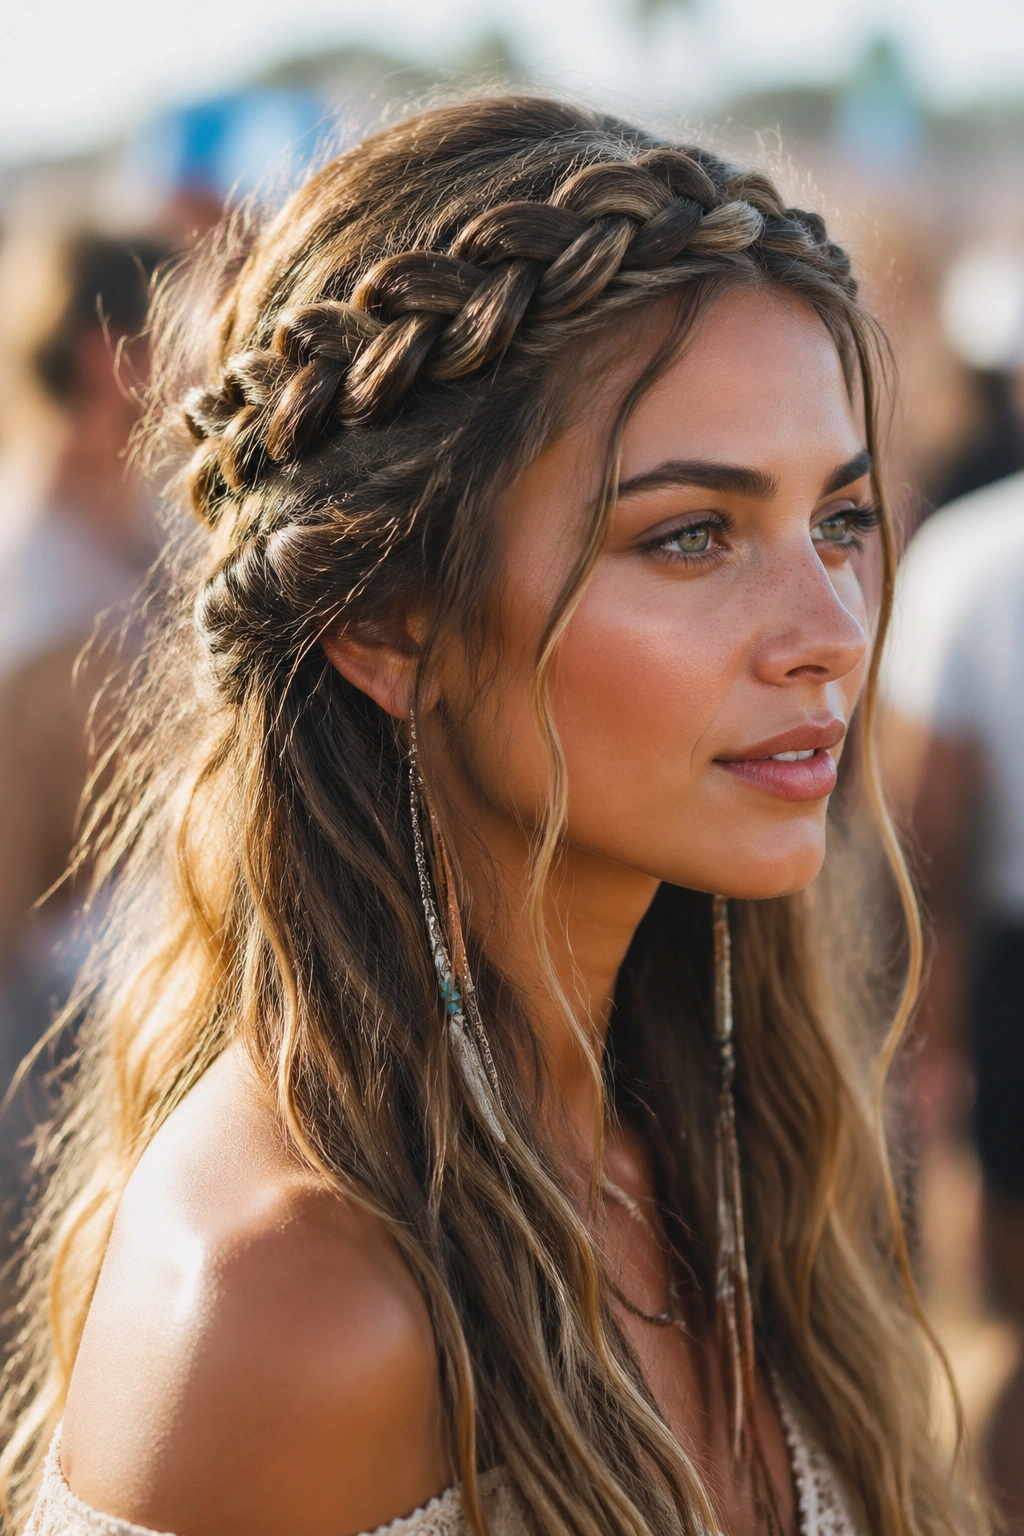
If you want hair off your face but still want length swinging down your back, this is the one. A half-up crown braid gives you the polish of an updo without giving up the softness that makes boho hair work so well with festival clothes.
It’s the braid I’d choose when the outfit is doing a lot. Think embroidered skirts, beaded tops, or a bold printed dress. The crown braid frames the face and keeps the top section controlled, so the rest of the look can stay loose and easy.
I like this braid best when the top section is braided from one temple to the other and pinned low enough to hide the bobby pins under the hair. That little detail matters. If the braid sits too high, it starts looking fussy. Keep the bottom half wavy or softly curled, and the whole style reads as relaxed instead of formal.
A couple of invisible pins near each ear usually do the job. If your hair is slippery, rough the crown with dry shampoo first. If your hair is curly, stretch the top section a little before braiding so the braid lies flat without getting tight.
3. Double Dutch Braids Into Soft Waves
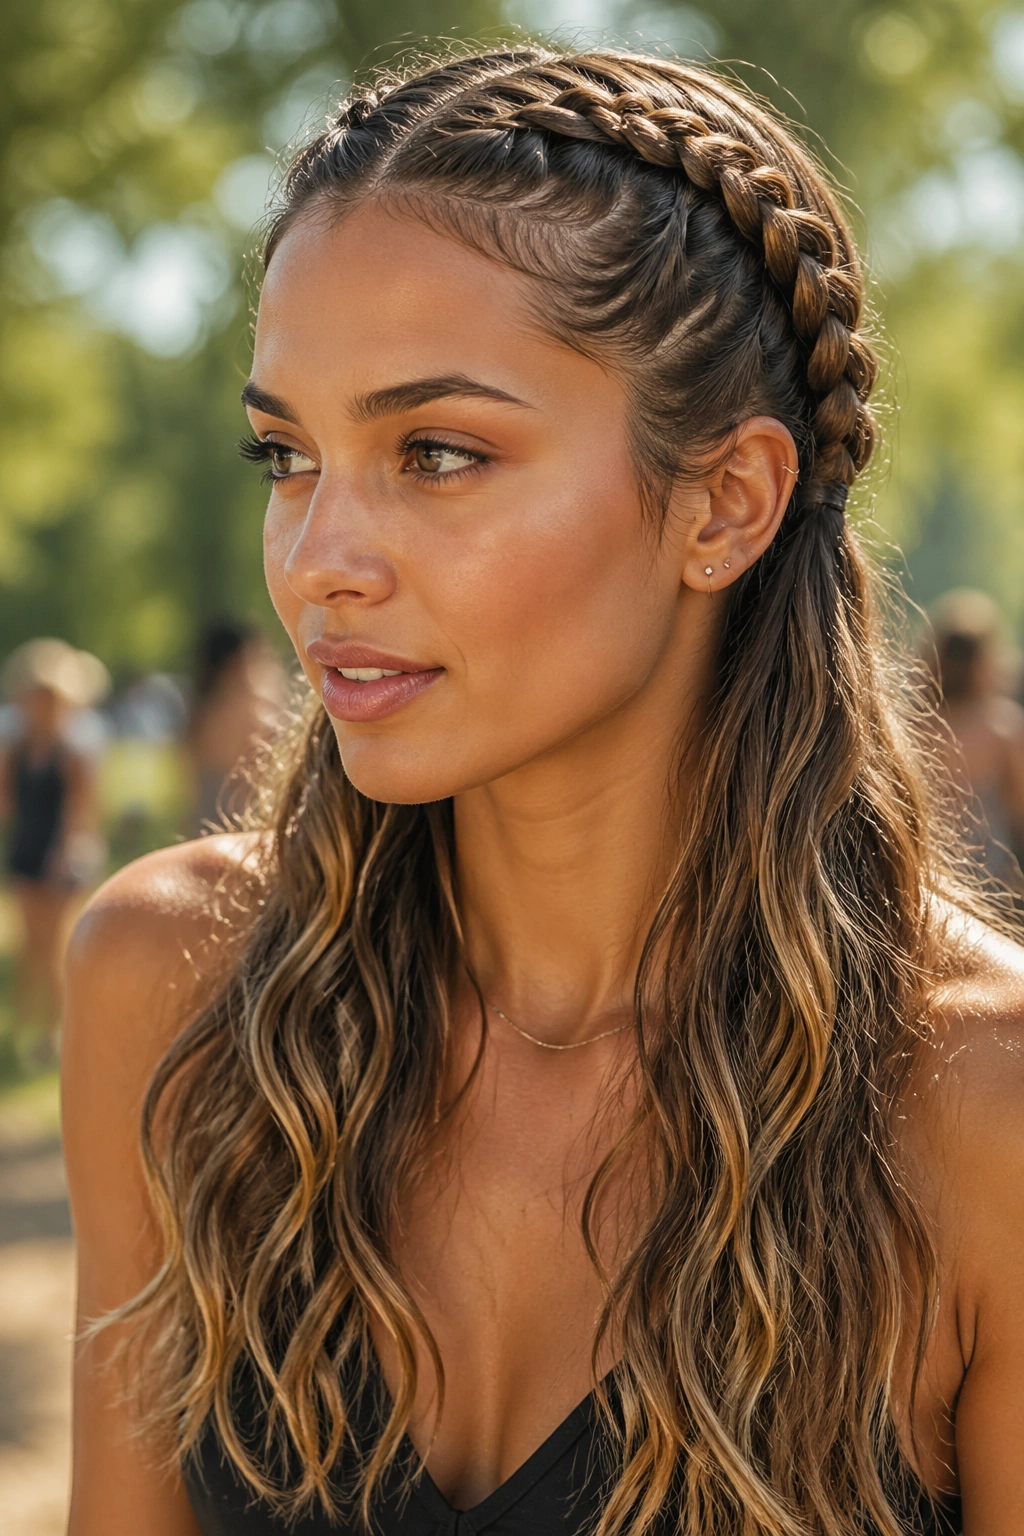
Want something that feels part festival, part practical? Double Dutch braids are a strong answer. They keep the front of the hair secure, look good from every angle, and release into soft waves if you braid only partway down.
How to Wear It
Start with a center part and braid each side close to the scalp for the first few inches. After that, stop braiding and let the ends fall into loose waves. That mix of structure and softness is what makes the style work. Tight roots, loose ends. Clean line, messy finish.
This is a good choice if your hair is thick, because the braids distribute the volume instead of puffing out at the sides. It also works well with square necklines and cropped jackets, where you want the hair to frame the outfit rather than cover it.
A few practical points:
- Use a styling cream on the top section if your hair frizzes fast.
- Braid each side firmly for the first 2 inches so the part stays neat.
- Leave the ends unbraided for a softer finish.
- Mist the loose lengths with a light wave spray if they need shape.
The final look is athletic, but not severe. That’s the part I like.
4. Braided Space Buns
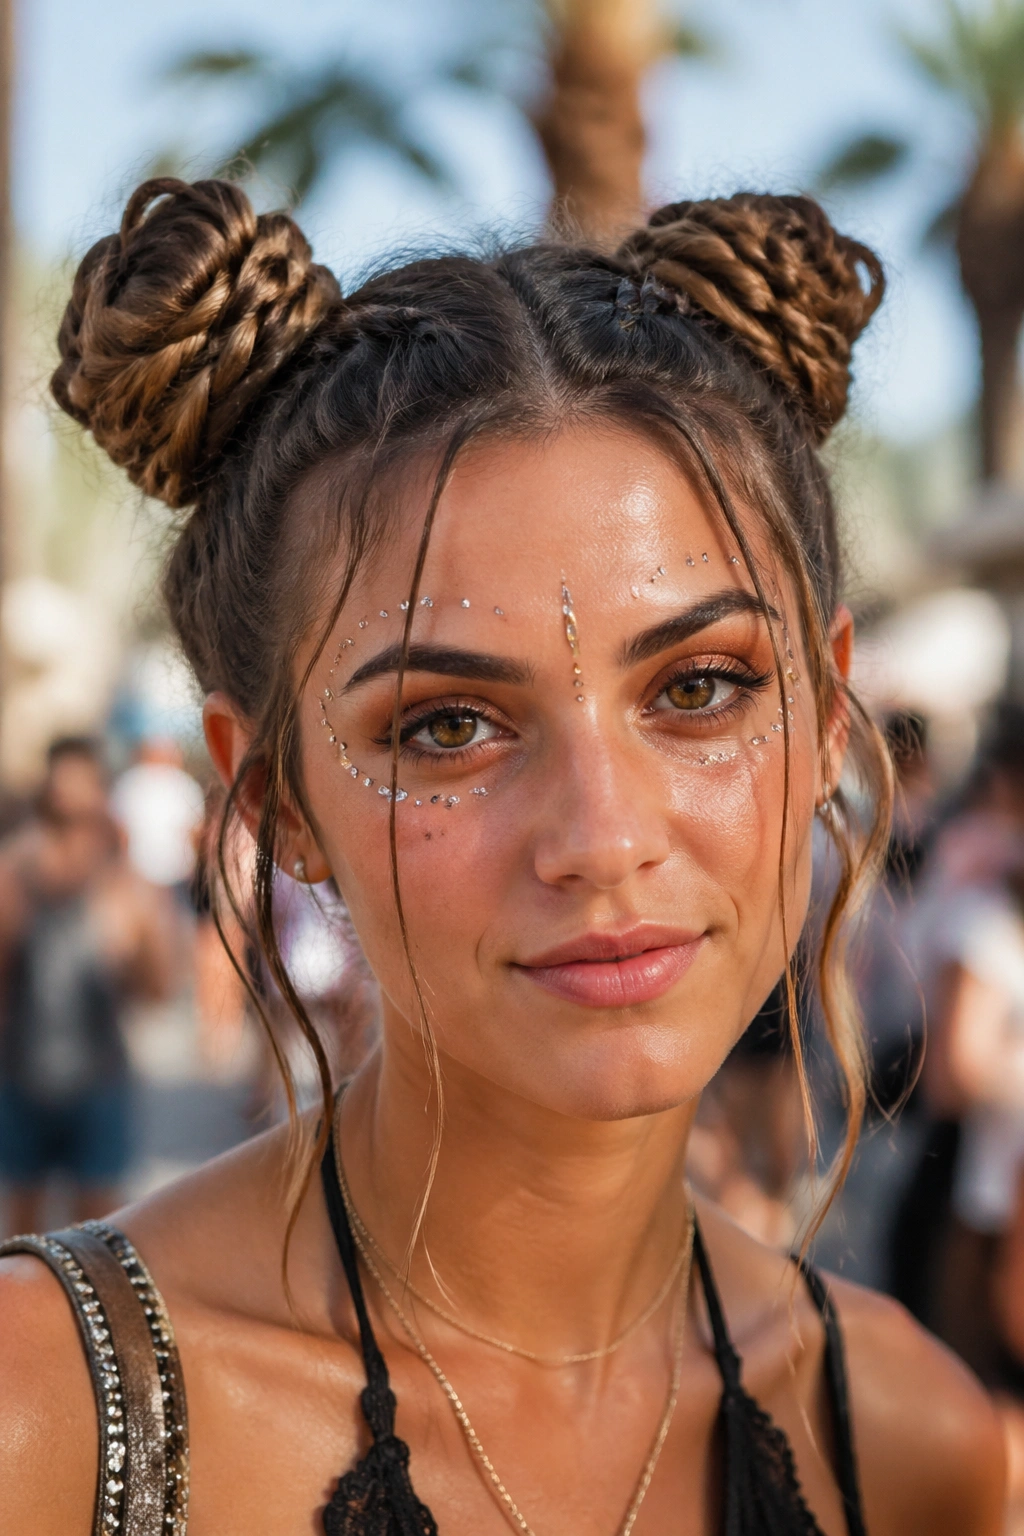
Braided space buns are a little playful, a little practical, and oddly good at surviving long, hot, crowded days. If you’ve ever watched your hair slide off your neck halfway through a set, you already know why this style earns its place.
Picture two braids starting at the crown, wrapped into buns just above the ears, with a few softer bits left free around the hairline. That’s the version I mean. Not cartoonish. Not too perfect. Just enough shape to feel deliberate.
The braid gives the bun structure, which matters if your hair is clean and wants to escape. Once the braid is twisted into a bun, use two pins per side, crossing them in an X for grip. Then loosen the outer loop a touch so the buns look soft rather than stiff.
- Place the buns slightly higher than the ears.
- Leave a few wisps near the temples.
- Use small clear elastics before you twist the braid.
- Keep the buns compact if you plan to wear a hat or bandana later.
This style pairs well with cropped tops, high-waist shorts, and anything with a wide neckline. It’s a little cheeky. That’s part of the charm.
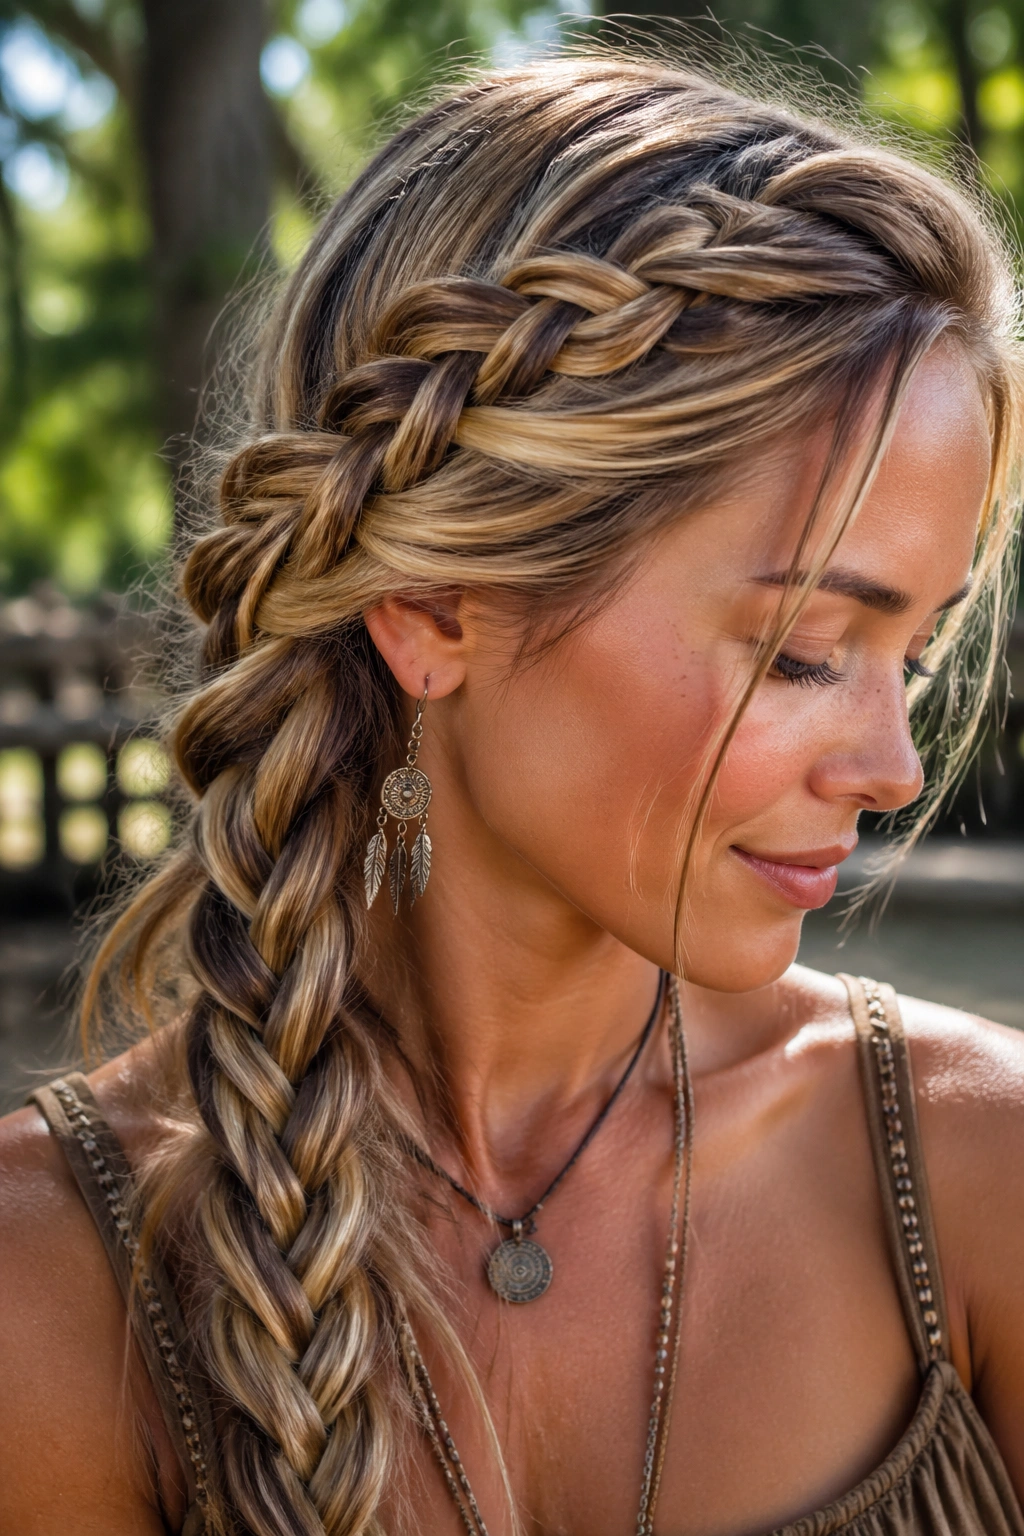
5. Waterfall Braid With Loose Length
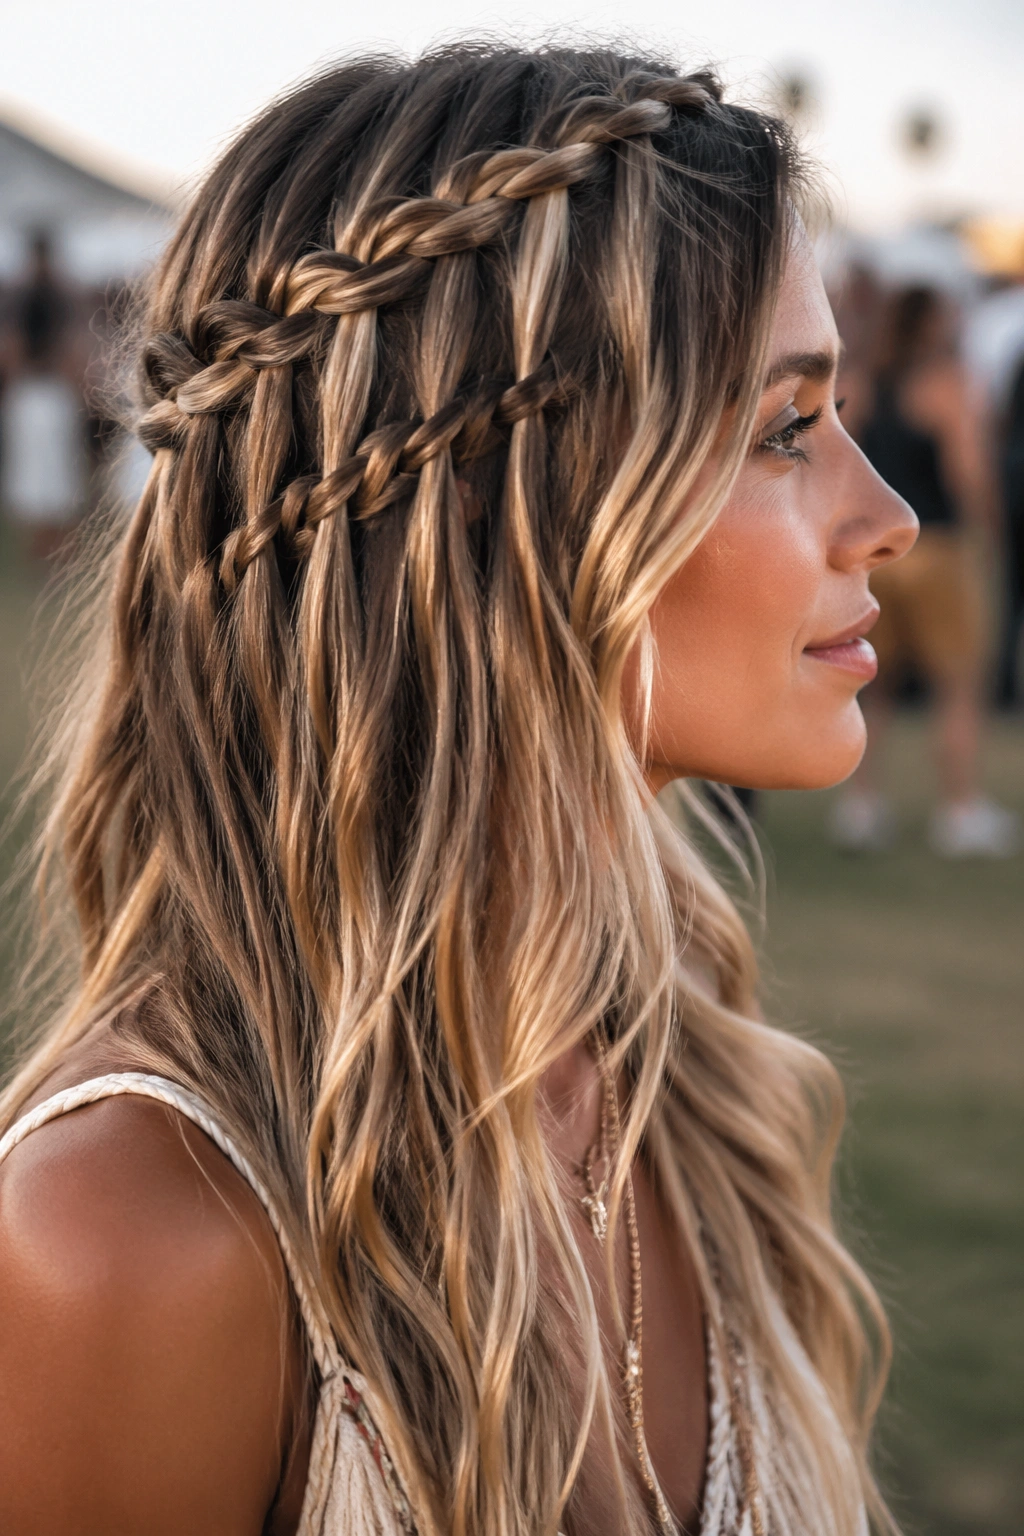
A waterfall braid is the one you choose when you want hair that looks like it’s moving even when you’re standing still. The braid drops sections through the weave, so the rest of the hair falls loose and visible underneath. It has a nice airy feel, almost like lace against the head.
I’ve always thought this braid looks best on long hair with some bend in it. Stick-straight hair can make it look more severe, while soft waves give the braid a better frame. It’s also a good pick if your hair has highlights, balayage, or a few lighter streaks. The woven pattern shows off the color change in a way that a plain braid doesn’t.
The one downside is that it likes grip. Silky hair can make the braid slip, especially near the temple. A touch of dry texture spray or a tiny amount of mousse worked through the front section helps the braid hold its shape without turning sticky.
For music festival outfits, this one sits nicely with flowy pieces. A sheer blouse, a tiered skirt, or a loose sleeveless dress all suit it. The style feels romantic without drifting into prom hair, which is a line I care about a lot.
6. Side Braid Wrapped With Ribbon
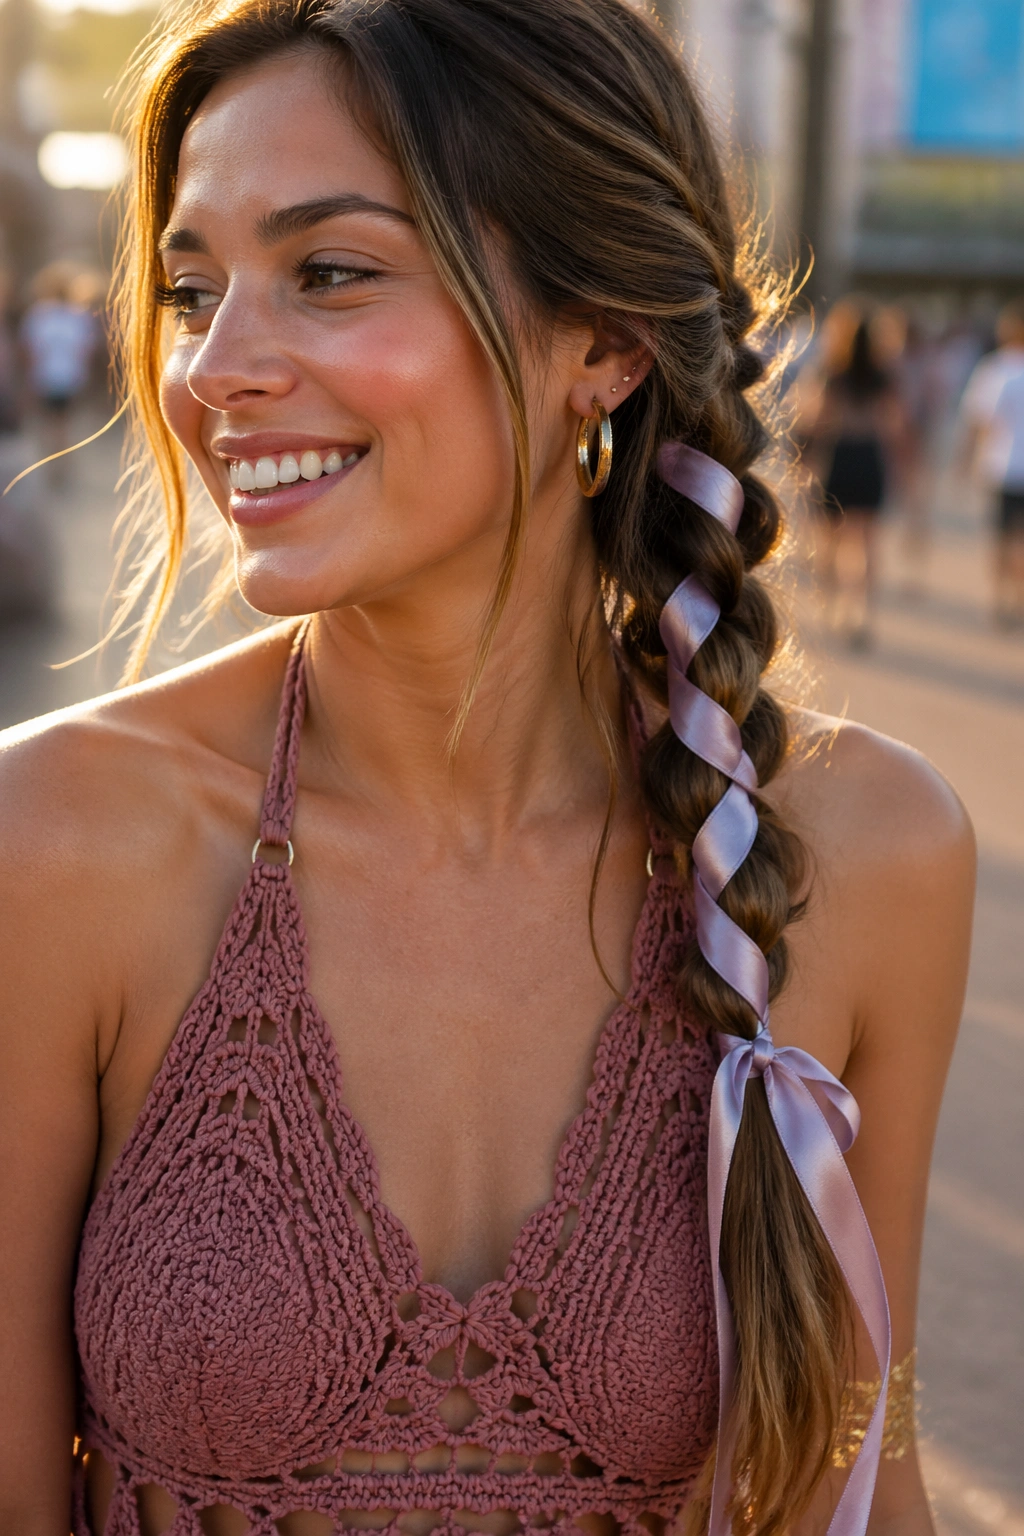
A plain side braid is fine. A side braid wrapped with ribbon is better. The ribbon changes the whole mood of the braid, turning it from casual throw-on hair into something that looks finished and a little more personal.
What Makes It Different
The ribbon doesn’t need to be loud. A half-inch satin ribbon, a soft velvet strip, or even a suede cord can do the job. I like ribbon because it adds color without forcing you to wear more jewelry or more print. If your outfit is already busy, the braid stays calm. If your outfit is simple, the ribbon gives it a lift.
Braid the hair over one shoulder, then tuck the ribbon into the first weave and keep it going through the length. Don’t pull it so tight that the braid stops moving. The best version still bends and swings when you turn your head.
This style is ideal for medium to long hair, especially if you’re wearing off-shoulder tops or anything with a neckline that needs a little space around it. It also holds up nicely in slightly messy weather, which sounds boring until the breeze starts and your hair still looks good.
Specific recommendation: use a ribbon that’s about 12 to 16 inches longer than your braid so you can tie a neat knot at the end without running short.
7. Micro Accent Braids Scattered Through Curls
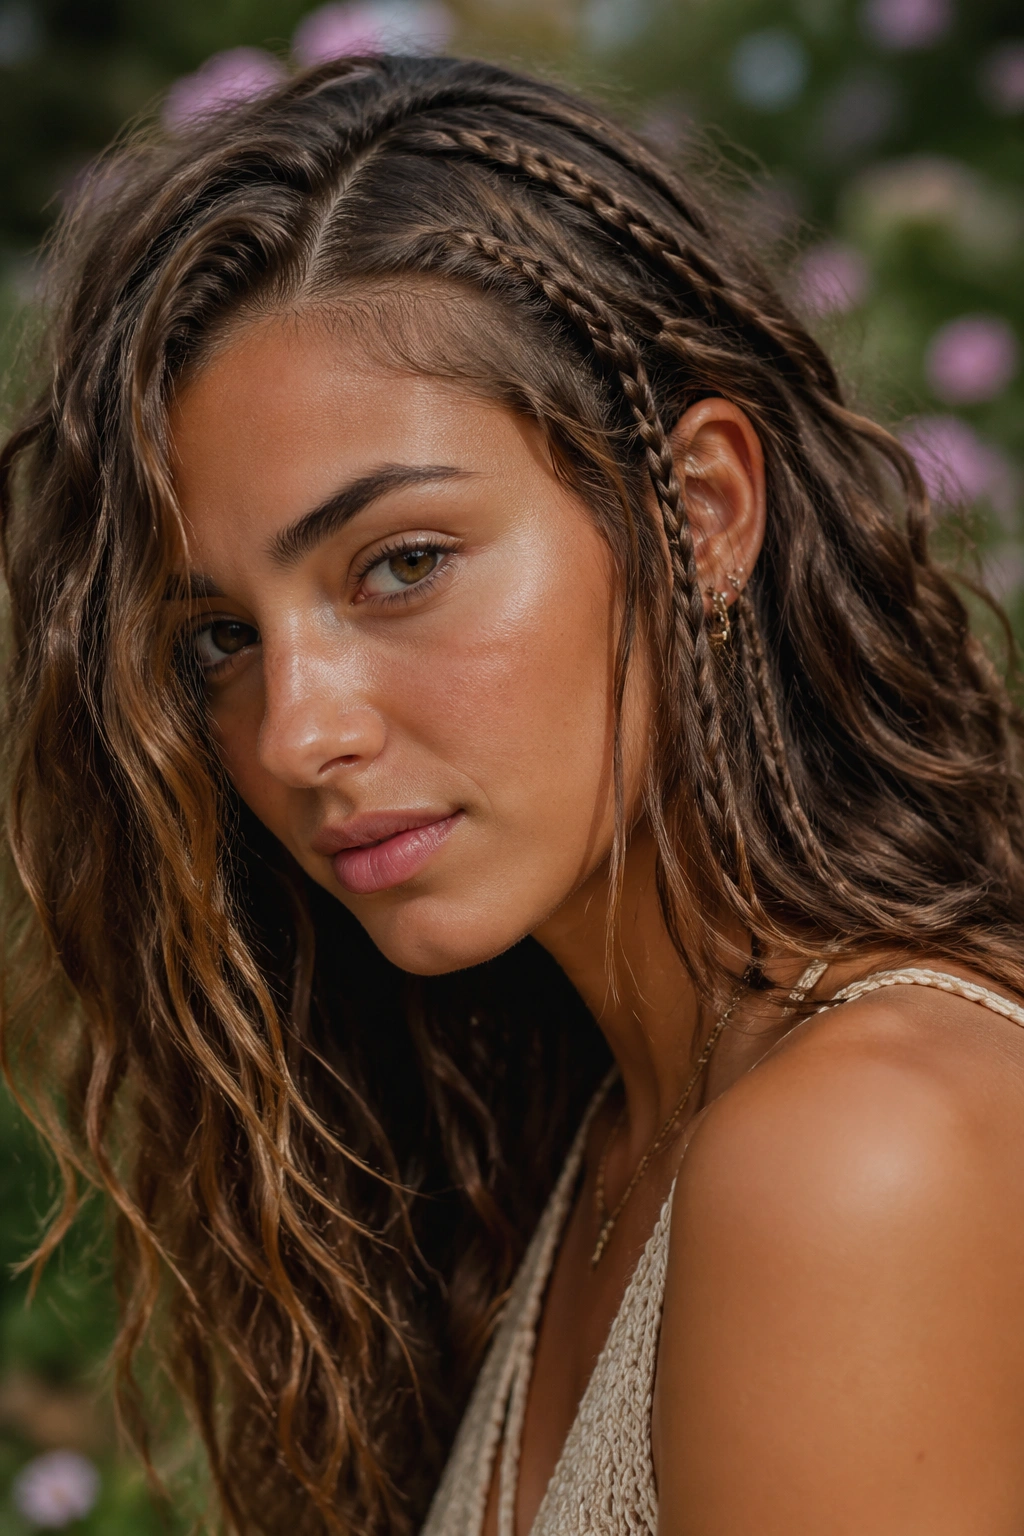
A few pencil-thin braids can do more than one big statement braid. They sit inside loose curls or waves and make the whole style feel more textured, more handmade, and a little more interesting when you move.
Why It Works
Micro braids are the detail that catches the eye from close up. They don’t have to cover the whole head. Three to five tiny braids placed near the part, the temples, or just behind one ear are enough. That’s the point. The rest of the hair stays loose, so the look never gets crowded.
I like this style when the outfit is already relaxed — denim, fringe, a printed tank, maybe a long skirt with boots. The braids add structure without making the hair heavy. They also work well if you want to keep your length visible, because the tiny braid accents sit on top of the curls instead of swallowing them.
A few quick details:
- Make each braid about 1/8 to 1/4 inch wide.
- Secure the ends with the tiniest clear elastics you can find.
- Add one braid near the part and one closer to the ear for balance.
- Keep the surrounding hair loose and soft.
The look lands best when the braids feel like accessories, not the main event. Which is a nice change.
8. Milkmaid Braids With A Messy Texture

Milkmaid braids are older than most people think, and the boho version works because it refuses to be too neat. Two braids wrap across the crown like a headband, but the modern take leaves gaps, softness, and a little bend at the ends.
If your hair is wavy or slightly unwashed, this style is especially easy. The extra grip helps the braids sit where they should, and the texture makes the whole thing look softer against the skin. Clean hair can do it too, but you’ll need a bit more prep with dry shampoo or texturizing spray.
I prefer these braids when the outfit has a romantic edge — lace, embroidery, a peasant blouse, a long skirt with movement. The braids lift the hair off the face and show off earrings, which is useful if you’ve got something bold hanging from your lobes.
Keep the braids slightly loose as you pin them across the head. If you stretch them too much, they start to look flat. A few hidden pins behind the ears are usually enough to keep the shape in place, and one soft wave at the nape keeps it from feeling too fixed.
9. Pull-Through Braid Ponytail
Not every braid has to be a braid in the classic sense. A pull-through braid ponytail gives you that thick, woven look without requiring the same hand coordination, which is a relief on days when you’re getting ready fast and your arms are already tired.
How to Style It
Start with a high or mid ponytail, then split the tail into sections and secure each section with clear elastics every 2 to 3 inches. Pull each section apart a little so the braid looks fuller. That’s the entire trick, more or less, and it creates a style with volume that a standard braid often doesn’t have.
This one is excellent for thick hair, because it controls the length without flattening it. It also plays well with halter tops, open backs, and sporty festival clothes. There’s movement in the ponytail, but the braid structure keeps it from becoming a tangled mess by the end of the day.
A small wrap of hair around the top elastic finishes it off nicely. If you want a softer feel, leave a few short layers around the face. If you want more lift, tease the crown before you gather the ponytail. Either way, it reads as festival-ready without trying too hard.
10. Rope Twist Crown
A rope twist crown is for the person who likes the idea of braiding but doesn’t want to wrestle with three strands for half an hour. Two sections twisted around each other create a clean, curved line across the head, and the result feels airy and a little unexpected.
It’s also a smart move when the hair is a day or two past wash day. Rope twists cling better to soft texture, and they don’t depend on super slick strands. A little dry shampoo at the roots can help, but you do not need a full styling arsenal here.
Quick Details
- Split each side into two sections.
- Twist both pieces away from the face.
- Cross the twists across the crown and pin them low.
- Hide the ends under the opposite side with 2 or 3 bobby pins.
This style works well with strapless tops and anything with open shoulders, because the twist draws attention upward. It’s also a good fallback if your braid skills are having a bad day. Twisting takes less finger memory than braiding, and sometimes that matters more than aspiration.
11. Boho Halo Braid
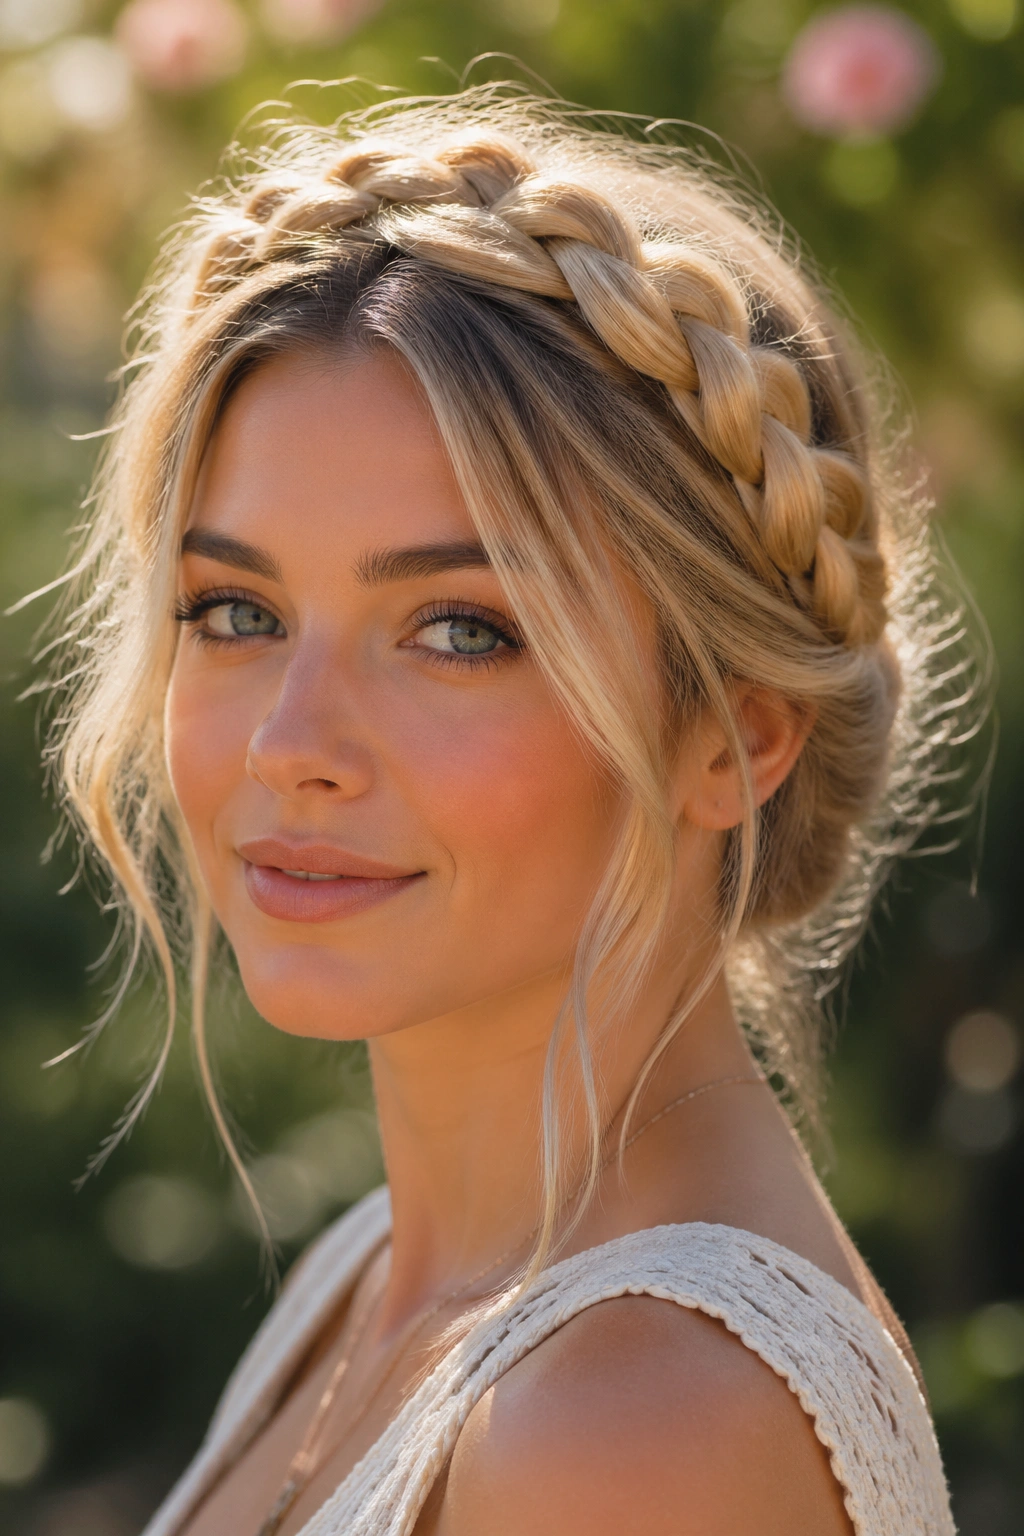
A boho halo braid has a softer personality than the strict versions you see in formal styling books. It circles the head, yes, but the edges are loosened just enough that it feels airy rather than rigid. That softness is what makes it work with festival clothes instead of against them.
I like halo braids on long hair that has a little texture or bend. The braid can be drawn from behind one ear and wrapped around the crown, then pinned low under the hair on the other side. Once it’s secured, pull the braid gently from the outside so it looks full. Not sloppy. Full.
This braid does a nice job framing statement earrings, necklines, and layered necklaces. It also keeps the hair completely off the face, which is a blessing if you hate strands sticking to your cheeks in warm weather or after a few hours in a crowd.
A halo braid can go elegant fast, so the outfit matters. Keep the clothes loose, textured, or slightly undone — cotton, gauze, knit, linen — and the whole look feels intentional. If you dress it up too much, the braid starts to read formal. That’s not what we want.
12. Braided Pigtails With Loose Ends
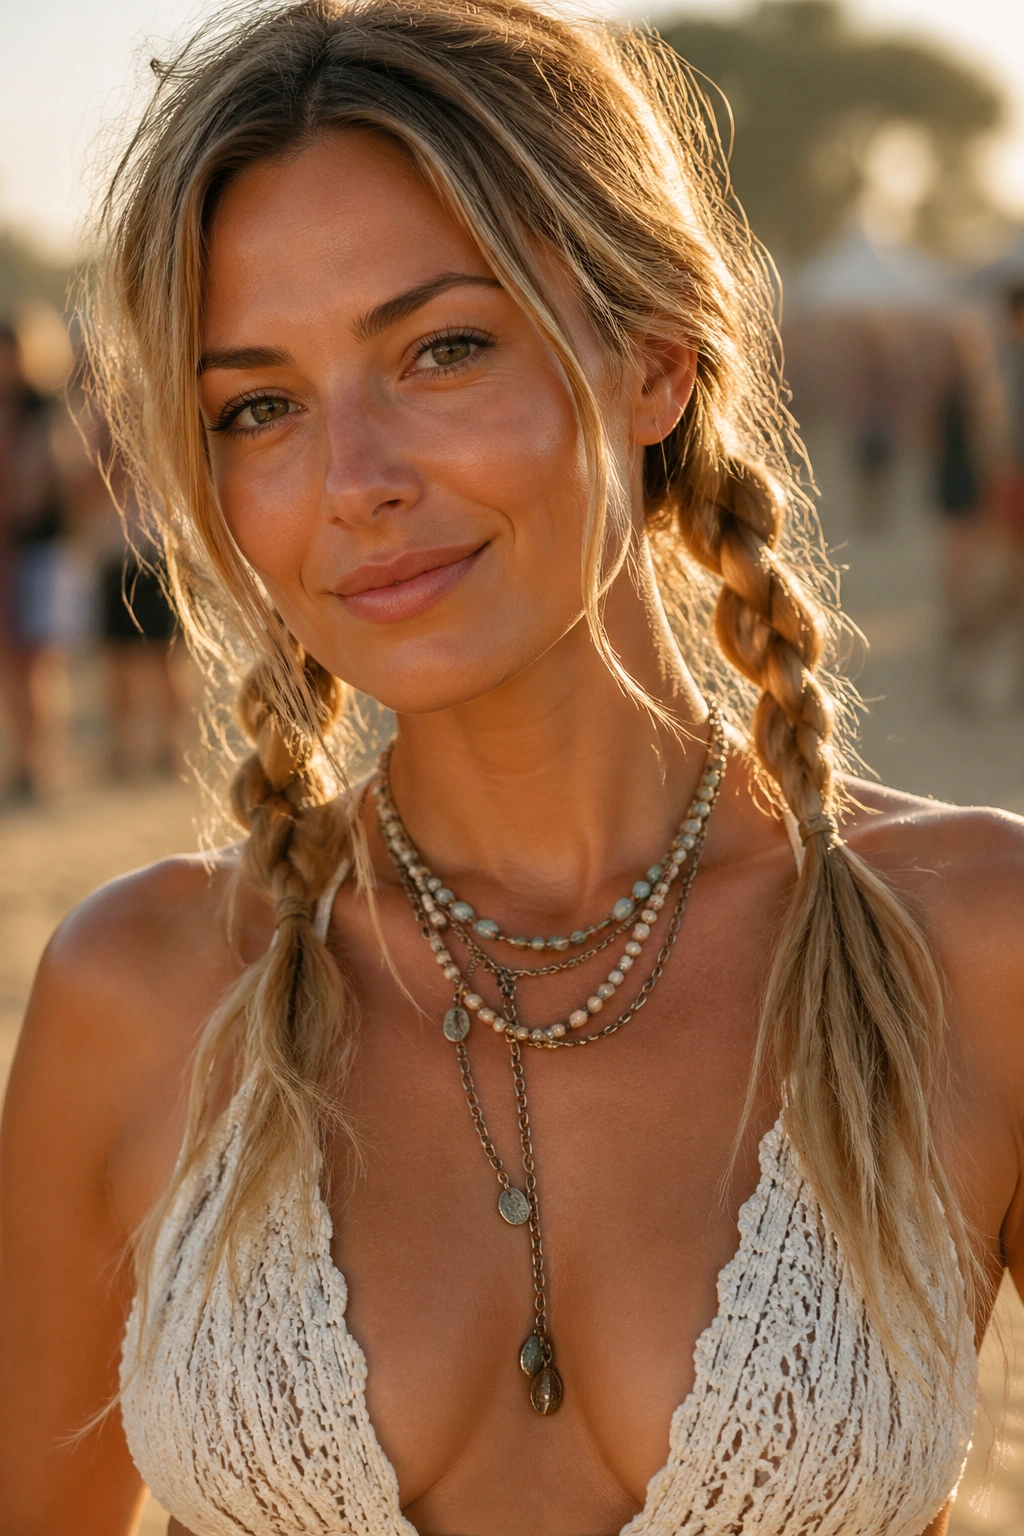
Braided pigtails sound youthful, and honestly, that’s part of the charm. The boho version feels softer than the school-day version because the braids start lower, sit looser, and leave the ends a little undone.
The key is placement. Keep the part clean, then braid each side from about ear level down instead of starting right at the scalp. That one change makes the style feel more grown-up and less costume-like. The hair around the face can stay loose, or you can let a few pieces tuck in and out of the braid for texture.
This style is especially kind to bangs and layered cuts. Shorter front pieces can escape naturally without ruining the look, and the symmetry helps balance a busy outfit. I’d reach for it with denim overalls, a printed romper, or a cropped top with a long skirt.
If your hair is fine, stop the braid a few inches before the ends and secure the last stretch with a clear elastic so the tails stay fluffy. If your hair is thick, pancake the braids lightly after tying them off. Either way, the whole thing should feel relaxed, not tight.
13. Lace Braid Into A Low Bun
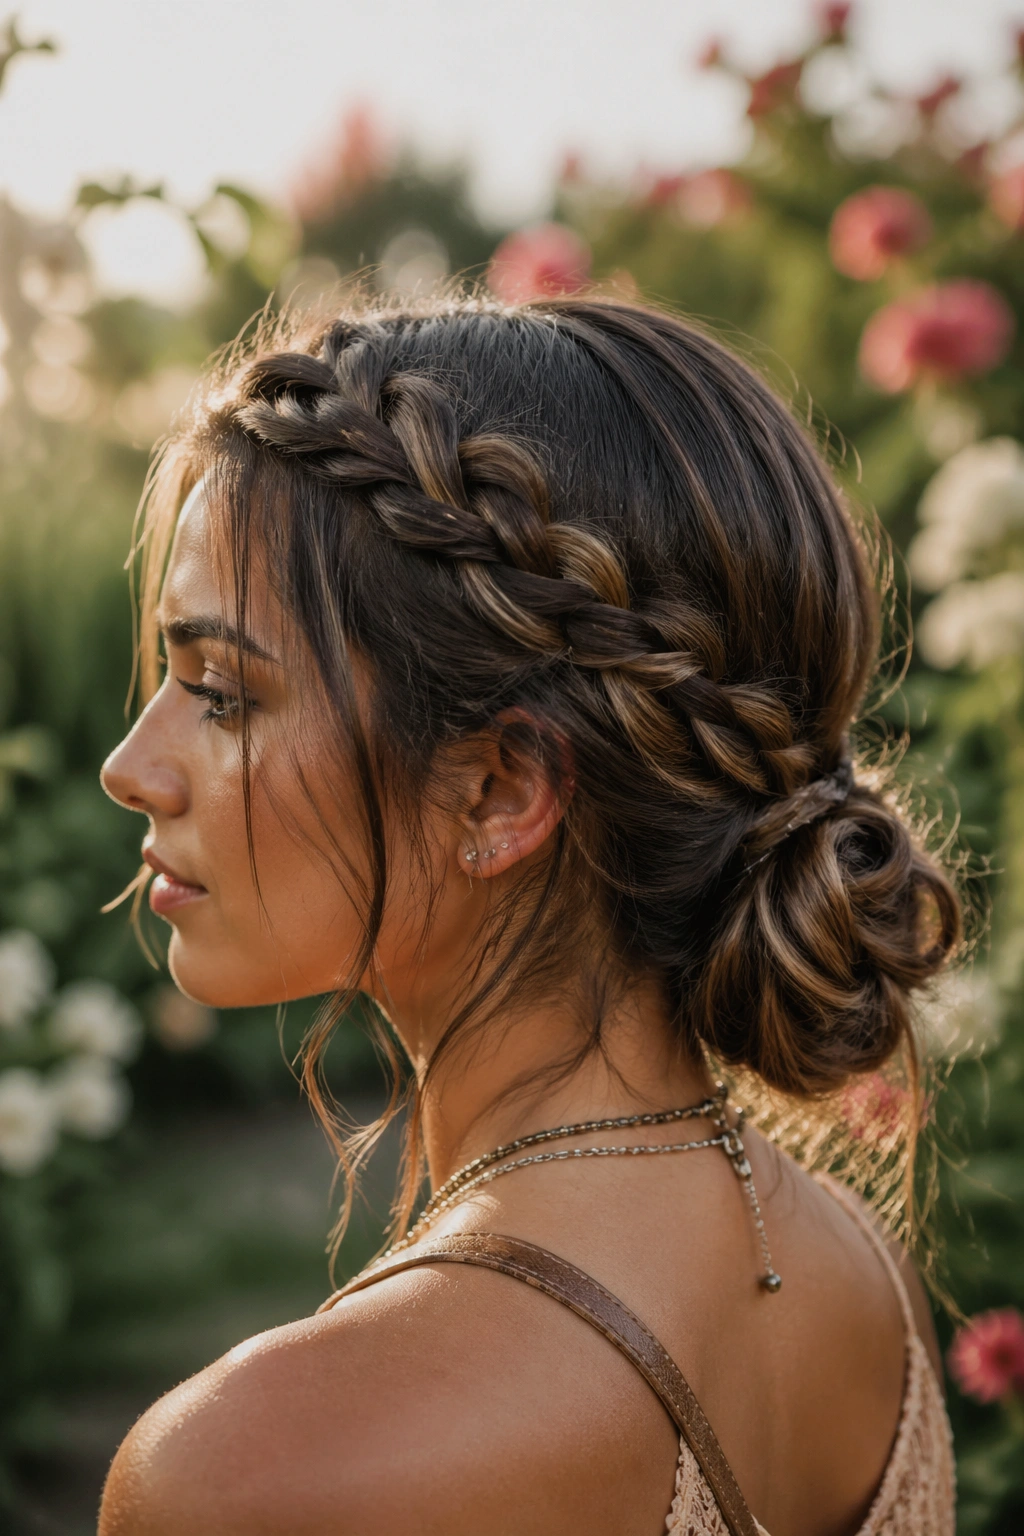
A lace braid feeding into a low bun is one of those styles that quietly solves a problem. You get the detail of a braid, the neatness of a bun, and enough texture around the face to keep it from looking severe. It’s useful when the day is long and you want the hair to stay out of the way.
What to Watch For
Start the lace braid on one side of the head and keep adding hair only from the top section as you move backward. Once you reach the nape, gather the loose hair into a low bun and pin it in place. Two pins may be enough for fine hair; thick hair usually needs four or five.
The bun itself should stay soft. Don’t smooth every strand down. Leave the surface a little imperfect so the braid and bun feel like part of the same relaxed style. That tiny bit of mess is the point.
This is a good match for structured outfits — a fitted vest, a longline top, a clean linen dress — because the braid adds softness back into the look. It’s also one of the more practical choices if you know you’ll be moving around a lot and don’t want loose hair in your face every ten minutes.
A tiny spritz of flexible-hold spray at the end helps, but keep it light.
14. Five-Strand Side Braid
A five-strand braid has more texture than the usual three-strand braid, and that extra width gives it a rich, woven look that feels right at home with layered, earthy festival clothes. It looks intricate from a distance and even better up close.
More strands mean more visual depth. That’s the whole appeal. The braid sits flatter against the head than a thick plait, but the pattern gives it a denser, almost basket-like finish that pairs well with linen, suede, embroidery, and anything with a hand-made feel.
It does take a steadier hand. I wouldn’t call it hard, but it isn’t the braid I’d reach for if I had ten minutes and wet hair. Once you get the rhythm, though, it becomes a satisfying style to wear because it looks like you spent a lot more effort than you did.
If you want this braid to stand out, keep the rest of the hair simple. No heavy curls. No extra accessories. Maybe one ring at the end, maybe a thin cord woven through the lower section. The braid itself already carries enough detail.
For medium to long hair, this is one of the more polished boho options. It’s a nice middle ground between rustic and neat.
15. Cornrow Fronts With Curly Length
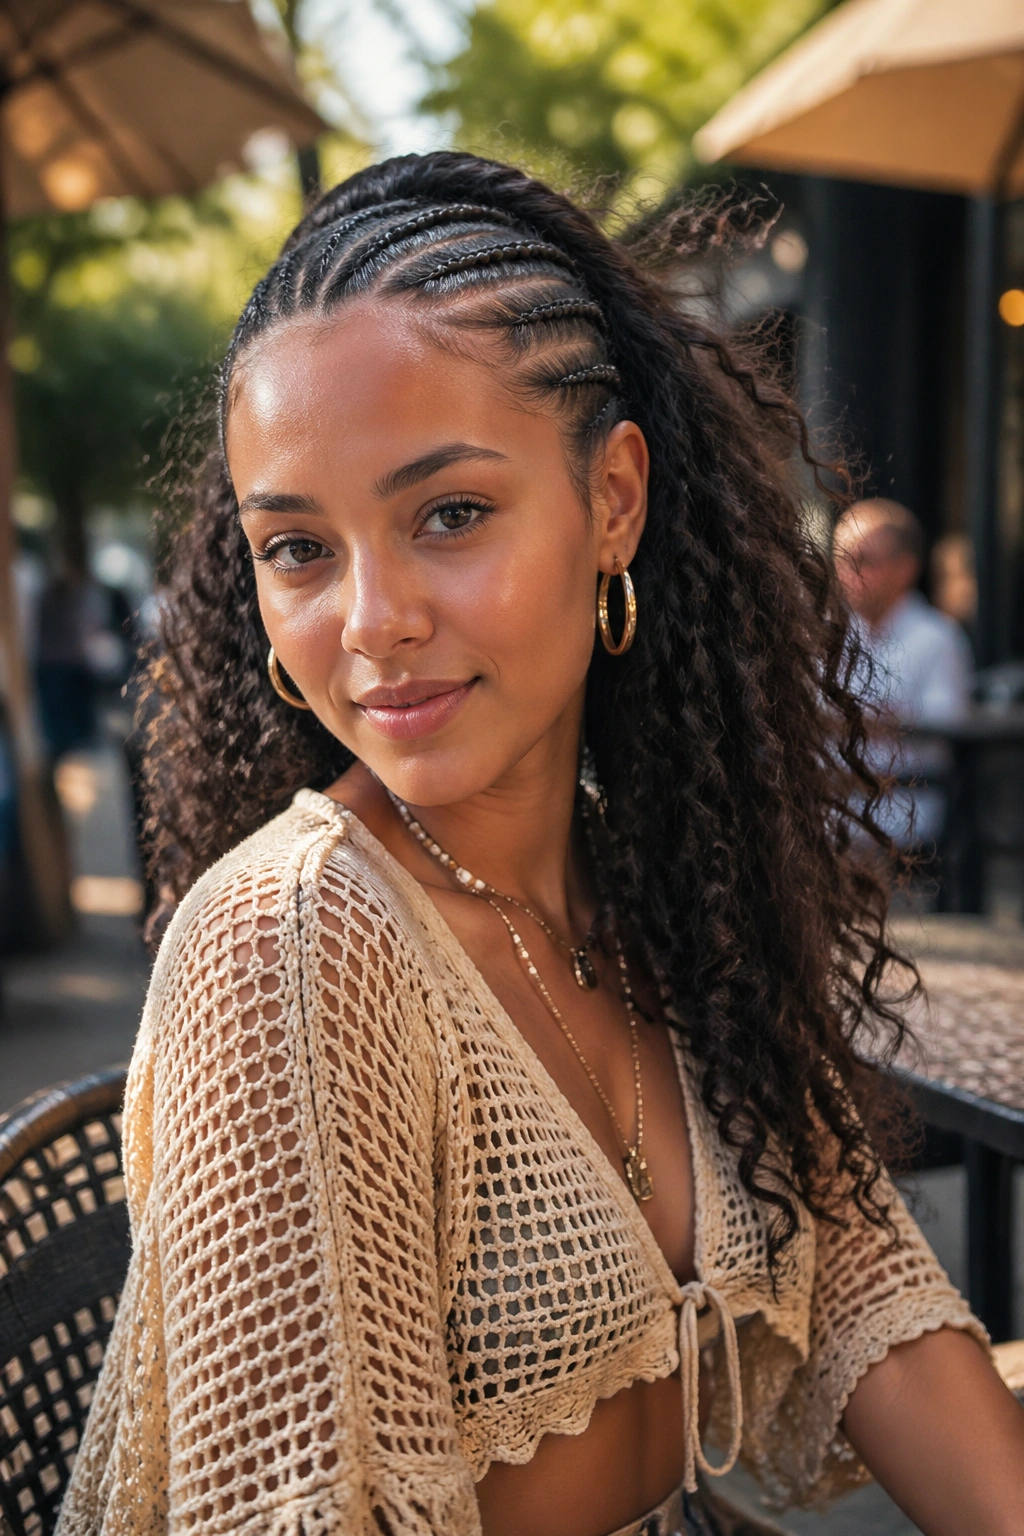
Need the front of your hair to stay put while the rest still feels loose? Cornrow fronts with curly length are a strong answer. A few small braids near the hairline control the pieces that usually slip loose first, while the back stays free and soft.
How to Keep Them Gentle
The scalp line should not feel pulled. That part matters. Start the cornrows about 1 inch back from the hairline and keep the tension even all the way through. If the braids hurt, they’re too tight. No style is worth a sore scalp for the rest of the day.
This look works especially well with textured hair, though a stylist can adapt it for many hair types. The front braids create a tidy frame, and the loose curls or waves behind them give the style its boho feel. It’s a useful combination when you want both control and movement.
- Keep the front rows slim and neat.
- Let the back stay loose and full.
- Add beads or cuffs sparingly if you want extra detail.
- Refresh the curls with a small amount of leave-in spray before heading out.
This is one of the more practical styles on the list, and I mean that as a compliment. It does the job without looking like it only cares about the job.
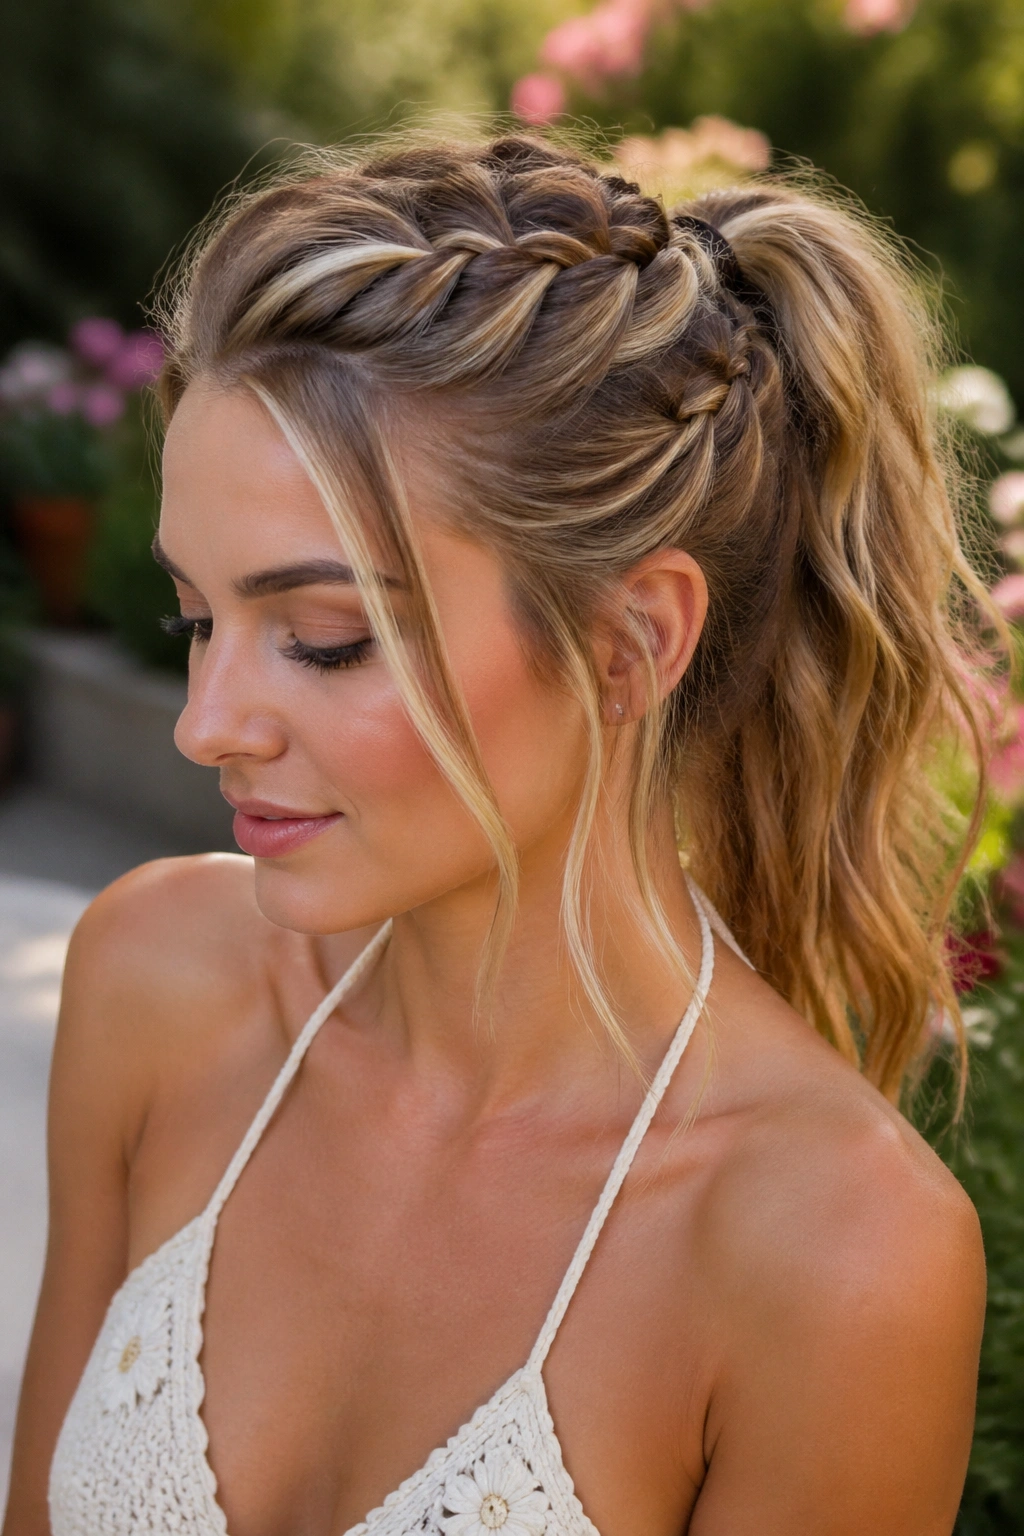
16. Accent Braids Into A Top Knot
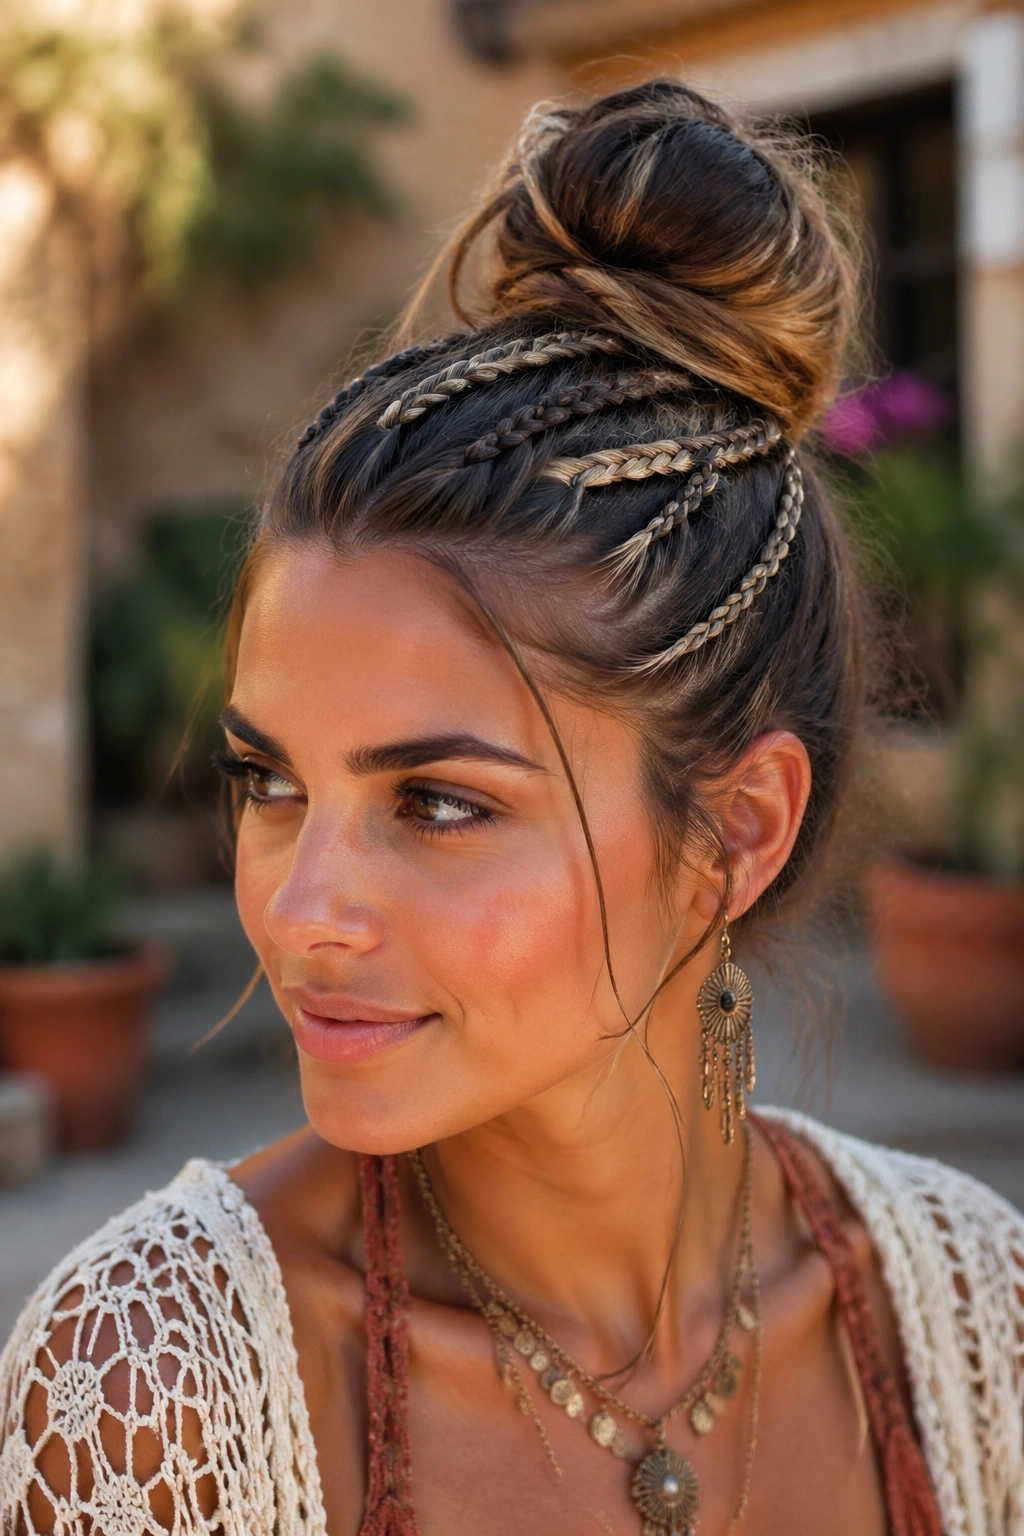
A top knot can look plain fast. A few accent braids change that in a heartbeat. They give the knot texture near the scalp, which keeps the whole style from disappearing into the background when the rest of the outfit is doing heavy lifting.
You do not need many braids. Two or three small accent braids, placed from the front or sides and gathered into the knot, are usually enough. The point is to break up the surface of the hair, not cover every inch of it. Leave the knot loose and a little undone, with a few bent ends sticking out on purpose.
This style is good when you want a high neck, a halter, or a bulky jacket to stay visible. Hair piled straight up can look severe with strong clothing, but the braids soften the shape. They also help if your hair tends to slip out of buns, because the braided pieces give the pins something to hold onto.
- Braid before you gather the knot.
- Secure the knot with pins in a crisscross pattern.
- Leave 1 or 2 slim pieces loose near the front.
- Add a scarf if the outfit needs more color.
It’s simple. That’s why it works.
17. Infinity Braid Headband
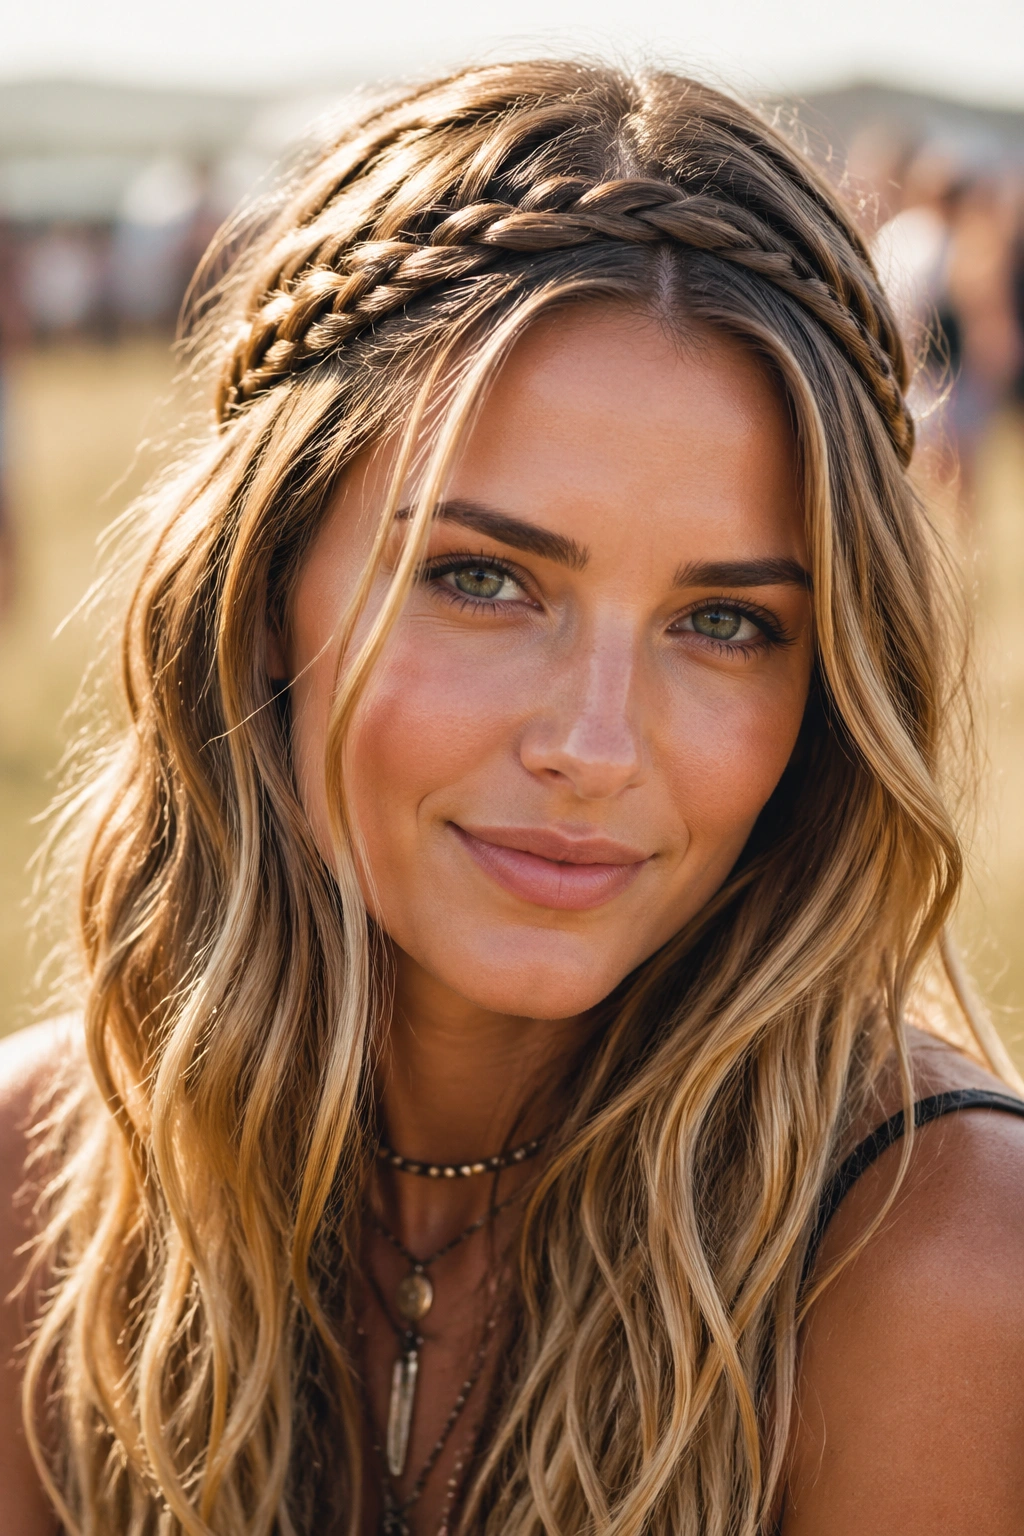
An infinity braid headband sits across the crown like a built-in accessory, which is a nice trick when you want the hair to carry the outfit without adding more stuff. It’s also one of the cleanest ways to deal with growing-out bangs or front pieces that won’t stay where you put them.
The braid curves in a smooth band from one side of the head to the other, keeping the hairline tidy while the rest of the length stays loose. That balance matters. Too much control and you lose the boho feel. Too little and the front falls apart halfway through the day.
I like this style with loose waves and a simple outfit, because the braid becomes the focal point. It also works with statement earrings, since the hair stays back from the face. A little shine serum on the ends can keep the loose hair from looking frizzy, but keep it away from the braid itself or the plait may slip.
There’s a quiet charm to this one. It looks intentional without being loud, which is harder to pull off than people think.
18. Half-Up Twisted Braid Pony
If a standard half-up pony feels too plain, a half-up twisted braid pony gives it more life. The top section is braided or twisted before being tied off, which adds texture right where the eye lands first.
What Makes It Different
The lift at the crown gives this style shape, and the braid keeps the top section from looking flat. I like to start with a small section from each temple, braid it back toward the center, then gather the rest of the top half into a ponytail. A strand wrapped around the elastic cleans up the finish.
This one is especially good for fine hair, because the braid makes the top look fuller without needing a mountain of teasing. It also works well with layered hair, since the loose pieces around the face can stay soft and the ponytail can move freely.
If you wear jumpsuits, sleeveless tops, or anything with a strong shoulder line, this braid gives the outfit some softness. It’s not fussy. It just gives the whole look a better shape.
A tiny bit of texturizing powder at the roots can help the crown hold. Use a small amount. Too much and the hair feels gritty in a way nobody asked for.
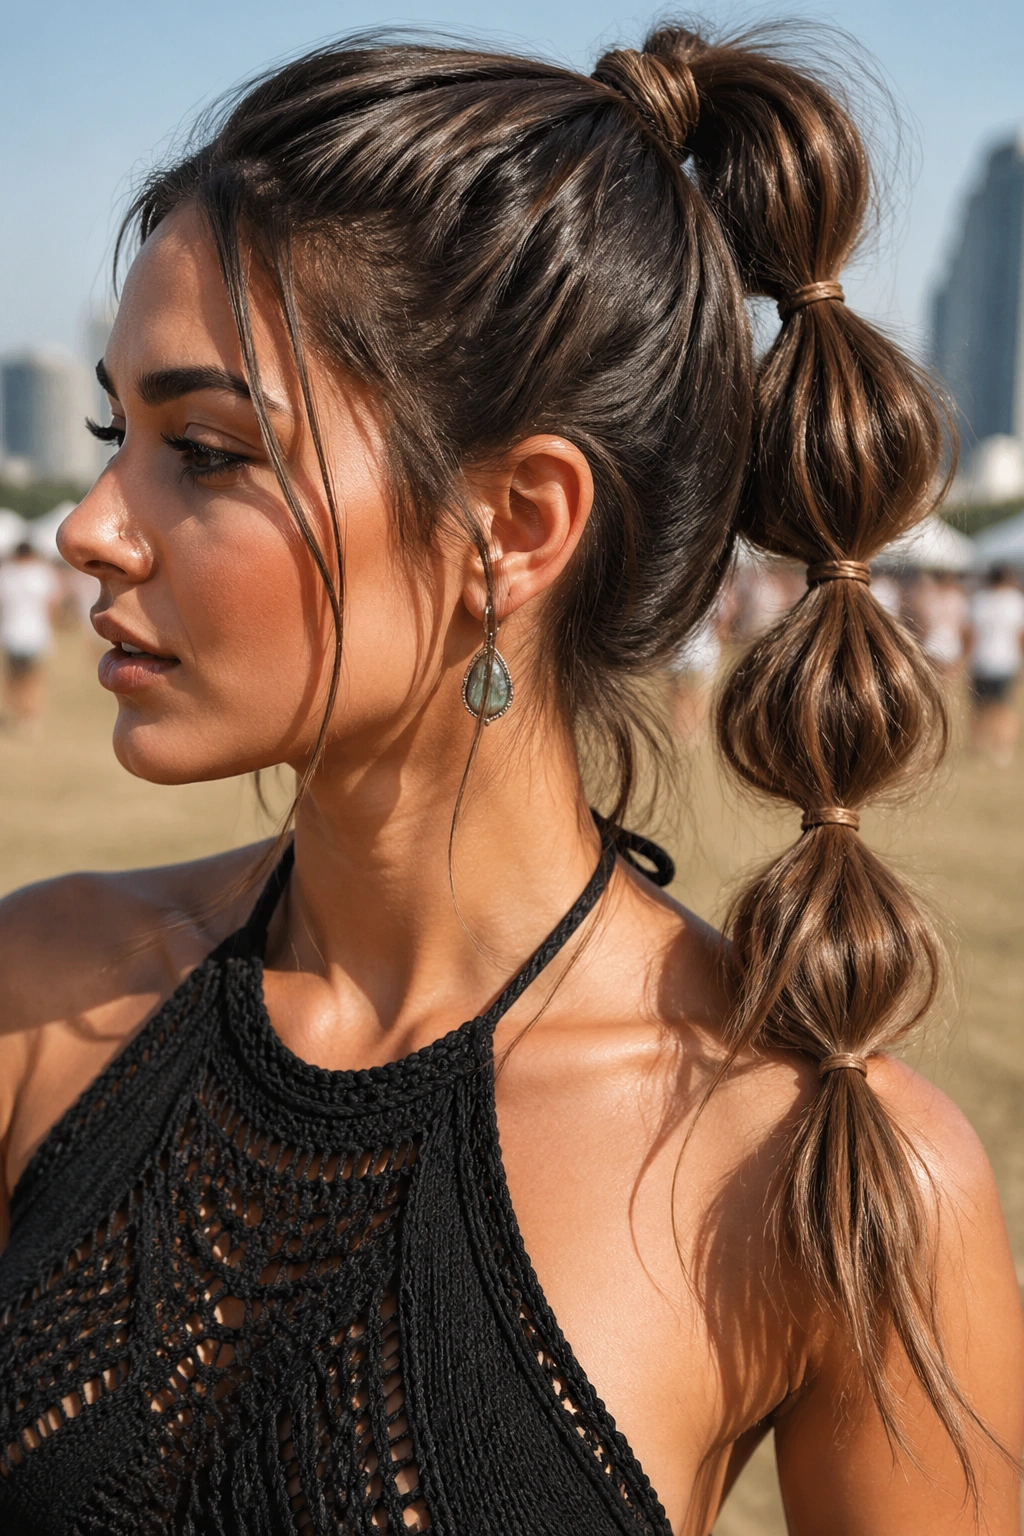
19. Braided Bubble Ponytail Hybrid
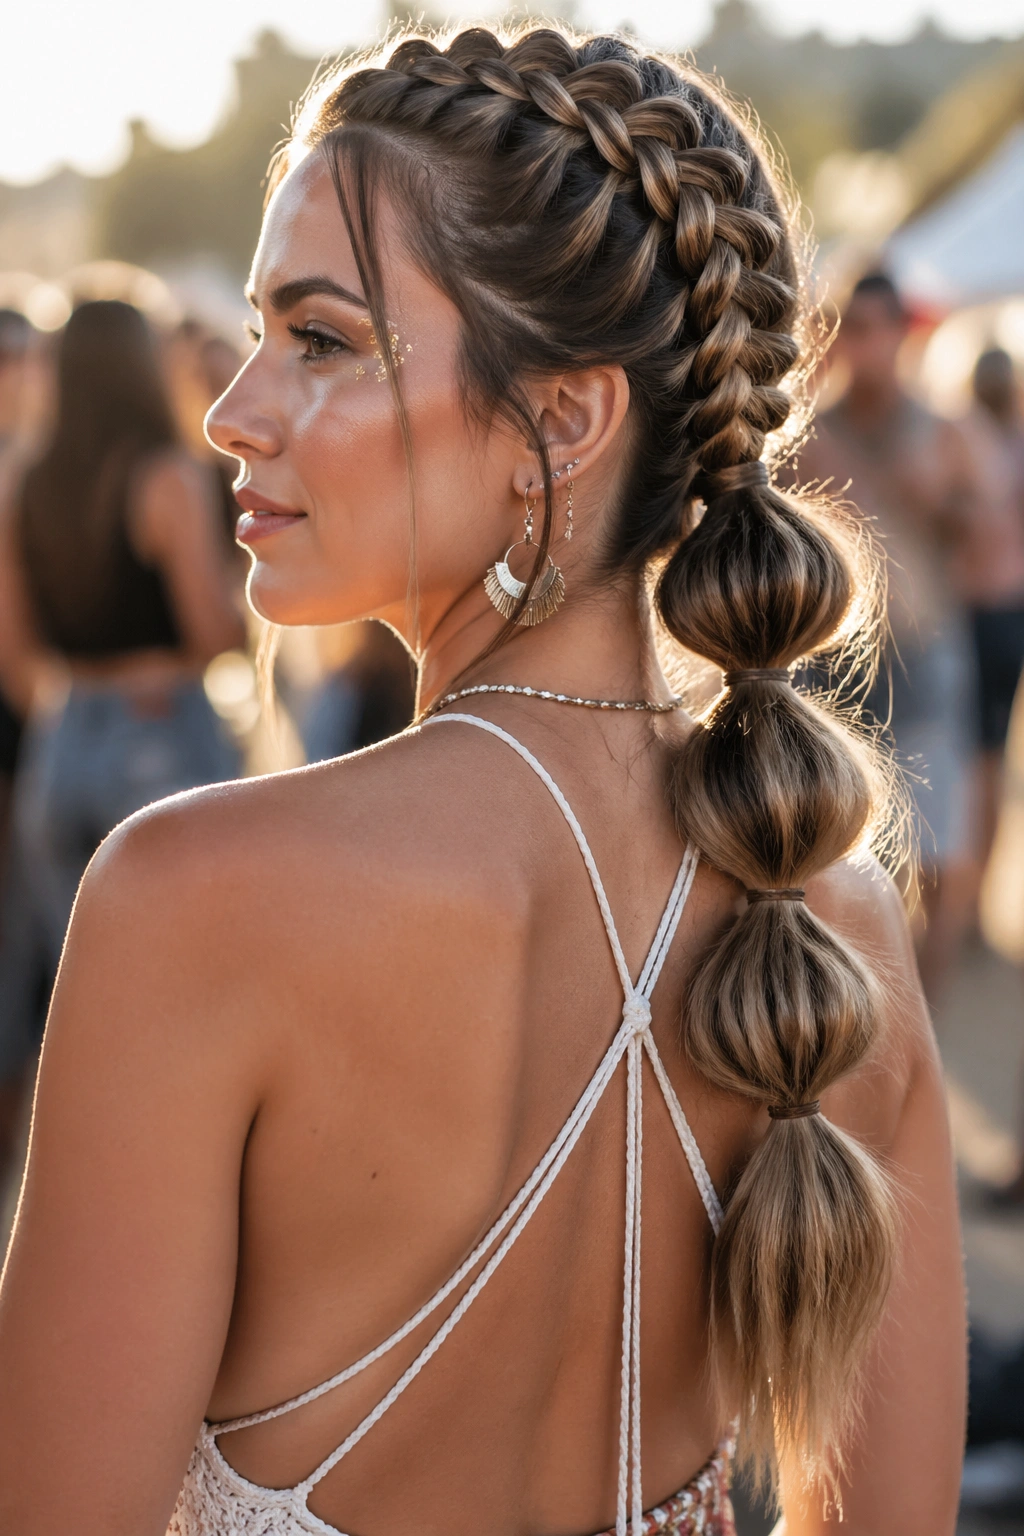
A braided bubble ponytail hybrid sounds complicated, but the effect is straightforward: texture on top, round shapes down the length, and a style that looks playful without falling flat. It’s one of the easiest ways to make a ponytail feel festival-ready.
This is the style I’d pick for someone who likes structure but still wants movement. You start with a braid or two near the crown, then turn the ponytail into bubble sections with clear elastics spaced 2 to 3 inches apart. Gently tug each section so the bubbles look soft and full.
The braid gives the top some order, while the bubbles break up the length in a way that feels a little whimsical. It’s a nice match for cropped jackets, bold prints, and pieces with texture in the fabric itself. The hair doesn’t need to compete. It just needs to keep up.
A few ring accents between the bubbles can be cute, but don’t overload it. The style already has plenty going on. Keep the bubbles even enough to read as deliberate, then loosen them just a touch so they don’t look too rigid.
20. Messy Braid Into A Scarf Wrap
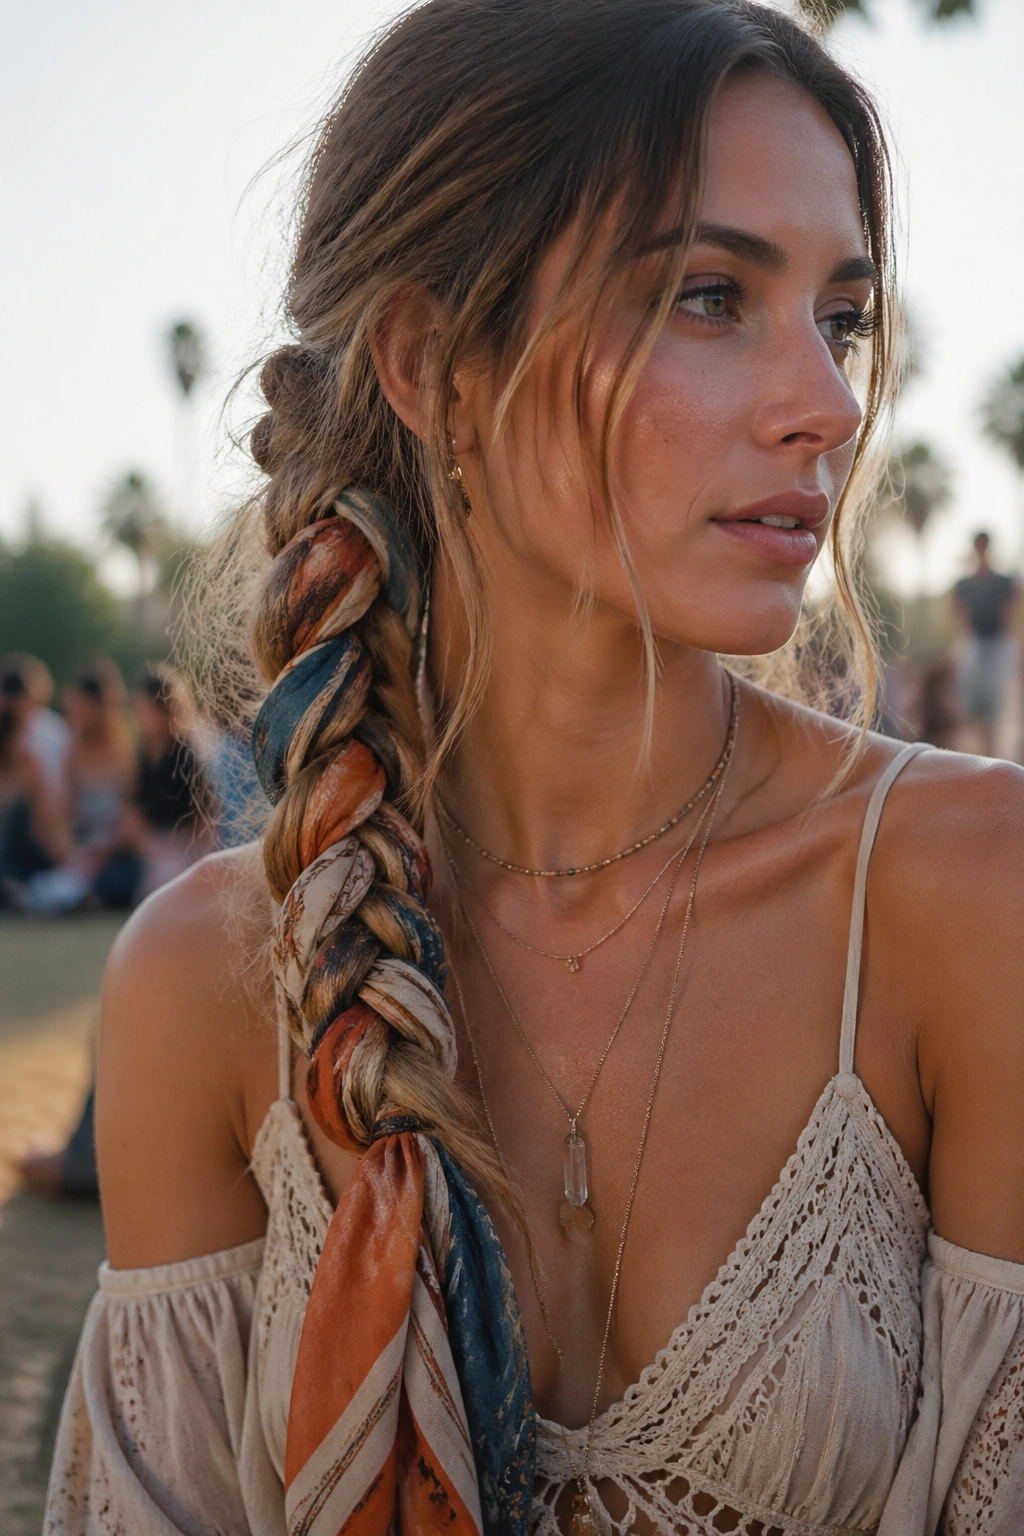
A messy braid with a scarf wrap is one of the easiest ways to make a simple plait feel styled. The scarf changes the whole mood, and it can pull color from the outfit without requiring another accessory up top.
How to Choose the Scarf
Pick a scarf that’s about 1 to 2 inches wide if you want it to thread through the braid, or a slightly wider square scarf if you plan to tie it at the base and let the ends trail. Cotton gives a more casual finish. Silk feels smoother and slides better through the hair, but it can loosen faster if your hair is already silky.
Braid the hair first, then knot or weave the scarf near the top or around the elastic. Keep the braid loose enough that the scarf can sit inside it without bunching. If the scarf has a bold print, let the clothing stay quieter. If the outfit is simple, go ahead and use the scarf as the color hit.
This style works especially well with off-the-shoulder tops, maxi skirts, and anything with a vintage bent. It also holds up nicely when you want a low-effort look that still feels thoughtful. The scarf does half the work. Which is fine with me.
21. Crown Braid With Hair Rings And Tiny Flowers
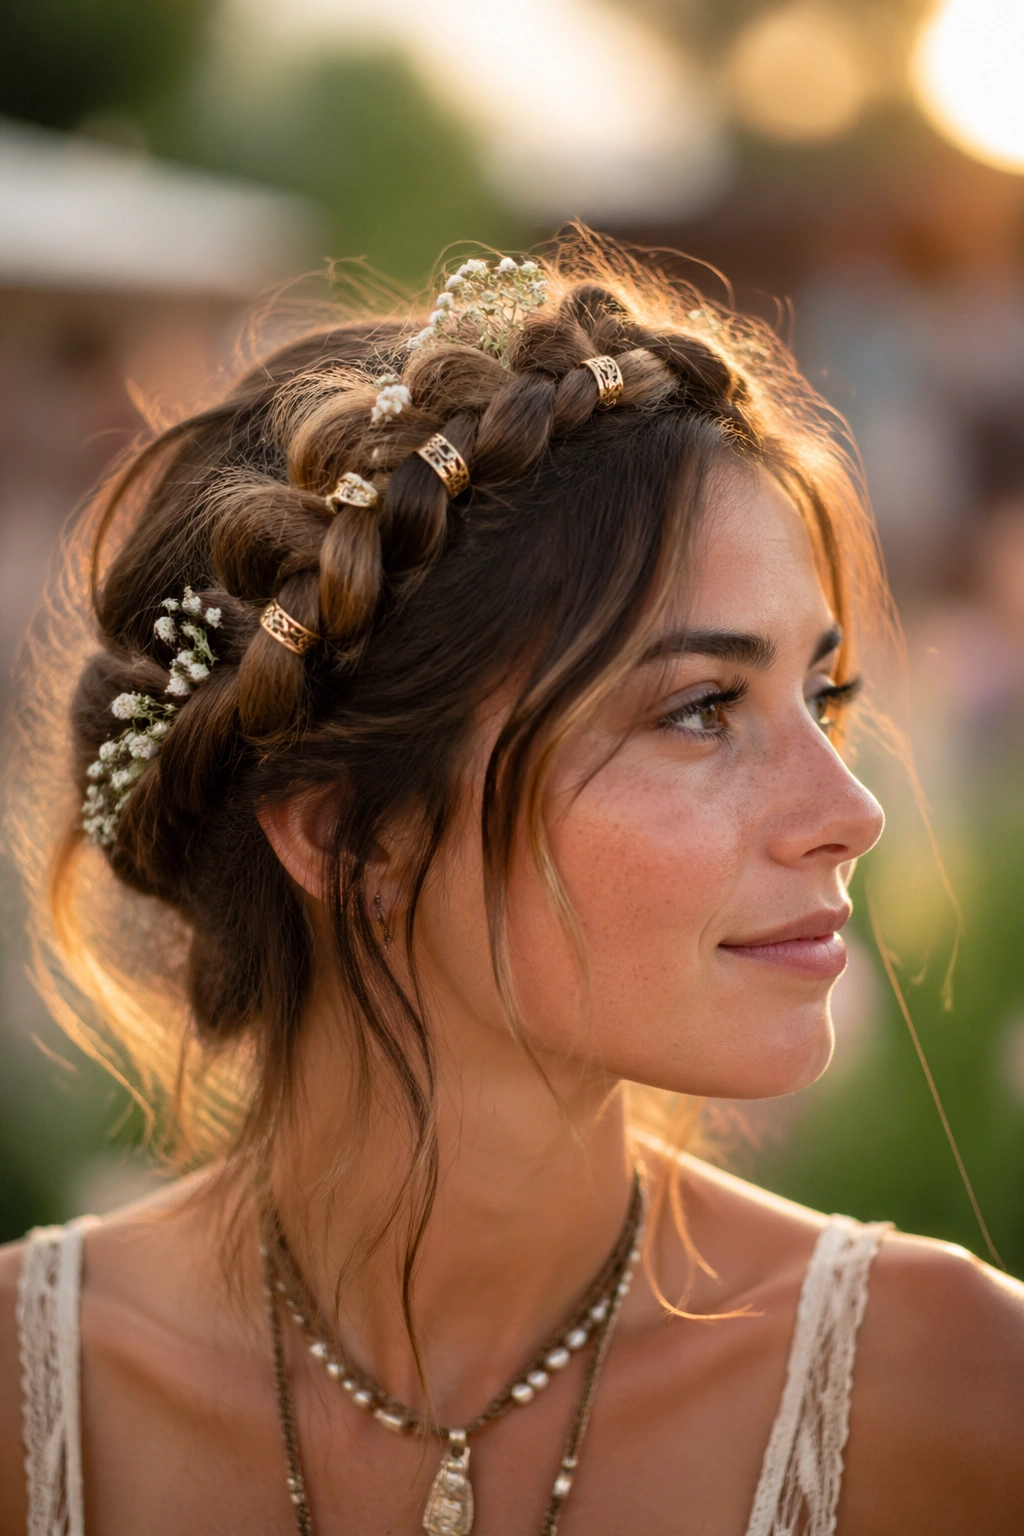
A crown braid with hair rings and tiny flowers is the one that turns heads first, then makes people lean in for a second look. It has that festival-romantic energy without needing a full costume effect, as long as you keep the accessories measured.
How to Keep It From Going Too Far
Start with a soft crown braid that wraps around the head and sits close enough to the scalp to stay secure. Then add just a few hair rings — three to six, spaced a couple of inches apart — or tuck in tiny flowers with flexible wire. The restraint matters more than the accessories themselves.
If you put flowers everywhere, the braid disappears. If you use one kind of embellishment and keep the rest of the hair loose or softly waved, the style still feels like hair, not craft supply. That balance is the whole thing.
This braid is a strong match for floaty dresses, sheer layers, and outfits with a little texture in the fabric. It also photographs in a way that feels rich without being stiff, especially when the braid is loosened just enough to show a bit of width. Keep the neckline simple, let the braid sit high and soft, and the whole look makes sense at once.
A style like this does not need much else. Maybe a ring or two, maybe one flower cluster near the ear, and that’s enough.