Butterfly braids have a way of looking polished without feeling stiff. That’s a rare thing in braided hair. The soft, pulled-out loops give the braid shape and movement, while the base keeps everything anchored and wearable.
Gen Z has leaned hard into that mix. The style works for a front-camera moment, a class presentation, a long weekend, or a night out when you want your hair to look done without looking too done. It also leaves room for personality, which matters more than people admit. A braid can be neat, messy, beaded, curly, shiny, or blunt at the ends — and it still reads as the same family of style.
The trick is that butterfly braids are not one look. They’re a method. Sectioning, tension, part placement, and the way you pull the loops all change the final result, sometimes more than the hair itself does. If the roots are pulled flat and the loops are all the same size, the style looks boxy. If the braid has room to breathe, it gets that soft, winged shape people keep saving to their camera rolls.
Start with the classic version, because that’s the one that teaches your eye what the silhouette should do. After that, the rest becomes much easier.
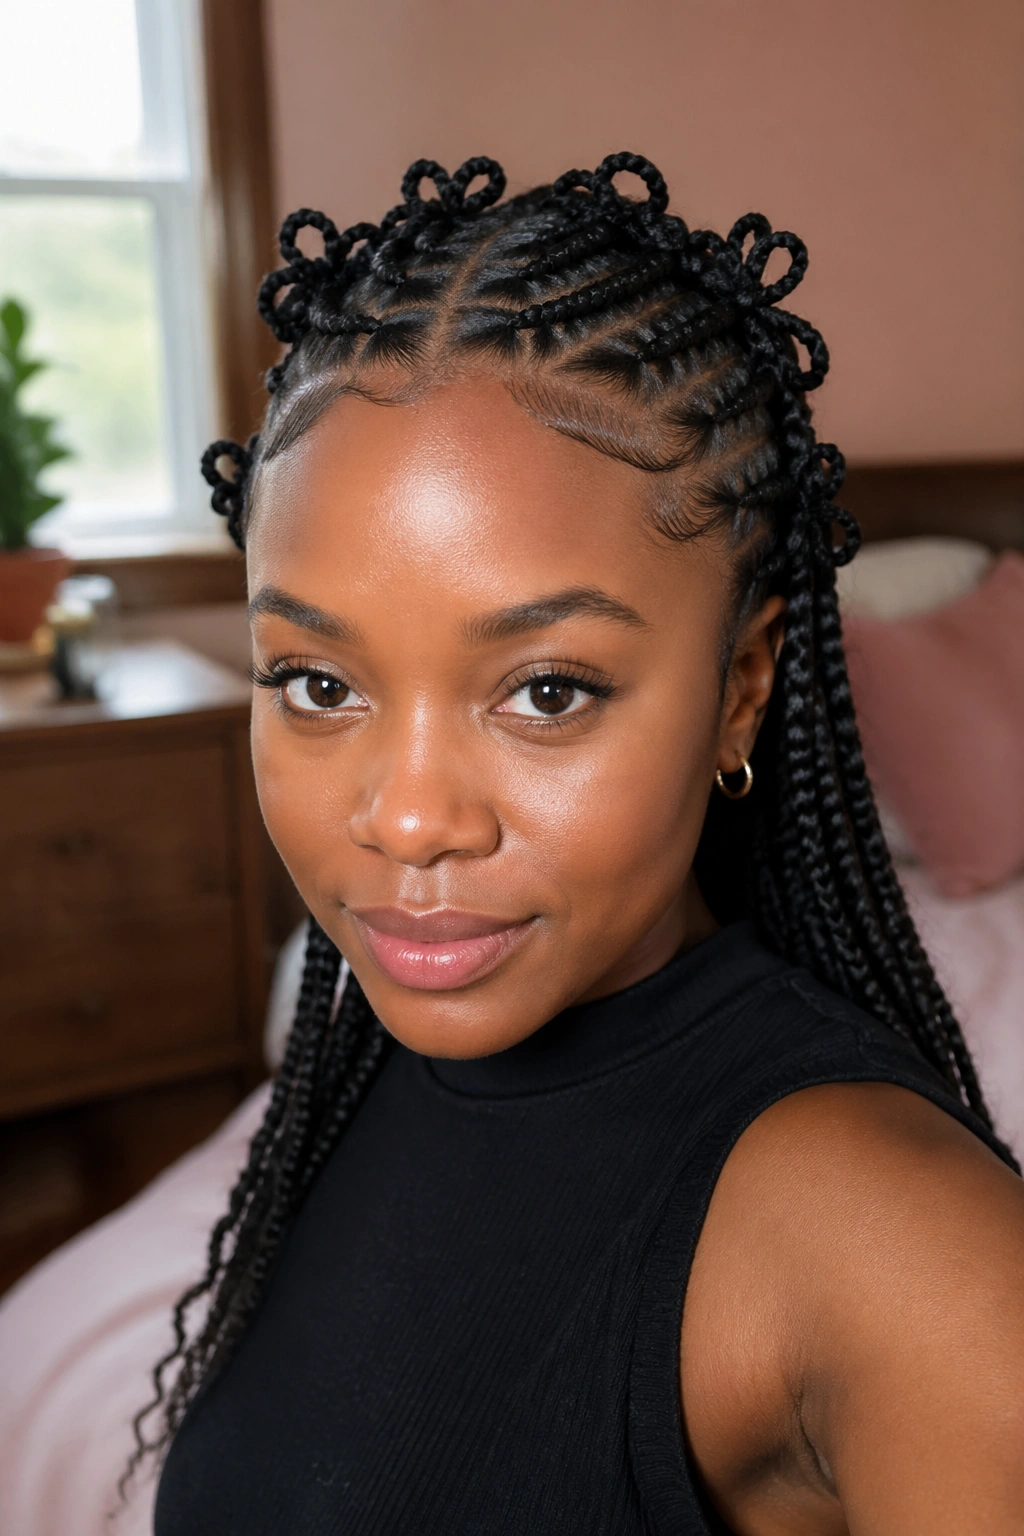
1. Classic Butterfly Braids With Soft Pulled-Out Wings
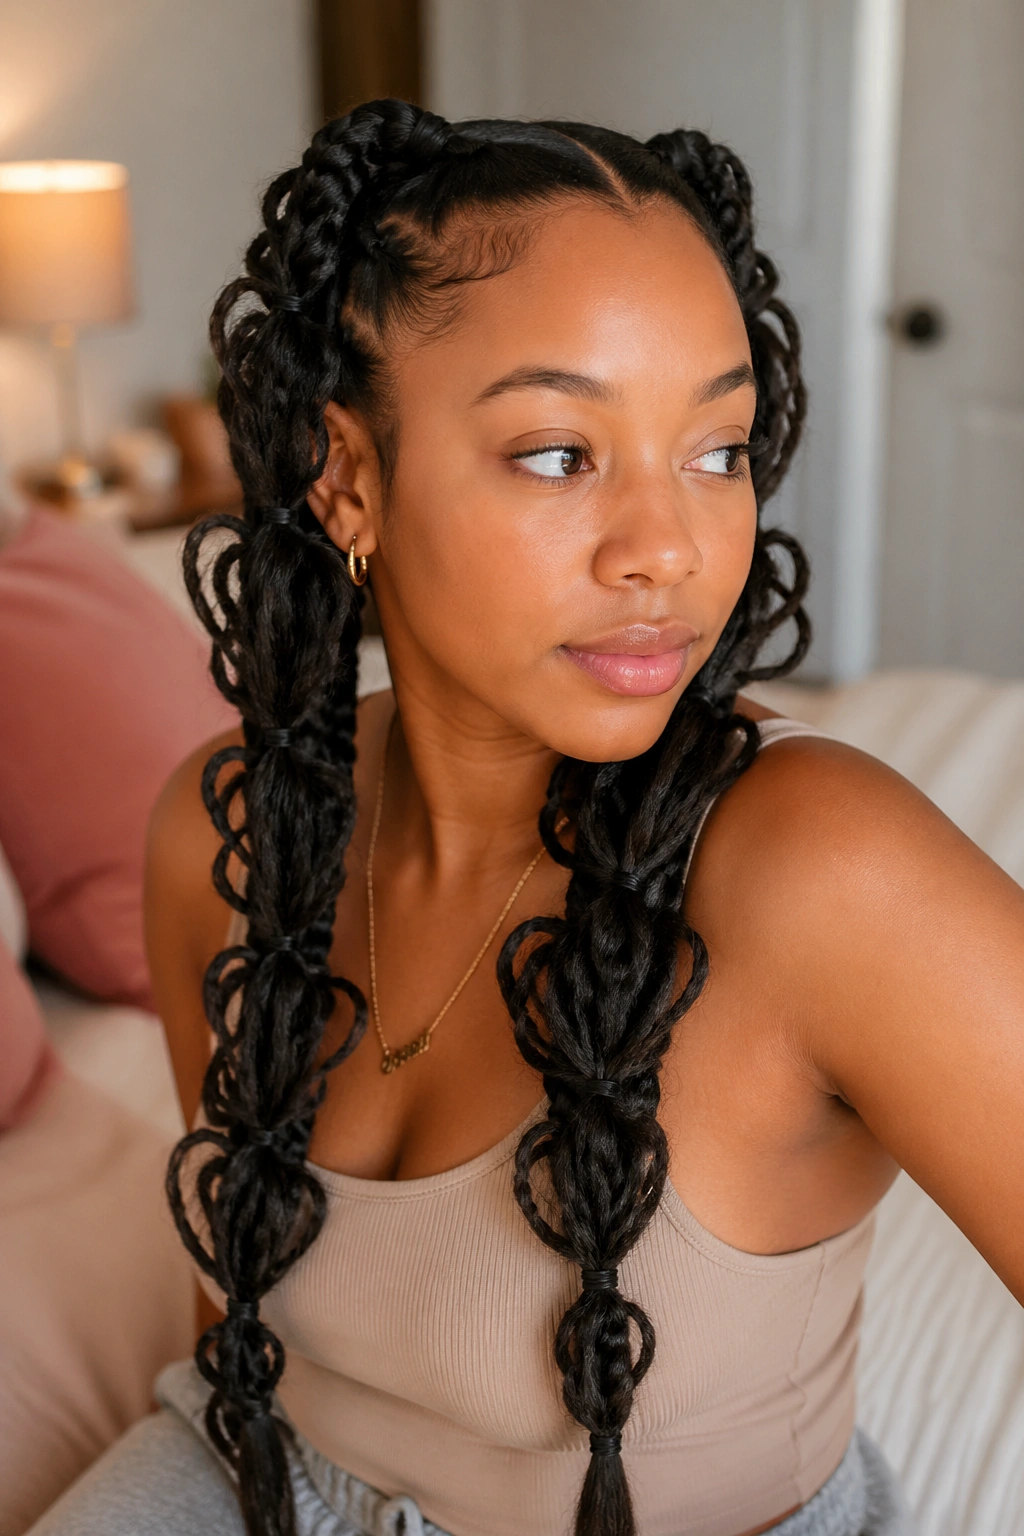
The classic butterfly braid is the blueprint. Clean parts, two or more braided sections, and those little loops pulled out from the braid body to create the airy, wing-like texture that gives the style its name. It looks simple, but the shape relies on restraint.
Why the loops matter
The loops are not random fluff. They’re the whole point. Pull them too hard and the braid loses structure; leave them too tight and you end up with a plain plait that feels flat. I like to think of it as giving the braid room to exhale.
A good classic butterfly braid usually starts with 1 to 2-inch sections, depending on thickness. Add a light mist of water or leave-in conditioner, then smooth a small amount of mousse through each part before braiding. That helps the braid lie cleanly without looking wet or crunchy.
- Best on medium to long hair because the loops show more clearly.
- Works with added hair if you want more length or density.
- Pull the outer braid stitches out about 1/2 inch at a time for that soft spread.
- Keep the roots snug, not tight so the style lasts without giving you a headache.
Pro tip: if the first braid looks good but the second one feels too bulky, you probably used more hair than you think. Cut the section size back a little. The style often looks better when the braids are slightly smaller than your first instinct says.
2. Half-Up Butterfly Braids With Loose Length
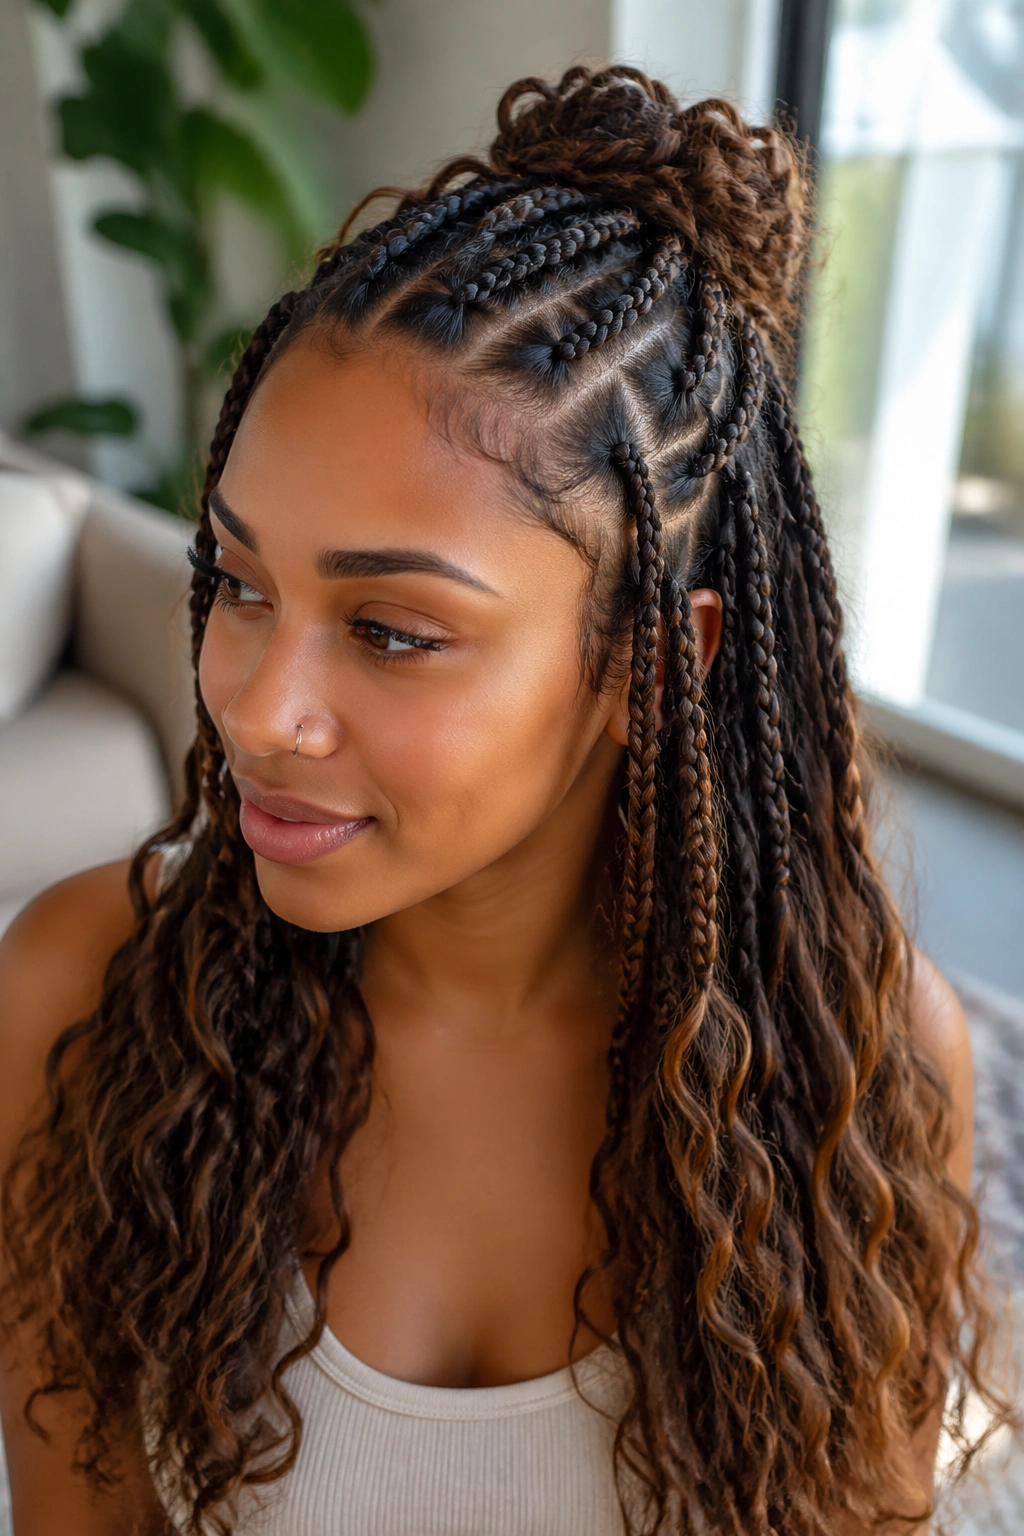
This is the version that feels easiest to wear in real life. The top half gets braided, the bottom stays loose, and the whole look lands somewhere between polished and casual. It’s a smart pick if you like braided hair but don’t want every strand pinned down.
The half-up shape also changes the mood of butterfly braids in a useful way. By leaving the bottom section free, the style keeps movement around the shoulders, which makes the braids look less heavy. That matters if your hair is thick or if you’re adding extensions and don’t want the whole head to feel crowded.
I reach for this style when someone wants the braid pattern to show, but also wants length to swing. It works on straight hair, waves, curls, and stretched natural hair. It’s one of those styles that feels friendly without looking basic.
If you want it to sit neatly, braid the top section back just past the crown, then secure it with a snag-free elastic before pulling the loops. Leave the loose length smooth, crimped, curled, or textured — all four can work, and the contrast can be the nicest part.
3. Butterfly Braids With Curly Ends
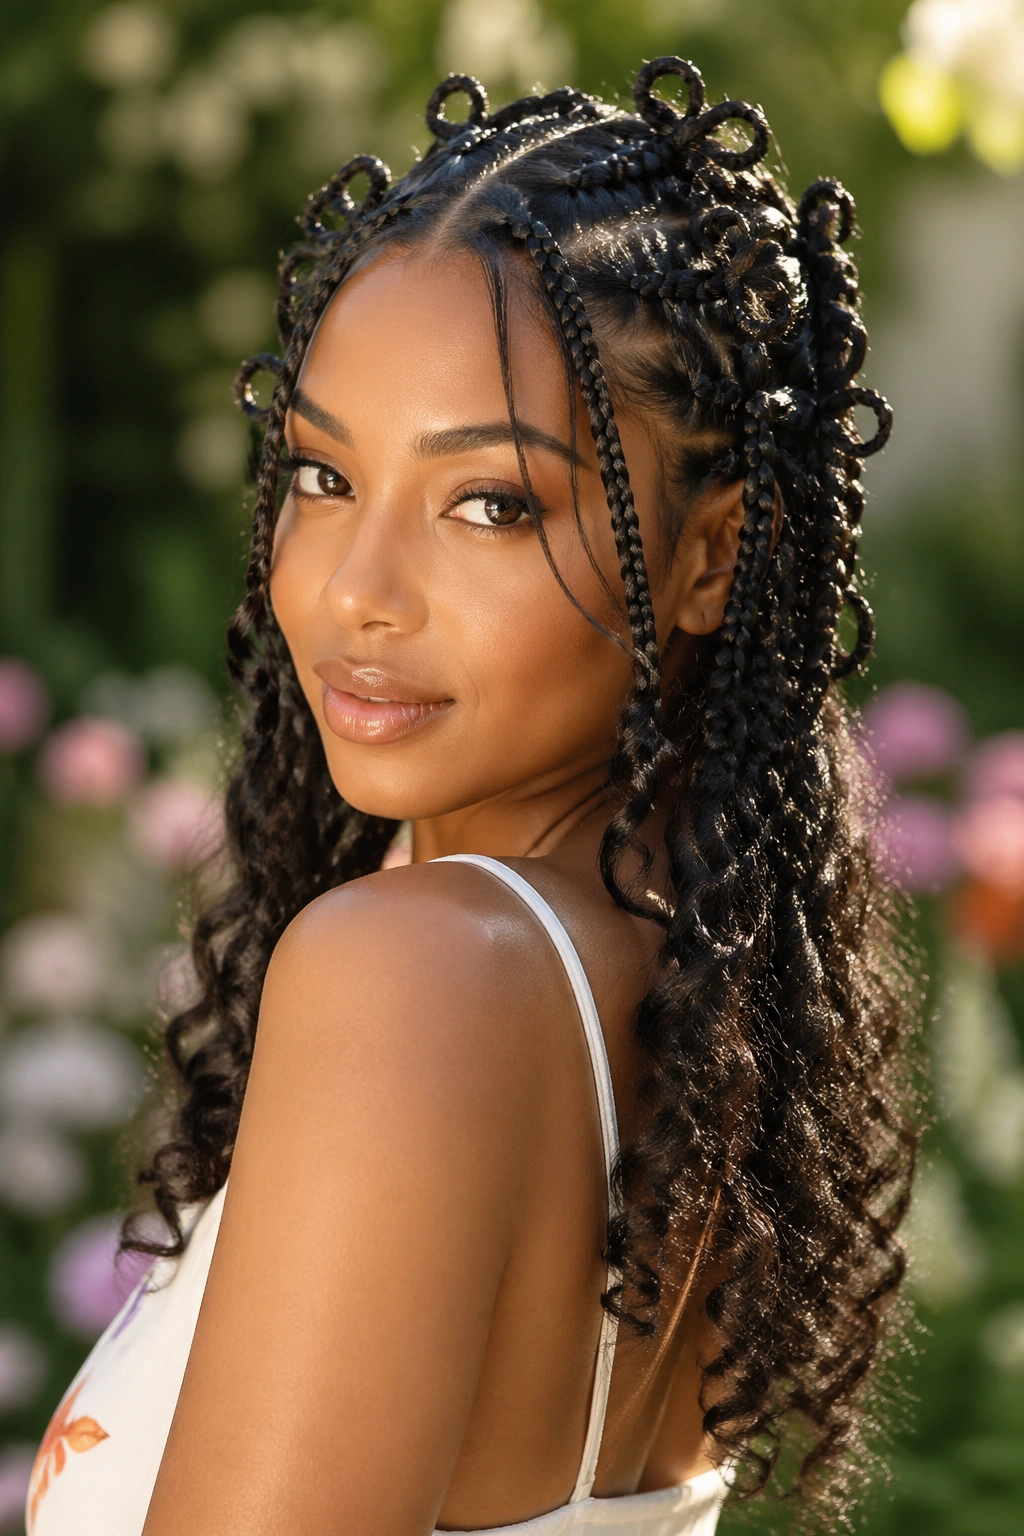
Why do curly ends make butterfly braids look softer? Because they break up the straight line at the bottom and keep the style from feeling too sharp. The braid body brings the structure, then the curls take the edge off.
That little shift changes everything. A braid that ends bluntly can look severe, especially if the parts are clean and the hair is tightly packed. Curly ends loosen the whole silhouette, and they make the style read a little more romantic without turning it into something fussy.
How to keep the curls bouncy
Use heat-safe extensions if you plan to curl the ends with a wand, or set the last few inches on perm rods before sealing. If you’re working with human hair, wrap the ends around a 1/2-inch to 3/4-inch barrel, then let the curls cool fully before touching them. Touching them too soon is a good way to flatten the shape before it has a chance.
A softer route is to braid down almost to the end, then leave 2 to 3 inches unbraided and twist those pieces into little curls or coils. That gives a more lived-in finish. It also helps if you want the braids to look lighter on the face.
The main thing is balance. Keep the curls loose enough to move, but not so loose that they unravel by lunch.
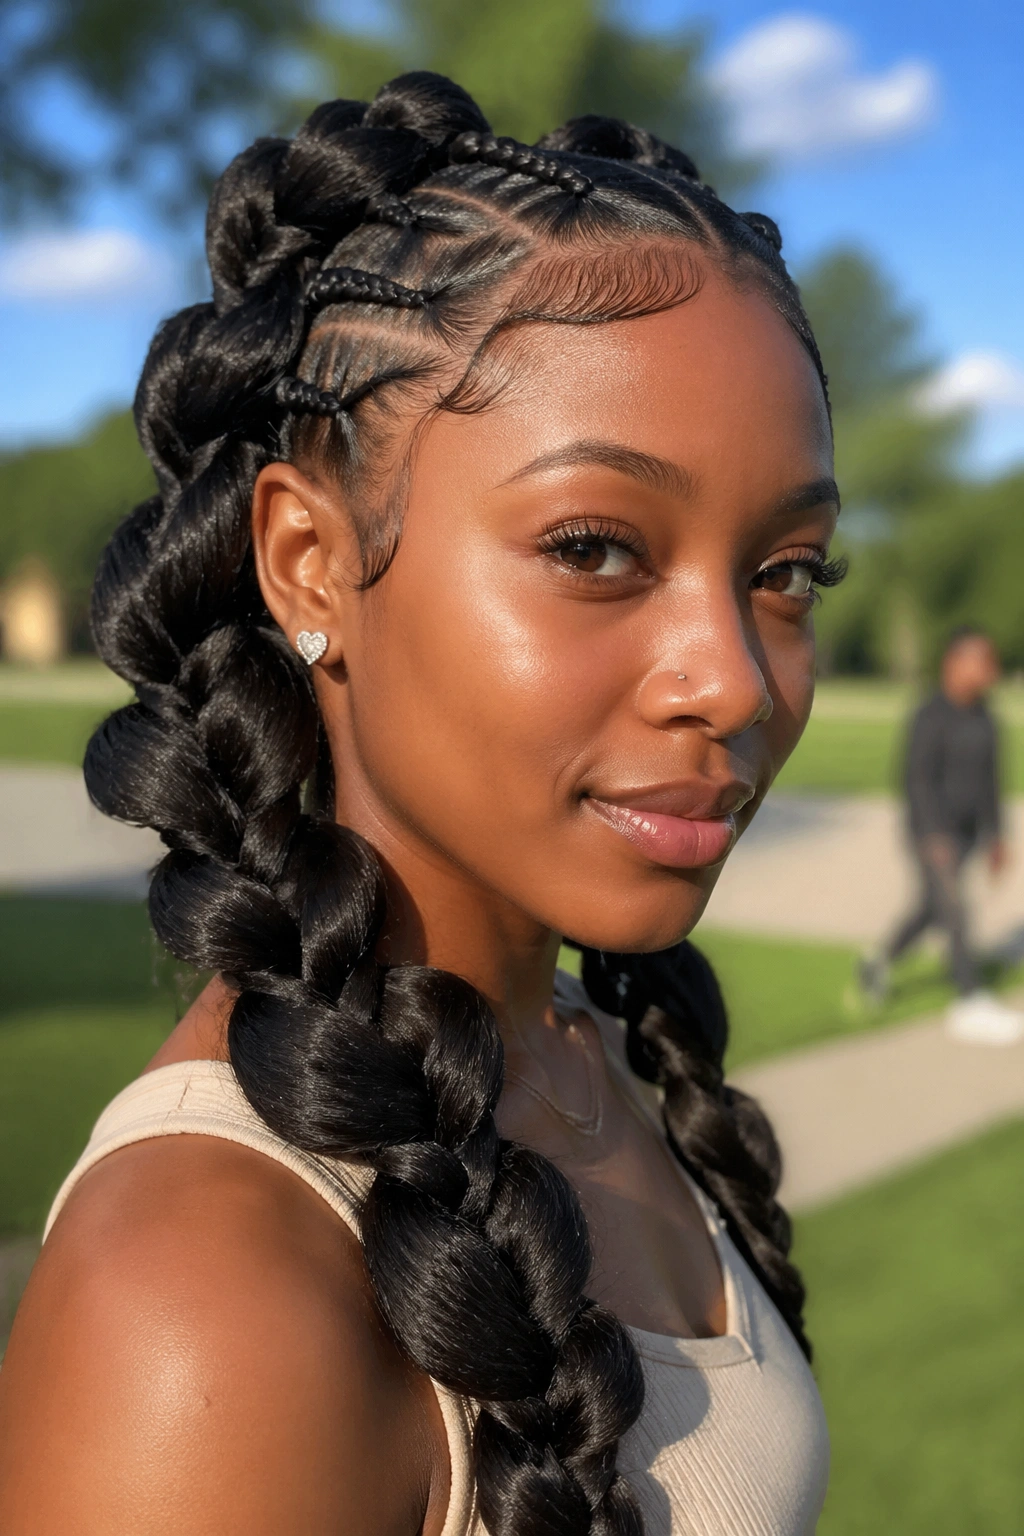
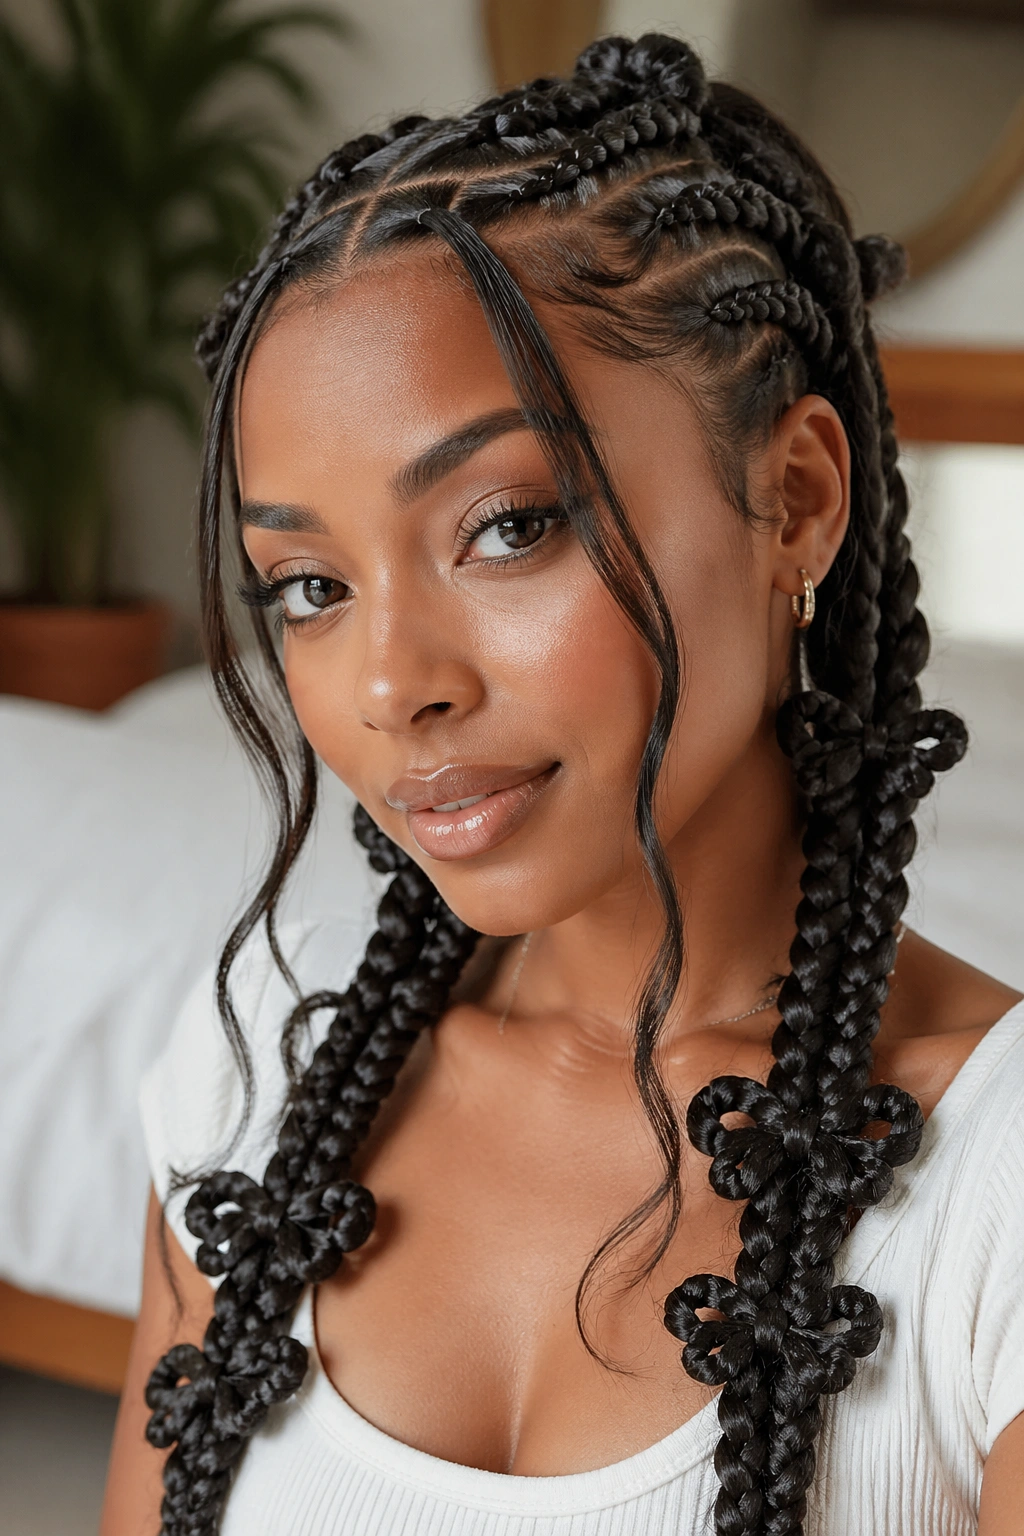
4. Side-Part Butterfly Braids
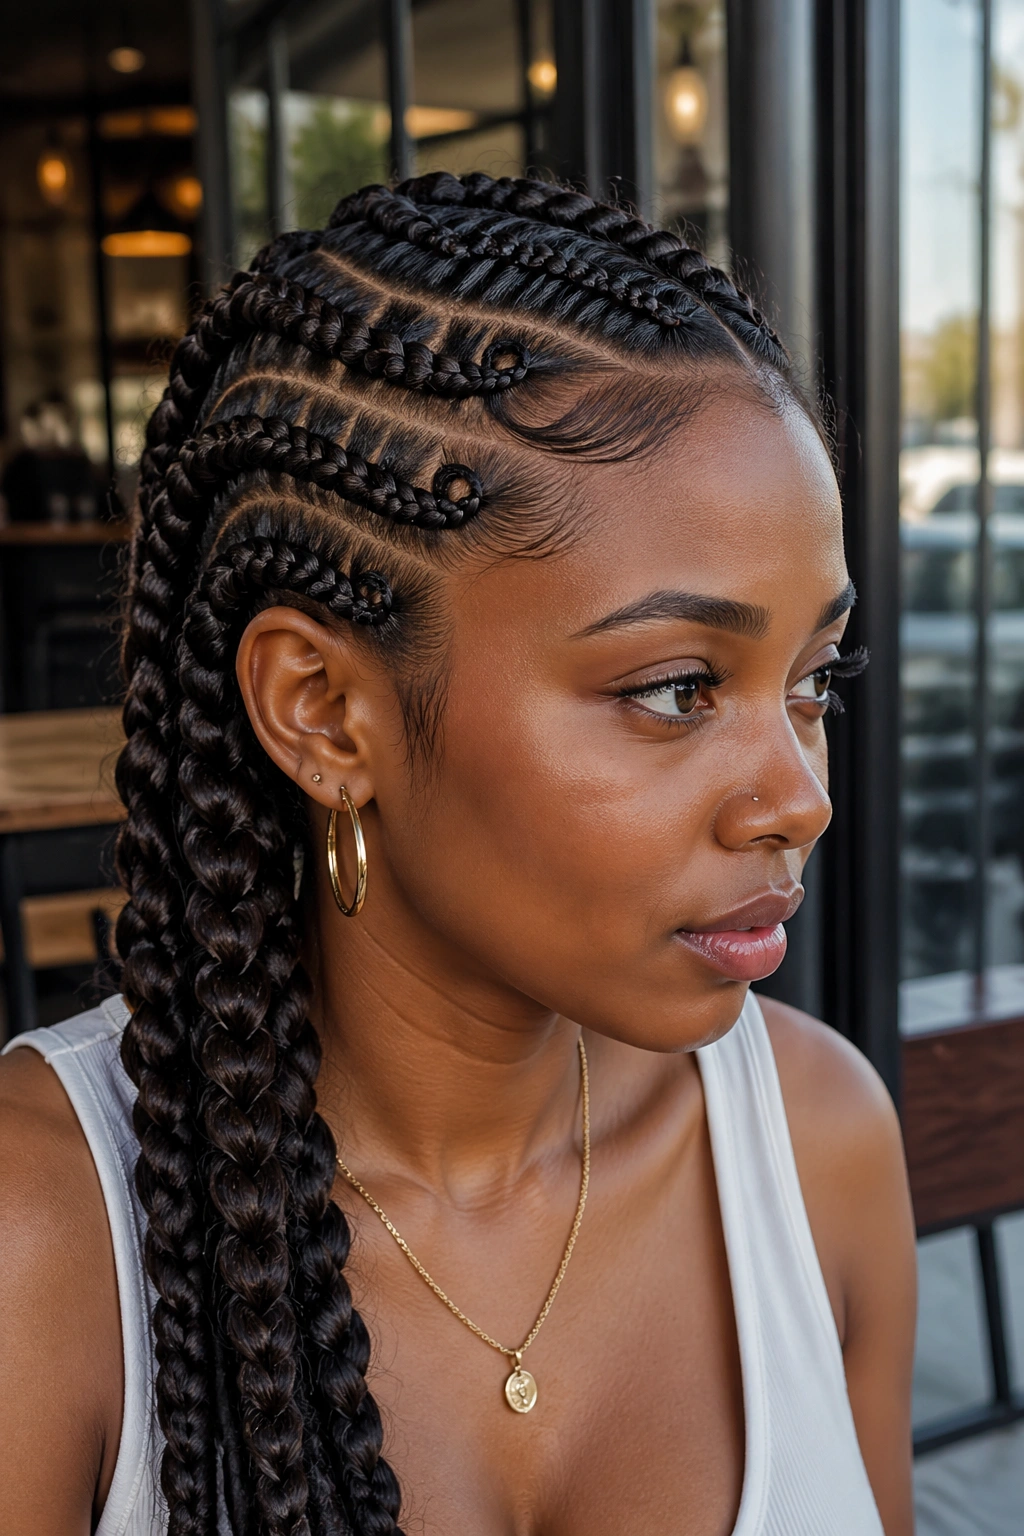
A side part gives butterfly braids a little attitude without making them loud. The whole style shifts when the part moves off-center, because one side carries more weight and the braid line starts to curve instead of falling straight down the head.
That curve matters. It softens the front of the face and gives the style a bit of motion before you even get to the loops. If a middle-part braid can sometimes feel symmetrical to a fault, the side part brings in a more casual, slightly undone feel.
- Deep side part: best when you want drama at the root.
- Soft side part: better if you want the braid to blend into the hairline.
- Larger front section: works well when you want the braid to sweep over one eyebrow.
- Smaller front section: keeps the style neater and keeps the forehead open.
One thing I like about this version is how forgiving it can be on different face shapes. It gives you a clear angle without asking the braid to do too much work. And if you wear hoops, a side part gives them more space to show, which sounds minor until you try it and realize it makes the whole look feel finished.
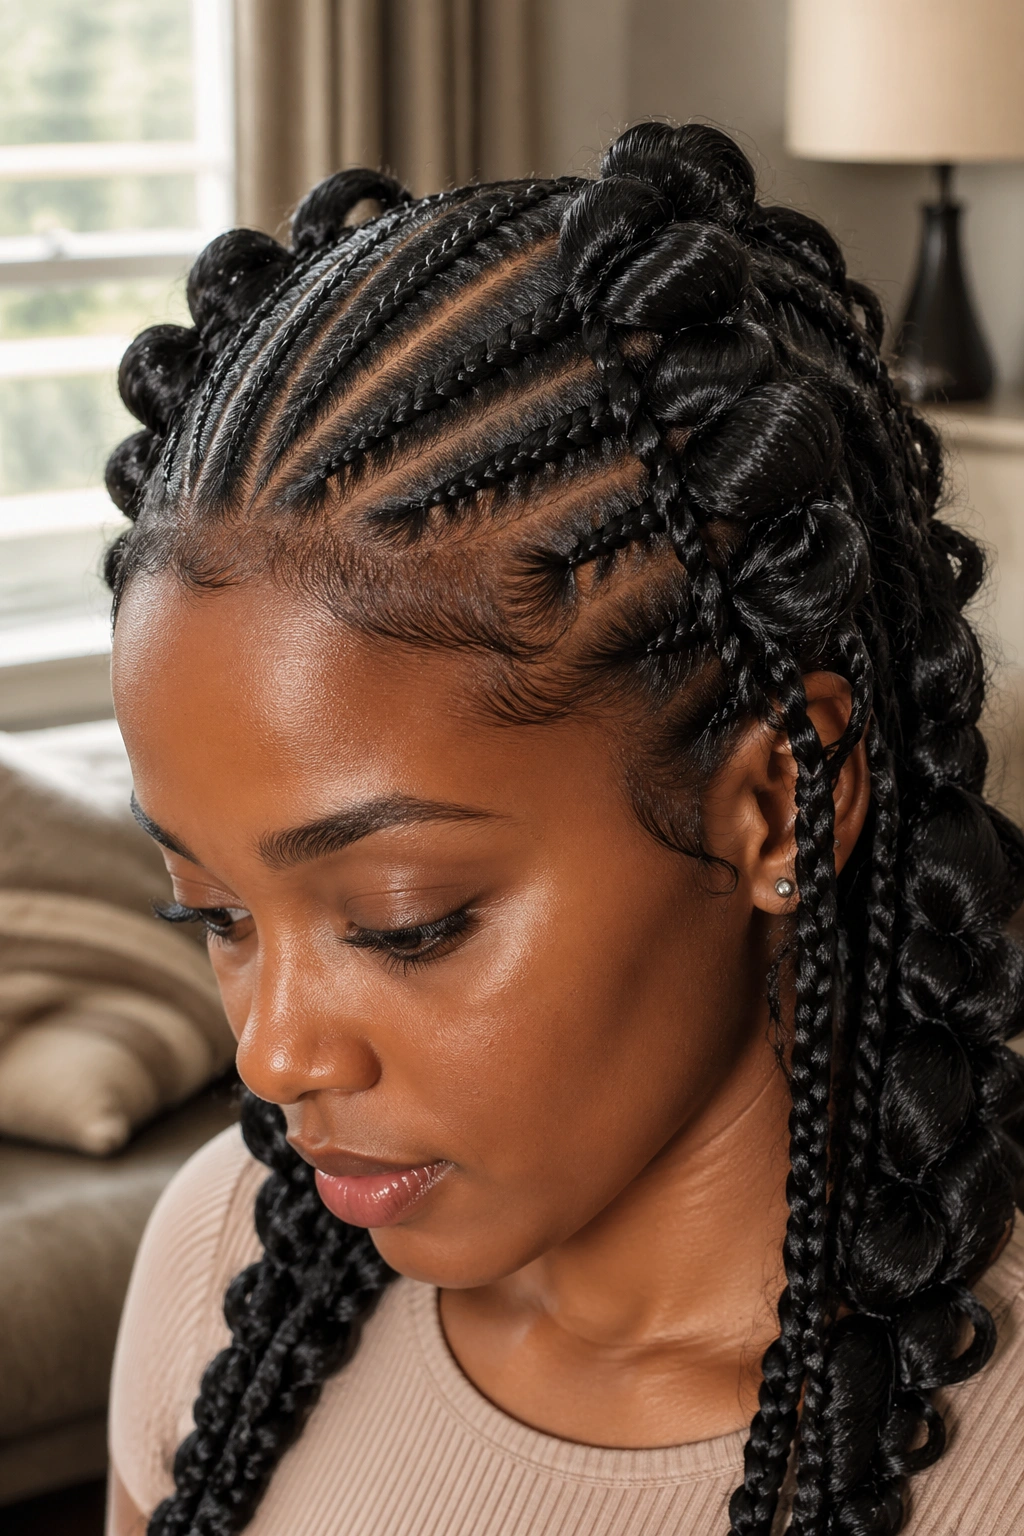
5. Jumbo Butterfly Braids
Jumbo butterfly braids are for people who want the style to read from across the room. Big sections, bold loops, and a braid body that looks full without needing a dozen tiny parts. There’s no pretending here. The shape is the point, and it shows.
I prefer jumbo braids when the hair is dense or when the person wants a quicker install. Fewer braids usually mean less time spent sectioning, and less time in the chair can make a style feel more doable. The catch is that big sections can flatten fast if you don’t leave enough room for the loops, so you still need a clean hand.
The braid should feel snug at the base and then open up as it moves down. That contrast is what keeps the style from looking blocky. If the whole thing is the same width from root to end, it loses the butterfly effect and turns into a heavy plait.
Bold styles need clean lines. Not stiff lines. Clean.
A light mousse and a little edge control around the hairline are usually enough. Too much product can make jumbo braids look shiny in a cheap way, and that’s one of those details you only notice once you’ve seen it in person.
6. Small Butterfly Braids
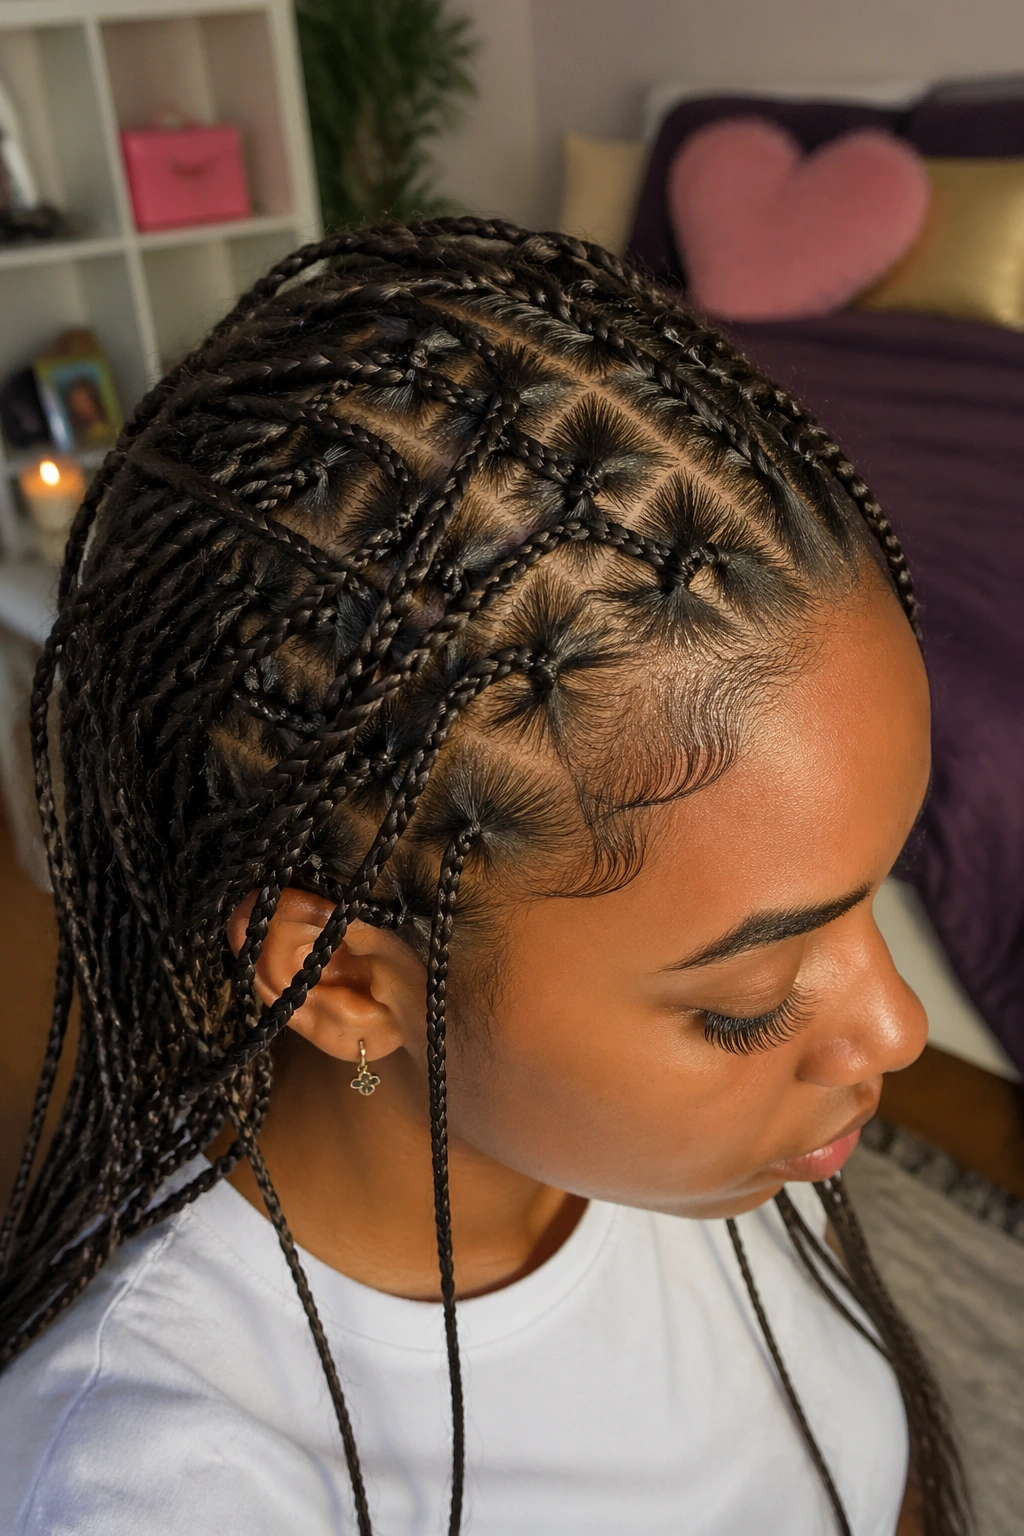
Small butterfly braids are the quieter sister of the jumbo version. They take longer to install, sure, but they give you a finer braid pattern, more movement, and a style that often feels a little more delicate around the edges.
Unlike jumbo braids, small butterfly braids spread the texture out over more sections, so the loops are less dramatic and more detailed. That makes them a good pick if you like seeing the braid work itself instead of just the final silhouette. They also sit flatter at the scalp, which some people prefer for comfort.
I’d choose this version for finer hair, longer wear, or any time the style needs to live under a hood, scarf, or work dress code. It’s also easier to tuck behind the ear without the whole braid sticking out like a rope. That tiny thing matters more than people think.
If you want the soft butterfly look but you don’t want a heavy crown of hair, this is the one. It asks for patience at the start and pays you back later when the style still looks neat after the first day of wear.
7. Butterfly Braids Pulled Into a High Ponytail

A high ponytail turns butterfly braids from soft to sporty in one move. The height lifts the face, shows off the braid pattern at the crown, and gives the whole style a more lifted line.
Where the ponytail sits
Place the ponytail at the upper crown, not the exact top of the head, unless you want a sharper, cheerier look. A slightly lower placement gives the braid more swing and keeps the weight from tugging too hard on the hairline. That’s a small difference that changes the whole wear experience.
Once the braids are gathered, wrap one braid around the base to hide the elastic. Then secure the wrap with a bobby pin pushed upward into the ponytail base, not straight out. It holds better that way.
A high ponytail works especially well when the braids have curled ends or loose loops near the back, because all that texture gets pushed into one lively shape. It’s also a good style for straight, bold makeup. The hair becomes the statement piece, which is handy when you don’t want to overthink the rest.
I like this one when the goal is energy. Not chaos. Energy.
8. Butterfly Braids With Beads
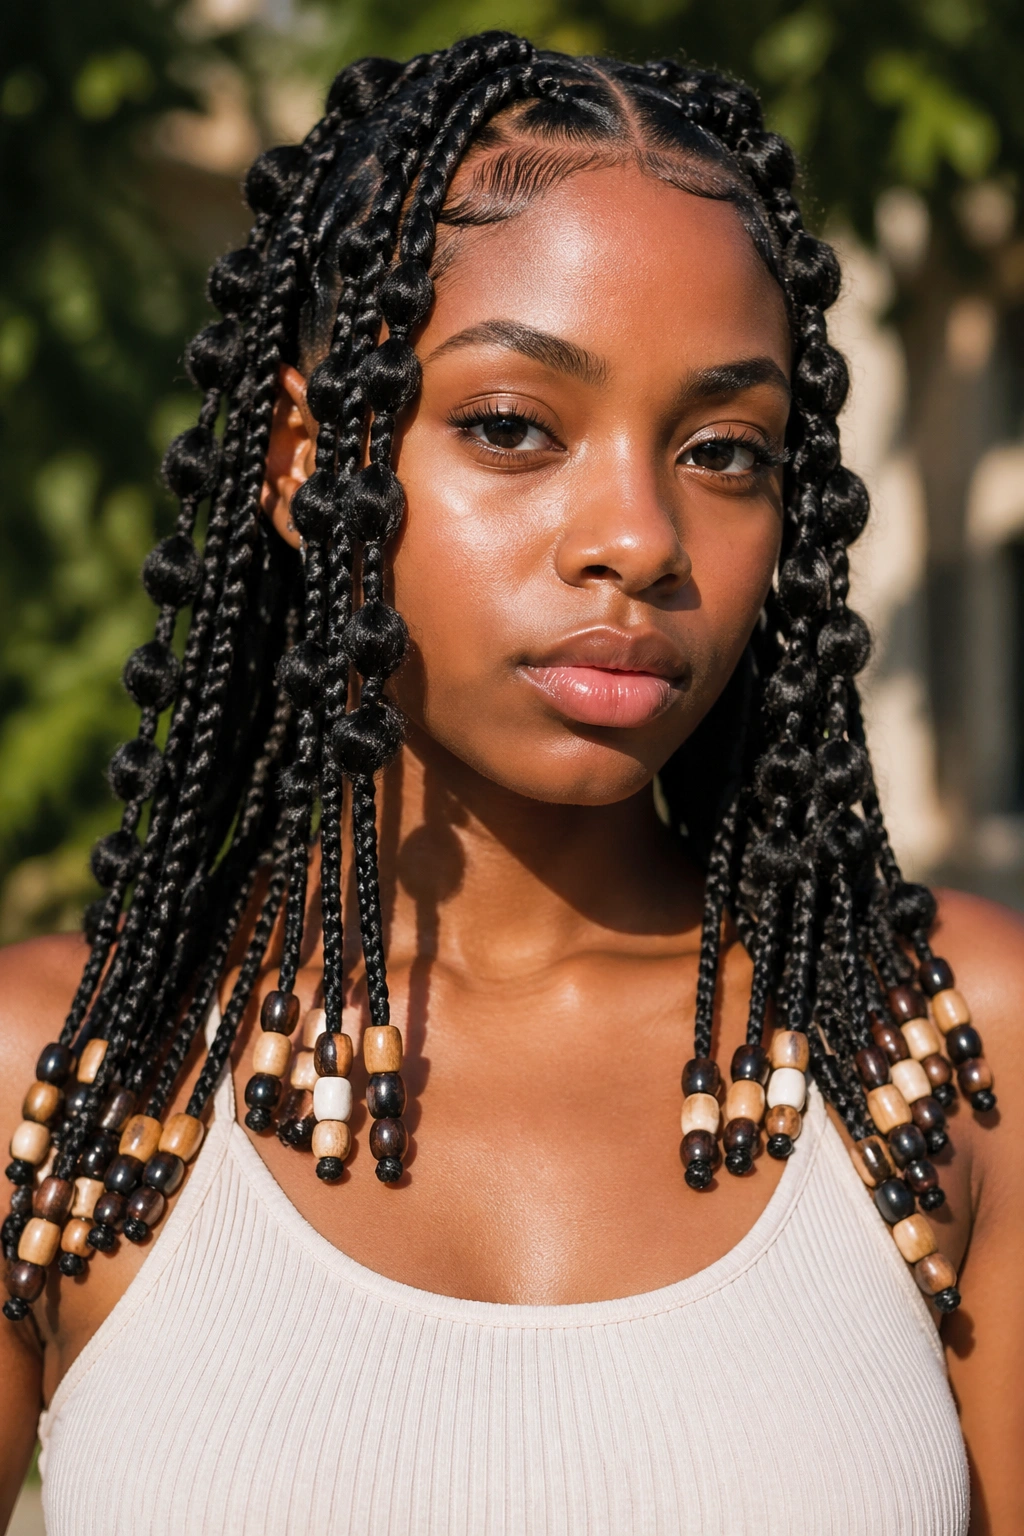
Beads change butterfly braids fast. They add weight, sound, shine, and a little bit of motion every time the hair moves. That’s a lot from a small accessory, which is exactly why the style keeps showing up.
If you want the beads to feel intentional, place them where the eye already goes — usually the ends or the outermost braids near the face. A few beads on every braid can look busy fast, while one or two focused spots read more clearly. I usually lean toward fewer beads with more contrast.
Wood beads feel earthy. Clear beads look sharper. Metal or gold-toned pieces bring more shine, but they also show more if the hair is frizzy. That’s the part people skip over. The accessory looks one way in a flat lay and another way once it moves.
The smartest bead placement is usually at the bottom third of the braid. That keeps the root area light and lets the ends carry the detail. If the beads slide, use a small knot or a tiny silicone stopper underneath so they stay put.
9. Colored Butterfly Braids That Make the Loops Pop

Can color make butterfly braids easier to read? Yes, and that’s part of why this version gets so much attention. The loops stand out more when the extension hair has depth, whether that means a honey-brown shade, copper, burgundy, or a high-contrast accent strand.
The key is not to overcomplicate the palette. If the color contrast is too strong, the braid pattern can start looking noisy. A shade that’s one or two steps lighter or darker than the base color usually keeps the braid detail visible while still giving you dimension.
Best color ideas
- Honey blonde and dark brown for a warm, clear braid line.
- Copper and auburn when you want the loops to show on camera.
- Burgundy and black for a darker braid with depth.
- Soft blue or gray streaks when you want accent pieces instead of full color.
I like colored butterfly braids best when the color is used to trace the braid, not hide it. That means placing brighter pieces near the outer sections where the loops will show most. If the bright strands live only underneath, the effect disappears once the braid settles.
The style gets the attention, not the dye job. That’s the sweet spot.
10. Knotless Butterfly Braids
Knotless butterfly braids are a smart choice when comfort matters as much as the finish. The braid starts without that tight knot at the root, so the tension is spread more gradually along the scalp. That makes the style feel lighter early on, which your head usually notices before your mirror does.
Compared with traditional braids, knotless versions tend to move more naturally at the base. The braid can still have the same soft butterfly loops, but the root lies flatter and looks smoother. If you wear braids often, that difference is not small.
They’re a strong pick for anyone with a sensitive hairline or anyone who hates the “fresh braid ache” that shows up the first day. You still need good sectioning and clean parting, though. Knotless does not mean careless. If the feed-in is uneven, the braid will show it.
I’d recommend this version for longer wear and for people who want the style to feel less heavy right away. It’s one of the few braided looks that can feel polished without making you count the minutes until you take it down.
11. Butterfly Braids With Face-Framing Pieces
Face-framing pieces are the easiest way to soften butterfly braids without changing the whole style. Two loose strands near the temples can make the braid feel more relaxed, more modern, and a little less formal.
I usually pull out pieces that are about 1/4 inch to 1/2 inch wide. Thin enough to look intentional, thick enough to show up. If the pieces are too chunky, they compete with the braids. If they’re too tiny, they just frizz and disappear.
Keep the pieces either straight, softly waved, or curled, but not all three at once. Mixed textures can work, but they need a reason. A smooth braid with lightly curved front pieces gives the face some shape and keeps the eye moving.
This is the version I’d choose if the braids feel a little too structured on their own. It’s subtle, which is nice. Not every style needs a loud accessory or a dramatic part to feel finished.
12. Crown Butterfly Braids Swept Across the Head
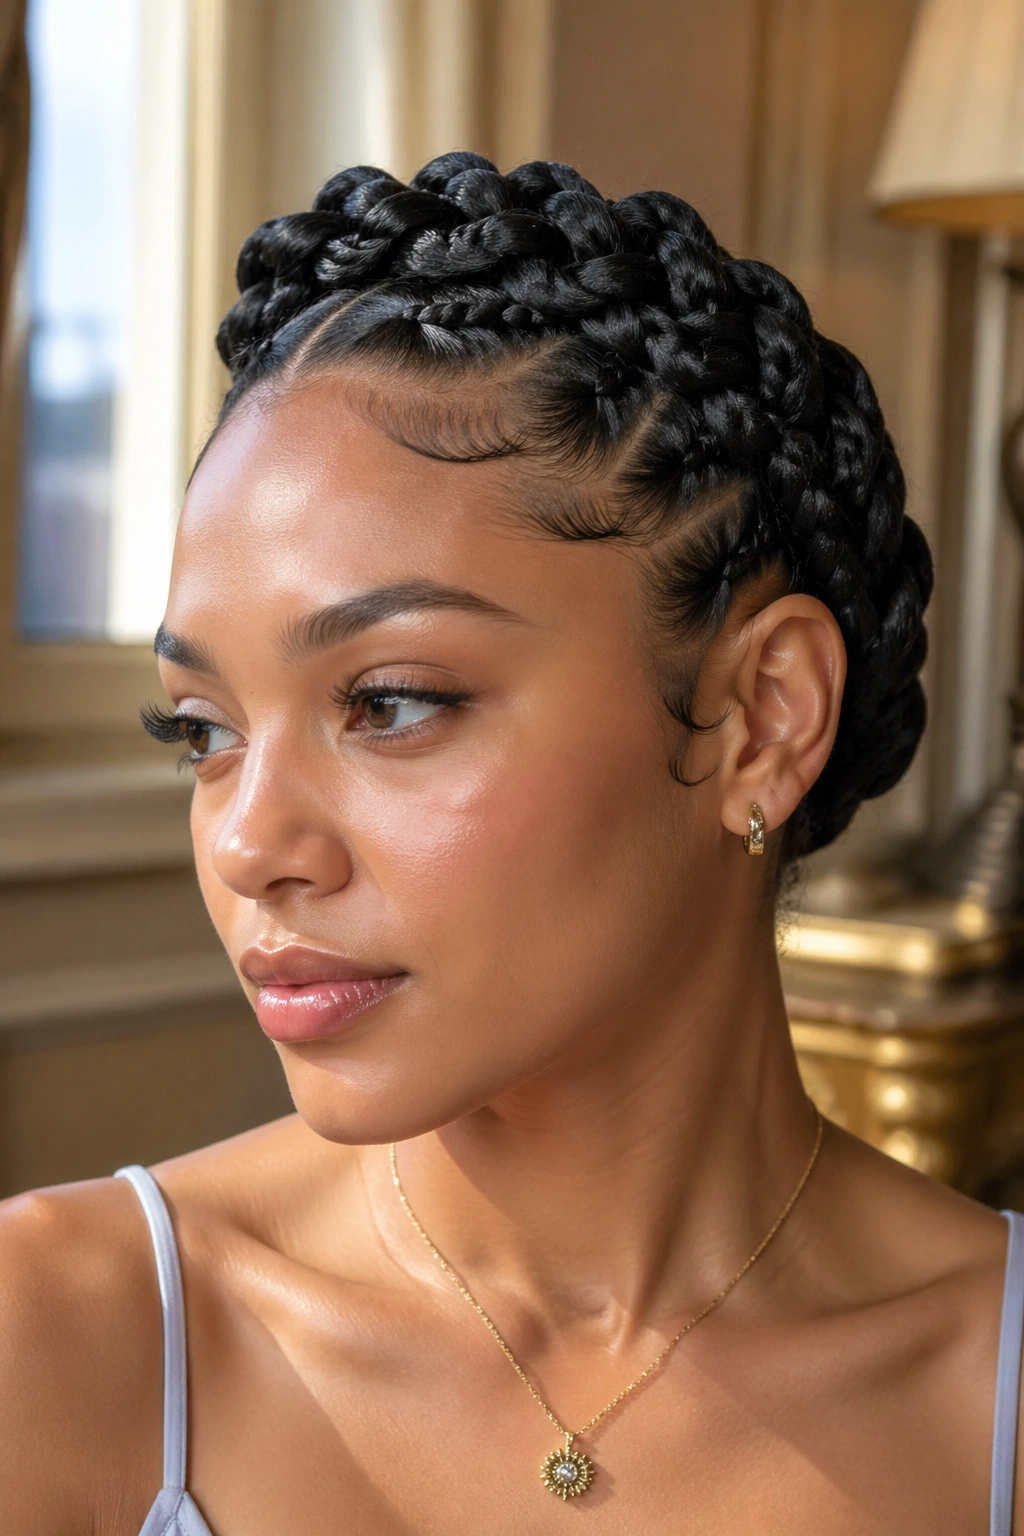
A crown braid shape gives butterfly braids a more polished outline. Instead of dropping straight down the back, the braids sweep along the hairline and around the head, which creates that halo effect people love for dressier days.
The shape works because it uses the braid’s volume as a frame. Your eye follows the curve first, then the loops, then the ends tucked away near the nape or behind the ear. It feels intentional without looking fussy. That’s harder to pull off than it sounds.
What to watch for
- Part width matters: too wide and the crown looks bulky.
- Pin placement matters: hide pins under the braid, not on top of it.
- End tuck matters: secure the ends where they won’t poke out by mid-day.
- Hair density matters: finer hair usually needs a little more support underneath.
I like this style for weddings, family photos, or any event where you want the hair off the face but still want it to look rich and full. It also works when you need a style that keeps your neck clear. That sounds minor until you spend an hour in warm indoor lighting and realize your hair isn’t sticking to your skin.
13. Butterfly Braid Bob
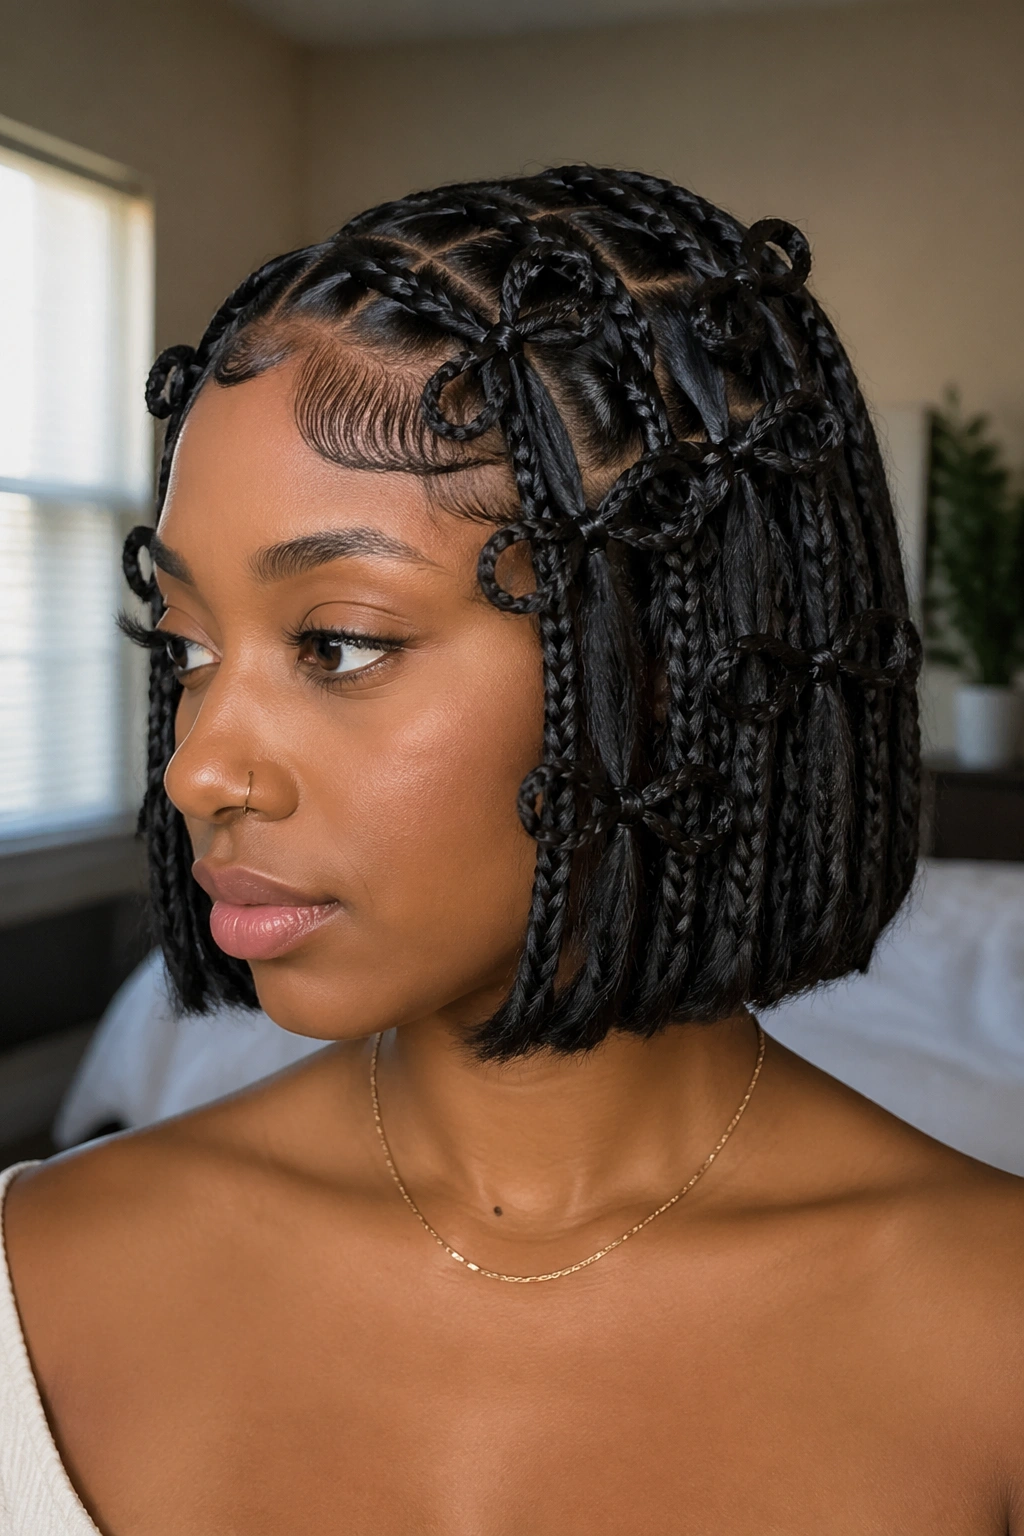
A butterfly braid bob is short, sharp, and a little unexpected. Instead of long hanging braids, you get a chin-length or shoulder-grazing shape that still keeps the soft looped texture. It feels fresher than people expect, and frankly, it looks cleaner too.
The short length changes the proportions. Every loop matters more because there’s less hair to hide behind. That means the braid pattern needs to be neat, and the ends need to be tucked carefully so the bob stays blunt rather than messy in a bad way.
This version is a good fit when long braids feel heavy, hot, or too much of a commitment. It also lets earrings and necklines show, which can make the whole outfit feel more put together without adding anything extra. The hair gets to do one job and do it well.
If you want the style to read as modern instead of costume-like, keep the parts clean and the bob line even. A jagged finish can work, but only if the rest of the braid is very controlled. Otherwise the shape starts fighting itself.
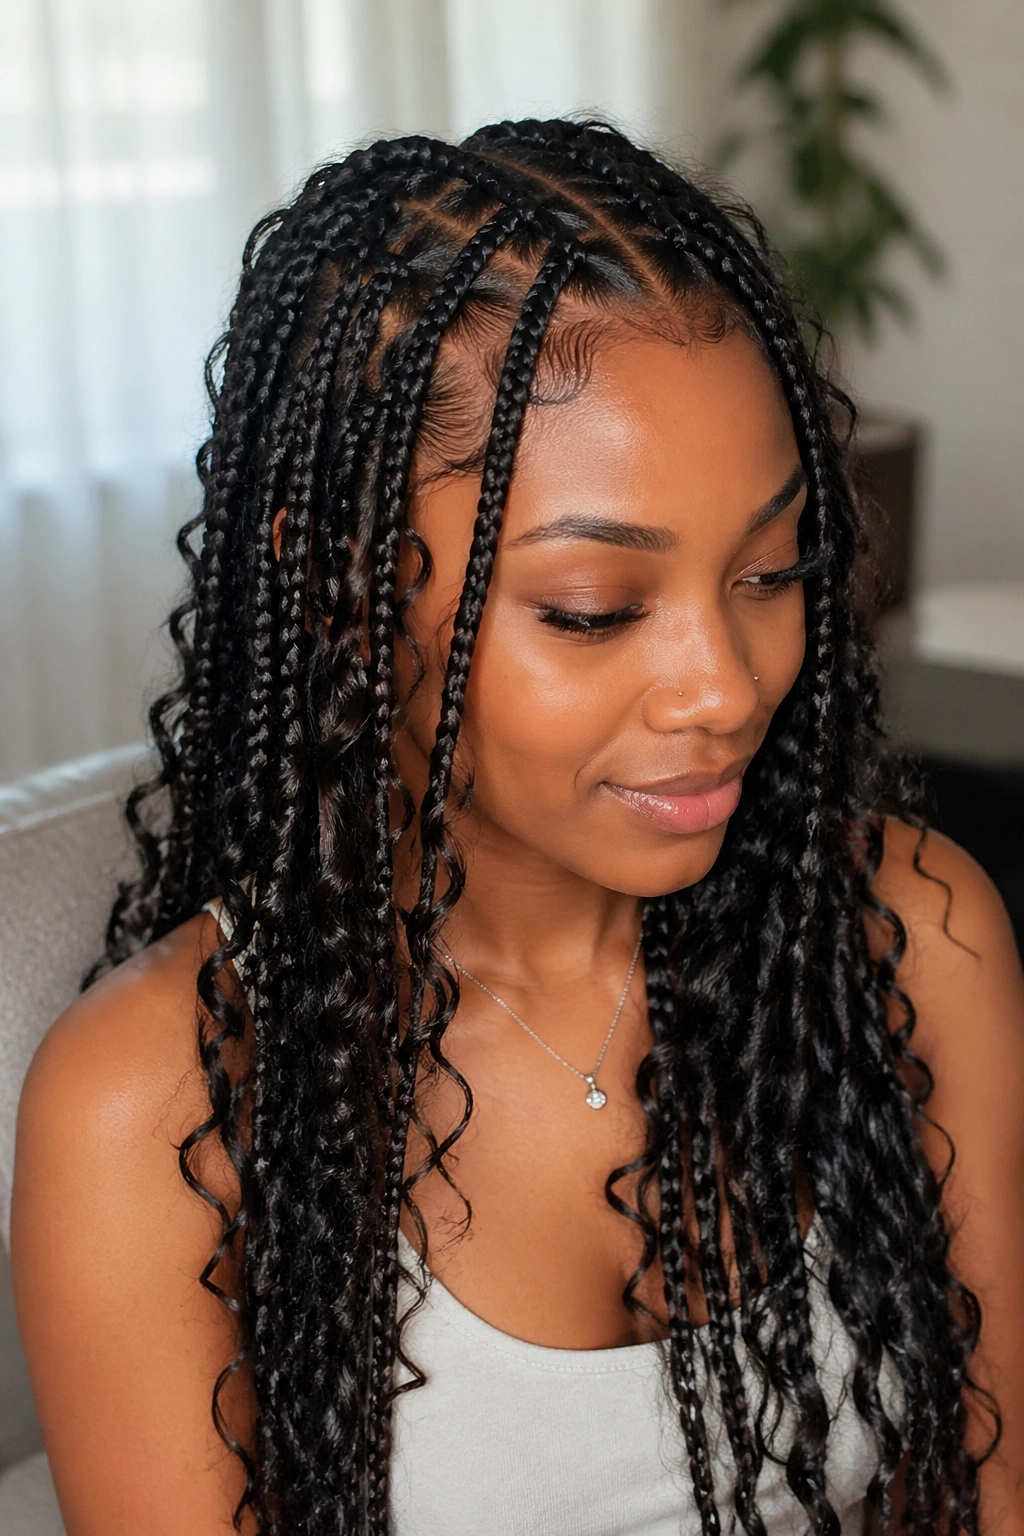
14. Boho Butterfly Braids With Mixed Texture
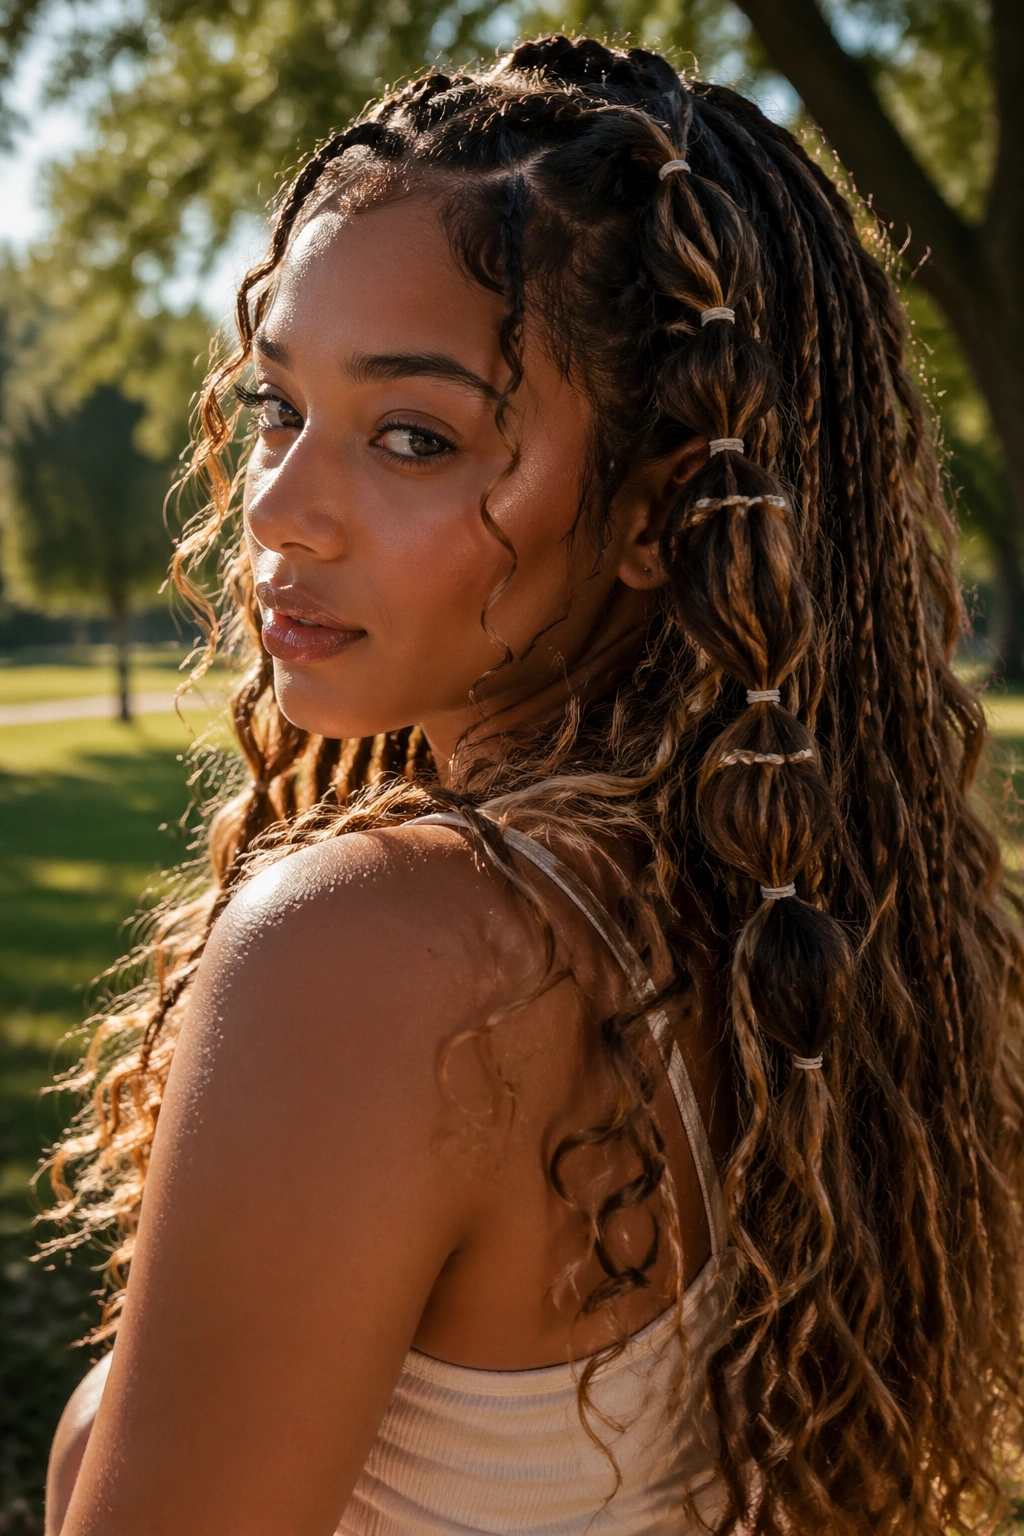
Boho butterfly braids lean into the messy side on purpose. Loose curly strands, soft loops, and a braid body that looks touched, not frozen. That mix is what gives the style its easy, slightly unstudied feel.
What makes boho work
The texture shift has to make sense. If you leave out a few curly tendrils and then keep the rest of the braid stiff, the contrast feels accidental. But if the whole braid has movement — loops, wisps, bent ends, a little softness near the temples — it starts to feel cohesive.
- Use curled leave-out pieces near the crown or sides.
- Keep the braid body soft by pancaking the outer stitches.
- Don’t overdo frizz control or the style loses its lived-in feel.
- Add one accessory only if you want the texture to stay the main event.
I like boho butterfly braids for people who don’t want their hair to look too locked down. They still want shape. They still want polish. They just don’t want every strand obeying the same rule. Fair enough.
The best version keeps a little tension at the base and a little softness everywhere else. Too much of either and the style stops making sense.
15. Butterfly Braids Laced With Ribbon
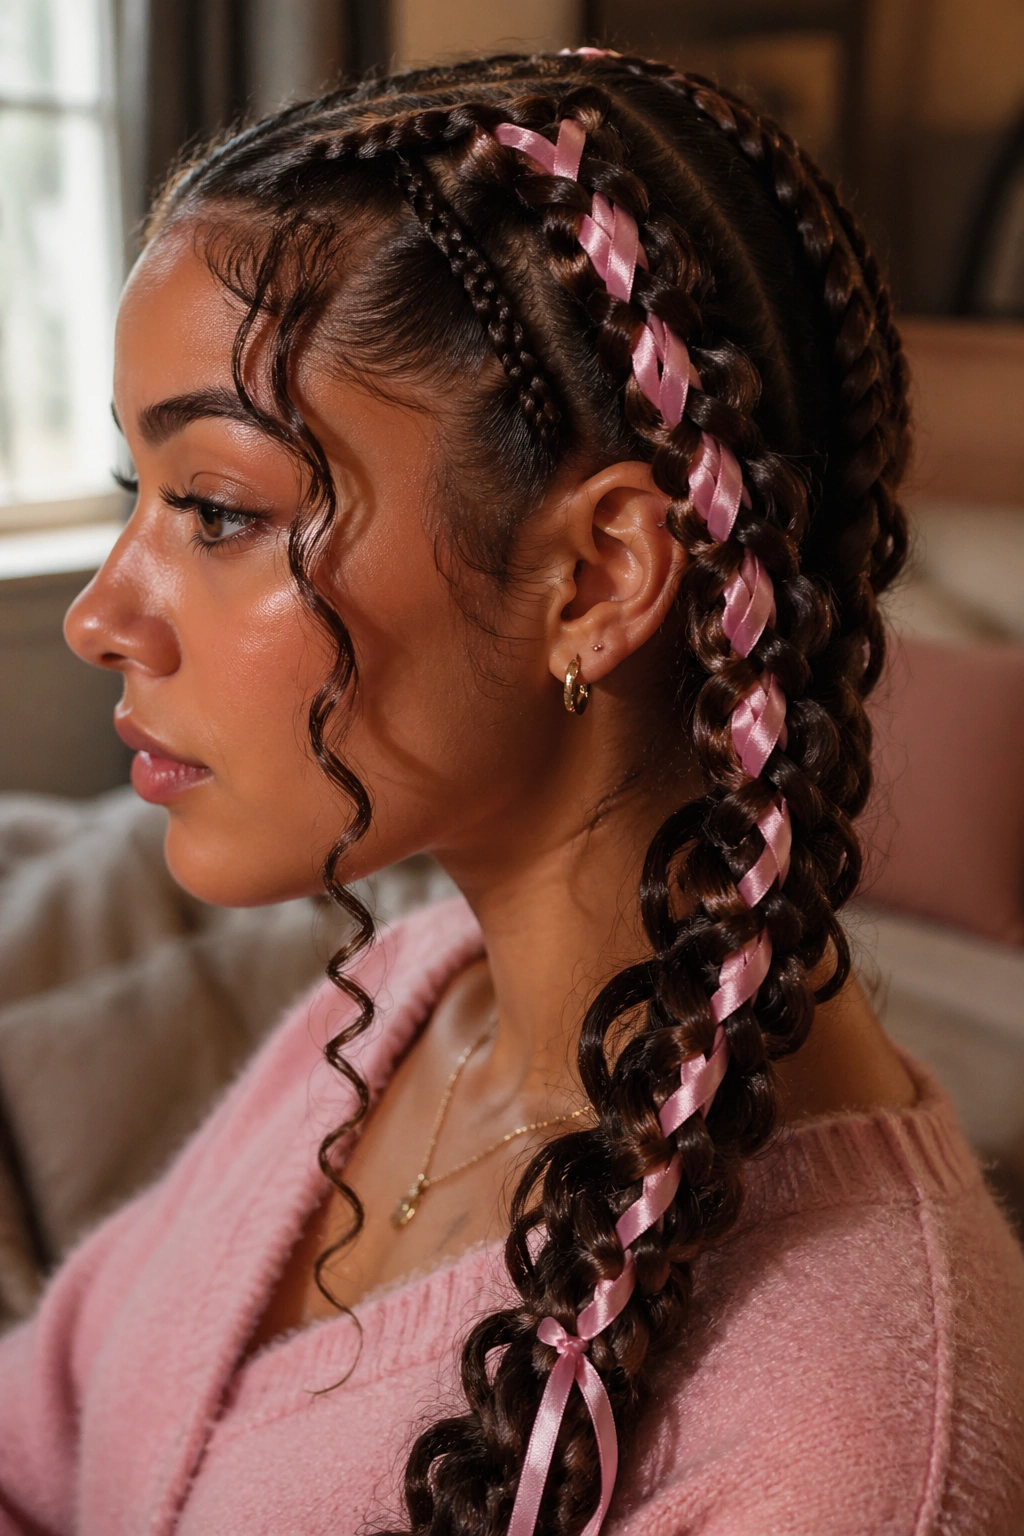
Can a ribbon make butterfly braids feel softer? Absolutely. A thin ribbon changes the whole mood without adding weight, and it gives you one more color note to play with. That’s the part people notice first.
The best ribbon styles use narrow satin or grosgrain ribbon, not a wide strip that fights the braid. Feed it through one braid section from the root or tie it in near the middle, then let the ends hang with the rest of the hair. If the ribbon is too wide, it hides the looped texture instead of supporting it.
How to tie it in
A single ribbon can travel through the braid like a strand of color, or you can knot short bows near the ends if you want a softer finish. Keep the ribbon tails longer than you think — about 4 to 6 inches past the braid end — so they don’t vanish into the hair once the style moves.
This works well for birthdays, casual celebrations, or any look that needs a little softness without going full glam. I’d avoid very thick ribbon on small braids, though. It swallows the braid pattern, and that’s a waste of the texture you paid for.
16. Butterfly Braids Gathered Into a Low Bun
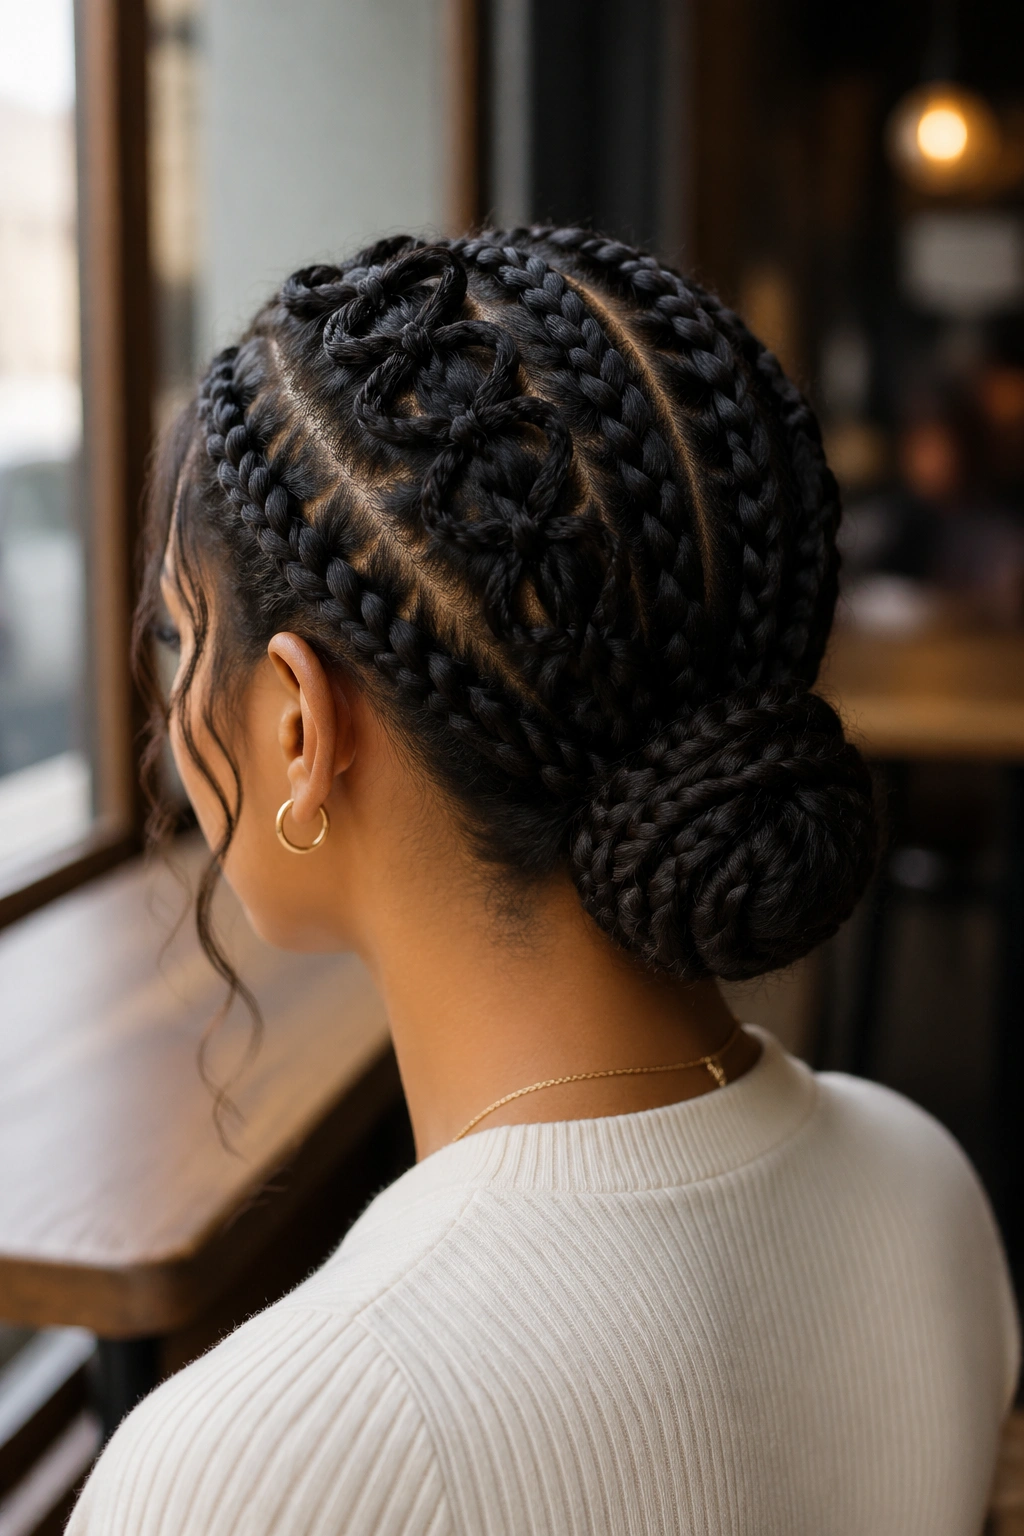
A low bun gives butterfly braids a quieter shape. Instead of hanging long, the braid folds into itself at the nape, which makes the style feel neat and controlled. It’s one of the best ways to make braids look grown without making them severe.
This version is especially useful when the ends are heavy. If you’ve added hair and the length feels like too much on your shoulders, tucking the braids into a bun solves the weight problem fast. The bun can be smooth, twisted, or slightly loose depending on the mood you want.
Compared with a high ponytail, the low bun keeps the hair closer to the neck and usually feels easier to wear for long stretches. It also works well with earrings and high necklines, because nothing is fighting for space near the face. That’s a small styling win, but a real one.
Secure the bun with bobby pins or a few small U-pins, then check the back in a second mirror. If the braid tails poke out, tuck them under the twist instead of pinning them flat. They hold better that way.
17. Butterfly Braids With Gems and Hair Jewelry
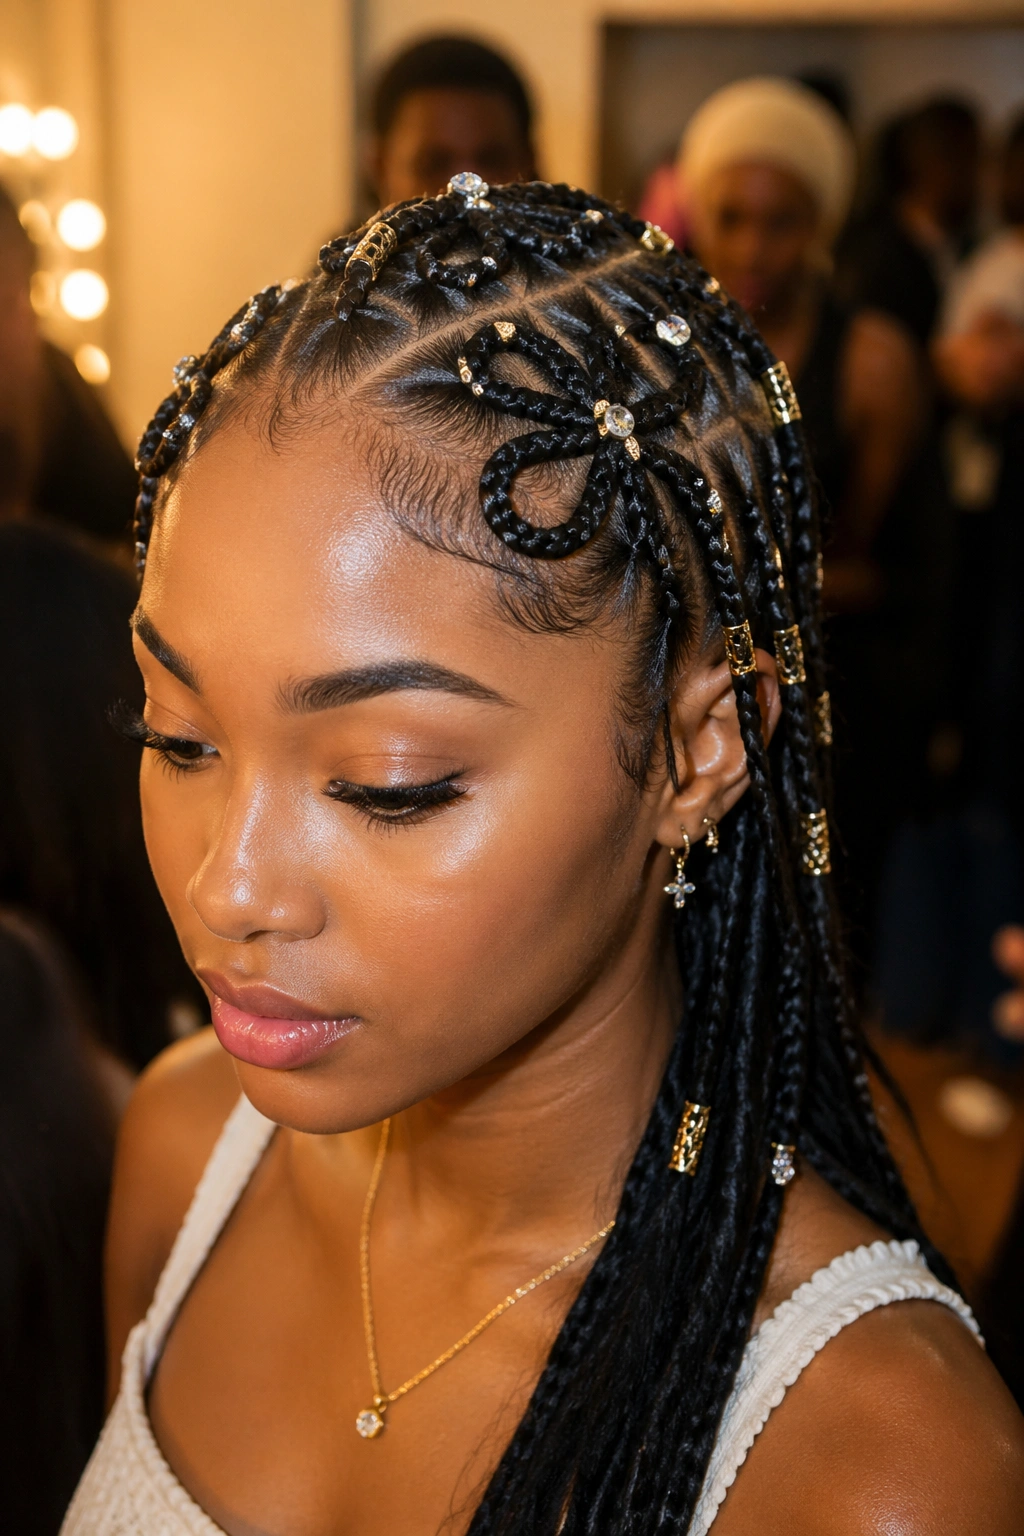
Butterfly braids with gems are for people who want the braid pattern to stay visible while still adding a little shine. Tiny gems, cuffs, or hair rings can do that job without drowning the style in decoration.
A good rule is to place the jewelry where the braid already has movement. The outer curve of the braid, the ends, and the braids closest to the face usually catch the eye first. If you place the gems in a straight line all the way down every braid, the style can start looking too fixed and a little stiff.
- Use two or three clusters, not one piece on every section.
- Keep larger gems near the front if you want them to show in photos.
- Pair jewelry with clean parts so the detail doesn’t get lost.
- Choose one metal tone unless you want a mixed look on purpose.
I like this version for concerts, parties, and any setting where the hair is part of the outfit. It also works when you want butterfly braids to feel a little less everyday. The trick is to stop before the accessories take over. Tiny sparkle is plenty.
18. Butterfly Braids for Natural Hair Protection
Butterfly braids can absolutely work as a protective style, but only if the prep and tension are handled with care. That starts before the first braid is made. Detangle fully, stretch the hair if that makes sense for your texture, and make sure the scalp is clean and moisturized enough to stay comfortable under the style.
A protective braid should not pull at the edges. That sounds obvious, but it’s the mistake I see most often. The hairline usually gives the first warning — tenderness, itching, little bumps, or a braid that feels tighter than the rest of the head. When that happens, the braid is too much, even if it looks neat.
Scalp comfort comes first
Use a light leave-in on your natural hair before sectioning, then seal with a small amount of oil only where your scalp actually needs it. More oil is not the answer. It can make the parts slippery and shorten the life of the style faster than people expect.
If your hair shrinks a lot, stretching it first can help the braid sit better and reduce uneven bulking inside the plait. I also like using medium-sized sections rather than tiny ones, because they keep the tension more even and the scalp calmer. For natural hair, comfort usually wins over drama.
And yes, a satin bonnet or scarf matters. The braid holds shape better overnight when it isn’t rubbing on cotton.
19. Butterfly Braids That Hold Up on Busy Days
Some braided styles look great only in perfect lighting. Butterfly braids are not supposed to be that fragile. The best versions still look decent after a long day, a car ride, a few gusts of wind, and whatever else the day throws at your hair.
The trick is to keep the parts clean, the base snug, and the loops shaped from the start. If you overpull the braid while setting it, the loops collapse later. If you leave the braid too loose, it frays early. That middle ground is the whole game.
I also like a small refresh kit for this style: a satin scarf, a travel-size mousse, a few bobby pins, and a tiny edge brush. You do not need a whole vanity bag. A quick touch-up at the roots and a gentle re-pancake of the outer loops can make the style look fresh again in less than 5 minutes.
The nice thing about butterfly braids is that they age in a forgiving way when they’re done well. A little softness adds character. A little frizz does not ruin the shape. And when the braid still holds its line after a full day of wear, that’s when it earns the right to be called a keeper.