Anyone who has spent four hours in a stylist’s chair knows the sinking feeling of seeing a twist begin to unravel on day five. You spent the money, you sacrificed your Saturday, and you endured the tension, only for the hair to decide it wants to go its own way. Afro twists are supposed to be the ultimate low-maintenance protective style, but they often fall victim to the “slippage” phenomenon, especially if your natural texture is on the softer side or if the synthetic fiber used is too silky.
The secret to a style that actually survives the three-week mark isn’t just about how tight you can pull—it’s about the friction between your natural hair and the extension. When you use the right kind of kinky or coarse hair, the fibers interlock with your own strands, creating a mechanical bond that defies gravity. It’s the difference between a knot that stays and a knot that slides. We are looking for that specific “grip” that only comes from high-quality Marley hair or specialized afro-textured bulk hair.
Maintenance plays a huge role, too, but you can’t maintain a foundation that wasn’t built to last. If the roots are loose from the jump, no amount of silk bonnets will save you. You need a technique that anchors the twist without causing traction alopecia. We’re talking about the “invisible root” method or the rubber band starter—hacks that veterans use to ensure their edges stay intact while the length of the twist remains juicy and hydrated.
If you’re tired of styles that look “fuzzy” after forty-eight hours, you have to be intentional about the selection. Not all twists are created equal. Some are designed for a weekend gala, while others are built for the woman who has a packed schedule and zero time for mid-week touch-ups. The following styles are the heavy hitters of the braiding world—the ones that hold their shape, embrace the natural frizz of 4C hair, and look even better as they age.
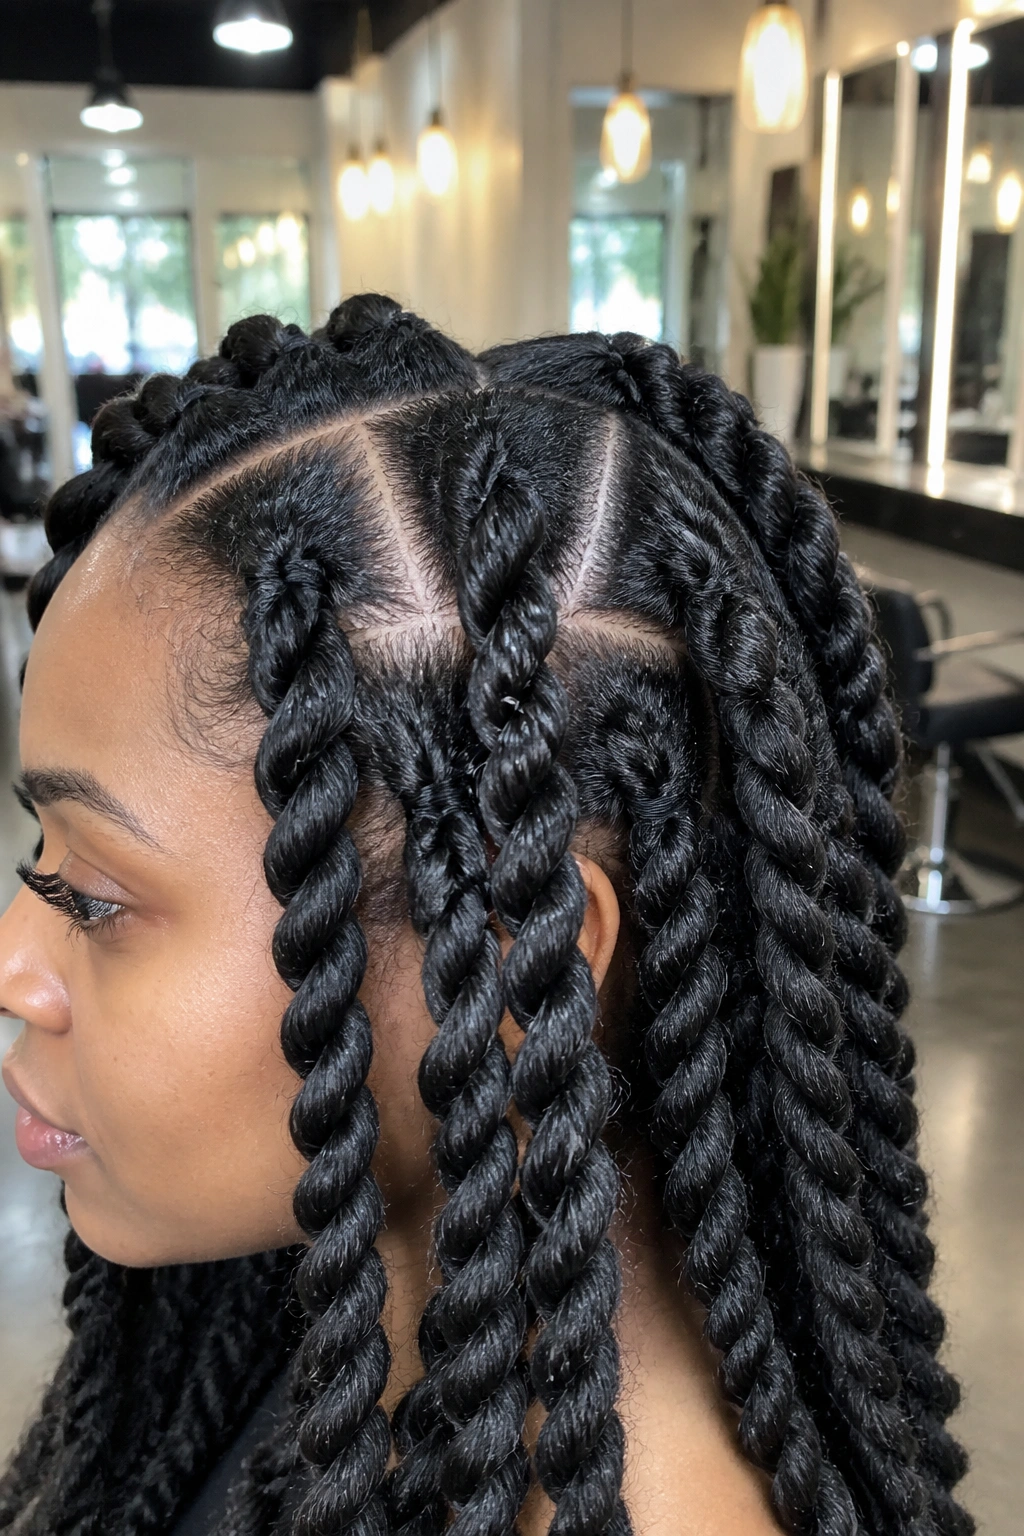
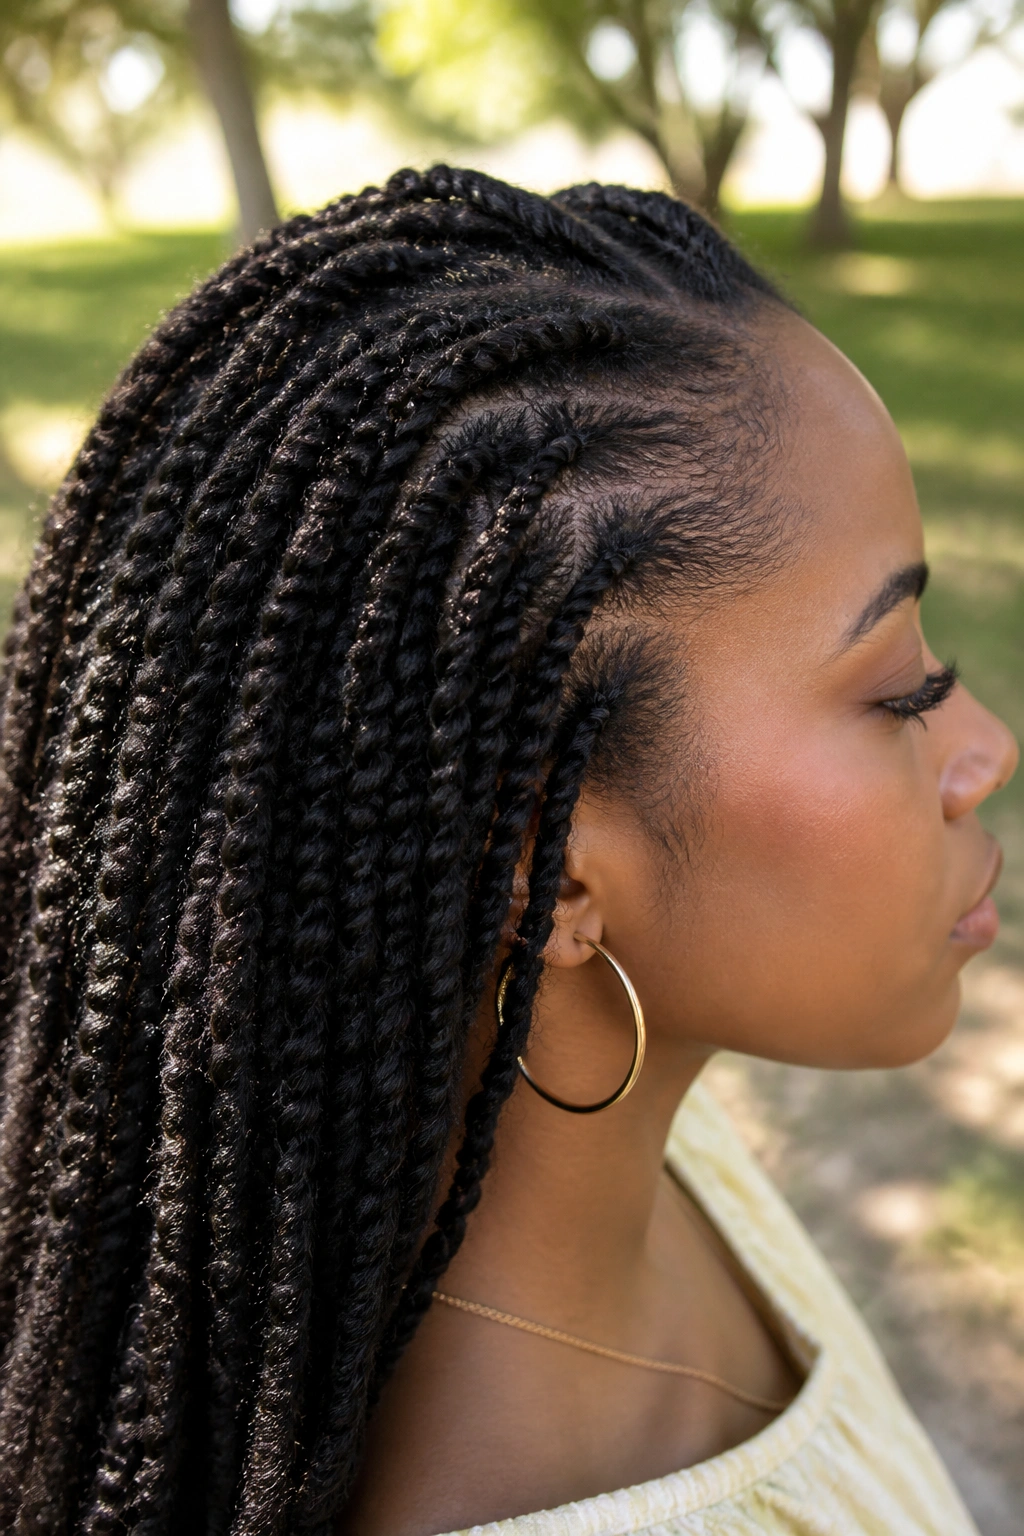
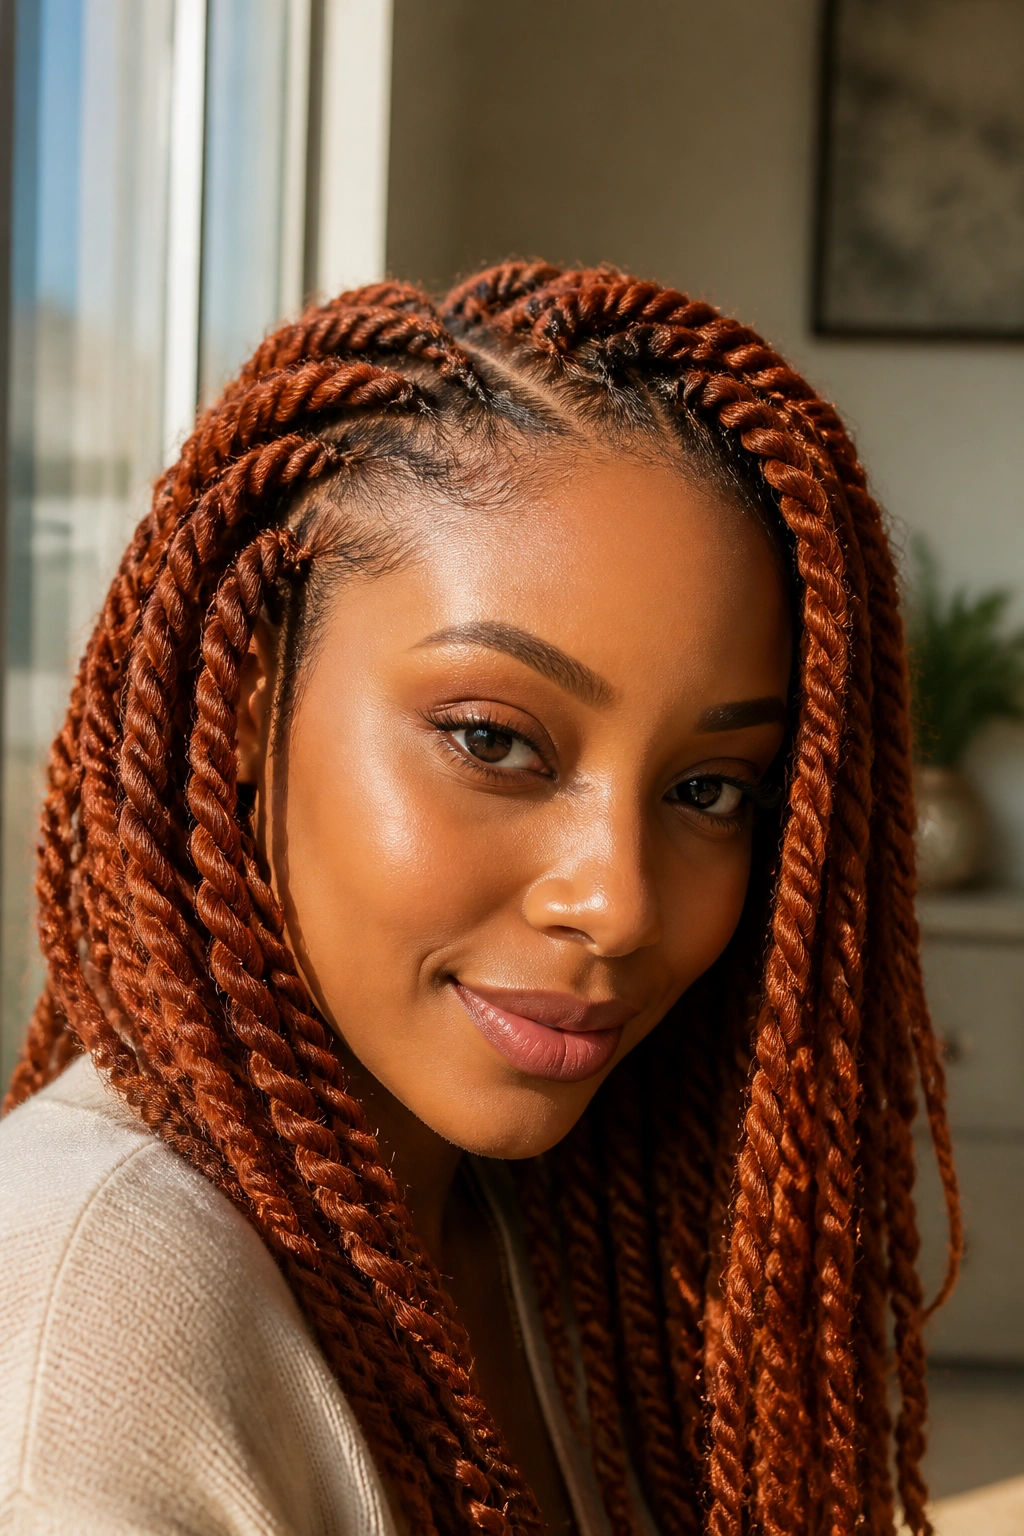
1. Classic Long Marley Twists with Coarse Texture
Most people gravitate toward Marley hair because it mimics the look of a natural blowout. The texture is rough, almost matte, and that is exactly why it lasts so long. Unlike silky Kanekalon, which can be slippery, Marley hair has a “tooth” to it. This means the individual fibers catch on each other, preventing the twist from untwisting itself from the bottom up.
Why Texture Matters for Longevity
The primary reason these stay put is the friction. When you twist two strands of coarse hair together, they essentially Velcro themselves in place. This is especially beneficial if you have a “halo” of frizz around your roots. Instead of the frizz looking like a mistake, it blends seamlessly into the matte finish of the Marley hair. You aren’t fighting your natural texture; you’re leaning into it.
Best Practices for the Ends
- Hot water dipping: Always dip the ends in boiling water to seal the twist and prevent fraying.
- Tapered ends: Thining out the hair at the very bottom allows for a more natural, secure finish.
- Oil sealing: Apply a bit of peppermint or jojoba oil to the ends after dipping to keep them from becoming brittle.
- Weight management: Don’t go too long if your hair is fine, as the weight of wet Marley hair can cause tension.
Pro tip: If you find the hair is too scratchy against your skin, a quick soak in apple cider vinegar and water before installation removes the alkaline coating that causes many people to itch.
2. Thick Havana Twists with a Rubber Band Base
Havana twists are the bigger, bolder cousin of the Marley twist. Because they use more hair per section, they can sometimes be prone to sliding right off the natural hair if the anchor isn’t secure. That’s where the rubber band method comes in. By creating a small, loose ponytail at the base with a high-quality, oil-coated rubber band, you create a permanent anchor point that cannot slip.
Look, some purists hate rubber bands, but if you use the ones specifically designed for hair and coat them in a bit of oil first, they won’t snap your strands. This foundation allows you to use much more hair for that chunky, voluminous look without worrying about the twist hanging by a thread after a week of sleeping on it. The sheer volume of Havana twists also means you have fewer “parts” on your scalp, which reduces the surface area available for frizz to take over.
It is a high-impact look that actually thrives on a bit of age. While other styles look “old” when the roots grow out, Havana twists just look more authentic. They begin to resemble soft locs over time, which is a vibe in itself. If you want a style that looks better in week three than it did on day one, this is the one to pick.
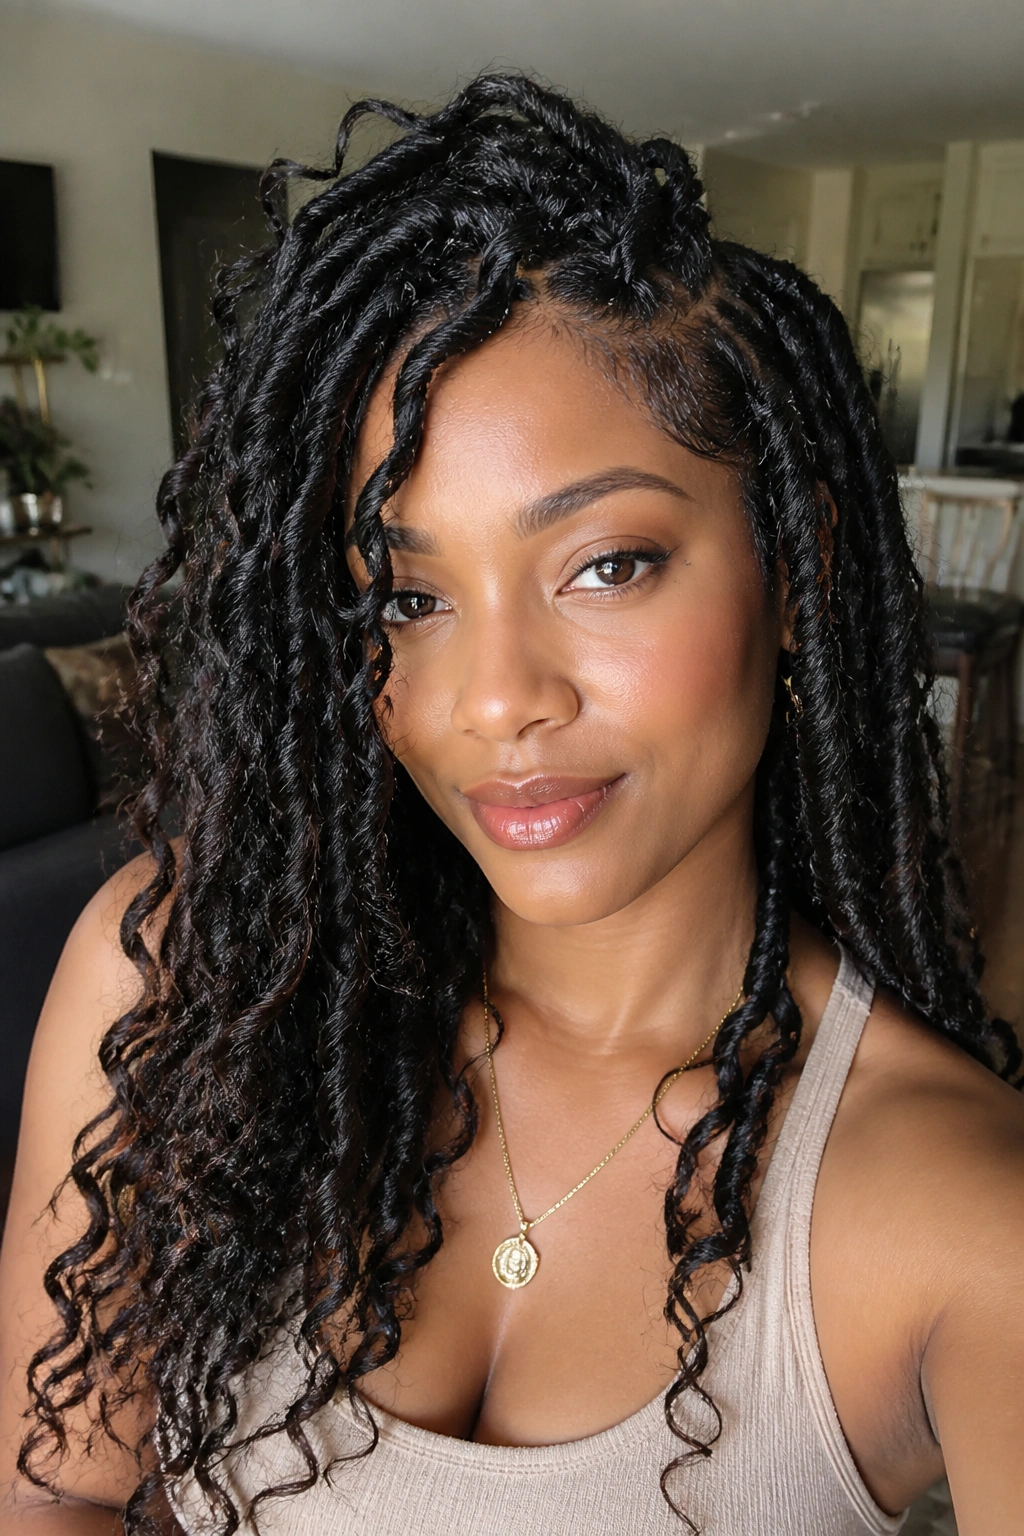
3. Distressed Passion Twists Using Water Wave Hair
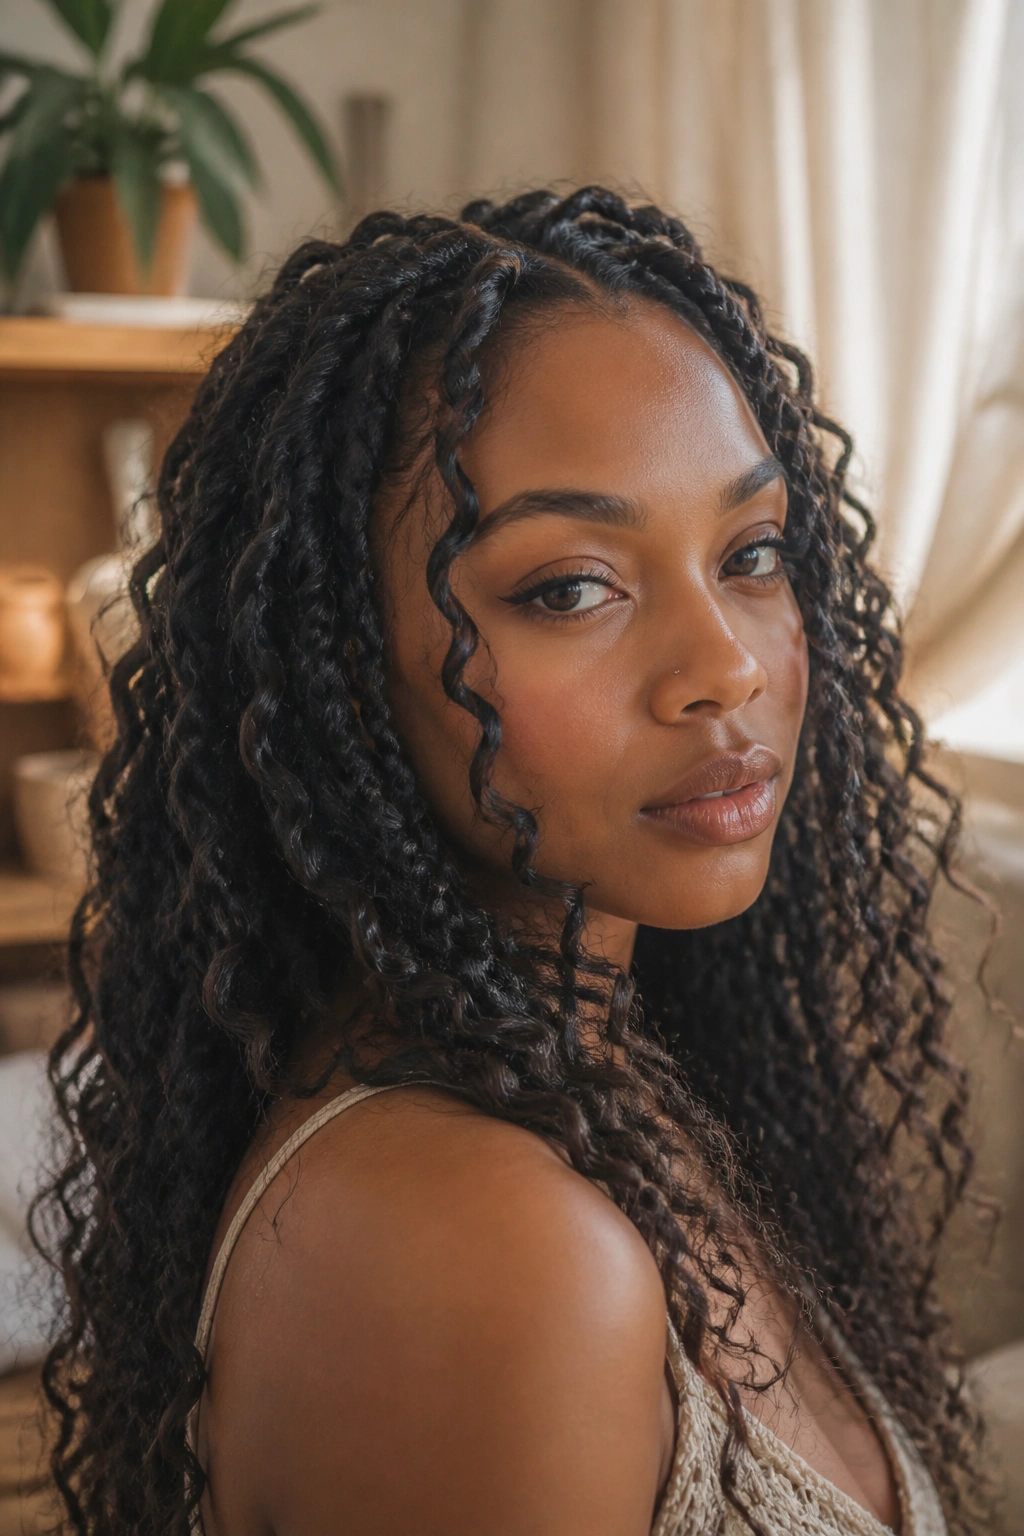
Passion twists are famous for their bohemian, curly aesthetic, but they are notoriously slippery. The “distressed” version solves this by intentionally creating texture and loops throughout the length of the twist. Instead of a smooth, uniform spiral, you’re essentially creating a series of tiny knots and tangles that lock the hair in place.
How the Distressed Look Works
When you pull bits of the hair out as you twist, you’re creating an uneven surface. This prevents the hair from sliding down the shaft of your natural hair. It’s a controlled messiness. If a piece of your own hair starts to pop out, it just looks like part of the “distressed” vibe rather than an unsightly mistake.
Is This Style for You?
Choosing Your Hair Type
You want to look for “Water Wave” or “Freetress” style hair for this. The curl pattern should be tight but manageable. If the hair is too silky, the distressed loops won’t hold their shape, and you’ll end up with a tangled bird’s nest. You want a fiber that feels slightly “crispy” to the touch—that’s the sign of a synthetic hair that will hold a loop without unraveling.
4. Short Spring Twists with a Crochet Anchor
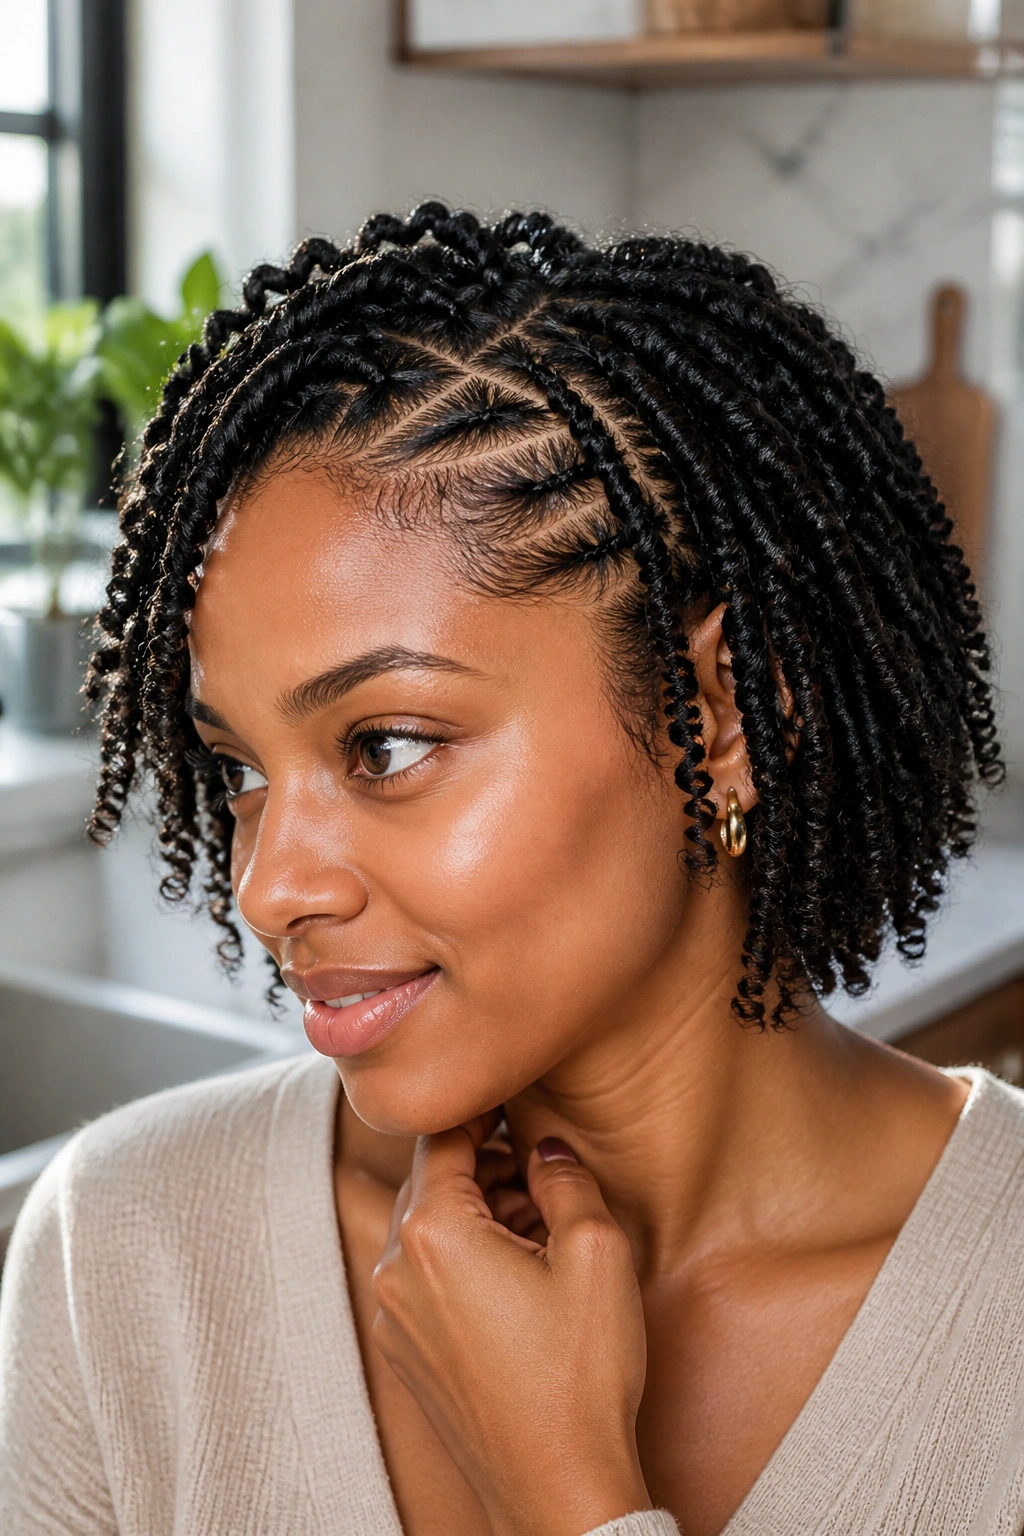
Spring twists are lightweight and bouncy, making them perfect for those who hate the “heavy head” feeling. However, because the hair is so springy, it tends to want to jump out of its original position. Using a crochet anchor—where you braid your natural hair into a small cornrow first and then loop the twist through—is the gold standard for security.
Historically, spring twists were done using the two-strand method from the root, but that often led to the “hanging by a thread” look after ten days. By switching to a crochet base, even just for the front rows, you ensure that the tension is distributed across a braid rather than a single point of hair. This keeps the twists looking fresh at the scalp for much longer than three weeks.
The hair itself is usually pre-separated, which saves a ton of time during installation. Because the hair is so light, you can actually wash your scalp while wearing these without the hair becoming an absorbent sponge that takes three days to dry. This makes it one of the most hygienic options for those who live active lifestyles or hit the gym daily.
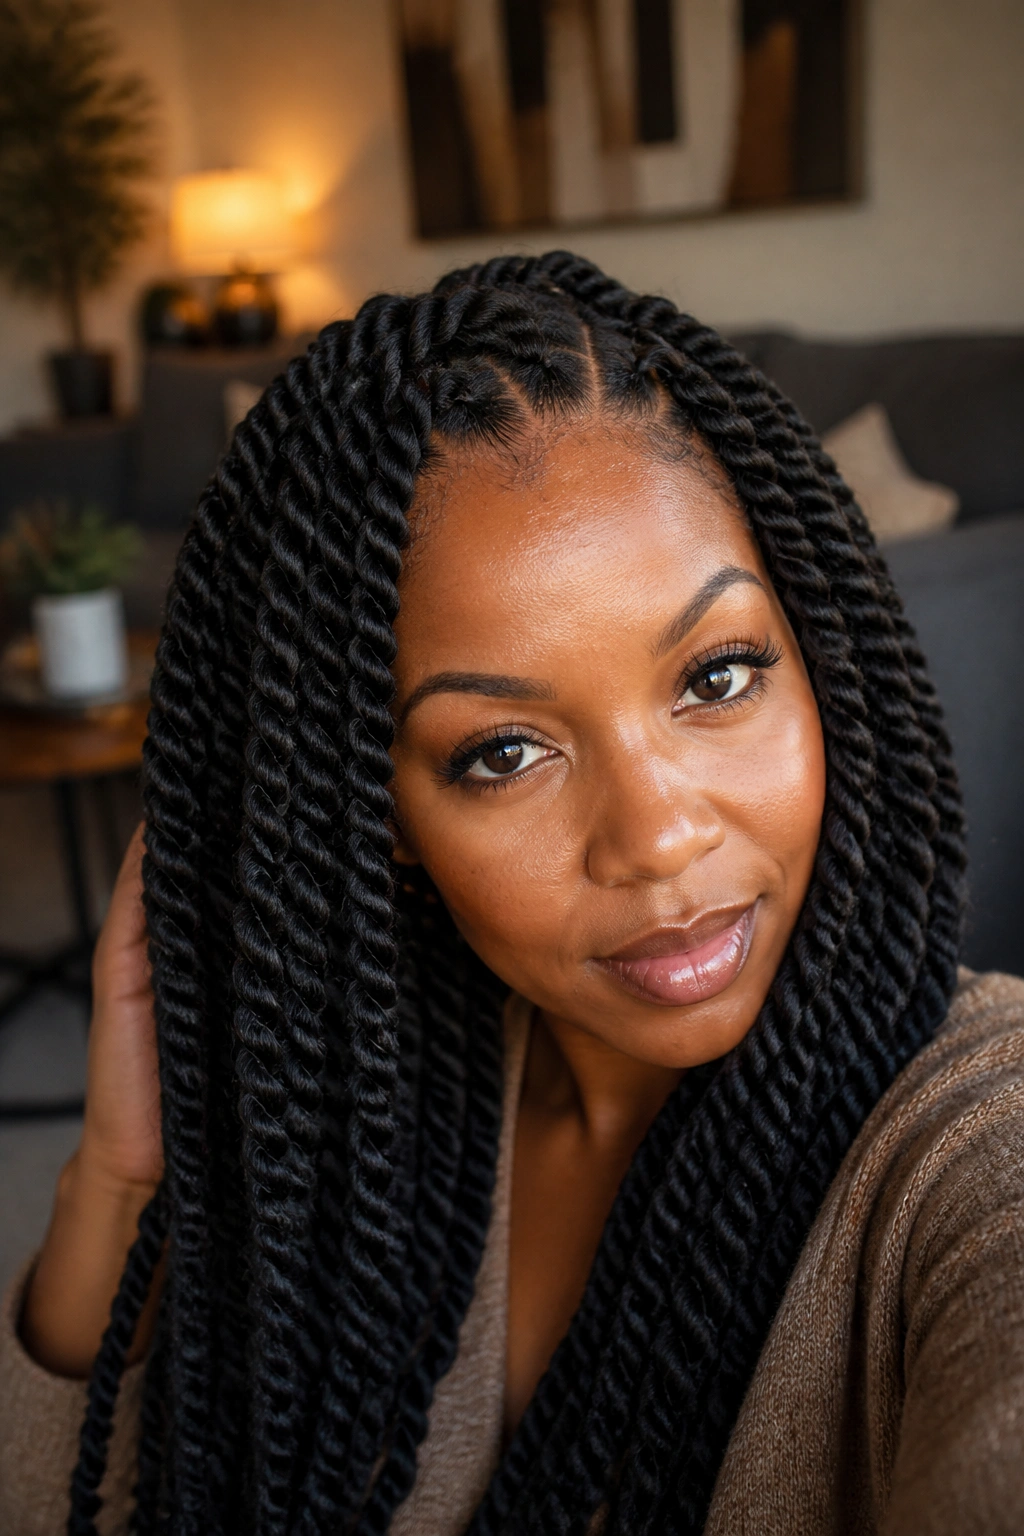
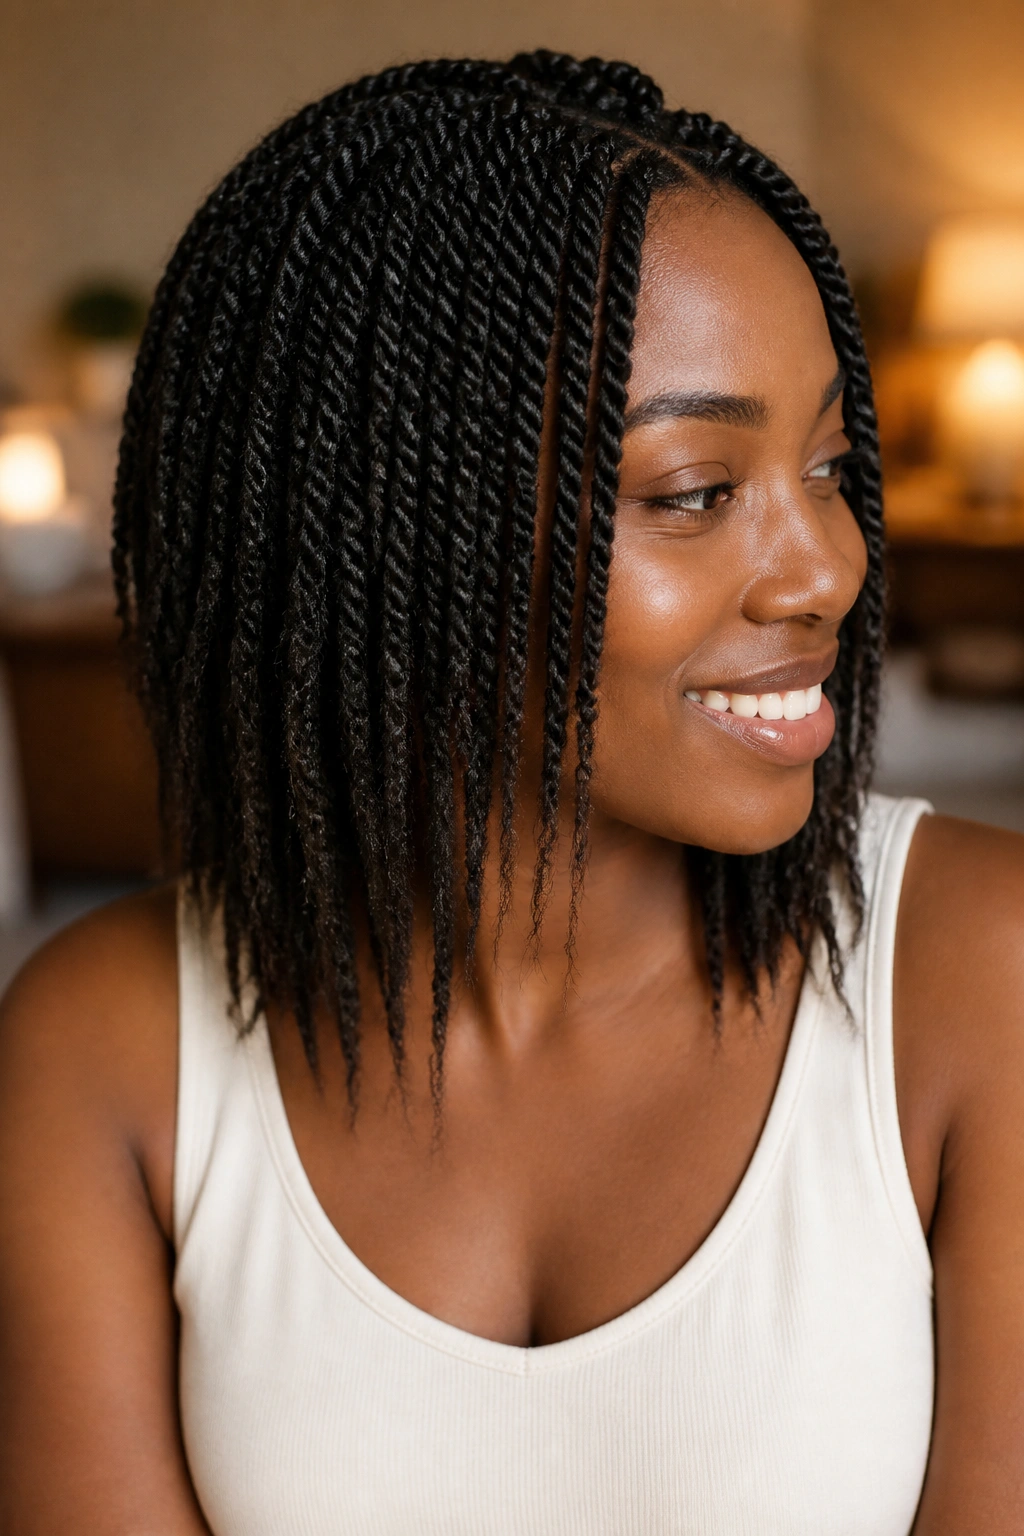
5. Nubian Twists with a Kinky Finish
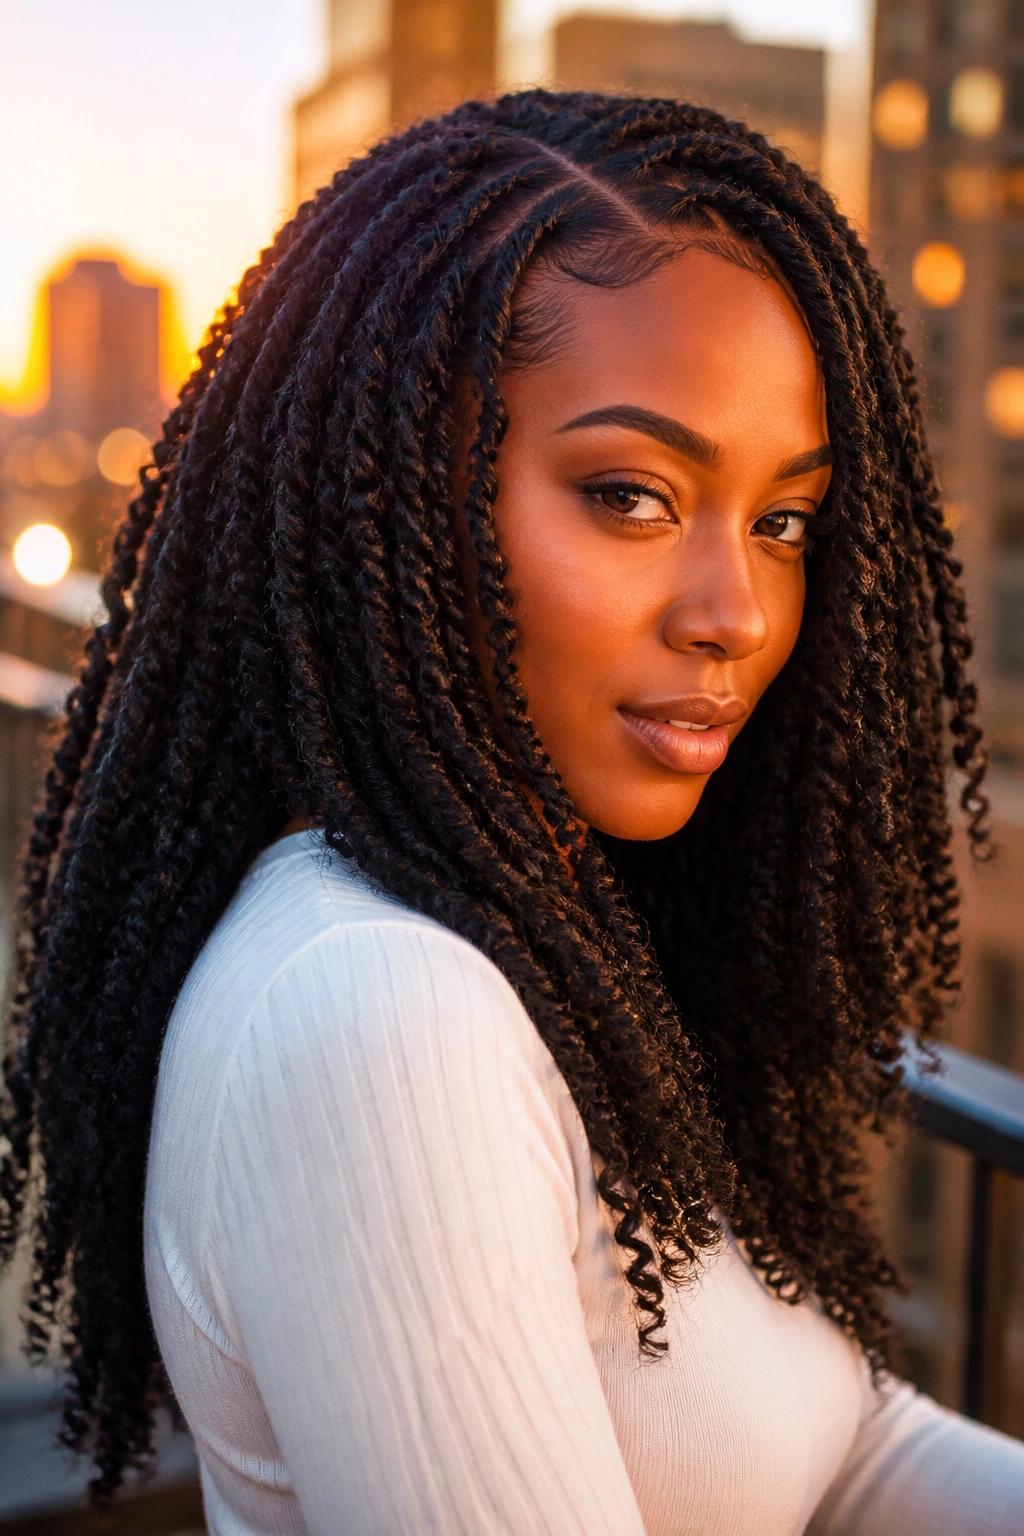
Nubian twists use a specific type of hair that is even tighter and more “kinked” than Marley hair. It usually comes in a pre-curled state that looks like a tight 4C coil. These are fantastic for longevity because the hair is almost impossible to untwist by accident. Once it’s in, it’s in.
The beauty of the Nubian style is its compact nature. These twists don’t swell as much as Havana or Marley twists, which means the “bulk” of the style stays consistent. You won’t find yourself with a head of hair that has doubled in size after a humid afternoon. They stay neat, tidy, and professional-looking for the duration of their lifespan.
If you are someone who struggles with “slippage” at the nape of the neck, Nubian twists are your best friend. The tight coil of the synthetic hair grabs onto those short, fine hairs at the back of your head and refuses to let go. It is a durable, rugged style that hides the “new growth” exceptionally well because the texture of the extension is so similar to the texture of the hair growing out of your head.
6. Invisible Root Afro Twists for a Seamless Look
The “invisible root” technique is the holy grail for anyone who wants their twists to look like they grew straight out of the scalp. Unlike the traditional method where you can see a braid or a knot at the base, this method involves starting the twist with your natural hair and gradually feeding in the extension.
Comparison: Traditional vs. Invisible Root
Traditional twists often show a distinct “V” shape at the root where the extension is looped. This “V” is a weak point; if it’s not tight enough, the whole thing slides. The invisible root method, however, wraps the extension hair around the natural hair at the very top. It’s more of a friction-based wrap than a knot.
Who Is This Best For?
This is the go-to for women with 4C hair who want to avoid the “braid-start” look. Because there is no braid at the base, there is less tension on the follicle. However, it does require a bit more skill to ensure it doesn’t slip. If done correctly, the twist stays anchored because the synthetic hair is essentially “molded” to your natural hair using a bit of edge control or braiding jam.
Longevity Factors
- Edge control choice: Use a water-based jam rather than a heavy wax to avoid buildup.
- Tension balance: The wrap must be firm but not tight enough to cause “white bumps” on the scalp.
- Hair prep: Natural hair should be freshly stretched for the best grip.
- Night care: A silk scarf is mandatory here to keep the “wrap” at the root from fraying.
7. Medium-Sized Kinky Twists with Curled Ends
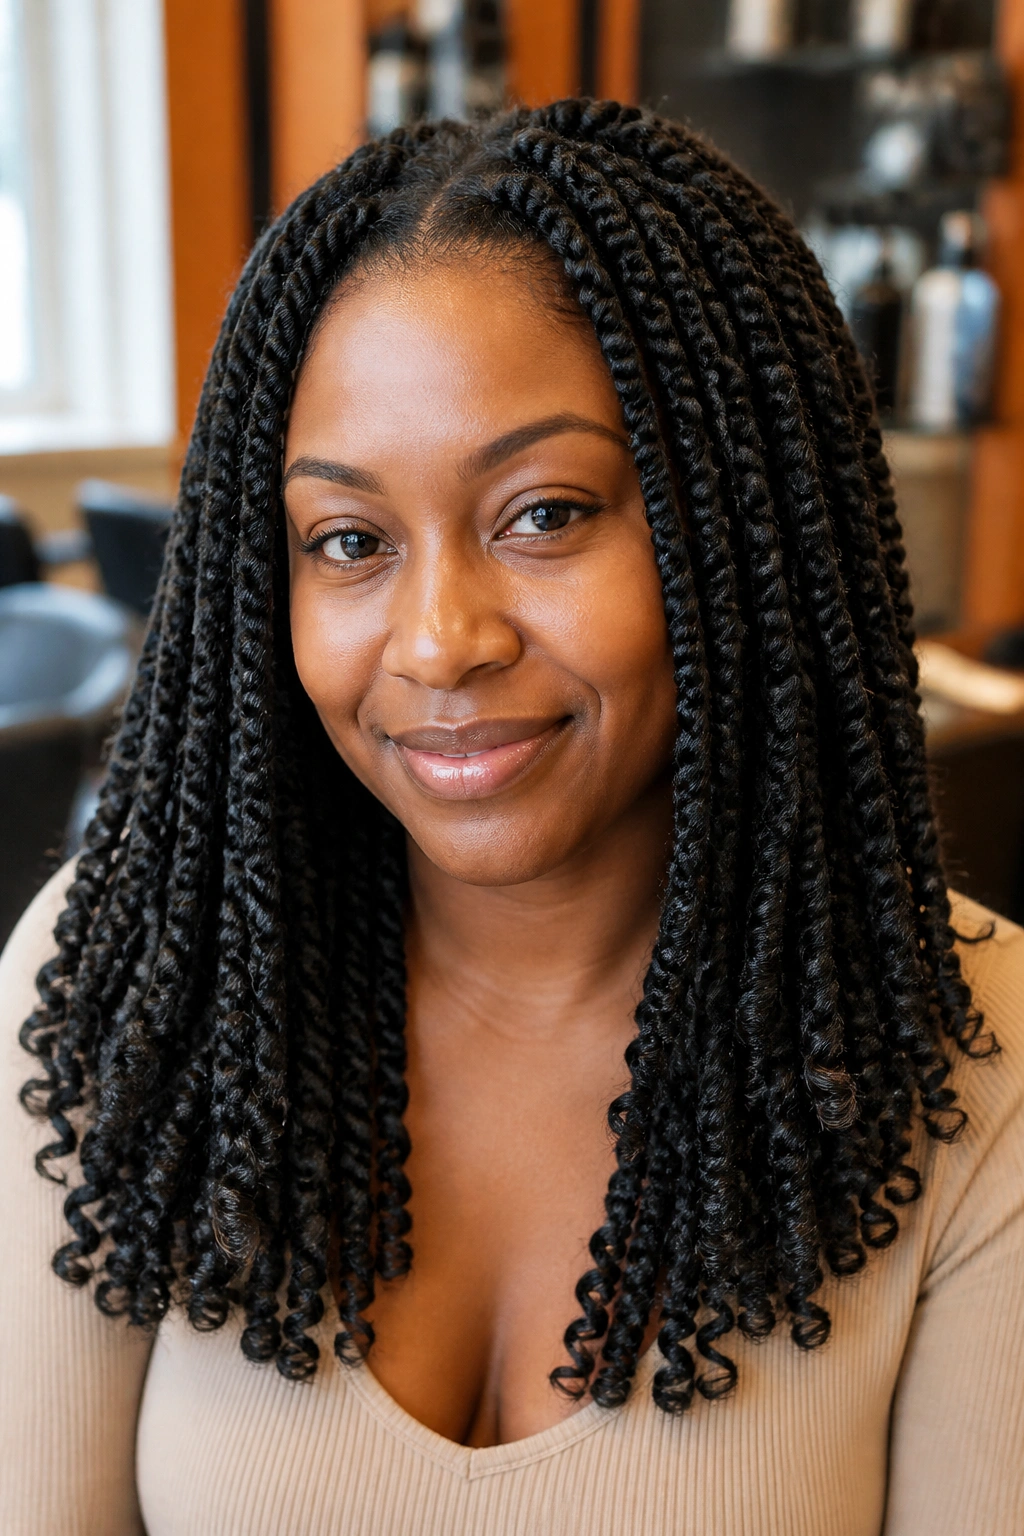
Kinky twists are the versatile middle ground. They aren’t as big as Havana twists, but they have more presence than micro twists. What makes them last for three weeks (and often longer) is the way the ends are finished. Instead of just dipping them straight, many stylists will roll the ends onto cold-wave rods before dipping them in hot water.
The Locking Mechanism of the Curl
By curling the ends, you create a physical barrier. The twist can’t unravel because it’s “locked” into a spiral shape at the bottom. It’s like putting a cap on a bottle. This is a game-changer for people whose twists always seem to come undone at the tips. Plus, the curled ends add a bit of weight that helps the twists hang straight rather than sticking out at odd angles.
Why It Works for Busy Schedules
- No re-twisting: The curled ends stay set for weeks.
- Less frizz: The uniform curl distracts the eye from any frizz along the shaft.
- Easy styling: They look great in a high bun or left down.
- Visual interest: The transition from a matte twist to a shiny curl is very flattering.
Pro tip: Use a little bit of mousse on the curls once a week to keep them defined and prevent them from matting together.
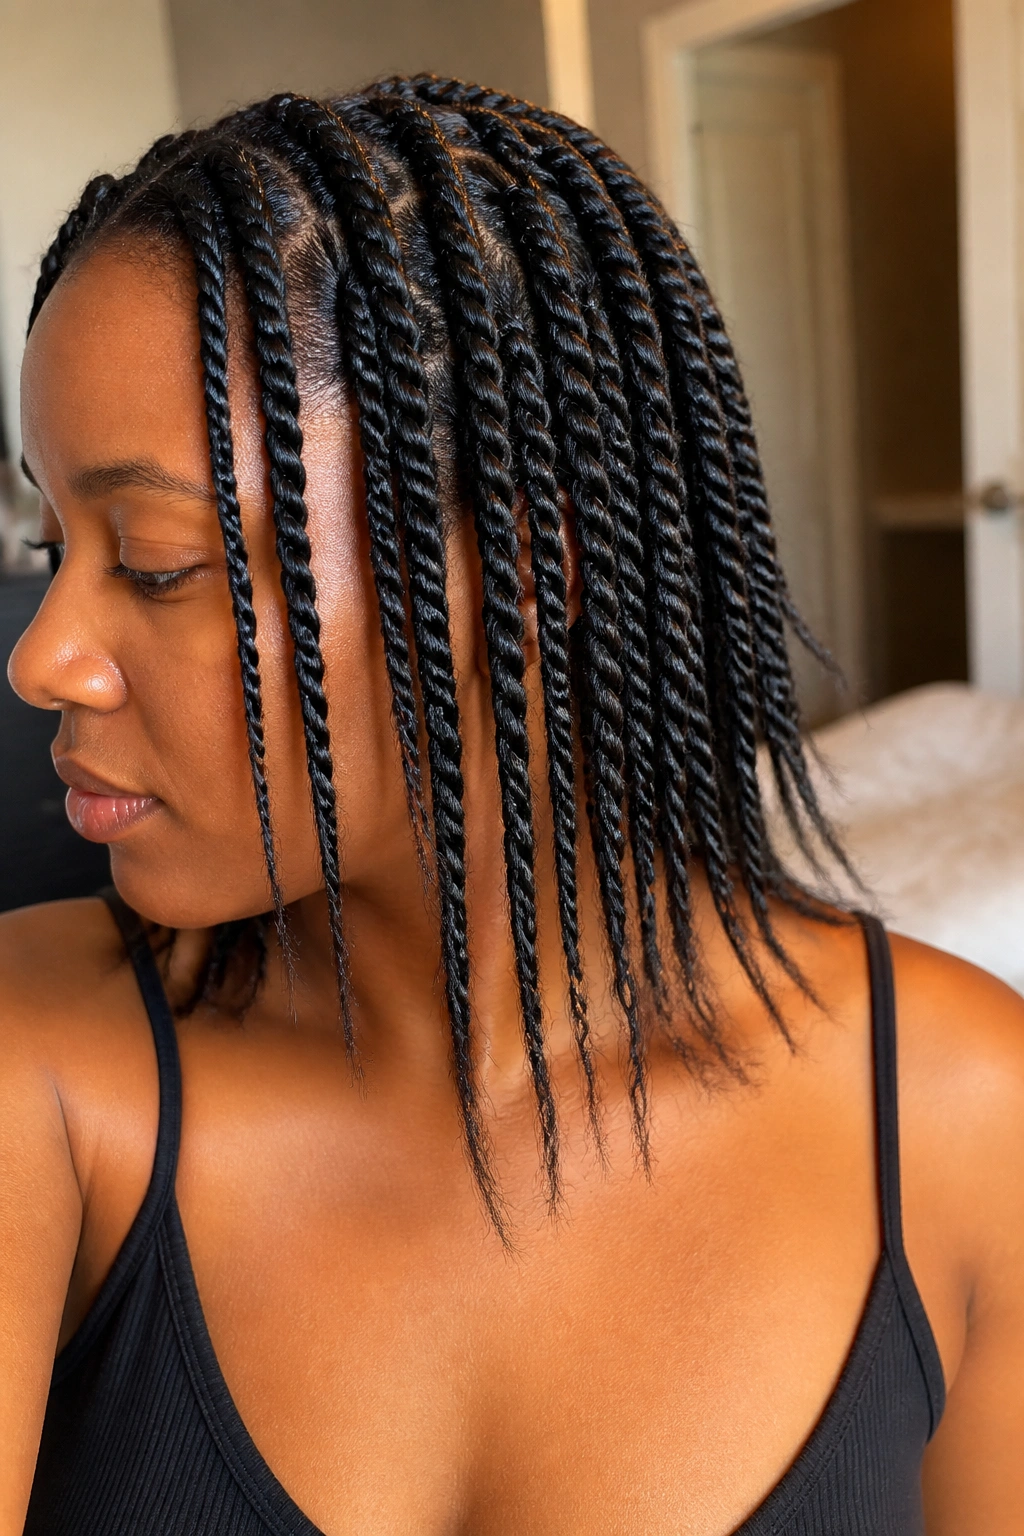
8. Micro Afro Twists for Maximum Scalp Access
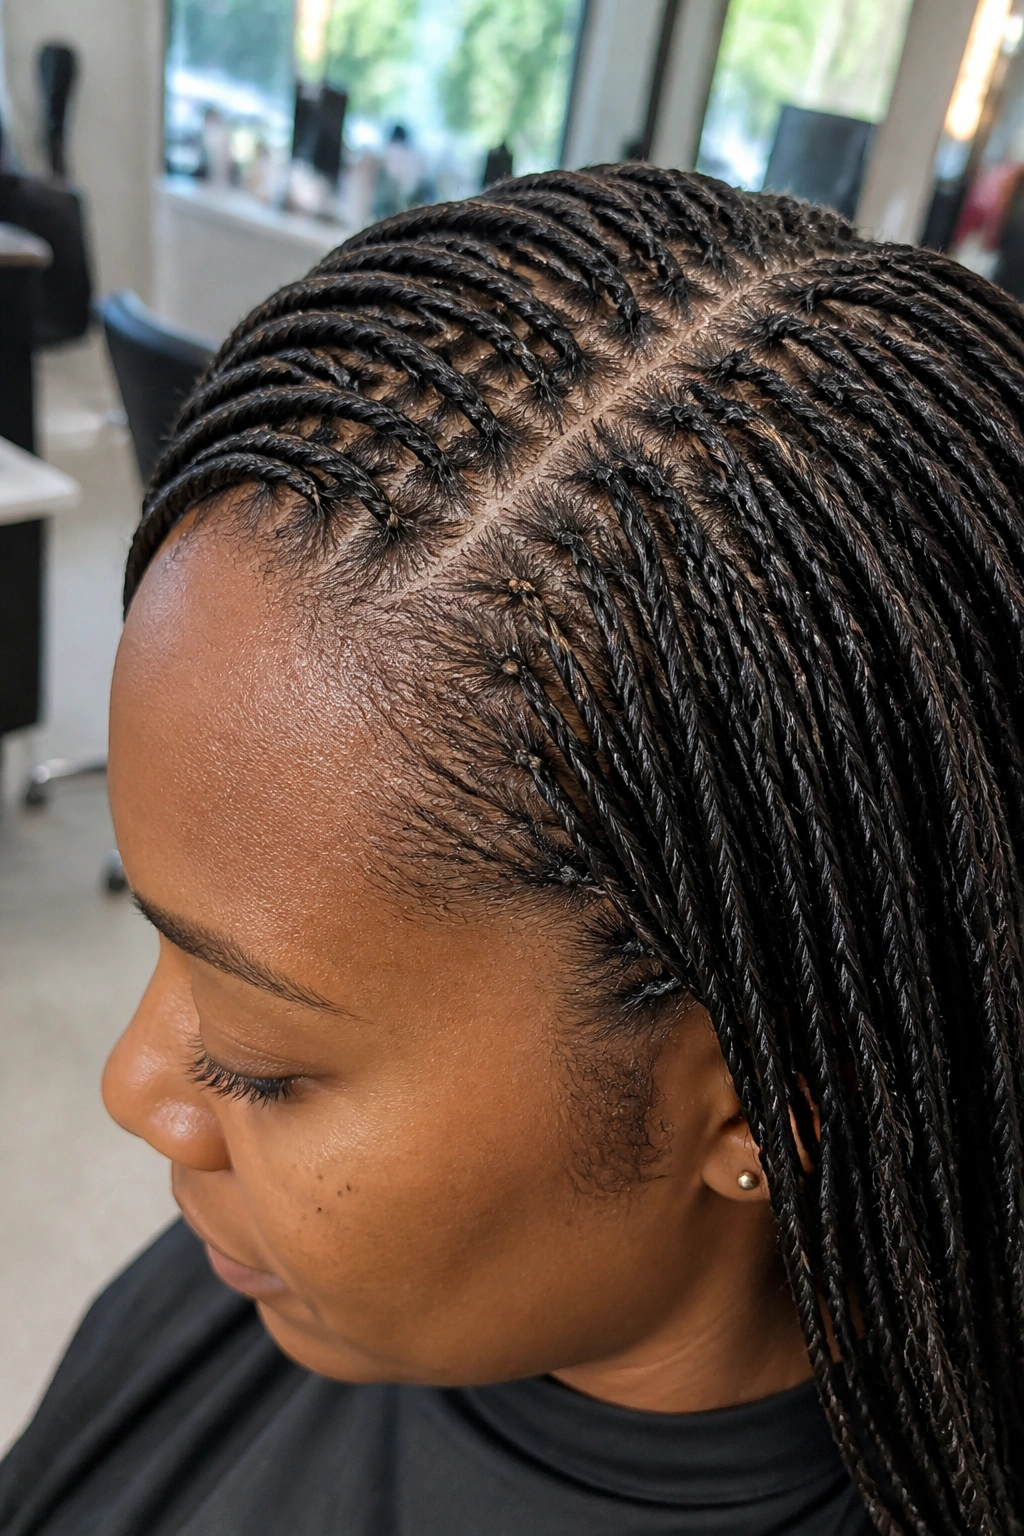
Micro twists take the longest to install, but they are arguably the most durable. Because each section is so small, there is very little weight pulling on any individual strand of hair. This significantly reduces the risk of the “sliding” effect.
The “Why” behind their longevity is simple math. In a head of jumbo twists, you might have 20 anchors. If one fails, you’ve lost 5% of your style. In a head of micro twists, you might have 150 anchors. The structural integrity is much higher. You can also get closer to the scalp with micro sections, which means the style looks “fresh” for an extra week compared to larger sections.
One thing to watch for with micros is the takedown. Because the twists are so small, they can begin to loc if left in too long. Three to four weeks is the sweet spot. Any longer, and you’re risking a very difficult detangling session. But for those three weeks, you’ll have a style that is incredibly versatile—you can even style them like loose hair, putting them in braids, ponytails, or intricate updos without any bulk.
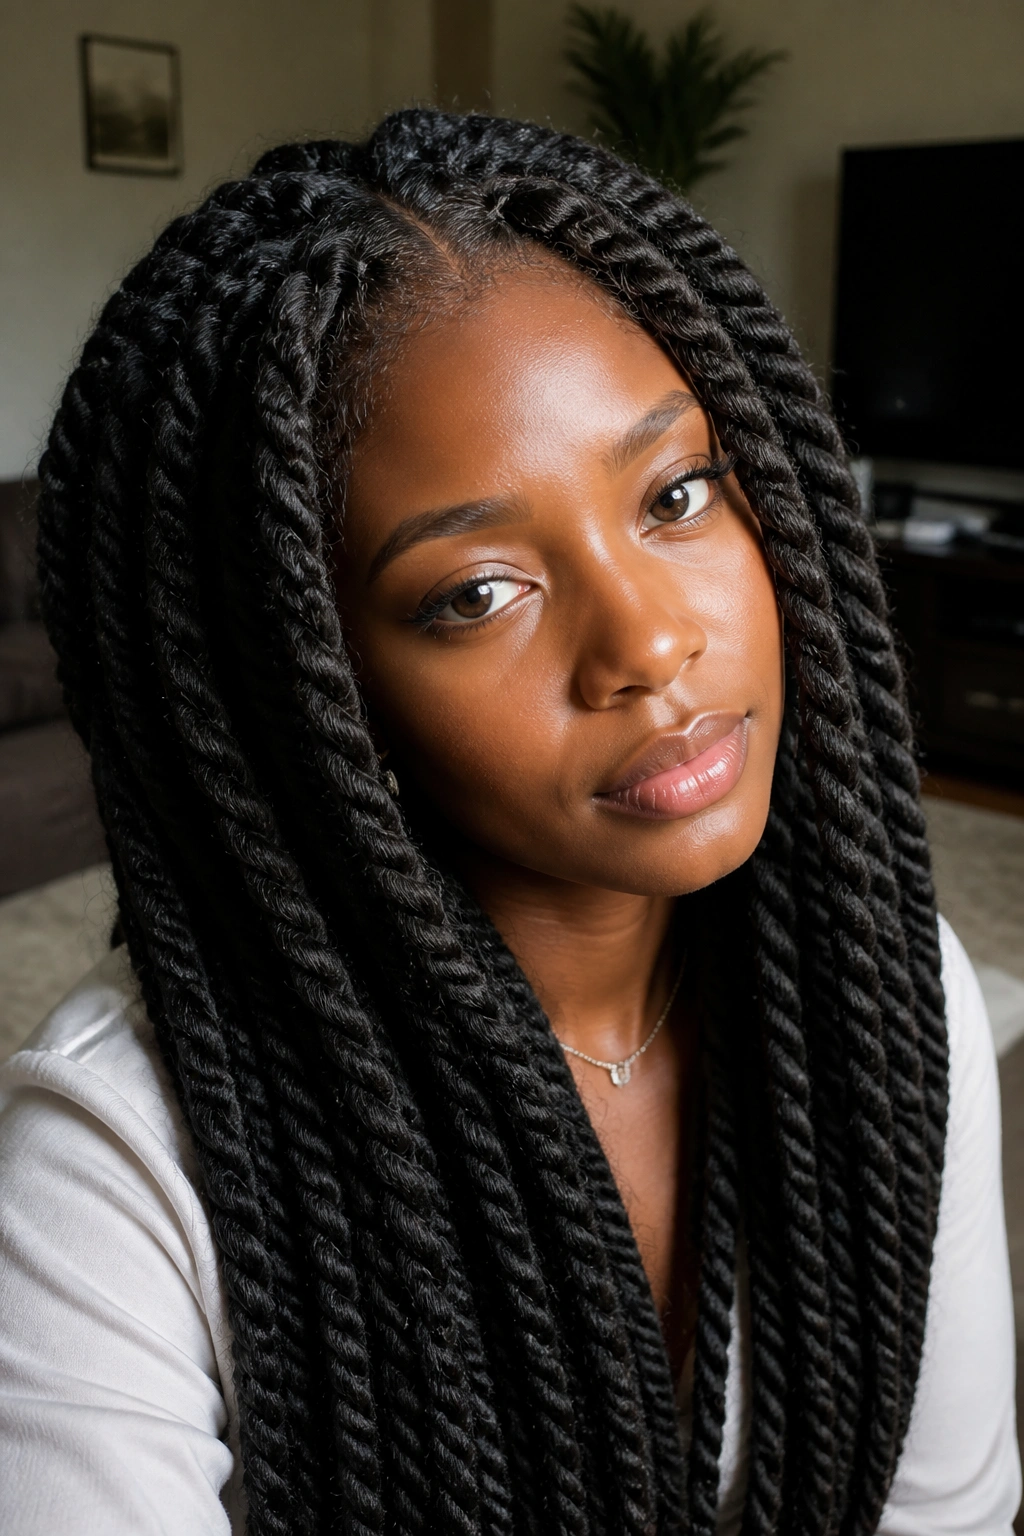
9. Jumbo Senegalese Twists with Afro-Texture Hair
Standard Senegalese twists use silky Kanekalon hair, which is beautiful but can be a nightmare to keep in place. However, when you perform the same technique using afro-textured hair, the results are much more stable. Jumbo sections are great because they get you in and out of the stylist’s chair quickly, but you need that texture to ensure they don’t fall out while you’re sleeping.
Why This Style Works
Does the weight of jumbo twists concern you? It should. But with afro-textured hair, the fibers are often lighter and more voluminous than the dense, silky alternatives. You get the look of a thick, juicy twist without the neck-straining weight. The kinky texture also hides the “braid-in” point much better than silky hair does.
How to Style It
- High Ponytail: Use a thick, fabric-covered elastic to avoid snagging.
- Low Bun: Great for professional settings.
- Half-Up: Shows off the volume while keeping hair out of your face.
- Side Sweep: Uses a large decorative clip for a formal look.
10. Bohemian Afro Twists with Human Hair Intermixed
This is a premium version of the afro twist. By mixing in strands of human hair (or high-quality curly synthetic hair) into a base of Marley twists, you get a “messy-chic” look that is designed to look better over time. It’s often called the “Boho” look.
The secret to why this lasts three weeks is that the “base” is a sturdy Marley twist. The curly strands are just decorative. Even if the curls start to frizz, it actually adds to the aesthetic. Most styles fail when they start to look “unpolished,” but this style is born unpolished. It’s a deliberate, artistic choice that masks the natural aging process of the hair.
When you’re choosing hair for this, don’t skimp on the curly pieces. If you use cheap synthetic curls, they will mat into a single dreadlock within five days. Using human hair for the curly “tassels” ensures they stay soft and can be refreshed with a little water and leave-in conditioner. It’s an investment in your sanity.
11. Ombre Root Afro Twists for Growing Out Color
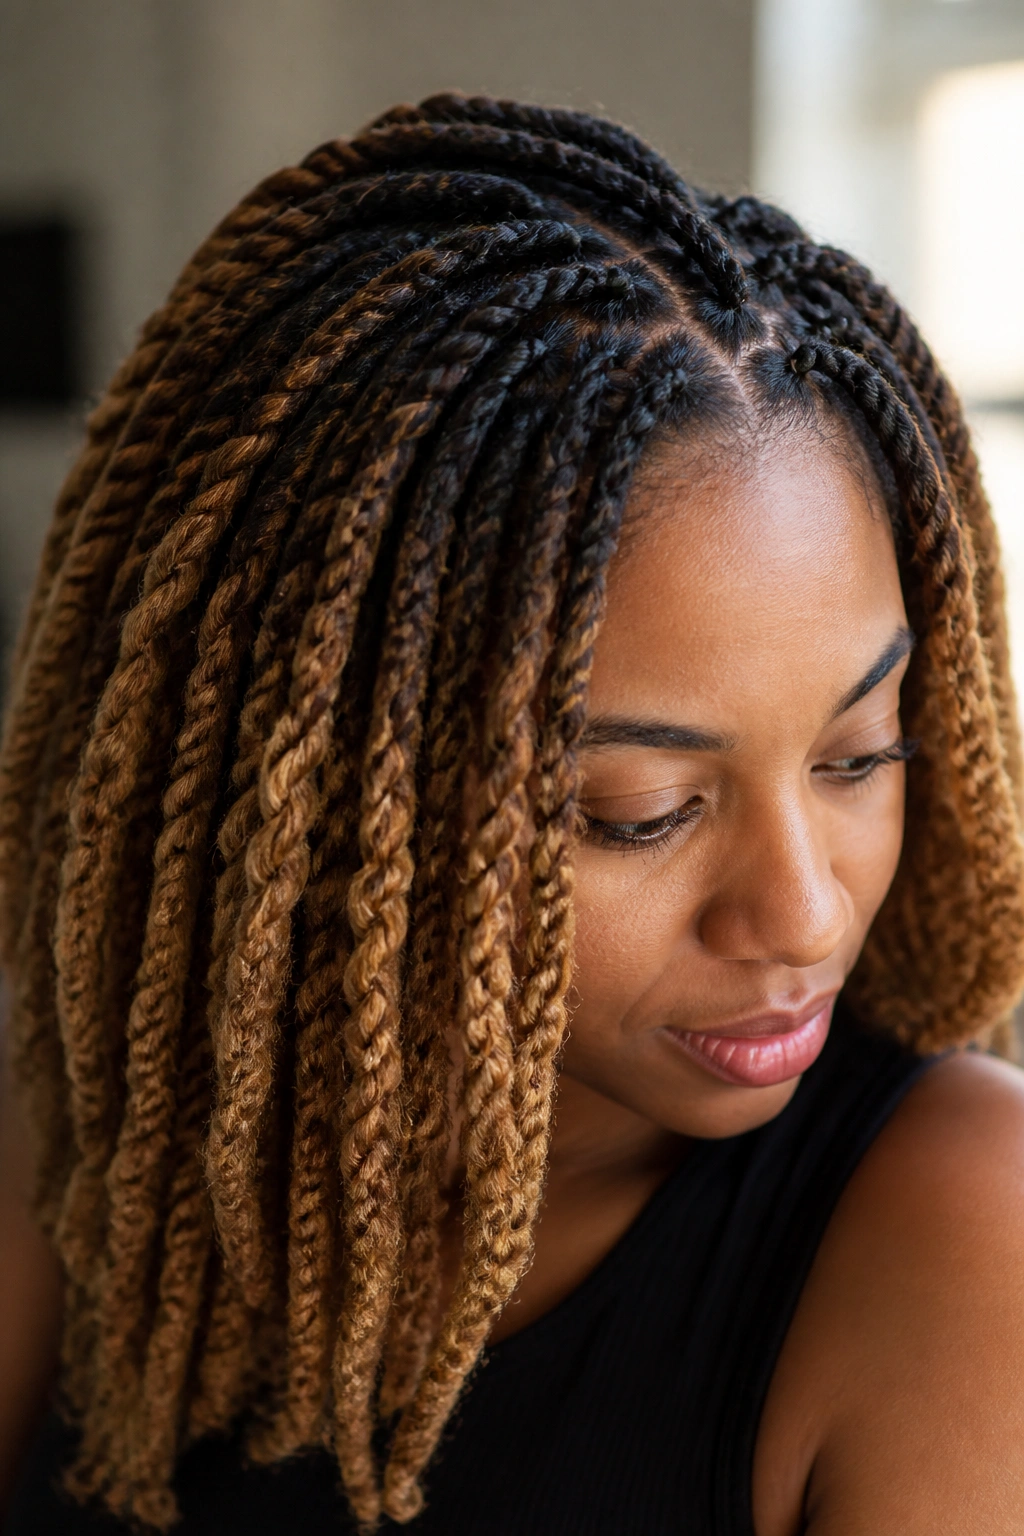
If you have dyed hair, you know the struggle of the “roots showing” through your braids. Ombre afro twists use a darker color at the root and transition into a lighter shade. This is a brilliant longevity hack because as your hair grows out, the transition remains seamless.
The visual trick here is that the “new growth” blends into the dark roots of the extension. It makes the style look deliberate even as it moves further down the hair shaft. From a technical standpoint, these are often done with the “feed-in” method, which allows for a very flat and secure base.
You’ll find that people who choose ombre or rooted colors tend to keep their styles in longer because they don’t have that “clock ticking” feeling when their natural hair color starts to peek through. It is the ultimate “set it and forget it” color choice for the busy professional.
12. Shoulder-Length Afro Twists with Tapered Ends
Length is often the enemy of longevity. The longer the twist, the more it rubs against your clothes, your chair, and your seatbelt. This friction creates frizz and can eventually cause the ends to unravel. By opting for a shoulder-length style, you eliminate a huge amount of that daily wear and tear.
Shoulder-length twists are also lighter on the edges, which is crucial if you have a sensitive scalp. The tapered ends are achieved by “feathering” the hair before you start twisting, making the bottom of the twist much thinner than the top. This prevents the ends from feeling “blunt” and heavy, and it makes the hot water sealing much more effective.
The look is bouncy, youthful, and very manageable. You can wear it down without it getting caught in your jewelry, and it dries much faster after a wash than waist-length hair. It’s a practical choice that doesn’t sacrifice any of the “cool factor” of the afro-textured look.
13. Side-Parted Afro Twists with a Flat-Twist Detail
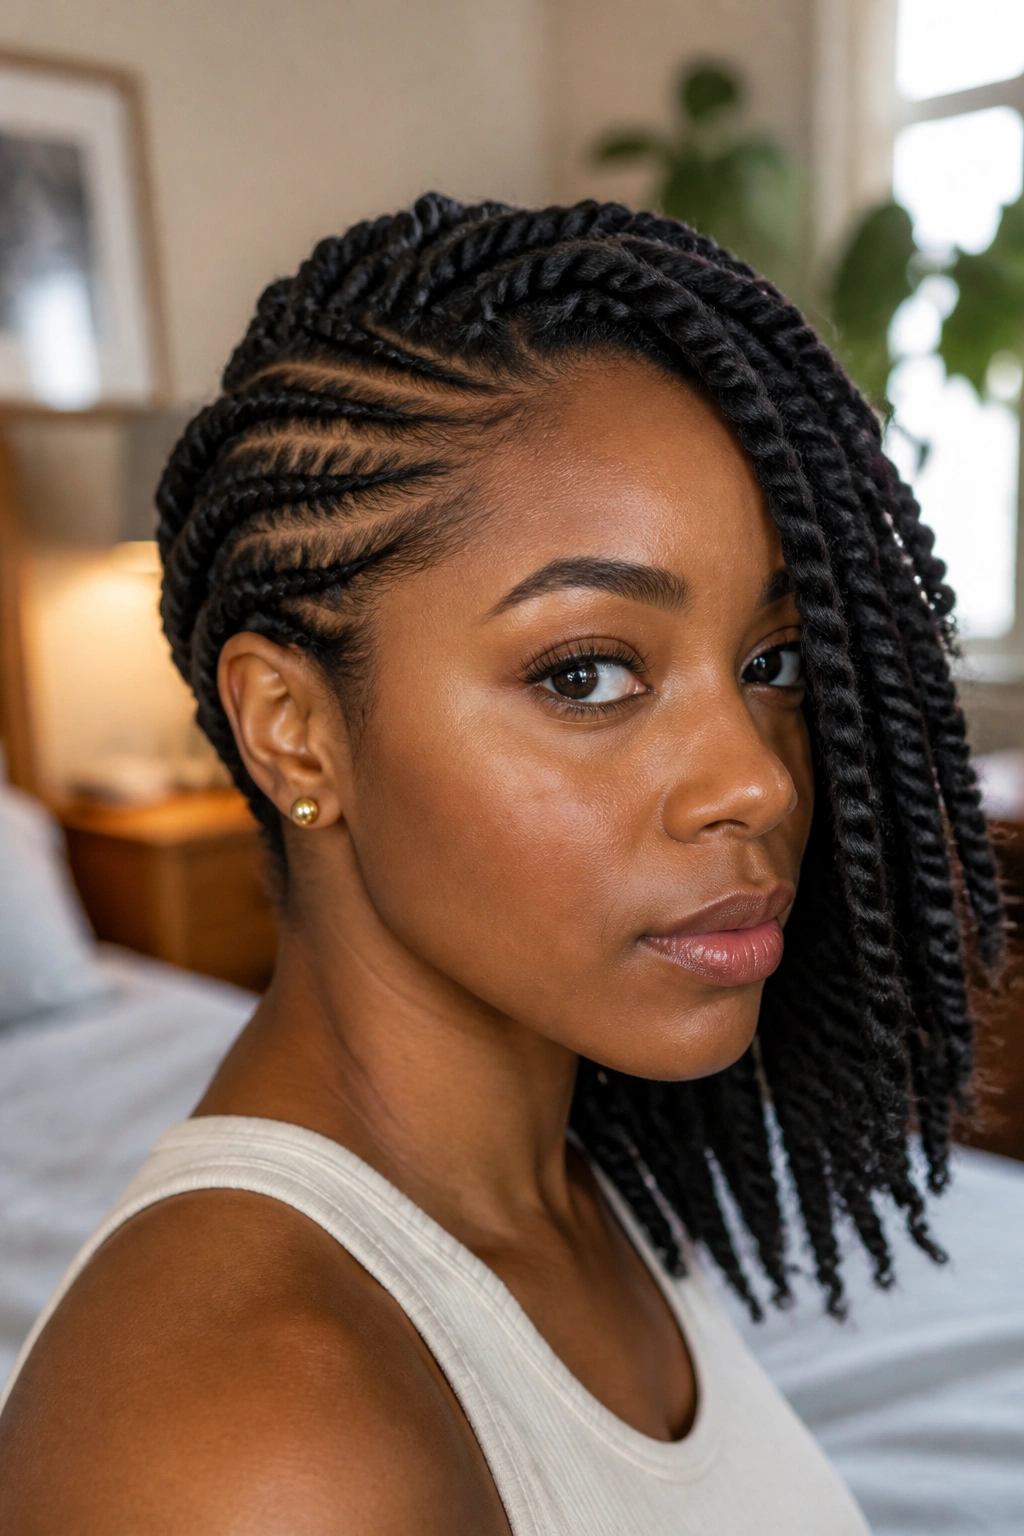
Adding a few flat twists to one side of your head isn’t just a style choice—it’s a structural one. Flat twists are essentially cornrows made of two strands, and they sit tight against the scalp. By incorporating these into your afro twist style, you’re securing a portion of your hair in a way that is virtually impossible to loosen.
The Benefit of Asymmetry
When you have a fixed part with flat twists, you aren’t constantly moving the hair back and forth. This reduces the manipulation of the roots. Less manipulation equals less frizz and a longer-lasting style. It also gives you a “sleek” side and a “voluminous” side, which is very flattering for most face shapes.
Maintenance Checklist
- Scalp Oil: Use a nozzle-tip bottle to apply oil directly to the parts of the flat twists.
- Satin Pillowcase: Since you might shift during the night, a satin pillowcase is a backup for your bonnet.
- Edge Brush: Keep the baby hairs laid to maintain the “sleek” side of the style.
- Avoid Heavy Gels: You don’t want “flaking” in your parts, so choose your products wisely.
Pro tip: If the flat twists feel too tight, don’t wait. Use a warm, damp washcloth and press it against the scalp to help the hair relax slightly.
14. Copper-Toned Afro Twists for a Warm Aesthetic
Copper and ginger tones are incredibly popular for afro twists because they complement a wide range of skin tones beautifully. But beyond the color, there’s a reason these styles seem to hold up so well: the hair used for these colors often has a slightly different manufacturing process that results in a very “grippy” texture.
While jet-black hair can sometimes be too smooth, colored synthetic hair often has a bit more “grit” to it. This is a secret known only to those who have tried every color in the book. The copper fibers interlock beautifully with 4C hair.
This color also hides “lint” much better than black hair. One of the biggest reasons people take their twists out at the three-week mark is the buildup of white lint from scarves and sweaters that gets trapped at the root. On copper or honey-blonde hair, this lint is much less visible, allowing you to stretch the style just a little bit longer while still looking clean.
15. Two-Strand Twists with Natural Hair (No Extensions)
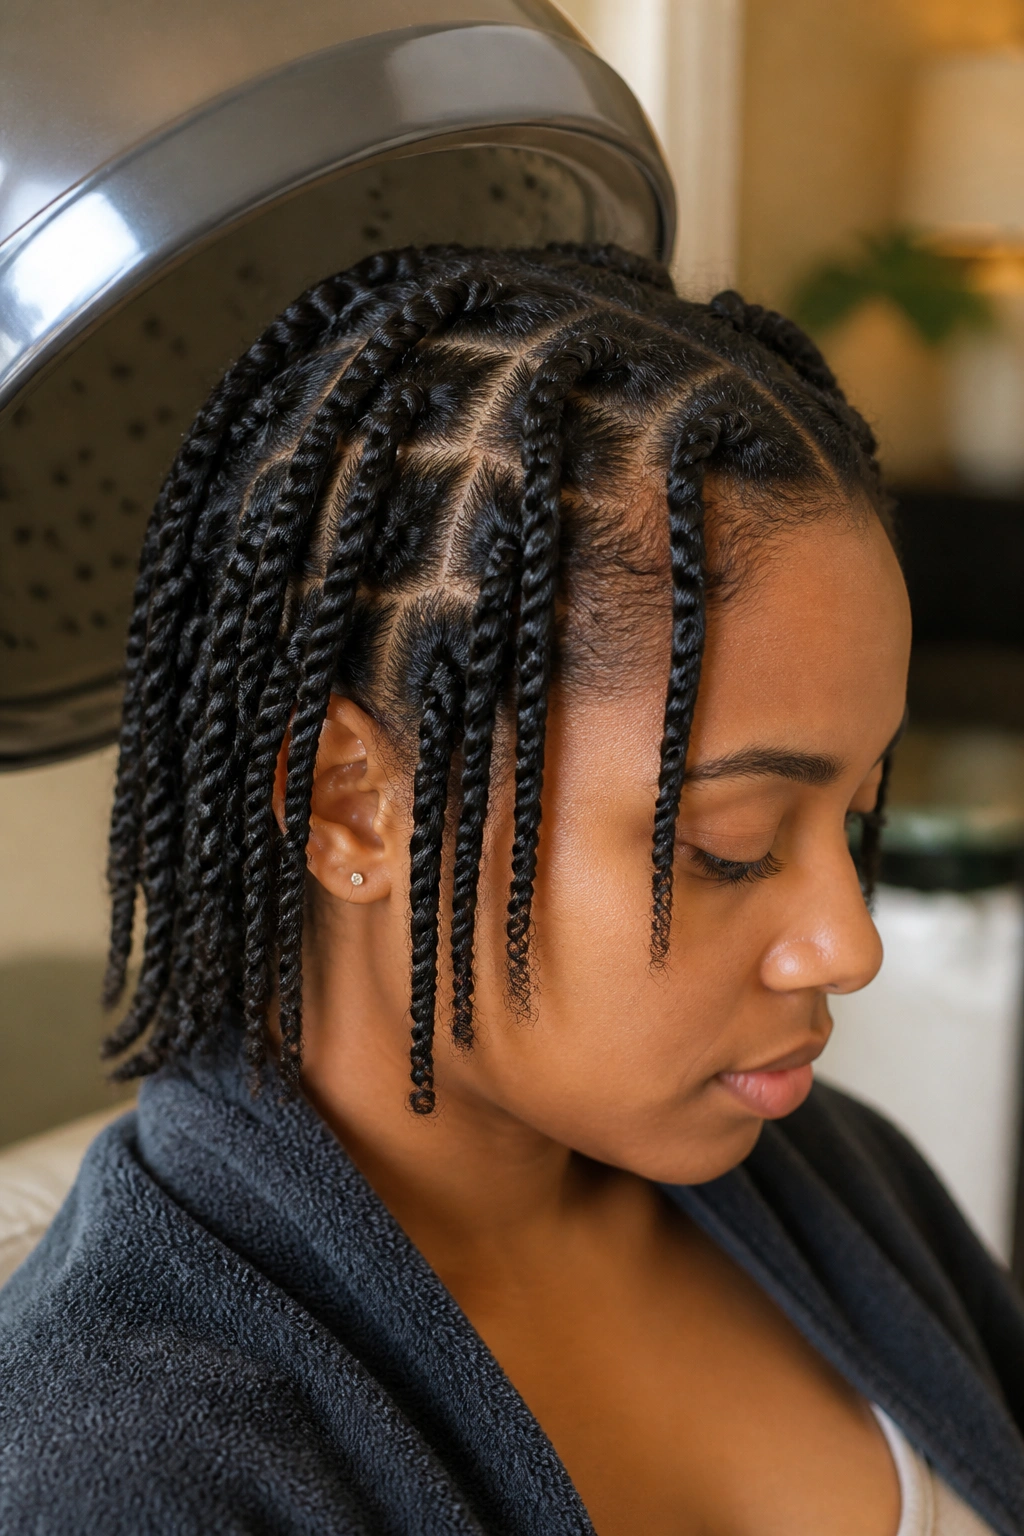
We can’t talk about afro twists without mentioning the original: using your own natural hair. If you have enough length and density, a “mini-twist” style with no extensions can easily last three weeks if the preparation is right.
The key to making natural twists last is “setting” them. This isn’t just twisting on damp hair and hoping for the best. You need a high-hold foaming mousse or a twisting butter with a bit of wax in it. Once the twists are in, you must stay under a hooded dryer or use a blow-dryer to “lock” the moisture and the product into the hair. This creates a “cast” that prevents the hair from shrinking and frizzing too quickly.
Natural twists are the ultimate in scalp health. Since there is no added weight, your follicles can rest. You can also wash these twists every single week. The trick is to wear a stocking cap while washing to prevent the agitation from unraveling the twists. Squeeze the water out, don’t rub. By week three, your hair will have “loc’d” into the shape, and the definition will be incredible when you finally do a twist-out.
16. Flat-Twist Back with Afro Twist Front
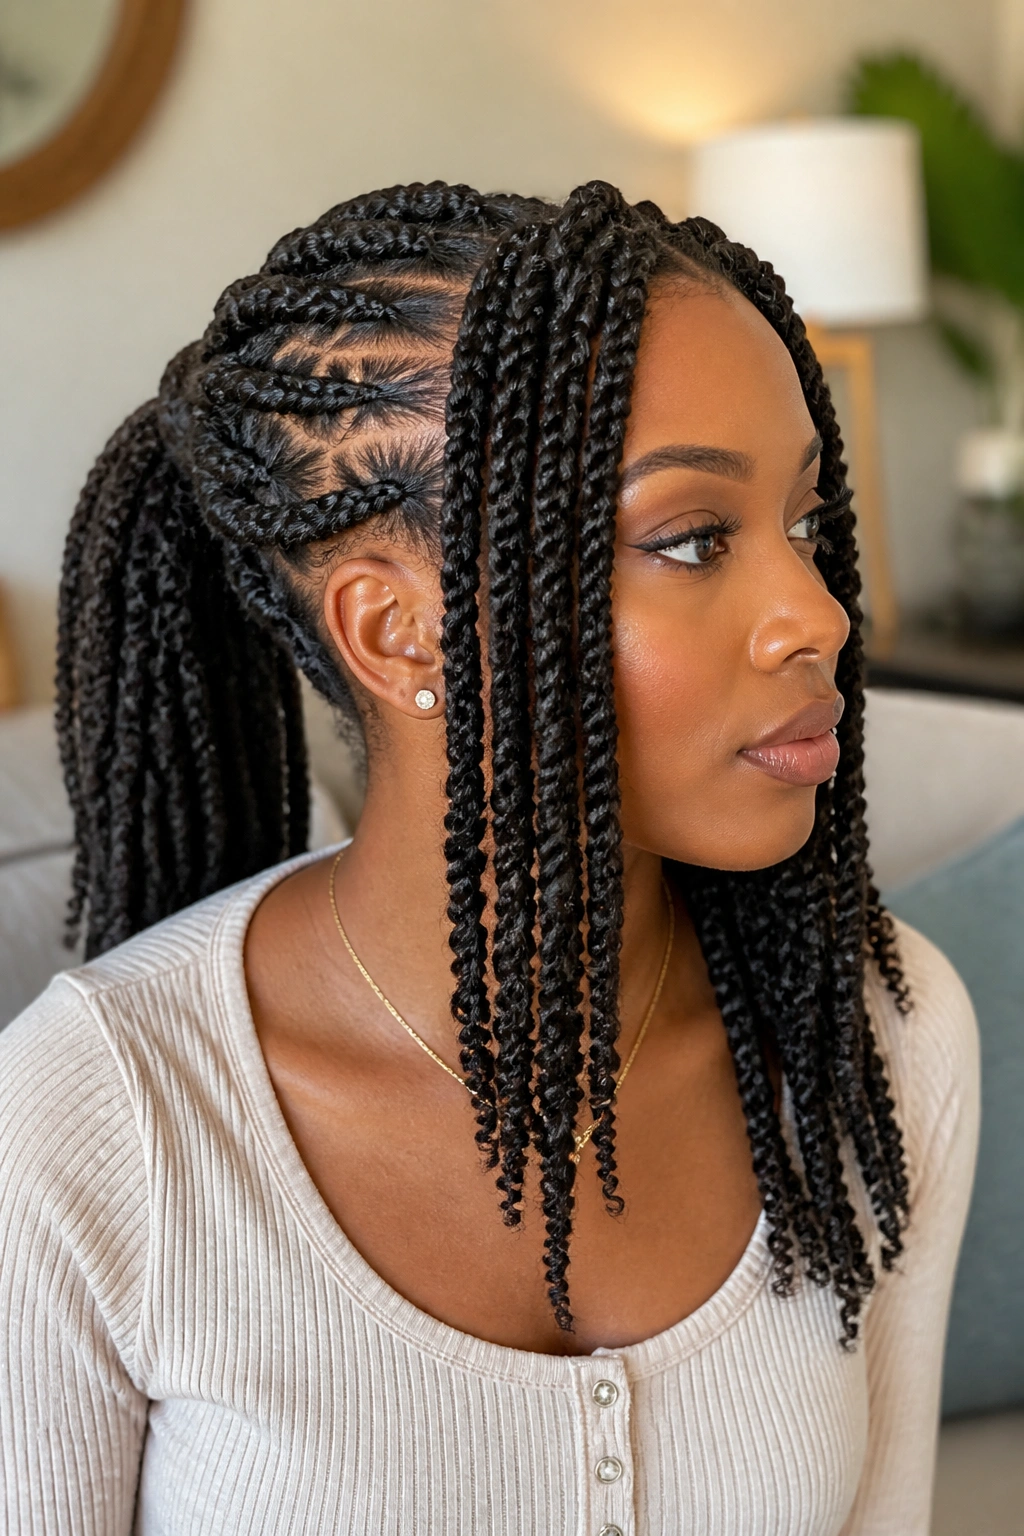
This is a “hybrid” style. The back of the head is flat-twisted upwards into a ponytail, and the top/front is left in long, hanging afro twists. This is the “mullet” of protective styles—business in the back, party in the front.
It’s an incredible style for longevity because the hair at the nape of the neck—which is the most prone to matting and frizzing—is securely flat-twisted against the head. It stays neat no matter how many times you put on a coat or lean back against a headrest.
The hanging twists at the top give you the aesthetic of a full head of twists without the maintenance. It’s a great choice for the summer or for people who live in humid climates, as it keeps the hair off the neck and allows the scalp to breathe. It’s also much faster to take down than a full head of individual twists.
17. Triangle-Parted Afro Twists for a Geometric Look
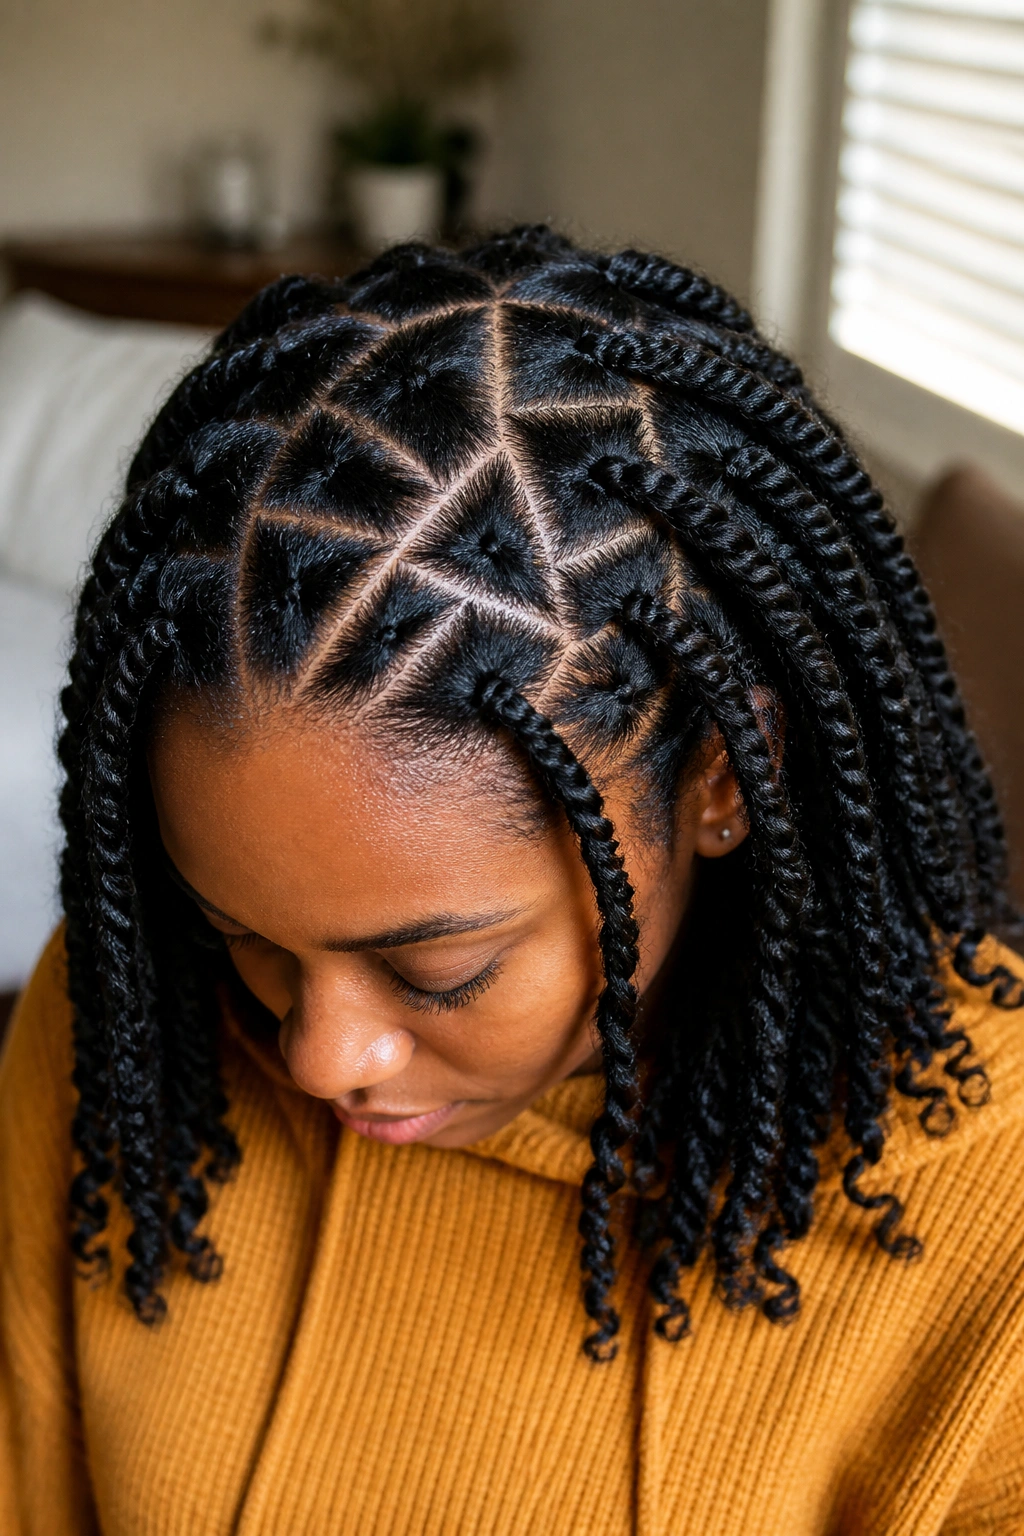
Sometimes, it’s all in the parting. Triangle parts are more than just a “cool look”—they actually help with hair distribution. In a square part, the hair is pulled from four corners into the center. In a triangle part, the tension is distributed more evenly across the scalp.
This distribution of weight means the roots are less likely to sag. When the roots don’t sag, the twist stays closer to the head for longer. It’s a subtle bit of engineering that makes a big difference in how the style looks in week three.
Triangle parts also make the style look fuller. Because the parts don’t line up in a straight grid, you don’t see as much “scalp” when the hair is moved. This “fullness” disguises any frizz that might be developing at the base of the twists. It’s a clever visual trick that experts use to make a style look “brand new” even when it’s seen some wear.
18. Tapered End Twists with Hot Water Seal
The way you finish the twist determines its fate. A “tapered” end means the twist gets thinner and thinner as you reach the bottom, eventually ending in a tiny point. This is achieved by pulling the synthetic hair so that the ends are “feathered” or “staggered” before you even start the installation.
Why Tapering is Non-Negotiable
If you have “blunt” ends, the hair will always want to unravel. It’s like a heavy rope. But a tapered end behaves like a thread. When you dip a tapered end in boiling water, the heat causes the synthetic fibers to shrink and fuse together slightly. This creates a permanent seal that no amount of tossing and turning in bed can undo.
The “Drip” Factor
Does your hair look “heavy” at the bottom? That’s usually a sign that it wasn’t tapered. Tapered ends have a beautiful “drip” and movement. They look more like natural hair and less like plastic.
How to Seal Like a Pro
- Bring water to a rolling boil.
- Carefully dip the bottom 3-4 inches of the twists.
- Hold for 10-15 seconds.
- Immediately pat dry with a microfiber towel.
- Apply a drop of hair oil to the tips while they are still warm to keep them soft.
19. Afro Twist Ponytail (Crochet Method)
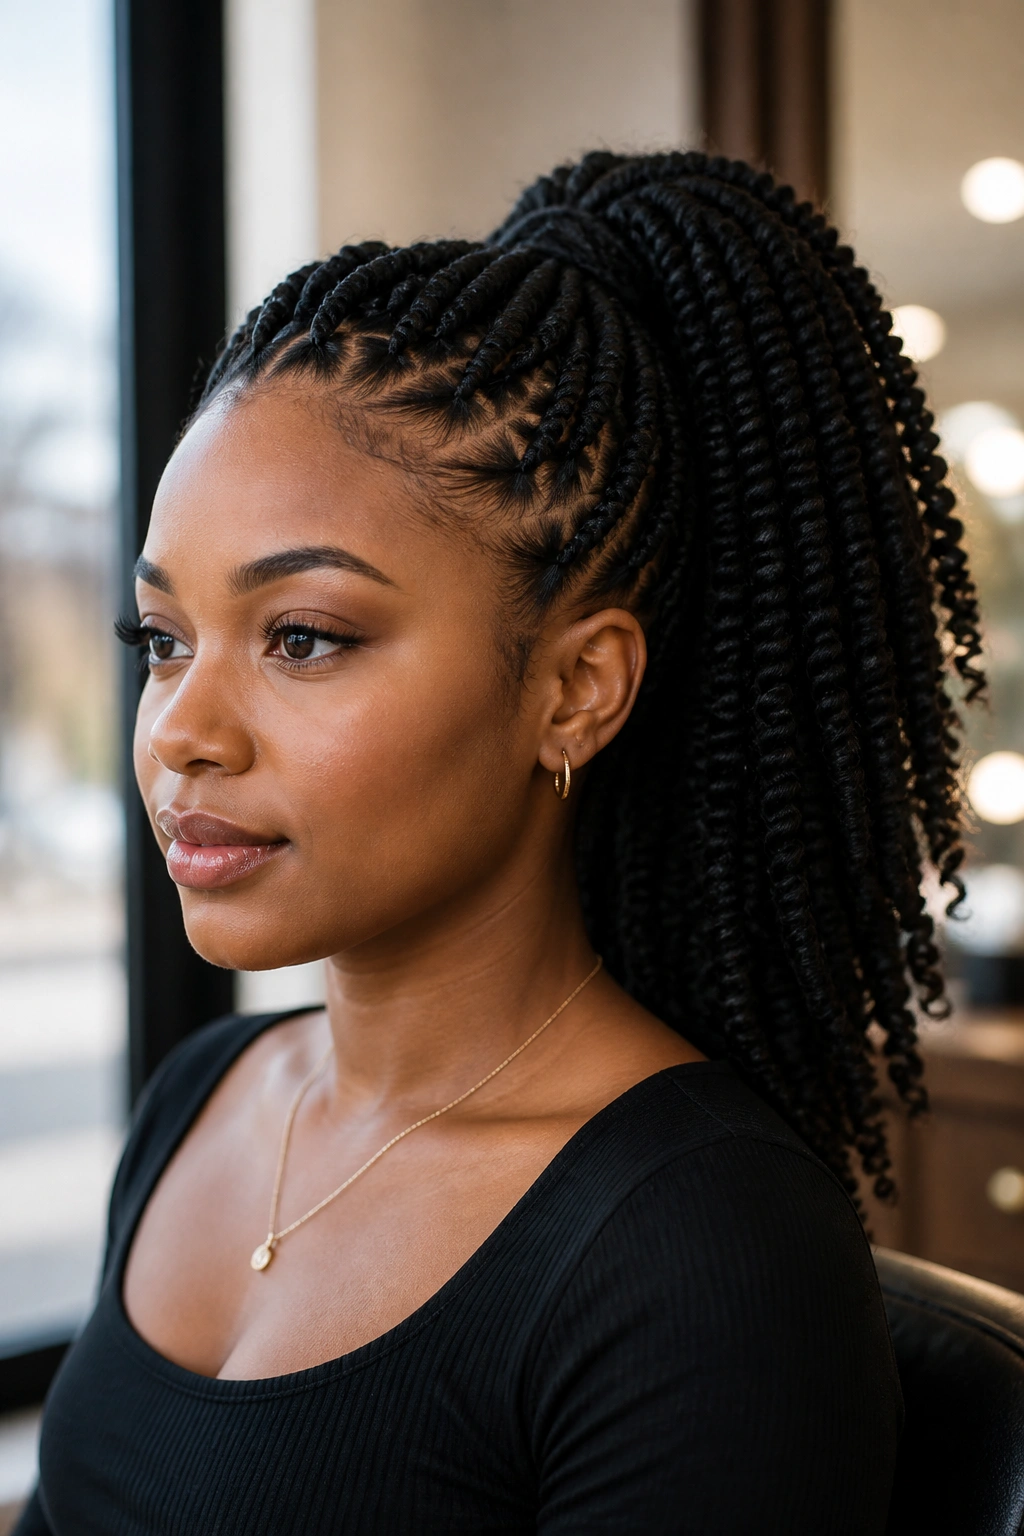
If you really want to ensure your style lasts, the crochet ponytail is a “cheat code.” You braid your natural hair into a secure bun or a series of flat twists and then crochet the afro twists into the base.
Because the twists are attached to a sturdy braid base rather than your individual strands of hair, there is zero chance of them “sliding.” You could go skydiving in this style and the twists wouldn’t budge. It’s the most secure way to wear twists, period.
It’s also the fastest style to refresh. If the “front” of your hair starts to look fuzzy after two weeks, you can simply un-crochet the top few twists, slick down your edges, and crochet them back in. You’ve essentially done a “refill” in twenty minutes, giving you another two weeks of wear. It’s the ultimate hack for the woman who wants her hair to look perfect 100% of the time.
The Bottom Line
Choosing a style that lasts three weeks is about more than just picking a photo from a gallery. It’s about understanding the physics of your hair. Friction, tension, and weight are the three variables you have to balance. If you pick a coarse hair like Marley or Nubian fiber, use a secure anchor like the invisible root or crochet method, and seal your ends with the hot-water-taper technique, you are setting yourself up for success.
Don’t be afraid of a little bit of frizz. The beauty of afro-textured twists is that they are meant to look organic. A little bit of “new growth” just adds to the authenticity of the style. The goal isn’t to look like a plastic doll; the goal is to have a functional, beautiful, and protective style that allows your natural hair to thrive beneath the surface.
Keep your scalp clean with a bit of witch hazel on a cotton ball, stay hydrated, and always, always wrap your hair at night. If you follow those simple rules, your three-week goal isn’t just a possibility—it’s a guarantee. You’ve put in the work to get the style in; now let the style work for you.