Short hair does not ban braids.
It just punishes lazy ones.
A clean bob, a shaggy pixie grow-out, a chin-length cut with layers that flip every which way — all of them can take braids for short hair, but not the same braid. The styles that hold are the ones that use tiny sections, firm anchor points, a bit of texture, and a willingness to stop before the ends get fussy.
That is the part a lot of braid advice skips. Short strands do not fail because they are “too short” in some vague way. They fail when the braid asks for a long tail, a lot of overlap, or a neat finish that the haircut simply will not give. Freshly washed hair can be slippery. Fine hair can pop loose at the first elastic. Heavy layers can leave gaps. None of that means you are out of options.
A tail comb, a few clear elastics, a couple of bobby pins, and either dry shampoo or a light texturizing spray will take you farther than fancy tools ever will. Keep the sections small. Keep the tension even. Stop trying to force a long-hair braid onto a short cut.
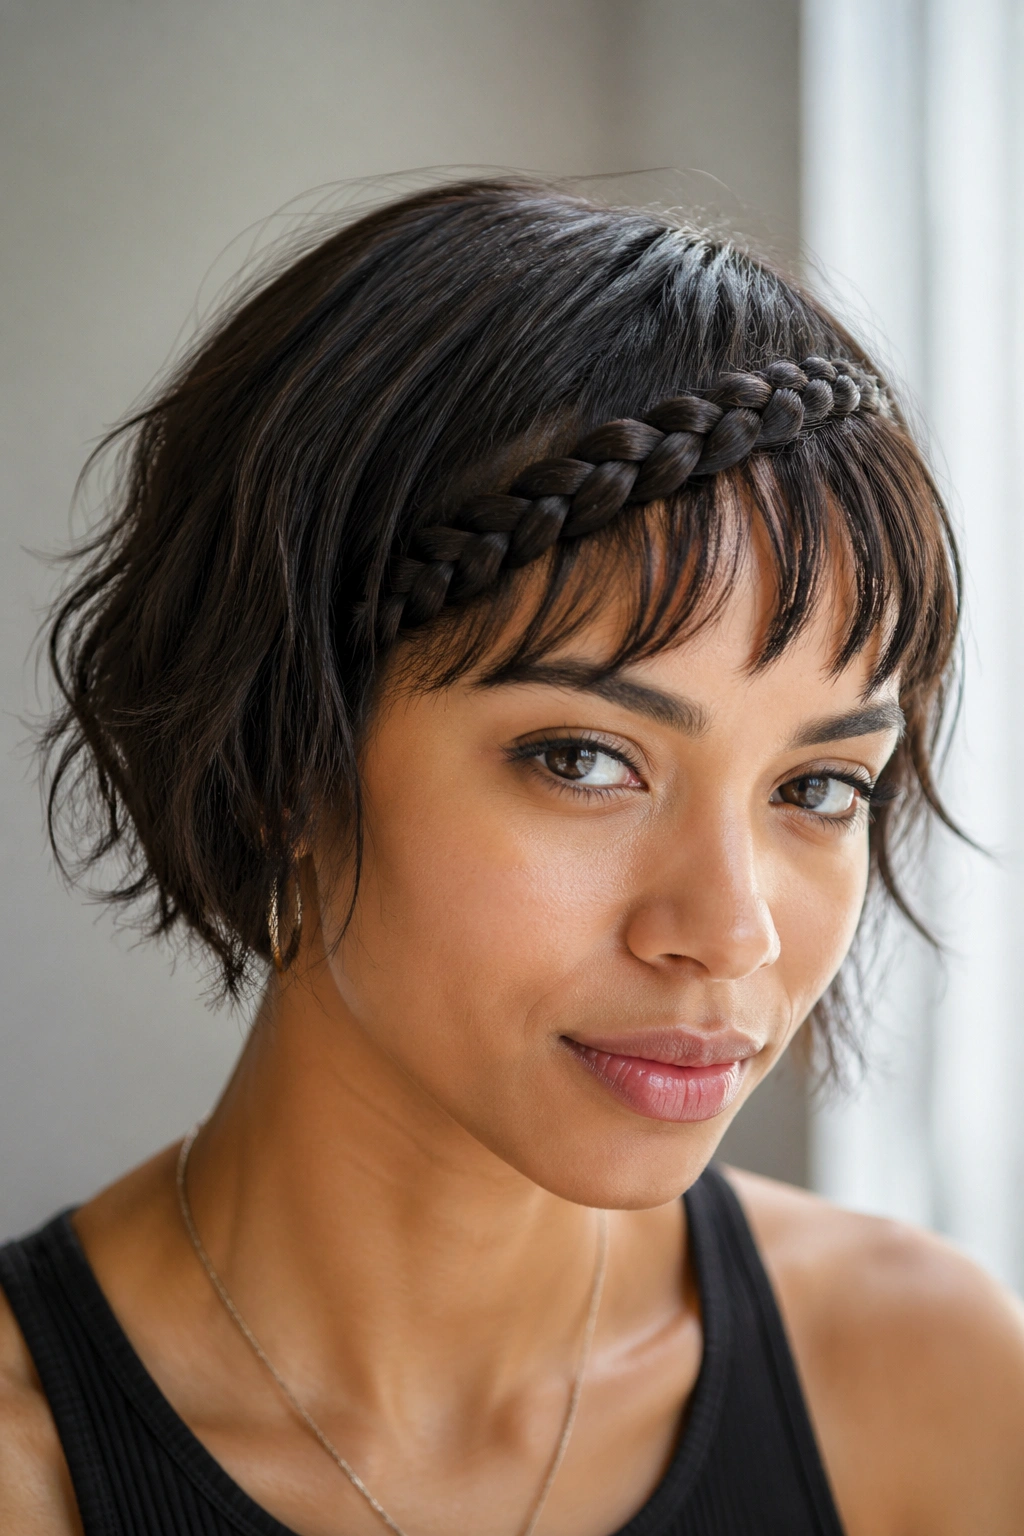
1. Mini French Braid Across the Hairline

This is the braid I reach for when short hair needs to look intentional in under five minutes. A tiny French braid along the hairline pulls loose pieces back, gives the front shape, and works even when the rest of the hair is too short to behave.
The key is size. A braid that starts with a section no wider than 1 inch will hold better than a chunky one that keeps swallowing layers. If your hair reaches your chin or a little past it, you can usually get three to five neat stitches before the braid wants to quit. That is enough.
Where It Works Best
- Best on bob-length hair with short layers at the front.
- Good if you want to keep bangs or a fringe off your face.
- Easiest when the hair has a little grit from dry shampoo or day-two texture.
- Nice for work, school, or any day you want the front to look tidy without pinning everything back.
A tiny French braid like this does not need a long finish. Braid it down toward the temple, then stop and secure it with a clear elastic or a small bobby pin tucked under the next layer of hair. If the ends stick out, that is normal. Tuck them under the braid and pin them flat.
The mistake here is overloading the first section. Too much hair, and the braid gets wide fast. Keep it narrow, keep your fingers close to the scalp, and let the rest of the haircut do the rest. Honestly, this one looks better when it is a little imperfect.
2. Dutch Braid Down the Center

Why does a Dutch braid work so well on short hair? Because the braid sits on top of the hair instead of disappearing into it. That raised ridge gives you structure, which is the whole game with shorter lengths.
A center Dutch braid is one of the best braid styles for short hair that still wants a polished finish. It also makes fine hair look fuller, because the braid shows off depth and shadow instead of lying flat. Start at the crown with a section about the size of two fingertips, then cross the side pieces under the middle strand. That “under” motion is what makes the braid pop.
How to Keep It Raised
- Hold the sections close to the scalp so the braid doesn’t sag.
- Add hair in tiny bites, not big chunks.
- Mist the roots with a light texturizer before you start.
- Stop at the nape and pin the tail under the braid if it won’t reach the end.
A short Dutch braid does not need to run all the way down the back. In fact, stopping at the point where your layers start to kick out can look cleaner. Pin the rest flat with two crossed bobby pins, then mist with flexible spray.
This is one of those braids that looks more complicated than it is. The bold shape does the heavy lifting. You just have to keep the hands steady.
3. Side Dutch Braid That Tucks Behind One Ear
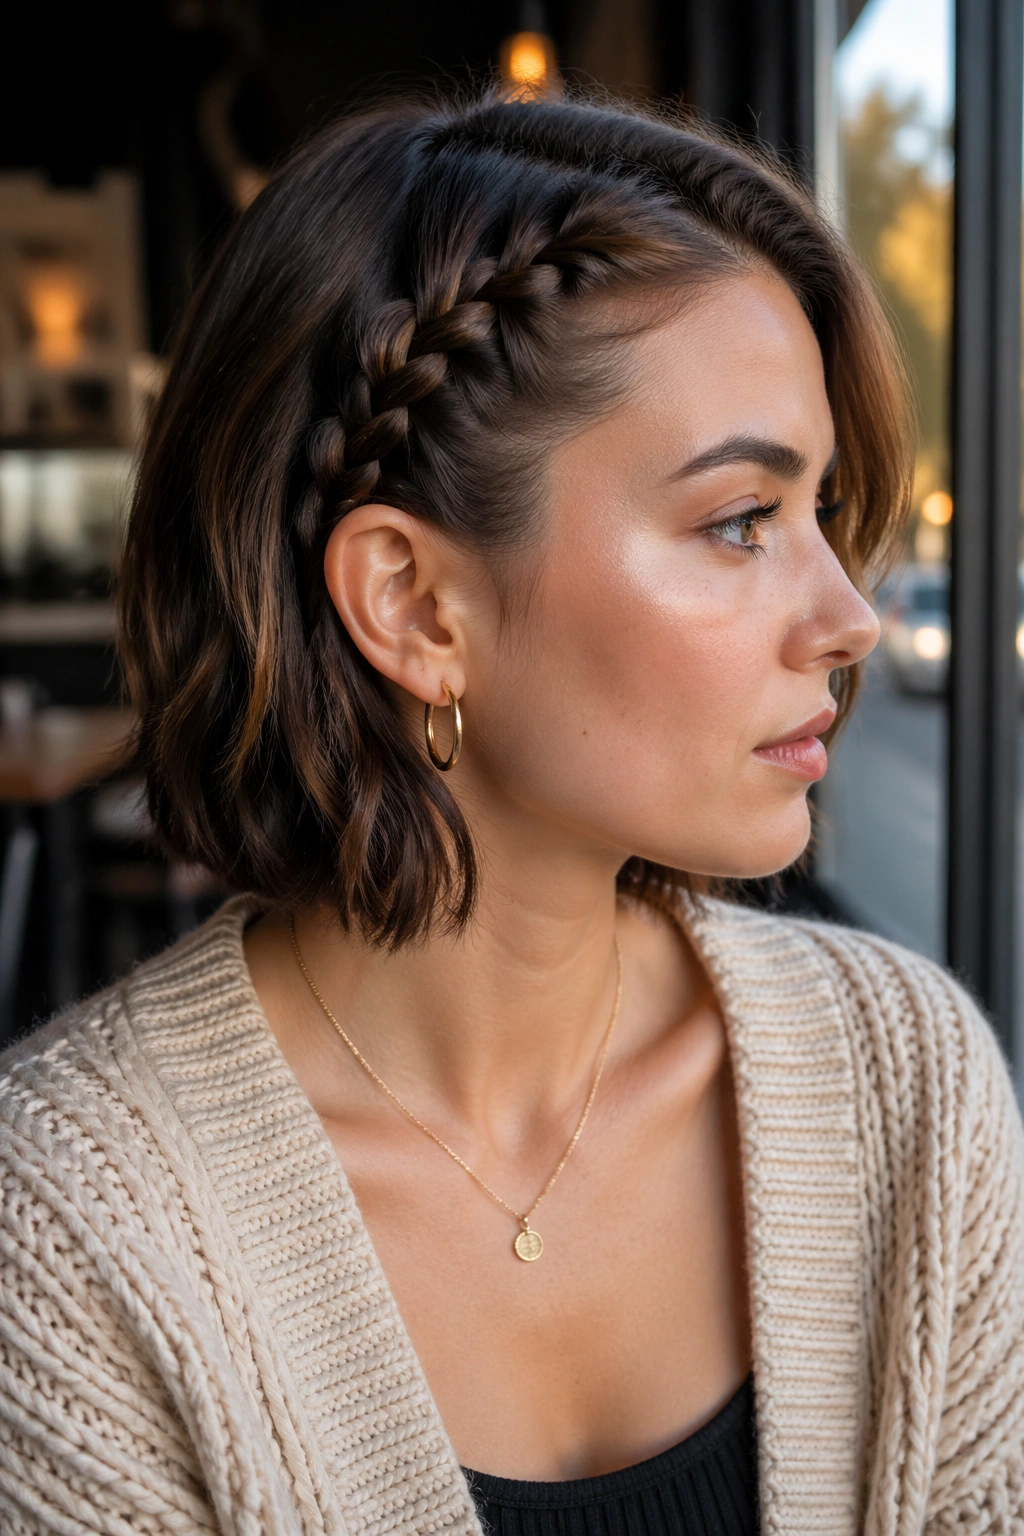
Picture a short bob that keeps falling into your face on one side. A side Dutch braid fixes that without making the whole cut look overworked. It also handles uneven layers better than a center braid, because one side can stay loose while the braid pulls the other side into shape.
The trick is to start at the temple and angle the braid back toward the ear. Keep the first three stitches snug. After that, you can relax a touch, since the braid will be secured behind the ear and partly hidden by the rest of the hair anyway. Short hair likes this kind of half-secret structure.
A side braid is also useful when one side of your haircut is shorter than the other. That happens more often than people admit. The braid gives the shorter side a place to go, instead of letting it stick out and announce itself.
If you want the style to last, tuck the end behind the ear and pin the braid at two points: once at the ear, once just below the last stitch. That two-pin setup keeps the braid from slipping while you move around. Tiny effort. Big difference.
4. Double Boxer Braids on a Short Bob
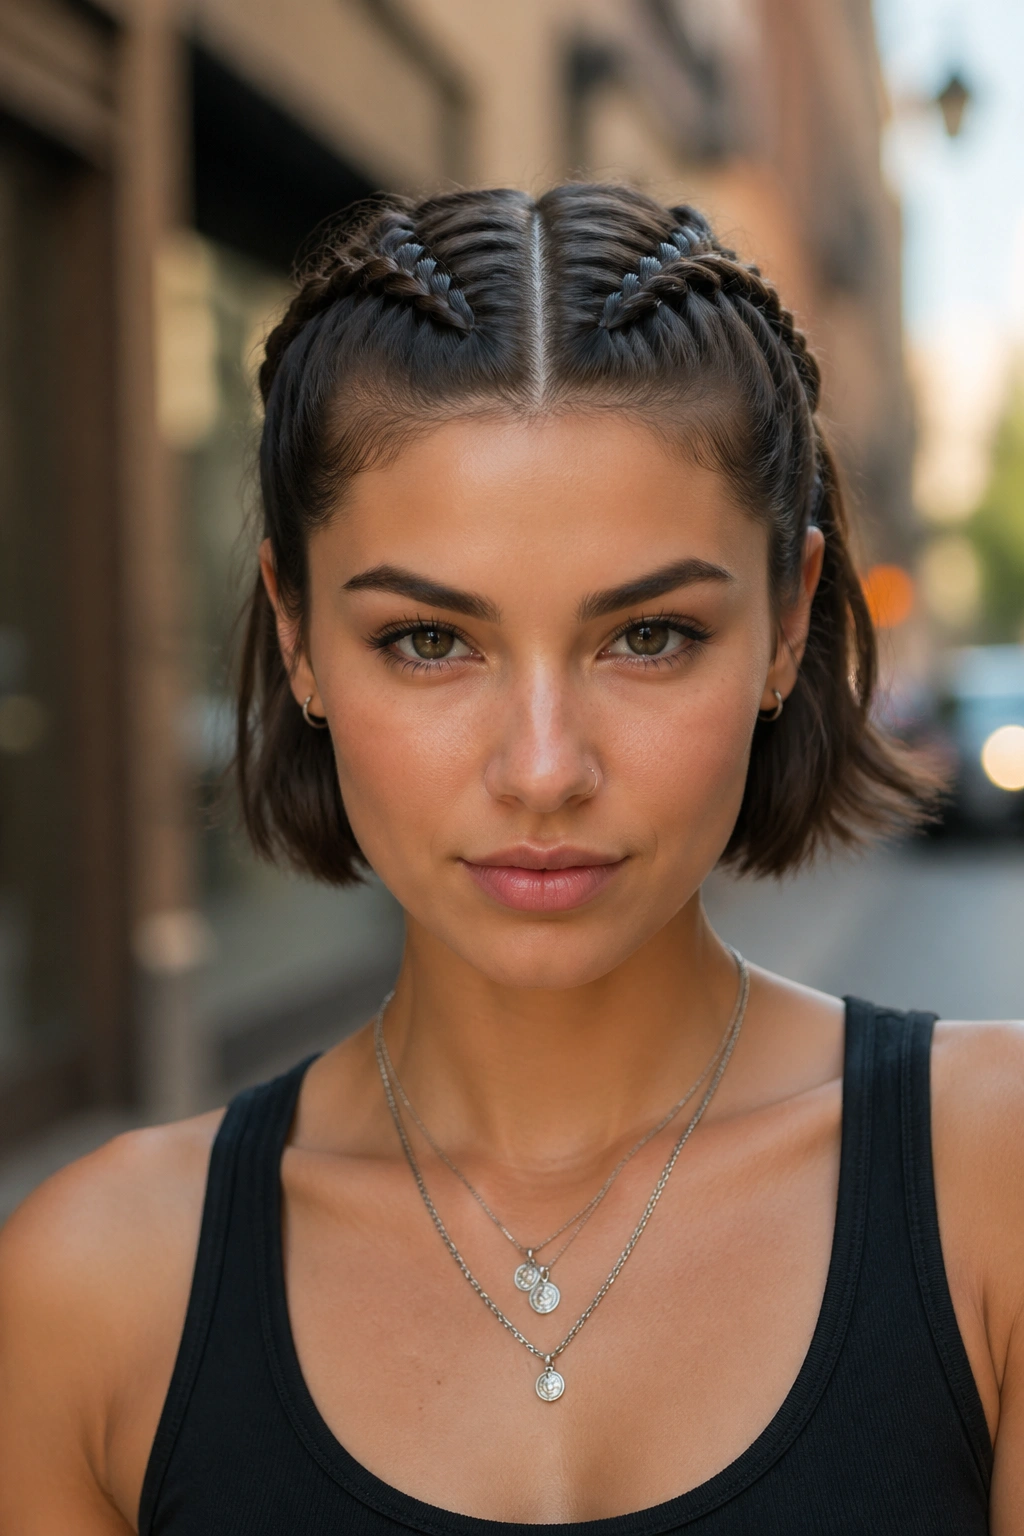
Boxer braids sound like a long-hair hairstyle, but short hair wears them with more attitude. Two tight Dutch braids down either side of the head keep layers under control and make a bob look sharper, not smaller. They also hold up better than softer braids if your hair has a bit of wave or lives in humid weather.
The reason they work is simple: each braid has its own path. That reduces pressure on any one section, which helps when the hair at the back is too short to weave cleanly. Braid both sides from the front hairline down to the nape, then stop where the tail gets thin. Secure each end with a small elastic and pin the last inch flat.
Short hair makes boxer braids look a little tougher and a little cleaner. I like that. They do not read as “trying to have long hair.” They read as a deliberate style with edges.
If you want them neat, use a rat-tail comb to part the center line straight down the head. If you want them a touch softer, pull out two or three tiny pieces around the temples after the braid is secure. Not a lot. Just enough to keep the face from feeling boxed in.
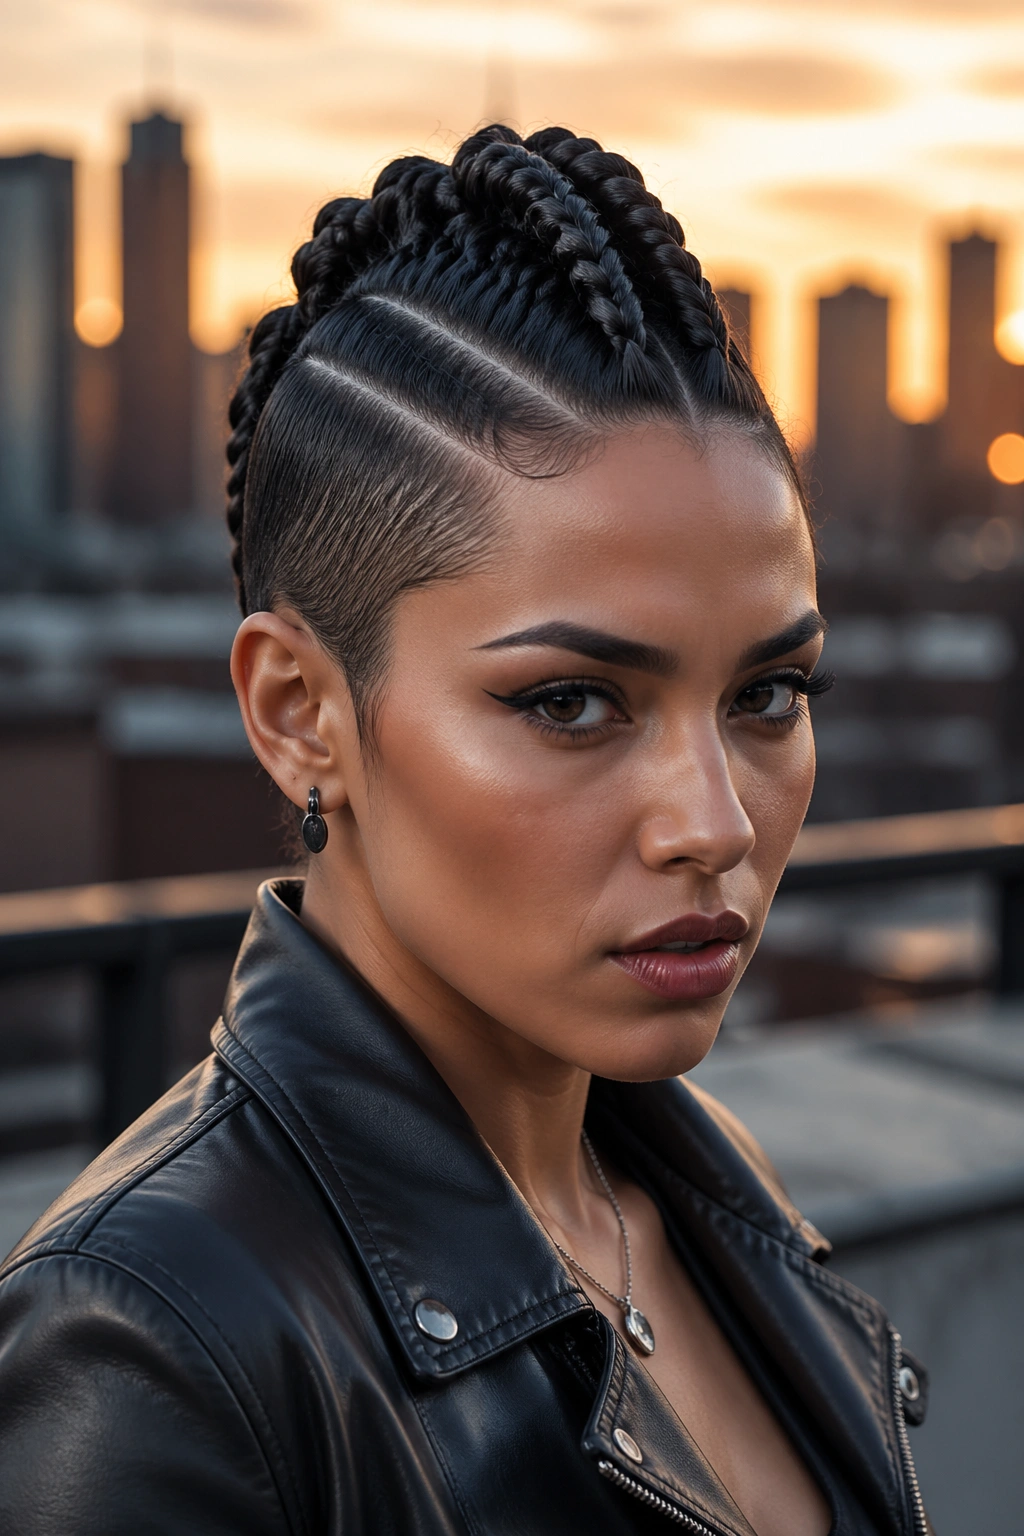
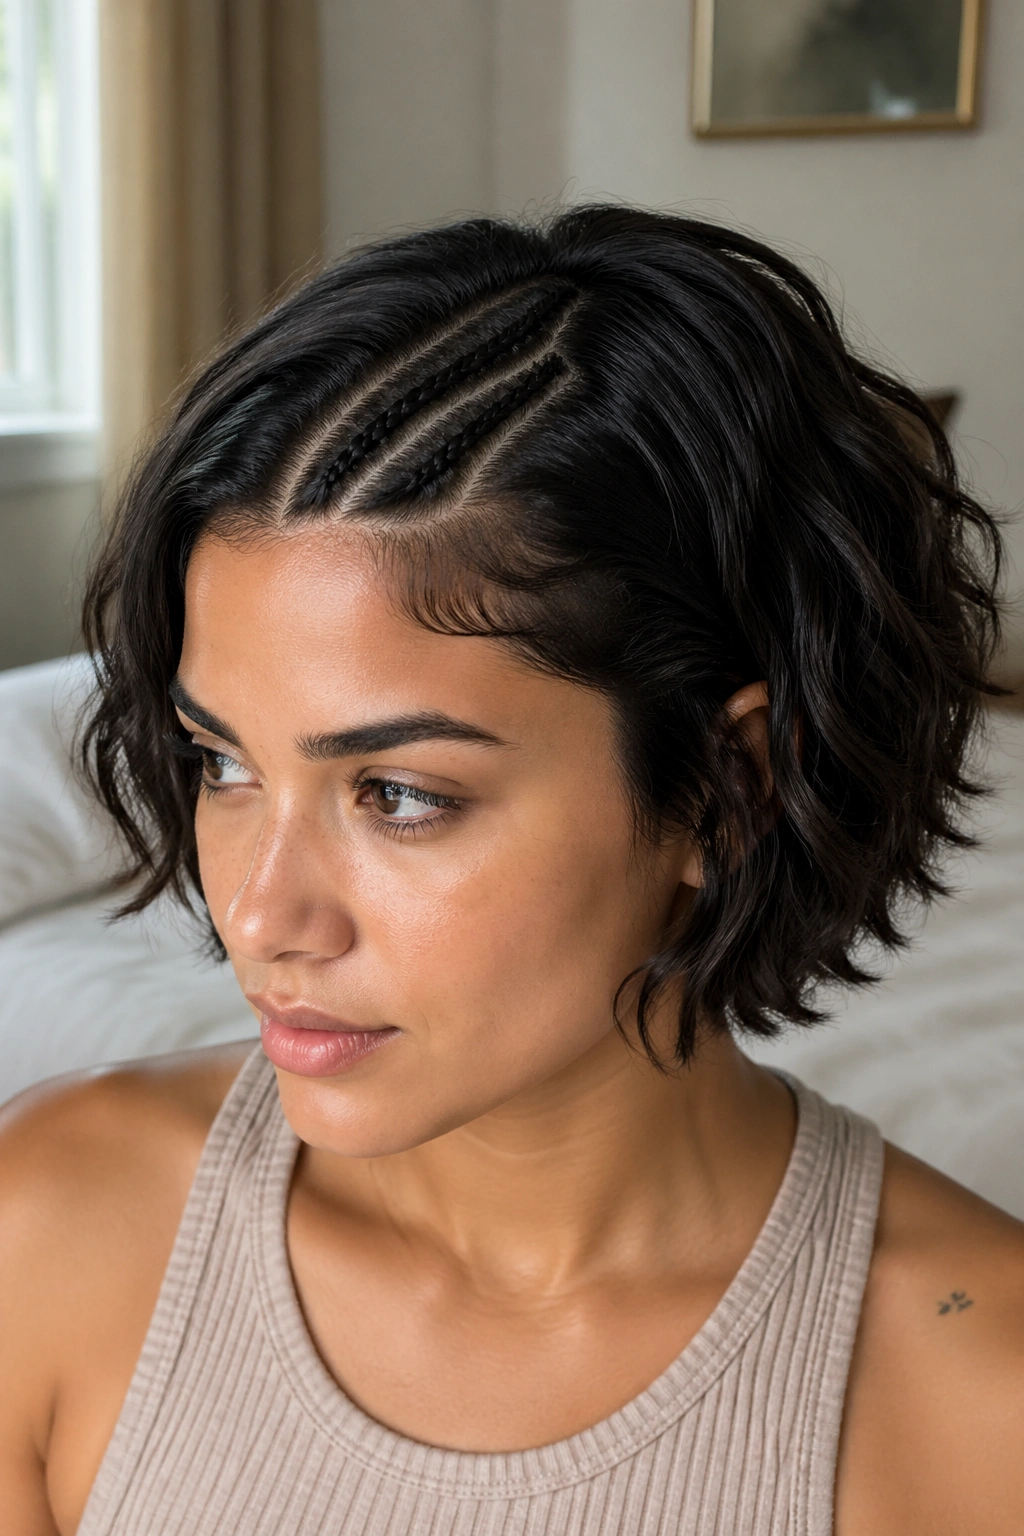
5. Tight Cornrows for Short Hair
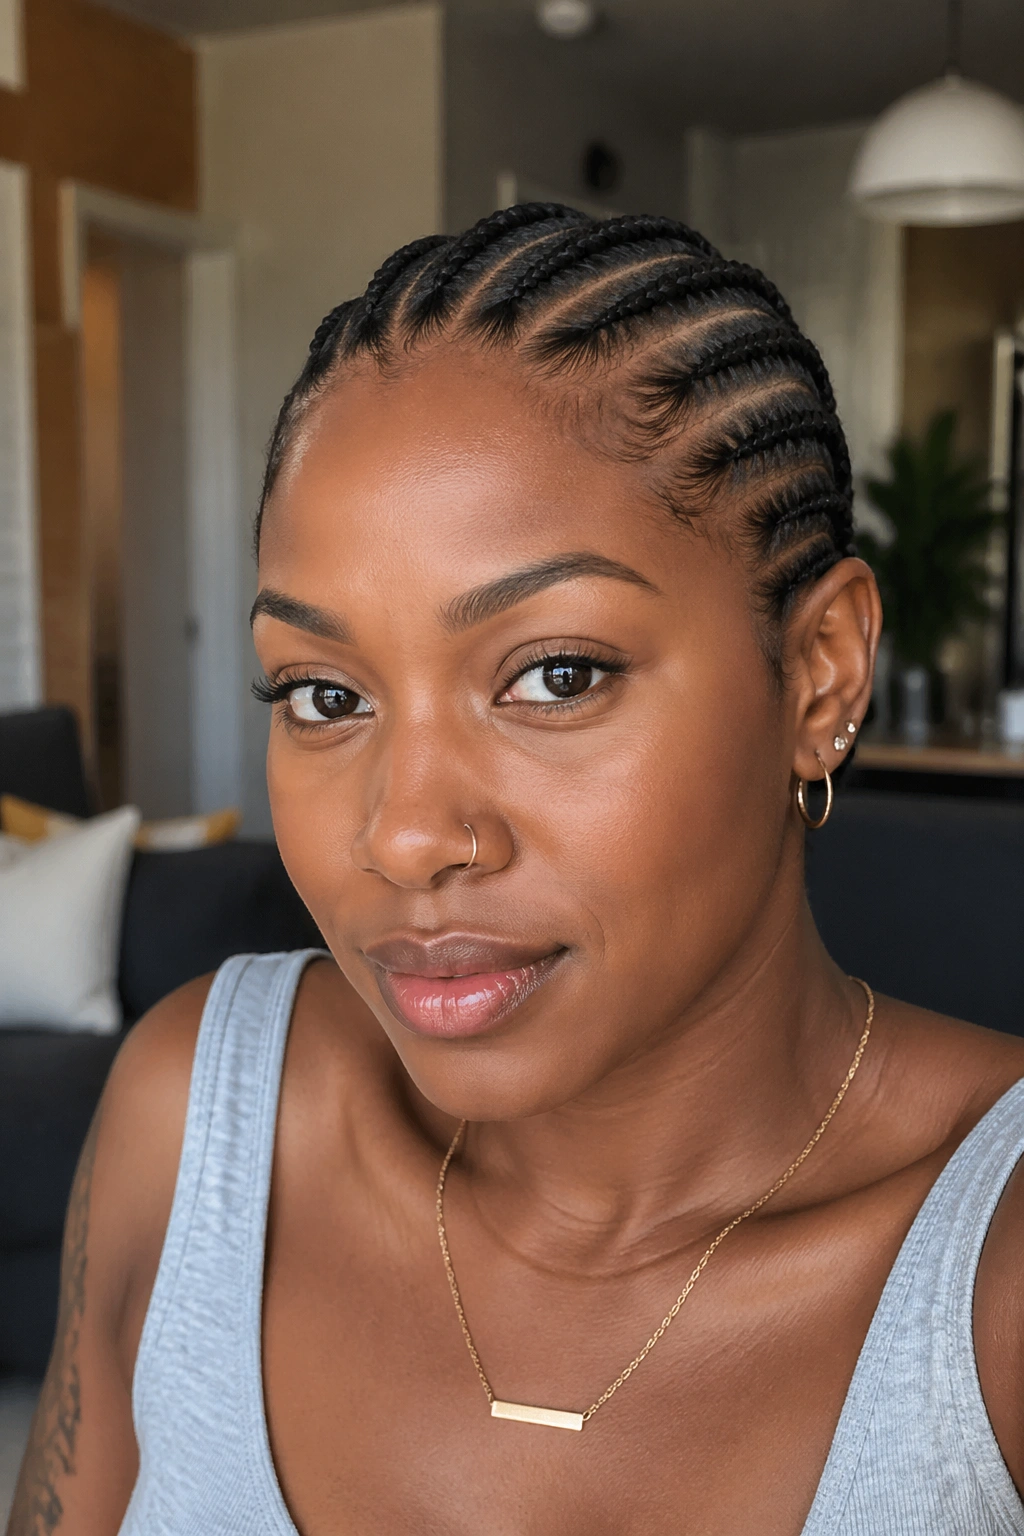
Cornrows are one of the most reliable braids for short hair because they sit close to the scalp and do not depend on a long tail. Shorter lengths can actually make them easier to control, especially if the hair has texture or a little natural grip. The braid path is there. You just follow it.
What Helps Cornrows Hold
- Use sections between 1/4 inch and 1/2 inch wide.
- Work on hair that is detangled and lightly stretched.
- Add a small amount of cream or gel at the roots, not the whole head.
- Keep the braid firm, not painful. Tight is not the same as secure.
On very short hair, cornrows work best when they are more like narrow tracks than big decorative rows. If your hair is too short to braid all the way to the ends, stop after a few inches and anchor the braid with a tiny elastic or a flat pin. That is still a cornrow. It does not need to be dramatic to count.
The common mistake is overusing product. A thin line of gel at the root helps. A greasy helmet of it makes the hair slide apart. You want the scalp to feel tidy, not coated.
Cornrows are the style I trust when the hair needs to stay put all day. Gym day. Windy day. Long day. They do the job.
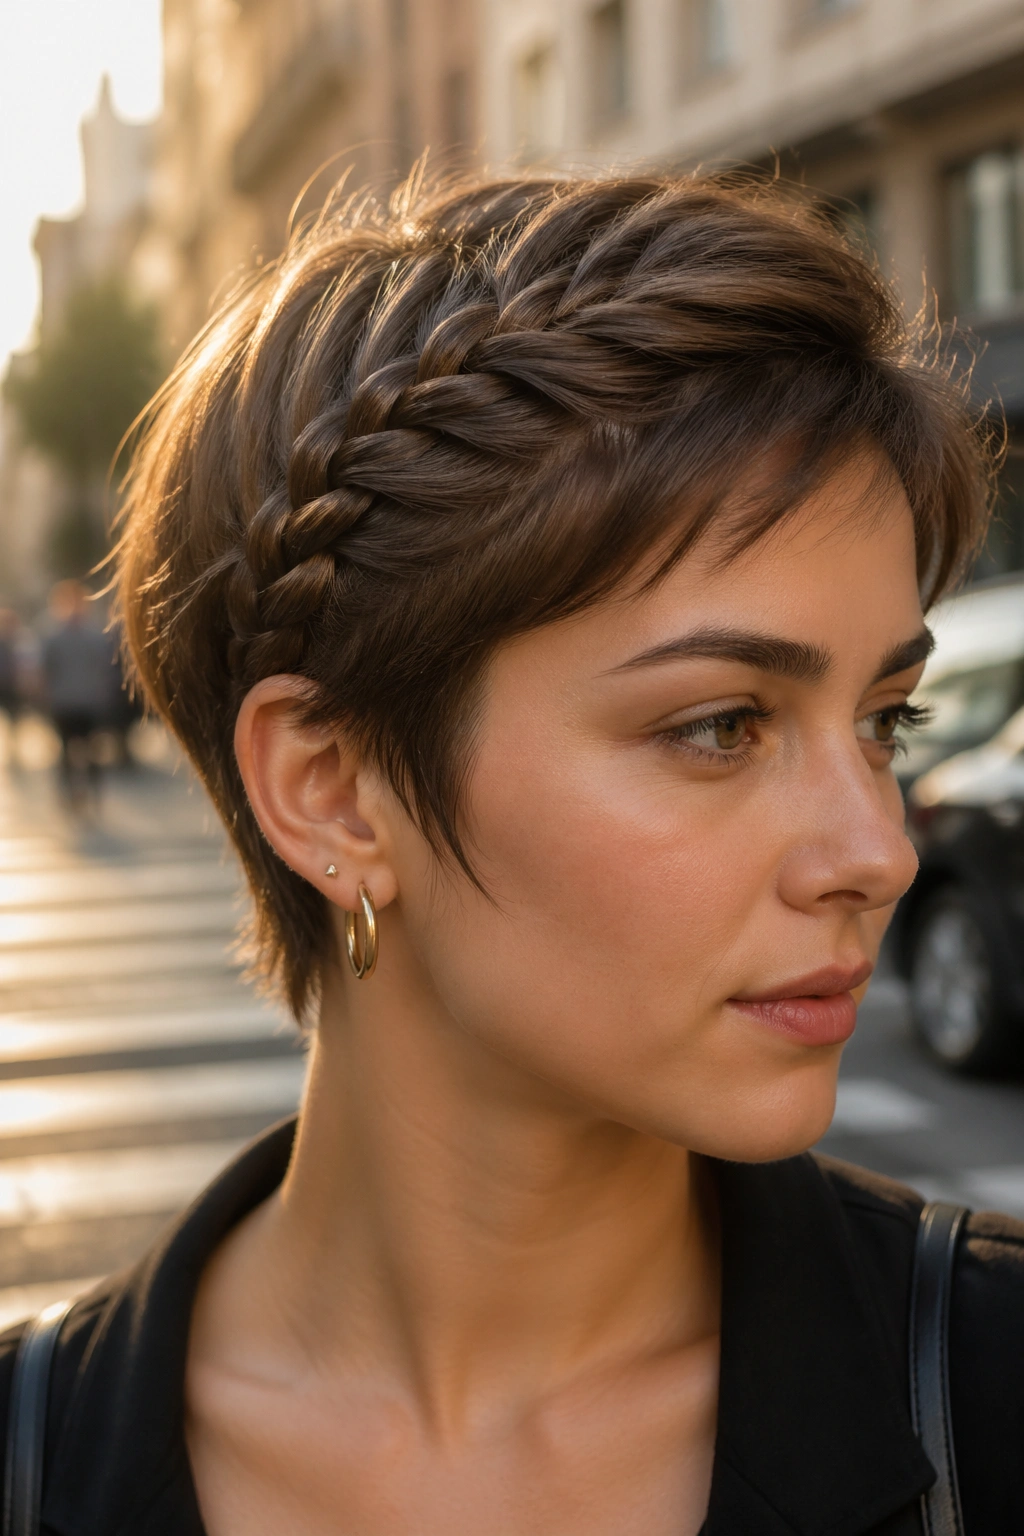
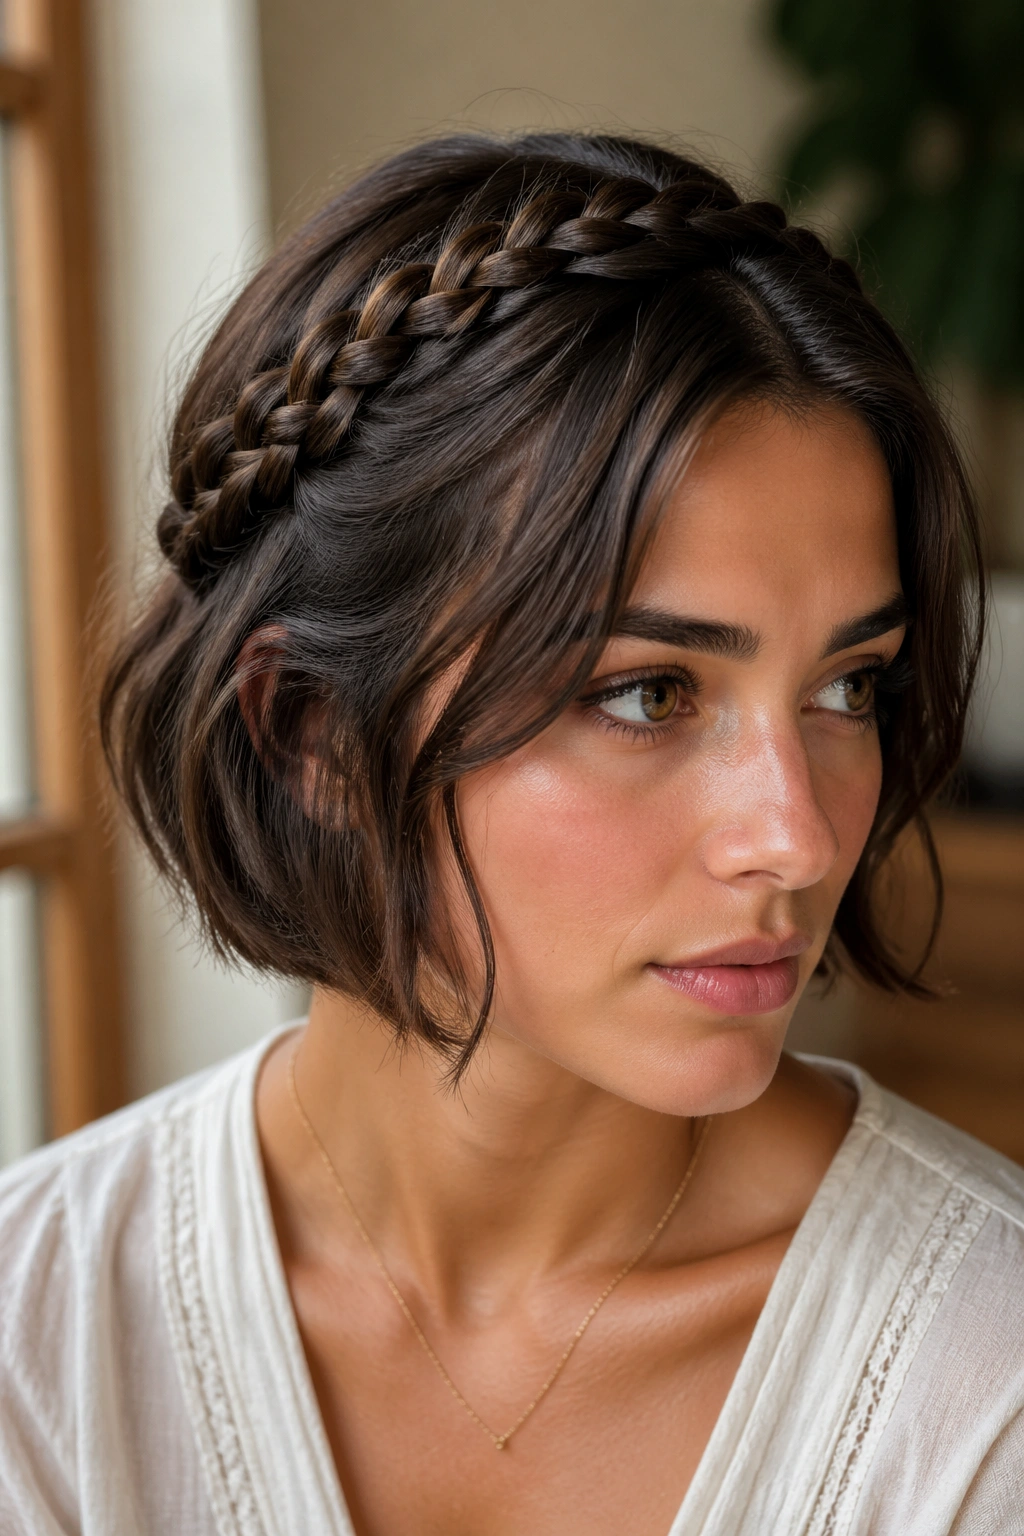
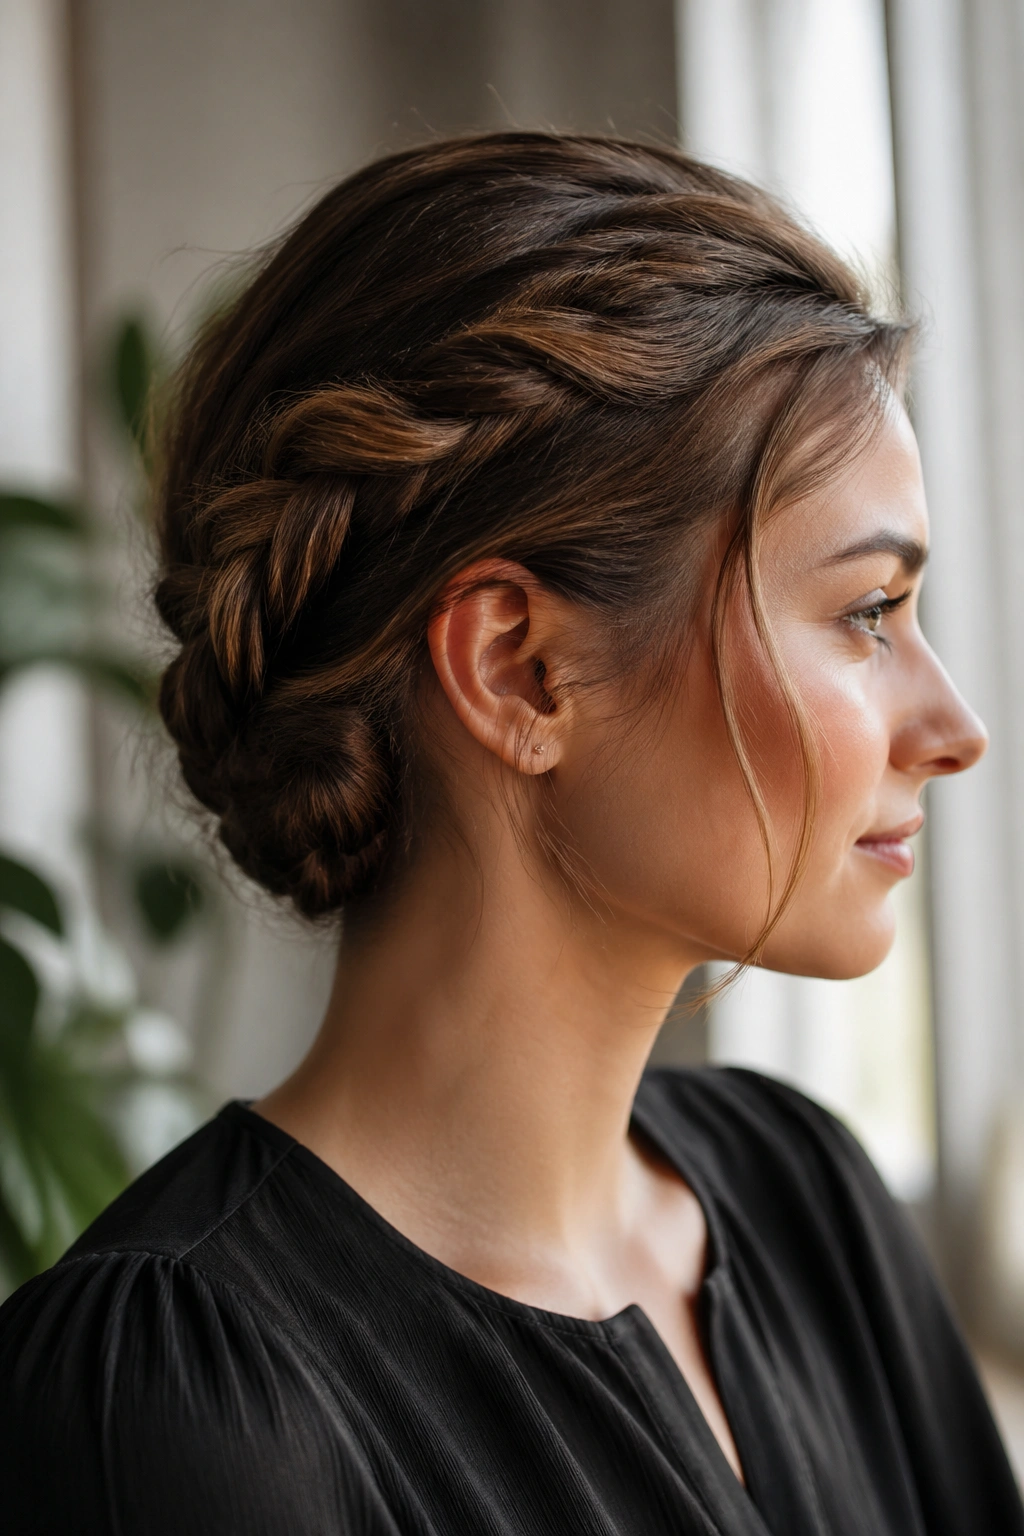
6. Halo Braid That Skims the Crown
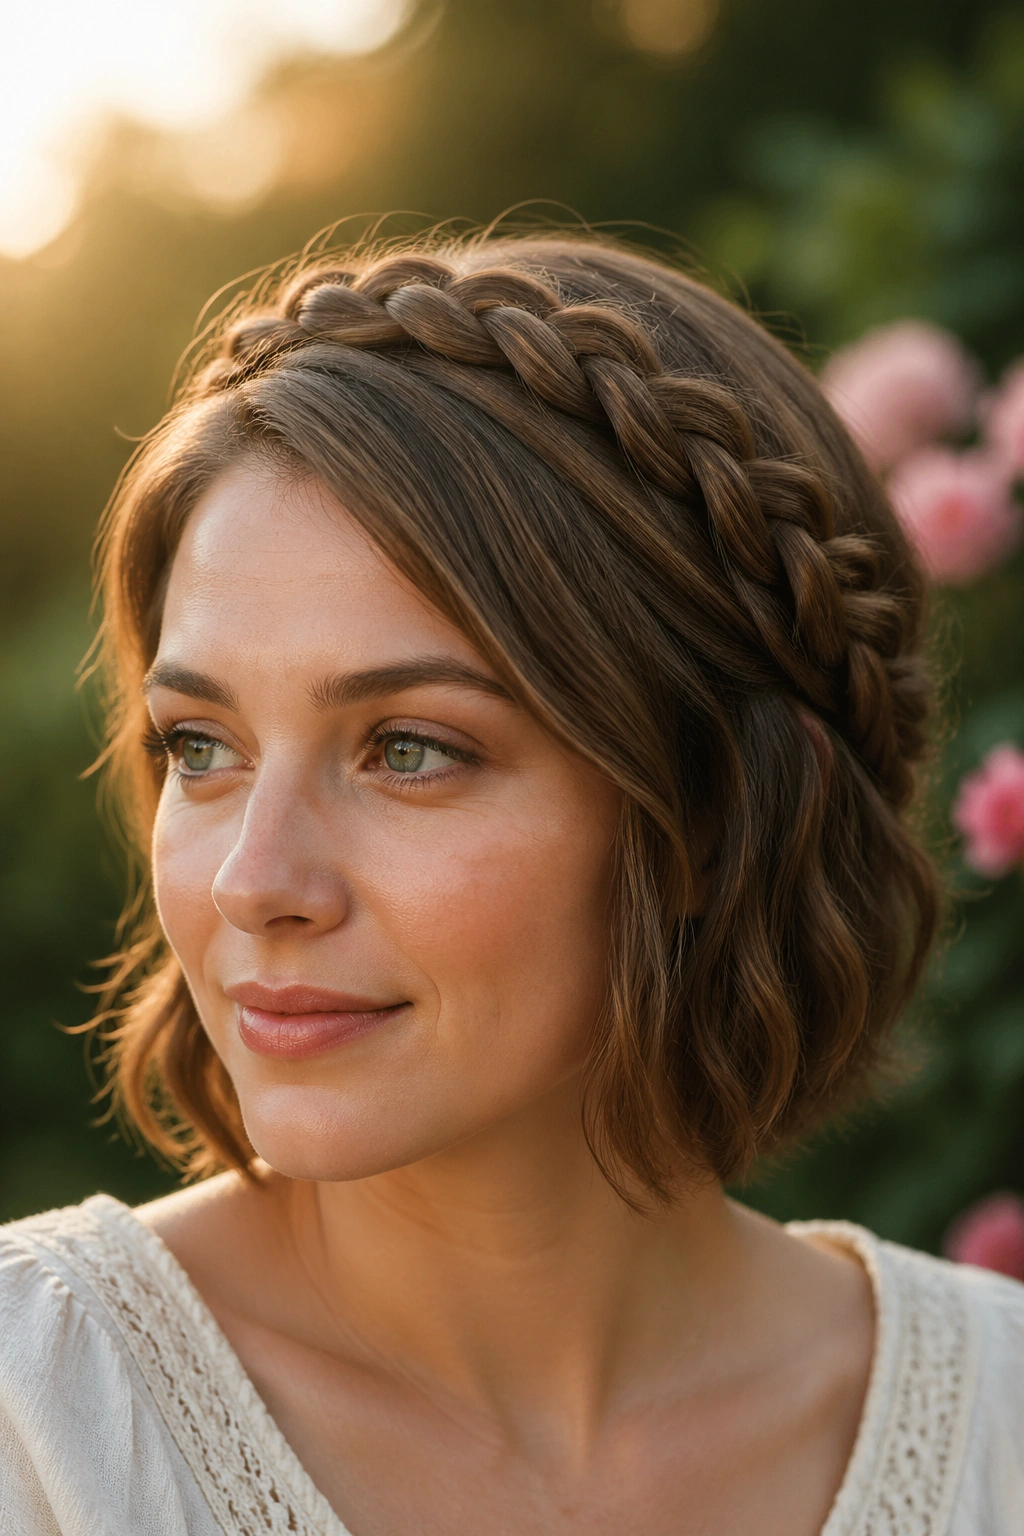
A halo braid on short hair can look like a small miracle, but the trick is not magic. It is pinning. Lots of pinning, placed where the eye won’t notice.
The braid starts at one side of the head and runs around the perimeter, hugging the crown like a headband made from your own hair. With short hair, the braid usually stops before it makes a full circle, and that is fine. You cross the ends at the back or hide them under the rest of the braid. The style survives because the loop is supported by pins every couple of inches.
Where the Pins Go
- Slide pins into the braid from underneath, not from above.
- Cross two pins in an X when a section feels loose.
- Pin right at the curve behind each ear.
- Use small U-pins if the hair is thick and keeps puffing out.
Halo braids suit bob cuts and shoulder-length cuts with layers that would normally escape a regular updo. The crown placement helps because it keeps the shortest pieces tucked near the head instead of asking them to hang down and misbehave.
A little softness around the hairline makes this style better. Pull one thin strand near the temple if the braid feels too stiff. Not too much. If you overdo it, the whole thing starts to sag.
7. Half-Up Crown Braid
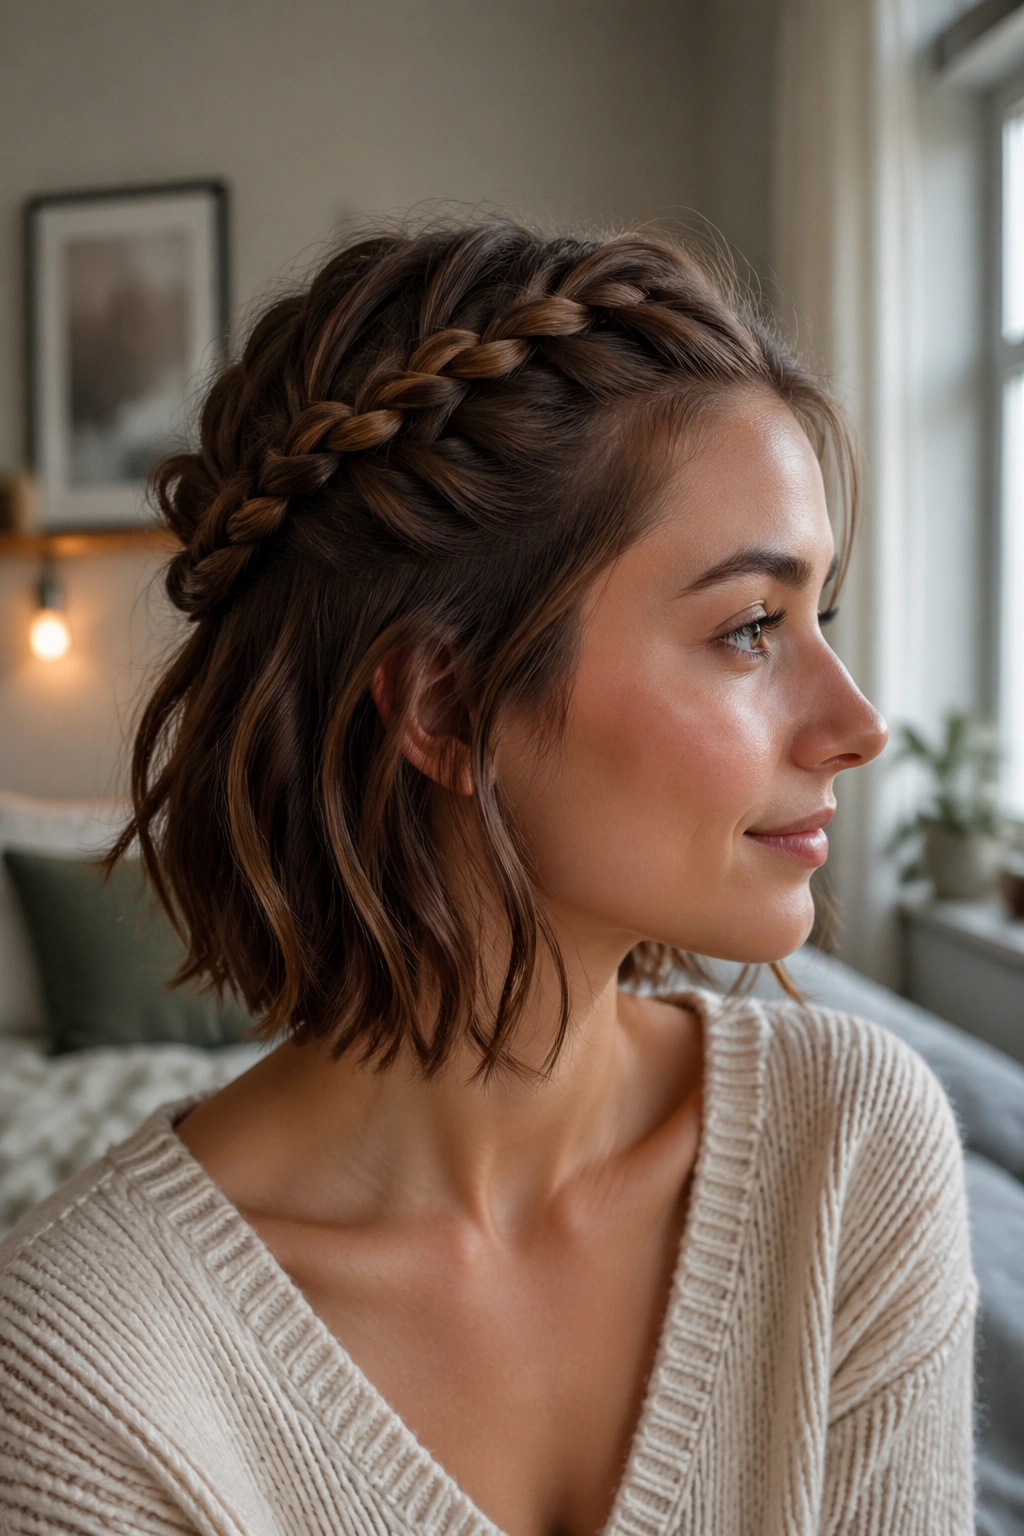
Half-up crown braids are the friendliest version of a crown style for short hair. They use only the top section, which means the braid has enough length to work with while the bottom hair stays loose and easy. That matters. Short hair often looks awkward when every strand is forced into the same plan.
Start with the front and upper side sections, then braid them back on each side toward the crown. Cross the two braids, pin them together, and let the lower layers stay down. The contrast does the heavy lifting. You get shape at the top and movement underneath, which is a nicer balance than trying to cram all the hair into a tight style.
This is one of the few short hair braid looks that actually gets better when the lower layers are slightly messy. The braid gives the top control. The rest can move.
If your cut is chin length, keep the braids narrow and close to the scalp. If it reaches your shoulders, you can widen them a little. Either way, use two pins at the crossover point. One pin is wishful thinking. Two is practical.
8. Tiny Fishtail Accent Braid
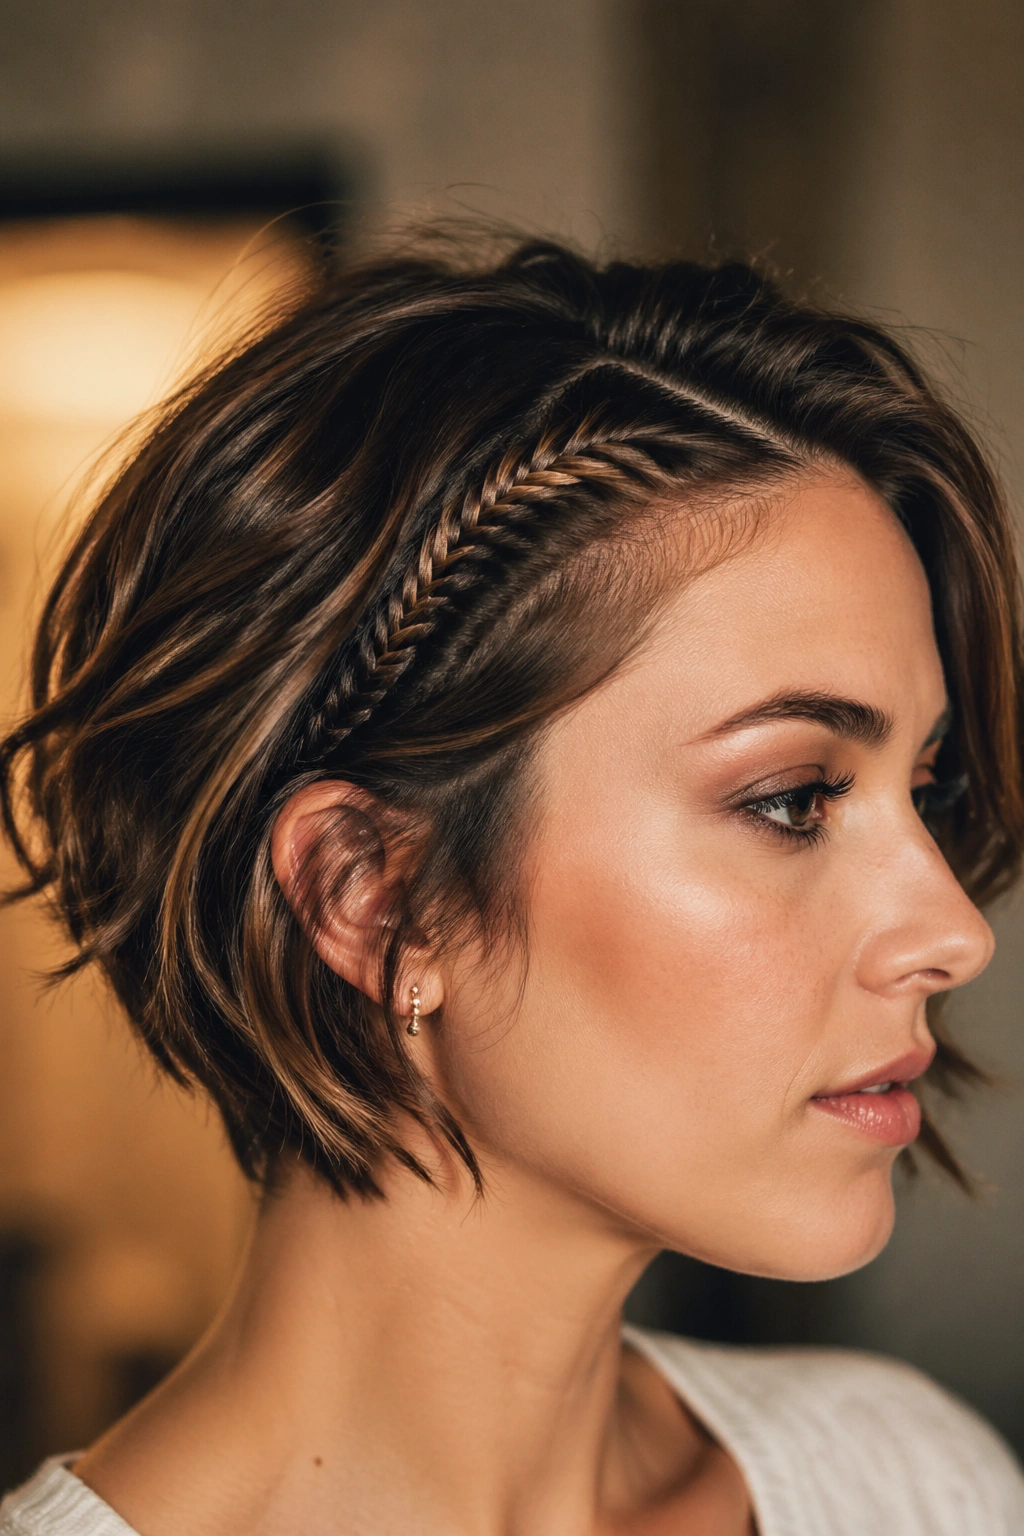
A fishtail braid looks delicate because it uses only two sections, which makes it ideal for short hair that can’t spare a lot of length. The small, overlapping pieces sit close together and create that woven look without demanding a heavy braid tail. On a bob or lob, a fishtail accent braid can be all you need.
The real trick is patience. Keep each bite of hair tiny, almost pencil-thin. If the pieces are too large, the braid loosens fast and the shape turns messy in a bad way. A tighter fishtail reads more polished and holds its line better on shorter cuts.
A little wave in the hair helps here. Straight, slippery strands can make the braid slide apart before you finish it. If your hair is too smooth, mist the section with texture spray first and wait thirty seconds for it to dry down a bit.
This braid works well as a side accent or as a small piece tucked into a half-up style. It does not need to carry the whole head. That is part of its charm. It gives the hair a detailed, handmade look without asking for much length at all.
9. Rope Braid for Short Layers
A rope braid is one of my favorites for short hair because it feels simpler than a three-strand braid and often holds better. You split the hair into two sections, twist each one, then wrap them around each other. That twist is easier to control when the ends are short and jumpy.
Unlike a regular braid, a rope braid does not need wide sections to show its pattern. Even a narrow strip of hair can look finished once it is twisted. That makes it a good choice for pixie grow-outs, chin-length bobs, and layered cuts where the front pieces are always escaping.
What Makes It Different
A rope braid is less fussy about length. The strands stay compact, so the braid feels denser and less likely to fray at the bottom. It also works well with slightly dirty hair, because the grip helps the twist stay together.
Use it on one side, down the back, or as a small accent near the temple. Secure the end with a tiny elastic, then wrap a strand of hair around the band if you want it to look cleaner. If the braid starts to unwind, the sections were too thick or the twist direction changed halfway through.
That is the whole thing, really. Keep the twist consistent and small.
10. Waterfall Braid on a Bob
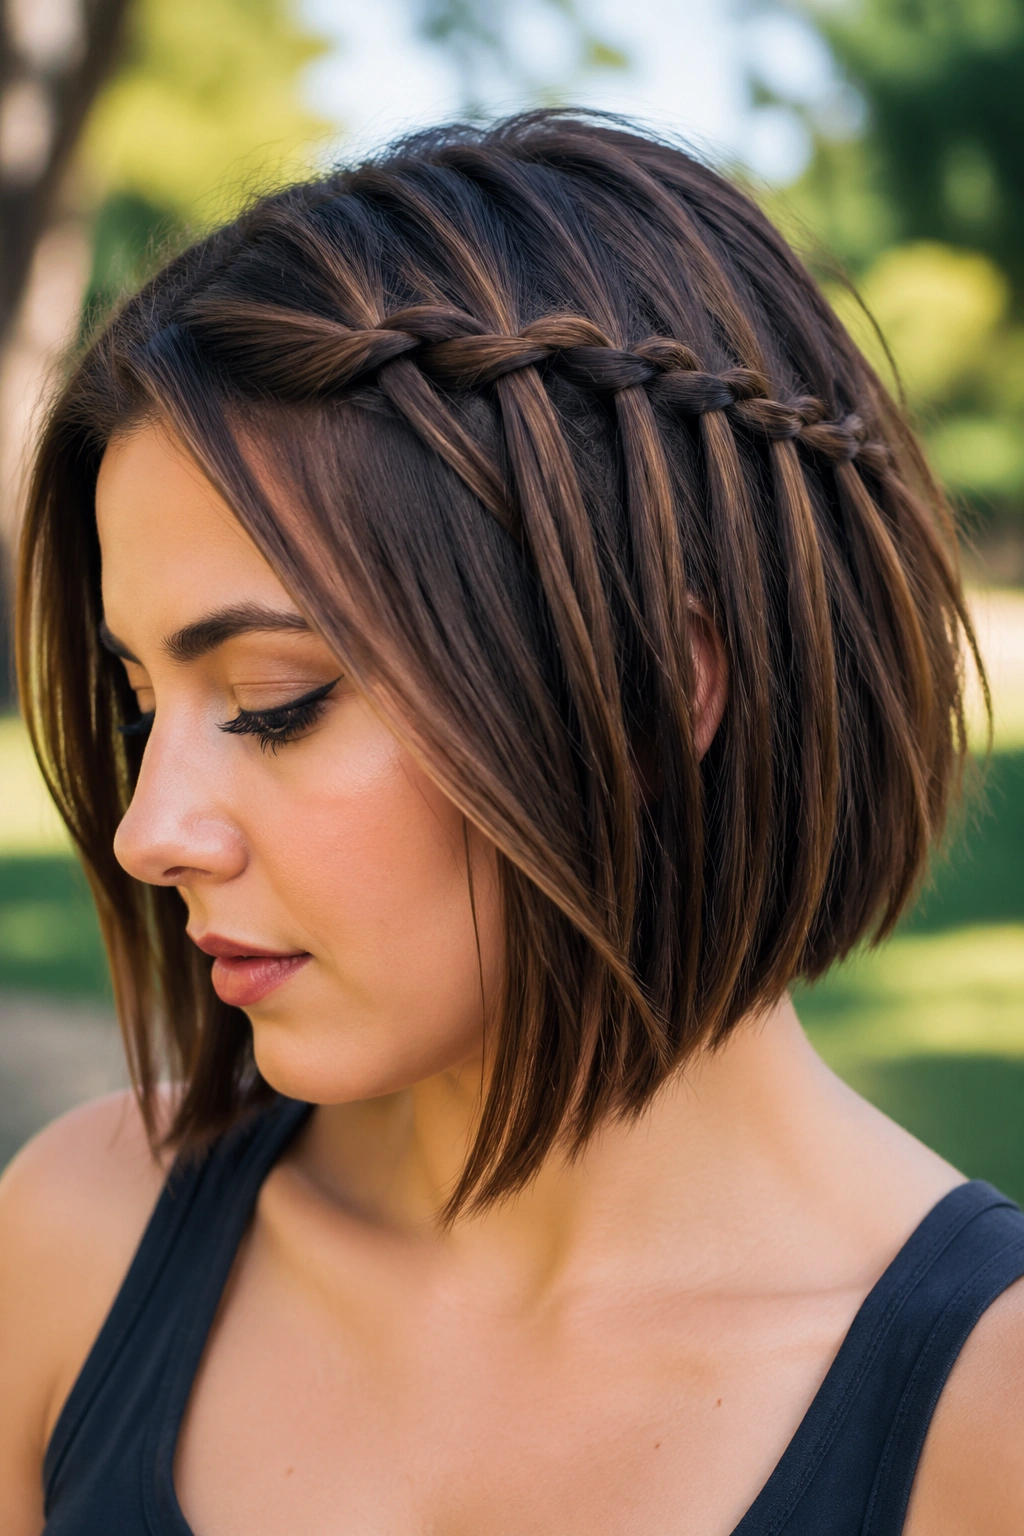
A waterfall braid is not impossible on short hair. It just needs a little more discipline than the long-hair version people are used to seeing. The dropped pieces are shorter, so the braid has to stay tight and neat or it starts to look like an accidental tangle.
The best way to make it work is to keep the top section small and the drops tiny. Think thin ribbon, not thick curtain. A bob with a bit of bend or soft wave gives the braid something to sit on, which helps the pattern stay visible. Straight hair can still do it, but the falls need more pinning.
Waterfall braids are lovely when you want detail without full commitment. They frame the side of the face and leave the rest of the hair free. That makes them useful for short styles that feel too flat on their own.
I would not try to make a waterfall braid huge on short hair. That is how it gets messy. Keep it narrow, hold each stitch snug, and pin the starting point if the front section tries to slip. One good pin often saves five minutes of fixing later.
11. Braided Bangs and Fringe Braids
Bangs can be the most stubborn part of a short haircut. They fall in your eyes, split in the middle, or puff up the second you step outside. A tiny braid across the fringe fixes the problem without flattening the whole style.
Good Places to Put It
- Straight across the forehead for a soft, sporty look.
- Diagonally from one temple toward the opposite side.
- With two tiny braids separated by a thin part.
- As a small braid hidden inside a larger front section.
This style works best when the fringe is at least 2 to 3 inches long. Shorter than that, and you are mostly pinning rather than braiding. That is still useful, but it changes the goal. Use a little styling cream on the fringe so the strands do not break apart while you work.
The nice thing about braid bangs is how forgiving they are. If the braid looks too small, make a second one. If the fringe is uneven, tuck the shorter pieces under the braid and hide the ends with a bobby pin behind the ear. It is one of those styles that turns a haircut problem into a detail.
And yes, it looks better when the pieces are slightly imperfect. Too neat can feel stiff.
12. Mohawk Braid for a Short Cut
A mohawk braid is the short-hair braid that makes the biggest statement with the least length. The center strip gets braided into a raised line from front to back, while the sides stay slicked, pinned, or lightly smoothed down. The contrast is what gives it energy.
This style loves layered pixie-bobs and shaggy short cuts because those haircuts already have movement. You just aim that movement toward the middle. Start with a narrow section at the front, braid tight along the center line, then add hair from both sides in small grabs so the braid stays compact. If the ends are too short to finish cleanly, pin them flat underneath the last stitch.
A little mousse or cream at the roots helps here more than people think. The braid needs grip. Without it, the shorter layers slip out and the middle ridge starts to wobble.
This is one of those looks that changes the mood of a haircut. Soft short hair becomes sharper. Messy layers look deliberate. It is not subtle, and that is exactly why it works.
13. Milkmaid Braid With Pinned Ends
Milkmaid braids on short hair are all about placement. You braid two side sections, bring them up and across the top of the head, then pin them where they meet. The visible braid gives you the shape; the pins do the quiet work underneath.
Short hair can absolutely do this style if the length reaches the jaw or a little below. The braids do not need to be thick. In fact, narrow braids sit better because they curve more easily around the head. If the tail is too short to wrap smoothly, tuck it under the braid and pin it into the base.
Pin Strategy
The first pin should go under the braid, right where it crosses the crown. The second should catch the tail or any short pieces that want to poke out near the ear. If the braid feels springy, add a third pin near the back of the head.
A milkmaid braid gives short hair a sweet, tidy look without making it look childish, which is a line some styles cross. Keep the braids a little rough around the edges and let a few face-framing pieces stay loose. That keeps the style from feeling like a costume.
14. Pull-Through Braid for Short Hair
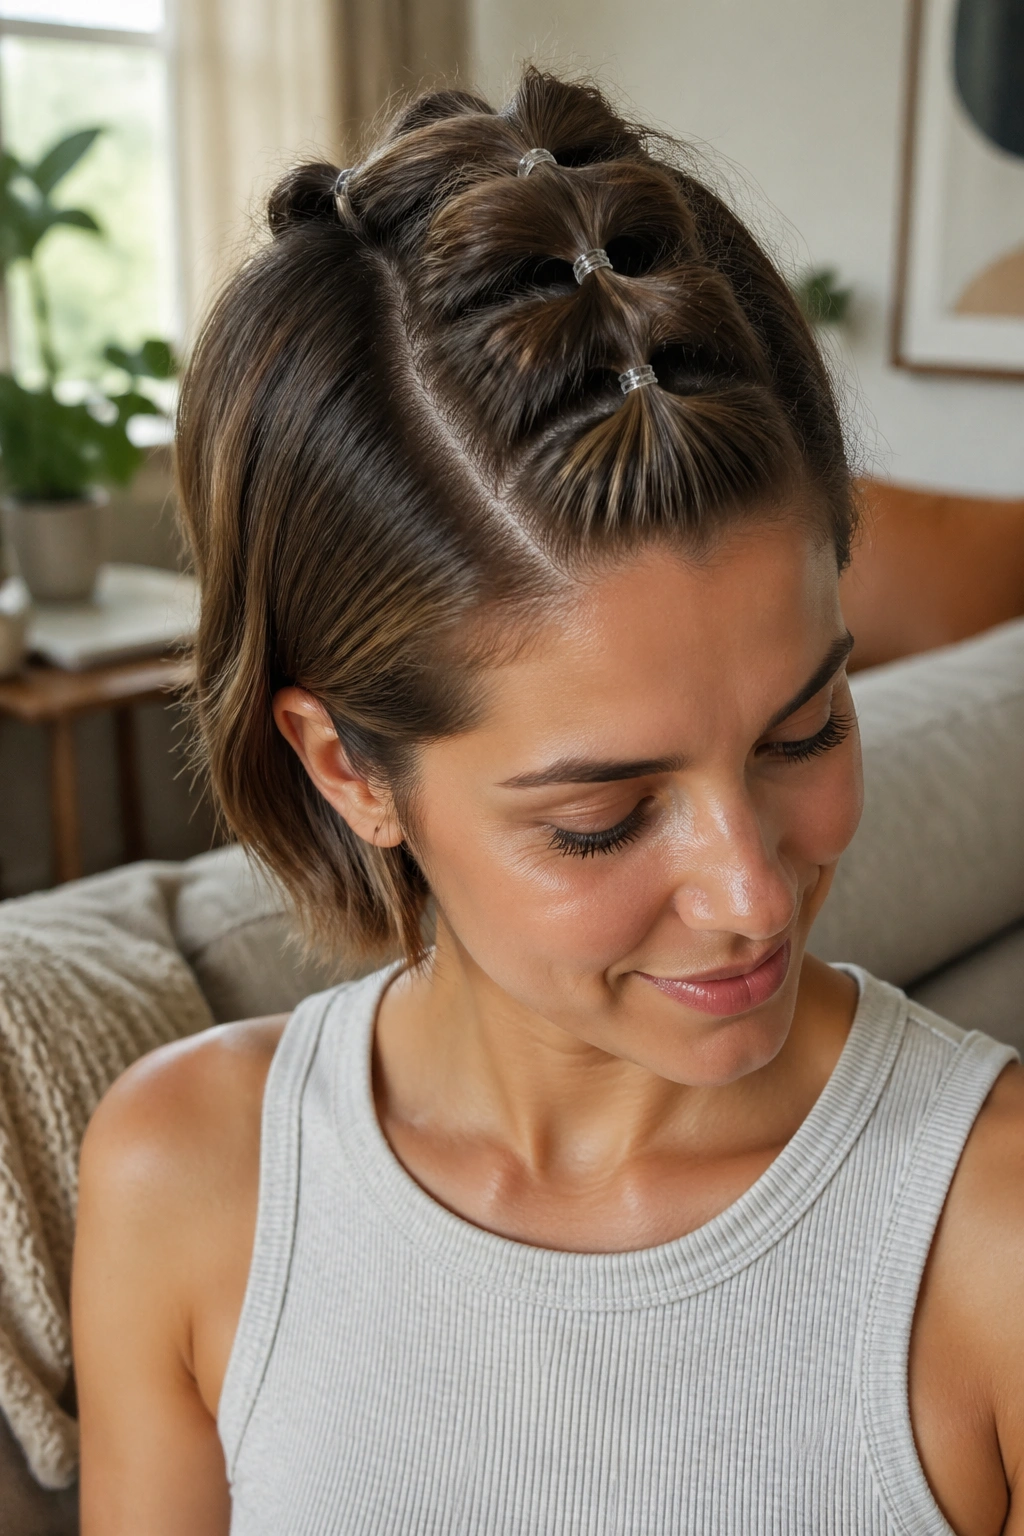
A pull-through braid is not a real braid, and I mean that in the nicest possible way. It cheats. That is exactly why it works on short hair.
Instead of weaving strands, you stack small ponytails on top of each other with clear elastics, then split each one and pull the next section through. The result looks full, even when the hair is too short for a traditional plait. If your ends keep escaping from regular braids, this style gives them a place to hide.
Why It Saves Short Cuts
- It needs length only between each elastic, not at the end.
- It creates a thick-looking braid shape from thin hair.
- It can be adjusted as you go, which helps with layers.
- It works on fine hair that usually goes flat in braids.
Use elastics about 1 to 2 inches apart, depending on your length. Smaller gaps make the braid look neater; larger gaps give it a chunkier shape. After each section is secured, tug the sides gently to puff it out a little. Do that slowly. Too much pulling and the whole thing turns lumpy.
This is a good style when you want the look of a braid but your haircut refuses to play along. No shame in that. The result still counts.
15. Micro Accent Braids Along the Part
Micro braids along the part are the detail work of short-hair braiding. They do not try to cover the whole head. They thread a few tiny lines through the top layers and leave the rest of the haircut alone. That restraint is what makes them work.
A pencil-width section is enough. Braid three to six tiny pieces along the part, then stop and secure each one with a tiny elastic or a pin hidden under the hair. If the braids are too thick, they start to overpower the cut. Short hair looks best when the detail stays small and sharp.
These little braids are especially good when you want a style that lasts through a long day without needing much touch-up. They also play well with waves, because the texture around them keeps the braids from looking like they were pasted on.
Don’t scatter them everywhere. Two or three well-placed micro braids usually look better than six that compete with one another. Place them near the part, around the temple, or just above one ear. That keeps the eye moving without cluttering the haircut.
16. Braided Bun for a Lob
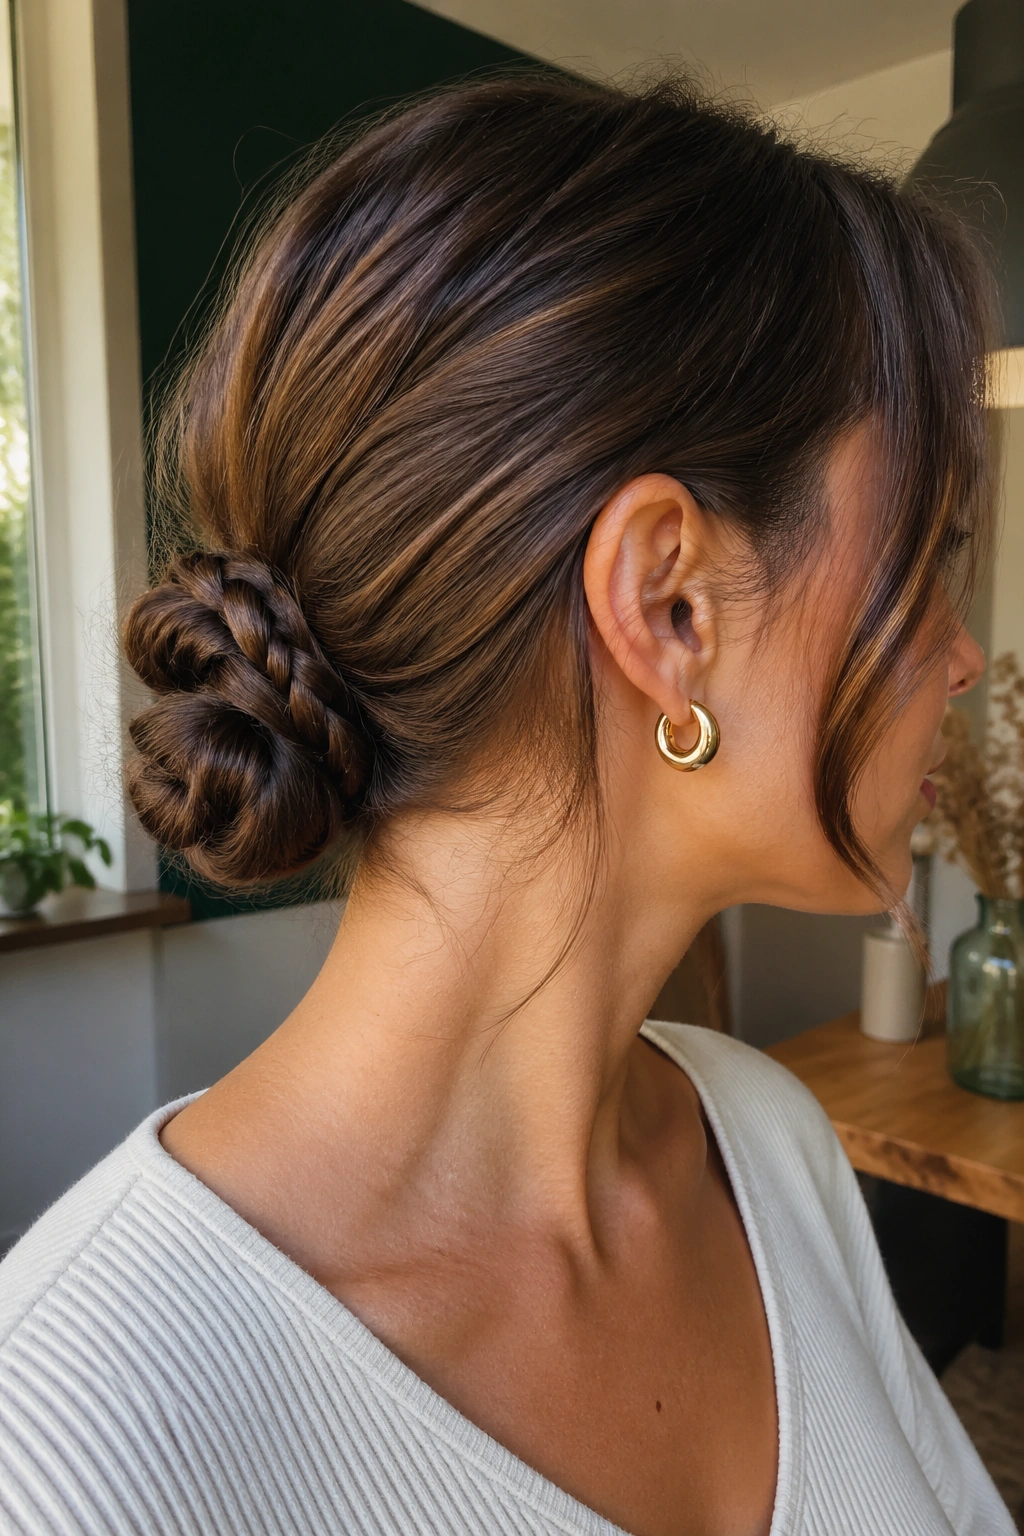
A lob gives you just enough hair to make a braided bun, and that is a nice sweet spot. The braid creates structure, the bun hides the shorter ends, and the whole thing feels neater than a plain twist. If your hair reaches the nape, you can usually pull this off.
Start with a low ponytail, braid the tail, then wrap the braid into a coil and pin it close to the base. If the tail is short, don’t fight it. Fold the end under the coil and pin the folded piece flat. The bun does not need to be large to look finished.
This style works because the braid adds grip. A plain bun on shoulder-grazing hair can slide loose fast, especially if the layers are slippery. A braided tail gives the bun a textured core that stays put better.
Use two to four bobby pins, depending on thickness. Slide them in from different angles so they catch the braid and the base at once. One pin holding everything is optimism, not technique.
17. Accent Braid With a Claw Clip
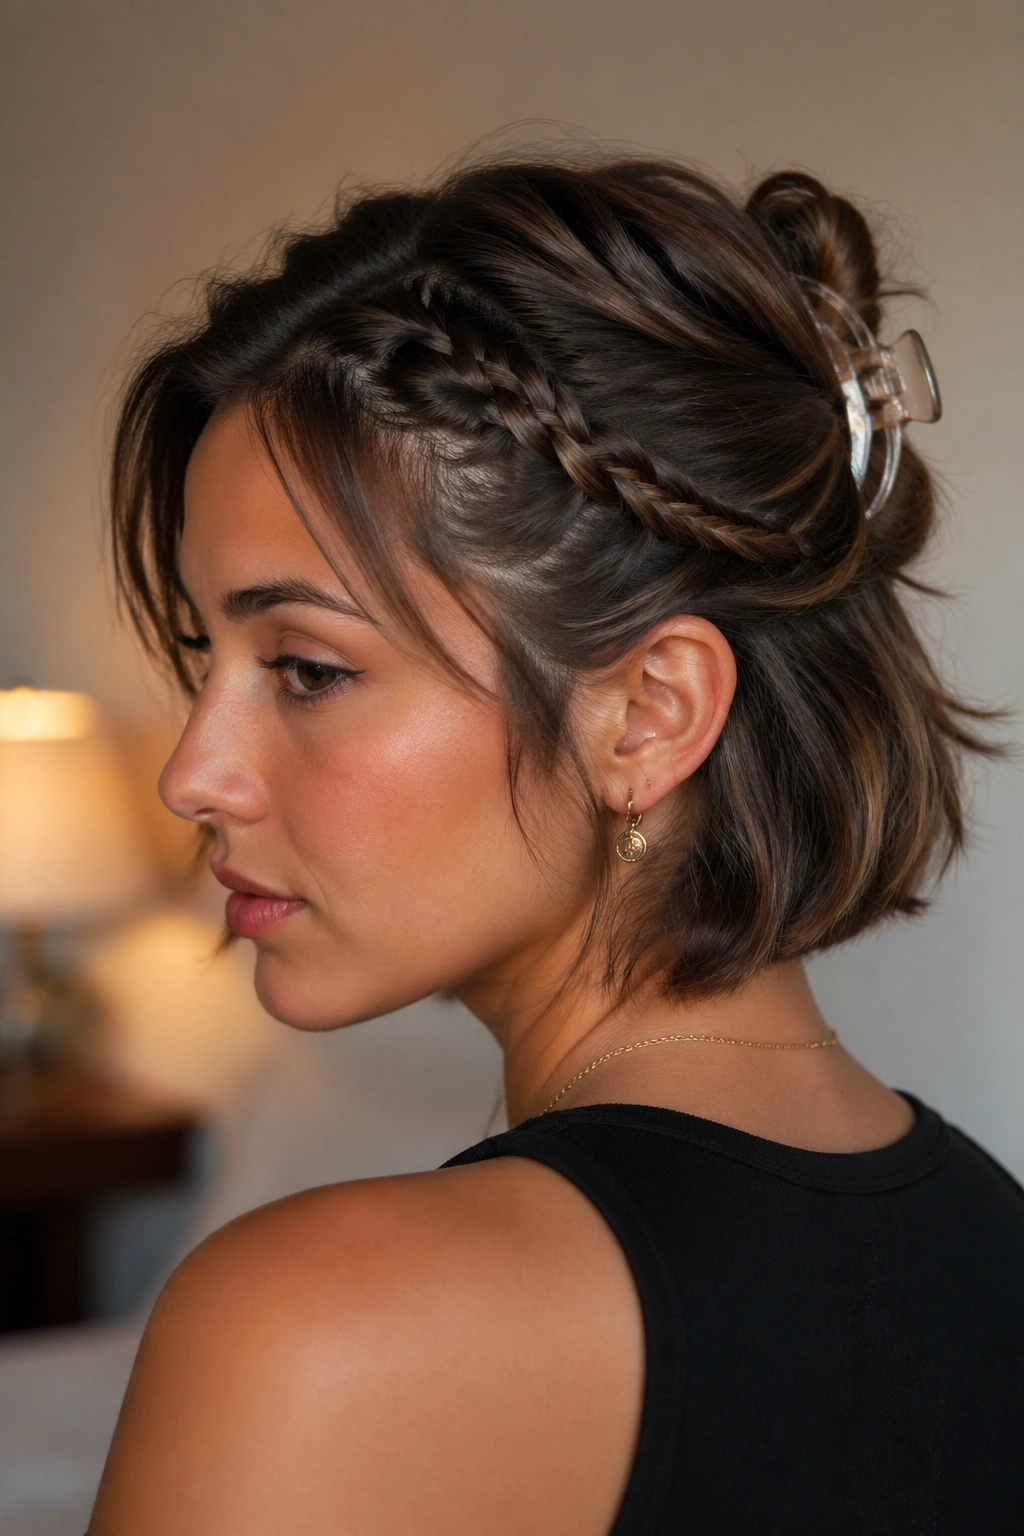
A claw clip and a short braid make a better pair than people expect. The braid controls the front and top, while the clip handles the back. Together they create a fast updo that looks thought through, not thrown together.
Braid a small front section first — a temple braid, a tiny Dutch braid, or even a rope braid — then gather the rest of the hair loosely and twist it up. Clip the twist in place, letting the braid sit visible along one side or across the crown. The braid gives the clip something to hold onto, which matters when short layers start slipping out.
This is a smart option for second-day hair. The roots have a little grit, which helps the braid stay neat, and the clip can catch whatever the braid doesn’t. If the clip keeps sliding, switch to a smaller braid and place it higher on the head so the twist has more support.
A lot of short-hair styles are about concealment. This one is about balance. The braid is the pretty part. The clip is the workhorse.
18. Bubble Braid With a Tiny Braid Base
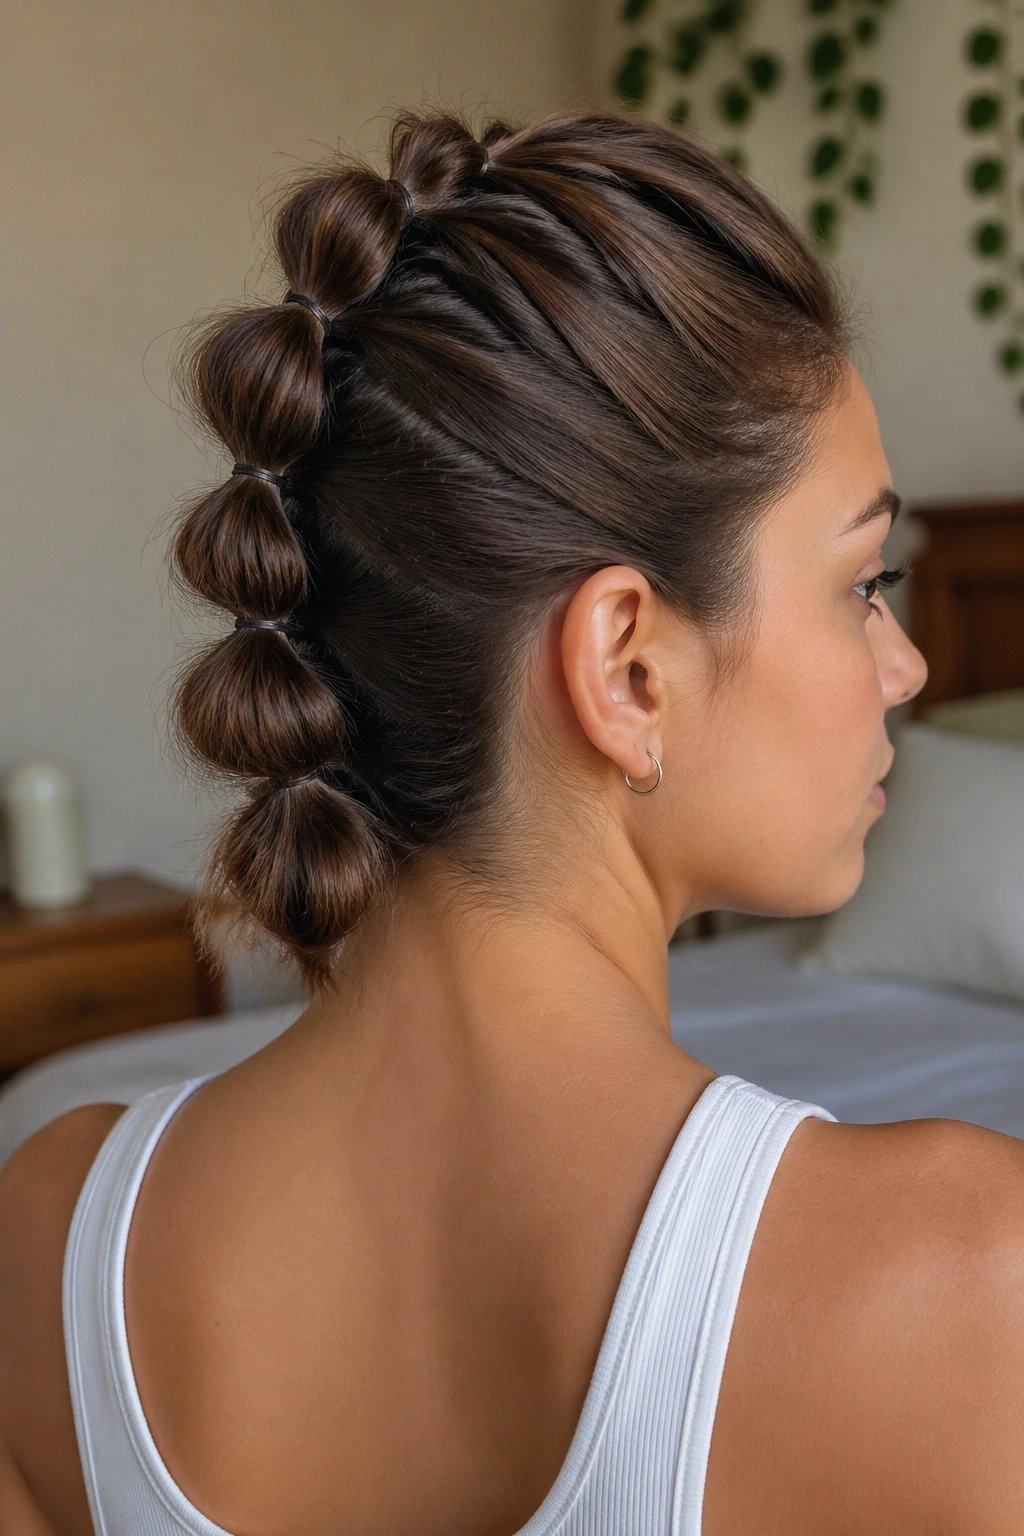
A bubble braid is one of the easiest ways to fake length on short hair, and adding a tiny braid base makes it look more finished. The braid at the top gives the style a clean start, then the elastic-separated bubbles build shape down the back or side.
Start with a narrow braid near the crown or hairline, secure it, then continue the rest of the section with small elastics every 2 to 3 inches. Tug each section gently until it puffs into a round bubble. The result looks fuller than a regular braid and works well even when the tail is too short to weave traditionally.
This style is good for short ponytails that stop halfway down the neck. It also helps if your haircut has layers that won’t stay in a standard braid. The bubbles keep those ends hidden inside each section instead of letting them poke out.
Keep the spacing even. Uneven elastic gaps make the style look patchy fast. If your hair is very fine, use tiny clear elastics and a bit of texture spray before you start. That extra grip keeps the bubbles from collapsing after an hour.
19. Low Faux Ponytail Braid With Tucked Ends
This is the braid for short hair that wants a polished finish without pretending to be longer than it is. You gather the hair low at the nape, braid what you can, and tuck the ends under so the shape reads as a neat faux ponytail instead of a half-failed plait. It works especially well on cuts that reach the collarbone or hover just above it.
The trick is to keep the base secure before you start braiding. Use a small elastic or a few pins to gather the lower section, then braid the tail as far as the length allows. When the ends get too short, fold them under the braid and pin them flat beneath the elastic. From the outside, the finish looks smooth and deliberate.
This style is useful when you want something cleaner than loose hair but softer than a full updo. It can look dressy with a satin ribbon wrapped around the base, or casual with a few loose pieces around the face. Short hair usually does better when the finish is practical first and decorative second.
That is the real lesson with braids on short hair. Stop asking for length that is not there. Use the scalp, use pins, use texture, and let the braid work with the cut instead of against it.