Date-night hair has to earn its keep.
A long braid ponytail does that better than most styles. It gives you height at the crown, movement through the length, and enough structure that your hair still looks intentional after dinner, drinks, and the long conversation that runs later than you expected. Loose waves can fall flat. A plain ponytail can look a little unfinished. Braids sit in the middle, which is exactly why they work so well.
The details matter more than the braid type itself. Where the pony sits, how tight the braid feels, whether you wrap the elastic, whether you leave a few face-framing pieces out — all of that changes the mood fast. A sleek version reads sharp and modern. A loose one feels softer, a little more romantic. Add a ribbon or a few micro braids and the whole style tilts in a different direction.
Some of these looks suit straight hair that needs grip. Others look better with waves, curl, or a little frizz left on purpose. That’s the useful part: long braid ponytails are flexible without being bland, and the 14 styles below give you room to match your hair, your outfit, and your patience level before you walk out the door.
1. Sleek High Dutch Braid Ponytail
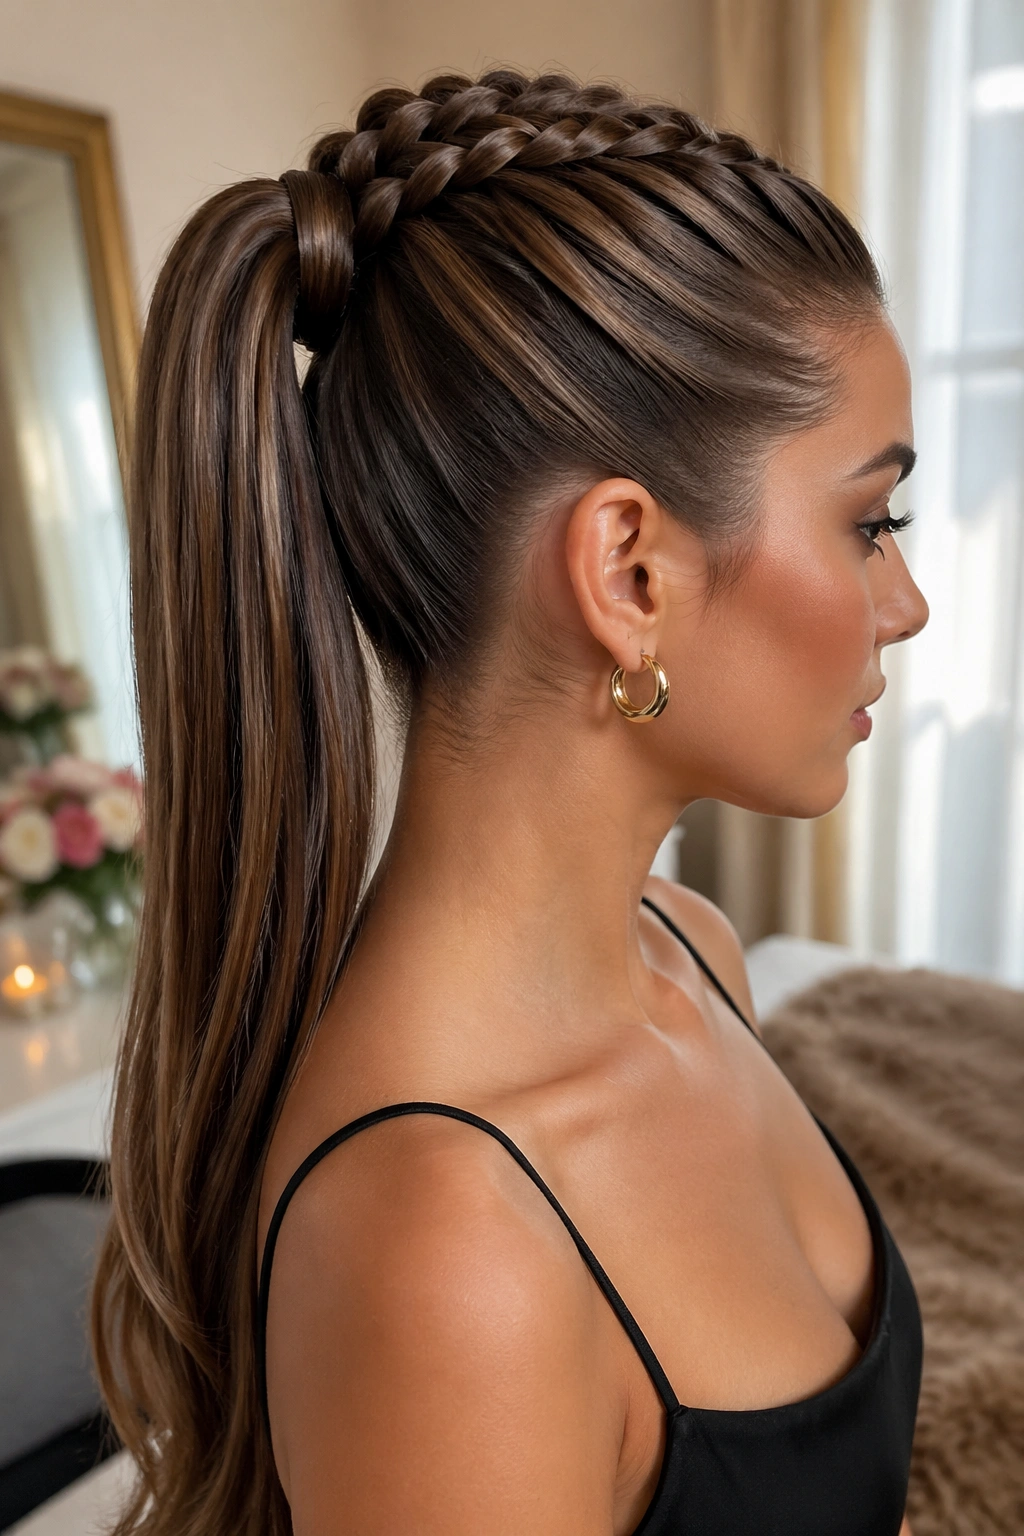
A high Dutch braid is the most polished version in the bunch, and I mean that in the best way. It lifts the face, shows off the neck, and gives you that clean, pulled-together line that looks good with a sharp neckline or a strappy dress.
Start the braid at the crown and keep the sections snug against the scalp so the pattern sits proud instead of sinking into the hair. Once you reach the nape, gather everything into a high ponytail and wrap a small strand around the elastic. That little wrap matters. It turns the finish from “I tied my hair back” into “I meant this.”
Why It Works at Night
The structure does the flirting for you. A Dutch braid already has dimension because the pieces sit on top of the hair rather than disappearing into it, so the style catches the eye even in low light.
It also keeps the top smooth without looking severe. If your roots get puffy fast, work a small amount of styling cream through the front hairline before you begin. Don’t drown it. A pea-sized amount is enough for most hair types.
- Best for sleek dresses, square necklines, and bold earrings.
- Use a fine-tooth comb if you want a glassy root line.
- Backcomb the crown lightly if your hair is very fine.
- Finish with a light mist of flexible hairspray, not a stiff shell.
Tiny tip: If the braid starts to slip, pin the first two crossing points with a bobby pin under the hair so the whole style stays anchored.
2. Chunky Side Braid Ponytail With a Wrapped Base
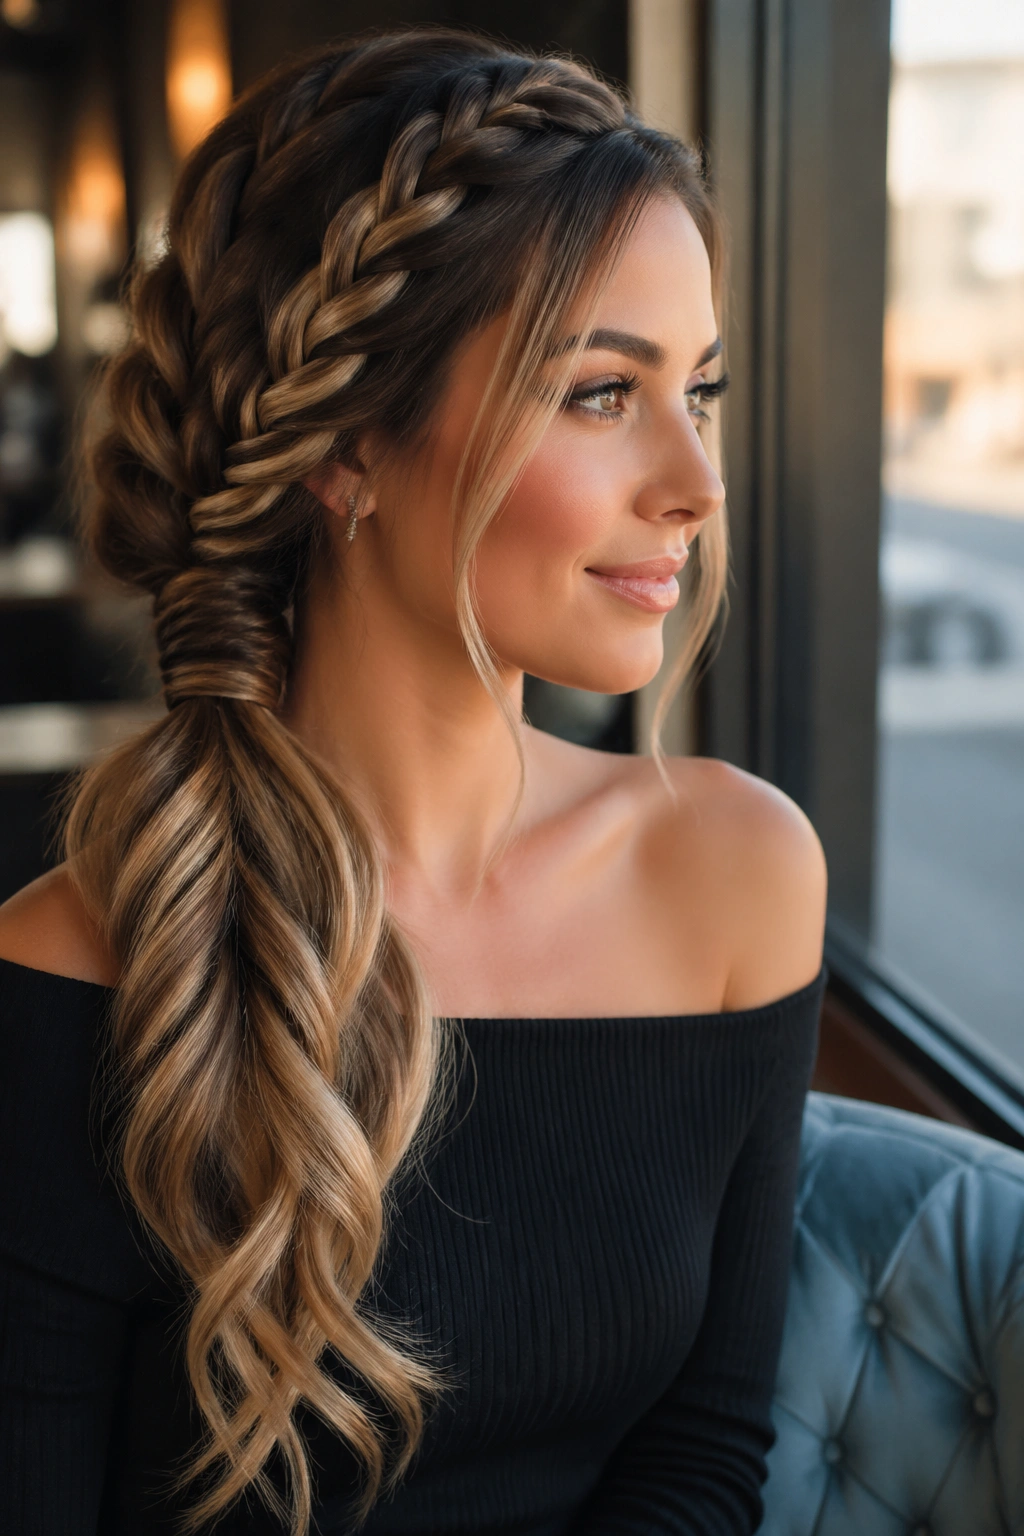
A chunky side braid can look expensive without looking stiff. That’s the charm. It sweeps across one shoulder, which gives the whole style a softer line than a straight-back ponytail, and it plays very nicely with off-center parts and one-shoulder tops.
The key is thickness. Keep the braid sections wide and let them overlap with a little room, then gently pull the edges apart once the braid is secured. People call that “pancaking,” but the name is clumsy; the effect is what matters. The braid turns broader, flatter, and a little more relaxed, which is exactly what you want here.
A low side placement feels especially good for dinner dates because it keeps the front open while still giving you hair to play with. Let one side sit behind the ear and let the braid fall forward over the collarbone. That line looks good in pictures and even better in person.
One thing I like about this style: it doesn’t need perfect symmetry. In fact, a little irregularity helps. If one section looks slightly wider than the other, leave it alone. That unevenness gives the braid movement, which is much more interesting than a tight, overworked plait.
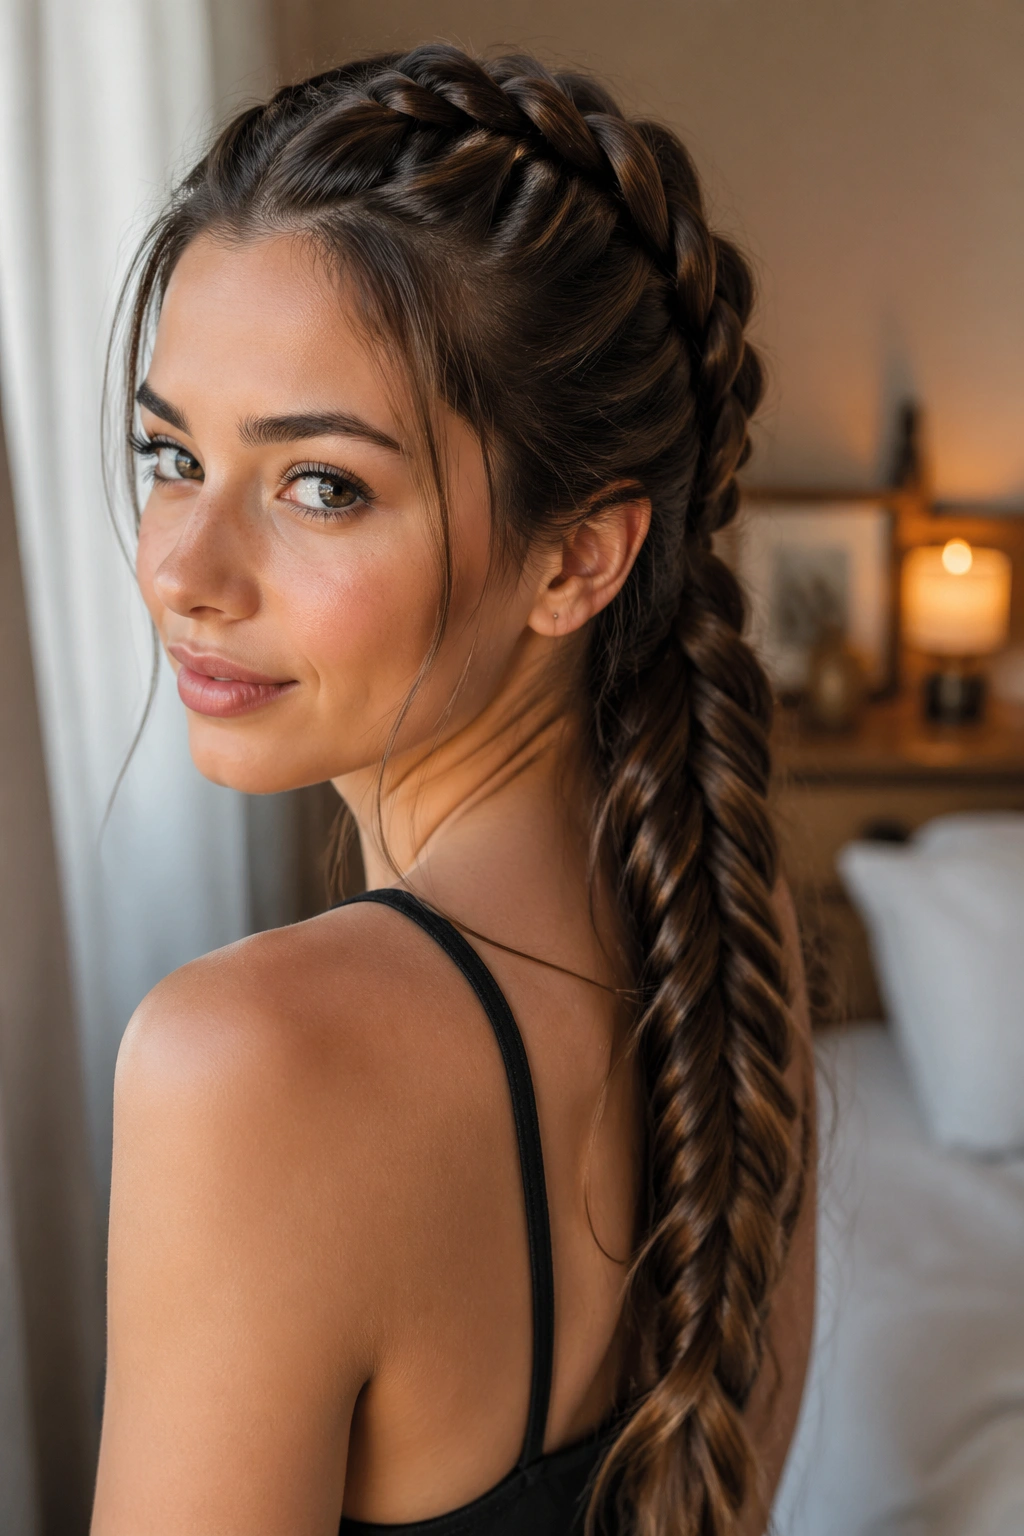
3. Fishtail Braid Ponytail With Soft Face-Framing Pieces
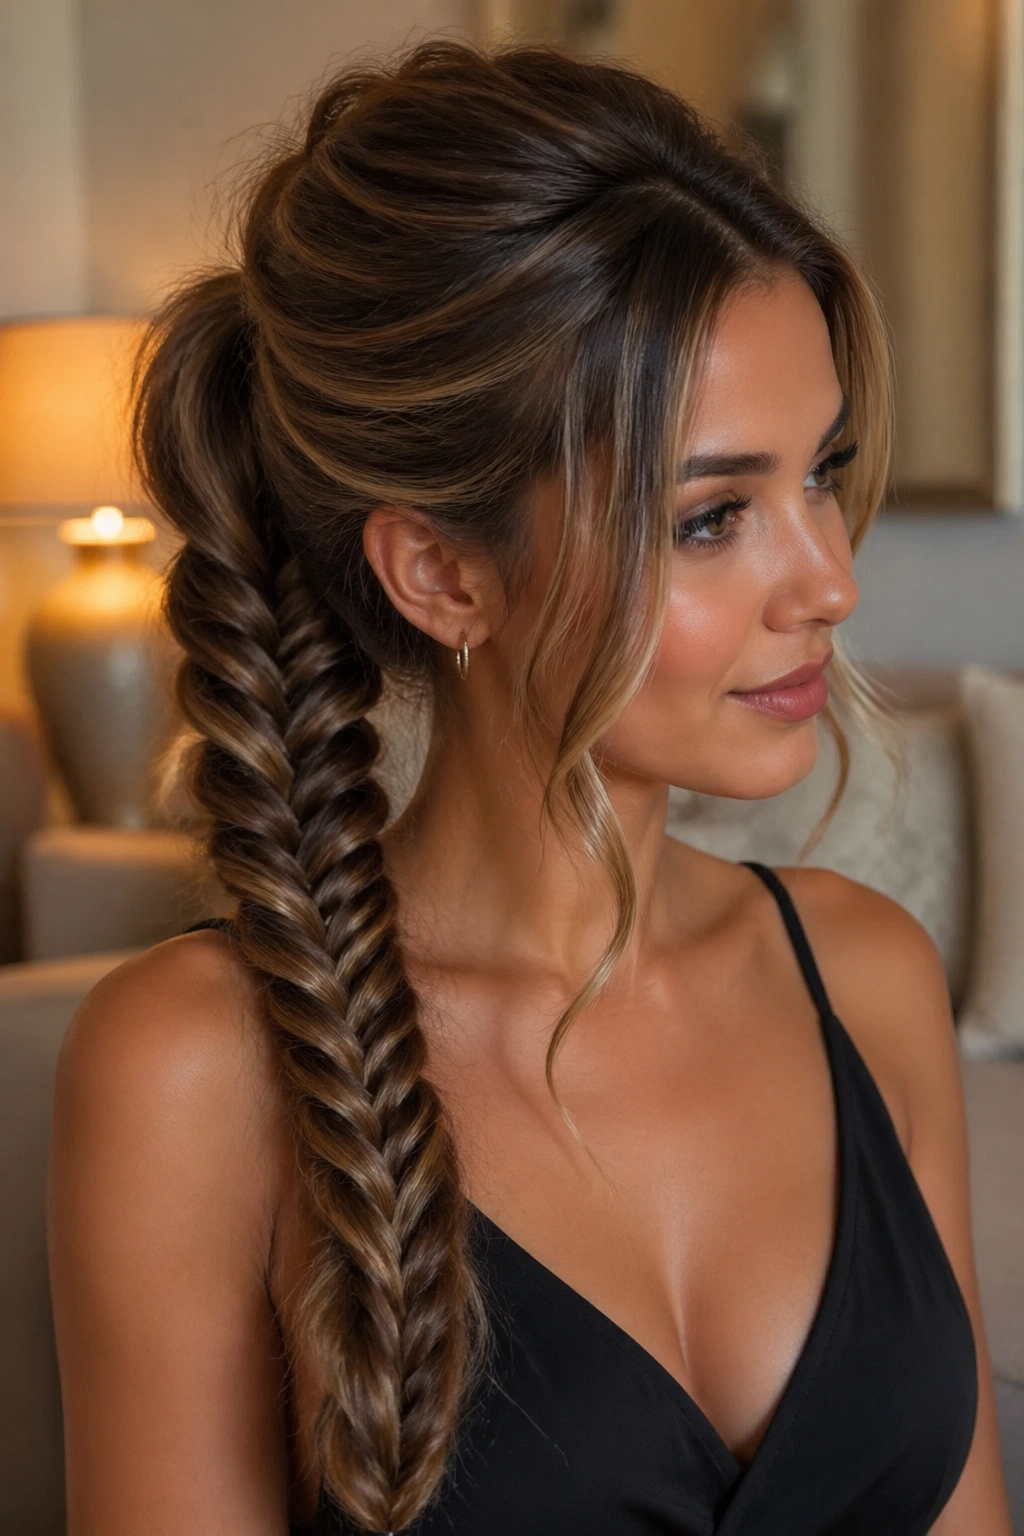
Why does a fishtail braid feel so romantic? Because the texture is small and layered, almost like woven fabric instead of obvious chunks of hair. The pattern looks detailed from a distance and even better up close, which is useful when the conversation gets near and the lights get low.
A fishtail ponytail works best when you keep the front pieces soft. Leave out two thin sections near the temples, curl them with a 1-inch iron, and let them fall toward the cheekbones. Then gather the rest into a ponytail and fishtail the length from there. If your hair is layered, you may need to smooth the shorter pieces into the braid with a little grip spray first.
How to Wear It
This style likes movement. If you pull every strand too tightly, the braid can look a bit packed and fussy. Keep it controlled at the crown, then loosen the lower half so the tail feels airy.
It’s one of the best date-night braid ponytails for satin dresses, slip skirts, and anything with thin straps. The braid itself brings enough detail that you can keep the rest of the outfit simple.
- Use a small elastic to secure the base before fishtailing.
- Pull the braid edges apart after you finish for a fuller look.
- Curl only the face-framing pieces if you want a softer finish.
- Skip heavy wax near the ends; it can make the braid feel sticky.
A practical note: Fishtails hold better on hair that’s not freshly washed. Day-old hair gives the sections more grab and makes the pattern easier to keep neat.
4. Rope Braid Ponytail With Curled Ends
Getting dressed with twenty minutes to spare? A rope braid is the one that behaves. It looks more intentional than a basic twist, but it takes less coordination than a full three-strand braid, which makes it a smart choice when the clock is not on your side.
The trick is simple: split the ponytail into two sections, twist both in the same direction, then wrap them around each other in the opposite direction. That contrast is what gives the rope braid its clean, springy look. If the ends are straight and blunt, curl them lightly with a wand so the style ends in a soft bend instead of a hard line.
The rope braid is especially nice on straight or slightly wavy hair because the twist shows off shine. A little serum on the mid-lengths makes the pattern pop without making the roots greasy. Keep the product away from the scalp. You want gloss, not slip.
- Use two small clear elastics if the hair is very layered.
- Twist each section tightly before crossing them.
- Hold the braid with one hand while you secure the end.
- Finish with a medium-hold spray so the rope shape stays defined.
The whole thing reads neat, but not uptight. That’s the sweet spot.
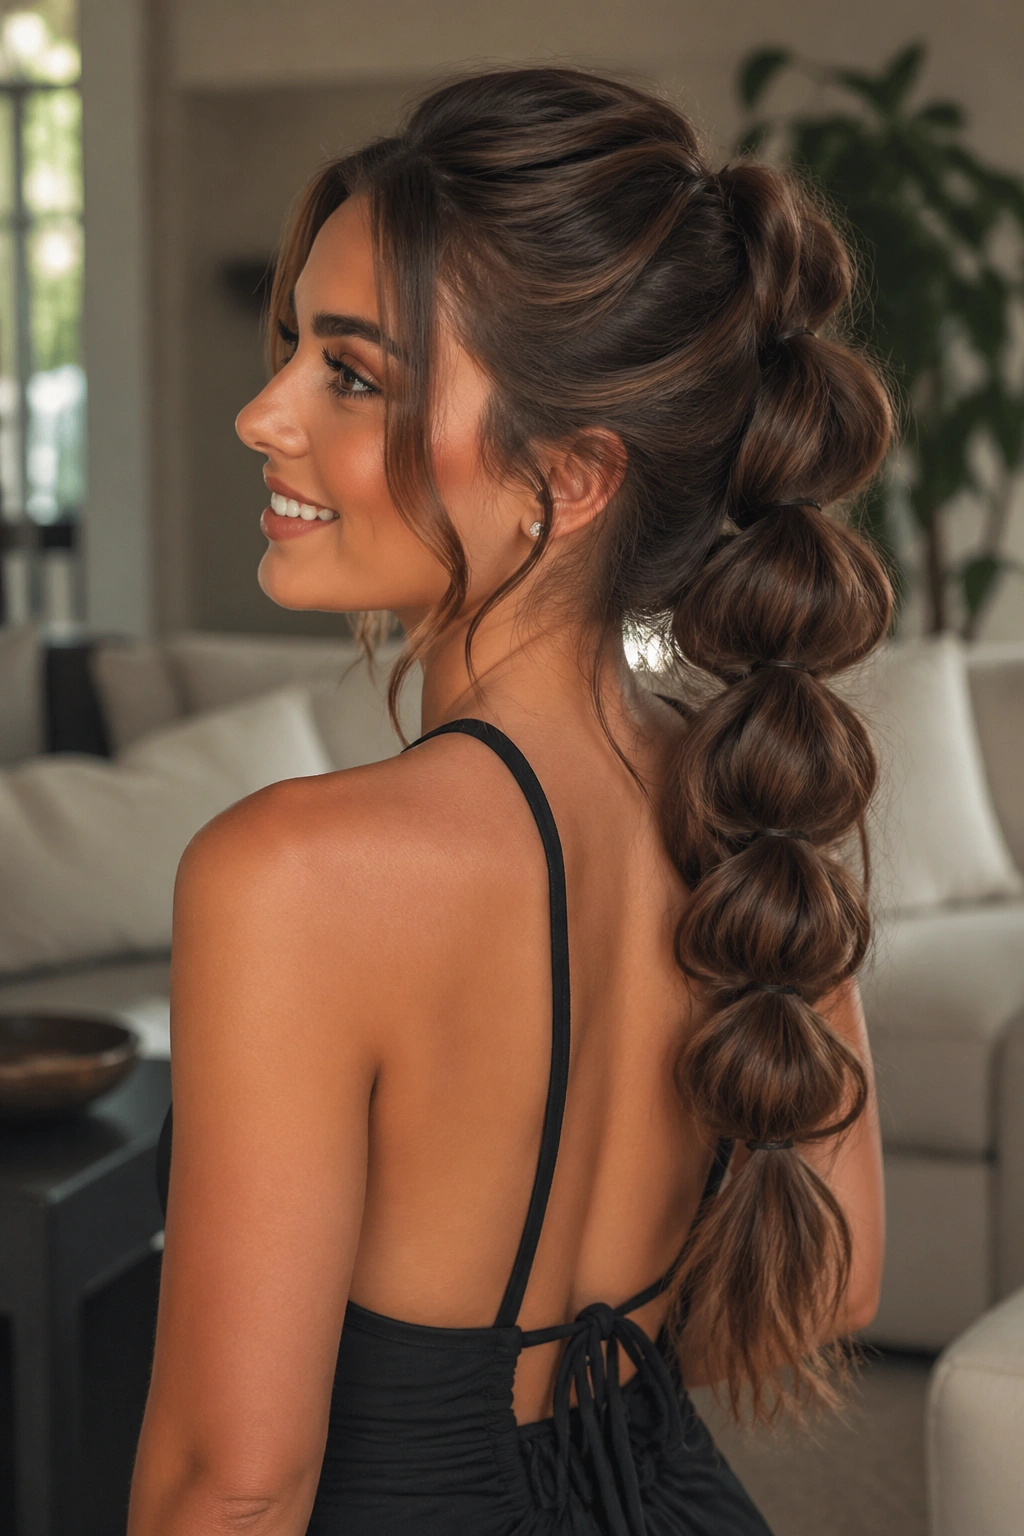
5. Bubble Braid Ponytail With a Glossy Finish
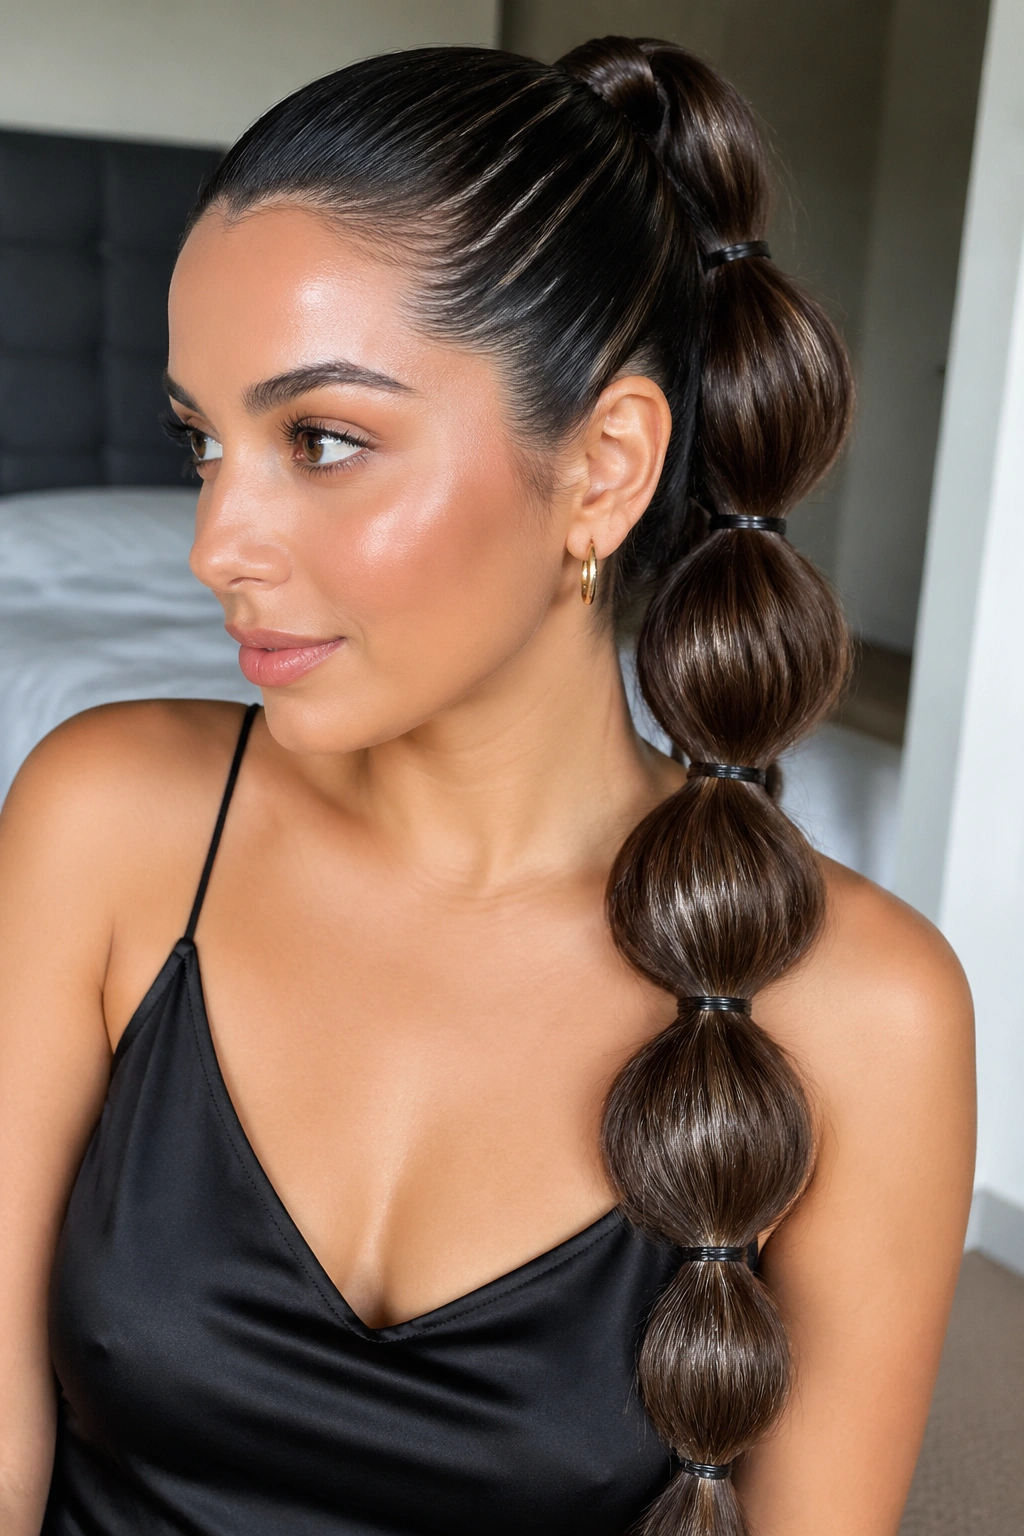
A bubble braid is playful, yes, but it does not have to look childish. The difference sits in the spacing and the finish. Keep the crown smooth, keep the bubbles round, and use enough tension that each section holds its shape instead of collapsing into puffed lumps.
Start with a ponytail, then add small elastics every 2 to 3 inches down the length. Gently pull each section outward between the elastics until it forms a soft bubble. That part is oddly satisfying. The braid-like shape comes from the spacing, not from weaving, so the style is fast once you get the rhythm.
I like this one for a dress with simple lines. A fitted black top, a slip dress, a blazer with strong shoulders — those are all good matches because the hair brings the visual interest. If the outfit is already full of lace, sequins, or ruffles, a bubble braid can still work, but keep the bubbles smaller and lower so the whole look doesn’t get noisy.
One short sentence matters here: shine is the point. Use a bit of gloss spray at the end, not at the roots, and the style suddenly looks deliberate rather than sporty.
6. Half-Up Braid Feeding Into a Long Ponytail
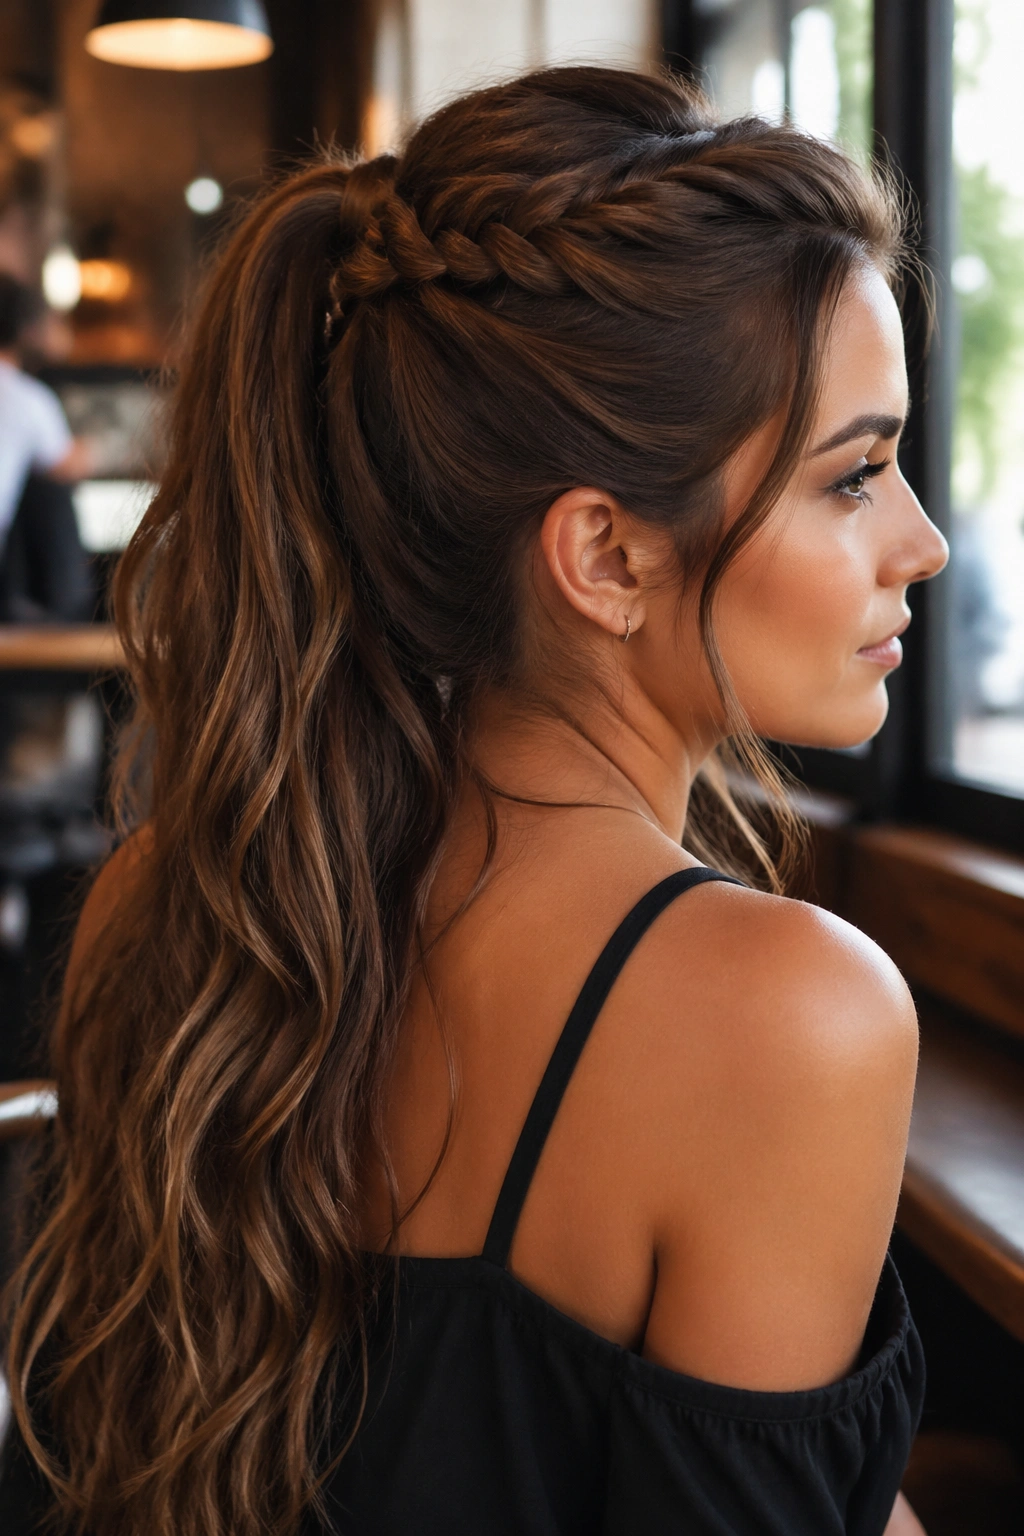
Unlike a full ponytail, this style leaves some length loose while the top half does the work. That makes it useful when you want your hair out of your face but still want the length to swing when you turn your head.
The braid can start at the temples, travel back along the crown, and merge into a ponytail at the mid-back of the head. The lower section stays free, so the finished look has both structure and softness. It’s a good move for layered hair, especially if the top layers are shorter and usually slip out of a basic tie.
What makes this one easy to wear is the balance. The braid gives you shape near the face, which keeps the style from feeling too plain, while the loose length keeps it from looking overly styled. That matters if you’re wearing something casual but still want the hair to feel finished.
I also like this version with warm highlights or balayage, because the braid shows off the color changes in a way that straight hair often doesn’t. Keep the waves loose through the ends — nothing tight or corkscrew-like. The goal is movement, not perfection.
7. Side-Swept Braid Ponytail for Off-Shoulder Outfits
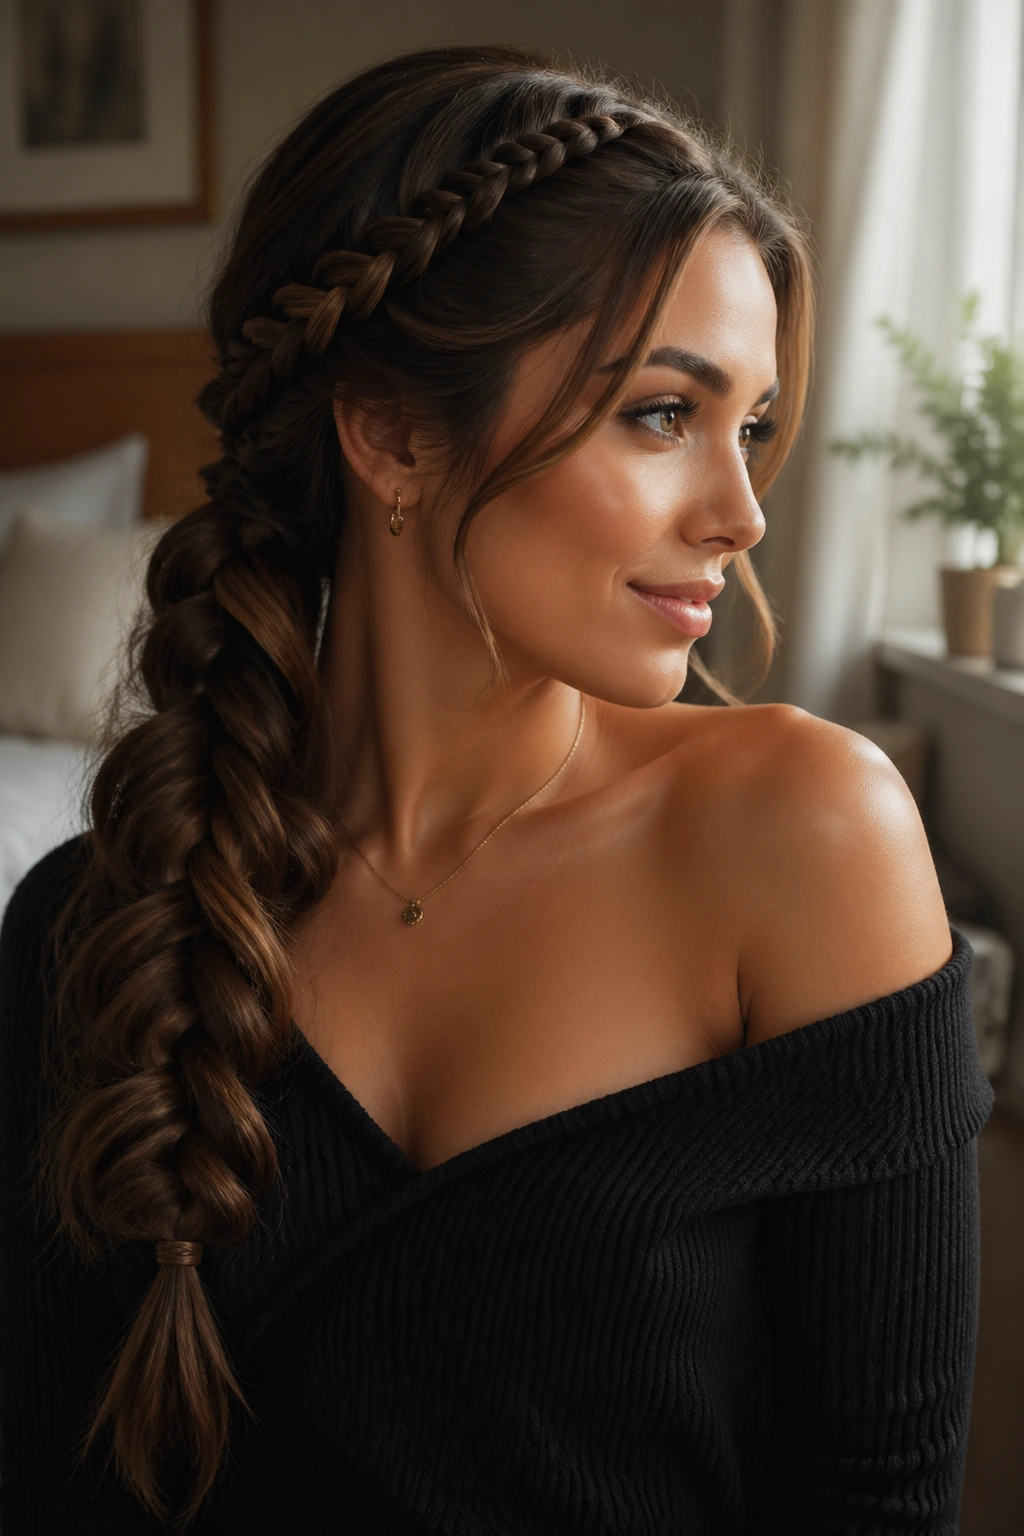
Picture an off-shoulder top and hair swept over one collarbone. That’s the mood here. A side-swept braid ponytail creates a diagonal line across the head, which gives the style a little drama without needing a full updo.
Start with a deep side part. Braid from the heavier side toward the back, then gather everything into a ponytail slightly behind one ear or at the nape, depending on how low you want the finish. A small amount of texture spray at the roots helps the hair stay where you put it, especially if your hair is silky and likes to slide.
What to Watch For
If you braid too far forward, the look can feel heavy around the face. If you braid too far back, you lose the sweep that makes the whole style interesting. The sweet spot is just above the temple, where the braid can skim across the front without swallowing it.
- Works well with asymmetrical dresses and one-shoulder tops.
- Pairs nicely with drop earrings on the open side.
- Use a tail comb to keep the side part sharp.
- Leave a few soft pieces near the jaw if you want less structure.
A side-swept braid has a little old-Hollywood energy without turning into a costume. That’s why it keeps showing up for evening plans.
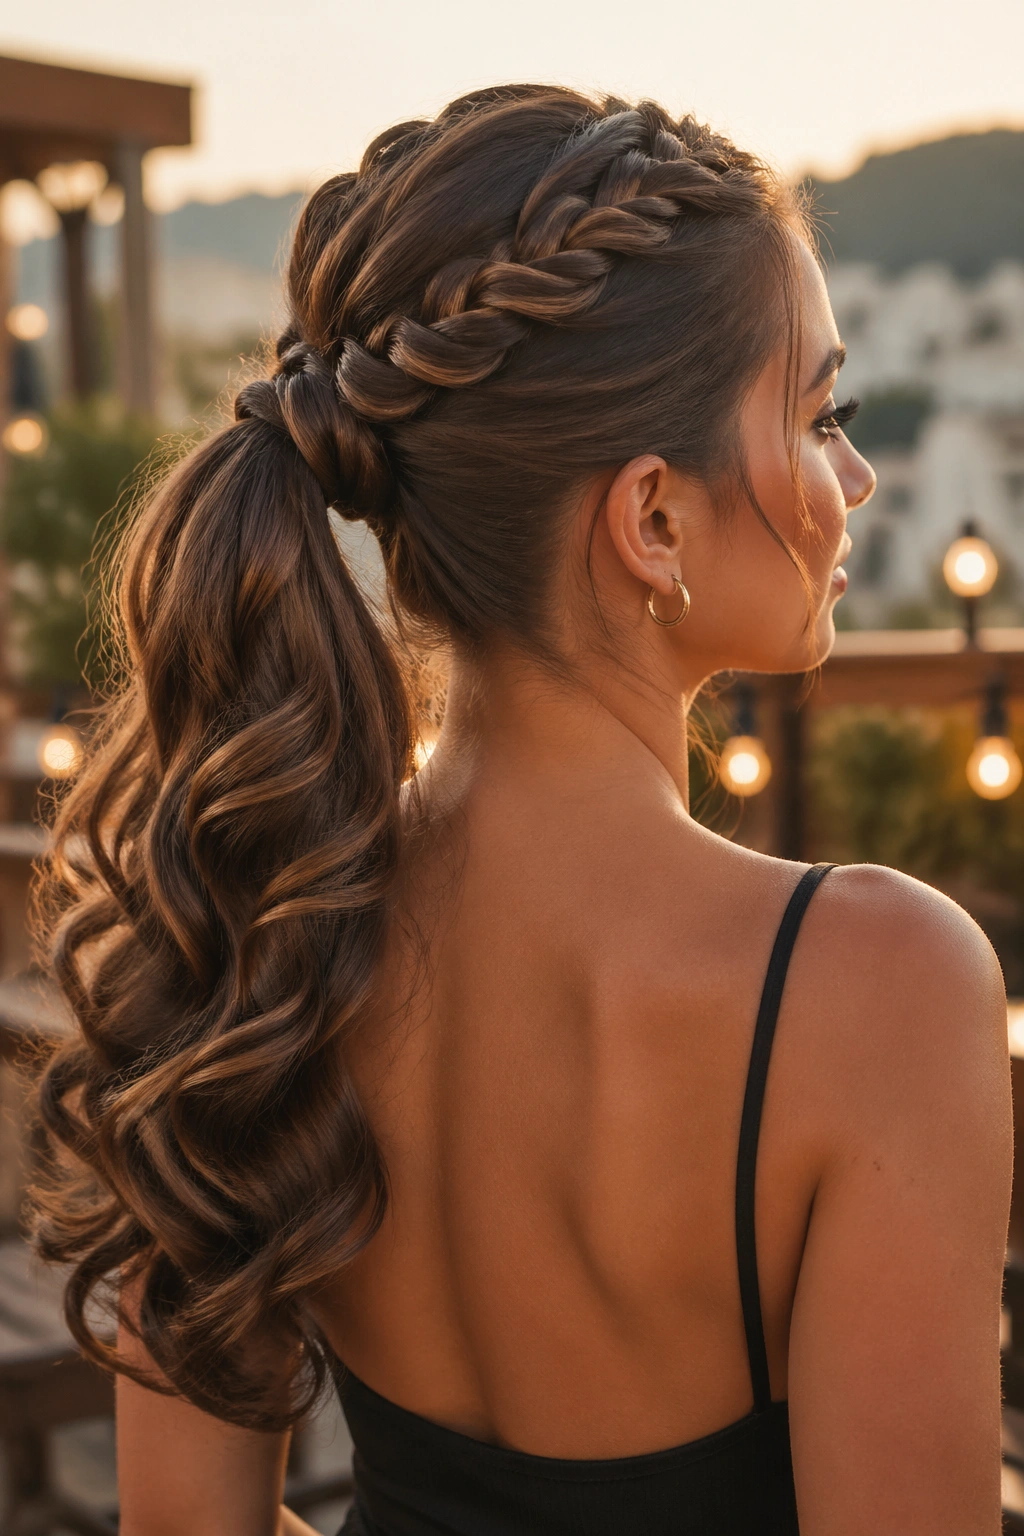
8. Crown Braid Leading Into a Low Ponytail
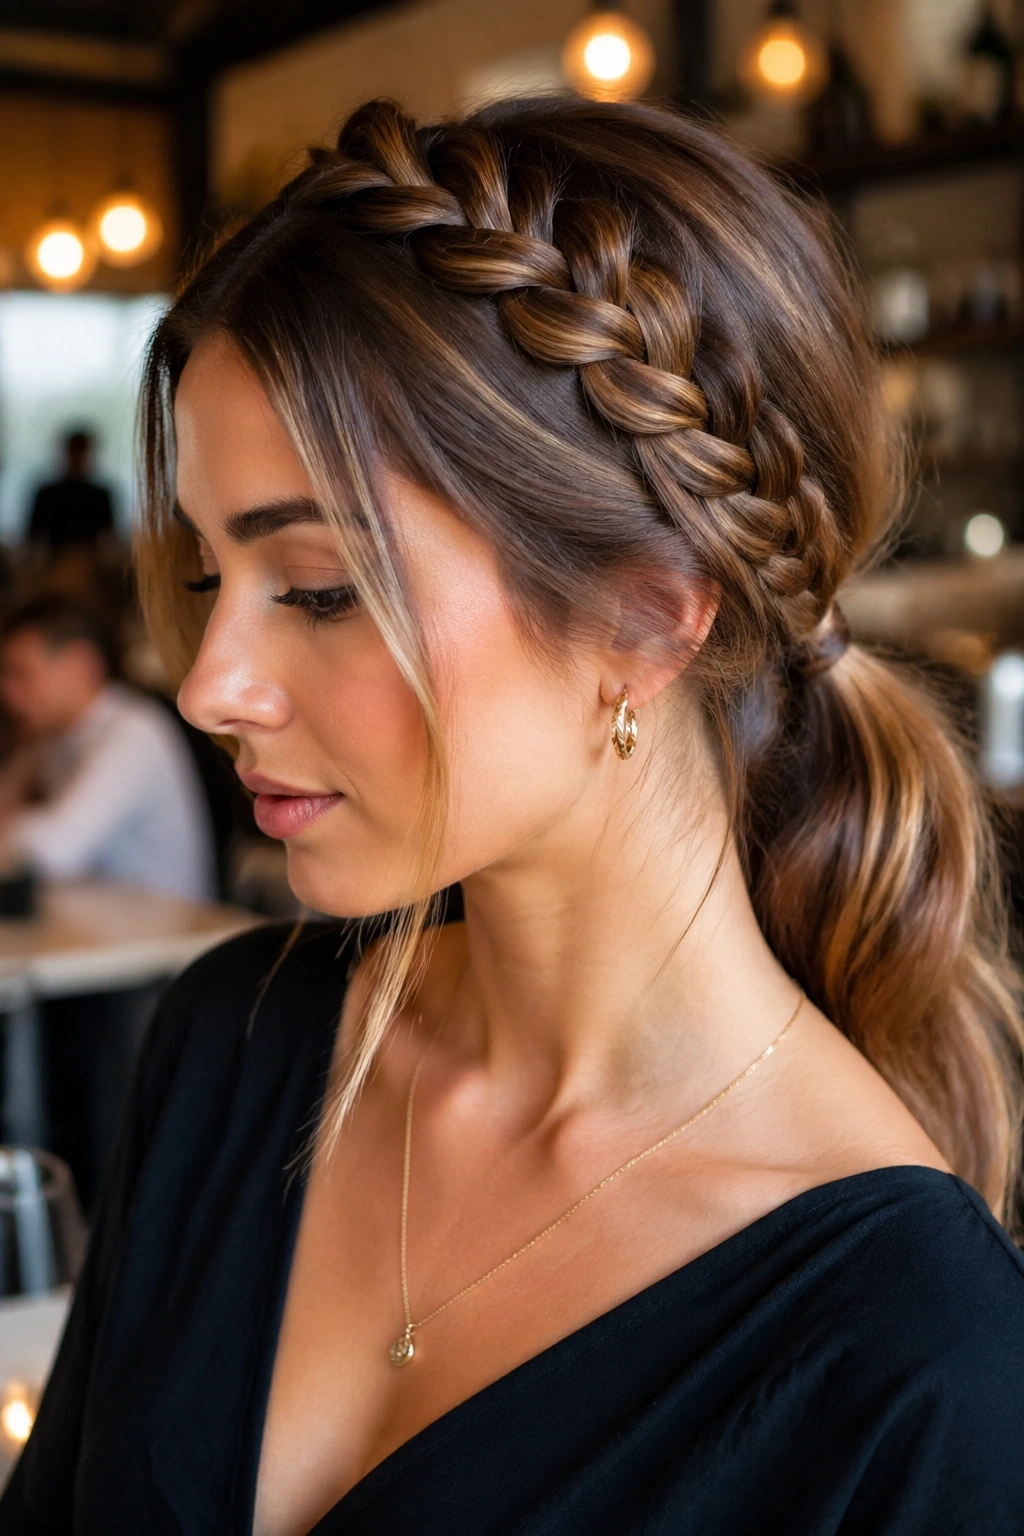
Can a low ponytail still feel dressed up? Yes — if the braid does the framing. A crown braid works like a built-in headband, pulling the eye around the face and then releasing into a ponytail at the nape, which keeps the whole style grounded.
This one is lovely when you want your hair off your neck but still want a soft, feminine shape. The braid sits close to the hairline, so it tames flyaways without flattening everything. Then the ponytail at the bottom keeps it from feeling too formal or too precious.
How to Keep It Soft
Use a light hand. A crown braid can look severe if every section is pulled tight and the parting is too crisp. Leave just enough looseness at the temples so the style moves when you do. A soft side part can help too, especially if your face shape benefits from a little asymmetry.
A low ponytail works best here when it sits right at or below the nape, not halfway up the back of the head. Wrap it with a strand of hair or a slim satin ribbon if the outfit calls for a more finished look.
This style suits dinner patios, candlelit restaurants, and anything where you want the hair to stay in place through the whole evening.
9. Pull-Through Braid Ponytail With Plush Sections
If your hair is fine, a pull-through braid might be the one to try. It creates bulk where a regular braid can look thin, and the result is all about those plush, rounded sections stacked down the ponytail.
The method is simple. Build a ponytail, divide it into small stacked sections with clear elastics, then split and pull each section so it widens into loops. It sounds fussy, but once the first few ties are in place, the shape builds quickly. The finished braid has a fuller, almost padded look that reads beautifully in photos and in dim light.
What I like most here is that it gives fine hair some visual weight without needing extensions. It also works on layered hair because the sections hold each other in place better than a standard braid. If the hair is slick, rough it up first with dry texture spray. A little grit makes the pull-through sections easier to shape and keeps them from slipping.
- Use elastics that match your hair color.
- Tug the sides evenly so the loops stay balanced.
- Keep the top smooth before you start.
- Stop pulling once the braid looks full; over-teasing makes it messy fast.
A pull-through braid has volume without looking messy, and that balance is hard to beat.
10. Boxer Braids Gathered Into One Ponytail
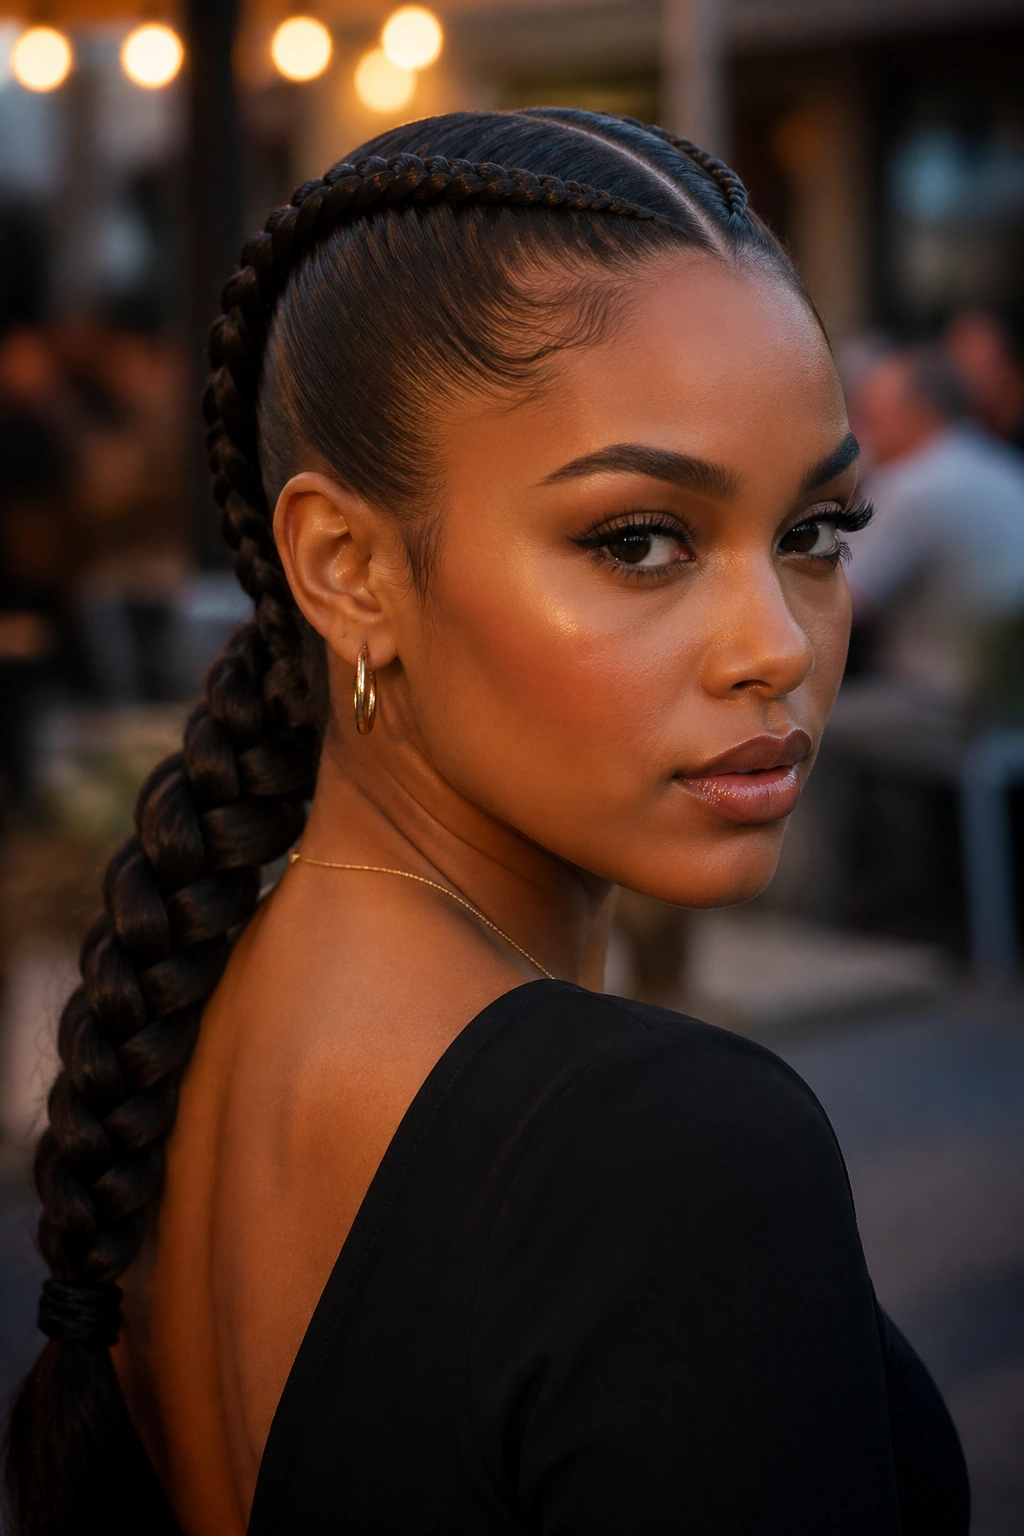
Boxer braids are not only for the gym. When they’re smoothed down and pulled into one ponytail, they can look sharp, modern, and a little cool in the right outfit. Think leather jacket, structured blazer, sleek tank, heeled boots. The hair becomes part of the outfit instead of sitting on top of it.
The trick is in the roots. Use a light styling cream or gel at the front so the center part stays clean and the braids stay tidy close to the scalp. Braid both sides back, then meet them at the nape and secure them together into one ponytail. You can leave the tail straight for a sharper line or add a loose bend with a flat iron if you want less edge.
This style is a good choice when you want to show off your face and your earrings. It keeps everything off the cheeks, which is useful if you like a strong lip or a bit of shine on the skin. It’s not soft in the usual romantic sense. That’s fine. Some date nights want polish, not sweetness.
One small warning: if the braids are too tight at the temples, the look can read severe. Keep the tension firm but not aggressive.
11. Ribbon-Woven Braid Ponytail
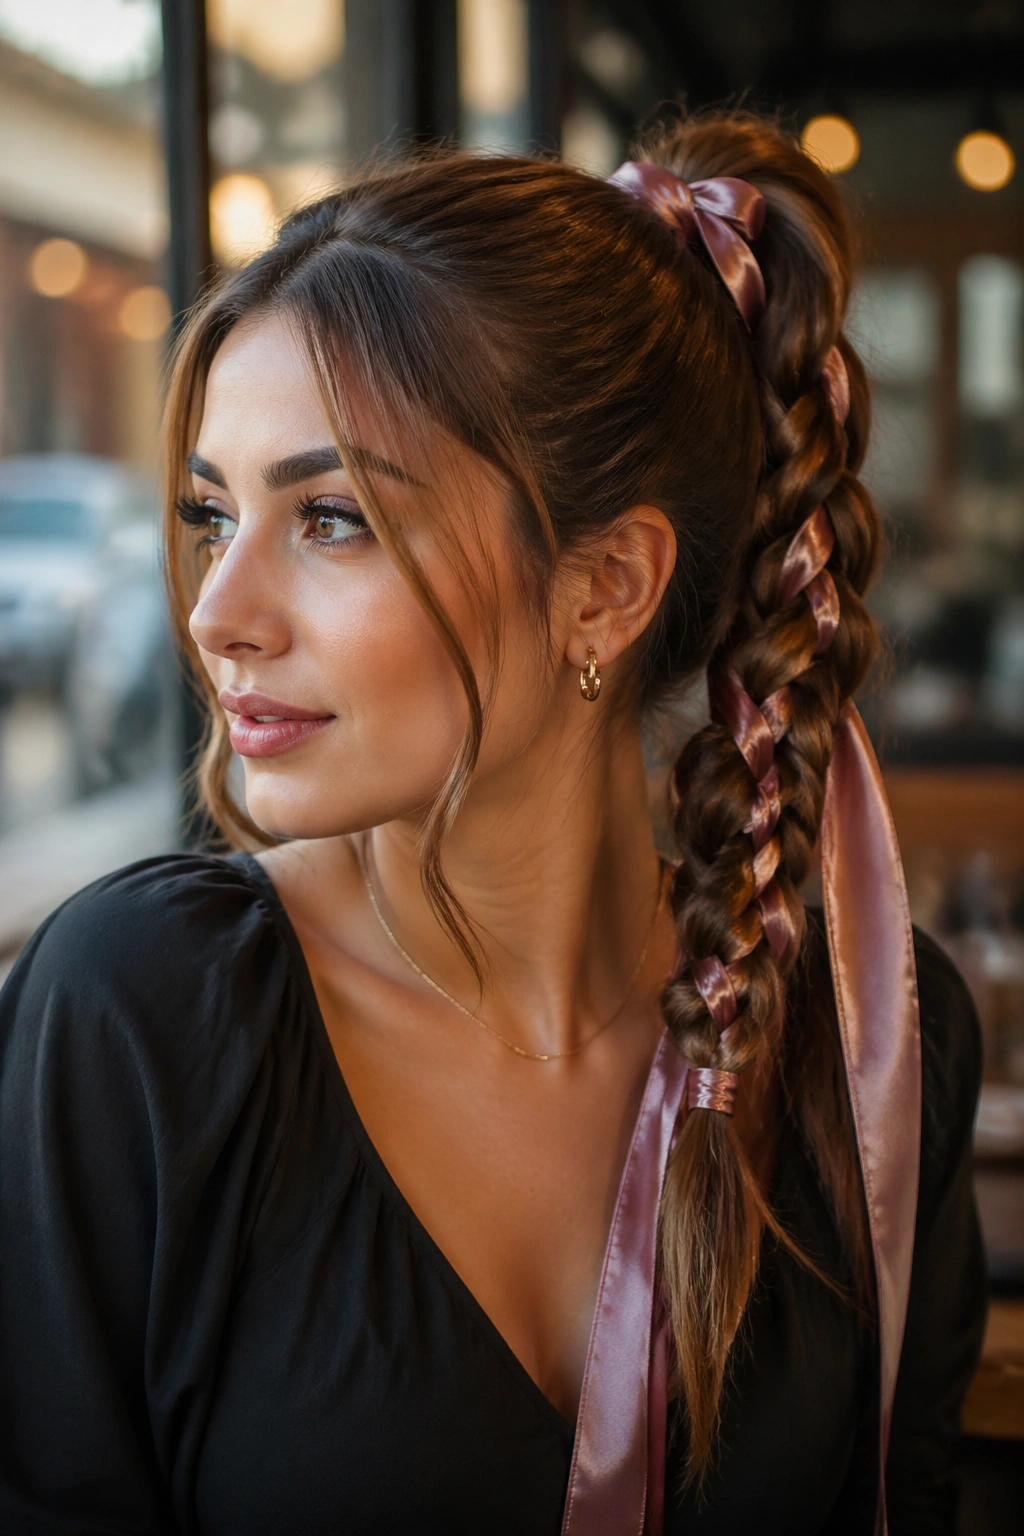
A ribbon changes the whole braid, and you do not need much of it — half an inch of satin is enough. The braid takes on the color, sheen, and movement of the ribbon, which makes the ponytail feel more dressed up without adding extra bulk.
A ribbon-woven braid works best when the ribbon echoes something else in your outfit. It can match a dress strap, a lipstick tone, or even just the metal of your jewelry if you pick a pale sheen. The important part is that it looks chosen, not random. A narrow black ribbon against dark hair can be dramatic; a blush or ivory ribbon reads softer.
Unlike a plain braid, this one benefits from a lower ponytail or mid ponytail so the ribbon tails can drape naturally. If the pony sits too high, the ribbon ends can stick up in odd ways and the whole style loses its charm. Let the ends fall. They do half the styling for you.
I’d keep the rest of the hair fairly smooth so the ribbon stands out. If the hair is too textured everywhere, the braid can get busy fast. A ribbon wants a little breathing room.
12. Micro-Braid Accent Ponytail With Loose Waves
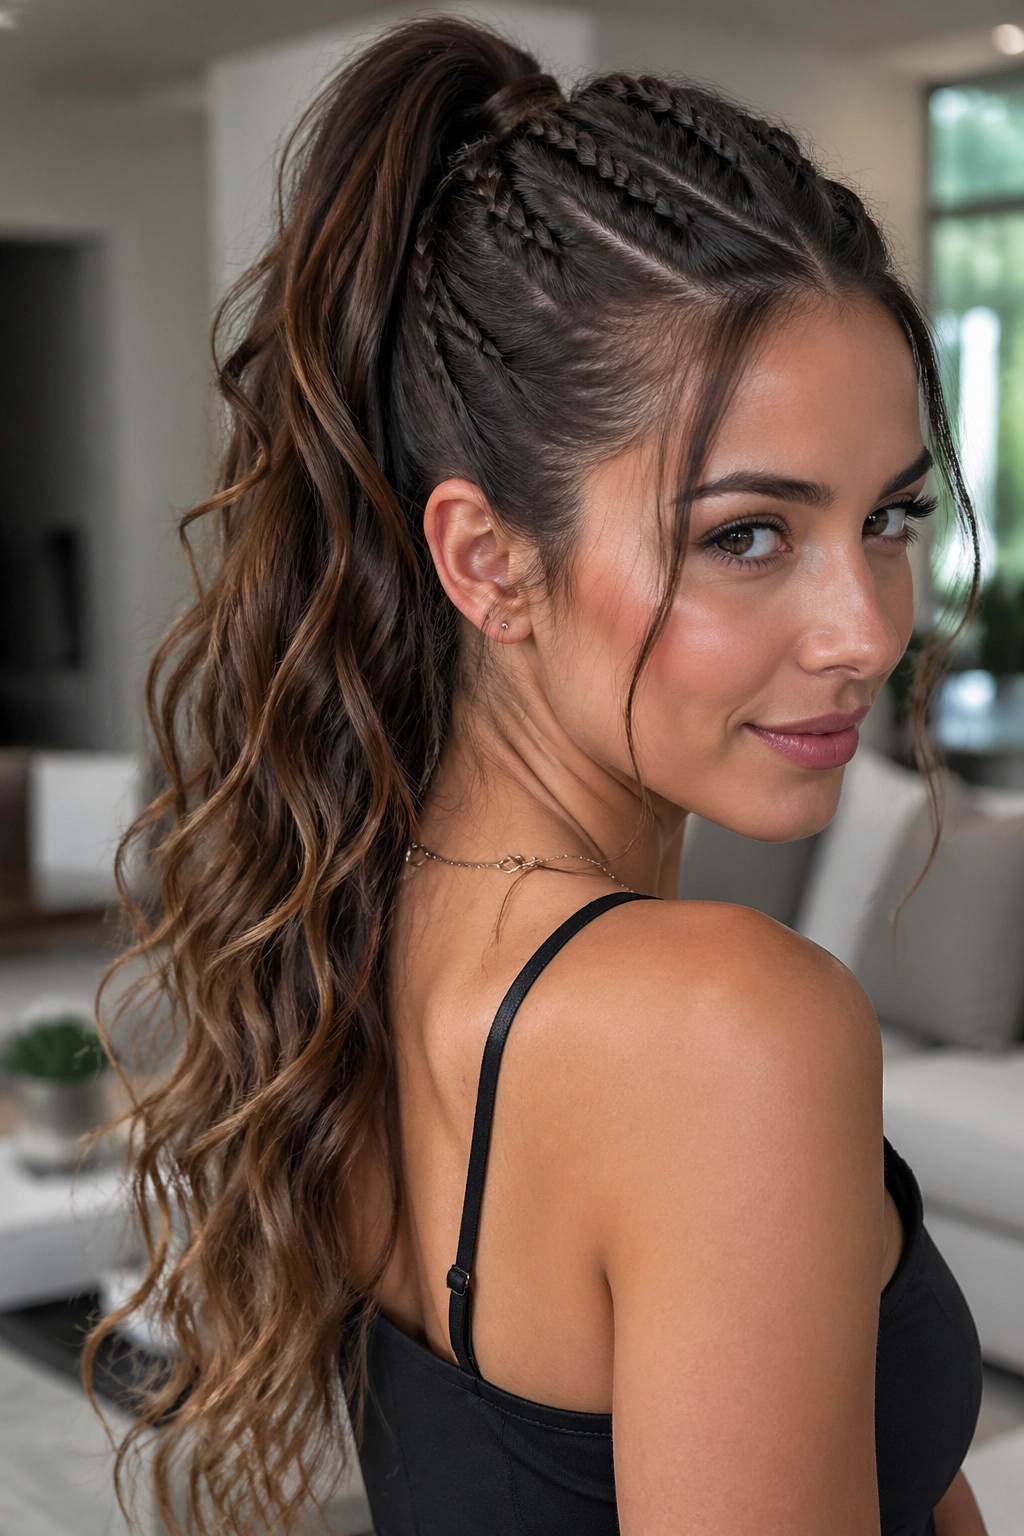
If you like detail that only shows when someone leans closer, this is the one. Tiny accent braids at the temple or near the crown add texture without taking over the whole head, and when they feed into a long ponytail the effect feels layered and personal.
The best version keeps the accent braids narrow — just a few strands each, not a whole row of tiny plaits. Two or three micro braids are enough. Too many, and the style starts looking crowded. Leave the main lengths in soft waves so the contrast is clear: small braid detail on top, loose movement below.
A style like this works especially well when the rest of the outfit is simple. A black sweater dress, a satin cami, even a crisp white shirt can look more styled with just a couple of braids tucked into the hairline. It’s a nice option if you like the idea of braids but don’t want the whole head braided.
This one feels best when the ends aren’t overdone. A touch of bend through the lengths is enough. The charm comes from the mix of tidy and loose, not from everything being equally polished.
13. Dutch-to-Fishtail Hybrid Ponytail
Why choose one braid pattern when the best versions borrow two? A Dutch-to-fishtail hybrid gives you structure at the scalp and softness through the length, which makes the ponytail feel more layered than a single braid ever could.
Start with a Dutch braid at the crown, where the raised pattern gives the hair some lift and control. Once you reach the point where the braid would normally taper, switch to a fishtail. That change in texture is the whole point. The top feels bold and secure, while the tail ends in something finer and more romantic.
Where to Switch
The switch point should sit below the ears, not right at the nape. If you change too early, the braid loses its shape. If you wait too long, the fishtail section can get cramped and hard to separate. On long hair, the middle of the back of the head is usually the easiest place to make the handoff.
This is one of my favorite looks for thicker hair because the braid can handle the extra volume. It also gives you a clean place to wrap an elastic or ribbon if you want to hide the seam. Let the last few inches stay a little undone. That relaxed finish keeps the braid from looking too engineered.
14. Waterfall Accent Braid That Softens the Whole Look
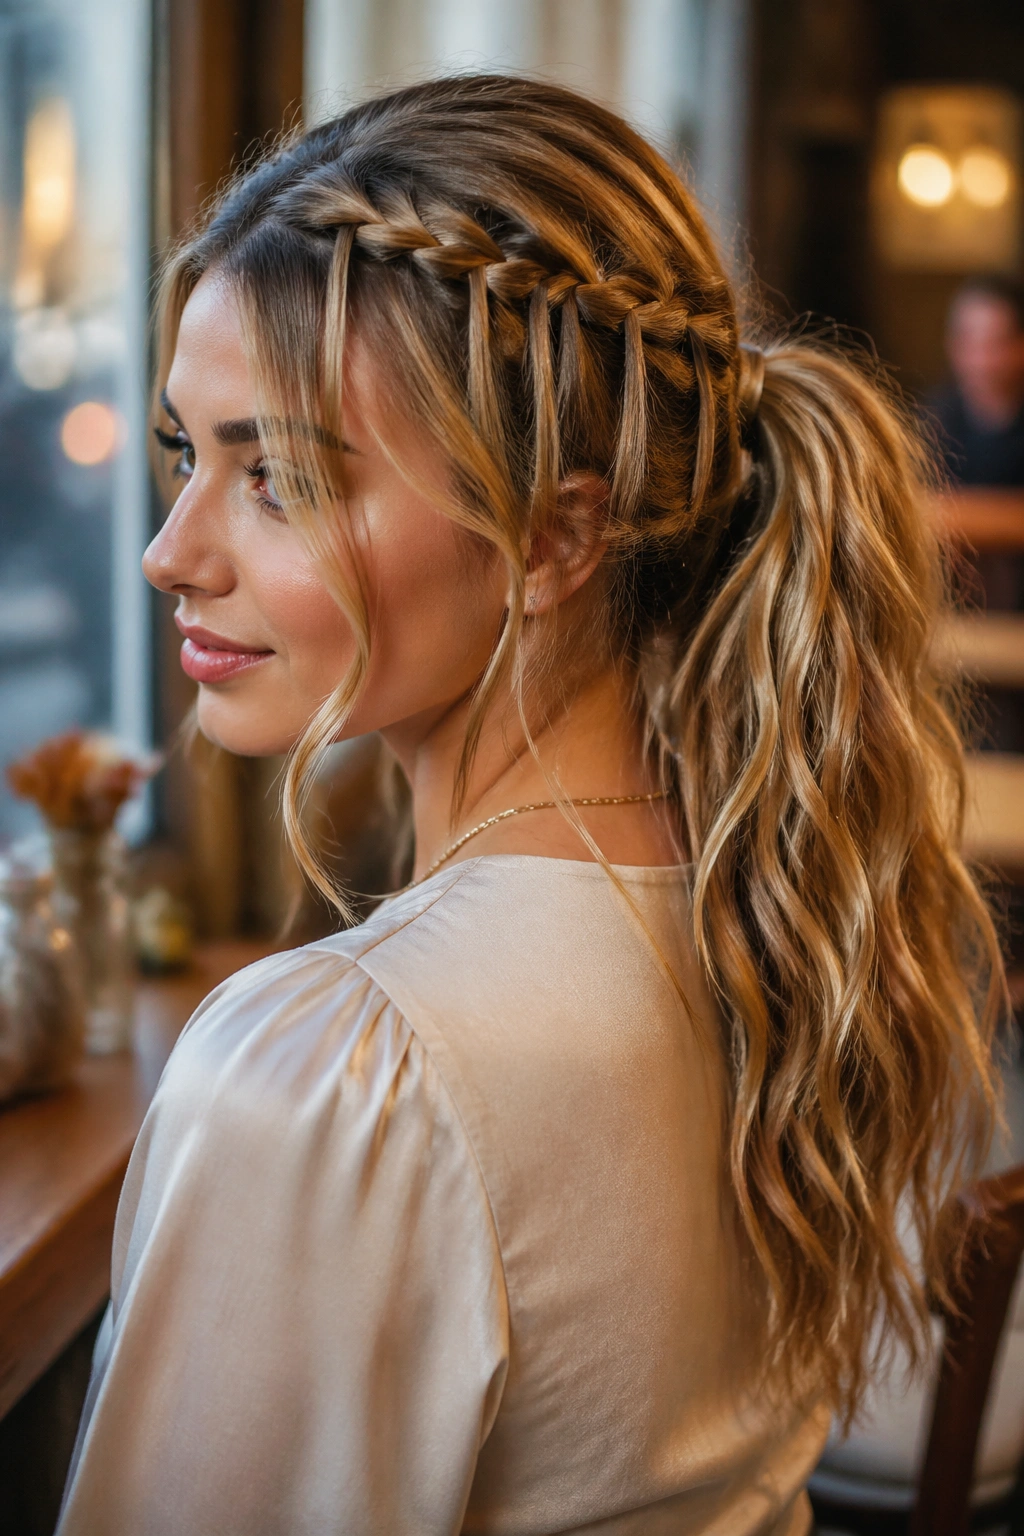
A waterfall braid is the softest-looking option here, and that is exactly why it works. The braid drops pieces as it moves across the head, so the ponytail feels airy instead of heavy. It’s a good choice when you want something romantic but not overly precious.
This style looks best with soft waves through the length. The braid on top acts like a frame, and the loose pieces falling into the ponytail keep the shape light. If your hair is very straight, add a bit of bend with a 1-inch wand before you start; the texture helps the braid sit properly and keeps the ends from looking flat under evening light.
I like this for a dinner date where the outfit already has a little softness — silk, lace, a fitted knit, anything with movement. The braid adds detail near the face, then the ponytail keeps the back simple. That balance is what makes it feel wearable instead of overdone.
If the first pass at the waterfall braid looks too loose, tighten the top section before you secure the ponytail. The whole style improves when the braid holds its line near the crown. After that, leave the tail gentle and touchable. That last bit matters more than people think.