Beanies are brutal on hair. They flatten volume, build static, and turn a decent braid into something limp if the style starts too loose or sits too high on the head. The best winter braids do the opposite: they hug the scalp, keep the ends controlled, and leave enough structure that your hair still looks intentional when you take the hat off.
That’s the whole game.
Winter braids are not about making your hair look fussy. They’re about making it behave. A knit cap adds pressure at the crown, friction around the ears, and a little bit of chaos every time you pull it off and on. So the braid has to be compact at the roots, secure at the nape or along the hairline, and smart about where it puts the bulk.
Some styles win because they lie flat. Others win because they distribute the bulk across two sides instead of one. A few are worth wearing simply because they come back to life faster after hat compression than a loose blowout ever will. The styles below do that job without making you fight your beanie all day.
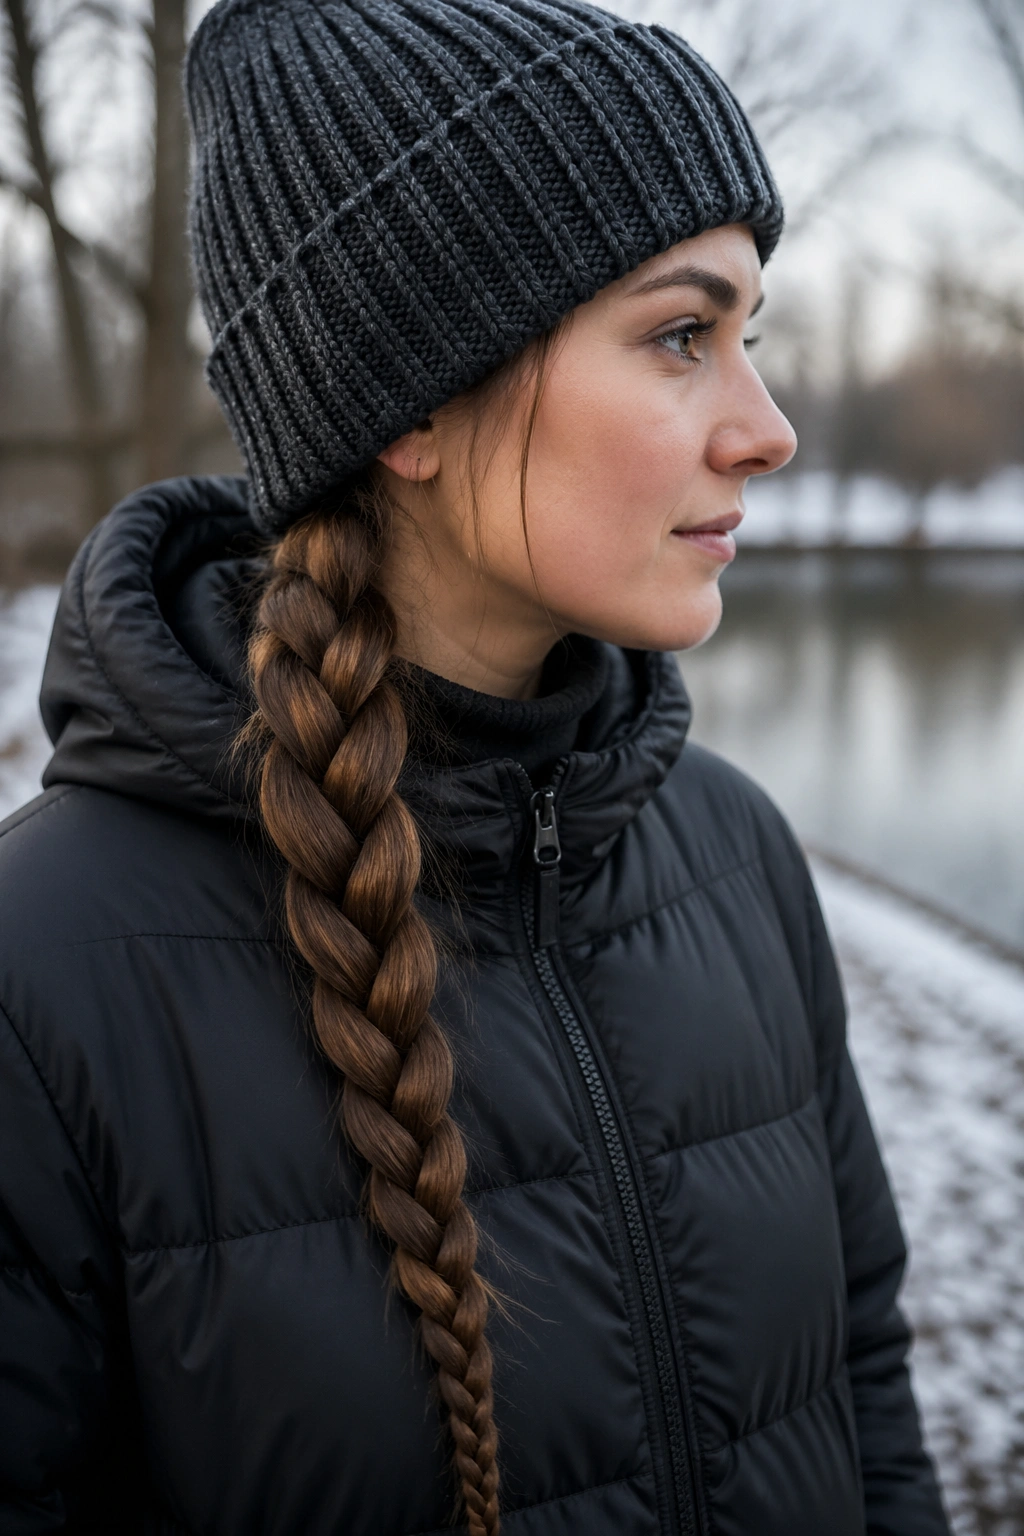
1. Low French Braid

A low French braid is the old reliable for beanie season. It starts close to the scalp, keeps the top smooth, and drops the bulk where a hat can sit over it without forcing the braid into a weird lump.
Why It Stays Put
The trick is the anchor point. A braid that begins near the crown and stays snug through the first few passes has a harder time slipping around under wool or fleece. By the time you reach the nape, the braid has enough structure to hold its shape even if the beanie presses on it for hours.
How to Wear It Under a Beanie
Keep the braid centered and fairly low. If you braid too loosely at the top, the hat will puff the sections apart and you’ll get that soft, fuzzy collapse that looks messy instead of lived-in. A tiny amount of smoothing cream at the front helps, but don’t drown the hair in product. Too much slip is a bad trade.
- Works well on straight, wavy, or curly hair
- Best on hair that’s at least shoulder length
- Sits flat under a standard cuffed beanie
- Tucks neatly into a coat collar or scarf
Best move: braid the first 4 to 6 passes with a little more tension than you think you need, then relax your hands once the braid is anchored.
2. Dutch Pigtail Braids
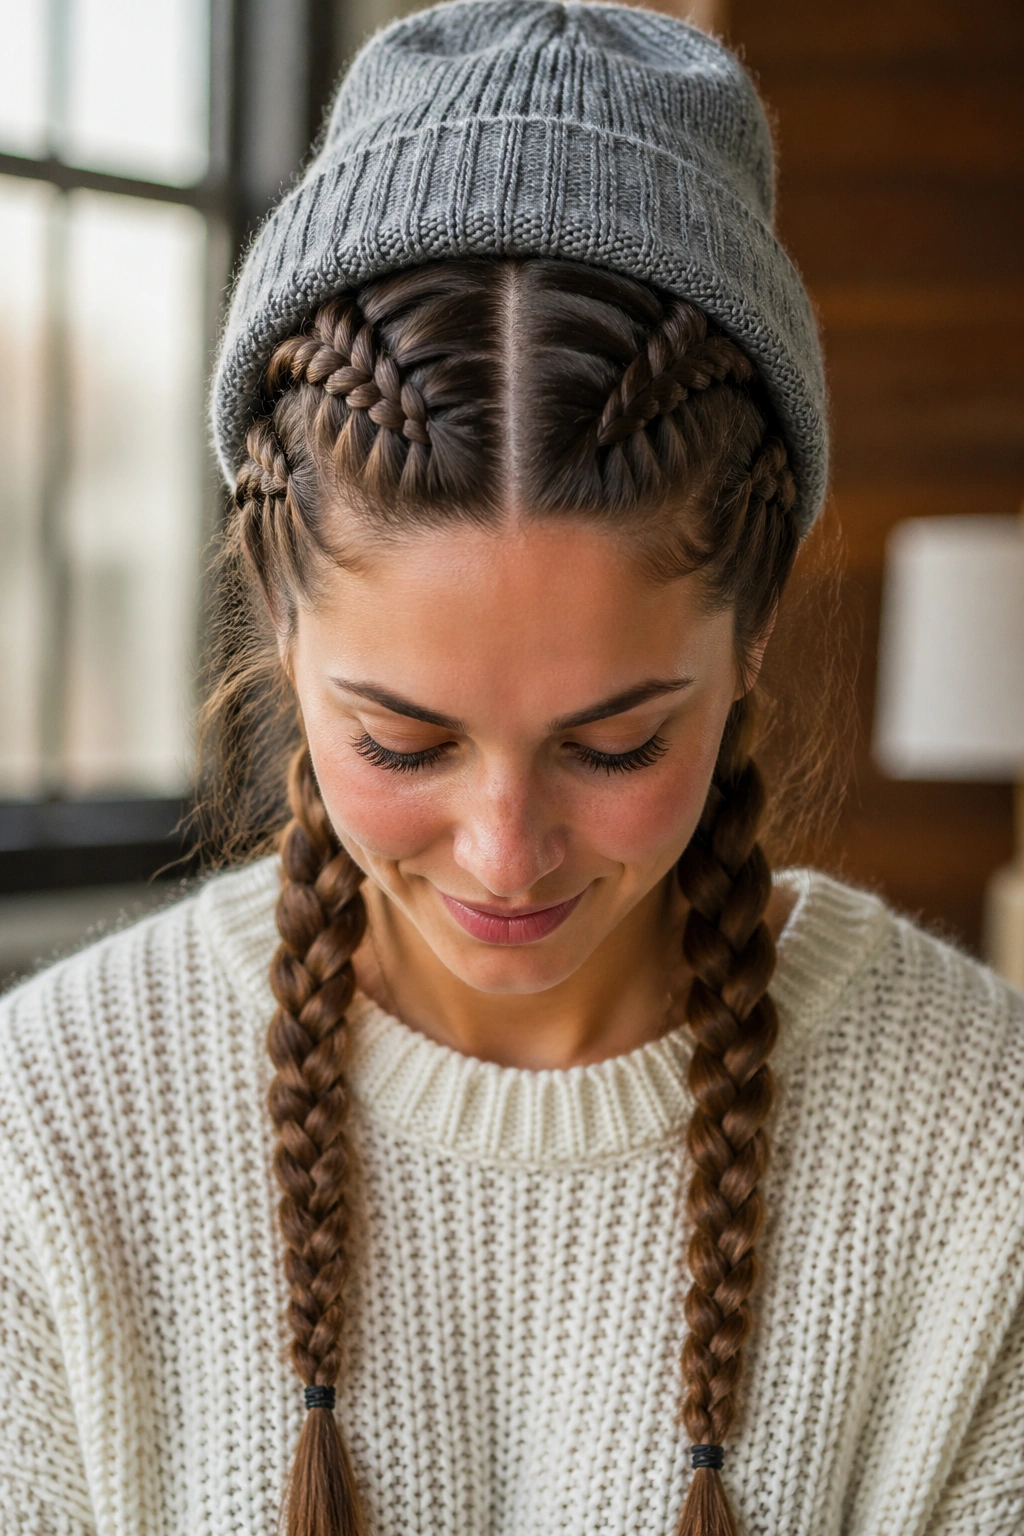
Why do double Dutch braids hold up so well under a hat? Because they split the pressure. Instead of one thick rope fighting the beanie at the center of your head, you get two narrower braids that stay close to the scalp and don’t balloon as fast.
That makes them a smart choice for active days. Walking, commuting, sledding, standing at a bus stop with cold ears — the style holds. The part line matters more here than people expect. A clean center part keeps the braids balanced, and balanced braids sit better under the hat brim without creating one side that feels squashed.
Where People Mess This Up
They braid too far out from the scalp. That’s the mistake. A Dutch braid needs enough tension at the root to stay compact, or the hat will push the sections outward and create gaps. You do not need to yank hard. You do need to keep the braid snug, especially through the first inch.
The ends can stay loose, tied low, or even slipped into a scarf if you want a tidier finish. If you wear a beanie with a fold-up cuff, the pigtail shape gives you a little breathing room at the back of the head. Less bulk. Less fuss.
3. Fishtail Braid
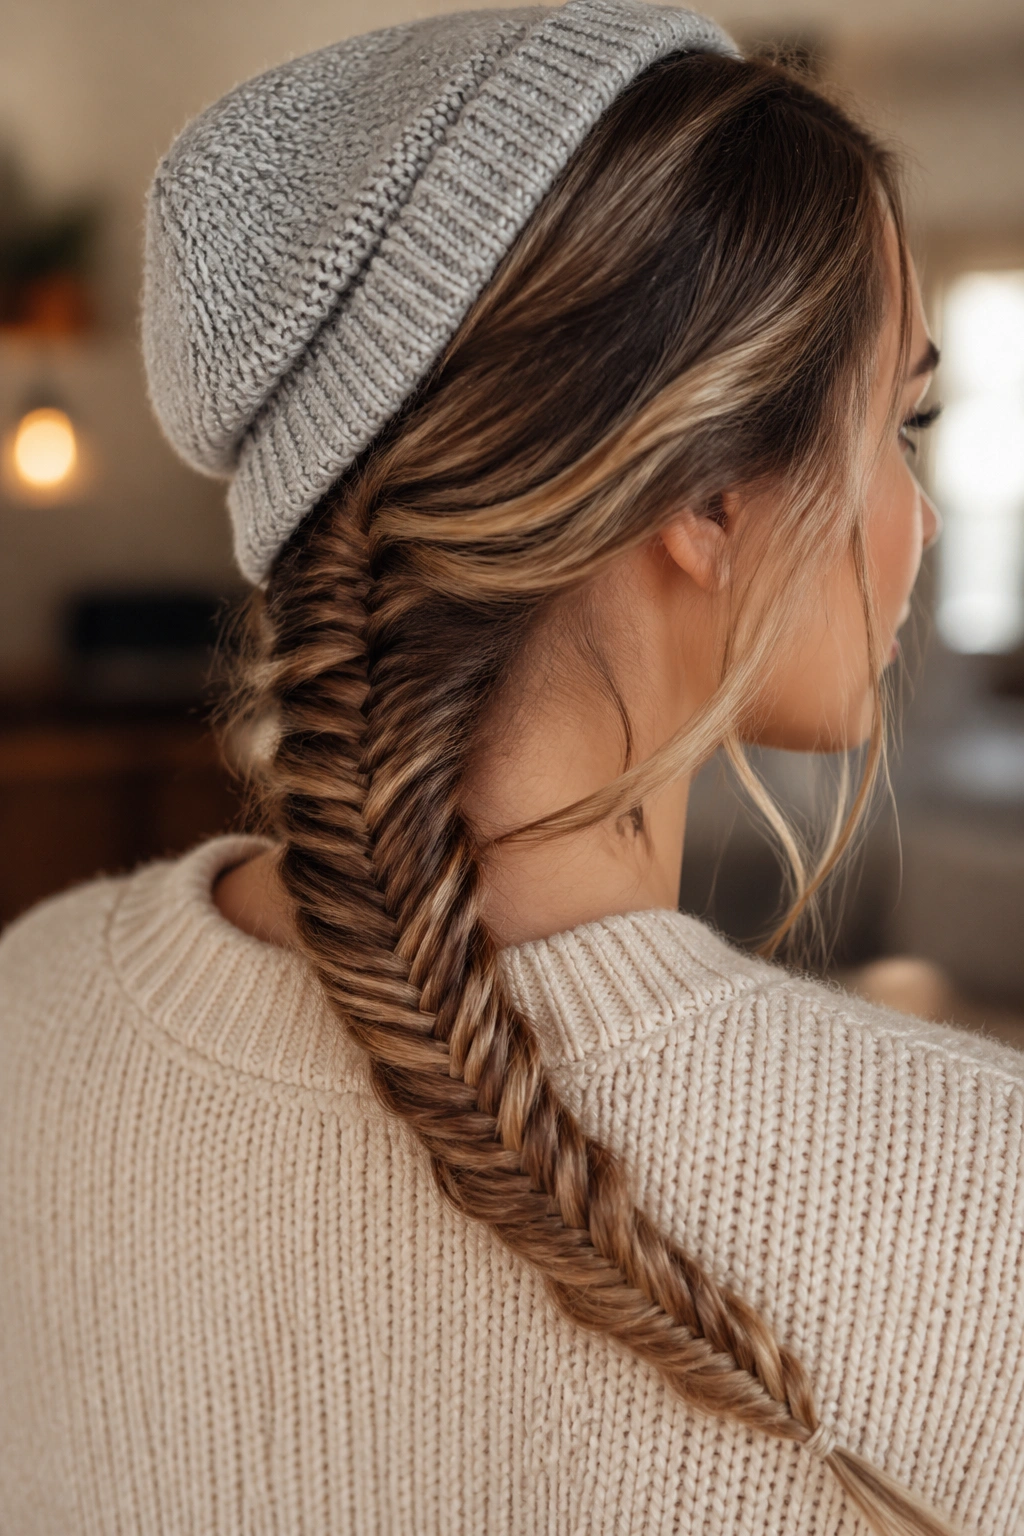
A fishtail braid is one of those styles that looks delicate but holds up better than people expect, especially when the hair has a little texture in it. The tiny crossed sections create a lot of grip, which helps once a beanie starts pressing down and shifting around.
It’s also a good one for layered hair. Regular three-strand braids can let shorter pieces poke out in every direction, but a fishtail tends to trap those little lengths more cleanly. You still may get some soft pieces at the temples. Fine. That’s part of the look.
Quick Things That Make It Work
- Start on second-day hair if you can
- Add a light texturizing spray at the mid-lengths
- Keep the first few passes tight, then loosen the tail if you want a fuller look
- Use a small clear elastic at the end so the braid does not unravel under the hat
The beanie can compress a fishtail a little more than a French braid, so I like it most when the braid starts low, near the nape, or sits to one side instead of straight down the middle. That keeps the top of your head less crowded. And if a few pieces puff out after you remove the hat? Good. It looks lived-in, not careless.
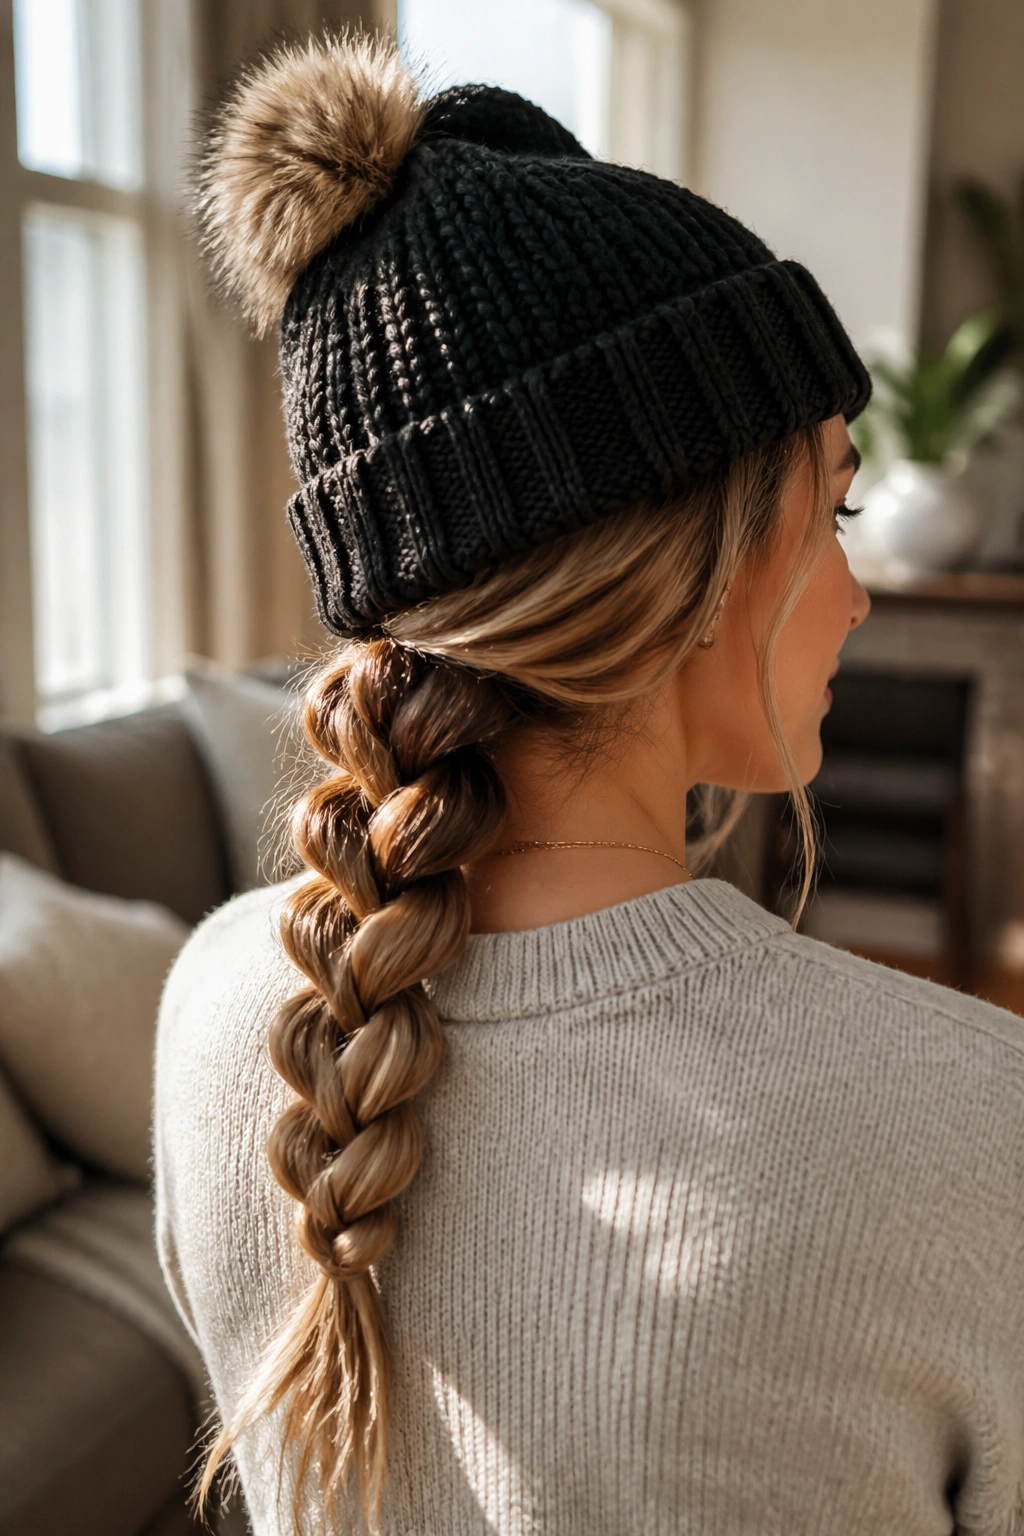
4. Rope Braid

A rope braid is the speed demon of winter hair. Two sections, a few twists, and you’re done. That simplicity matters when you’re heading out the door with cold hands and no patience for fussy styling.
It stays put under a beanie because the twist structure lies flatter than a chunky three-strand braid. There are fewer crossing points, which means fewer spots for the hat to snag and loosen. It’s especially handy for thick hair that swells under knitwear. A rope braid keeps that bulk under control instead of letting it spread sideways.
Unlike a standard braid, this style can slip if the ends are slick. That’s where a small amount of paste or cream helps. Use a pea-sized amount on the palms, smooth it through the ends, then twist and secure with a firm elastic. If your hair is very layered, twist each side a touch tighter than feels natural. The braid relaxes a little once the hat goes on.
I like this one for long walks and windy days. It doesn’t fight the beanie, and it looks clean even after a little flattening. A little bent? Sure. But not ruined. That’s the point.
5. Crown Braid
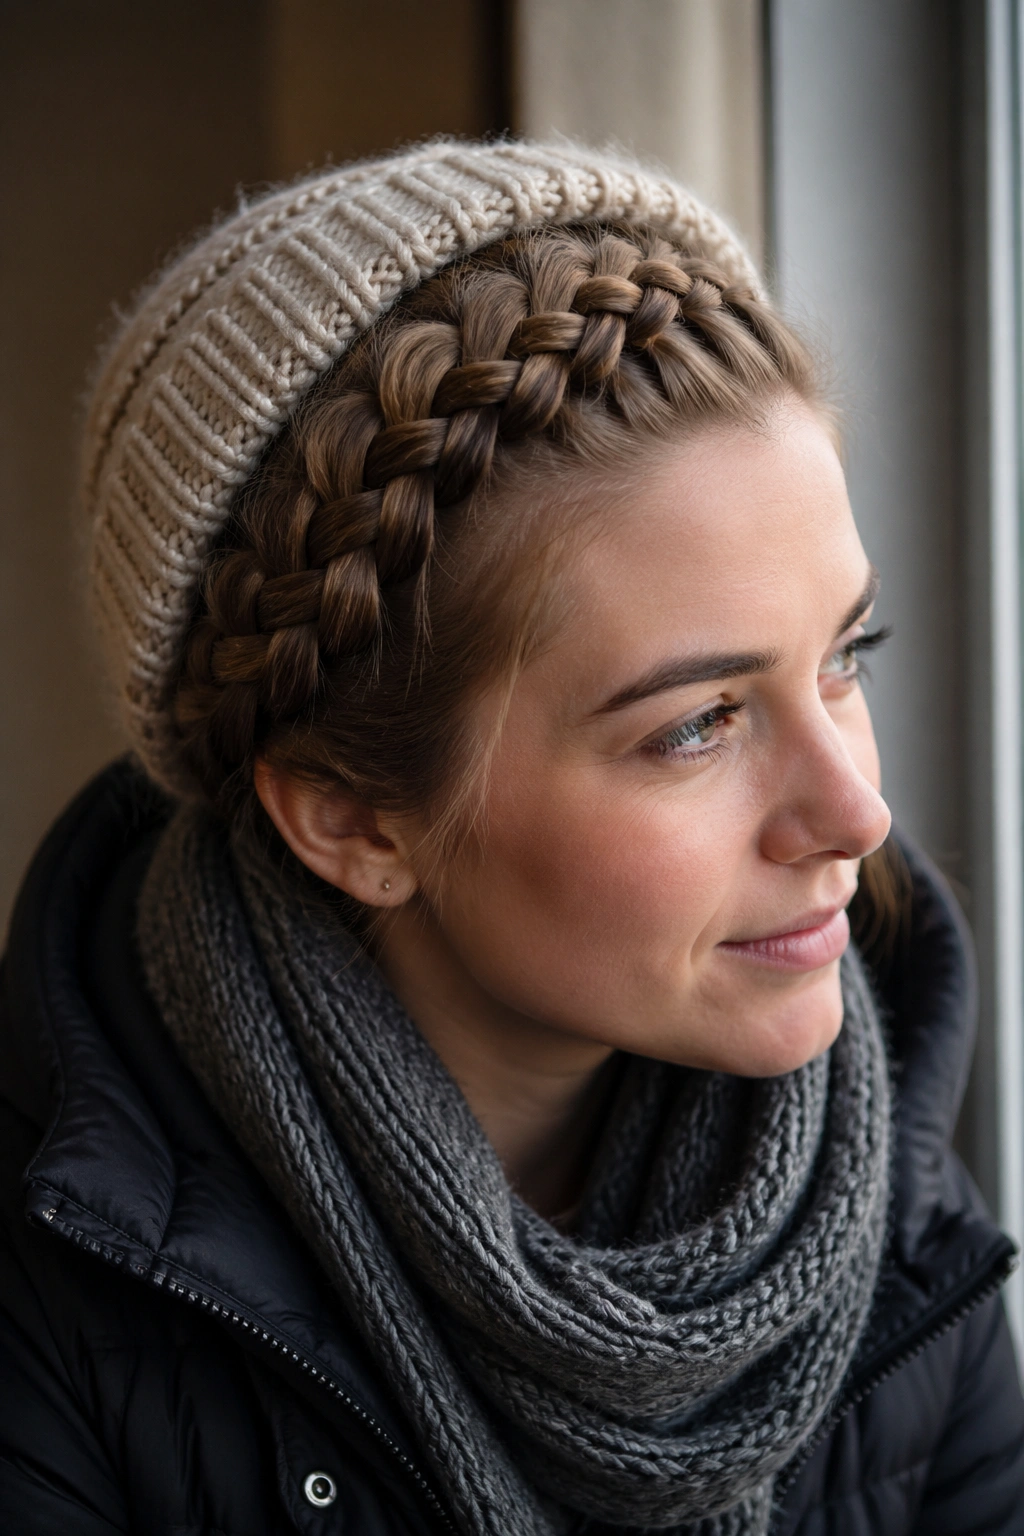
A crown braid is for the days when you want the braid to do more than hide under the hat. It wraps along the hairline, which keeps the front sections pinned back and gives the beanie a better place to sit without swallowing your face.
The best version for winter is not overly puffy. Keep it close to the head, pin it in 1.5 to 2 inch intervals, and make sure the braid follows the curve above the ears instead of floating too high. A crown braid that sits high gets flattened fast. One that hugs the head keeps its shape longer and leaves less room for hat friction.
How to Keep the Shape Clean
Use bobby pins that match your hair color, and slide them in with the wavy side down for a stronger grip. If the braid wants to loosen near the temple, pin that spot first. That’s where beanies tend to tug.
The nice thing about this style is that it still looks put together when the hat comes off. The braid frames the face, and the rest of the hair can be tucked low or left in a small tail at the back. It’s one of the few winter braids that looks deliberate both under a hat and after you take it off. Not many styles can say that.
6. Milkmaid Braid
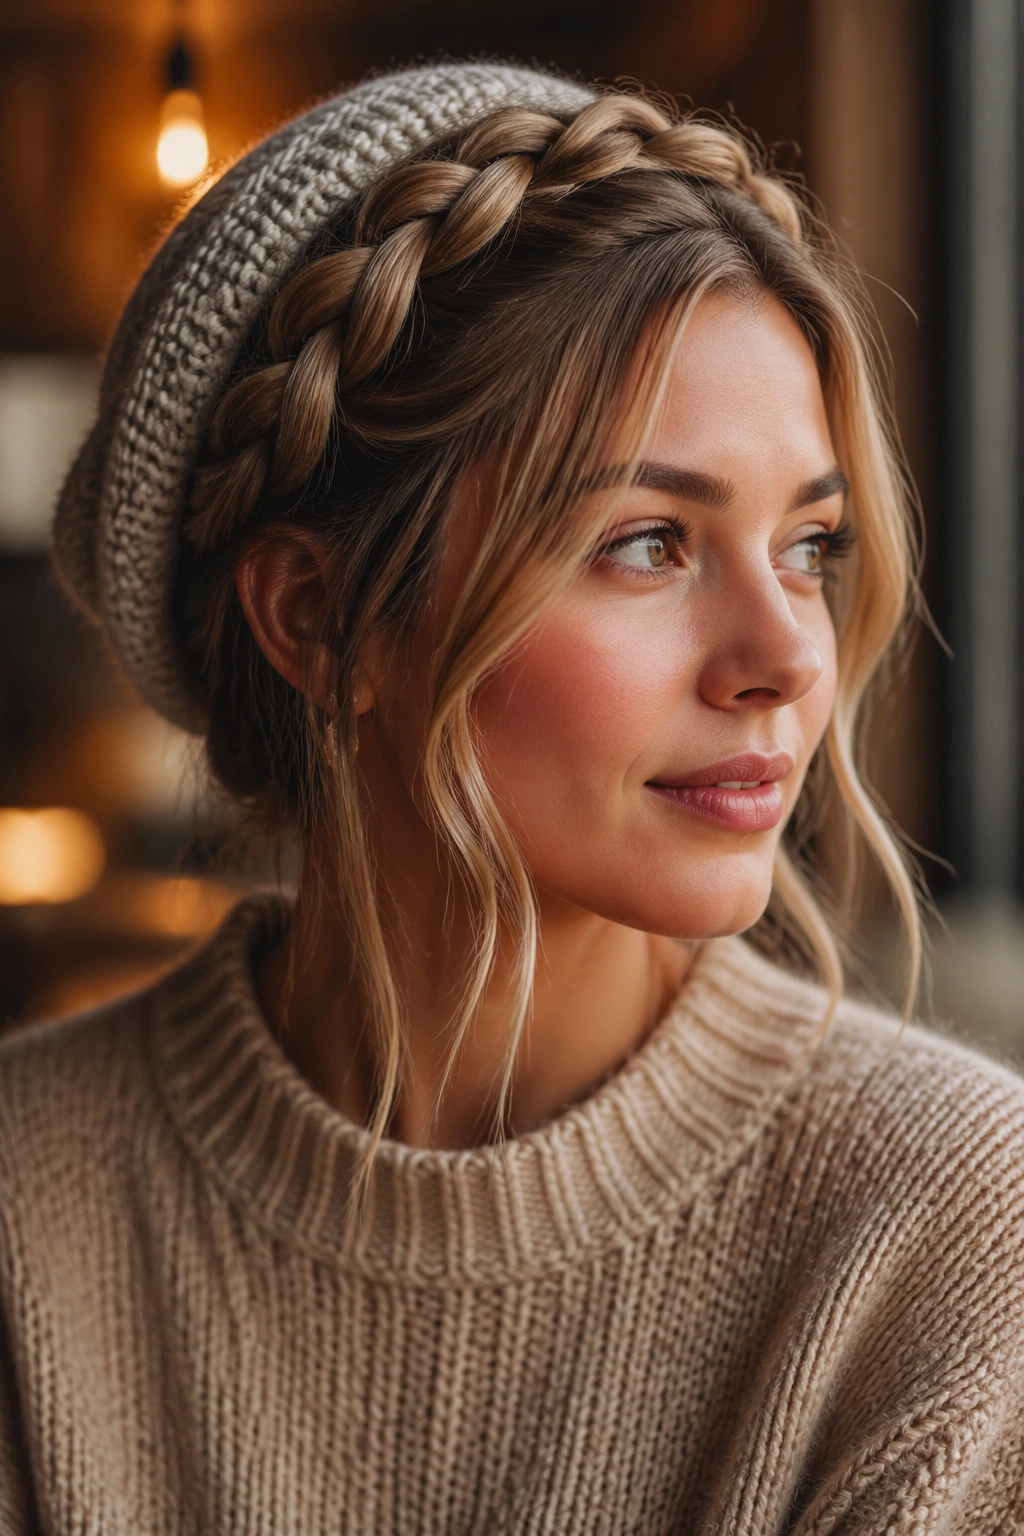
A milkmaid braid has a softer feel than a crown braid, and that softness is exactly why it works. Two braids are wrapped over the top of the head and pinned, which keeps the bulk away from the nape and gives the beanie a smooth place to rest.
It’s a little more romantic, sure, but it’s not fragile. The style is actually sturdy if you pin it well and keep the braids snug before you wrap them. If you make the braids too loose, the loops get bulky under the hat and the whole thing shifts. Tight enough to hold. Loose enough to flatten into shape. That balance matters here.
I reach for this when I want hair off my neck but don’t want a ponytail hanging under a scarf. It works best on medium to long hair because you need enough length to wrap the braids around the head. Shorter layers can still work, but they need more pins, and nobody needs a dozen pins sliding around under a knit cap.
Small detail that helps: pin the braids just behind the ears first, then secure the remaining ends at the back. That stops the front from creeping upward when you pull the beanie on.
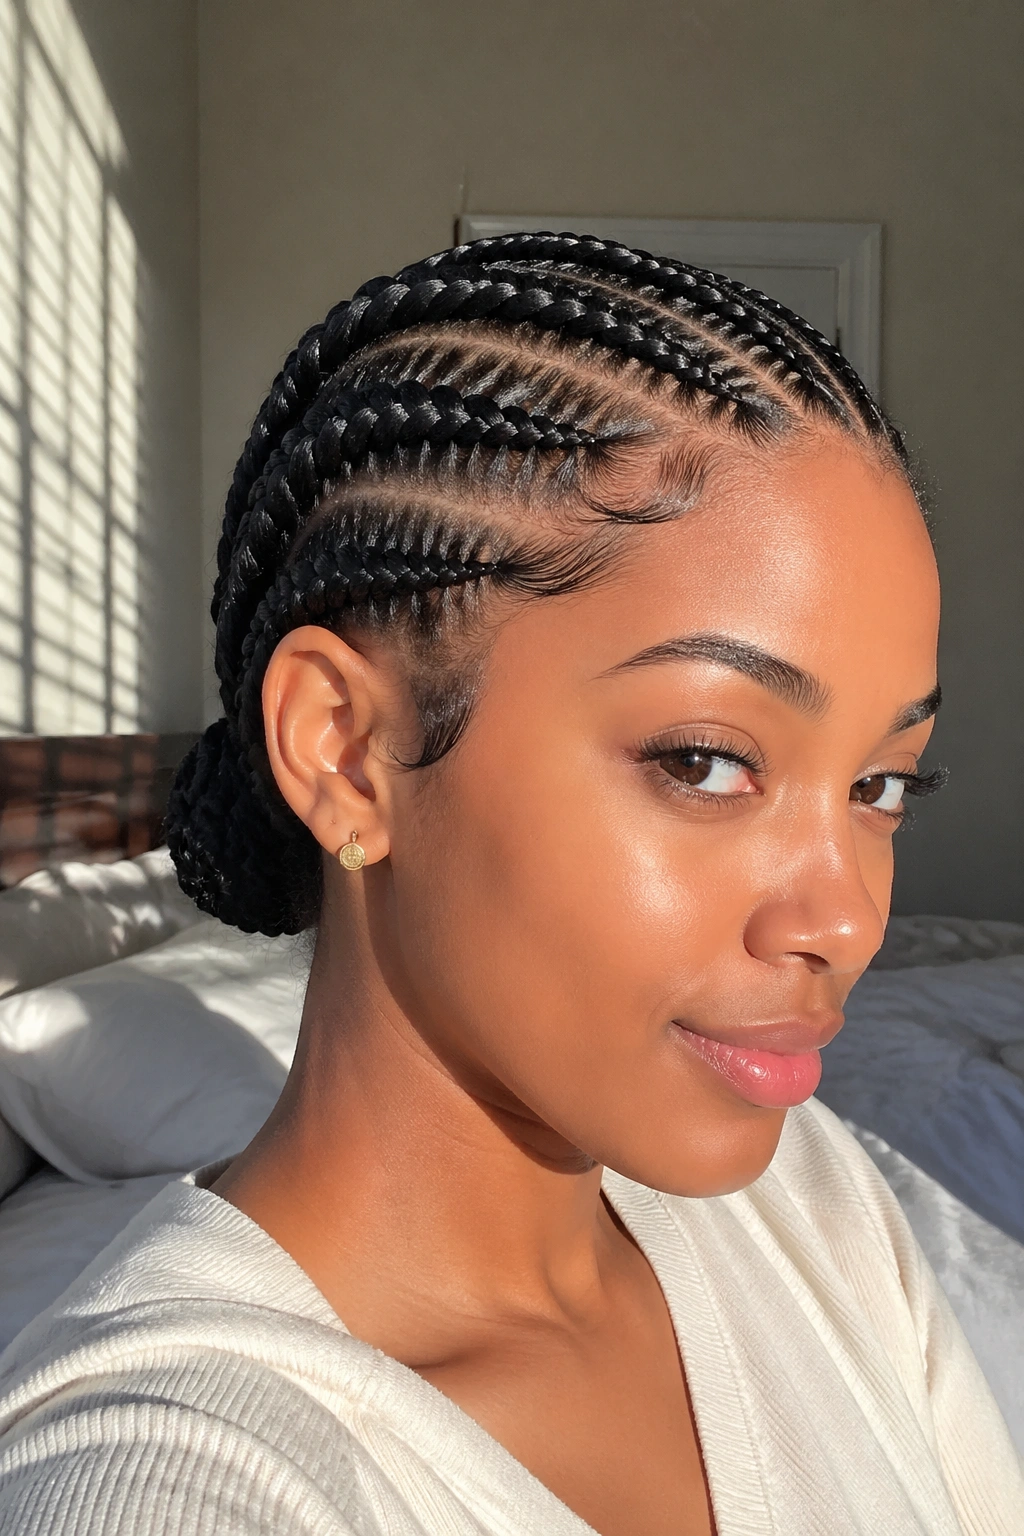
7. Boxer Braids
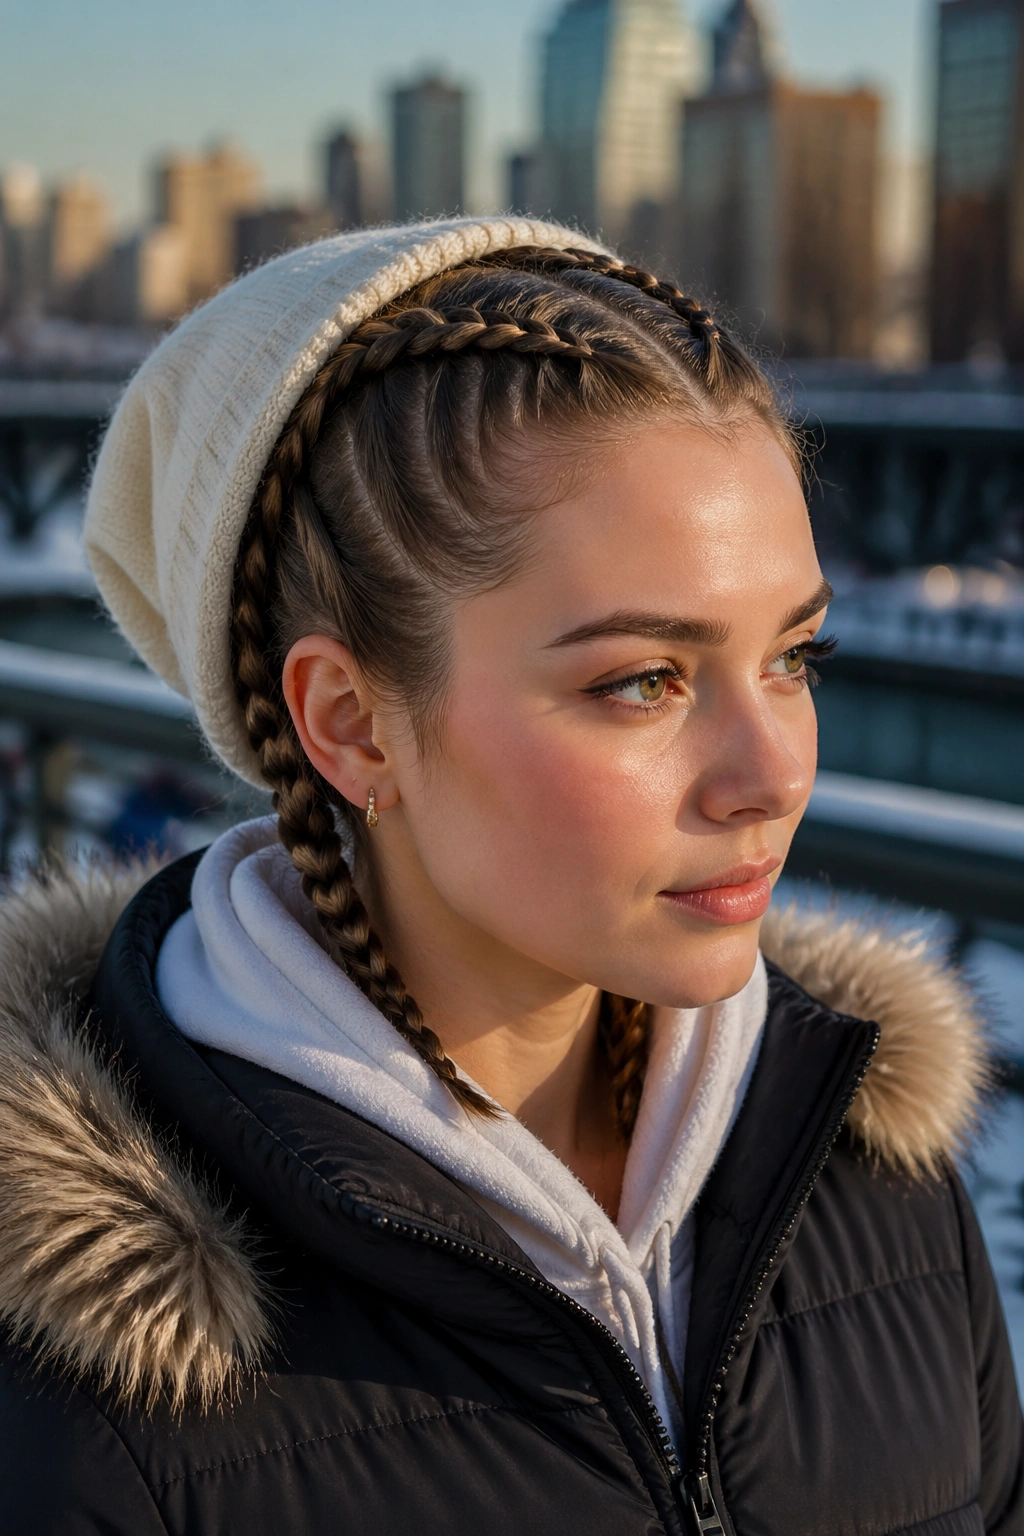
Boxer braids are the no-nonsense answer for days when your hair needs to stay under control through everything. They’re basically two tight Dutch braids running from the front hairline to the nape, and that center-part structure makes them ideal under a beanie because the hair is already divided and anchored.
Why Athleisure Hair Works So Well Here
These braids don’t rely on volume. They rely on tension and placement. That makes them a good fit for straight hair that slips, curly hair that expands, and anything in between. The hat presses them flatter, yes, but the shape survives because the foundation is already close to the scalp.
A Few Details That Help
- Start the braids just behind the hairline, not too far back
- Keep the part clean before you begin
- Use small snag-free elastics at the ends
- If you want less bulk, braid all the way down and tuck the tails into a collar or scarf
This style does a nice job of avoiding that weird “one side crushed, one side fluffy” look when the beanie comes off. Both sides take the hit evenly. That sounds minor until you’ve spent a day fixing uneven hat hair in a bathroom mirror. Then it feels like a small miracle.
8. Side Dutch Braid
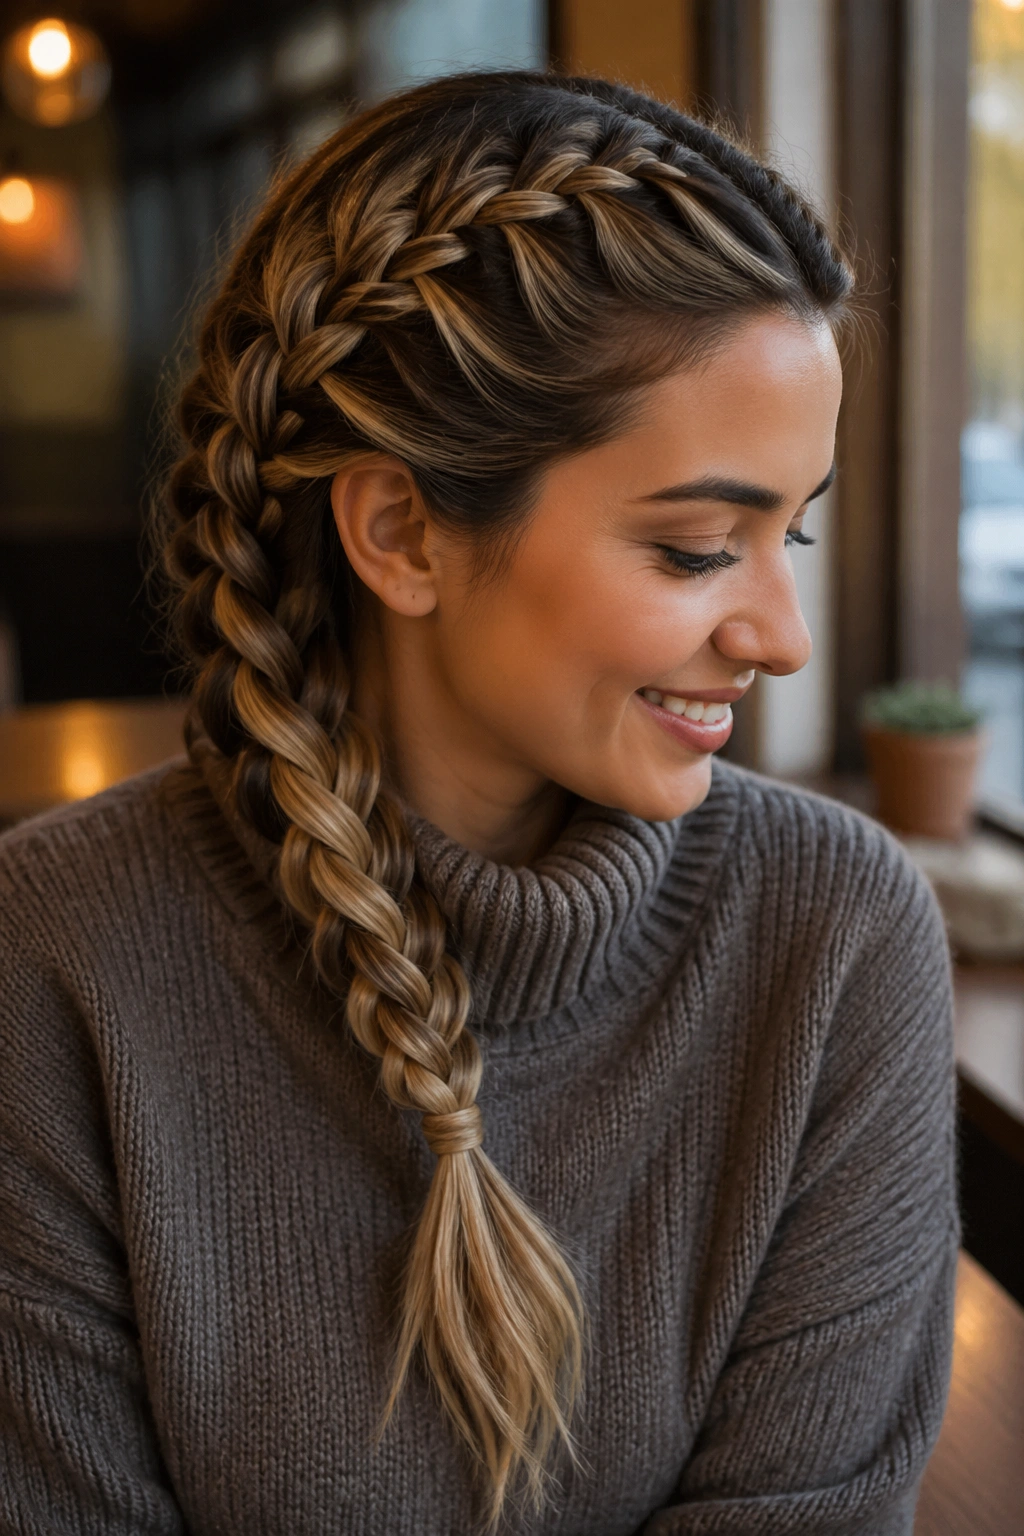
A side Dutch braid is the one I’d pick if you want a braid that looks intentional without trying too hard. It sweeps the hair to one side, which gives the beanie a flatter surface on the other side and keeps the whole shape from feeling too centered or heavy.
That asymmetry is useful. A straight-down braid can clash with some hat shapes, especially slouchy ones that bunch in the back. A side braid works with the slouch. It has a little movement, a little fall over the shoulder, and enough grip at the root to keep it from unraveling when you pull the hat on and off.
What Makes This Version Hold Better
A side Dutch braid starts with an underhand braid near the temple, then travels diagonally toward the nape. That diagonal line keeps the braid visible but out of the hat’s main pressure zone. You can pin the loose end underneath or let it hang over a coat collar.
How to keep it from collapsing
Use a tiny bit of hold spray on the top section before you begin. Not a crunchy shell. Just enough grip to stop the shorter front pieces from slipping. If you have layers, the side braid is forgiving, but only if the first few inches are neat. After that, you can loosen the tail a bit for a fuller look.
9. Pull-Through Braid
Pull-through braids are a little sneaky. They look like a thick, fancy braid, but they’re built with small elastics and sections that get pulled through each other rather than woven in the usual way. That means they can give you a fuller shape even after a beanie presses the top flat.
They’re a good pick if your hair is fine and you want more presence. Traditional braids can disappear under a hat. A pull-through braid still shows up. The sections stay defined, and because the braid is built in stacked pieces, it keeps its shape better than you’d expect.
The catch? You need more elastics. No way around it. If that sounds annoying, skip this one. But if you like a polished braid with a little drama, this is a solid option. Start with a low ponytail or a series of mini ponytails down the back, then gently tug the loops once the braid is finished. Do the tugging after the hair is secured, not before.
The one thing I’d avoid is making the sections too big. Large sections create a bulky ridge under the hat. Smaller sections sit flatter and still give you that thick-braid effect once you’ve loosened the loops a touch.
10. Lace Braid
A lace braid is one of the best fixes for hair that falls into your face the second you pull on a beanie. Only one side of the braid takes in new hair, so it hugs the hairline instead of marching straight down the back like a standard braid. That makes it especially useful for bangs, face-framing layers, and side pieces that refuse to stay put in cold weather.
It also gives you a cleaner look without asking for much length. If your hair is medium length and you’ve been frustrated by styles that demand more inches than you have, this one is worth a try. You can run it from the temple to the ear, stop there, and pin the rest back. Or you can continue it farther into a side braid if you want more length control.
The real strength of the lace braid is the front section. Hats tend to create flyaways around the forehead and temples, and that’s where this braid earns its keep. It holds those strands in place without pulling the entire head tight, which means you avoid the stretched, headache-prone feeling that some braids create.
A tiny touch of gel on the hairline helps if your hair is slippery. Use a toothbrush or a clean spoolie to smooth the little baby hairs near the part. Small move. Big difference.
11. Four-Strand Braid
A four-strand braid has a little more grip than a standard three-strand braid, and that extra structure is what makes it handy under a beanie. The braid lies flatter than people expect, especially once it’s tightened near the crown and left to hang low.
It’s also a nice answer for thick hair that tends to puff out under knitwear. More strands mean more surface control. The braid feels sturdier in the hand, and that sturdiness helps when the hat keeps rubbing against the top layers.
What Makes It Different
- Uses four sections instead of three
- Creates a tighter, more rope-like finish
- Holds detail well on straight or wavy hair
- Looks cleaner than a loose braid after hat compression
The style can sound fussy, but it doesn’t have to be. Once you learn the hand pattern, it becomes a quick way to get a braid that looks more polished than a regular plait without adding a lot of bulk. I like it low and centered, tied off with a small elastic and left smooth rather than teased.
If your hair tends to split apart in ordinary braids, this is the one that usually behaves better. The sections have more control, and that makes the whole style feel steadier under a hat. Not glamorous. Useful. There’s a difference.
12. Braided Low Bun
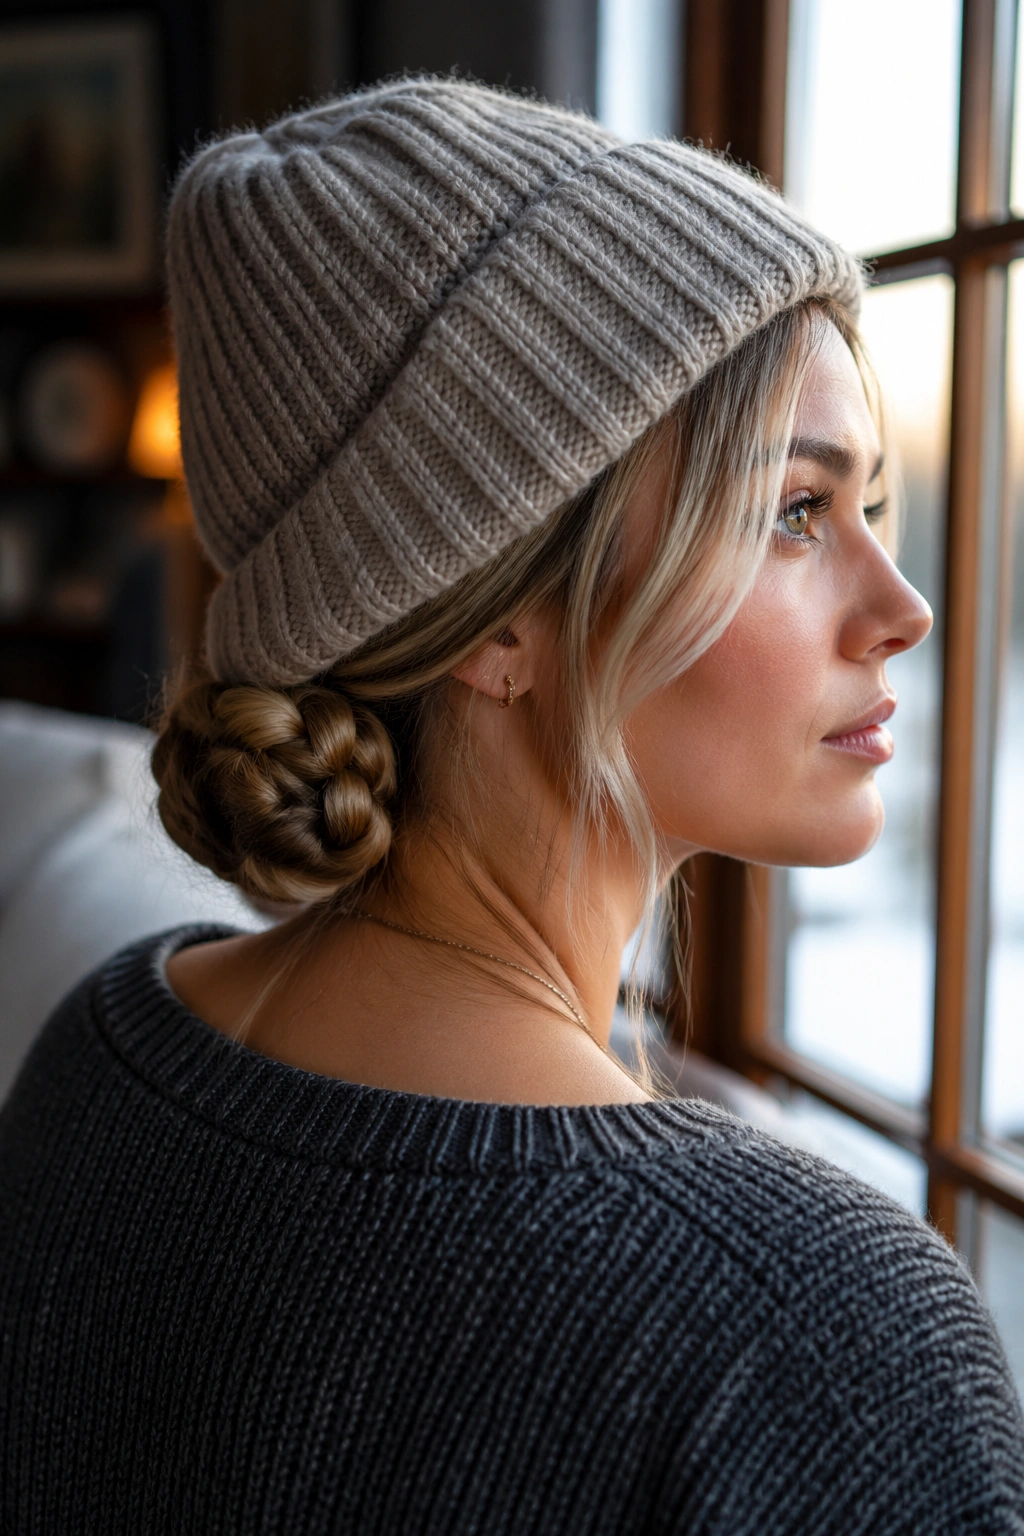
A braided low bun is the style I trust when I know the beanie is going to stay on for hours. It keeps the hair bundled at the nape, hides the ends, and leaves almost nothing for the hat to crush except a smooth knot tucked low on the head.
The braid itself can be a regular three-strand braid, a Dutch braid, or even a fishtail if you want more texture. Once it reaches the nape, coil it into a bun and pin it flat. The bun should sit below the main pressure point of the beanie, not right where the crown folds or the hat’s seam sits. That placement matters more than people think.
How to Make It Hold
Use a small coil elastic or two crossed bobby pins to lock the bun in place. If your hair is thick, split the braid in half before coiling so the bun doesn’t become a brick. A soft bun looks better under a hat and feels better by the end of the day.
Best Beanie Pairing
This style works especially well with slouchy hats and cuffed knits because the low shape leaves room at the top and keeps the back from feeling stuffed. It’s also a good option if you want to take the hat off and still have something tidy left behind. No big rework. No emergency mirror session.
If I had to pick one braid-based style for the days when I know I’ll be in and out of cold air all day, this would be the one. It’s low, compact, and far less needy than a loose braid that has to be rescued every time the hat comes off.
Beanies don’t have to wreck your hair. They just punish styles that sit too high, hang too loose, or lean on volume for their whole personality. Keep the braid close to the scalp, keep the ends controlled, and give the hat something flat to rest on. That’s the formula. Everything else is a variation on it.