There is a specific kind of panic that sets in about three days after you trade your long tresses for a chic bob or a trendy lob. You stand in front of the mirror, gripping a handful of hair that used to reach your shoulder blades but now barely grazes your chin, and you realize your repertoire of updos has vanished. Most people think short hair means the end of intricate styling, but that is a massive misconception. In fact, shorter lengths provide the perfect canvas for lace braids because you don’t have to manage three feet of tangling strands while trying to maintain precise tension.
Lace braiding is essentially the sophisticated, one-sided cousin of the traditional French braid. While a French braid pulls in new hair from both the left and right sides as you cross strands over the center, a lace braid only incorporates new hair from one side. This creates a “floating” effect, where the braid sits like a delicate piece of trim along the hairline or around the curve of the head, leaving the rest of the hair to fall naturally. For those of us with bobs and lobs, this is a total lifesaver. It keeps hair out of your face without requiring the bulk or length needed for a full-wrap crown braid.
I have spent years experimenting with these techniques on every hair texture imaginable, from bone-straight fine bobs to thick, curly lobs that seem to have a mind of their own. What I have found is that the lace technique is the most forgiving for shorter lengths. Because you aren’t pulling hair from the bottom of the section, you don’t have to worry about those pesky “baby hairs” at the nape of the neck falling out of the braid halfway through the day.
The key to mastering these looks lies in the prep work and the finger placement. Short hair needs grip, and lace braids need a steady hand. Once you get the rhythm of adding hair only from the top (or bottom, depending on the style), you will find that a five-minute morning routine can look like you spent an hour in a high-end salon chair.
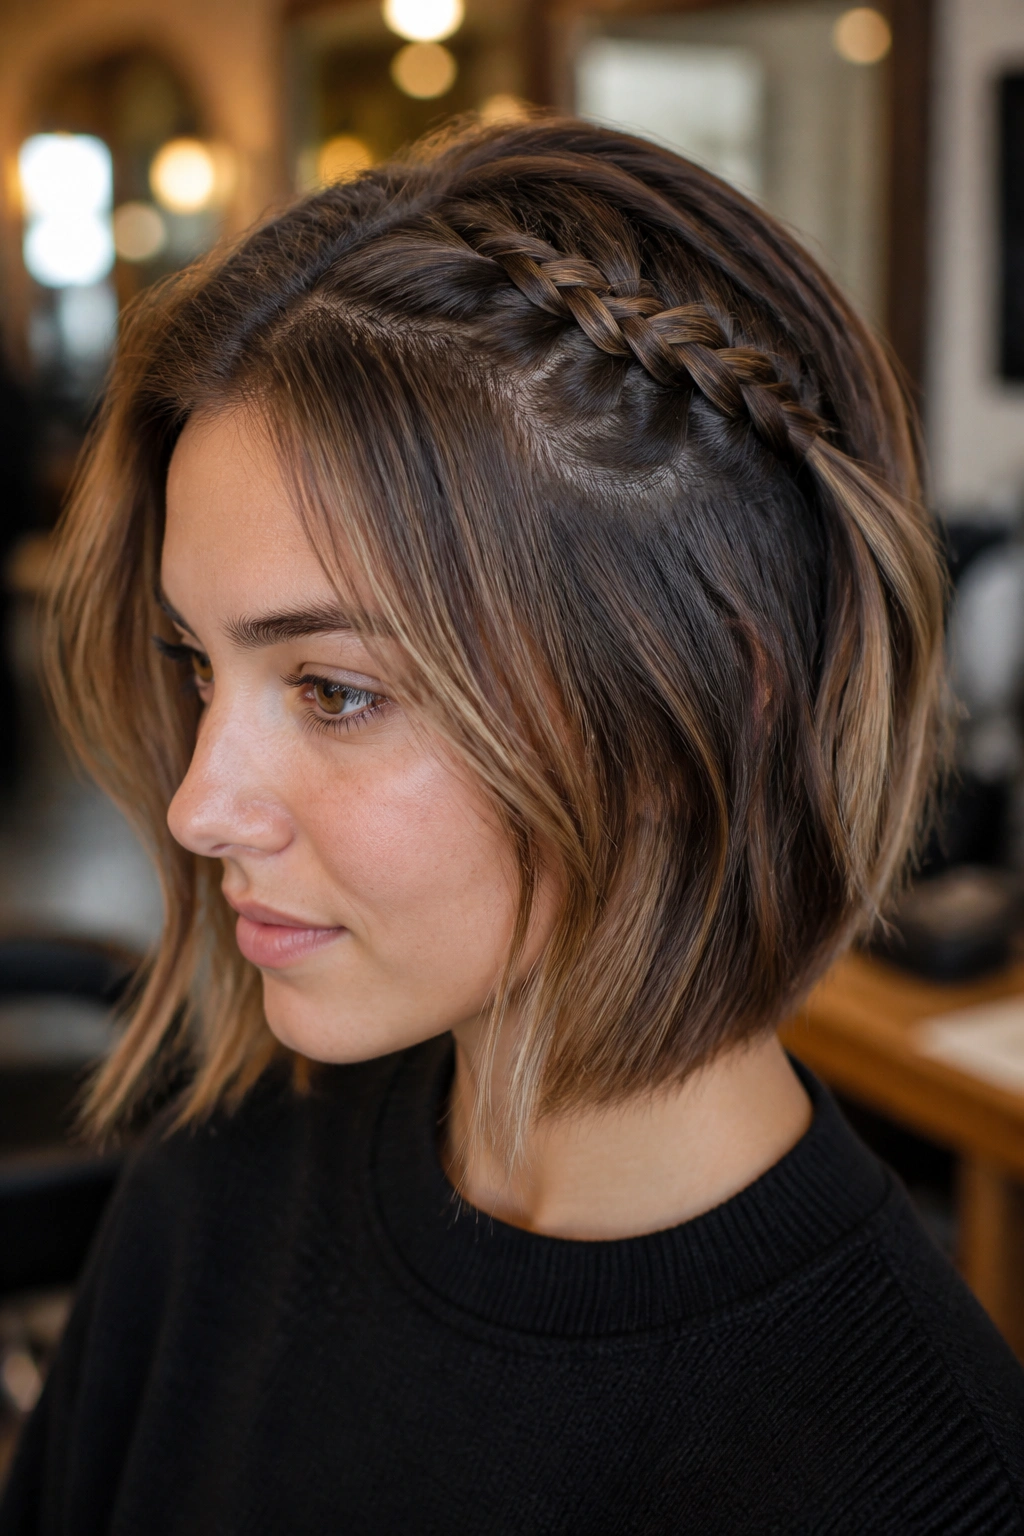
1. The Asymmetrical Side Lace Braid
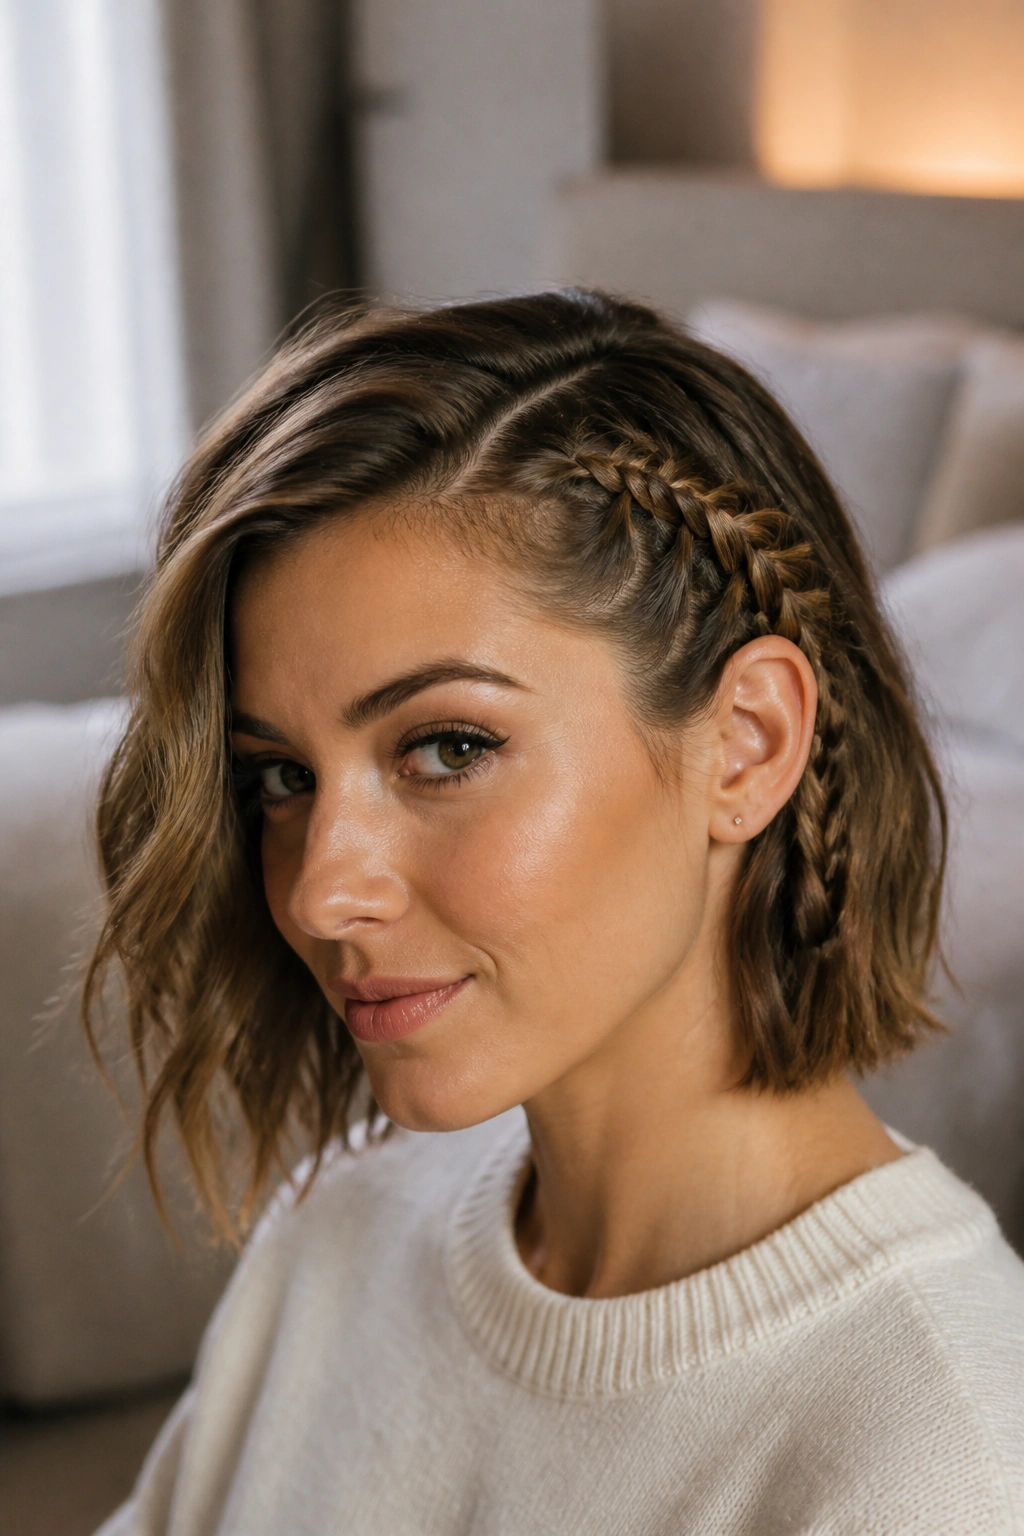
This is the quintessential “entry-level” lace braid that looks anything but basic. It starts at a deep side part and travels down along the temple, tucking behind the ear. It is the perfect solution for those days when your bangs are acting up or you want to show off a great pair of earrings without pinning your hair back in a flat, boring way.
Why It Works for Shorter Lengths
Because this braid only adds hair from the hairline side, it creates a distinct border that mimics the look of a shaved side-part or a tight undercut without the commitment. On a bob, it provides a sharp contrast between the structured braid and the soft, loose hair on the opposite side. It’s also incredibly stable; since the braid isn’t pulling from the back of the head, it won’t tug or loosen as you move your neck.
Quick Technical Facts
- Ideal Hair Length: Chin-length bobs and longer.
- Section Size: Use 1/2-inch sections for a delicate look.
- Tension Level: Medium-firm to prevent sagging near the ear.
- Best Tool: A rat-tail comb for a clean, sharp side part.
Pro tip: Apply a tiny bit of matte pomade to your fingertips before you start braiding to keep flyaways from popping out of the short sections.
2. Horizontal Lace Crown

If you have ever struggled with a full halo braid on short hair, the horizontal lace crown is your new best friend. Instead of trying to circle the entire head, this style focuses on the “crown” area—the top third of your head. It creates a beautiful, headband-like effect that stays put through an entire workday or an evening out.
The beauty of the horizontal lace crown is its versatility. You can start the braid at the temple and work it straight across the back, or keep it closer to the forehead for a more regal appearance. By only adding hair from the front hairline, the back of your bob remains untouched, maintaining that signature swing and volume that makes short haircuts so appealing in the first place.
I often recommend this for people who are growing out their hair. It manages those awkward, mid-length layers by tucking them into a secure structure. You aren’t fighting gravity as much here because the braid rests on the flat of the head. It’s a reliable, sturdy choice that looks complex but relies on a very simple repeating motion.
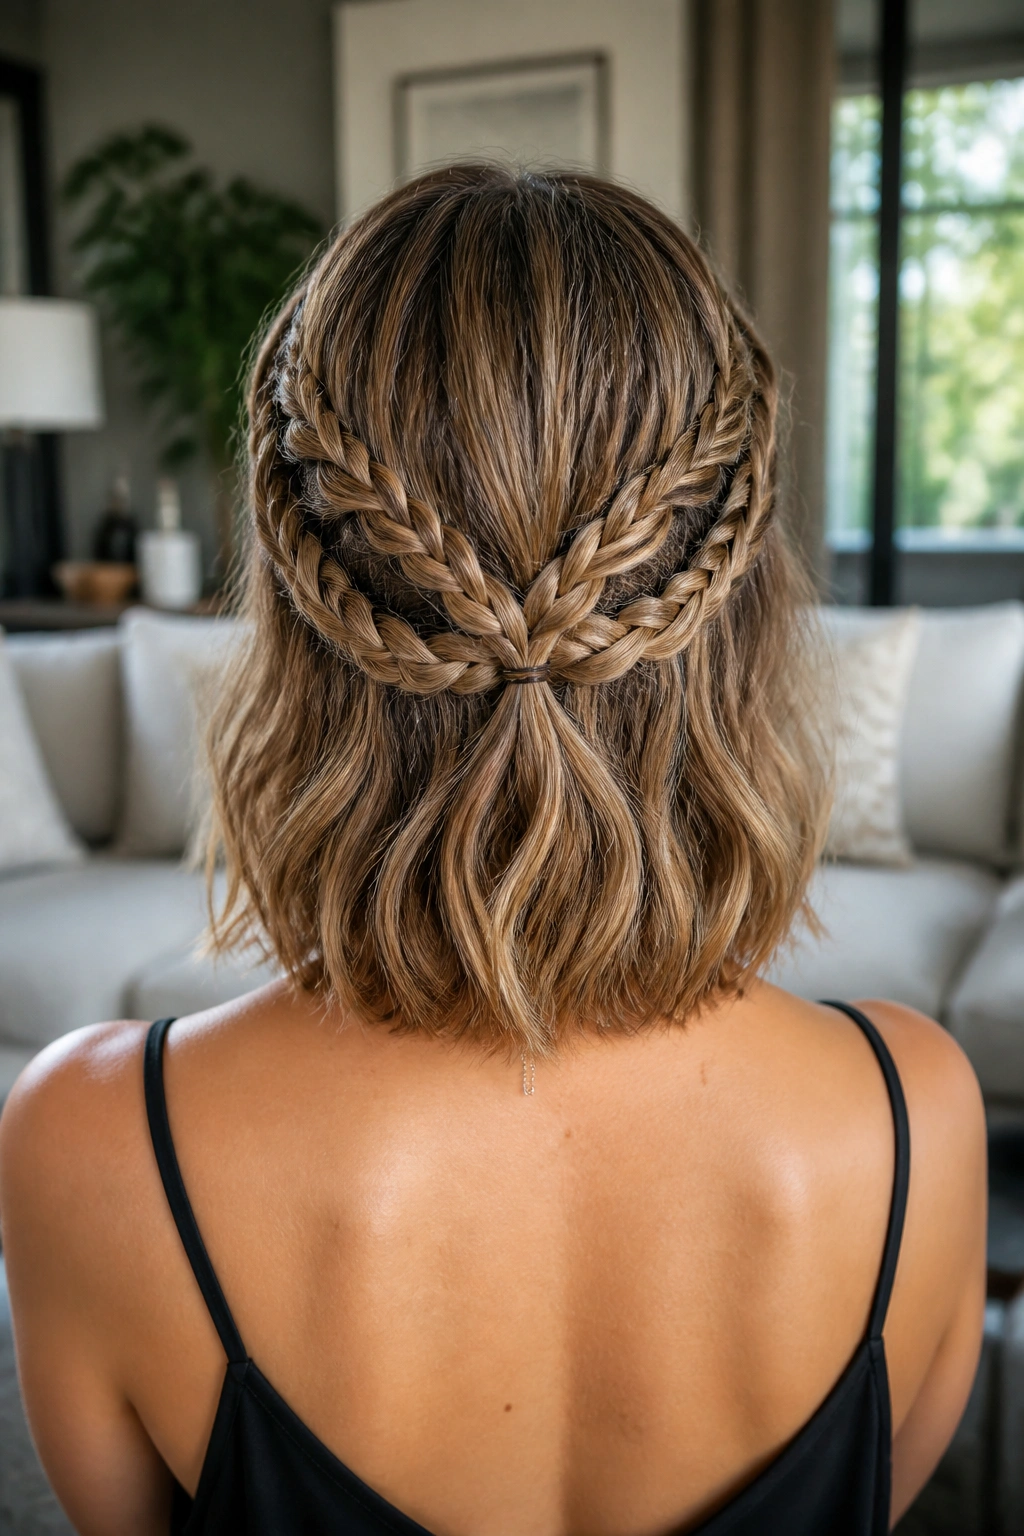
3. The Dipping Waterfall-Style Lace Braid
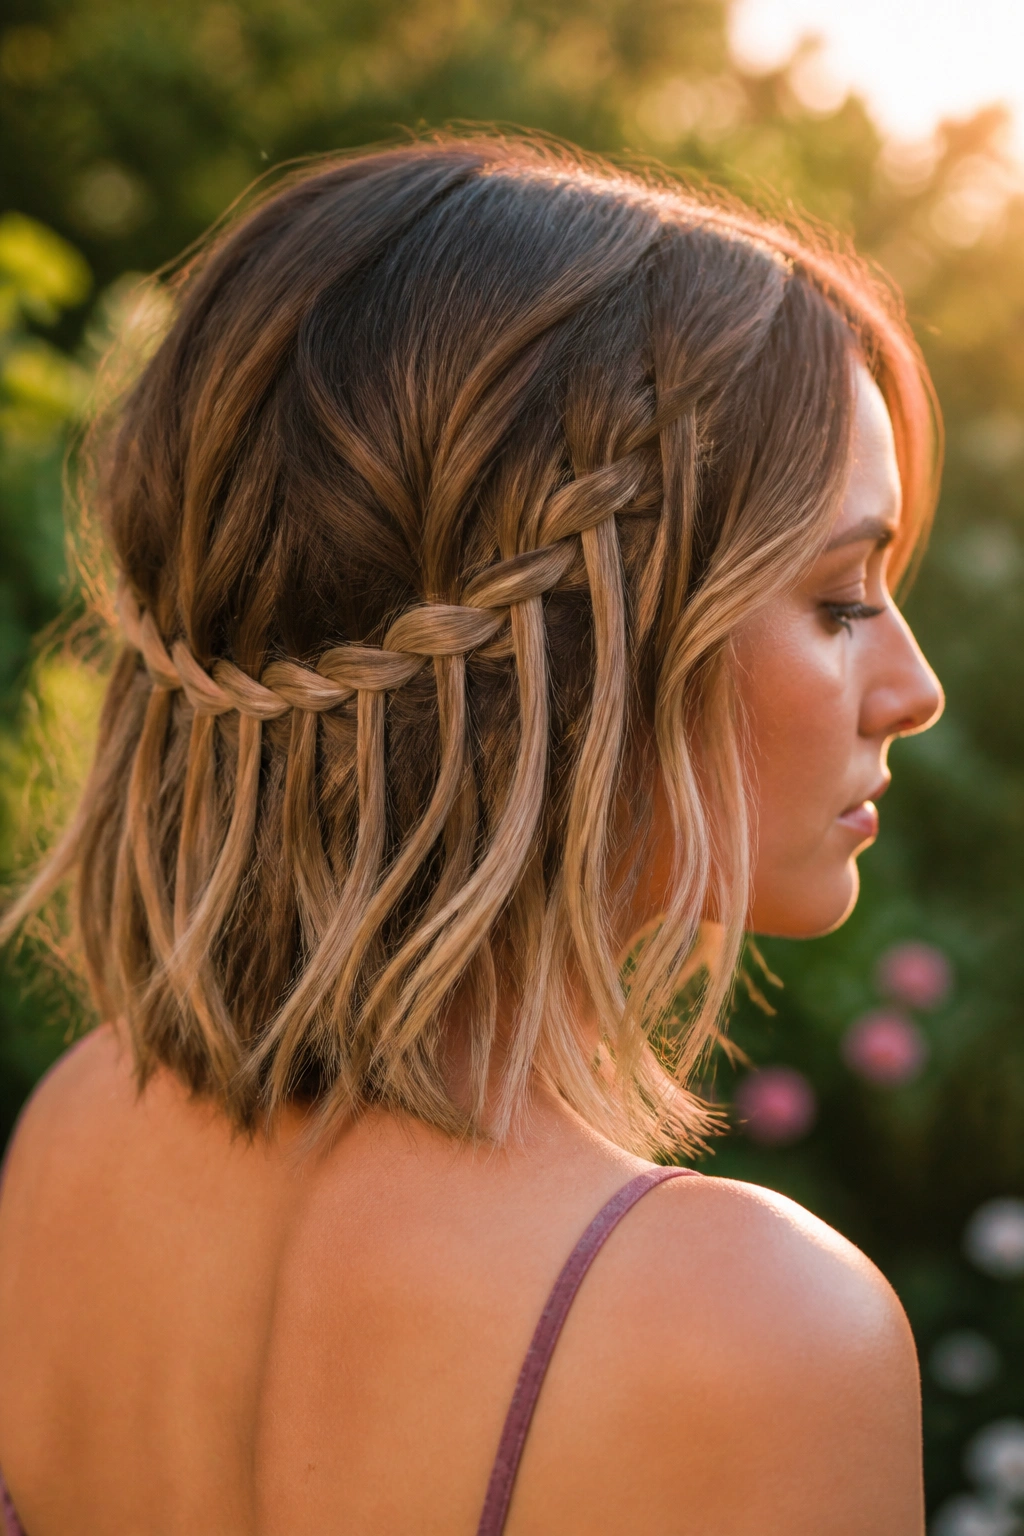
Many people confuse waterfall braids with lace braids, but this specific variation uses the lace technique to create a “dipping” effect across a lob. Instead of a straight line, the braid follows a gentle U-shape from one side of the head to the other, picking up hair only from the top.
How to Achieve the Dip
- Start at the temple and begin a standard lace braid, adding hair only from the crown.
- As you reach the back of the head, slightly increase the length of the sections you are adding.
- Allow the braid to sag naturally by about an inch to create the curve.
- Continue to the opposite side, shortening the sections as you approach the other temple.
What Makes It Different
Unlike a traditional waterfall braid where you drop strands completely, this lace version keeps all the hair within the braid structure. This provides much more security for short hair, which tends to slip out of standard waterfall styles. It creates a “shelf” for the rest of your hair to fall over, adding a layer of depth and texture that looks particularly stunning on hair with highlights or balayage.
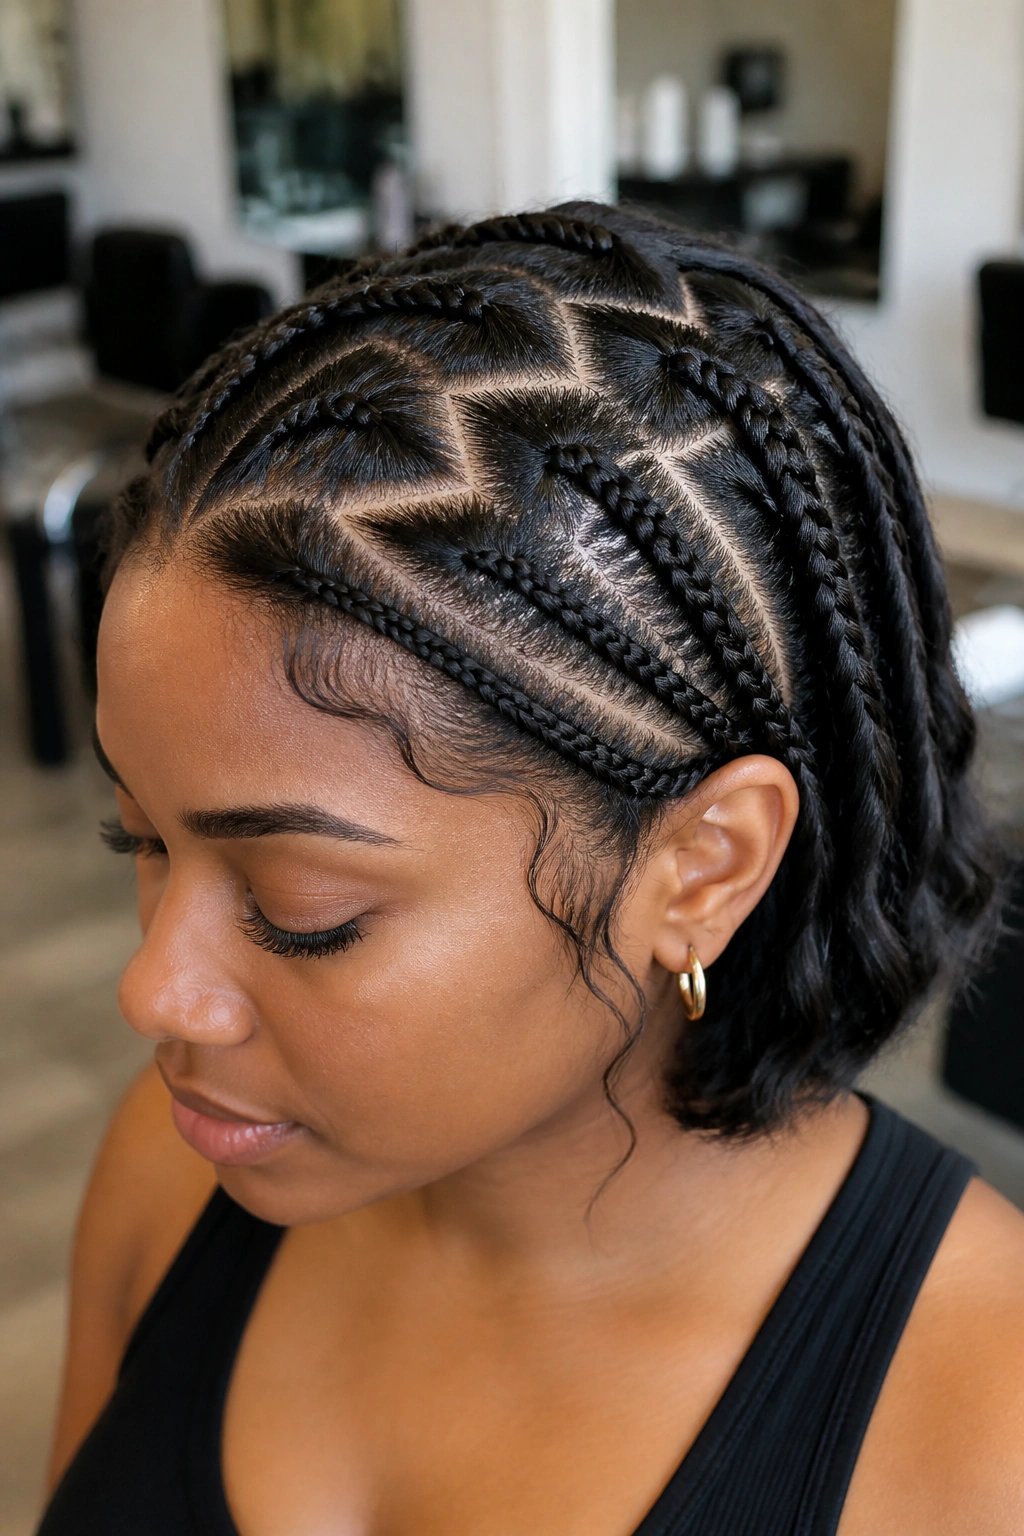
4. Lace Braid Pigtail Accents
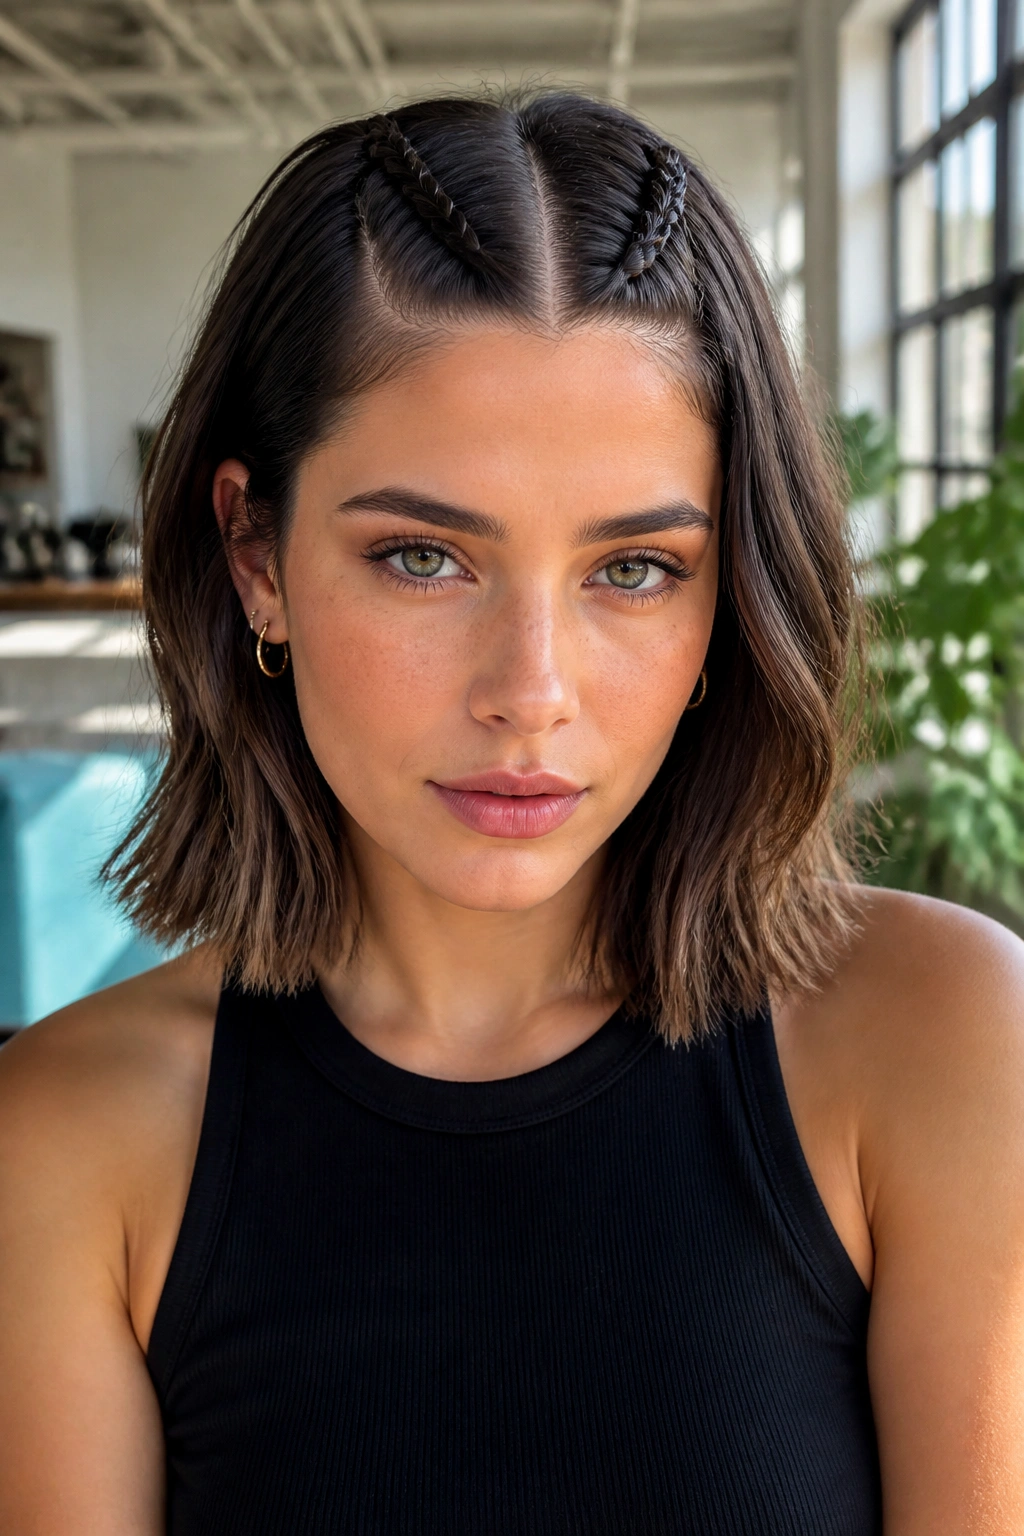
Pigtails often get a bad rap for looking too youthful, but lace-braided pigtail accents on a lob are sophisticated and edgy. This involves two parallel lace braids starting at the forehead and running back toward the crown, adding hair only from the center part.
This style is a favorite for fitness enthusiasts or anyone who needs their hair completely out of their eyes but still wants to look polished. By adding hair only from the center part, the sides of the hair are left to hang freely, which frames the face beautifully. It’s a “best of both worlds” scenario where you get the security of a braid but the aesthetic of a loose style.
When you finish these braids at the crown, you can either tie them off with clear elastics or transition them into tiny “space buns” if your hair is long enough. For shorter bobs, I prefer pinning the ends underneath the loose hair at the back with bobby pins. This creates a seamless look where the braids seem to disappear into the bulk of the hair.
5. The French Lace Bang Braid

This is the ultimate “bad hair day” fix. If you have bangs that are in that awkward growing-out phase, or if you simply woke up with a cowlick that refuses to cooperate, the lace bang braid is your solution. It stays right on the edge of the forehead, picking up only the very front-most strands.
The secret to a great bang braid is to keep it tight and close to the skin. Since you are working with the shortest hairs on your head, any slack in the tension will result in the braid falling apart within an hour. I find that starting with a very small three-strand base—almost like a micro-braid—and then gradually adding hair helps to anchor the style.
It’s a very intentional look. It says, “I meant for my hair to be this way.” It works on the shortest pixie-bobs just as well as it does on shoulder-length lobs. Because it only incorporates the fringe, the rest of your hair can be as messy or as sleek as you like. It provides a point of focus that draws attention to the eyes and cheekbones, acting almost like a natural contour for the face.
6. Double Lace Braided Headband
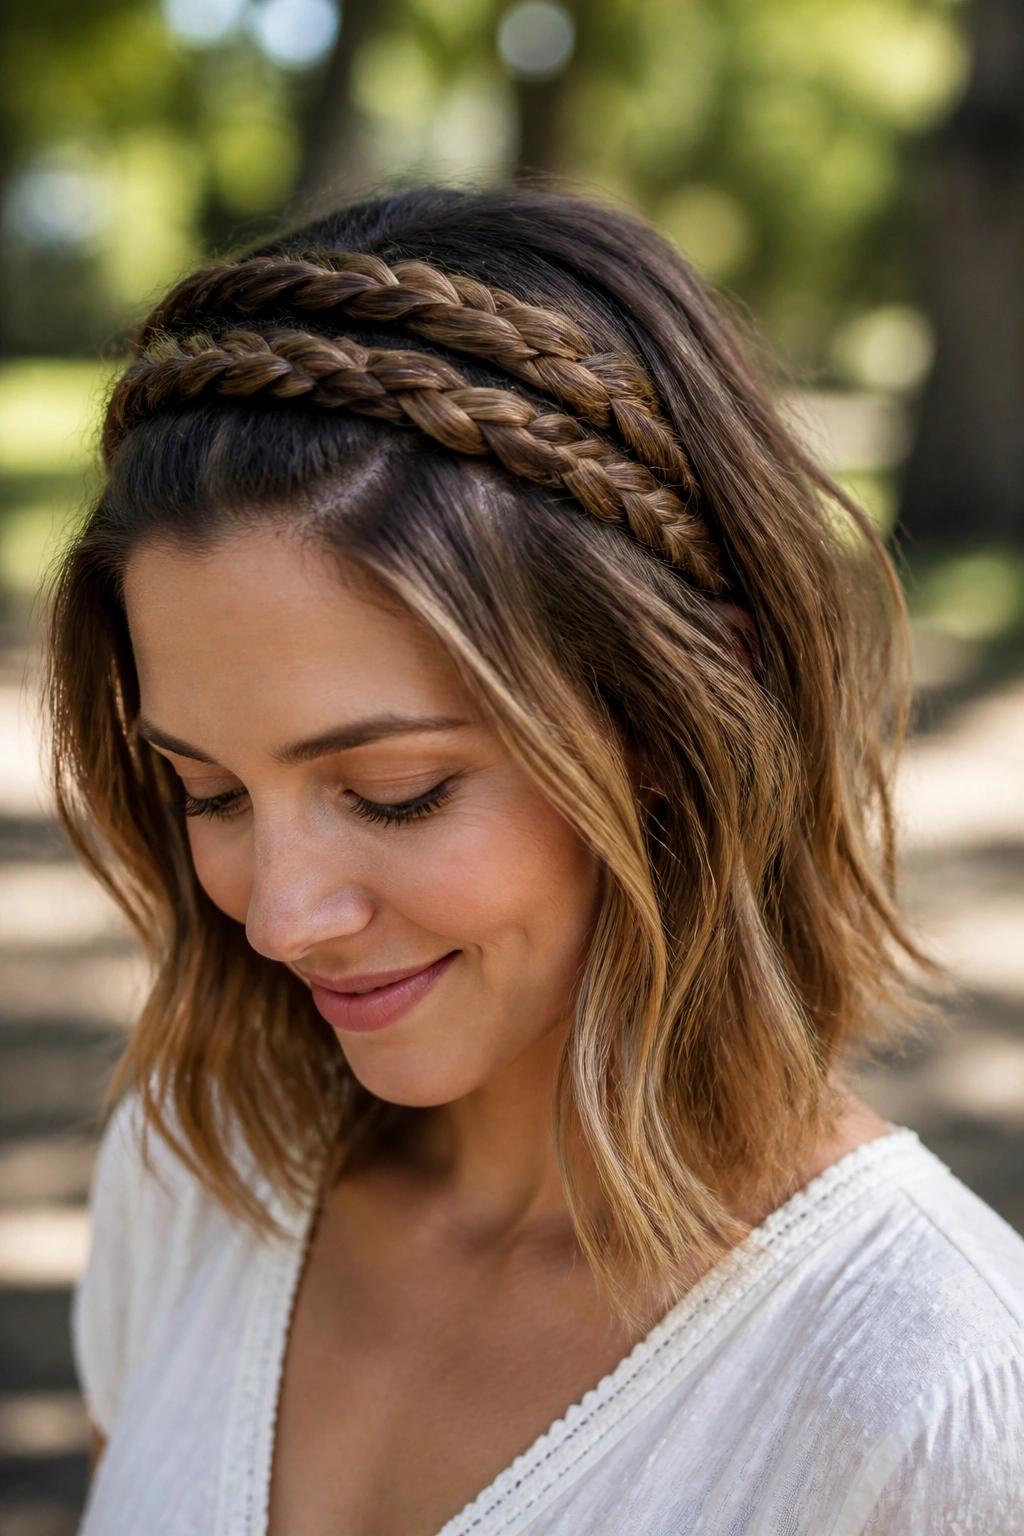
For those who want maximum impact, the double lace braided headband is a masterpiece of texture. It involves two lace braids sitting right next to each other. One picks up hair from the hairline, and the second, sitting just behind it, picks up hair from the crown.
Which One Is Best for You?
This style is specifically tailored for those with a bit of “lob” length, as it requires enough hair to create two distinct tracks. If you have very fine hair, this is a fantastic way to fake volume. The two braids sitting side-by-side create a wide, textured band that looks much thicker than a single braid ever could.
The Comparison Angle
Unlike a traditional thick braid that might feel heavy or slip down the back of a short haircut, these two smaller tracks distribute the weight. They “lock” into each other. If the front braid starts to move, the back braid acts as an anchor. It’s a more structural approach to hairstyling that mimics the look of expensive hair accessories.
7. Diagonal Lace Path for Lobs
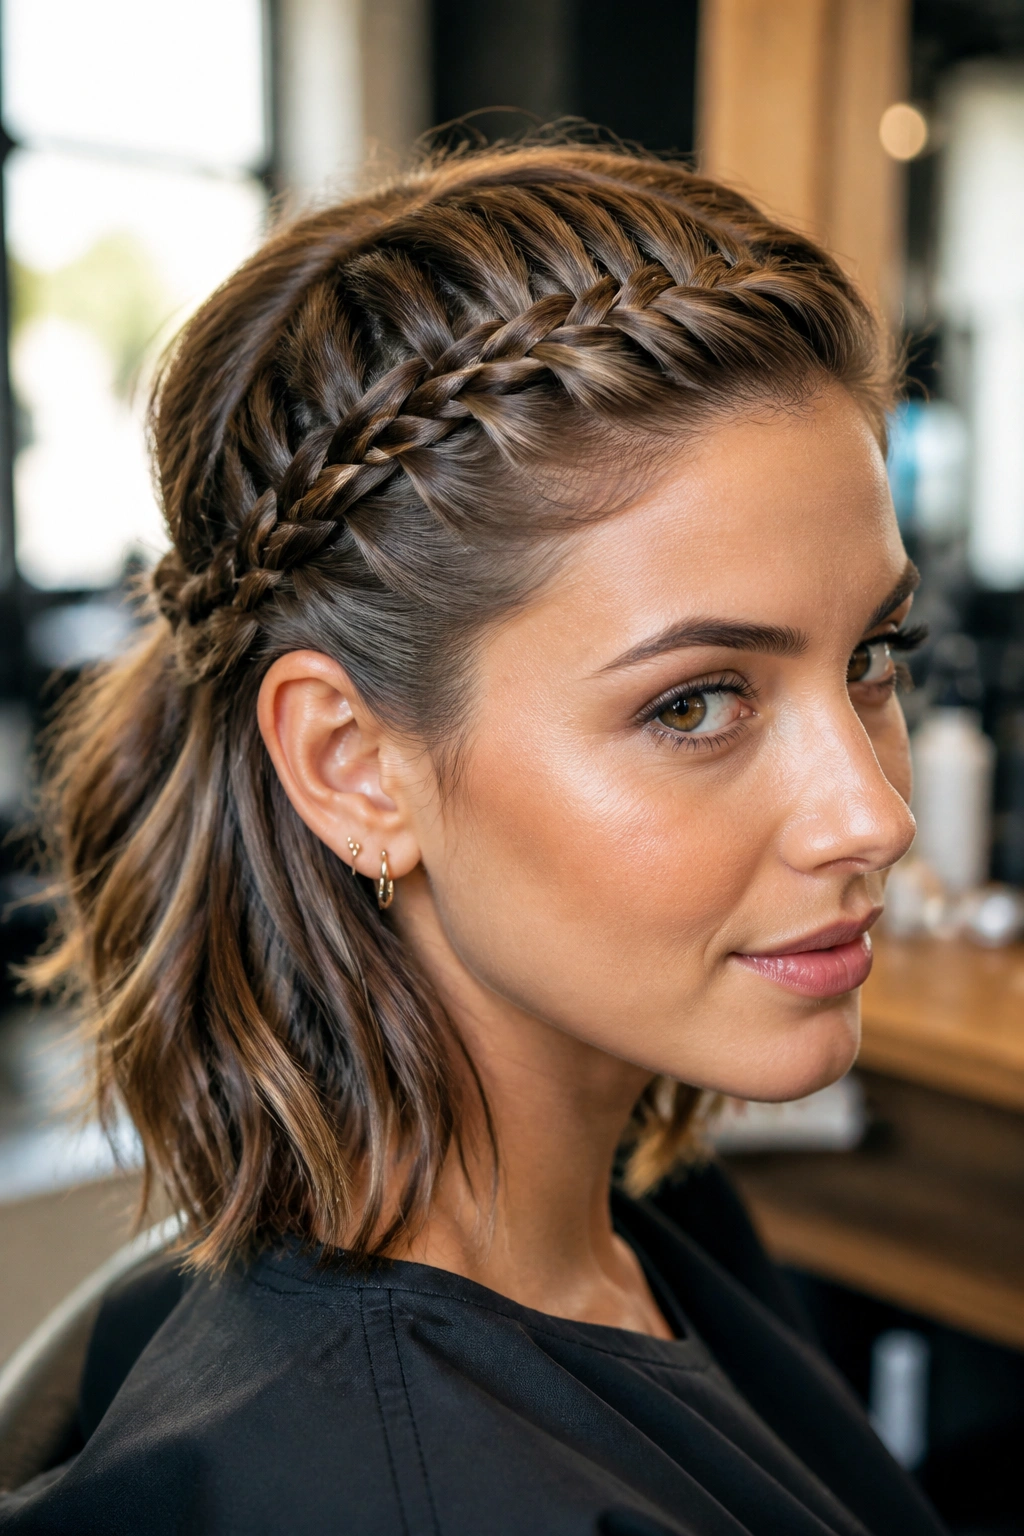
Standard braids usually go front-to-back or side-to-side, but a diagonal path is a great way to use the extra length found in a lob. This braid starts at one temple and travels diagonally across the back of the head, finishing behind the opposite ear. It uses a lace technique that only picks up hair from the “uphill” side of the diagonal.
I love this style for formal events. It has an architectural quality to it that looks very high-fashion. When you braid on a diagonal, you are essentially creating a focal point that moves with the viewer’s eye. On a lob, this path highlights the bluntness of the cut at the bottom while providing a soft, intricate detail across the middle.
To keep a diagonal braid from “ghosting”—which is when the braid lifts off the head and loses its shape—you must ensure you are pulling the added sections firmly toward the direction of travel. If you pull them straight down, the braid will sag. If you pull them back too hard, the braid will bunch. It takes a little practice to find that perfect 45-degree tension, but the result is worth the effort.
8. The Zig-Zag Lace Part
This is for the person who wants to break all the rules of traditional braiding. Instead of a straight line, you move the braid in a “Z” pattern across the top of the head. This requires a lace technique that switches the side you add hair from every time you change direction.
Why This Style Challenges the Status Quo
- It creates massive volume at the roots by shifting the hair’s natural fall.
- It hides “holes” in the hair or areas where the scalp might be more visible.
- It provides a 360-degree visual interest; it looks different from every angle.
- It’s the best way to handle very slippery, freshly washed hair because the changes in direction create natural friction.
The zig-zag isn’t just a visual gimmick; it’s a functional way to secure hair. By changing directions, you are essentially “weaving” the braid into the rest of the hair. It becomes much harder for the braid to slide out, making it an excellent choice for a long day of travel or an outdoor event where wind might be an issue.
9. Under-the-Ear Lace Accent
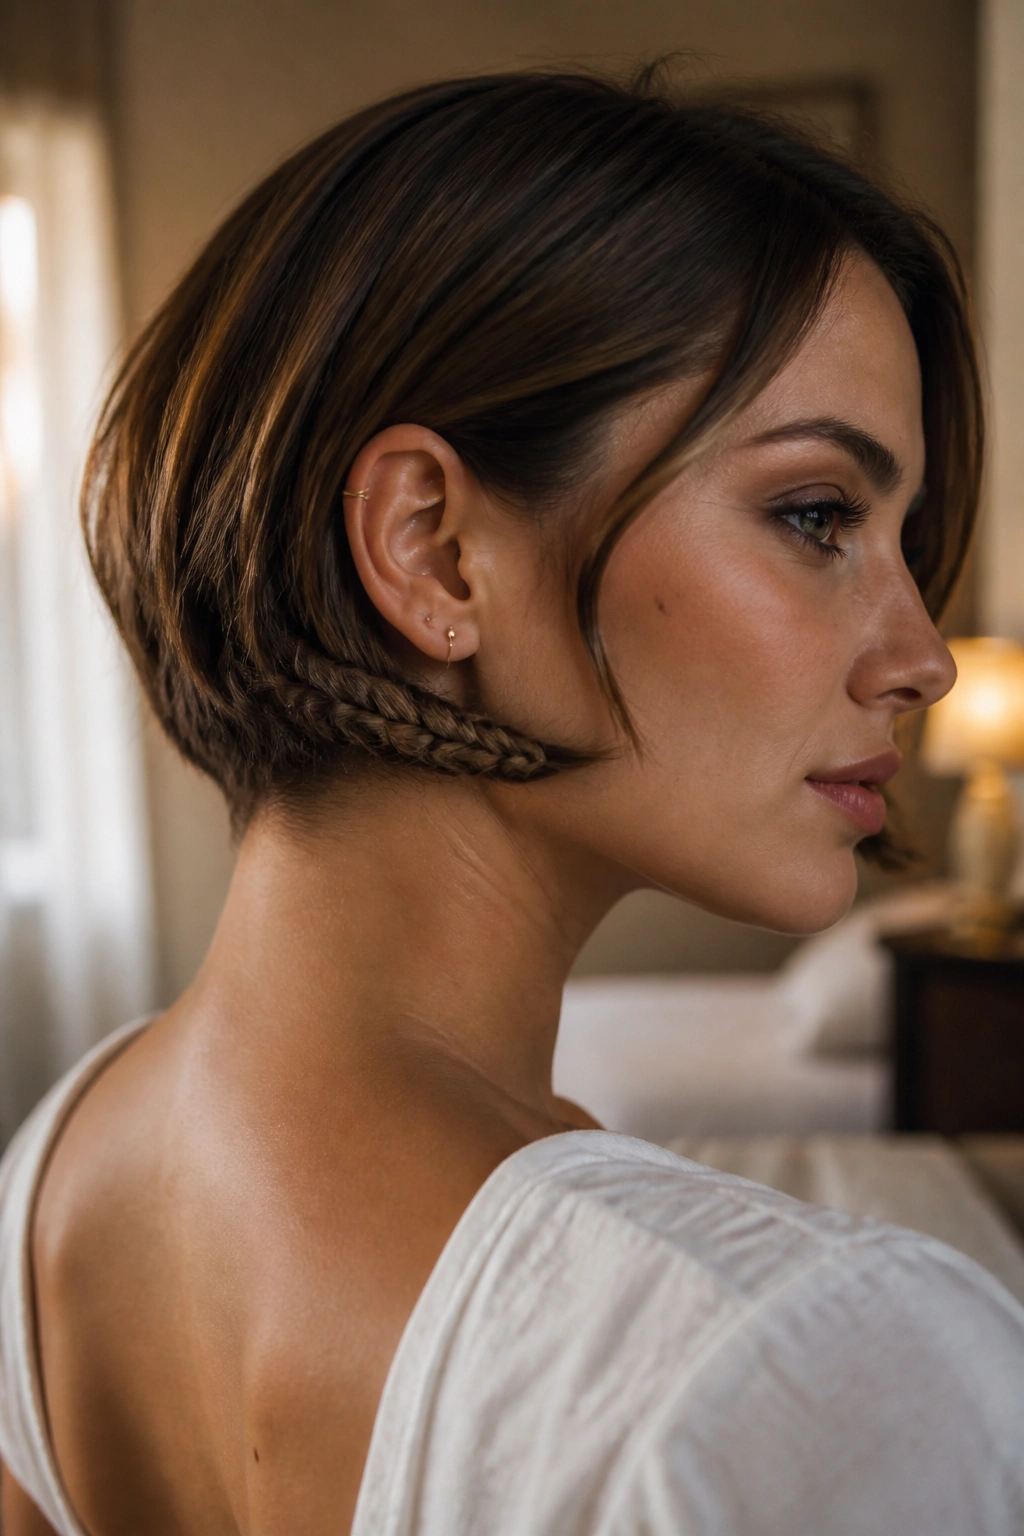
Sometimes, less is more. The under-the-ear lace accent is a “hidden” braid that starts near the nape and travels horizontally toward the chin, picking up hair only from the bottom edge of the bob. It’s a subtle detail that only becomes visible when you move your head or tuck a section of hair behind your ear.
How Is This Useful?
- Control: It tames the “fuzz” that often happens at the bottom of a bob.
- Style: It adds a “peek-a-boo” element to an otherwise simple haircut.
- Practicality: It keeps the hair at the nape from sweating against your neck.
I often use this technique when I’m working with clients who have very thick hair. By lace-braiding a small section at the bottom, you can actually reduce some of the “bell-shape” that bobs sometimes take on. It’s a functional bit of hair-mapping that doubles as a cool, understated style. Think of it as the “secret handshake” of the braiding world—it’s for those who know where to look.
10. Reversed Lace Braid Chignon
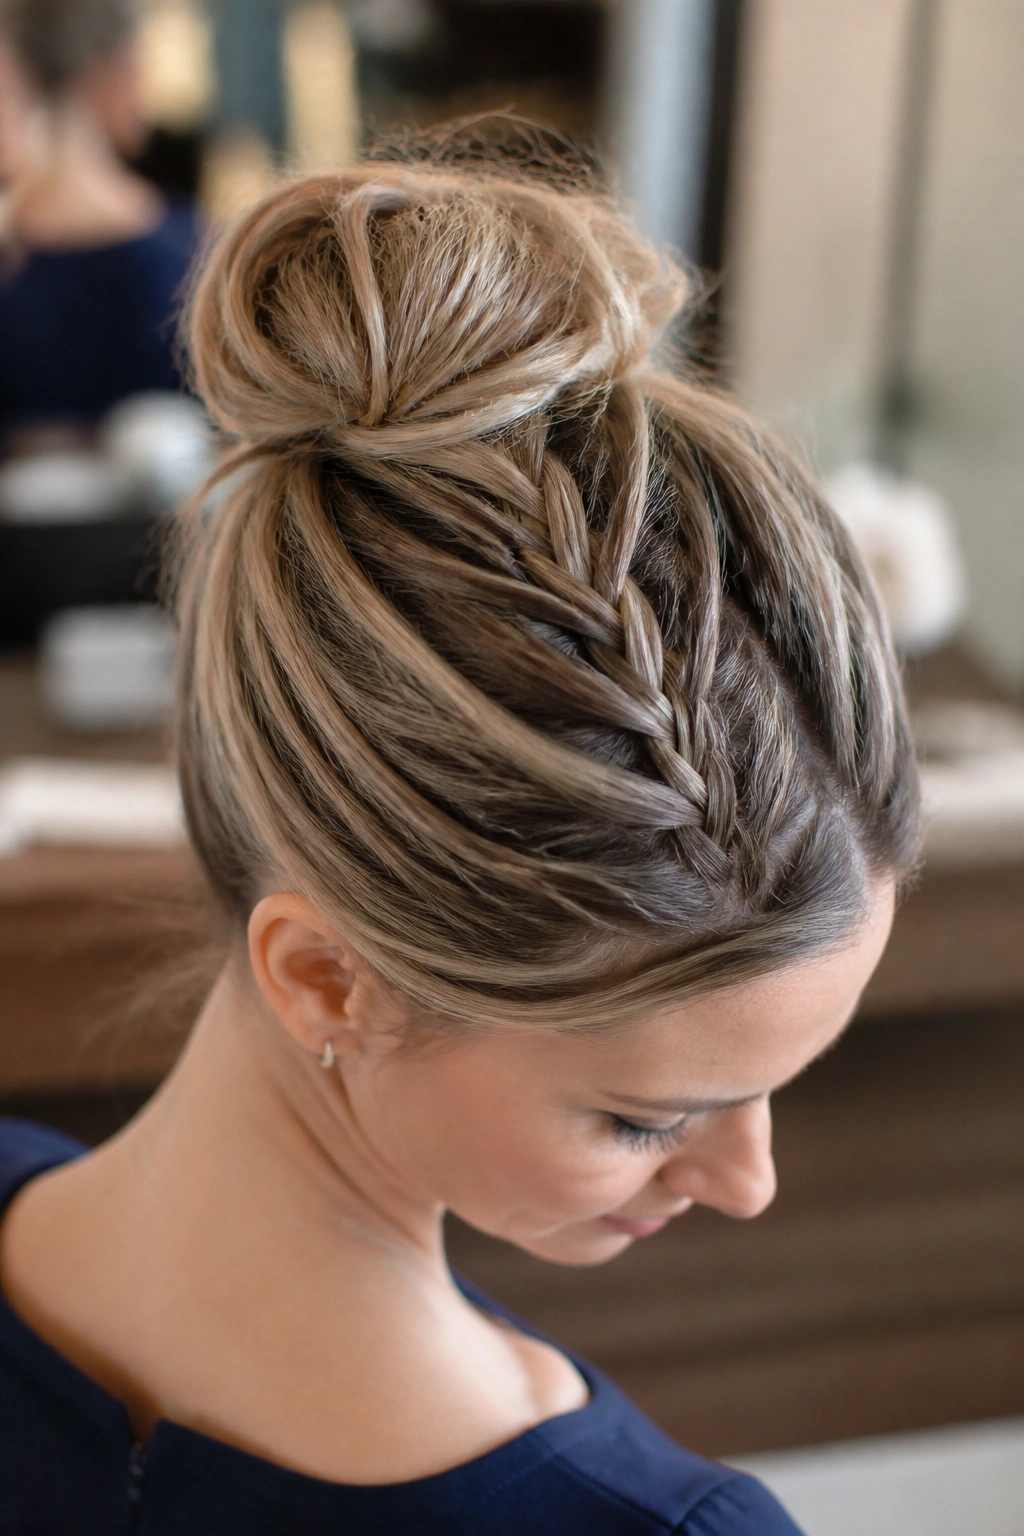
Who says you can’t have an updo with a bob? The reversed lace braid starts at the nape of the neck and works upward toward the crown, adding hair only from the sides. This “upside down” lace braid gathers all the short hairs that usually fall out of a ponytail and directs them toward the top of the head.
When you reach the crown, you can twist the remaining hair into a small bun or a series of messy loops. This is one of those styles that makes people ask, “How did you get all your hair up there?” The answer is the lace technique. By securing the hair at the base first and working up, you are creating a staircase for your hair to climb.
This is a bit more advanced because you have to braid with your head flipped over or use a system of mirrors, but it is the most secure updo for short hair I have ever encountered. It’s perfect for summer months when you want your hair completely off your neck but don’t want to deal with a dozen bobby pins that eventually slide out anyway.
11. Feathered Lace Braid for Fine Hair
If your hair is fine or thinning, tight braids can sometimes make the scalp look too prominent. The feathered lace braid is the solution. It uses very loose tension and “pancakes” the edges of the braid—pulling the loops outward—to create a wide, airy look that picks up hair only from the top.
The goal here isn’t a tight, rope-like structure. Instead, you want something that looks like a series of soft interlaced feathers. After every three or four crosses, I stop and gently tug at the outer edges of the braid. Because it’s a lace braid, you only have to worry about pulling one side of the loop, which makes the “feathering” look much more intentional and uniform.
This style is incredibly romantic and soft. It works well for weddings, brunches, or any time you want a “soft-focus” look. It’s also very gentle on the hair. If you have breakage or fragile strands, the lack of intense tension makes this a safe way to style your hair without causing further damage.
12. The Multi-Strand Lace Wrap
This is essentially a lace braid that acts as a tie-back. Instead of braiding all the way to the ends, you lace-braid a small section from each temple and then “wrap” them around each other at the back of the head. You only add hair from the hairline, which keeps the front of the style very clean.
The multi-strand wrap is a great way to showcase a bob’s natural texture. If you have wavy or curly hair, the “wrap” at the back creates a beautiful contrast with the curls. It’s a very fast style—usually taking less than three minutes—but it has a high-effort appearance.
The trick is to use a small, clear elastic to join the two braids at the back, then take a tiny sliver of hair from the “tail” and wrap it around the elastic to hide it. Pin it in place with a small U-shaped pin. It creates a seamless, circular flow that highlights the symmetry of a well-cut lob.
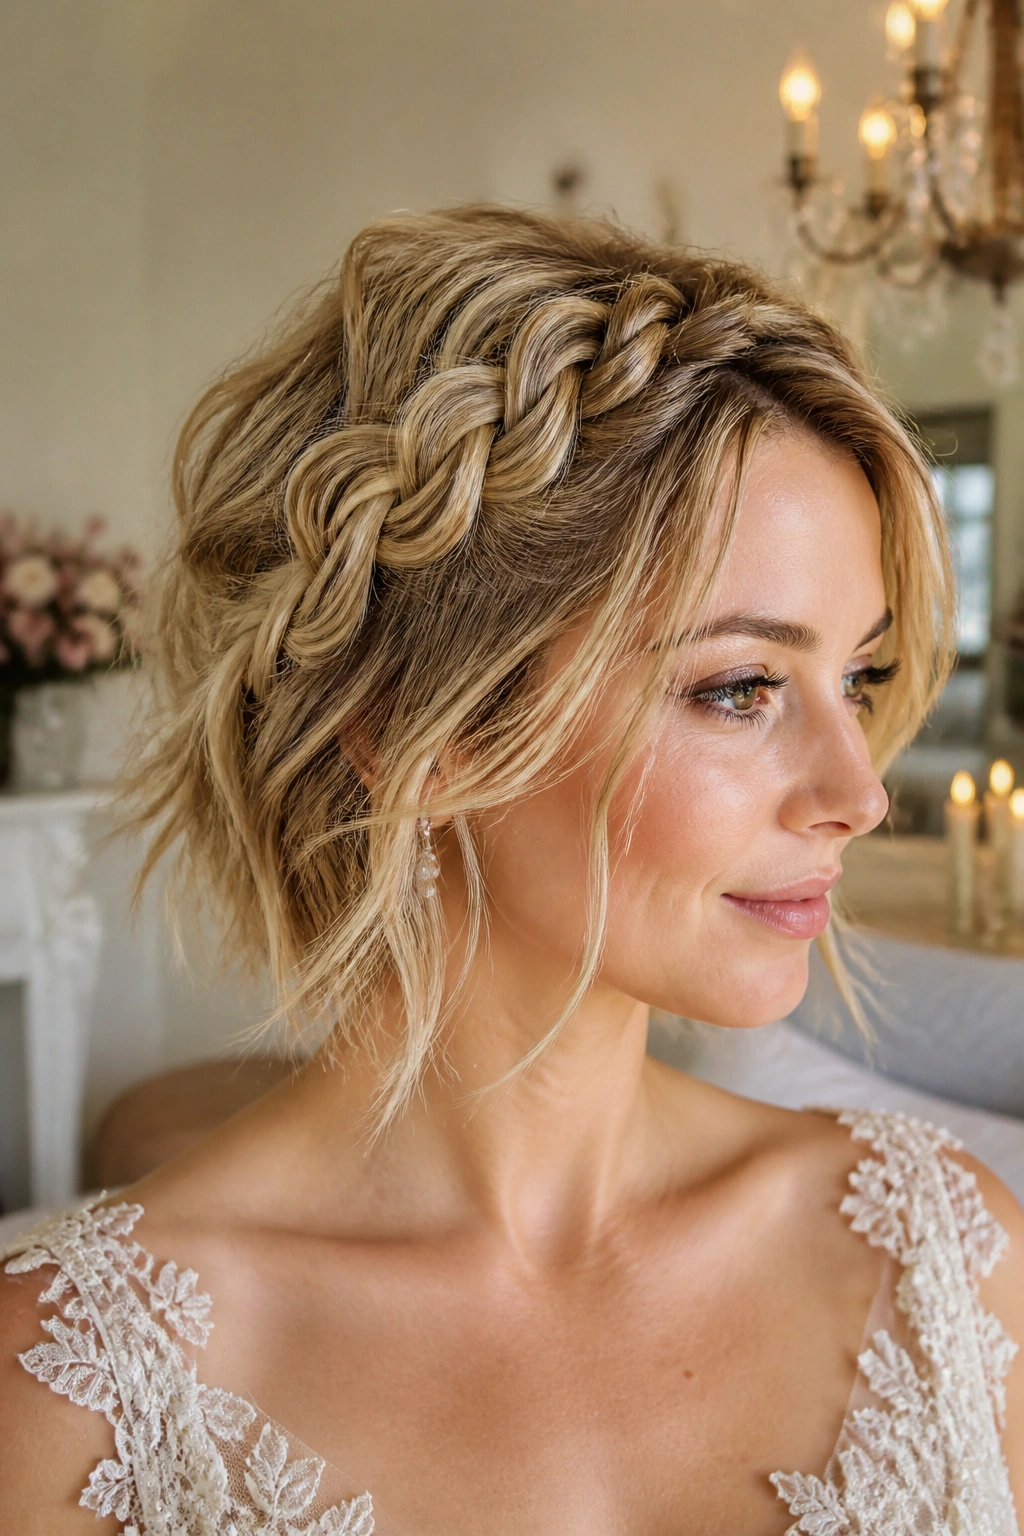
13. Textured Bohemian Lace Halo

The Bohemian version of the lace halo is all about “perfect imperfection.” It’s a lace braid that circles the head, picking up hair from the crown, but with varying section sizes. This creates an organic, textured look that doesn’t feel too “done.”
How to Style It
- Start with second-day hair or use a dry texture spray to add “grit.”
- Begin the lace braid at the back of the head, moving forward toward the temple.
- Vary the thickness of the hair you add—sometimes a thin sliver, sometimes a thicker chunk.
- Leave a few “tendrils” out around the ears and face to soften the look.
Why This Style Is Timeless
The Boho halo is the ultimate “cool girl” braid. It doesn’t require a perfectly straight part or mirror-perfect symmetry. In fact, if a few pieces stick out, it only adds to the charm. On a bob, this style provides a massive amount of volume at the crown, which can be very flattering for round or square face shapes. It’s a rugged, durable style that actually looks better as the day goes on and it gets a little bit “lived-in.”
How Lace Braiding Differs from Traditional French Braids
Understanding the mechanics of the lace braid is the difference between a style that looks professional and one that looks like a tangled mess. Most of us are taught to French braid by adding hair to every strand we cross over. This is great for long, heavy hair that needs to be anchored firmly to the scalp. But on a bob, that much anchoring can make the hair look flat and “plastered” to the head.
The lace braid is a “selective” braid. By only adding hair to one side—usually the top—you are creating a decorative element that sits on top of the hair rather than being buried within it. It’s much more like embroidery than weaving. This allows the natural “swing” of the bob to remain. If you have a blunt-cut lob, a lace braid will highlight the straightness of the bottom edge because it doesn’t disturb the hair falling from the back of the head.
Another major difference is the tension management. In a French braid, you are pulling from two directions, which naturally centers the braid. In a lace braid, the tension is asymmetrical. You have to consciously pull the braid toward the side you are NOT adding hair from to keep it from drifting. It sounds complicated, but your hands will learn the “lean” very quickly.
Prep Work: Getting the Right Texture for Bobs
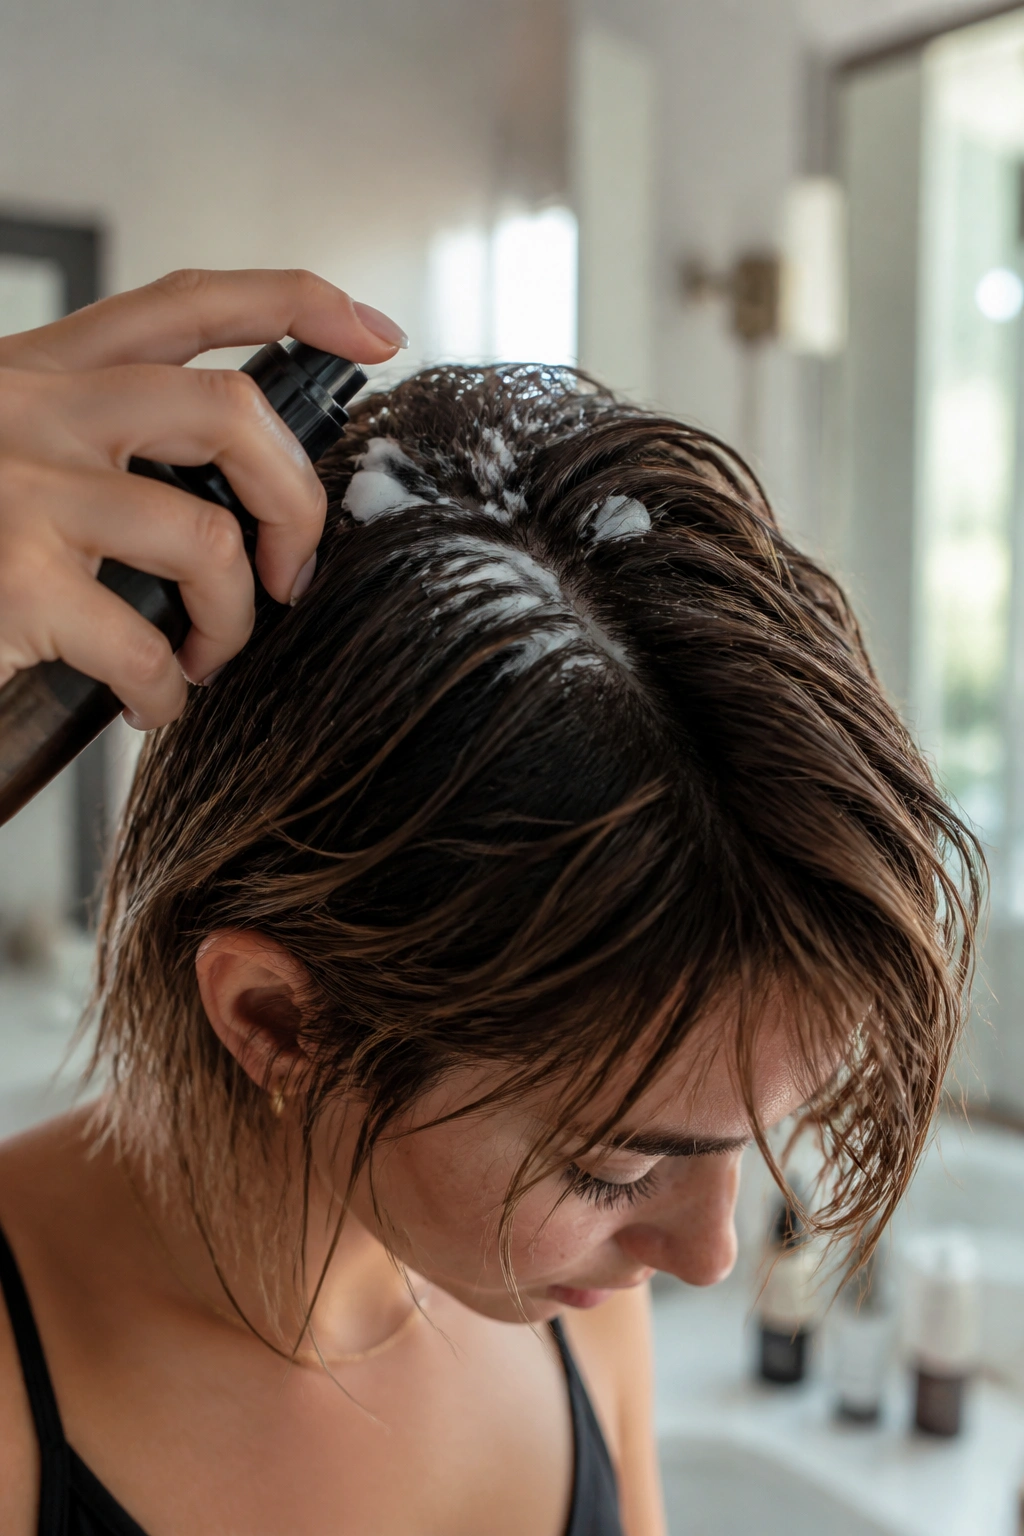
You cannot braid slippery, “silky” short hair. If you just washed and conditioned your hair with a heavy smoothing product, those short layers are going to pop out of your lace braid like springs. The secret to a braid that lasts more than twenty minutes is “the grip.”
I always recommend starting with hair that hasn’t been washed in at least twenty-four hours. The natural oils provide a bit of tackiness that helps the strands stay together. If you must start with clean hair, you need to intervene with products. A sea salt spray or a volumizing mousse applied to damp hair and then blow-dried in will create the “tooth” your fingers need to hold the sections.
For those with very fine hair, a puff of volumizing powder at the roots where you plan to braid is a literal lifesaver. It creates a matte, grippy surface that prevents the braid from sliding down your forehead. If you have thick, curly hair, a light leave-in cream will help define the sections so the braid looks clean rather than frizzy. Prep is 80% of the work in short-hair braiding; the actual braiding is just the finishing touch.
Essential Tools for Short Hair Braiding
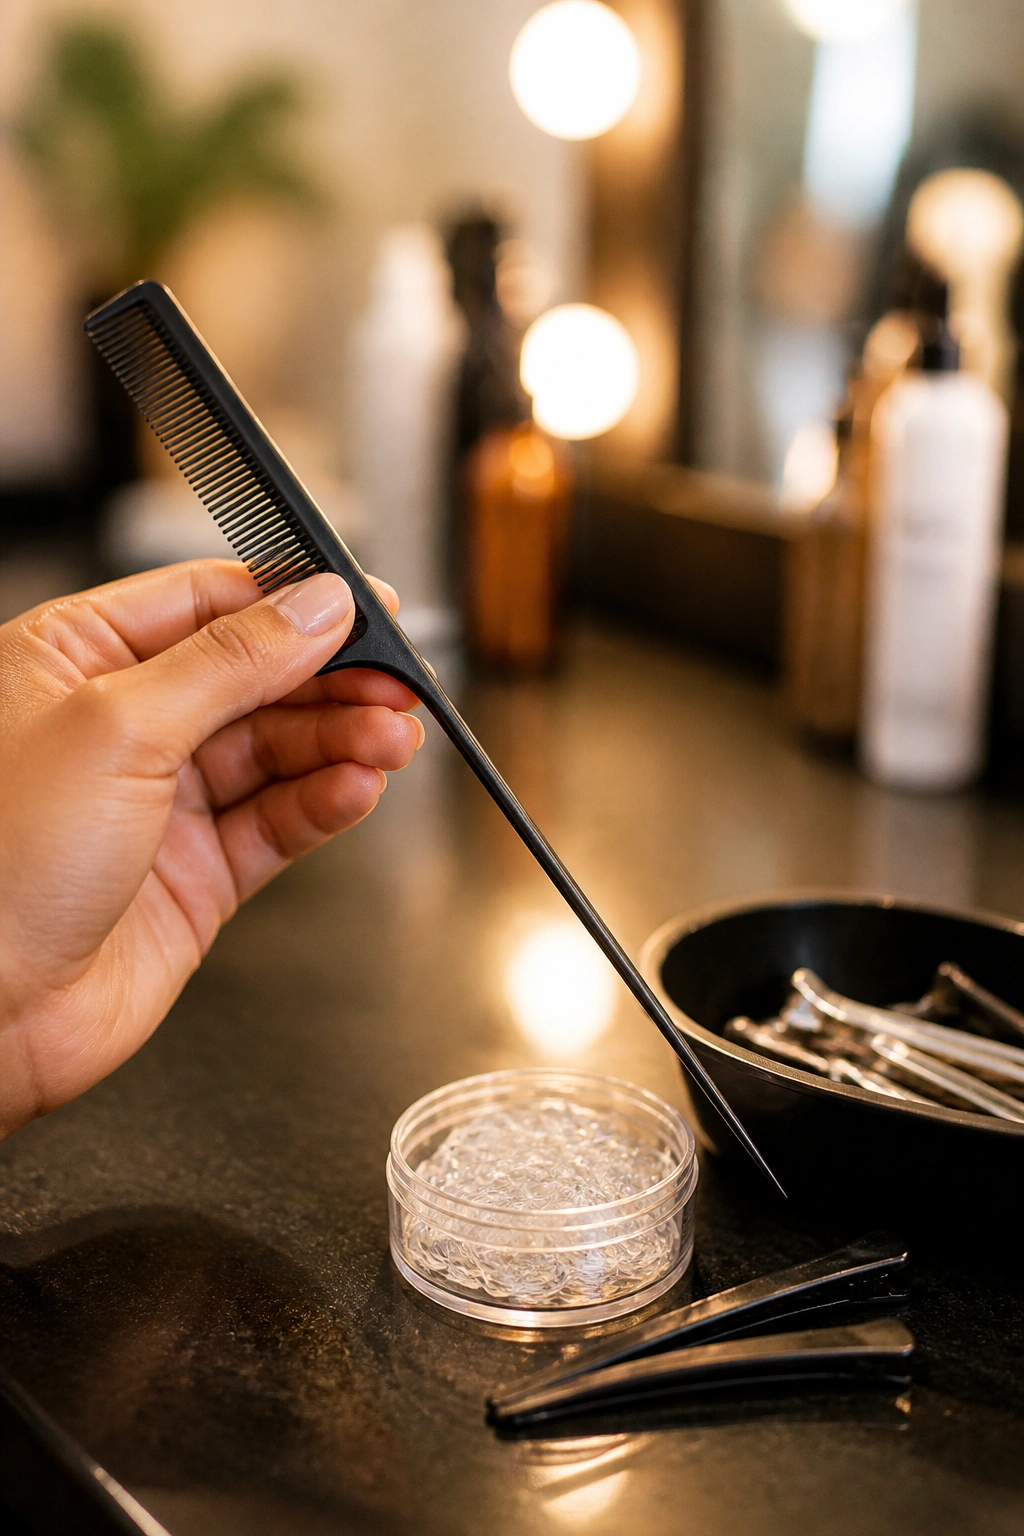
You don’t need a suitcase full of gadgets, but a few specific tools will make lace braiding significantly easier. When you’re working with the limited “real estate” of a bob, precision is your best friend.
- The Rat-Tail Comb: This is non-negotiable. You need that long, pointed handle to create clean parts and to hook small sections of hair to add to your lace braid. Fingers are too blunt for the precision required on short hair.
- Sectioning Clips: Use these to pin back the hair you aren’t braiding. There is nothing more frustrating than accidentally grabbing hair from the back of your bob when you’re trying to do a clean lace braid in the front.
- Clear Poly-Bands: These tiny elastics are much better than standard hair ties. They are nearly invisible and don’t add bulk to the ends of your braids, which is crucial when you’re trying to hide the “tails” of your braids under short layers.
- Matte Pomade or Styling Wax: Just a tiny dab on your fingertips will help you “glue” the ends of short layers into the braid as you work.
Finishing Techniques to Keep Short Strands in Place

The “tail” of the braid is where most short-hair styles fail. You reach the end of your braid, tie it off, and suddenly three inches of hair are sticking out at a weird angle behind your ear. To fix this, you need a “tuck and pin” strategy.
Instead of letting the braid hang, I like to “sew” it into the loose hair using bobby pins. Take a bobby pin, catch a bit of the braid’s tail, and then push it upward into the bulk of the hair. This hides the elastic and the ends simultaneously. If you have a very short bob, you might need to use “fringe pins”—which are smaller and thinner than standard bobby pins—to keep things discreet.
Finally, give the braid a “hit” of hairspray, but don’t just spray the whole head. Spray a clean mascara wand or a toothbrush with a high-hold spray and run it over the braid itself. This smooths down the “halos” of flyaways without making your entire head feel crunchy. It keeps the braid looking sharp and defined while the rest of your hair remains soft and touchable.
The Bottom Line
Bobs and lobs are not the end of your styling journey; they are just the beginning of a different kind of creativity. Lace braids offer a level of sophistication and practicality that traditional braids often lack on shorter hair. They allow you to play with symmetry, texture, and volume without needing the literal weight of long hair to hold a style together.
Whether you are looking for a way to keep your hair out of your face during a workout or you need a polished look for a formal event, there is a lace braid variation that fits. It’s all about understanding the “one-sided” logic of the technique and giving your hair the right texture to hold the shape.
Don’t be discouraged if your first few attempts feel clunky. Braiding is a muscle memory skill. Your fingers need to learn the specific angles of your new haircut. Within a week of practicing these thirteen styles, you will find that you can whip up a lace-braided accent in the time it takes for your coffee to brew. Short hair is chic, modern, and—with a few lace braids in your toolkit—infinitely versatile.