Finding the right way to style a pixie cut or a chin-length bob often feels like a constant battle against gravity and length. You want that intricate, pulled-back look that long-haired people flaunt, but three-strand braids often leave you with “sprouting” ends—those annoying little bits of hair that pop out of the braid because the strands aren’t long enough to stay tucked. This is exactly where the French-style rope braid becomes a legitimate lifesaver. Unlike a traditional braid, a rope twist only uses two strands. It is essentially a sophisticated twist that incorporates more hair as you move along the scalp, much like a French or Dutch braid, but with a much tighter, more secure grip on shorter layers.
The magic of the rope twist lies in its mechanics. Because you are twisting the two individual strands in one direction and then crossing them over each other in the opposite direction, you create a tension that locks the hair in place. For those of us with bobs that barely hit the jawline or pixies with a bit of length on top, this tension is what prevents the style from unraveling ten minutes after you leave the house. It handles layers beautifully because the “wrap” of the twist encapsulates shorter hairs better than the “interweave” of a standard braid.
If you have ever tried to French braid your own hair and ended up with a tangled mess of three strands, the two-strand approach will feel like a breath of fresh air. It is more intuitive, faster to execute once you get the rhythm, and—in my opinion—looks a bit more modern and “undone” than a stiff, traditional braid. Whether you are trying to hide a fringe that is in that awkward growing-out phase or you just want to add some three-dimensional texture to a flat bob, these variations offer a range of looks from gritty and edgy to soft and romantic.
Before you start twisting, though, we have to talk about prep. Short hair needs “grip.” If your hair is freshly washed and slippery, the rope will slide right out. I always recommend starting with a bit of dry shampoo or a sea salt spray to give the hair some “tooth.” You want the strands to almost stick to each other. Once you have that gritty texture, you are ready to tackle these thirteen styles that prove short hair has just as much styling potential as waist-length locks.
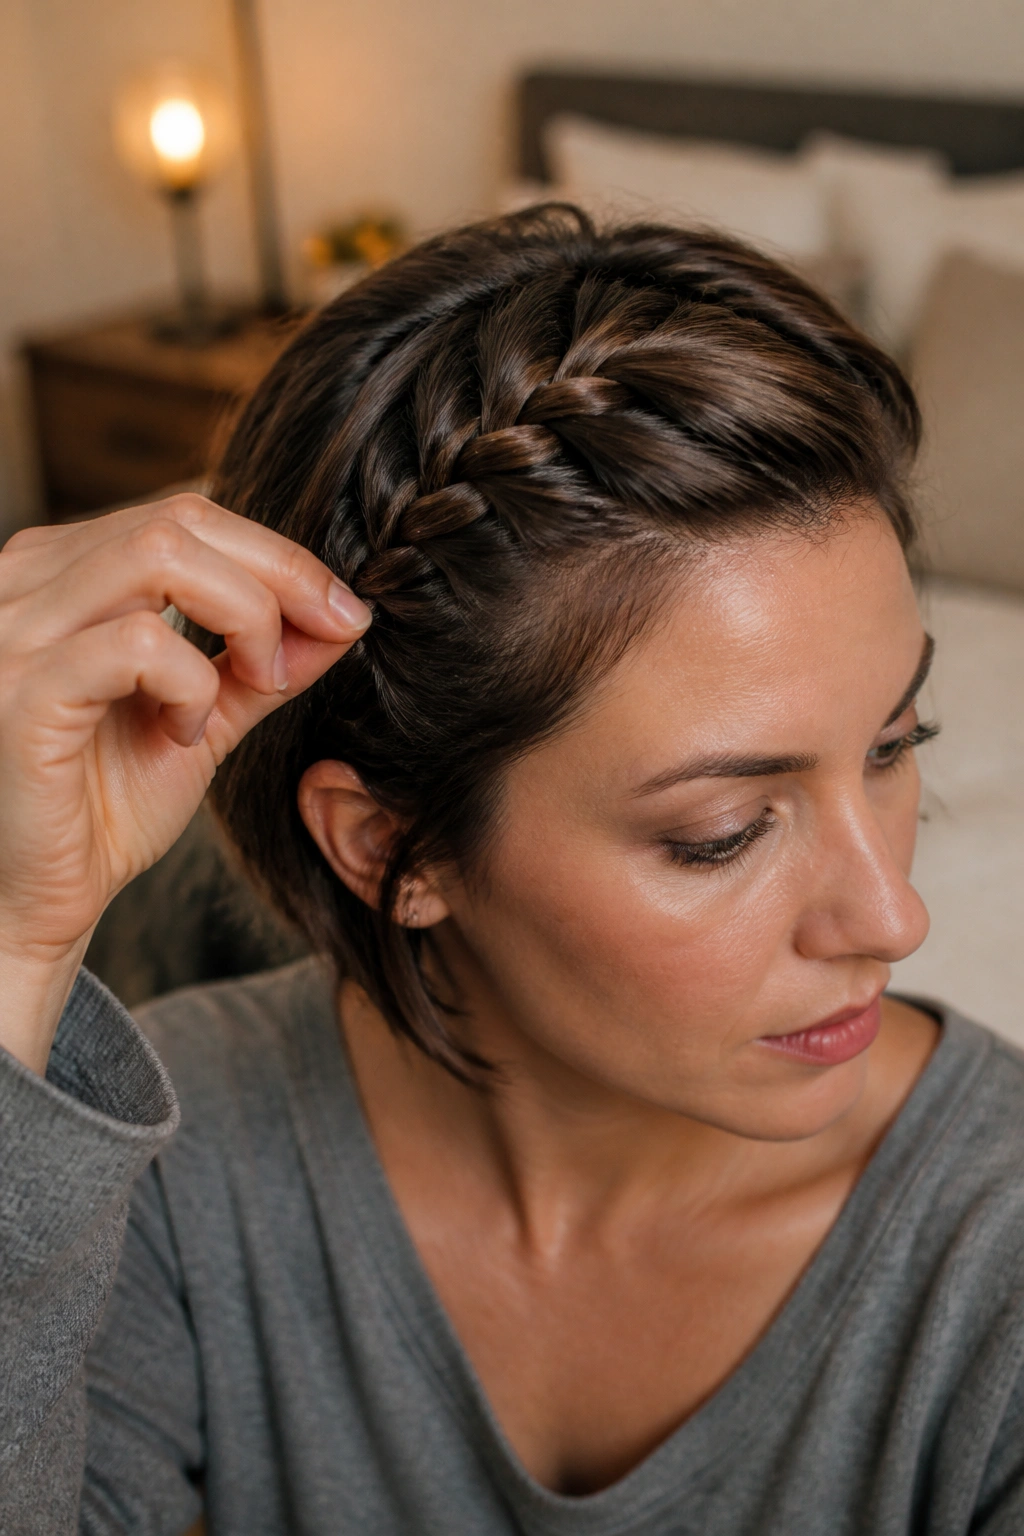
1. The Side-Swept Micro Rope for Pixies
If you are rocking a pixie with a longer top section, this micro rope is the perfect way to add detail to an otherwise simple cut. It focuses on the hair right along the hairline, sweeping it back and away from the face. This is particularly useful on those days when your bangs just won’t cooperate or if you are trying to stretch a wash for one more day.
Why the Micro Rope Works for Short Layers
The key here is taking very small, precise sections. Because the hair is short, you don’t have the luxury of “slack.” By keeping the sections about a half-inch wide, you ensure that every hair is tightly incorporated into the twist. You start at the part, take two tiny sections, and begin the twist-and-cross method, adding a tiny bit of hair from the hairline into the bottom strand with every rotation.
Quick Success Tips
- Use a matte pomade on your fingertips to catch flyaways as you work.
- Keep your hands as close to the scalp as possible to maintain tension.
- Secure the end with a small, clear elastic and tuck it under a longer layer of hair.
- Spritz the finished twist with a high-hold hairspray for extra security.
Pro tip: If your hair is exceptionally short, don’t worry about the rope reaching the back of your head; just twist until you hit the temple and pin it there for a “faux-sidecut” effect.
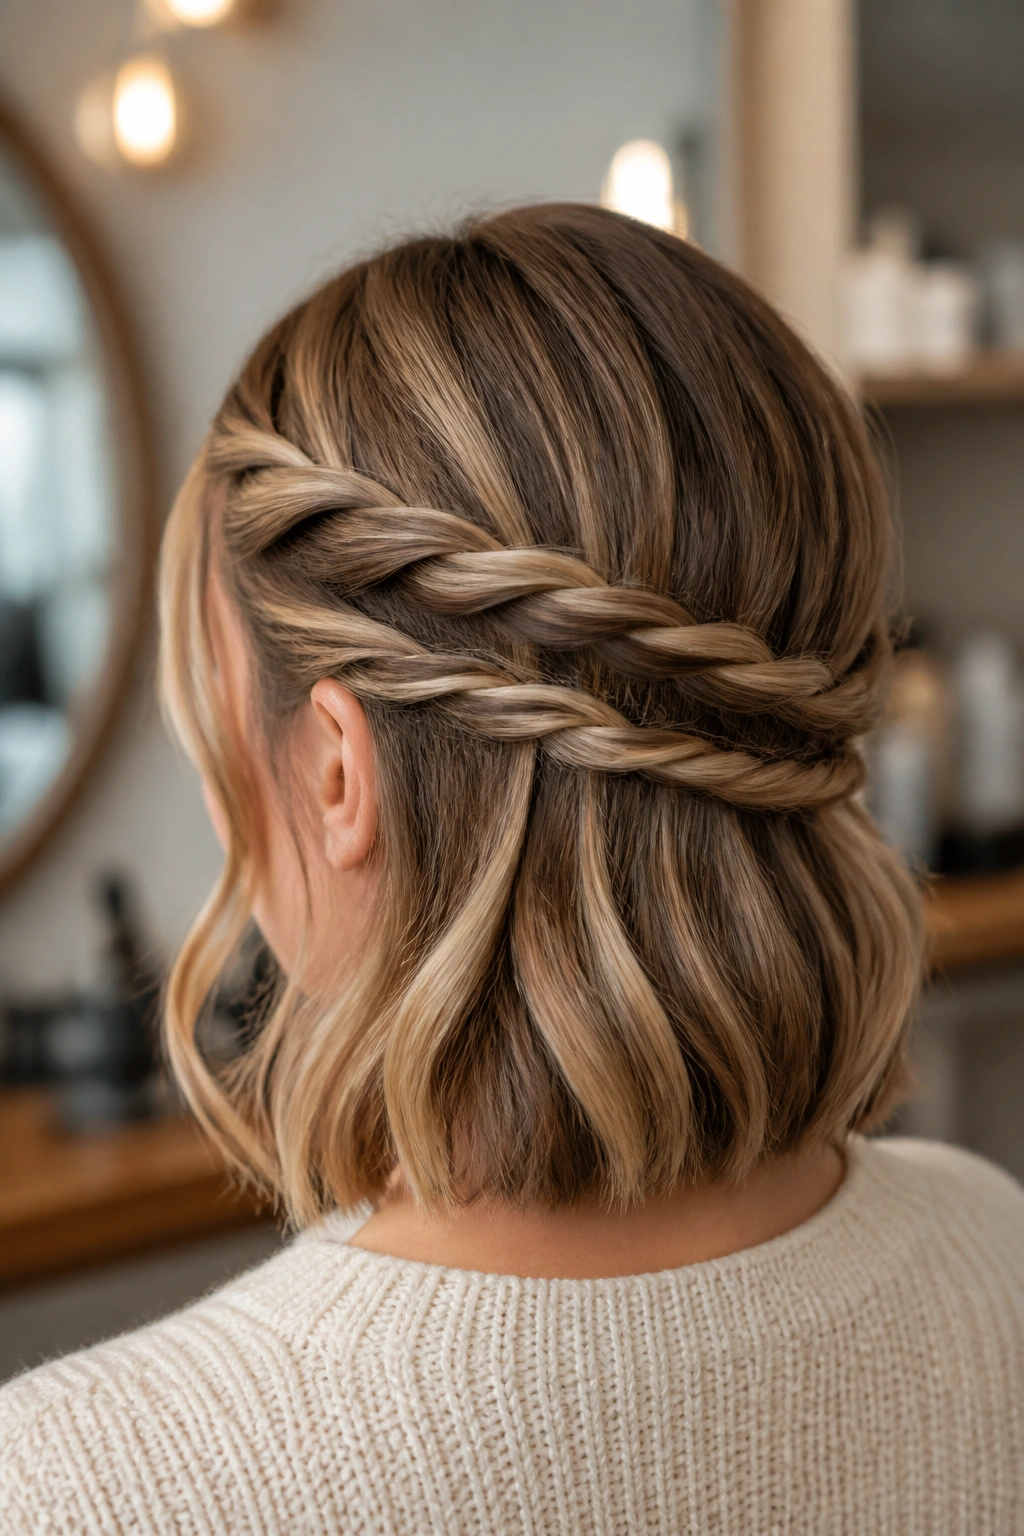
2. The Full Halo Twist for Blunt Bobs
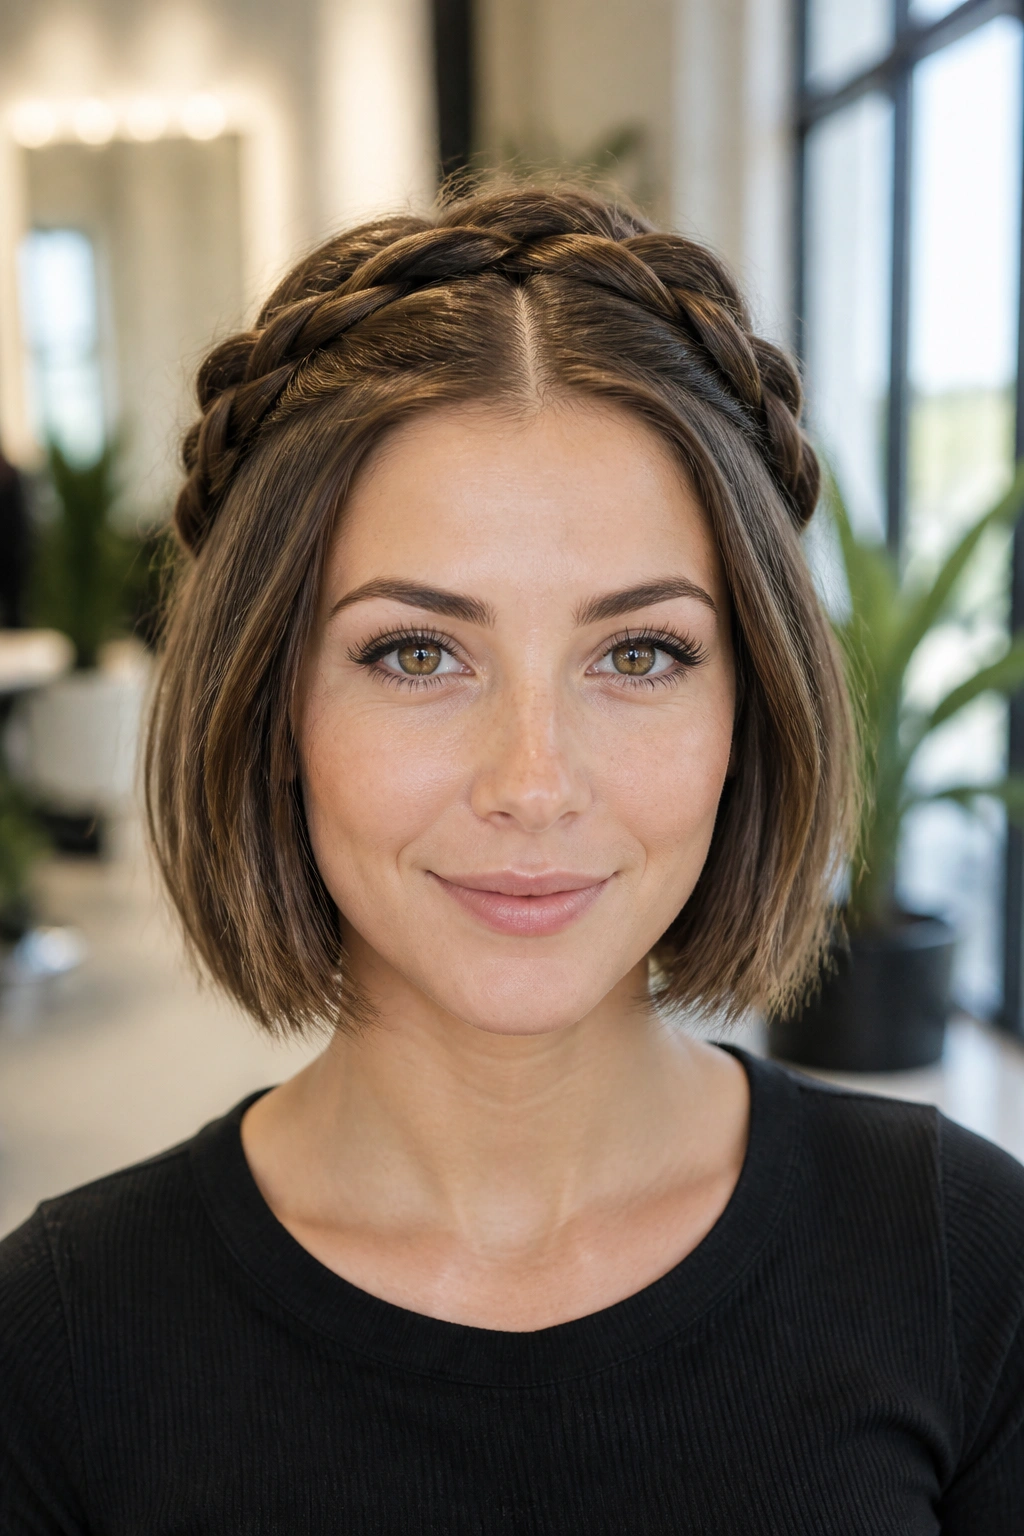
This is the holy grail for anyone with a bob who wants their hair completely off their neck. It creates a crown-like effect that looks incredibly intricate but is actually just two long rope braids that meet in the middle. It’s a fantastic option for warmer weather or formal events where you want a “polished” look without needing extensions.
The halo twist works best on hair that is at least four or five inches long. You essentially split your hair down the center or a deep side part and create two French-style rope braids starting from the front and working toward the nape of the neck. Because you are adding hair as you go, you can pick up those shorter pieces at the back of the head that usually fall out of high ponytails.
Once both sides reach the center-back, you can either join them into a tiny “pigtail” and tuck them under, or if you have enough length, cross them over each other and pin them flat. The beauty of the rope twist here is that it looks much thicker and more voluminous than a flat three-strand braid. It gives the illusion of having a lot more hair than you actually do.
3. Double Dutch-Style Rope Braids
Do you love the look of boxer braids but find your hair is too short to make them look sleek? Using a rope twist instead of a Dutch braid (where the strands go under) creates a very similar aesthetic but with a more corded, rope-like texture. This style is incredibly durable, making it my go-to for workouts or outdoor activities.
Can You Get This Look on Chin-Length Hair?
Yes, and it actually stays in better than a standard braid. The two-strand twist creates a “locking” mechanism. When you cross the strands, they squeeze together, holding the shorter layers inside the “rope.” You’ll want to part your hair straight down the middle and work on one side at a time. Start right at the forehead and pick up hair from both sides of the twist as you move back.
How to Style the Ends
- The Mini-Bun: If your hair is too short to continue the rope past the nape, twist it into two tiny “space buns.”
- The Hidden Tail: Pin the remaining ends flat against the head and cover them with the bulk of the twist.
- The Tucked-Under: Use a bobby pin to “sew” the tail of the rope back up into the braid itself.
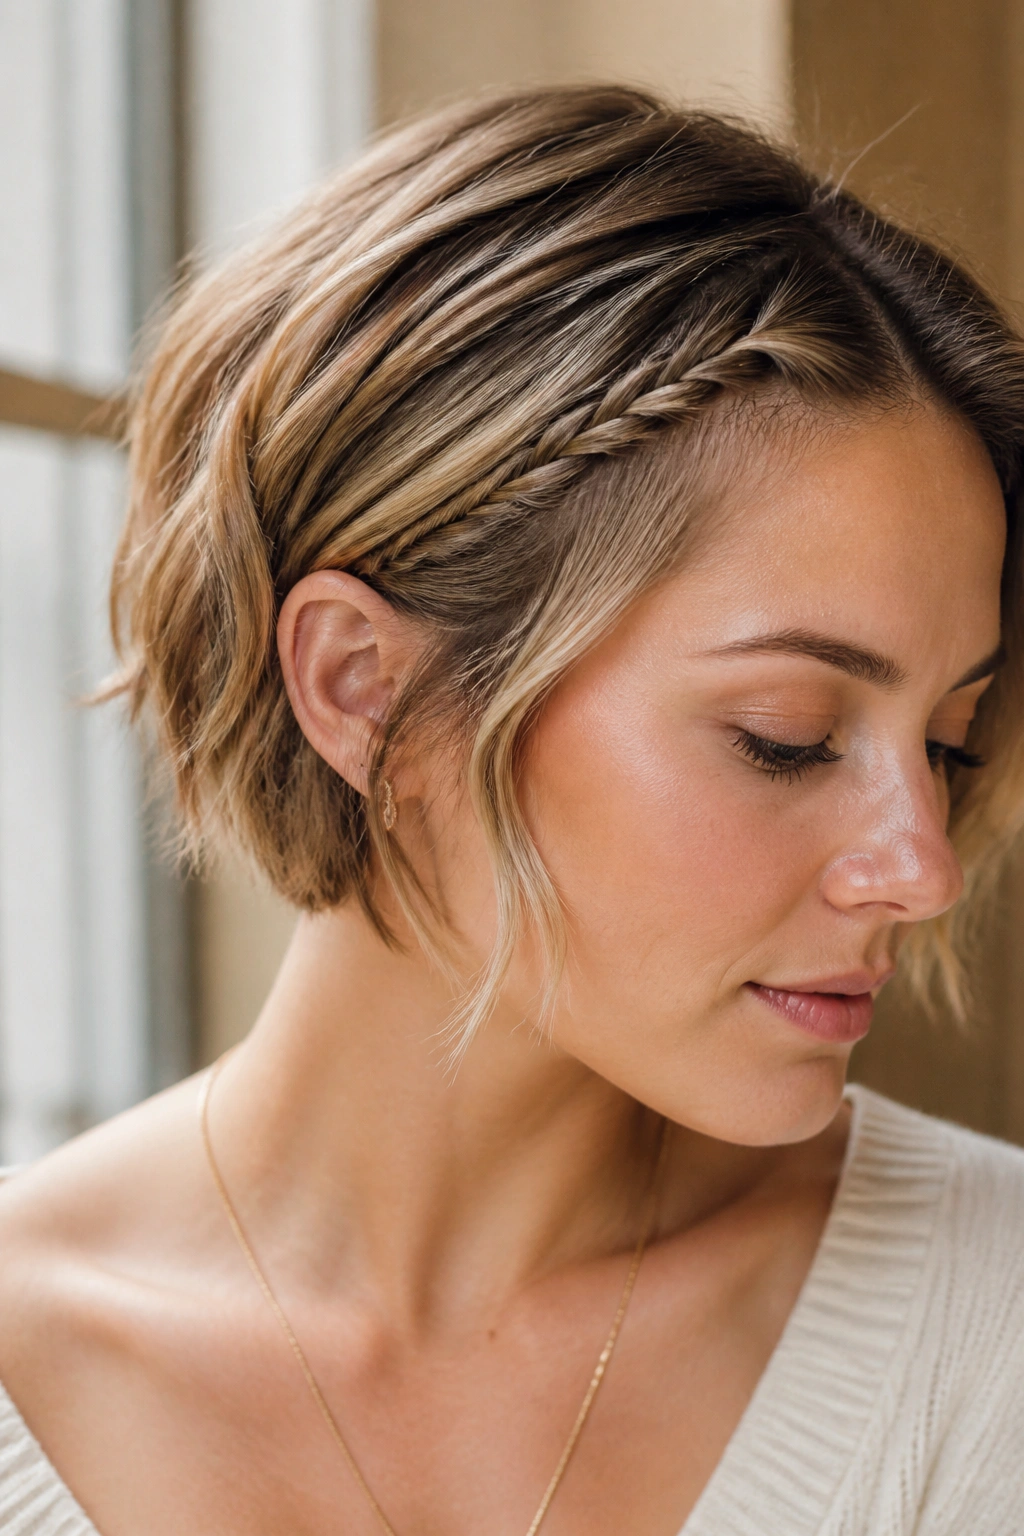
4. The Face-Framing Fringe Twist

We’ve all been there—the “growing out the bangs” phase. It is a special kind of styling purgatory. The fringe twist is the most stylish way to deal with hair that is too long to be bangs but too short to stay behind the ear. Unlike a simple twist, the French rope method keeps the fringe from “bagging” out or looking messy.
I remember helping a friend style her hair for a wedding when she was mid-pixie-grow-out. We tried everything, and the only thing that didn’t look like a middle-schooler’s hair clip was this rope twist. It sits flat against the forehead, creating a beautiful, corded border that transitions perfectly into the rest of the hair.
- Pick up two sections right at the part.
- Twist each section toward your face.
- Cross them over each other away from your face.
- Add a tiny bit of the fringe into the bottom strand before each cross.
- Finish: Stop just above the ear and secure with two bobby pins crossed in an “X” shape.
This creates a “headband” effect using only your own hair, and because it’s a rope twist, it has a distinct, 3D texture that catches the light far better than a flat twist.
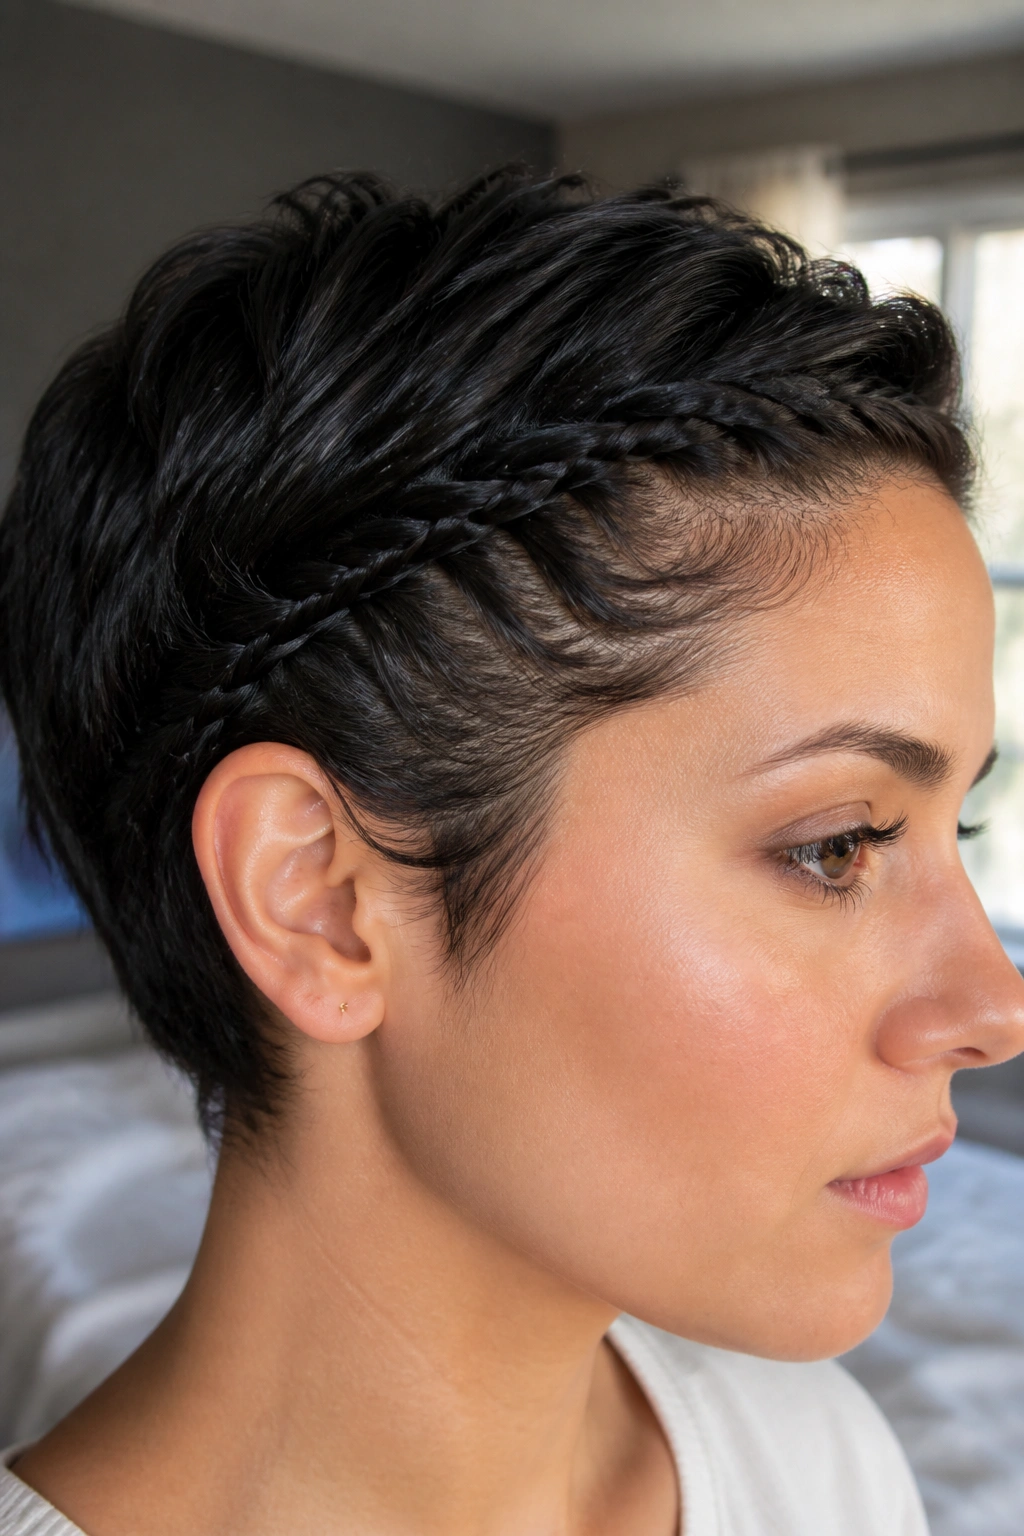
5. Asymmetric Side-Panel Rope
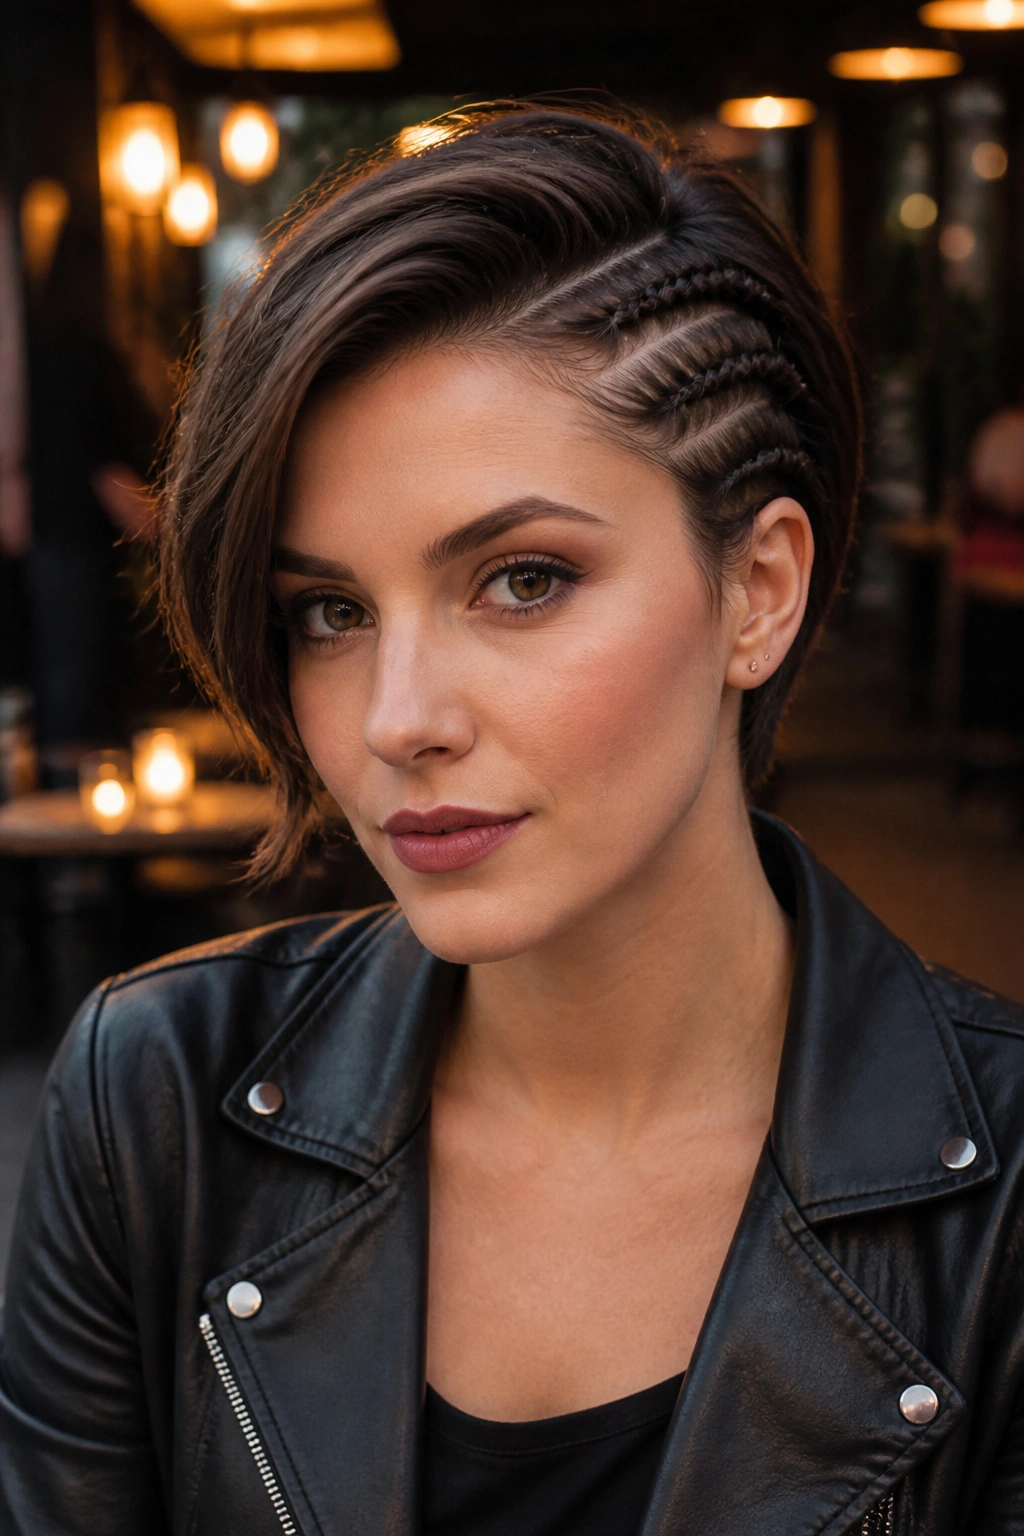
This is for the person who wants a bit of edge. By creating two or three very tight, parallel rope braids on just one side of the head, you create the visual illusion of a shaved side or an undercut. It’s a great way to change your silhouette without committing to a clipper cut.
This style is all about precision. You want your parts to be razor-sharp. I usually use a rat-tail comb to create two horizontal sections on the “short” side of my part. Each section gets its own tight, French-style rope twist that starts at the hairline and ends just behind the ear.
The contrast between the tight, sleek rope twists on one side and the voluminous, messy texture of a bob on the other is striking. It’s a favorite for night-outs because it stays perfectly in place no matter how much you move. Since the sections are small, even very short pixie layers can be “roped” into submission here. Just make sure to use a bit of hair wax on your fingers to keep the look clean and intentional.
6. The Nape-Up Reverse Rope Twist
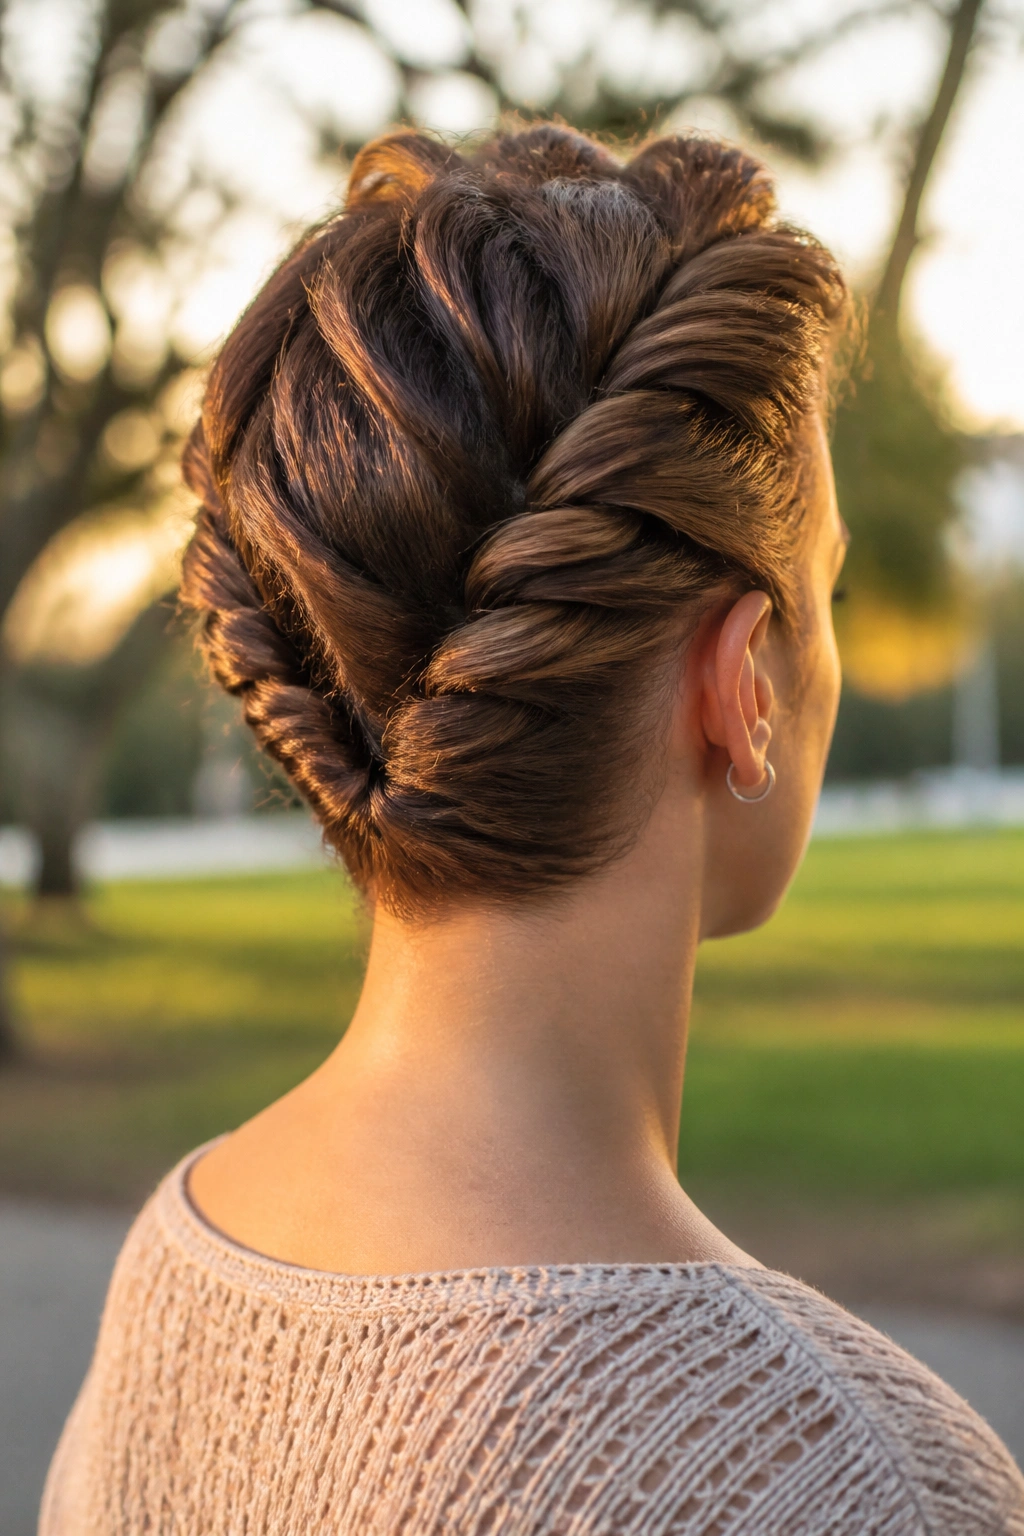
Most people think of braids as starting from the top and going down, but for short hair, the “upward” rope is a game-changer. This style is perfect for bobs that have a lot of “shaggy” layers at the back. It involves leaning your head forward and twisting the hair from the nape of your neck up toward the crown.
What Makes the Reverse Rope Different?
Standard ponytails for short hair often result in “the droop”—those bottom layers that just won’t stay up. By “roping” them from the bottom up, you are using the weight of the hair to your advantage. As you twist upward and add more hair, you are creating a structural base that supports the rest of the style.
Best Candidates for This Look
- People with “stacked” bobs.
- Anyone with a lot of fine, “baby” hair at the base of the neck.
- Those looking for a way to secure the bottom half of a half-up, half-down style.
I recommend finishing this with a messy top-knot or a small clip at the crown. It’s an unexpected detail that people usually only notice when you turn around, and it looks far more sophisticated than a handful of randomly placed bobby pins.
7. The Stacked Diagonal Double Twist
If you have a bit more length to work with—say, a bob that hits just above the shoulders—the stacked diagonal twist offers a romantic, almost Grecian feel. Instead of going straight back, these ropes start at the temple and travel diagonally across the back of the head.
Creating the Layered Look
You’ll want to create two separate rope twists on the same side of your head, one about an inch above the other. As you French-rope them across the back, the top rope will “sit” on the bottom one. This creates incredible thickness.
- Sectioning: Split the side of your hair into a top and bottom half.
- The Top Rope: Start at the temple and angle it toward the opposite nape.
- The Bottom Rope: Start at the ear and follow the same diagonal path.
- Merging: When they meet on the other side, you can twist them together into one large rope.
This style is surprisingly secure because the two braids support each other. It’s my favorite recommendation for bridesmaids with shorter hair because it photographs beautifully from every angle.
8. The Waterfall Rope Twist for Bobs
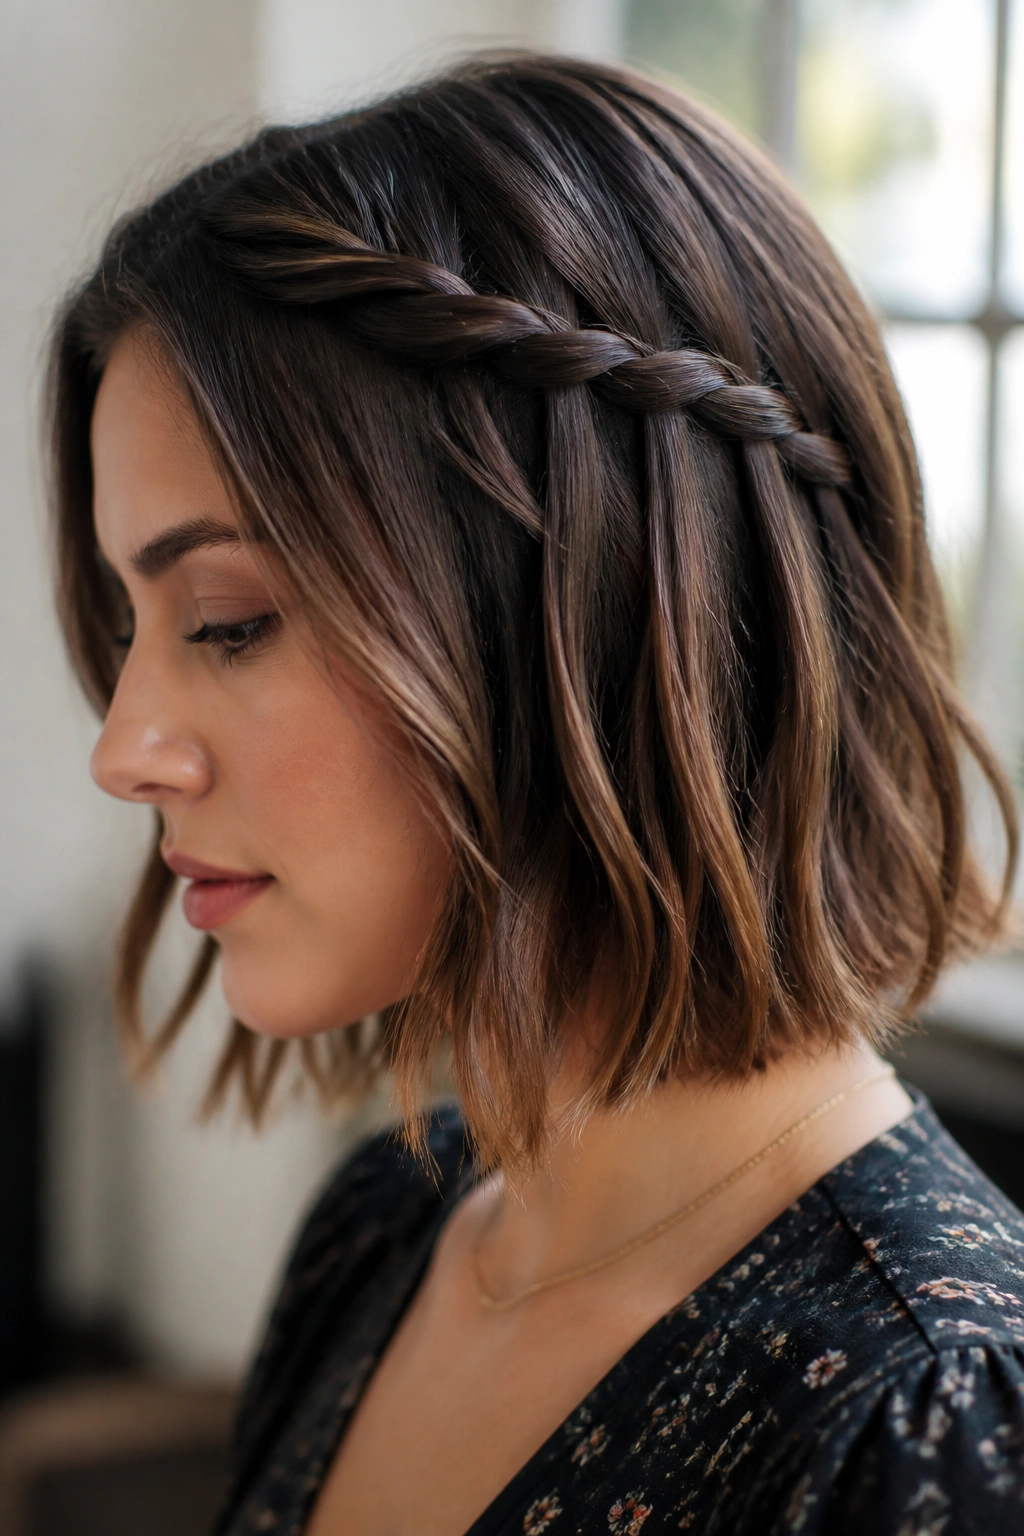
The waterfall braid is a classic, but doing it with three strands on short hair is an absolute nightmare. The “dropped” strands always seem to pull the rest of the braid down. However, a waterfall rope twist is much more manageable.
In this version, you twist two strands, but every time you cross them, you let a piece of hair from the top fall through the twist before crossing again. Because you only have two strands to manage, you can maintain much better tension. It gives you that ethereal, cascading look without the frustration.
The key to making this work on a bob is to keep the “waterfall” pieces relatively thin. If you drop too much hair, the rope will lose its shape. This is a “low-tension” style, meaning it’s meant to look soft and airy. It is perfect for showing off highlights or balayage because the twisting action really emphasizes the different tones in your hair.
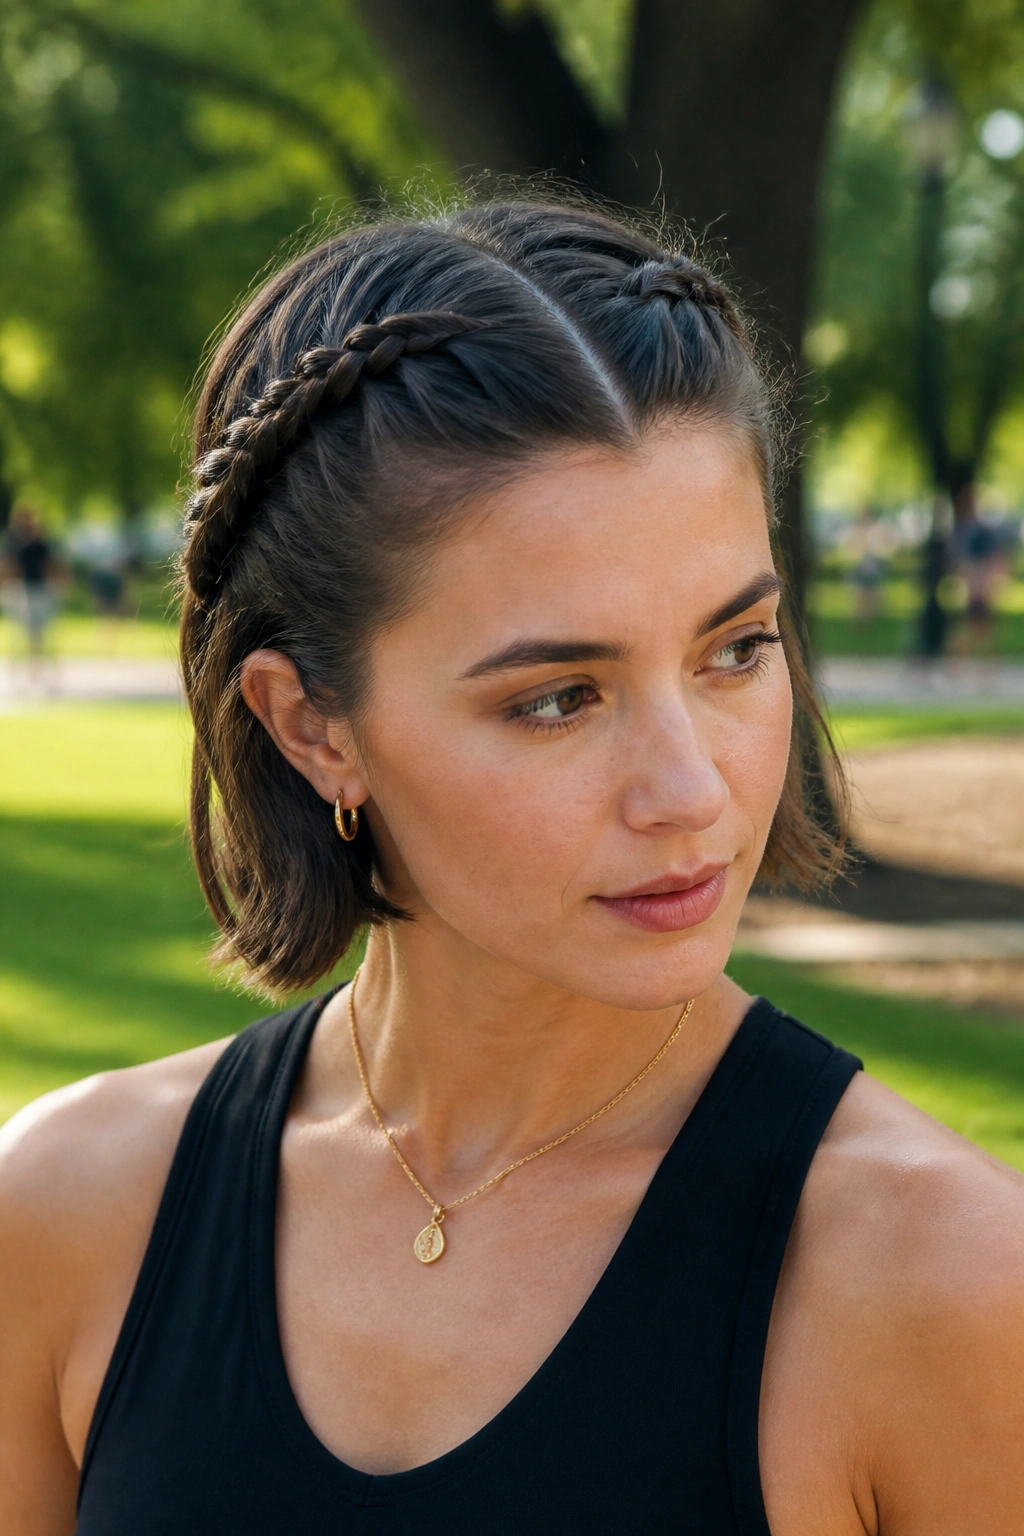
9. The Pigtail Twist-Back
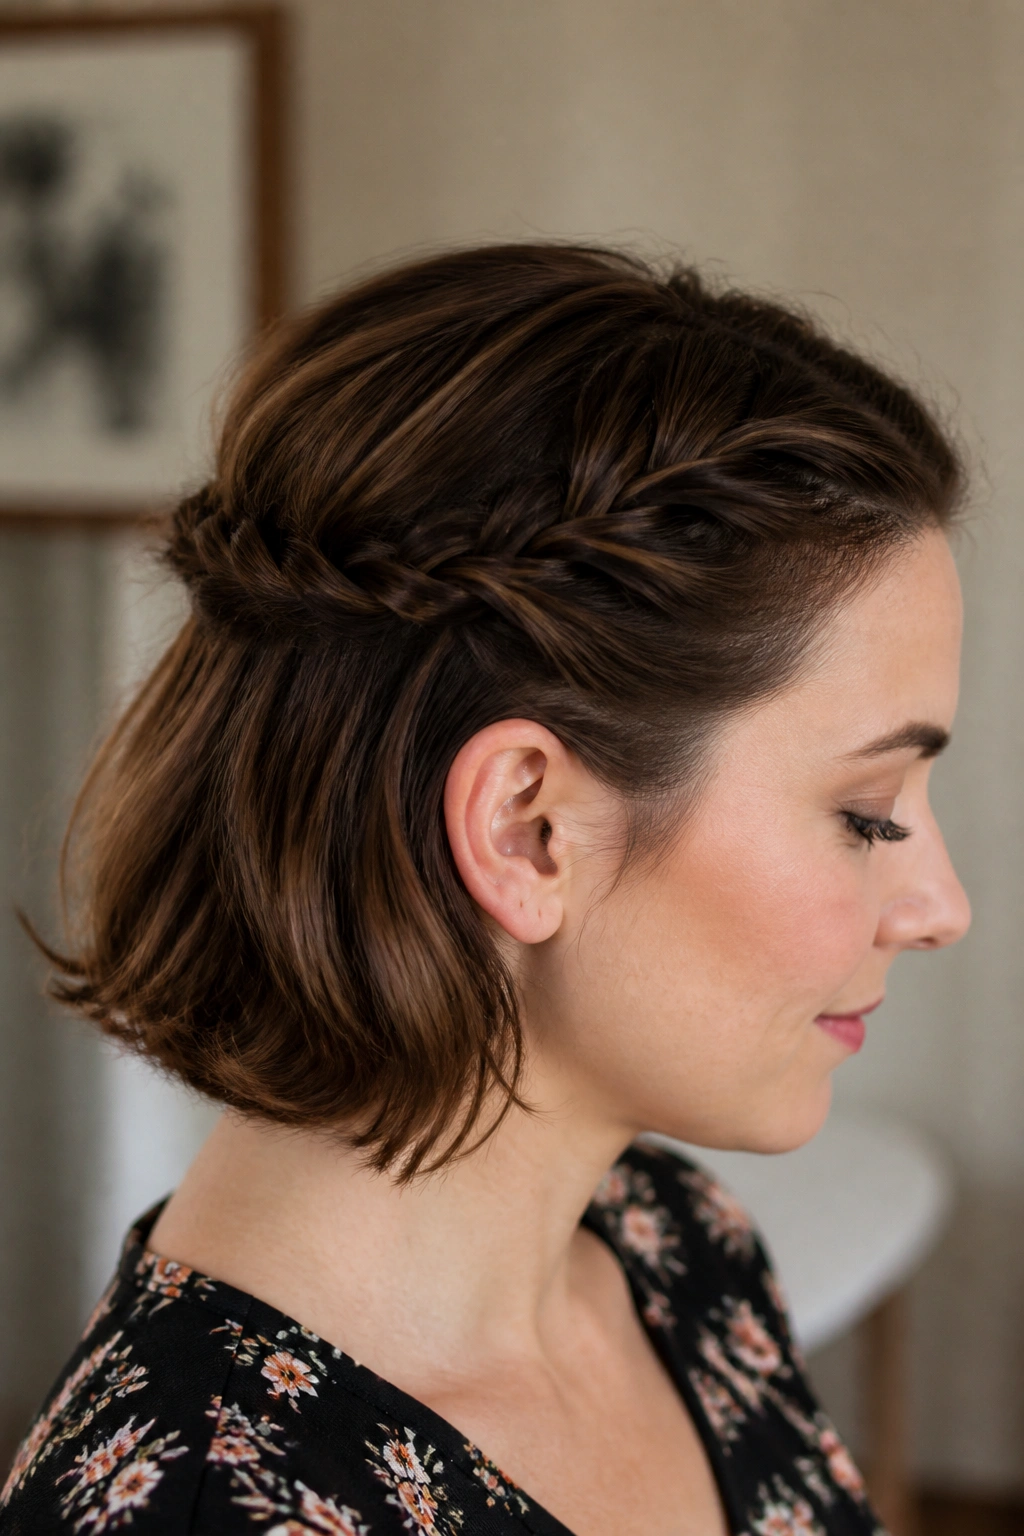
Don’t let the word “pigtails” fool you; this isn’t a playground look. By creating two French rope twists that start at the temples and meet at the back, you create a sophisticated “half-up” look that is much more secure than just pinning hair back.
This is the ultimate “five-minute” style. You don’t need a mirror or a lot of products. Just grab two sections at the front, start twisting, and pick up hair along the top of the ear. When you reach the back, join the two ropes with a small elastic.
Why I love this: It works on everything from a shaggy pixie-bob to a blunt, one-length cut. If the ends of your pigtails are short and “spiky,” lean into it. That’s part of the charm of short hair. You can even “pancake” or pull apart the twists slightly to make them look fuller and more textured.
10. The Mohawk-Style Center Rope
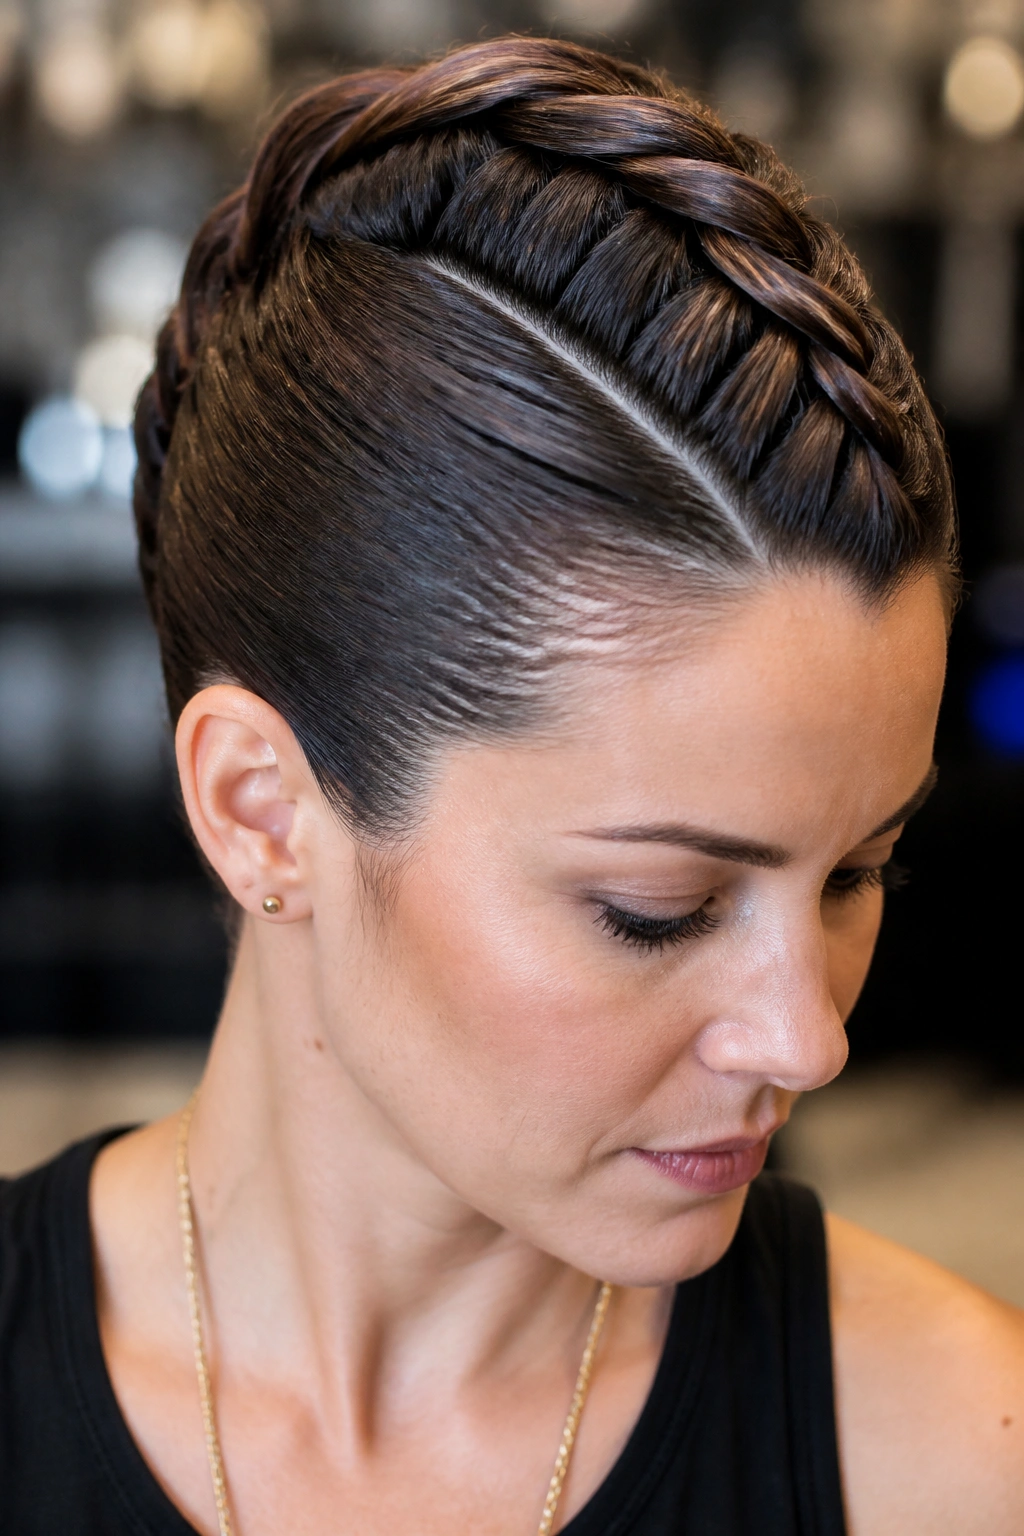
For the bold at heart, a single, thick French rope twist running right down the center of the head creates a powerful, architectural look. This is essentially a “fauhawk” created with hair-twisting rather than gel and hairspray alone.
- The Setup: Partition off a 2-inch wide section of hair from the forehead all the way to the nape.
- The Twist: Start right at the hairline. Since this is a wider section, you’ll be adding more hair with each cross.
- The Tension: Keep it tight! This style relies on the “height” of the rope to create the Mohawk silhouette.
- The Sides: Keep the sides of your hair very sleek. I usually tuck them behind the ears or use a bit of gel to slick them back toward the center rope.
This look is incredible on hair with a lot of volume or natural curl. It tames the bulk while still letting the texture of your hair shine. It’s also a great way to show off a statement pair of earrings.
11. The Zig-Zag Parting Twist
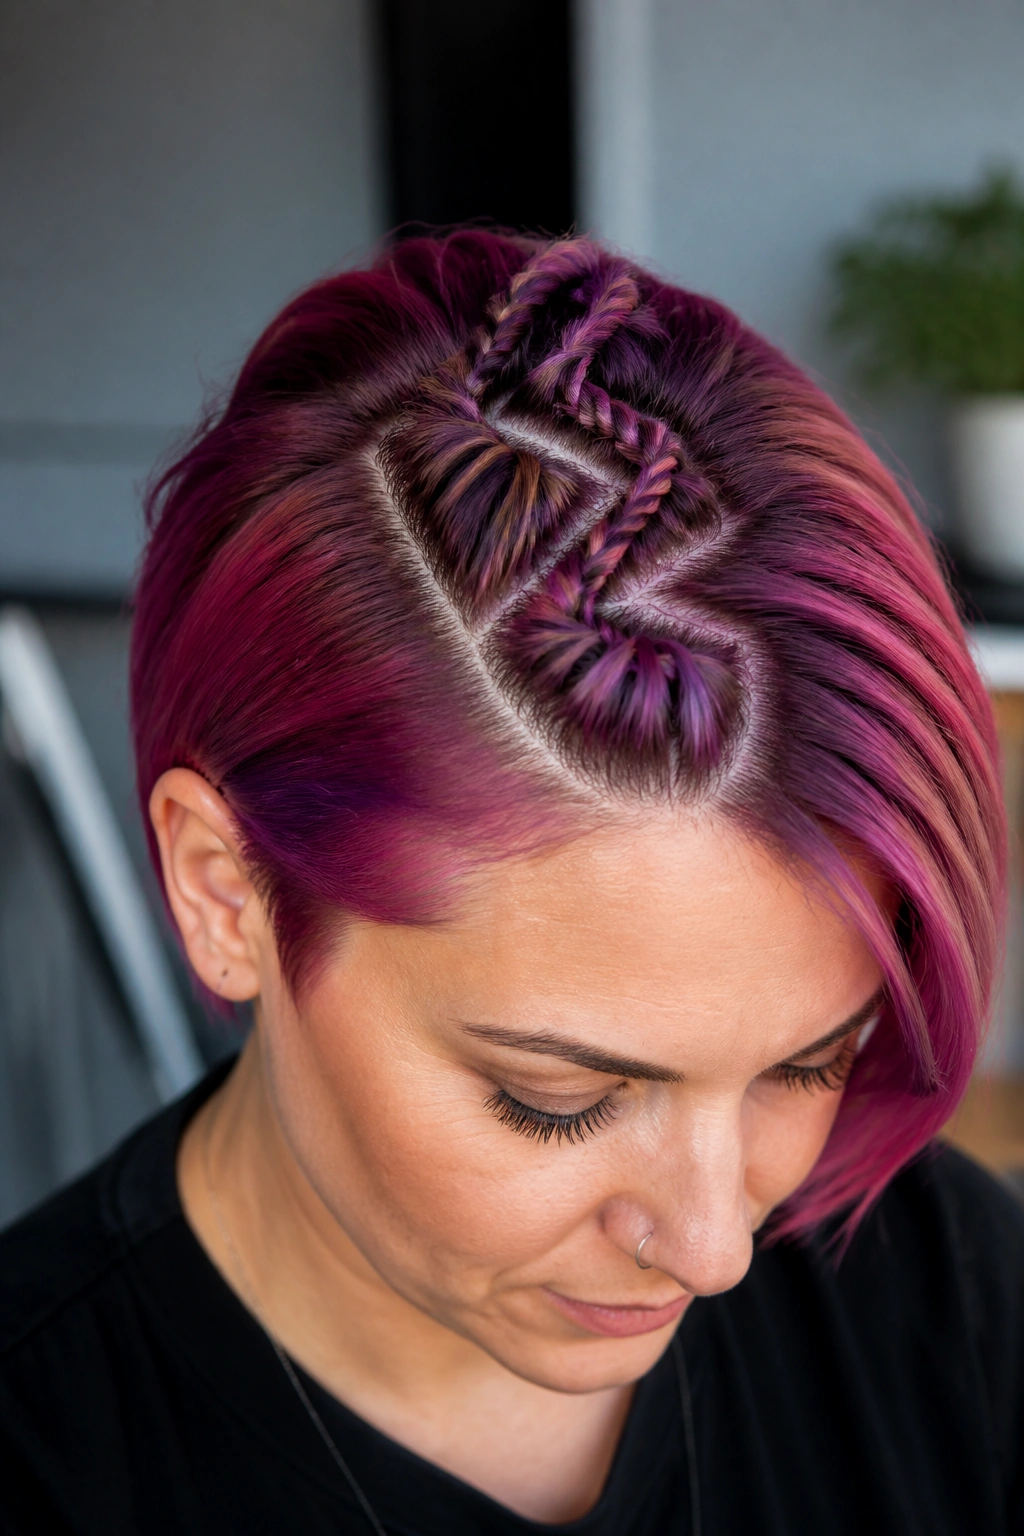
Sometimes, the style isn’t just about the braid itself, but about the “architecture” of the scalp. Using a zig-zag part before you start your rope twists adds a level of complexity that looks like you spent an hour in a stylist’s chair.
Use the tip of a rat-tail comb to draw a zig-zag line from your forehead to the crown. This creates two asymmetrical sections. When you rope-twist these sections, the “teeth” of the zig-zag create a beautiful pattern along the braid. It’s a small detail, but it’s one of those things that people will stop and ask you about.
This works particularly well on vibrant, fashion-colored hair. The way the colors interlock at the parting line is visually stunning. Because the parting is non-linear, it also helps hide any “gaps” in your hair if you happen to have fine or thin patches.
12. The Multi-Mini Rope Accent
Who says you only need one or two braids? For a bohemian, textured look, try scattering three or four tiny rope twists throughout your hair. This isn’t about pulling all the hair back; it’s about adding “interest” to your natural texture.
I like to place one micro-rope near the temple, another tucked behind the ear, and maybe one peeking out from the back. Since these are “French-style,” you’re still adding hair as you go, which makes them look like they are part of the hair’s natural flow rather than just something “stuck on” top.
The “Lazy” Version: If you’re really short on time, just do one. A single, tiny rope twist on one side of a bob can completely change the vibe of the haircut. It breaks up the symmetry and adds a “hand-crafted” feel to your look.
13. The Half-Up Top Knot Rope
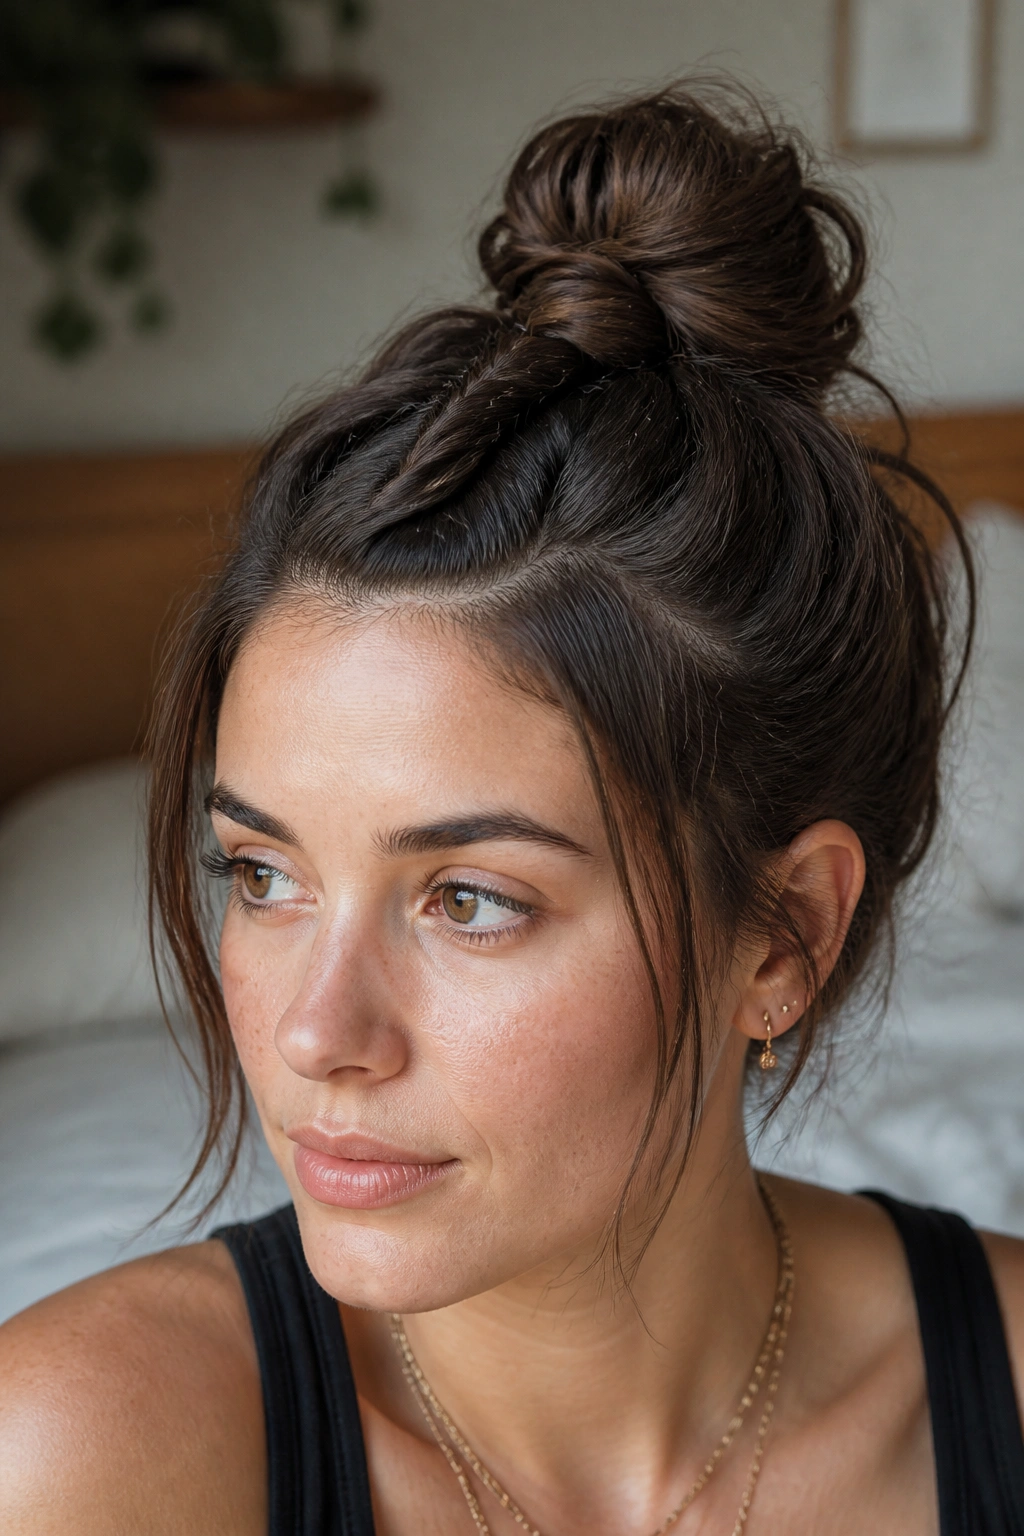
The “hun” (half-bun) has been a staple for short hair for years, but adding a rope twist to the top section takes it from “I just woke up” to “I actually tried.” Instead of just grabbing the top half of your hair and throwing it into a loop, rope-twist it from the forehead to the crown first.
This provides two benefits. First, it keeps the top of your hair from falling flat throughout the day. The twist acts like a structural rib. Second, it adds height. Once you reach the crown, take the remaining “tail” of the rope and wrap it around itself to create a small, textured bun.
The bun will look much more intricate because it’s made from a twisted rope rather than just straight hair. It’s the perfect solution for those days when the top of your hair is oily but the ends look great. It’s functional, fast, and looks fantastic on everyone from teenagers to professionals.
Essential Tools for Short Hair Braiding
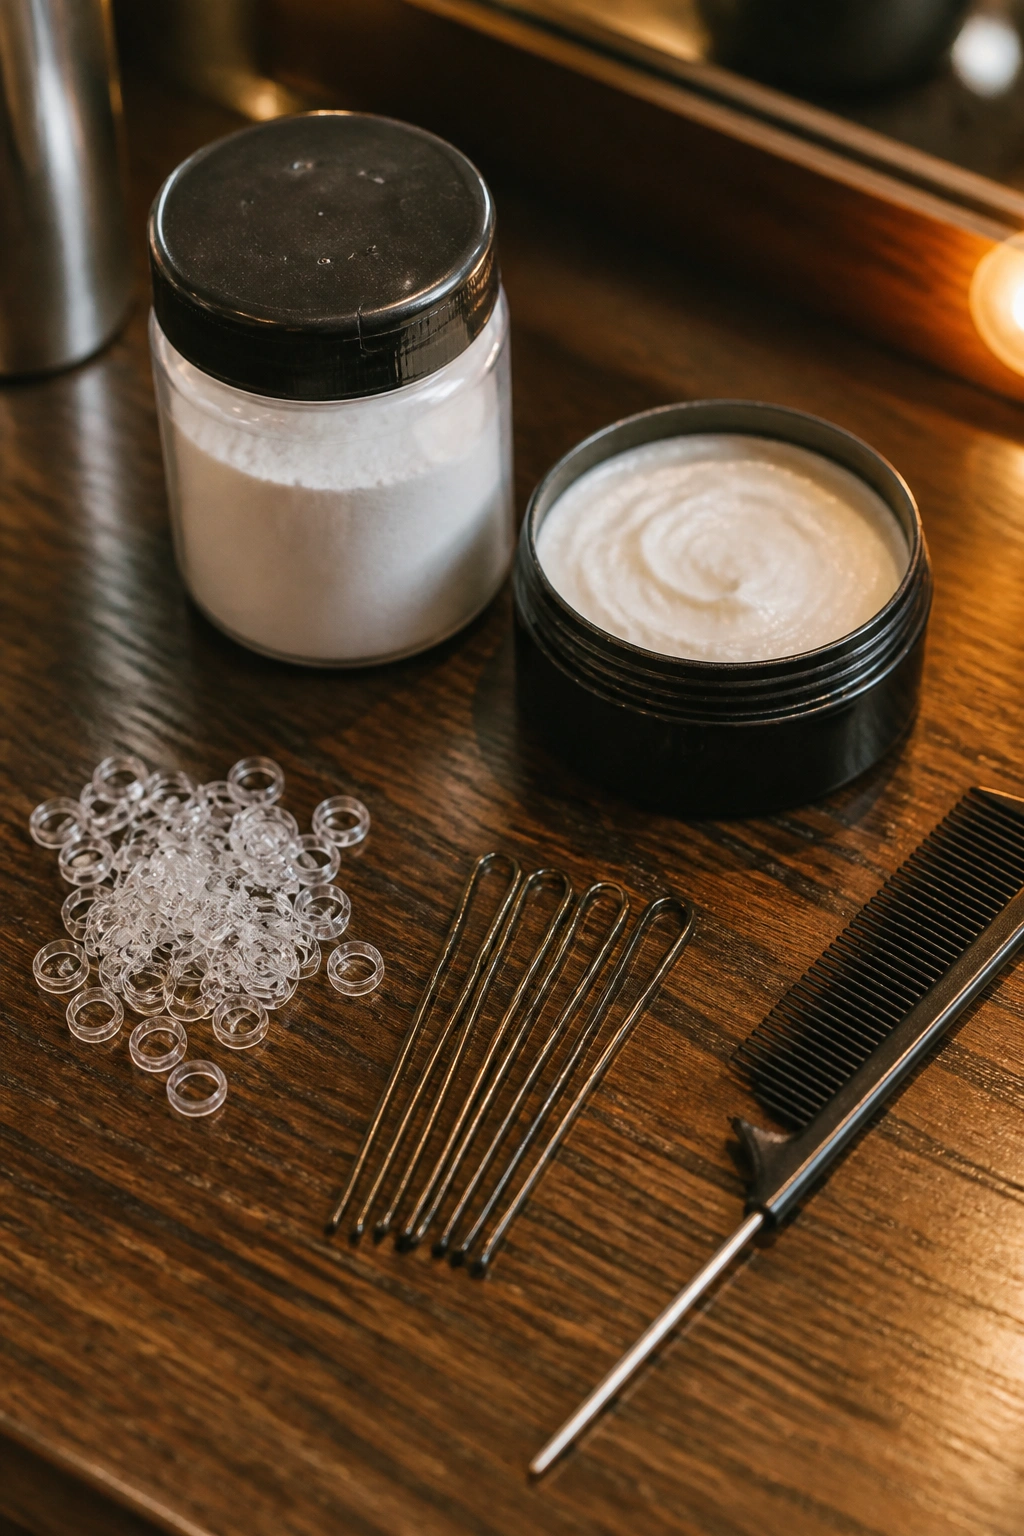
You don’t need a professional kit, but a few specific items will make your life significantly easier when working with short lengths.
- Clear “Snagless” Elastics: These are non-negotiable. Standard hair ties are too bulky for the ends of short braids. The tiny clear ones disappear into the hair.
- Texture Powder or Dry Shampoo: As mentioned before, you need grip. A light dusting of texture powder on the strands as you twist will keep them from sliding.
- U-Shaped Hair Pins: These are different from bobby pins. They are great for “tucking” the ends of ropes into the rest of the hair without creating that “flat” look bobby pins can sometimes cause.
- Rat-Tail Comb: Essential for clean sectioning. In short hair, a messy part is much more noticeable than in long hair.
- Lightweight Hair Wax: Use this to smooth down the “sprouting” ends. Just a tiny dab on your fingertips as you work will keep the rope looking sleek.
Troubleshooting Common Rope Braid Issues
Even with the two-strand method, short hair can be finicky. If your braid feels loose, you are likely not twisting the individual strands enough. Remember the golden rule: Twist the strands in one direction, and cross them over each other in the opposite direction. If you twist both in the same direction, the braid will simply unravel.
If you find that the hair is “bagging” or sagging away from the scalp, you need to pick up smaller sections. The closer the hair is to the twist, the tighter it will sit. Think of it like a corset; you want to pull the tension evenly as you go.
Finally, don’t aim for perfection. The beauty of short hair styling is often in its slightly “messy” or “lived-in” quality. If a few hairs escape, just tuck them back in with a pin or let them be. A rope twist that looks a little “organic” is often more flattering than one that is pulled so tight it looks painful.
The Bottom Line
Mastering the French-style rope twist is the single best thing you can do for your short hair styling routine. It bridges the gap between “hair down” and “hair up” in a way that is modern, durable, and surprisingly easy once you get the hang of the two-strand rhythm. Whether you are dealing with a pixie, a bob, or a lob, these thirteen variations give you a style for every occasion, from the gym to a gala. Stop fighting your length and start twisting it. You’ll be amazed at what those few inches of hair can actually do.