Heart braids have a funny habit of looking more complicated than they are. From across the room, they read as polished and deliberate; up close, they usually come down to clean parting, even tension, and a few well-placed pins. That’s the part people miss. The shape is the star, but the real work is hiding inside the braid.
For Valentine’s Day looks, that matters even more. You want something sweet without tipping into costume territory, and you want a hairstyle that survives dinner, photos, a coat collar, and maybe one too many minutes in a car with the windows fogging up. A little texture spray helps. So does hair that isn’t freshly washed and slippery as glass.
The good versions of heart braids share the same backbone: a neat center or side part, a curved section that actually looks like a heart instead of a lopsided loop, and an end point that lands where the eye expects it to land. A rat-tail comb, a handful of clear elastics, and enough patience to redo one side if it goes sideways are more useful than a drawer full of products.
Some styles lean soft and romantic. Others are sharper, younger, or dressier. That flexibility is the whole point, really. A heart braid can sit on long waves, short layers, a sleek ponytail, or a low bun, and the best version is the one that matches the outfit instead of fighting it.
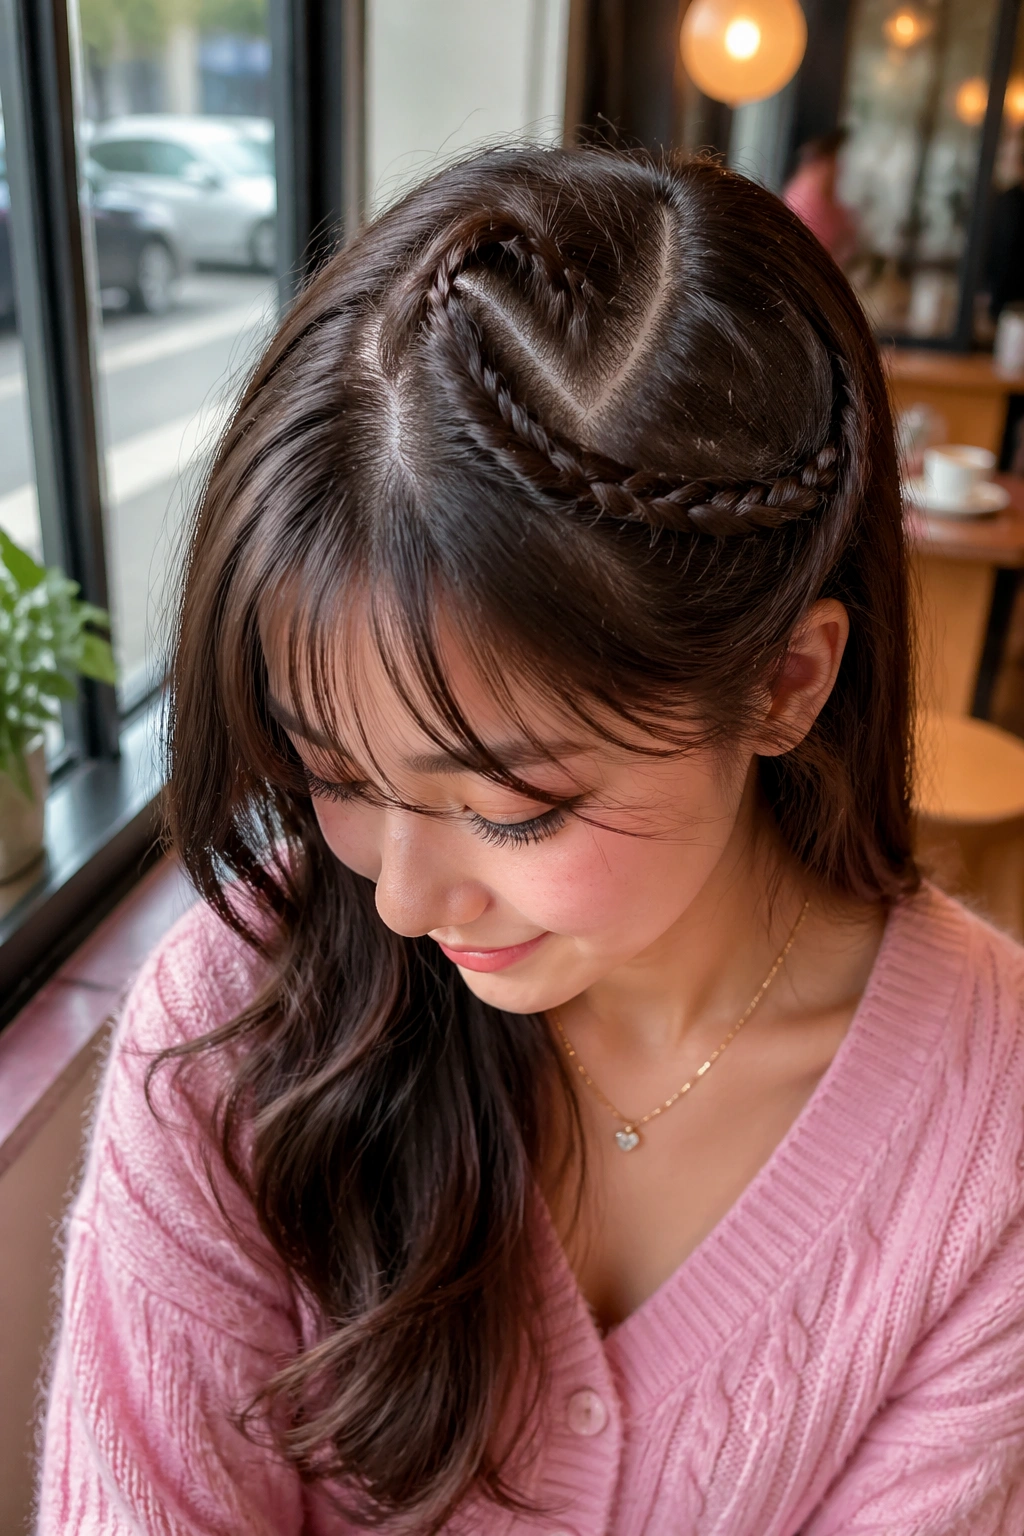
1. Classic Center Heart Braid
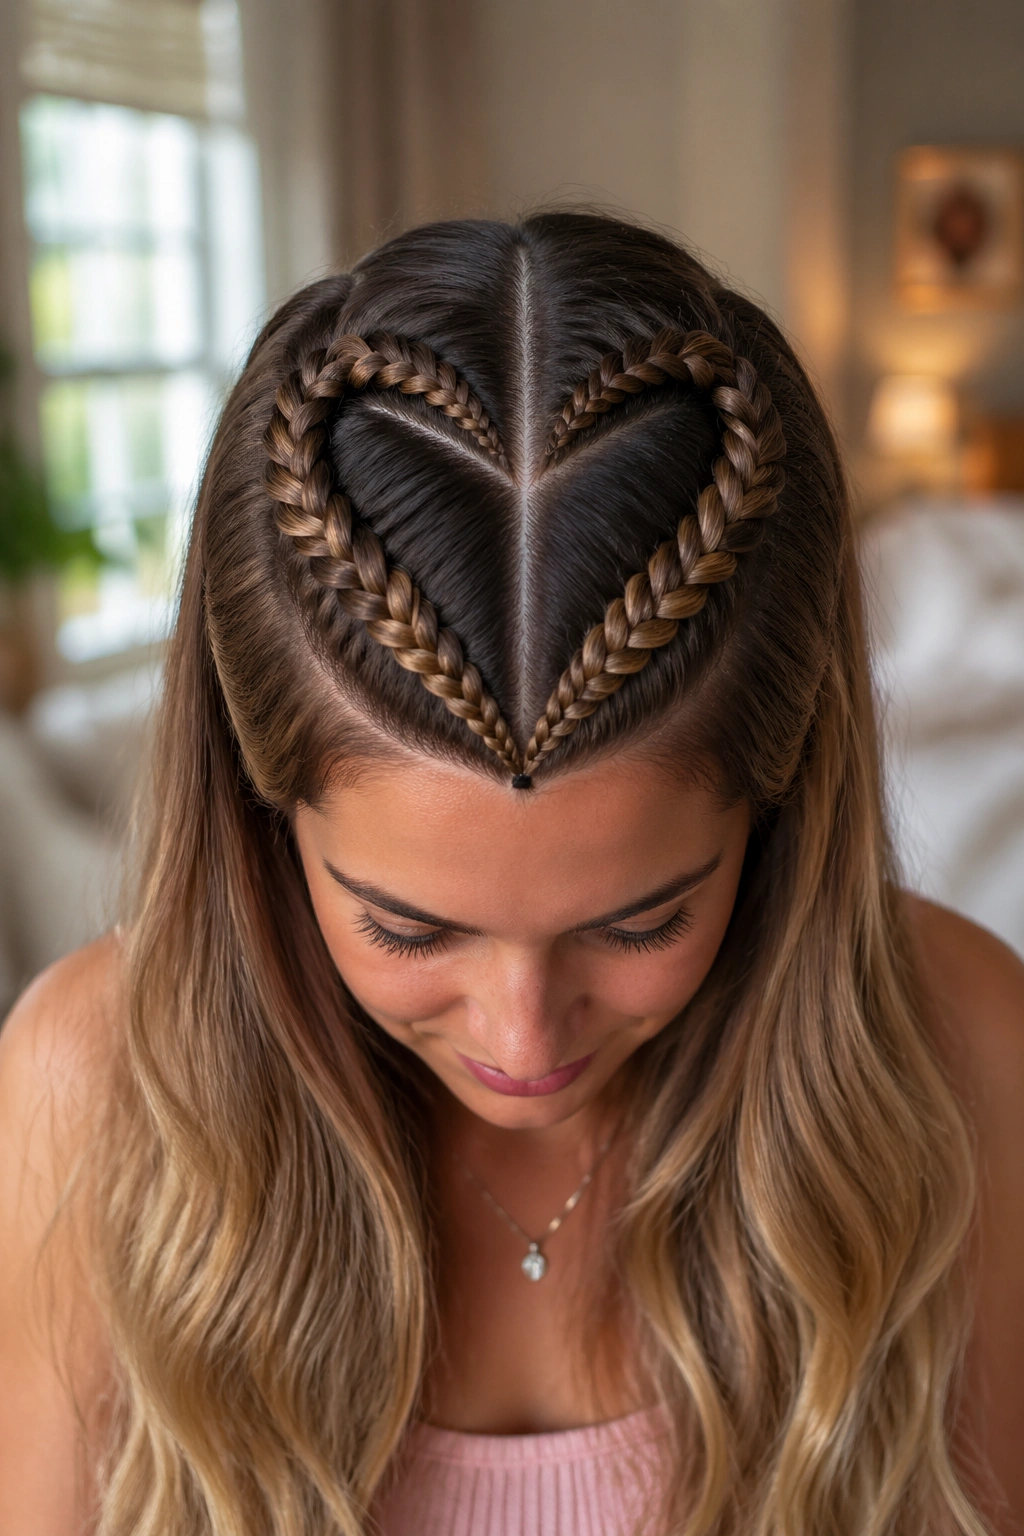
The centered heart braid is the one I reach for when I want the shape to be obvious without looking fussy. It sits best when the part runs straight down the middle, because symmetry does half the work for you before your fingers even start braiding.
Why this version works so well
A clean center part gives the braid a clear map. You take two curved sections from the crown, guide them inward, and let them meet at a point near the back of the head. That point is where the whole shape either feels neat or starts to wobble, so slow down there.
The nicest thing about this version is that it works on hair that has a little grip. Day-old hair, light mousse, or a dusting of dry shampoo makes the braid hold its shape better than squeaky-clean hair. Thin hair can still do it, though you may want to pancake the braid edges a little so the heart reads from farther away.
Small details that make the shape cleaner
- Keep each top section about 2 to 2½ inches wide at the hairline.
- Curve the braid section inward first, then braid downward.
- Tie the meeting point with a clear elastic, not a thick colored one.
- Use two crossed bobby pins at the point if the braid keeps slipping.
- Pull the outer edges gently after you finish, but only once. Tugging too much flattens the heart.
My blunt advice: if the heart looks a little square, redraw the part and try again. The part is doing more work than people think.
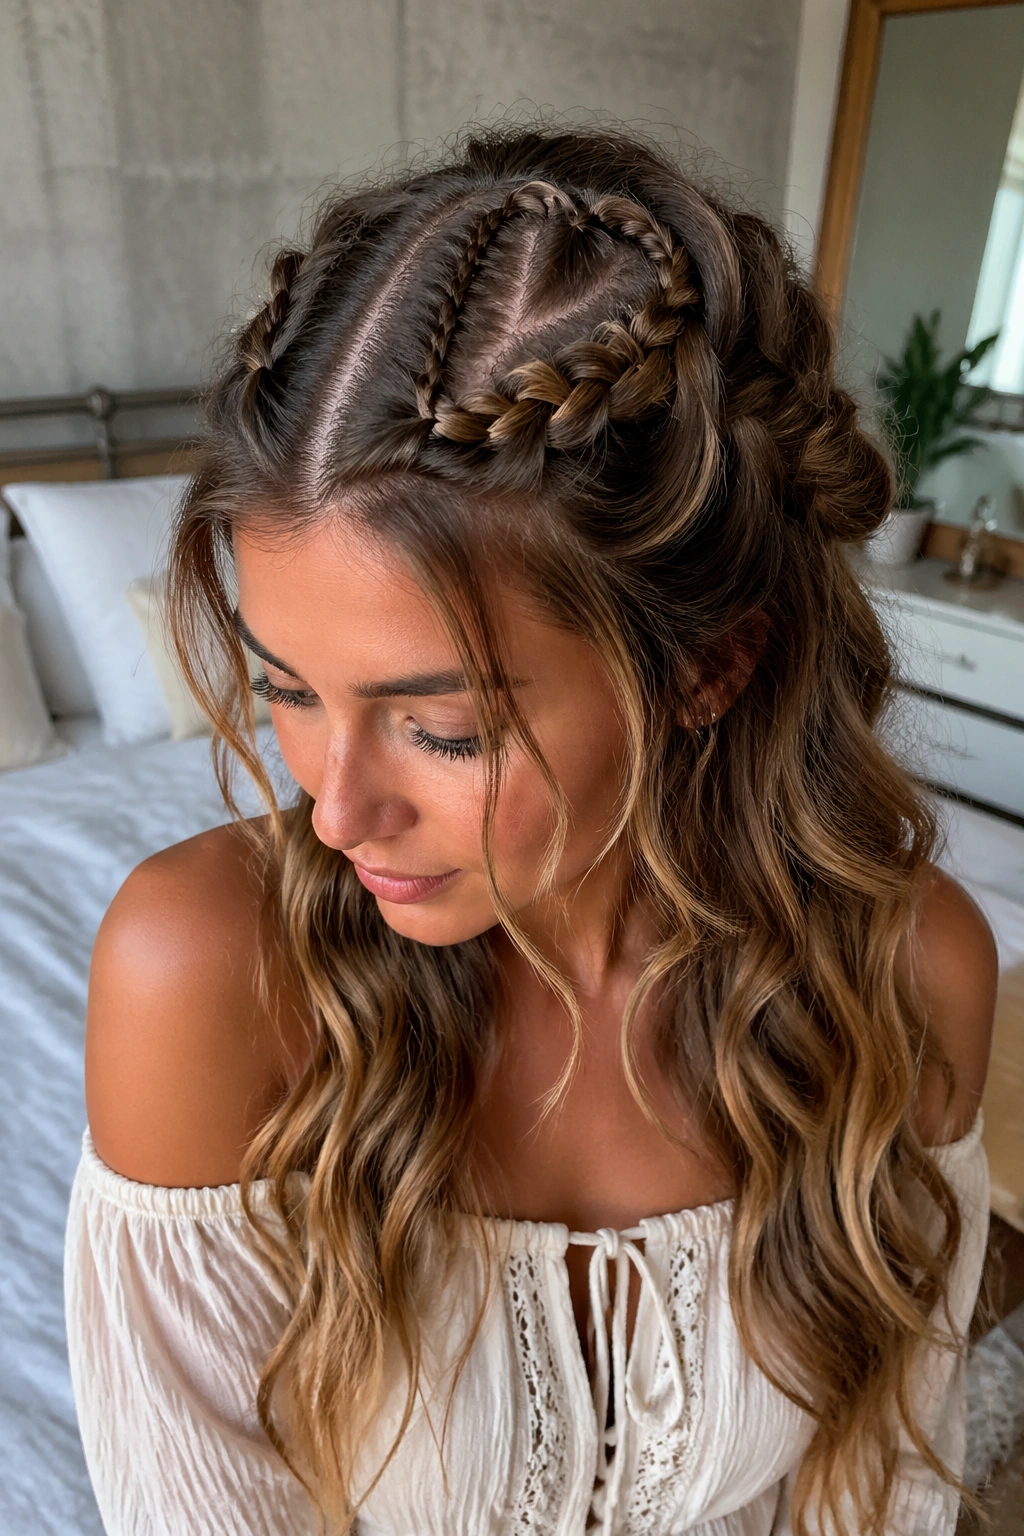
2. Twin Side Heart Braids
Why do two small hearts often look better than one giant one? Because the eye likes balance, and twin braids give you that without making the hairstyle look oversized. It’s a playful look, but not childish if you keep the lines clean and the braids low enough.
This style works especially well when you want movement. One heart on each side can sit just above the ear or slightly behind it, and the rest of the hair can hang straight, waved, or curled. I like it on medium-length hair because the shape stays visible without swallowing the whole head.
The best part is how forgiving it is. If one side ends up slightly rounder than the other, the mismatch can read as handmade instead of messy. That’s a rare gift in braid styling. Tiny imperfections look intentional here.
If you want to wear it to a date, keep the braids tight at the base and loosen only the outer loops. If you want it more casual, pull out a few face-framing pieces and let the rest stay soft. Either way, the twin-heart idea gives you a lot of room to play.
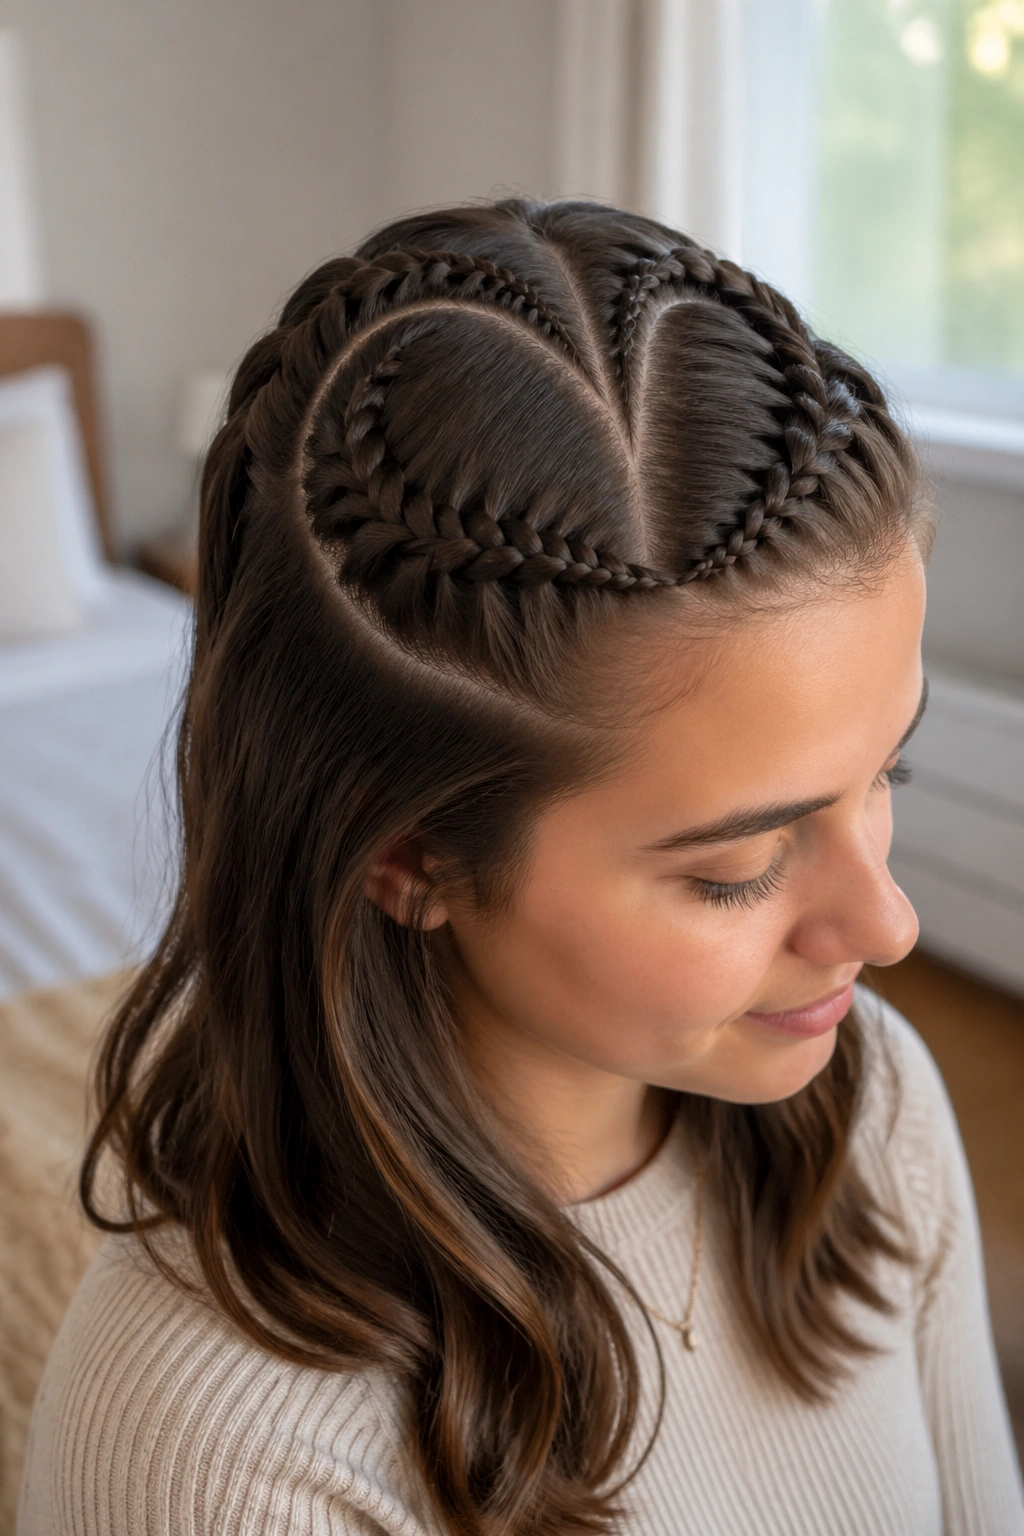
3. Half-Up Heart Braid at the Crown
If your hair goes flat by dinner, this is the version I keep coming back to. A half-up heart braid keeps the shape high enough to be seen, while the loose lengths underneath still give the style softness and swing.
The sectioning that keeps it from sagging
Start with a temple-to-temple section across the top half of the head, then split that section into two mirrored curves. The trick is not taking too much hair from the back. Too wide, and the heart spreads out and loses shape. Too narrow, and it looks pinched.
A half-up version is also kinder to curls and waves. You’re not forcing the whole head into one pattern, which means the bottom half can keep its own texture. That contrast is lovely in photos, especially when the top is tight and the ends are loose.
- Use a 1-inch curling iron or a waving tool on the ends if the bottom layers need more body.
- Clip the loose hair out of the way before braiding the top.
- Finish the heart with a small elastic, then hide it under a wrapped strand.
- Mist the top lightly with flexible-hold hairspray; stiff spray makes the heart look sharp in the wrong way.
A half-up heart braid feels like the safer choice, but it’s not boring. It just gives you room to breathe.
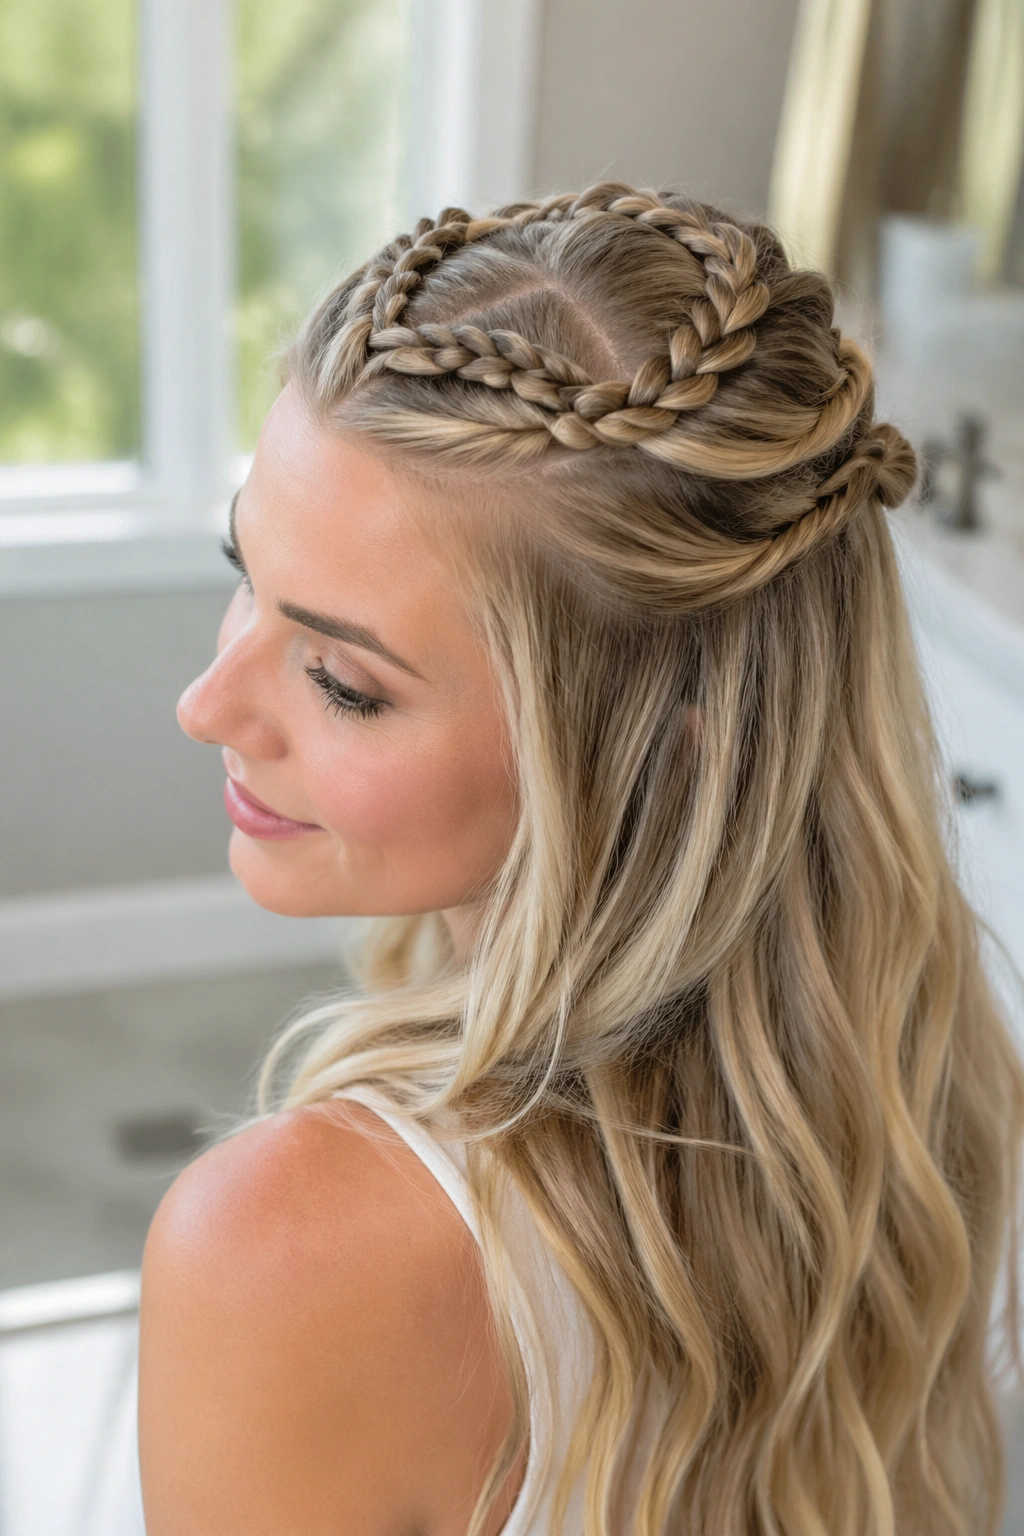
4. Heart Braid Halo Around the Head
A heart braid does not have to sit in the center to read like a heart. Once the braid curves around the head like a halo, the shape becomes softer and a little more surprising, which I actually prefer for dressier outfits.
What makes the curve hold
The braid needs an anchor point behind one ear, then a controlled arc across the crown. Don’t rush the turn. That’s where a lot of halo braids fall apart and start looking like a regular crown braid that lost its nerve halfway through.
Pinning matters here more than people admit. Use two bobby pins in an X wherever the braid starts to drift. If the hair is very silky, slide one pin in from above and one from below so they catch the same section from different angles. It’s a small thing. It saves the whole style.
This version suits off-the-shoulder dresses, high necklines, and earrings that deserve a little room to show off. It keeps the hair off the face, but it still feels romantic. That mix is hard to beat.
A halo heart braid can also hide layered hair better than you’d expect, because the braid wraps the looseness into the shape instead of exposing every uneven bit.
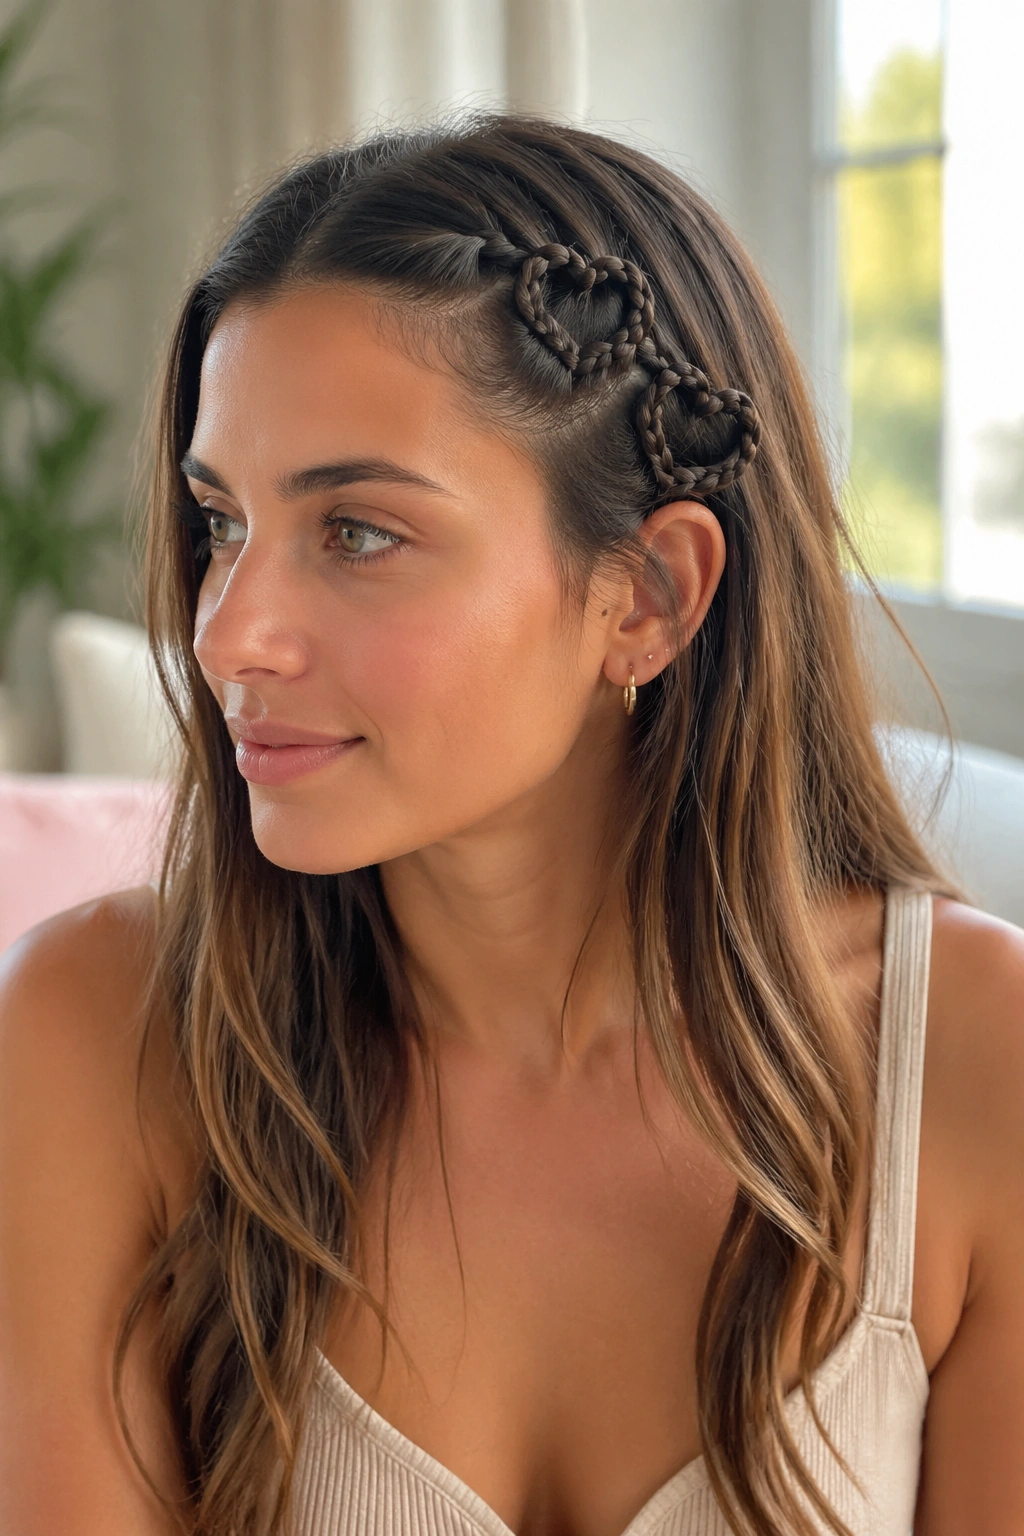
5. Tiny Temple Heart Accent Braid
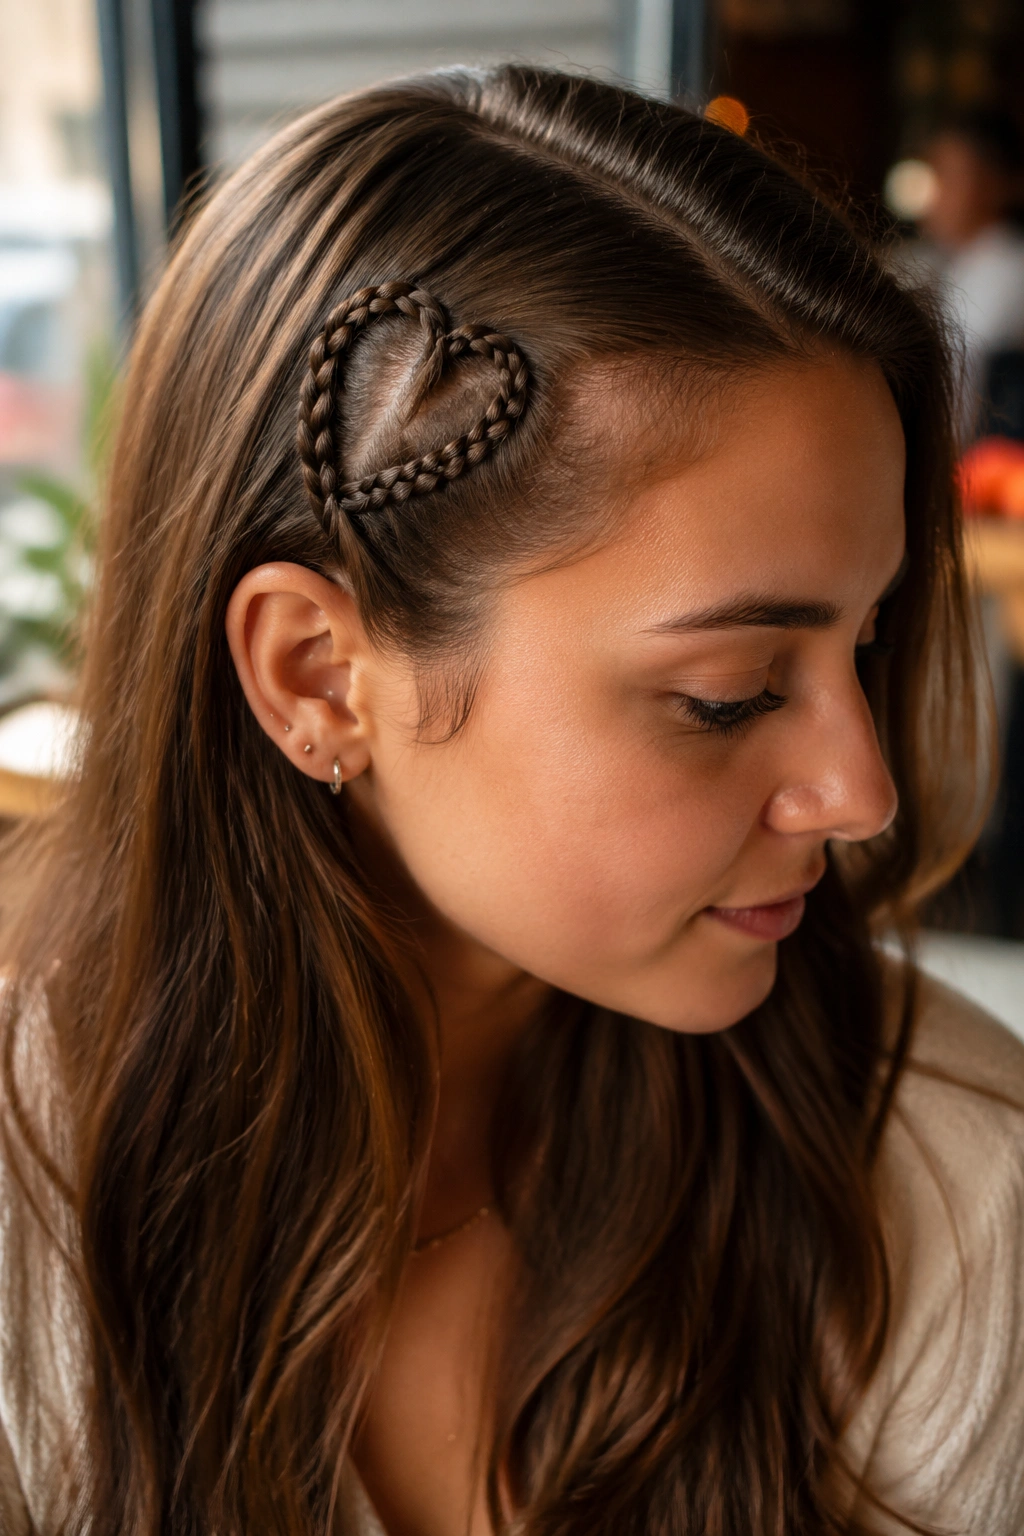
A tiny braid at the temple has the same feeling as a fine chain necklace. Small, precise, and a little bit cheeky. It’s the style I’d pick when the outfit is already doing a lot and the hair just needs one sharp detail.
The heart itself is small enough to sit near the hairline, usually just above the temple or slightly behind it. The rest of the hair stays down, which makes this version useful for short bobs, lobs, or longer hair that you don’t want to pin up. It’s also a quiet way to wear the Valentine’s Day theme without announcing it to the room.
What to keep in mind
- Keep the accent section no wider than 1 inch.
- Use a mini clear elastic so the finish disappears into the braid.
- Smooth the front with a light styling cream only if the flyaways are wild; too much product makes the braid look greasy.
- Let the opposite side stay simple. One strong detail is enough.
This style looks best when it’s a little imperfect. A tiny heart braid doesn’t need hard edges. It needs intention, a clean curve, and one or two loose strands near the cheek.
6. High Ponytail with a Heart Braid Wrap

Two inches is enough to make this look work. That’s the amount of braid you really need at the base of a ponytail before the shape starts reading like a heart-wrapped accent instead of a random twist.
A high ponytail gives the style energy right away. Add the heart braid around the base, and it stops feeling sporty and starts feeling dressed up. I like this version for dinner plans, dance nights, or any event where you want your hair off your neck but still want something people will notice.
Best hair texture for it
Slightly rough hair holds the wrap better than ultra-soft hair. If your strands are very slick, tease the crown lightly before gathering the ponytail, then smooth the top layer over it. You want lift, not a bird’s nest.
The ponytail itself can be straight, curled, or waved. A curled tail gives the braid more contrast because the wrapped heart shape sits against a softer length. Straight hair looks sharper. Neither is wrong.
- Secure the ponytail first with a strong elastic.
- Take a narrow braid from the side or from above the ponytail base.
- Wrap it into a heart curve and pin the ends underneath.
- Finish with a quick mist of hairspray at the roots, not just the braid.
The thing people forget is the ponytail base. If that part is loose, the whole look slides. Tight first, pretty second. Always.
7. Dutch Heart Outline Braid
I keep coming back to Dutch braid lines when I want the heart shape to show from farther away. The braid sits raised on the head instead of sinking into it, so the outline has more depth and the curve reads faster.
That raised edge is the whole point. A Dutch heart outline can look almost carved into the hair, which gives it a bolder feel than a flatter braid. It’s a good pick when the dress is simple and you want the hairstyle to carry more visual weight.
What makes it different
A standard braid blends into the hair more easily. A Dutch version pops off the surface, so the heart edges are easier to see under soft lighting or in photos. That makes it a strong choice for shoulder-length hair too, where you want shape without bulk.
This style also handles thicker hair well. Thick sections can swell a little as you braid, and the raised structure keeps that fullness from turning muddy. If the braids feel too heavy, loosen the outer stitches in tiny amounts and stop before the shape gets puffy.
One more thing: the Dutch heart looks best when the parting is clean at the start. After that, it can get a little rough around the edges. That roughness gives it character. Perfectly neat from top to bottom can look stiff.
8. Stacked Mini Hearts Along One Side
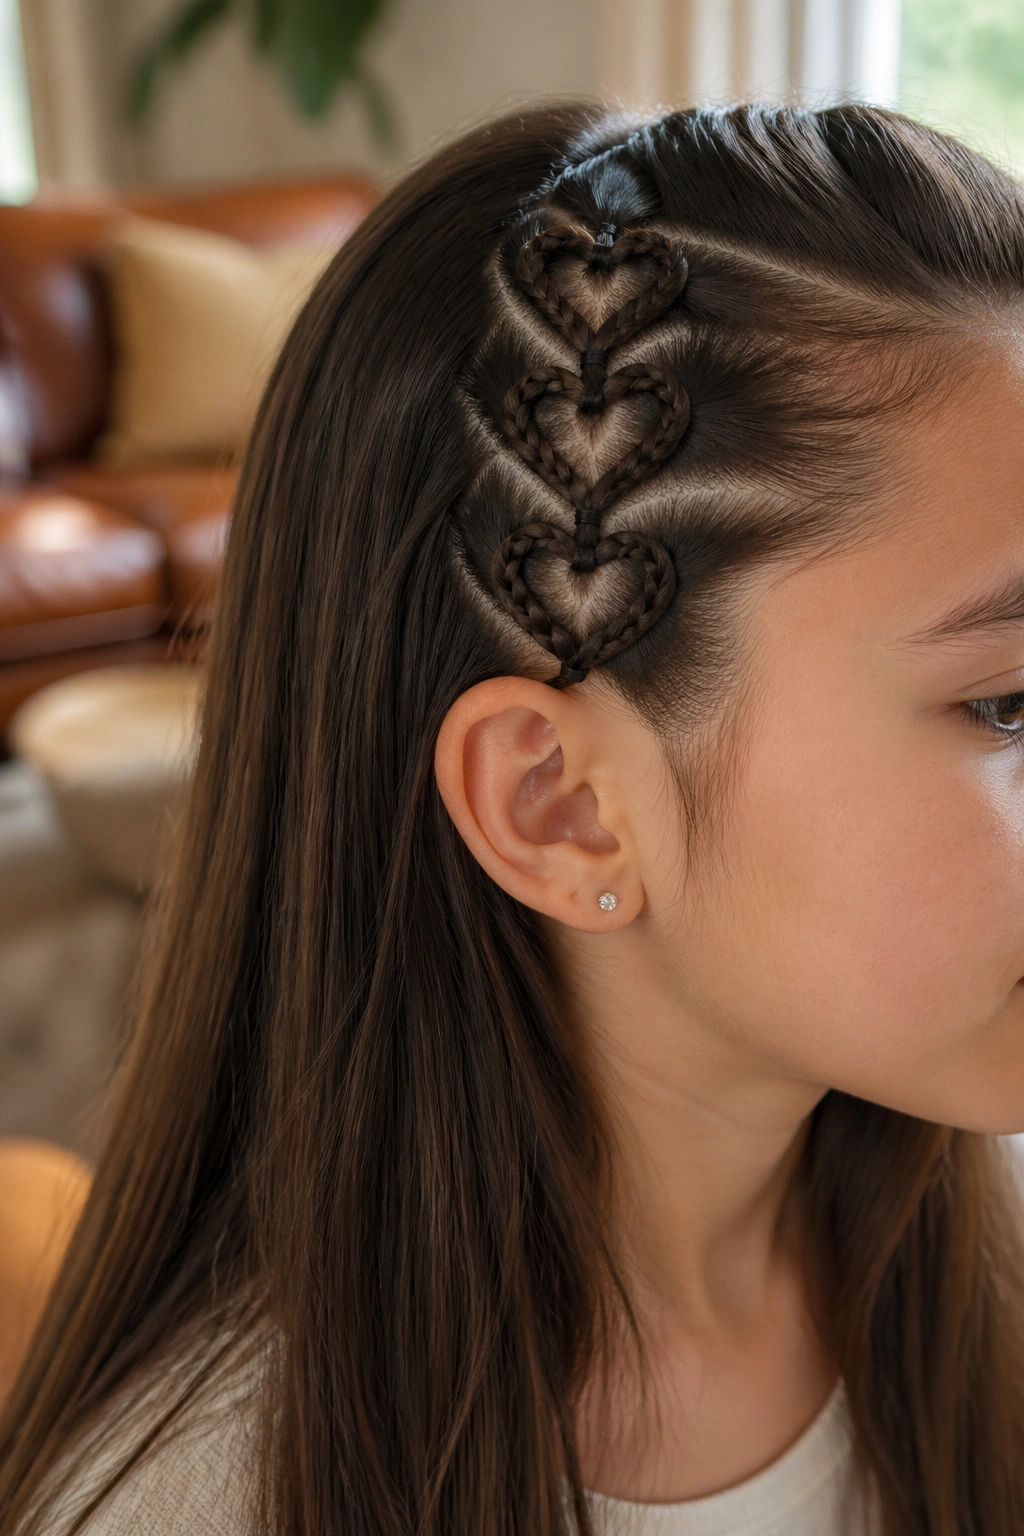
Three small hearts on one side beat one giant one when you want the style to feel playful. The stacked version has rhythm. Your eye moves from the first heart to the second and then the third, which gives the whole look a little more life.
This is the one I’d suggest for anyone who likes details but does not want the hair to feel overloaded. The hearts can sit from temple to ear to nape, or they can step downward more tightly along a side part. Keep each one small, and the idea stays crisp instead of turning bulky.
A simple way to place them
- First heart: just above the temple.
- Second heart: about 2 inches lower, near the top of the ear.
- Third heart: close to the nape or just behind the ear.
- Keep each section roughly ¾ inch to 1 inch wide.
The style works especially well on kids, teens, or anyone going to a party where a single braid might feel too plain. Still, it can be elegant on adults if the rest of the hair is smooth and the hearts are tight and tidy.
The biggest mistake is making each heart too large. Once they start competing with each other, the pattern gets noisy. Small and repeated is the move here.
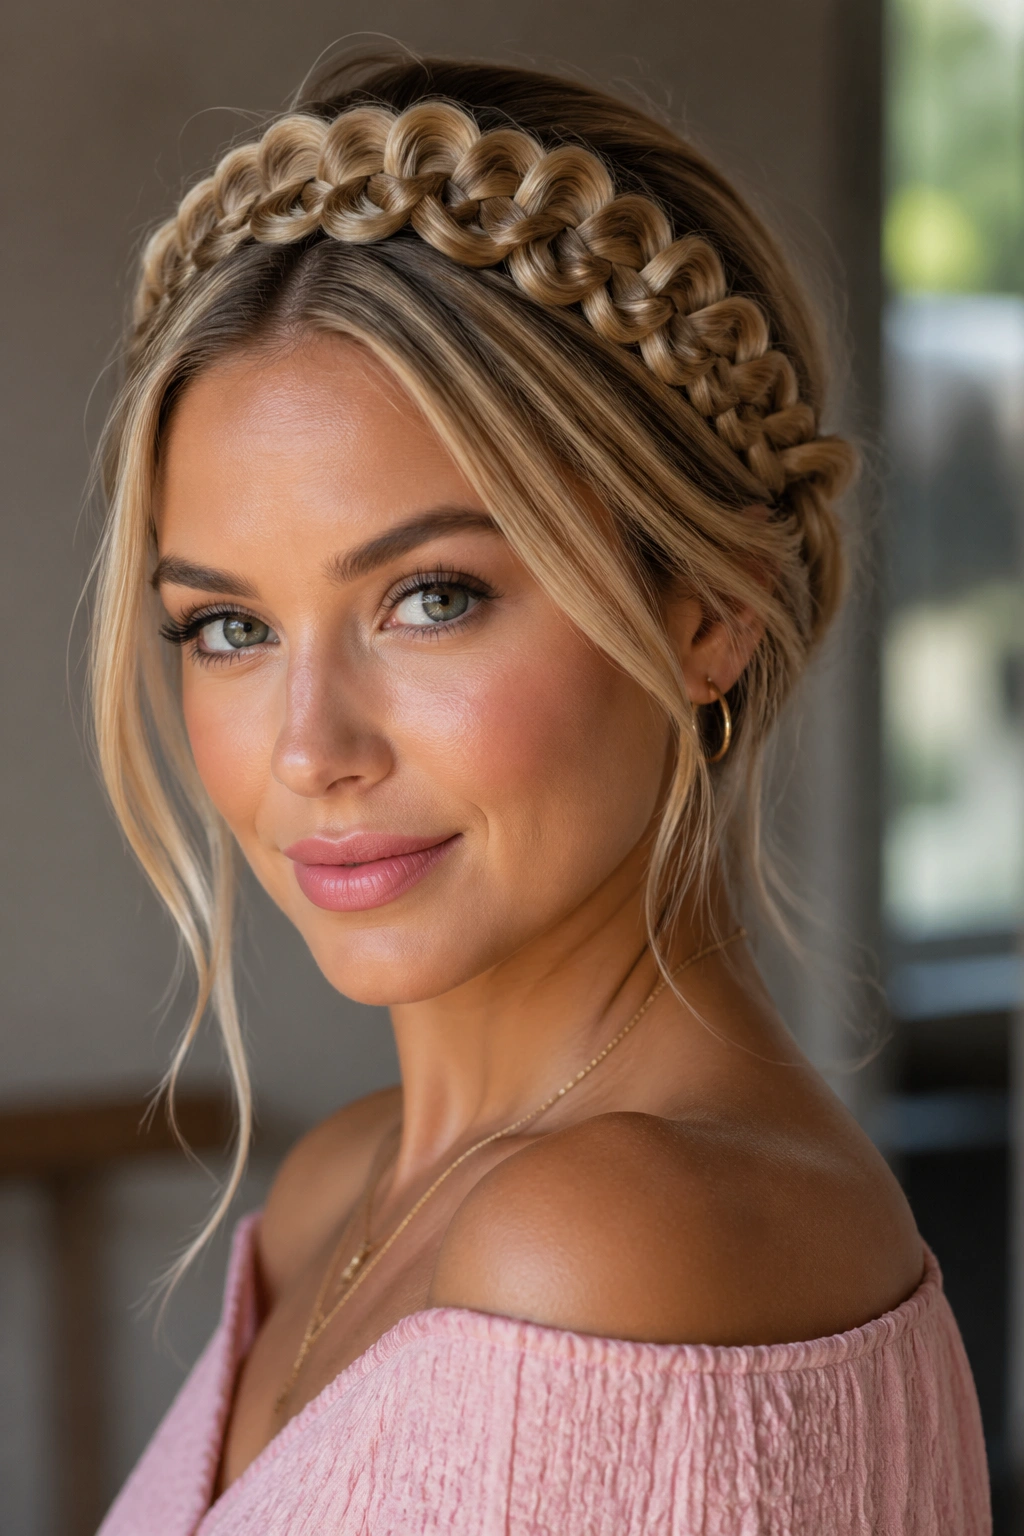
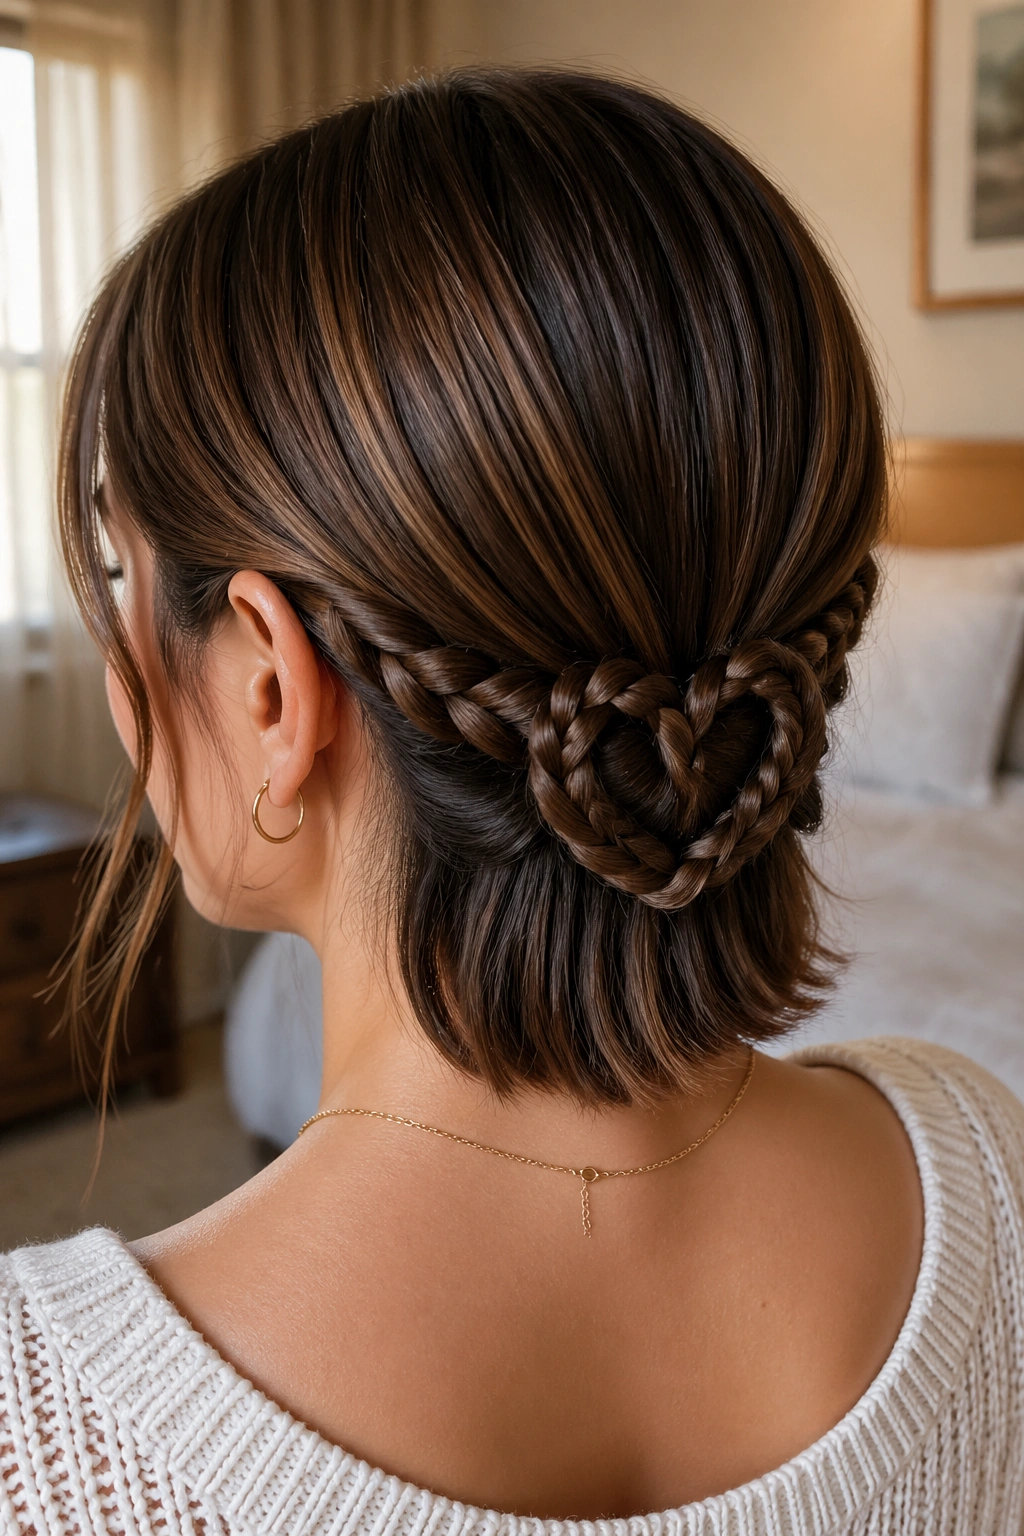
9. Heart Braid Bun at the Nape
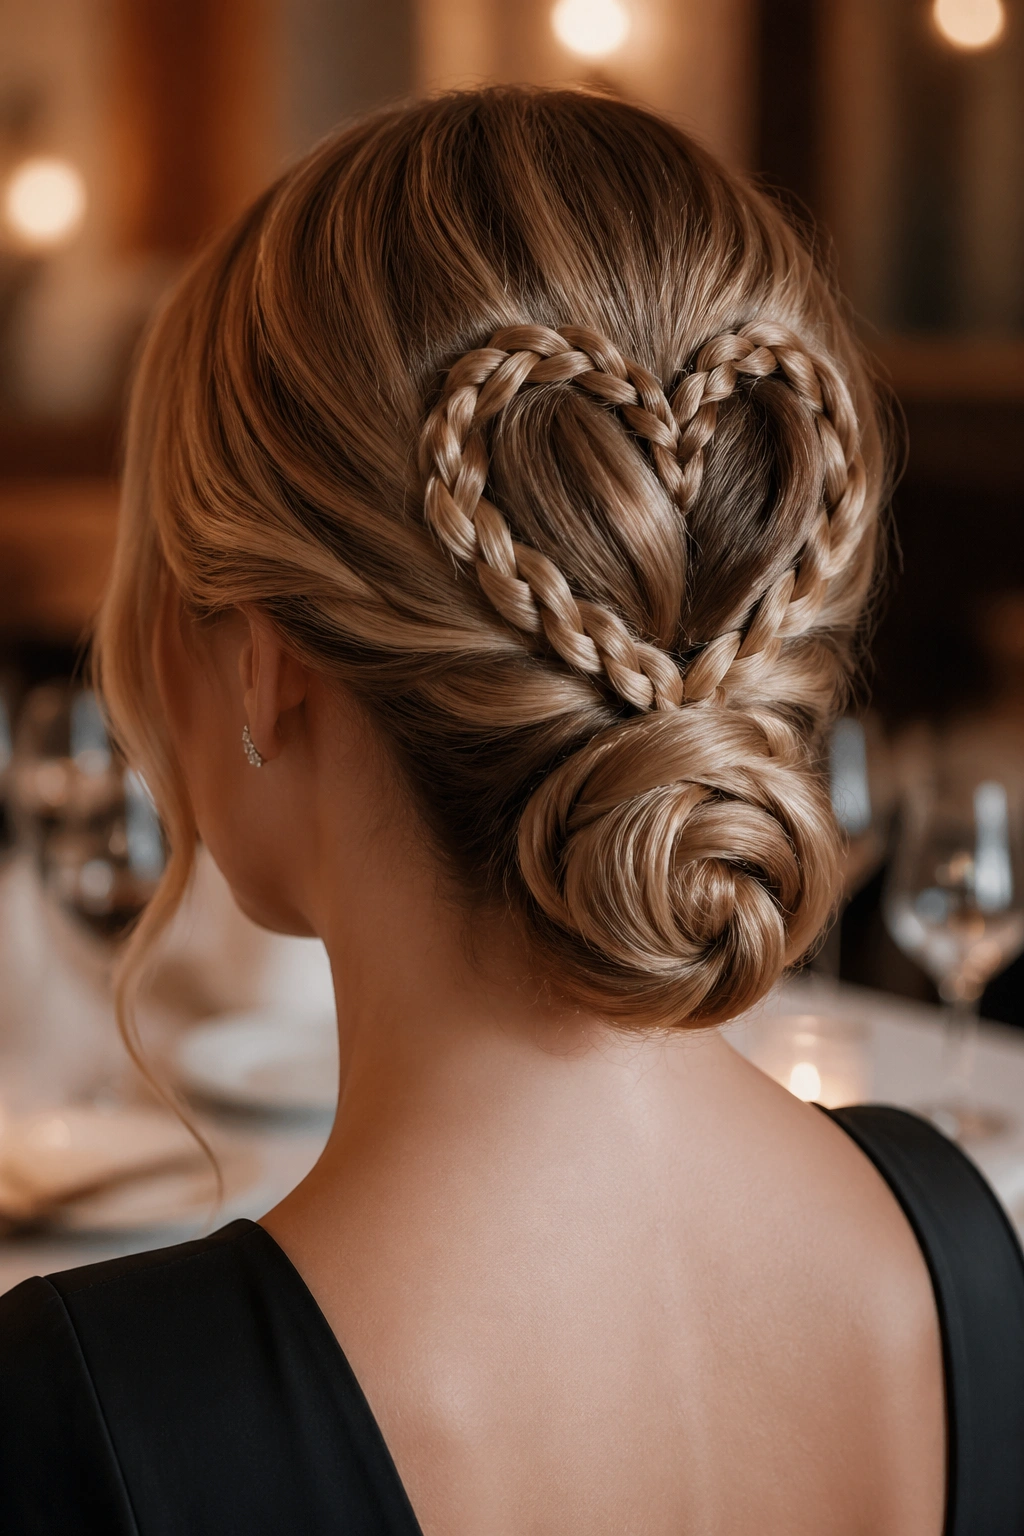
For a dinner reservation, I like the version that ends in a bun. The heart gives you the romance, and the bun gives you a finish that feels settled. No wandering ends. No loose tail brushing your coat.
The braid usually starts high enough to create the heart shape, then drops into a low bun at the nape. That transition matters. If the braid-to-bun shift is too abrupt, the look feels patched together. A smooth wrap makes it read like one thought.
Why the bun matters
A low bun steadies the whole style. It keeps the braid from hanging too much weight off the back of the head, which is useful if your hair is thick or shoulder-length. It also makes the heart shape look more formal, because the eye lands on the braid and then settles on the bun instead of trailing down loose lengths.
You do not need a bun donut unless your hair is thin and you want more volume. A few pins and a small elastic usually do the job. Twist the braid into the bun while it’s still a little flexible, then pin at the corners first. That keeps the bun from collapsing when you sit back.
If a few ends stick out, leave them. A perfectly hidden bun can look too hard. One or two soft ends near the nape make it easier on the eye.
10. Side-Swept Heart Braid for Deep Partings
What if you wear a side part and do not want to fight it? Then the side-swept heart braid is the move. It leans into the part you already like, which is why it often looks more natural than forcing a center shape.
This version starts off to one side of the crown and curves the heart diagonally across the head. The result feels a little less expected, which I think is exactly why it works. The eye follows the slant, and the heart shape shows up as a gentle surprise instead of a front-and-center statement.
A side-swept braid is also useful when bangs are in the mix. You can leave the fringe free, tuck it softly behind the curve, or fold it into the front edge of the braid. None of those choices are wrong. They just change the mood.
If you want the look to stay soft, don’t pull the braid too tight near the front hairline. Keep the curve smooth, then tighten the lower part where it disappears into the rest of the hair. That gives the braid shape without making the scalp look overly pulled.
11. Loose Boho Heart Braid with Pulled Loops
Not every heart braid should be crisp enough to count the stitches. A looser boho version has its own appeal, especially when the outfit is soft, textured, or a little undone on purpose. It feels less formal and more lived-in.
The shape still needs to be clear, though. That’s the trick. You can loosen the outer loops, leave a few face-framing pieces, and add soft waves through the lengths, but the heart itself should stay readable. If the braid gets too airy, the shape disappears and you’re just left with a pretty tangle.
The trick with the loops
Pull only the outer edge of the braid first. Leave the inner edge a little tighter so the heart keeps its outline. That uneven looseness looks better than stretching both sides equally, which can flatten the shape fast.
A light texturizing spray works here better than heavy oil. Oil can make the hair slide and kill the shape. Texture spray gives the braid a dry grip and keeps the pulled loops from falling flat an hour later.
This style is at its best with soft waves and a dress that has some movement to it. Cotton, lace, silk, even a ribbed knit can play nicely with it. Crisp tailoring is a tougher match unless you want the contrast on purpose.
12. Ribbon-Woven Heart Braid
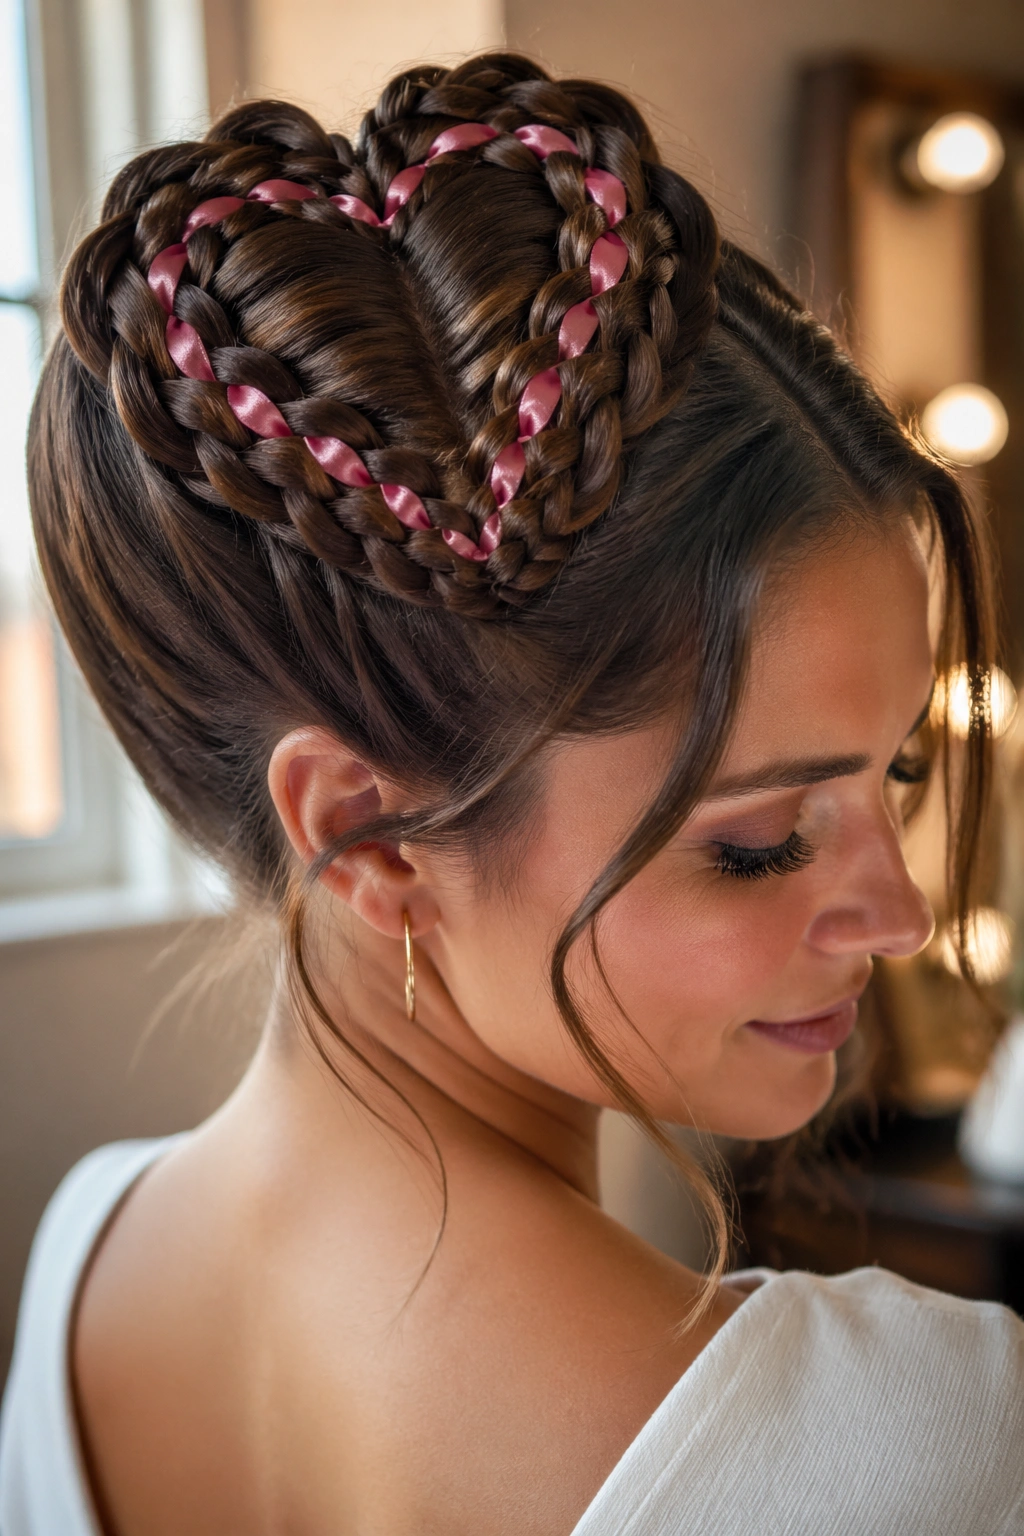
A 1/4-inch ribbon changes the whole thing. Not in a subtle way, either. Once the ribbon is woven through the braid, the heart shape looks less like a hair trick and more like an actual styled accessory.
This is the version for anyone who wants color built into the braid itself. Satin reads smooth and polished. Velvet feels richer and a little heavier. Grosgrain gives you more grip, which is useful if your hair is fine and slippery. I like satin for polished outfits and grosgrain when the braid needs to stay put all night.
Which ribbon behaves best
- Satin ribbon: slides easily, looks sleek, and shows color well.
- Velvet ribbon: adds texture, but can feel bulky in thick hair.
- Grosgrain ribbon: holds better and frays less.
- 1/4-inch width: narrow enough to braid cleanly without crowding the hair.
Thread the ribbon into the first section, then keep tension even all the way down. If one side gets tighter, the heart can twist. Trim the ribbon ends at an angle when you finish so they do not fray too quickly.
This one does not need much else. Keep the makeup simple, let the ribbon do its work, and the style looks far more considered than it actually is.
13. Low Heart Braid for Shorter Hair
Shorter layers can still pull off a clean heart if you stop chasing a giant shape. That’s the real adjustment. A compact heart near the nape or just above it often looks stronger on shoulder-length hair than an oversized version would.
This is the style I’d recommend for anyone with a lob, a collarbone cut, or pieces that refuse to stay tucked into bigger braids. The smaller scale works with the length instead of fighting it. You get the heart, but you also keep the haircut visible.
A low placement helps because the hair has less distance to fall out of shape. Use mini elastics, keep the sections narrow, and pin the curve close to the head. If some layers escape near the ears, smooth them with a tiny bit of styling cream rather than loading the whole head with product.
One last thing. The best low heart braids look calm, not cramped. Keep the shape small, keep the tension even, and let the braid end where the hair naturally wants to settle. That’s usually where the style starts to feel finished.