Wavy hair has this incredible natural texture that can make even the simplest style look effortlessly gorgeous. But here’s what many people with waves discover: braids take that texture to a whole new level. Instead of fighting your waves, braids actually work with them, creating dimension, definition, and a romantic vibe that looks intentional rather than undone.
The thing is, not every braid style translates equally well to wavy hair. Some feel too rigid or formal, while others seem made specifically for the soft, undulating texture you’ve got going on. The best braids for wavy hair enhance those natural waves rather than smooth them away, and they hold beautifully because your hair’s natural grip means you don’t need everything pulled tight to the scalp to keep it in place.
Whether you’re looking for something casual you can throw together before work, an intricate style for a special event, or just a way to style your waves on a day when they’re feeling a little unpredictable—there’s a braid out there that’ll work. The braids in this guide all play nicely with wavy textures, and most of them actually improve as your waves soften and relax throughout the day.
1. The Soft Dutch Braid
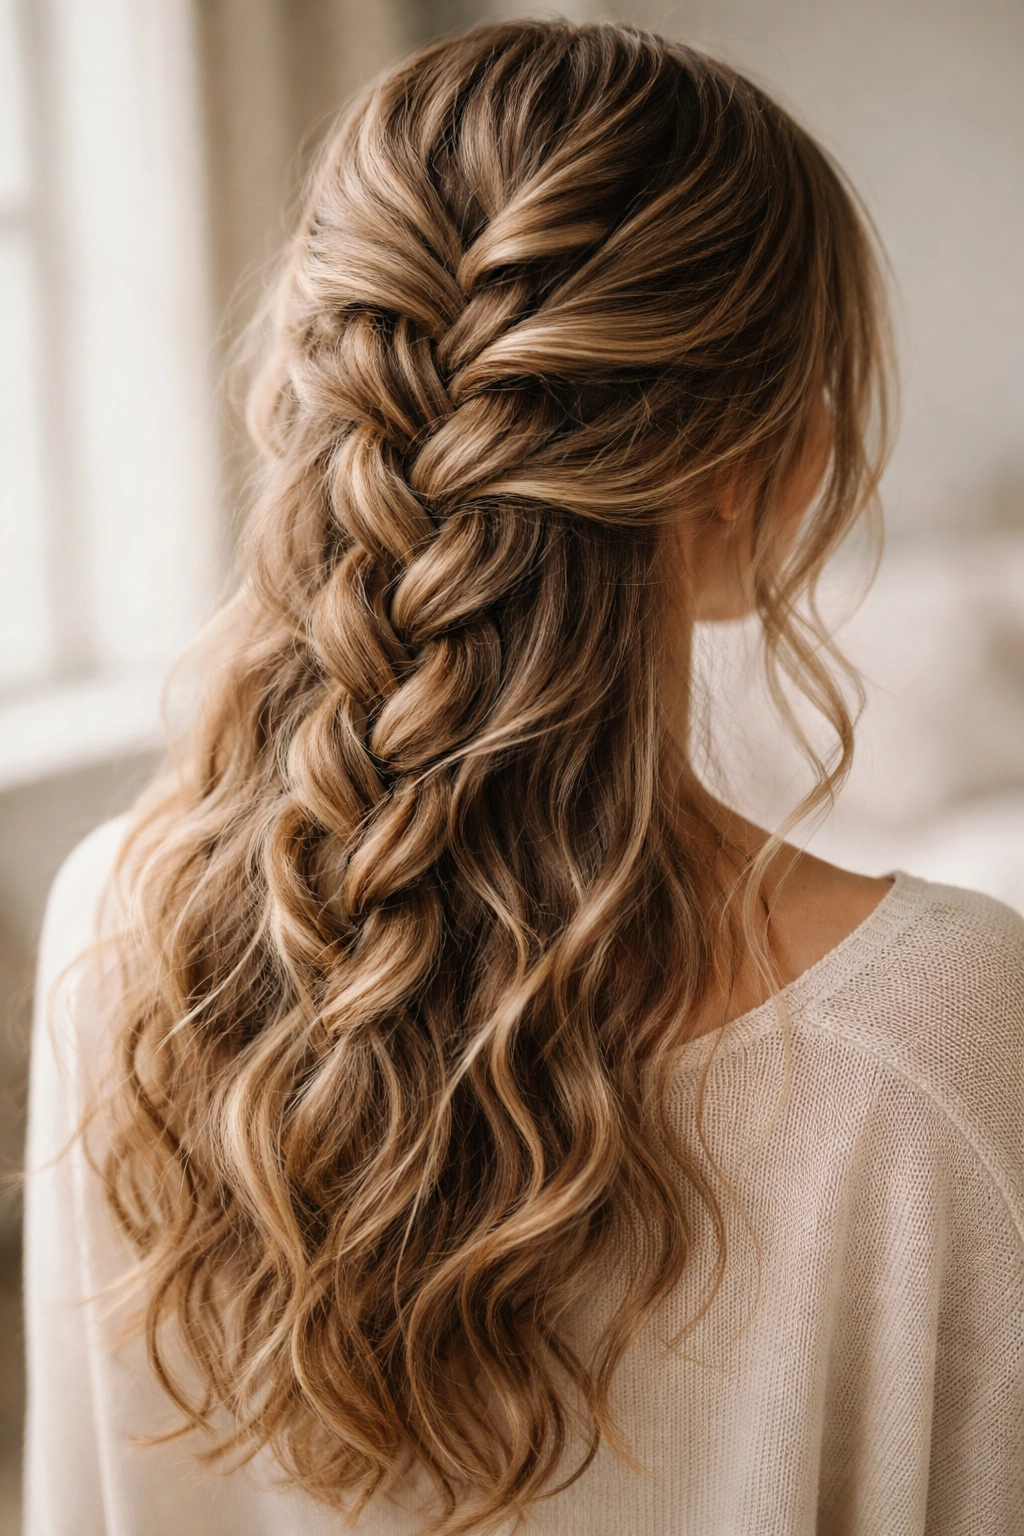
A Dutch braid is basically the inverse of a French braid, where you braid the sections under rather than over each other. For wavy hair, the soft Dutch braid is magic because it creates this really textured, dimensional look that celebrates rather than conceals your natural waves.
Why It Works for Wavy Hair
Dutch braids automatically look fuller and more interesting in wavy texture than in straight hair. The wave structure creates natural peaks and valleys that the braid sections follow, so the braid itself develops this organic, undulating quality. You don’t need to pull it tight to the scalp—in fact, looser Dutch braids look better with waves.
How to Style It
Start at the crown and braid loosely, incorporating small sections of hair as you work your way down the back of the head. Once you finish at the nape, gently pull and tease out the braid strands to add volume and soft texture. The goal is a braid that looks intentionally relaxed, not perfectly neat. Finish with a light hairspray to hold loose strands in place without crunching your waves.
Best for
Casual days when you want to pull your hair back but keep it looking effortlessly styled. This braid works equally well on second-day waves or freshly washed wavy hair.
Pro tip: Do this braid on waves that are 24-48 hours old—second or third-day hair holds texture better and requires less product.
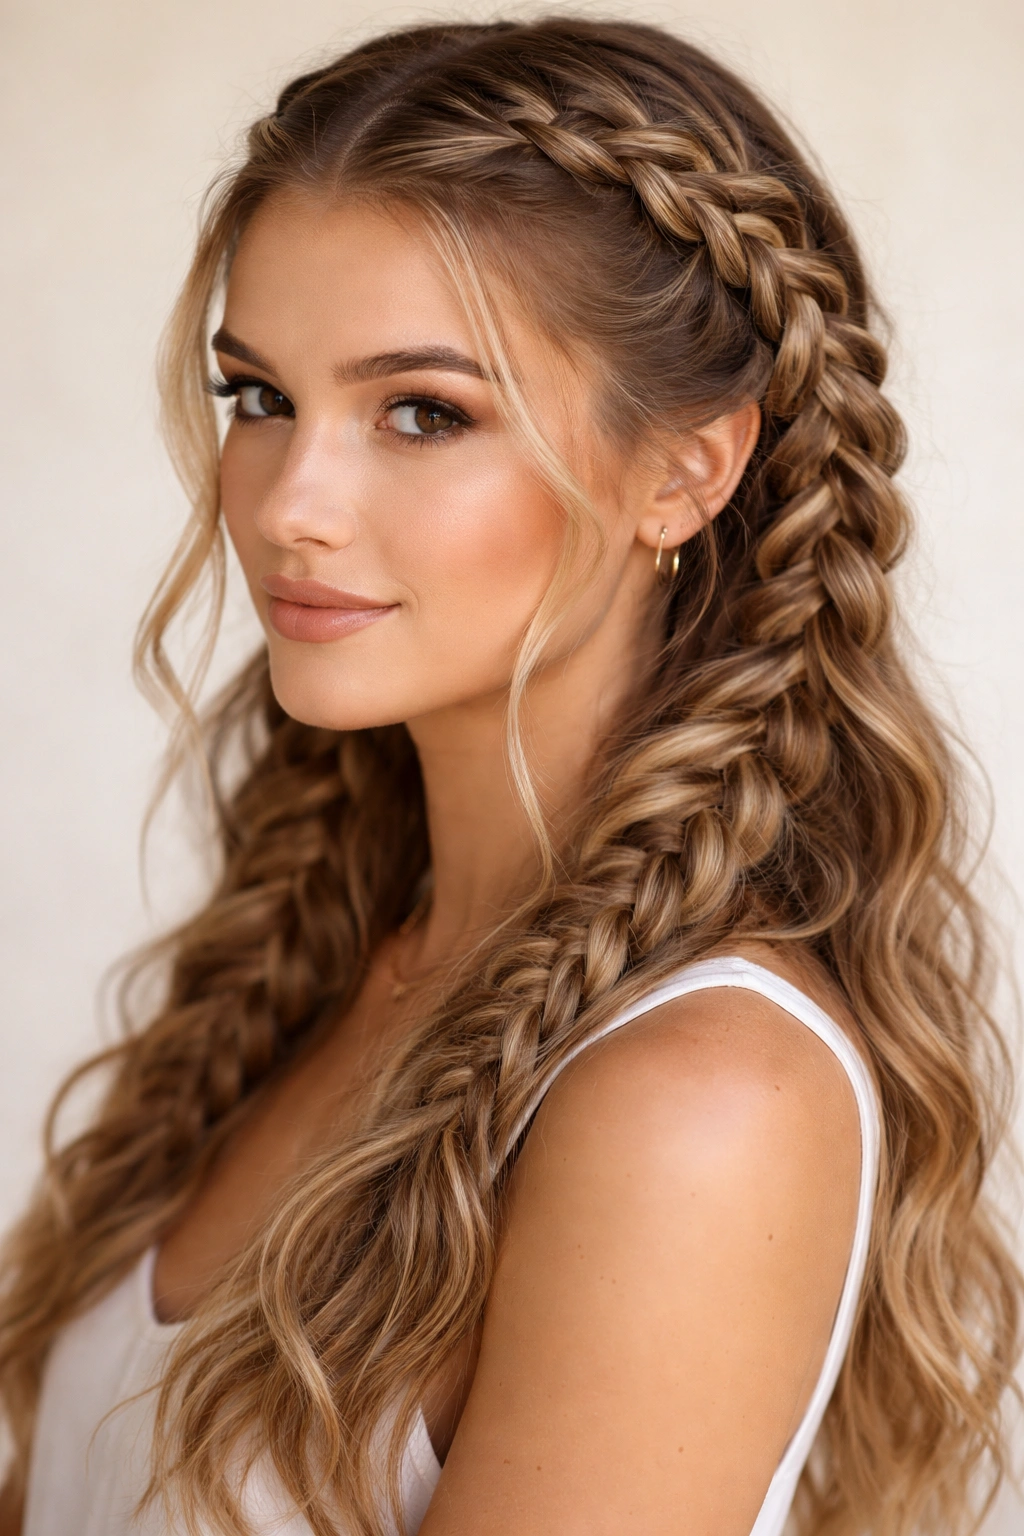
2. The Textured Side Braid
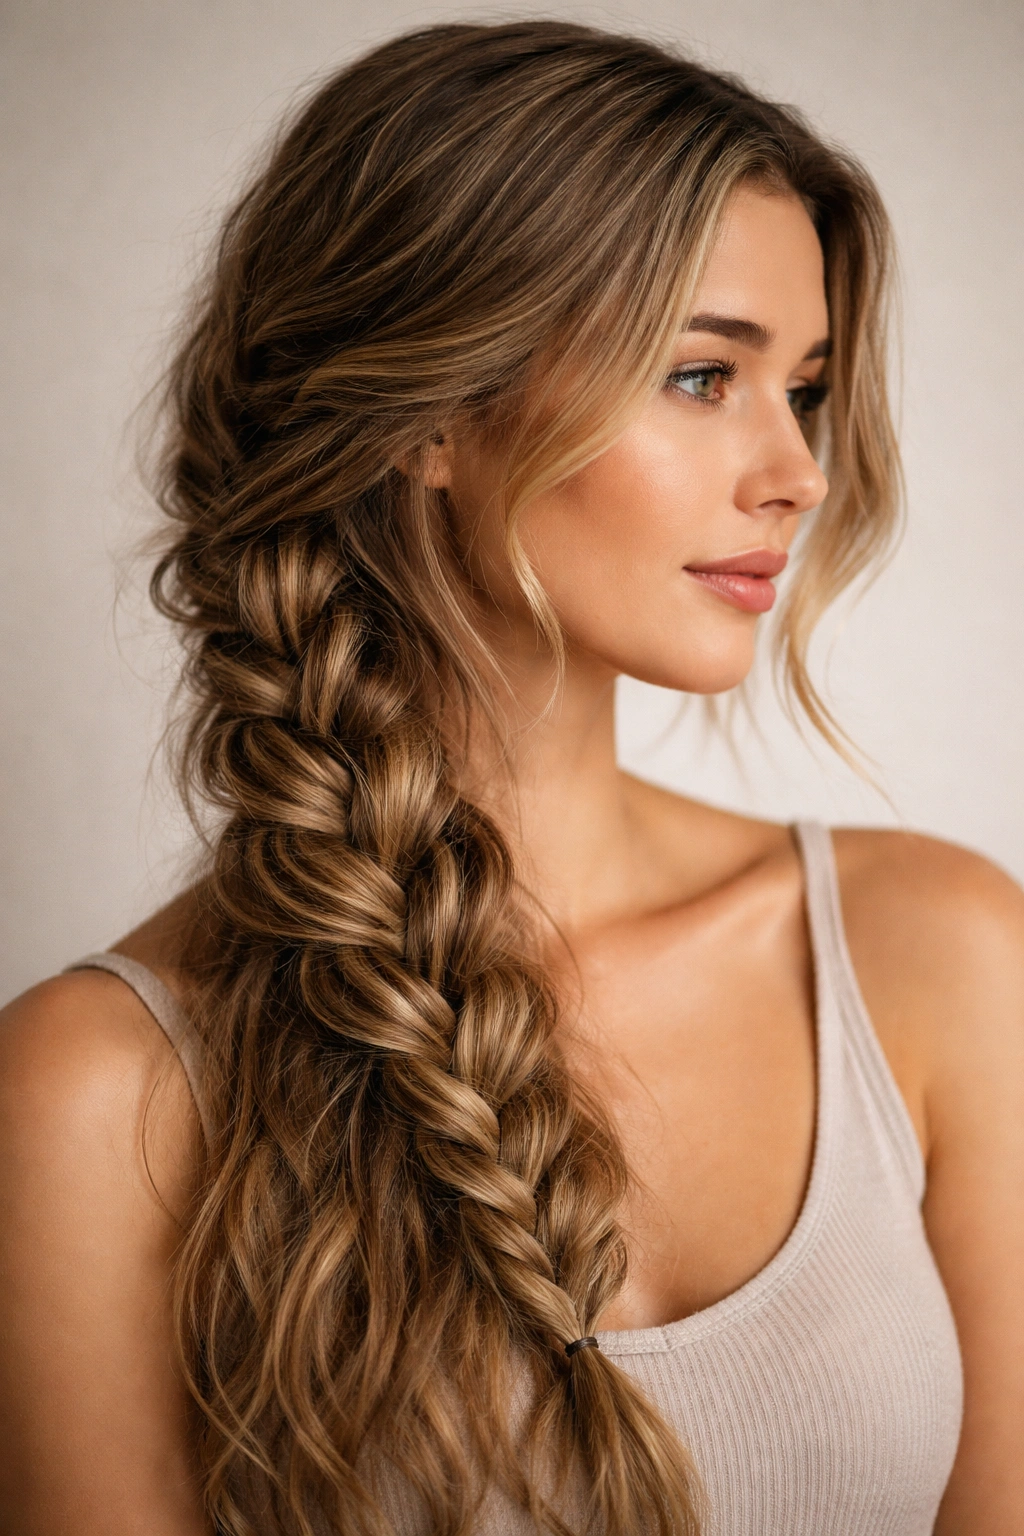
A side braid draped over one shoulder is a classic move, but pair it with wavy hair and you get something that reads as both relaxed and intentional. The asymmetry flatters most face shapes, and the drape works beautifully with waves.
Why It Works for Wavy Hair
Side braids don’t require your hair to be pulled tightly away from your face, which means you can frame your features with softer, wavy pieces. The braid itself sits at an angle that complements the natural movement in waves. Waves create texture that makes even a simple three-strand braid look more dimensional and interesting than it would in straight hair.
How to Style It
Section off hair from one side of your head (roughly from above your ear), and French or Dutch braid down and across toward the opposite shoulder. Leave face-framing pieces loose to soften the look. You want enough texture in the braid that you can gently pull it apart afterward to create a fuller, softer appearance. Secure the end with a small elastic and tuck or pin the braid so it sits naturally over your shoulder.
Best for
Date nights, casual events, or any day when you want to add polish without looking overdone. This braid works especially well if you have layers or longer layers throughout your hair.
Pro tip: Apply a light texturizing spray or sea salt spray before braiding to give your waves more grip and make the braid hold its texture throughout the day.
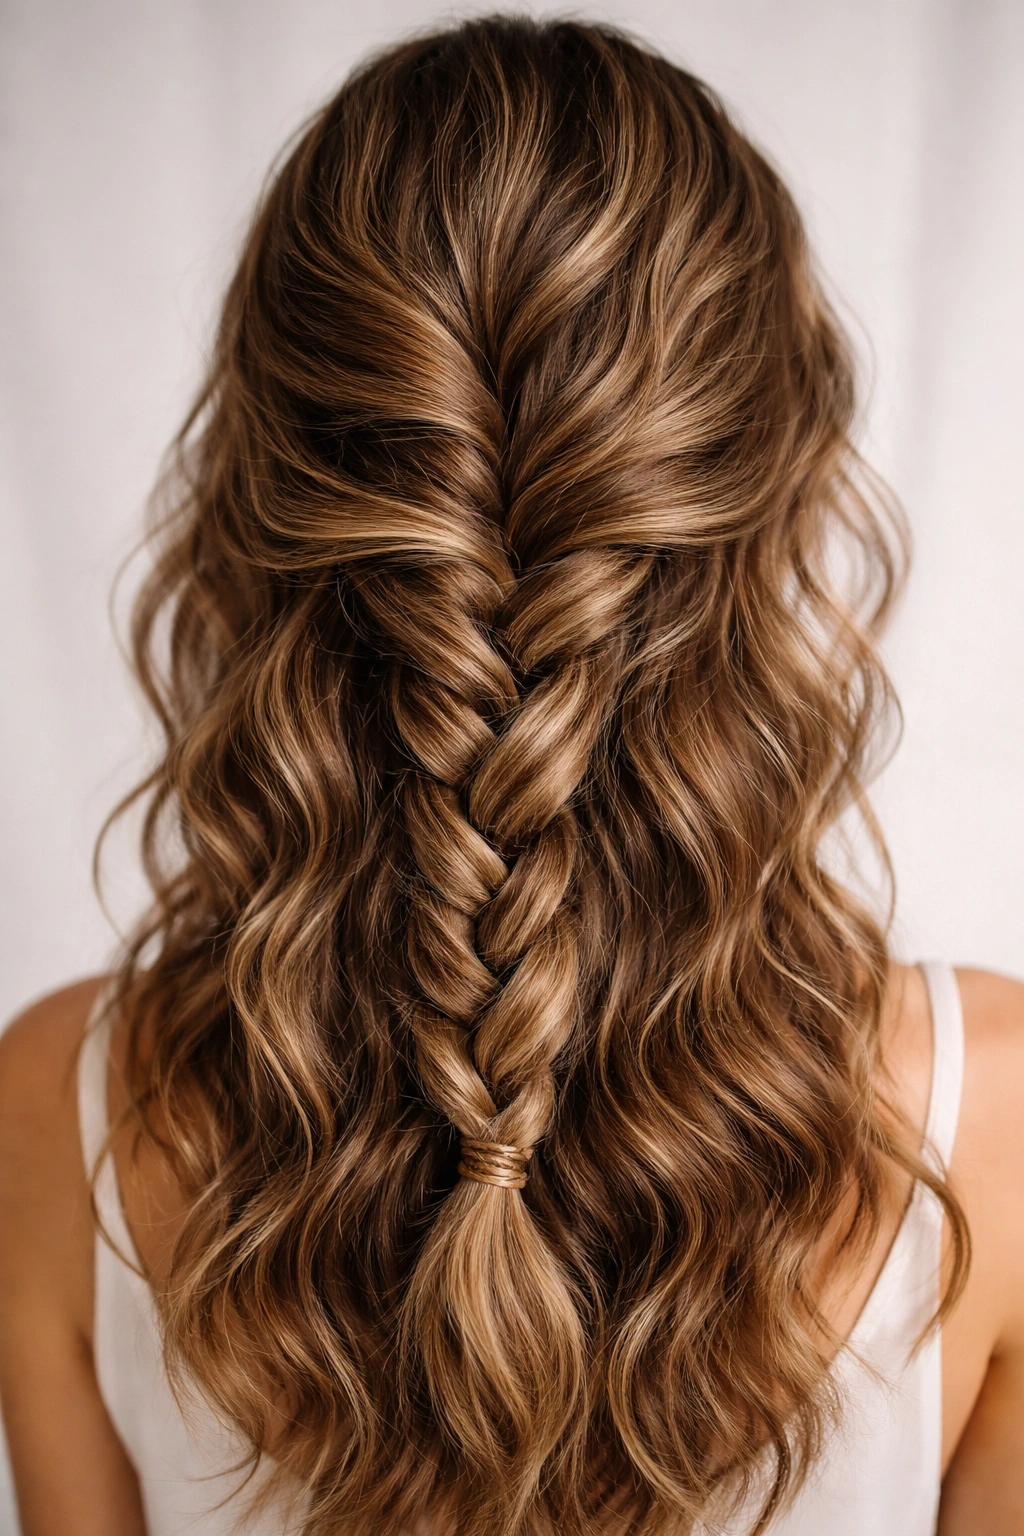
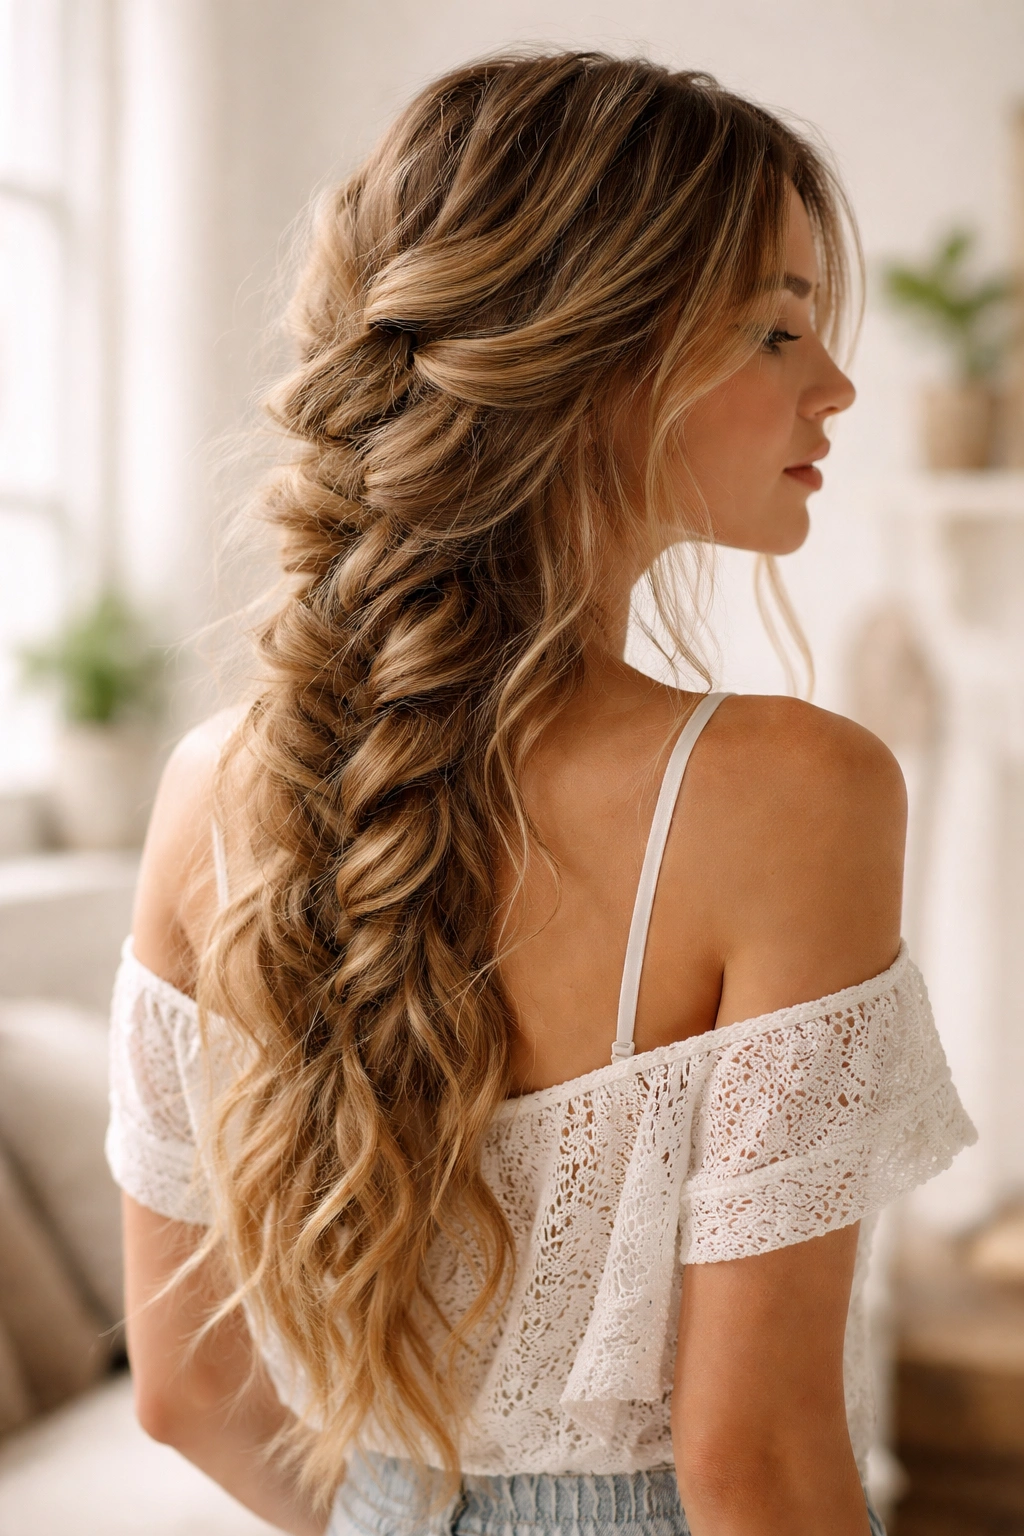
3. The Fishtail Braid
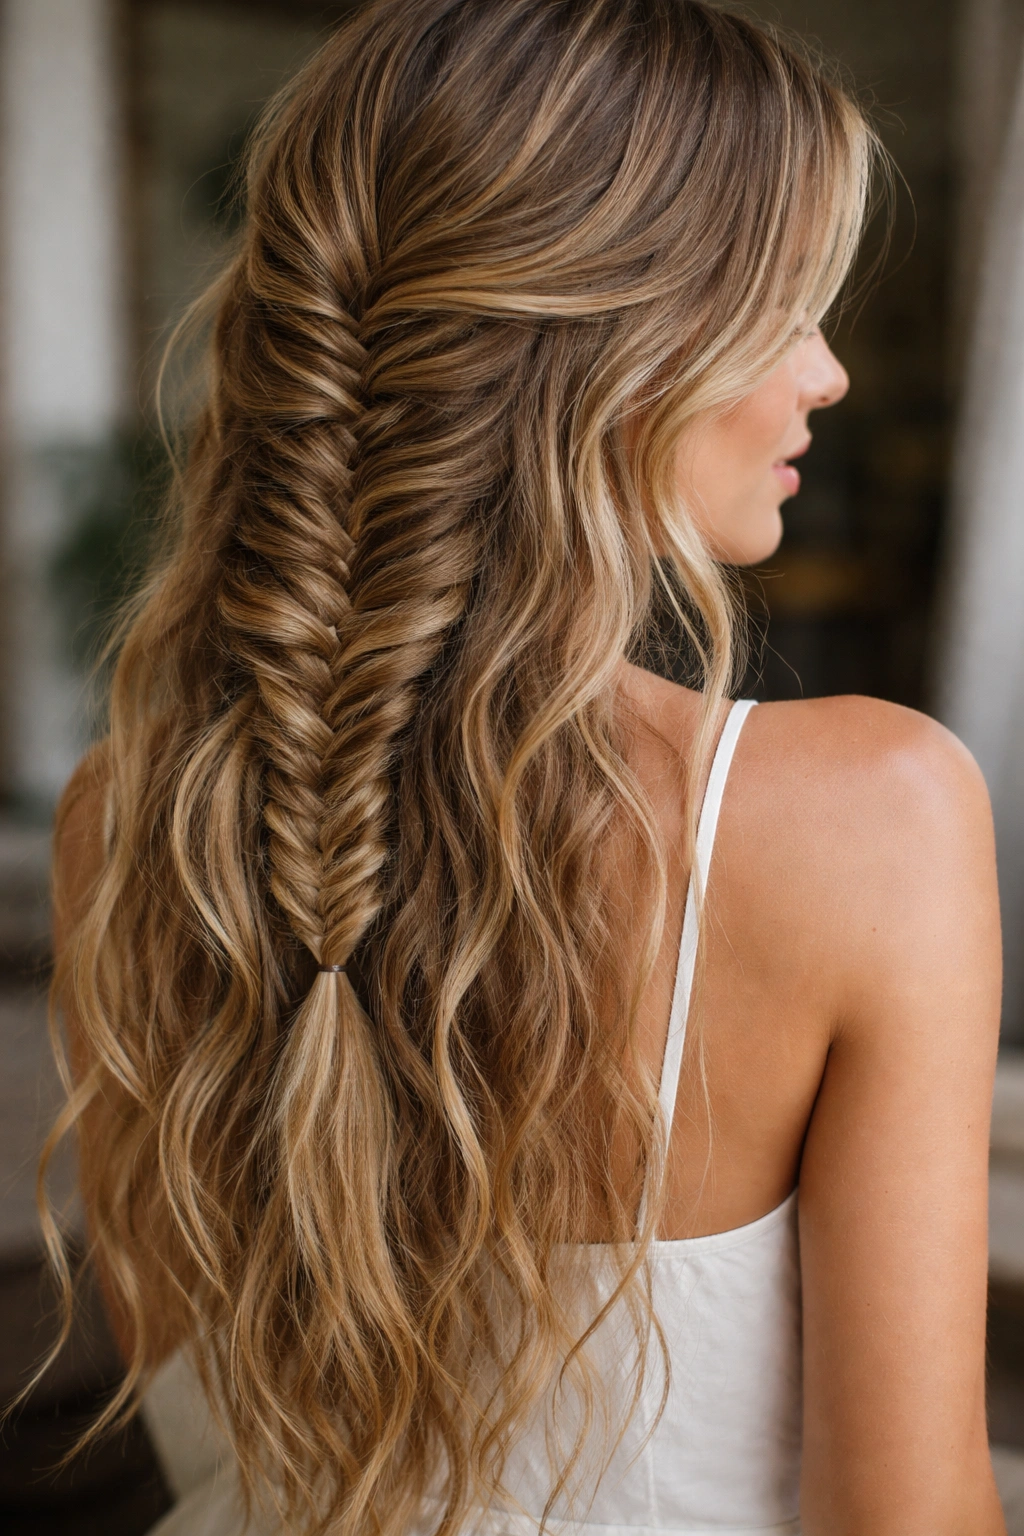
Fishtail braids have an inherent texture and movement to them, which means they’re naturally suited to wavy hair. Instead of looking too intricate or fussy, a fishtail braid on waves reads as soft and romantic.
Why It Works for Wavy Hair
The fishtail technique creates this woven, almost feathered appearance that pairs perfectly with the natural undulation of waves. Your waves automatically add visual interest to the braid structure, so you don’t need the braid to be perfect—slight imperfections actually enhance the overall look.
How to Style It
Divide damp or dry hair into two sections on either side of a center (or off-center) part. Take a small section from the outer edge of one side, cross it over to the inner side, and repeat on the other side, continuously alternating. As you work, you’re essentially weaving thin pieces from one side to the other. Once you’ve reached the bottom, gently pull sections of the braid apart to create a fuller, softer appearance. The key with wavy hair is to make it deliberately loose—try for a braid that looks like it might come undone at any moment.
Best for
Weekend mornings when you want something that looks more intentional than a regular braid but not so polished you look like you spent an hour styling. Fishtail braids look gorgeous half-up or full-down braided styles.
Pro tip: Start your fishtail at an angle rather than straight down the center. This asymmetry reads as more modern and works beautifully with wavy hair.
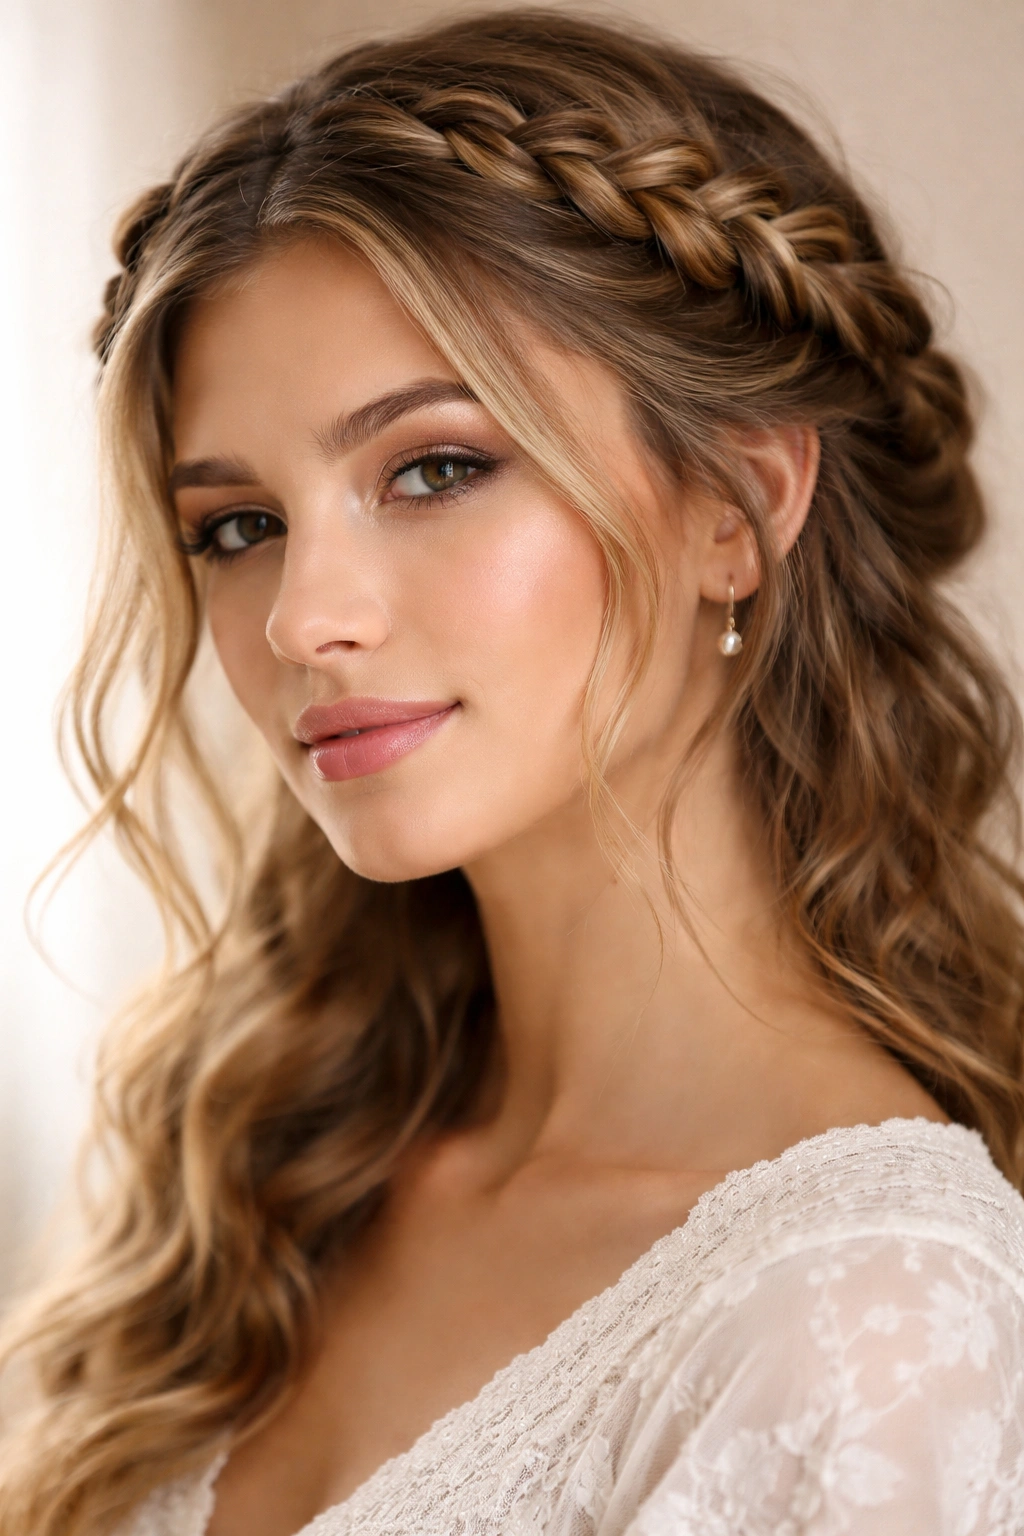
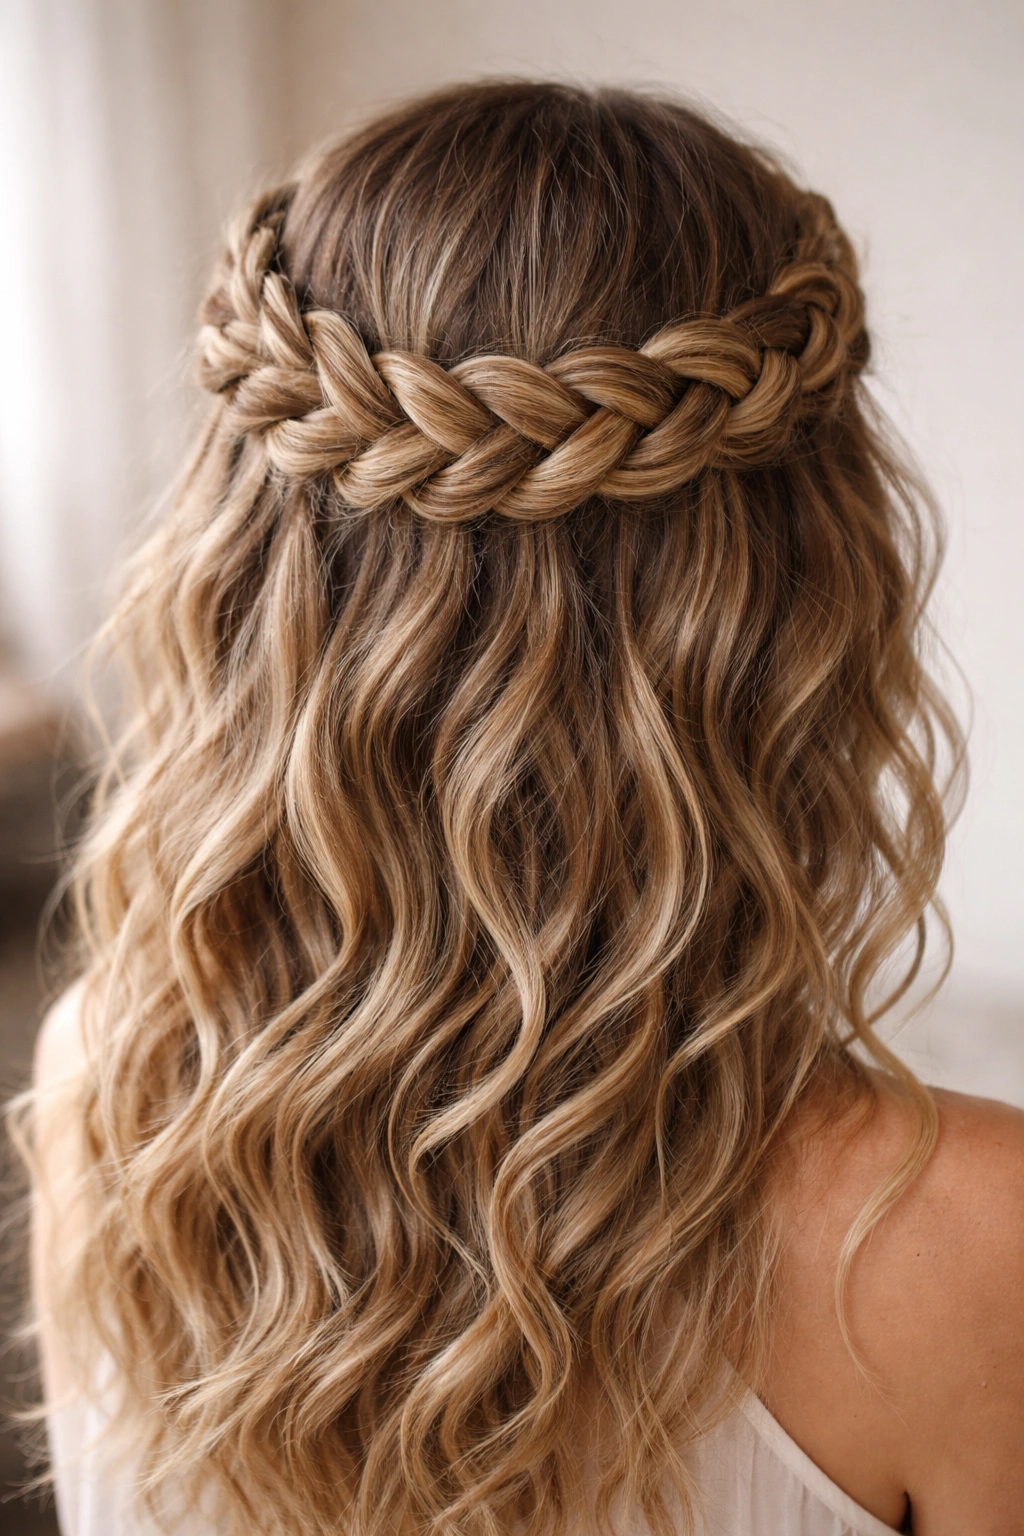
4. The Halo Braid
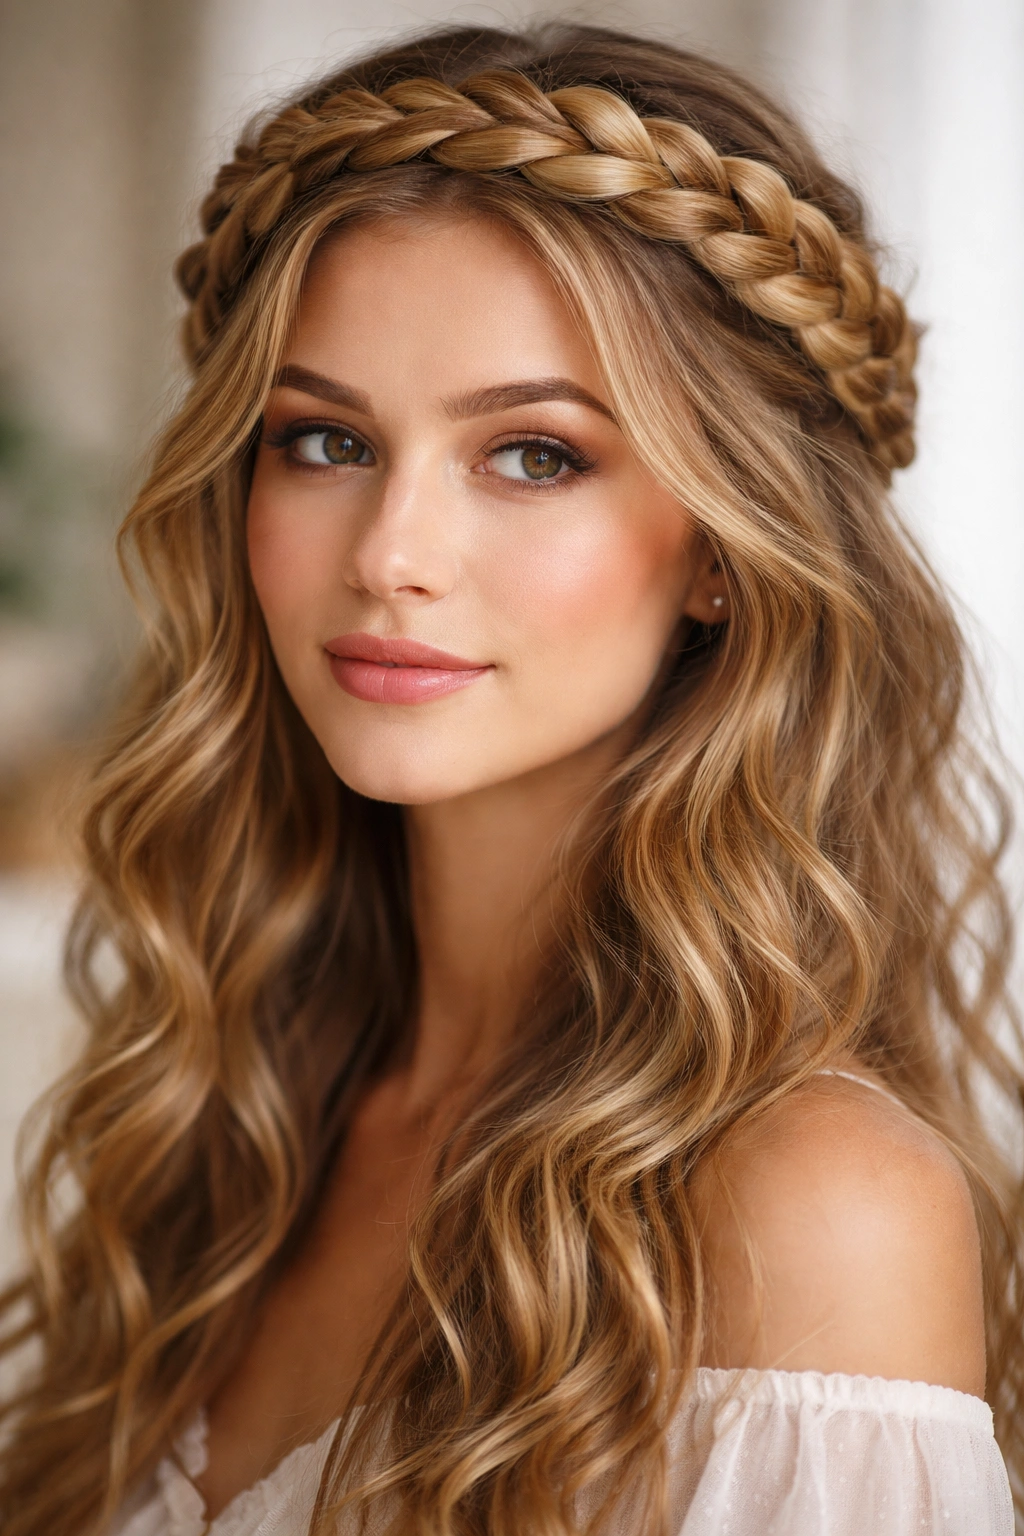
A halo braid circles your head like a crown, and for wavy hair, it’s one of the most flattering styles you can do. It pulls hair back from your face without looking severe, and it actually shows off the shape of your head and facial features.
Why It Works for Wavy Hair
The halo is subtle enough that it doesn’t fight with your wave pattern. It frames your face softly and creates a romantic, ethereal look that complements wavy texture beautifully. Because it sits atop your head rather than being tight to the scalp, it works with any degree of wave tightness.
How to Style It
Start by creating a side part (or center part if you prefer symmetry). Take a section of hair from just below one ear and begin a loose French or Dutch braid that goes around the back of your head to just below the opposite ear. Secure the end with pins that match your hair color. Leave face-framing pieces out to soften the look, and gently pull sections of the braid to add volume.
Best for
Brunch dates, casual weddings, or any time you want to look polished and put-together without seeming like you’re trying too hard. Halo braids look particularly good when you have your hair down—don’t feel like it has to be an all-up style.
Pro tip: Before braiding, apply a light leave-in conditioner to your waves. This keeps them hydrated and manageable, which makes the braid easier to create and helps it hold throughout the day.
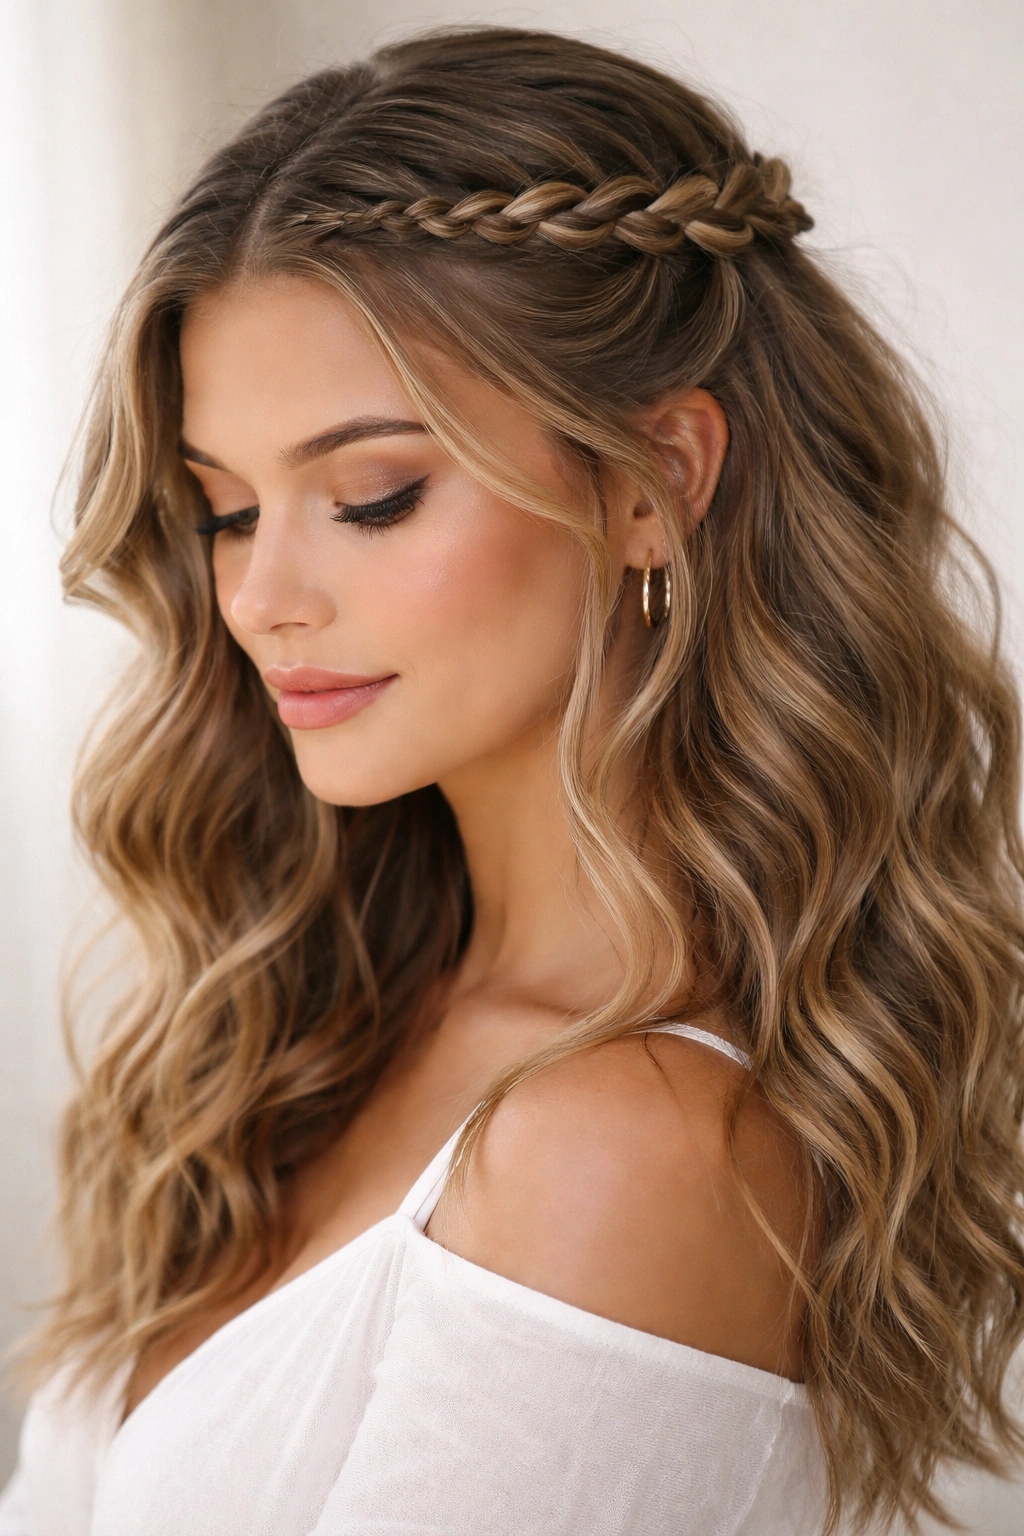
5. The Crown Braid Twist
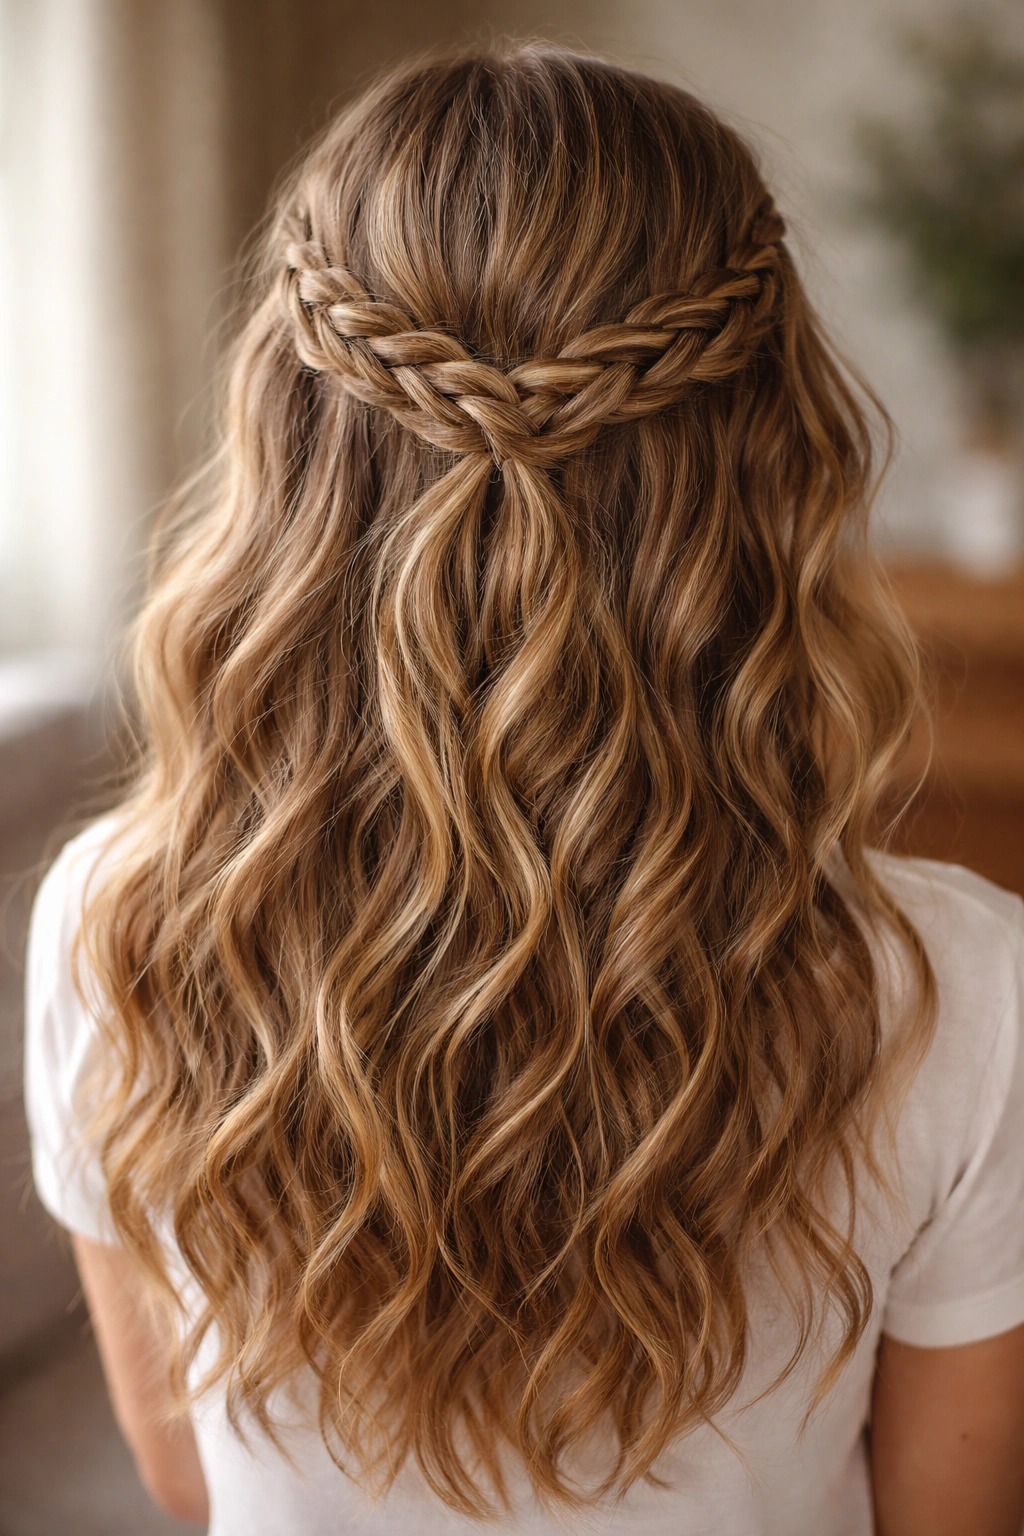
This is a variation on the halo where you create two braids (one on each side) that meet at the back of your head, giving the effect of a crown without the full wraparound. It’s easier to execute than a traditional halo and looks stunning with wavy hair.
Why It Works for Wavy Hair
Two smaller braids are easier to keep soft and textured than one larger braid. The wave structure in your hair naturally supports this style without requiring excessive pinning. When the two braids meet at the back, the meeting point creates a focal point that looks intentional and pretty.
How to Style It
Create two parts from your center part down to just above each ear. Start a loose braid from one side of your head, working toward the back. Do the same on the other side. Once both braids reach the center back of your head (roughly where your crown would be), secure both braids together with bobby pins or a single small elastic. You can wrap the braids slightly around each other for extra dimension.
Best for
Occasions where you want something more formal than a side braid but less involved than a traditional halo. This works beautifully for photos because the crown effect automatically flatters from the front and side angles.
Pro tip: Spray your braids lightly with dry shampoo before pinning them together. This adds grip and helps the braids stay in place without sliding throughout the day.
6. The Twisted Half-Up
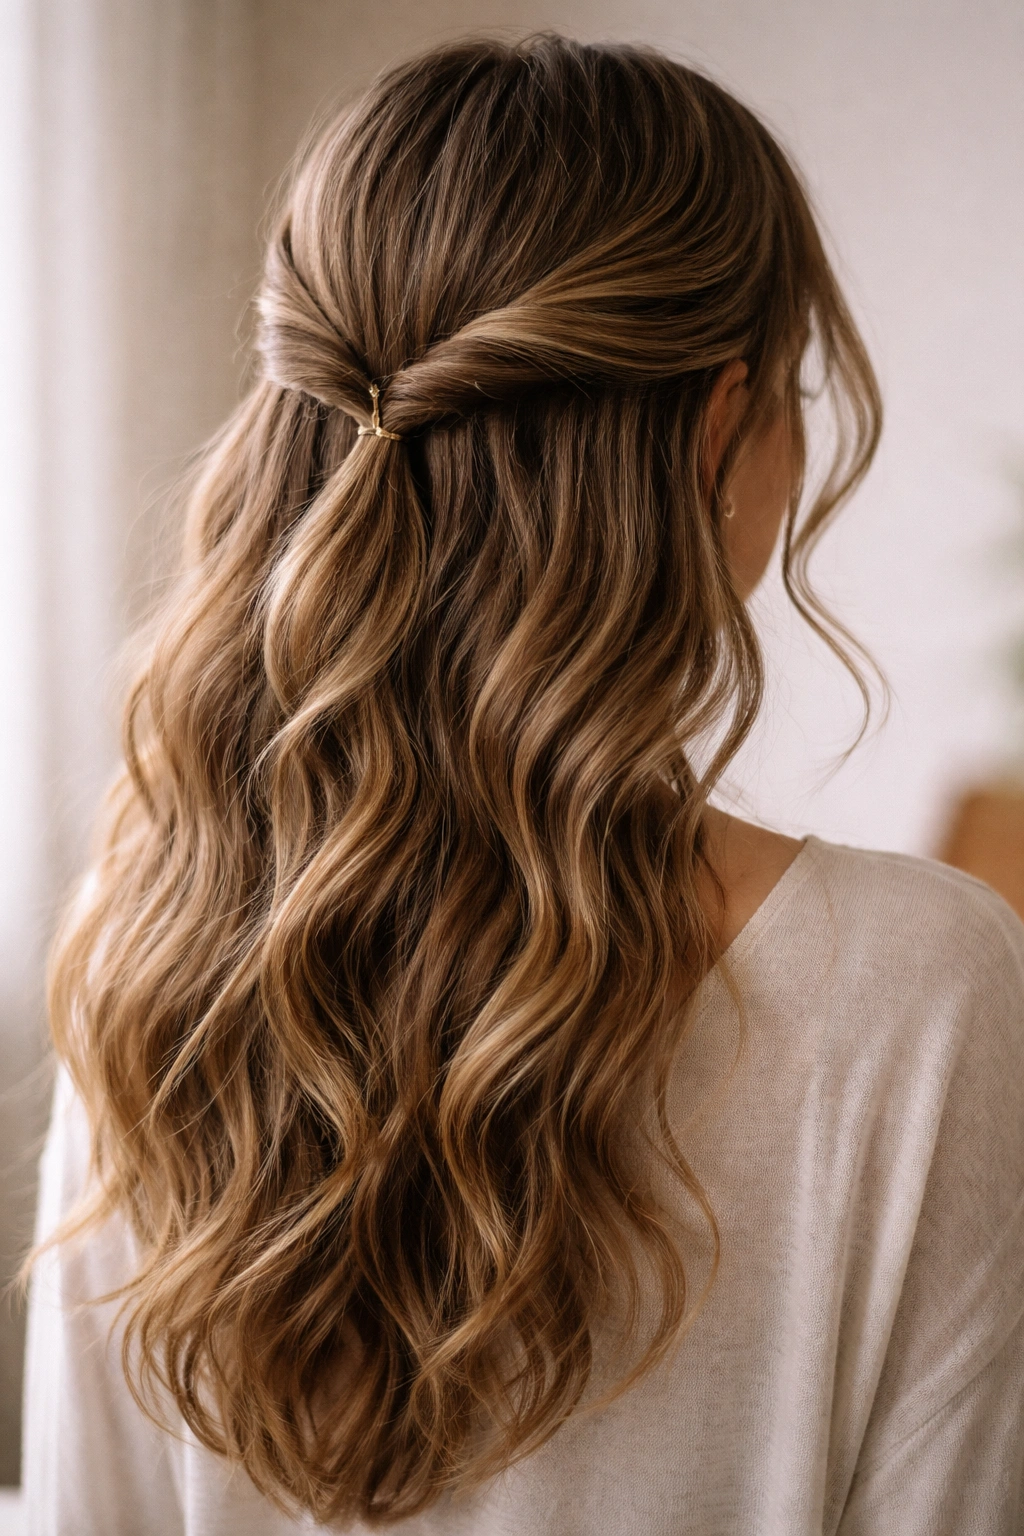
Sometimes the simplest approach works best, and a twisted half-up style is proof of that. There’s no actual braiding involved, just two twisted sections of hair secured together at the back. It’s elegant, it’s easy, and it looks incredible on waves.
Why It Works for Wavy Hair
Half-up styles let you show off your waves while pulling back enough hair to keep it from being overwhelming. Twists create texture that mimics your natural waves, so the overall look is cohesive. The beauty of twists is that they actually look better with some texture in your hair—perfectly straight hair can make a twist look a bit plain.
How to Style It
Section off a piece of hair on one side, starting at your temple and extending back to roughly your ear. Twist that section loosely (the looser the better with wavy hair) and hold it at the back center of your head. Repeat on the other side. Twist both sections together once, then secure with a small elastic or bobby pins. Leave face-framing pieces loose and gently tease out any tight twists to create that soft, lived-in look.
Best for
Days when you’re short on time but still want to look polished. This style works for both casual and slightly dressier occasions, depending on what you pair it with.
Pro tip: For extra volume, flip your head upside down for 30 seconds before doing your half-up. This creates natural texture that the twists will glide through more easily.
7. The Waterfall Braid
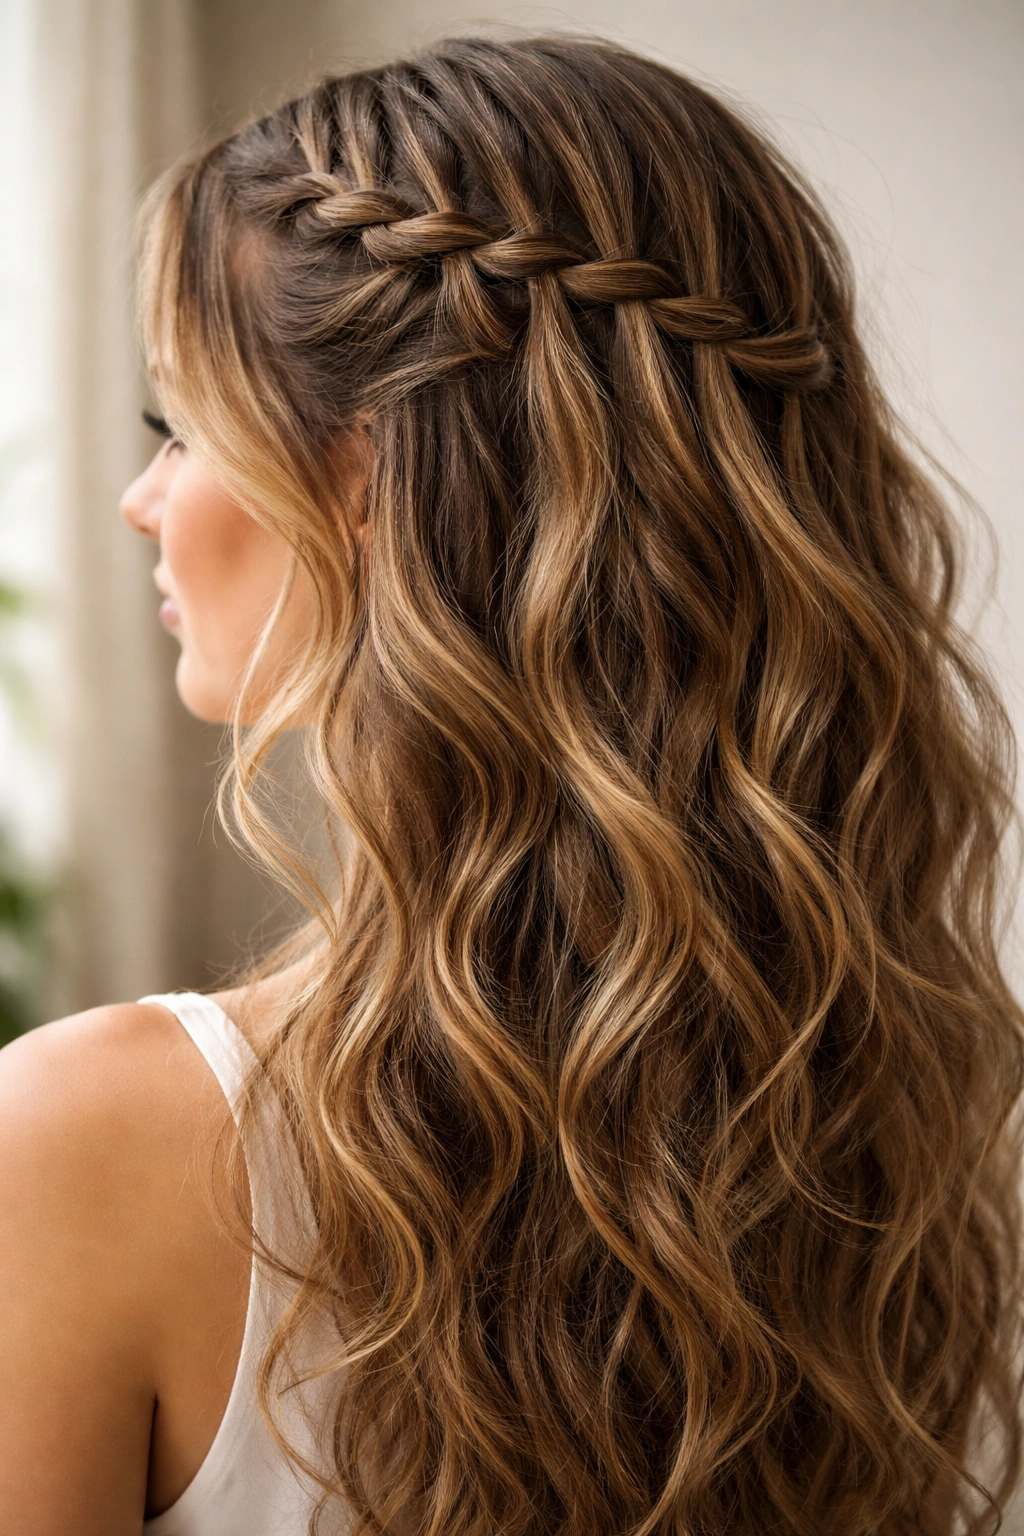
A waterfall braid has sections of hair that literally cascade down like falling water, which sounds intricate but is actually quite doable on wavy hair. The flowing sections complement your natural waves beautifully.
Why It Works for Wavy Hair
The falling sections of a waterfall braid mimic the way wavy hair naturally falls and moves. Your waves make those cascading sections look more intentional and textured. The braid itself holds beautifully in wavy hair because the texture provides natural grip.
How to Style It
Start at your temple on one side with a small three-strand braid section. As you braid, drop the bottom section of hair and replace it with a new section from above, creating a waterfall effect as you work across the back of your head. You’re essentially dropping a strand with each new section you add. Once you reach the opposite side, secure the braid with a small elastic. Gently pull sections apart to add volume, and let those waterfall strands fall naturally. They’ll frame your face beautifully.
Best for
Special occasions where you want something visibly intricate but not too formal. This braid works particularly well for events where you’ll be photographed from the side.
Pro tip: Use a fine-tooth comb to gently separate the cascading sections once you’ve finished braiding. This creates a fuller, softer waterfall effect that works better with wavy hair.
8. The Box Braid-Inspired Waves
While traditional box braids are protective styles best suited for textured hair, a looser, more romantic interpretation works beautifully for wavy hair. Think of it as chunky, textured sections that create dimension and visual interest.
Why It Works for Wavy Hair
This style celebrates the thickness and texture of waves rather than trying to smooth them into traditional braids. The chunky sections create visual movement that complements your wave pattern. It’s easier to create and maintain than actual box braids, and it’s less tension-heavy on the hair.
How to Style It
Divide your hair into 4-6 larger sections (depending on how much hair you have and the width you want). Start each section with a loose three-strand braid—don’t make these perfect; the more textured they look, the better. You can leave some waves in each section unbraided, creating this beautiful mixed-texture effect. Secure the ends with small elastics and gently pull the braids apart. You can pin some sections back or let them all hang down; both look gorgeous.
Best for
Days when you want a distinctive, intentional look that’s easier to maintain than traditional box braids but more involved than a simple three-strand braid.
Pro tip: This style actually improves throughout the day as the braids relax and waves settle. Do it the night before if you’re heading somewhere important.
9. The Double Dutch Braids
Two Dutch braids, one on each side, create a playful, youthful look that doesn’t feel at all juvenile when done in the right way. With wavy hair, double Dutch braids look romantic and effortless.
Why It Works for Wavy Hair
Two braids automatically create more dimension and texture than a single braid. With wavy hair, the braids catch light differently on each side, creating an interesting visual effect. The natural waves mean you don’t have to worry about the braids looking too tight or severe.
How to Style It
Create a center part from your forehead to the nape of your neck. Start a loose Dutch braid on one side, working from your hairline toward the back. Repeat on the other side. Both braids should end at roughly the same point at the back of your head. You can secure them separately with elastics, or tie them together. Gently pull sections of both braids to add texture and volume.
Best for
Casual days, outdoor activities, or any time you want something fun that doesn’t read as too formal. This works beautifully with a summer dress or casual jeans.
Pro tip: If you want your double braids to stay put all day, spray them lightly with flexible hold hairspray rather than a heavy hold product. This keeps them from looking crunchy while maintaining shape.
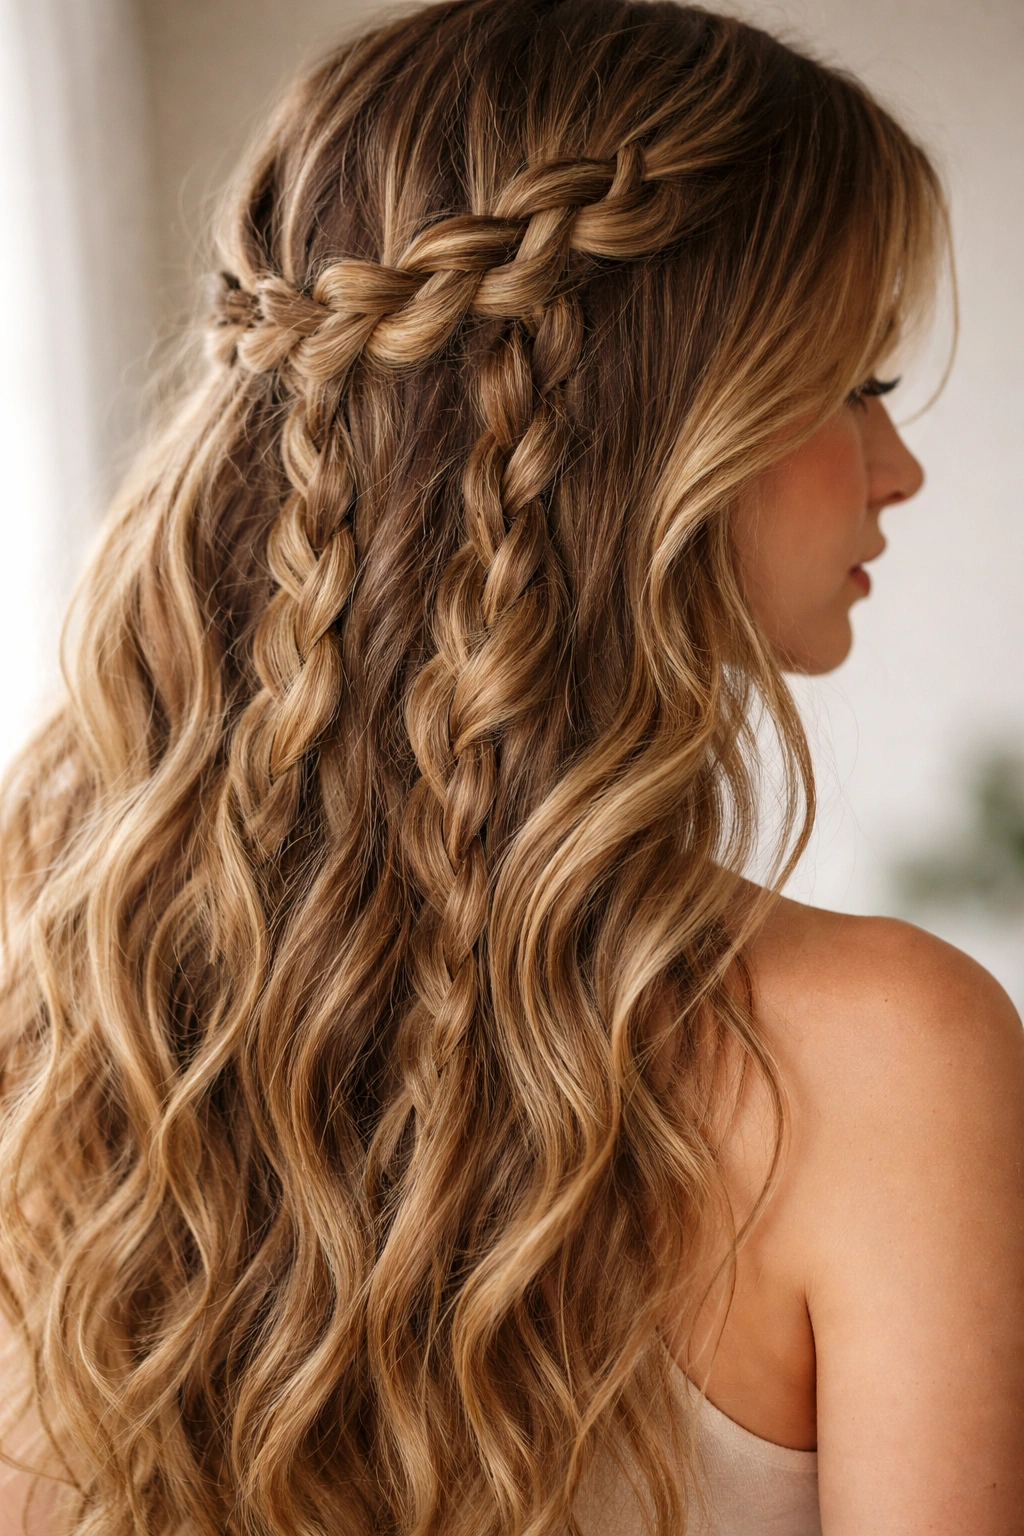
10. The Rope Braid
Rope braids look complex but are actually simpler than traditional three-strand braids. They’re two sections of hair twisted around each other, creating a sleek, elegant look that works surprisingly well with wavy hair.
Why It Works for Wavy Hair
Rope braids create a different kind of texture than traditional braids. The twist structure plays nicely with waves, creating visual interest without fighting your natural texture. Because rope braids are typically looser than three-strand braids, they work better with the softness of wavy hair.
How to Style It
Divide a section of hair into two equal parts. Twist one section clockwise, twist the other section clockwise, and then wrap the two twisted sections around each other (going counterclockwise). As you wrap, continuously add new hair to each section to create a braid effect. Secure at the bottom and gently pull the rope apart to create volume and texture.
Best for
Both casual and dressier occasions. A rope braid can look extremely polished or relaxed depending on how tightly you twist it and how much you pull it apart afterward.
Pro tip: Rope braids are easier to create if you start with slightly damp hair or hair that’s had some product applied. This gives your hair a bit more grip and makes the twisting motion smoother.
11. The Lace Braid
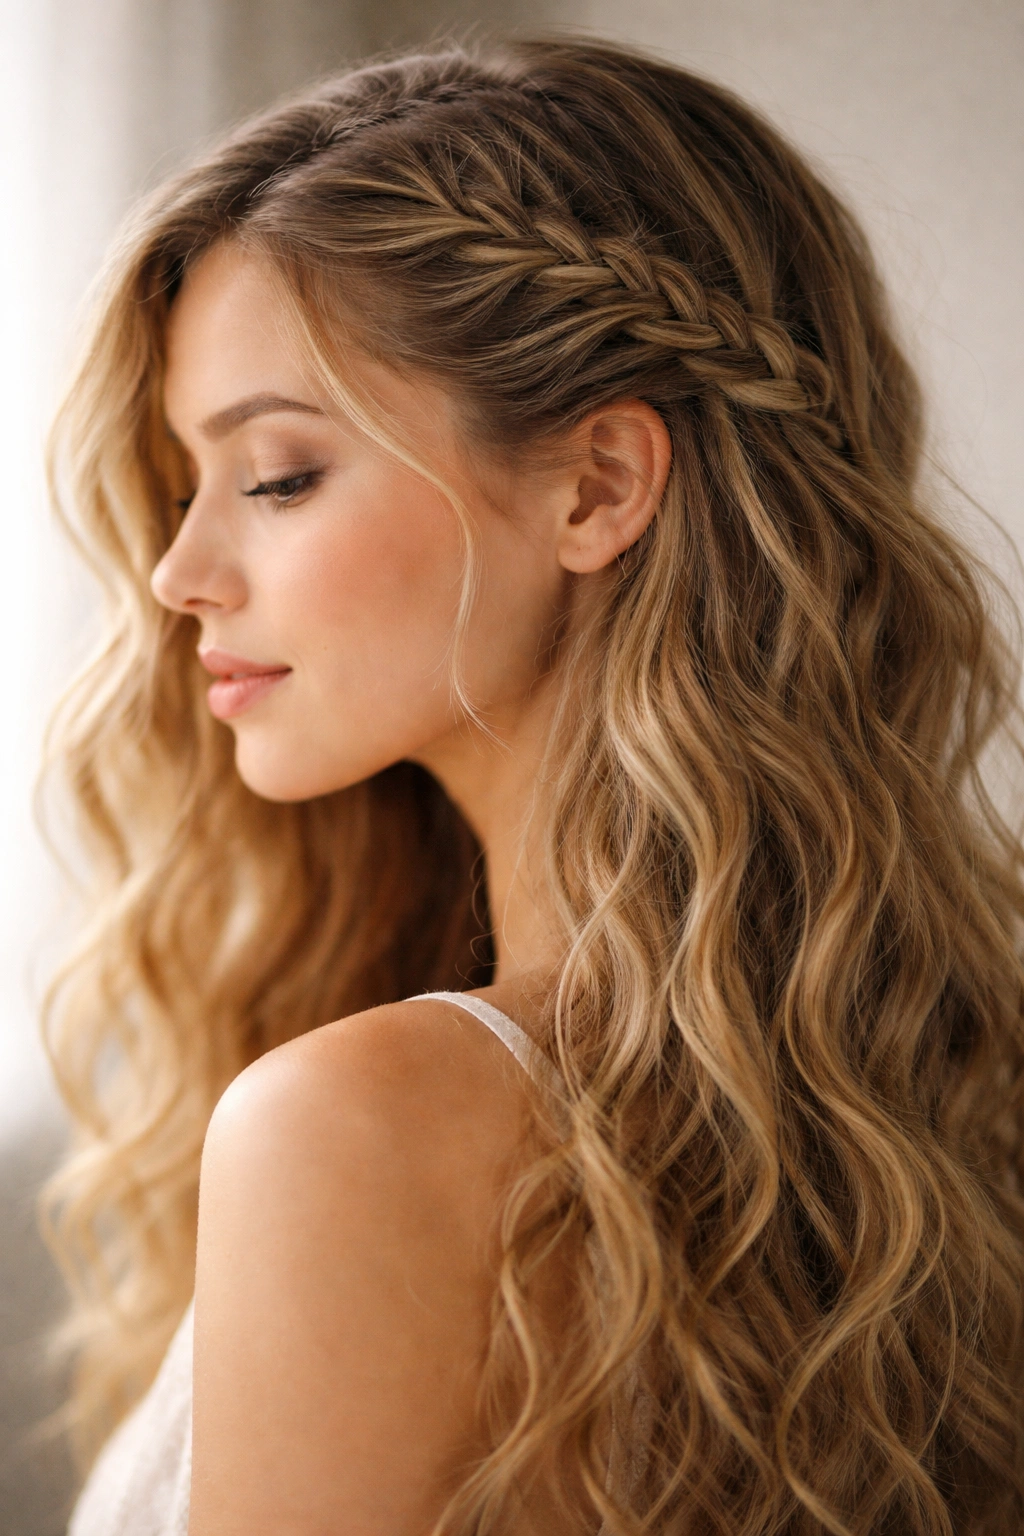
A lace braid (also called a French lace braid) is essentially a French braid where you’re only picking up hair from one side, creating this delicate, lacy effect along the edge of your head. It’s subtle, sophisticated, and looks stunning on wavy hair.
Why It Works for Wavy Hair
Lace braids don’t require tight tension because they’re anchored along only one side of your head. This means you can keep them soft and textured. The braid naturally falls in a way that complements wavy texture beautifully. It’s an excellent choice if you want your braids to look effortless.
How to Style It
Start at your temple or behind your ear, depending on which side you’re braiding. Begin with three strands of hair and start a traditional three-strand braid. As you braid, pick up new hair only from the outer side (the side toward your face), not from both sides like a traditional French braid. This creates a braid that edges your head. You can create one lace braid on each side or just one for asymmetry. Gently pull sections apart and allow wave pattern to show through.
Best for
Work settings where you want something polished but not too formal. Lace braids are also excellent for keeping hair somewhat controlled while still looking soft and pretty.
Pro tip: A lace braid is perfect for second-day or third-day wavy hair, when your waves have relaxed and your hair has developed more texture. The braid holds beautifully at this stage and looks more effortless.
12. The Braided Ponytail

A braided ponytail combines two classic styles, and the effect is greater than the sum of its parts. Instead of a simple elastic securing your hair, the elastic is concealed by a small braid, creating a polished, finished look.
Why It Works for Wavy Hair
The braid element adds visual interest that compensates for the simplicity of a ponytail. With wavy hair, the ponytail itself has inherent texture and movement, so the braid doesn’t need to be perfect—in fact, a slightly loose, textured braid looks better than a tight one.
How to Style It
Gather your hair into a ponytail at your preferred height (high, mid, or low). Secure it loosely with an elastic. Take a small section of hair from the ponytail itself and braid it loosely, then wrap it around the elastic and secure it with bobby pins. Gently pull the braid apart to add texture. You can also pull out a few face-framing pieces before securing the ponytail for extra softness.
Best for
Work days, casual outings, or any time you want a ponytail that looks more intentional than just pulling your hair back. This style elevates a simple ponytail without looking overdone.
Pro tip: Backcombing the hair in your ponytail before wrapping the braid around the elastic adds volume and creates a fuller, more textured look.
13. The Milkmaid Braid
A milkmaid braid wraps around your head like a crown, with the braids positioned closer to the hairline than a traditional halo. It’s romantic, distinctly pretty, and works beautifully with wavy hair.
Why It Works for Wavy Hair
Milkmaid braids sit in a position that frames your face softly without pulling too tightly. Your waves create natural texture that makes these braids look fuller and more interesting. The positioning works with your wave pattern rather than against it.
How to Style It
Create two braids that run from the nape of your neck upward (or work downward from the top—whichever is easier). Position them on opposite sides of your head and pin them up to wrap around your head like a crown. The braids should sit closer to your scalp and hairline than a halo braid, creating a more enclosed frame around your face. Gently pull sections apart for a softer look.
Best for
Romantic occasions, garden parties, or any event where you want to look intentionally styled and pretty. This braid reads as more put-together than a halo because of its specific positioning.
Pro tip: This style is easier to execute if you section your hair into two halves with a center part, then braid each half, rather than trying to create a wraparound braid. The results look the same but feel less complicated to execute.
14. The Bohemian Messy Braid
This is less of a specific braiding technique and more of a vibe—it’s about creating a braid (or multiple braids) that looks deliberately undone and textured. For wavy hair, this might be the most natural braiding style of all.
Why It Works for Wavy Hair
A bohemian messy braid actually celebrates the supposed “imperfections” of braiding waves. The looseness, the flyaways, the lack of geometric precision—all of that is exactly the point. This is the style where your wavy hair’s natural texture is a feature, not something to control.
How to Style It
Start with loose waves. Create a loose three-strand braid (or multiple braids—a side braid and a waterfall, a double braid, whatever feels right). Deliberately leave sections undone. Gently pull and twist sections of the braid to add volume and texture. Leave lots of face-framing pieces. Mist lightly with sea salt spray or texture spray. The key is that nothing should look controlled or perfect; everything should look like it happened naturally.
Best for
Beach days, casual outings, festivals, or any occasion where you want to look effortlessly beautiful rather than meticulously styled.
Pro tip: Do this style on waves that are at least 24 hours old. Fresh waves from a wash can look a bit too uniform for this bohemian vibe; older waves have relaxed into more varied texture.
15. The Braided Bun

A braided bun is a braid that’s been coiled and pinned at the base of your head or wherever you secure it. For wavy hair, the braid adds texture that prevents the bun from looking too neat or severe.
Why It Works for Wavy Hair
The braid structure creates visual interest that a regular bun doesn’t have. With wavy hair, the braid is automatically textured, so even a somewhat tight bun reads as soft and pretty rather than severe. The waves visible in and around the bun add dimension.
How to Style It
Create a braid that runs down the back of your head or along one side. Once you’ve finished braiding, coil the braided section into a bun shape and secure it with bobby pins. Gently pull sections of the braid to add volume. Leave face-framing pieces out if desired. You can use one braid coiled into a bun, or two braids coiled together into one larger bun.
Best for
Work, formal events, or any time you want your hair completely off your face but still want to maintain a soft, pretty look.
Pro tip: The messier and more textured you make this bun, the better it looks. Don’t worry about stray strands; they’re part of the appeal.
16. The Crown Reverse Braid
A reverse (or inside-out) braid done in a circle around the top of your head creates a crown effect that’s similar to a halo but with more defined texture. It’s striking and complex-looking but easier than it sounds.
Why It Works for Wavy Hair
Reverse braids are naturally more textured than regular braids because they’re done with an under-over motion. This texture pairs perfectly with wavy hair—it creates this seamless blend where the braid and your natural waves almost merge visually.
How to Style It
Start at one ear and create a reverse Dutch braid that runs across the back of your head to the opposite ear. The braid should sit on top of your head, creating a crown effect. Secure the end with pins or a small elastic tucked into the rest of your hair. Gently pull sections of the braid to add volume and soften the appearance. The more you pull it apart, the more it blends with your waves.
Best for
Special occasions, weddings, or any event where you want an impressive-looking style that actually isn’t as technically complicated as it appears.
Pro tip: This style is much easier if you use a bobby pin to anchor your starting point before you begin braiding. This keeps the braid from shifting as you work.
17. The Side-Swept Braided Half-Up
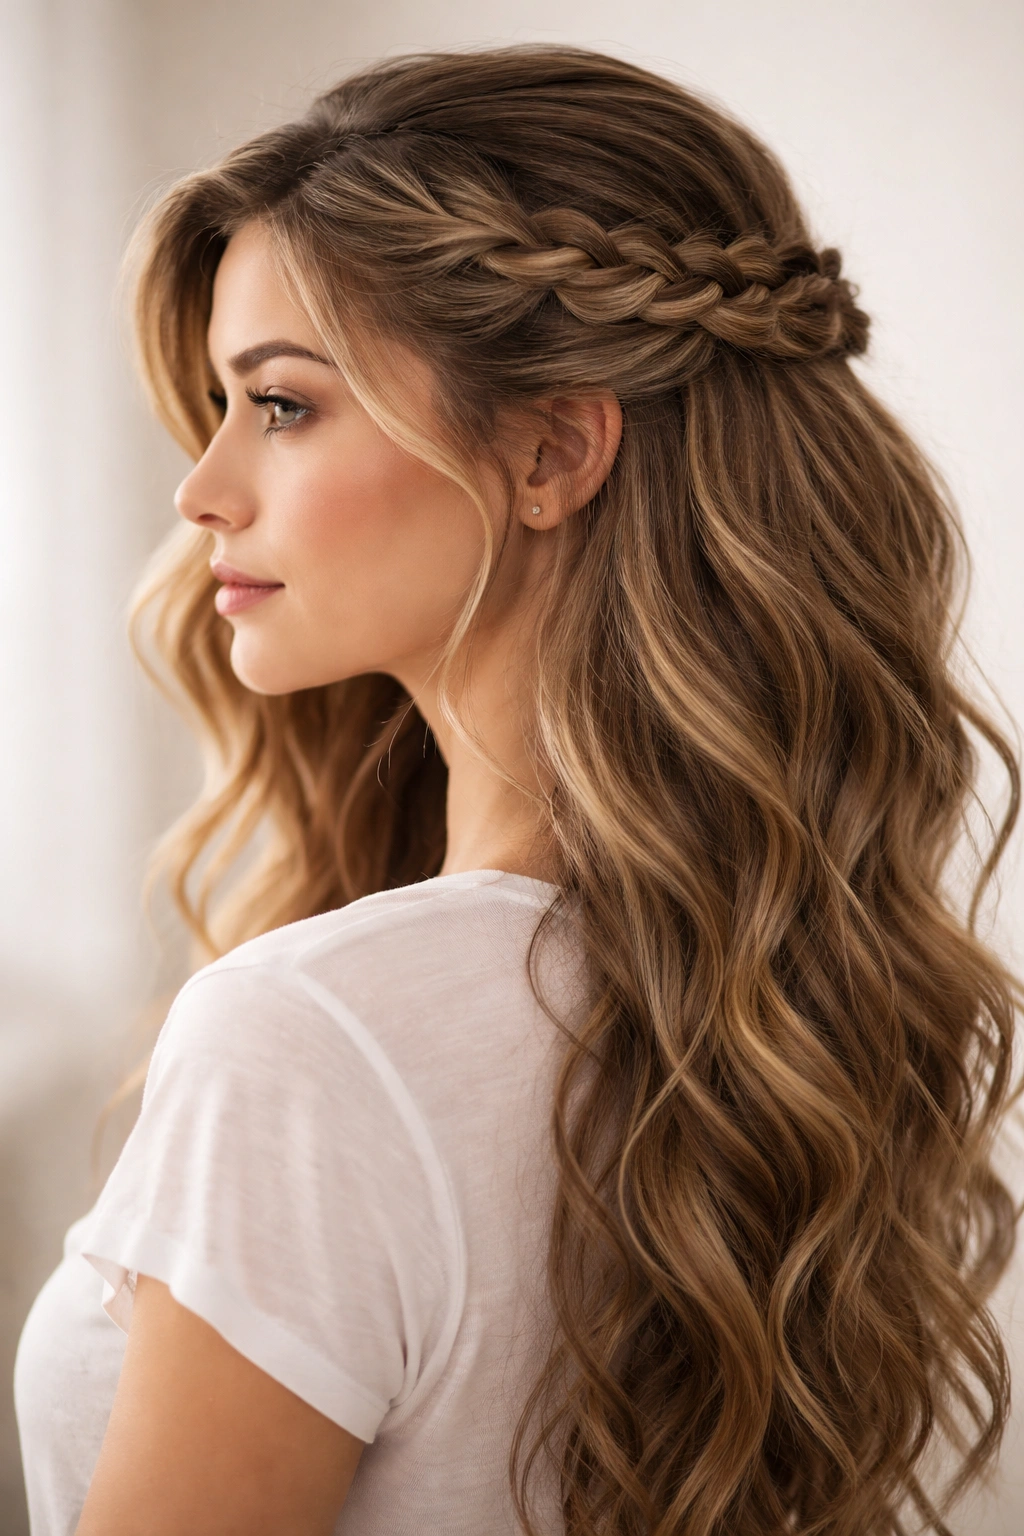
This is a half-up style where the top portion is braided on one side and swept to the opposite side of your head before being pinned. It’s asymmetrical, romantic, and works beautifully with wavy hair.
Why It Works for Wavy Hair
The side-swept effect creates a flattering frame for your face that works with your natural waves rather than against them. The braid adds enough visual interest that you don’t need to pull your hair too tightly to make the style look intentional. Wave texture automatically adds to the romantic feel.
How to Style It
Create a deep side part. Starting from the deeper side, take a section of hair from behind your ear and create a loose braid. Once you’ve braided 3-4 inches, start incorporating hair from the crown area into your braid as you continue braiding. Work the braid toward the opposite side of your head (the side with the shallower part). Secure the end with a small elastic or bobby pins on that side. Gently pull the braid apart and allow some pieces to frame your face.
Best for
Dates, dinners out, or any time you want to look effortlessly romantic without seeming overdressed.
Pro tip: This style is much easier to execute on second-day waves. Your hair will be more manageable and will hold the braid shape better than freshly washed hair.
18. The Twisted Crown with Braid Accent
This final style combines twists and a small accent braid for a look that’s sophisticated and complex-seeming but actually quite manageable. It’s the perfect style for wavy hair because the texture supports every element.
Why It Works for Wavy Hair
The combination of twists and a small braid creates lots of visual texture without requiring your hair to be super long or extremely thick. Wavy hair naturally supports both twists and braids, so everything holds beautifully without excessive pinning. The result is romantic, pretty, and distinctly your own.
How to Style It
Create two twists from your temples toward the back of your head, as though you were doing a half-up style. At the back center where these twists meet, anchor them with bobby pins. Now, take a small section of hair from the crown area and create a small braid that runs down the center of your head, either above or below the twists. Secure this braid at the back with bobby pins or tie it to your twists. Gently pull all elements to add volume and texture. Leave face-framing pieces loose.
Best for
Almost any occasion. This style is casual enough for daily wear but put-together enough for special events.
Pro tip: Add a small decorative hair clip or pin where your twists and braid meet at the back. This anchors everything visually and adds an intentional, finished touch to the style.
Final Thoughts
Braiding wavy hair is genuinely easier than braiding straight hair once you understand how to work with your natural texture instead of against it. Your waves provide grip that keeps braids secure without requiring tight tension. They create inherent dimension that makes even simple three-strand braids look interesting and intentional.
The key to beautiful braids on wavy hair is embracing the softness and texture rather than fighting it. Loose, gently pulled-apart braids always look better on waves than tight, geometric ones. Don’t be afraid of flyaways or strands that aren’t perfectly placed—they’re part of what makes wavy hair braids look romantic and effortless.
Start with whatever style appeals to you most, and don’t worry about getting it perfect on the first try. Braiding is a skill that improves with practice, and your wavy hair is actually the most forgiving texture to practice on. Each time you create a braid, you’ll develop a better sense of how much texture to add, how loosely to work, and which styles work best with your particular wave pattern. Give yourself permission to experiment, embrace the texture you were born with, and enjoy the process of creating styles that feel authentically yours.