Curly hair gives bubble braid ponytails a head start. The texture does half the styling for you, which is why these looks can feel playful instead of stiff.
That’s the real charm of bubble braid ponytails for curly hair: the style borrows the round, segmented shape of a bubble braid, then lets curls keep their own personality. You get height, rhythm, and movement without flattening everything into a sleek shell. When the bubbles are spaced well, the whole thing looks fuller than a plain ponytail and far less fussy than a tight braid.
The trick is tension. Too loose, and the bubbles collapse into random puffs. Too tight, and the roots look stressed while the curls lose the thing that makes them worth wearing.
A good version starts with the curl pattern you already have, not against it. Tight coils, loose ringlets, stretched curls, day-three frizz—all of them can work. They just ask for different spacing, different elastics, and a little honesty about how much structure your hair wants that day.
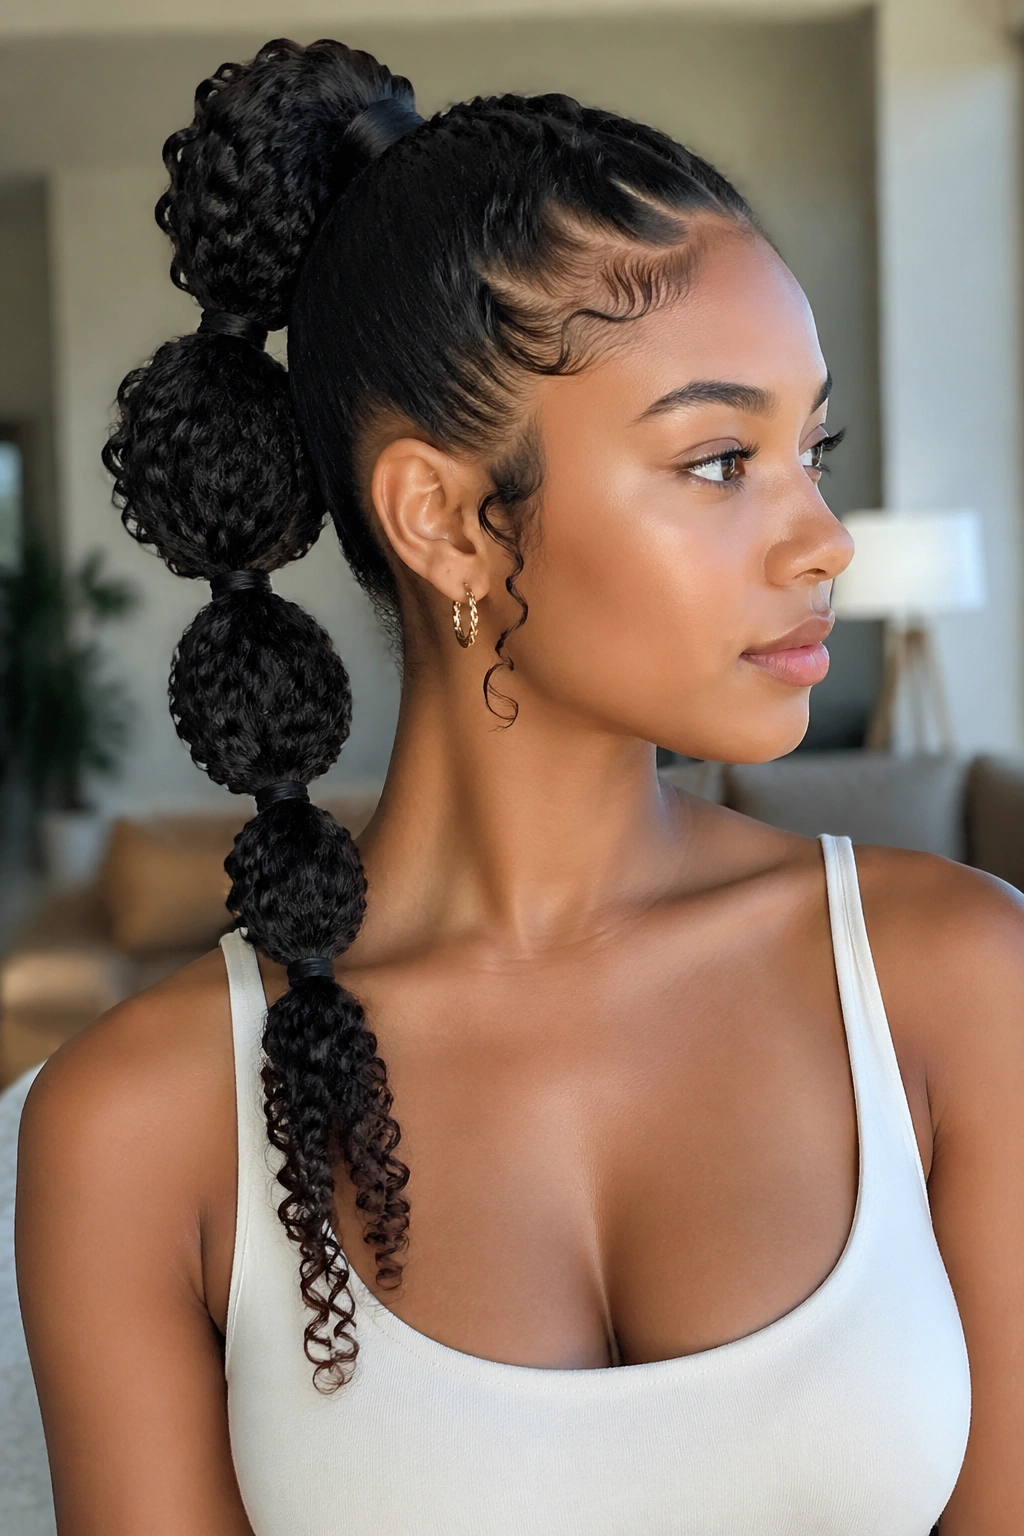
1. High Crown Bubble Ponytail on Wash-Day Curls
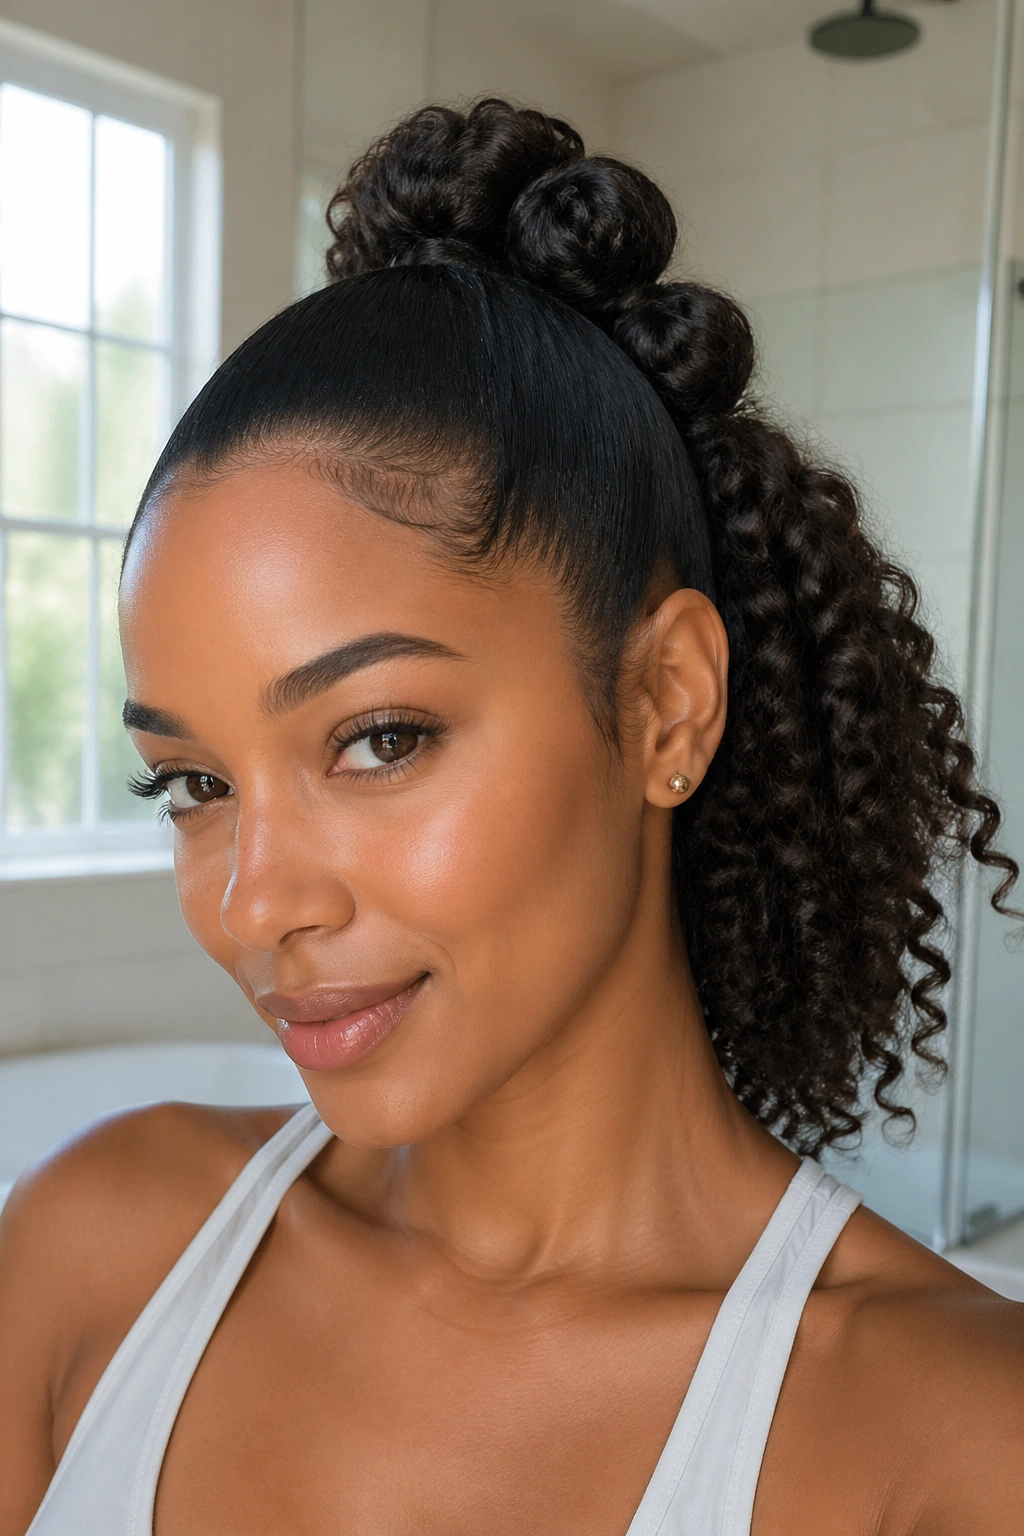
Wash-day curls love this style because they already have lift at the roots and clean definition through the lengths. A high crown bubble ponytail uses that freshness instead of hiding it. Keep the top section smooth enough to shape, but do not press the curls flat; you want volume at the crown, not a helmet.
Why it works on fresh curls
The first bubble sits high, so the silhouette starts strong right away. After that, each section can be puffed out with your fingers until it looks round and even. On curly hair, that shape happens fast, which is half the fun.
- Use 4 to 6 small elastics for medium-length hair.
- Start with a gelled or mousse-smoothed crown.
- Leave the ends curly for a softer finish.
- Tug each bubble outward by about 1/2 inch on each side.
Tiny tip: place the first elastic higher than you think. Curly hair drops as it dries.
2. Low Nape Bubble Ponytail With Face-Framing Pieces
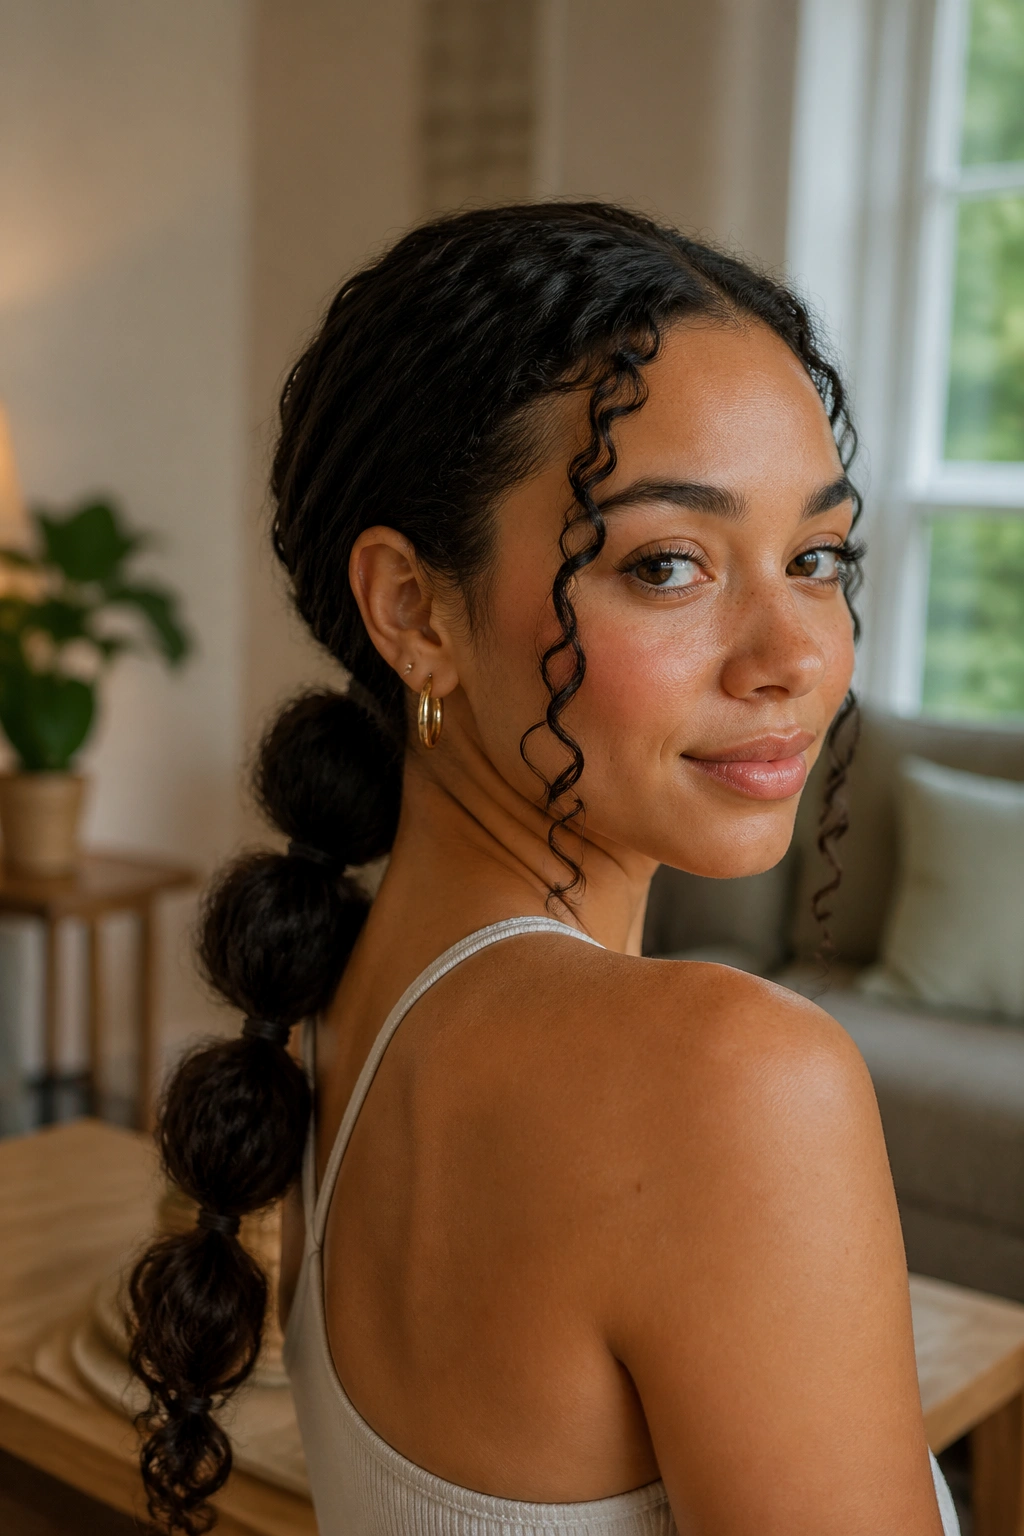
A low bubble ponytail feels calmer, softer, and a little more grown-up than the high version. It sits at the base of the neck, which lets the bubbles fan out without fighting the hairline. Leave a few curls out around the face, and the whole look stops feeling overly done.
This is the style I reach for when I want the structure of a ponytail but not the bounce of something too perky. It works especially well if your curl pattern is loose enough that the bubbles stack neatly. If your hair is dense, the low placement keeps the weight under control.
The face-framing pieces matter more than people think. They break up the shape, add movement, and keep the ponytail from looking like one solid block. A middle part makes it cleaner; a side part makes it feel a little less formal.
3. Side-Swept Bubble Ponytail for Thick Curls
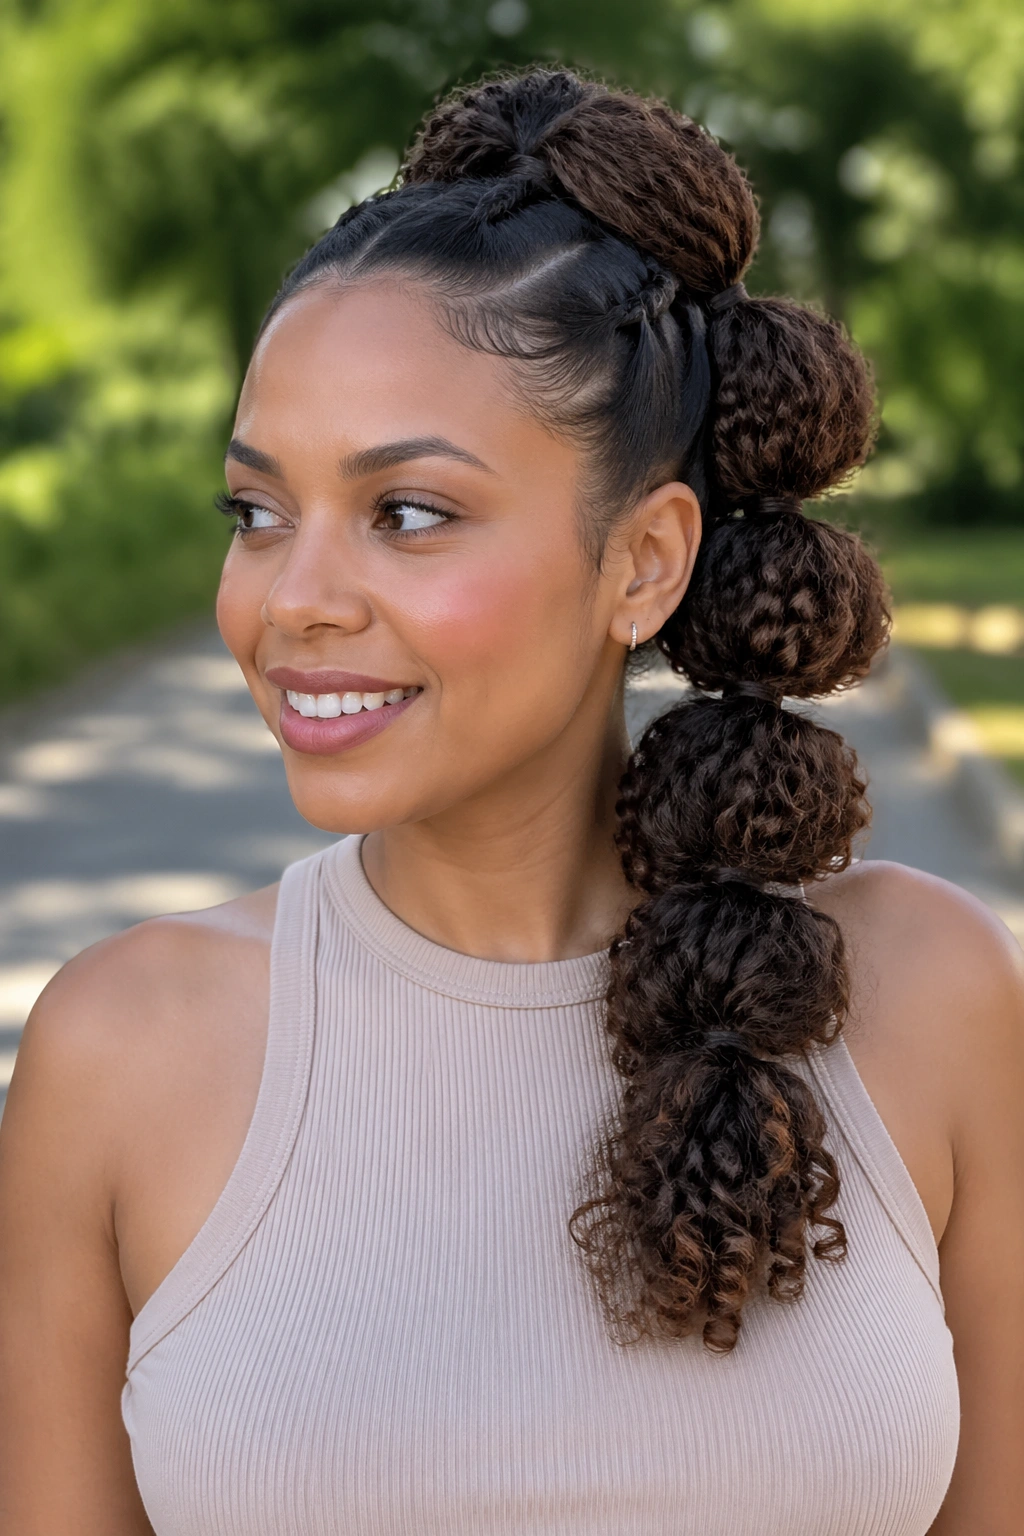
Thick curls can swallow a plain ponytail whole. A side-swept bubble version fixes that by moving the weight off center, so the bubbles show instead of disappearing into the mass of hair. The diagonal line also gives the style a little drama without asking for extra work.
What makes it different
The side sweep creates a natural arc from crown to shoulder. That arc helps each bubble read as its own section, even when the curls are large and full. It’s a smart move for anyone whose hair tends to puff out in every direction the minute it’s tied back.
How to shape it
Use a brush only on the top layer if you want a cleaner finish. Then secure the ponytail low and off to one side before adding elastics down the length. A little curl cream on the loose pieces keeps the ends from looking dry against the smoother top.
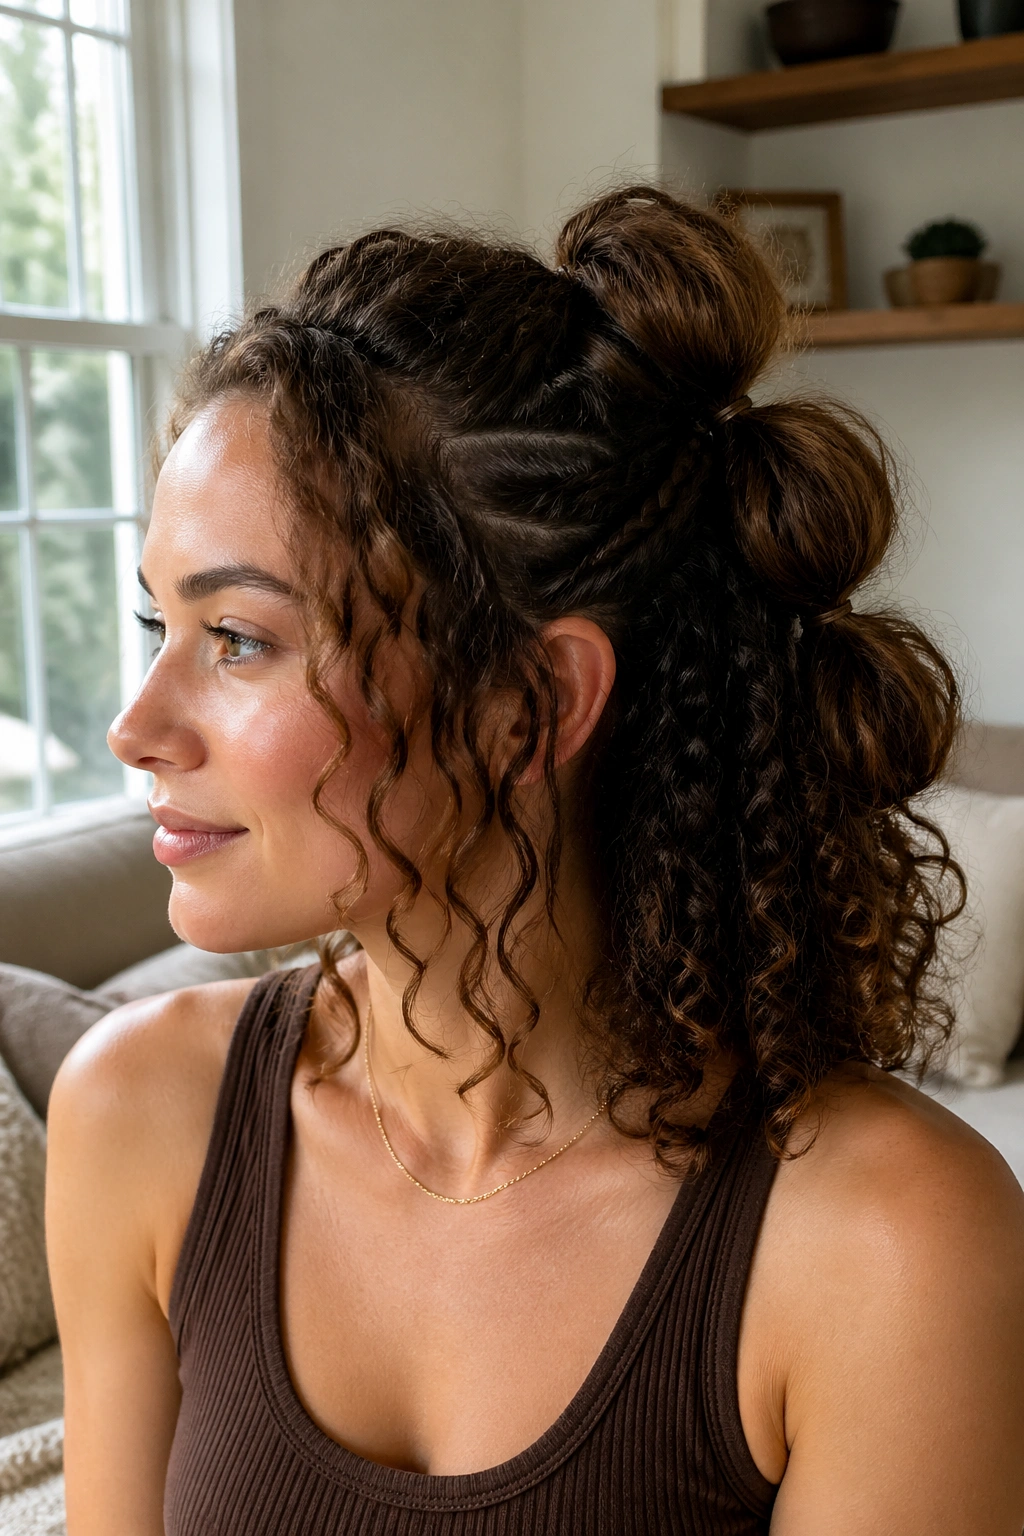
4. Half-Up Bubble Ponytail for Loose Ringlets
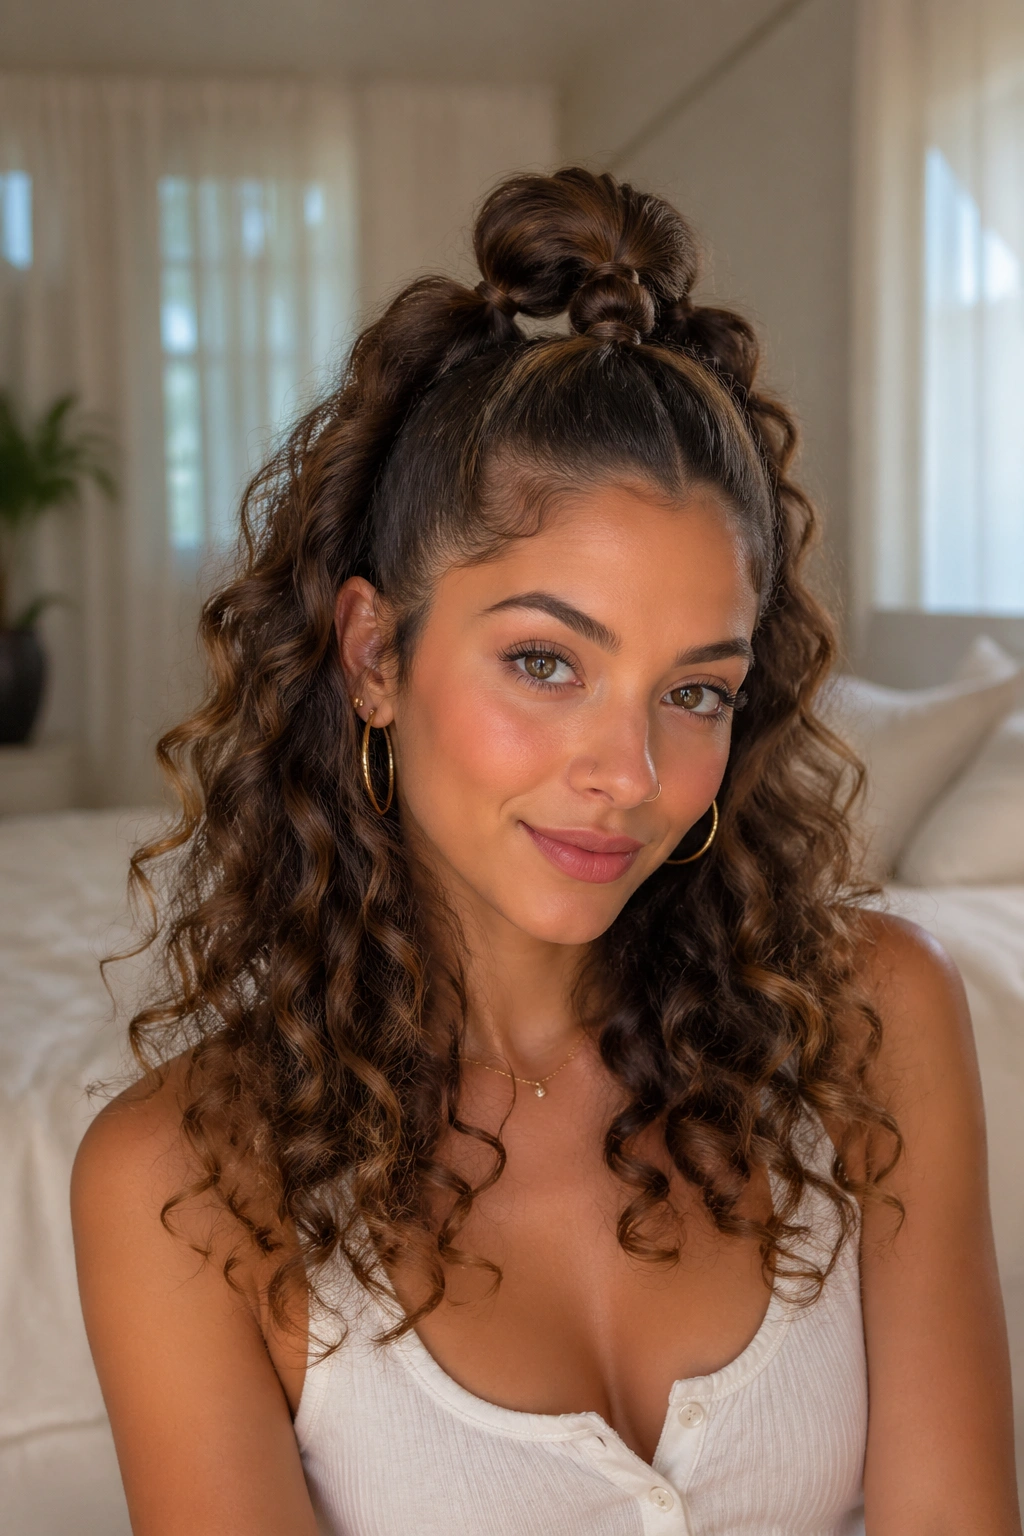
Half-up styles and ringlets get along better than people expect. The top section gives you the bubble chain, while the bottom curls keep the look soft and full. That mix is useful when you want your hair out of your face but do not want to sacrifice the shape of your curls.
The half-up bubble ponytail is also forgiving. If the crown gets a little frizzy, the lower curls balance it out. If the lower section is flatter than usual, the bubbles bring the energy back up top.
One thing to watch: keep the half-up section wide enough to hold a few curls from each side of the head. If you take too little hair, the ponytail can look skimpy. If you take too much, the lower half loses its best volume.
5. Bubble Braid Ponytail With a Braided Base
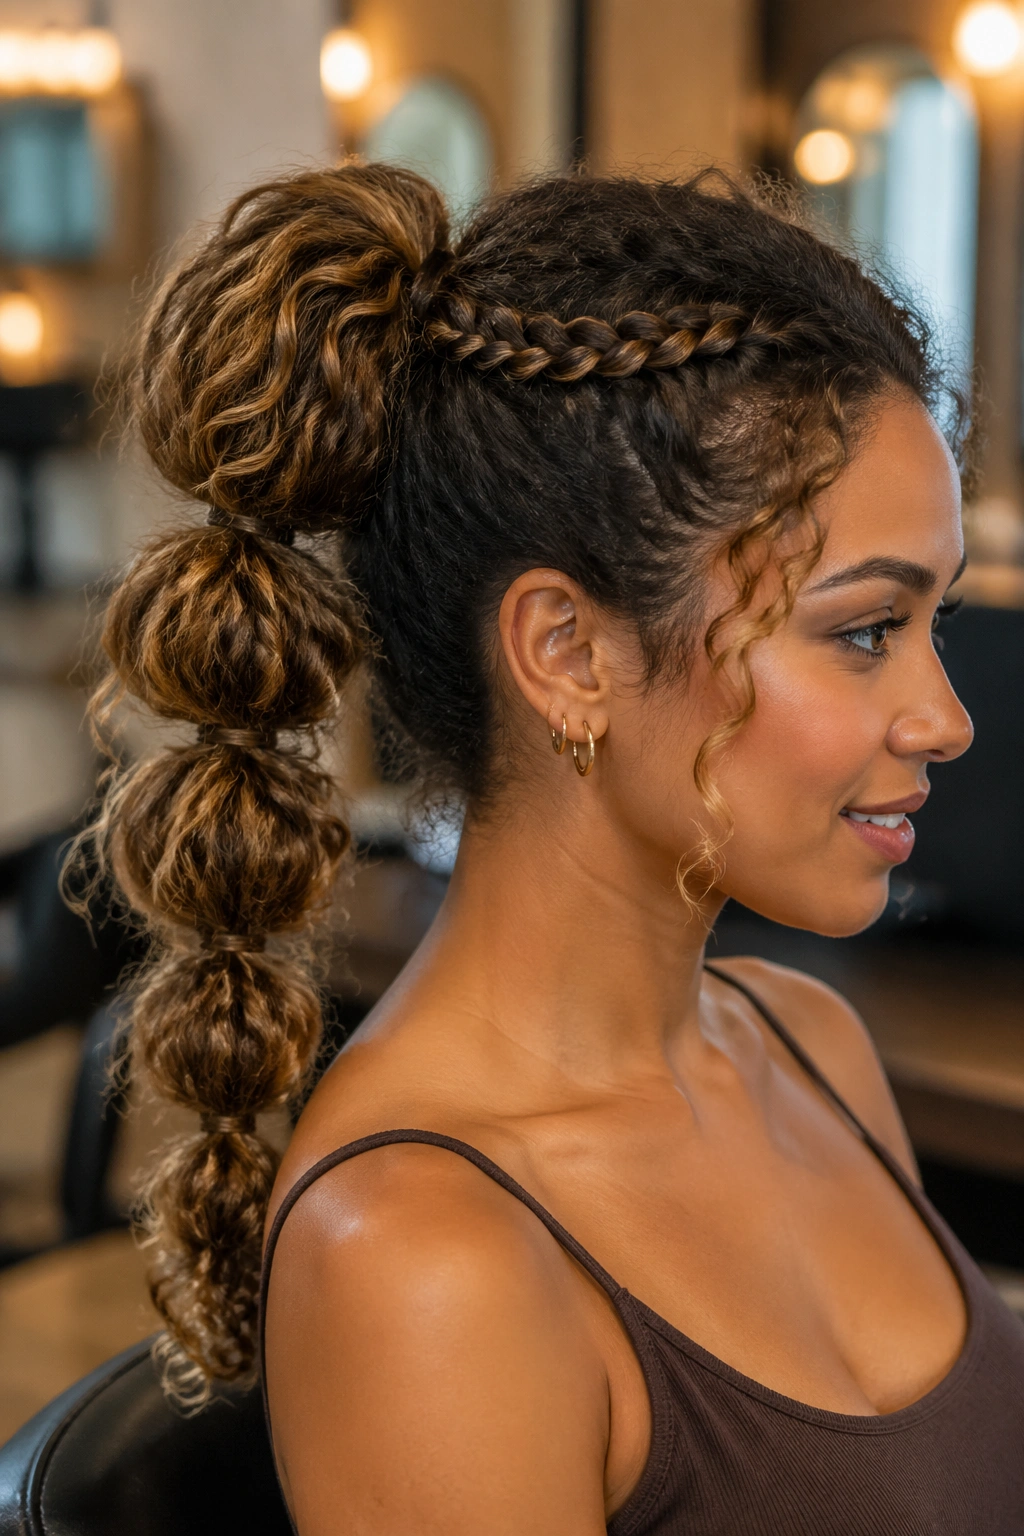
A braided base gives the style more grip, which is helpful when your curls are silky, layered, or prone to slipping. Start with a small braid at the crown or along the top half of the ponytail, then turn the rest into bubbles. The braid acts like a visual anchor.
That little braid changes the mood right away. Plain bubble sections can feel airy; a braided base adds texture and makes the whole style look more deliberate. It’s one of those small moves that pays off fast.
The best part
- Works well with medium to long curly hair
- Keeps the front section from puffing out too early
- Helps elastic bands stay put on slippery textures
- Lets you mix braid detail with bubble volume
Good rule: braid only the top section. If you over-braid the whole thing, you lose the bubble effect.
6. Bubble Ponytail on Stretched Curly Hair
Stretched curls make bubble spacing easier to control. When the hair has less shrinkage, you can decide exactly where each bubble lands instead of letting the pattern collapse on its own. That is useful for tighter curls and coils, where a long ponytail can shrink by several inches once it dries.
This version looks cleaner than a fully natural puffed ponytail. It also shows off length in a way that a fully shrunken style cannot. A gentle blow-dry on low heat, banding overnight, or a quick twist-stretch all work if you want the hair elongated without straightening it.
The key is not to stretch so hard that the curl pattern disappears. A little spring is still the goal. You want shape, not limpness.
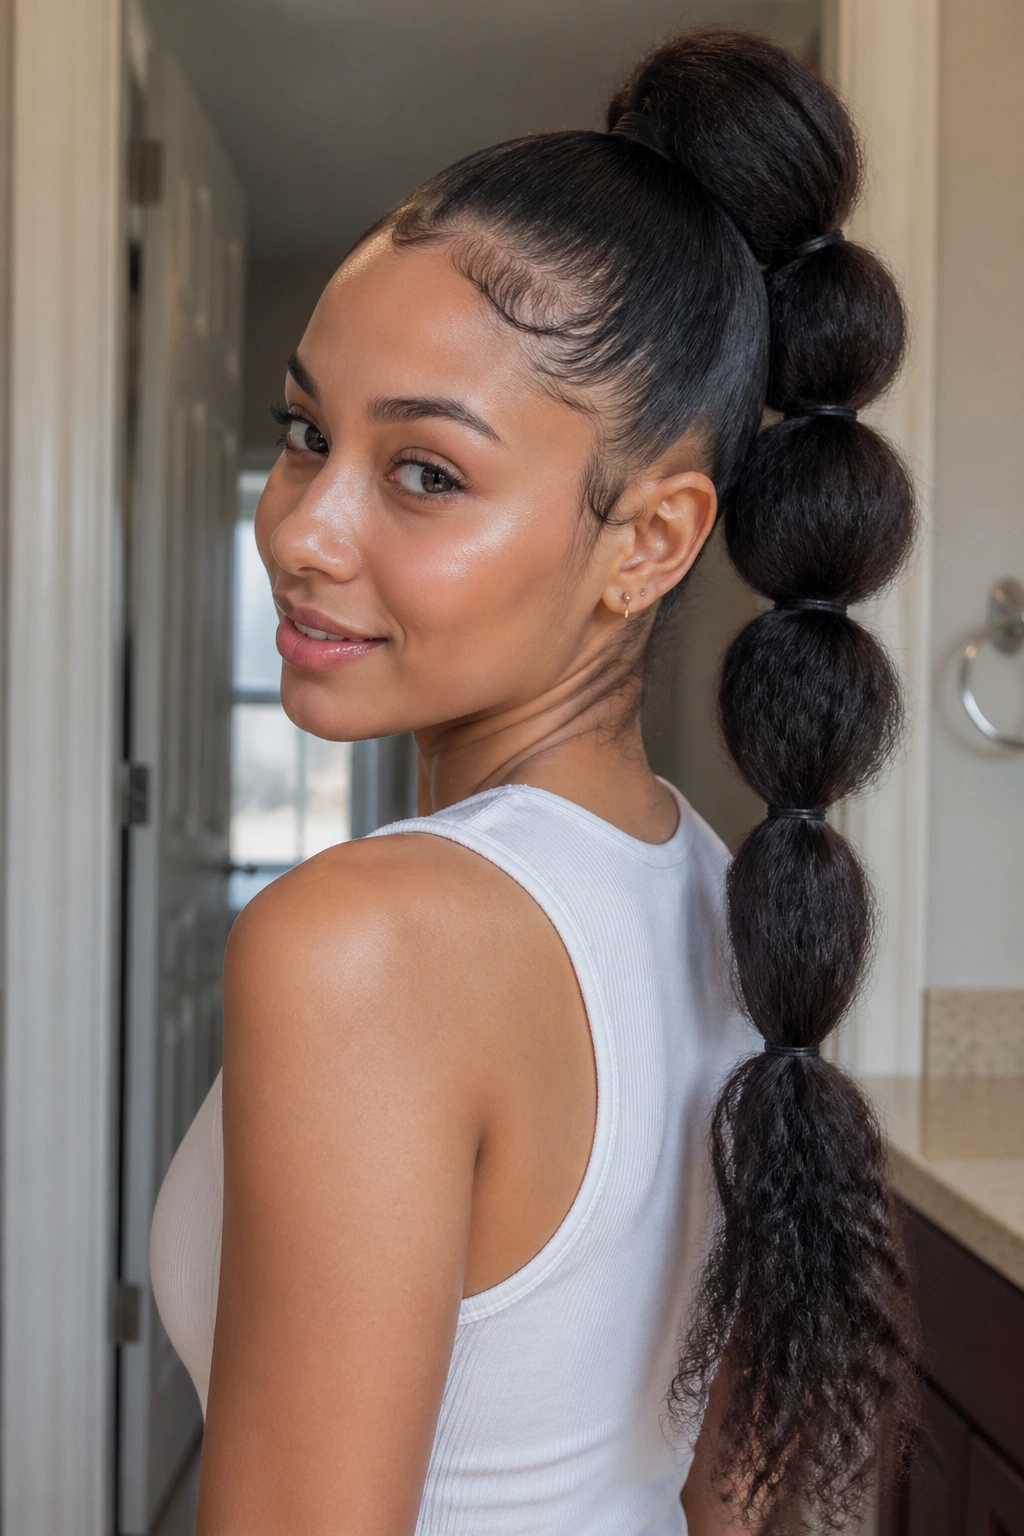
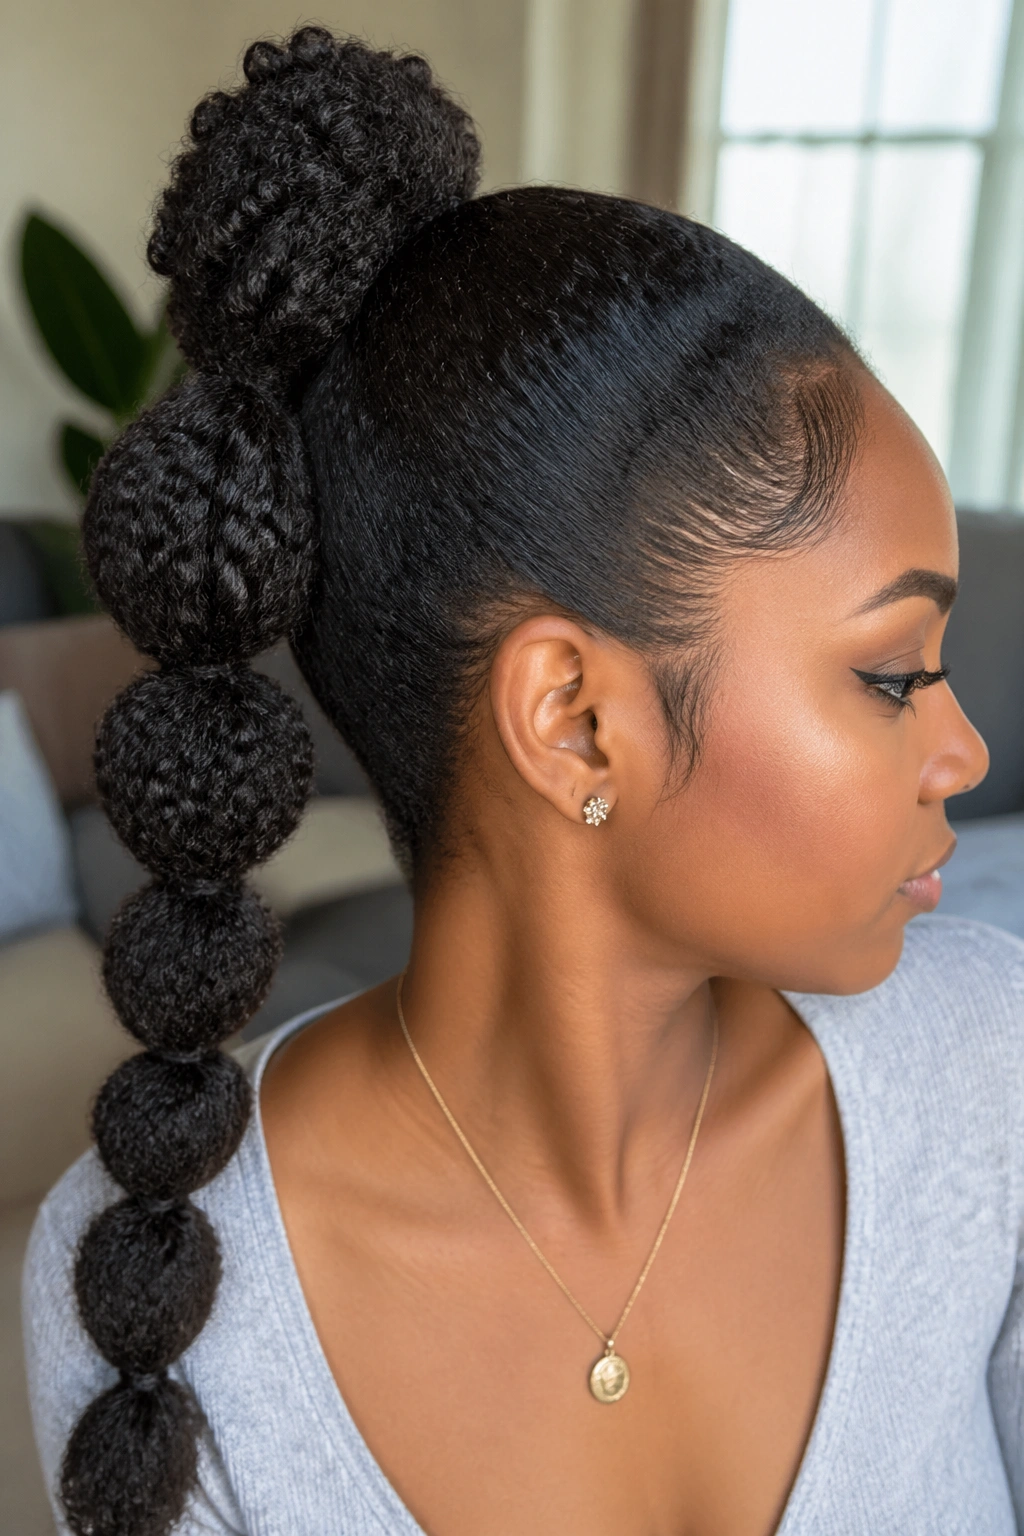
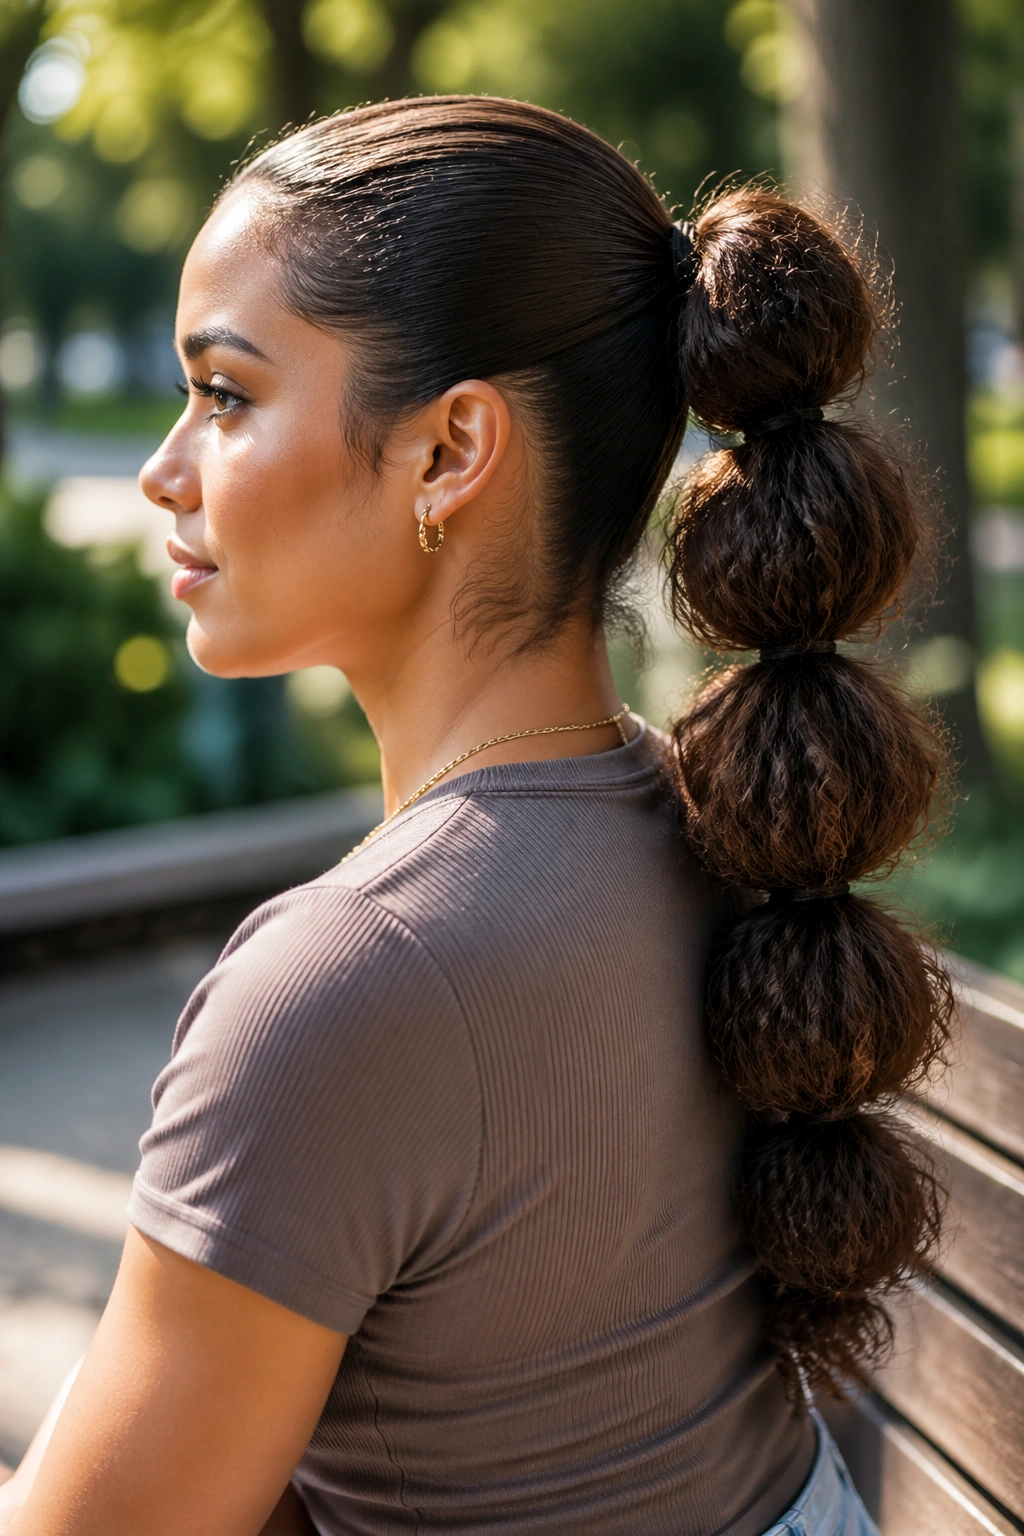
7. Bubble Ponytail With a Sleek Front and Puffy Bubbles
A sleek front with fluffy bubbles is a strong contrast, and that contrast is what makes the style read from across the room. Smooth the hairline, tame the part, and keep the ponytail itself full. The difference between the two zones gives the look a sharper edge.
Why the contrast matters
Curly hair does a nice job of softening a polished front, which keeps the style from looking severe. At the same time, the bubbles keep the ponytail from sinking into the scalp. That balance is useful for events, photos, or any day you want your hair to look a little more intentional.
A soft brush, a light gel, and a little patience at the front go a long way. After that, stop fussing. The bubbles should stay round and touchable, not lacquered into place.
8. Double Bubble Ponytails for Shorter Curls
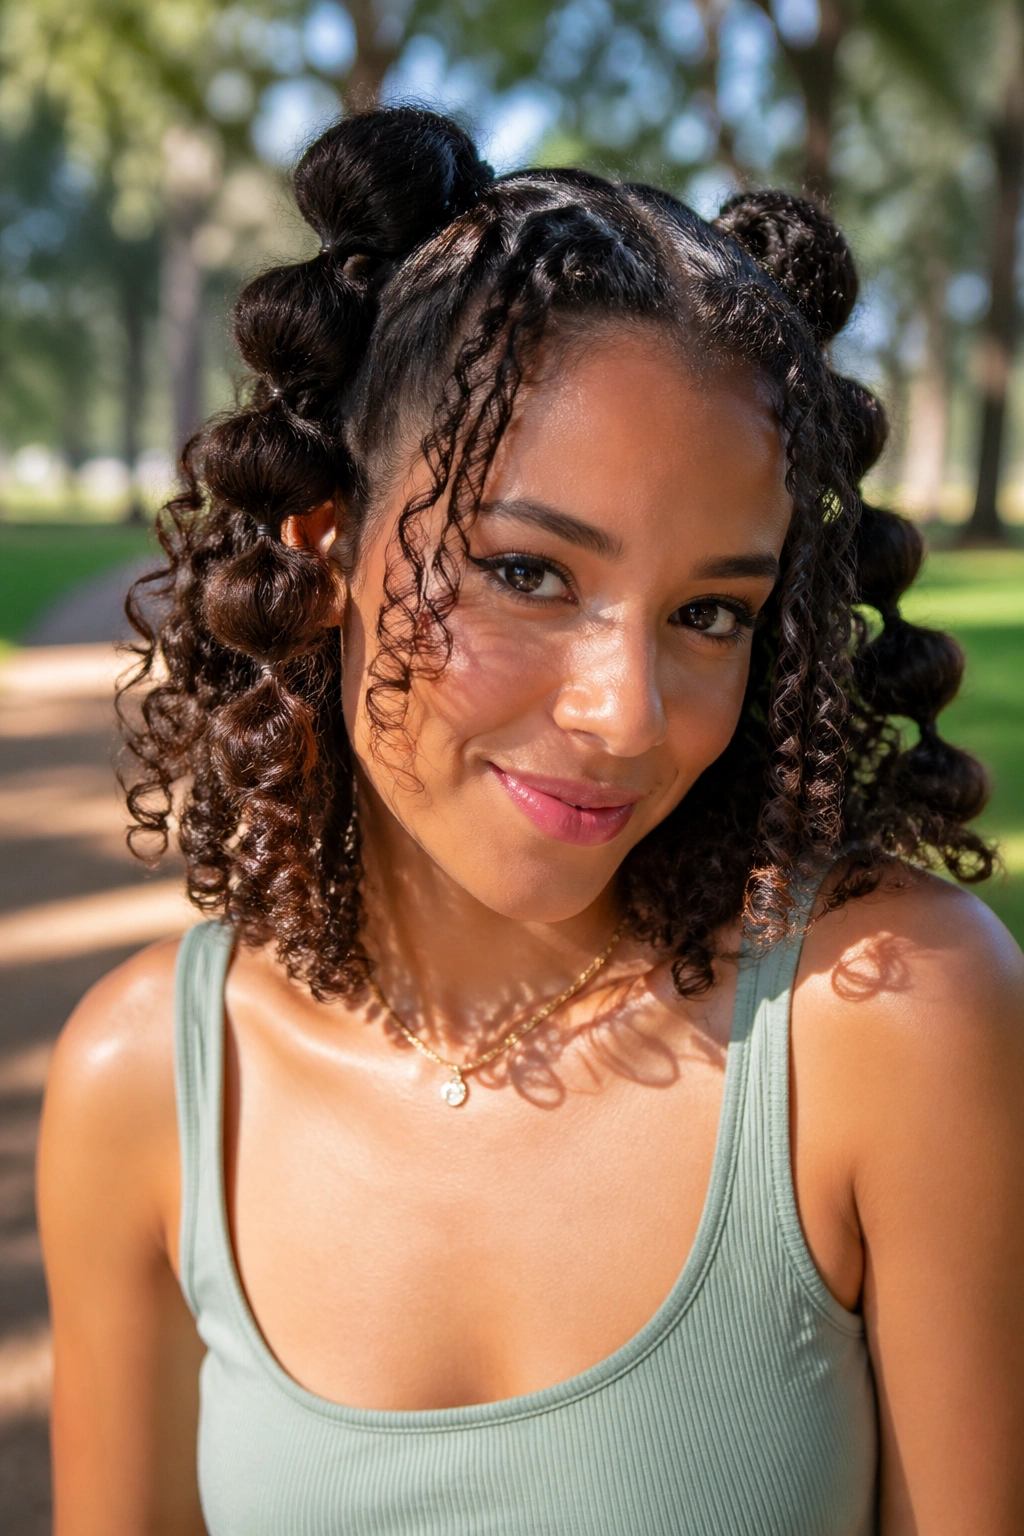
Shorter curls can feel awkward in a single long bubble chain. Two smaller bubble ponytails solve that neatly. They can sit side by side, or one can sit slightly higher than the other for a stacked effect that looks playful instead of childish.
This is a good move for shoulder-length hair, because it gives the illusion of more design without demanding more length than you have. The style also spreads the volume around, which keeps the back of the head from looking too heavy.
The best part is how easy it is to personalize. Add one bubble on each side for a sporty feel, or keep the sections tight and neat for a cleaner finish. Either way, the look feels balanced.
9. Ribbon-Wrapped Bubble Ponytail
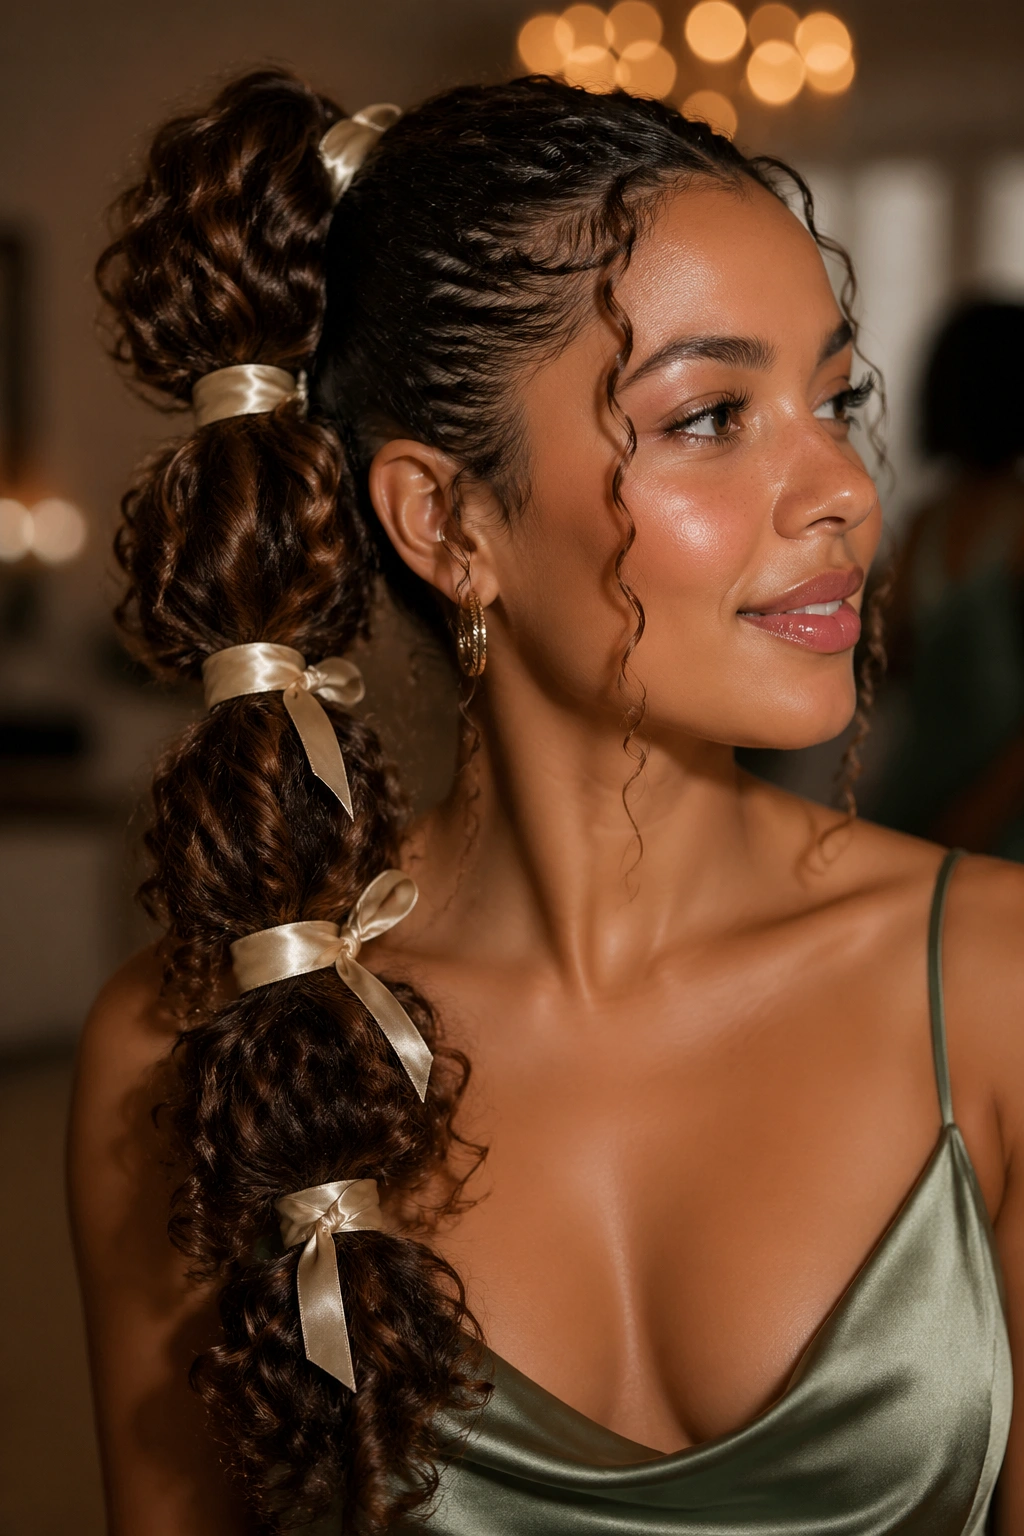
Ribbon changes everything. A plain elastic can disappear into curly hair, but a narrow satin ribbon gives the bubbles a softer outline and makes each section look more finished. Wrap it around the base of the ponytail or thread it between the elastics for a more decorative line.
A ribbon-wrapped bubble ponytail works especially well for parties, dinners, or any outfit that needs a little extra detail. Pick a ribbon about 1/2 inch to 1 inch wide if you want it to blend instead of taking over the whole style.
The nice part is that ribbon makes the bubbles feel less casual without making them stiff. It adds movement. It also hides the elastic bands, which is always a win.
10. Bubble Ponytail With Scrunchie Stacking
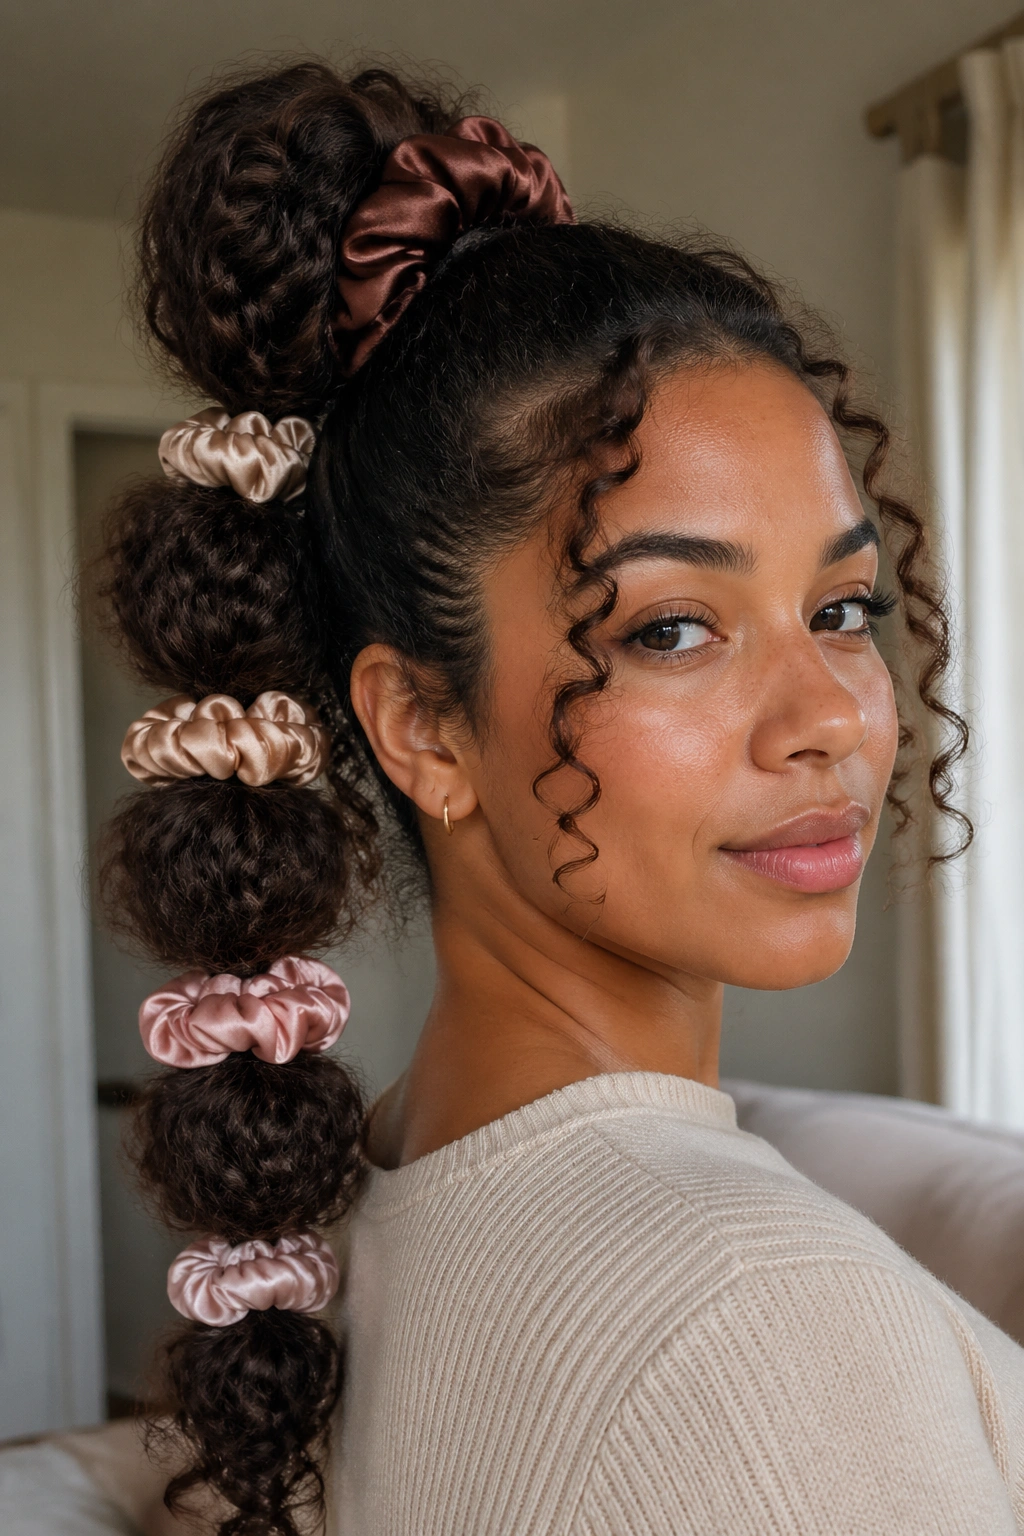
Scrunchies are kinder to curls than tiny rubber bands, and stacked scrunchies can turn a simple bubble ponytail into something a little more plush. Use one mini scrunchie at each break in the ponytail, then gently puff the sections between them. The result feels soft, bouncy, and less likely to snag.
What to look for
- Silk or satin scrunchies for delicate curls
- Mini sizes if your hair is fine
- Chunkier ones if your hair is dense or long
- Neutral colors if you want the bubbles to stay the focus
This style is more forgiving on second- or third-day curls because the scrunchies grip without crushing. And yes, they look cute. That matters too.
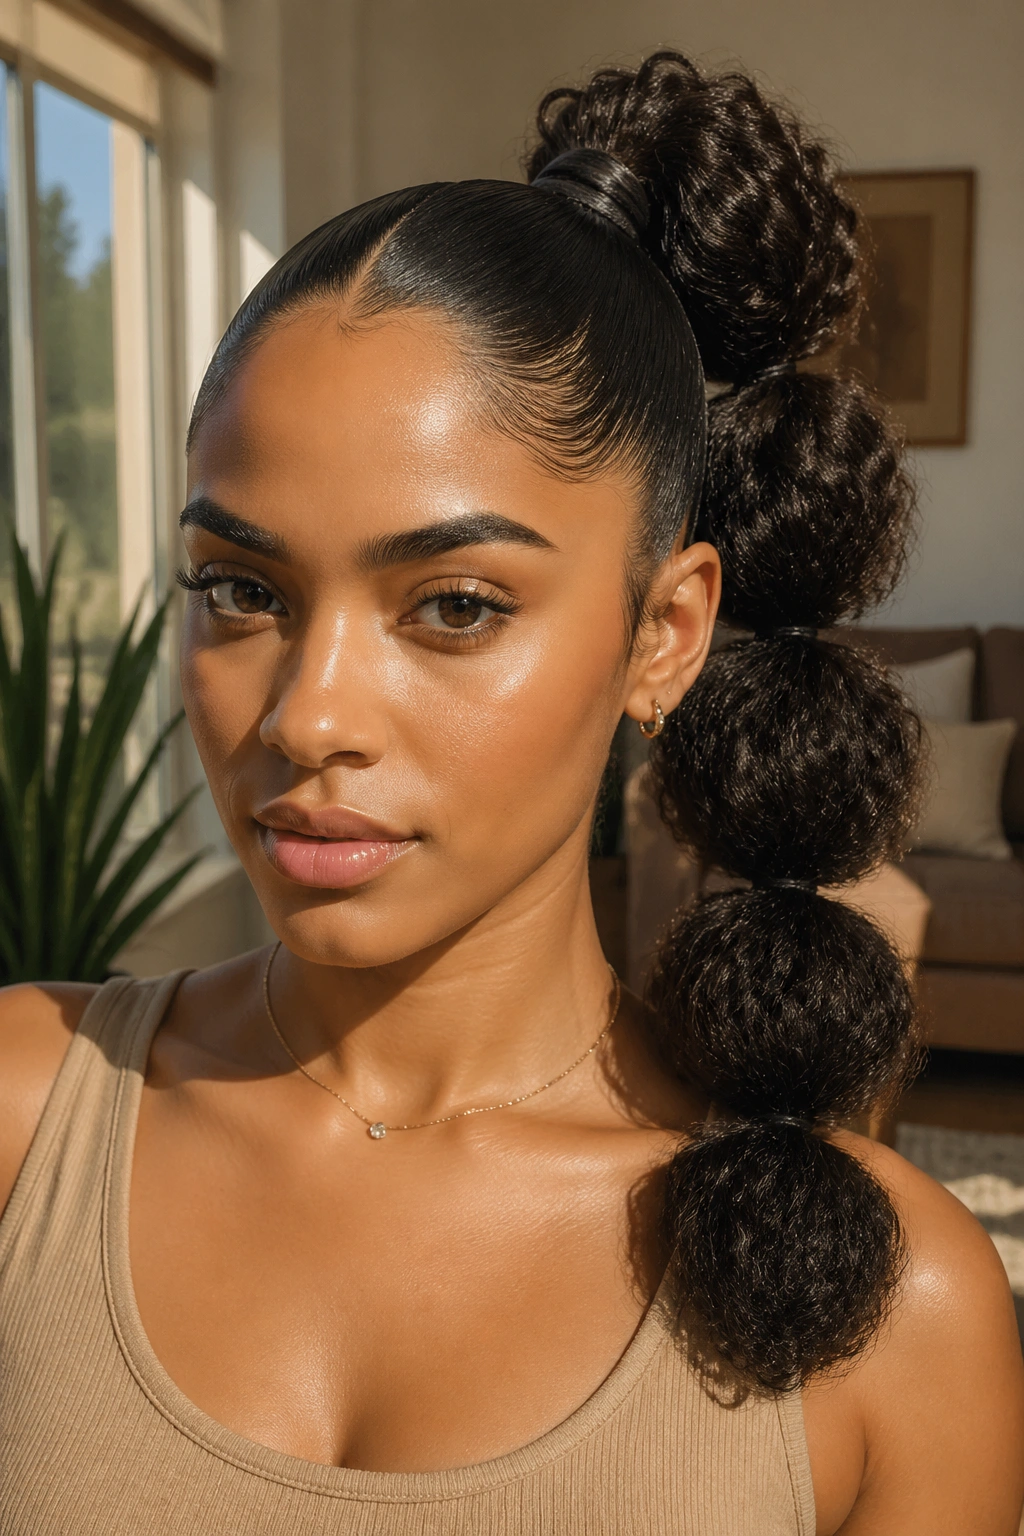
11. Bubble Ponytail for Tight Coils and Shrinkage
Tight coils need a different rhythm. Wider spacing can look awkward because the hair shrinks back and eats the space between elastics. Closer, smaller bubbles usually look better. They echo the density of the hair instead of pretending it is longer than it wants to be.
How to size the bubbles
Think compact, not stretched. Place each elastic only 1 to 2 inches apart if your hair is highly textured and prone to shrinkage. Then gently pull the hair between them until each section looks round. The bubbles should feel full, almost plush.
A lot of people make the mistake of pulling too hard at the ends to force length. Don’t. Tight coils look better when they are respected, not stretched into submission. The style gets stronger when the bubble size matches the hair’s natural spring.
12. Messy Bubble Ponytail for Day-Three Hair
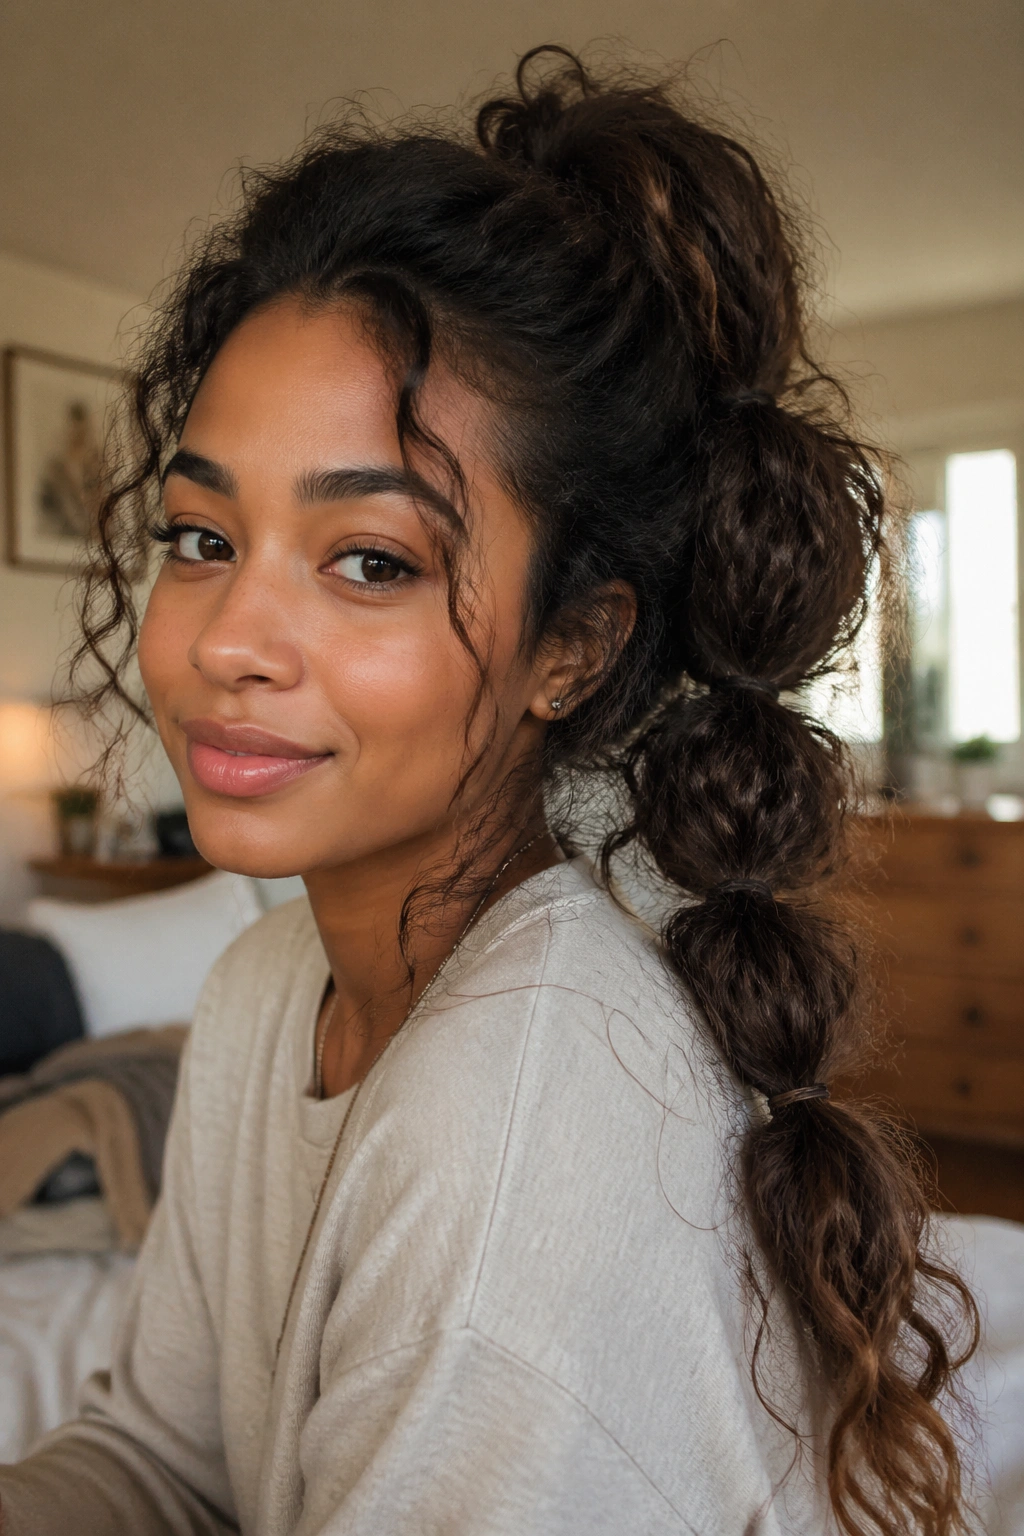
Day-three hair is where bubble ponytails quietly shine. A little frizz at the crown gives the style texture, and the bubbles pick up shape without asking for a fresh wash. Dry shampoo, a bit of leave-in on the ends, and a light smoothing pass over the top usually do the job.
This version should not look too neat. That is the point. The best messy bubble ponytail feels like you woke up with a good idea and only half finished it, in the nicest possible way.
If a few curls stick out between the elastics, leave them. They make the style feel lived-in instead of rigid. Trying to tame every strand usually makes the whole thing look more tired.
13. Bubble Ponytail With Braided Sides

Braided sides give curly hair a cleaner path into the ponytail. Flat twists, cornrows, or simple side braids all work. They keep the front controlled while the back stays full and bubbly, which creates a nice contrast.
That detail also helps if your hairline tends to puff up fast. The side braids hold the shape, and the ponytail can do the fun part at the back. It is a practical style disguised as a decorative one.
Use this version when you want your curls protected but not hidden. The braids stay close to the head, so the style feels secure. The bubbles carry the volume.
14. Bubble Ponytail With Beads or Cuffs
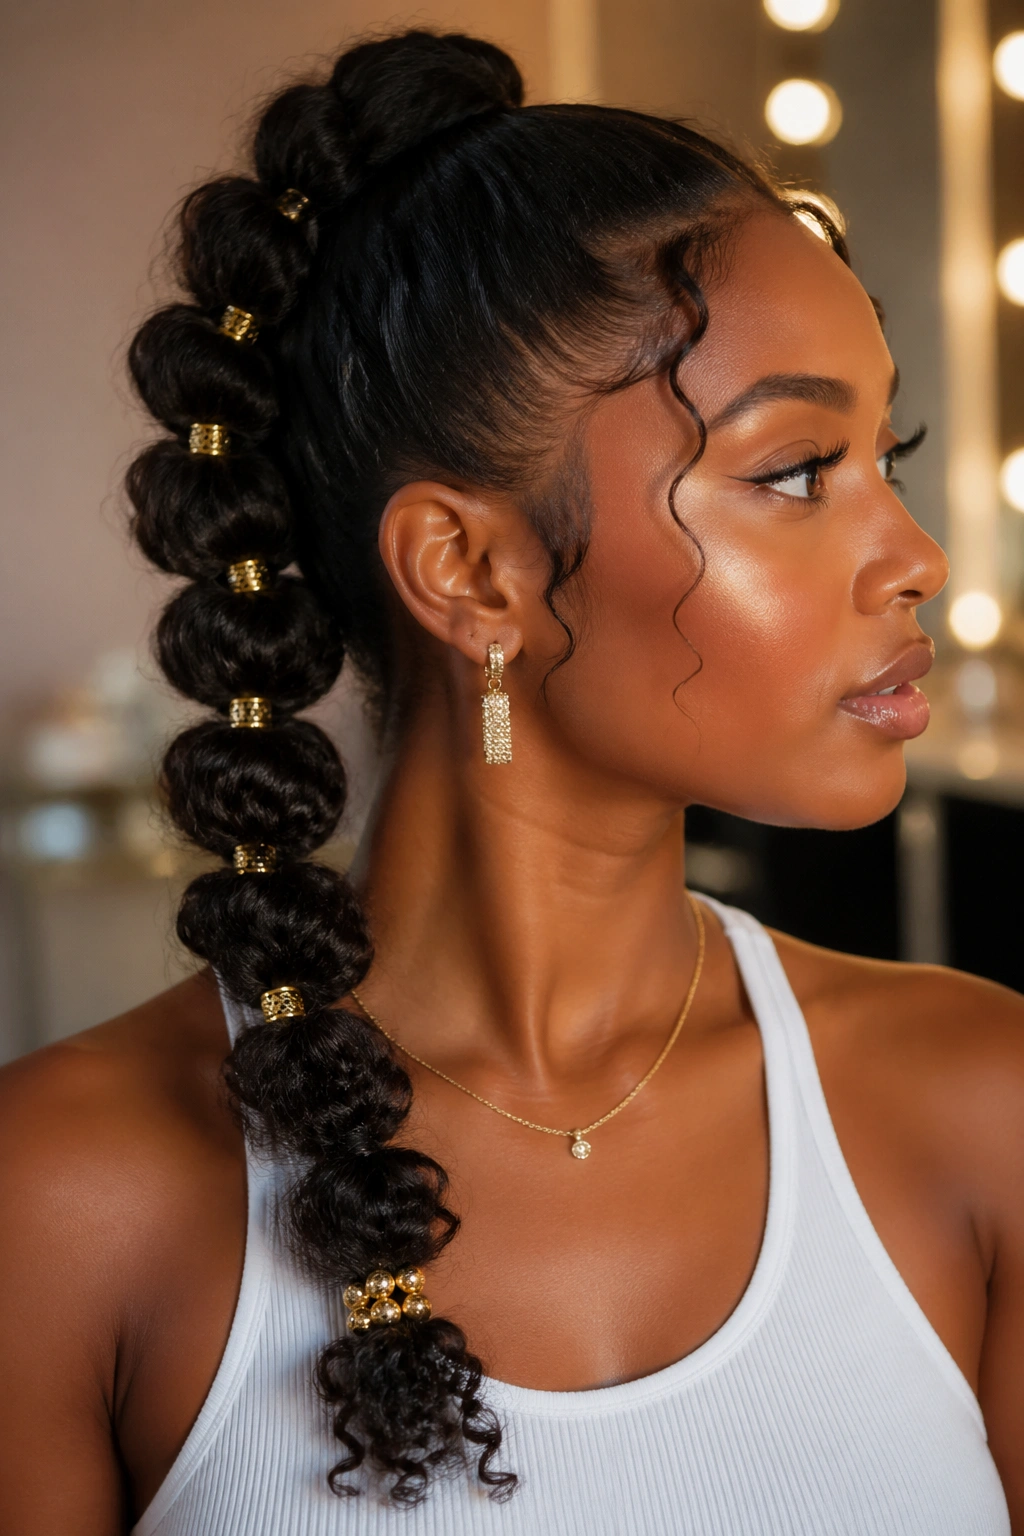
Accessories can make a bubble ponytail feel finished with almost no extra effort. A few metal cuffs around the elastics, or small beads tucked into the ends, can turn the style into something sharper and more personal. The trick is not to use too many pieces at once.
I like cuffs best when the ponytail is long enough to show several segments. They catch the eye without making the hair look overworked. Beads are prettier when the ends are left loose and curled, because they add weight and swing.
If your outfit is plain, this is an easy place to add interest. If your outfit is already loud, keep the accessories minimal. Hair and clothes should not fight each other.
15. Workout-Friendly Bubble Ponytail
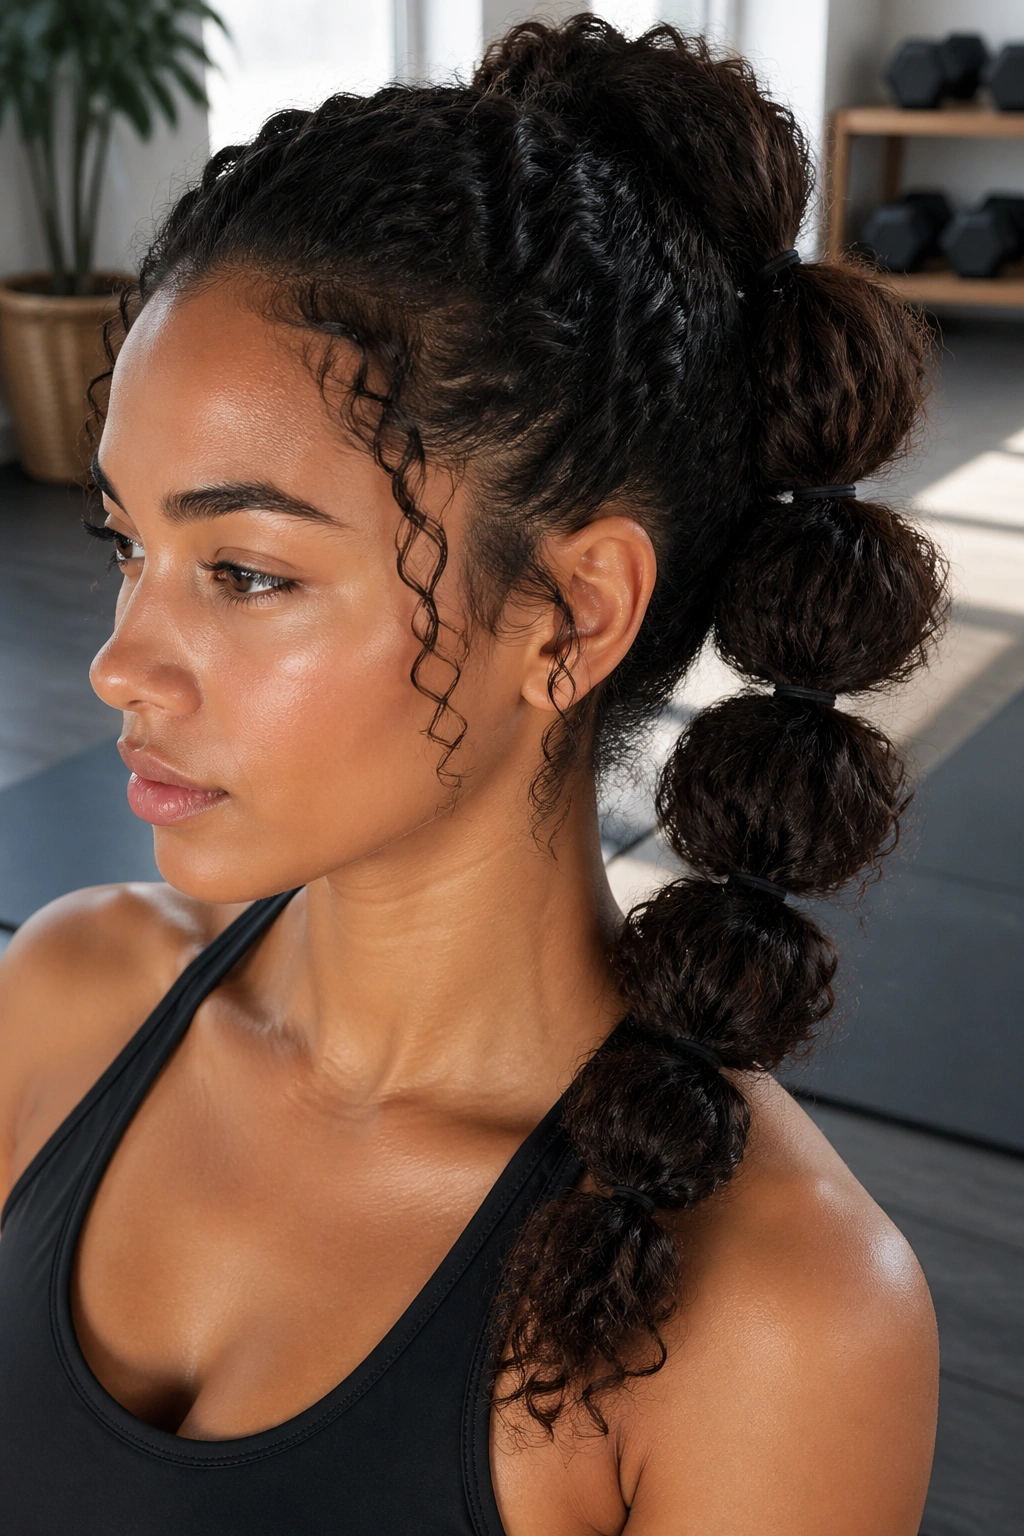
A workout bubble ponytail has one job: stay put. It should hug the head, keep the curls off your neck, and avoid the floppy, half-fallen look that happens when a regular ponytail gets sweaty. Use strong elastics, but not the kind that snag when you take them out.
What to avoid
- Too many loose pieces near the face
- Heavy accessories that swing while you move
- Bubbles spaced so far apart that they slide
- A ponytail set too low if you need neck clearance
A high or mid-height version usually works best for movement. And if your hair is extra thick, secure the base first, then add the bubbles after. That extra anchor makes a difference once you start moving around.
16. Formal Bubble Ponytail for Events
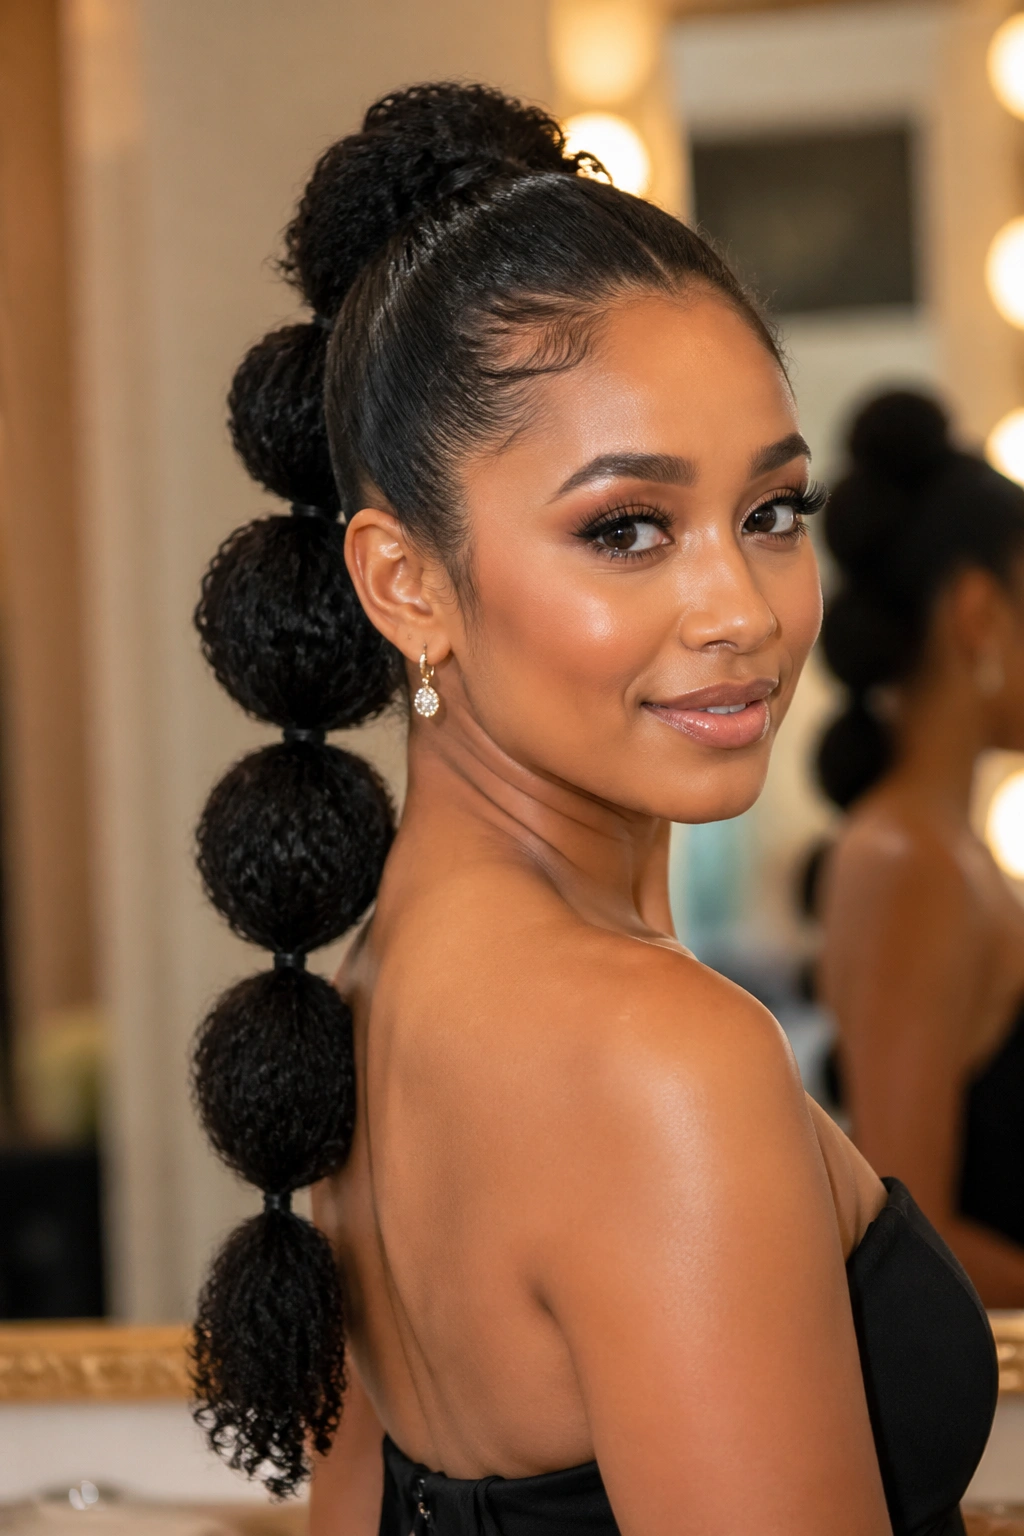
A formal bubble ponytail lives in the details. The front should be smooth, the part should be clean, and the bubbles should sit evenly so the style reads polished from every angle. This is the version that works with dresses, blazers, and anything that needs a little polish without a full updo.
The nice thing about curly hair is that it keeps this style from feeling stiff. Even when the top is sleek, the ponytail still has texture and body. That keeps it from looking over-controlled.
Small, matching elastics help here. So do a little shine serum on the outer layer and a soft brush for the top section. No need to drench the hair in product. A light hand looks more expensive.
17. Bubble Ponytail for Shoulder-Length Curls
Shoulder-length curls can be tricky because they sit in that middle zone: not short enough for a tiny puff, not long enough for a dramatic chain. A bubble ponytail solves the problem by using fewer, larger bubbles. That gives the hair room to breathe.
What changes at this length
The ponytail will not hang as far, so the style has to earn its shape early. Keep the first bubble close to the crown and the second one a little lower, then stop before the hair looks crowded. Two or three bubbles are usually enough.
If the ends are too short to form a neat tail, let them curl out naturally. That soft finish feels better than forcing a tiny stub into a fake point. Shoulder-length curls look best when you stop trying to make them something else.
18. Bubble Ponytail With Defined Ends
Some styles need the bubbles to stay round, but the ends can still look polished. A defined-end version uses a twist-out, a little curling iron, or finger-coiled sections at the bottom so the last drop of hair looks intentional. That gives the ponytail a cleaner finish.
The contrast between the bubbles and the ends matters. Round, segmented length on top. Curly, shaped movement at the bottom. It keeps the style from fizzling out halfway down the back.
One small detail helps a lot: finish the ends after the ponytail is already in place. That way you can see how much length you actually have left, and you do not over-style hair that will shrink once it settles.
19. Low Bubble Ponytail With a Scarf Tie
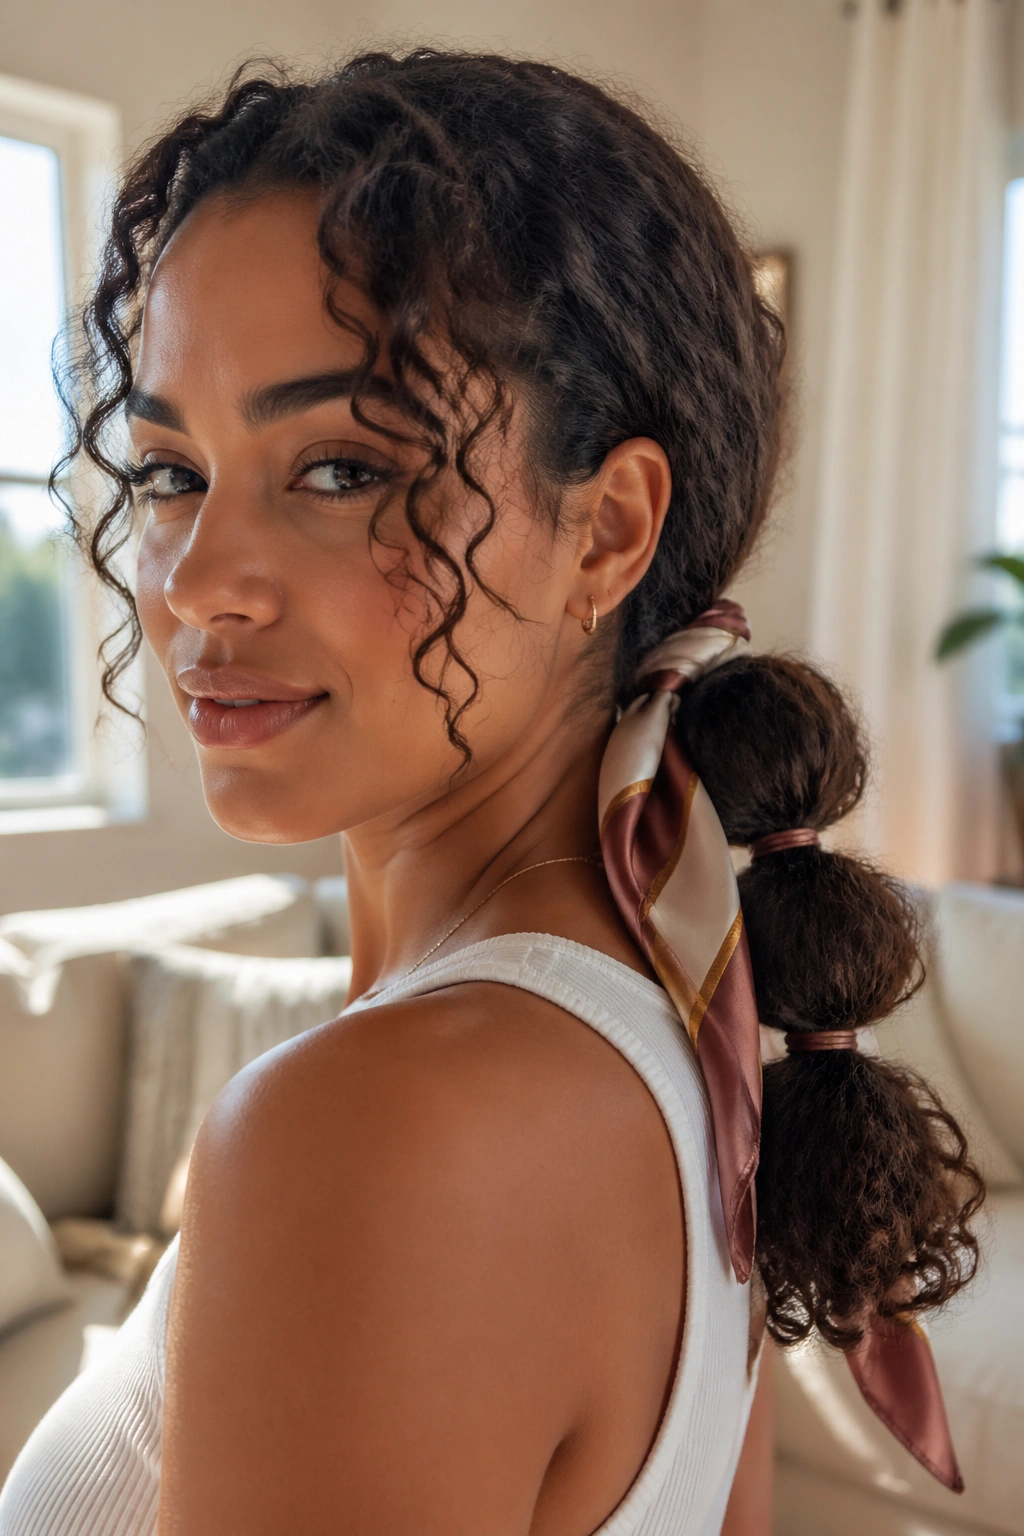
A scarf tie changes the mood immediately. Wrap one around the base of the ponytail or knot it over the first elastic, and the style feels softer and more deliberate. Satin and silk are easiest on curls because they glide instead of catching.
This version has a relaxed, weekend feel, even if the rest of the look is neat. It works especially well with low bubbles, where the scarf can sit at the nape without competing with the shape of the ponytail.
A printed scarf can pull color from your outfit, while a solid one keeps the focus on the hair. Either way, the scarf helps the ponytail feel styled, not just tied back.
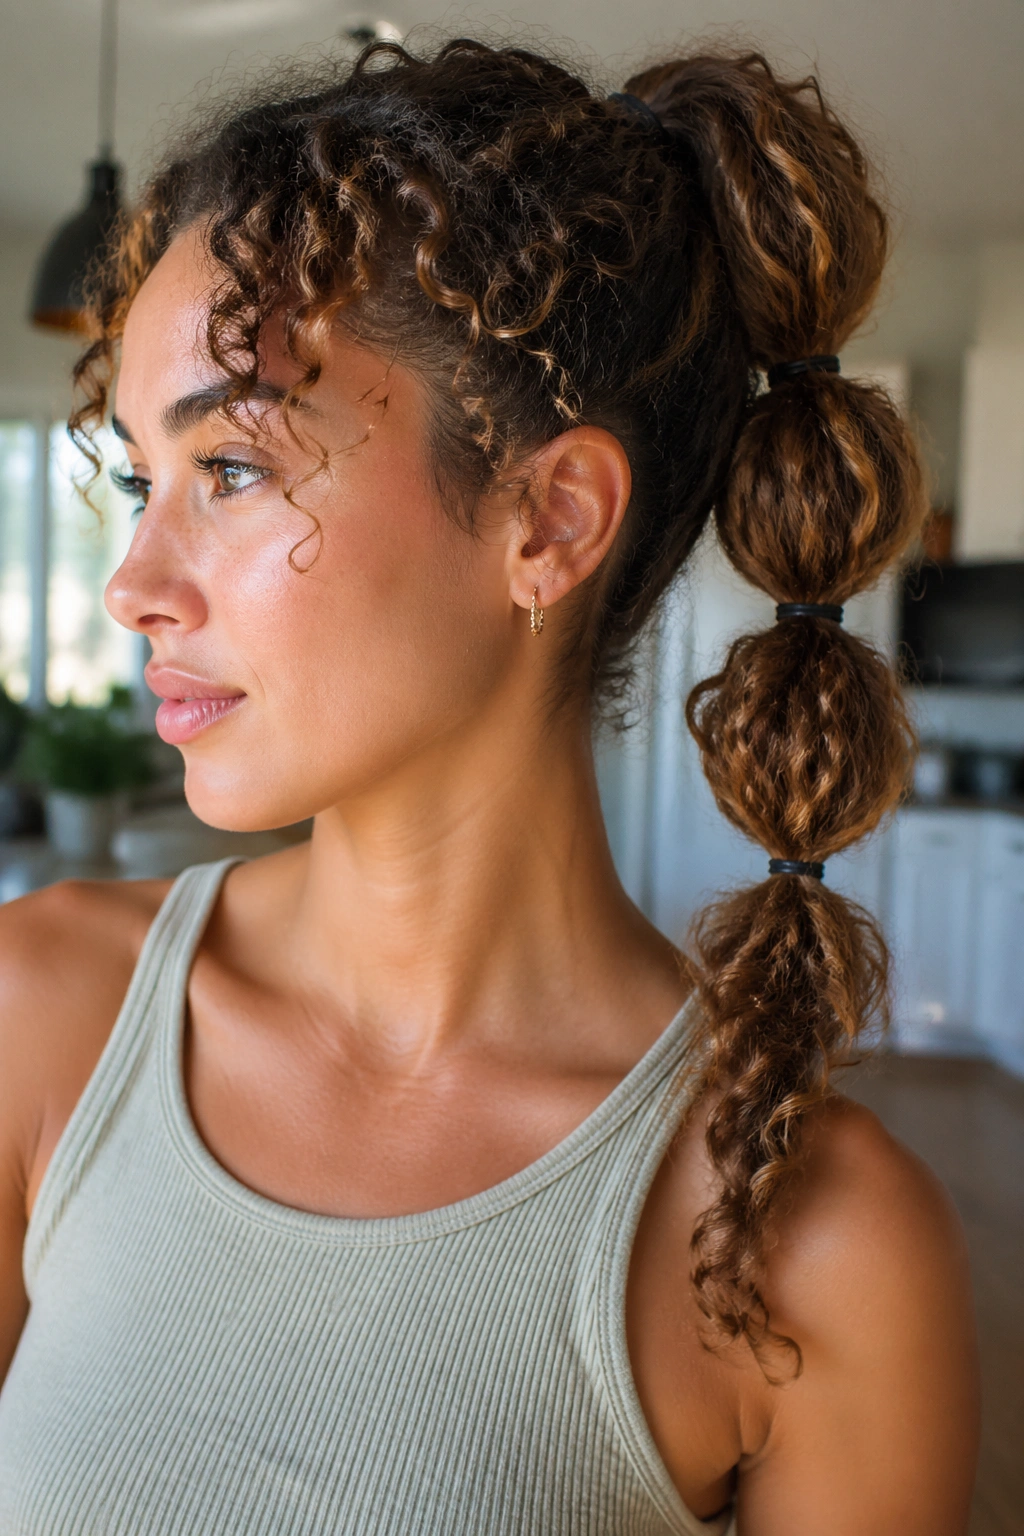
20. Bubble Ponytail With Two Texture Zones
This is the style for people who like contrast. Keep the front and crown smoother, then let the mid-lengths and ends stay fluffy, defined, or a little wild. The two texture zones make the bubble segments stand out more than a single uniform finish ever could.
The style reads modern because it doesn’t ask every part of the hair to do the same thing. The top acts like a frame. The length carries the personality. That split can be especially flattering on curls that get frizzy near the roots but stay pretty at the ends.
You can push this look toward polished or casual depending on how much you smooth at the front. Less product, softer lines. More gel, sharper contrast. Both work.
21. Everyday Bubble Ponytail That Takes Five Minutes
This is the one to learn first. A quick everyday bubble ponytail is the style you can pull together when you want your curls up, off your face, and still looking like curls. No complicated sectioning. No tiny accessory hunt. Just a few elastics, a brush for the top if you want it, and a little finger fluffing.
The easiest version starts with a low or mid ponytail, then adds two or three bubbles down the length. Stop before it gets overworked. The whole point is speed and shape, not perfection.
If you only wear one bubble style on repeat, make it this one. It suits school runs, errands, workdays, and those odd in-between mornings when your hair looks fine but not finished. Clean, quick, done.