The best messy mermaid braids look a little unfinished on purpose. That’s the whole appeal, really. You want the braid to feel like it was tossed together after a swim, not carved into place by a ruler and three mirrors.
A clean braid can be pretty. A messy mermaid braid has a little more life in it. The strands bend, loosen, and fall in ways that feel softer around the face and less fussy through the ends, which is why this style works so well when you want that undone beach texture without looking like you tried too hard.
It helps to start with hair that has some grip. Day-old hair is usually better than freshly washed hair, and a few sprays of dry shampoo at the roots can make the sections hold without turning crunchy. If your hair is pin-straight, a quick bend with a 1-inch curling wand or a few loose braids overnight can make the finished style look fuller and less slippery.
And yes, there are a dozen ways to make the same idea feel different. Some versions lean soft and romantic, some look a little edgy, and some are more about volume than braid definition. The fun part is that none of them need to be perfect. In fact, perfection usually ruins the charm.
1. Side-Swept Messy Mermaid Fishtail
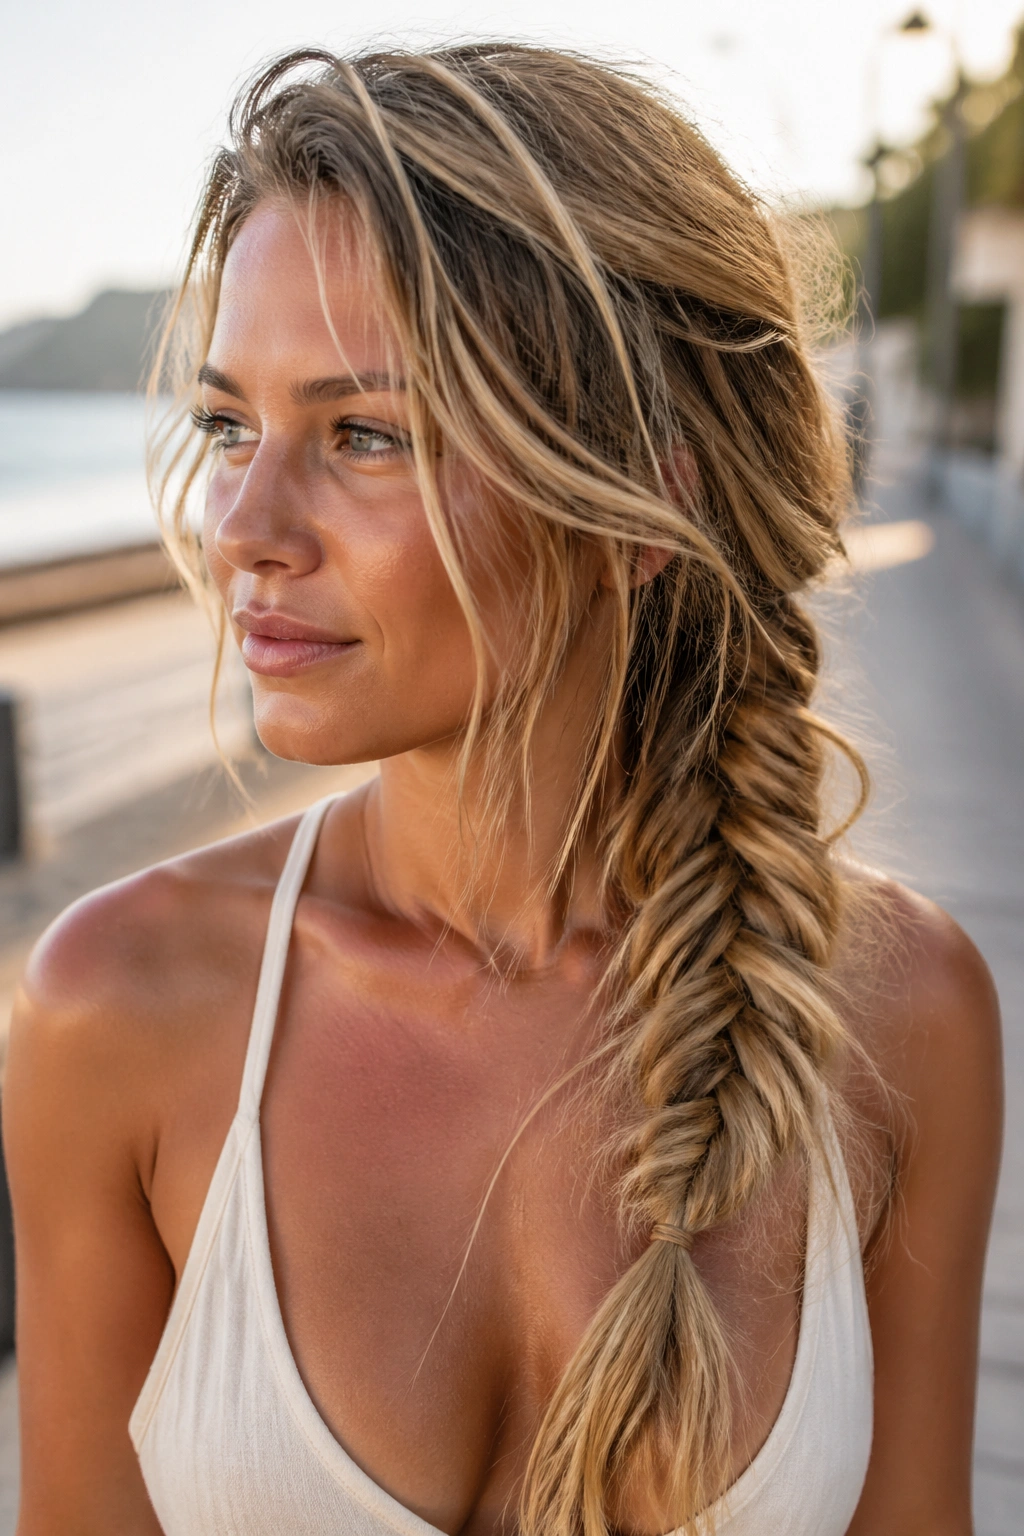
The side-swept version is the one I reach for when I want the braid to do the styling for me. It lands over one shoulder, which gives you that long, draped shape people usually associate with mermaid braids, and the off-center placement makes the looseness feel intentional instead of accidental.
Why the Side Sweep Works
A side part changes the whole mood. It gives one side more height at the crown, which makes the braid look fuller before you even start weaving. Then, once the fishtail drops across the shoulder, the strands have room to fan out without getting flattened by your back or a collar.
The trick is to braid a little lower than you think you should. Start behind the ear, not above it, and keep the first 3 to 4 inches slightly loose. That slack matters. If you pull the braid too tight at the top, it can look stiff by the time you pancake the sections.
Quick details that help:
- Use a light mist of texturizing spray from roots to mid-lengths.
- Keep the fishtail pieces small if your hair is fine.
- Pull the outer edges of each braid segment until they widen by about half an inch.
- Leave two face-framing strands around the cheekbones for softness.
My favorite part: the braid gets better as it loosens during the day. That sounds messy, but that’s the point.
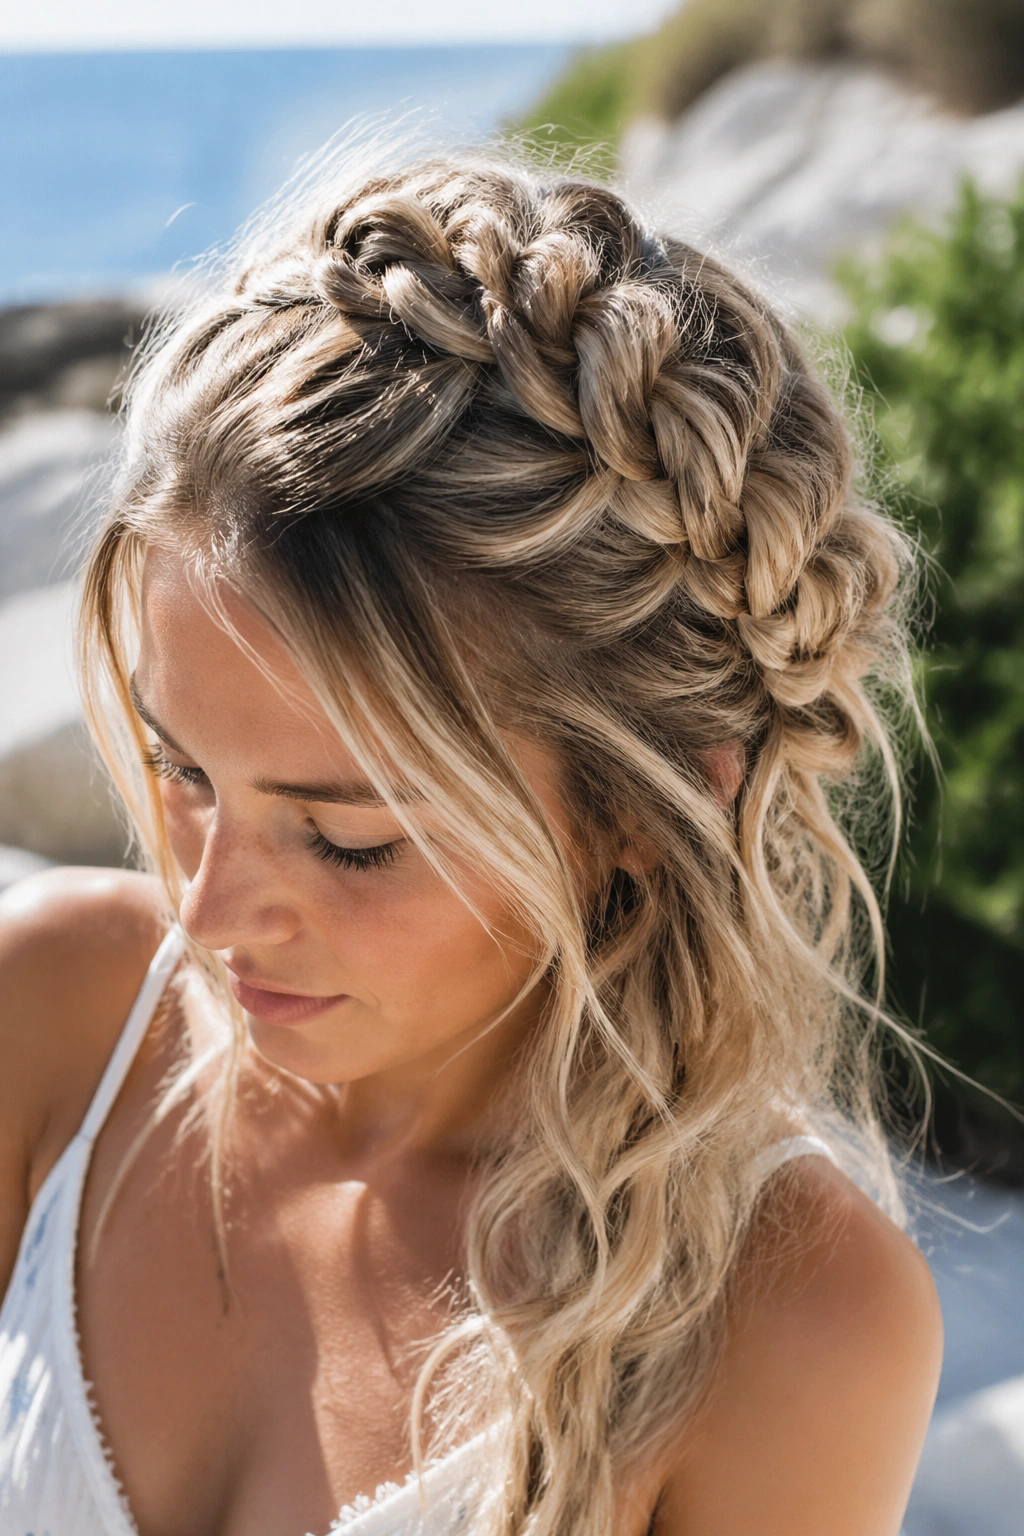
2. Half-Up Crown Mermaid Braid
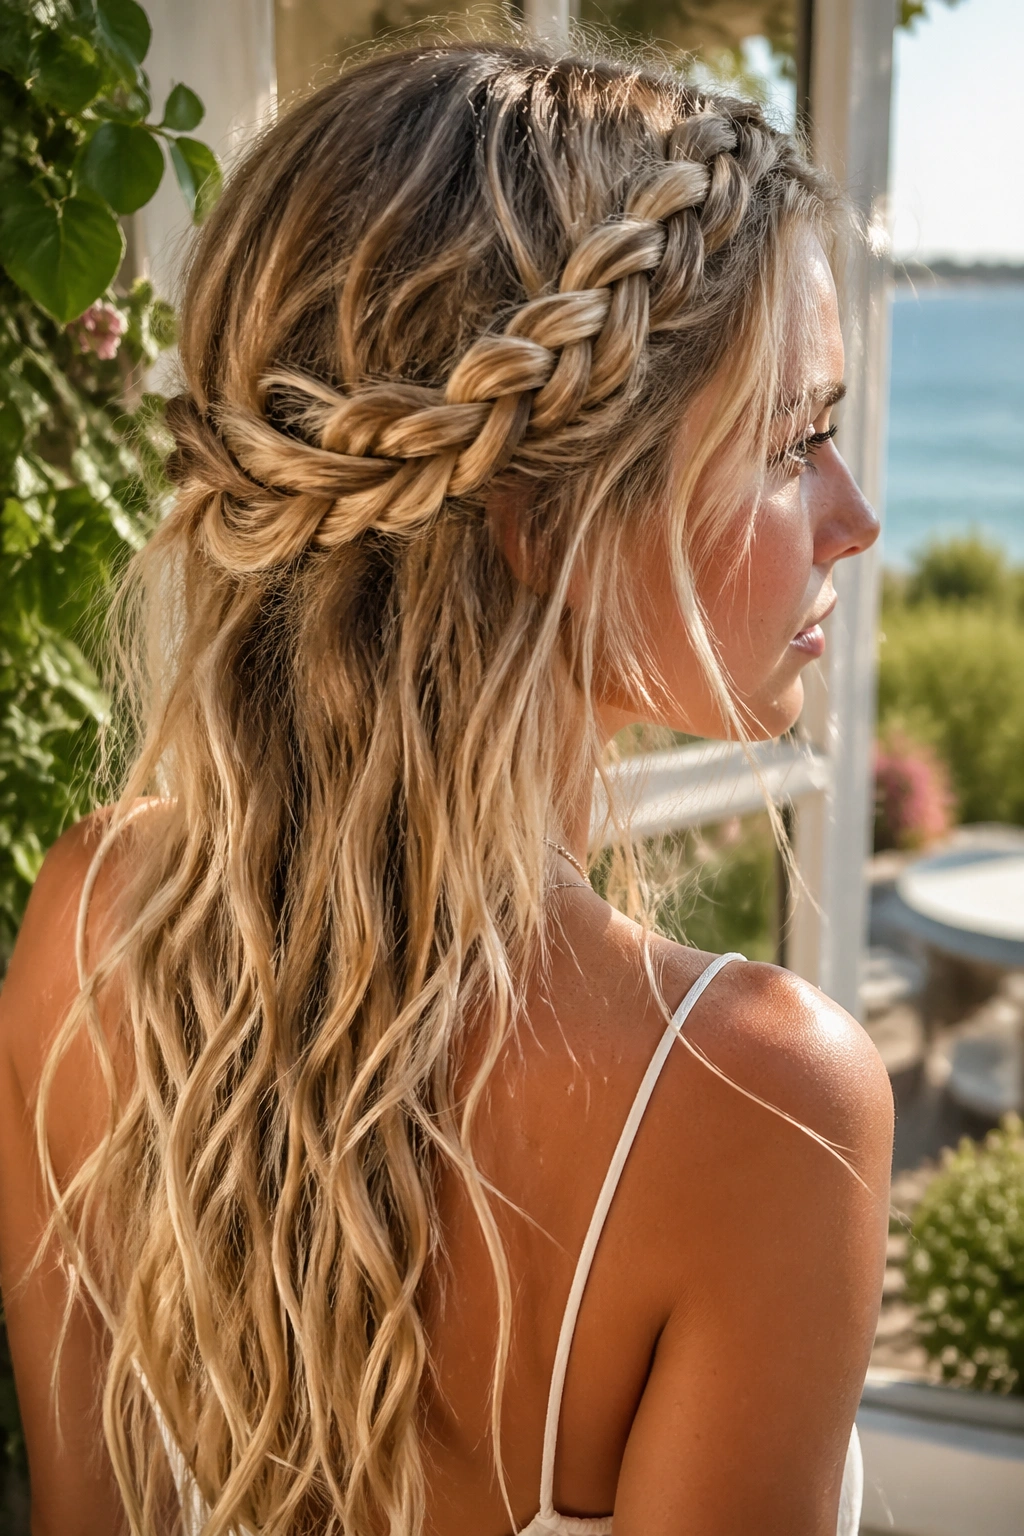
Do you want braid detail without giving up the length? This is the one. The half-up crown version keeps the top and sides controlled while leaving the rest of the hair loose, so you still get movement through the ends and a good amount of that beachy, lived-in texture.
The braid usually starts near one temple, travels across the back of the head, and meets the other side like a soft headband. I like this shape because it flatters almost everyone. It lifts the face, but it does not pull the whole style into a tight, formal place. That matters. A mermaid braid should feel a little breezy.
If your hair is layered, don’t fight the shorter pieces too hard. Let a few slip free around the ears and neckline. Those pieces soften the line of the braid and stop the crown from looking too neat. For straight hair, a 1-inch wave through the lower lengths keeps the contrast from getting flat and flat is the enemy here.
This is also one of the better options when you want a style that survives a long day. The pinned section stays put, and the loose lengths can do their own thing. That’s a nice arrangement.
3. Pull-Through Mermaid Braid with Big Links
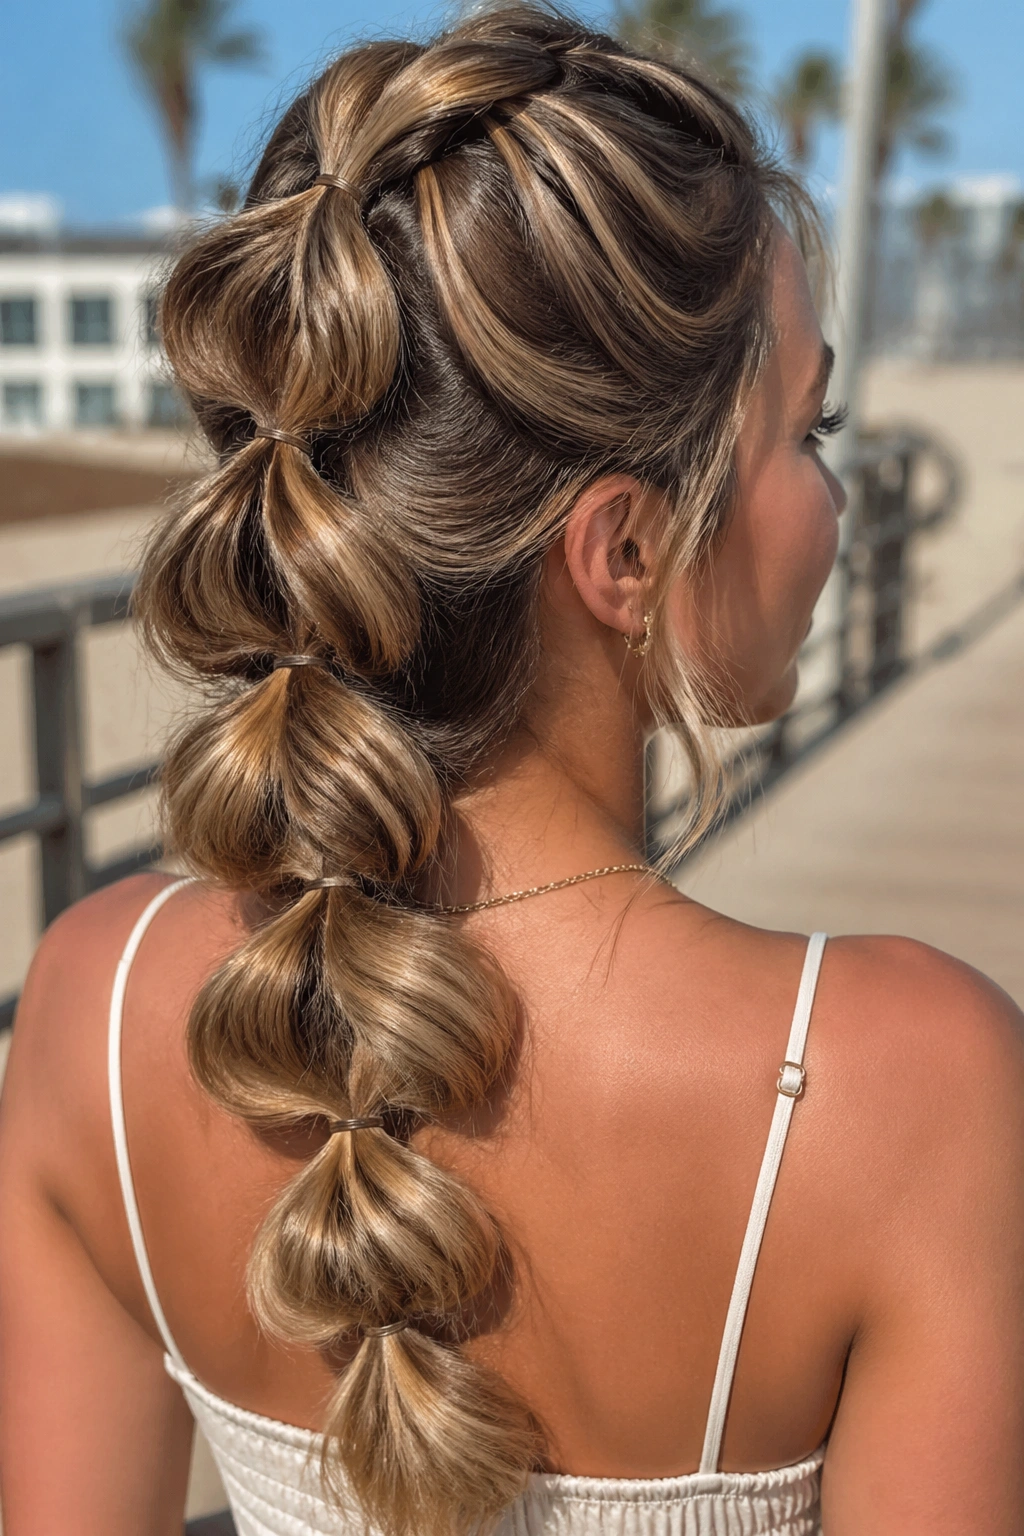
A pull-through braid gives you the look of a huge, elaborate braid without the tight weaving that can flatten fine hair. It’s one of the easiest ways to fake volume, and honestly, it can look more dramatic than a traditional braid if you widen the sections enough.
How to Build the Spacing
Start with a series of tiny ponytails down the center line of the head or slightly off to one side. Use clear elastics or small matching ties, spacing them about 1.5 to 2 inches apart. Then split each ponytail in half, pull the next section through, and secure again. Once the structure is in place, tug gently on each loop until the braid looks thick and soft.
The shape matters more than the cleanliness. If each loop is too perfect, the style starts to look stiff. Pull a little unevenly. Let one side sit lower than the other. That small crookedness gives the braid movement.
Best For
- Fine hair that needs visual bulk
- Hair with layers that slide out of a normal braid
- Long lengths that can handle repeated elastics
- Styles that need a bit of drama without teasing
One caution: don’t yank the loops too early. Build the braid first, then widen it. If you loosen every section as you go, the shape can collapse before you finish.
4. Waterfall Mermaid Braid with Loose Waves
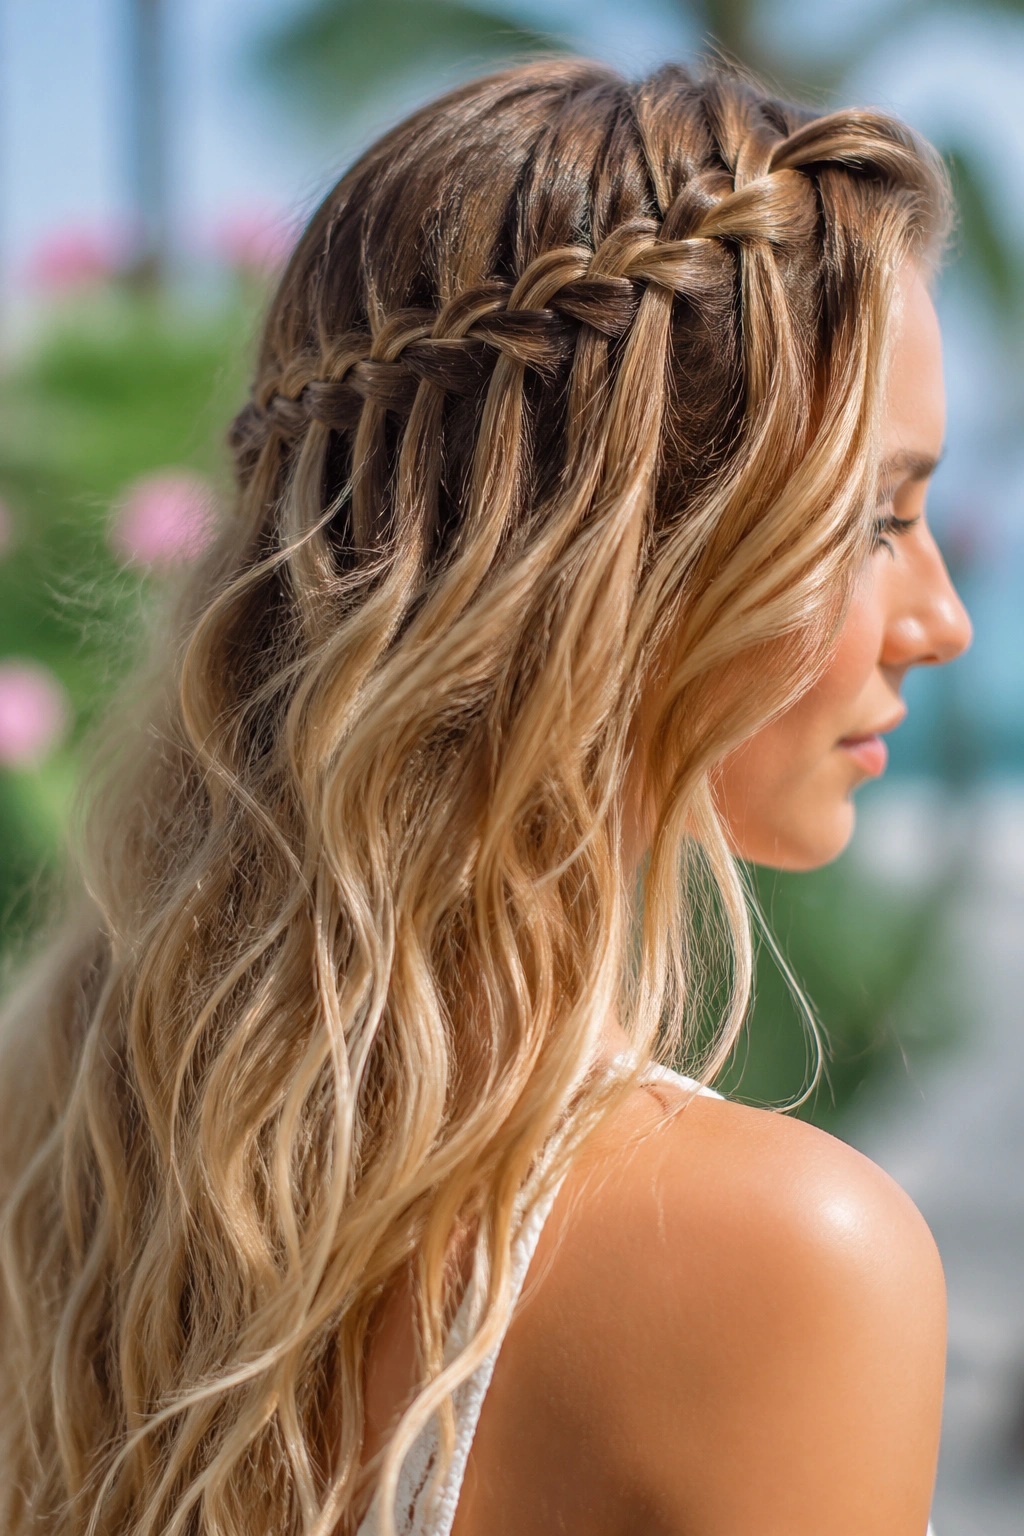
The waterfall braid has a softer rhythm than a standard plait. One strand drops out as you braid, which leaves little openings through the side of the style — tiny gaps that feel airy instead of heavy. On wavy hair, it can look especially pretty because the loose pieces blend right into the rest of the texture.
It takes a calmer hand than a fishtail. Not harder, just calmer. You braid across the head, release a strand at each pass, and keep the remaining hair moving in the same direction. The finished line should look like it’s flowing, not pinned down.
I like this style most on hair with some natural bend. If your hair is very straight, the waterfall pieces can look too separate unless you add a few loose waves first. A barrel around 1 inch wide is enough. You do not need polished curls here. The braid wants softness, not bounce.
There’s also a nice practical side to it. The front and side sections stay anchored, so the style holds away from the face, but the rest of the hair can stay loose and touchable. That balance is hard to beat when you want beach texture and a bit of structure at the same time.
5. Double Mini Braids Into One Back Plait
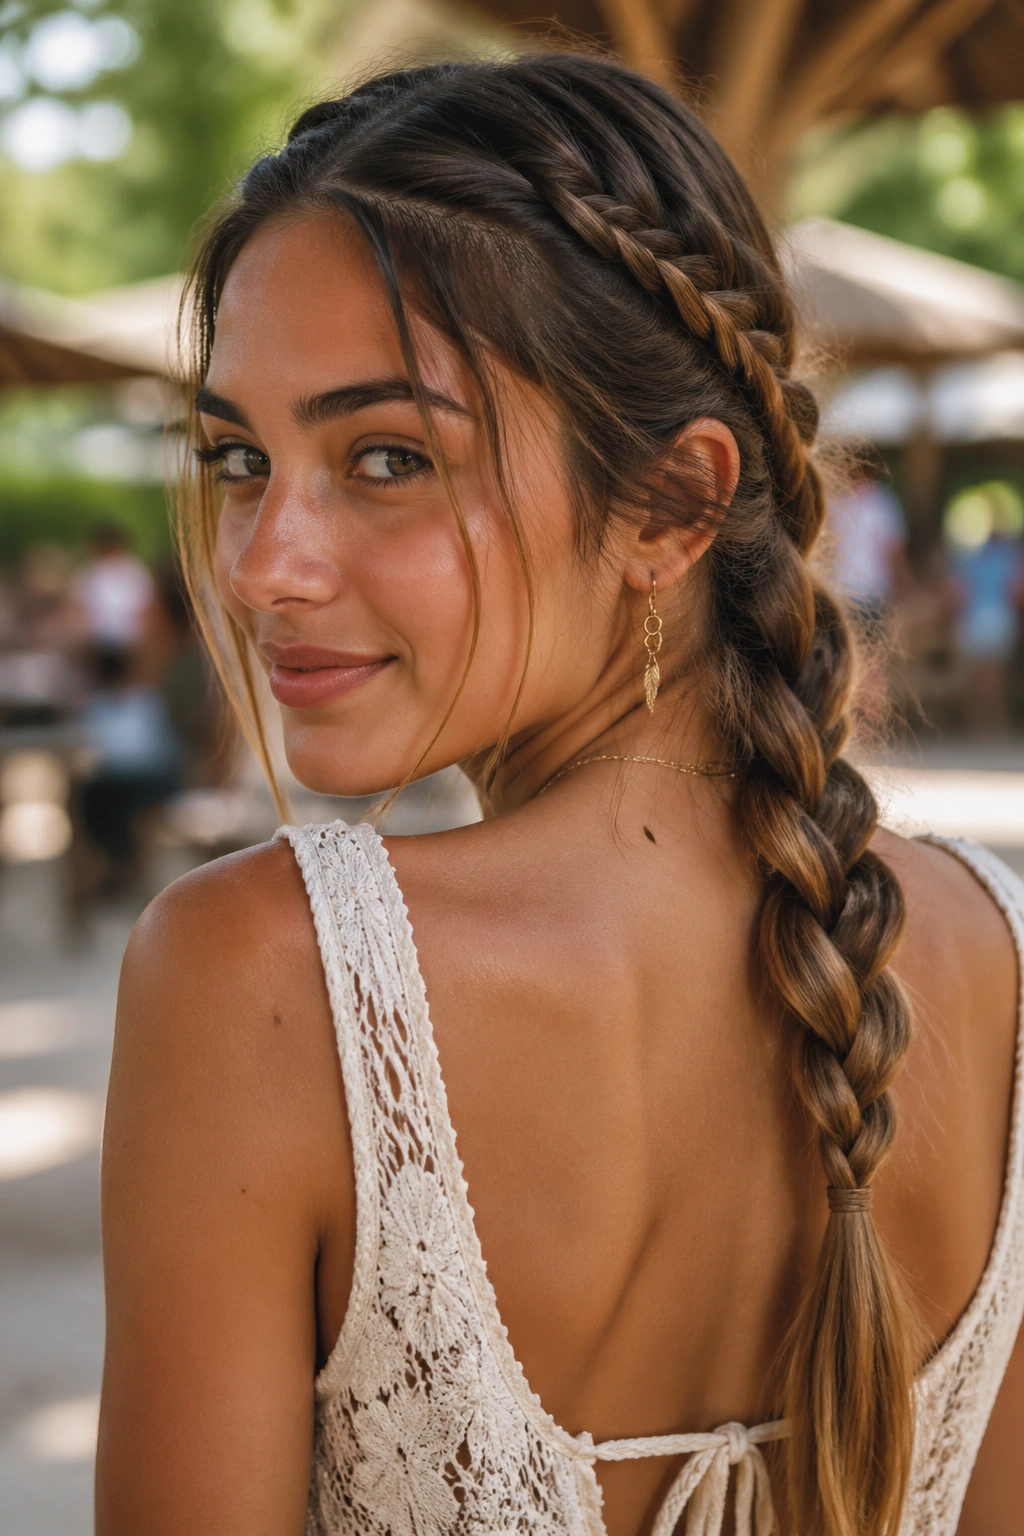
Two small braids can do more than one big one. This style starts with narrow braids at the front or just behind the temples, then gathers them into a larger braid at the back. It looks layered, a little bohemian, and slightly more styled than a single braid without getting fussy.
The front braids act like framing pieces. They pull the eye in, but they also create a path toward the main braid, which makes the whole style feel connected. I especially like this on hair that has a lot of movement because the smaller braids keep the crown from puffing out in random places.
What to Watch For
- Keep the mini braids narrow, about 1/2 inch wide.
- Leave the crown slightly lifted before joining the sections.
- Blend the braids into the larger plait at mid-back level, not too high.
- Finish the ends with a soft tie and pull a few strands free around the ears.
It sounds a little detailed, but it becomes quick once your hands know the pattern. And if your hair is thick, this is a smart way to break the mass into shapes that look lighter on the head.
6. Low Boho Mermaid Braid with Ribbon
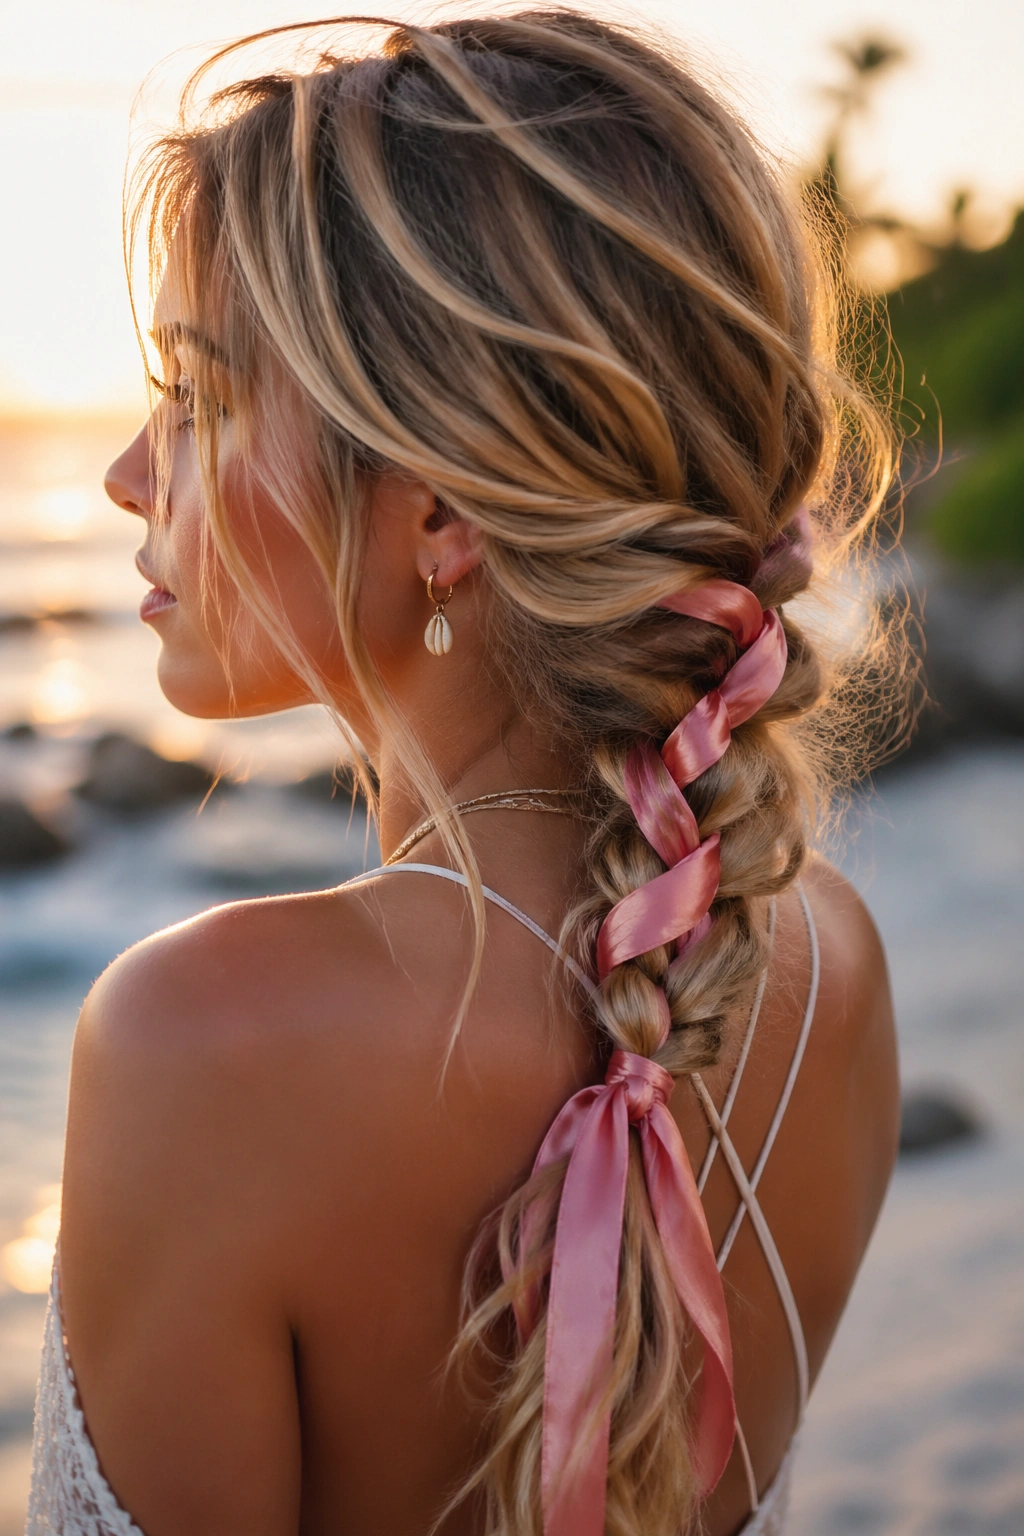
Unlike a tight formal braid, this version uses softness as the main feature. The braid sits low at the nape, the sections are gently loosened, and a ribbon or scarf gives the style a bit of color and movement without making it feel dressed up in a stiff way.
The ribbon matters more than people think. A satin ribbon slides and catches the light in a soft way, while a cotton tie feels more casual and grounded. I tend to like ribbon that’s about 1/2 inch to 1 inch wide. Anything thicker starts competing with the braid instead of supporting it.
This style works well when you want the braid to feel finished but not overworked. The ends can stay slightly rough, which is part of the charm. I’d keep the top smooth enough to show the parting clearly, then let the braid loosen as it moves downward.
It’s a smart choice for longer hair that needs a little visual break. The ribbon gives the eye somewhere to land, and that helps the undone texture read as a design choice instead of a last-minute fix.
7. Fishtail Bubble Hybrid with Undone Ends
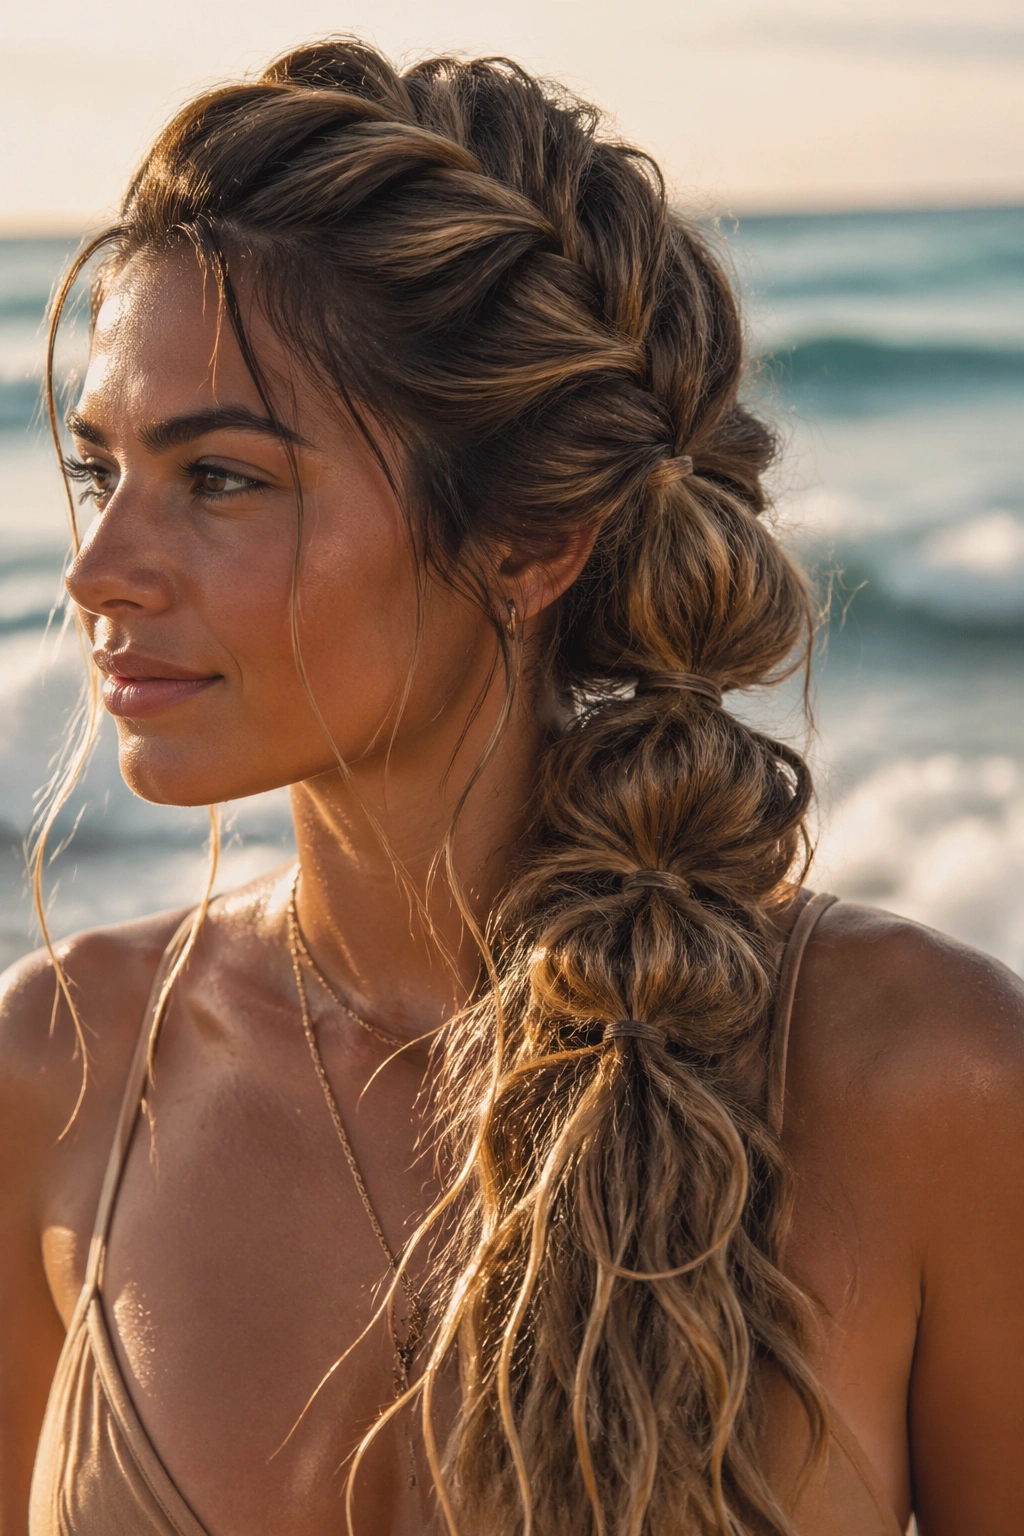
This one is a little louder, but not in a bad way. It mixes the visual rhythm of a fishtail or braid with bubble sections, so you get rounded volume through the length and a softer finish at the bottom. It’s especially good when your hair is thick enough to hold shape without collapsing.
The structure starts with a braid or twist at the top, then shifts into small sections tied off every few inches. After that, each bubble gets pulled open until it looks plush and slightly uneven. The goal is not symmetry. The goal is body.
I like this style on very long hair because the length gives the bubbles room to look intentional. Shorter hair can do it too, but the spacing has to be tighter, around 2 inches apart. On thick hair, you can go wider. On finer hair, keep the bubbles closer together so the style does not sag.
It’s one of those looks that benefits from a little roughness at the ends. A smooth tip can feel too neat. A frayed, wavy finish gives the whole thing more personality.
8. Twisted Rope Mermaid Braid
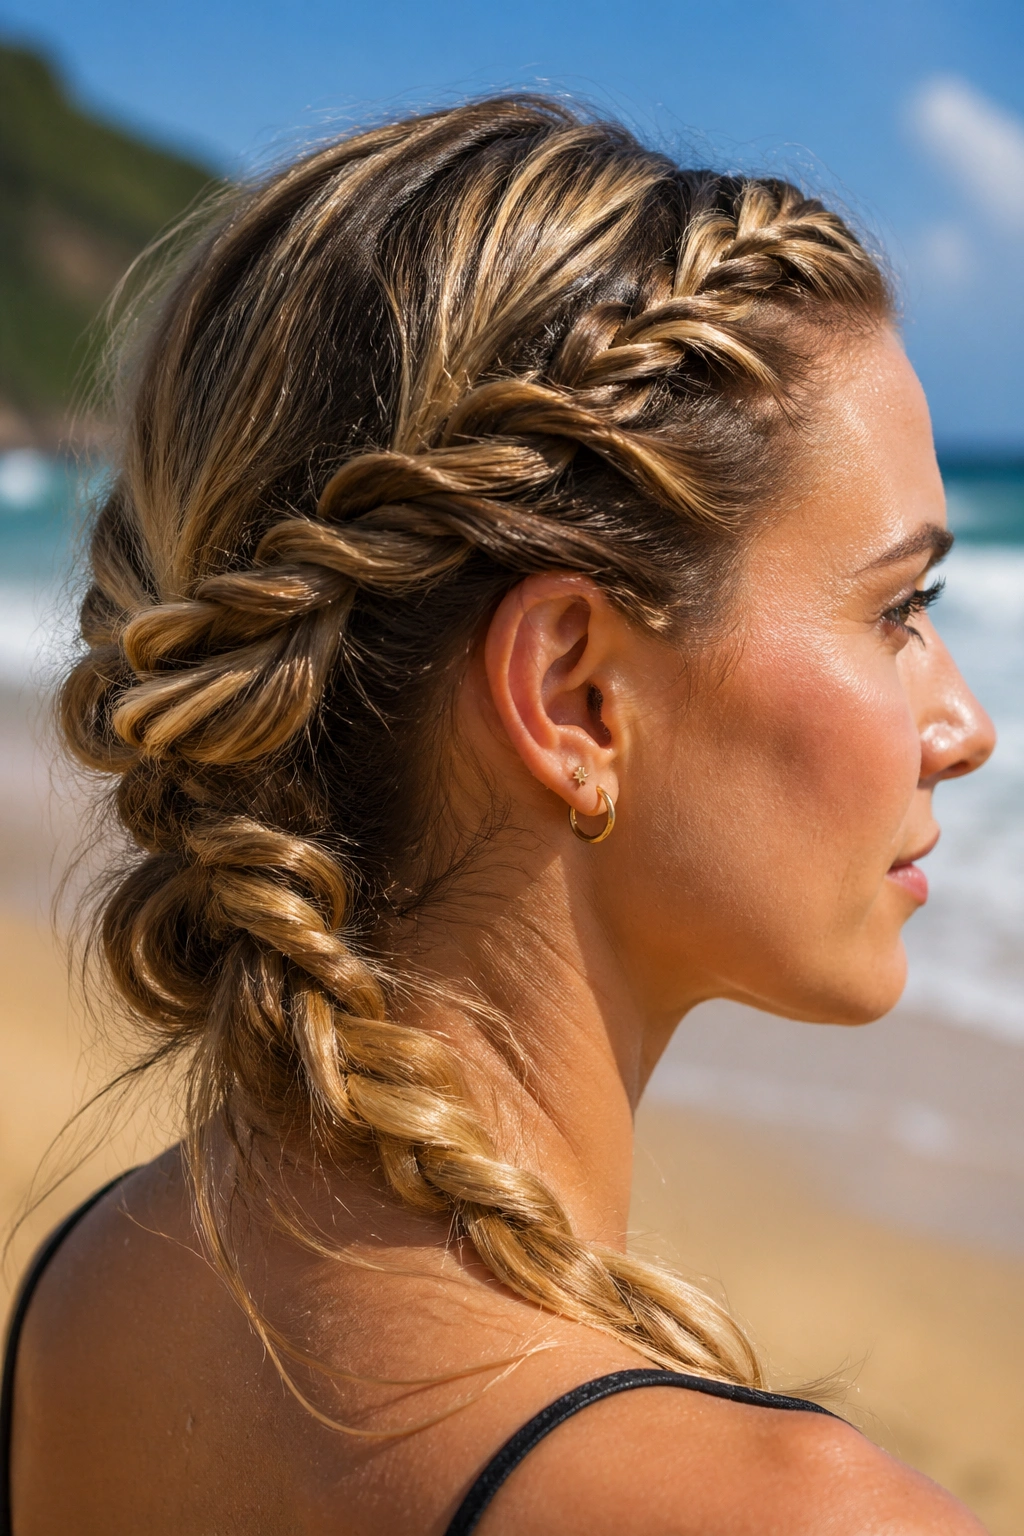
What if your fingers are better at twisting than weaving? Then this is the style. Rope braids use two sections instead of three, and that makes them easier for a lot of people to keep even. They also create a shinier, smoother line that still works when you rough up the edges later.
Where Rope Twists Shine
Rope braids work especially well on coarse hair, thick hair, and hair that tends to slip out of a regular braid. The twist pattern naturally clamps down on the strands a little more, so the braid can hold its shape without needing a ton of product. That said, a light mist of hold spray helps keep the twist from unraveling by the second hour.
The best version for this look starts at one side and runs down the back in a loose, asymmetrical line. Once the rope is secured, tug the outer coils apart with your fingertips. That widening step is where the beach texture shows up. Without it, the braid can feel too tidy.
- Twist each side in the same direction before crossing them together.
- Secure every 4 to 6 inches if your hair is slippery.
- Pull the finished twist flatter in the middle and fuller near the nape.
- Leave the last 2 to 3 inches unbraided if you want a softer finish.
The shape is simple. The texture does the talking.
9. Dutch Mermaid Braid with Loose Texture
A clean braid line can still feel soft. That’s the beauty of a Dutch braid version, where the strands cross under instead of over, making the braid sit up from the scalp a little more clearly. You get a visible spine through the hair, then you loosen it until the edges blur.
The raised braid line is useful on layered hair because it gives definition at the crown. If your hair tends to go flat near the roots, a Dutch mermaid braid creates structure right where you need it. Then you can loosen the lower sections and let the ends stay airy.
I’d keep the root area neat on this one and save the mess for the lengths. That contrast is what makes it work. A slightly crisp top with a looser tail looks more deliberate than a style that’s messy all the way through.
One small note: because the braid sits higher off the scalp, it can show sectioning mistakes more easily than some other styles. Slow down on the first three passes. After that, your hands usually fall into rhythm.
10. Side Mermaid Braid Into a Messy Bun
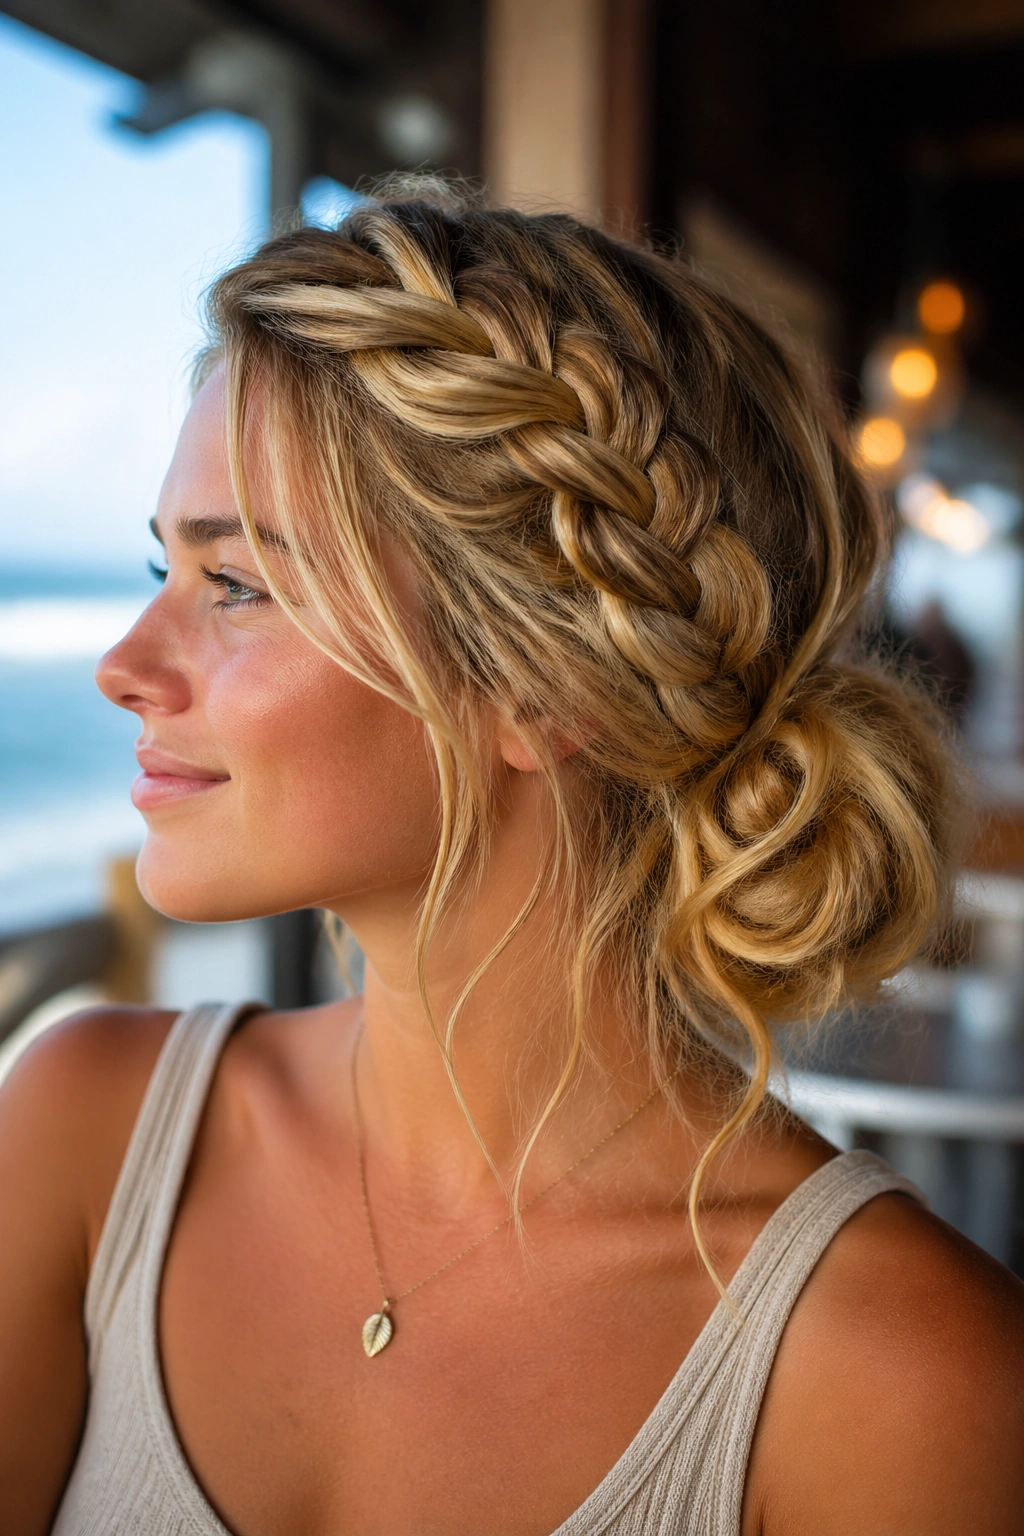
Sometimes the ends won’t cooperate. Fine. Pin them up.
This style starts as a side braid and ends as a low bun, usually tucked near the nape or just behind one ear. It’s a clever way to keep the mermaid-braid mood while dealing with hair that is too short for a full tail or too layered to behave at the ends.
The braid gives the bun texture before the bun even forms. Then you twist the leftover length into a loose coil, pin it with two to four bobby pins, and let the ends poke out a little. That unfinished edge is part of the look. If the bun is too smooth, it loses the beach feel and starts looking formal.
I like this version on second-day hair because the grip is already there. Freshly washed hair can slip, and the bun can feel like it wants to slide down the head. A little dry shampoo near the roots fixes most of that.
It’s one of the easiest styles to wear all day because the braid and bun work together. One holds the other. That matters more than people admit.
11. Tucked-Under Mermaid Braid Chignon
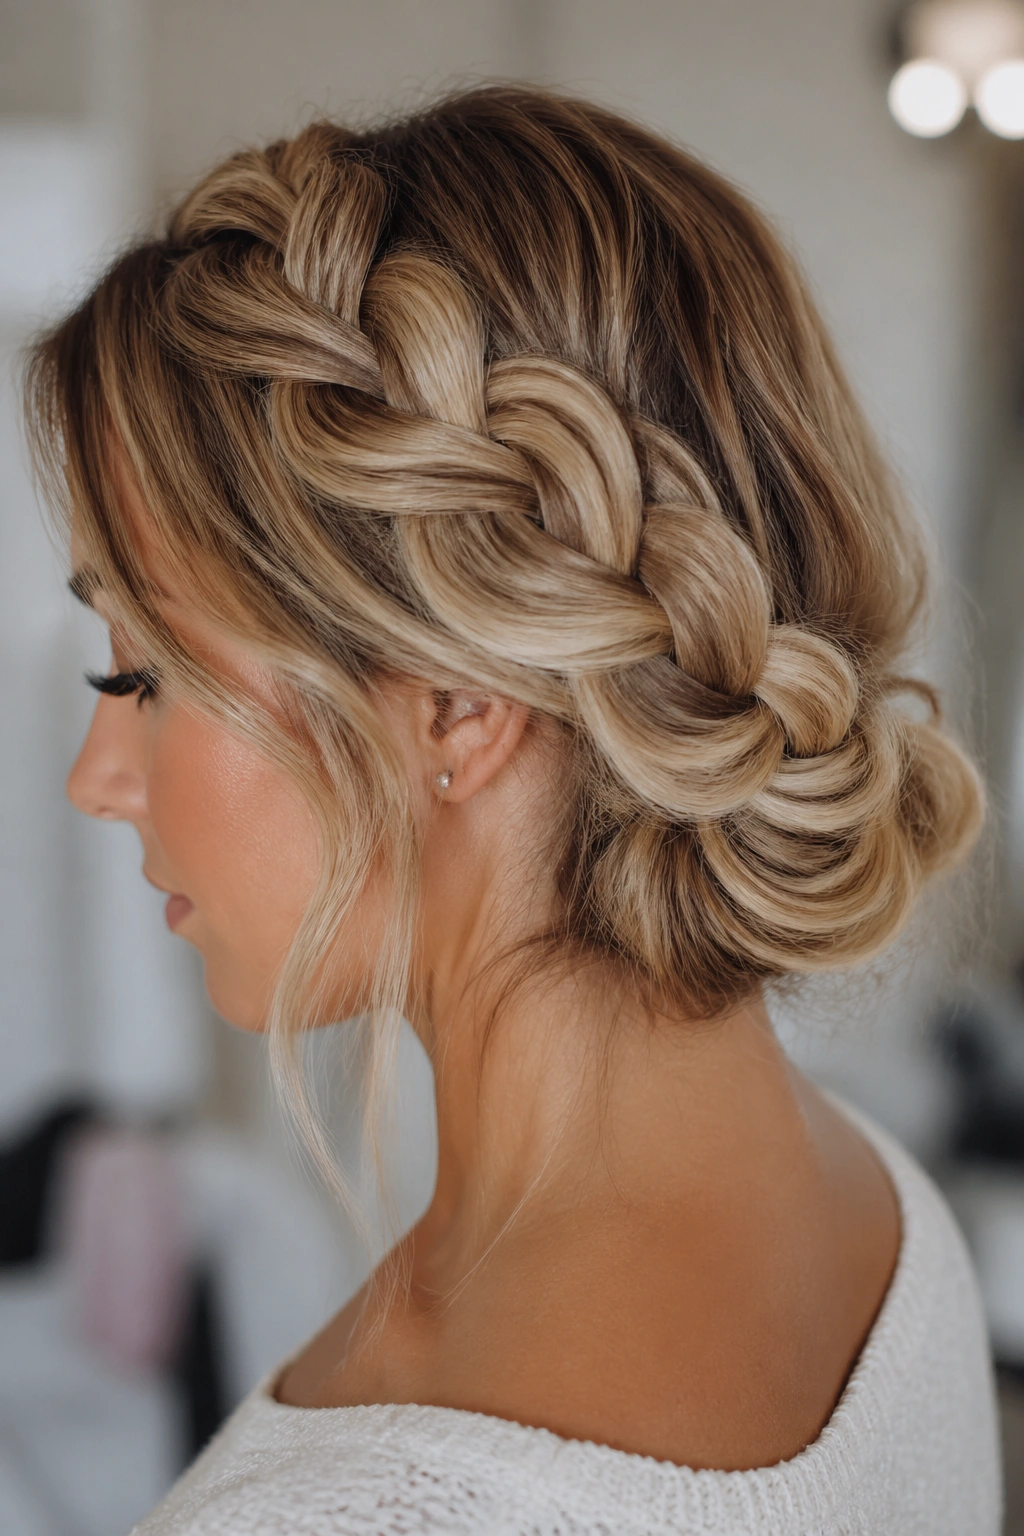
This is the version for when you want the texture but need the finish to look a bit more controlled. The braid starts with the same undone length and loose tension, then the ends are tucked under and pinned into a low chignon. So you still get the softness, but the silhouette stays neat.
The trick is to keep the braid broad enough that the tucked part does not disappear. If the braid is too tight, the bun can look tiny and severe. If it’s too loose, the whole thing can turn into a fuzzy knot. There’s a narrow middle lane here, and it’s worth finding.
Best When You Need a Little More Polish
- Weddings
- Dinner plans
- Work events
- Anytime you want beach texture without loose ends swinging around
For face framing, leave two soft pieces out near the temples and maybe a thin strand near the nape. Those bits stop the chignon from feeling too buttoned up. I’d also keep the bun slightly off-center unless you want a stricter look. Off-center placement gives the braid room to breathe.
It’s a style that likes a few imperfect pins. Hidden, yes. Perfect, no.
12. Chunky Accent Braids Over Loose Waves
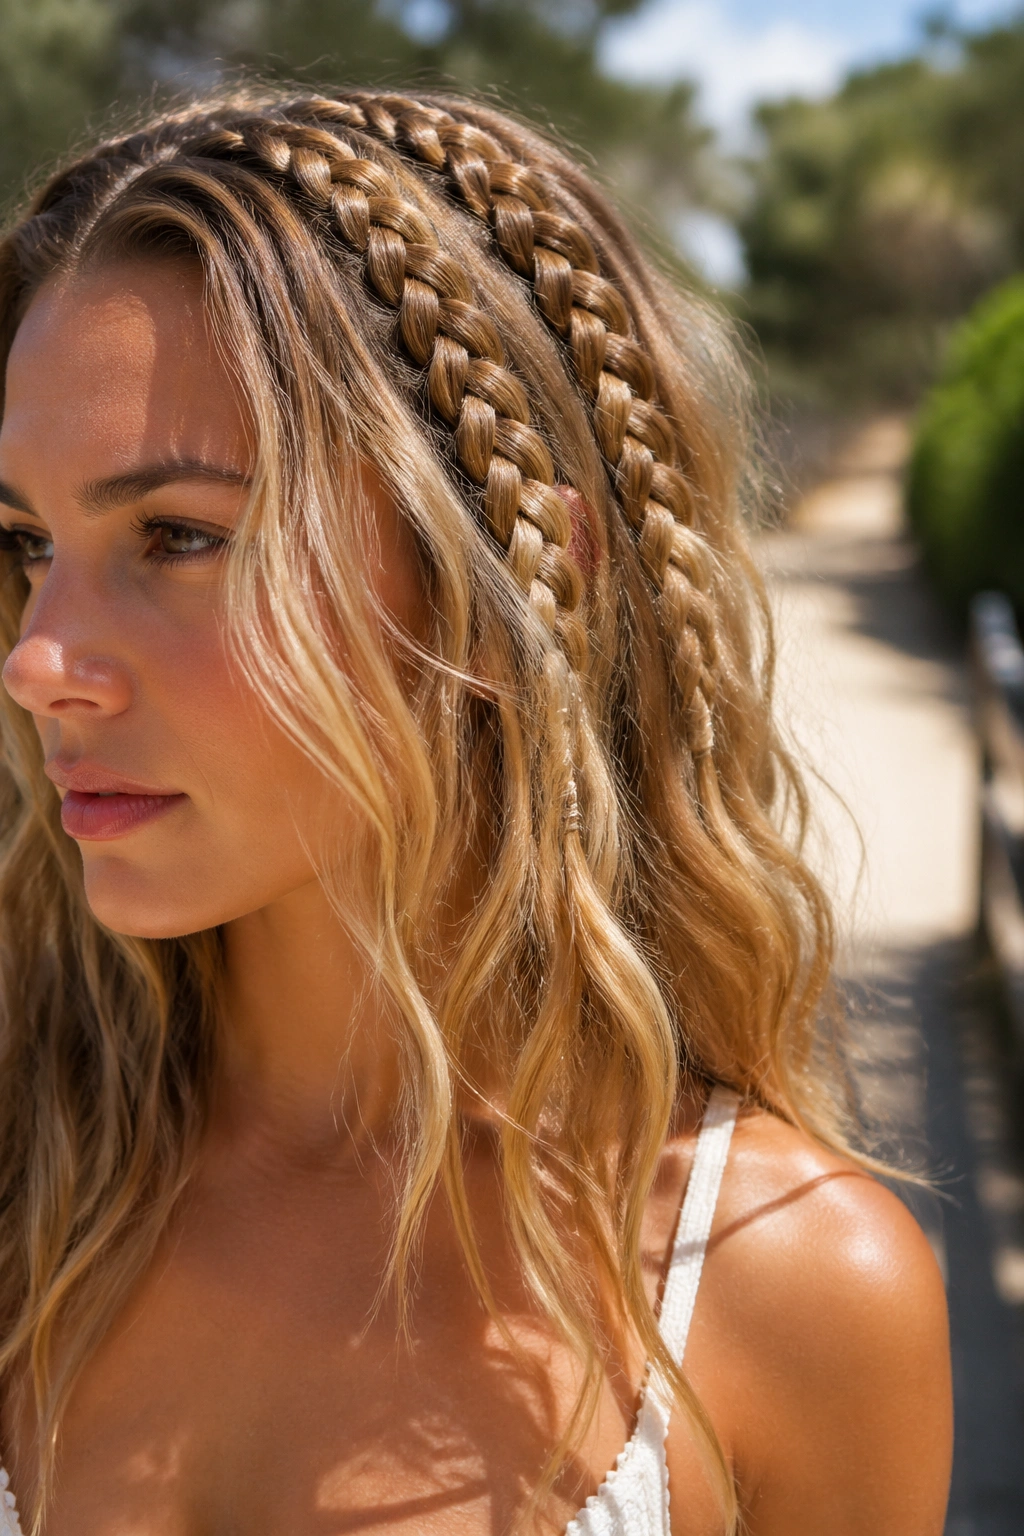
Not every mermaid braid has to take over the whole head. A few chunky accent braids can be enough, especially if you want texture but don’t want to commit to a full plait. This is one of the easiest ways to add shape to loose waves without losing much length.
A good place to start is the hairline or the temples. Take 1/2-inch sections, braid them loosely, and let them trail into the rest of the hair. You can do one on each side, or stack two tiny braids on one side if you want more detail. Then rough up the waves around them so the whole look feels unified.
The nice thing here is that the braids become part of the texture rather than a separate style. They break up the surface of the hair in a way that looks casual, especially if the rest of the length has a soft bend. This is also a good option for shorter long hair that can’t quite manage a full mermaid braid but still wants that coastal feel.
You can pin the accents back if you want the face open, or let them fall forward a little. Either way, they give you that broken-up, lived-in look without much effort. A small style. Big payoff.
13. Wet-Look Mermaid Braid with Soft Ends
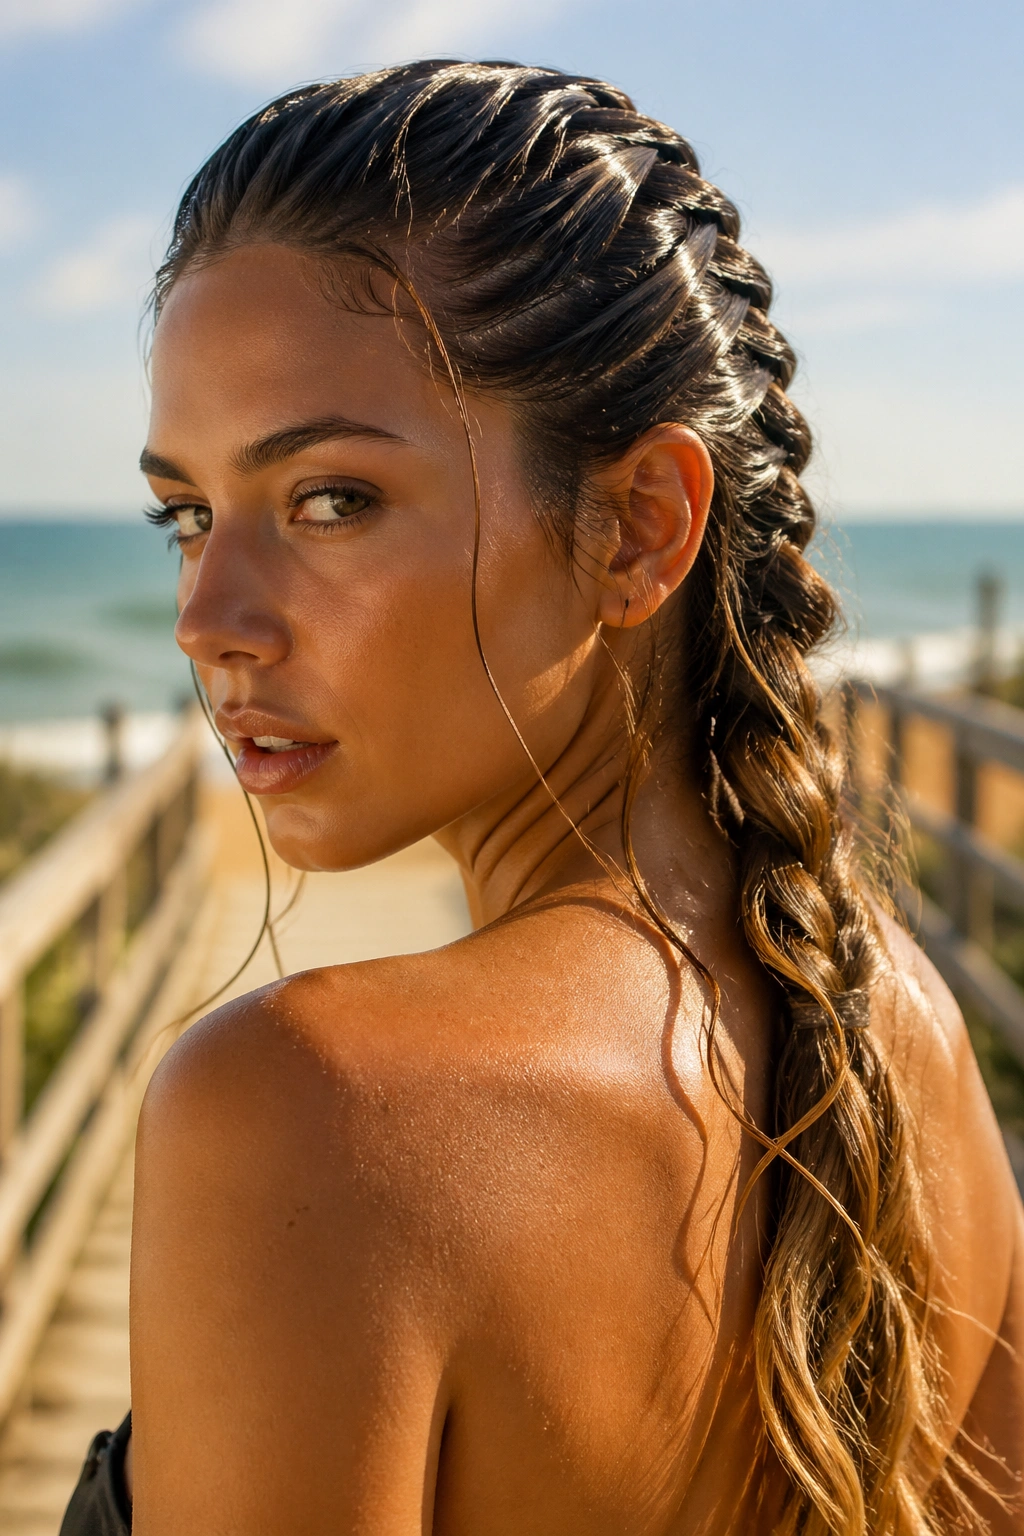
This version leans a little more editorial, but it still belongs in the messy mermaid braid family. The top and mid-lengths get a touch of gel or styling cream, enough to make them sleek, while the ends stay looser and softer so the braid doesn’t turn into a hard shell.
The contrast is what makes it work. Smooth roots give the braid a clear line, and the softer ends keep it from feeling severe. If you’ve ever wanted a braid that can handle humidity and still look on purpose, this is the one to try. It starts controlled, then relaxes as it moves down.
I like this on hair that has a natural wave or bend because the finish at the bottom doesn’t need much help. If your hair is straight, twist the last few inches around your fingers after applying a tiny bit of cream. That adds shape without making the ends sticky.
There’s also a nice trick here: braid the hair while it’s barely damp, not soaked. Too much water drags the braid flat and makes it take forever to dry. Barely damp hair holds shape much better. It’s one of those small details that changes the whole result, and once you notice it, you stop doing the wetter version entirely.
If you want a final thought, it’s this: the best mermaid braids are rarely the neatest ones. They’re the ones with enough hold to stay together, enough slack to move, and enough unevenness to look like a person made them by hand.