A braid can look polished and still feel soft. That’s the part most people miss.
Ceres braids live in that sweet spot: tidy enough to read as intentional, loose enough to keep the face open and gentle. I use the phrase here as a catchall for braid looks that feel feminine, airy, and a little dreamy — less severe than tight boxer braids, less fussy than a formal updo. The magic is in the small things: a braid that isn’t pulled tight at the scalp, a few face-framing pieces, and enough texture that the hair still moves.
The trap is overworking it. Too much shine serum, too many pins, and too much tension can turn a pretty braid into something stiff and slightly older than you wanted. A dry texture spray, a soft mousse at the roots, and a braid loosened by hand after it’s secured will usually do more for a romantic finish than chasing perfection ever will.
Some of the best versions are almost plain from a distance. Up close, though, they have little details: a strand tucked behind one ear, a ribbon tied off-center, a plait that starts crisp and ends airy. Those details are where the softness lives, and they’re the reason these styles work for weddings, dinners, spring events, or any day you want your hair to look considered without looking stern.
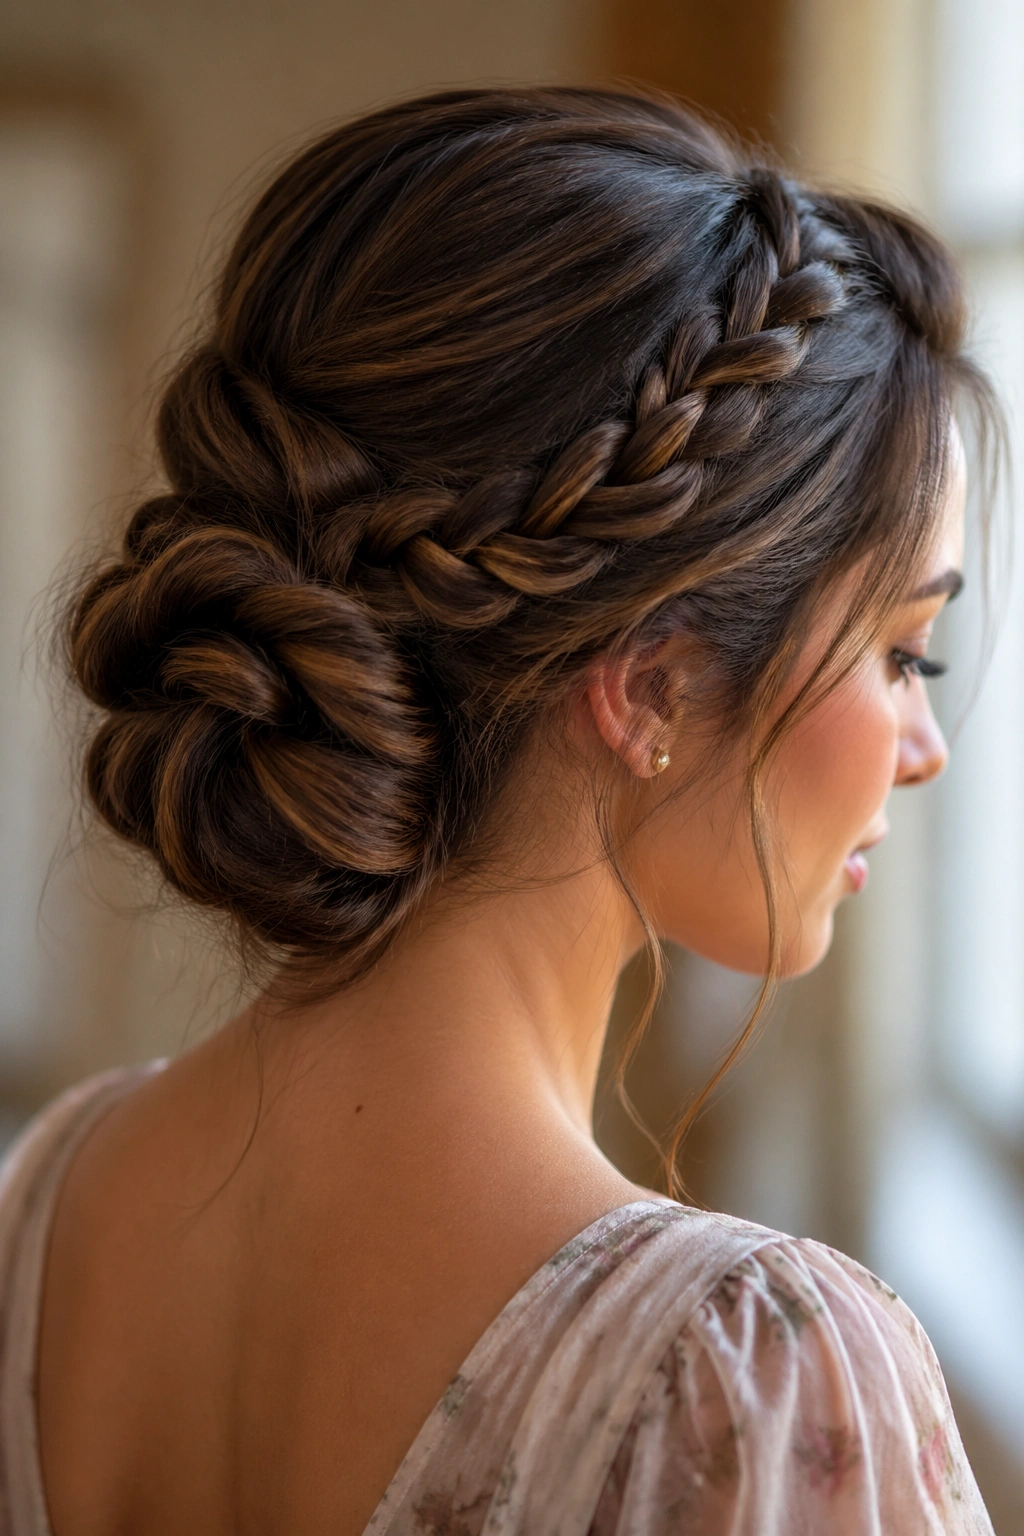
1. Loose Crown Ceres Braid
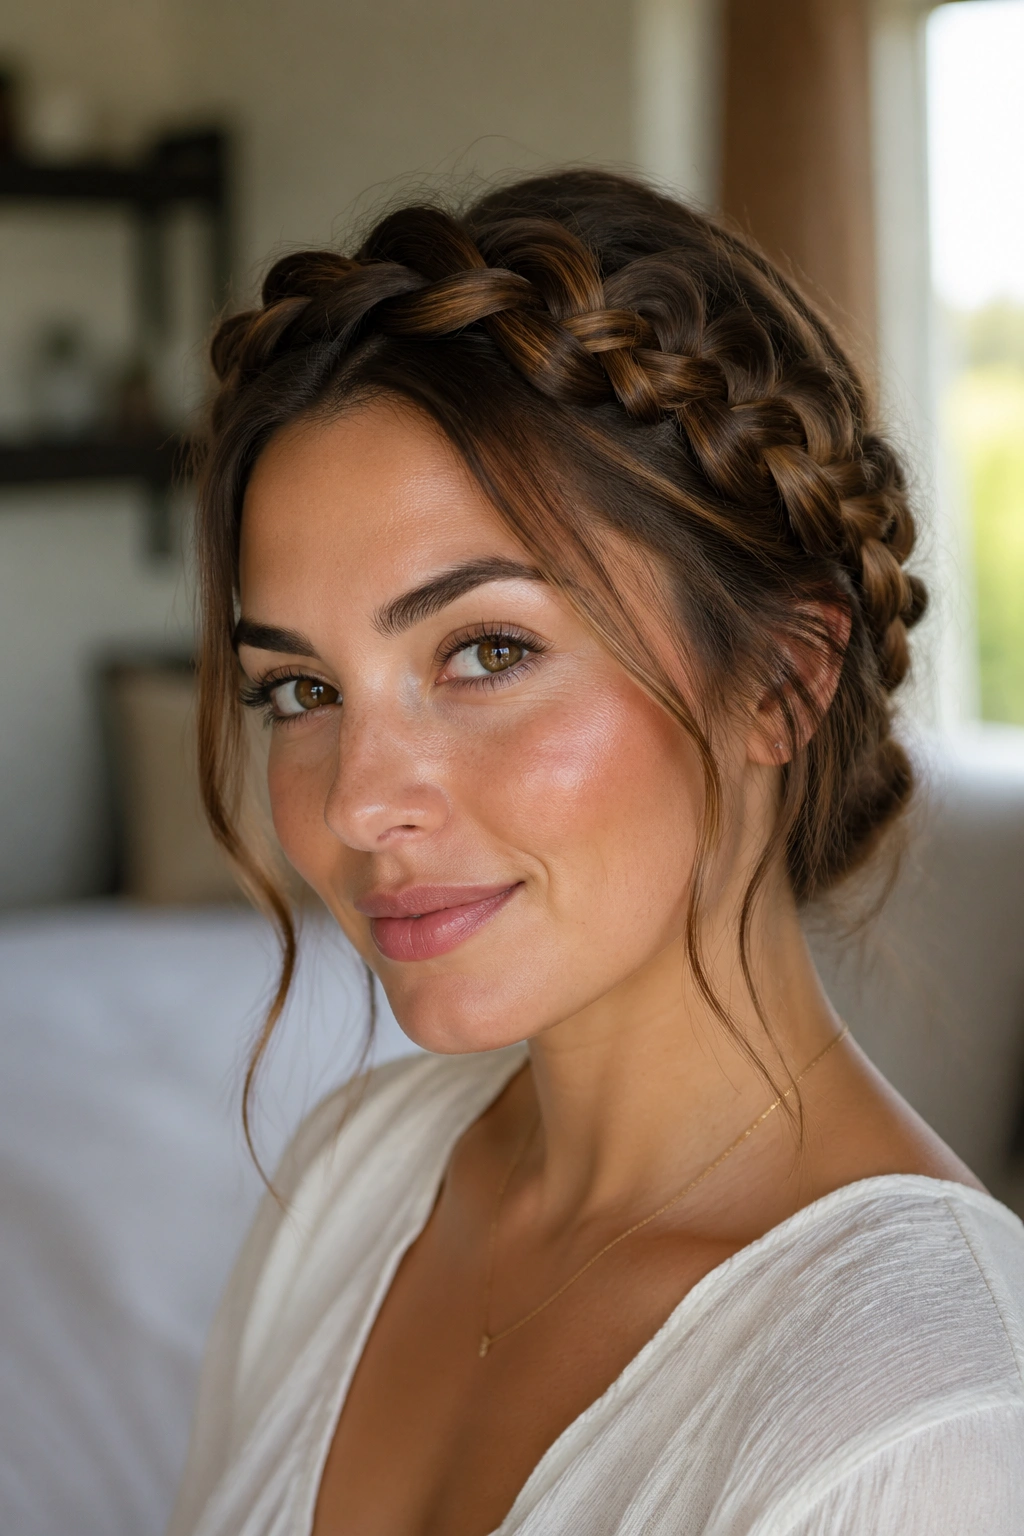
A loose crown braid is the one I reach for when the outfit is simple and the hair needs to do a little work. It frames the face, keeps length off the neck, and still feels breezy instead of formal. If you want a soft romantic braid hairstyle without spending forever in the mirror, start here.
Why It Works
The braid sits high enough to show off the cheekbones, but the loosened sections keep it from looking severe. I like leaving a 1-inch section loose near each temple, then pinning the braid so it crosses the back of the head slightly below the crown. That tiny drop changes the whole feel.
- Use hair that’s 1-day old or lightly misted with dry shampoo for grip.
- Braid from ear to ear, then secure with 2 hidden bobby pins at the nape.
- Gently tug the outer edges of the braid in 2- to 3-mm steps, not giant pulls.
- Finish with a flexible-hold spray from about 10 inches away.
My favorite trick: loosen the braid after pinning it, not before. It keeps the shape intact.
If your hair is fine, backcomb the crown by half an inch first. Not more. You want lift, not a helmet.
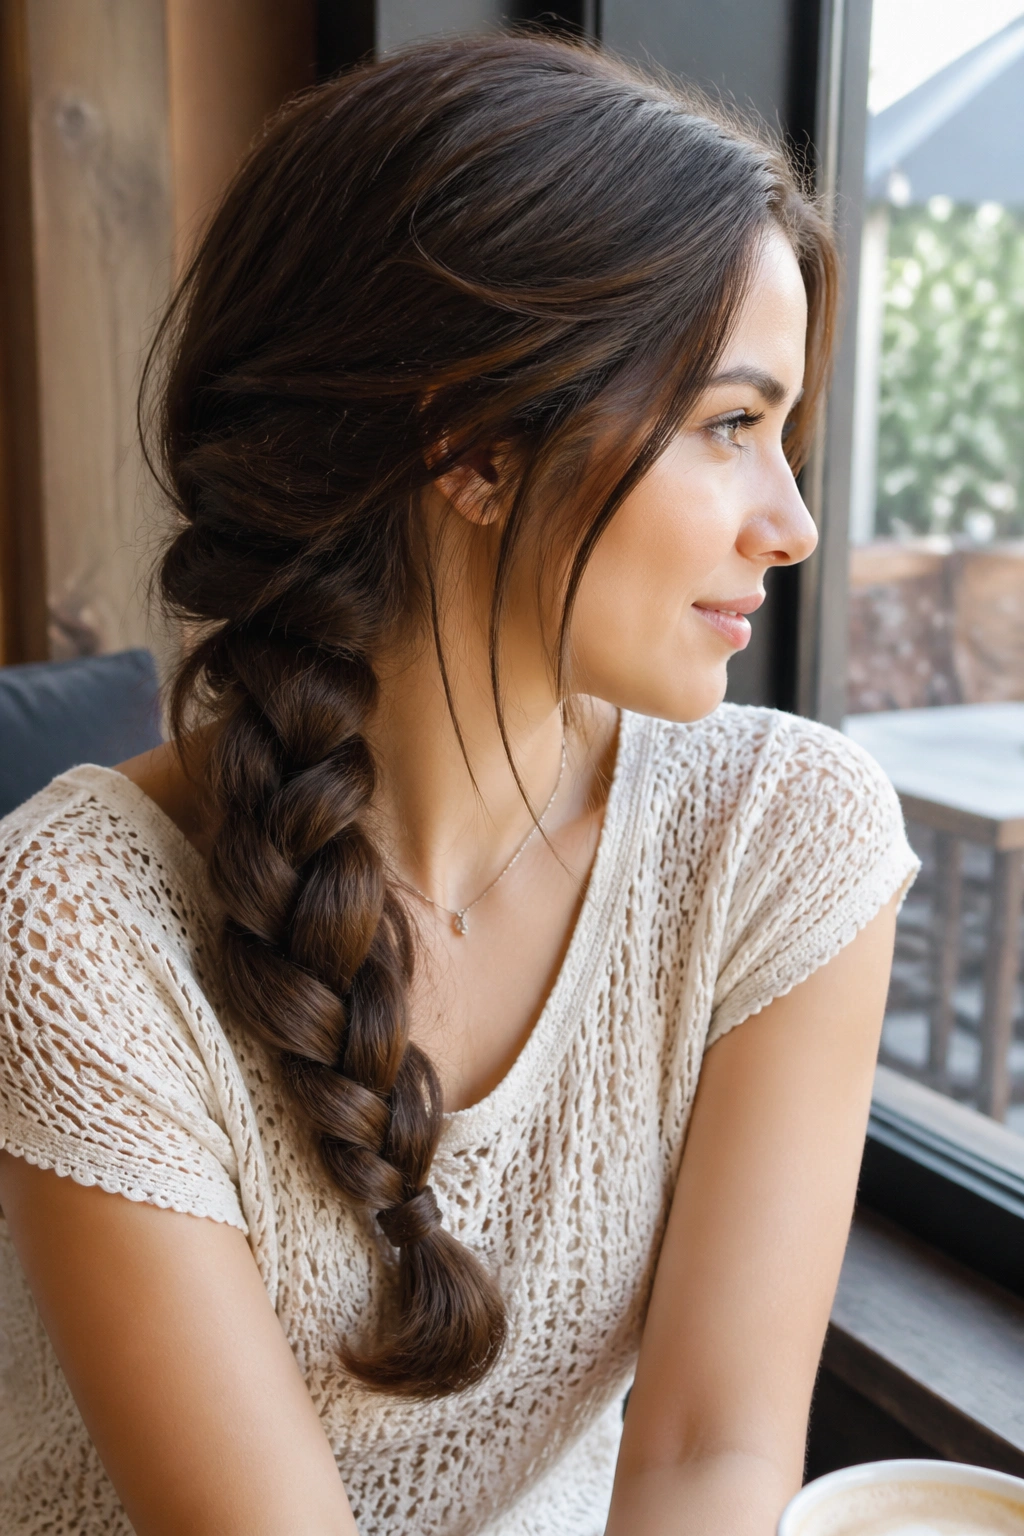
2. Side-Swept Fishtail Ceres Braid
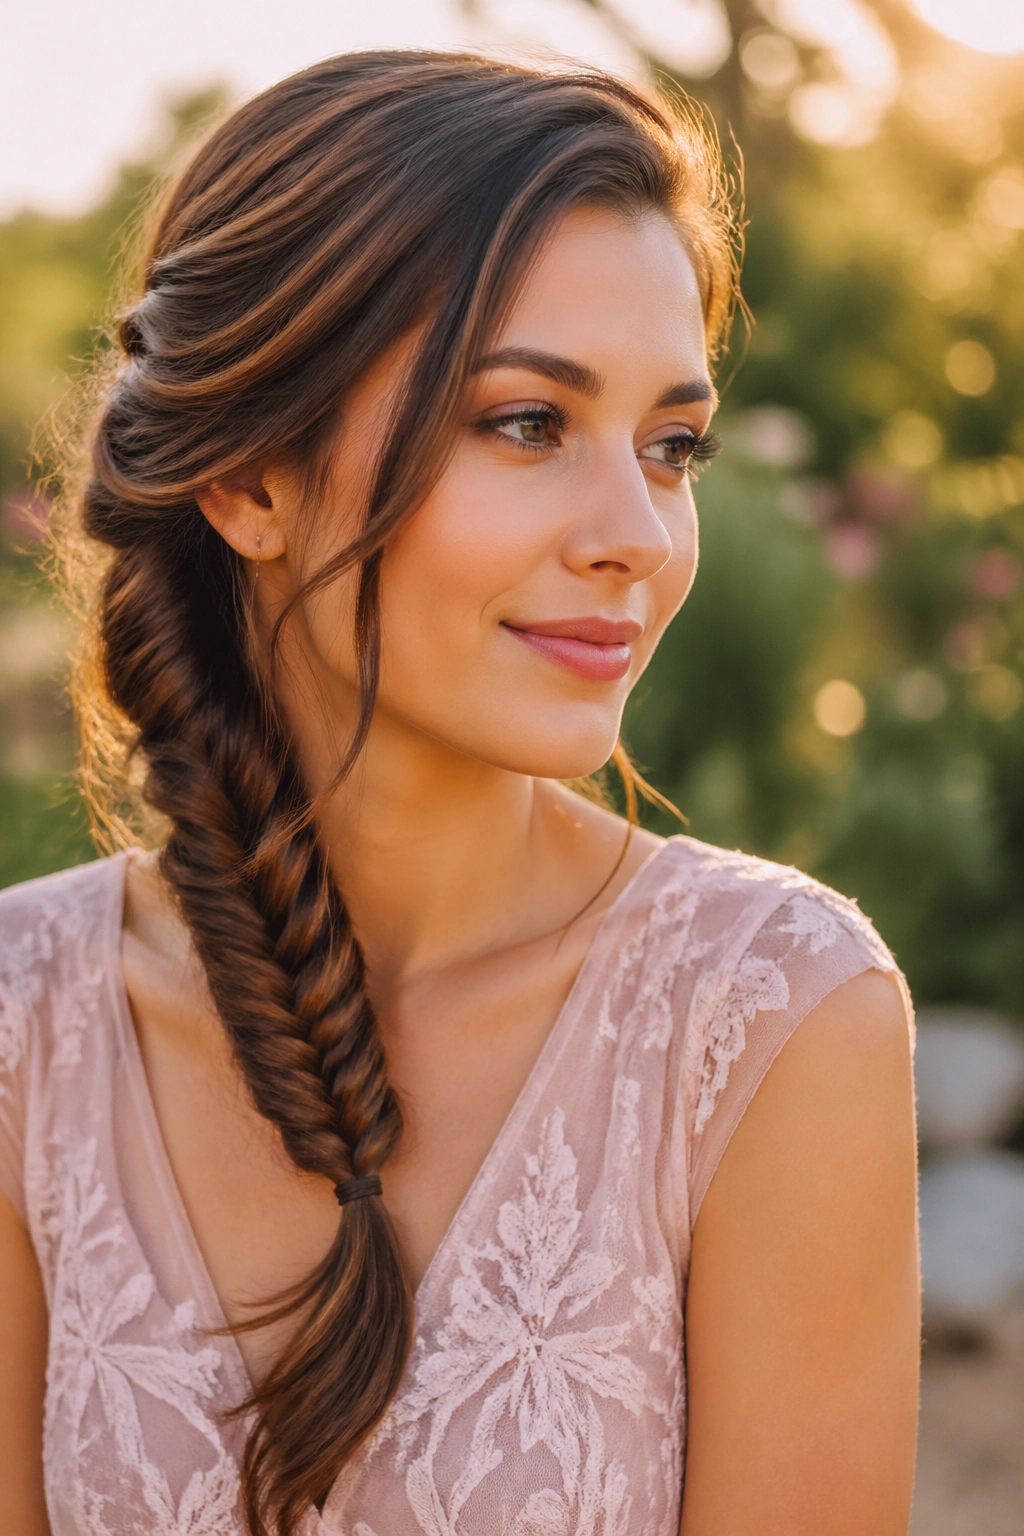
A side-swept fishtail looks fancier than it is. That’s the whole reason I like it.
It gives you the detail of a woven braid with a softer edge than a tight three-strand plait, and the off-center placement makes the style feel relaxed instead of formal. Start the braid below one ear, keep the weave small and even, then let the last 4 to 6 inches fall free if your hair is long enough. That open tail keeps the look from feeling boxed in.
The best version is never pin-straight at the roots. A little bend through the mid-lengths makes the braid sit better on the shoulder, and a side part helps it feel less fussy. If your hair slips, rough up the first 2 inches with a tiny bit of texturizing powder before you begin.
I like this one for long hair that needs shape without a full updo. It also works nicely with a low neckline, because the braid lands right where the outfit ends. Keep the fishtail loose, and it reads soft instead of beachy or overdone.
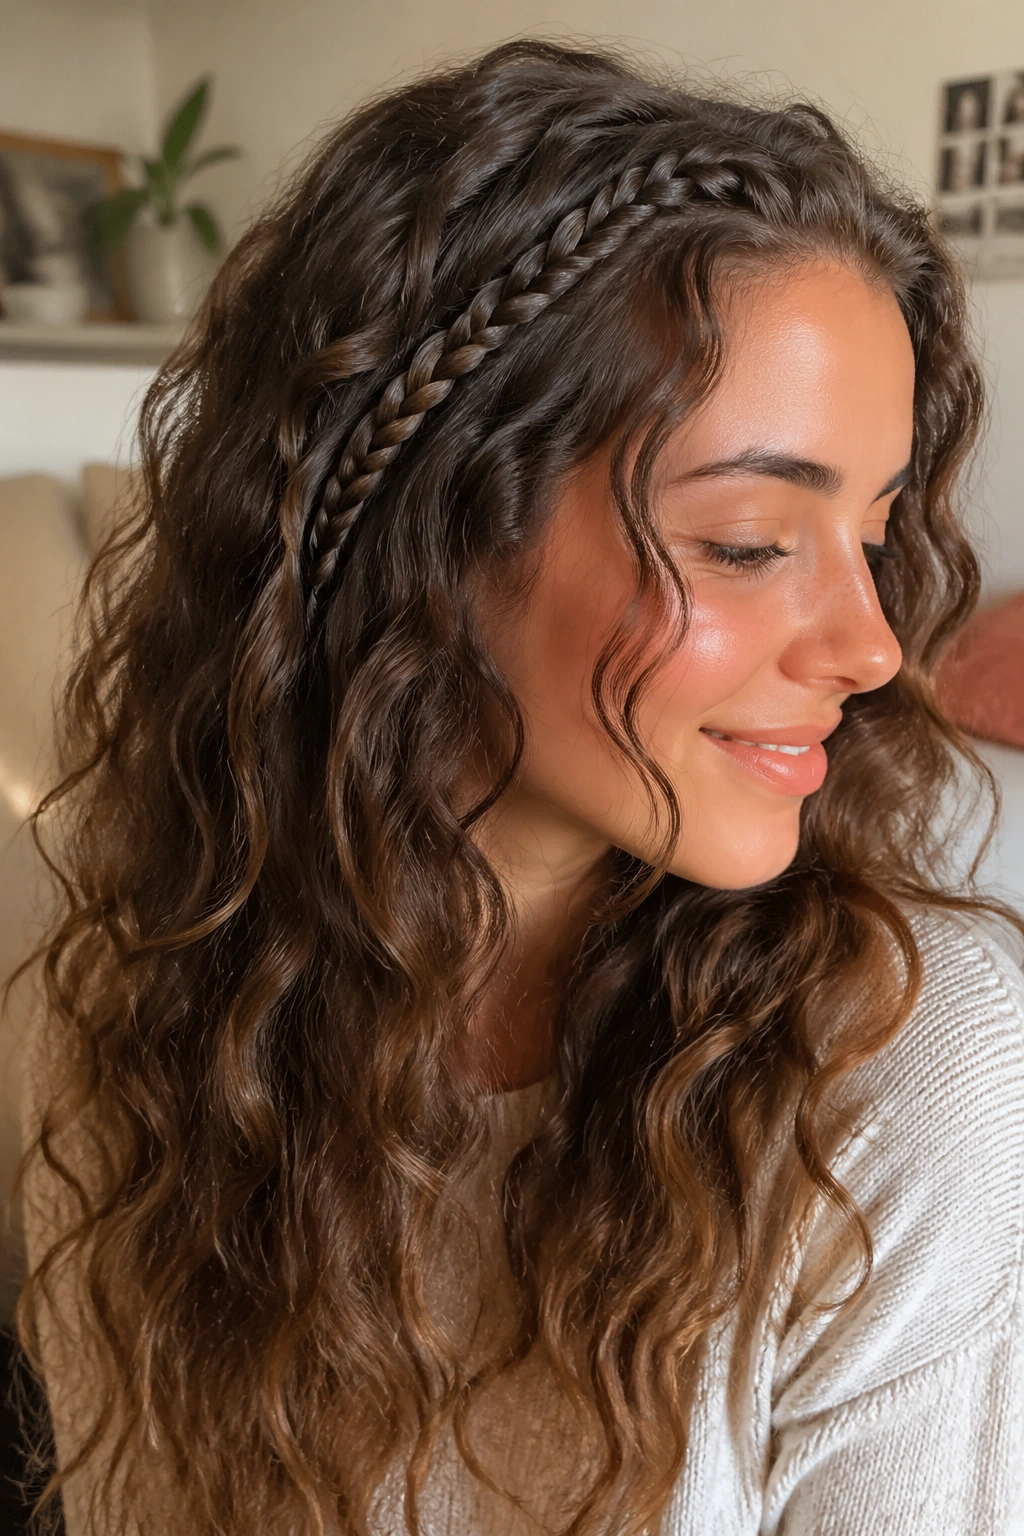
3. Half-Up Twin Ceres Braids
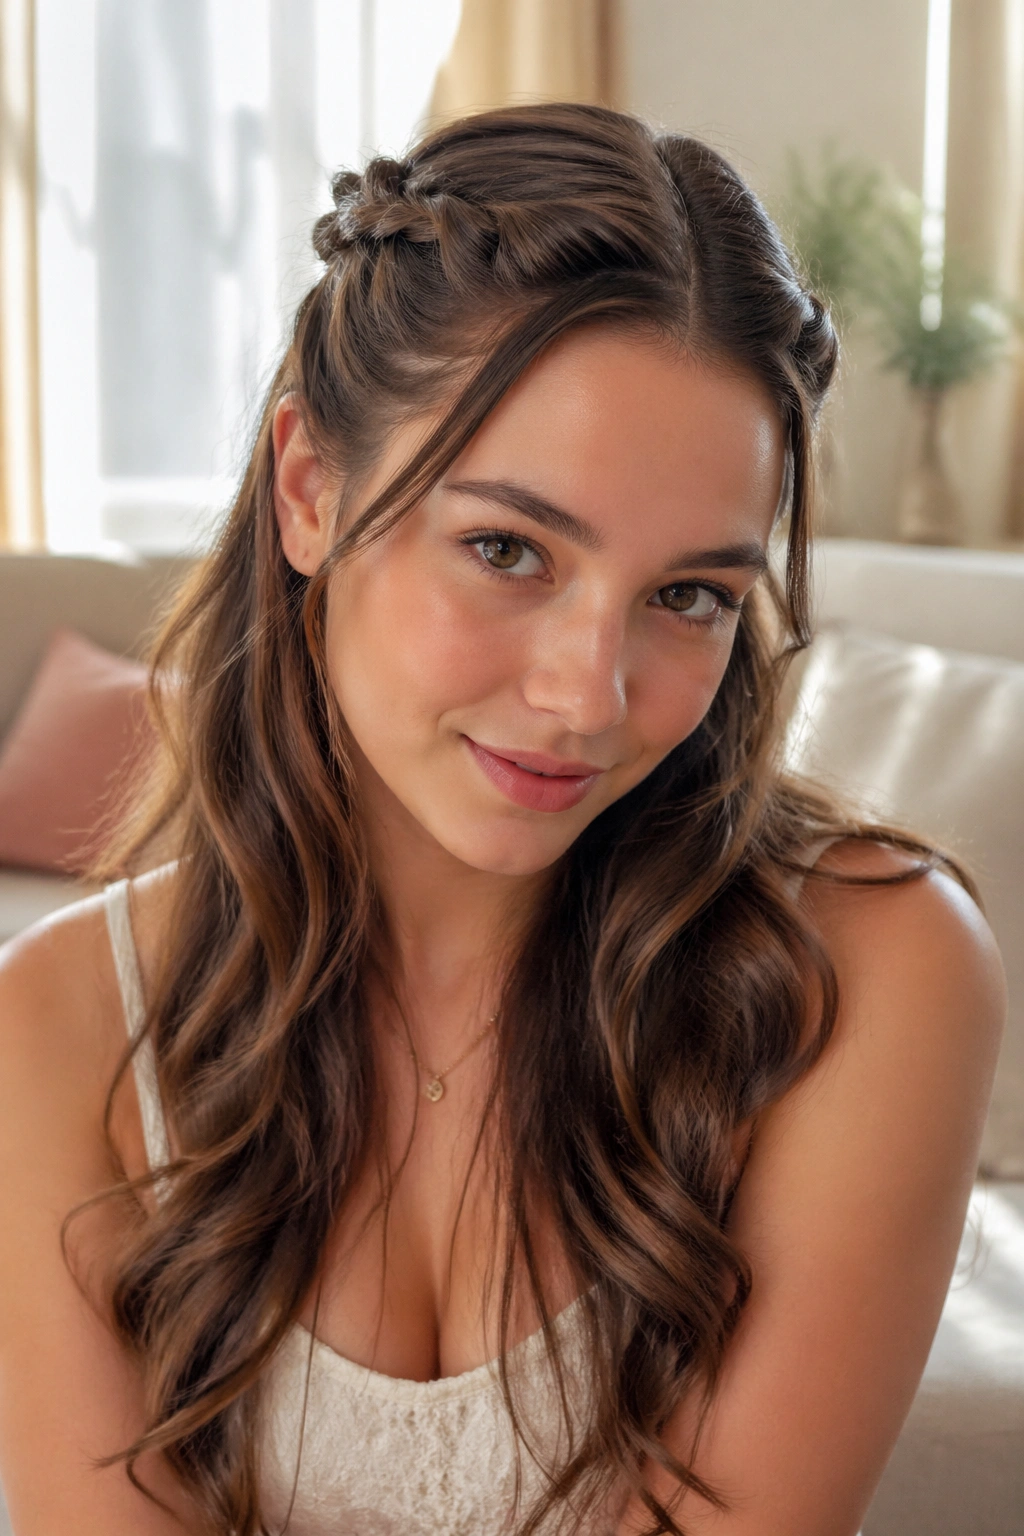
Why do twin half-up braids feel so romantic? Because they leave the hair open.
You get the pretty framing at the top, but the length still moves, which keeps the style from feeling heavy. This is one of those looks that works especially well with loose curls underneath, since the two small braids act like a frame rather than the whole story. I usually braid from just behind the temples, cross the two braids at the back, and pin them under a small puff of volume.
How to Wear It
If you want the softest version, curl the lower half of the hair with a 1-inch iron and brush the curls out once they cool. That step matters. Tight ringlets can fight the relaxed braid vibe, while brushed waves make the whole thing feel gentler.
- Part the hair slightly off-center for a more natural finish.
- Keep each braid no thicker than 1 inch at the base.
- Secure the braids with clear elastics before crossing them.
- Leave 2 thin pieces loose around the temples.
This style is especially good when you want braids but don’t want to lose length. It’s also kind to layered hair, since the layers blend into the waves instead of sticking out in odd places.
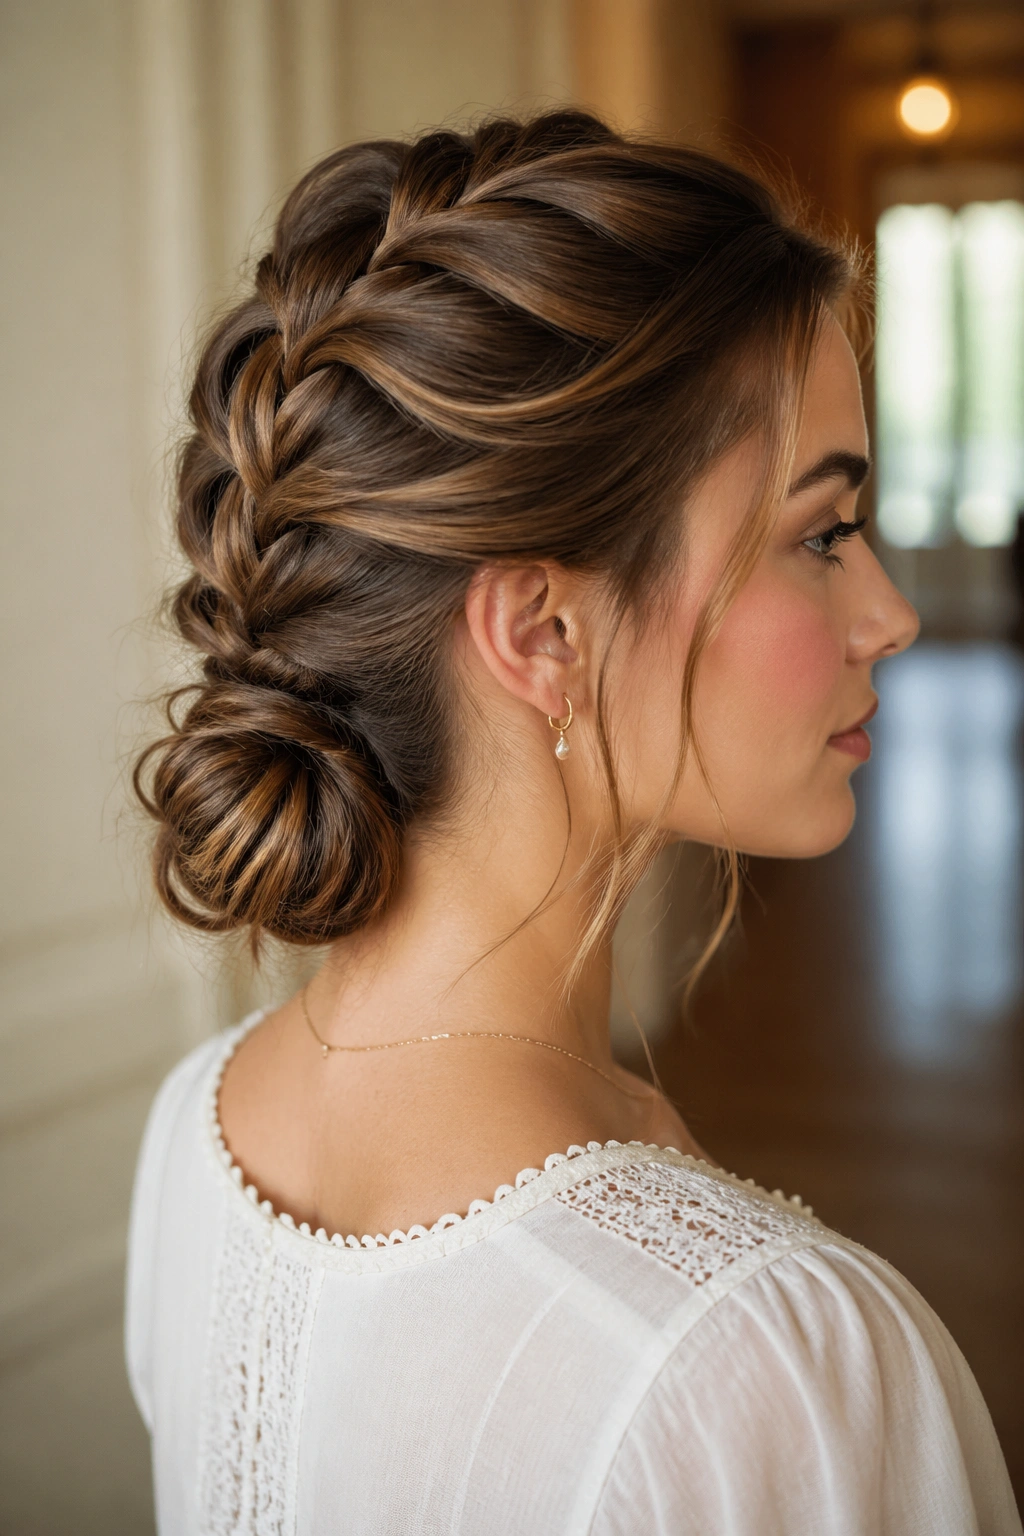
4. Low Braided Chignon
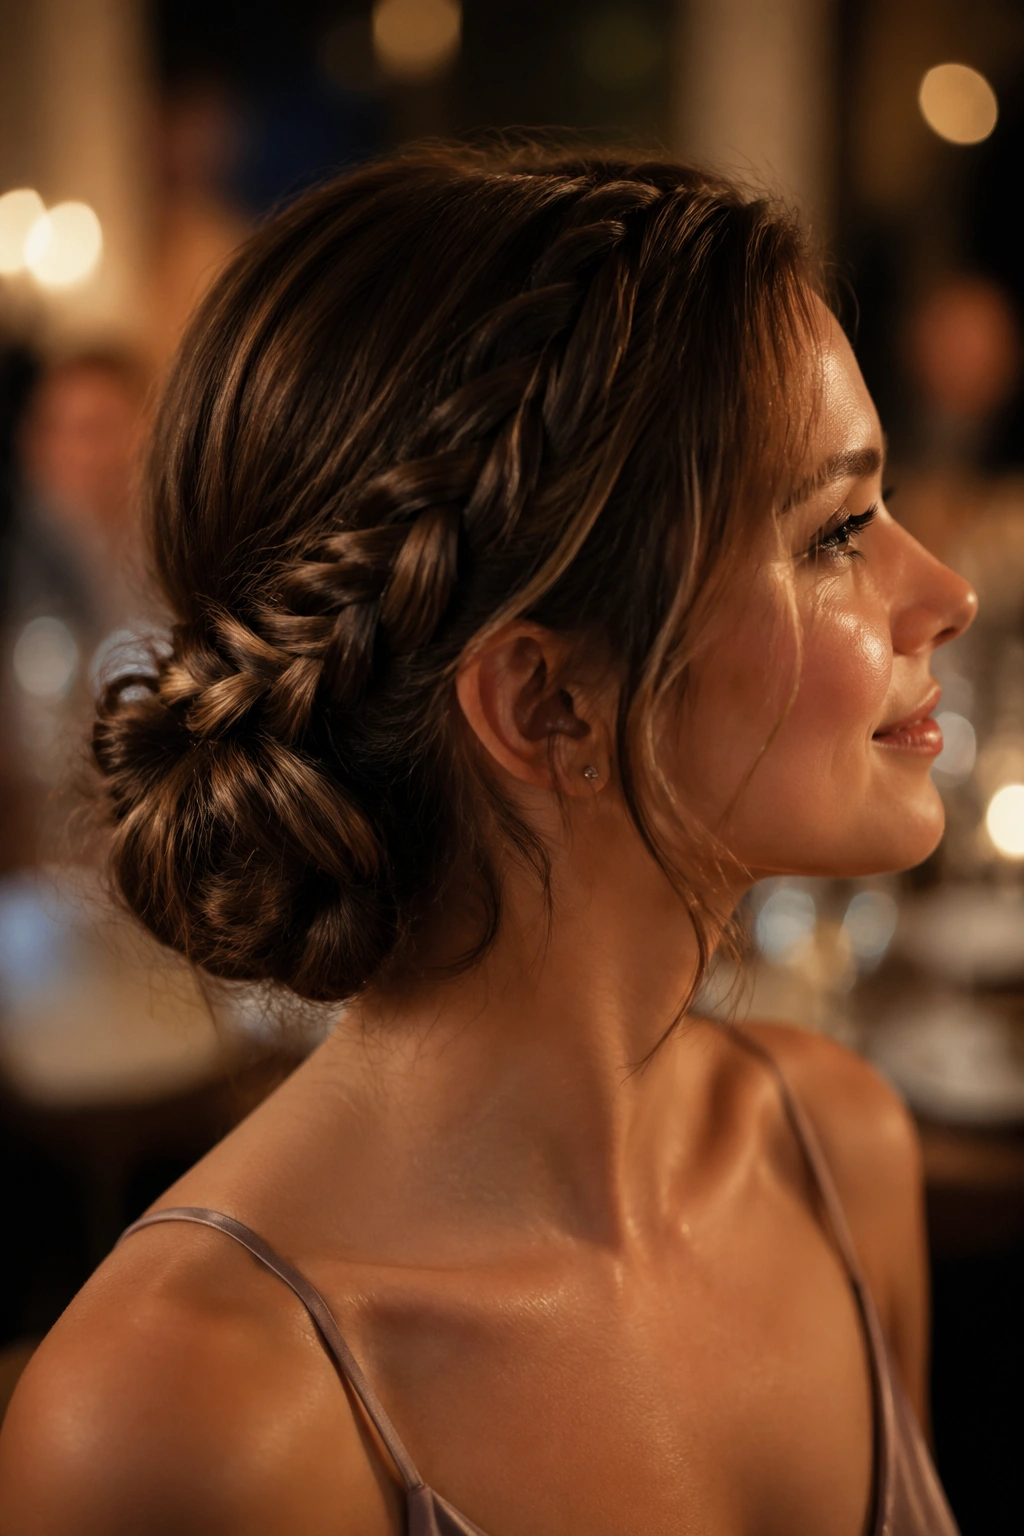
I’d wear this to a dinner where the lighting is low and the table is crowded. It behaves well.
A low braided chignon gives you the softness of a bun with a little more texture through the back of the head, which is exactly why it feels more romantic than a plain twist. The braid can start at the nape or just above it, then coil into a bun that sits close to the neck. Keep the coil loose and a bit imperfect. Too neat, and the whole thing turns severe.
Key Details That Matter
- Use 4 to 6 bobby pins, crossed in an X shape for grip.
- Place the bun just below the occipital bone, not halfway up the head.
- Leave the top of the braid slightly widened by hand.
- Let a few ends peek out if the hair is layered.
This one works especially well for medium to thick hair, because the bun has enough body to hold its shape. Fine hair can do it too, but you’ll want a bit of mousse at the roots and maybe a small filler bun if the length is short.
The best part is how close it sits to the neck. That placement gives the style a quiet softness, even when the braid itself is structured.
5. Halo Braid with Face-Framing Pieces
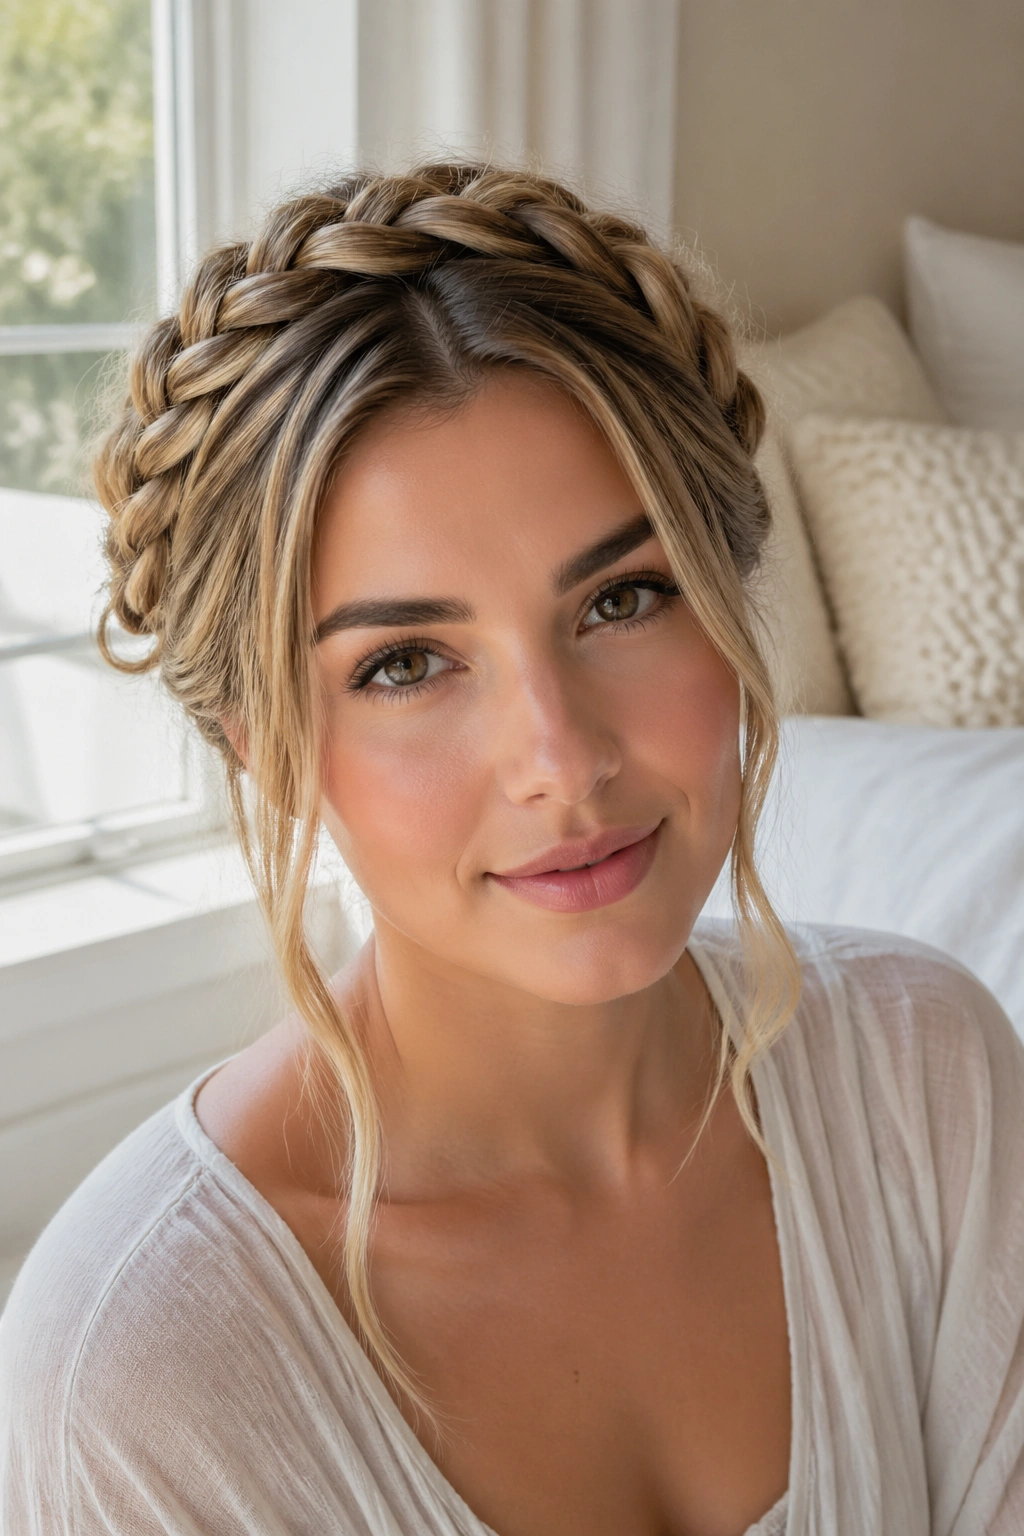
A halo braid can go wrong fast. Too tight, and it starts to look ceremonial. Too polished, and it loses the easy charm that makes it worth wearing at all.
The version I like keeps the braid a finger’s width away from the hairline, then softens the front with two small tendrils on each side. Those pieces matter more than people think. They break up the circle and stop the style from looking like a hard frame around the face. If you have a strong jawline or want to soften a square shape, that little bit of movement helps.
The braid itself should be medium-sized, not thick enough to feel chunky and not so tiny that it disappears. Aim for about 1 to 1.5 inches of braid width around the head, depending on hair density. I also like a very slight lift at the crown before the braid goes around, because it stops the style from sitting flat against the skull.
A halo braid has a quiet sort of drama. It reads polished from across the room, but up close it should still feel touchable. Skip the hard gloss. Soft shine is enough.
6. Waterfall Braid on Soft Waves
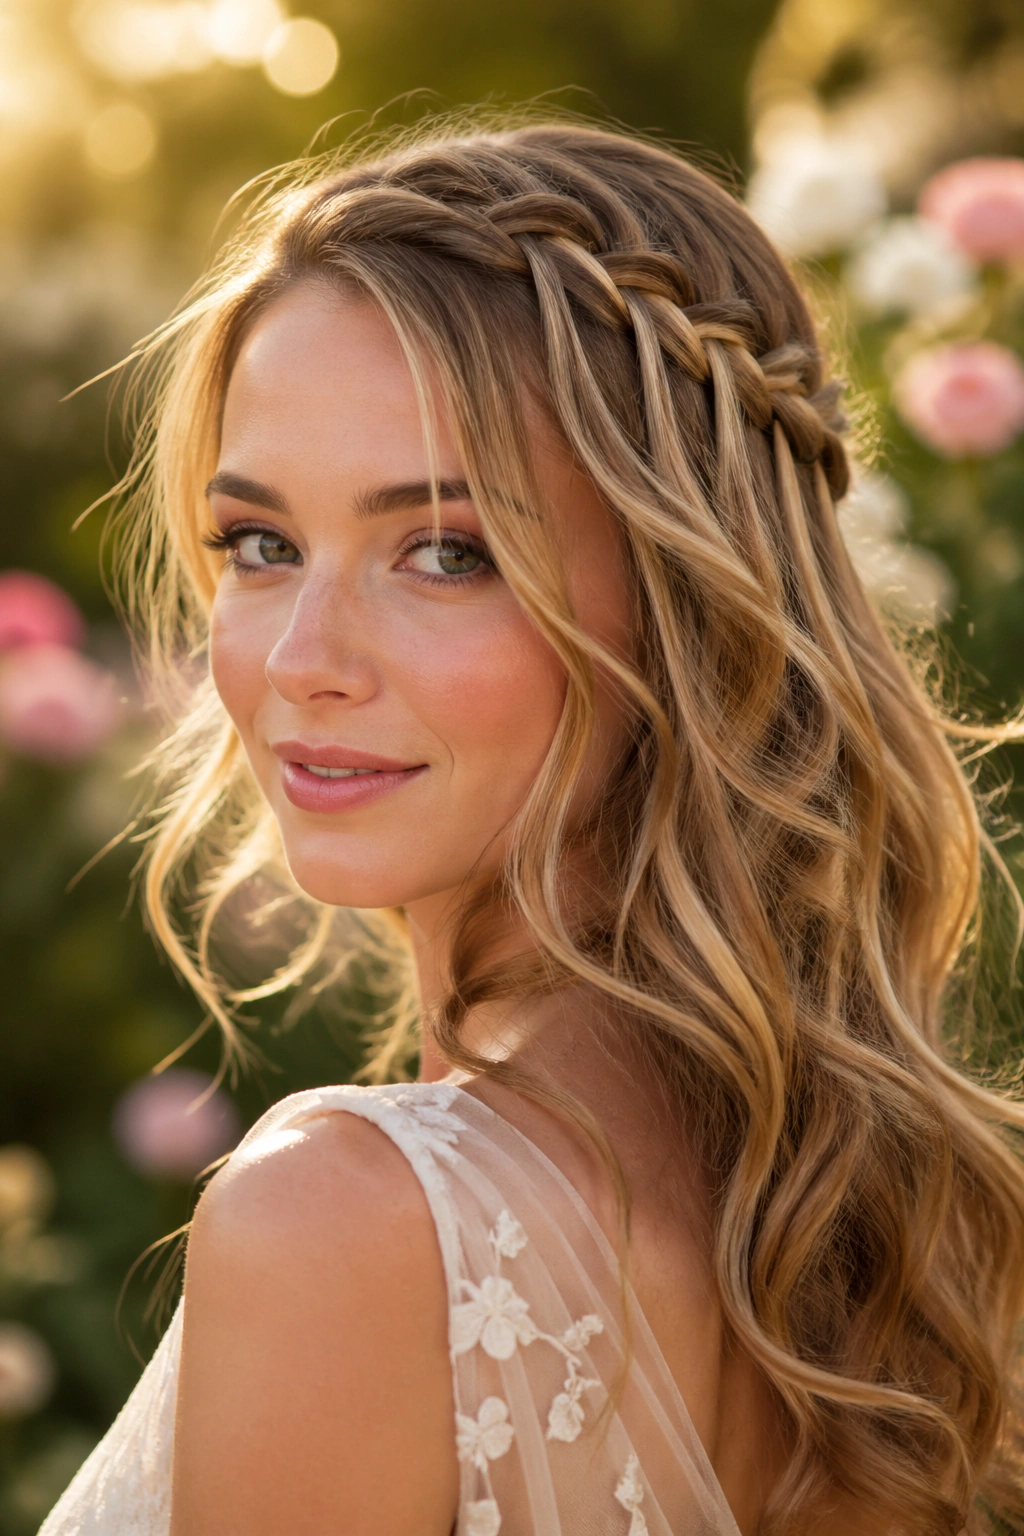
Unlike a full braid, a waterfall braid leaves most of the hair free. That’s exactly why it feels airy.
The braid drops sections through the weave while the rest of the length stays down, so you get movement instead of control. That makes it a strong choice if you want a braid that looks intricate without swallowing the whole hairstyle. I’d choose it for long layered hair, shoulder-length hair with some bend, or any style where the ends need to stay visible.
The trick is to pair it with loose waves, not tight curls. A 1-inch curling iron or a three-barrel tool can work, but brush the waves out once they cool so the braid sits into them instead of fighting them. You want the drops in the braid to blend into the hair, not stand out like little hooks.
This one is best when you want the braid to feel like a detail, not the entire event. It’s softer than a crown braid, lighter than a milkmaid braid, and easier to wear with hair down. If you like romantic braid hairstyles that still show off length, this is one of the cleanest choices.
7. Dutch Braid into Loose Ends
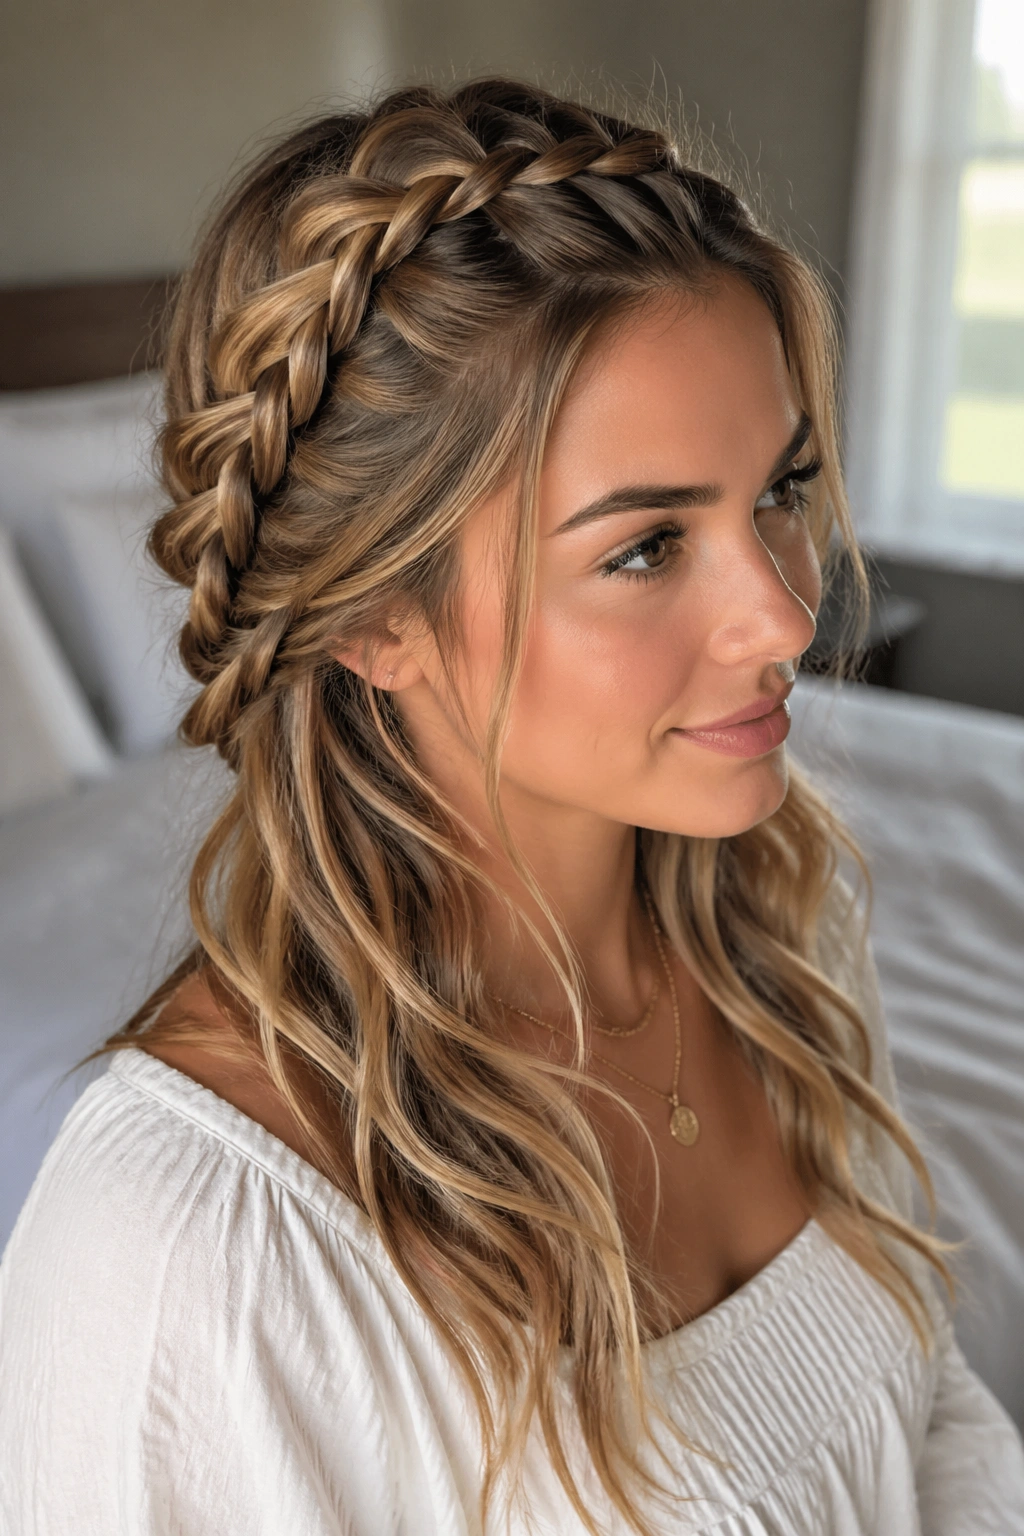
A Dutch braid has more edge than most people think, and that’s exactly why it softens so well when you loosen the top only. Start with a tight base so the braid has structure, then gently widen the outer loops after it’s secured. Leave the tail loose and brushed out, and the whole thing turns from sporty to soft in a minute.
How to Keep the Base Soft
The base matters more than the braid itself. If the first 2 inches are flat and tight, the style will look severe no matter how much you tug later. I prefer a slightly off-center part, then a braid that starts just behind the hairline instead of right at it.
- Use a pea-sized amount of mousse through damp roots before drying.
- Braid along the scalp with moderate tension, not hard pulling.
- Secure the braid at the nape with a clear elastic.
- Gently pancake only the outer edges near the top.
This style works well on thick hair, because the braid has enough body to show the pattern. On fine hair, a little dry shampoo at the roots keeps the braid from slipping.
The loose ends are what make it romantic. Brush them into a soft wave or leave them slightly bent from a blowout. Straight ends can work, but they do make the whole style feel more casual.
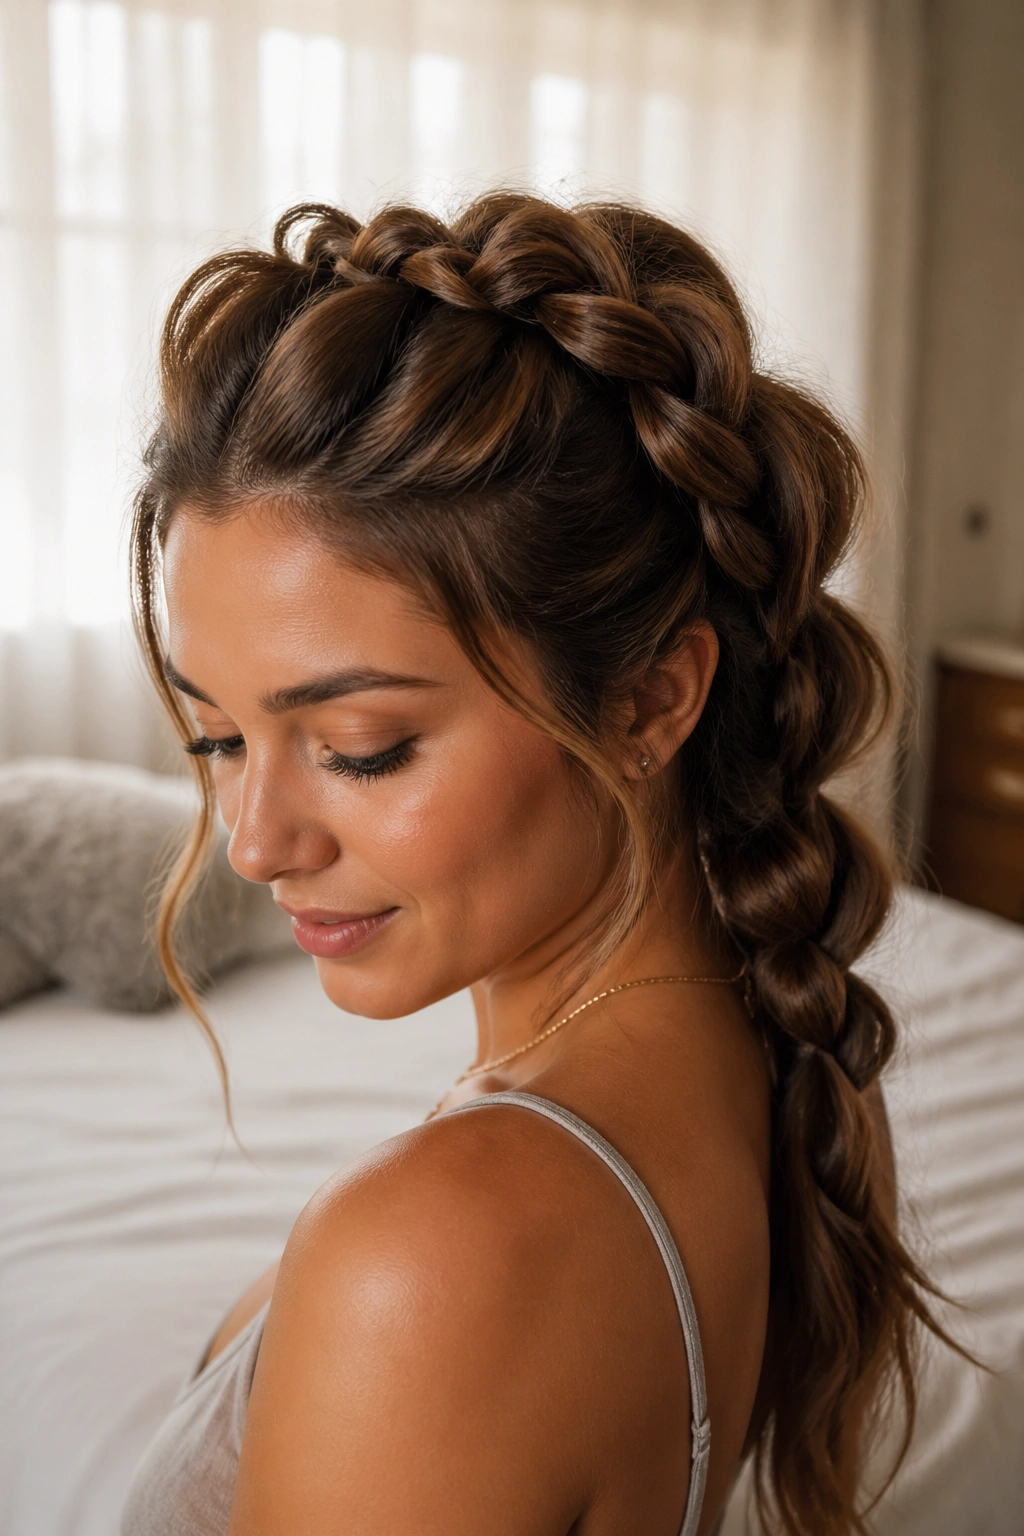
8. Rope Braid Ponytail with Ribbon
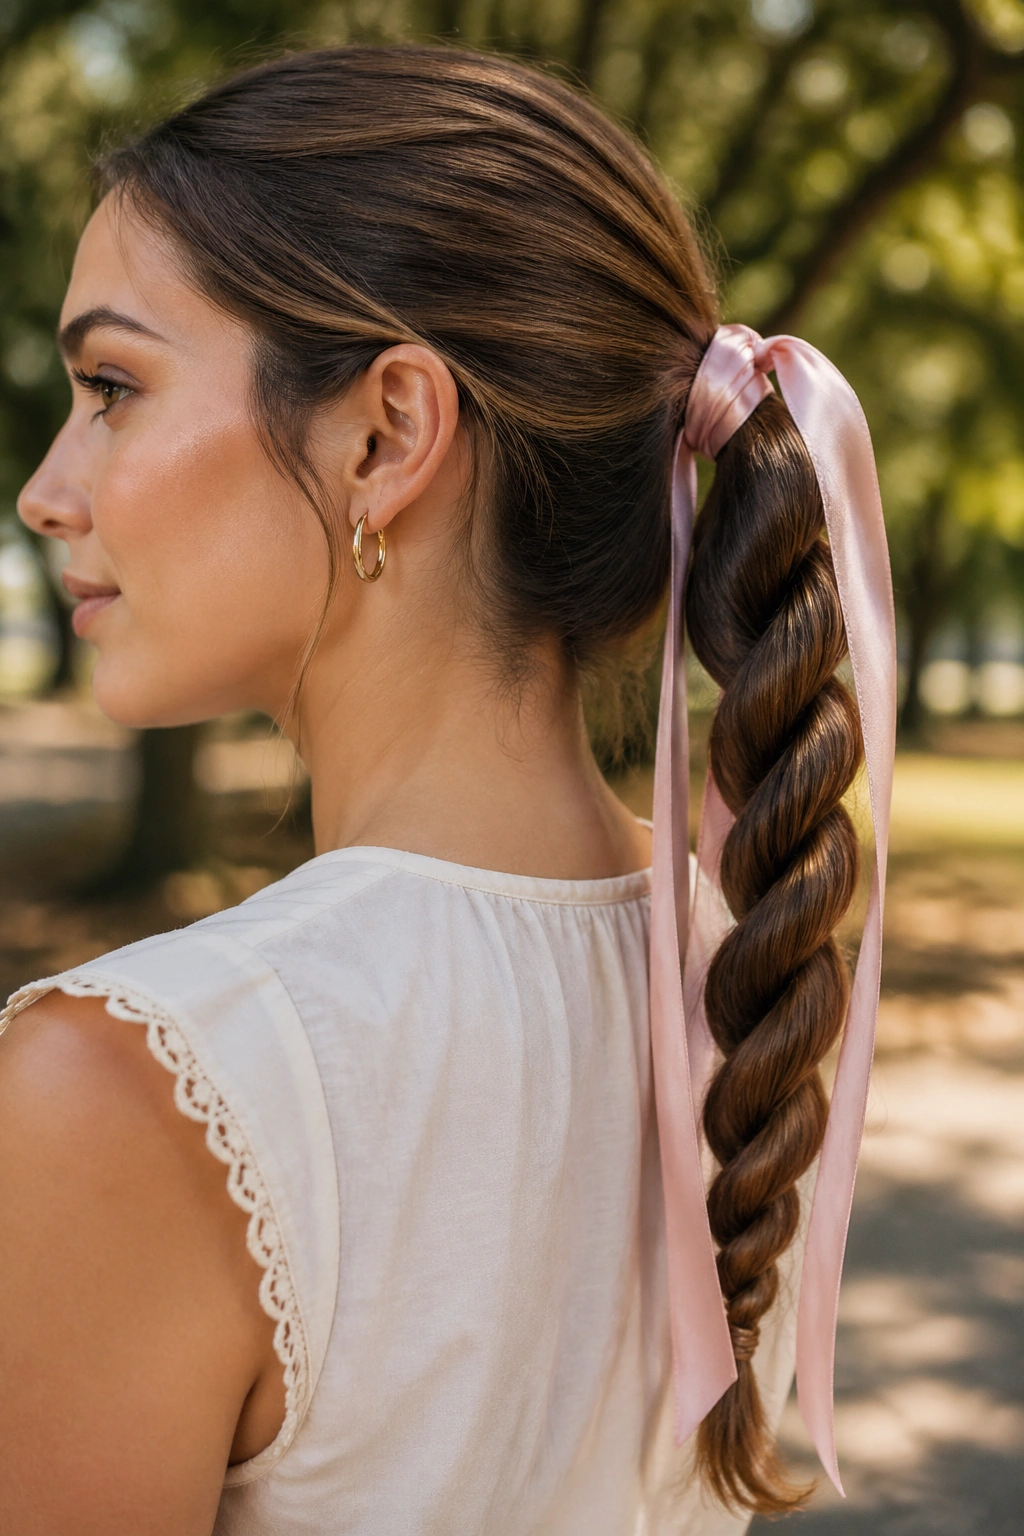
A rope braid ponytail can look almost plain in a mirror, then suddenly feel graceful once a ribbon enters the picture. I like satin for shine and grosgrain if you want the bow to hold its shape better. A ribbon that’s 1/2 to 1 inch wide is enough; anything wider starts stealing attention from the braid.
The braid itself is simple: split the ponytail into two sections, twist each one in the same direction, then wrap them around each other in the opposite direction. That twist pattern gives you a clean spiral that looks refined without needing much skill. Tie it low or at mid-back, depending on how soft you want the finish.
This is a good option for hair that doesn’t hold tiny braids well. Rope braids grip better than many three-strand styles, especially when the hair is layered or a little slippery. If you want extra softness, pull a few wisps from the crown after the ponytail is secured. Not too many. Two or three strands are enough.
The ribbon matters more than people admit. A black ribbon feels classic, blush feels delicate, and cream works when you want the style to sit quietly against the hair.
9. Braided Chignon with a Twist
Why does a braided chignon feel more romantic than a plain low bun? Because the braid gives the eye something to follow.
A simple bun can sometimes read as practical only. Add a braid that wraps into the knot, and the style suddenly has texture, movement, and a little visual interest near the nape. Keep the braid loose through the middle and tuck the ends underneath, then pin the chignon close to the base of the neck. That placement keeps the look soft.
Where to Place the Knot
The sweet spot is low enough to brush the collar line, but not so low that it disappears into the shirt. I like the knot about 1 inch above the hairline at the nape. That gives you shape while still letting a few strands soften the edges.
A braided chignon works well for weddings, formal dinners, and anywhere you want the hair off your face without losing romance. It’s also kinder than a sleek bun if your hair has layers, because the braid hides the shorter pieces instead of forcing them into obedience. Good hairpins help here. Cheap ones slide.
If the braid feels too tight after pinning, pull at the sides in tiny steps with your thumb and index finger. That small move changes the whole mood.
10. Accent Braid in Long Curls
A single accent braid can do more than a full head of braids when the rest of the hair is already doing something pretty. Think of it as a quiet detail, not a main event. One thin braid tucked near the temple or along the hairline adds structure, while the curls around it keep the look soft and loose.
I like this for long hair that already has a wave or a curl pattern. You don’t need to braid much. Sometimes one braid no thicker than a pinky, starting near the part and ending behind the ear, is enough. Secure the end with a tiny clear elastic, then hide it under a curl if the hair is long enough.
The braid should not be too neat. A little unevenness helps it blend into the curls, which is the whole point. If the rest of the hair is textured, the braid becomes a subtle accent. If the rest of the hair is smooth, the braid becomes a small focal point. Both work.
What to Watch For
- Keep the braid thin: about 1/4 to 1/2 inch wide.
- Place it on the heavier side of a side part for balance.
- Mist the finished curl pattern with flexible spray, not hard lacquer.
- Tuck the elastic under a curl so it disappears.
This is the style I’d choose when I want a braid but don’t want to give up the softness of loose hair.
11. Milkmaid Braid with Soft Volume

Milkmaid braids are one of those styles people either adore or dismiss too quickly, and I think that’s a shame. Done right, they’re soft, feminine, and surprisingly wearable. The trick is volume. If the braids are pulled flat to the head, the style can feel severe. If they’re loosened a little and lifted before pinning, they become almost cloudlike.
I like this version best on hair that reaches at least the collarbone, though longer hair makes the wraps easier. Start with two braids, one on each side, then cross them over the crown and pin them just behind the ears. A few hidden pins will do, but use enough to keep the weight from shifting. Four to six is normal. More if your hair is thick.
A center part gives the traditional version, but a soft off-center part feels easier and less costume-like. That tiny change matters. So does leaving the front pieces slightly loose instead of scraping them straight back. The style should look settled, not forced.
If you want the braid to feel extra romantic, keep the ends tucked but not invisible. A little softness at the pin line helps the whole crown sit like it belongs there.
12. French Braid into a Low Knot
A French braid into a low knot is the best kind of compromise. It looks pulled together, but not strict.
Unlike a full French braid that runs all the way down the back, this version stops at the nape and turns into a soft knot or folded bun. That gives you the clean line of the braid up top and the gentler shape at the bottom. It works especially well for workdays that turn into dinners, because the style stays put for hours without looking overly dressed.
The braid should begin with a 2-inch section at the crown, then gather hair gradually as you move down. Keep the braid snug at the top, then relax your grip once you reach the lower half of the head. That shift creates a natural fade from structured to soft. If the ends are layered, pin them into the knot instead of wrapping them around and around.
This style is a good choice for medium-length hair that needs a little control. It also behaves well in humidity, which I appreciate more than I should. A light mist of flexible spray at the braid and a few crossed pins at the knot are usually enough.
13. Pull-Through Braid with Pillowy Texture
A pull-through braid gives you the volume of a huge braid without asking you to weave three sections the hard way. That’s the appeal, and it’s a good one. The style is built from a chain of ponytails, then puffed out one section at a time, so the final shape looks full and soft even if your hair is fine.
Start with clear elastics every 1.5 to 2 inches down the length. That spacing keeps the sections even and makes the braid easy to shape. After each ponytail is made, split the section above it and pull the lower ponytail through. Once the chain is built, gently widen each bubble with your fingers. Not all at once. Work from top to bottom so the shape stays balanced.
This braid shines on long hair, clip-in extensions, or any texture that struggles to hold a traditional braid. It also pairs well with soft waves at the front, because the body of the braid is already doing the heavy lifting. I’d avoid making it too tidy. The point is loft, not precision.
Best tip: hide the elastics with a small ribbon or a strand of hair wrapped around each one if you want the style to read dressier.
14. Soft Side Sweep Braid
If I had to pick one braid that quietly does a lot of work, it would be this one. A side-part braid with tucked ends is easy to wear, easy to soften, and easy to adapt when the hair is thick, fine, layered, or somewhere in between. It starts with a deep or moderate side part, then moves into a loose braid that drapes over one shoulder before the ends are tucked under or pinned out of sight.
That tucked finish is what keeps it from feeling casual in the wrong way. You still get the movement of a side braid, but the shape feels intentional because the ends disappear neatly. I like leaving the front side open with one soft wave near the cheekbone. It gives the braid a little breathing room and stops the style from becoming one long rope of hair.
This is the one I’d choose when I want a soft romantic look without a lot of fuss. It works with a silk blouse, a square-neck dress, or even a simple knit if the braid itself has enough texture. If you only try one of these styles, start here. It’s forgiving, pretty, and easier to fix than it looks.