Pin-straight long hair looks polished until it slips out of everything. A lace braid ponytail fixes the part that usually misbehaves: the front stays anchored, the crown looks intentional, and the length still gets to move. On hair that lies flat and glossy, that little strip of braid can make the whole style feel held together instead of sliding loose by lunch.
Straight hair has a slick surface. Freshly washed hair can be almost too cooperative, which is lovely until the braid starts to unravel faster than you can pin it. A small puff of texturizing spray, a tail comb, and a few clear elastics change the result more than heavy styling ever will. You don’t need a ton of product. You need grip, clean sectioning, and a plan.
That’s what makes lace braid ponytails so useful on long, straight hair: the braid handles the top and sides, while the ponytail shows off the length. You can wear the style high, low, side-swept, wrapped, bubble-backed, or a little undone if you want softness around the face. The shine that comes with pin-straight hair becomes part of the appeal instead of something you have to fight.
Start with the version that matches your day. The high one looks sharp in five minutes. The low one feels softer. And the rest? They each solve a slightly different problem.
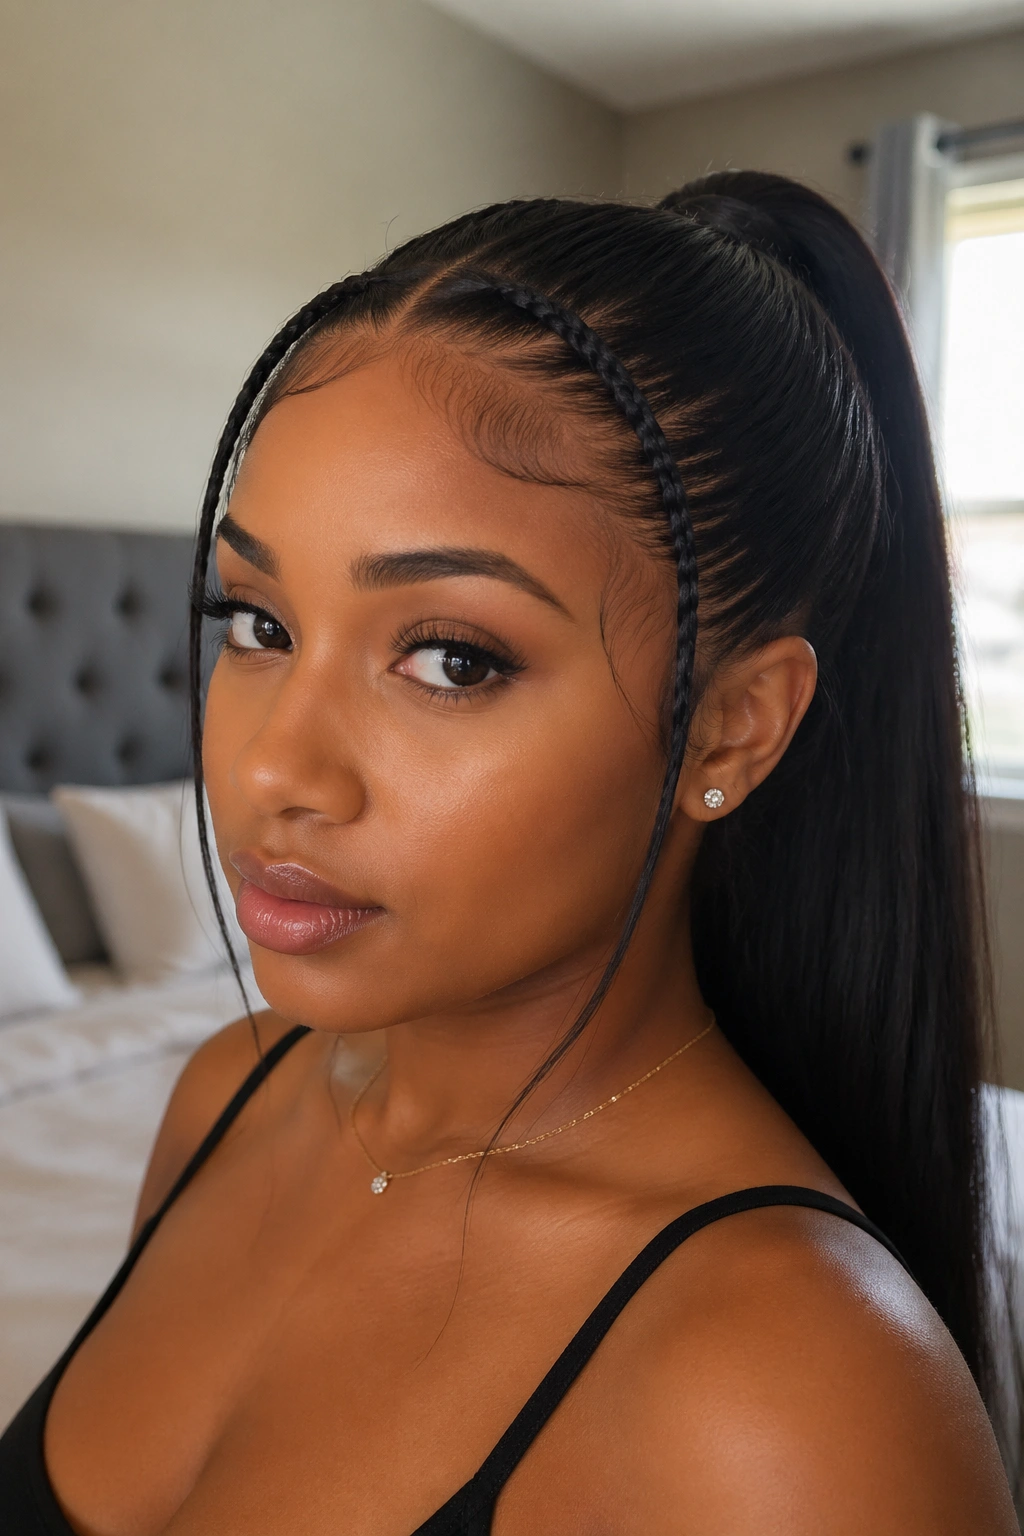
1. High Crown Lace Braid Ponytail
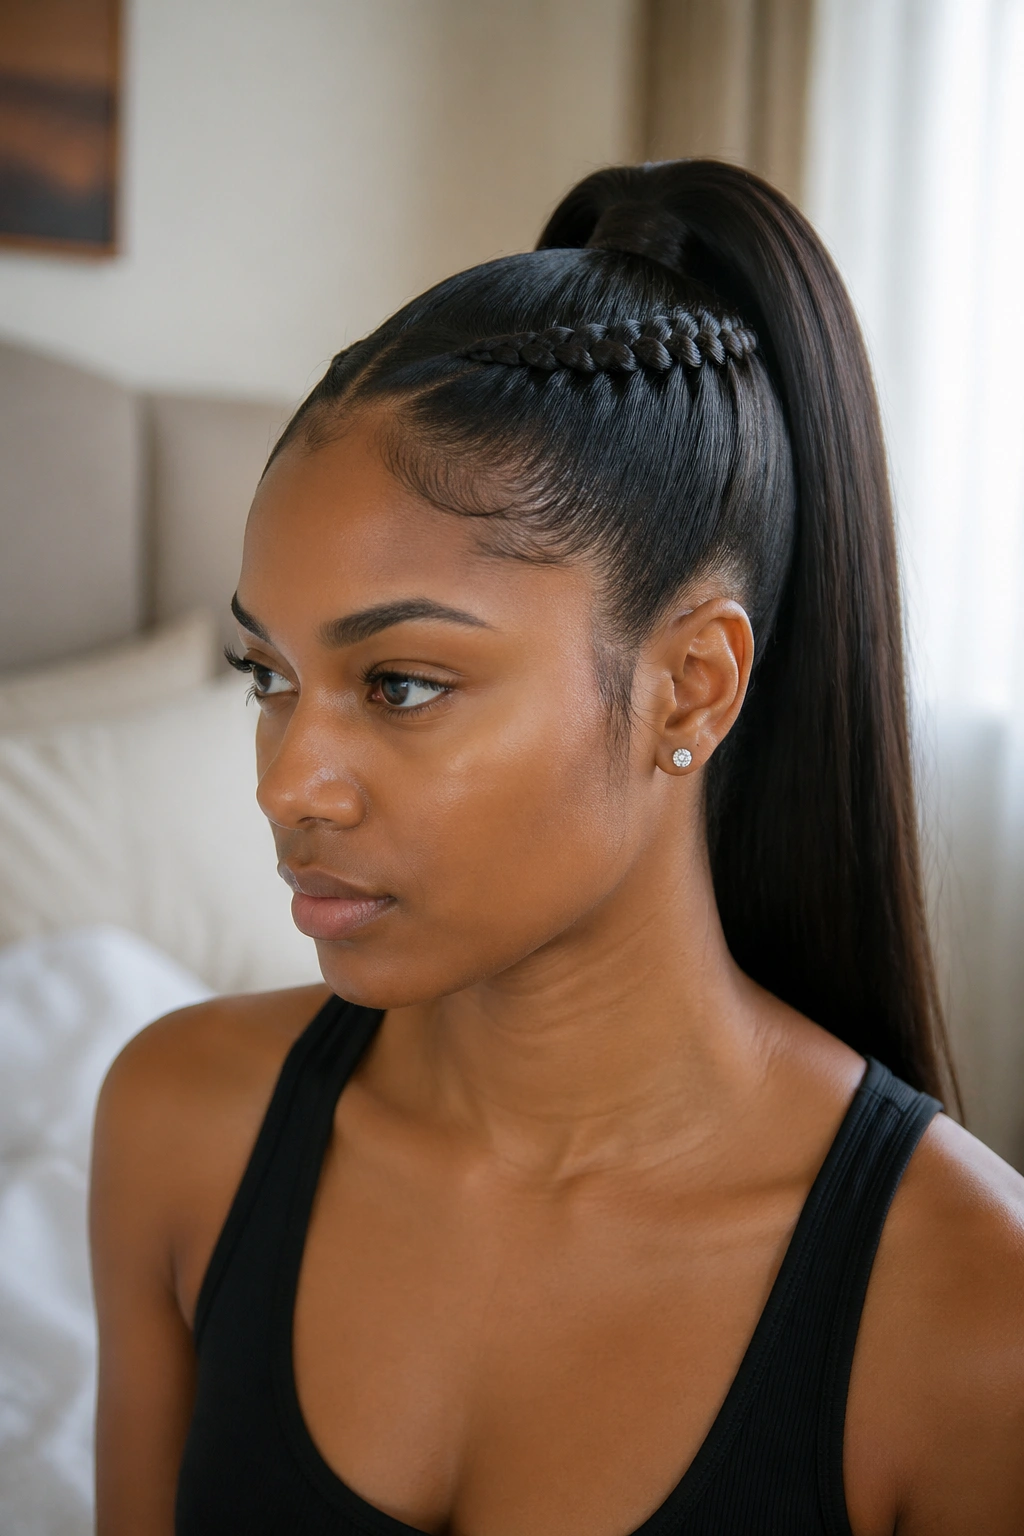
A high lace braid ponytail is the quickest way to make pin-straight long hair look deliberate. It lifts the face, gives the crown some shape, and keeps the ends from disappearing into a flat curtain.
Why it works on straight hair
The braid gives you an anchor where straight hair usually slips. Start at the temple on your heavier side part, feed in small sections from the hairline only, and guide the braid back toward the crown. Once you hit the ponytail point, secure everything with a firm elastic and smooth the base with your hands.
Use 1-inch sections at the front if your hair is very slippery. Smaller sections hold better and look neater at the scalp. If you want the ponytail to feel fuller, lift the crown a little before tying it off. A tiny bit of root lift matters more than trying to fluff the whole style later.
Quick details that help
- Best on hair that’s clean but not glassy-clean.
- Sits well with a middle part or a soft off-center part.
- Looks strongest when the ponytail is tied at the top of the occipital bone or a touch higher.
- A narrow strand wrapped around the elastic makes the finish look cleaner.
Tip: Keep the braid snug for the first 2 or 3 inches. That’s the part that decides whether the style stays up or droops.
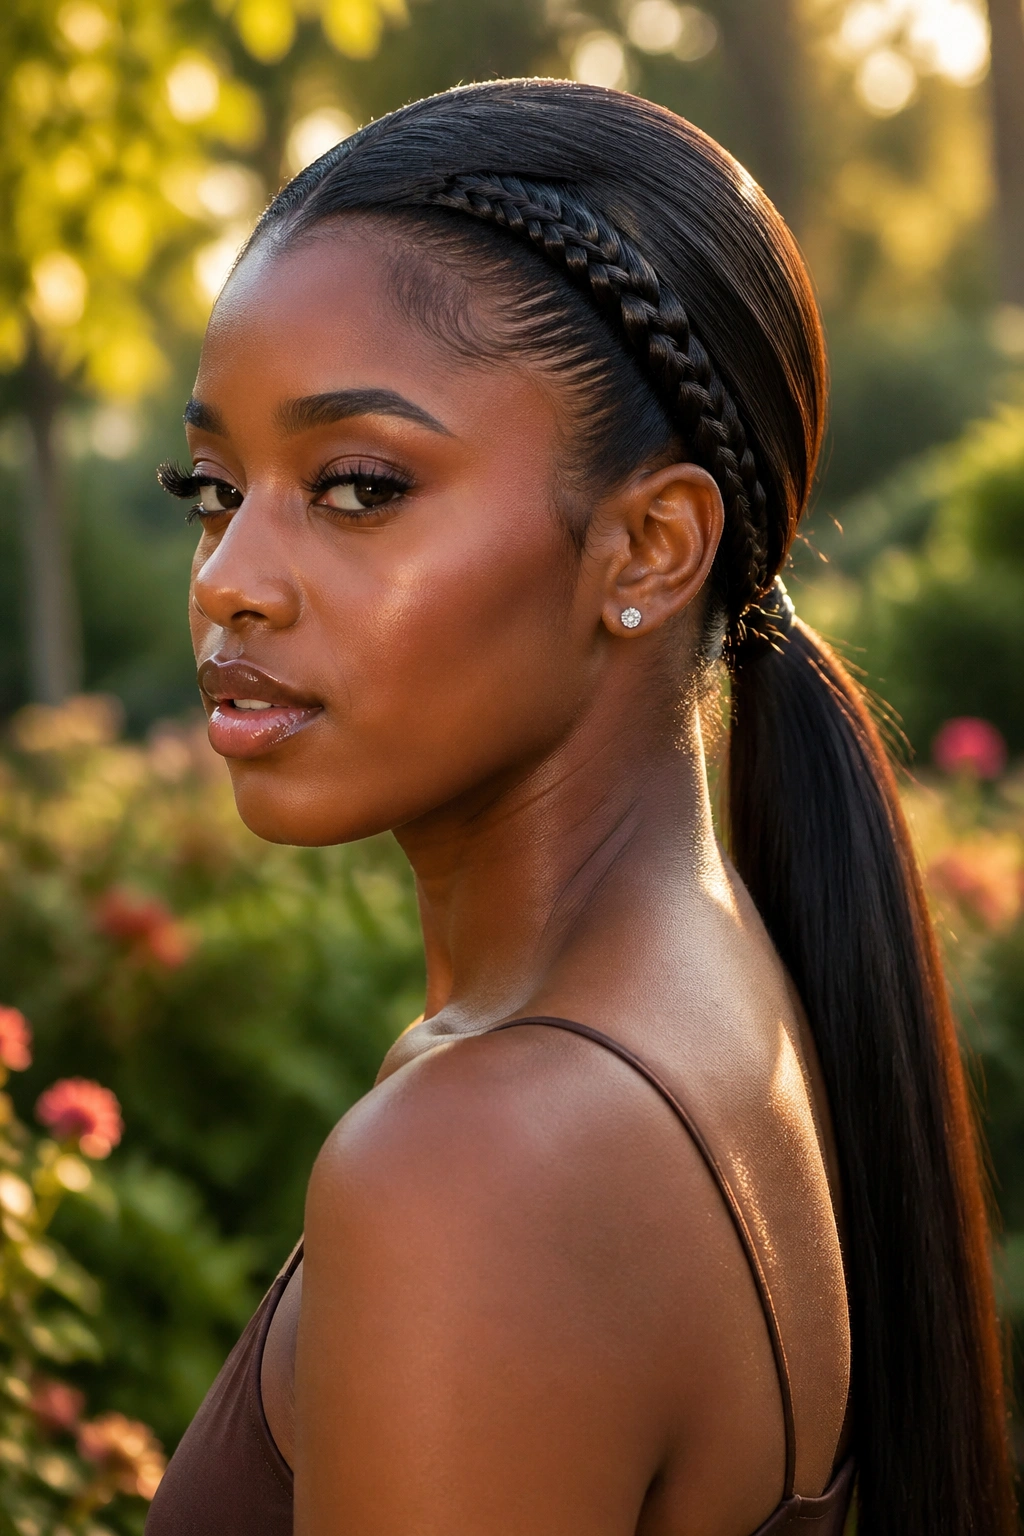
2. Low Nape Lace Braid Ponytail with a Wrapped Base
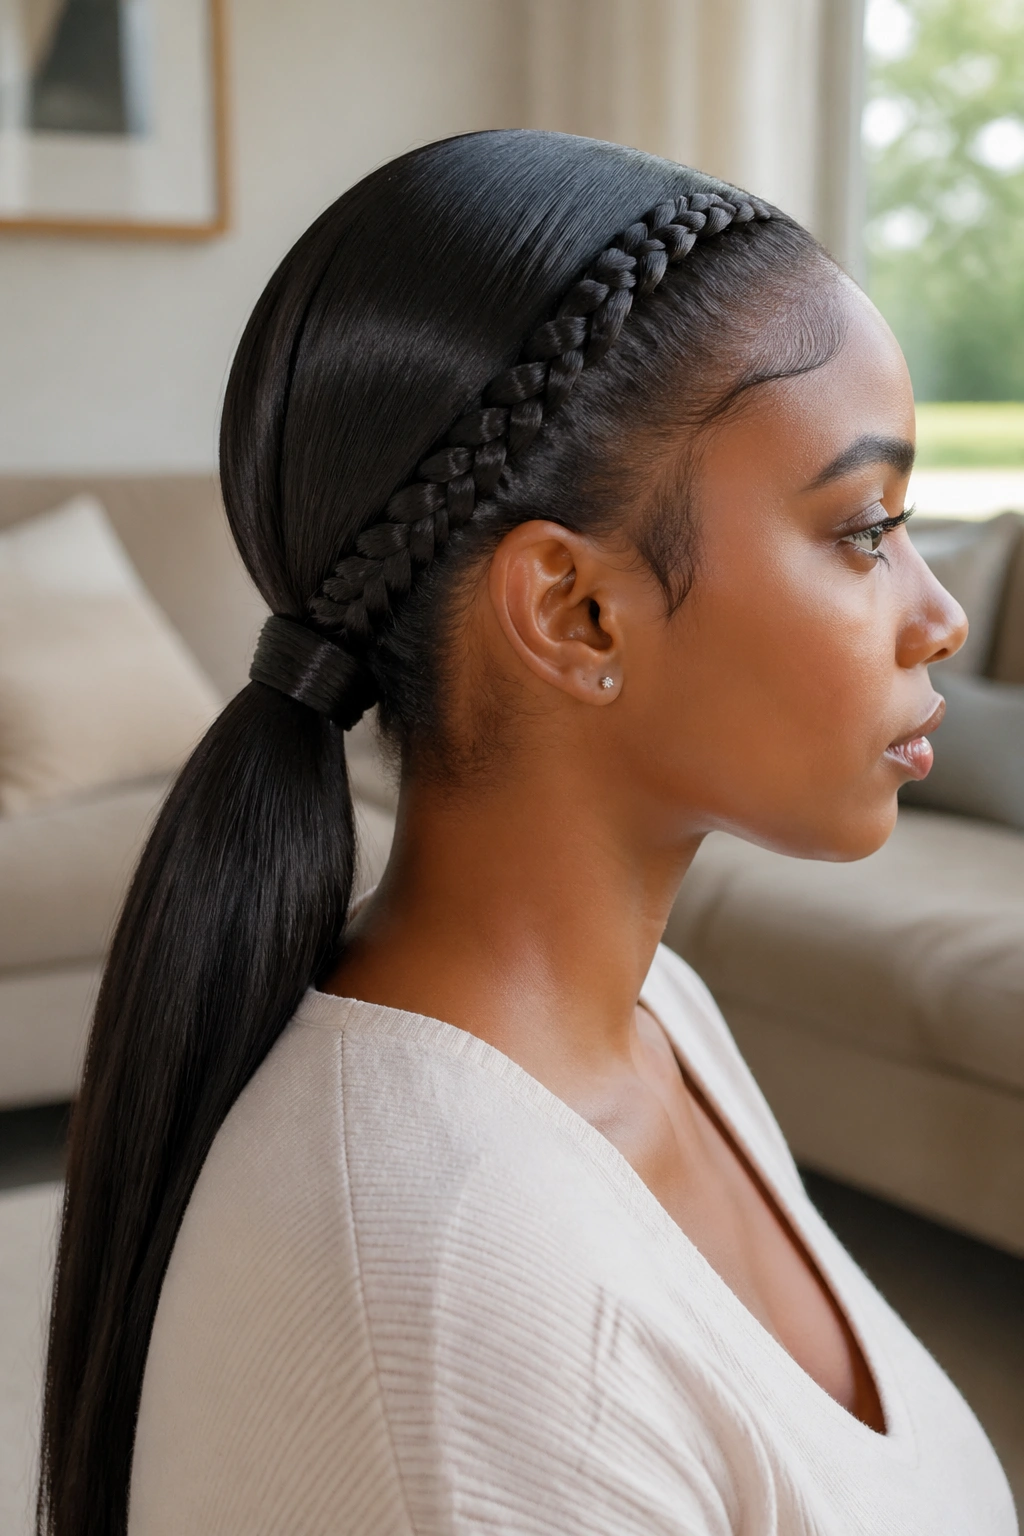
A low nape version feels calmer and a little more grown-up. Straight hair likes this placement because gravity helps instead of working against you, and the whole look stays smooth around the crown.
Begin the lace braid at the temple, then guide it along the side of the head until it reaches behind the ear. Feed in only from the top side so the braid keeps that neat, one-sided look. Gather the rest at the nape and tie it low, close to the base of the neck. If your hair is extra long, leave 2 to 3 inches of space below the elastic before you add the wrap so the ponytail can swing.
A wrapped base makes this style look finished instead of casual. Take a thin strand from under the ponytail, wind it around the elastic, and pin the end underneath with a bobby pin. If your hair is fine and slippery, mist the wrapping strand lightly with hairspray first. It grips better and doesn’t slide loose as fast.
This version pairs well with collars, scarves, and earrings that need room to show. It’s not loud. It doesn’t try to be.
3. Side-Swept Lace Braid Ponytail
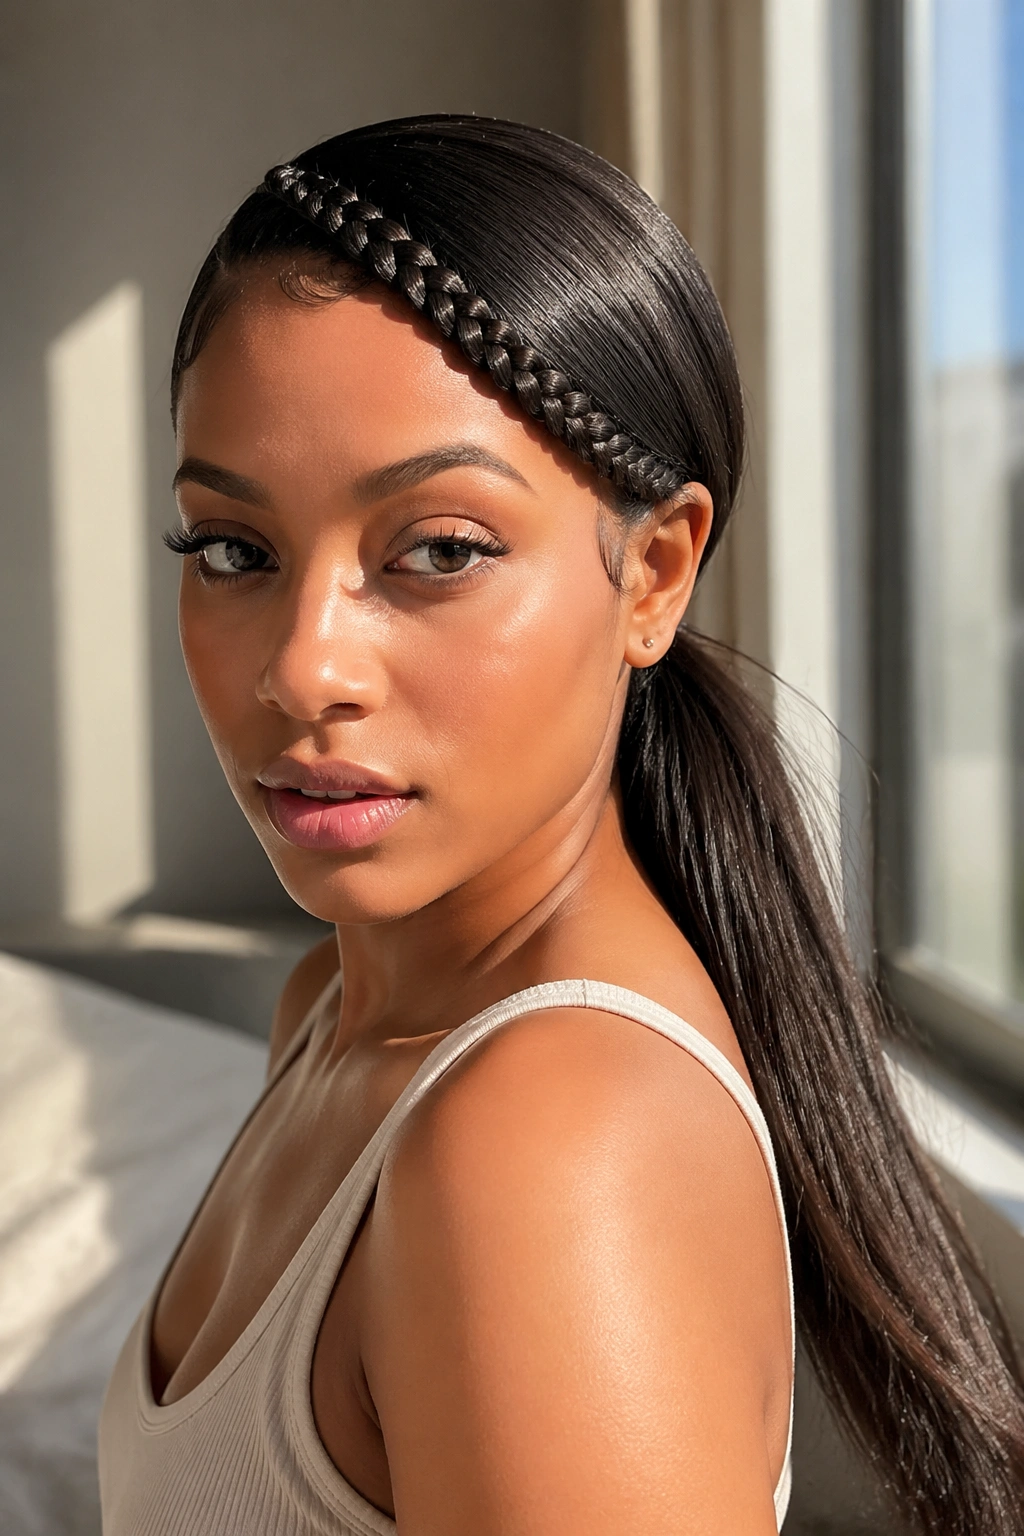
Want something softer than a straight-back ponytail? Sweep the whole braid toward one side and let the tail fall over one shoulder. That single move changes the mood fast.
The braid should curve, not march straight back. Start near the temple on the side with the most hair, feed in sections along the hairline, and direct the braid behind the ear before tying the ponytail a little off-center at the nape. The result feels more relaxed, but it still looks put together because the braid does the work up front.
How to wear it
A side-swept lace braid ponytail looks especially good when the front pieces stay smooth and the tail stays sleek. If the ends are pin-straight, run a flat iron over the last 2 or 3 inches so they hang cleanly. If the hair is too blunt at the bottom, the style can look heavy, so a tiny bend at the ends helps.
This is a good choice when you want to show off one earring, one shoulder, or a neckline that deserves attention. The braid acts like a frame. The ponytail does the rest.
A soft side part usually gives this style the best shape. A center part can work too, but the side version has more movement and feels a little less formal.
4. Half-Up Lace Braid Ponytail
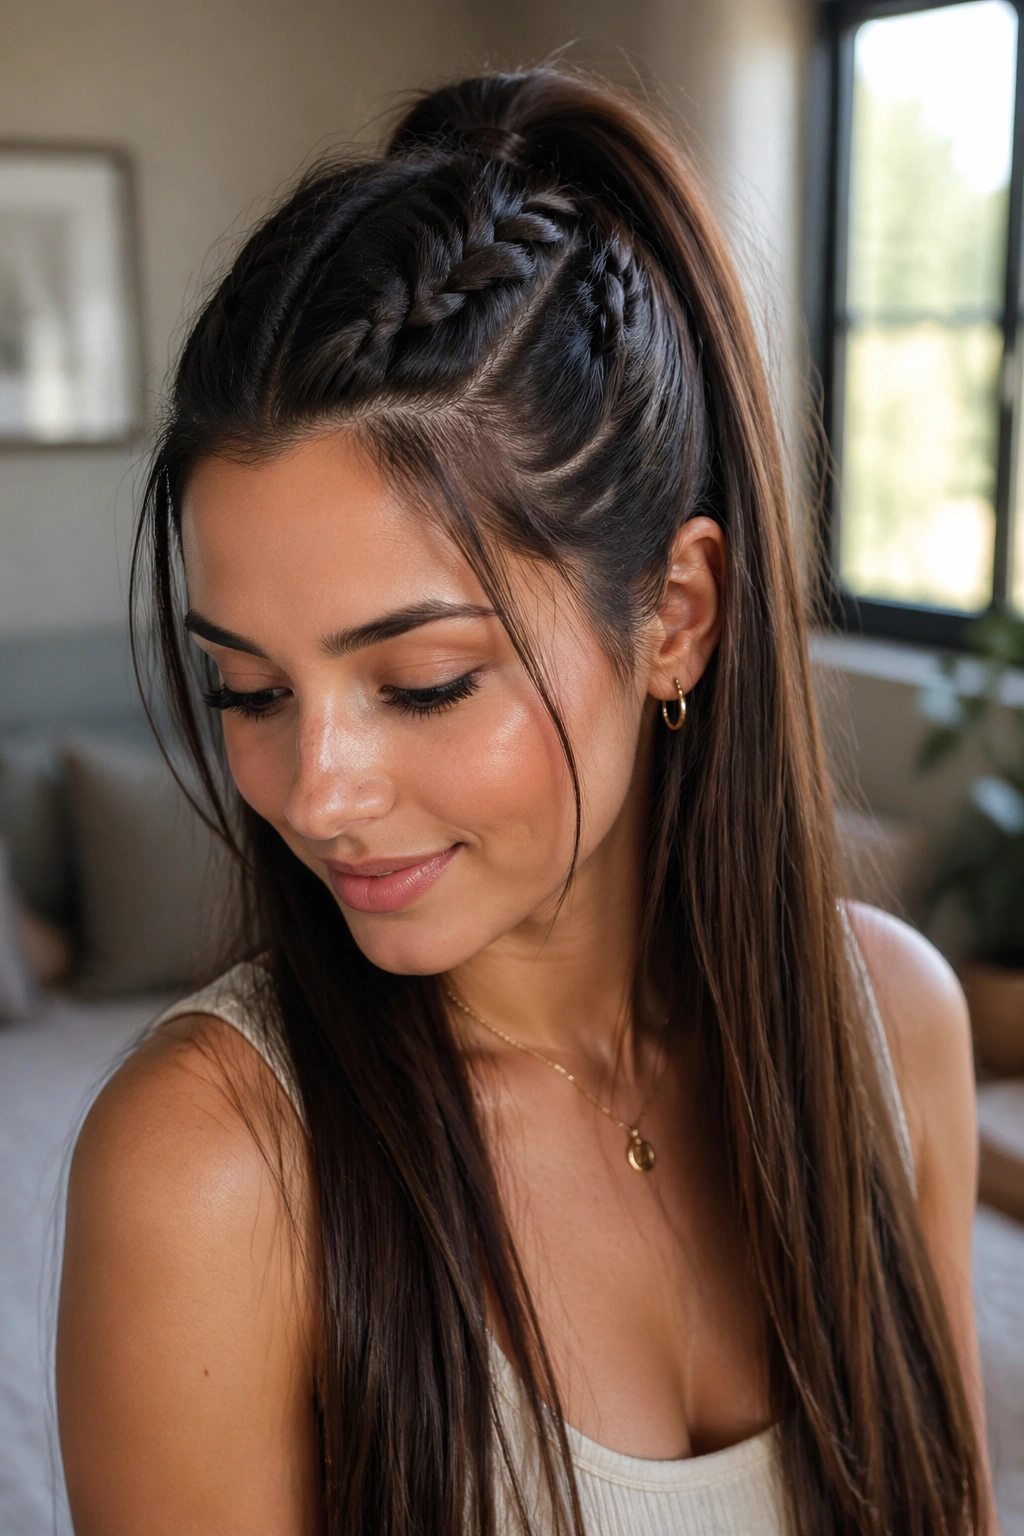
When your lengths are too good to pull back completely, the half-up lace braid ponytail earns its keep. You still get the clean braid at the front, but the rest of the hair stays down and visible.
Think of it as a two-part style. Lace braid from the temple back toward the crown, then gather only the top section into a small ponytail. Let the bottom half stay loose and straight. On very long hair, that contrast is the whole point: neat at the top, dramatic below.
The balance to aim for
The top ponytail shouldn’t sit too high unless you want a more youthful look. A position just above the crown tends to look the most balanced on long straight hair. If the top section feels too thin, take a slightly deeper slice of hair from each side before you braid. If it feels too heavy, the ponytail will slump and the shape gets lost.
This version also plays nicely with face-framing layers. They can stay soft around the jaw while the braid keeps the hairline under control. A tiny bit of backcombing at the crown — only about half an inch deep — helps the top ponytail keep its shape without looking puffy.
It’s the style I’d pick when I want the front off my face but I’m not ready to hide the length. Which is most days, honestly.
5. Double Lace Braid Ponytail
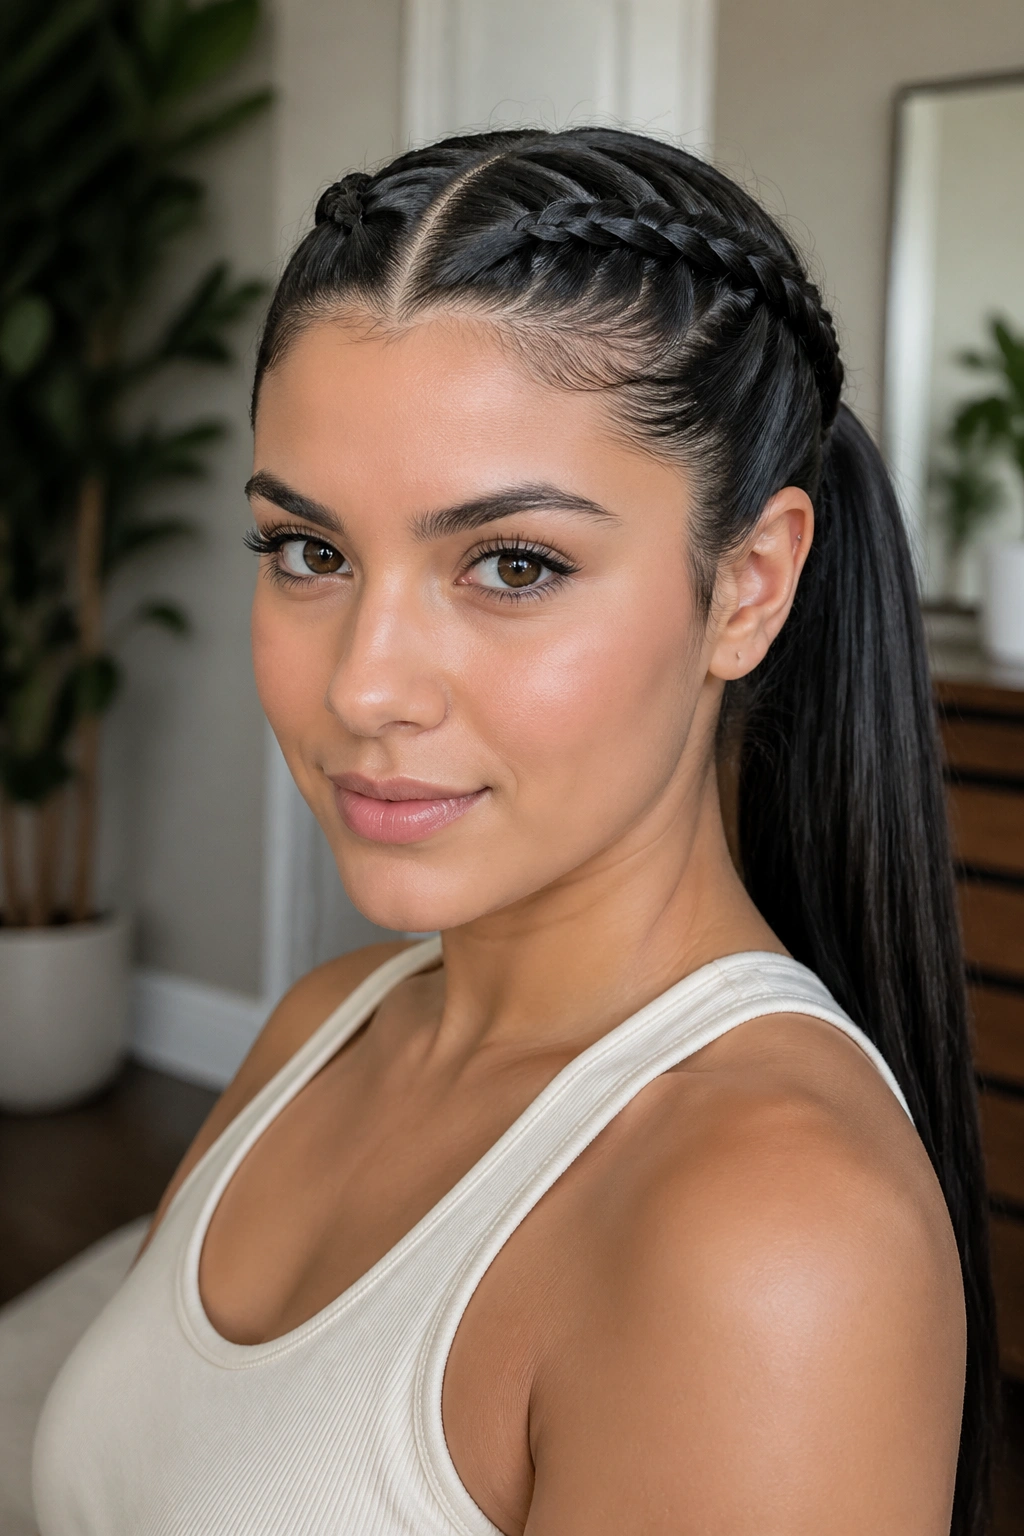
Two braids are not overkill here. On pin-straight long hair, a double lace braid ponytail often holds better than a single braid because each side helps lock the other one in place.
Start one lace braid at each temple and feed both toward the back of the head. Keep them even, but don’t stress about making them identical strand for strand. Straight hair rarely rewards overthinking. Once the braids meet at the back, gather the remaining hair into one ponytail and secure it firmly. A small elastic at the point where the braids meet helps keep the structure tidy before the final tie.
The shape is naturally symmetrical, which makes this style feel clean and organized. It works especially well if your hair is dense or very long, because the two braids keep the front from puffing out while the ponytail carries the weight. If your hair is fine, make the braids a little narrower so they sit close to the scalp instead of looking bulky.
I like this version for days when a single braid feels too plain. It has more presence, but it doesn’t veer into costume territory. That’s a useful line to hold.
6. Crown Lace Braid into a Bubble Ponytail
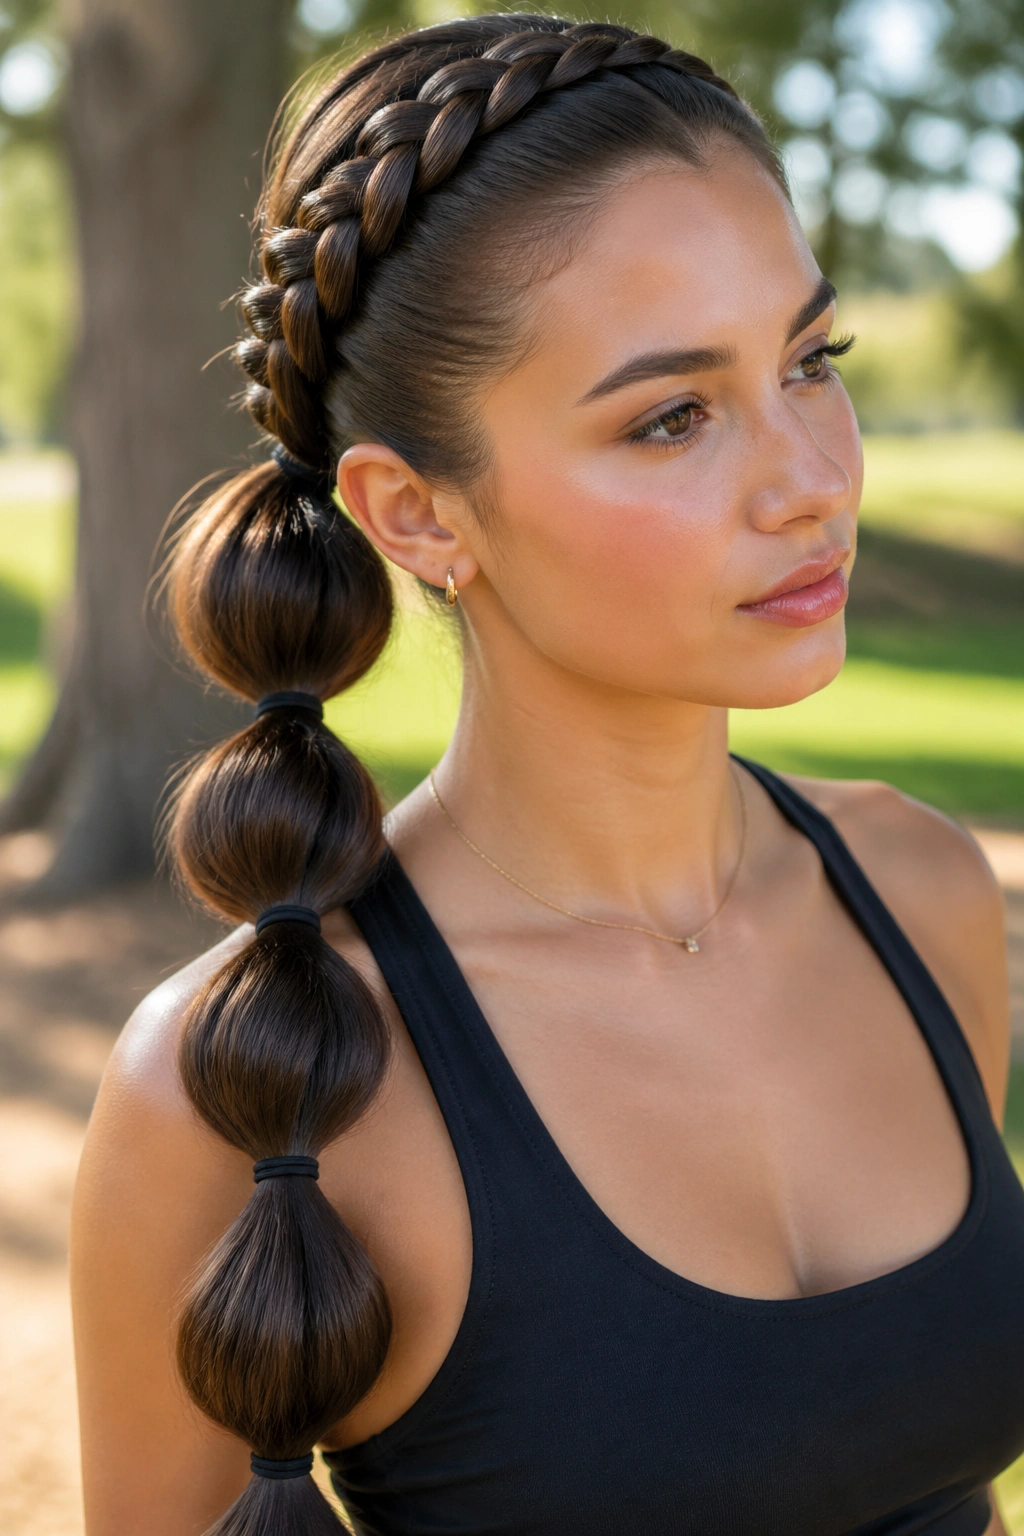
Bubble ponytails and straight hair are natural friends. Add a lace braid at the crown, and the style gets structure before the bubbles even begin.
The braid can run from one temple across the top of the head or from both sides meeting near the crown. Once the ponytail is secured, place clear elastics every 2 to 3 inches down the length, then tug each section gently until it rounds out into a bubble. Don’t pull every bubble to the same size. That’s the trap. Slight variation looks better and feels less stiff.
What makes it different
- Use 3 to 5 elastics, depending on hair length.
- Keep the crown smooth before you start creating bubbles.
- Tug each section from the sides, not the center, so the shape stays round.
- A touch of pomade on the palms helps calm flyaways.
The braid at the top keeps the style from looking like a plain ponytail with elastic marks. It gives the eye something to follow before the bubbles start. On pin-straight hair, that extra detail is worth it because the tail itself can look very sleek.
This is the one I’d pick for a playful outfit or a long day when you want the hair to stay interesting from morning to night.
7. Fishtail-Lace Hybrid Ponytail
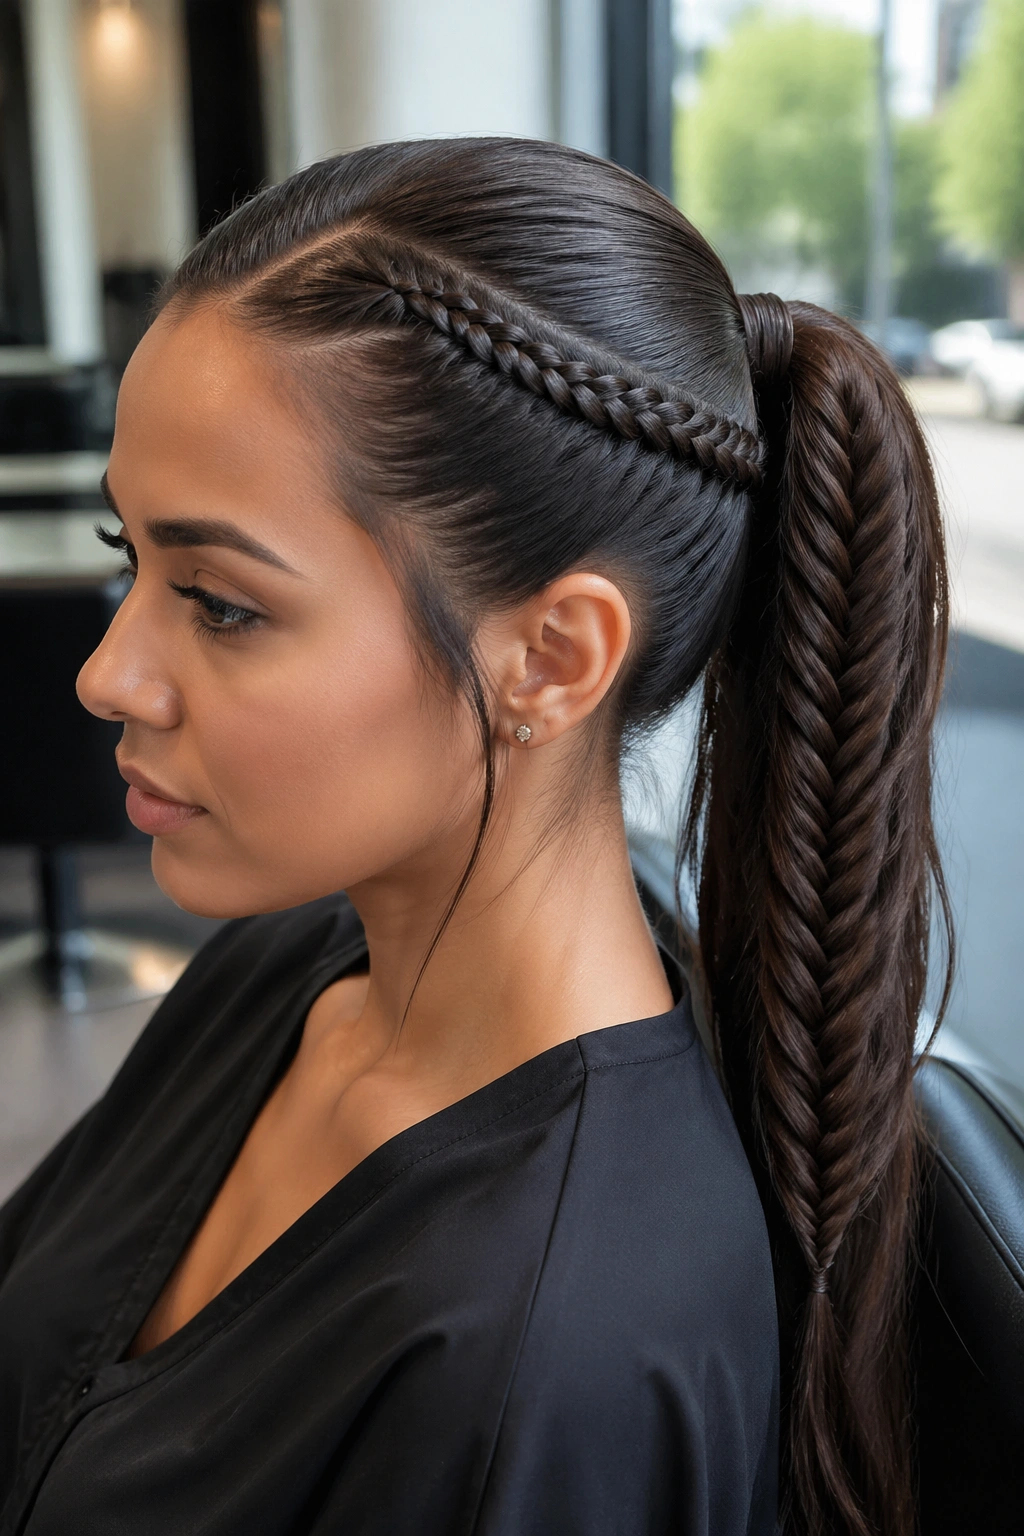
Why make the braid do two jobs? A lace braid in front and a fishtail through the ponytail tail gives straight hair a lot more texture without making the style feel busy.
Begin with a lace braid at the temple, feeding in hair from one side only until you reach the point where you want the ponytail to start. Gather the hair, secure it, then split the tail into two sections and fishtail the rest of the way down. That switch is the whole trick. The front stays smooth and controlled. The tail gets woven texture that reads beautifully on long lengths.
How to use it
- Start with a 1-inch front section if your hair is slippery.
- Switch from lace braid to fishtail once the braid reaches behind the ear.
- Secure the tail with a clear elastic before fishtailing.
- Pancake the fishtail only after the end is tied off.
The hybrid look works especially well if plain straight hair feels too flat in a single ponytail. The fishtail adds movement, but it doesn’t need curls or waves to make sense. That matters. Some styles rely on texture you may not want to create. This one works with what you already have.
If you like neat roots and a more detailed tail, this is a strong choice. It has enough pattern to look styled, but not so much that the whole thing turns fussy.
8. Braided Bang Lace Ponytail
Growing out bangs can be a pain. A braided bang lace ponytail is one of the few styles that makes the awkward middle stages look on purpose.
The front section gets its own little job. Take a narrow slice from the hairline where the bangs or shortest face-framing pieces live, then lace braid that section back toward the temple or behind the ear. Once it’s tucked in, pull the rest into a ponytail and let the front braid act like a smooth little frame. The style is especially useful if your bangs split at odd places or keep dropping into your eyes.
This version stays close to the scalp, which matters. If the braid floats too high, it starts to look separate from the ponytail instead of part of the same design. A light touch of wax or styling cream on the first inch of hair can help shorter pieces stay calm while you braid.
What to watch for
- Keep the front braid narrow so it doesn’t steal the whole look.
- Pin shorter pieces behind the ear before tying the ponytail if they won’t cooperate.
- Don’t over-tease the bangs area; the style should stay smooth.
It’s a quiet fix, but a smart one. The forehead stays open, the eyes stay clear, and you don’t have to fight those shorter pieces all day.
9. Reverse-Sweep Lace Braid Ponytail
A braid that travels backward in a curve feels different from one that just goes straight to the back of the head. That’s why the reverse-sweep version has such a nice line.
Start near the side of the face, close to the cheekbone or just above the ear, and guide the lace braid backward so it arcs instead of sitting flat in a single row. Feed in hair as you move, but keep the direction slightly diagonal. The eye reads the curve right away, and that gives the style more shape even before the ponytail starts.
Unlike a plain side braid, this one has a bit of built-in drama. It suits a side part especially well, and it looks good with a low ponytail because the curve leads the eye down toward the nape. If your hair is pin-straight, the neatness of the braid edge gives you contrast against the long tail, which keeps the style from disappearing into one smooth blur.
This is a strong pick for long earrings, collarbones, and necklines that need a little framing. It’s also a nice option if you want something that feels sculpted but not severe. The braid should look directed, not stiff. There’s a difference, and it shows.
10. Textured Messy Lace Braid Ponytail
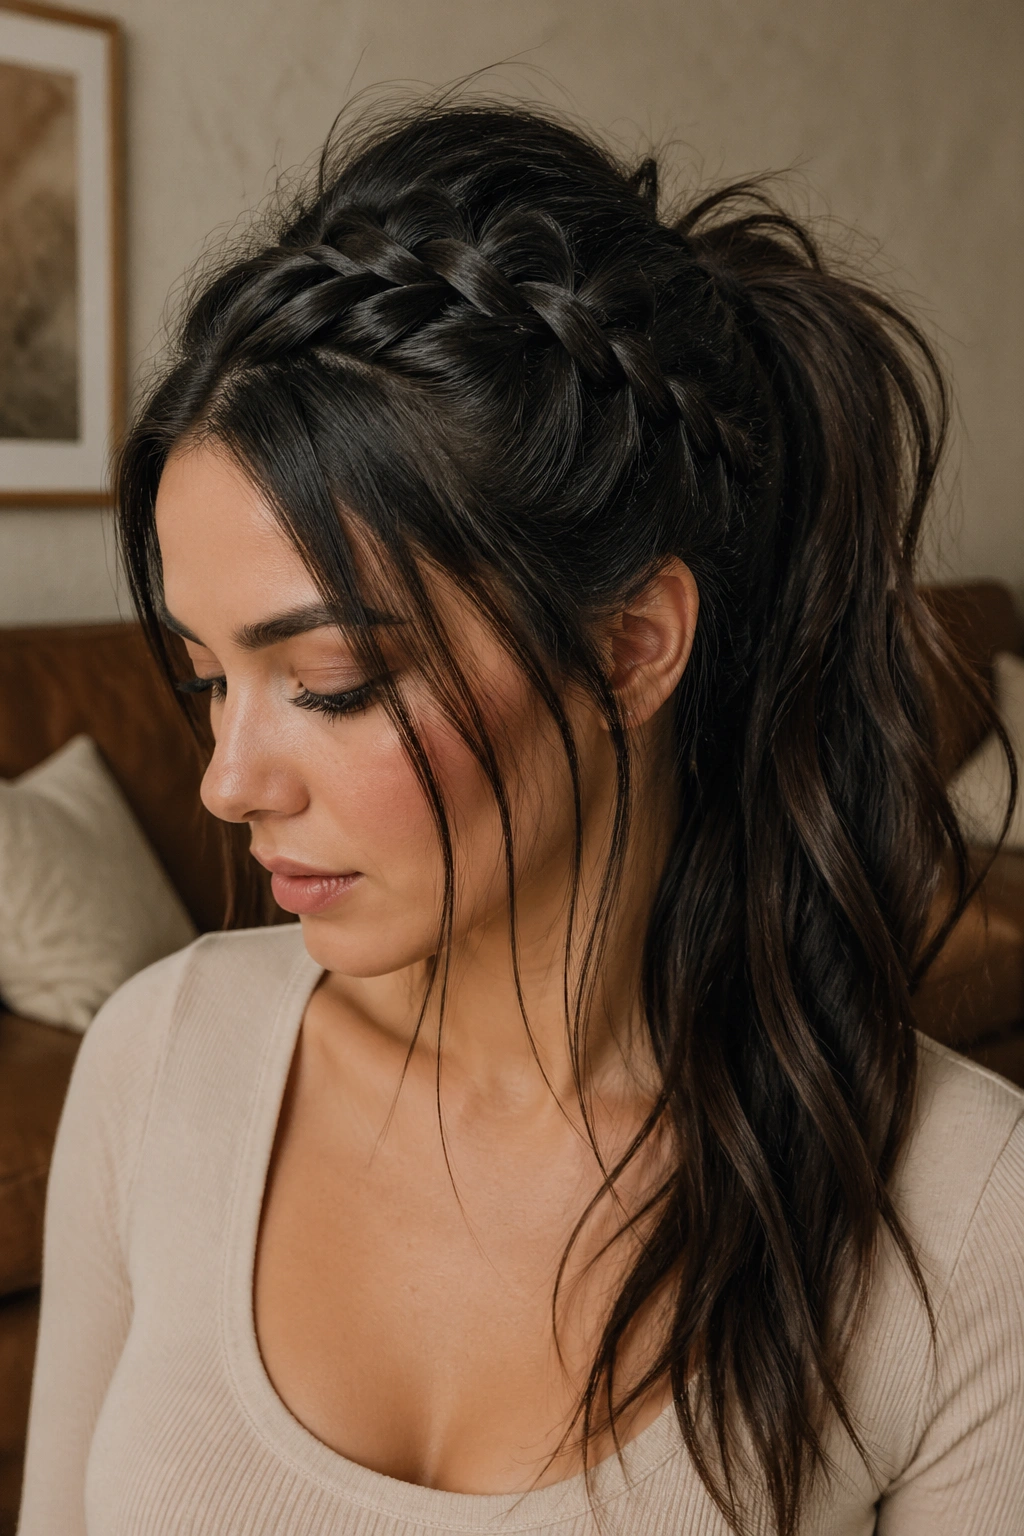
Straight hair can wear a messy style, but it needs a little grit first. Without that, “messy” turns into “slipped out,” which is not the same thing at all.
Mist the roots with dry shampoo or a light texture spray, then rough up the crown with your fingertips before you start braiding. Build the lace braid with slightly larger pieces than you would for a sleek version, and don’t press every stitch flat. After the ponytail is tied, pull a few tiny bits at the braid edges to loosen the shape and let a couple of face pieces fall free.
Loose is not the same as sloppy.
The key is to leave the base controlled while softening the rest. If you fluff the whole thing, the braid loses its line and the ponytail can look frizzy instead of lived-in. That’s the mistake people make most. Keep the braid legible. Let the crown breathe a little. Leave the ends smooth enough that the style still feels finished.
This version works well when pin-straight hair feels too severe on its own. The texture spray breaks up the shine enough to make the braid hold, and the loosened pieces keep the style from feeling overdone. It’s a nice middle ground when you want ease, not polish.
11. Wrapped Elastic Lace Braid Ponytail
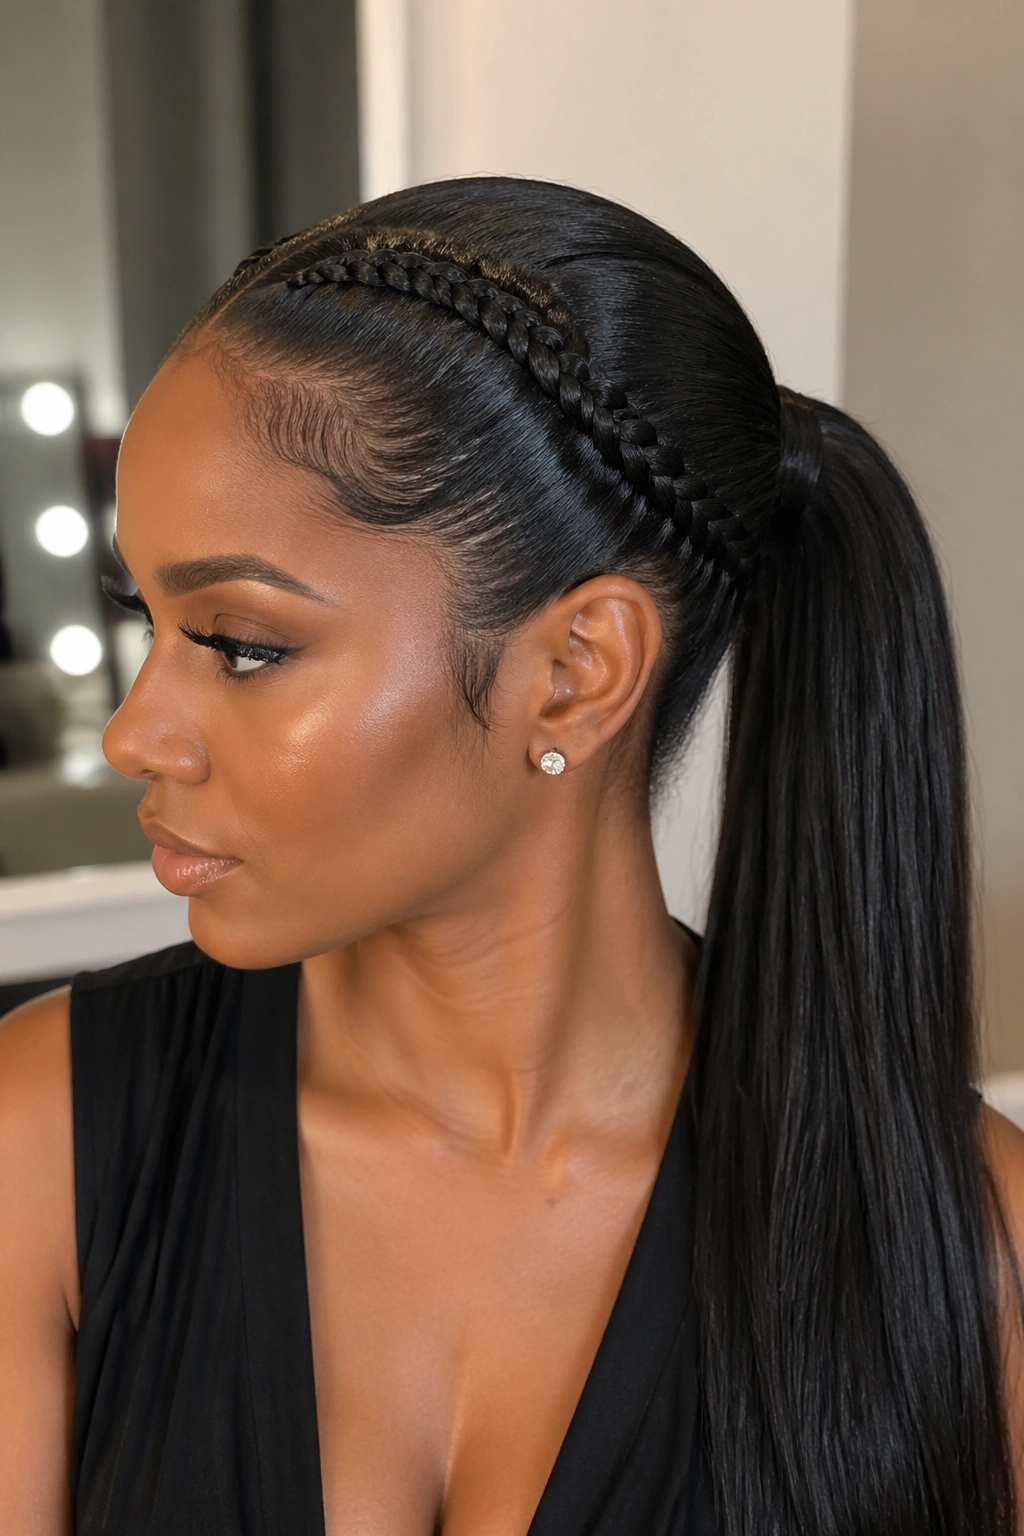
Want the elastic to disappear completely? This is the version to choose. The braid does the visual work, and the finish looks cleaner than a plain tie ever will.
Once the lace braid reaches the ponytail point, secure the hair with a clear elastic or a small matching one. Then take a thin strand from underneath the ponytail, wind it around the base until the elastic is hidden, and pin the end beneath the wrap. The strand should lie flat as it circles the base; if it twists too much, the finish starts looking bulky.
How to finish the wrap
A wrapped base needs a firm anchor. Use a bobby pin pushed upward into the tie point, not sideways where it can poke out. If the hair is thick, two crossed pins usually hold better than one. A tiny mist of hairspray on the wrapping strand helps it stay smooth while you work.
This style looks especially good with a sleek side part and straight lengths that have been ironed smooth. The wrapped base becomes the visual center, so it helps if the rest of the ponytail is tidy. A light serum on the tail ends can keep them from looking dry under bright light.
It’s a small detail, but it changes the whole read of the style. The ponytail looks planned from the base up, and that matters when the rest of the hair is long and very straight.
12. Athletic Secure Lace Braid Ponytail
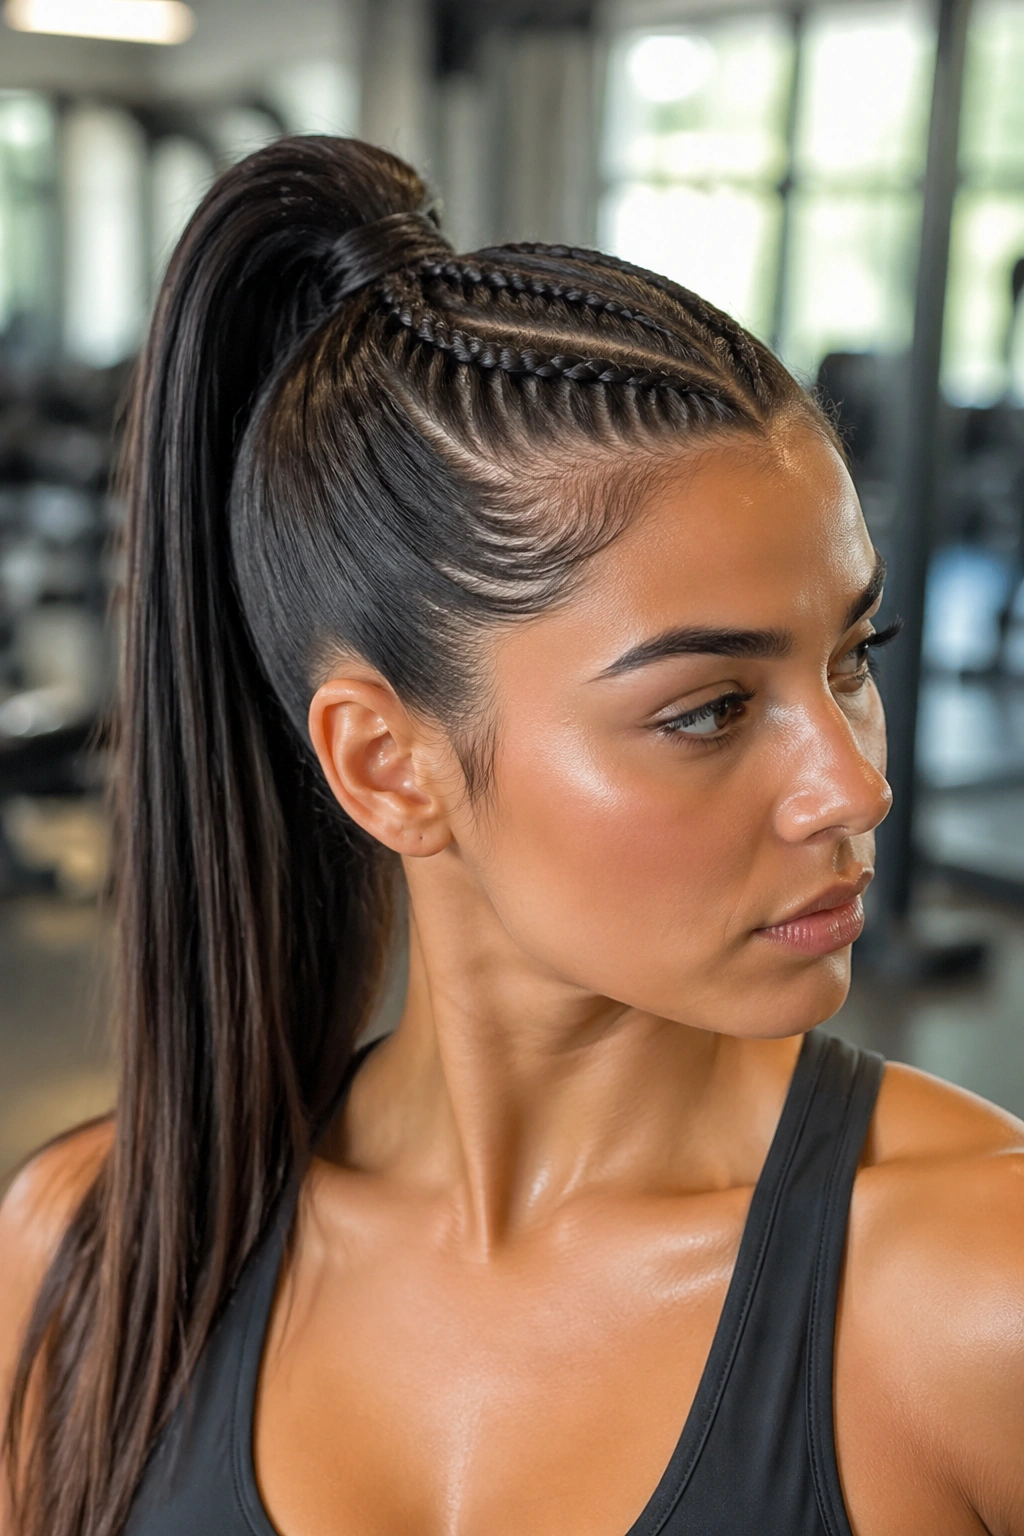
When the style has to stay put, skip the airy finish and build something firmer. A secure lace braid ponytail is practical first, pretty second, and that order is fine.
Start the braid tight at the hairline, keep the sections narrow, and braid all the way back to the point where the ponytail will sit. Gather the hair firmly and use a strong elastic, then add a second elastic a little lower if your hair is heavy or very long. That extra tie keeps the tail from sliding down once you start moving around.
Small details that matter
- Use matte texture spray at the roots for grip.
- Keep the braid close to the scalp instead of lifting it for volume.
- Choose snag-free elastics so the hair doesn’t catch when you retie it.
- Tie the ponytail a touch higher than you think you need if the hair is thick.
This version makes sense for long days, windy weather, workouts, travel, or any time you don’t want to think about your hair again. The braid controls the front. The tighter ponytail keeps the length from whipping around. And because the hair is pin-straight, the finished line looks clean rather than bulky.
A style does not have to feel soft to be useful. This one proves it.
13. Sculpted Event Lace Braid Ponytail
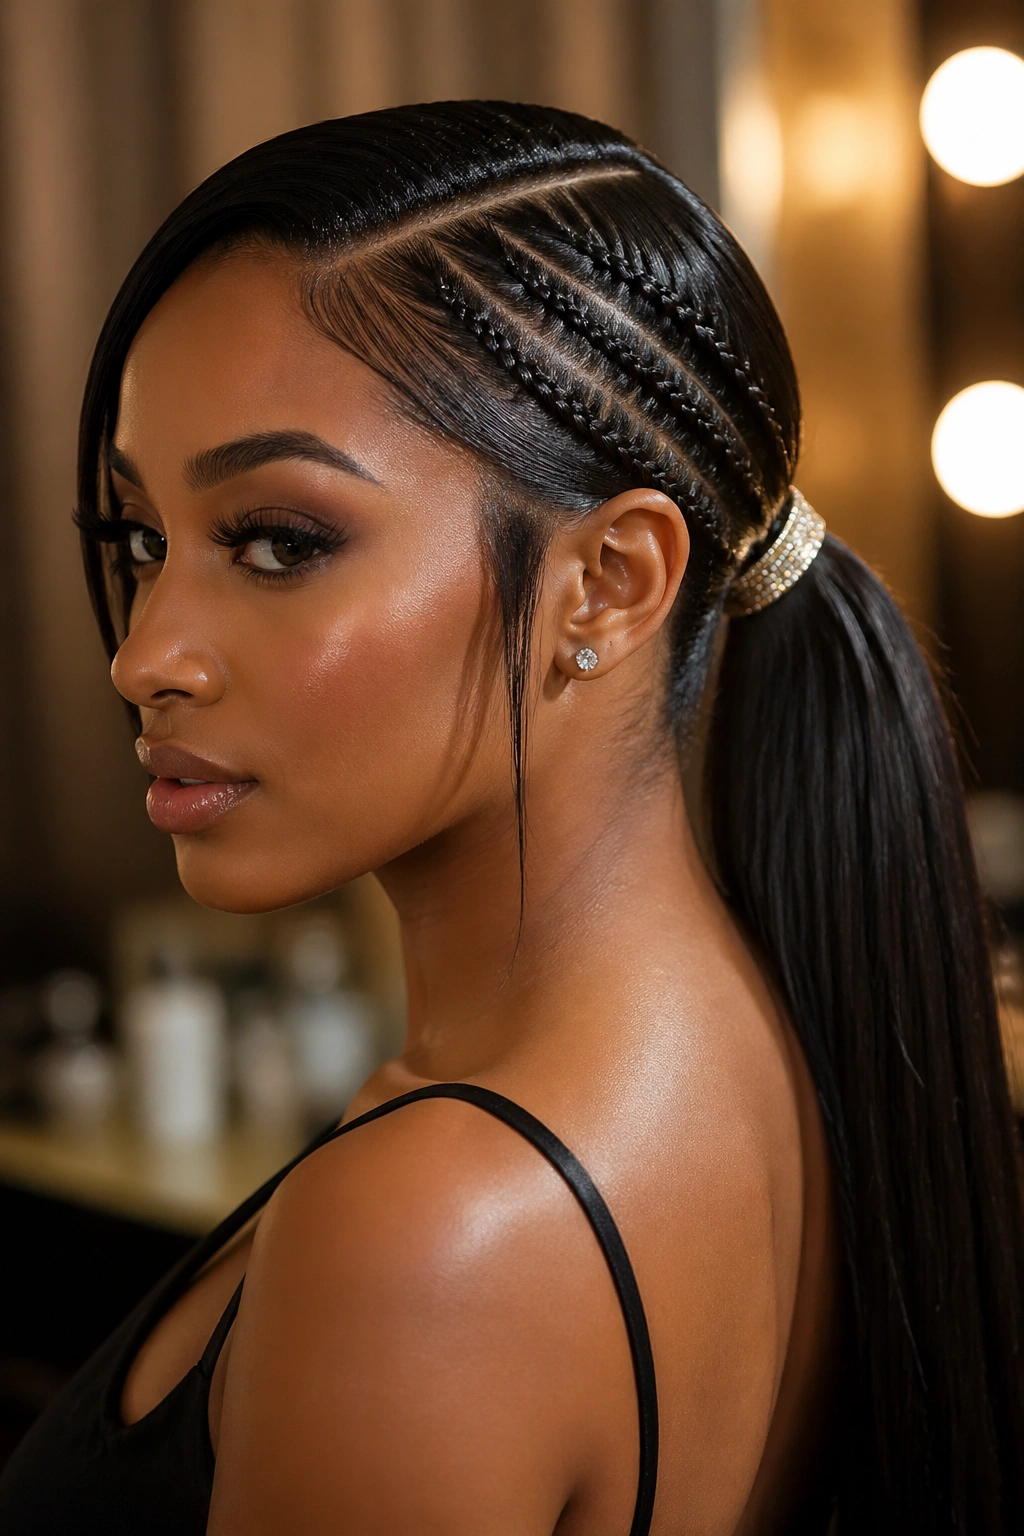
A lace braid ponytail can look dressy enough for evening if you treat the crown like a clean shape and the tail like part of the outfit. That’s the whole point of this version. It’s controlled, smooth, and a little more dramatic than the everyday styles above.
Use a deep side part or a centered part, depending on what frames your face better. Braid the front tightly enough to stay crisp, then keep the crown sleek before you gather the ponytail low or mid-low at the back. The ponytail itself can stay straight and glossy, or you can add a slight bend near the ends if you want softer movement. A hair cuff, a pearl pin, or one narrow ribbon can finish it without crowding the braid.
The mistake to avoid here is overloading the style with decoration. Straight hair already gives you shine. The braid already gives you pattern. Anything extra should work with that, not compete with it. One accent usually looks better than three.
If you’re choosing a version for a formal dinner, a photo-heavy event, or a day when you want the hair to hold its shape for hours, this is the one I’d reach for first. It has enough structure to survive movement and enough polish to look intentional from every angle. That combination is hard to beat.