Long hair has a way of making simple styles feel bigger than they should. A ponytail that looks flat on a collarbone-length cut can suddenly look dramatic, tidy, or almost sculptural once you’ve got hair past the shoulders — and that’s where rope braid ponytails start pulling their weight.
They’re one of those styles that looks fussy from a distance and is far easier than people think. You only need two sections of hair, a steady hand, and a little patience with the twist. That’s it. No three-strand braid counting. No tiny pieces slipping out every five seconds.
The best part is how differently rope braids behave on longer hair. A twist that seems fine on a short ponytail can suddenly read as glossy, thick, and deliberate when there’s actual length for the rope shape to travel down. The same style can look sporty, formal, soft, or sharp depending on where you anchor it and how tight you keep the twist.
That flexibility is the reason these styles are worth having in your back pocket. Some days you want your hair off your neck. Some days you want to show off the length. And some days you want both, which is where the right rope braid ponytail earns its keep.
1. High Rope Braid Ponytail That Lifts Everything
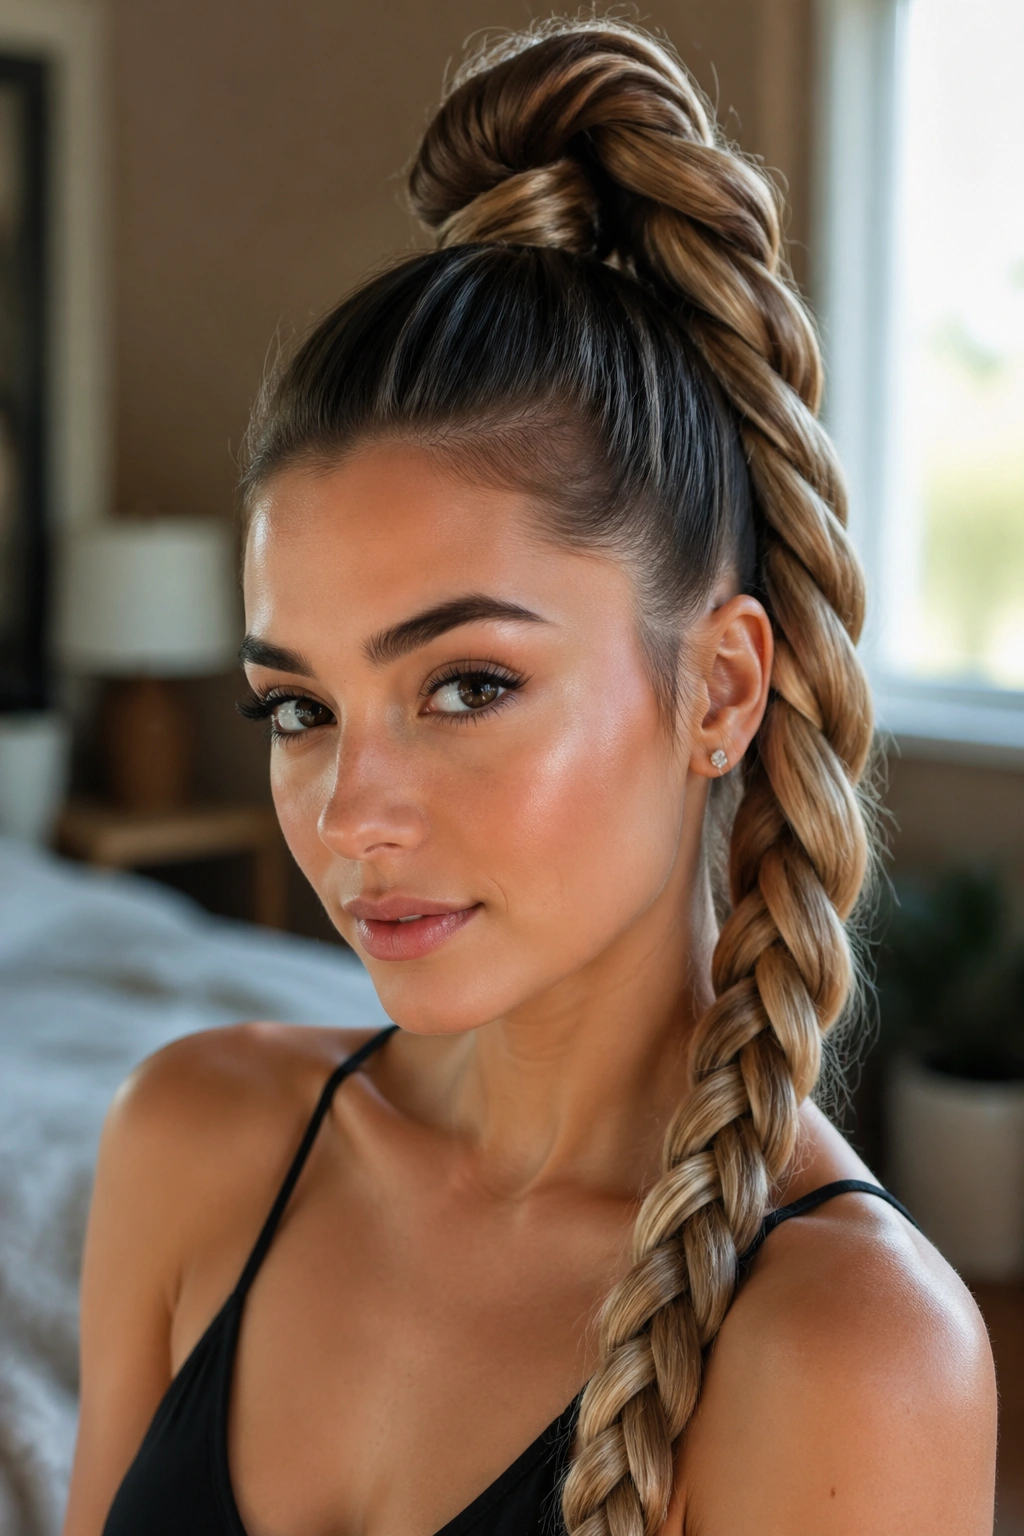
A high rope braid ponytail is the cleanest place to start because it shows off the twist immediately. Put the ponytail at the crown or just behind it, and the whole style gets a little more energy. On hair past the shoulders, that height keeps the braid from feeling droopy, which is the main trap with longer lengths.
Why the High Version Works on Long Hair
The lift changes the whole silhouette. A higher base makes the top of the head look longer, the jawline a little sharper, and the braid itself easier to see from the front.
Split the ponytail into two equal sections, twist each one in the same direction, then wrap them around each other in the opposite direction. That opposite wrap is the part that keeps the rope braid from unraveling.
- Best for hair that is medium to thick
- Looks strongest when the crown is smoothed first
- Needs a tight elastic at the base
- Works with straight, wavy, or blow-dried hair
- Holds up better if you finish with a light mist of hairspray
My favorite detail here: leave the ponytail base sleek and let the rope itself do the talking. Too much texture at the crown can make the style look messy instead of sharp.
2. Low Rope Braid Ponytail With a Center Part
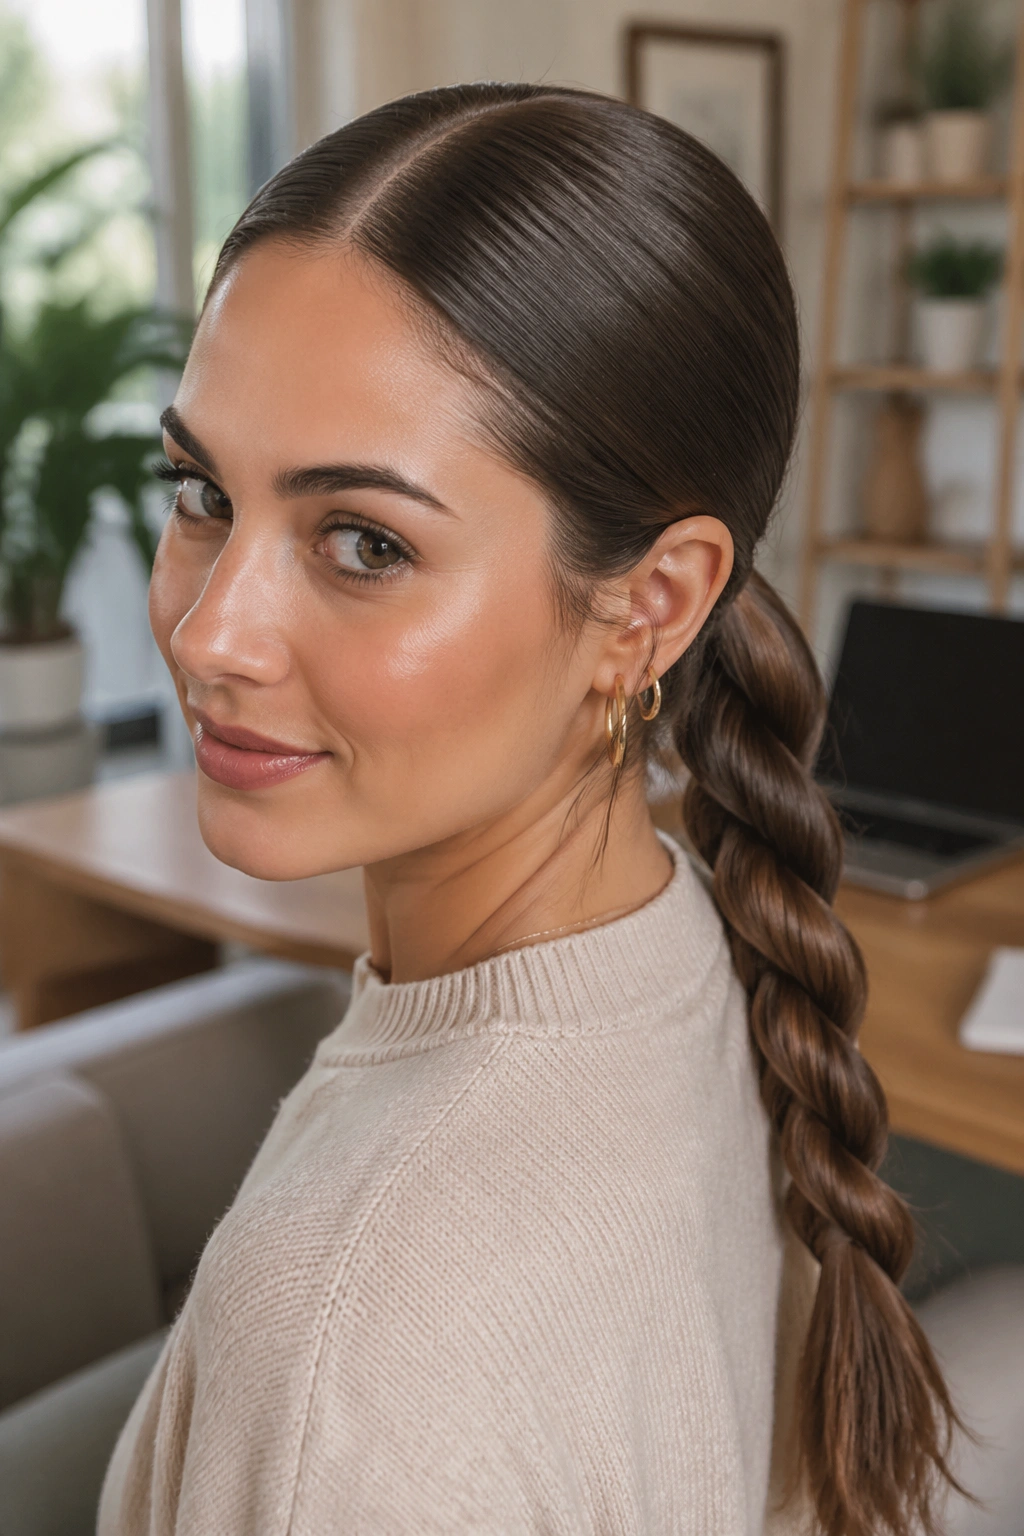
Low ponytails are underrated. People think high styles give the most shape, but a low rope braid ponytail can look cleaner and more expensive because it sits right at the nape and lets the braid line fall naturally down the back.
A center part gives the whole thing a calm, balanced feel. On hair past the shoulders, that parting keeps the sides from puffing out too much near the temples, which is a common issue if your hair has any wave or layer.
The trick is to smooth the top section with a brush or your fingers before you secure the ponytail. If the base is neat, the rope twist can stay sleek without fighting flyaways at every turn.
This is the version I’d reach for on a day when I want my hair controlled but not severe. It works with a blazer, a knit dress, a button-down, or even a sweatshirt if you like your casual style a little more finished.
And yes, the low placement makes the rope braid longer in appearance. That little visual trick matters more than people admit.
3. Side-Swept Rope Braid Ponytail
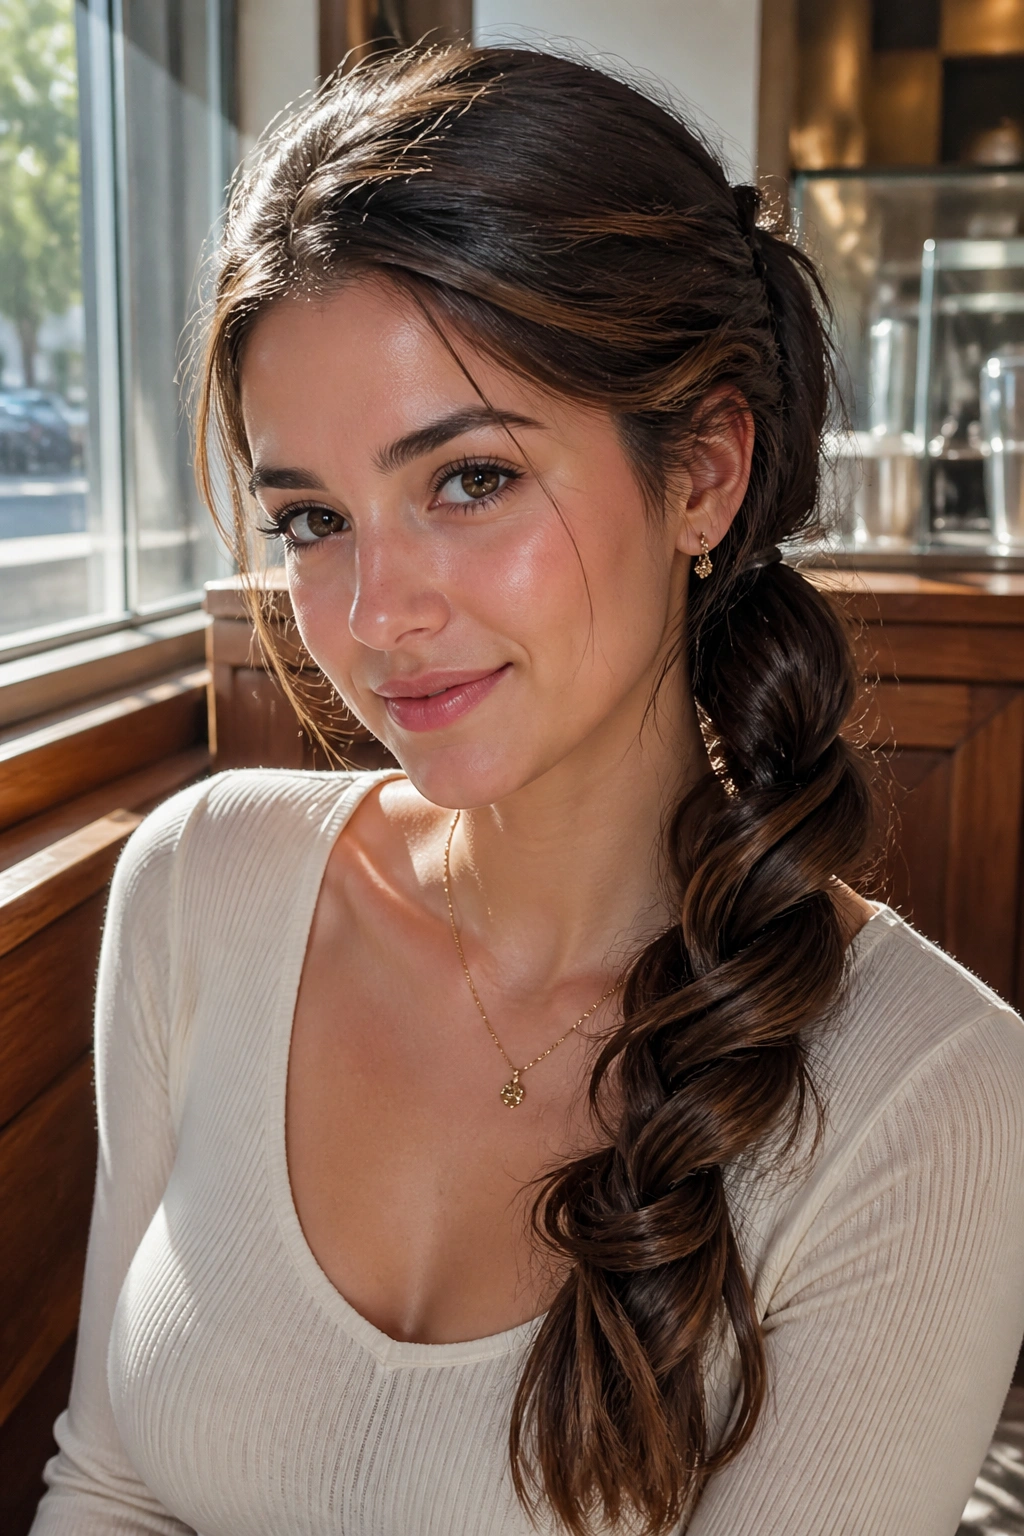
Why does a side-swept rope braid ponytail feel softer than a straight-back one? Because the braid follows the line of your face instead of fighting it. That angle changes the mood right away, especially on long hair that has a lot of natural movement.
Start by parting the hair slightly off-center. Bring the ponytail to the side just behind one ear, then secure it low enough that the length can fall over one shoulder without pulling.
How to Style It
A side placement is easiest when the hair has a bit of bend. A flat, pin-straight texture can still work, but a little wave gives the rope twist more shape once it lands on the shoulder.
The front matters here. If you slick every strand back too tightly, the style can look harsh. Leave a few soft pieces near the hairline if you want a gentler finish.
- Use a small elastic that matches your hair color
- Keep the twist tight near the base, looser toward the end
- Let one shoulder carry the braid instead of forcing it behind you
- Pin the side with a bobby pin if it slips forward too much
Best use case: dates, dinner, or any day when you want your hair to look intentional without going full formal.
4. Rope Braid Ponytail With a Wrapped Elastic
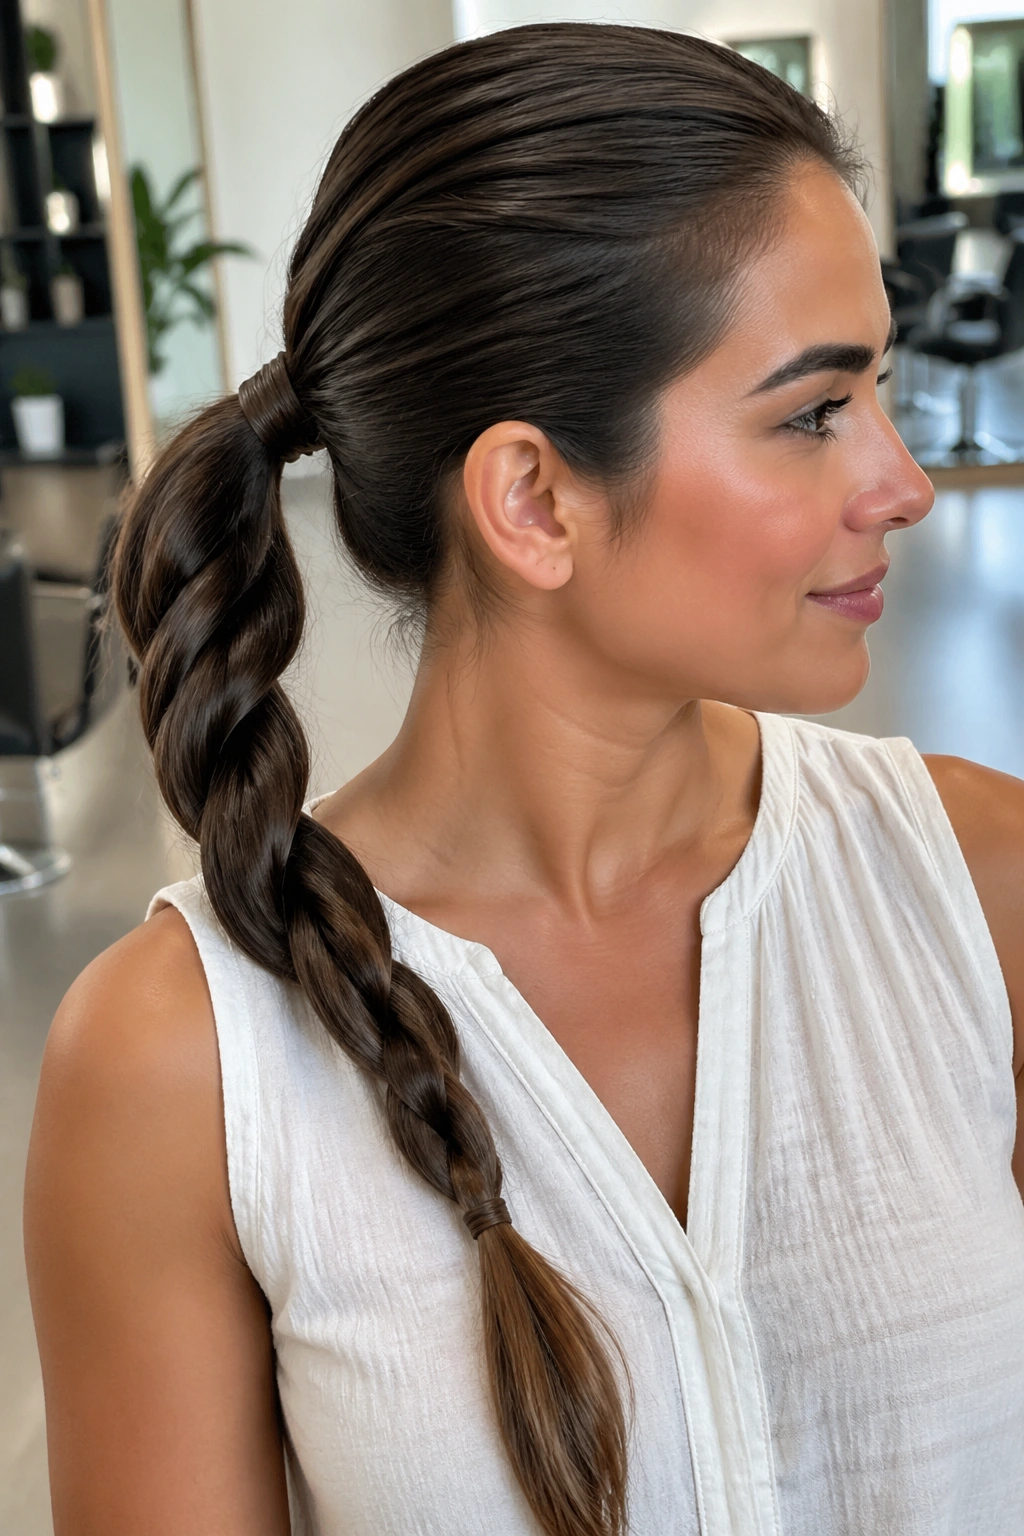
A visible hair tie can ruin a style fast. You know the feeling. The braid is good, the length is good, and then a chunky elastic sits there at the base like an afterthought.
Wrapping the elastic fixes that problem in a way that feels small but makes a huge difference. Take a thin strip of hair from the ponytail, wind it around the base until the elastic disappears, and tuck the end under with a bobby pin.
What Makes It Worth the Extra Minute
This version works because it cleans up the only part of the style that can look rushed. On hair past the shoulders, the length already gives you drama; the wrapped base gives you polish.
It also helps if your hair is layered. Layers tend to poke out around the tie, and the wrap hides some of that. Use a tiny bit of serum or cream on the wrap section so it lies flat instead of fuzzing out.
- Wrap only a thin strand; thick wrap pieces look bulky
- Secure the end of the wrap under the ponytail, not off to the side
- Use one bobby pin crossed over another if your hair is slippery
- Spray the wrap lightly before it frays
A small detail, sure. But it changes the whole read of the style.
5. Half-Up Rope Braid Ponytail
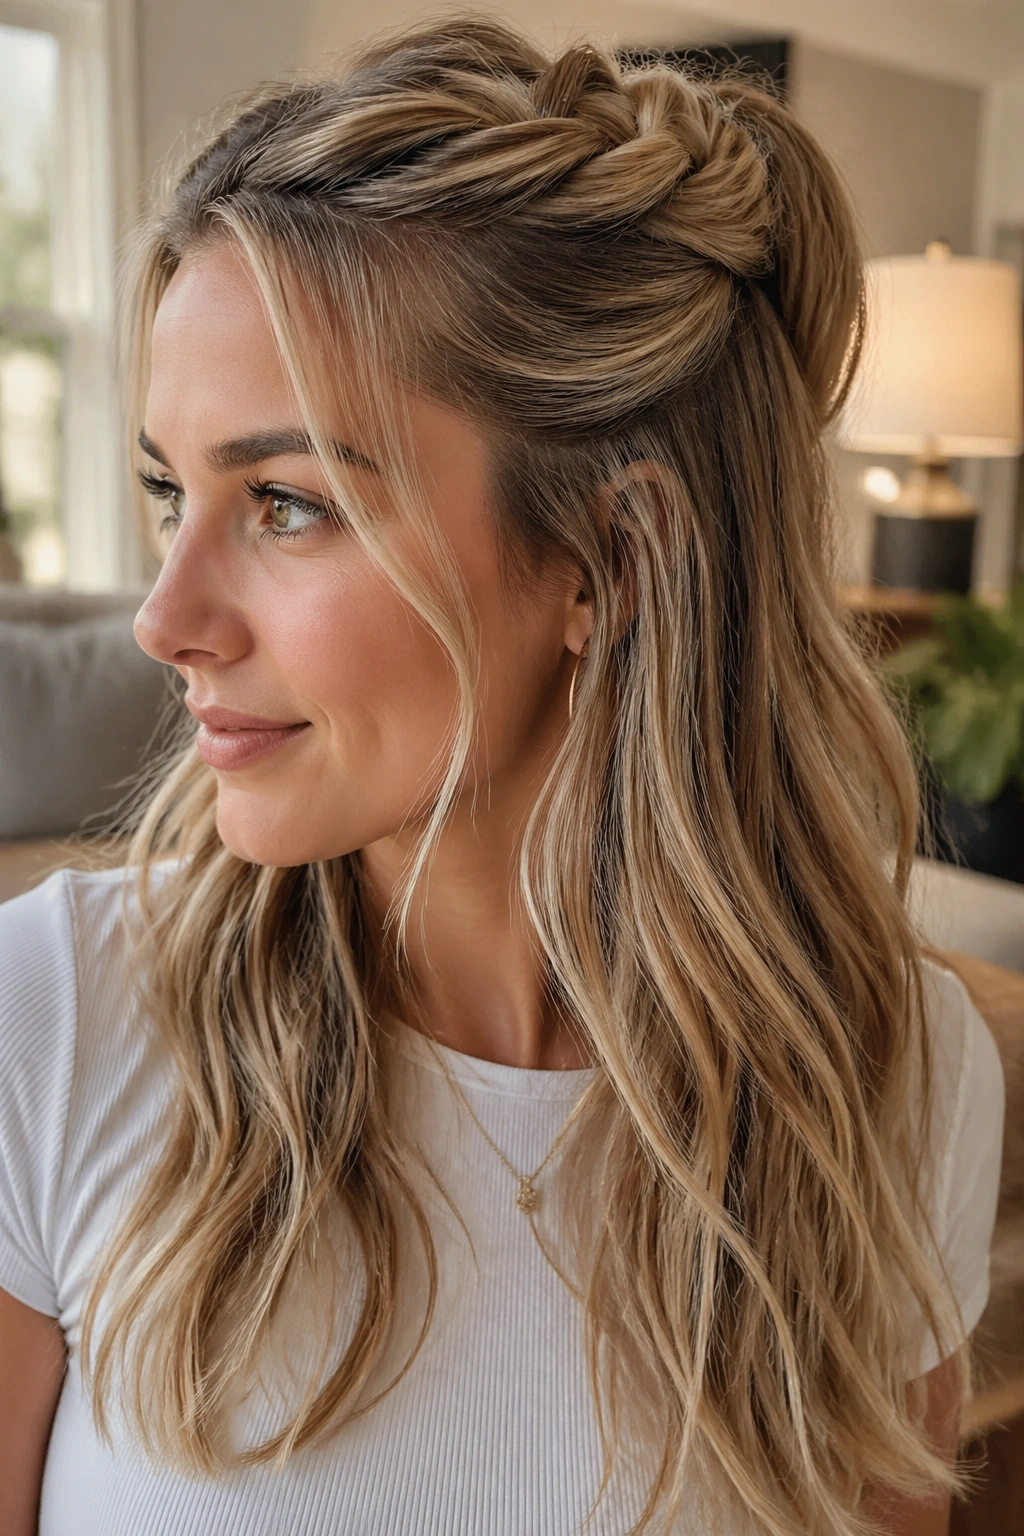
A half-up rope braid ponytail is the one that saves you when you want hair off your face but don’t want to lose the length down your back. It keeps the crown controlled and still leaves enough hair loose to show off the rest of your cut.
The shape is useful on shoulder-past-the-shoulder hair because it creates lift at the top without making the style too heavy. A full ponytail can sometimes drag long hair down. Half-up avoids that. The result feels lighter, and the rope braid sits where people can actually see it.
Start by sectioning the top half from temple to temple, then pull it back and secure it. Twist that top ponytail into a rope braid, and let the bottom half hang loose, smooth, or softly waved.
The thing I like most is how forgiving it is with layers. Shorter face-framing pieces can stay down while the rest gets swept back. That gives the style a less rigid, more lived-in finish.
If your hair is thick, keep the half-up section a little smaller than you think you need. Too much top hair can make the ponytail feel bulky. Too little, and the braid disappears. There’s a narrow sweet spot, and once you find it, the style becomes a repeat favorite.
6. Double Rope Braids Feeding Into One Ponytail
Unlike a single rope braid, this version gives you more visual texture before the ponytail even starts. Two rope braids come down from the sides or from the temples, then meet in one ponytail at the back. The effect is neat without looking rigid.
This style is especially good for thick hair because the extra sections help distribute the weight. One big ponytail can feel heavy and pull the scalp. Two smaller ropes leading into one base often feel easier to wear for hours.
The parting can be clean and symmetrical or a little softer. Either way, the trick is to keep the two ropes even in thickness so the ponytail doesn’t tilt to one side. That imbalance shows up fast on long hair.
You can join the braids with a clear elastic, then hide that junction with a small strip of hair or leave it visible if you like the sporty look. Either choice works. I tend to prefer the hidden version when the hair is smooth and the visible version when the hair has texture.
This is one of those styles that looks more complicated than it is. That’s half the appeal.
7. Sleek Rope Braid Ponytail for Straight Hair
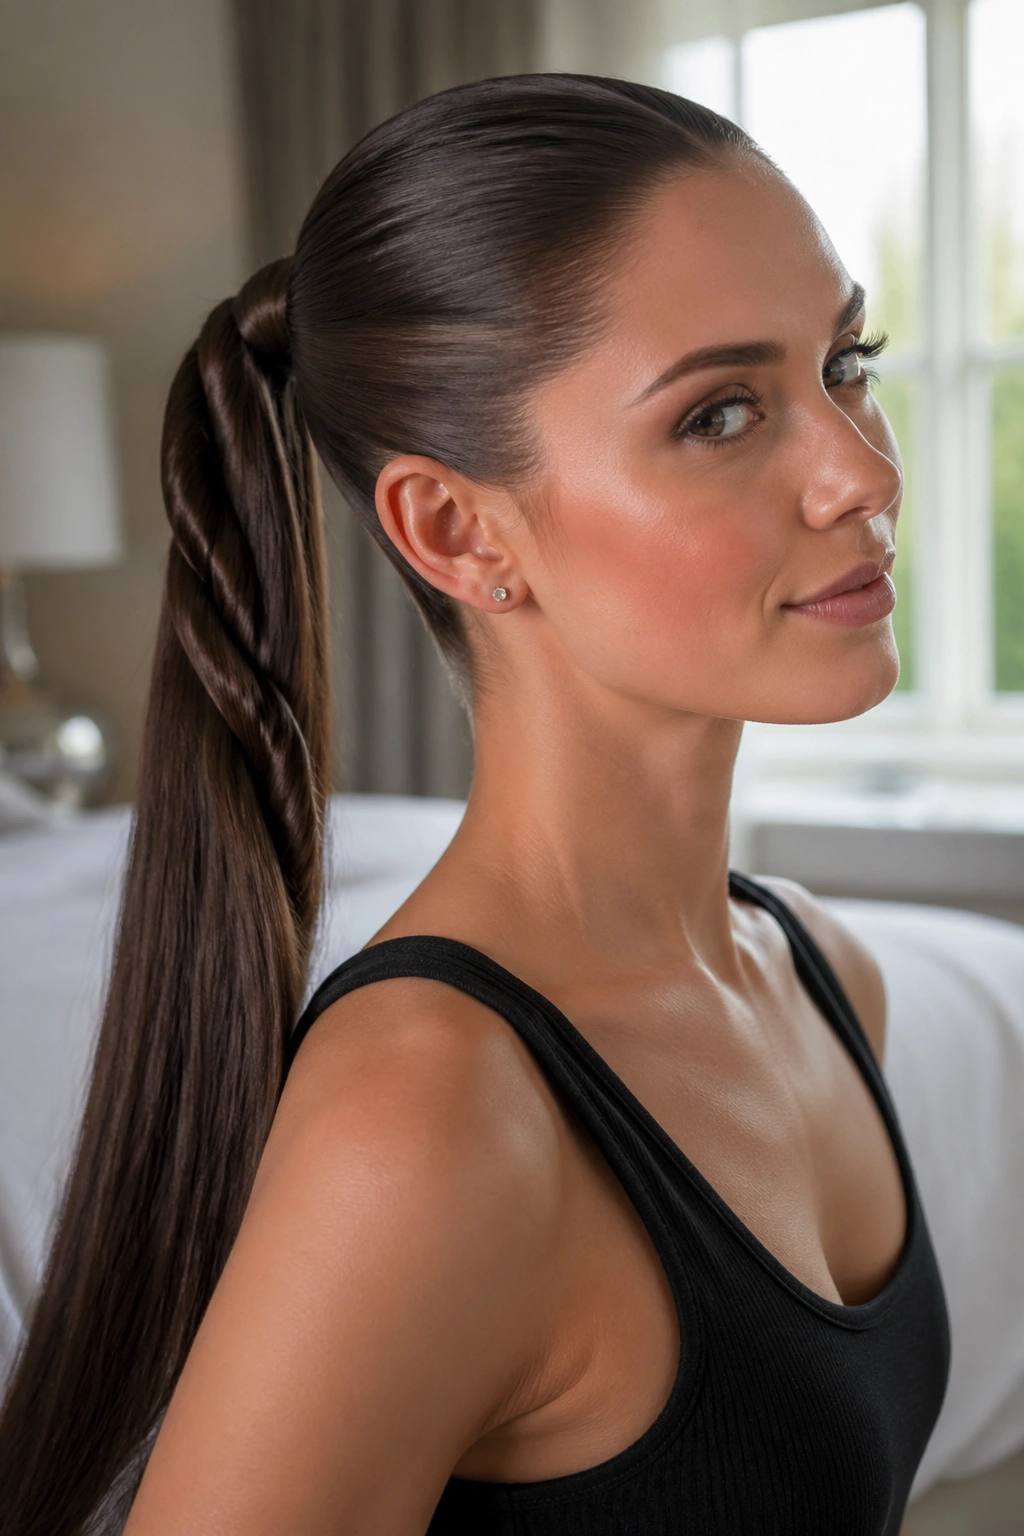
Straight hair shows the rope pattern best. The twist line stays crisp, the edges stay neat, and the braid reads almost like a polished cord running down the back.
That said, straight hair also shows every mistake. If the sections aren’t equal, the rope will wobble. If the elastic is loose, the whole thing slides. If the top isn’t smoothed first, the style loses the clean look that makes it work.
What to Watch For
A little prep goes a long way here. Brush the hair into place, mist lightly with water or a smoothing spray, and use a fine-tooth comb if you want the base glassy. Then twist with steady tension from top to bottom.
- Keep both sections the same size
- Twist each section firmly before crossing them
- Hold the ends while you release the braid so it doesn’t loosen
- Finish with a small amount of hairspray on your palms, then smooth the outer layer
I like this version for long straight hair because it doesn’t fight the texture. It uses it. The result can feel sharp in a good way, almost architectural, without crossing into stiff or overworked territory.
8. Textured Rope Braid Ponytail After Soft Waves
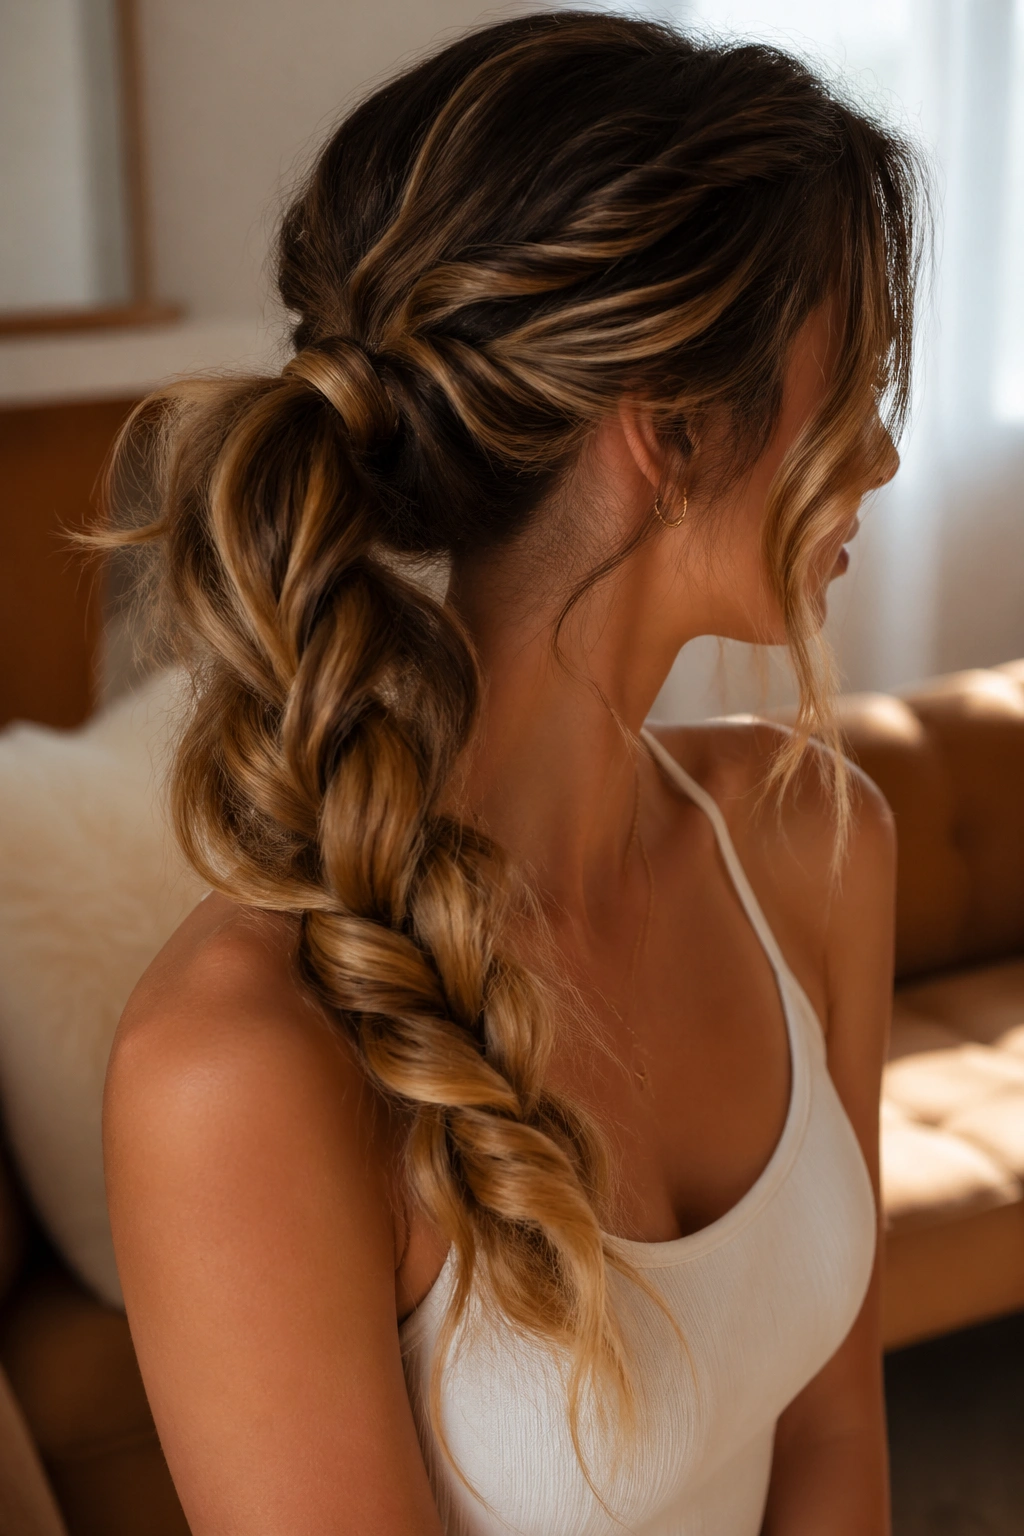
What makes this one so easy to wear? Texture. A rope braid over soft waves has more grip, so the twist stays put with less effort, and the finished ponytail feels looser in a way that’s hard to fake.
Second-day hair is often the best starting point. Clean hair can be too slippery, especially if it’s fine. A bit of natural oil at the roots and a little bend through the mid-lengths gives the rope braid something to hold onto.
How to Get the Grit
Use a light texturizing spray or a small touch of mousse before you gather the ponytail. Then rough-dry or air-dry the hair until it has shape, not puff. You want movement, not frizz.
The rope itself can be looser here. Don’t crank it so tight that the wave pattern disappears. Let some of the bends show through the braid. That contrast is the whole point.
If you like a softer look, pull a few strands around the temples after the ponytail is secure. If you want it cleaner, keep those front pieces tucked back. Both work. The difference is mood, not technique.
This is the version I’d call easygoing, but not lazy.
9. Rope Braid Ponytail With a Ribbon or Scarf
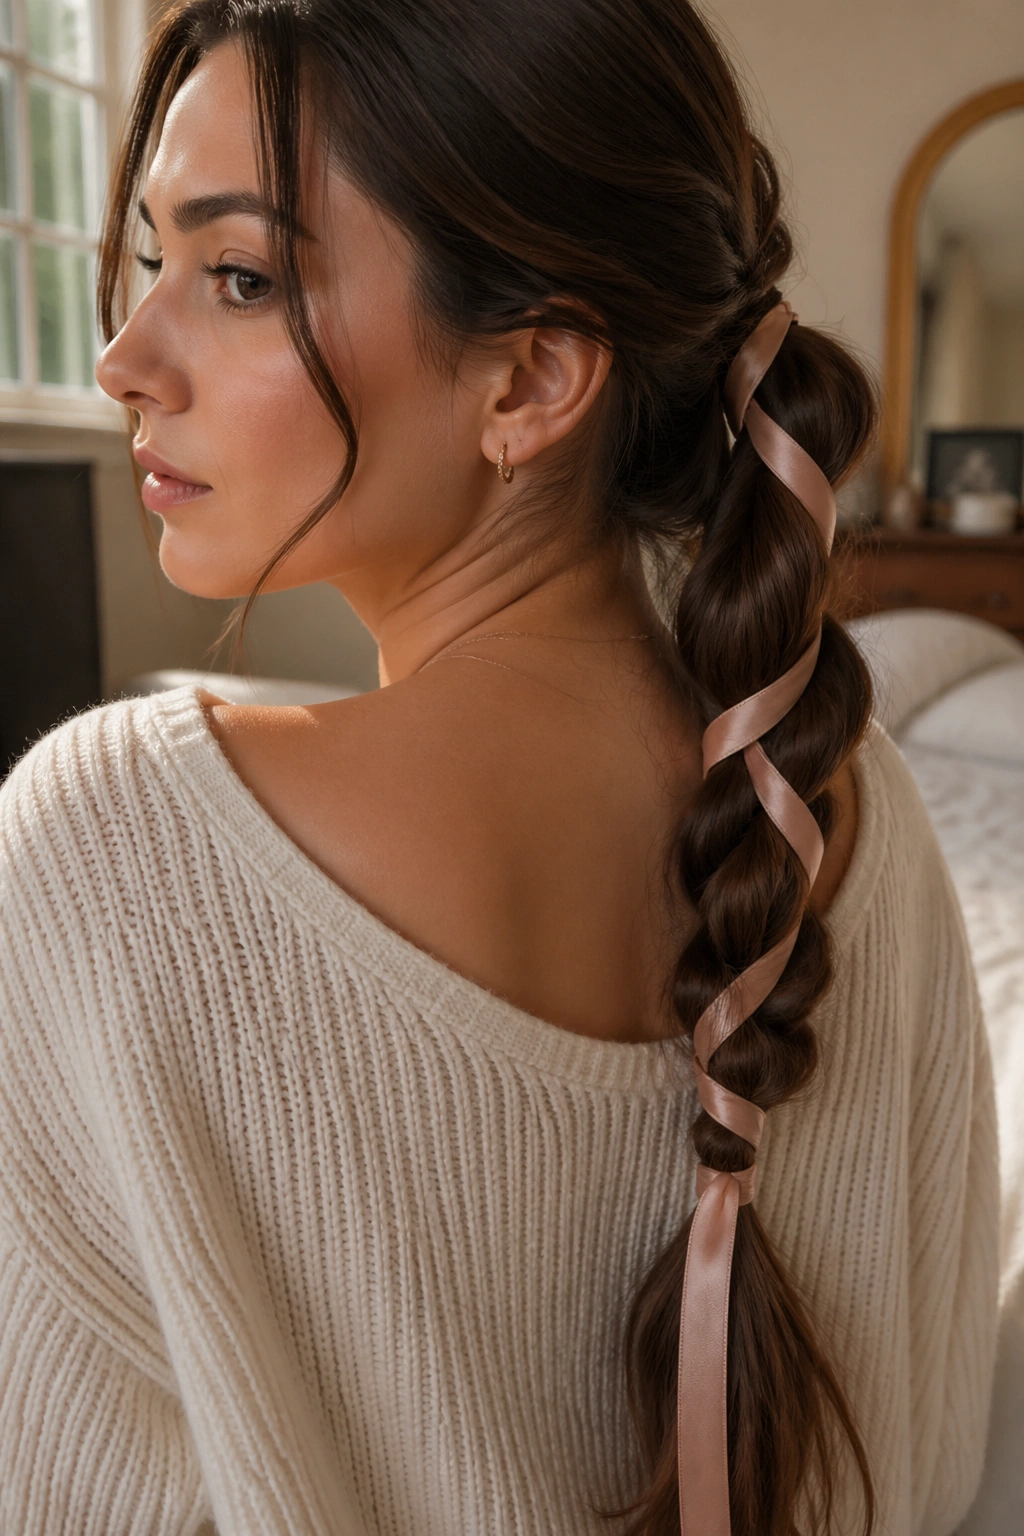
A ribbon changes the tone fast. Suddenly the same rope braid ponytail feels less athletic and more styled, even if the braid itself is almost identical. That little strip of color or fabric gives the eye something to follow all the way down the length.
The key is choosing something narrow enough to twist without bunching. A silk ribbon, satin ribbon, or a slim scarf cut into a long strip works better than a chunky tie. Thick fabric can make the rope feel bulky and hard to secure.
You can start the ribbon at the ponytail base and braid it in with the two sections, or wrap it around the finished rope. The first method creates a woven look. The second feels cleaner and is easier to redo if you’re in a hurry.
- Thin ribbon if you want a neat finish
- Satin or silk if you want a softer drape
- Cotton if you want extra grip
- A neutral color if the outfit is busy
- A bright color if the rest of the style stays simple
This style works especially well on longer hair because there’s enough length for the ribbon to trail without getting lost. Shorter ponytails can swallow the detail. Long hair gives it room.
10. Bubble-Ended Rope Braid Ponytail
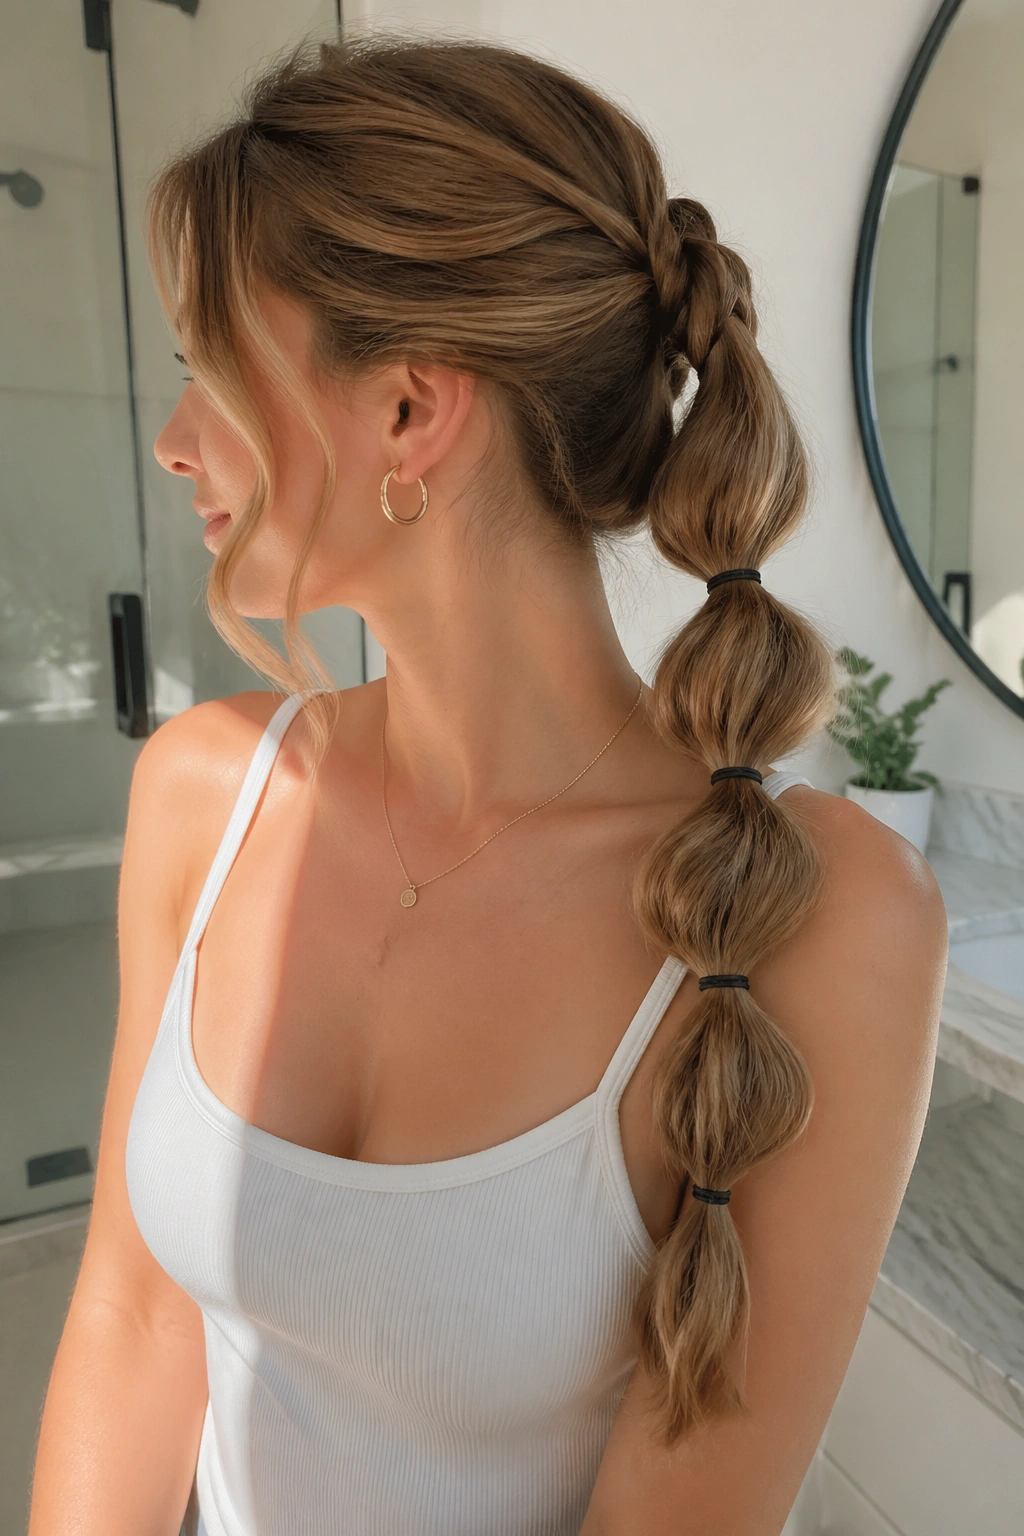
A bubble-ended rope braid ponytail is what happens when you want the structure of a rope braid with a little extra play at the end. The top section is twisted as a rope, then the lower section is broken into soft bubbles with small elastics spaced down the length.
It’s a smart choice when the ends of your hair are thinner than the rest. Instead of leaving the last few inches looking wispy, the bubbles turn that softness into part of the design.
Start with a regular rope braid for the upper half or two-thirds of the ponytail. Secure it, then add elastics every 2 to 3 inches in the remaining length. Gently tug each section between the ties so it puffs into a rounded shape.
That tugging matters. Too much, and the bubbles turn sloppy. Too little, and you just have a string of tight ties down the back. Aim for a rounded shape that still looks controlled.
I like this one because it gives long hair movement without sacrificing order. It’s a neat style with a little fun built in, which is honestly a nice change from the usual “clean or messy” binary people talk about with hair.
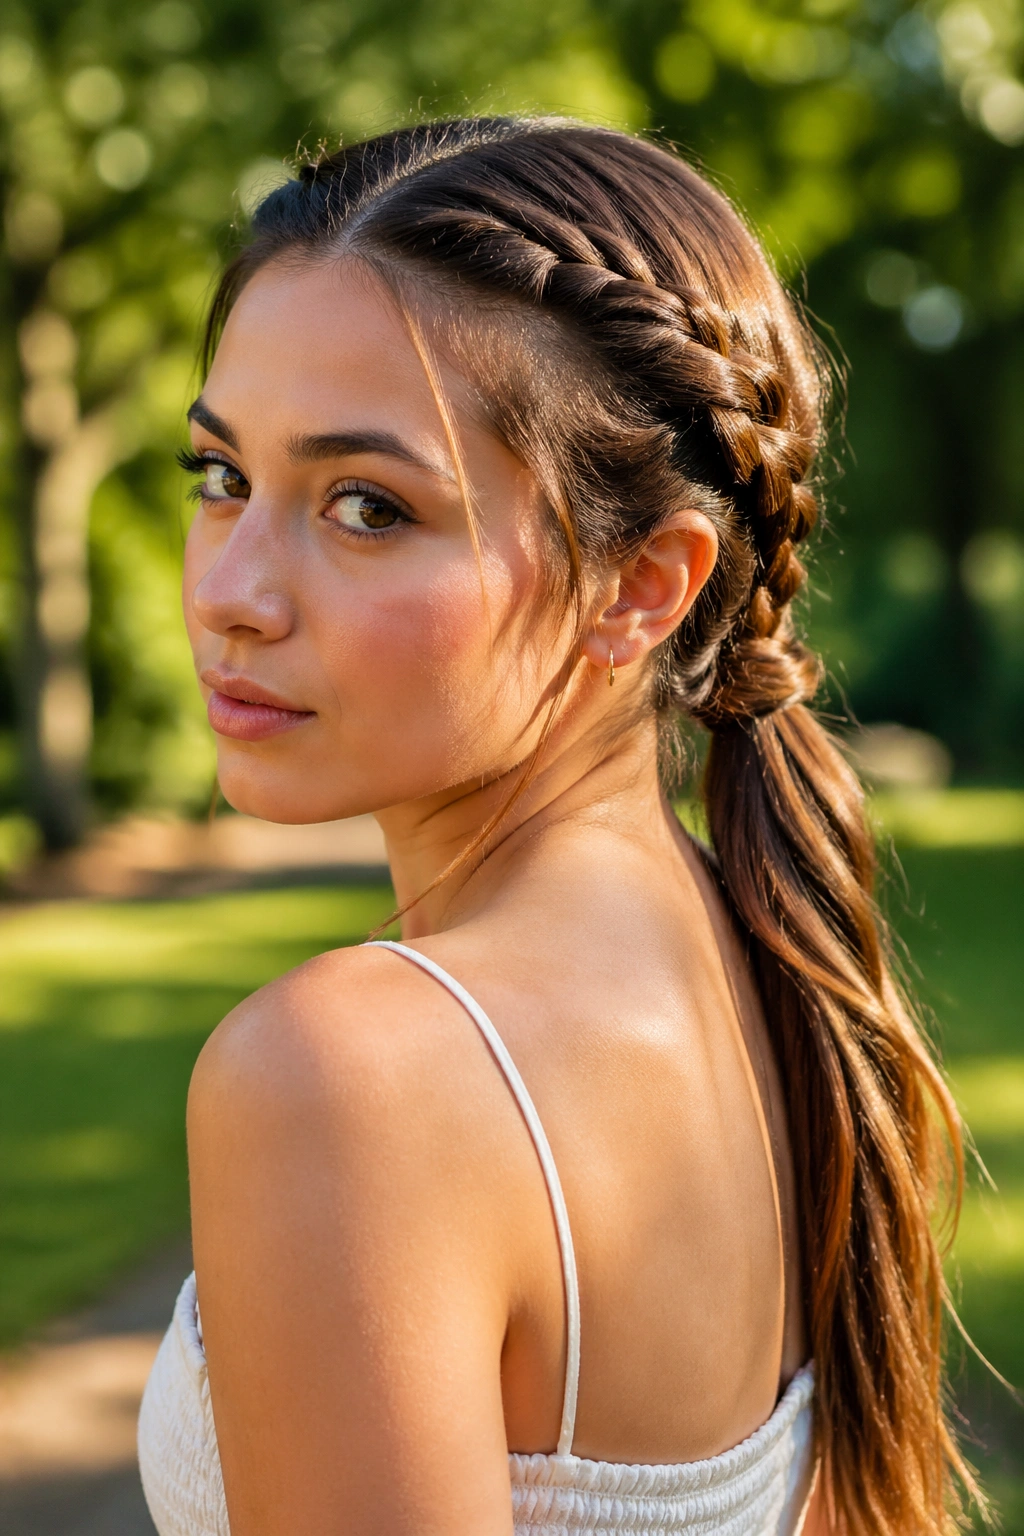
11. Crown-to-Ponytail Rope Braid
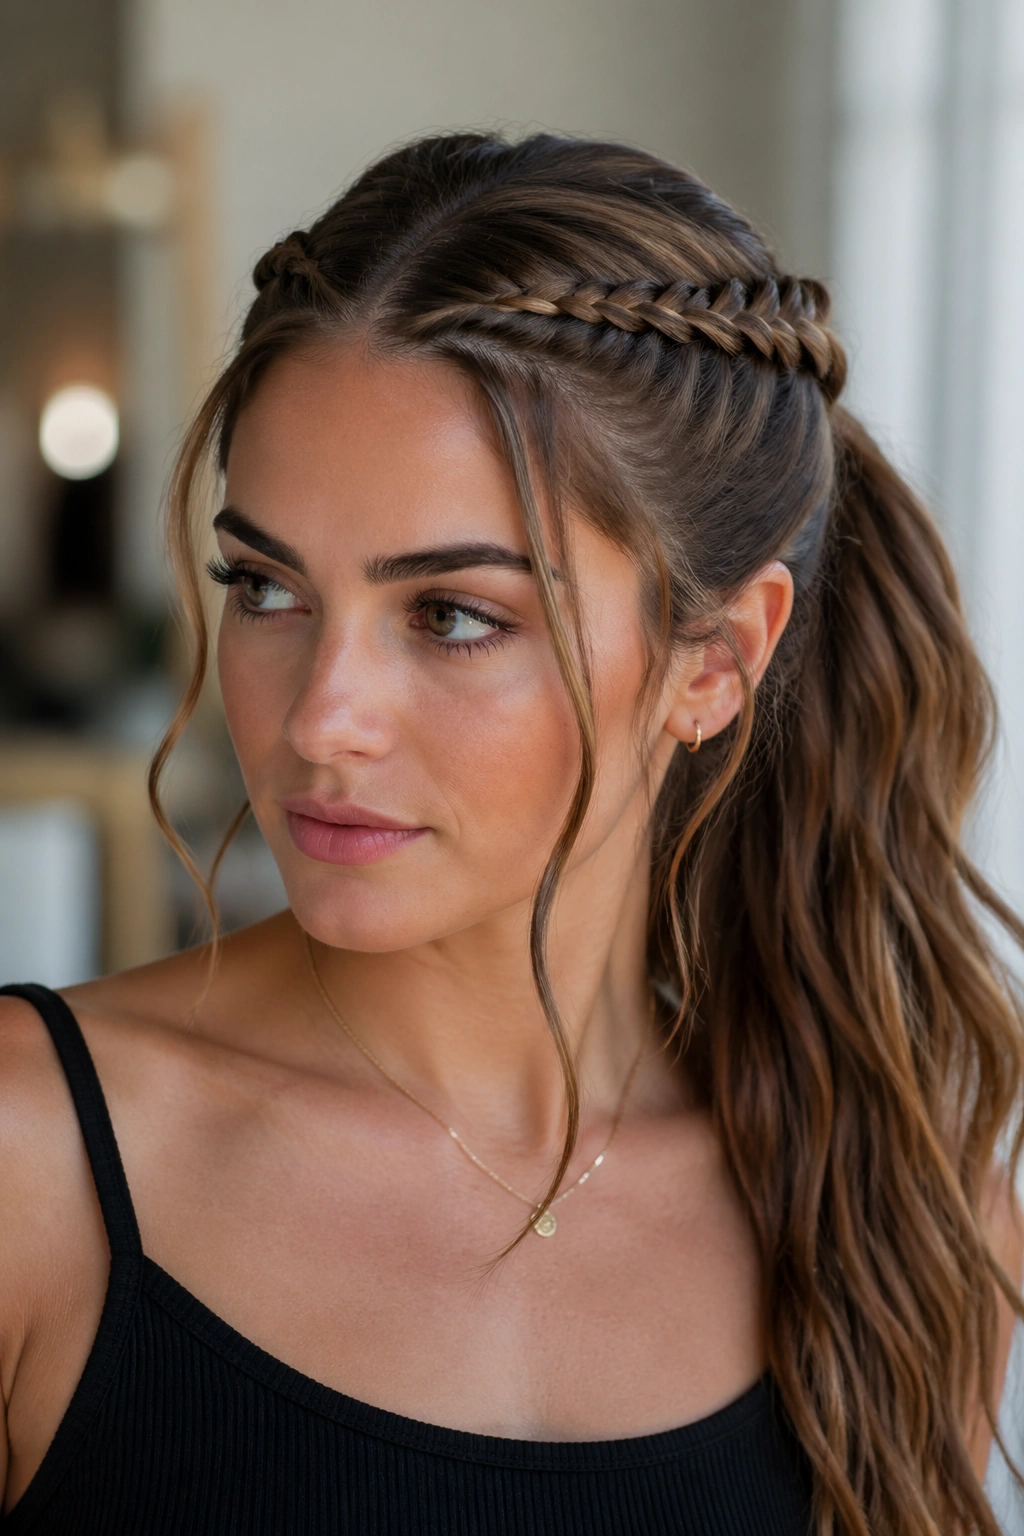
This style starts at the front, which makes the finish feel more complete. Two rope braids or twisted sections begin near the hairline, travel back along the sides, and meet at the ponytail. The front has structure, and the back gets the length.
It’s one of the best options when you want hair off the face but do not want the top to look flat. The crown-to-ponytail shape gives lift without teasing, which is a welcome trade if you hate backcombing.
What Makes It Different
The front pieces are doing real work here. They frame the face, hold the style in place, and keep the ponytail from looking like it was pulled together in two minutes. On hair past the shoulders, that front structure also balances the weight of the length down the back.
Use a comb to make two clean sections at the front, then twist each one back toward the ponytail. Keep the tension even so one side doesn’t sit higher than the other. If the hair is layered around the face, pin the shorter pieces where they belong before they escape.
This is one of the more graceful rope braid ponytails on the list. Not fragile. Just more finished.
12. Athletic Rope Braid Ponytail
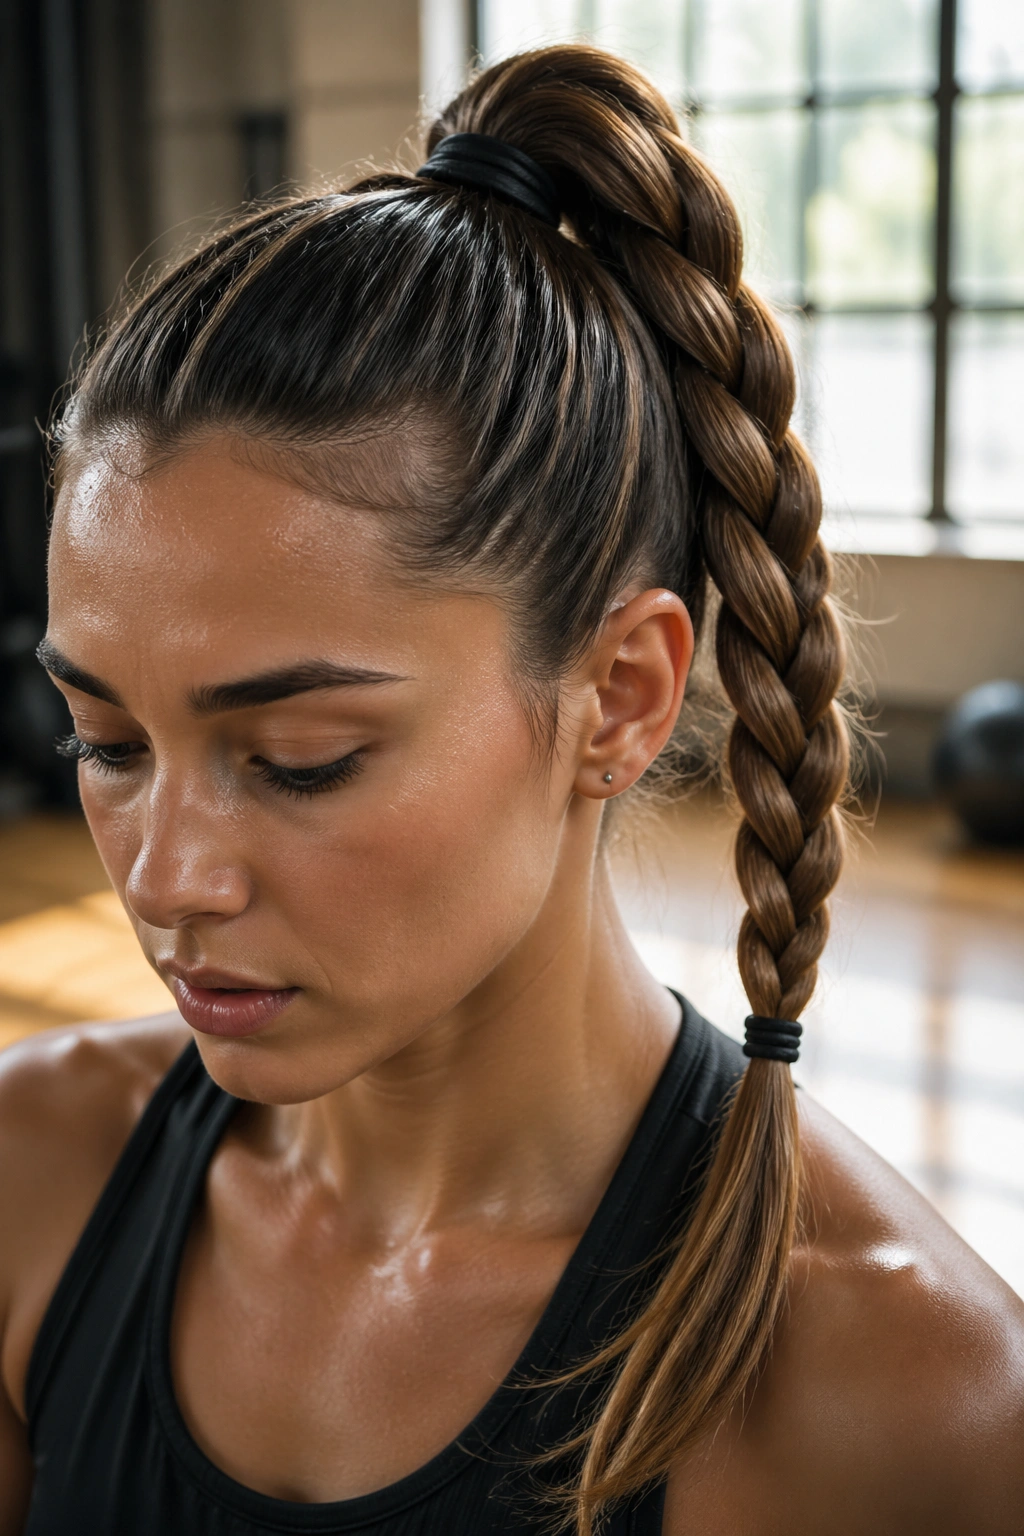
A workout rope braid ponytail needs one thing above all else: a base that will not move. Long hair can be heavy once you start running, jumping, or lifting, so the style has to stay close to the head and resist tugging.
This is where a tight high ponytail helps. Pull the hair up firmly, secure it with an elastic that grips well, then rope braid the length and seal the end with another elastic. If your hair is very slippery, a second small elastic at the base can help anchor the first one.
Keep the braid tighter than you would for a dinner style. Loose tension looks nice in a mirror and falls apart during motion. Sports hair has different rules.
- Use an elastic with strong hold, not a decorative one
- Smooth the sides before you secure the ponytail
- Keep flyaways down with a tiny bit of gel or spray
- Braid all the way to the end so the tail doesn’t whip around
The nice thing about this version is that long hair actually helps. A shorter rope braid can bounce too much. Hair past the shoulders gives the braid enough weight to stay controlled.
13. Evening Rope Braid Ponytail With Curled Ends
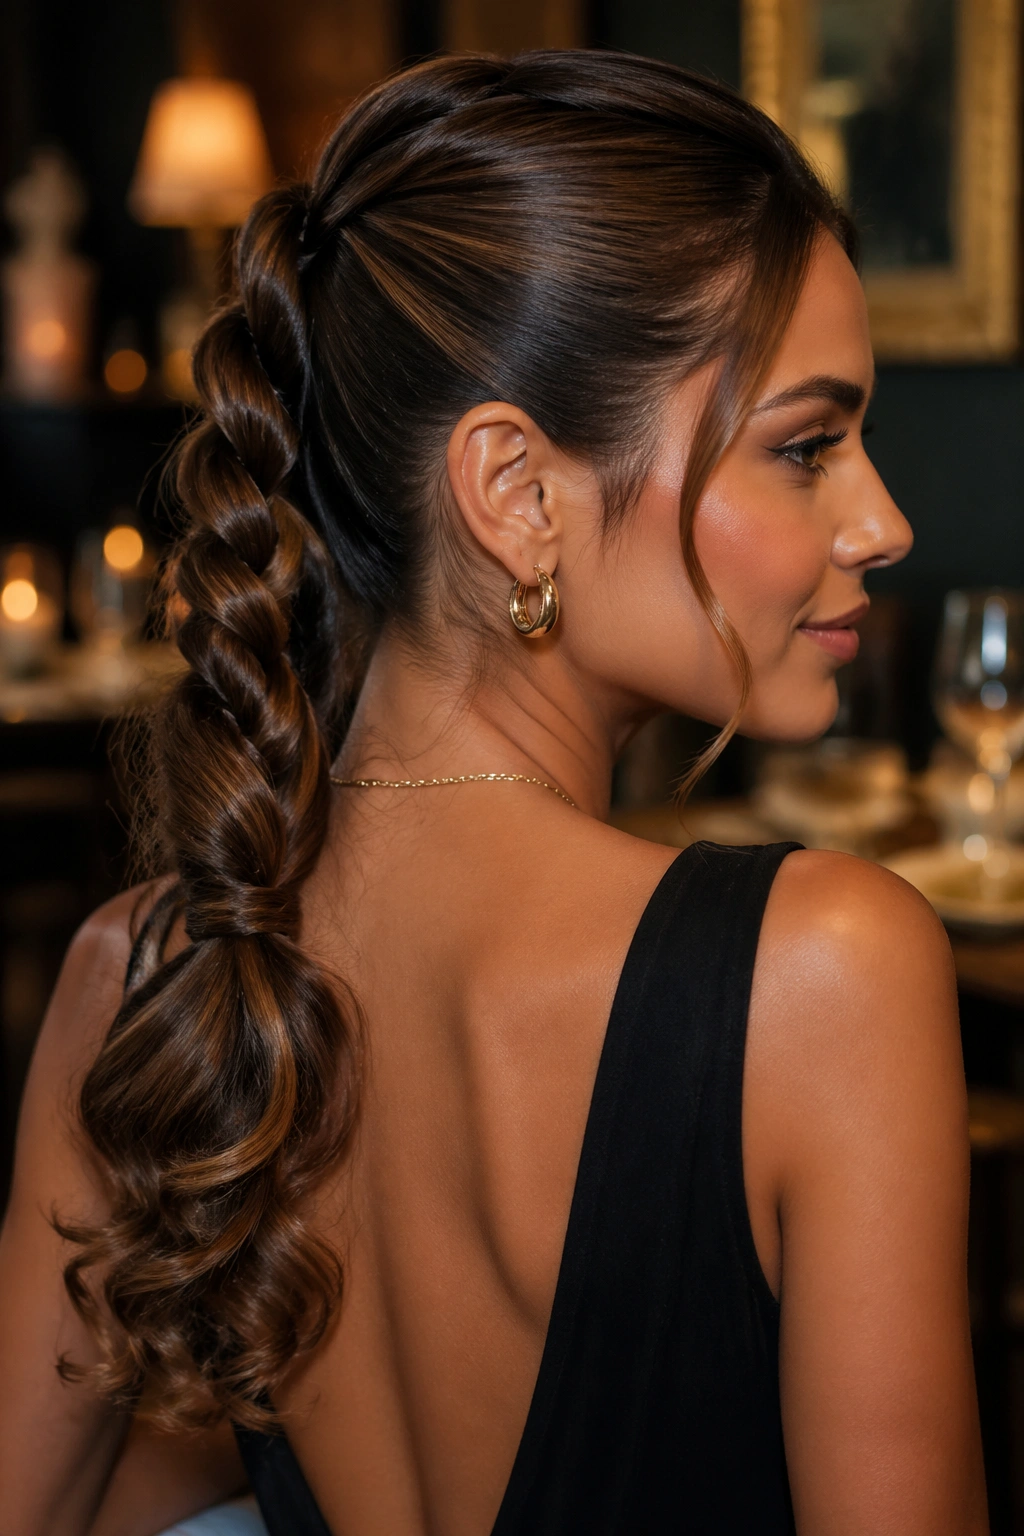
This is the one I’d save for a dinner, a wedding guest look, or any night when you want the ponytail to feel dressed up instead of practical. The rope braid stays smooth through the upper section, and the ends are curled so the whole style softens at the bottom.
The curled finish matters more than people expect. A straight, heavy end can drag the whole style down. A bent or curled finish gives the braid a little lift and keeps the final inches from looking too blunt.
Start with a polished base, make your rope braid, then wrap the loose ends around a 1-inch curling iron or set them in large rollers if you want a gentler curve. Let the ends cool fully before touching them. That part matters. Warm hair drops shape faster than you’d think.
You can keep the rope itself tight and glossy, or leave a few softer strands around the face. I prefer the first version when the outfit is structured and the second when the rest of the look is softer. Either way, this style has enough shape to stand on its own.
And if you’re wondering which rope braid ponytail people notice first, it’s usually the one that looks the most deliberate. This is that one.
A rope braid ponytail for hair past the shoulders does not need to be fancy to look good. It just needs clean sections, a stable base, and a finish that suits the rest of your day.
The styles that work best are the ones that respect your hair’s weight instead of fighting it. Keep the crown smooth when you want polish, loosen the braid when you want softness, and don’t be shy about wrapping an elastic or adding a ribbon if the base needs help. Small fixes matter more than giant styling routines.