Greasy roots have a way of showing up at the worst possible moment. The good news: a French braid bun is one of the few styles that can make oily hair look deliberate instead of neglected.
What makes it work is simple. The braid breaks up shine, the bun gathers the lengths, and the scalp line gets tucked under texture instead of sitting there in full daylight. A little dry shampoo helps, sure, but the real trick is in the braid placement and tension. Too loose, and the roots still peek through. Too tight, and the style starts looking stiff and a bit severe.
There’s also a nice side effect here that people miss. Second-day hair usually grips a braid better than freshly washed hair, so the style tends to hold with less slipping, fewer flyaways, and fewer pins fighting for their lives.
Some versions look polished enough for a meeting. Some are messy enough for a weekend. All of them do the same practical job: they take the shine at the top of your head and turn it into part of the style instead of a problem.
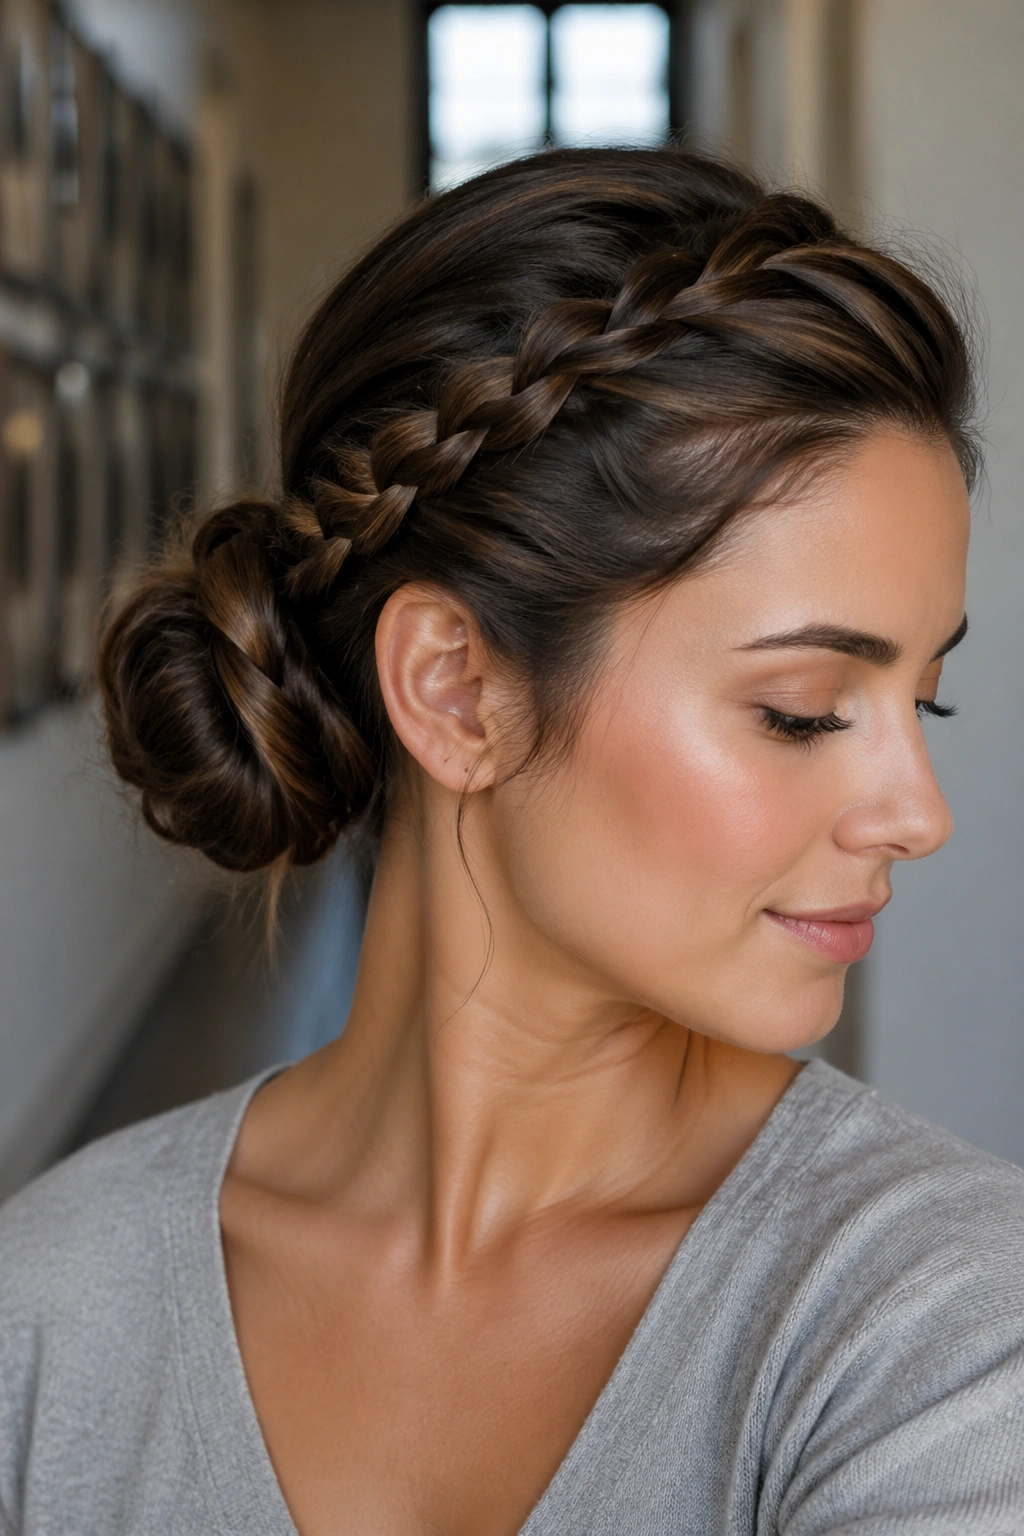
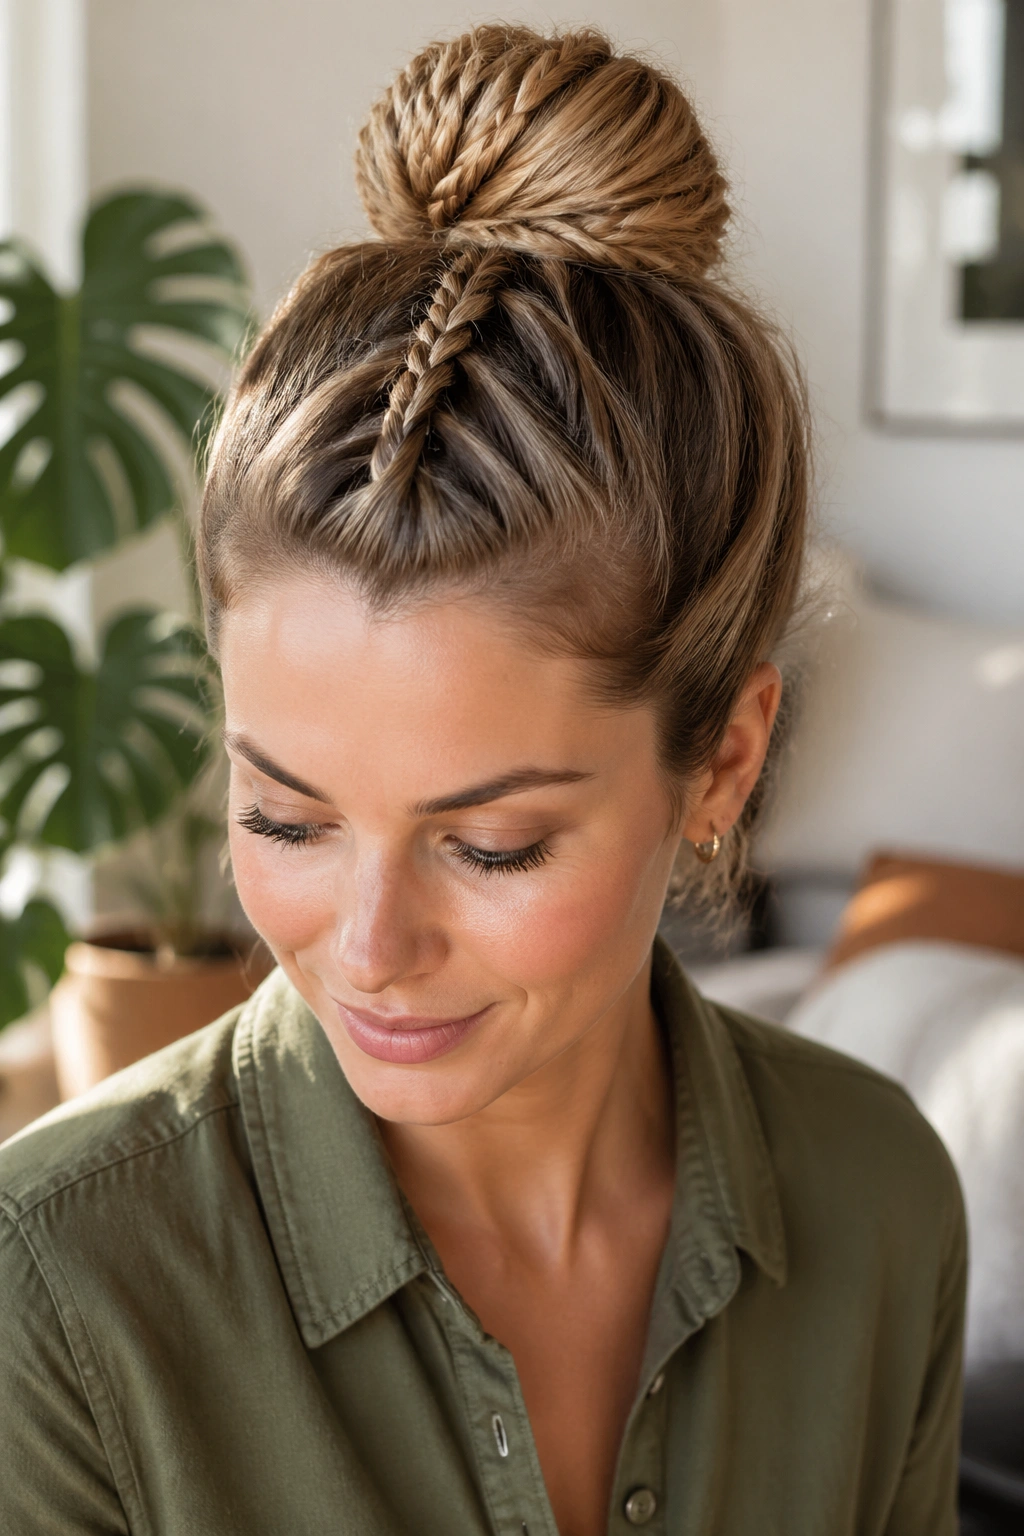
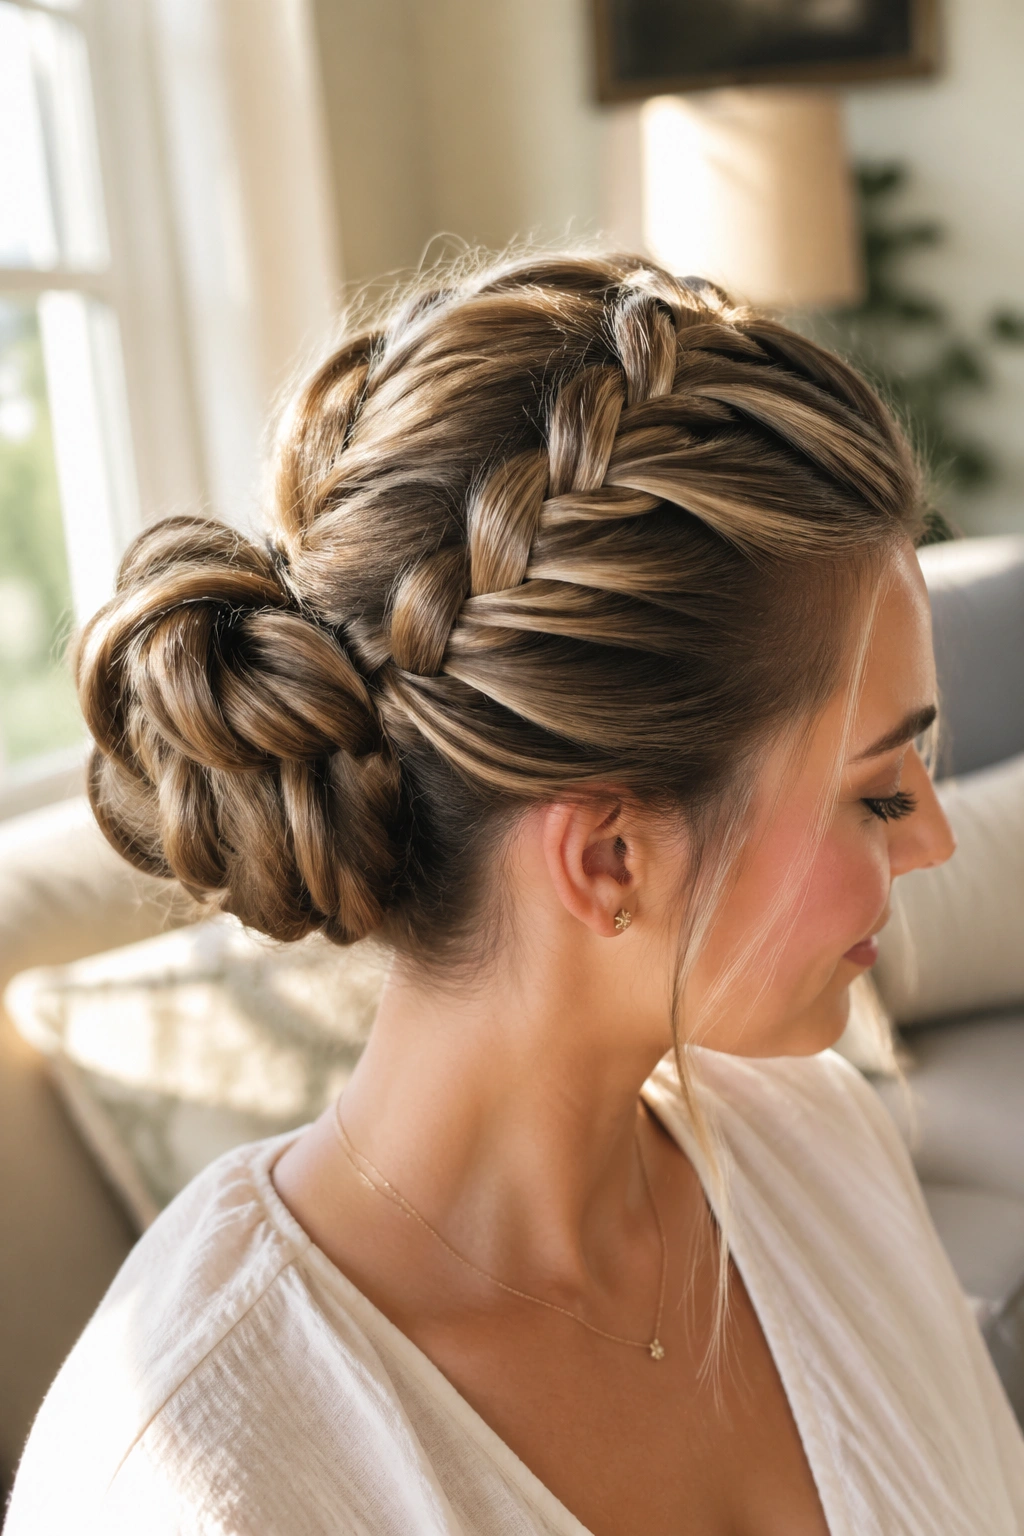
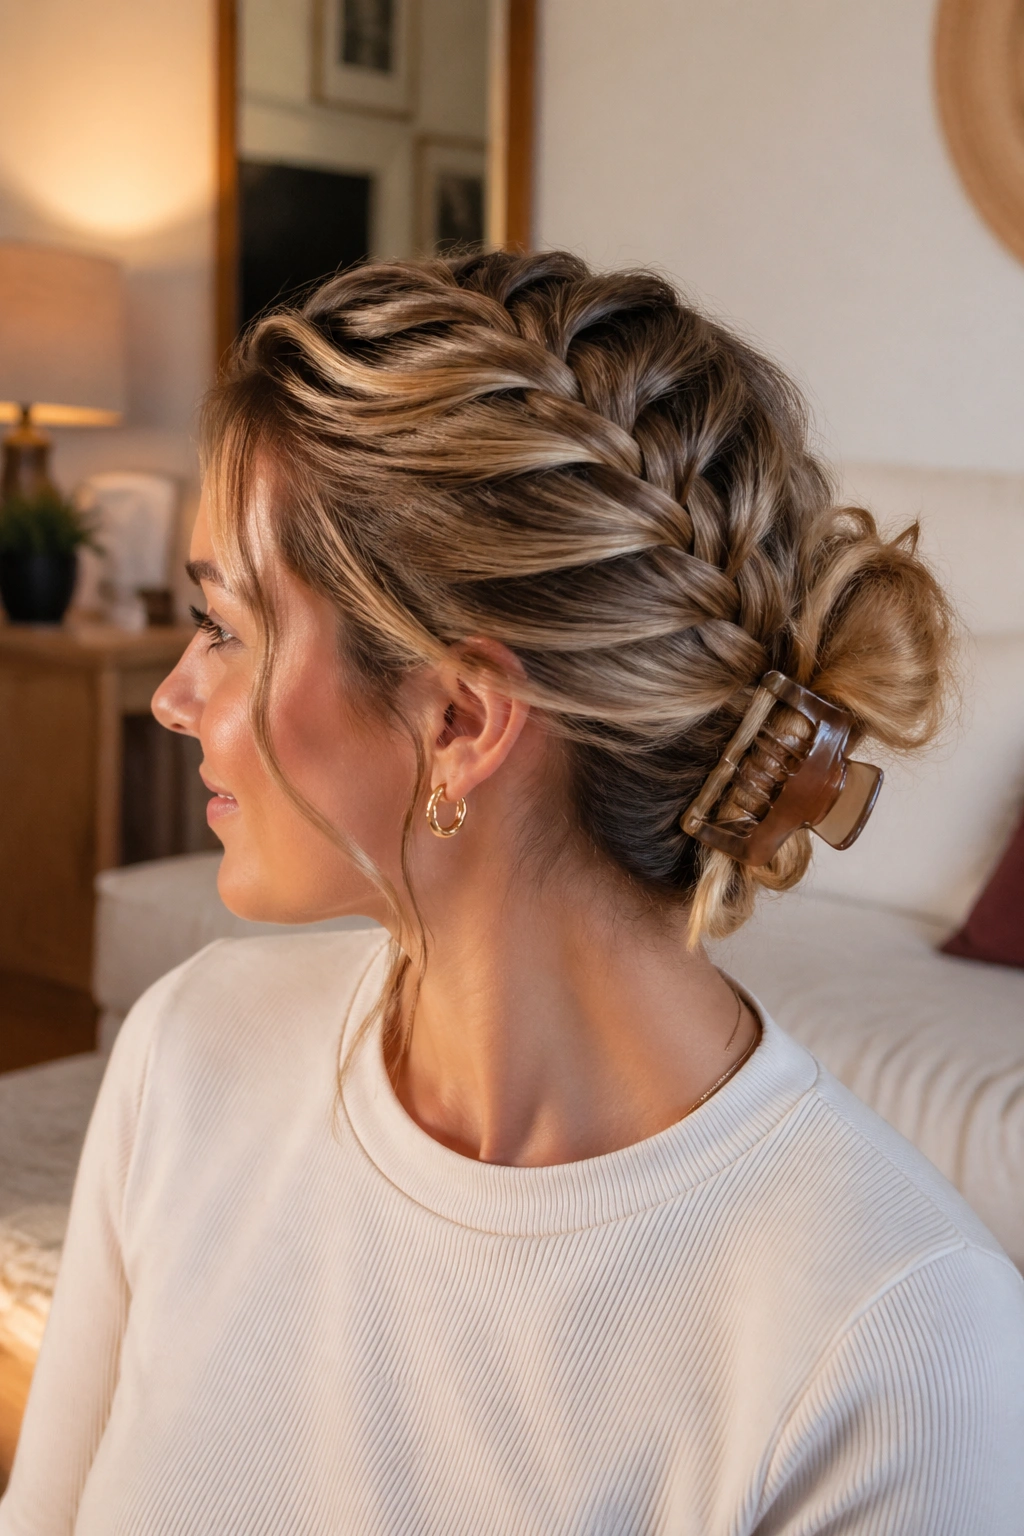
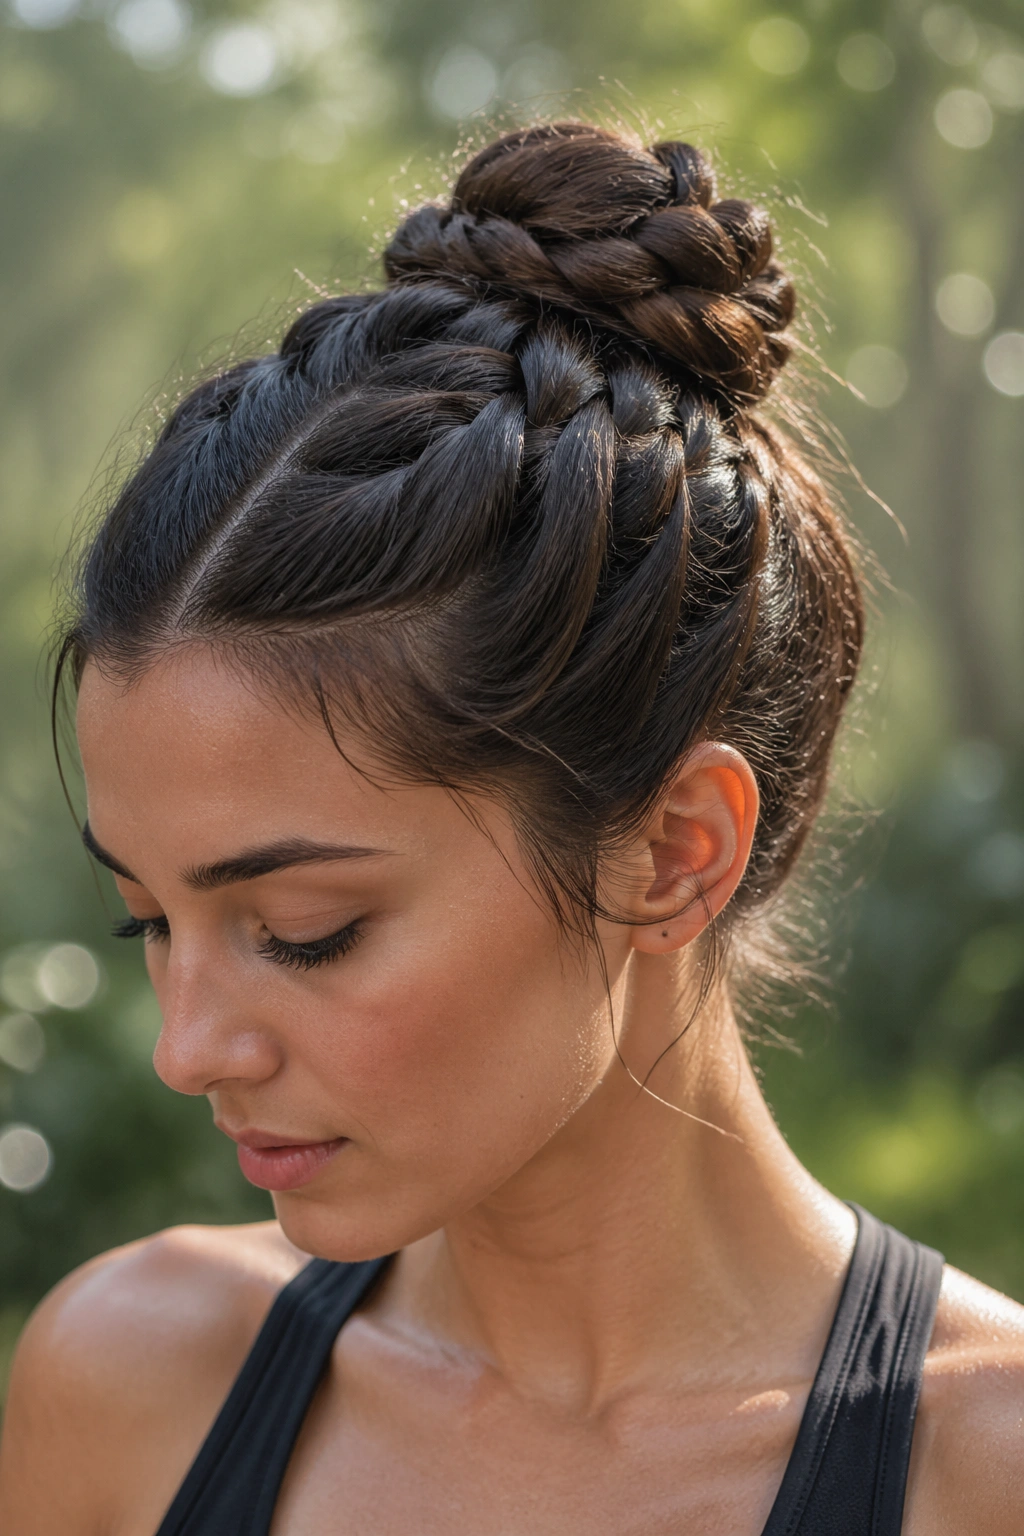
1. Center-Part French Braid Bun
A clean center part is a smart move when the grease sits right at the crown. Split the hair evenly, braid each side back toward the nape, and join both braids into one bun so the shiny part line disappears under the weave.
Why It Hides Shine So Well
The center part gives your face a frame, but it also keeps the braids balanced. That balance matters when roots are oily, because it stops one side from looking flatter or darker than the other.
- Keep the part straight and narrow, about a finger-width wide.
- Mist dry shampoo along the part before you braid.
- Use small sections near the hairline so the braid lies close to the scalp.
- Twist the ends into a low bun and pin them under the braid tail.
Best tip: braid the first two passes snugly. That is where the style either covers the roots or lets them show through.
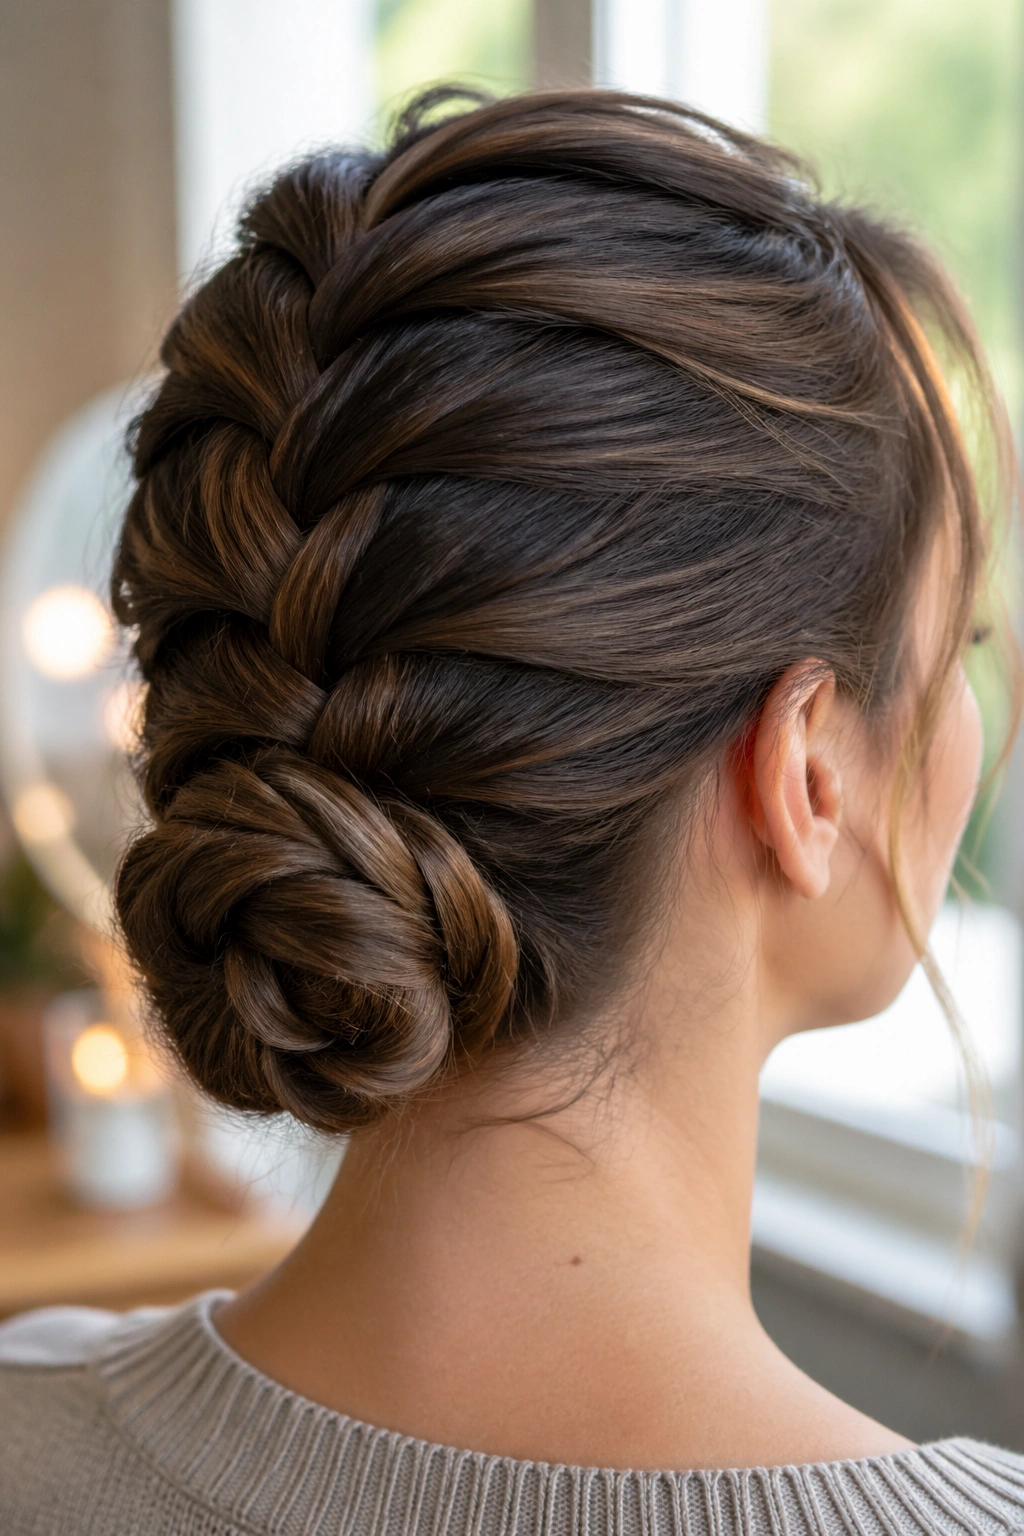
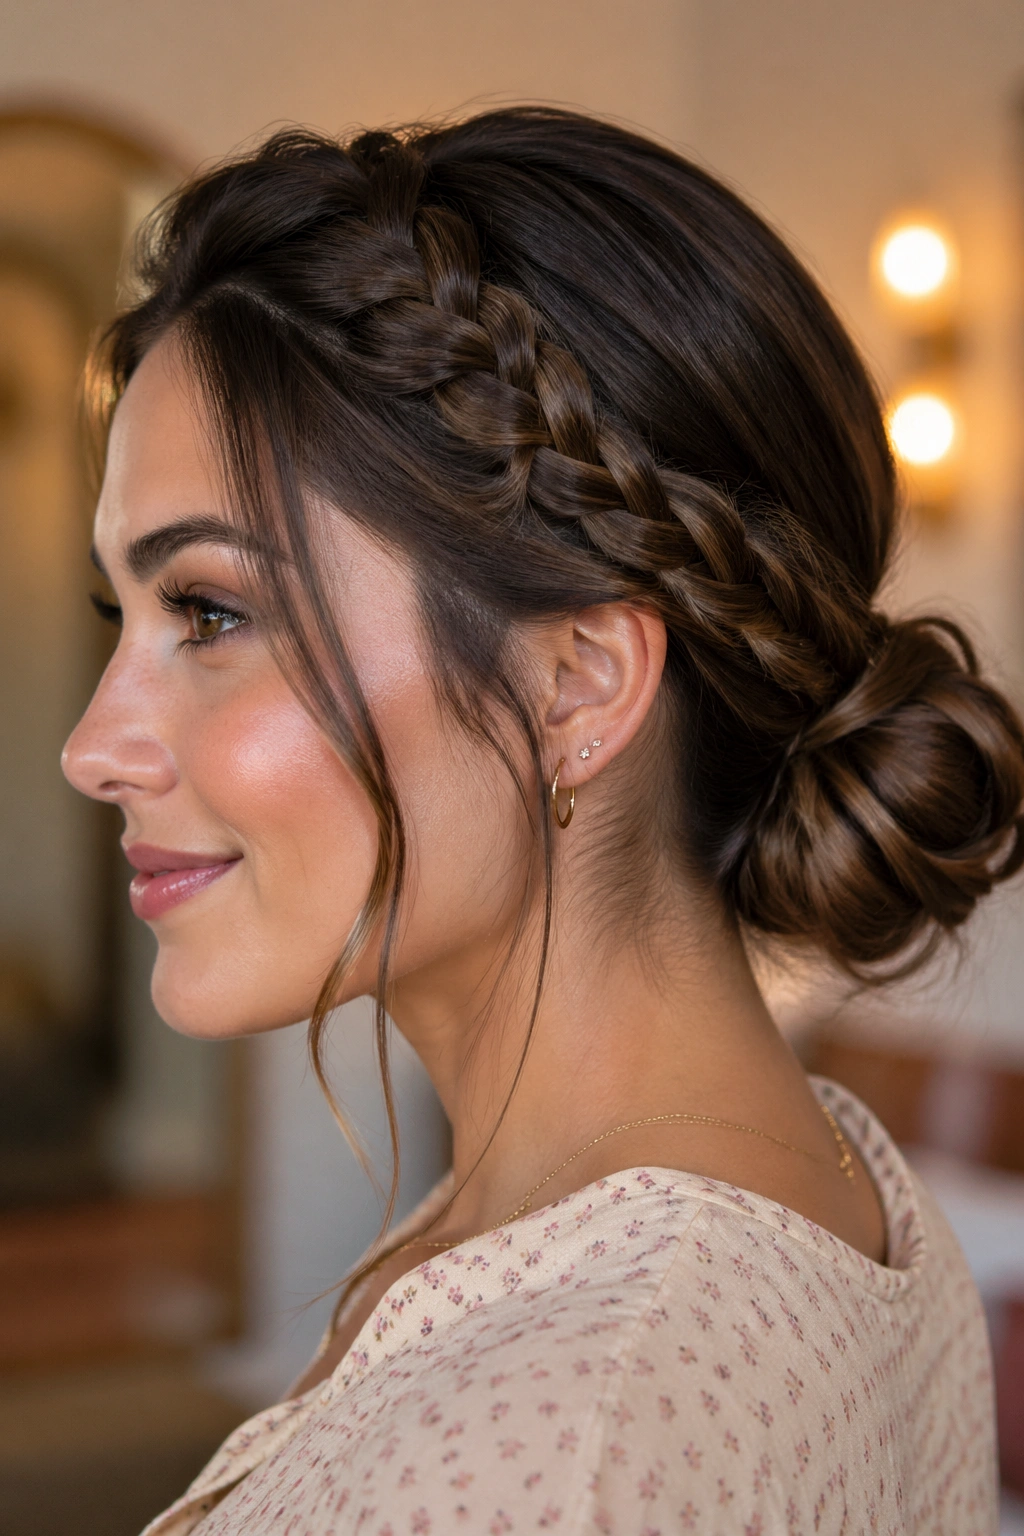
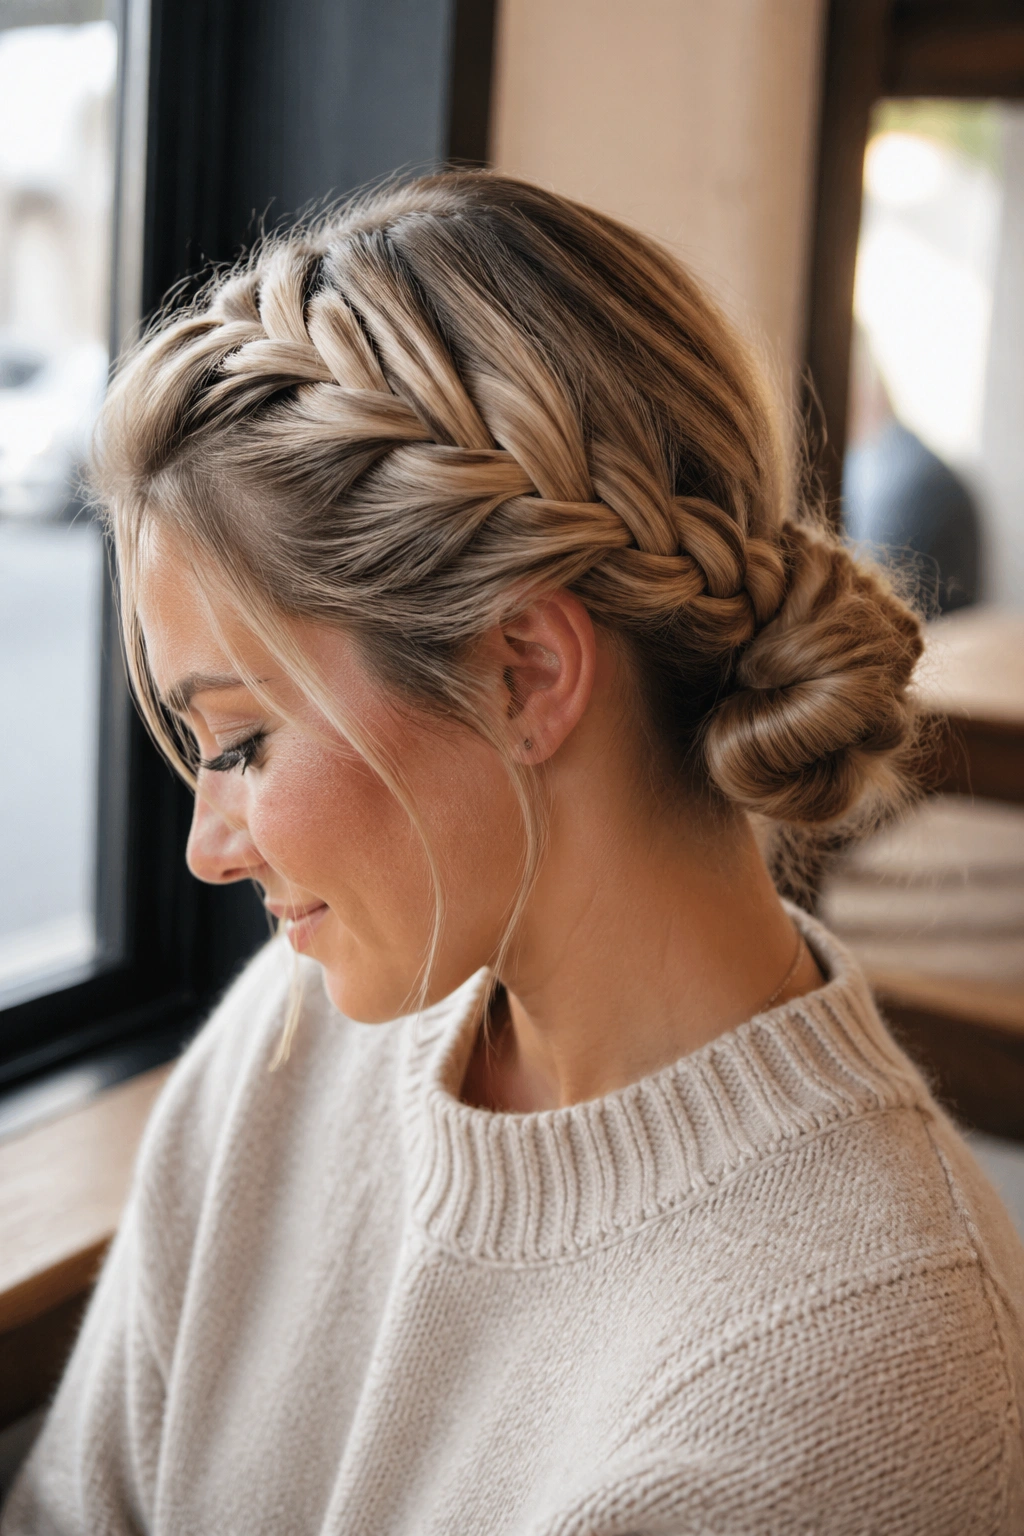
2. Low Nape French Braid Bun
If your roots get greasy fast but the rest of your hair still has some shape, keep the bun low. A braid that starts at the front hairline and ends near the nape hides the oil along the top of the head and leaves the finish calm instead of fussy.
The low placement also works well under collars, scarves, and jackets. No one sees the back of the bun first anyway. They see the front, and that front is where the braid does the heavy lifting.
I like this version for straight hair that goes limp by midday. It looks neat without needing a lot of teasing or product, which is handy when you do not want to pile more stuff onto already shiny roots.
3. Crown French Braid Bun
Why does a crown braid bun make unwashed hair look so much better? Because it steals attention from the scalp and puts it on the braid line instead. Once the braid circles the head, the eye follows the woven shape, not the oil at the roots.
That is the whole trick. The braid acts like a frame, and the bun at the end gives the style a clean finish instead of a flat one. It works especially well when the oil starts at the hairline and temples, which is where most people notice it first.
How to Wear It
Keep the braid close to the head from the first section. If you pull it too far off the scalp, the roots peek through between the strands. Once the braid reaches the back, tuck the ends into a bun and secure it with crossed pins so the shape stays put.
A few loose pieces around the ears can soften the look. Just keep them thin. Thick face-framing strands can make the hairline look wetter than it is.
4. Side-Swept French Braid Bun
Sometimes the problem is not the whole head. It is one greasy temple, one flattened side, one part that decided to misbehave. A side-swept French braid bun handles that kind of uneven oil better than a dead-center style.
Start the braid on the fuller side and sweep it diagonally across the back of the head. That diagonal line pulls the eye away from the shinier side and makes the whole style look intentional. It is a small thing, but it changes the read of the hair fast.
- Start the braid above the higher temple.
- Keep the braid angle low and diagonal.
- Pin the bun slightly off-center.
- Leave the front smooth, not slick.
Good news: this one is forgiving if one side of your hair is flatter than the other. The diagonal shape hides the mismatch.
5. Messy Pancake French Braid Bun
A messy bun can look lazy. A pancaked French braid bun looks like you meant every piece of it. That wide, flattened braid gives the style texture, and texture is your best friend when roots are shiny.
The reason it works is simple: light bounces less off textured hair than off smooth hair. Once you gently pull the braid outward after securing it, the braid gets wider, softer, and better at breaking up shine around the crown.
Do not pancake the braid before you secure it. That is the mistake. Finish the braid first, tie it off, then tug the outer loops with your thumb and forefinger. If you try to stretch it too early, the sections loosen and the bun loses shape fast.
A touch of matte spray on the bun itself helps too. Not on the roots. Never on the roots.
6. Sleek Office French Braid Bun
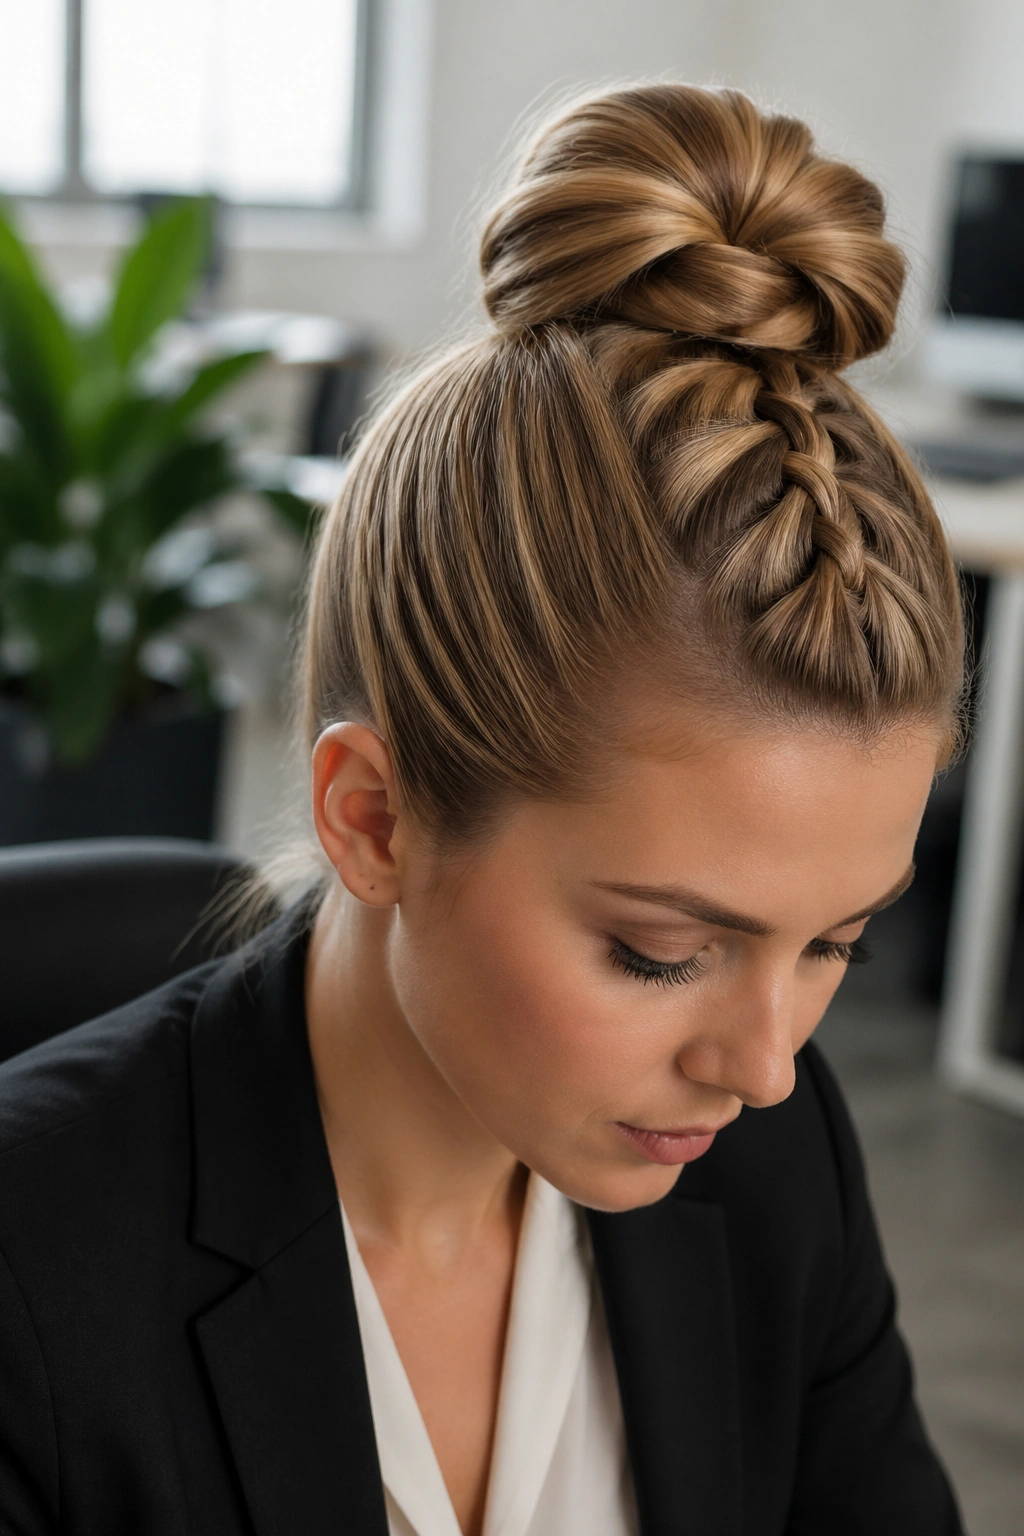
A polished braid bun is the one I reach for when I need oily roots hidden and the rest of the hair to look tidy. It reads cleaner than a messy bun, and it survives a desk day without falling into the sad, half-collapsed shape that some styles get by noon.
Unlike a loose topknot, this version keeps the crown controlled. The braid starts right near the hairline, where shine tends to show first, and the bun stays compact enough that the silhouette looks deliberate. That matters in bright indoor light, where greasy roots can flash more than you expect.
Use a small amount of smoothing cream only on the mid-lengths and ends. Leave the roots alone. That tiny detail keeps the style from turning slick in the wrong places.
Best for straight or lightly wavy hair. If your hair is very layered, pin the shorter pieces flat before the braid reaches the nape.
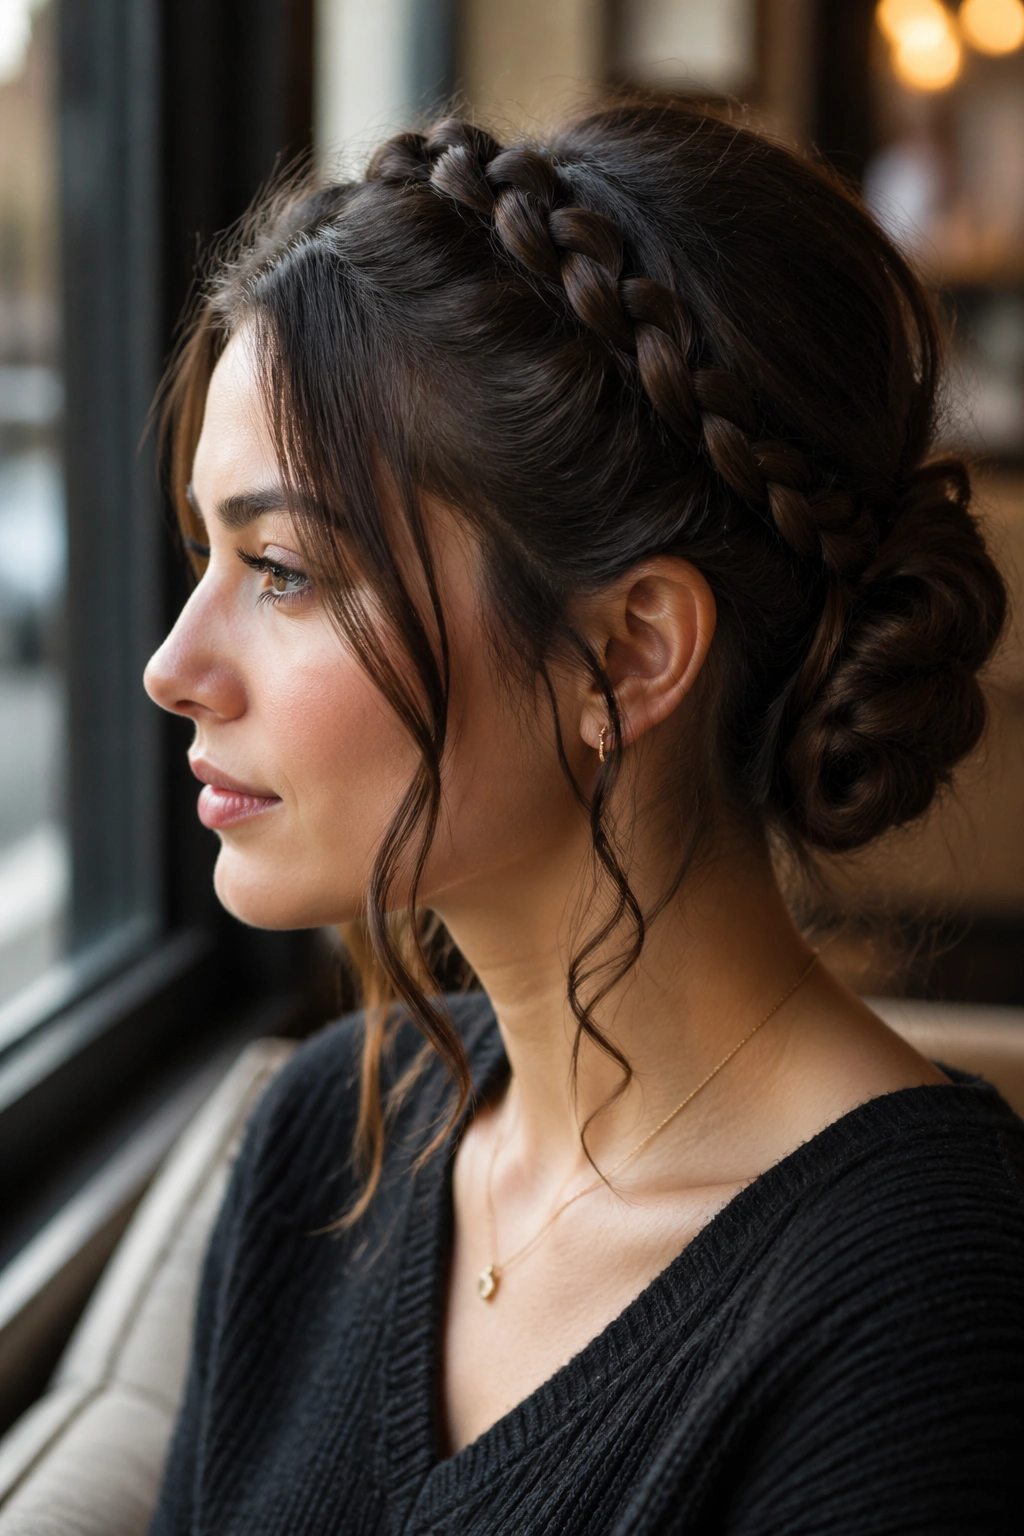
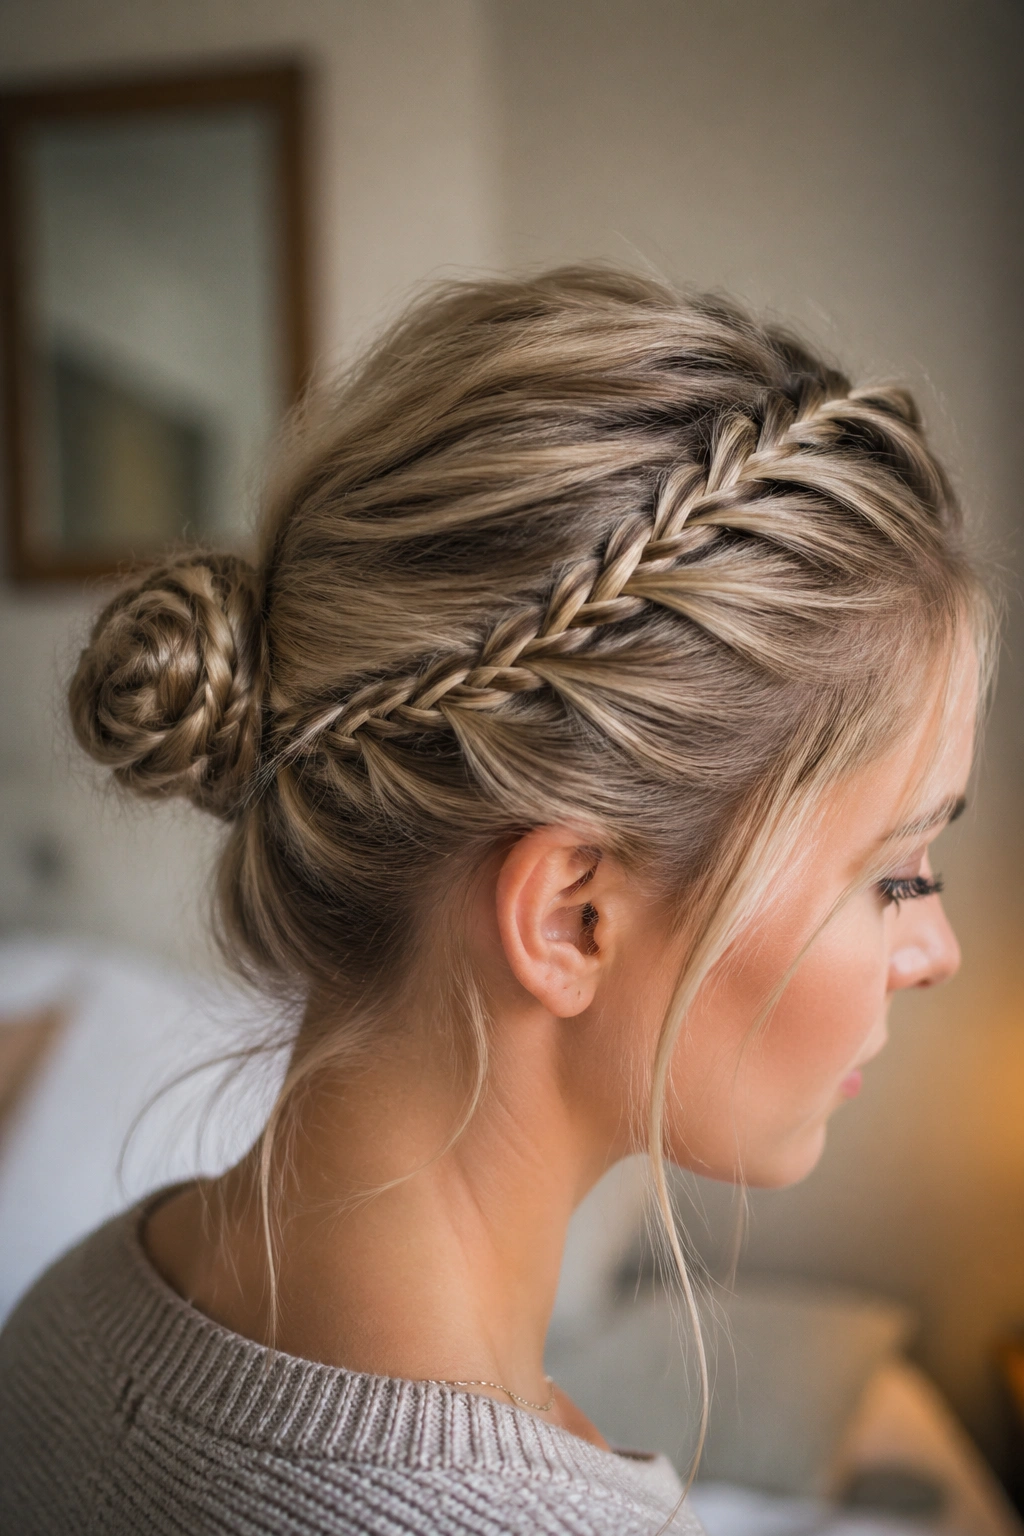
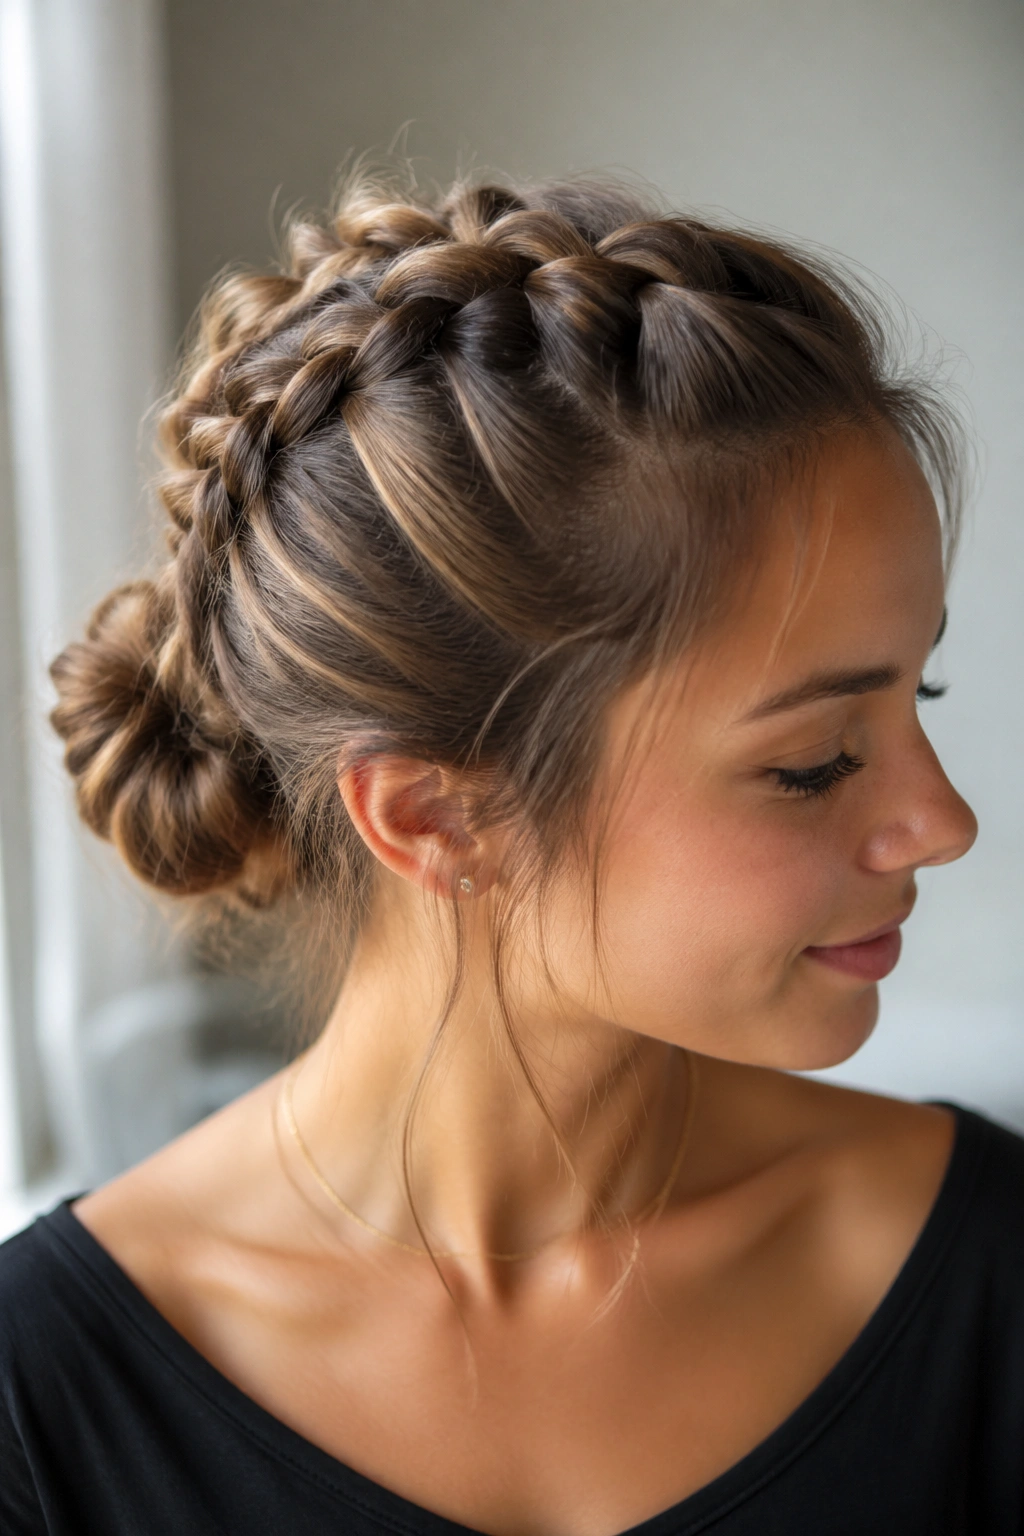
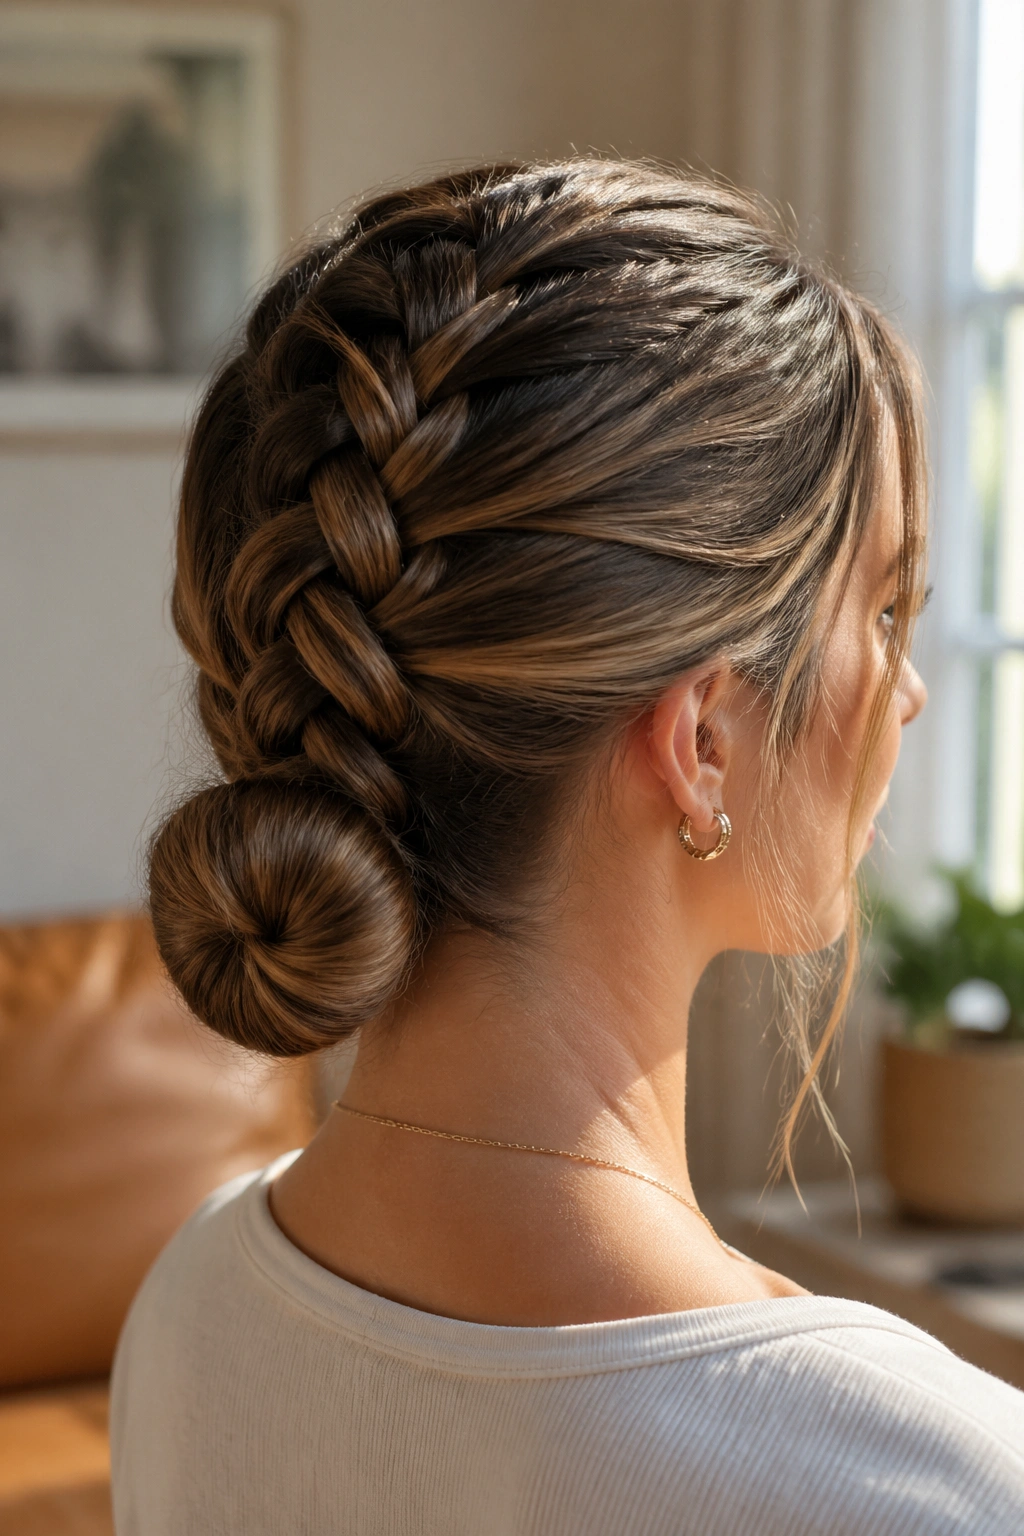
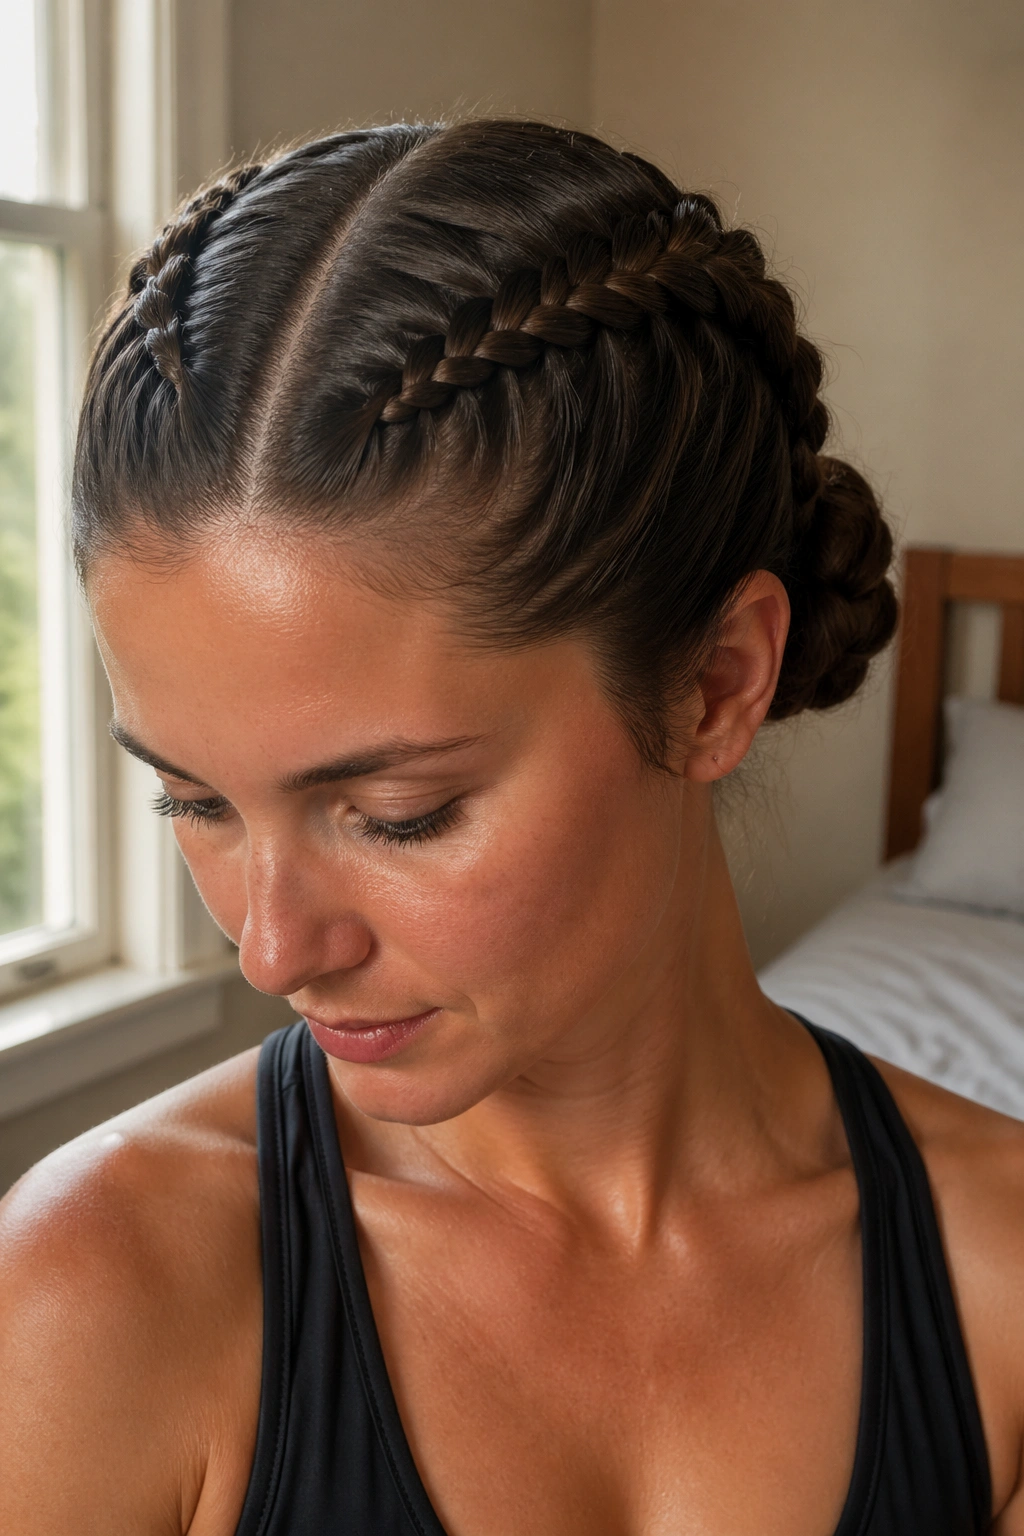
7. Double French Braid Bun
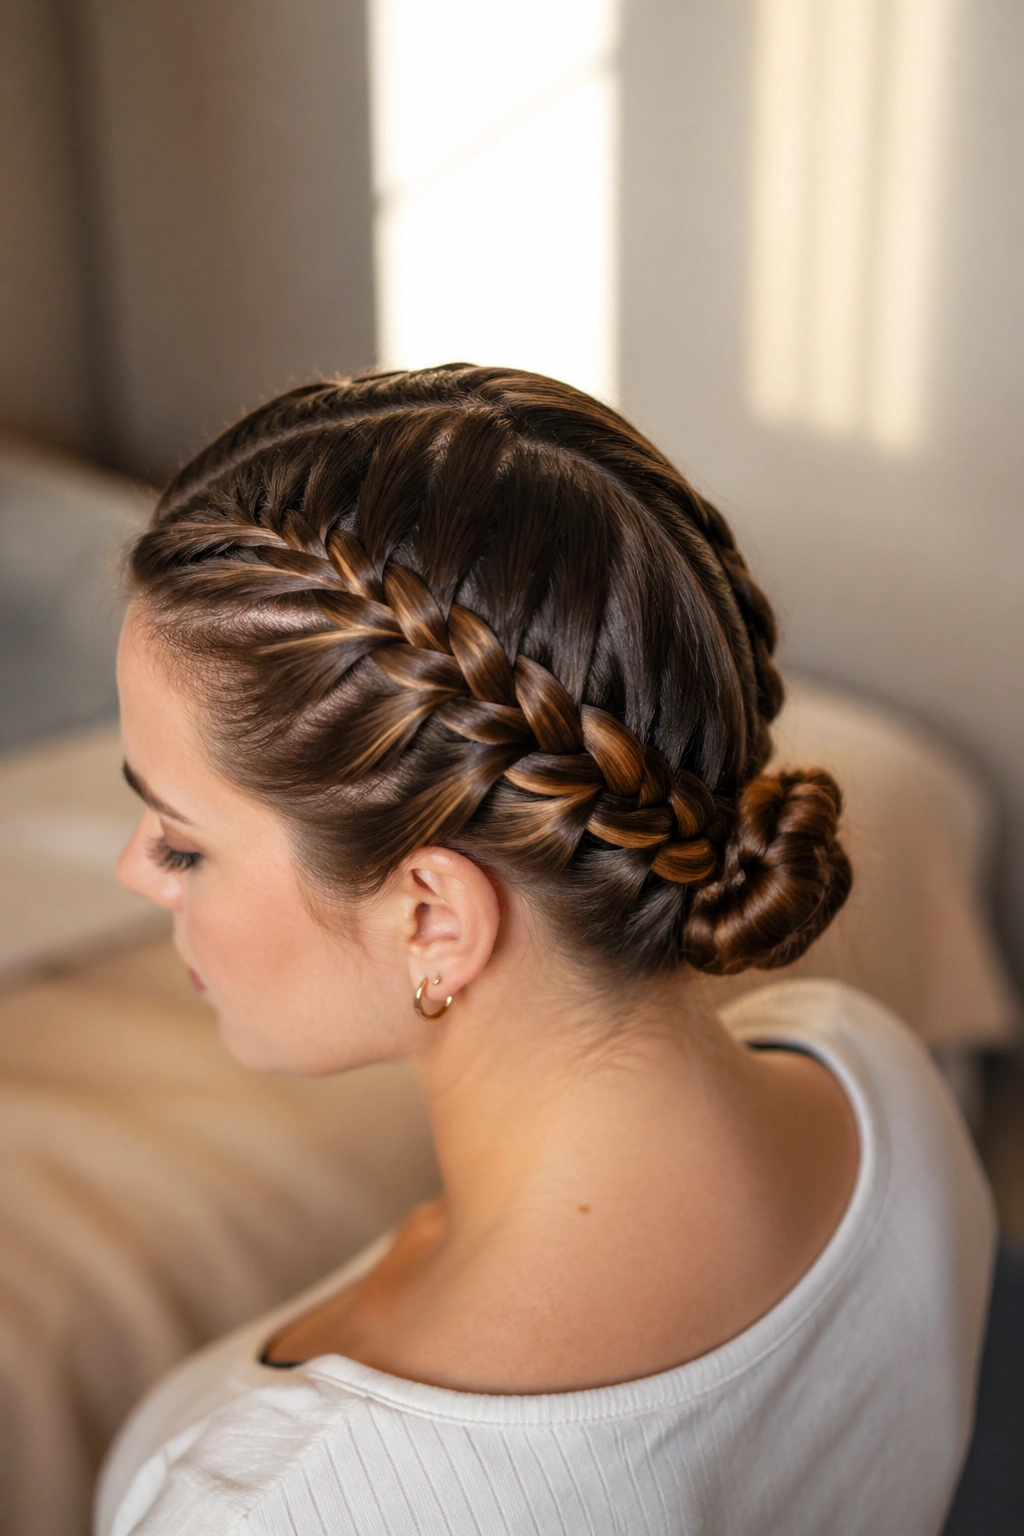
Two braids can hide more root shine than one, especially when the oil sits around the part and both temples. Start one French braid on each side, bring them together at the back, then coil the tails into one bun. It spreads the visual weight and makes the scalp look less exposed.
What Makes It Hold
The first braid creates coverage near the temple. The second braid does the same on the other side, so there is less empty space where oily roots can show through. That is why this version feels more secure than a single braid on very fine hair.
- Use two small elastics before joining the braids.
- Cross the pins in an X under the bun.
- Keep the braid sections even so one side does not look bulkier.
- Pin any short layers before the bun goes up.
If your hair slips easily, this is one of the better options. More braiding means more grip. Simple.
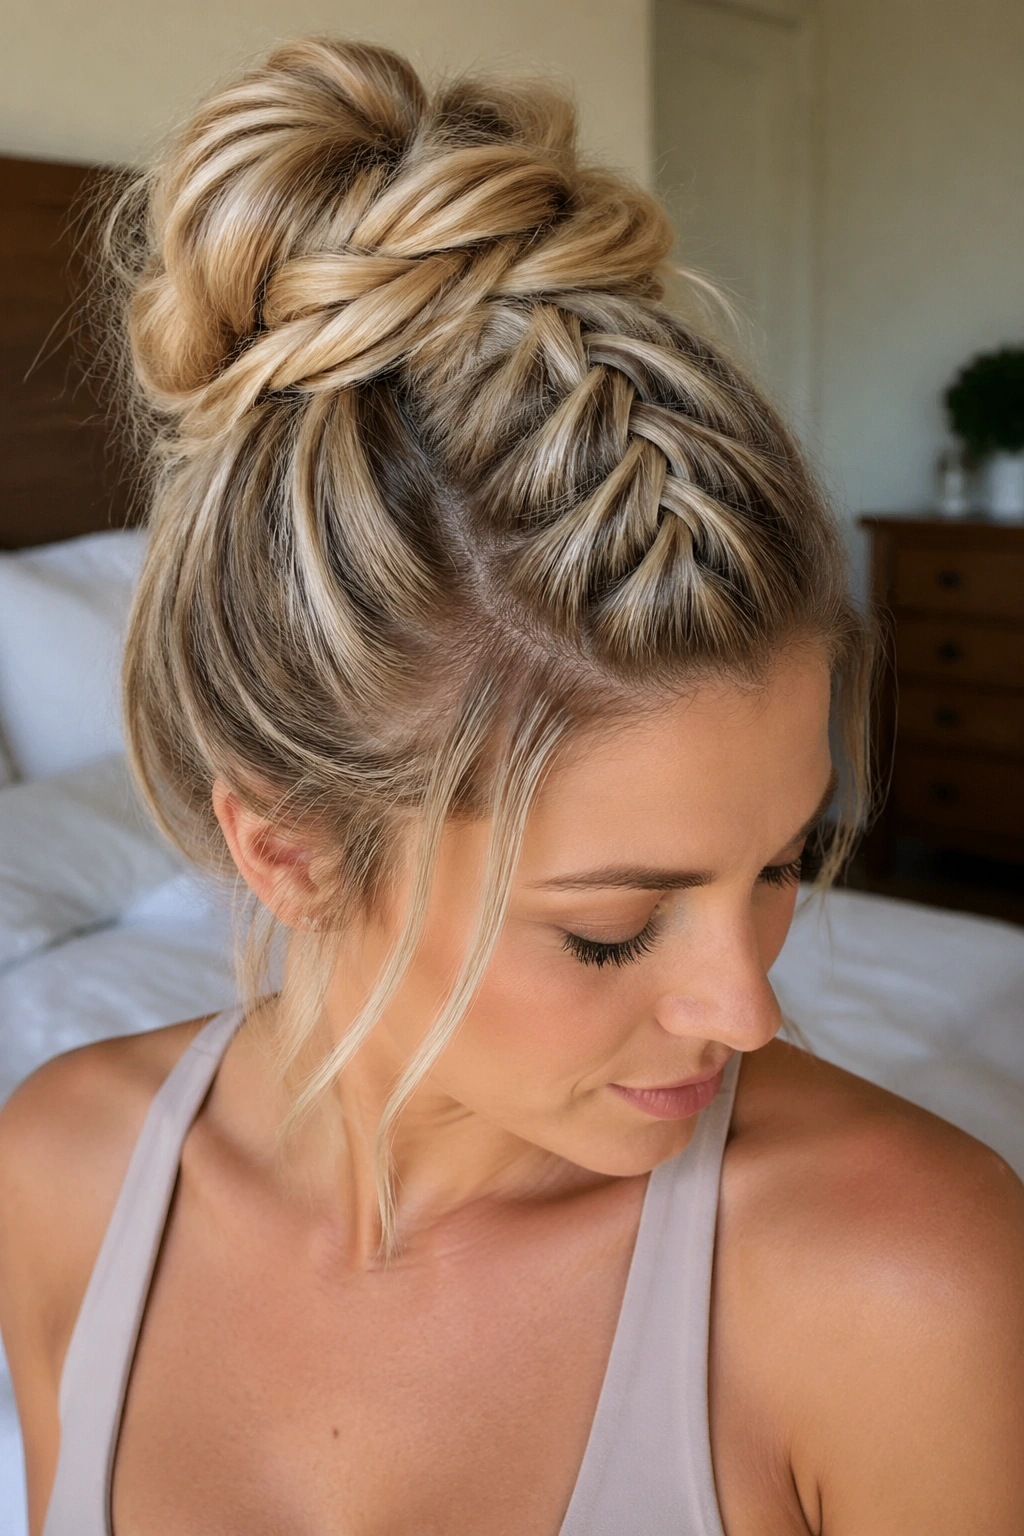
8. High French Braid Topknot Bun
A high bun hides greasy roots fast. Pull the braid upward from the front hairline, keep it snug along the crown, and finish with a topknot at the highest point of the head. The height lifts the whole style away from the oily zone, which helps if the front is the worst part.
There is another reason this works. A high placement creates shape at the top, so flat, shiny roots do not sit as obviously against the skull. That extra lift matters more than people think, especially when the hair has no volume left.
Keep the braid neat at the front, but do not over-smooth the crown. A little texture is useful here. A topknot that looks too sleek can make the shine stand out instead of hiding it.
This one is great for long hair, gym days, and mornings when you need the fastest possible rescue.
9. Braided Bun with Loose Tendrils
Can a few loose pieces help when the roots are greasy? Yes, if you keep them under control. Thin tendrils around the temples and jawline soften the face and draw attention away from the scalp, which is where the shine usually gives itself away.
The braid bun carries the structure. The loose pieces carry the distraction. That sounds harsher than it is, but the effect is real. A soft curl near the cheek pulls the eye forward, while the bun keeps the back tidy.
How to Keep It Polished
Curl the tendrils lightly with a 1-inch iron or give them a quick bend with a straightener. Do not leave them poker-straight unless you want the contrast to look a little harsh.
Keep the bun itself tight enough that the back does not puff out. If the bun gets too fluffy, the loose front pieces stop looking intentional and start looking like leftovers.
10. Rope-Wrapped French Braid Bun
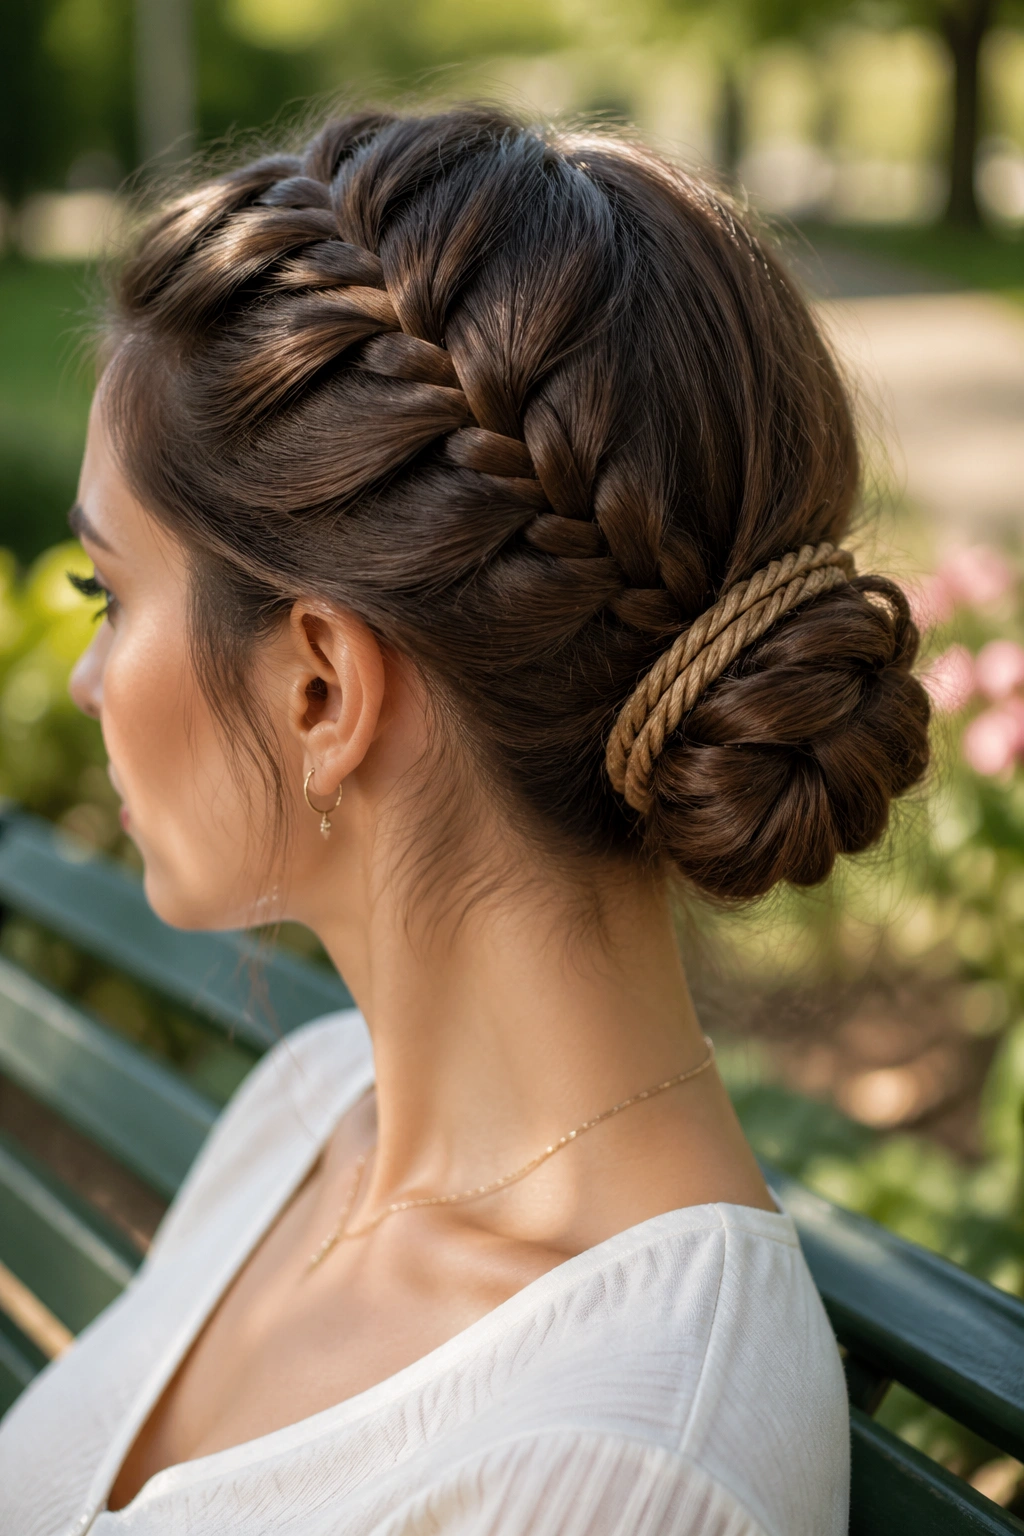
When hair feels limp, a rope-wrapped finish adds shape without needing extra bulk. Braid the hair French-style back to the nape, then twist the remaining length into a rope-like coil around the bun base. The wrapped surface hides oily roots better than a smooth roll because it gives the eye more texture to read.
I like this version on hair that is fine at the top and heavy at the ends. The braid controls the roots, while the rope wrap keeps the bun from collapsing into a flat knot.
- Twist the tail tightly before wrapping it.
- Pin through the base, not just the outer edge.
- Use a pin every 1 to 1.5 inches around the bun.
- Finish with a light mist of flexible spray.
That last step matters. Too much spray can make the roots look shinier than they are.
11. Mini French Braid Bun for Short Hair
Short hair can do this too, and people underestimate it. If your hair hits the collarbone or sits just above it, a mini French braid bun gives you enough structure to hide greasy roots without pretending you have waist-length hair.
The braid will be smaller, obviously. That is fine. What matters is keeping the top section controlled from the hairline back to the crown, where oil tends to show first. A few crossed bobby pins can hold the bun tighter than one big elastic ever will.
This version is especially useful for lobs and layered cuts. Shorter pieces around the face stay in place better when they are braided close to the scalp, and the bun at the back stays compact instead of flopping around.
Tiny style. Big payoff.
12. Chunky Pancake French Braid Bun
A chunky braid does a better job hiding shine on thick hair than a skinny, tight braid does. The wider weave breaks up the smooth surface, and once you pancake it, the braid looks full enough to cover a lot of scalp without needing extra teasing.
Compared with a tight braid, this one feels softer and more forgiving. That is useful if your roots are oily but your hair still has plenty of body. A tight braid can make thick hair look harder and flatter than it should. A chunkier braid keeps the texture alive.
Use larger sections at the crown, about 1.5 inches each, then pull the sides of the braid outward after you tie it off. Do not tug the center. You want width, not a loose mess.
Best for dense hair, heavy waves, and anyone whose roots go shiny before lunch.
13. French Braid Bun with Hidden Elastic
The elastic should disappear. If you can see the tie, your eye goes straight to the bun, and sometimes straight to the greasy roots too. This version uses a small braid strand to wrap the elastic so the finish looks cleaner and more expensive than it actually is.
Why the Hidden Tie Matters
Visible elastics create a hard line. Hidden elastics soften that line and keep the braid from looking chopped at the base. That matters most when the roots are oily, because shiny hair already reflects more light than dry hair.
Use a matte elastic that matches your hair color, then wrap a 2-inch strand around it and pin the strand underneath the bun. If the hair is very dark or very light, matching the elastic matters less than the wrap. The wrap does the visual work.
This style is good when you want the front to look neat without the back screaming for attention.
14. Curly-Hair French Braid Bun
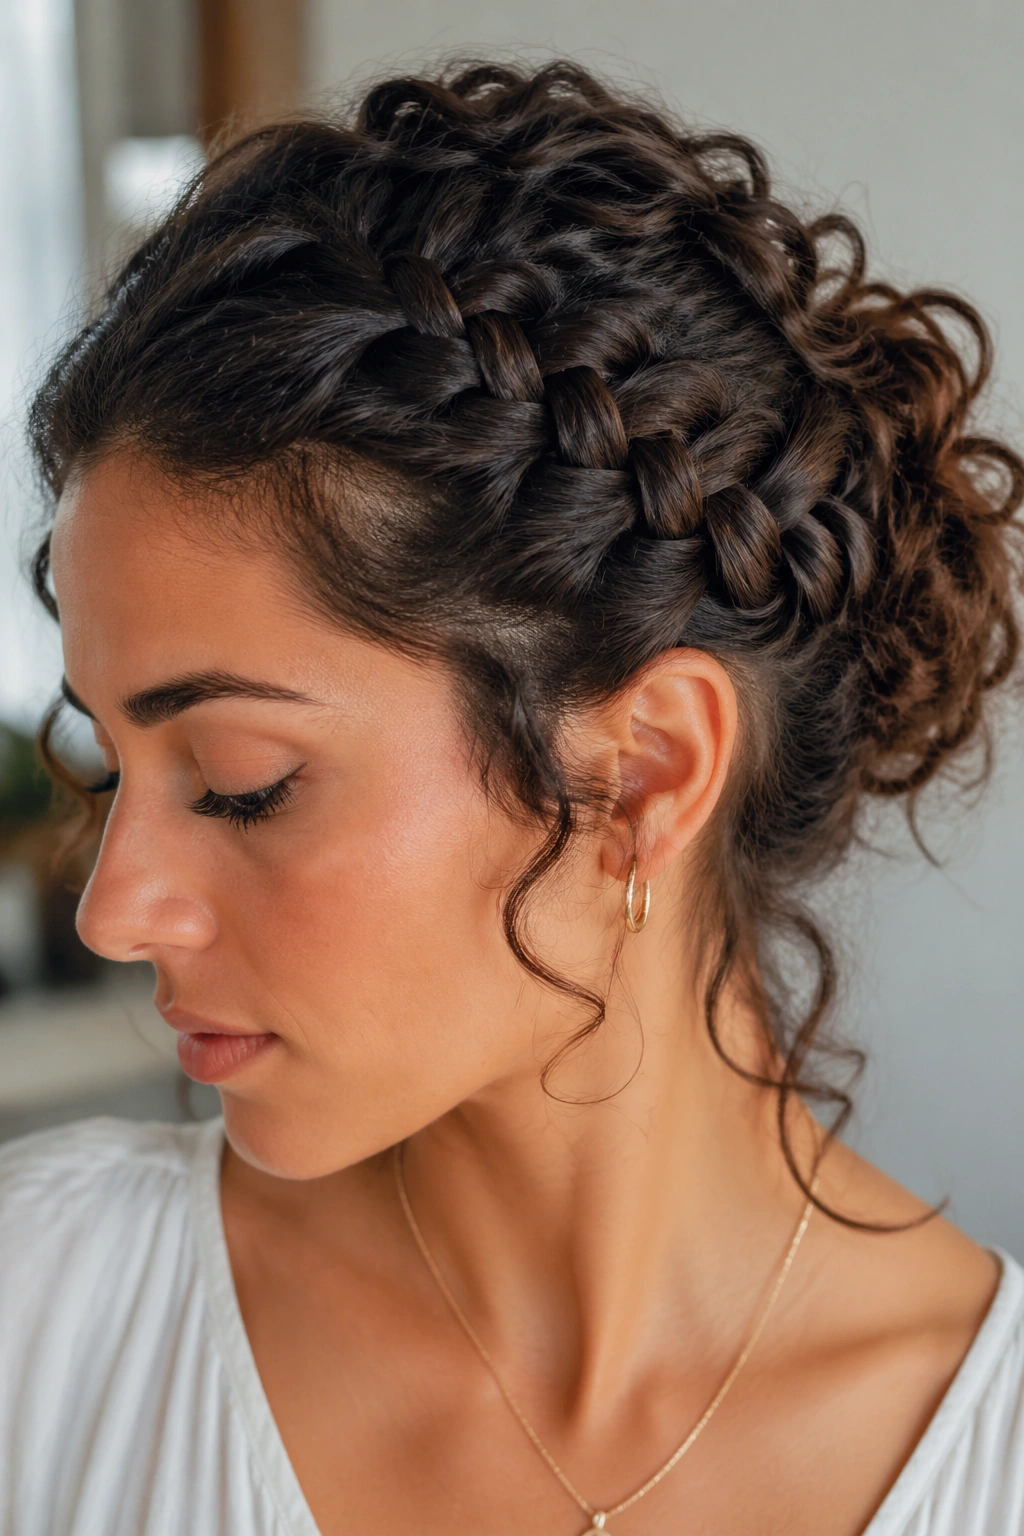
Curly hair can hide greasy roots better in a French braid bun than straight hair does. The texture does half the work for you. Once the braid starts, the curls break up the shine at the scalp and make the whole style look fuller, even if the roots are a little past their best.
The trick is not to braid soaking-wet curls. That usually creates a mushy shape that shrinks in odd ways later. Let the hair dry to about 70 percent, then braid while it still has some stretch. The ends can stay curly inside the bun, which gives the style a soft finish instead of a rigid one.
If your crown gets flat but the mid-lengths keep their curl, this is a good rescue style. It does not fight your texture. It uses it.
15. Fine-Hair French Braid Bun
Can fine hair handle a French braid bun without looking skimpy? Yes, if you prep it first and keep the sections small. Fine hair shows oil fast, which sounds like bad news, but it also takes texture spray well, and texture is what gives the braid something to grip.
Start with dry shampoo at the roots and a little texturizing spray through the crown. Then take narrow sections, about the width of a pencil, as you braid back. If the sections are too wide, the braid looks thin and the scalp shows through. Too tight, and the whole style flattens.
How to Get the Most From It
Tease only the crown, not the ends. A tiny lift near the root is enough. Then pin the bun low and tight so the shape stays compact.
This one looks best when you stop fiddling. Fine hair often gets worse the more you touch it.
16. Gym-Ready French Braid Bun
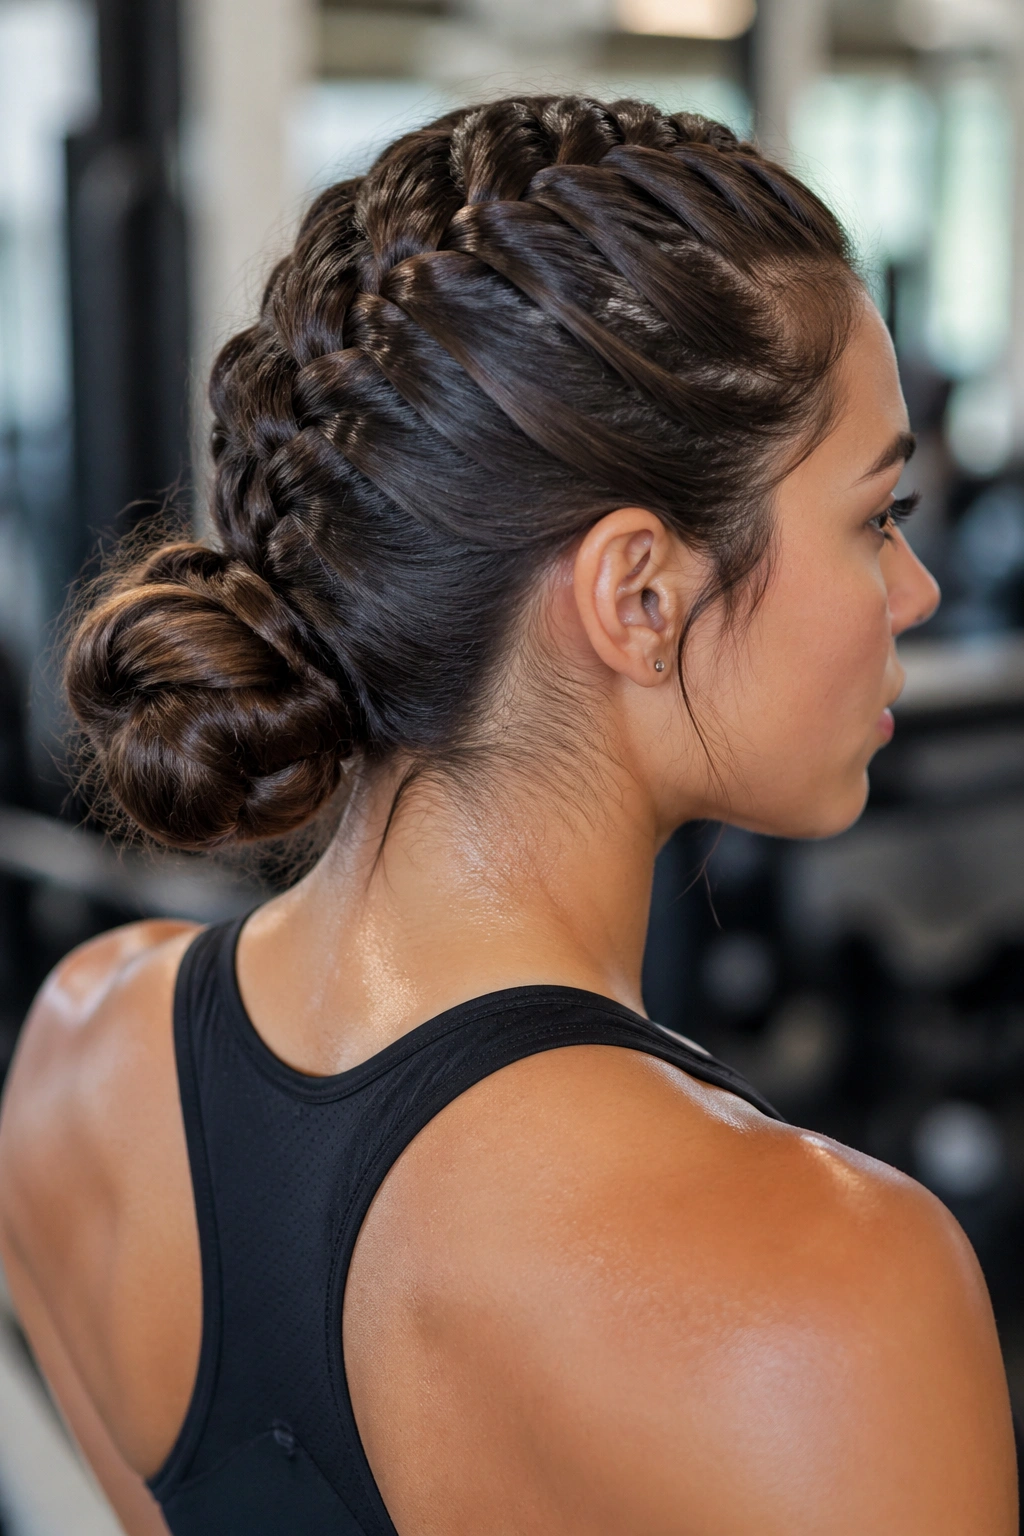
Some styles need to look good in motion, not just in a mirror. A gym-ready French braid bun stays put when you move, sweats, bend, and tie a hoodie over it. It also hides greasy roots that are already on display from a workout or a long, warm commute.
Start the braid just behind the hairline and keep it close to the head. The closer the braid hugs the scalp, the better it hides oil and the better it holds. Finish the bun low enough that it does not bounce around, then pin the sides with two or three strong bobby pins.
- Use a grippy elastic, not a slippery one.
- Pin the nape first.
- Cross pins under the bun for hold.
- Skip heavy creams near the roots.
If you want one style that survives both sweat and shine, this is the practical pick.
17. Half-Up French Braid Bun
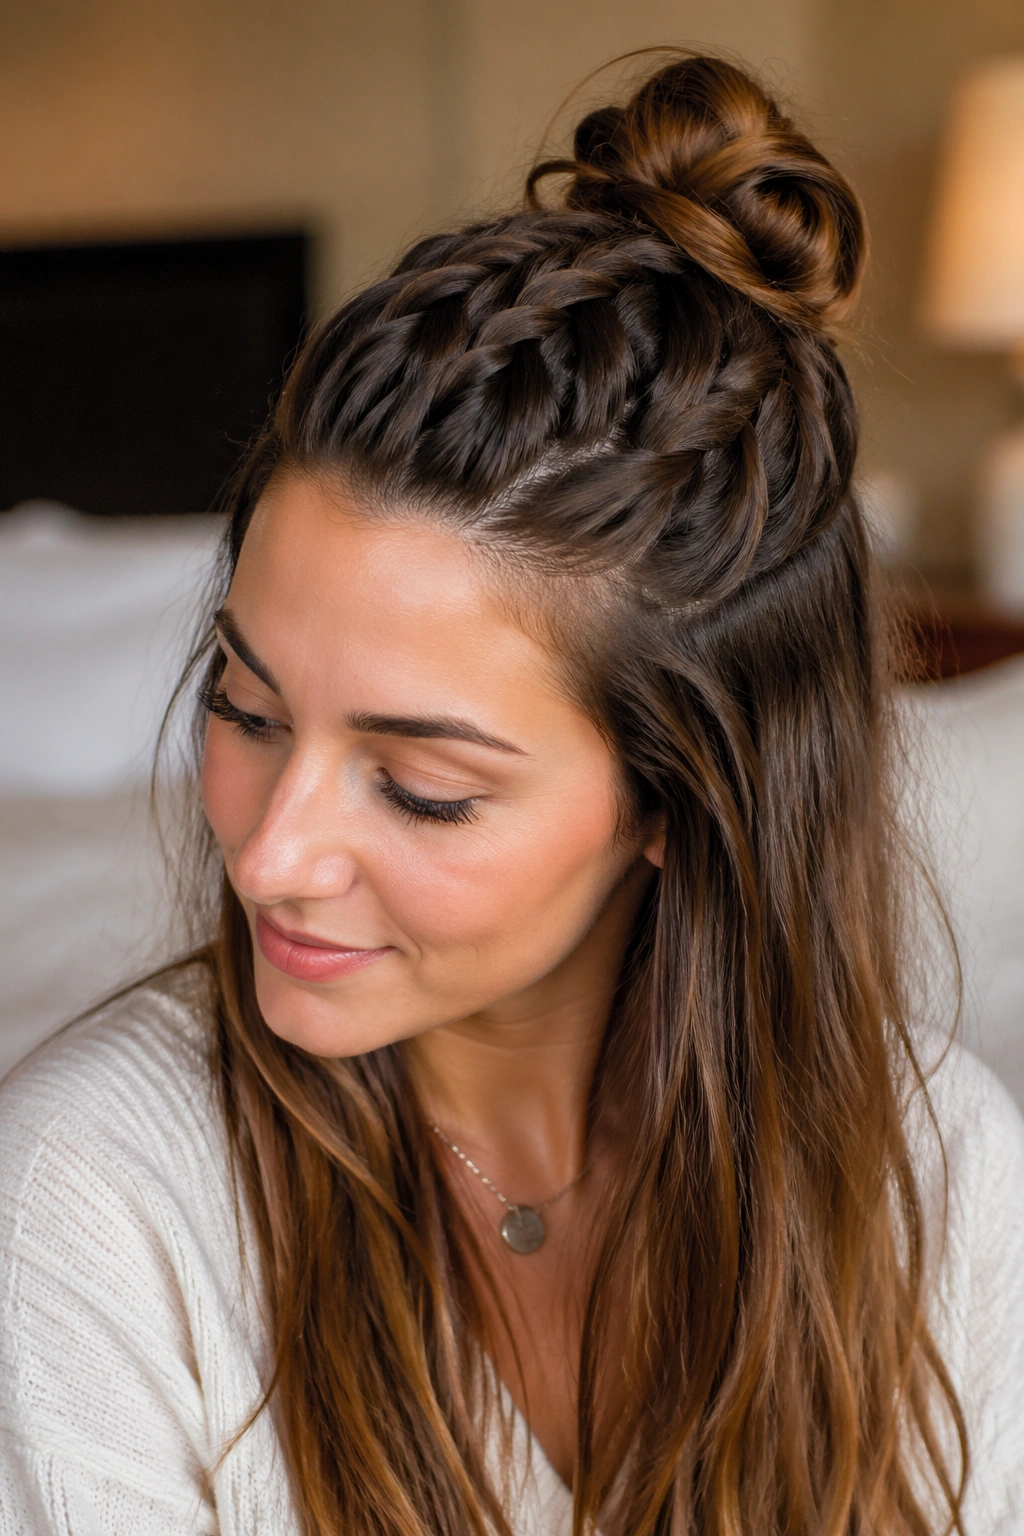
A half-up French braid bun is useful when the top of your hair is oily but the lengths still look good. You pull only the front and crown sections back, braid them, and pin them into a small bun while the rest of the hair stays down.
That split matters. Not every greasy-root day needs a full updo. Sometimes you only need to hide the part and flatten the hairline while keeping some movement through the ends. This style does that without making your hair feel overworked.
It suits layered cuts especially well because the shorter top pieces stay tucked away. If the bottom half has waves or curls, leave them alone. They add enough softness that the braid bun does not feel too severe.
It is a nice middle ground. Clean at the top, loose underneath.
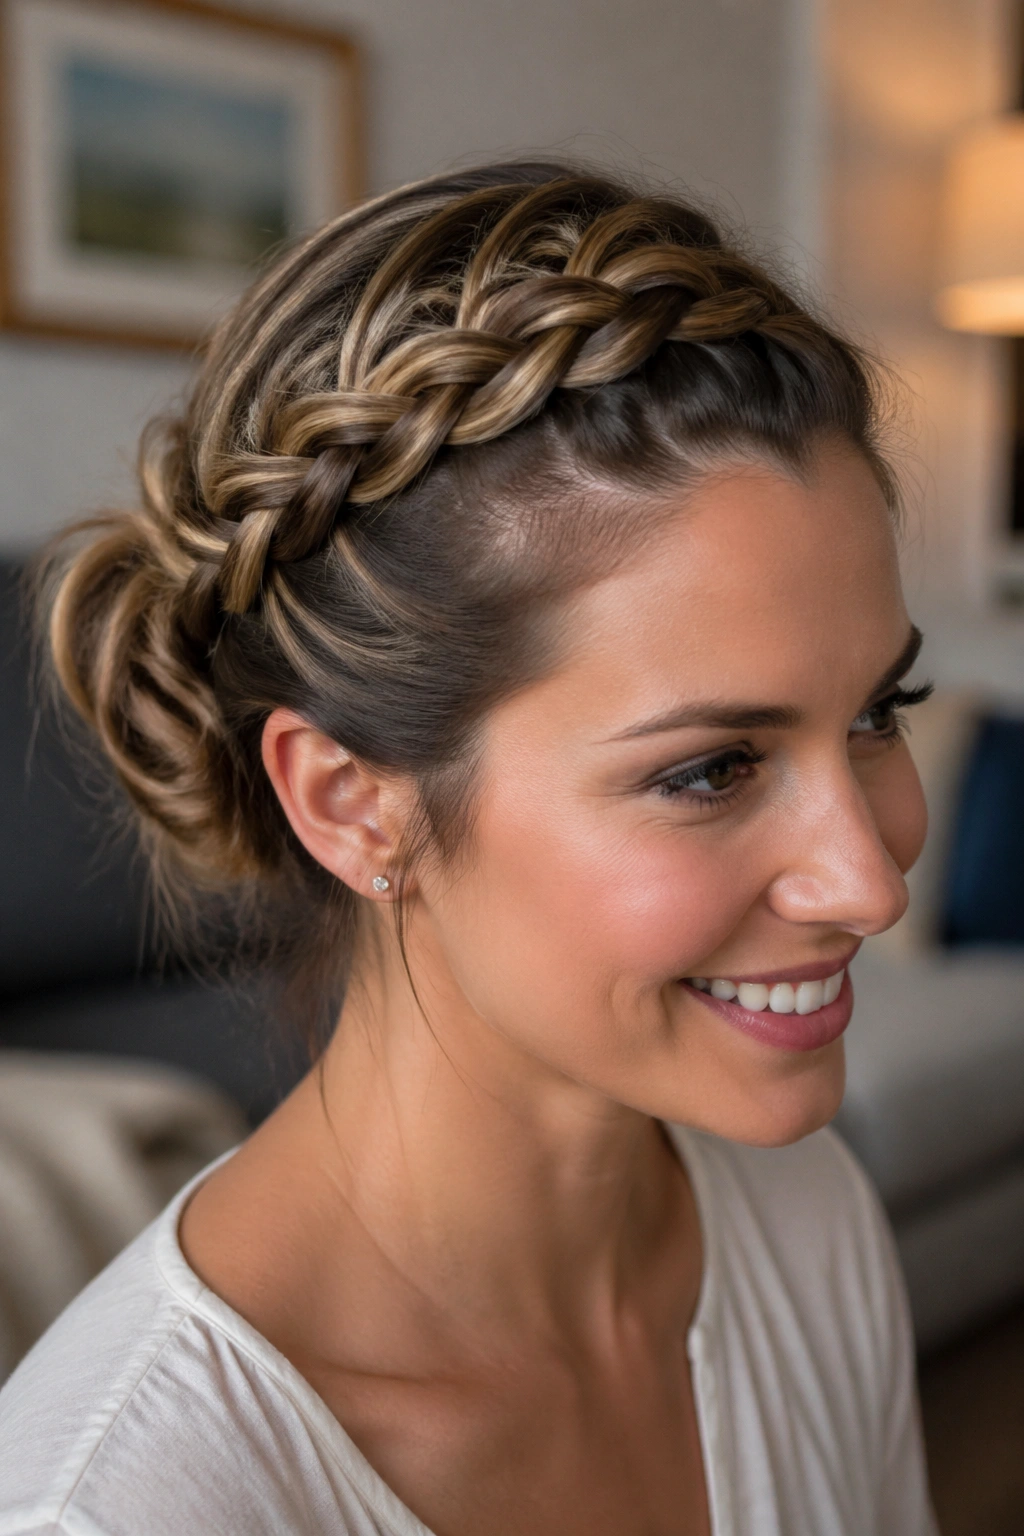
18. Lace-Braid Bun
A lace braid is a quieter version of the French braid, and that makes it useful when the roots are oily mostly at the temples. Instead of adding hair from both sides every time, you keep feeding from one side, which creates a cleaner frame around the face.
Unlike a standard French braid, this one leaves more of the hair under the braid untouched, so the front reads smoother. That is handy if one side of your hair has flattened more than the other. The braid can hide that asymmetry instead of showing it off.
It works best with a side part and a low bun. Keep the braid close to the scalp on the shiny side, then twist the ends into the bun without over-pulling the front pieces.
If your hairline is the problem area, this is a neat fix. If the whole crown is oily, go bigger.
19. Reverse French Braid Bun
A reverse French braid, often called a Dutch braid, sits on top of the hair instead of sinking into it. That raised shape is useful when greasy roots need more coverage, because the braid itself creates a little shadow over the scalp.
The style also gives the crown a touch of lift. Flat, shiny roots look worse when they lie flush against the head. A reverse braid changes that line and makes the whole head shape look fuller before the bun even starts.
Braid the strands under, not over, and keep the tension even all the way back. Once you reach the nape, coil the length into a bun and pin it tight. The raised braid does the visual hiding, and the bun finishes the job.
If regular French braids feel too flat on your hair, this is the better choice.
20. Claw-Clip French Braid Bun
When pins alone are not enough, a claw clip can save the style. Braid the hair French-style back, twist the length into a bun, then clip the base so the bun has an anchor as well as pins. It is a small change, but on slippery hair it makes a real difference.
I reach for this when hair is extra soft at the crown or when I know I will be taking the style down again later. The clip gives the bun a second point of grip, which helps hide the greasy roots by keeping the top section pressed into place.
- Choose a medium clip, about 3 to 4 inches.
- Place it low, under the bun, not on top.
- Add two bobby pins at the temples.
- Use the clip to support the bun, not crush it.
It is not the dressiest version, but it holds.
21. Ribbon-Wrapped French Braid Bun
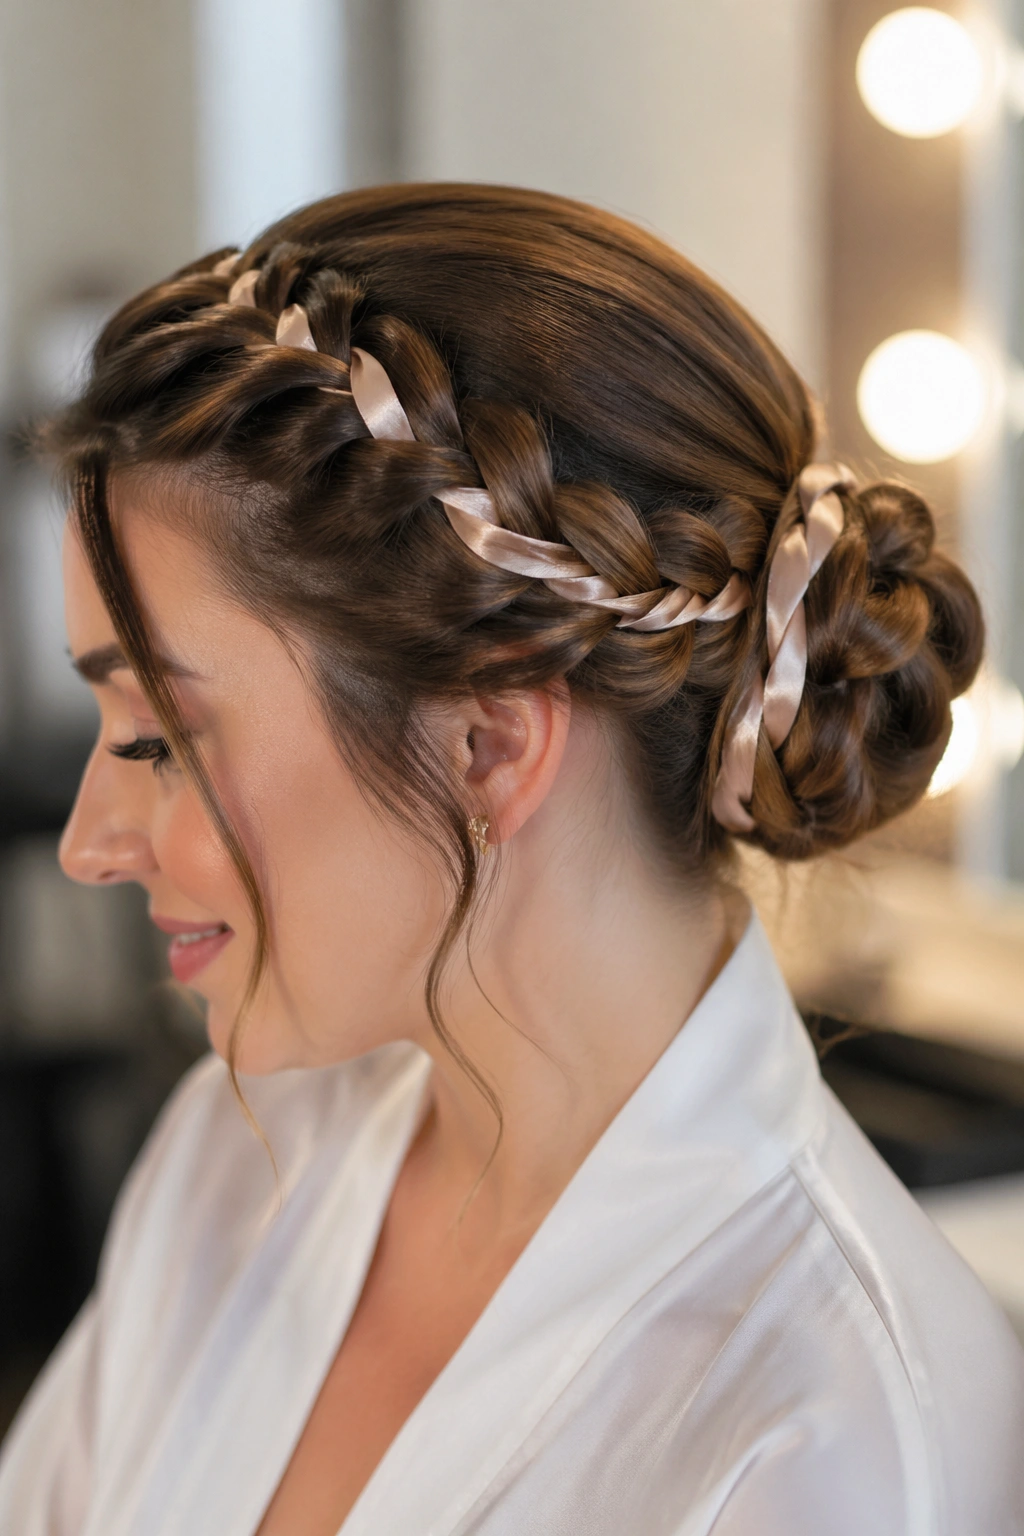
A ribbon changes the whole feel of a braid bun. Wrap one around the braid or through the base of the bun, and the eye goes to the color and movement instead of the shine at the roots. That is the trick. The accessory does part of the hiding for you.
Satin ribbons catch light, but not in the same hard way that oily roots do. A matte ribbon can feel softer and a little more casual, while a silkier one looks more polished for dressy settings. I would skip anything too narrow, though. Thin ribbons twist and slip fast.
Use the ribbon after the braid is secure. If you tie it too early, the tension shifts and the braid can loosen. Keep the bow small or tuck the ends under the bun if you do not want a big finish.
Simple. Clean. A little more dressed up.
22. Braided Knot Bun
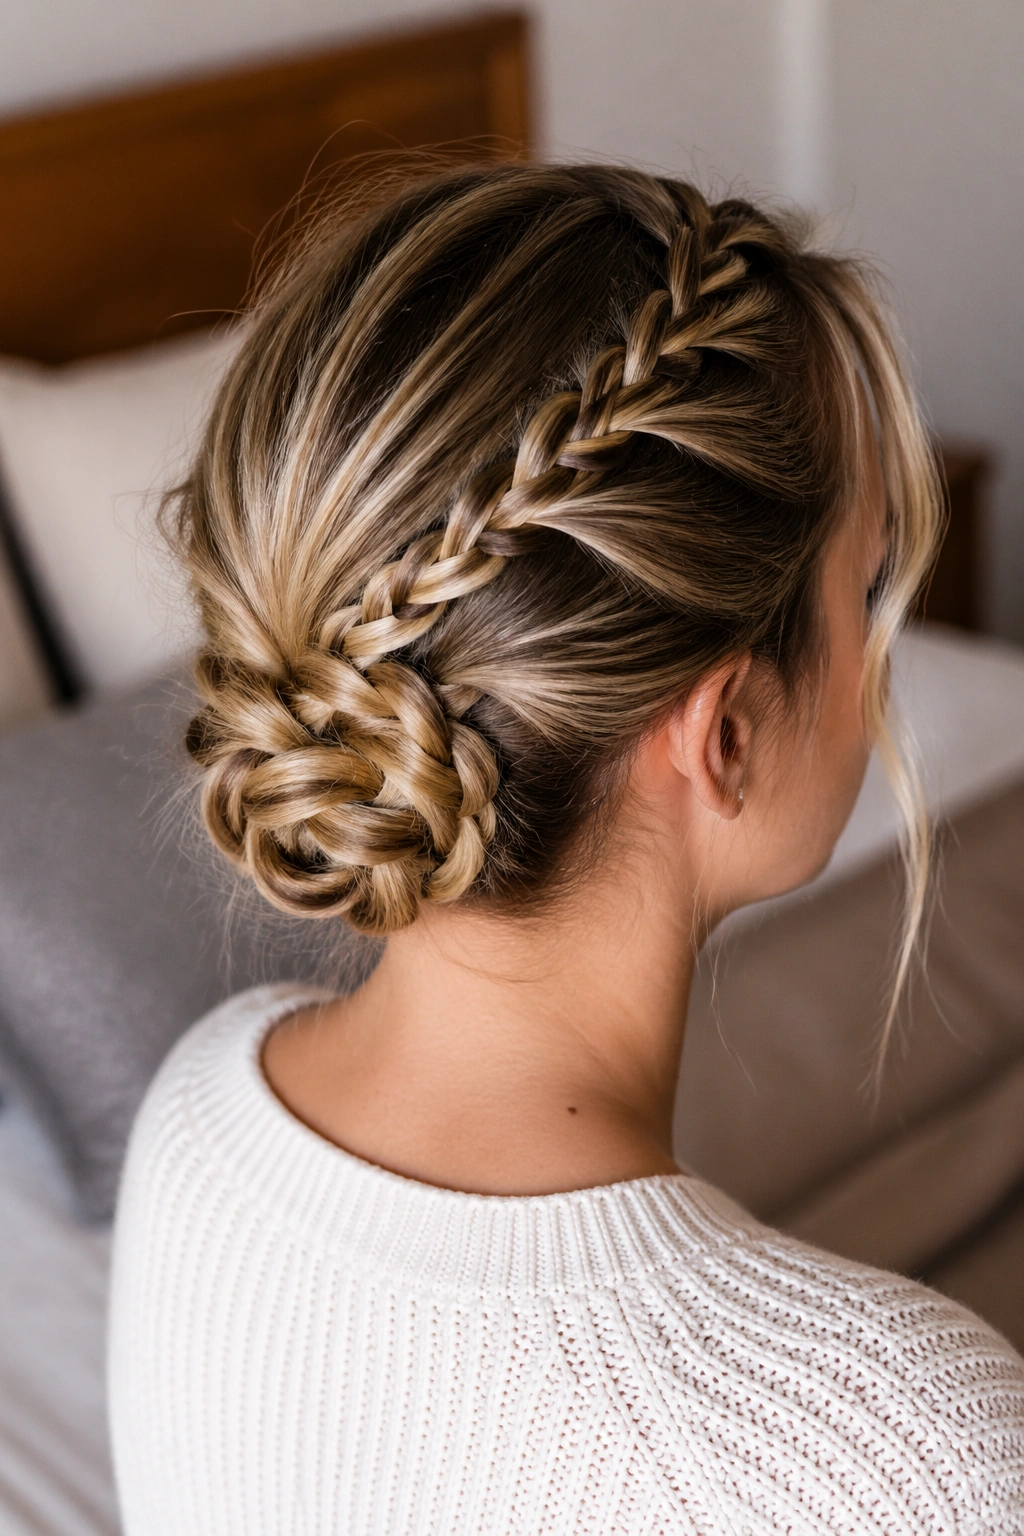
What if your bun keeps coming apart? Turn the braid into a knot before you pin it. A braided knot bun folds the length over itself, which gives the style a denser center and makes the top look tighter even when the roots are not at their best.
That extra knot shape helps hide greasy roots because it creates more bulk at the back of the head. The hairline is still covered by the French braid, but the finish gets a little more structure than a regular coil. I like it for medium-length hair that does not have enough length for a full wrap.
How to Make It Stay
Fold the braid in half, twist the loop once, and pin through the center before you tuck the ends. Two pins from opposite sides usually hold better than one huge pin jammed in at an angle.
If your hair is very slippery, a light dusting of dry shampoo at the nape helps the knot hold.
23. Low Donut French Braid Bun
A donut bun gives the style a round, smooth shape that can be handy when you want greasy roots hidden and the finish to look neat from every angle. French braid the hair back first, then wrap the lengths around a small bun maker at the nape so the braid becomes part of the structure.
The donut helps the bun stay even, which matters if your hair is thick in some spots and thin in others. It also hides the elastic under a cleaner surface. When the bun is round and solid, the eye stops noticing the root area quite as much.
- Choose a donut close to your hair color.
- Place it just above the nape.
- Spread the hair evenly over the form.
- Pin the loose ends under the bun.
This one is best when you want control more than softness.
24. Humidity-Proof French Braid Bun
Humidity can turn loose hair into a puffball fast. A French braid bun cuts that problem down because the braid keeps the crown controlled before the air gets a chance to swell it. If your roots are oily and the weather is damp, this is the style that keeps both problems in check.
Use a small amount of anti-frizz cream on the mid-lengths and ends, not the roots. Then braid with firm, even tension and pin the bun with crossed pins so it does not loosen as the day goes on. The goal is not to make the hair glassy. It is to keep the shape from expanding.
This style works especially well on wavy hair, which tends to puff at the top before the bun has even settled. A tight braid gives the shape a spine. That is the part that survives the weather.
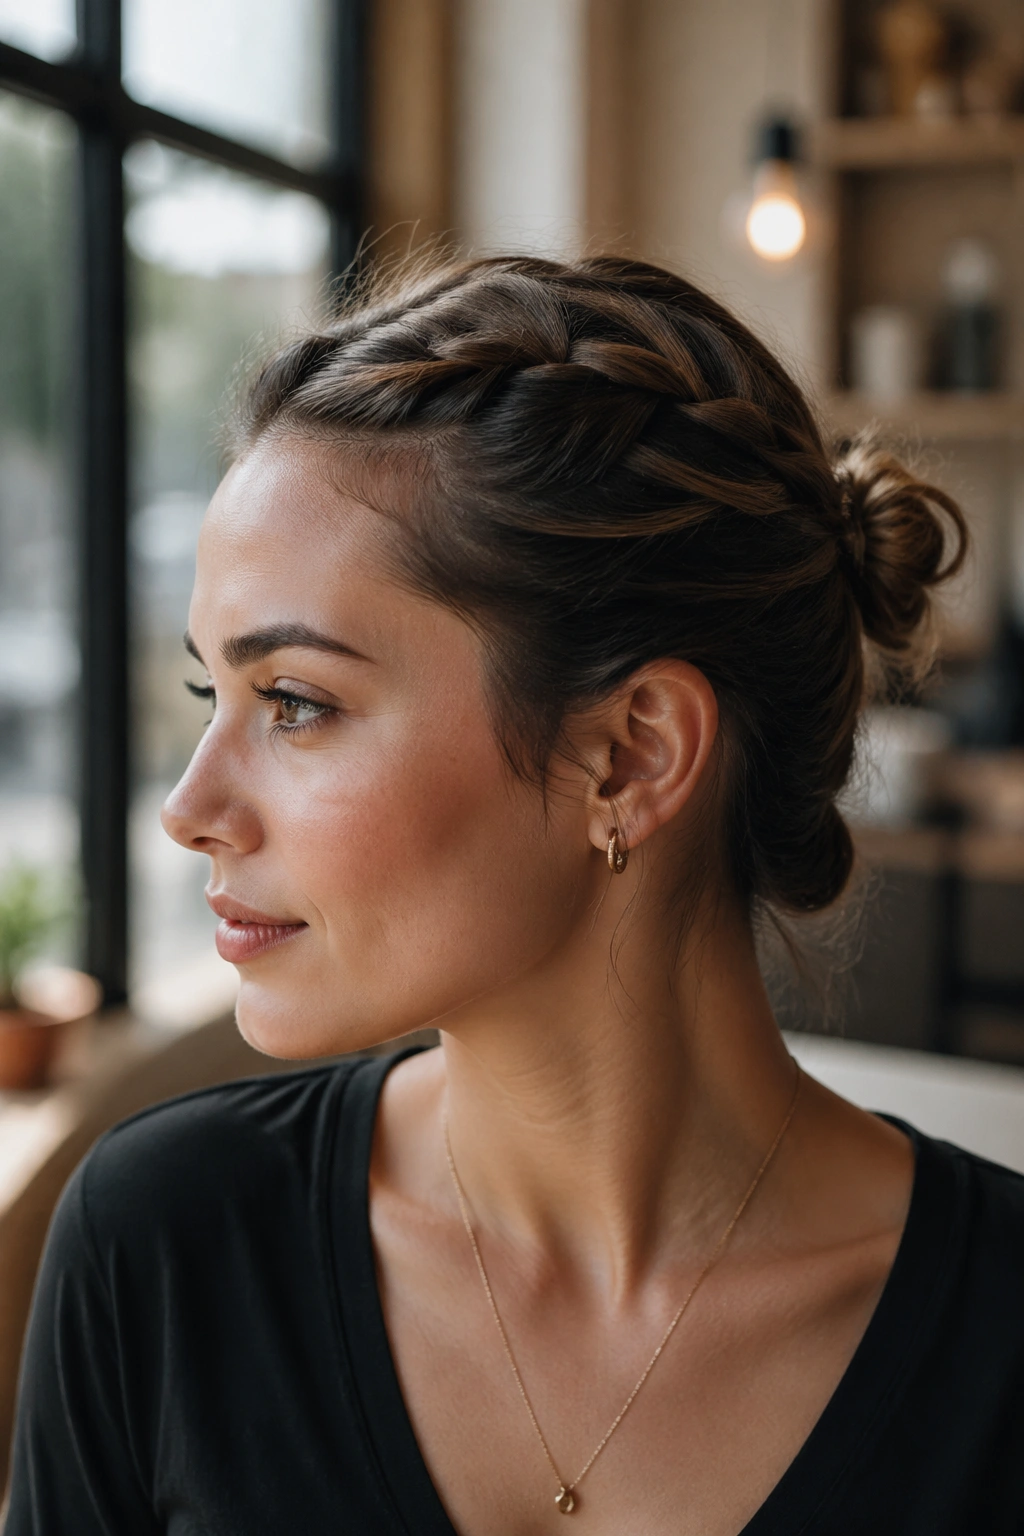
25. Three-Day Hair Rescue Bun
Hair that is a little farther from wash day often behaves better in a French braid bun than freshly cleaned hair does. The grip is better, the braid holds shape, and the oily roots do half the styling work for you. That sounds blunt, but it is true.
Unlike a clean, sleek bun, this version likes texture. Don’t fight it. Dry shampoo at the part, a little roughness through the crown, and a braid that starts close to the scalp will usually look better than an overly polished version that shows every shiny spot.
This is the one I would choose for travel, long weekends, or any day when the hair is not dirty enough to wash but not fresh enough to leave loose. It meets the middle ground cleanly.
Also, it is forgiving. That alone makes it worth knowing.
26. Prom-Polish French Braid Bun
A polished French braid bun can look formal without making the roots look hard or slick. Start with a neat braid near the hairline, keep the sections even, and finish with a compact bun that sits low or mid-height, depending on where the shine shows up most.
A few pearl pins or plain metallic pins can dress it up, but I would keep the decoration small. Large accessories pull the eye away from the braid shape and can make the roots look flatter by comparison. The braid itself is already doing enough work.
Satin-finish hairspray is the finishing touch here. Not a heavy coat. Just enough to calm flyaways around the hairline and keep the top from fuzzing up under indoor light.
If you need a style that handles shine and still looks event-ready, this is a strong pick.
27. Five-Minute Emergency French Braid Bun
Five minutes. That is enough.
When you are late and your roots are shiny, this is the one that saves the day. Mist dry shampoo along the part and temples, rough up the crown with your fingertips, then French braid straight back from the front hairline into a low bun. No extra fuss. No elaborate shaping. Just a quick, clean line that covers the oily spots before anyone has time to notice them.
The reason it works is speed plus structure. A fast braid keeps the roots under control, and the bun hides the ends so the whole style reads intentional from the front.
If you only learn one rescue version, learn this one. It is not the fanciest braid bun here, and it does not try to be. It just gets the job done, which is often the more useful thing anyway.