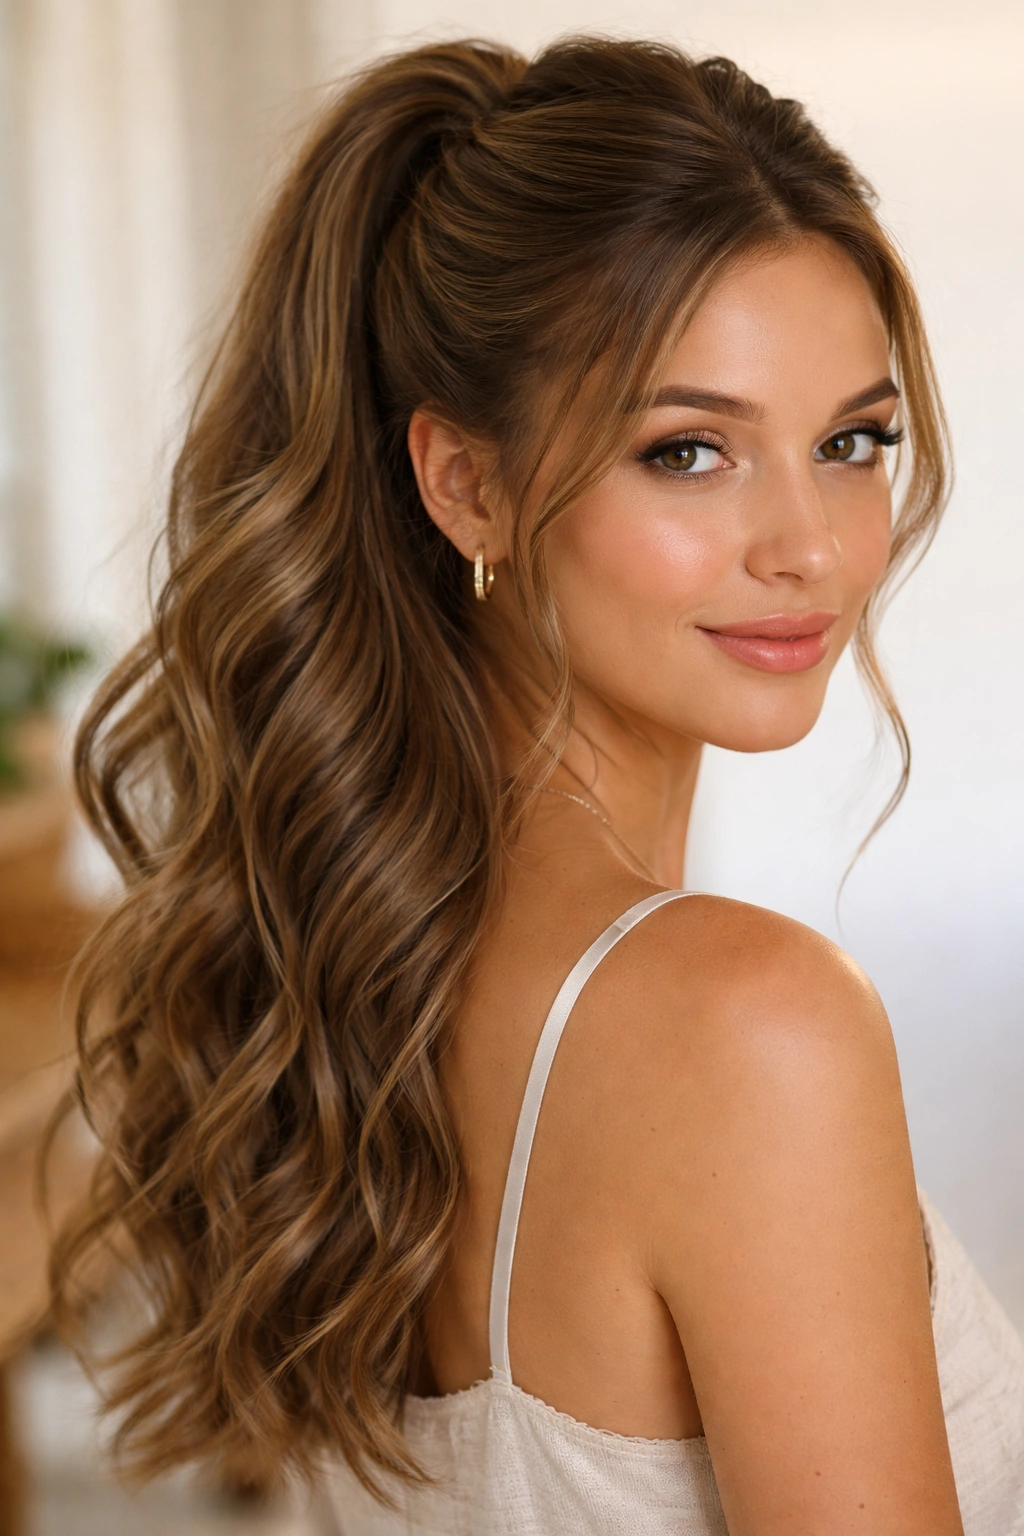
Half-up styles are absolute magic for wavy hair — they hit that perfect sweet spot between effortlessly undone and intentionally styled. If you’ve got natural waves, you already know the frustration of trying to tame them into full up-dos or managing them completely down without things getting weird or frizzy. A half-up works because it takes advantage of your wave pattern, adds dimension and texture to the top section, and lets your waves do what they do best without fighting their natural fall.
The thing about wavy hair is that it craves structure at the crown while it thrives when the lengths are free to move and undulate. Half-ups do exactly that — they anchor your waves in a deliberate shape at the top while letting the bottom half shine with its full, natural texture. Whether you’re dealing with loose, beachy waves or tighter, more defined waves, there’s a half-up style that’ll work with what you naturally have instead of against it.
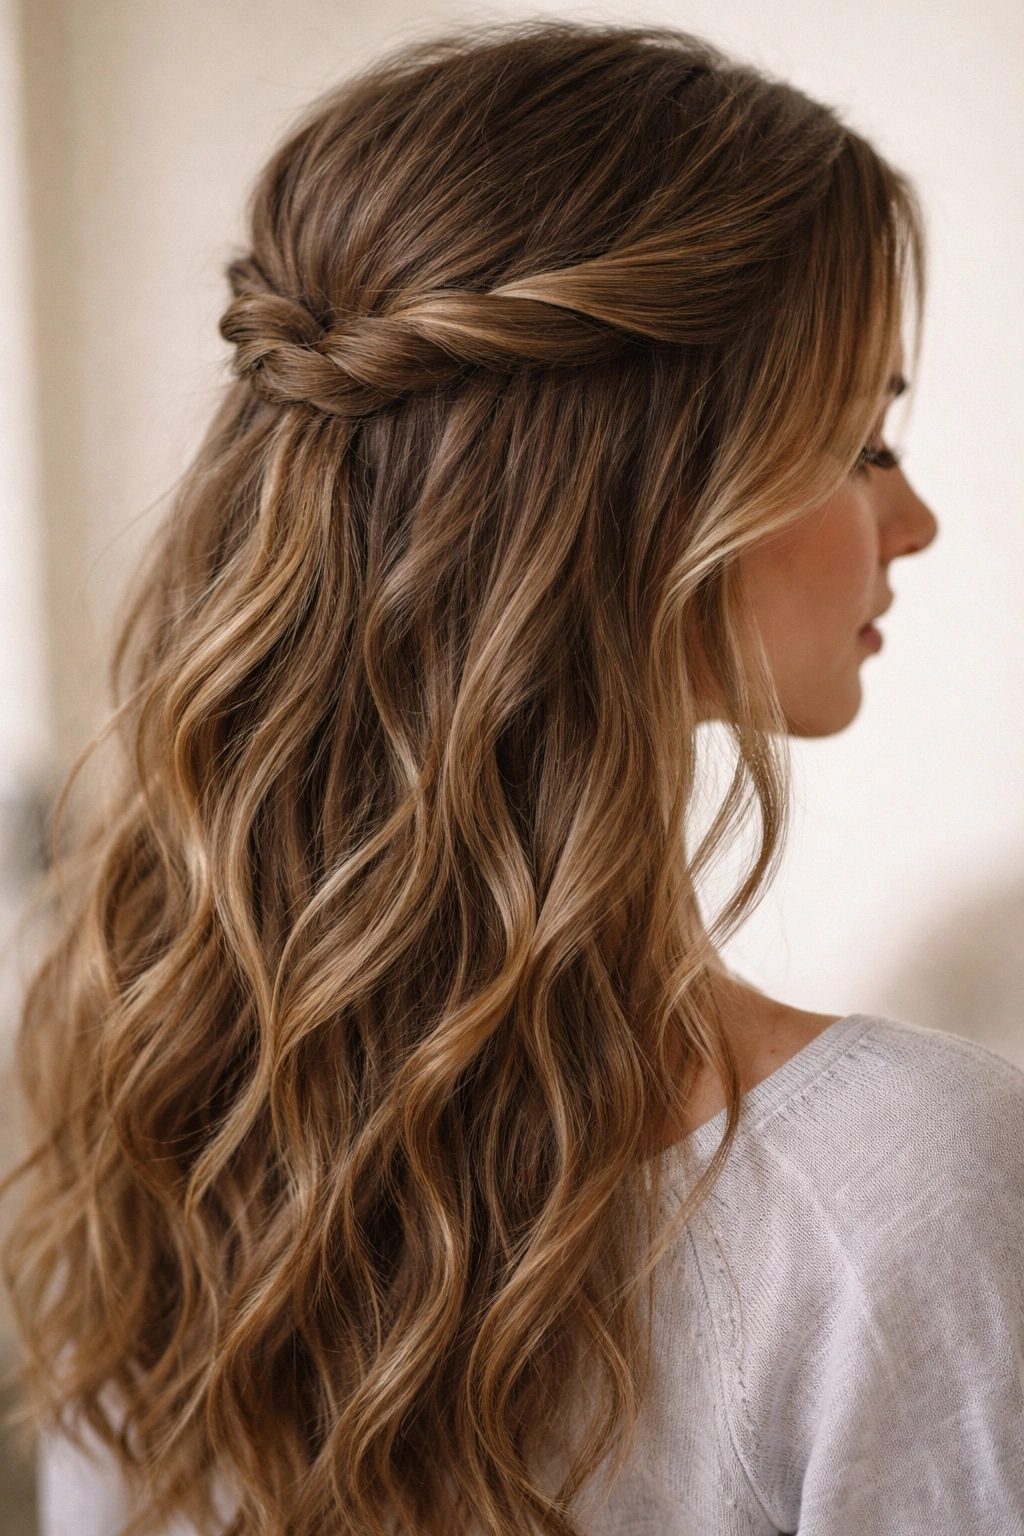
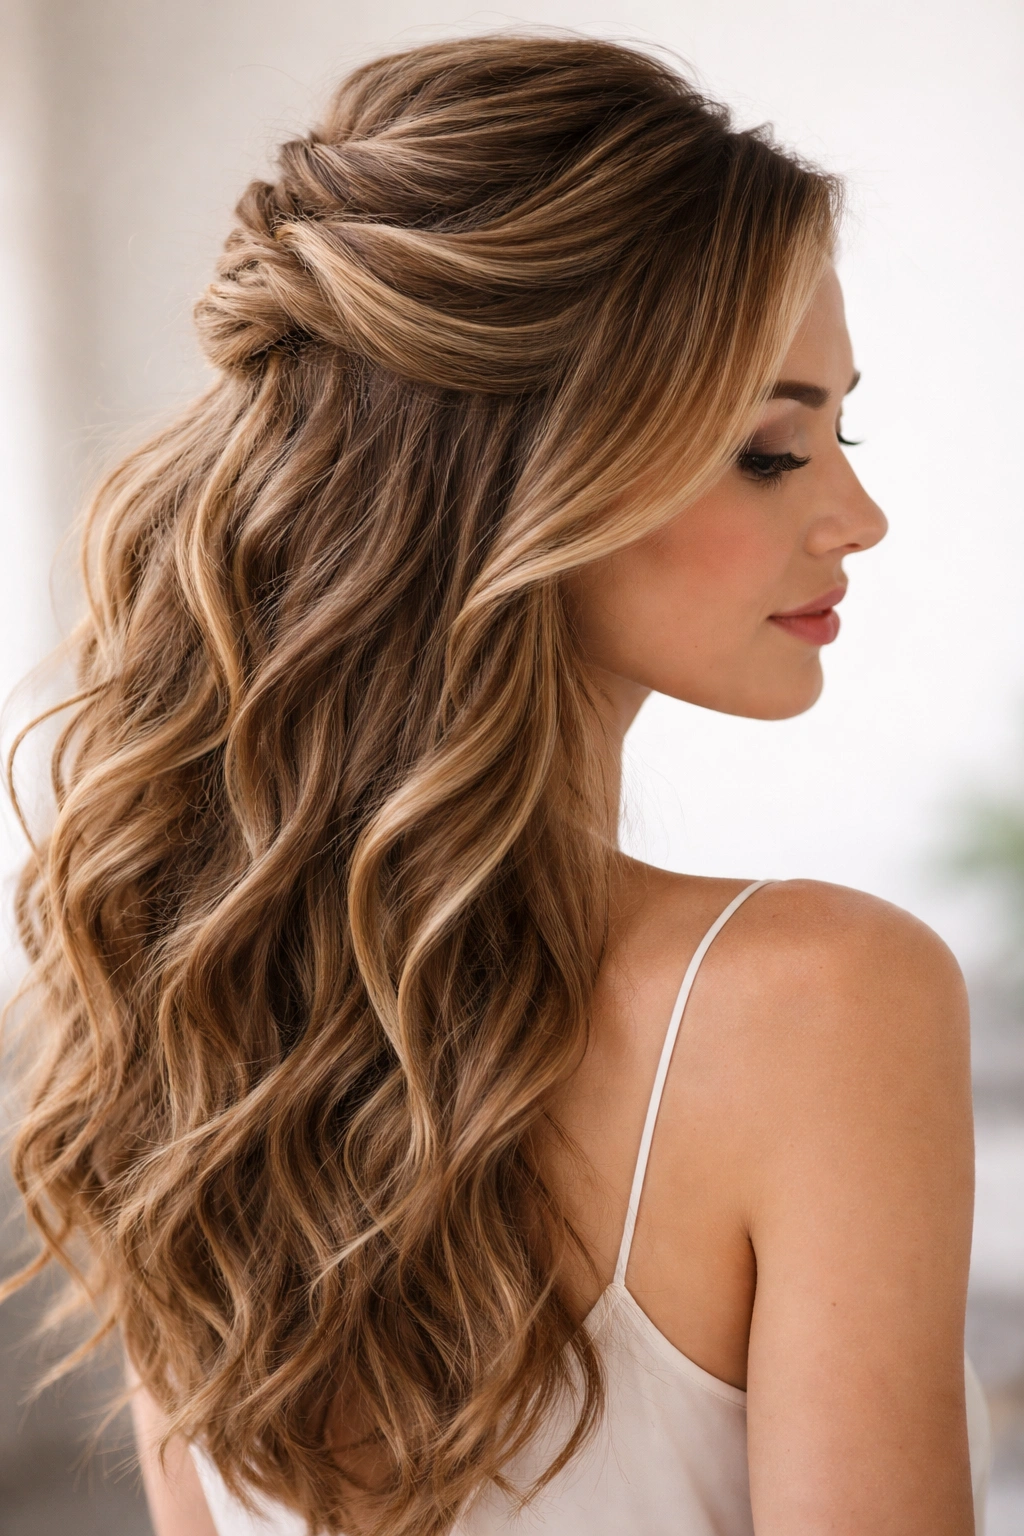
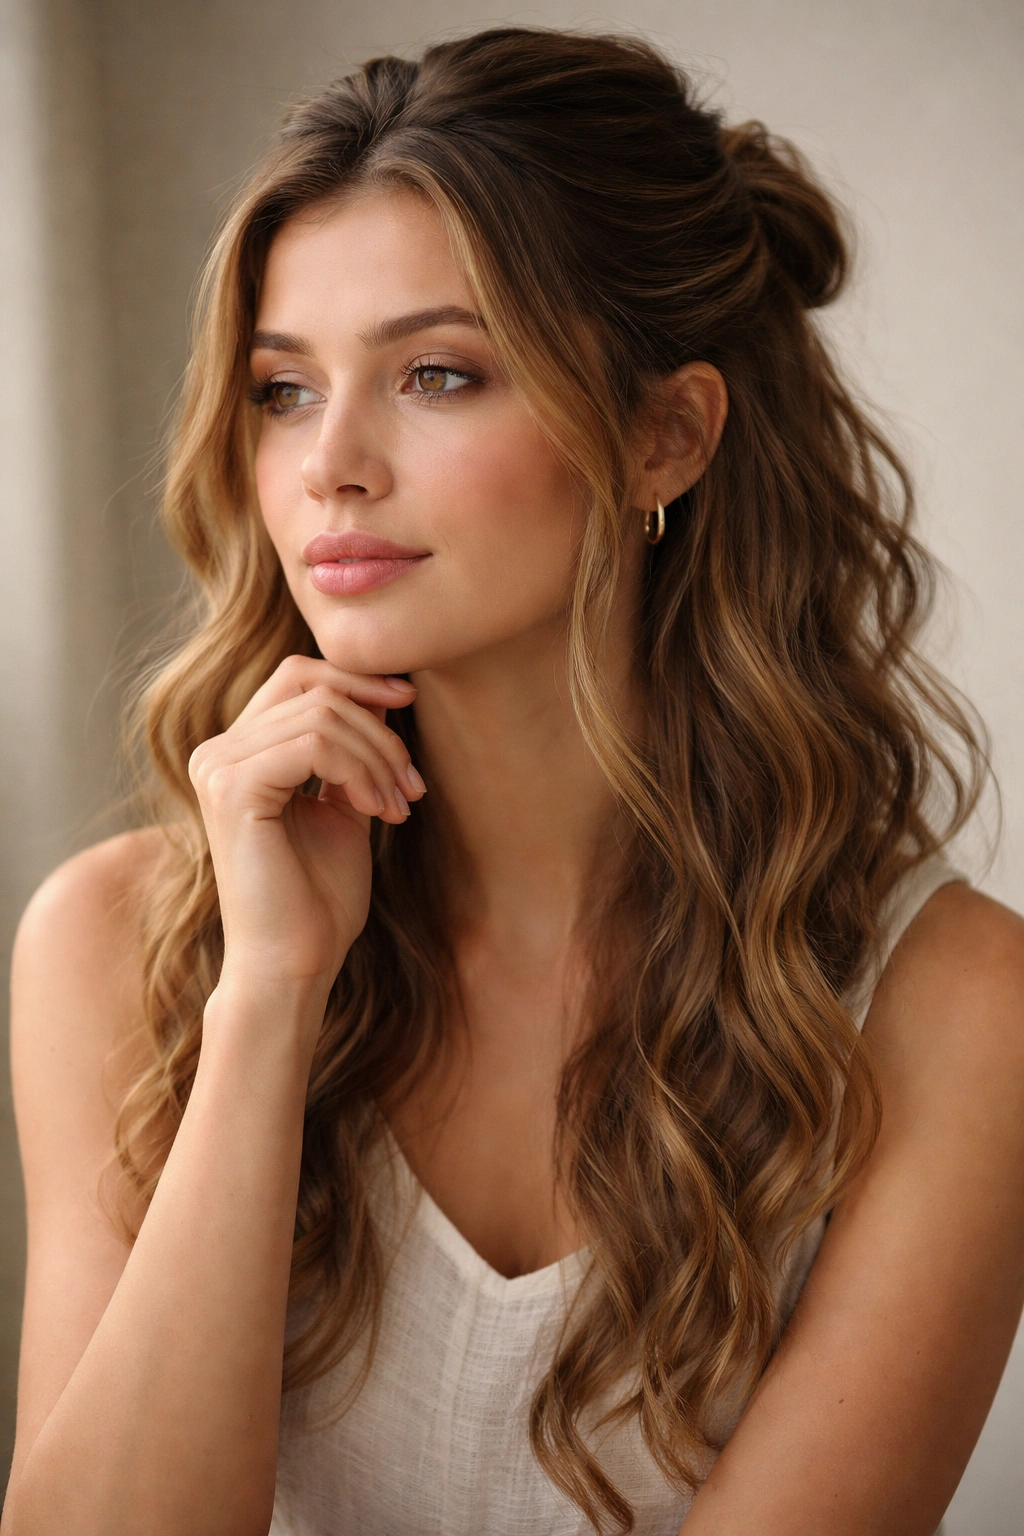
1. The Textured Crown Half-Up With Loose Waves
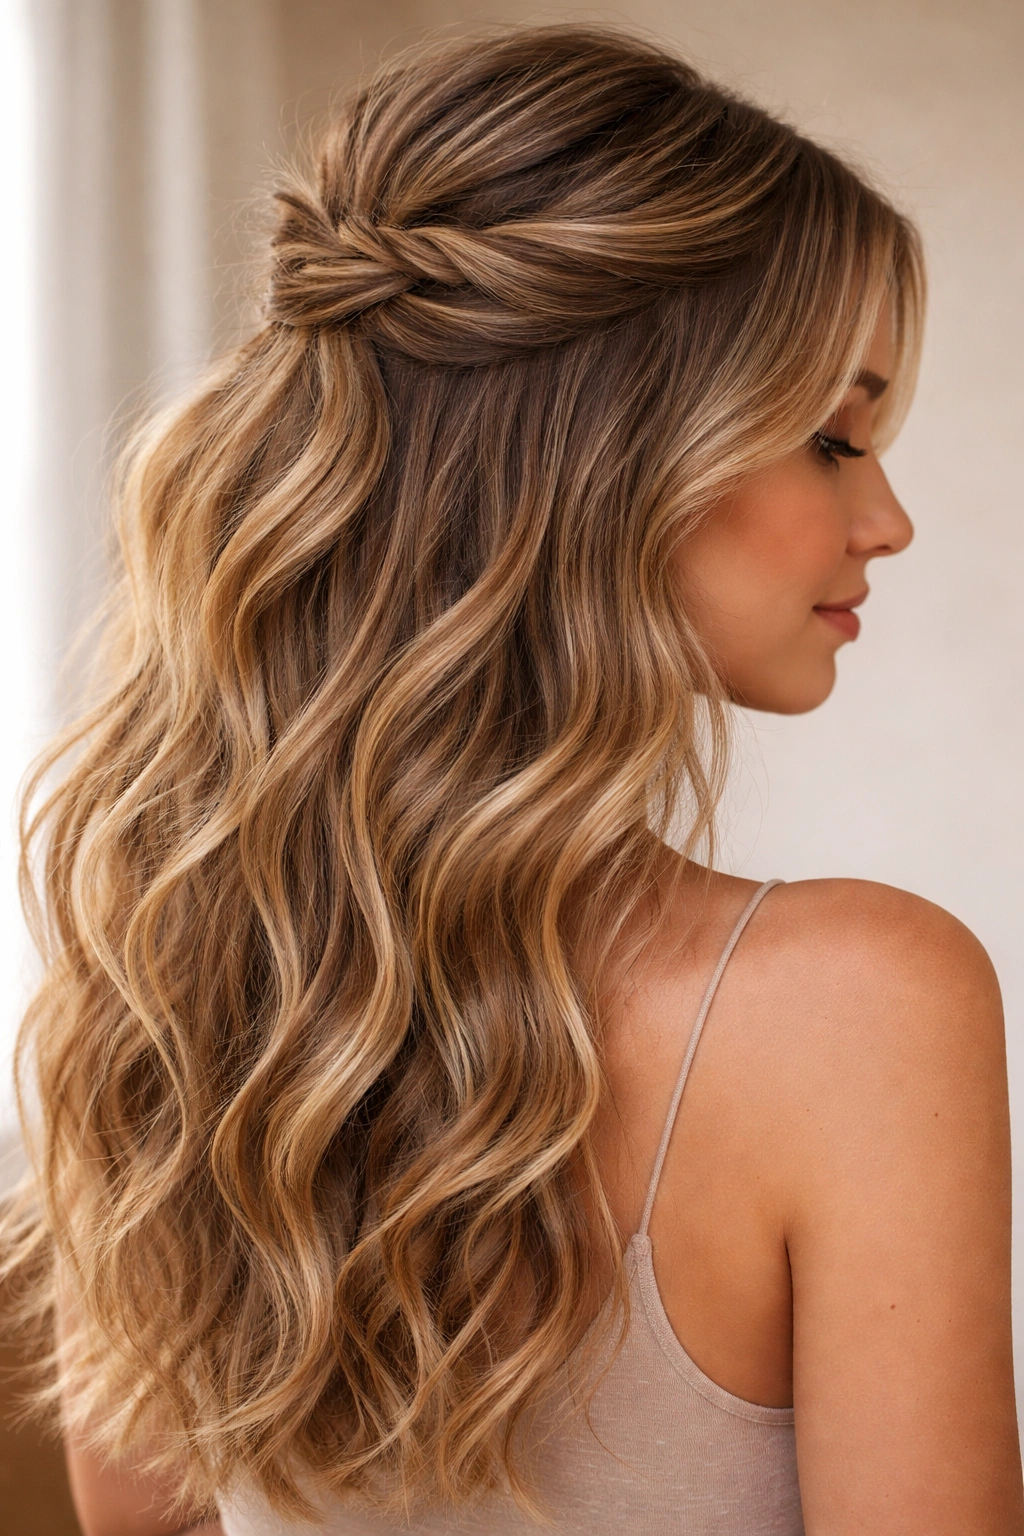
This is the half-up that looks like you barely tried, even though you definitely did. You’re creating immediate volume and texture right at the crown by working with the natural wave pattern of your hair rather than fighting it. The key is that this style sits higher on your head and uses twisting or a loose gathering technique to keep things soft and undone-looking.
Why This Works for Wavy Hair
Wavy hair has built-in texture, and this style amplifies it rather than smoothing it down. You’re creating a sculptural shape at the crown while your waves below remain full and dimensional. The style works because it doesn’t require perfect smoothness or slicked-back sections — the texture is literally the point.
How to Style It
Start with slightly textured hair (day-two waves are actually ideal here). Take a section from your temples on each side, about two inches wide, and twist each section loosely toward the back of your head. Meet the two twists at the center back where you’d normally place a half-up, and secure them with a hair tie or bobby pin. Pull gently on the twists to loosen them and create texture — this is what makes the crown look full and intentionally undone. Leave the rest of your waves to fall naturally.
Pro Tips for Best Results
The texture matters here, so avoid applying product that creates stiffness or crunch. A lightweight texture spray or sea salt spray actually helps define your waves without weighing them down. Don’t twist too tightly — loose, casual twists read as intentional rather than try-hard. If you have very long hair, this style works best when you don’t gather too much hair at the crown, so aim for about one-third of your total hair volume in the half-up section.
2. The Twisted Half-Up With Face-Framing Pieces
This variation keeps soft pieces down on either side of your face while creating a gathered twist at the back. It’s flattering for every face shape because the face-framing pieces elongate and soften the overall look, while the twist adds definition and keeps hair off your neck without looking severe.
What Makes This Different
You’re creating two distinct features in this style: the twists that anchor the look at the back, and the intentional face-framing pieces that move and wave independently. This is a more polished version of a textured half-up, but it still maintains the undone quality that works so well with wavy hair.
Step-by-Step Styling Method
Begin by identifying which pieces you want to leave down for framing — typically one or two inches of hair on each side of your face, starting from your temples. Section the rest of your hair, leaving out those face-frame pieces. Take the sectioned hair and divide it into two equal parts. Twist each part and bring them both toward the back center of your head, crossing them slightly for visual interest, then secure with a clip or elastic. The face-framing pieces should sit naturally forward and wave freely.
Getting the Right Balance
The size of your face-framing pieces matters — too much loose hair reads as incomplete, while too little looks too finished. Aim for pieces that are about as wide as your pinky finger on each side. If your waves are naturally tight or curly, these pieces will frame better. If your waves are looser, they’ll have more movement, which creates a different but equally pretty effect. Either way, let them do their thing without smoothing or trying to style them into submission.
3. The Half-Up Knot With Sculptural Volume
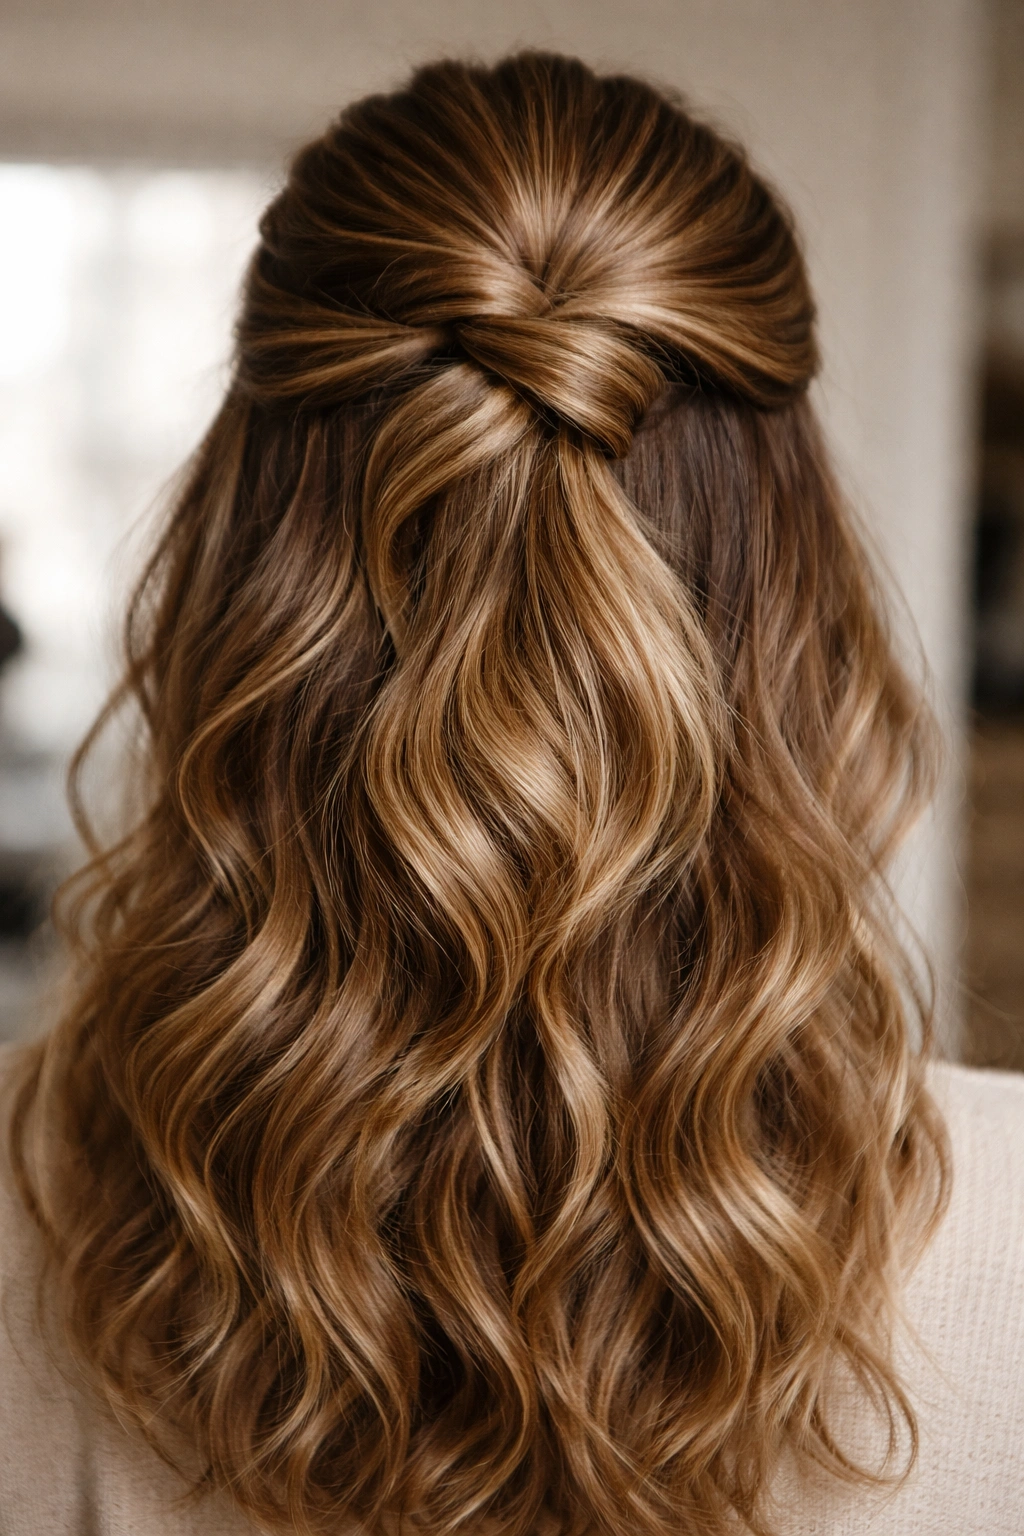
Instead of twists or braids, this style uses a simple overhand knot to secure the top section. It’s surprisingly chic and creates a distinctive sculptural element at the crown that photographs beautifully. The knot catches light differently than a traditional tie or braid, which adds visual interest and dimension.
Why the Knot Works
A knot requires less precision than a braid and feels more intentional than a casual twist. For wavy hair, the knot sits perfectly because waves already have natural movement — the knot becomes a deliberate anchor point rather than fighting the natural texture. You’re using the wave pattern to your advantage, and the knot actually looks better when your hair isn’t pin-straight.
How to Create the Knot
Gather the top third of your hair (roughly from ear to ear and back) into a half-ponytail position. Divide this gathered section into two equal parts. Cross the right section over the left section and pull through, just like you’re tying a knot — one simple loop. Tighten gently, then release and fluff the knot slightly to create dimension and texture. The remaining gathered hair will bunch slightly below the knot, creating a three-dimensional effect. Secure the tail with a small elastic underneath.
Pro Styling Tips
This works best when you have some texture or wave to your hair already — blow drying straight before styling makes the knot look too defined and formal. If your hair tends toward very loose waves, consider creating a tiny braid section at the very top before you make the knot, which anchors things better. You can also use a decorative clip underneath the knot instead of a hair tie for a dressier look. The rougher and more textured the knot appears, the better it looks with wavy hair.
4. The Loose Half-Up Braid With Soft Waves
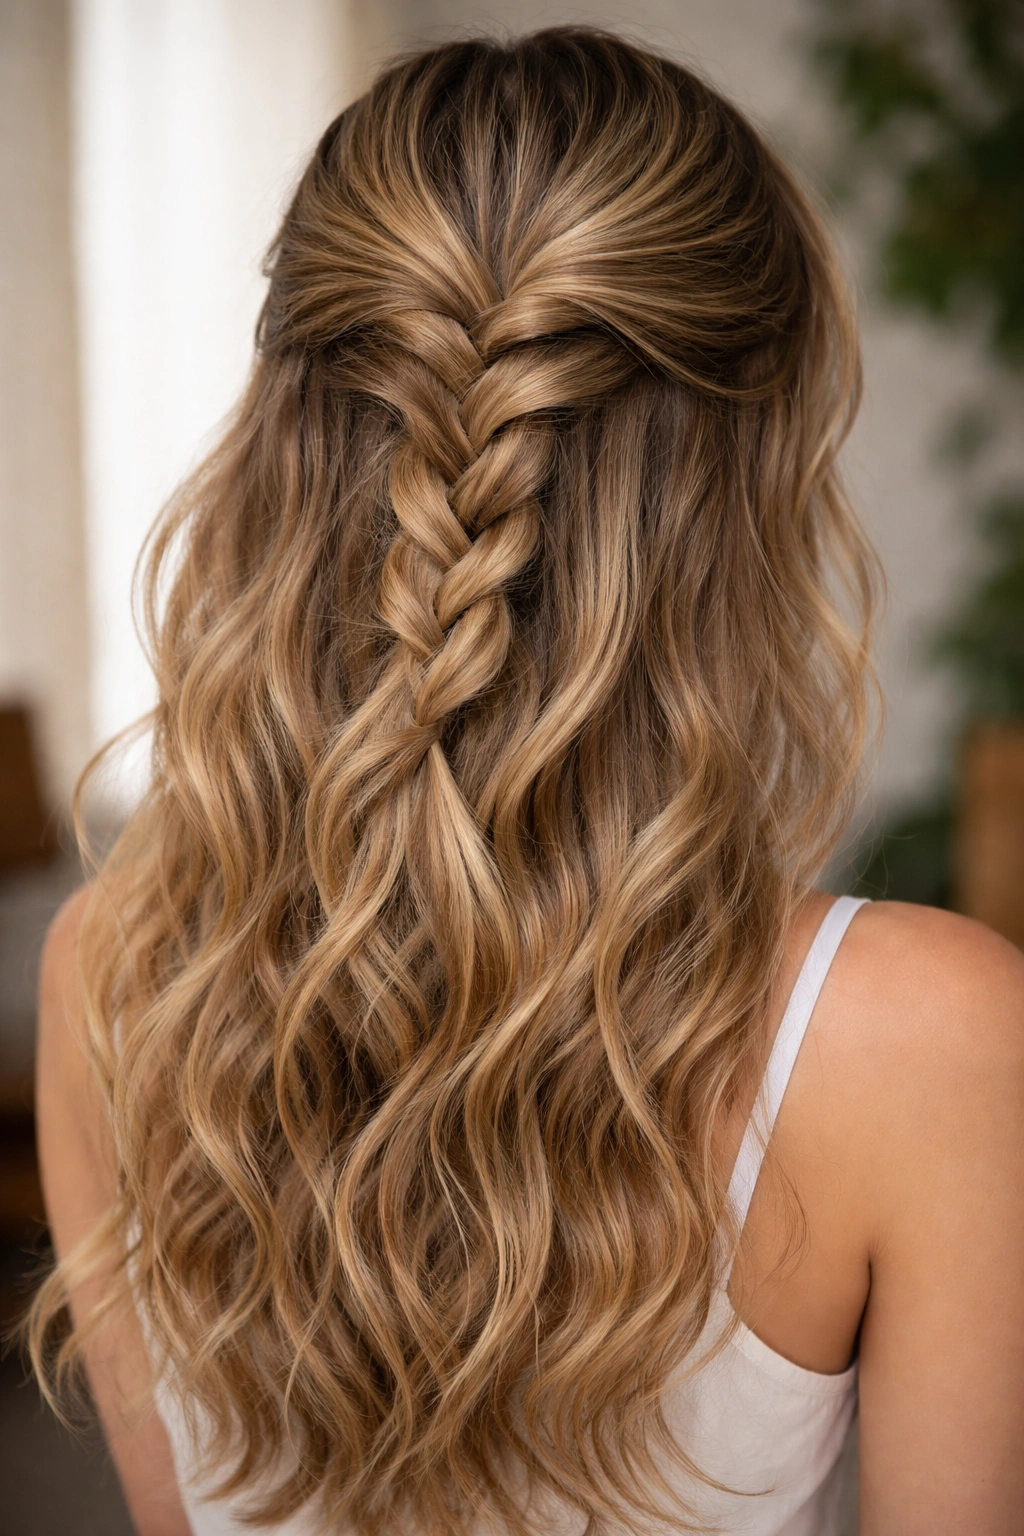
A braid works beautifully with wavy hair because the texture of your waves actually makes the braid look fuller and more intentional. Loose braids are the move here — super tight plaits look rigid and formal against naturally wavy texture, but a soft, undone braid reads as cohesive and intentional.
Why Braids and Waves Are Natural Partners
Your wavy texture already has movement built in. When you braid wavy hair loosely, the waves poke through the braid sections, creating a fuller, more interesting texture than a braid in straight hair. The braid acts as a frame for your waves rather than containing them completely. This is the secret to making braids look effortless with wavy hair.
The Braiding Technique That Works
Take a section of hair from one temple, about two inches wide. Begin a loose three-strand braid, but braid loosely enough that you can see the wave texture between the braid sections. As you work back, gently pull on the outer strands of the braid to loosen it further — this is called undoing or pancaking the braid. Continue braiding until you reach the center back of your head, about two inches below where a traditional half-up would sit. Secure with a small elastic. Pull gently on the braid to create additional texture and volume.
Making It Look Effortlessly Undone
The looser your braid, the better it works with wavy hair. If your first attempt feels too tight, practice braiding with looser tension. You can also gently pull sections of braid away from the center as you work, creating a more voluminous, textured braid. If you have very defined or curly waves, the braid will naturally look fuller — you might not need to pancake as much. If your waves are looser, pancaking the braid helps create more visual texture and dimension.
5. The Half-Up Ponytail With Cascading Waves
This style creates a soft ponytail positioned at the crown level, but instead of tying all the way down, you’re using a flexible gathering technique that lets your waves cascade naturally below. It’s polished enough for professional settings but maintains the relaxed quality that wavy hair does best.
What Sets This Apart
You’re creating a gathered section at the half-up point without the severe smoothness that traditional ponytails demand. The ponytail sits at the crown, but your waves below remain loose and moveable. This is perfect for days when you want to feel put-together without looking like you spent an hour styling.
How to Execute It Cleanly
Gather hair from your temples and the sides of your head, bringing it toward the center back where a half-up would sit. Instead of a tight elastic, use a flexible ponytail holder or even a loose silk scrunchie. Create a soft, rounded shape at the crown rather than a sleek pulled-back look. You can smooth down any flyaways with a small amount of gel or smoothing cream, but avoid creating a slicked or overly polished effect. The goal is a gentle gathering that looks intentional but not rigid.
Styling Variations for Different Wave Patterns
If you have tight waves or curls, this style will naturally have more definition at the crown because your texture automatically creates volume. For looser waves, you might want to gently back-comb or texturize the crown section slightly before gathering, which creates more lift. Either way, let your waves dictate how the style falls — don’t fight the natural movement by smoothing everything down or trying to create uniform waves.
6. The Side-Swept Half-Up With Dimensional Texture
Instead of centering the half-up at the back of your head, you’re gathering it to one side. This creates an asymmetrical, modern look that’s flattering and interesting. The side placement means your waves have interesting movement because they’re not being pulled straight back — they sweep and angle differently than a centered style.
Why Asymmetry Suits Wavy Hair
Centered styles can sometimes look too formal or structured with naturally wavy hair. A side-swept half-up embraces the movement and dimension of waves because the asymmetry makes the whole look feel more deliberate and fashion-forward. You’re working with the natural asymmetry that waves create rather than trying to create perfect symmetry.
The Styling Method
Section off hair from the temple on one side of your head, taking a piece that extends from your temple back toward the center. Twist or braid this section gently as you bring it across the back of your head toward the opposite side. Secure it just behind your opposite ear with a bobby pin or small elastic. The twist or braid should sit at approximately the same level as a traditional half-up, but the off-center placement creates immediate visual interest. Leave the rest of your waves to fall naturally and cascade over one shoulder.
Getting the Proportion Right
The key is taking enough hair from the sectioning side to feel substantial, but not so much that the style looks unbalanced. Typically, about one-third of your total hair works well. If you take too little, the secured section feels thin and insubstantial. If you take too much, the remaining waves feel sparse on one side. Experiment to find the right proportion for your hair density and length.
7. The Double Twisted Half-Up With Layered Interest
This style uses two separate twists that spiral around each other or sit side by side before being secured together. It creates a more complex, interesting texture at the crown compared to a single twist, and it offers more visual dimension. Double twists work especially well with wavy hair because the texture adds depth to the crown area.
The Complexity That Actually Makes Styling Easier
While this sounds more complicated than a single twist, it’s actually just as simple to execute — you’re just working with two sections simultaneously. The benefit is that the final look has more visible texture and appears more intentionally styled. For wavy hair, this works because you’re celebrating the texture rather than simplifying it.
How to Create the Double Twist
Divide your hair into two sections: left and right. Starting from your temples, take a section about two inches wide on each side. Twist the left section as you bring it toward the back-center of your head, and simultaneously twist the right section. You can either spiral the two twists around each other as you work, or bring them to the center as two parallel twists and secure them together. Both approaches create beautiful texture.
Making It Look Intentional
Pull gently on the finished twists to loosen them and create dimension. You want the twists to look textured and undone, not tight and groomed. If you have very straight hair, you might want to use a texture spray before twisting to help the twists hold and look fuller. If you have naturally wavy hair, the texture spray is optional — your natural waves will make the twists look fuller automatically.
8. The Half-Up With Accessory Detail and Wave Enhancement
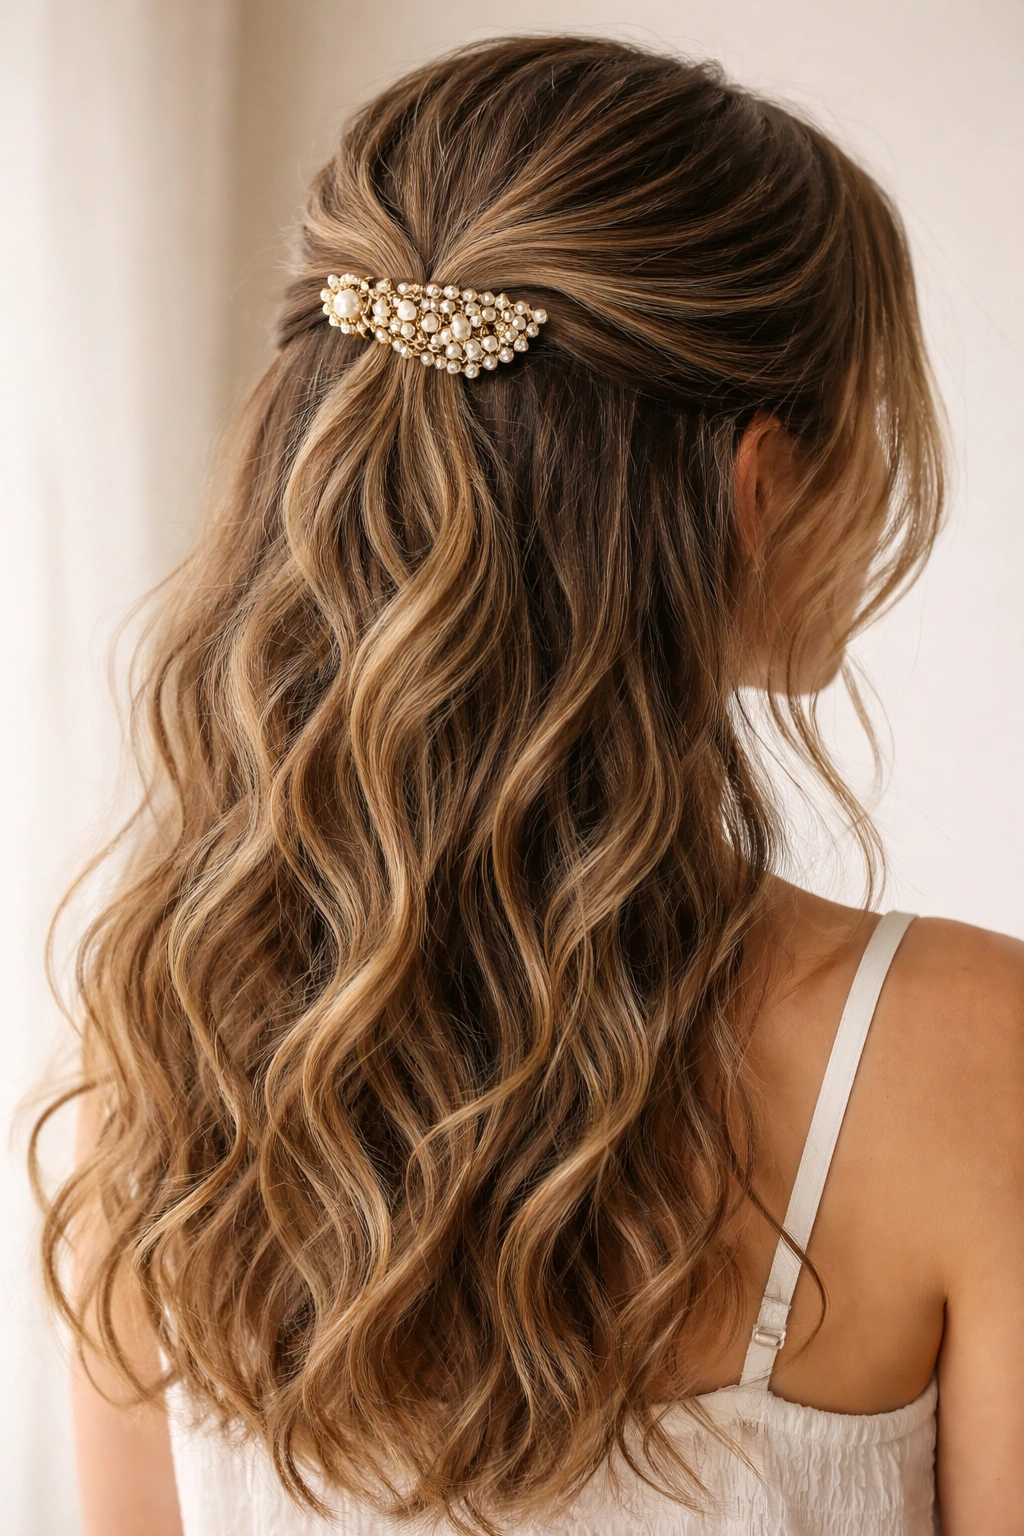
This final style is all about using a beautiful clip, comb, or hair stick to secure your half-up while intentionally enhancing the wave pattern of the secured section. You’re combining a functional piece of jewelry with textured waves to create something both beautiful and practical.
How Accessories Transform the Half-Up
The right accessory completely changes the mood of a style. A tortoiseshell clip feels vintage and fun. A metal claw clip reads modern and editorial. A decorative hair stick feels elegant and intentional. By choosing an accessory you love, you’re adding personality and polish to the style in a way that goes beyond what you can do with just an elastic and bobby pins.
The Technique for Wave Enhancement
Gather your hair into a half-up position, but before you secure it, gently work your fingers through the gathered section to separate and define the individual waves. If your waves need a little help, use a texturizing spray or dry shampoo on the gathered section before securing. This creates visible, defined waves within the half-up area rather than a smooth gathered section. Then secure everything with your chosen accessory, positioned so it catches light and draws attention to the texture you’ve created.
Choosing the Right Accessory for Your Hair
The weight of your chosen accessory matters. If your hair is fine or thin, choose something lightweight like a thin claw clip or delicate hair stick. If you have thicker, denser hair, you can handle heavier clips or comb-style accessories. The material also matters for grip — metal and wood tend to hold better than plastic, especially if your hair is slippery or very smooth. Consider your overall style aesthetic when choosing: bohemian vibes work better with hair sticks or woven clips, while modern minimalist looks suit sleek metal clips.
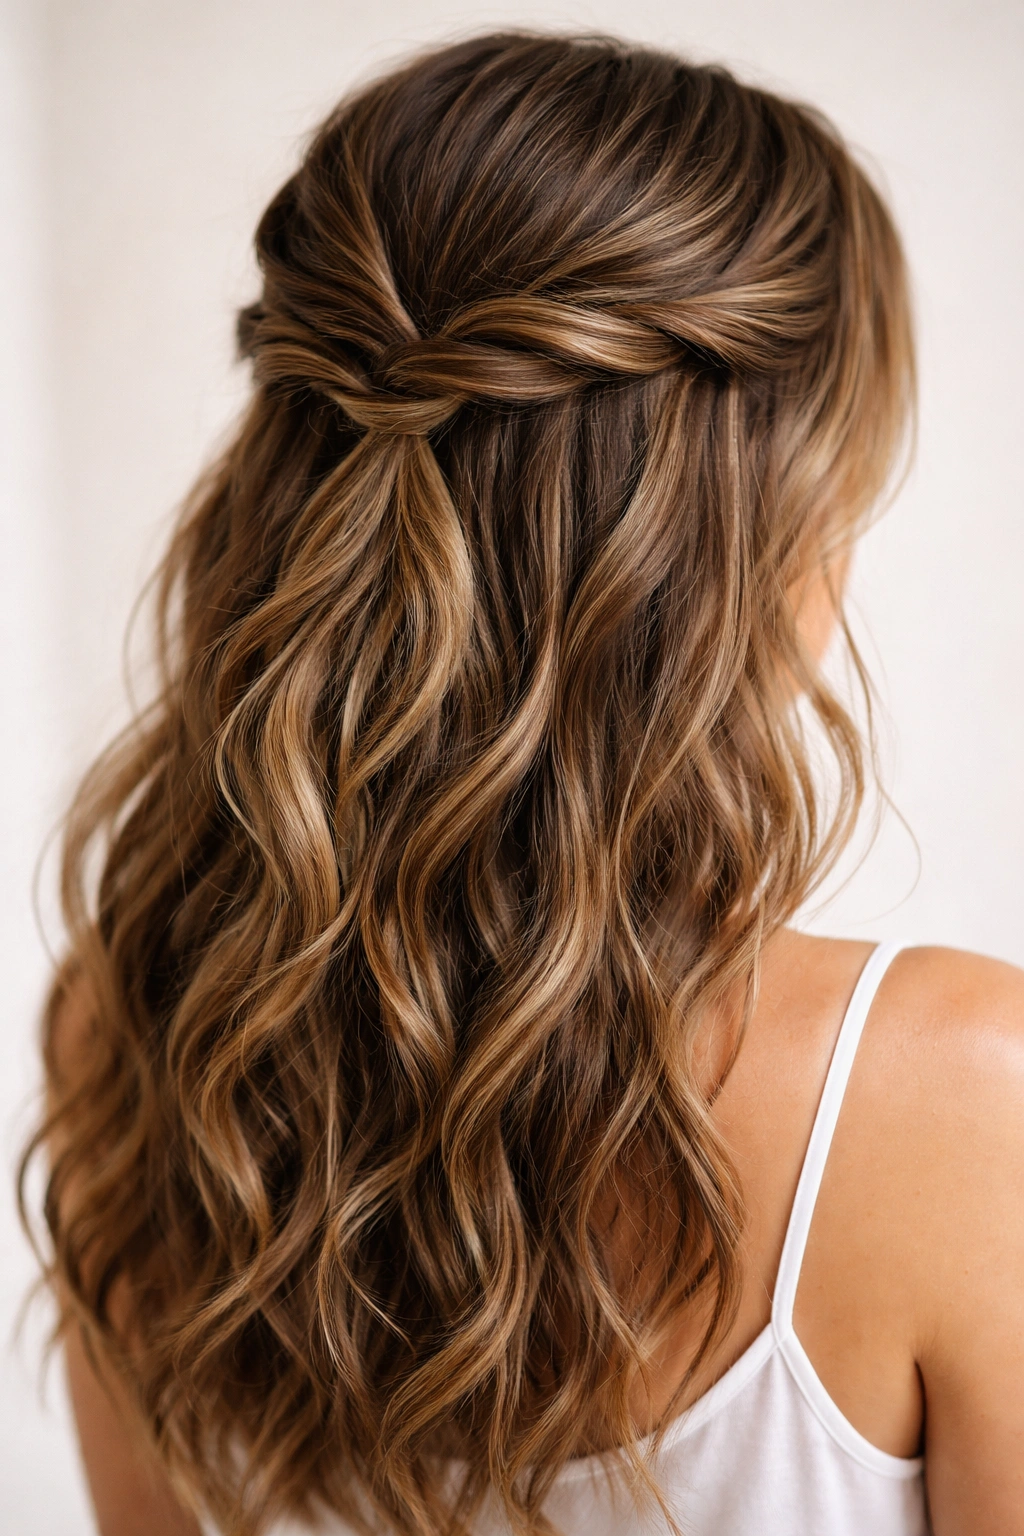
Final Thoughts
Half-ups with wavy hair are honestly some of the most effortless, beautiful styles you can do. The texture is already there — you’re just organizing it in a way that feels intentional. Each of these eight styles shows you different ways to work with your waves rather than against them, which is the whole secret to making half-ups look like they took minimal effort but maximum intention.
The best part about these styles is that they work whether your day-two waves are bouncy and defined or your freshly-washed waves are loose and undone. Your hair’s natural texture is the foundation, and a good half-up simply showcases it. Start with whichever style speaks to you, practice the technique once or twice, and then trust that your waves will do the heavy lifting. Once you nail one of these, you’ll probably find yourself rotating through all of them because they’re all genuinely that easy and that flattering.