Pin-straight long hair can look sleek, glossy, and expensive right up until it has to stay in a bun. Then the whole personality of the hair changes. It slides. It slips. It mocks your bobby pins.
That is exactly why rope braid buns for pin-straight long hair are so satisfying. A rope braid adds grip without asking you to wrestle with a three-strand plait, and long lengths give you enough material to build shape instead of just a sad little knot at the back of the head. If your hair tends to go limp in humidity or sheds pins like confetti, a rope-twist bun is often the move that finally makes sense.
The best part is that these buns do not all look the same. Some sit low and polished. Some look sharp and architectural. Some soften the face with loose ends and a little movement around the temples. Straight hair is actually a good base for this kind of styling because the shine shows off the twist, but it also means you need to think about prep, anchor points, and pin direction. Small details matter here.
Keep a few clear elastics, a handful of U-pins, and a texturizing spray close by. You’ll use them more than you think.
1. Low Rope Braid Bun for Pin-Straight Long Hair
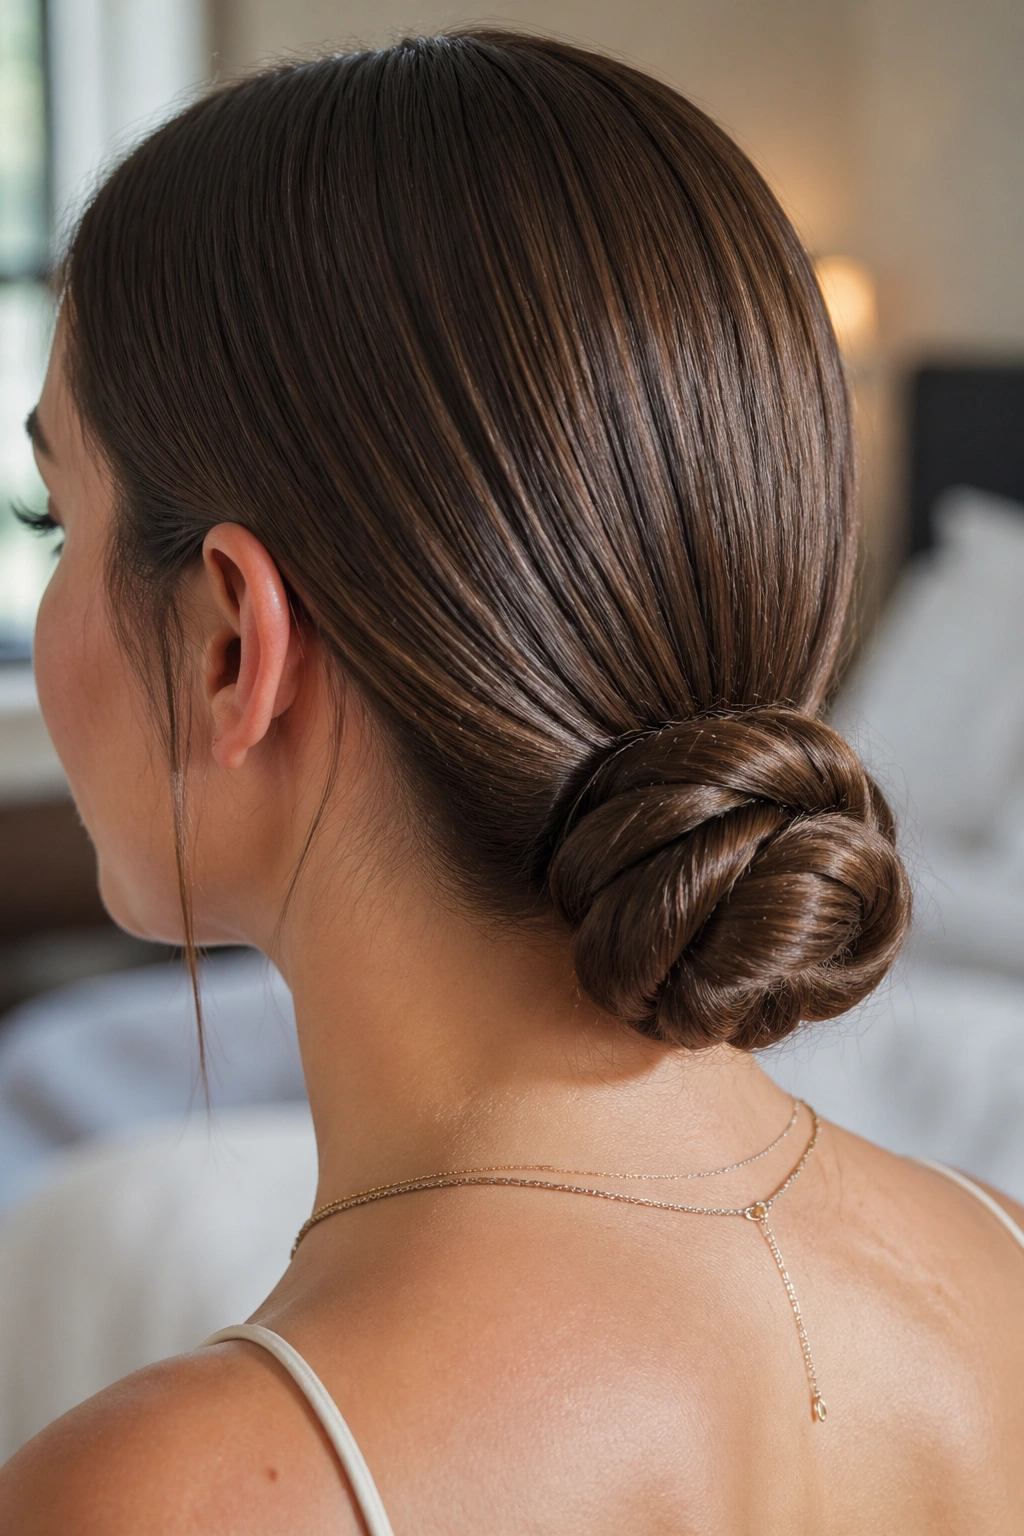
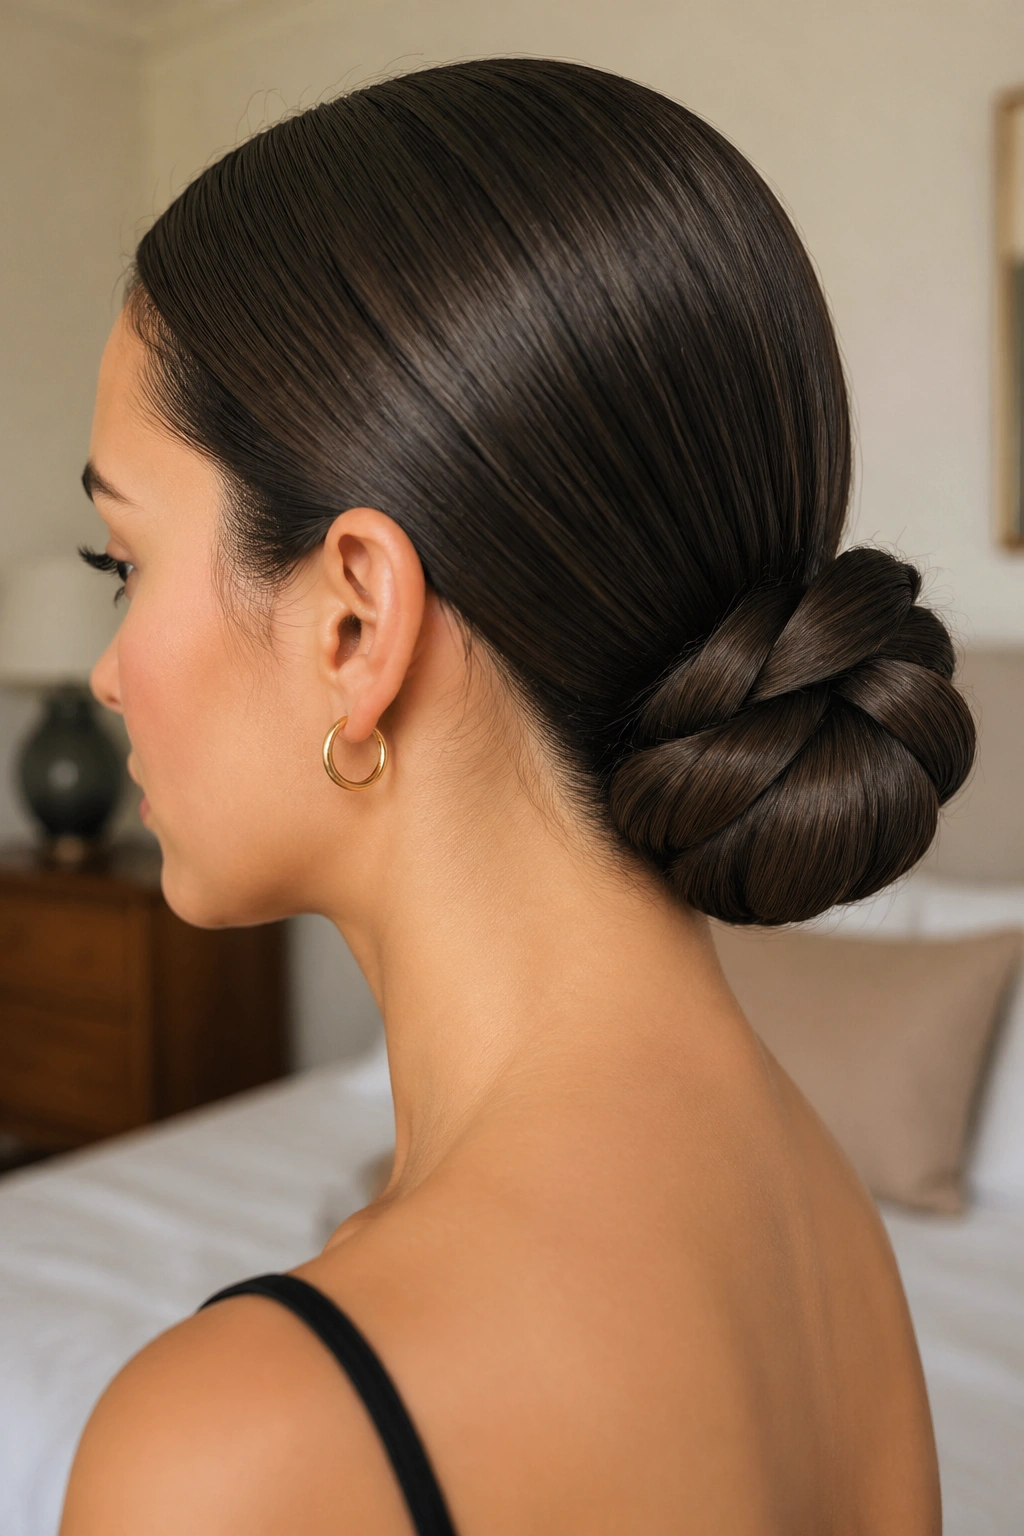
Low buns are the safest place to start, and honestly, they’re the version I’d hand to someone who says straight hair never stays put. Sitting at the nape, this style uses the weight of your own hair to help the bun behave instead of fighting gravity at the crown.
Why it holds so well
A low placement gives you a shorter distance to pin, which matters when your hair is slippery. The rope twist creates a tight spiral, and that spiral gives the bun something to bite into.
Straight strands usually need friction. This style gives them exactly that.
A small amount of dry shampoo at the roots helps, but don’t overdo it. You want a little grab, not a chalky helmet. Pull the hair into a low ponytail, split it into two sections, twist each section the same direction, then wrap them around each other in the opposite direction. That’s the rope braid part. Coil the finished twist into a bun, tuck the ends under, and pin through the center so the pins catch both the bun and the base ponytail.
- Best with second-day hair or lightly sprayed clean hair
- Works especially well with a center part or deep side part
- Uses fewer pins than a loose braid bun
- Looks neat even if the twist isn’t perfect
Small tip: pin from the outside of the bun toward the scalp, not straight across. It disappears better and stays put longer.
2. High Rope Braid Topknot Bun
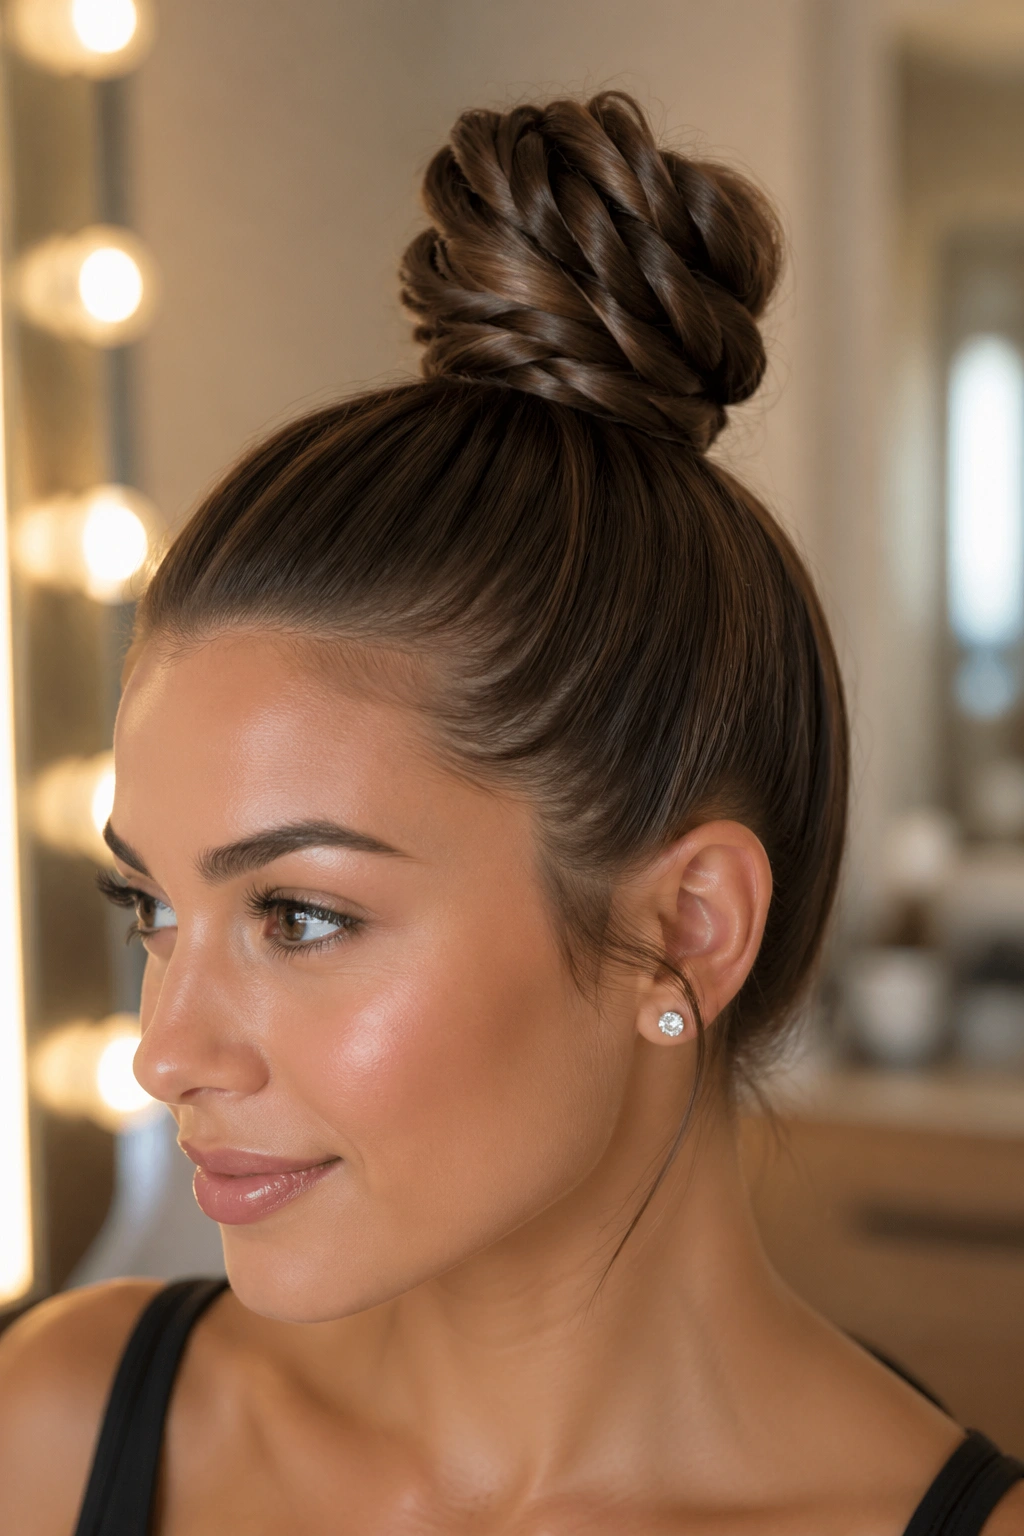
If you want height, this is the one that gives pin-straight hair some attitude. A high rope braid topknot makes the hair look fuller than a flat low bun, and it turns long lengths into a proper shape instead of letting them hang heavy and boring at the back.
The trick is to build a little lift at the crown before you twist. You do not need aggressive teasing. A few backcombed strokes at the roots, or a dusting of volumizing powder, is usually enough. Gather the hair high, twist it into a rope braid, then wrap it around the base like a knot. The bun should feel compact, not bulky.
Straight hair can make this style look too polished if you’re not careful, so I like to leave the twist a little airy on purpose. Not messy. Just not packed down like a rope tied with a machine. A matte finishing spray helps if your hair is very glossy and refuses to hold shape.
The practical part is simple. Use one strong elastic at the base, then secure the bun with at least four pins spaced around the circle. If the bun feels heavy, use two U-pins through the center instead of trying to jam in tiny bobby pins everywhere. Tiny pins are fine for flyaways. They are not the main support.
3. Side-Swept Rope Braid Bun
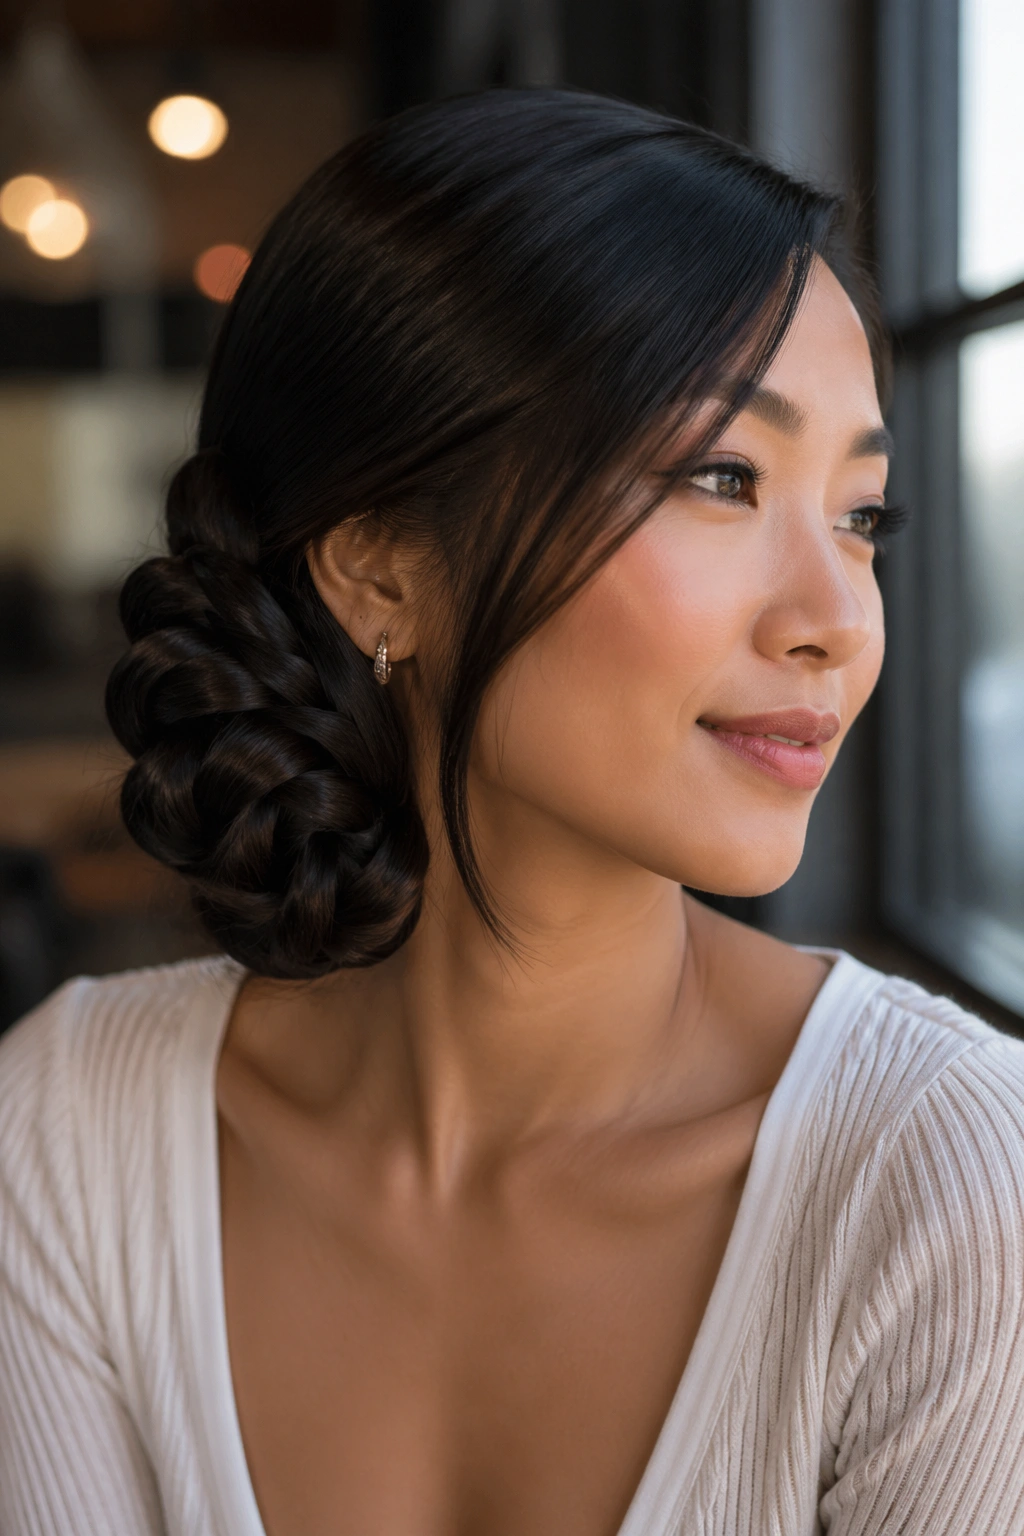
What if you want the bun to feel softer, not stricter? A side-swept rope braid bun does that job beautifully, and it gives pin-straight long hair a little movement without asking you to curl the whole head first.
The side placement changes the whole mood. It lets the bun frame one cheekbone, opens up the neck, and makes the style feel a little less formal than a center-back knot. I like this version for dinners, weddings, and any day when a plain bun feels too plain. The hair still looks controlled, but not stiff.
How to keep the sweep from collapsing
Start the ponytail just behind one ear rather than directly in the middle. Split the tail into two sections, twist, and wrap them around each other tightly enough that the braid does not puff out. Then coil the finished rope braid toward the side of the nape and pin it in a crescent shape.
A side bun needs balance, so the pins matter more than the twist. Place one pin at the base near the ear, one behind the bun, and one hidden under the lower edge. If the bun wants to tip, cross two pins in an X right where the coil meets the head.
- A side part makes the sweep look softer
- Ear-skimming placement keeps the bun from sitting too low
- A few face-framing strands can help, but keep them slim
- Best for long hair with medium thickness or more
Watch this: if you pull the bun too far forward, it starts to look lopsided instead of elegant. Keep it just behind the jawline.
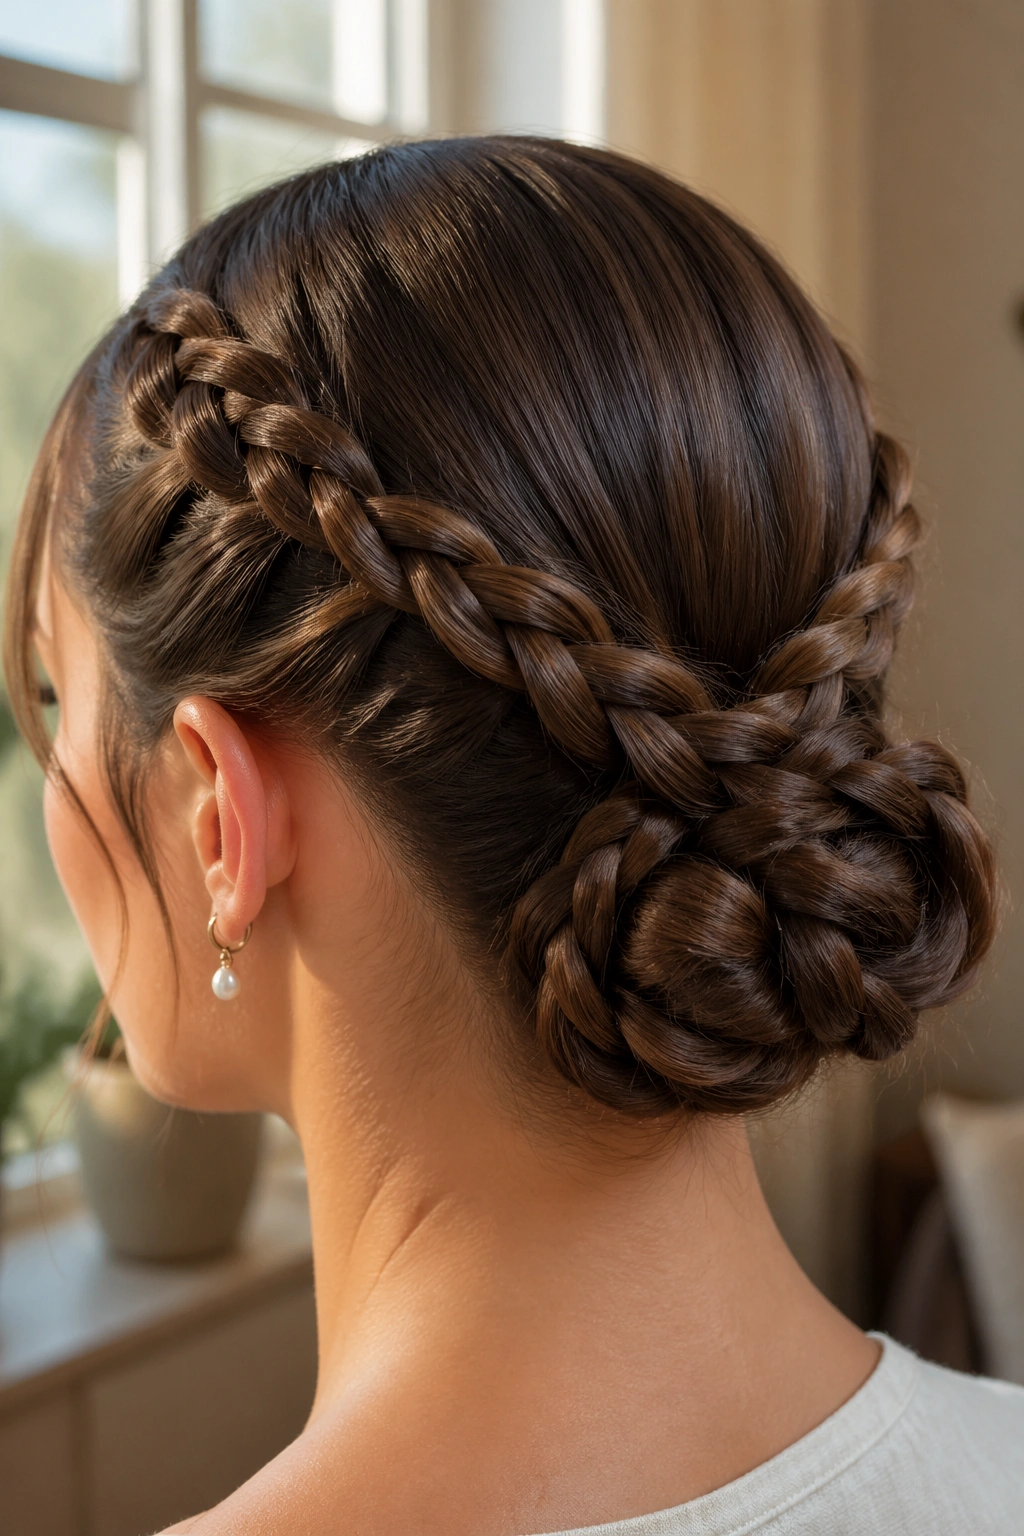
4. Rope Braid Crown Bun
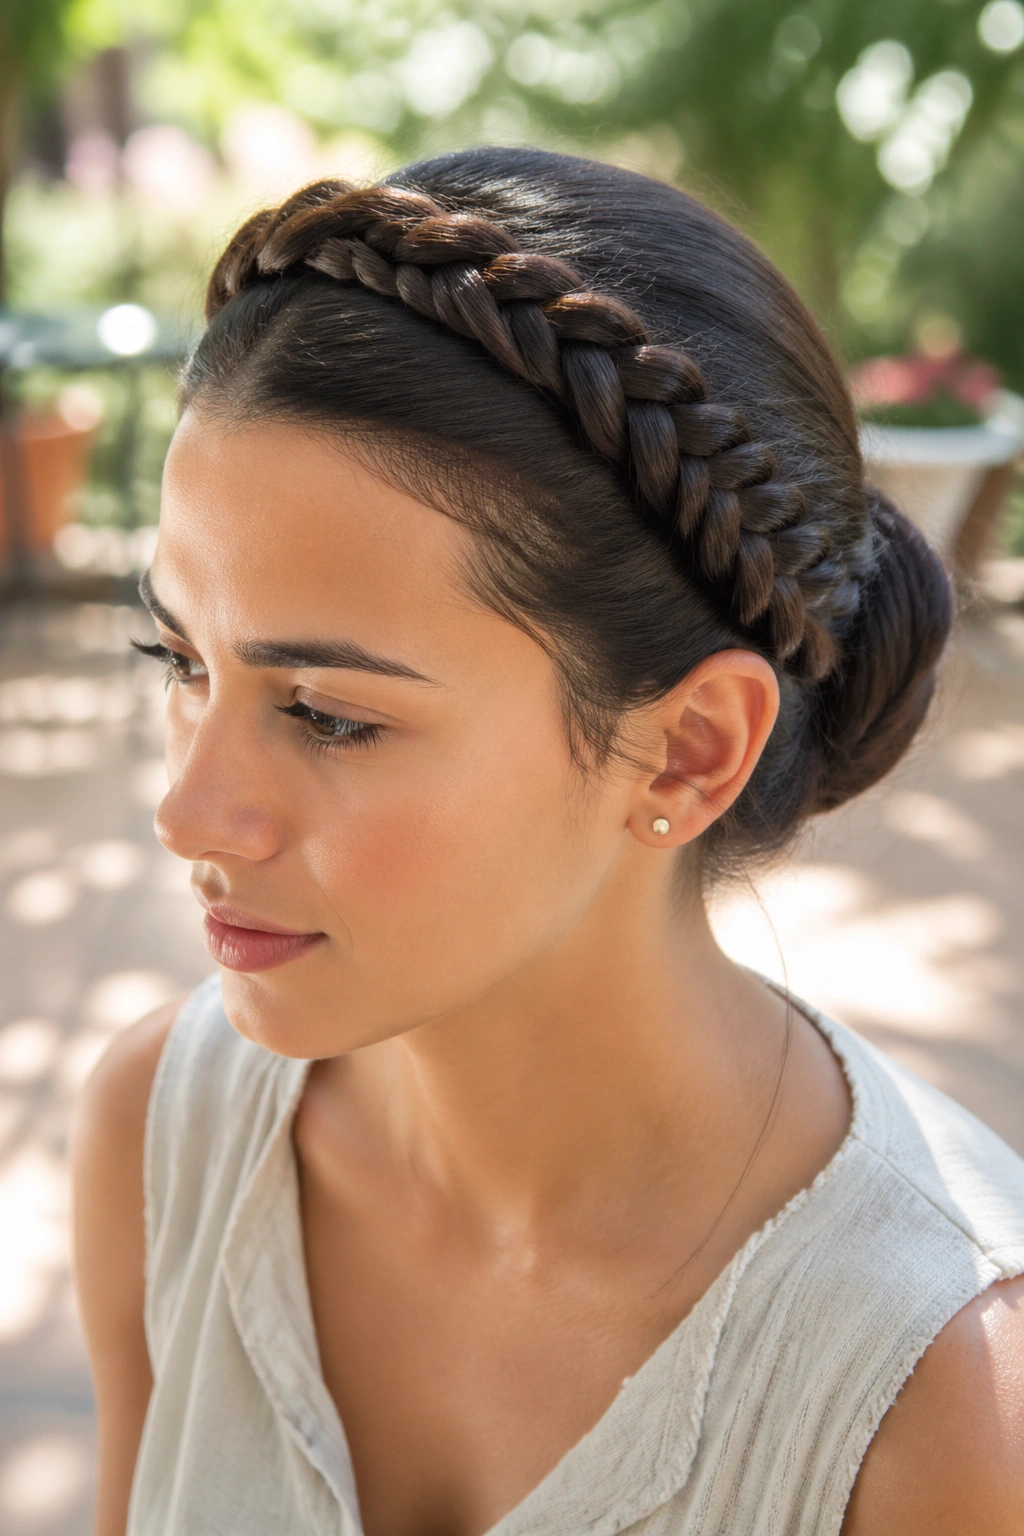
A crown rope braid bun is the style you reach for when you want the hair off the shoulders and the whole thing to look intentional from every angle. It has that wrapped, halo-like feel, but it still ends in a bun, which keeps it grounded instead of precious.
I’ve always liked this one for long straight hair because it solves the “too much length” problem. You use the front and side sections to build the crown, then feed them into a bun at the back. The result is neat on top and fuller at the nape. No flat scalp. No thin-looking sides.
The shape that makes it work
Take two sections from the front hairline, one from each side, and twist each into a rope braid toward the back. Join them just below the crown and tuck the joined length into a low bun. If your hair is very long, the extra length can be wrapped around the bun once more for a thicker finish.
The key here is keeping the crown section flat and close to the head. If the braid stands up too much, the style loses that clean arc. A fine-tooth comb and a little smoothing cream help more than heavy hairspray.
- Best for open necklines and sleeveless tops
- Flatters long, straight hair that needs shape
- Needs bobby pins that match your hair color
- Looks best when the crown twist is even on both sides
The nicest thing about this style is the back view. It looks finished from a distance and still has enough detail to hold up when someone gets close.
5. Sleek Center-Part Rope Braid Bun for Pin-Straight Hair
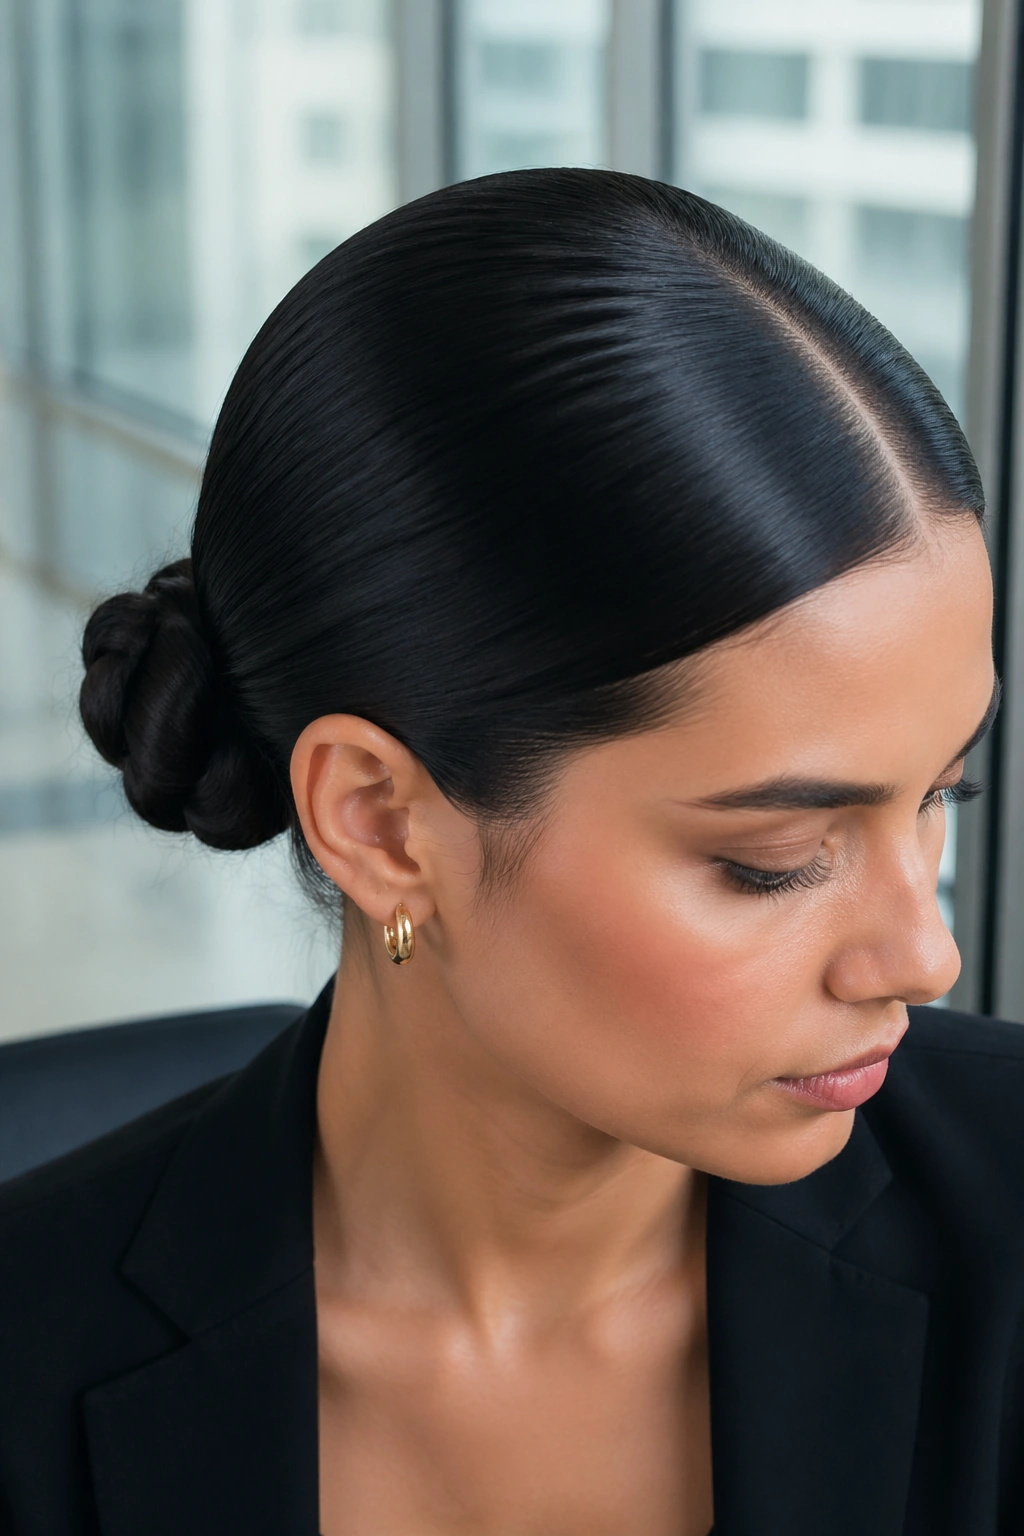
A center part can make straight hair look sharper in a way that feels almost architectural. Add a rope braid bun, and the whole style turns clean, crisp, and a little severe in the best sense.
This is the version I’d pick for a suit, a sharp dress, or any outfit that already has strong lines. The hair should lie smooth at the top, with the rope twist doing the decorative work instead of volume or looseness. Use a pea-sized amount of smoothing cream through the mid-lengths, brush the hair flat, and gather it low or mid-low depending on how high you want the bun to sit.
The bun itself does not need to be huge. In fact, too much bulk ruins the point. Twist the ponytail tightly, wrap it once or twice, and tuck the ends under so the shape reads as deliberate. If the bun feels puffy, press it gently with your palms before pinning. That small move makes a bigger difference than people expect.
One thing I like about this version is how it shows off shine without looking greasy. Straight hair can swing too far in either direction. Clean and glossy is good. Flat and slicked to the skull can look harsh. A controlled center part plus a tight rope bun sits in the middle.
6. Loose Rope Braid Bun with Face-Framing Strands
Unlike the sleek center-part version, this one is meant to feel softer from the start. You still get the rope braid structure, but you let the edges breathe a little and leave a couple of face-framing pieces out so the style stops looking so severe.
That makes this bun a smart choice if your straight hair tends to fall flat around the face. A few loose strands can add shape fast. I’m talking about two thin sections, maybe half an inch wide each, not giant curtain pieces that swallow the whole style. If you want them to bend, hit just the ends with a 1-inch iron for a five-second twist. Or leave them straight and tuck them behind the ears halfway through the day. Both work.
What makes it different
The bun itself should be a little softer too. Twist the ponytail into a rope braid, then gently widen the twist by pulling on the outer edges before coiling it. Do not pull so hard that the braid falls apart. You want soft edges, not chaos.
This version is best when you want movement around the face and less tension at the hairline. Straight hair can feel severe when it is pulled back tightly all day, and this loosens that feeling without turning into a mess.
- Good for long faces that need width at the cheeks
- Works well with a low or mid-height bun
- Needs less hairspray than a sleek version
- Looks better when the face-framing pieces are thin, not chunky
If the bun starts looking too casual, smooth the crown back down with the tail of a comb and re-pin the outer edge. That usually fixes it.
7. Double Rope Braid Bun
Two rope braids give straight hair something it usually needs: more structure. Instead of relying on one central twist, you build two smaller twists and join them into a single bun, which creates better grip and a fuller shape.
That extra texture matters a lot on pin-straight lengths. Hair that is slick from root to tip often slips out of a single braid bun because there isn’t enough surface area for the pins to catch. Two rope braids change that. They cross, stack, and anchor each other.
Why double braids help slippery hair
Split the hair into two equal sections from the ponytail or, if you want a more detailed look, start with two low side ponytails. Twist each section into a rope braid, then wrap them around each other or around a shared center point. The overlap creates more tension, which keeps the style from sagging through the day.
You can keep the bun compact or fan the two rope braids outward for a thicker, braided rosette effect. I prefer compact if the hair is very fine, and looser if the hair is thick and heavy.
- Stronger hold than a single rope twist
- Adds visible texture to very straight hair
- Good when you need the bun to survive movement
- Slightly faster to fix if one braid loosens, since the second braid still supports the shape
Use one elastic to bind the base, then pin each braid separately into the bun. If both braids are fighting for the same space, the style gets bulky. Give each one its own route.
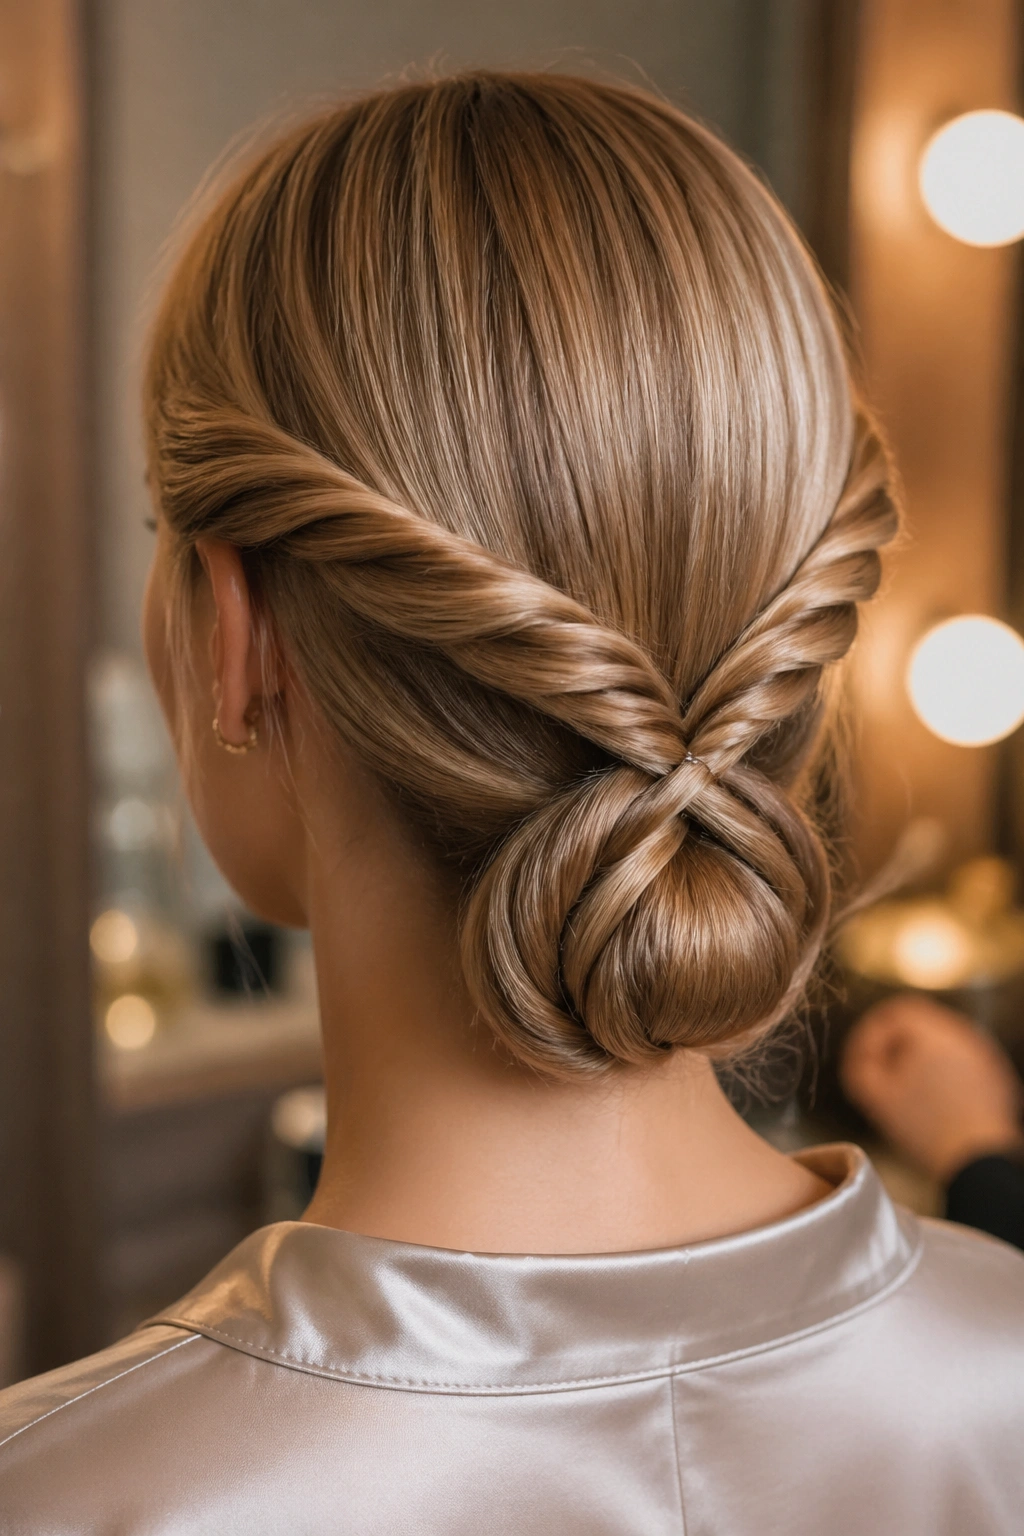
8. Rope Braid Chignon
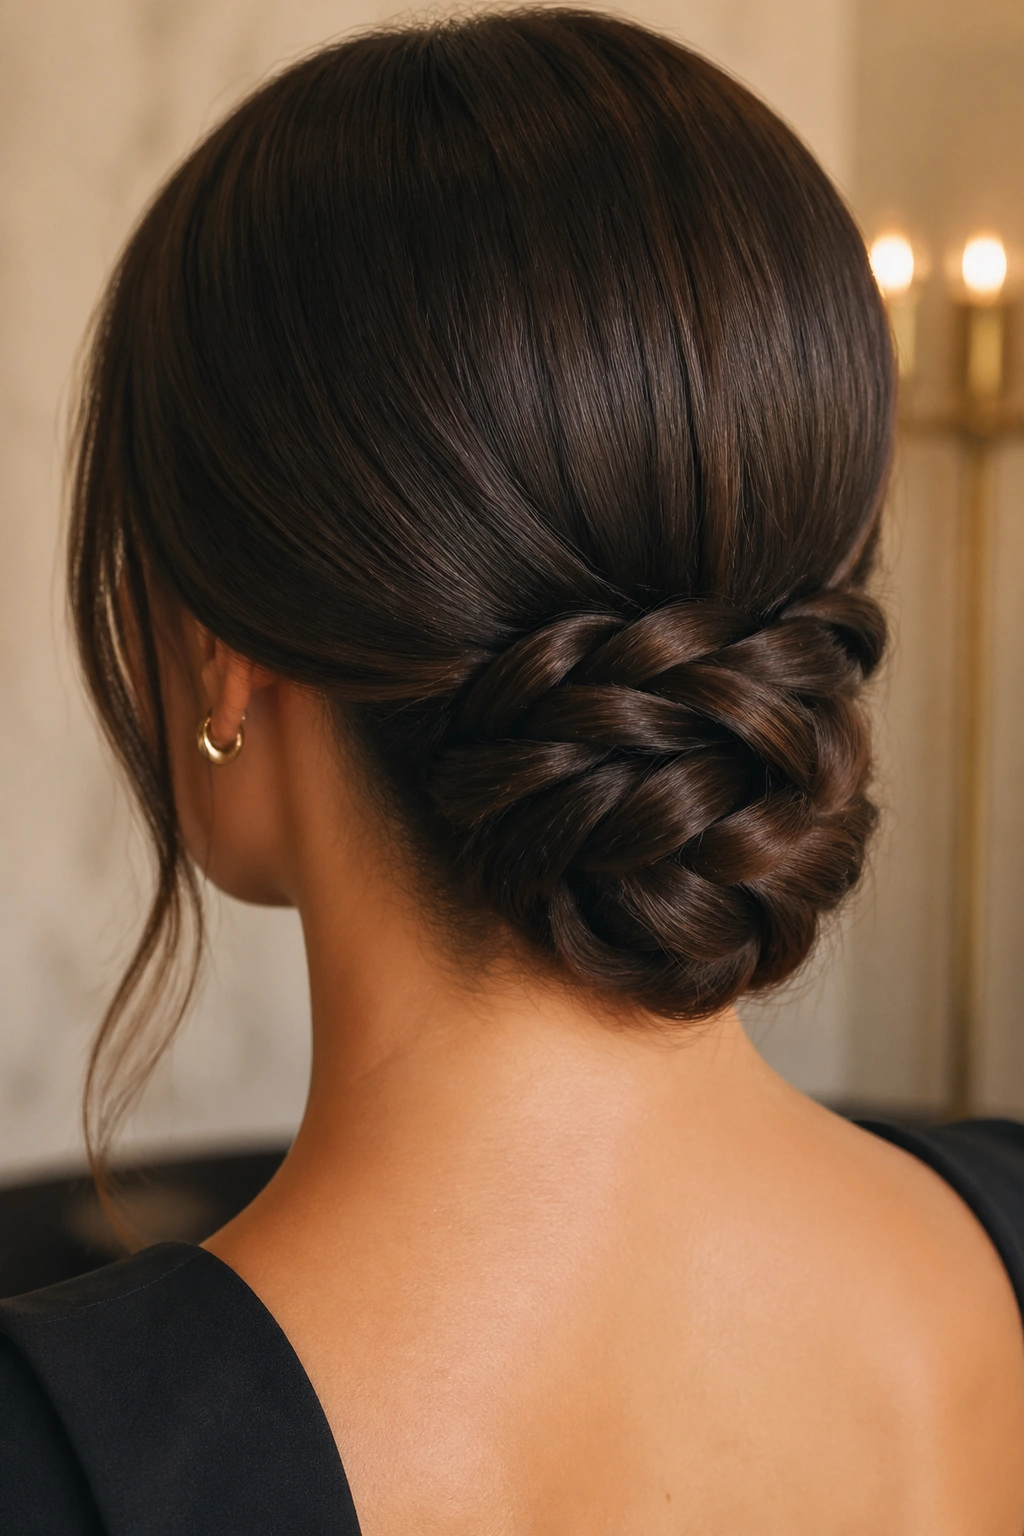
A rope braid chignon is what you wear when you want the bun to sit low, smooth, and a little more formal than the average twisted knot. It feels elegant without turning fussy, which is probably why this shape keeps showing up in events where people sit down, stand up, and hug a lot.
Does it need perfect hair? No. It needs control.
The chignon sits close to the nape and is usually tucked under rather than left as a round ball. Start with a low ponytail, twist it into a rope braid, then wrap the length upward and inward so the ends disappear into the roll. If your hair is long enough, you can fold the twist twice and still have enough length to hide the tips cleanly.
How to shape the roll
The secret is pinning in layers. Put one pin at the base, then one across the fold, then one on the far side of the roll so the bun does not rotate. Straight hair tends to slide because the strands are smooth, so the pins have to do more than just decorate.
A fine-tooth comb and a little styling balm are usually enough to smooth the top. I would skip heavy gel unless your hair is extremely flyaway. Gel can make the surface look too wet, and the chignon starts to lose that soft, expensive finish.
This is the version I’d reach for if you want the bun to disappear into the nape rather than call attention to itself.
9. Bubble Rope Braid Bun
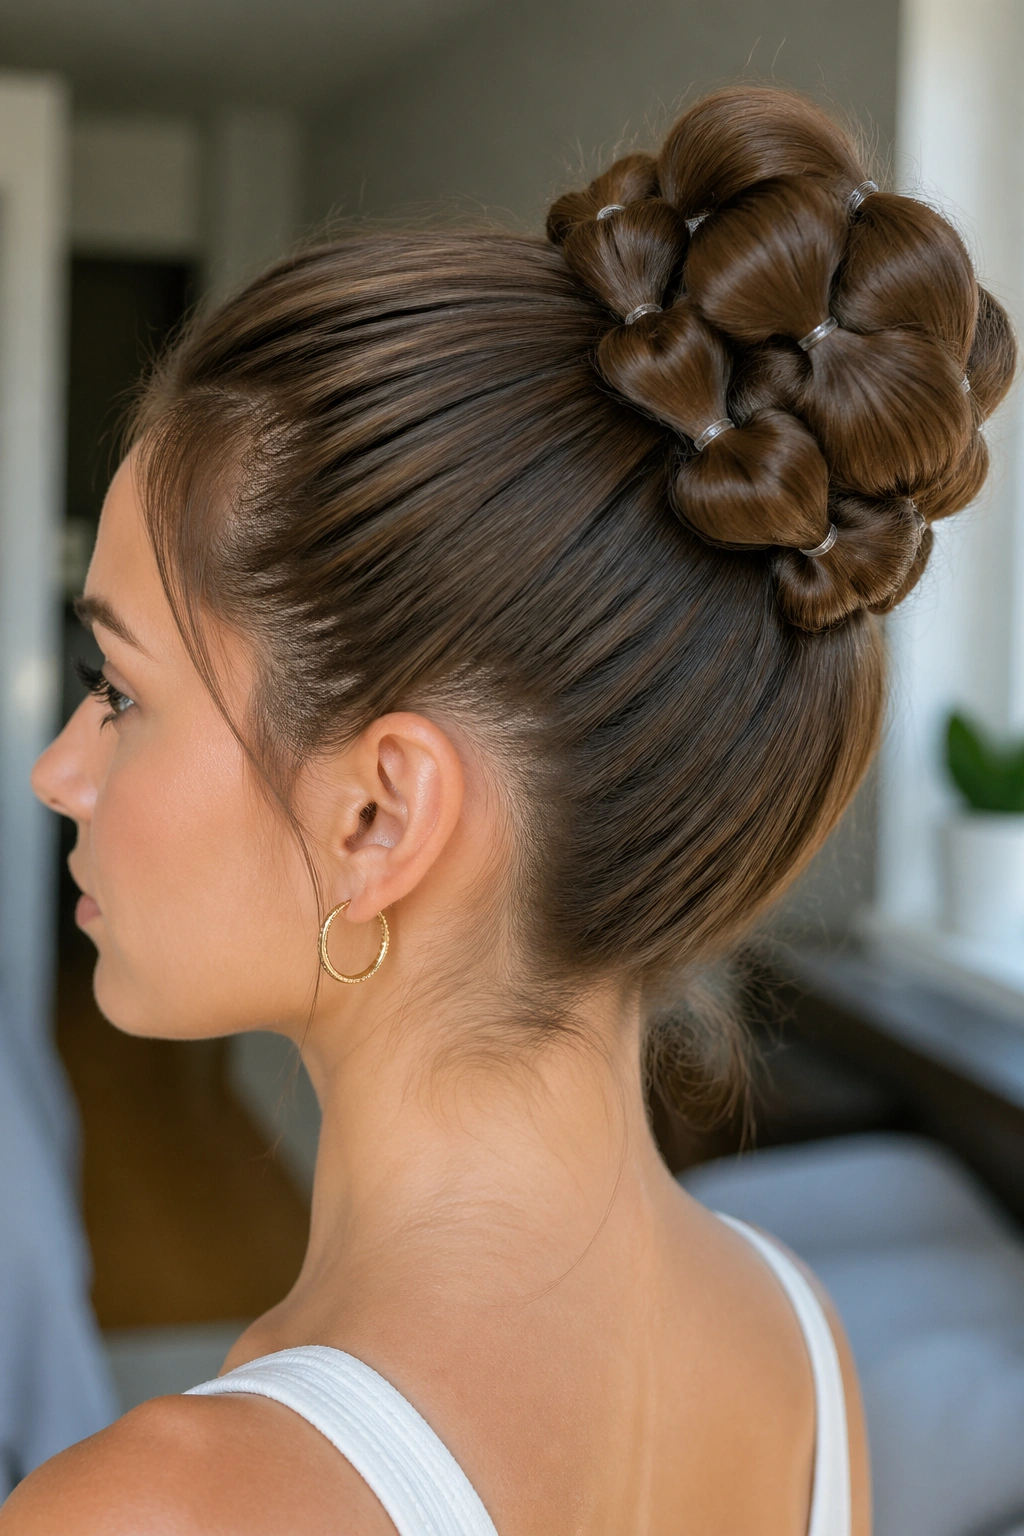
A bubble rope braid bun sounds playful because it is. It also gives pin-straight long hair a useful shortcut: you can create visible shape with elastics instead of depending on a braid that needs perfect tension.
Start with a ponytail, place small elastics every 1½ to 2 inches down the length, and gently pull each section outward so it puffs into a bubble. Then twist the bubbled length into a bun and pin it near the base. The bubbles stay visible enough to read as design, but the bun keeps the whole thing grounded.
This style works especially well on hair that is too slippery for a soft, loose braid. The elastics create stops in the hair, so the style holds better than you’d expect. It also gives fine straight hair a thicker look without teasing the roots into a frenzy.
Best elastic choice
Use tiny clear elastics or thin snag-free bands. Thick black office elastics tend to pinch the hair and show through the bubbles. If you’re worried about visible bands, wrap a small strand of hair around the first elastic at the base and pin the tail underneath.
A bubble rope braid bun looks best when the bubbles are uneven by a tiny amount. Not crooked. Just human. Perfectly identical bubbles can look stiff, while slight variation makes the style feel softer and more natural.
10. Rope Braid Space-Bun Hybrid
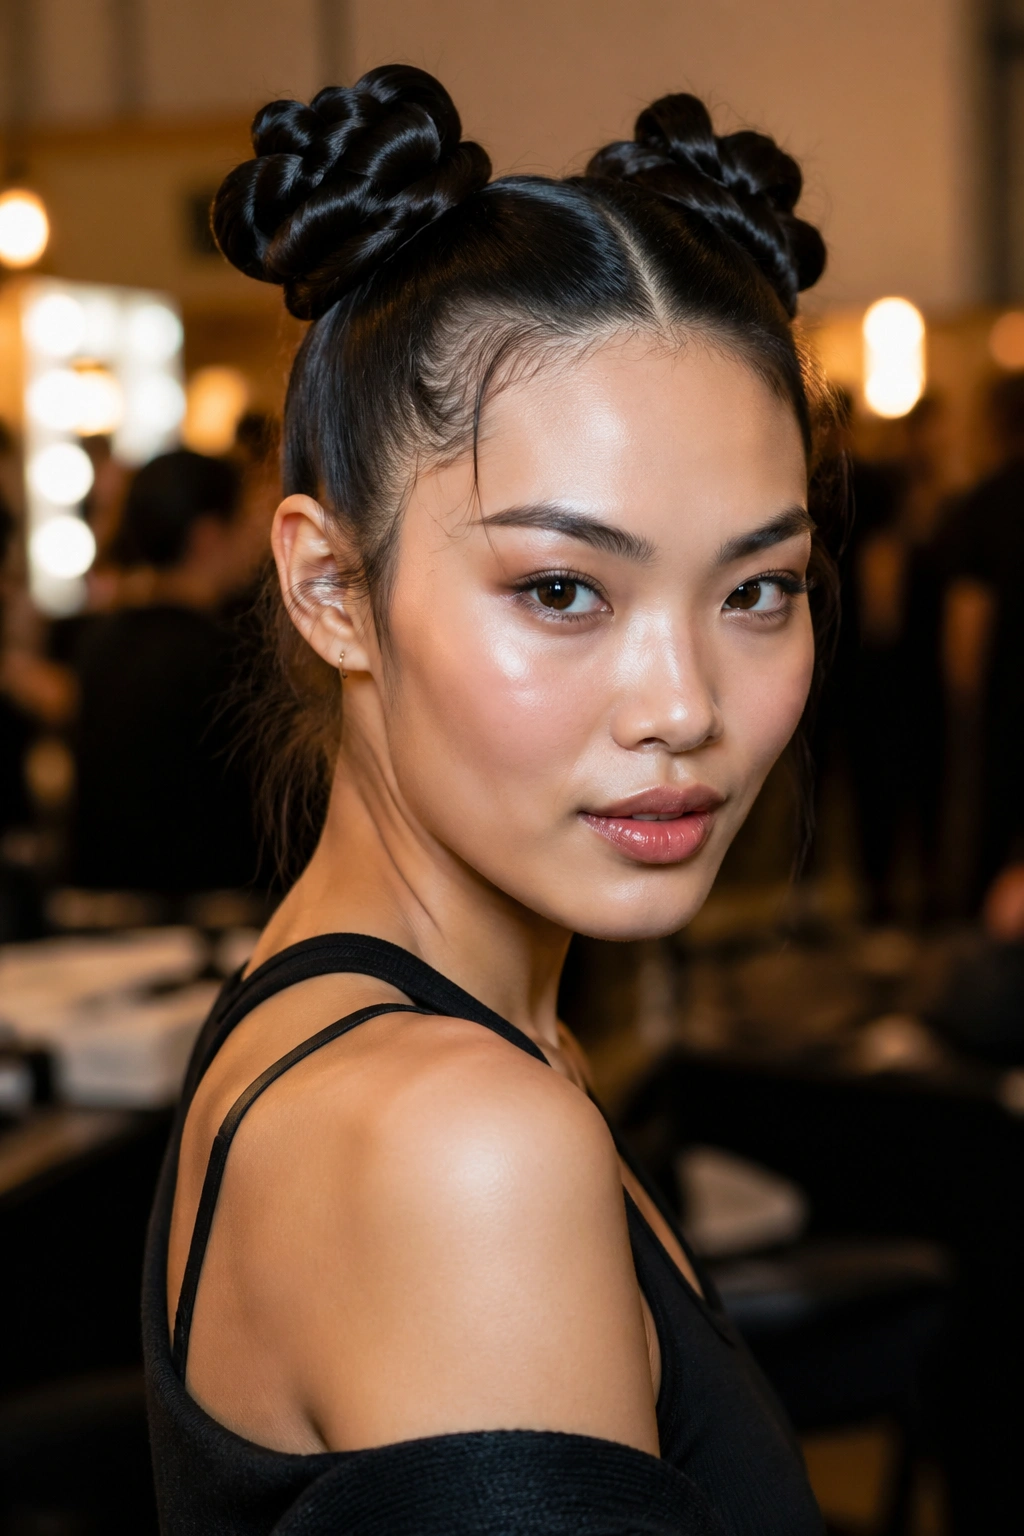
A space-bun hybrid is the playful cousin in this group. Instead of one single bun, you make two smaller rope braid buns high on the head, which breaks up the weight of long straight hair and keeps the style from feeling too heavy.
This version is especially good if your hair is long enough to pull down the sides of your face in a flat sheet. Two buns split the mass and give the hair some air. The rope braid base makes them sturdier than plain mini buns, which matters because pin-straight hair can slide out of smaller shapes fast.
Use a center part, divide the hair evenly, and make two high ponytails. Twist each one into a tight rope braid, coil each twist into a small bun, and pin it at the base with at least three pins per side. If the buns tilt outward too much, bring them a little closer to the head. Otherwise the style starts looking like costume hair instead of a real lived-in look.
- Best for concerts, casual weekends, or festival days
- Makes long hair feel lighter on the head
- Needs symmetrical placement to look balanced
- Works better with textured or slightly dirty hair than freshly washed hair
If you want the style to feel less youthful and more polished, keep the buns smaller and the parts cleaner. That one change shifts the whole mood.
11. Infinity Rope Braid Wrapped Bun
There’s something satisfying about a rope braid bun that looks more complicated than it is. The infinity version does exactly that by looping the twisted sections in a figure-eight pattern before you wrap them into the bun.
The shape has a little movement to it, which is useful for pin-straight long hair because straight strands can sometimes look too blunt when they’re only coiled once. The figure-eight softens that. It also gives you more places to hide pins.
What makes it different
Start with a low ponytail and split it into two sections. Twist them into a rope braid, but before wrapping the length into a bun, cross one loop over the other so the braid forms a loose infinity shape. Then tuck the loops into a compact knot and pin them where the crossing point sits. That crossing point is the whole charm. It’s the detail that makes the bun look thought through.
Keep the loops even enough that the shape reads cleanly, but do not obsess over perfect symmetry. If one side is slightly fuller, the style still works. It starts to look odd only when the loops are so tiny that the shape disappears.
How to keep the loops from slipping
Use a strong base elastic and pin through the center of the figure-eight first. After that, add pins at the outer edges to stop the loops from opening. Straight hair can unspool faster than you expect, so the first pin is doing real structural work here, not just decorating.
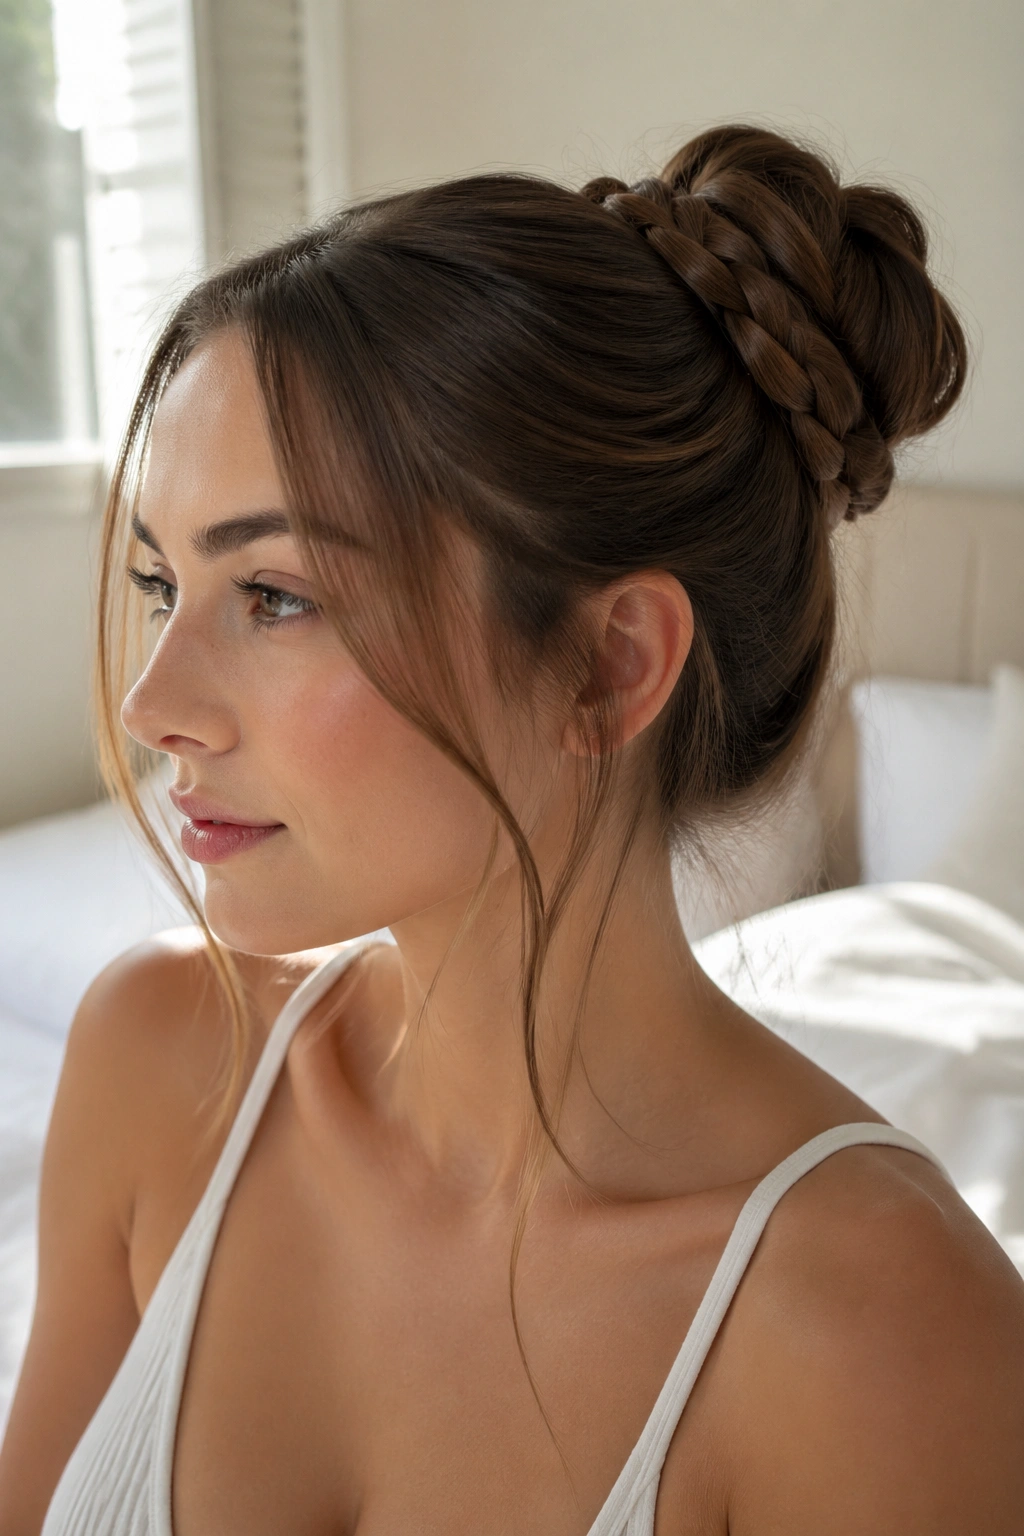
12. Half-Up Rope Braid Bun
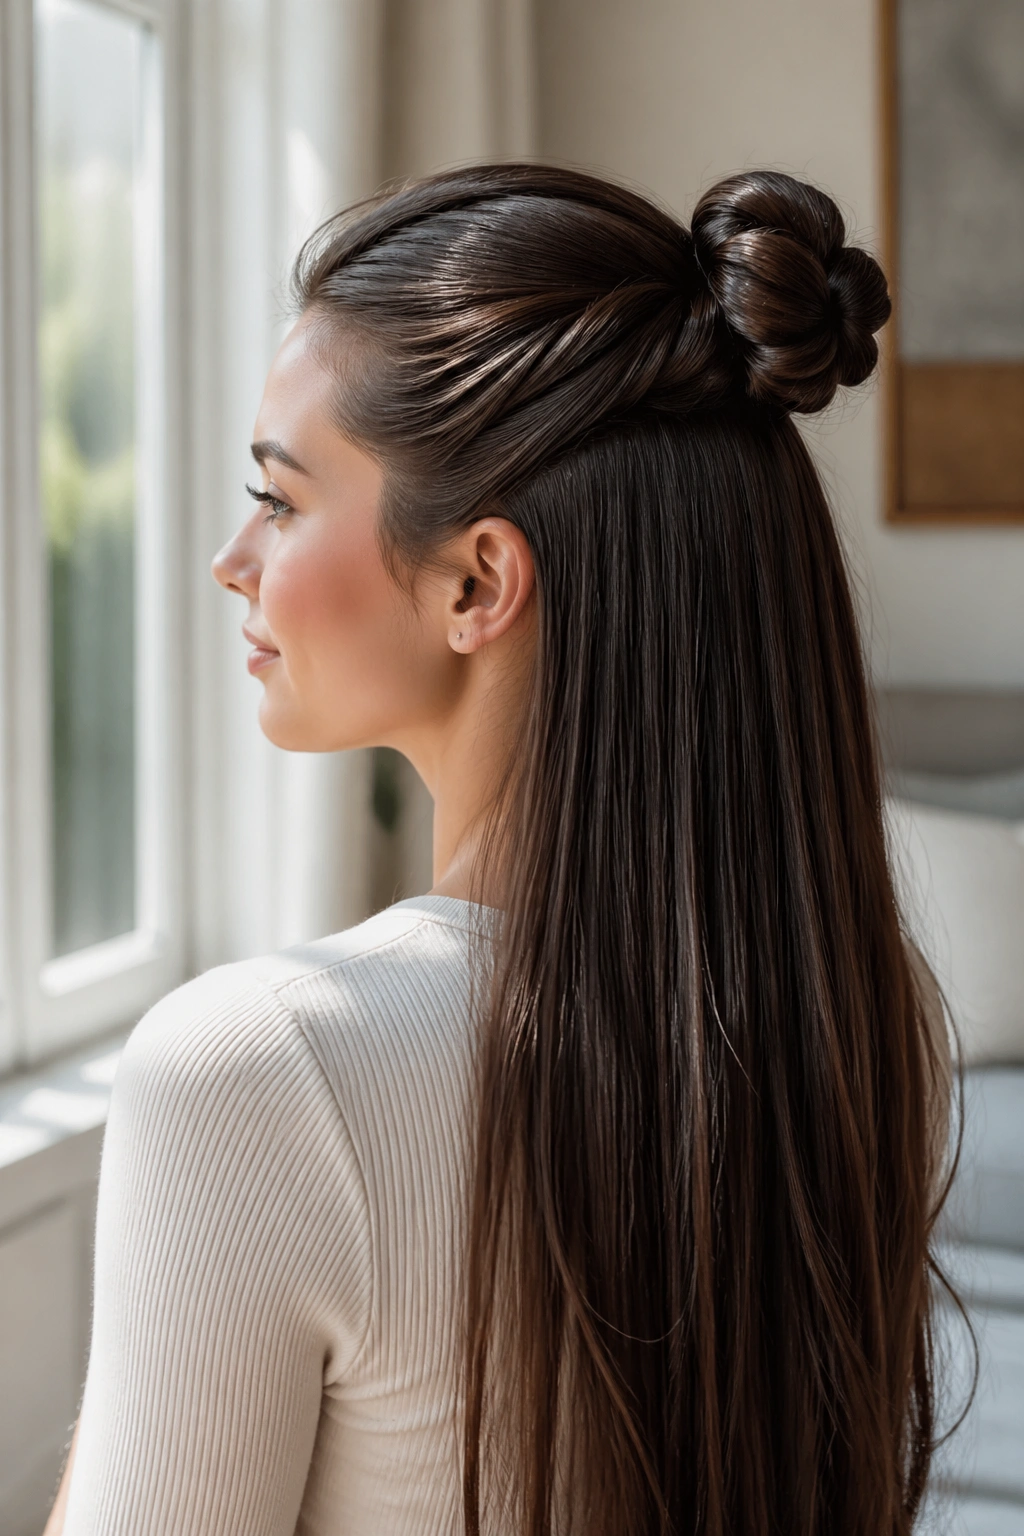
A half-up rope braid bun is a good answer when you want your hair off your face but you do not want to lose the length. It keeps the top section neat and leaves the rest of the hair down, which is useful when the ends are the best part of the look.
This is one of my favorite options for pin-straight long hair because it solves the “too much hair everywhere” problem without making the whole head feel pinned back. The top section holds the structure, and the rest stays loose and glossy underneath. It also gives the illusion of extra volume at the crown, since the top half is gathered and twisted.
Pull back the top third of the hair, leaving the lower section free. Split the gathered top section into two pieces, rope braid it, then coil it into a small bun at the back of the head. Secure the ends underneath so they don’t poke out. If the lower hair is blunt, a quick bend with a flat iron on the last inch can stop it from looking too sharp against the bun.
Some people like this style best with a tiny bit of texture at the temples. Others keep it dead smooth. Both versions work. The difference is mood, not technique.
13. Wrapped Finish Bun
The wrapped finish bun is the version I’d save for the days when you need the hairstyle to stay in place and look finished from every angle. It uses a rope braid as the base, then wraps a second strand or section around the bun to hide the elastic and lock the shape in.
That extra wrap makes a real difference on pin-straight long hair. Smooth hair has a way of revealing every anchor point if you let it, and this style hides the practical stuff under a clean outer layer. It also makes the bun look thicker without making it messy.
Start with a low or mid ponytail, twist it into a rope braid, then coil it into a bun. Take a thin section from underneath or use the leftover tail to wrap around the base once more, covering the elastic completely. Pin the wrap at the underside so the front of the bun stays clean. If the hair is silky, a tiny bit of spray on the wrapping section helps the strand grip better before you pin it.
The best part is how forgiving this style is. If your bun feels too small, add a second wrap. If it feels too big, flatten the coil slightly with your palm before the final pin. Straight hair tends to tell on sloppy work, but it also rewards careful work fast.
Pick the bun that matches the day, not the fantasy. A low wrap for meetings. A high topknot when you want lift. A loose face-framing version when you want softness. That’s the whole charm of rope braid buns for pin-straight long hair: they give you structure without making the hair lose its shine.