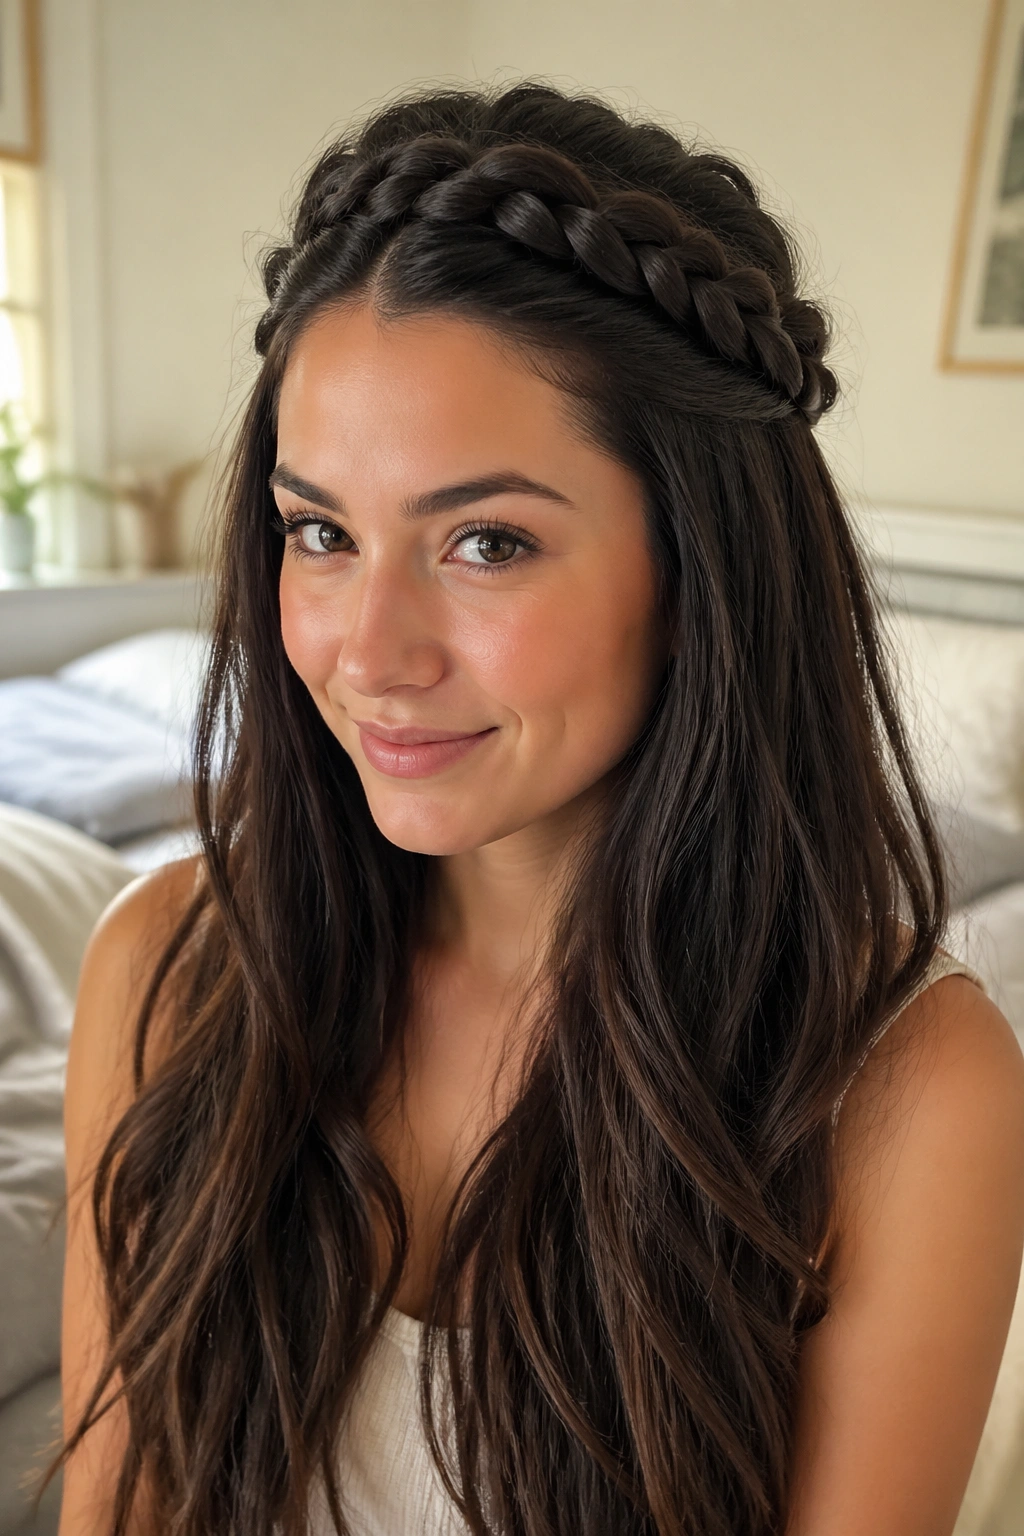
Hair that reaches the waist changes the rules. A braid that looks tidy on shoulder-length hair can turn into a heavy rope, a fuzzy curtain, or a sagging knot once there’s this much length to work with.
That’s exactly why pancake braids are such a smart move. You are not just braiding; you’re shaping the braid after it’s built, gently pulling the outer loops wider so the whole thing reads as thick, clean, and intentional instead of thin and stringy. On waist-length hair, that extra width matters. A lot.
There’s also a catch that people learn the hard way: long hair can handle drama, but it punishes sloppy sectioning. If your part is crooked, your tension changes halfway down, or you pancake too aggressively before the braid is anchored, the style can puff in the wrong places and collapse in others. The good news is that a few small habits fix most of that. A rat-tail comb, clear elastics, and a light mist of texture spray do more work than people expect.
Some of the best-looking pancake braids on very long hair are not the most complicated ones. They’re the styles that use the length on purpose — a braid draped over one shoulder, a crown braid that wraps around the head, a half-up braid that leaves the rest of the hair loose and glossy. The shape matters. So does the finish. And long hair gives you room to play with both.
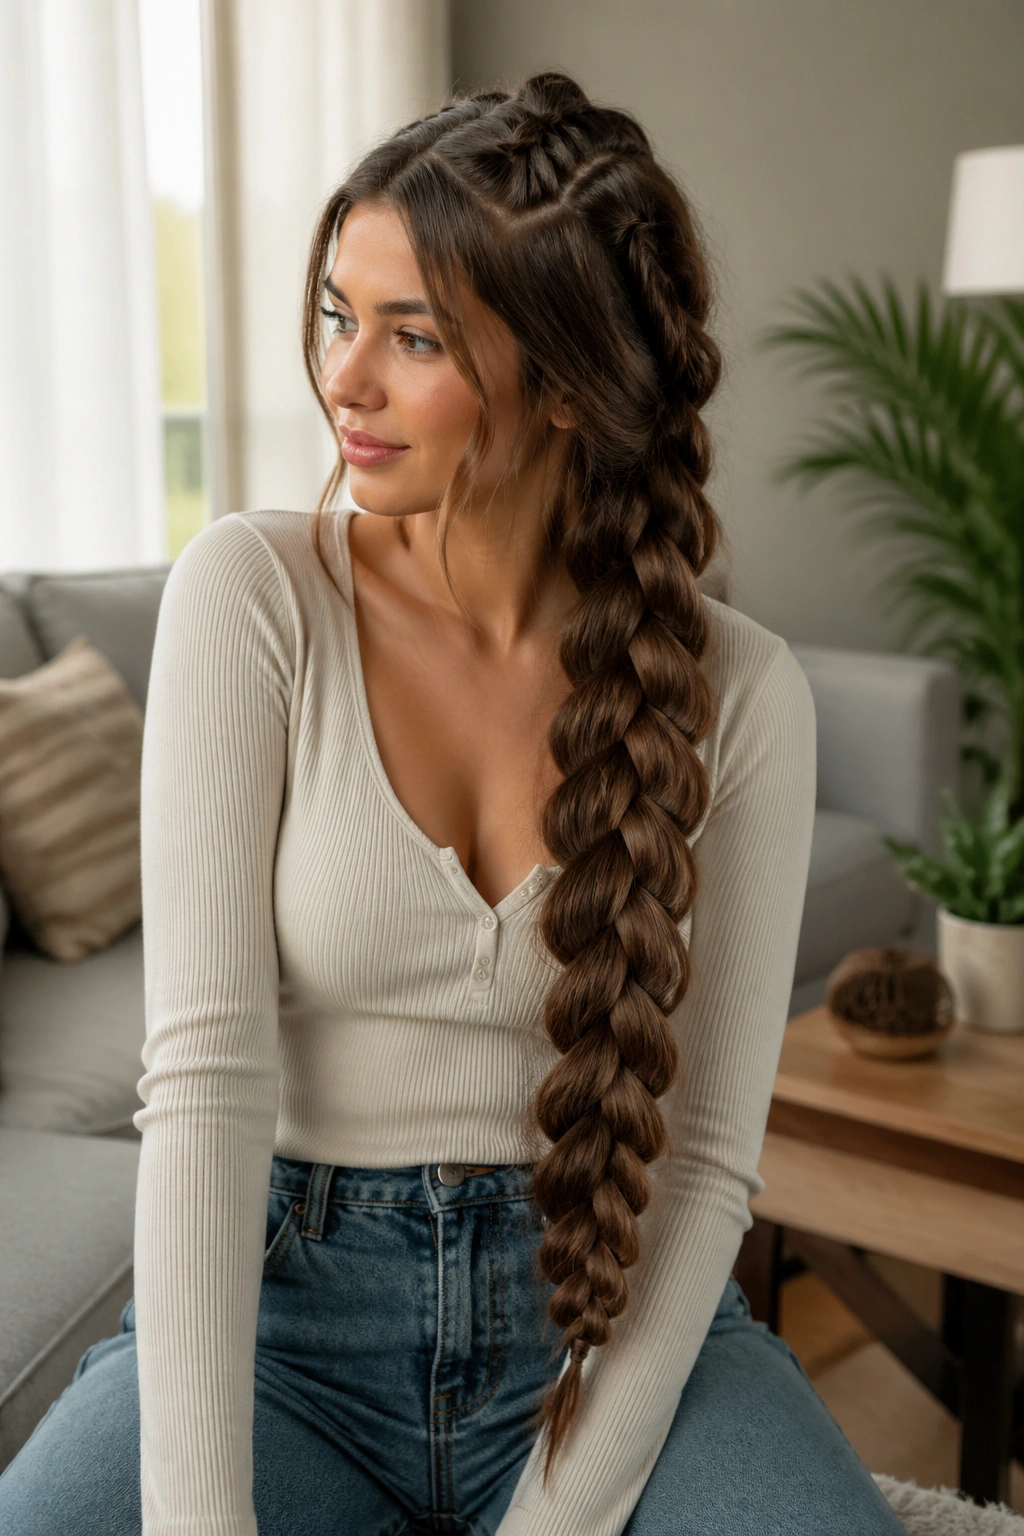
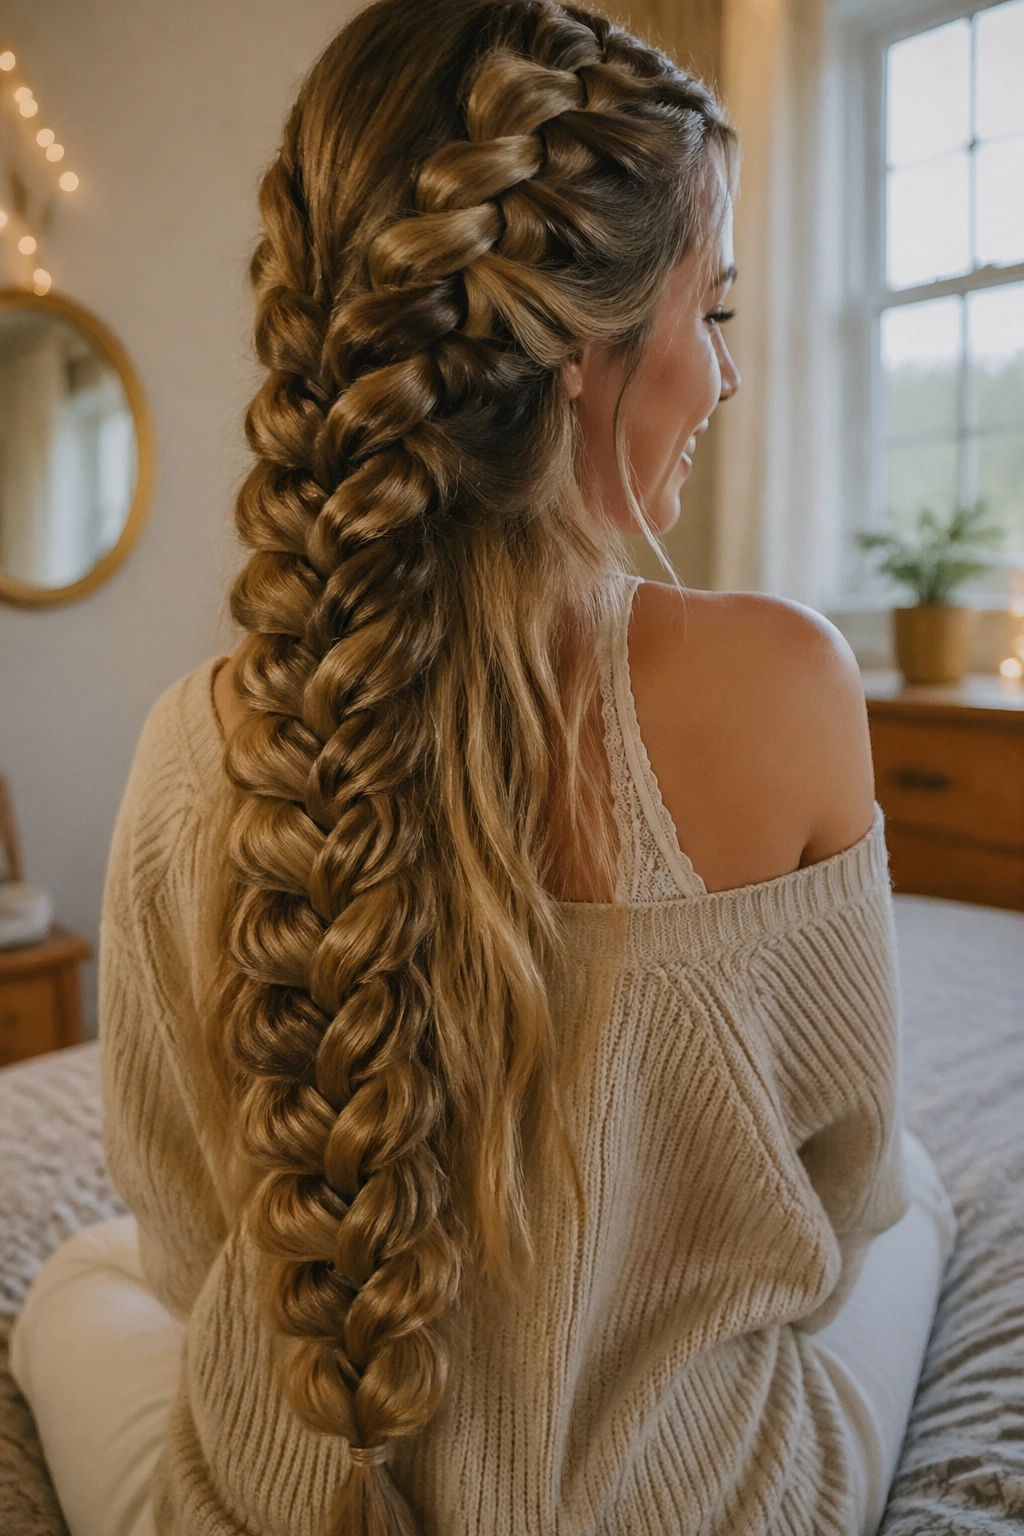
1. The Classic Center-Back Pancake Braid
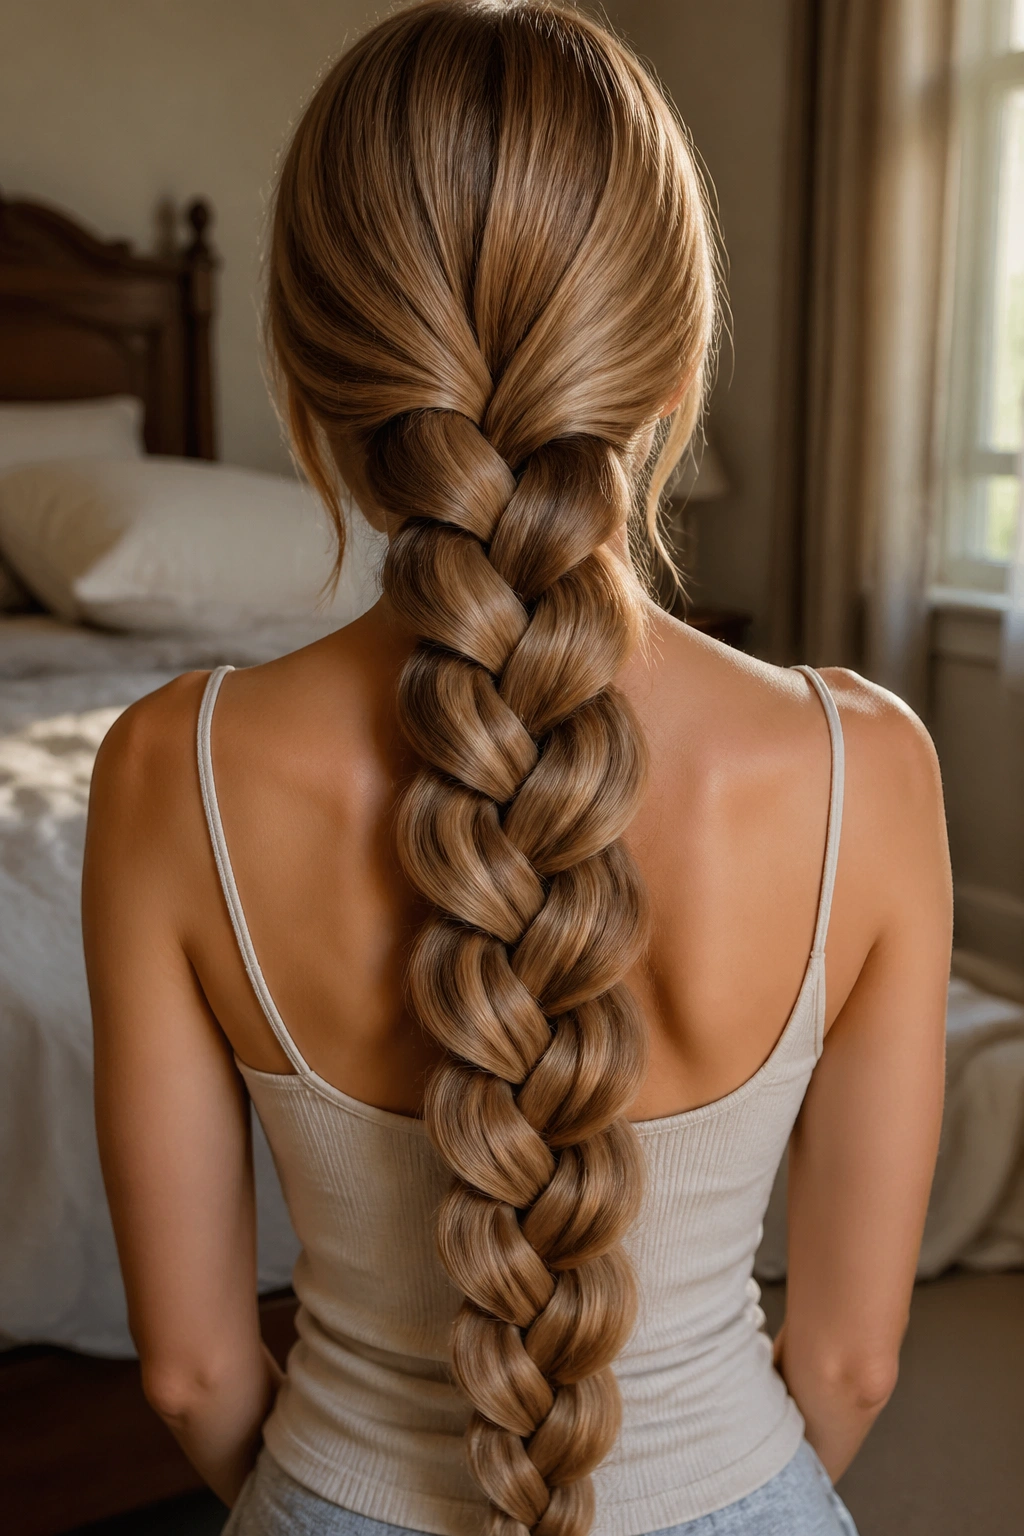
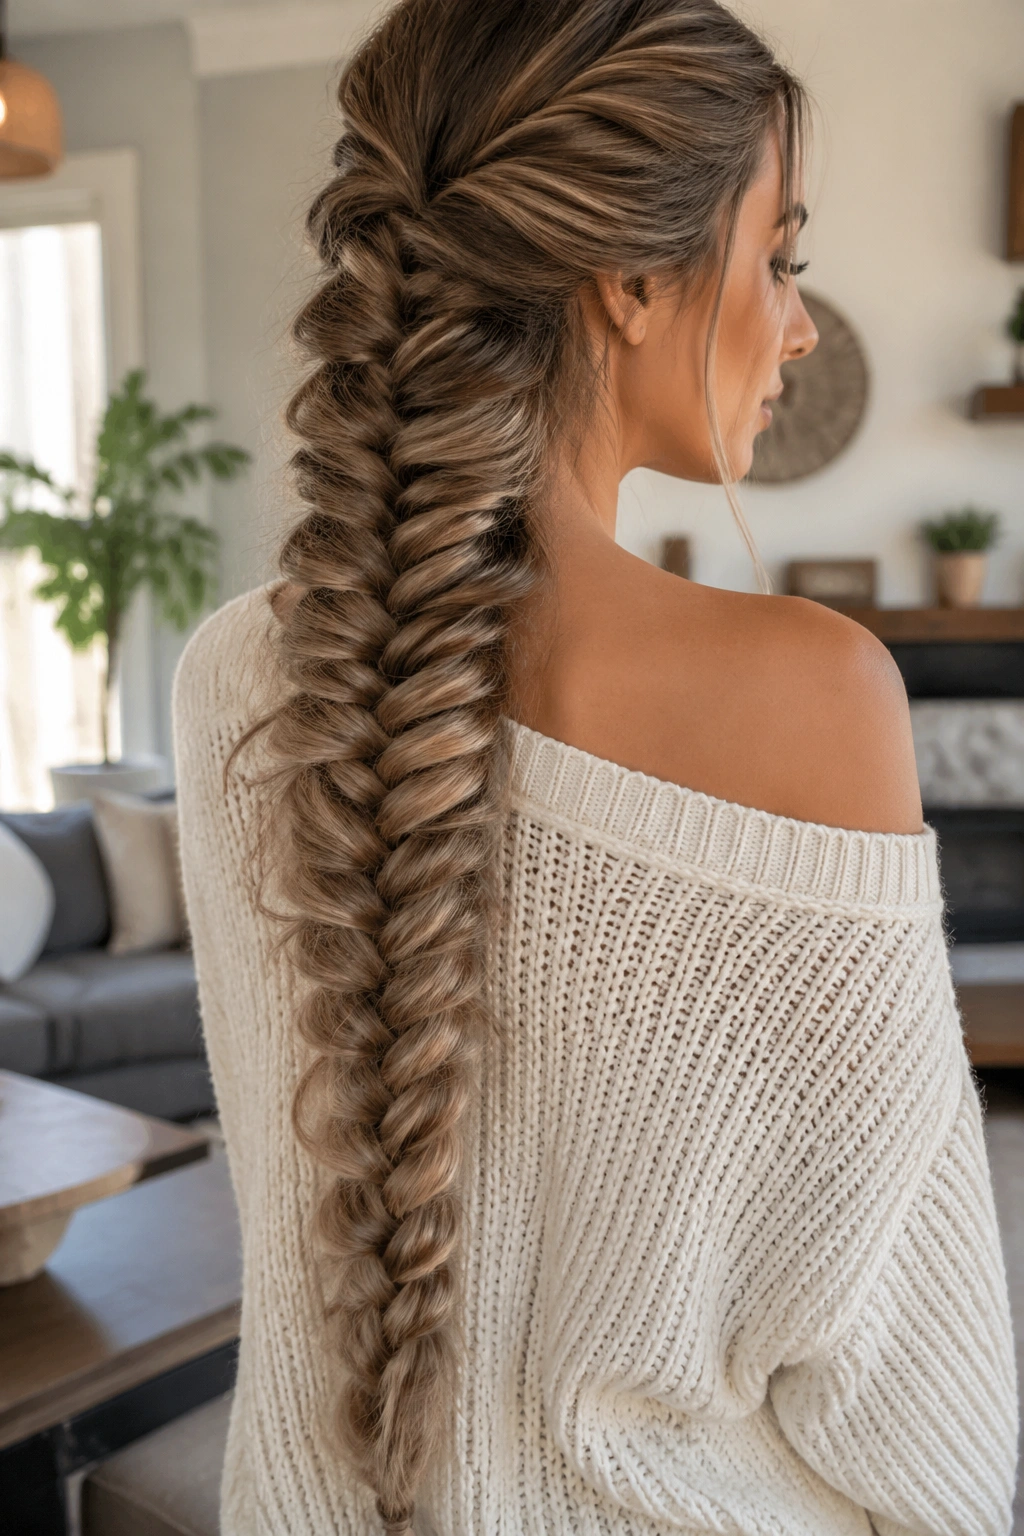
This is the braid I reach for when I want the length to do the talking. A center-back pancake braid starts at the nape, runs straight down the back, and gets wider with every gentle pull on the outer edges. On waist-length hair, it looks especially good because the braid doesn’t disappear into the hair mass; it becomes the main event.
Why It Works on Waist-Length Hair
The long drop gives the braid room to breathe. If your hair reaches your waist, even a simple three-strand braid can look dense and elegant once you pancake the loops out by about 1/4 inch to 1/2 inch per side.
The trick is to keep the top snug and the lower half a little softer. That contrast keeps the style from looking puffy at the crown and flat at the end. I like a low starting point and a finish that tapers naturally, not one that gets stretched so much it turns lumpy.
How to Keep the Width Even
- Start with a clean center part or skip the part entirely and smooth the hair back with a brush.
- Secure the braid tightly at the nape before you pancake anything.
- Pull only the outer loops, working from the top down so the braid keeps its shape.
- Stop widening before the very last 4 to 6 inches, or the tail can start to look frayed.
- Finish with a light mist of hairspray and smooth the flyaways with a pea-sized amount of styling cream.
Best tip: pancake with your thumbs and index fingers, not your whole hand. You get more control that way, and the braid stays even instead of ballooning in random spots.
2. The Side-Swept Shoulder Pancake Braid
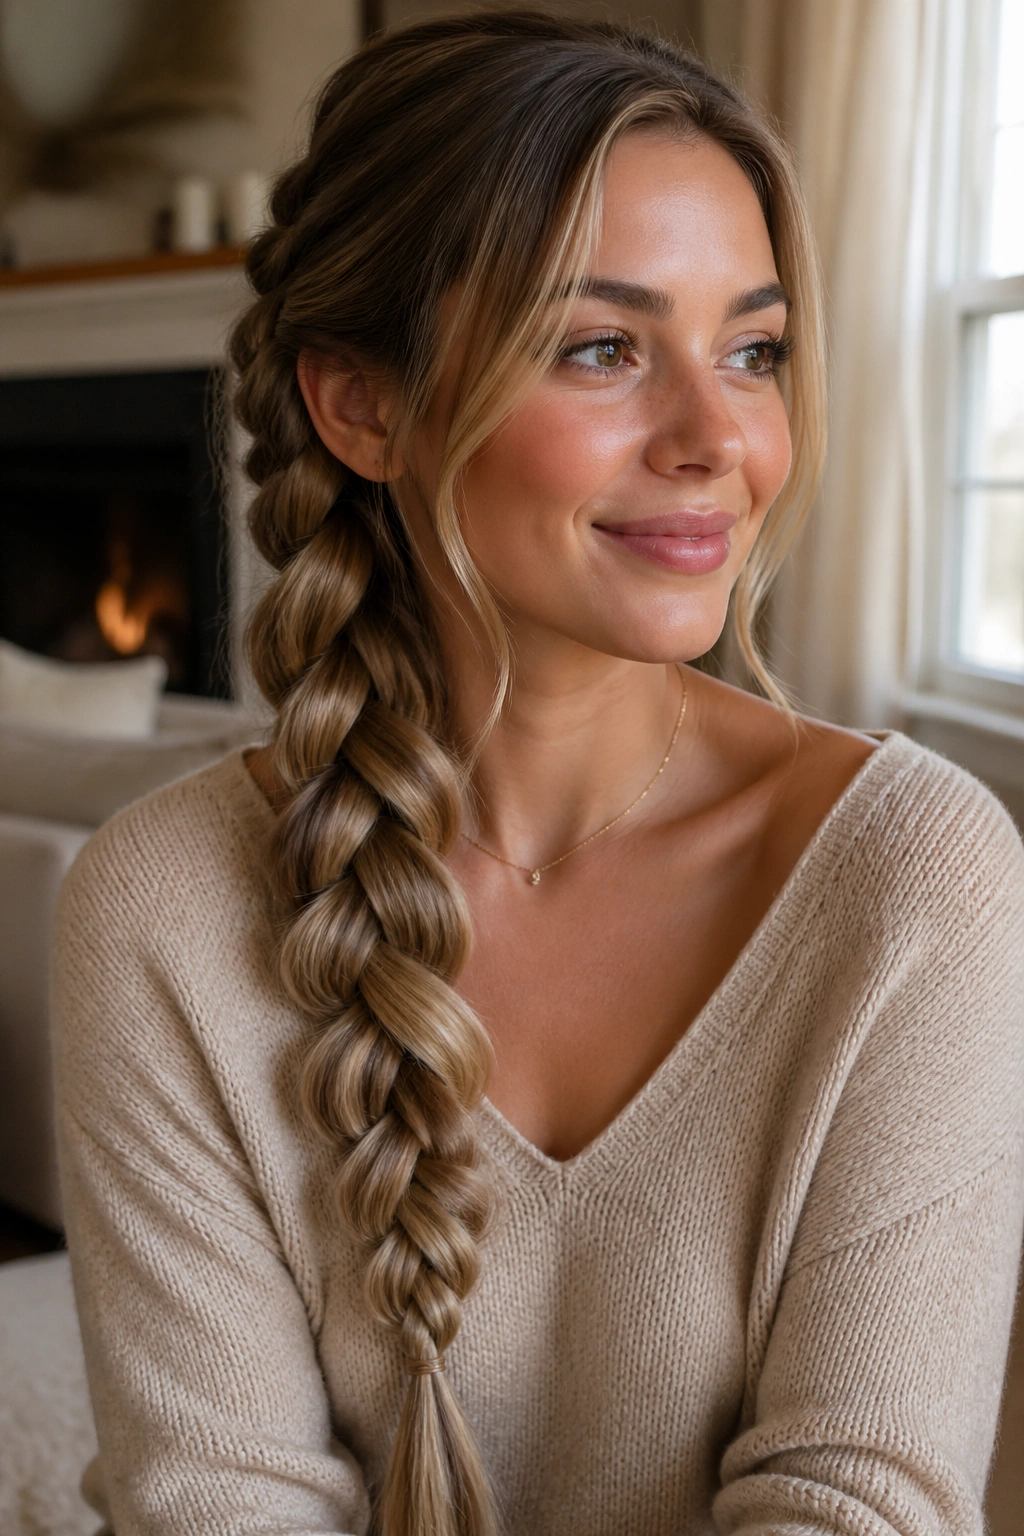
A side braid is the easiest way to make waist-length hair feel deliberate instead of heavy. Toss the braid over one shoulder and you get instant shape, plus a little movement at the collarbone that a back braid can’t give you.
Gravity does half the work.
The best version starts just behind one ear or slightly lower at the nape, then drapes forward in a loose line. Pancake the outer edges more on the visible side than the underside; that’s the part people see, and it keeps the braid looking full from the front. If your hair is thick, a side braid can feel bulky unless you keep the sectioning tidy at the root.
This style works especially well when the lengths are all one shade, because the widened braid shows off the texture better. If your hair has layers, tuck the shorter pieces into the first few crossover points and smooth them with a bit of pomade. Otherwise they’ll poke out and fray at the sides.
A side-swept pancake braid is also forgiving. You can loosen it a little for a softer look or keep it tighter for a cleaner line, and neither choice feels out of place. That’s useful on long hair, where the style can go formal or casual fast.
3. Twin Pancaked Dutch Braids
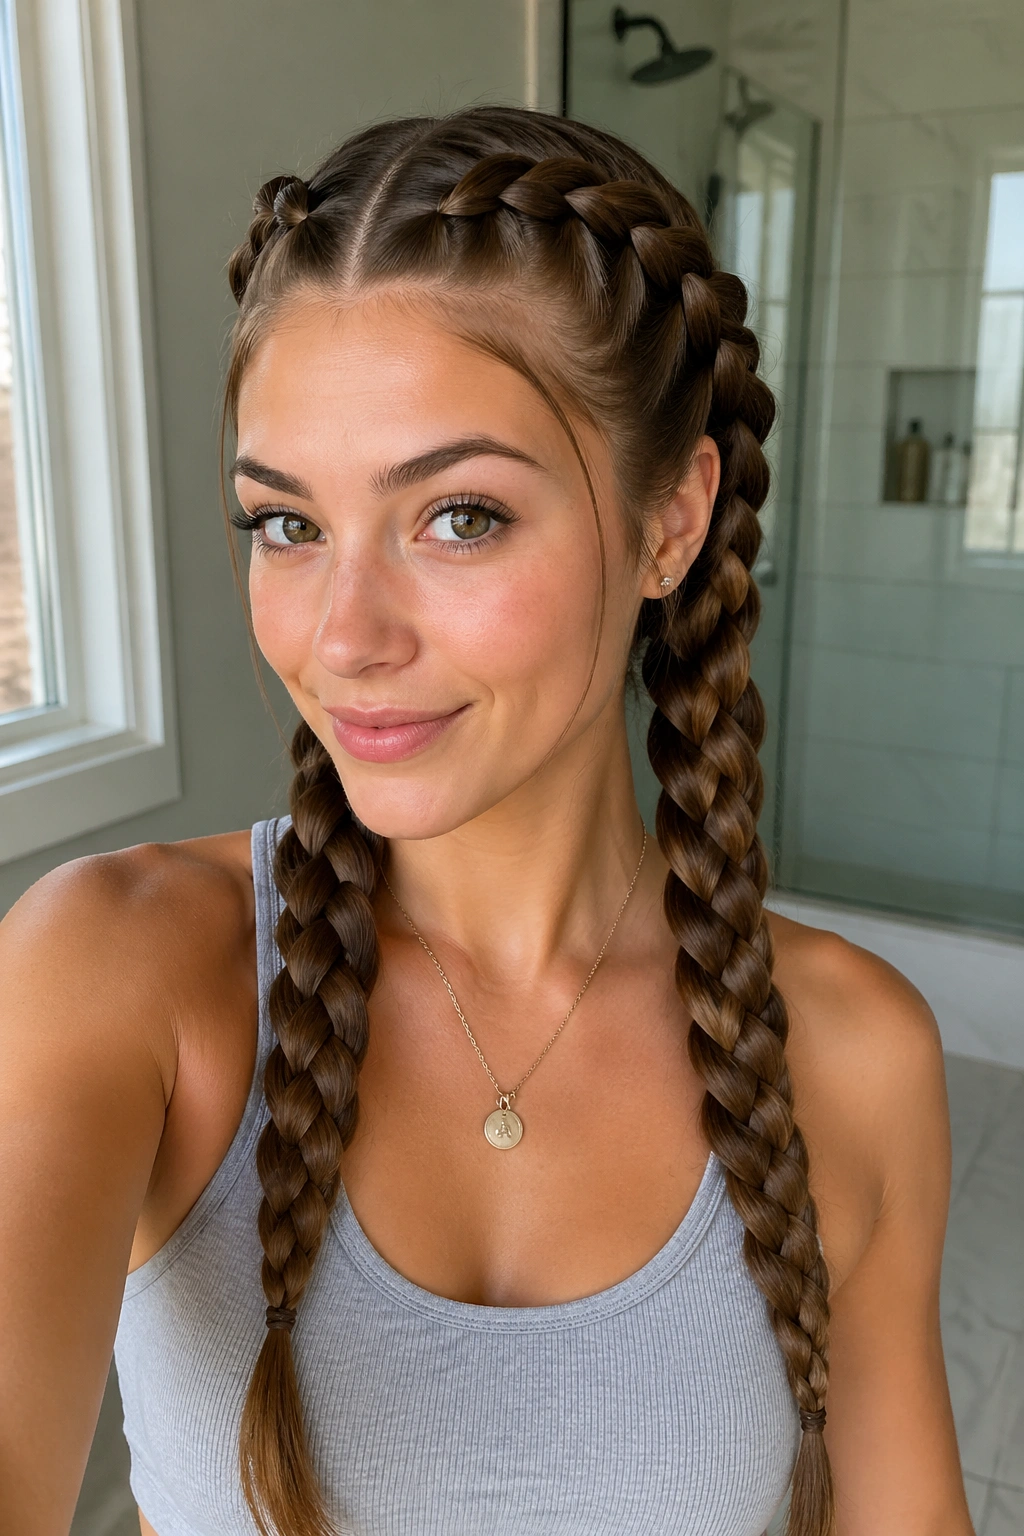
Want a style that stays put and still gives you width? Twin Dutch braids are hard to beat. They sit close to the scalp, spread the hair evenly down both sides, and look especially sharp once you pancake the outer ridges.
What Makes Them Different
Dutch braids flip under instead of over, which makes them stand out from the head. On waist-length hair, that raised shape gives the braids enough presence to hold their own against all that length. When you pancake them, they get broader without losing that lifted look.
They also solve a common long-hair problem: weight. One giant braid can tug. Two braids split the load and feel easier to wear for a full day.
How to Wear Them Without Looking Too Tight
- Part the hair down the middle with the tail of a comb.
- Start each braid at the hairline, not too far back, or the style can read as flat.
- Keep your crossover tension even on both sides.
- Pancake the outer loops after each braid is finished, then gently tug the lower half a second time.
- Leave the ends either braided through to the tips or tied into small elastics for a cleaner finish.
If you want a little softness, pull out a few thin face-framing strands and curl them away from the face. If you want the braids to look crisp, skip that entirely. Either way, the symmetry is the point.
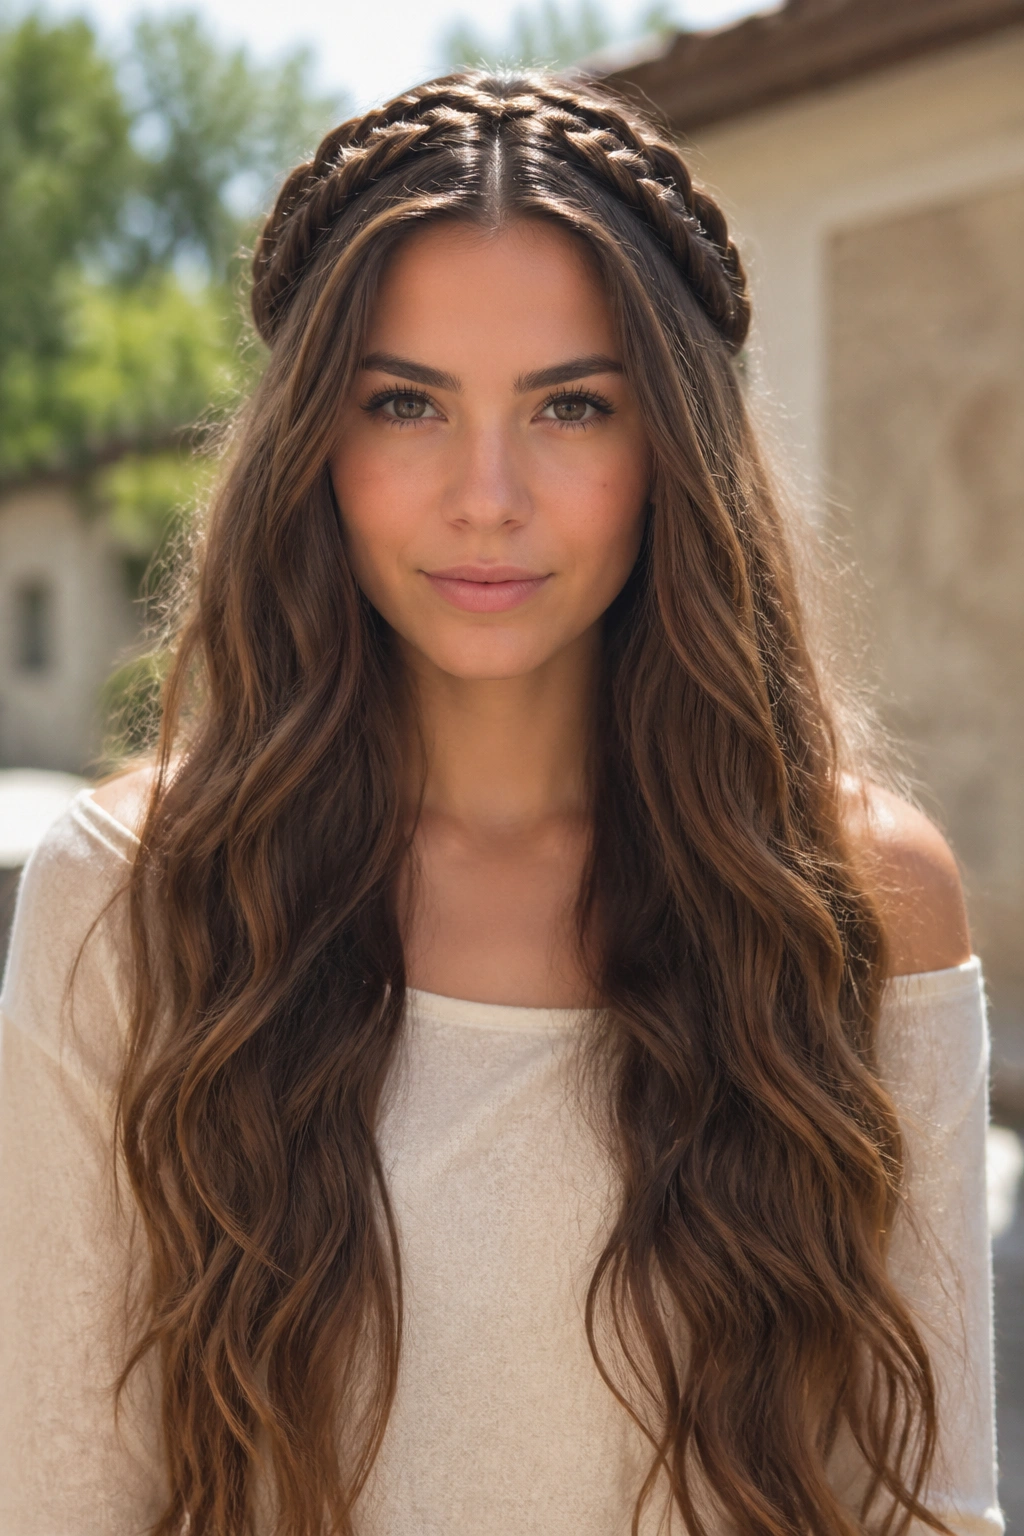
4. The Halo Pancake Braid
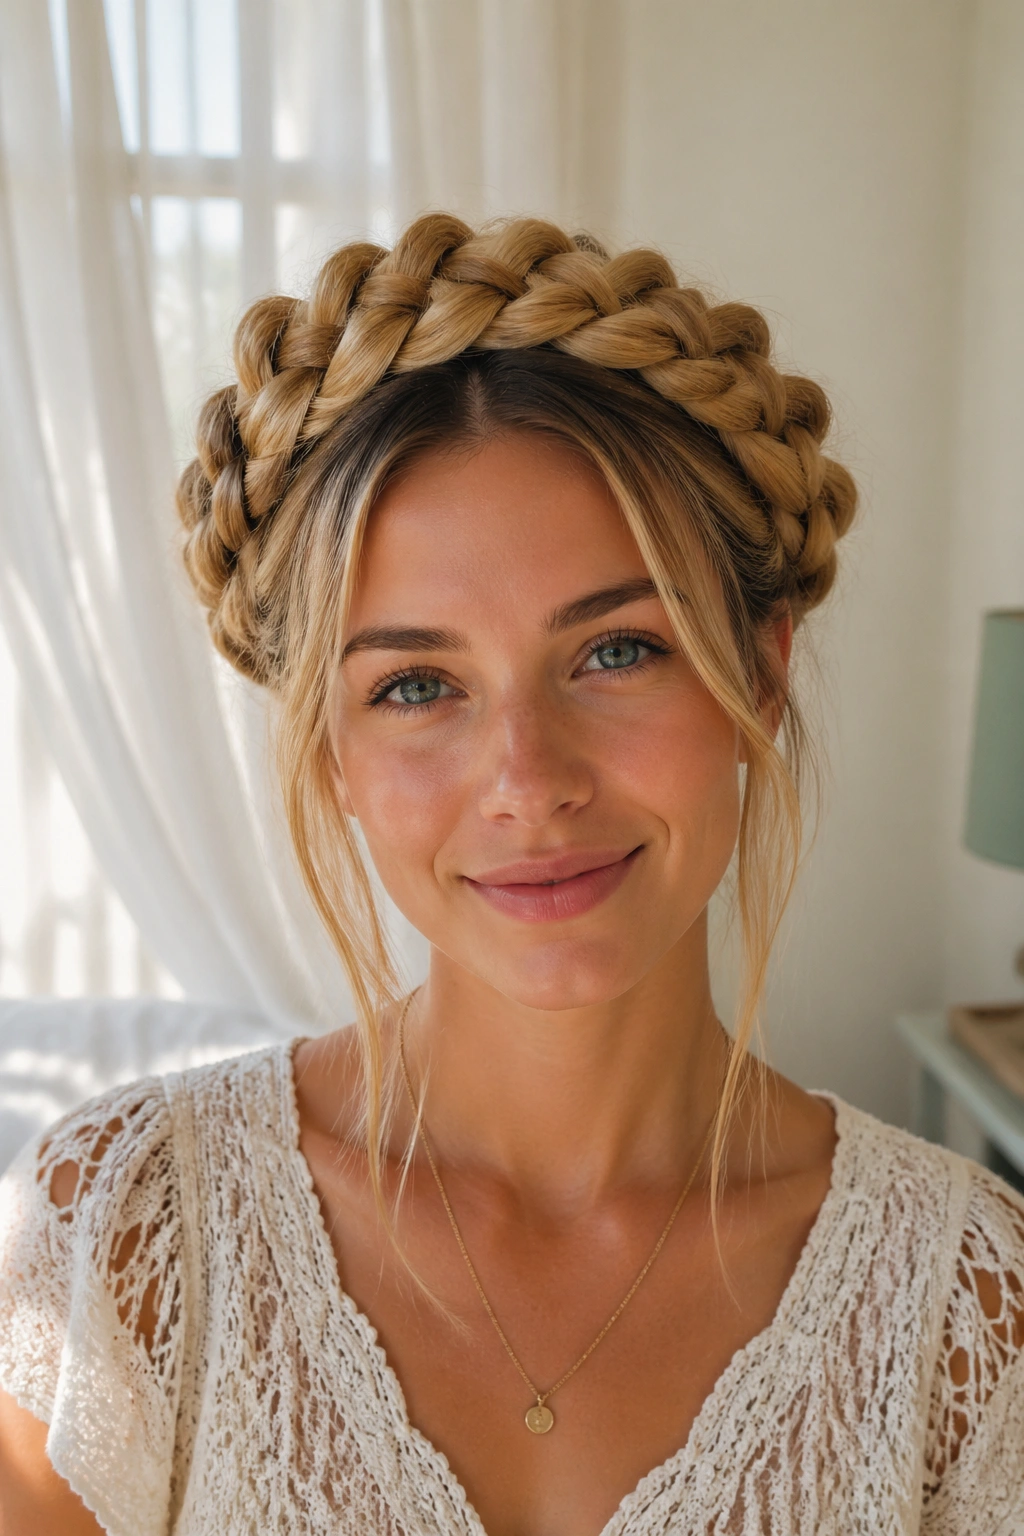
A halo braid is what you wear when you want the hair off your neck but still visible from every angle. Wrapped around the head and pancaked into a wide band, it turns long hair into something sculptural without making it feel stiff.
The style does take patience. Waist-length hair has enough bulk that the braid can start to feel like a rope while you’re moving it around the crown. The answer is to braid in a smooth arc from one side of the head to the other, pinning as you go instead of waiting until the end. Small U-pins every 1 to 2 inches keep the weight from sliding.
One thing I love about this version is that the pancaking doesn’t need to be perfect. A halo braid looks better when the braid has a little texture and the outer edges are broad enough to catch the eye. If it’s pulled too flat, it can look severe. Too loose, and it falls apart. Right in the middle is the sweet spot.
The ends usually tuck under the braid or hide behind the ear, which means the long lengths do not need to be fully contained. That makes the style easier than it looks. You get the frame around the face, the braid wrapped like a crown, and the rest of the hair managed instead of fighting the shape.
5. The Fishtail Pancake Braid
A fishtail braid has a finer, more detailed texture than a standard three-strand braid, and pancaking it gives the whole thing a wide, woven look that reads beautifully on long hair. The pattern becomes visible fast, which is why this one is such a good match for waist-length lengths.
What Makes It Different
Unlike a regular braid, a fishtail uses two main sections and tiny pieces from the outside edges. That tighter pattern means the pancaked shape can look almost like lace if you pull it out slowly and evenly. It’s one of those styles that looks fussy until you realize it’s really just repetition and patience.
How to Get the Most From It
- Divide the hair into two equal sections before you start.
- Take small pieces, about 1/4 inch wide, from the outside of each section.
- Keep the first few inches snug so the braid has a strong base.
- Pancake each side in short, careful pulls rather than one big tug.
- Stop widening near the bottom if the tail starts to lose definition.
A fishtail can get fuzzy fast on very dry hair, so I like a tiny amount of smoothing cream on the hands before braiding. Not much. Just enough to keep the strands from sticking up. On waist-length hair, the braid often ends up long enough to reach below the shoulder blades, which gives you a clean runway of texture. That extra length is part of the appeal.
6. The Half-Up Crown Pancake Braid
If you want your hair down but still want the braid to feel like a feature, this is the one. A half-up crown braid pulls the front and side sections back, then pancakes them wide so the braid sits like a band across the top of the head while the rest of the hair falls loose.
The contrast is what makes it work. The braid gives shape, and the loose length keeps the look from feeling too severe. On waist-length hair, the open back section also helps show off the full drop, which is half the point of having hair this long in the first place.
This is a strong choice for days when you want your hair away from your face without tying up the whole length. It also works well if the bottom layers are a little more lived-in than the top. The braid distracts from any small rough patches underneath.
The nicest version uses a braid that starts at one temple, curves back across the crown, and pins just behind the opposite ear. Pancake the outer edge that faces outward, then tuck the hidden side tighter against the head. That keeps the shape visible from the front while making the pinning area neat and secure.
7. The Pancaked Dutch Braid into a Low Bun
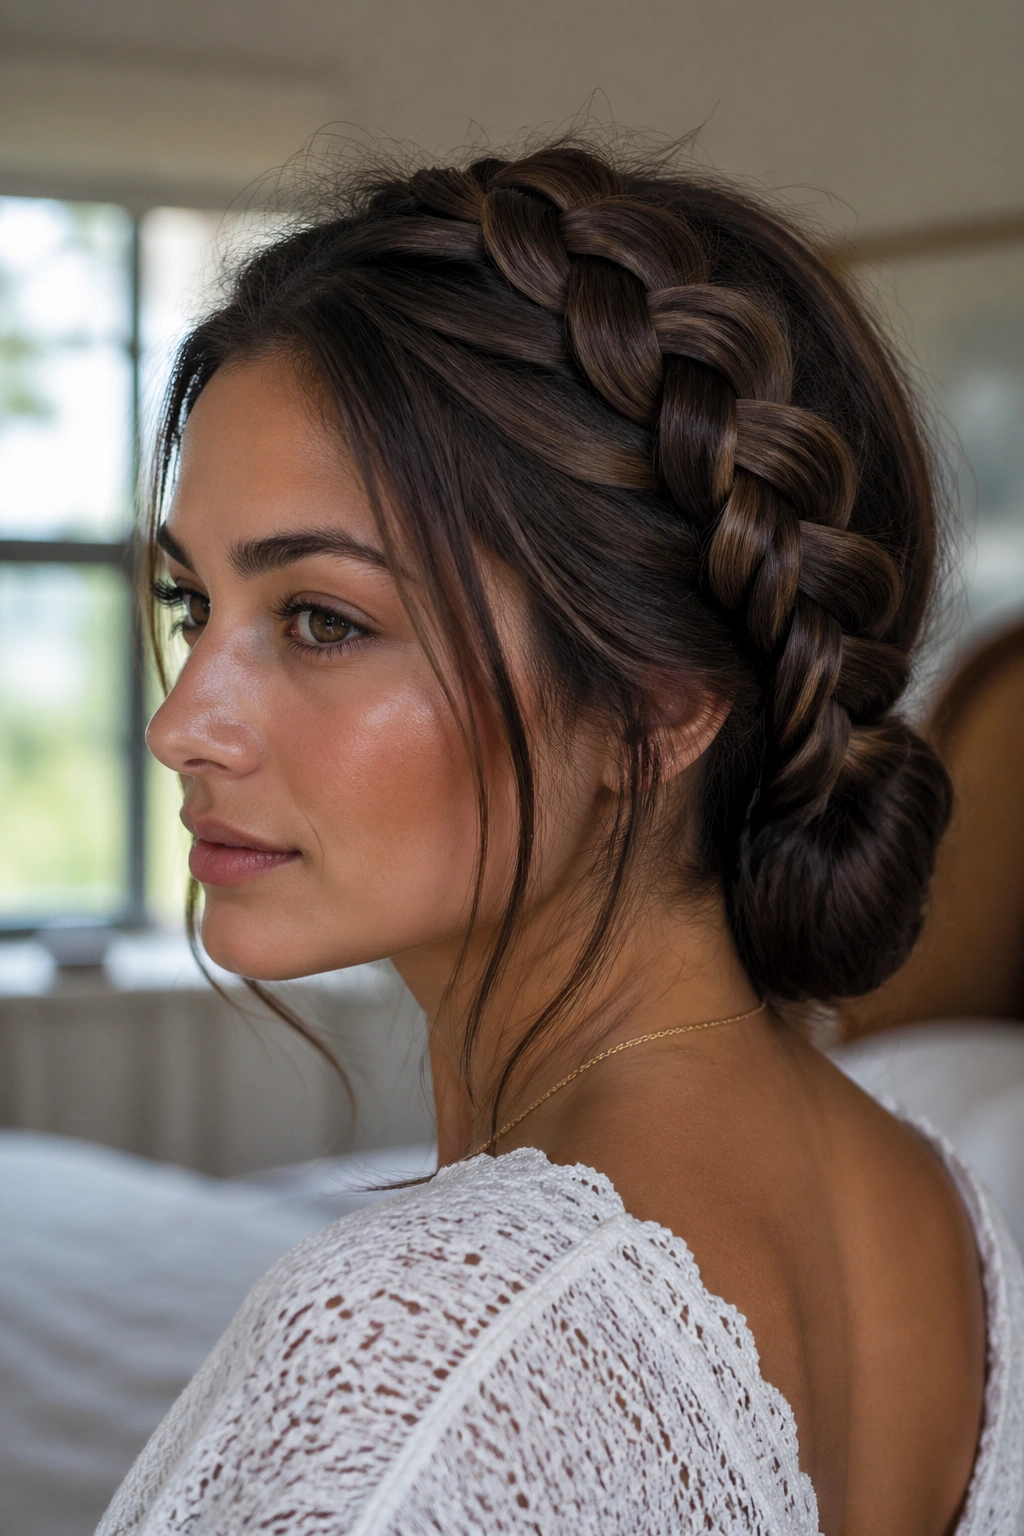
What if you want braid volume and a tidy finish in one move? A Dutch braid that ends in a low bun is a smart answer. The braid creates structure on top, then the bun gathers the remaining length into a compact shape at the nape.
This style is excellent for long hair because it handles weight instead of fighting it. Once the braid reaches the back of the neck, coil the end into a bun and pin the bun flat. Pancake the braid first, then shape the bun second. If you do it the other way around, the bun can look lopsided because the added width changes where the hair wants to sit.
I like this style for occasions where you want the braid visible from the front and the back, but don’t want loose hair brushing your shoulders. It has enough polish for a dressier outfit and enough grip for a busy day.
A small note: the bun should be low and compact, not puffed out like a messy knot. The braid already gives you visual volume. Let the bun stay quiet.
8. The Pull-Through Pancake Braid
The pull-through braid is a cheat code for very long hair. It uses a stack of small ponytails instead of a traditional three-strand weave, which means you can build a thick, exaggerated braid without wrestling the whole length in your hands at once.
That matters when your hair reaches the waist. Traditional braids can get heavy halfway through, and your arms start to notice. The pull-through version divides the work into smaller sections, so the finished braid looks fuller and more controlled.
Why It’s Easier Than It Looks
The braid sits in linked loops, and each loop can be pancaked after it’s secured. Because the sections are already separated by elastics, the shape stays bold even when you widen it. That makes it one of the best choices for thick or layered hair.
What to Watch For
- Use small, clear elastics so the braid looks clean.
- Keep each section roughly the same size, or the loops will twist unevenly.
- Pancake the sides after each new loop is added, not only at the end.
- Hide the elastics by wrapping a tiny strand of hair around them if you want a softer finish.
This braid has a more playful feel than a classic plait. It’s also the one I’d pick if I wanted volume that held its shape through the day without needing much rescue work.
9. The Zigzag-Part Pancake Braid
A zigzag part sounds fussy until you see it on waist-length hair. Then it makes perfect sense. The broken part line gives the style a bit of movement before the braid even starts, and the pancaked braid below it keeps the whole look from feeling too straight or flat.
The key is not to make the zigzag too sharp. Small angled sections are enough. If the part looks like a lightning bolt, it starts to feel costume-like. A softer zigzag gives you texture at the scalp without shouting for attention.
This style works nicely with one braid or two. A single zigzag-part braid feels playful and a little unexpected; twin braids make the part line even more visible. In either case, pancake the braid just enough that the width matches the visual energy of the part. A thin braid under a bold zigzag can look mismatched.
I like this one for long, glossy hair that needs a little break from straight lines. It’s a tiny change, but tiny changes matter when the braid stretches halfway down your back.
10. The Waterfall Pancake Braid
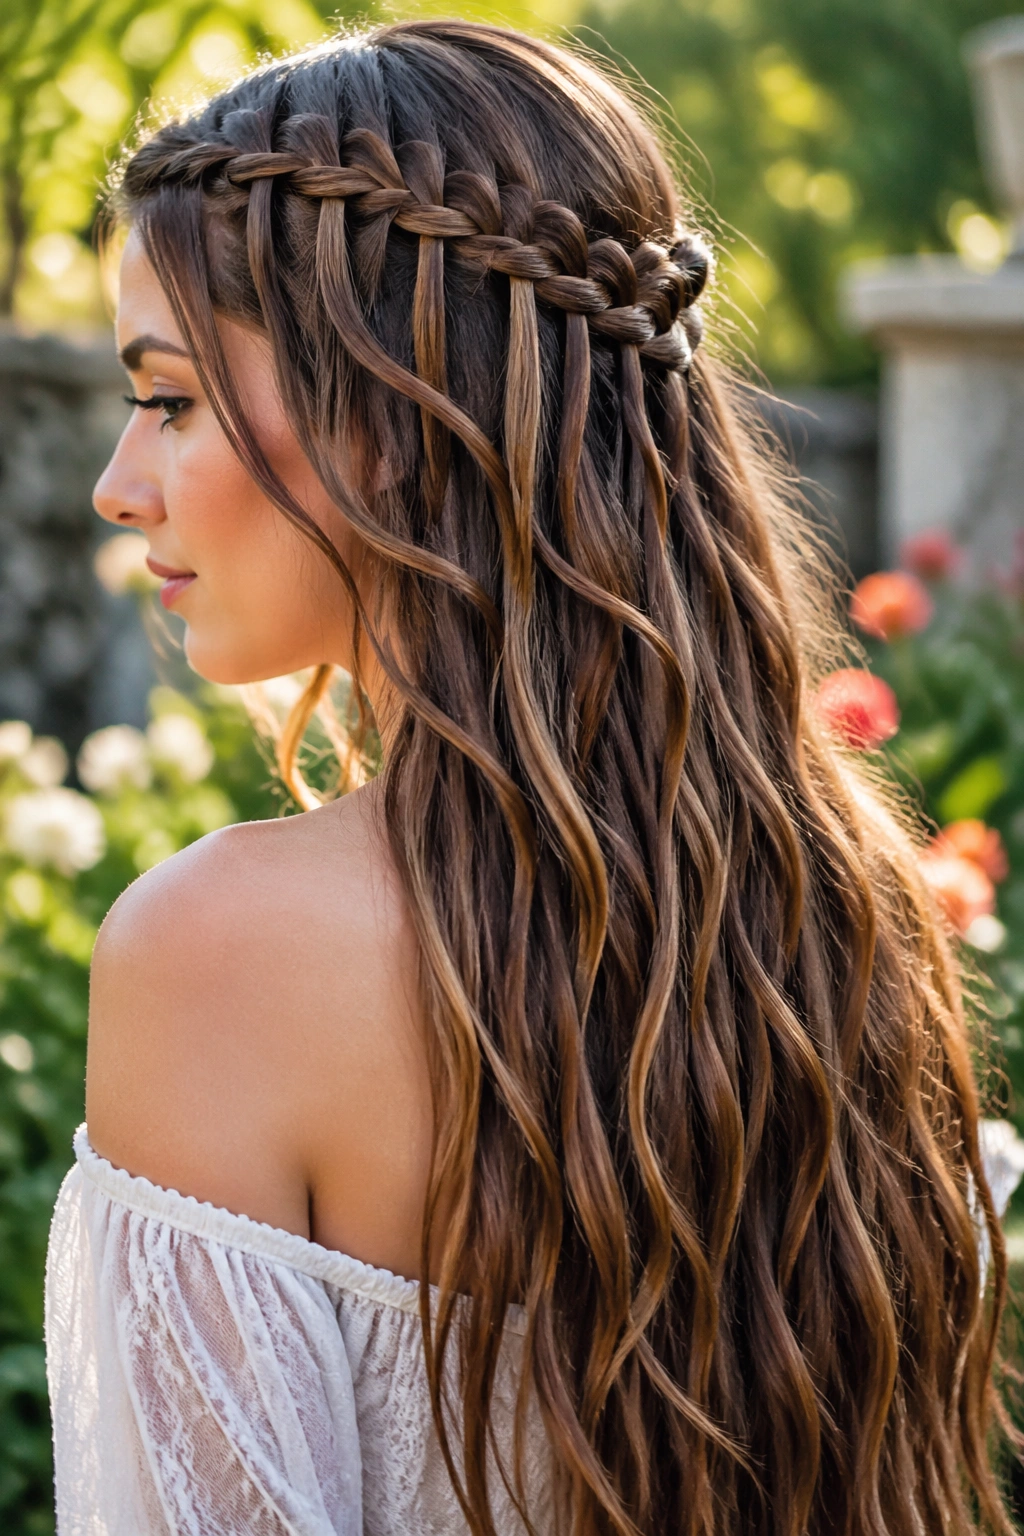
A waterfall braid gives you one of the prettiest ways to frame long hair because some strands drop through the braid while the rest keeps flowing. On waist-length hair, that falling motion matters. You get the sense of length in motion, not just length held in place.
The pancaking technique here should be light. Heavy pulling can distort the waterfall gaps and make the style collapse. Aim for broad, soft loops along the braid’s top edge, and leave the hanging pieces smooth so they read as intentional ribbons instead of stray strands.
This is one of those braids that benefits from a few practice runs. Once you get the hand rhythm, it’s not hard, but the spacing between the drops needs to stay even. I usually keep the sections small — about the width of a pencil — because large sections make the braid chunky and block the view of the falling pieces.
One-sentence truth: the smaller the sections, the cleaner the waterfall.
If your hair is layered, this style can be tricky, since short pieces may slip out near the crown. Pinning the beginning of the braid a little tighter solves most of that. A light veil of hairspray at the end helps too, but don’t drown it. The loose sections should still move.
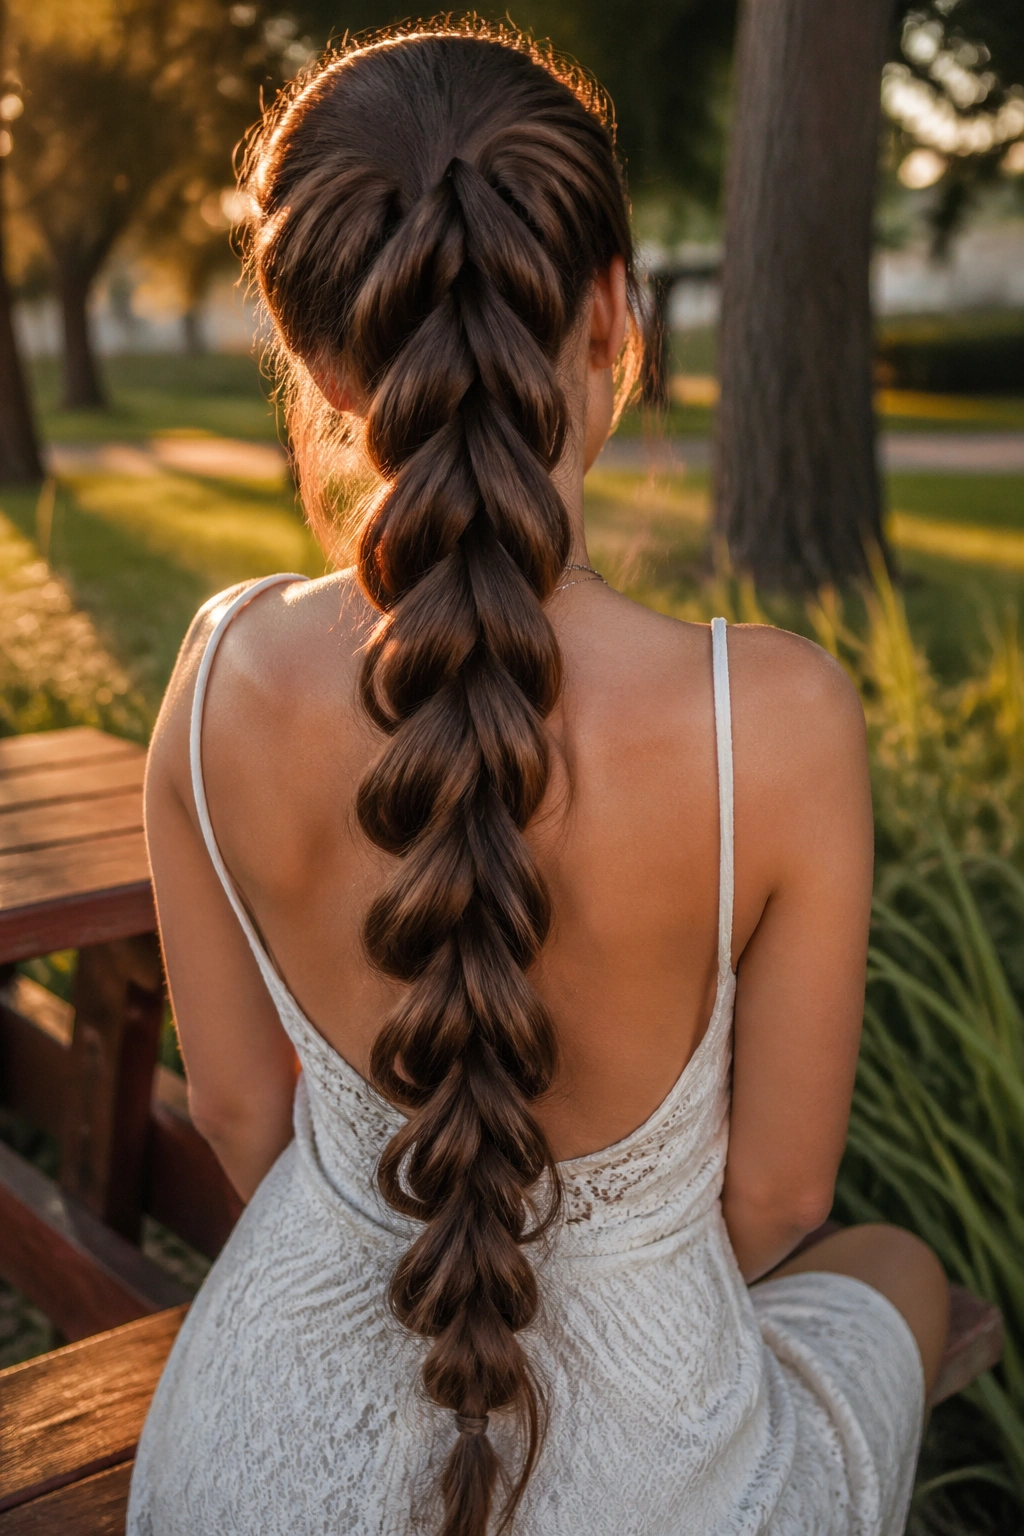
11. The Pancaked Braided Ponytail
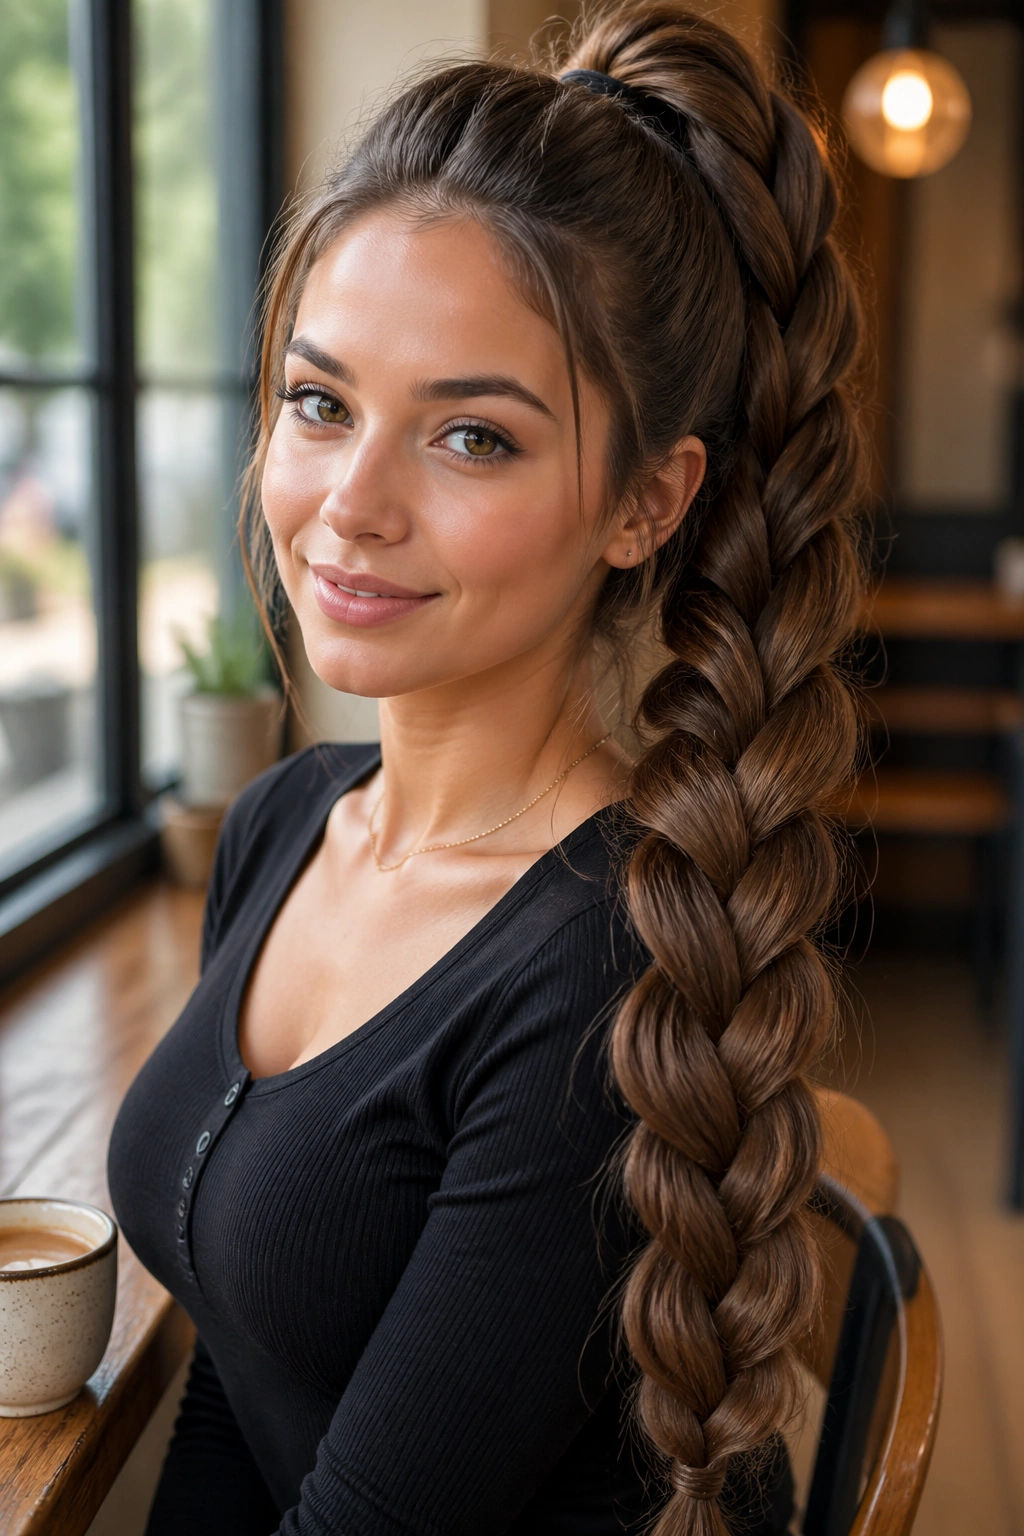
A braided ponytail sounds simple, and that’s why it works. Pull the hair into a high, mid, or low ponytail, braid the tail, then pancake the braid so it becomes wide and plush instead of thin and rope-like. On waist-length hair, the tail alone can hang low enough to look dramatic without much effort.
This style is useful when you want the hair out of the way but still want the braid to be visible. A low ponytail feels calm and polished. A high one feels sharper and more athletic. The same pancaking trick works for both.
The best part is that you can control the finish fast. If your hair is very thick, braid the ponytail loosely and pancake only the outer edges. If your hair is finer, pull the braid wider to give it more body. A wrapped strand around the elastic makes the base look finished, and it hides the hair tie at the same time.
That’s the kind of small detail that matters on long hair. The eye travels through the whole length, so a clean base at the top keeps the style from looking like it was thrown together in a hurry.
12. The Milkmaid Pancake Braids
Milkmaid braids have a slightly old-world feel, but the style gets a cleaner, more modern shape once you pancake the braids and pin them across the top of the head. On hair down to the waist, the twin braids have enough length to wrap comfortably without feeling skimpy.
Why Two Braids Are Easier Than One
Two braids distribute the hair evenly and make pinning simpler. You braid each side first, pancake the outer edges, then lift them across the crown and secure the ends under the opposite braid or beneath the hairline.
How to Keep It from Looking Too Tight
- Leave a thin section loose around the ears if you want a softer frame.
- Pin the braids in hidden spots where the shape naturally overlaps.
- Use 4 to 6 bobby pins, depending on thickness, and cross them for a stronger hold.
- Keep the crown slightly lifted, not flattened against the scalp.
I like milkmaid braids on long hair because the style shows off both the thickness and the length at once. You can make them neat, a little messy, or somewhere in between. If the braids feel too ceremonial, loosen the front a touch and let the ends sit a little lower on the head. That tiny change makes the whole look feel more lived in.
13. The Ladder-Style Pancake Braid
A ladder braid is the one I save for when I want the braid to do more than sit there. It has a built-in pattern that looks almost architectural, and on waist-length hair the repeating sections have enough room to show up clearly. Pancaking gives those sections depth, so the braid reads wide and layered instead of flat.
This style takes a bit more patience than a standard plait, but not nearly as much as people assume. You’re creating linked sections that echo down the length, then gently spreading each visible loop so the pattern opens up. If your hair is very long, that repetition is a gift. The braid becomes a long runway of texture instead of a small detail near the crown.
The finish matters here. Keep the top controlled, then widen the braid more as it travels down the back. That shift keeps the head shape tidy while letting the tail become the visual payoff. A little shine serum on the palms before pancaking can help smooth the surface without flattening the braid.
This is the style that proves long hair can carry structure without looking stiff. It has enough line to feel deliberate, enough width to show off the braid work, and enough length to make the whole thing feel worth the effort.