A single braid can do a lot.
It keeps hair off your neck, makes a rushed morning look considered, and doesn’t ask for twenty pins and a prayer. For people who like single braids and still want a minimalist daily look, the sweet spot is usually not about fancy patterns. It’s about placement, tension, and a finish that looks calm instead of overworked.
Hair texture changes everything. Fine hair needs a little grip or the braid slips apart by lunch. Thick hair usually needs smoother sectioning so the braid does not puff out halfway down the back. And if your hair is a mix of clean roots and slightly oily ends, which is most people’s real life, that middle ground often makes the braid hold better than freshly washed hair ever will.
The best minimalist braids are the ones that feel like a decision, not a rescue plan. Clean part. One clear line. A shape that works with your haircut instead of fighting it. Start with the simplest one first.
1. The Clean Center-Back Single Braid
If you want the most stripped-down version of a braid, start here. A center-back three-strand braid sits neatly down the spine of the head and reads calm from every angle. There’s no drama in it, which is exactly why it works so well on a weekday.
Why It Works
The middle part gives the braid a clean frame, and the low placement keeps it from looking too dressed up. On straight hair, it looks tidy; on wavy hair, it looks a little softer without losing shape. I like it most when the braid begins right under the occipital bone, because that spot keeps the crown smooth and avoids the puffy top that ruins an otherwise neat style.
- Best on shoulder-length hair and longer
- Holds well with second-day hair or a light dusting of dry shampoo
- Works with clear elastics, matte elastics, or a tiny fabric tie
- Sits flat under jackets and scarves
Tip: Keep the tension even from top to bottom; a braid that starts tight and ends loose looks accidental.
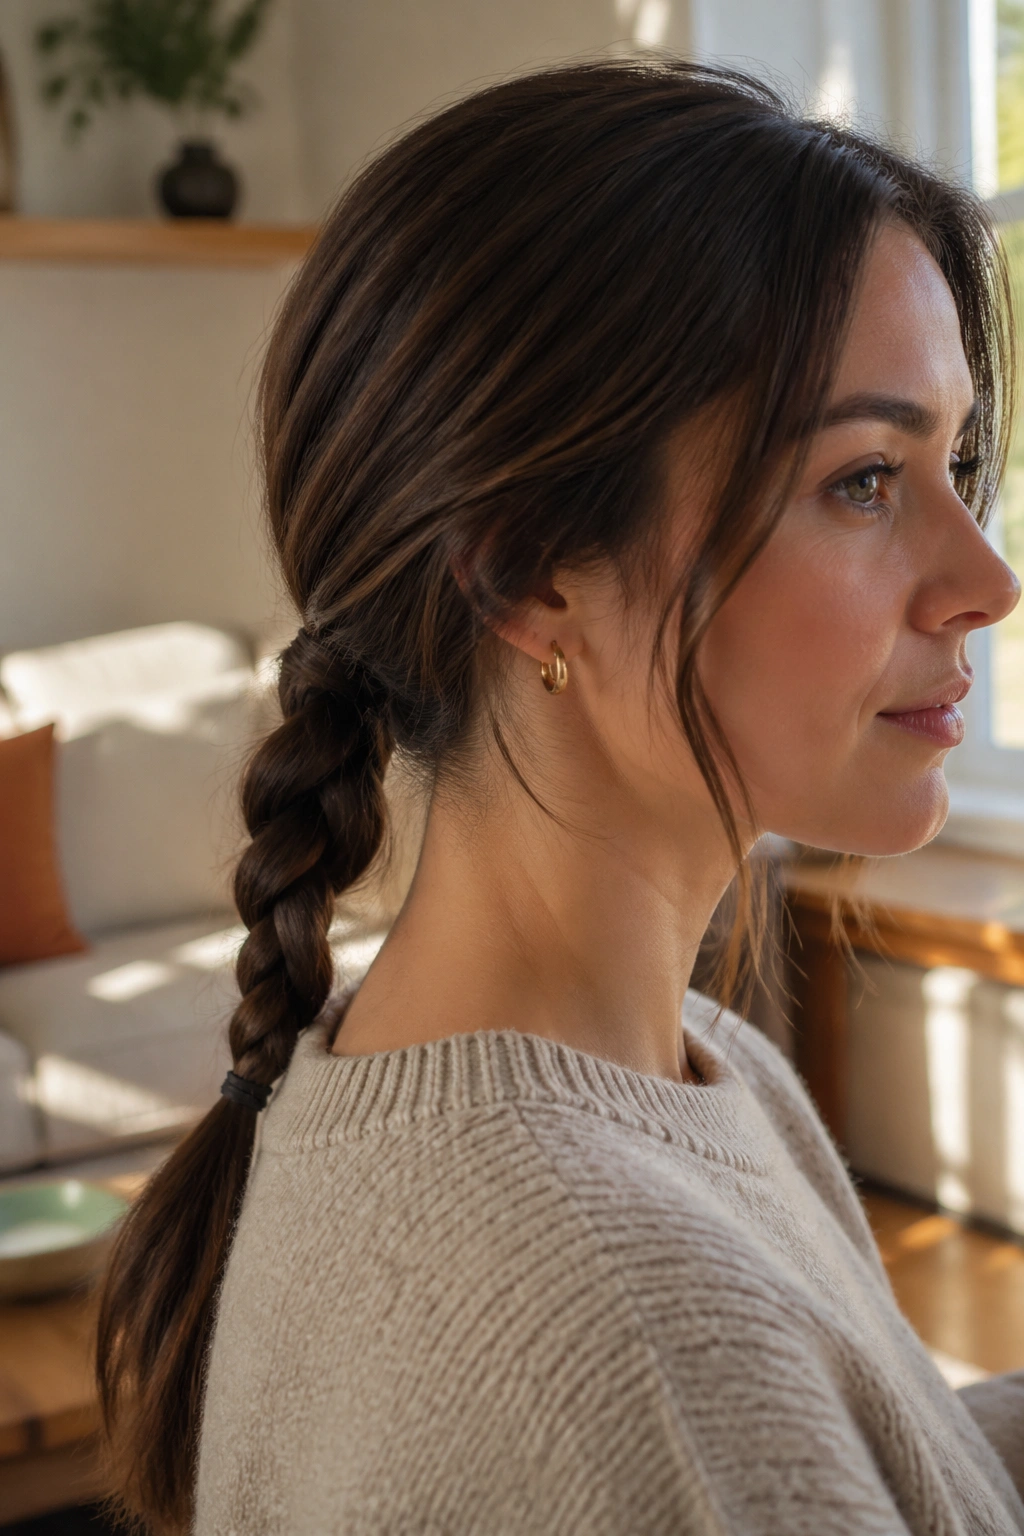
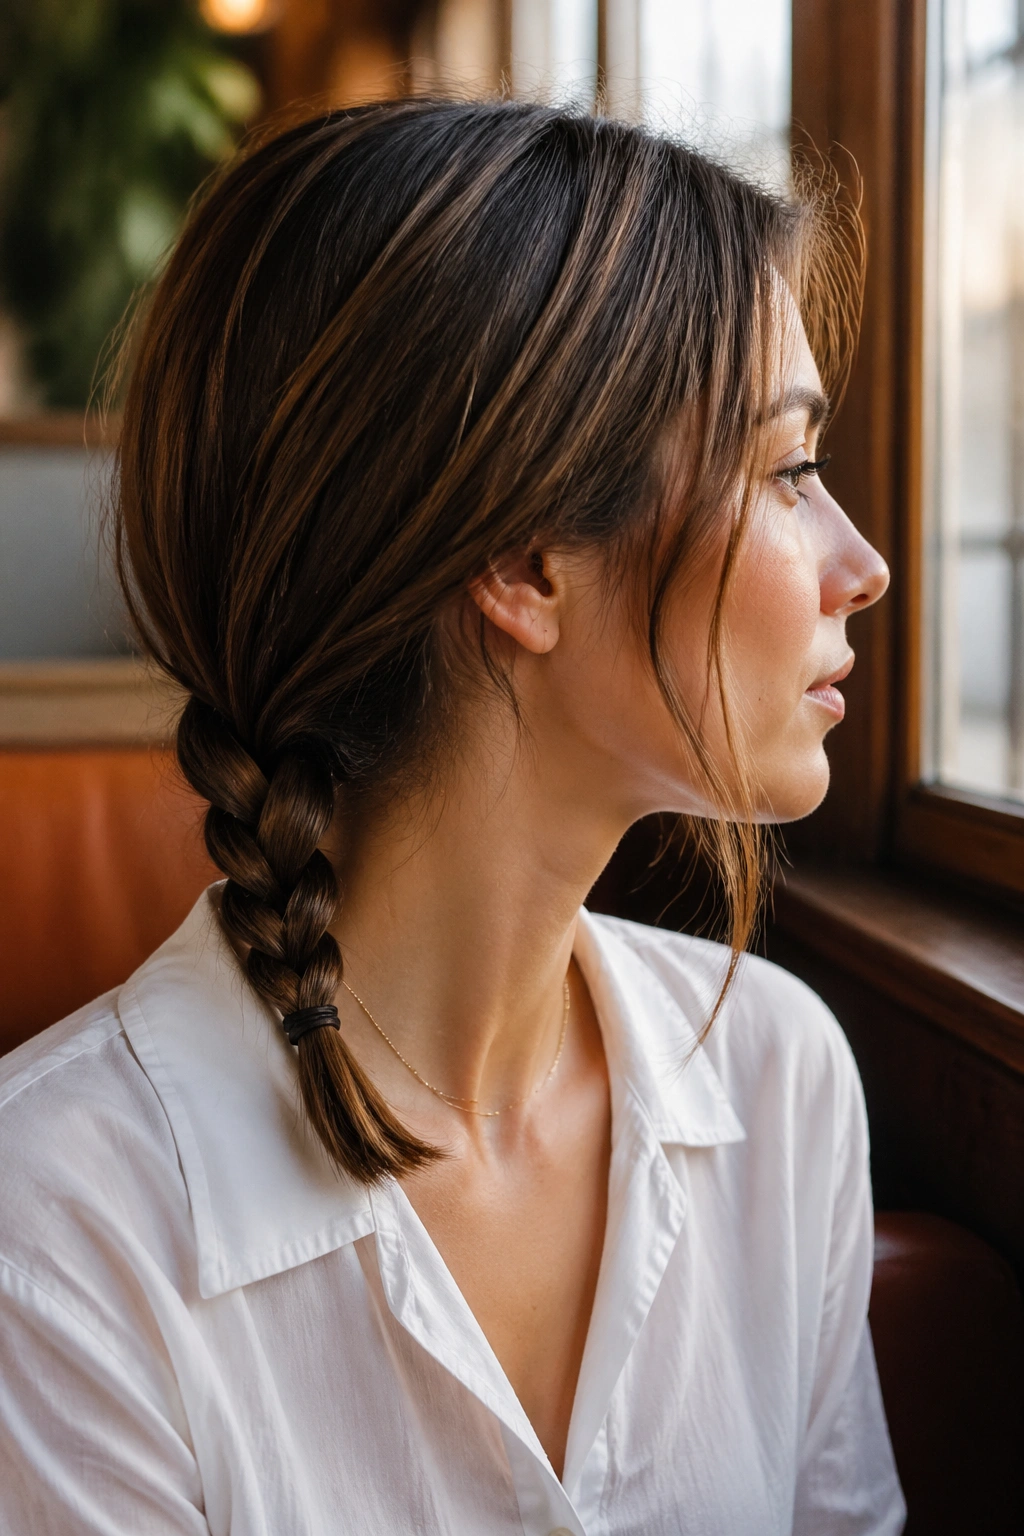
2. The Low Side Braid That Sits on One Shoulder
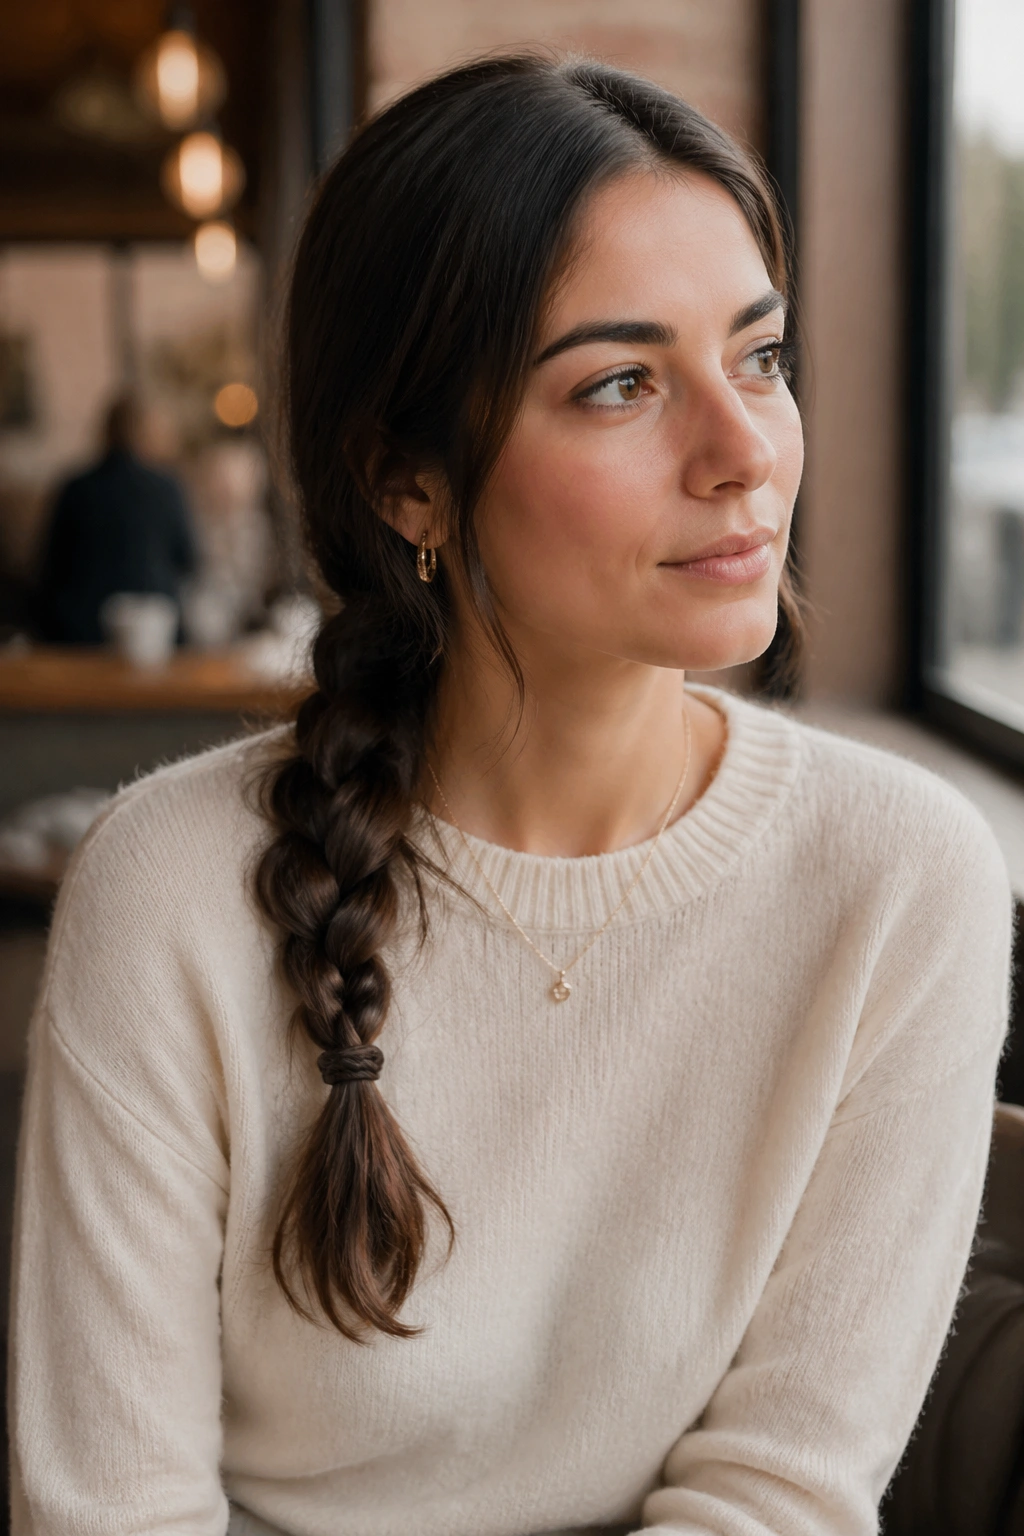
A low side braid is the fastest way to make a simple plait feel a little more intentional. It changes the line of the whole style. Instead of falling straight down the back, the braid drapes over one shoulder and softens the shape of the face in a way that feels easy, not fussy.
This one is useful when you want hair out of the way but don’t want the severe look a center braid can create. A deep side part gives it more weight, and the shoulder placement keeps the braid visible without shouting for attention. I also like it on collarbone-length hair, where the braid can stay compact instead of hanging like a heavy rope.
It helps to braid from the heavier side of the part so the style balances itself. If you tuck the end behind the shoulder seam of a sweater, it stays put longer. Simple. Efficient. That’s the whole appeal.
3. The French Braid That Stops at the Nape
Why does a French braid often look cleaner than a loose braid? Because the top section is built into the braid itself, so the hair along the scalp stays controlled instead of floating away in little bits. That makes it a strong choice for a minimalist daily look, especially if your front layers have a habit of slipping loose.
How to Wear It
Start high at the crown or just behind the hairline, keep each added section equal in size, and stop once you reach the nape. From there, switch to a standard three-strand braid for the tail. The result is a braid that feels anchored at the top and simple at the bottom, which is a good balance when you want polish without stiffness.
If your hair is very fine, a tiny bit of texture spray at the roots helps the braid hold. If it’s thick, keep the added sections smaller than you think you need. Big sections make the braid bulky fast.
4. The Loose Side Braid with Air at the Crown
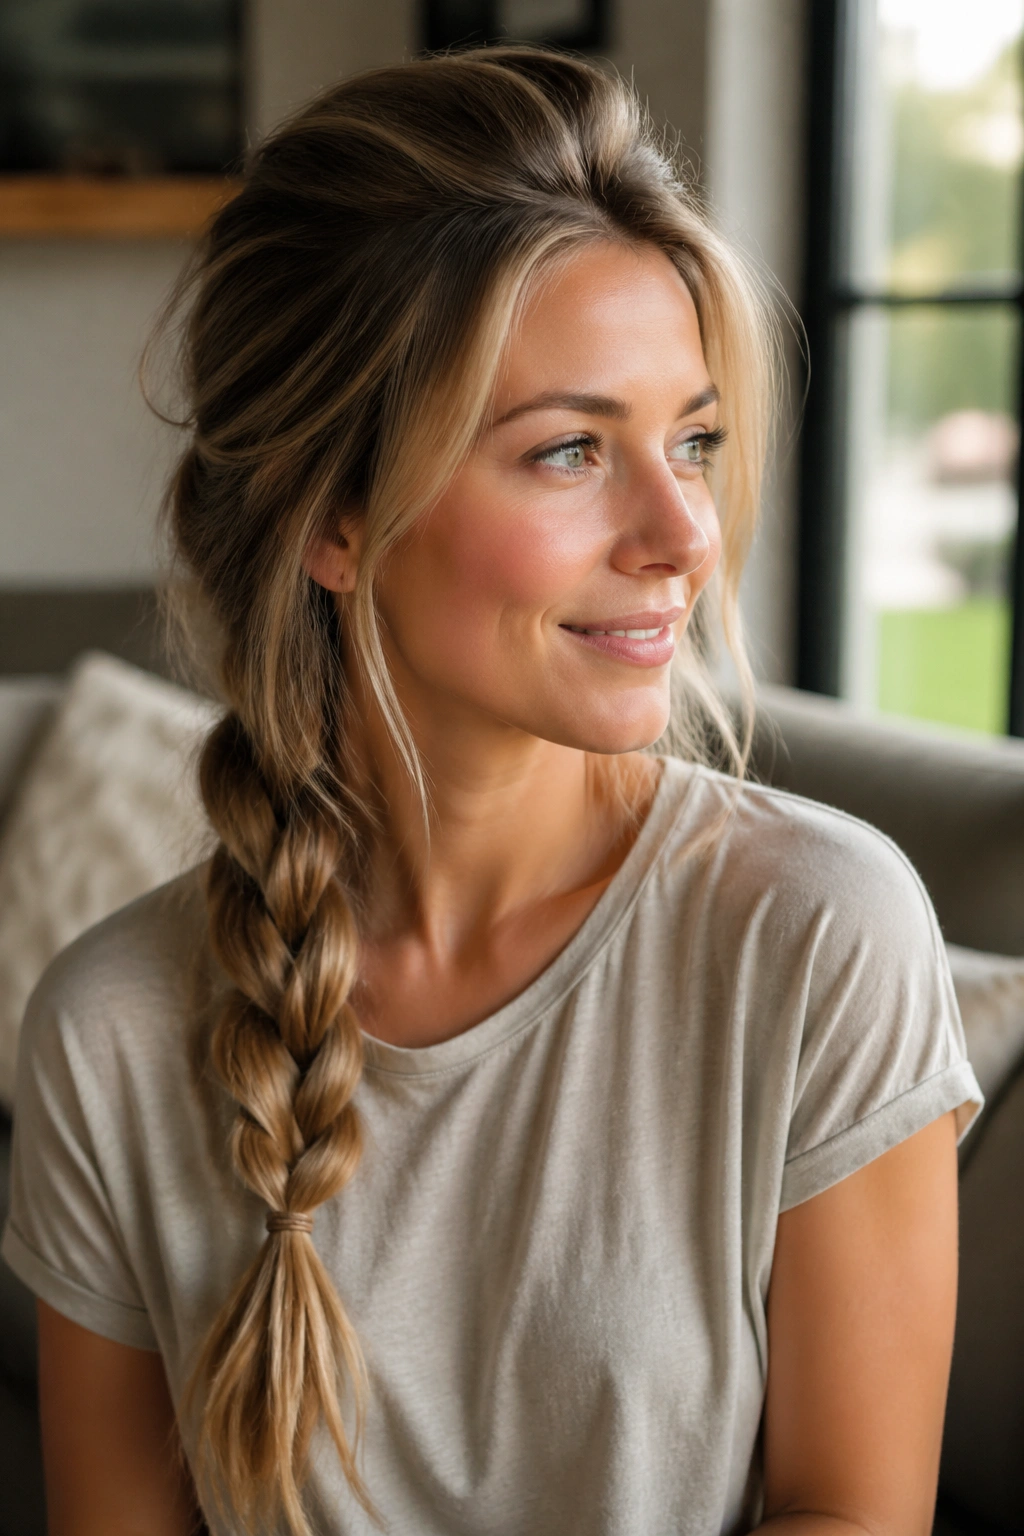
On mornings when the top of your hair needs to breathe a little, this is the one. A loose side braid with some lift at the crown softens the head shape and keeps the whole style from looking too neat. That small bit of air matters. It makes the braid feel lived-in, not strict.
The trick is to start with a gentle side part, then loosen the crown by lifting the roots with your fingertips before braiding. I like this braid when the hair is clean but not slippery, because too much freshness can make the style collapse. A little grit helps the braid keep its shape while still looking relaxed.
- Keep the first inch near the part slightly loose
- Let the braid rest below the shoulder, not tight against the neck
- Use a small elastic that matches your hair color
- Pull two or three tiny face-framing strands free if the look feels too sharp
The whole point is to look like you meant to leave a little softness there.
5. The Sleek High Braid
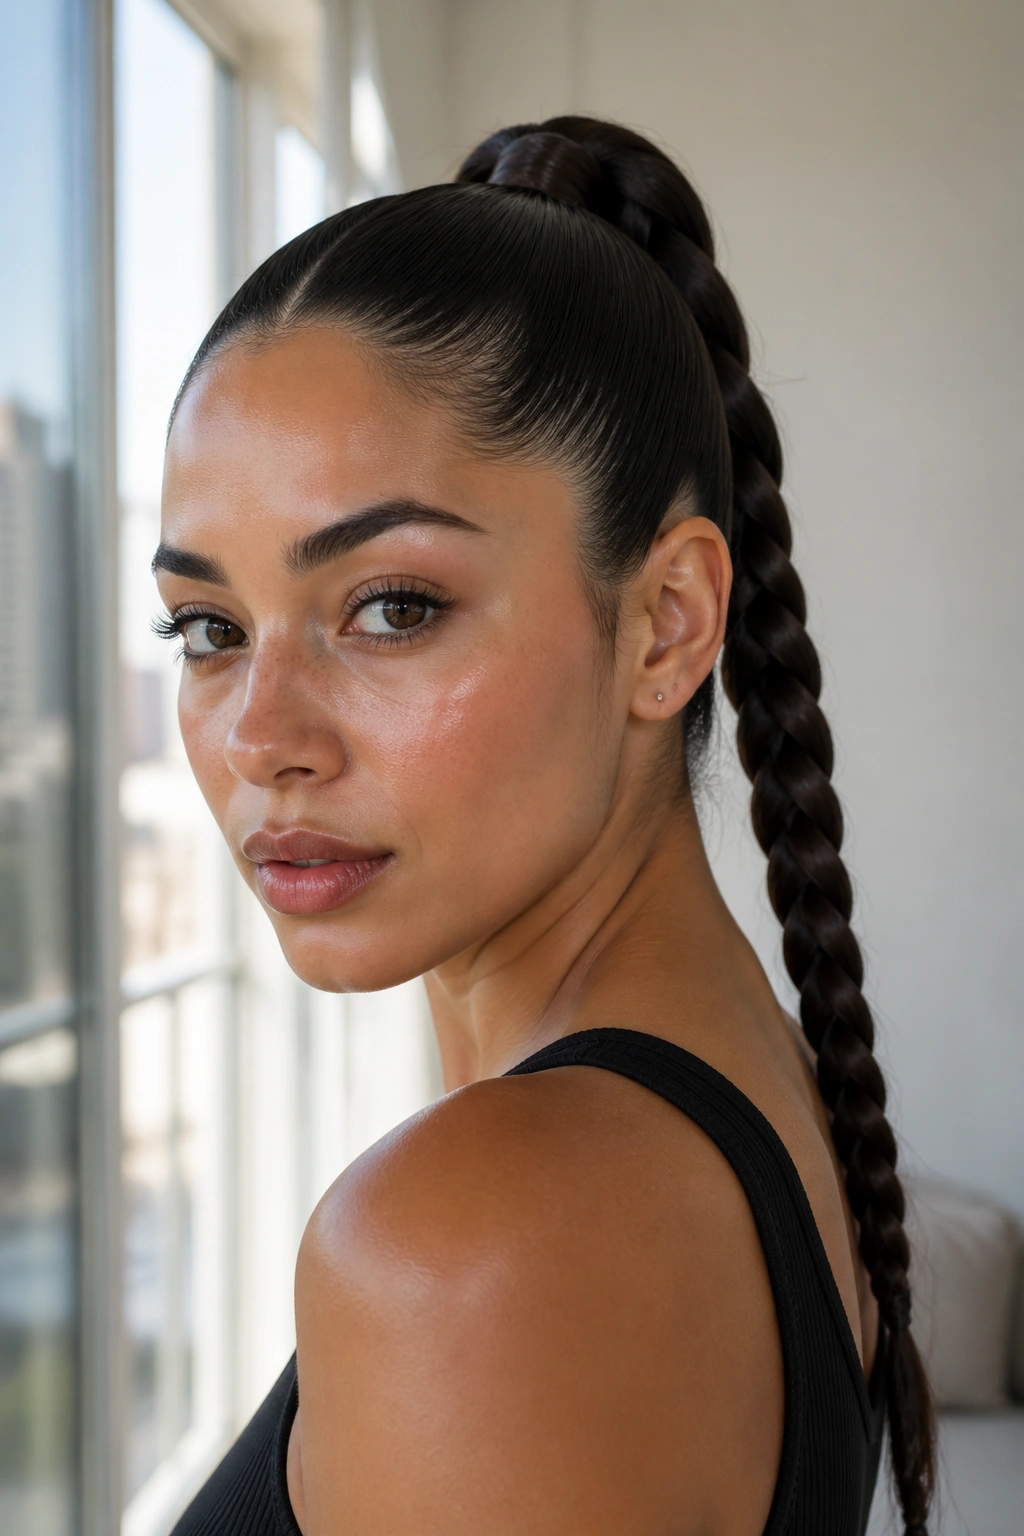
A high braid has a sharper edge than a low one, and that’s not a bad thing. The higher placement lifts the face and clears the neck, which is useful when you want your hair to feel neat in a way that almost looks architectural. It’s one of the few braids that can feel minimalist and a little bold at the same time.
What makes it work is the prep. Smooth the roots back with a lightweight cream or a pea-sized amount of gel, then gather the hair high but not at the absolute crown unless you want the braid to sit like a top knot’s cousin. A position just above the occipital bone usually feels cleaner and less severe. The braid itself can be tight or only moderately tight; either way, the top needs to look smooth.
I prefer this style on days with a collared shirt or a simple crewneck because it frames the outfit without adding anything extra. That sounds small. It is not. A braid sitting high on the head changes the whole line of the silhouette.
6. The Rope Braid for Fine Hair
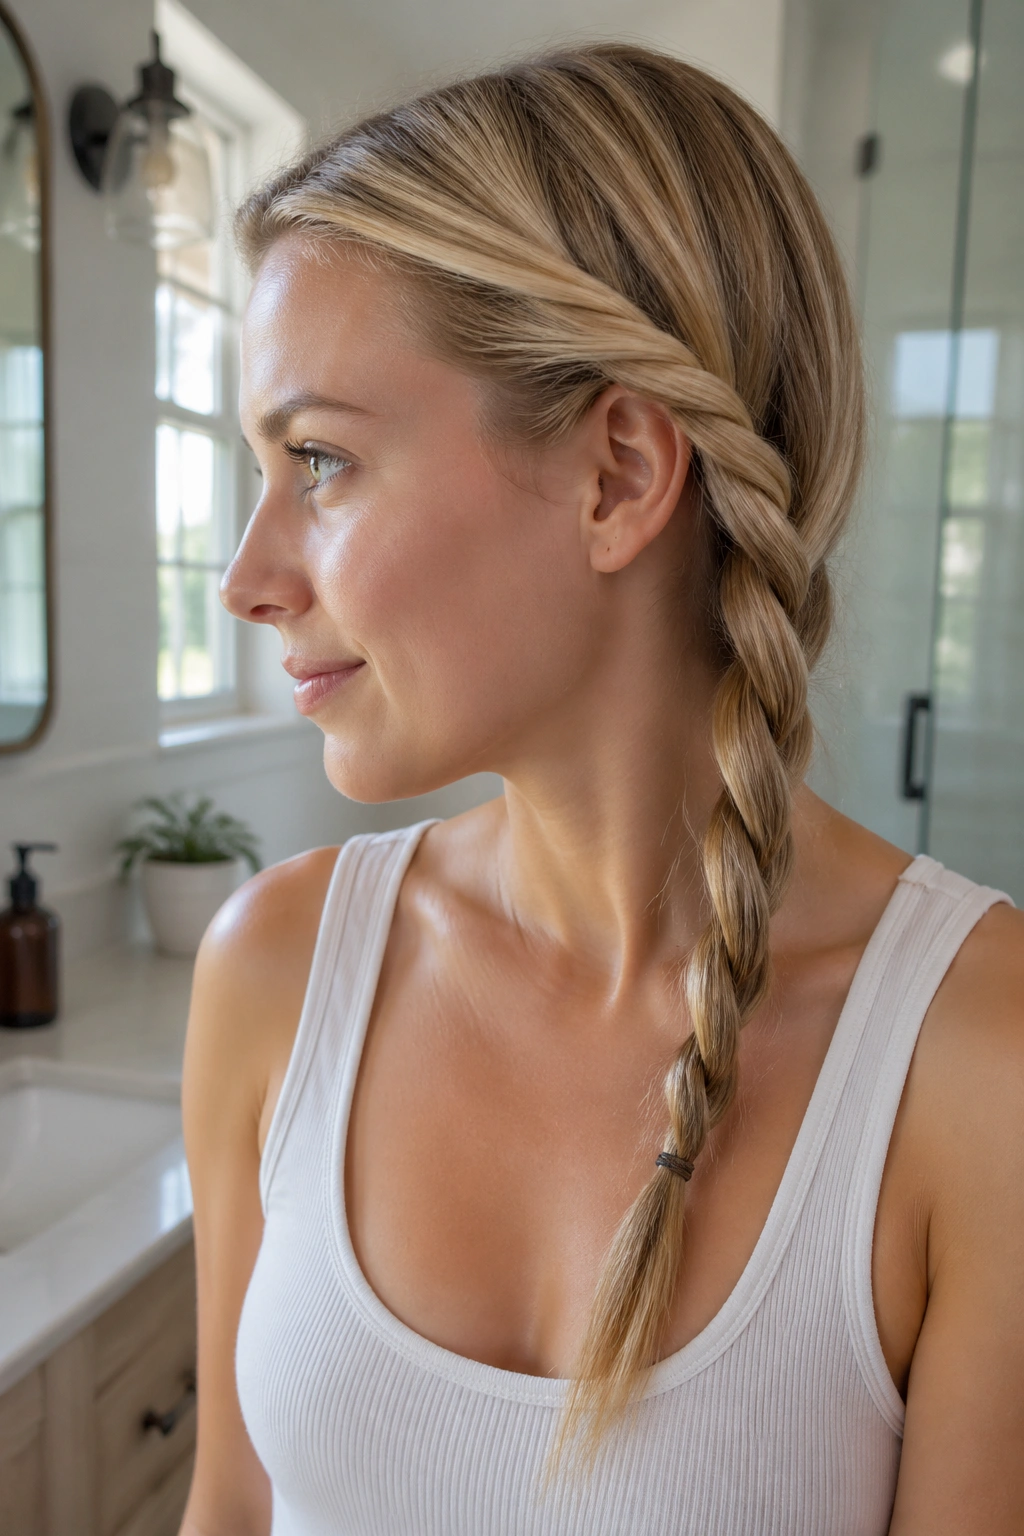
A rope braid is a good move when your hair is fine and a regular three-strand braid looks thinner than you want. Unlike a classic plait, a rope braid twists two sections around each other, which creates a neater, slimmer pattern that often holds better on silky hair. It can feel almost architectural when you do it cleanly.
That twist pattern also makes the style quicker to shape in the mirror. You do need some grip, though. Fine hair can slip loose if the strands are too freshly washed, so a bit of dry shampoo at the roots or a mist of texture spray through the mid-lengths makes a real difference. No need to overdo it. Too much product and the braid gets rough.
This is the braid I’d recommend for someone who wants a tidy daily style and hates fiddling with tiny sections. It’s quick, it stays neat, and it doesn’t demand the kind of section precision a fishtail needs.
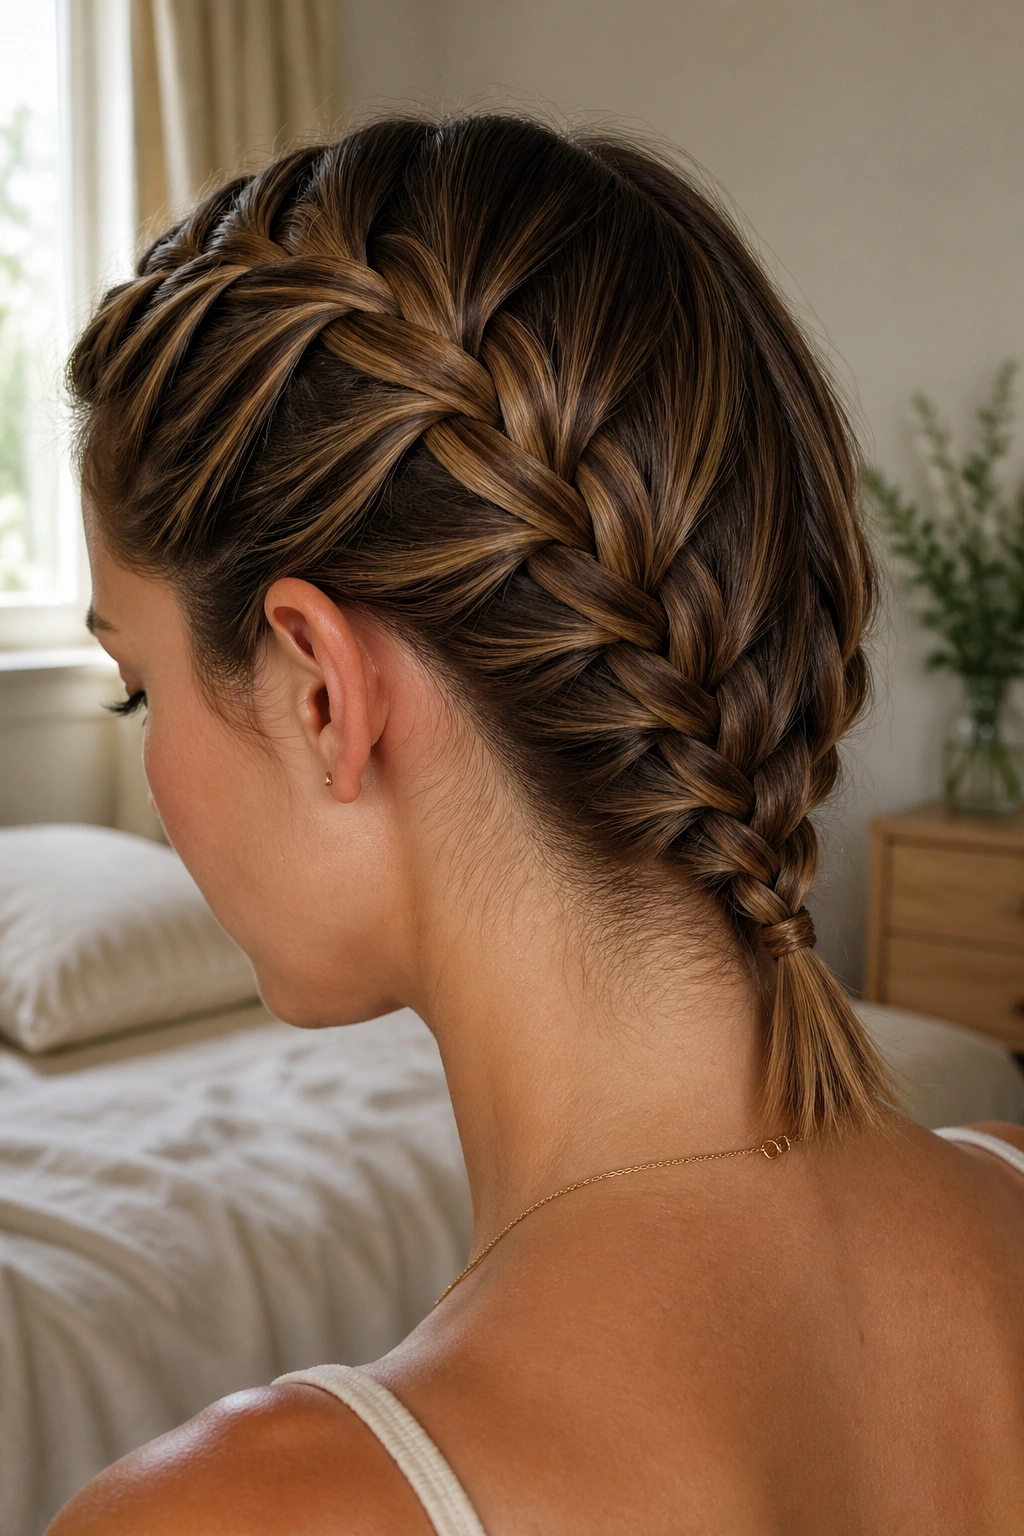
7. The Dutch Braid with a Flat Scalp Finish
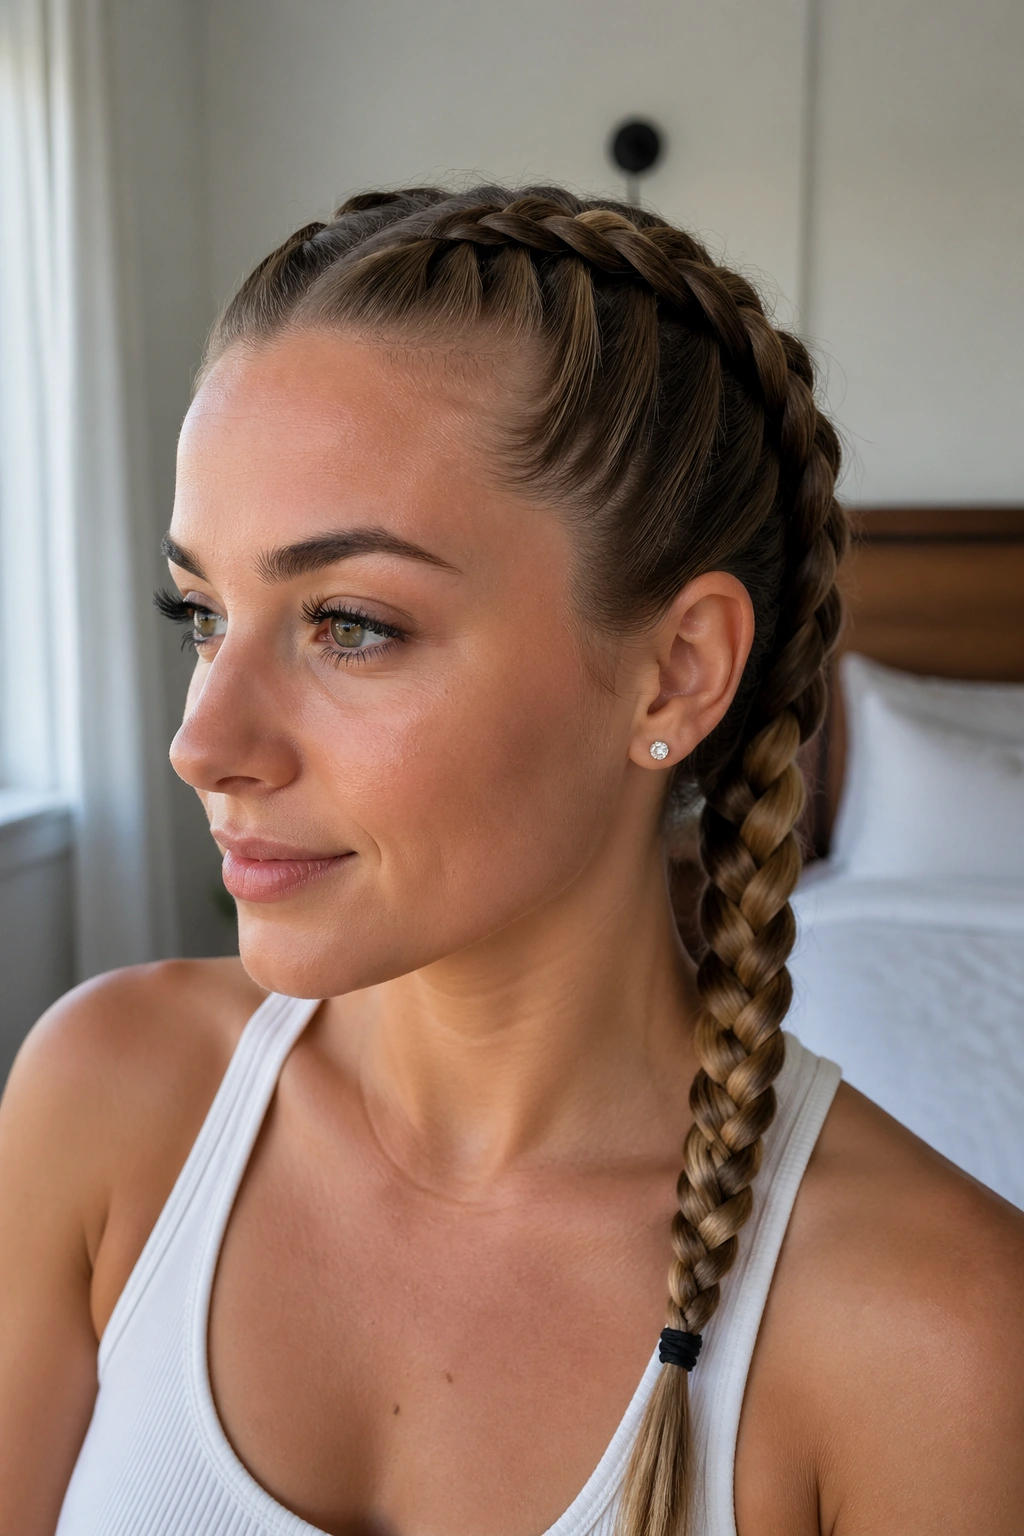
A Dutch braid gives you more visible shape than a French braid because the sections cross under instead of over. That one detail makes the braid sit on top of the hair instead of disappearing into it, and the result is a cleaner outline at the scalp. If you want definition without extra decoration, this is a strong pick.
The Shape Difference
The braid begins at the hairline, but the raised effect doesn’t come from making it bigger. It comes from the under-crossing pattern and from keeping the sections even. A Dutch braid can look heavy if the sections are too thick, so I usually tell people to split the first three pieces smaller than feels natural. The braid ends up more elegant that way.
What to Watch For
- Keep the part line crisp
- Braid close to the head for the first 3 to 4 inches
- Secure the tail low if you want a calmer finish
- Smooth flyaways with a little serum on your palms, not directly on the braid
The flat scalp finish is what keeps this one looking minimal instead of sporty.
8. The Fishtail Braid with Narrow Texture
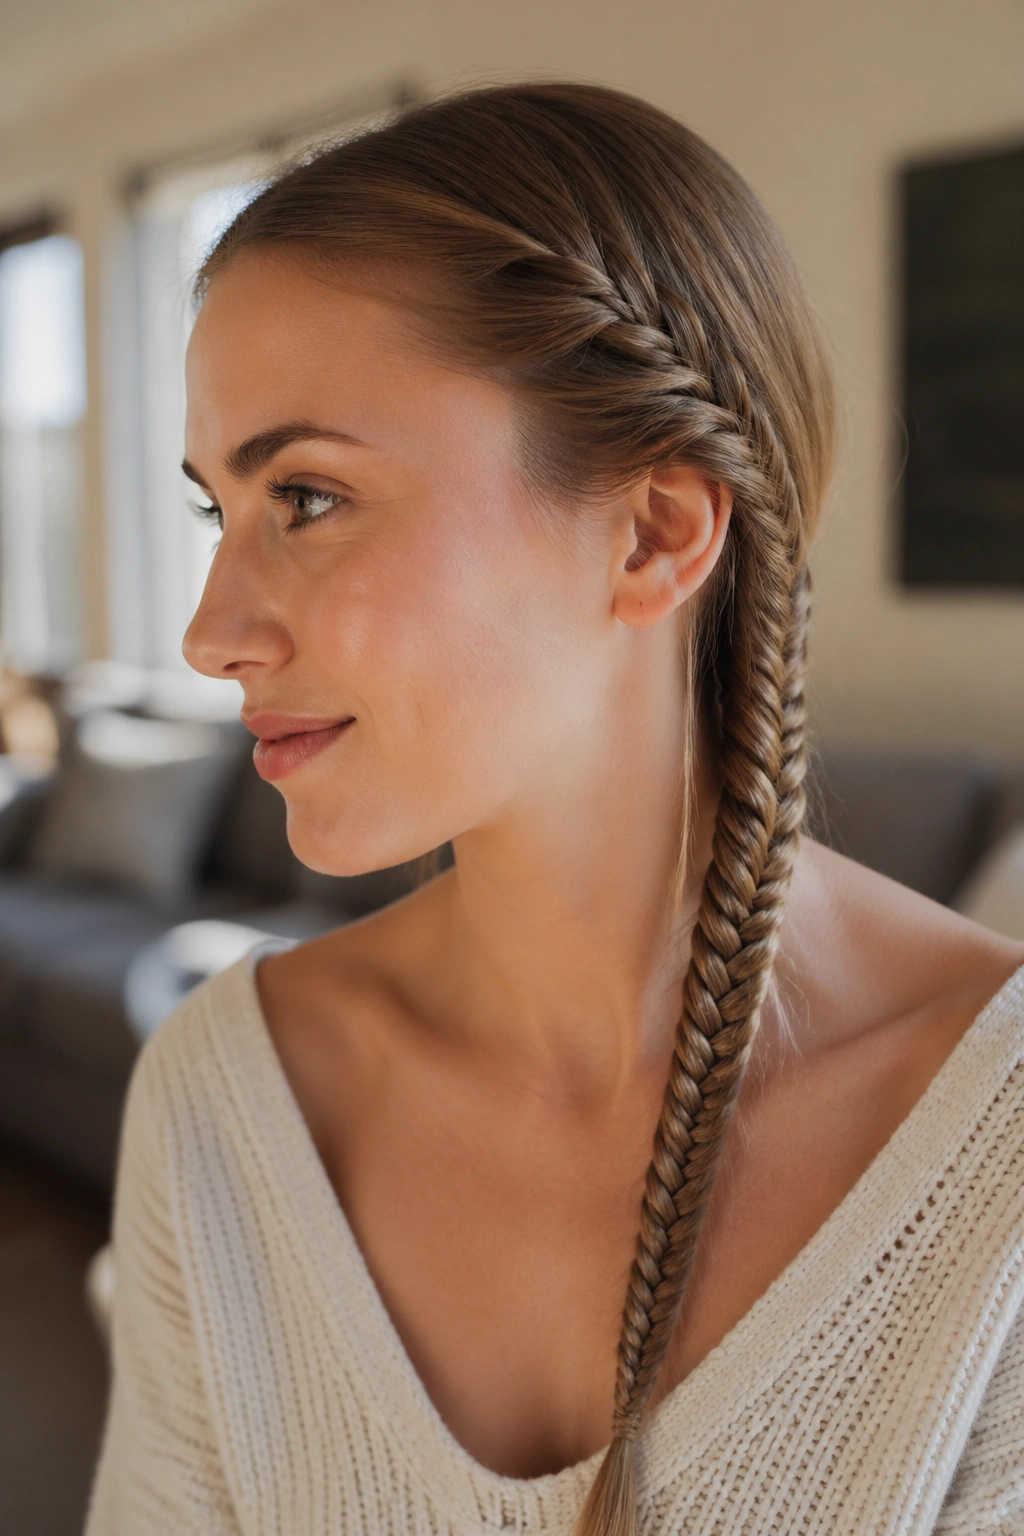
A fishtail braid sounds fancier than it really is. Once you strip away the reputation, it’s basically a narrow, detailed braid that makes simple hair look deliberate. That narrow texture is its whole point. It gives you pattern without bulk, which is useful when you want a daily braid that doesn’t take over the whole head.
I like fishtails best on straight or softly wavy hair because the pattern stays readable. If the hair is too layered, the little crossovers can get lost, and then the braid starts to look fuzzy instead of clean. That’s not a disaster, just a different mood. A little piece of lint from a sweater? That braid will show it.
For a more minimalist read, keep the fishtail low and tight at the top, then ease the ends slightly so it doesn’t look severe. The braid should feel narrow and tidy, not precious. That’s the sweet spot.
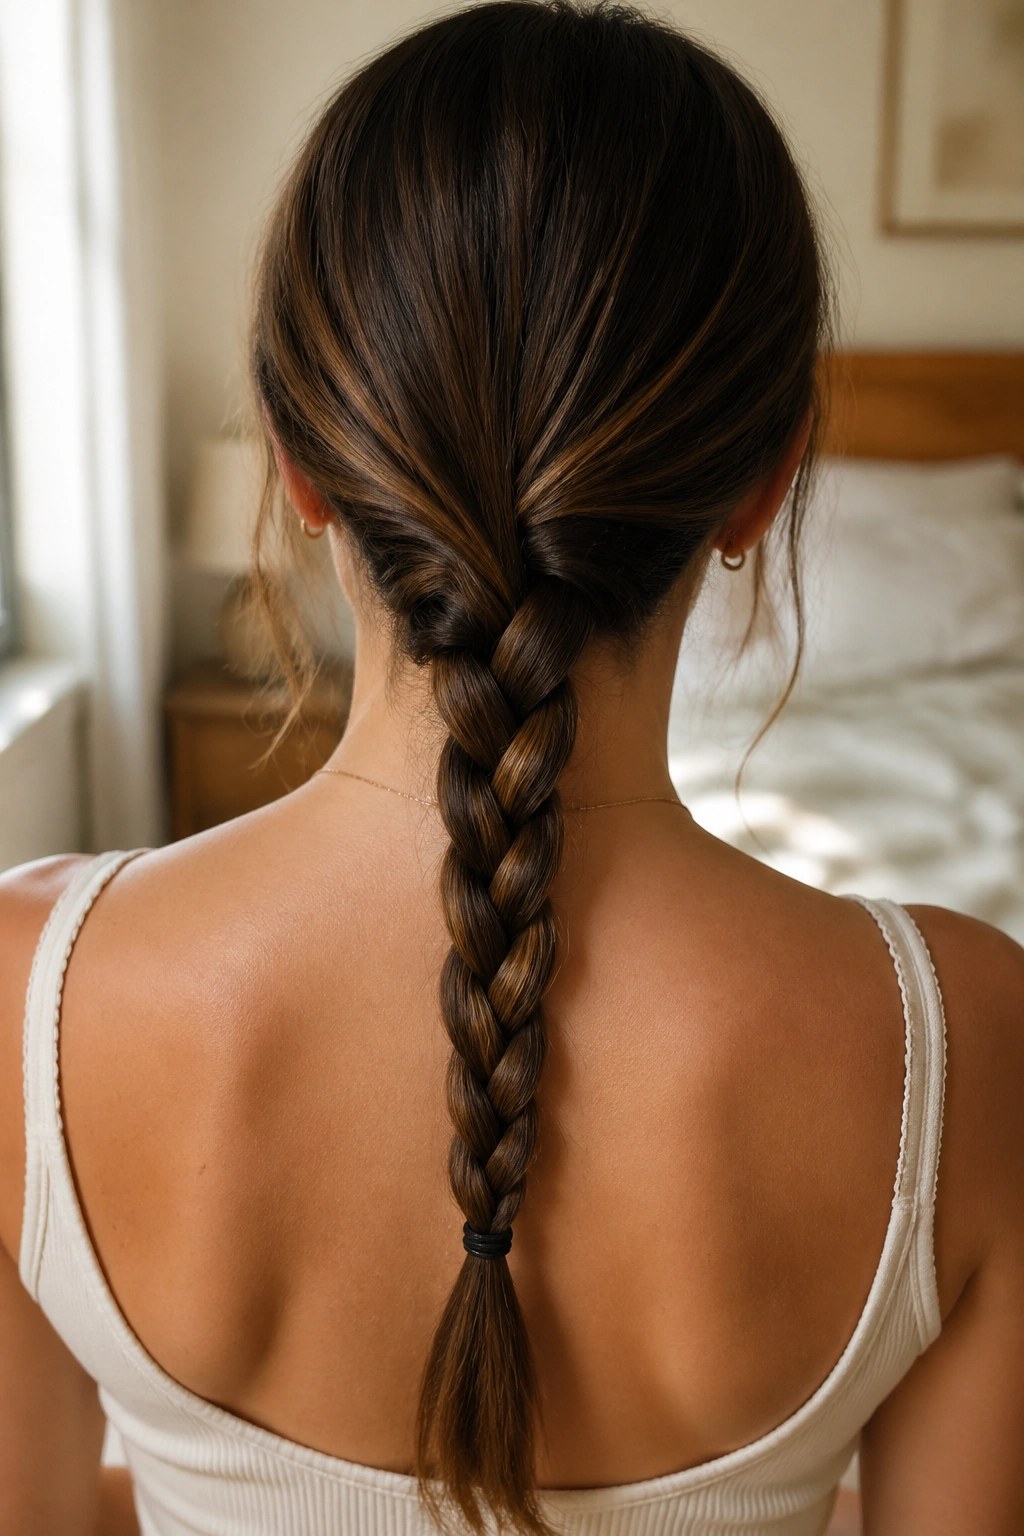
9. The Low Braided Ponytail
What do you get when you want the order of a braid and the speed of a ponytail? A low braided ponytail. It keeps the hair gathered, but the braid gives the tail enough structure that it looks planned instead of thrown together. Good deal.
How to Keep It Neat
Tie the hair at the nape first, then braid the ponytail down from there. That small two-step setup matters because it keeps the crown smoother than braiding from the top all the way down. If you want a cleaner finish, wrap a tiny strand of hair around the elastic and pin it underneath with a bobby pin.
This style is useful on days when your ends are dry or uneven, because the braid hides a lot of that. It also works well if your hair is layered and the tail tends to fray. The ponytail base keeps the style secure, and the braid keeps the end from looking too loose.
10. The Braided Nape Knot
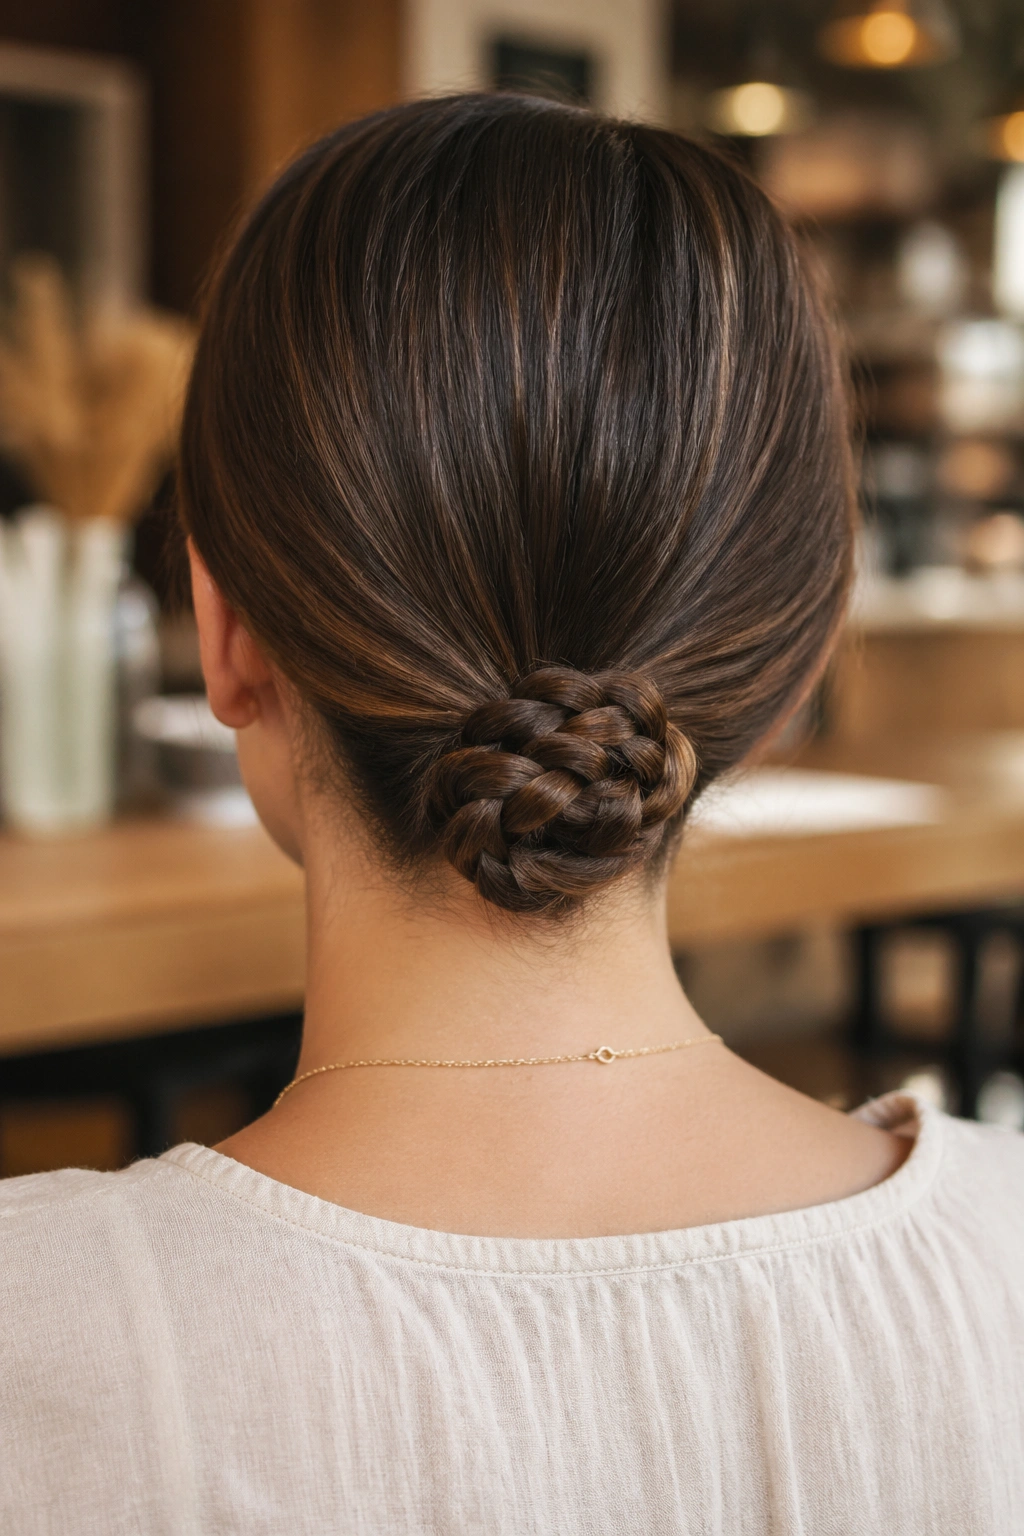
Sometimes you want the braid to disappear a little at the end. A braided nape knot does that job well. It starts as a single braid, then folds the tail up and pins or tucks it at the nape so the shape stays compact. The look is neat without being formal.
I reach for this one when a standard braid would hang too low or catch on a coat collar. It keeps the neck clear and gives you a clean back view, which matters more than people think. Hair that touches your shoulders all day can frizz faster from friction. This avoids some of that.
- Braid to the nape first
- Fold the tail upward before it dries out completely
- Secure with two crossed bobby pins or a slim clip
- Leave the knot small; if it gets bulky, it stops looking minimalist
There’s a practical charm to it. Nothing wasted.
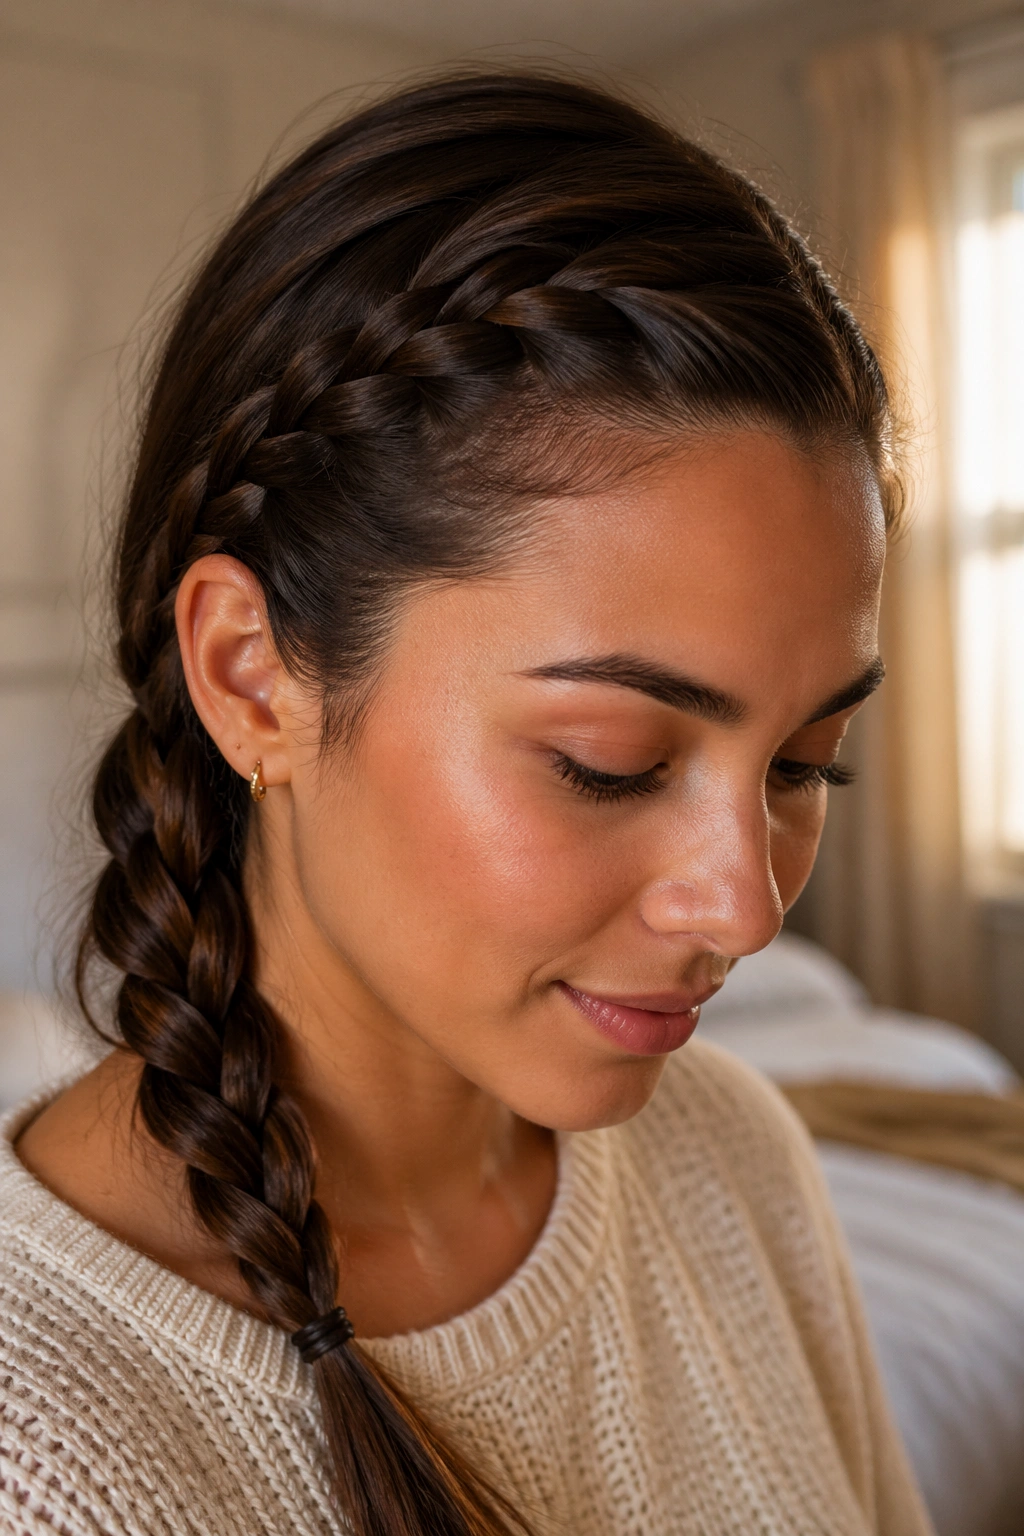
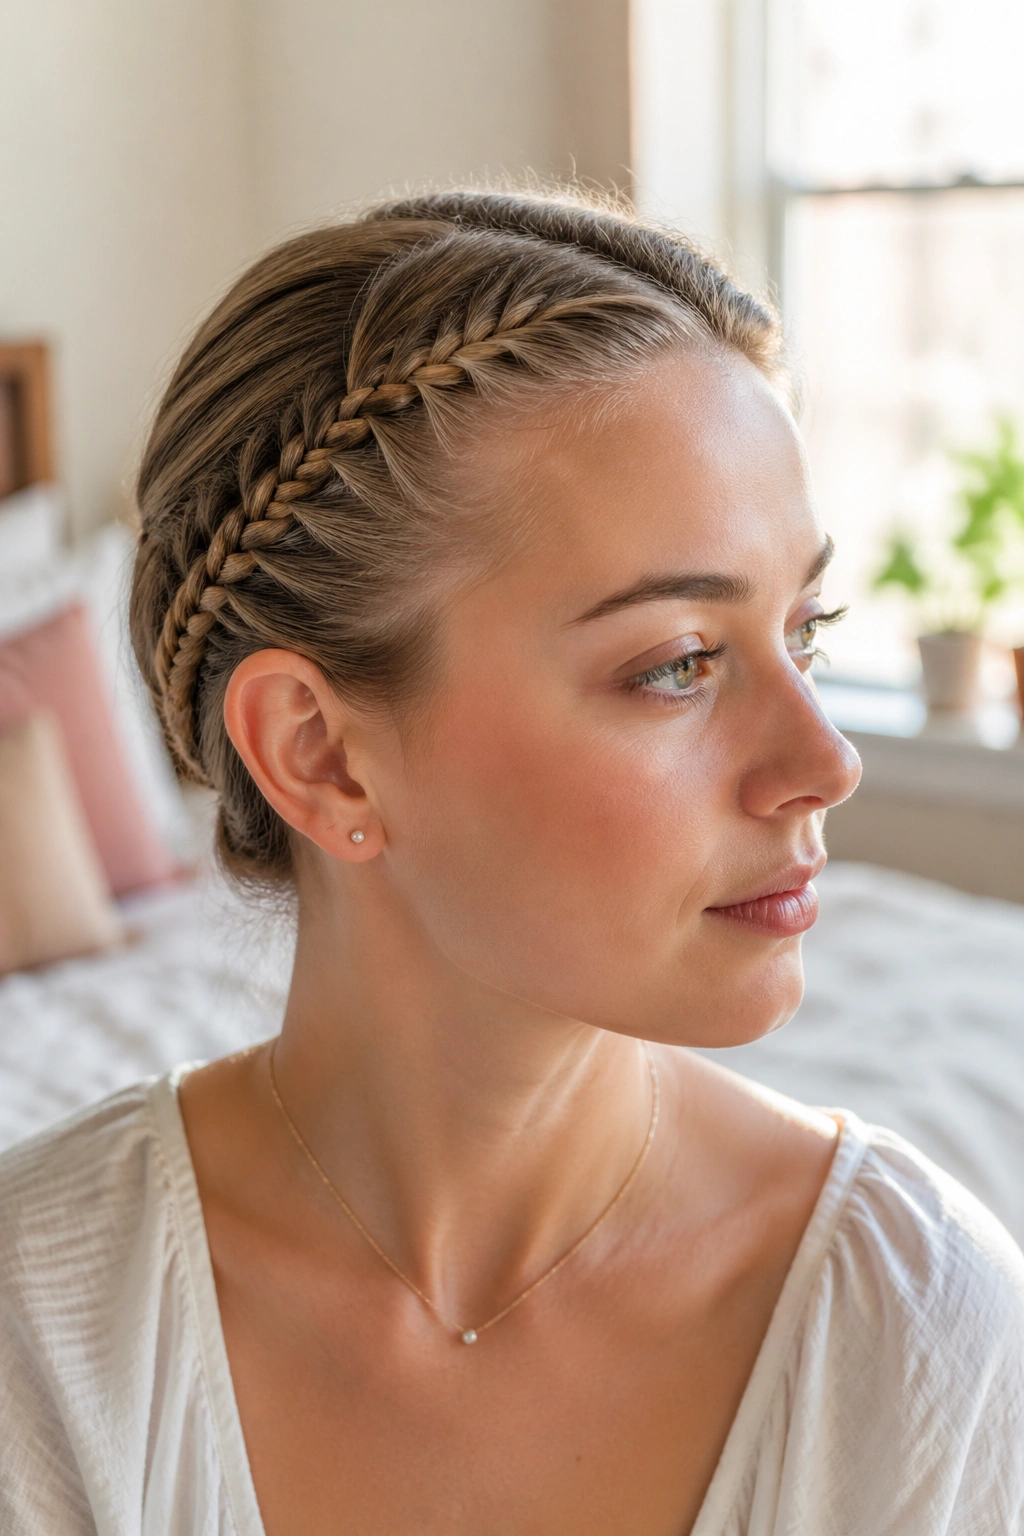
11. The Half-Crown Single Braid
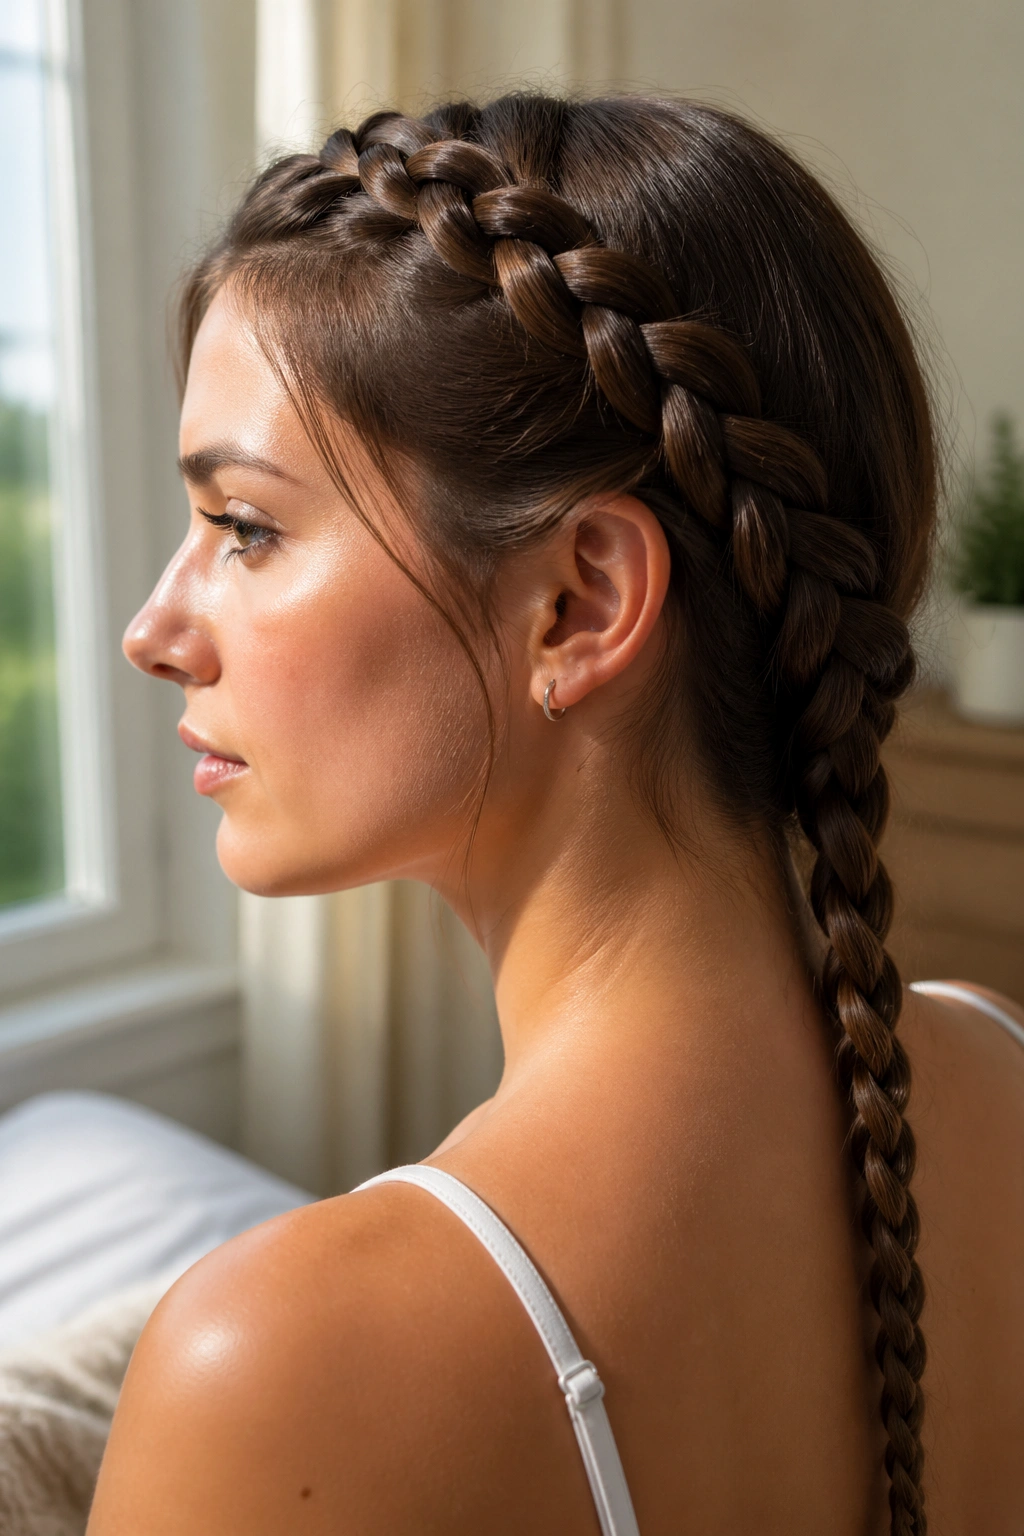
A half-crown braid gives you structure around the head without the weight of a full updo. It starts near one temple, follows the hairline or crown just enough to feel shaped, then ends in one braid that drops down the back or shoulder. That line is what makes it feel calm and useful at the same time.
This style is especially good when your front layers keep falling into your eyes. A braid that hugs the head for a few inches can hold the fringe area in place without pinning everything flat. I like it with a slightly off-center part, because a perfect middle can make the look a bit formal. A softer part keeps it daily.
One thing people miss: the braid should track the head shape, not sit on top of it like a band. If it lifts too high, the style starts to feel decorative instead of minimal. Keep it close. Let the hair do less.
12. The Pull-Through Braid Look
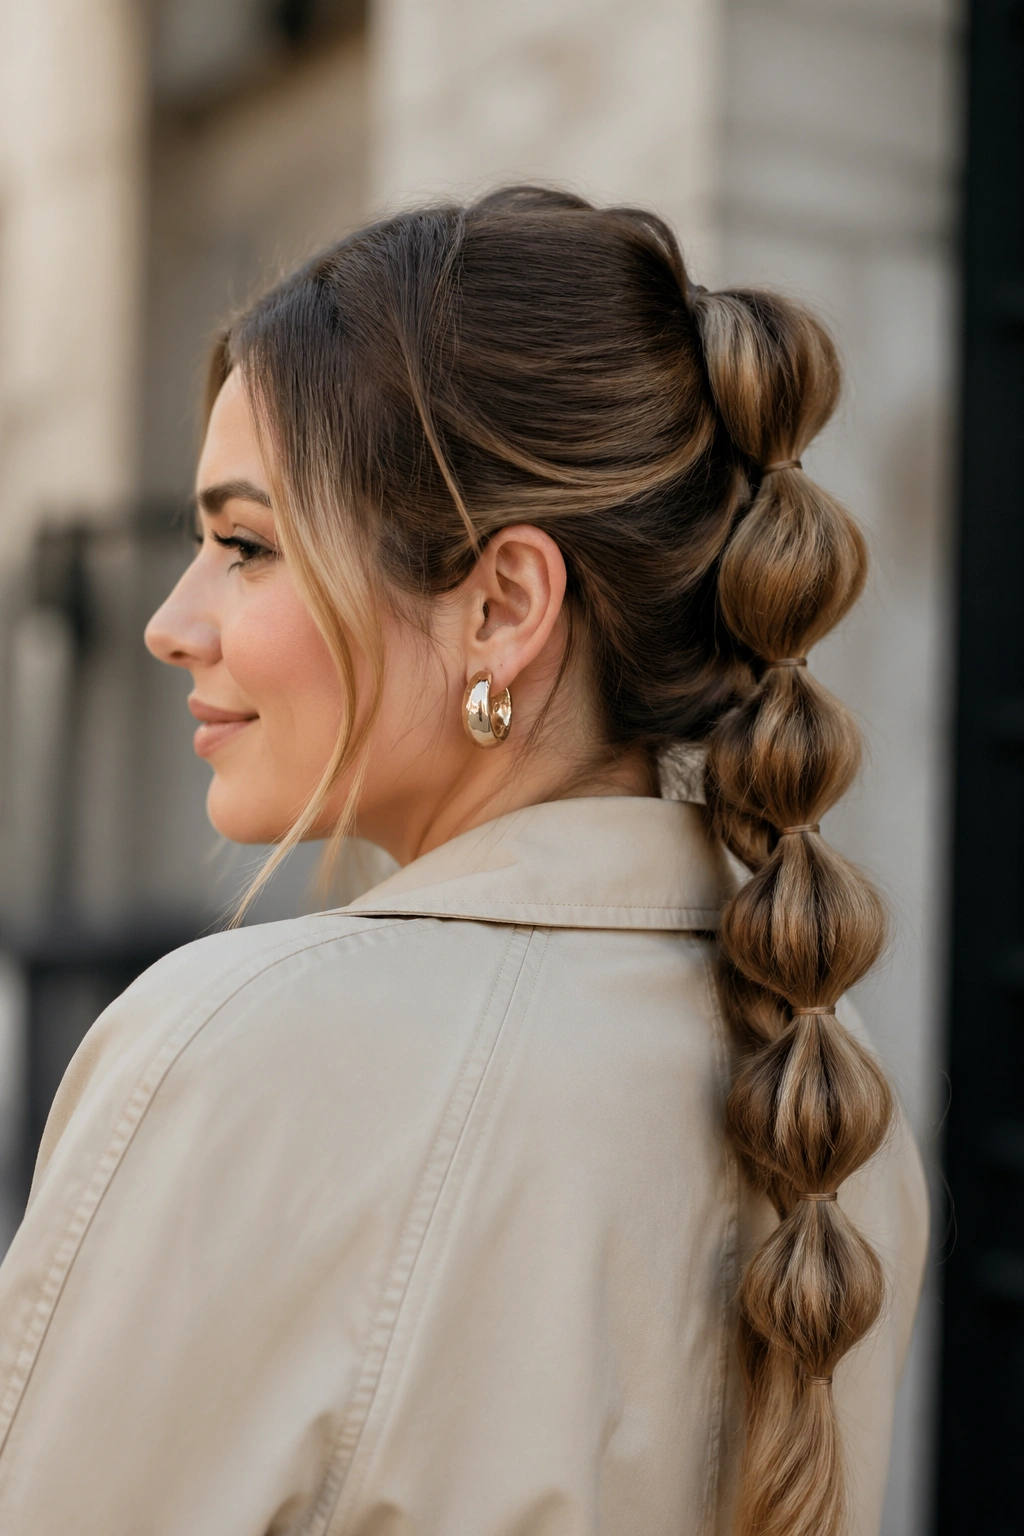
A pull-through braid is the closest thing to a cheat code for braid volume. Unlike a standard braid, it uses small ponytail sections stacked and pulled through each other, so the shape looks fuller and more structured. That makes it useful for thick hair, or for anyone who likes braid texture but not the flatness that can come with classic braiding.
The catch is that it needs more elastics. Not a deal-breaker. Just a fact. If you want the cleanest result, use small clear elastics and keep the spacing even, about 1 to 1½ inches apart. Uneven gaps show fast on this style.
It’s not my first pick for the most stripped-down look, but it earns its place because it can make ordinary hair look orderly in a single line. If your hair is layered or short in the front, this style hides a lot of the unevenness that would show in a regular braid.
13. The Deep Side-Part Braid
A deep side part changes the mood of a braid instantly. The style stops looking centered and starts looking a little more sculpted, which is useful when you want a minimalist braid that still has character. A deep side-part braid adds shape before the braid even begins.
What Makes It Different
The heavy side of the part gives the braid more visual weight, so the finished style feels balanced even if the braid itself is simple. I like this on rounder face shapes because the line of the part creates a longer look. On straight hair, it also helps hide the fact that the braid is basic, which is fine. Basic is often better.
Quick Notes
- Start the braid at the heavier side of the part
- Keep the first section close to the hairline
- Let the braid fall slightly behind the ear if you want a softer line
- Smooth the part with a comb, not your fingers
That last point sounds tiny, but fingers leave lift. A comb gives you the clean line this style needs.
14. The Face-Framing Braid with Soft Pieces

A braid does not need every strand pulled back to feel tidy. A few soft pieces around the face can make the whole style easier to wear, especially if your hairline feels harsh when it’s fully swept back. The trick is restraint, not volume.
I usually leave two thin sections near the temples, each about the width of a pencil, and braid everything else cleanly. Those pieces soften the jaw and keep the braid from looking too severe against bare skin. If your haircut has short layers around the cheekbones, this style can make those layers look intentional instead of messy.
The ends matter here, too. A braid with soft face-framing pieces works best when the tail is still neat and low. If both the front and the back are loose, the look loses its shape fast. One soft element is enough. More than that and the braid starts to wander.
15. The Wet-Look Single Braid
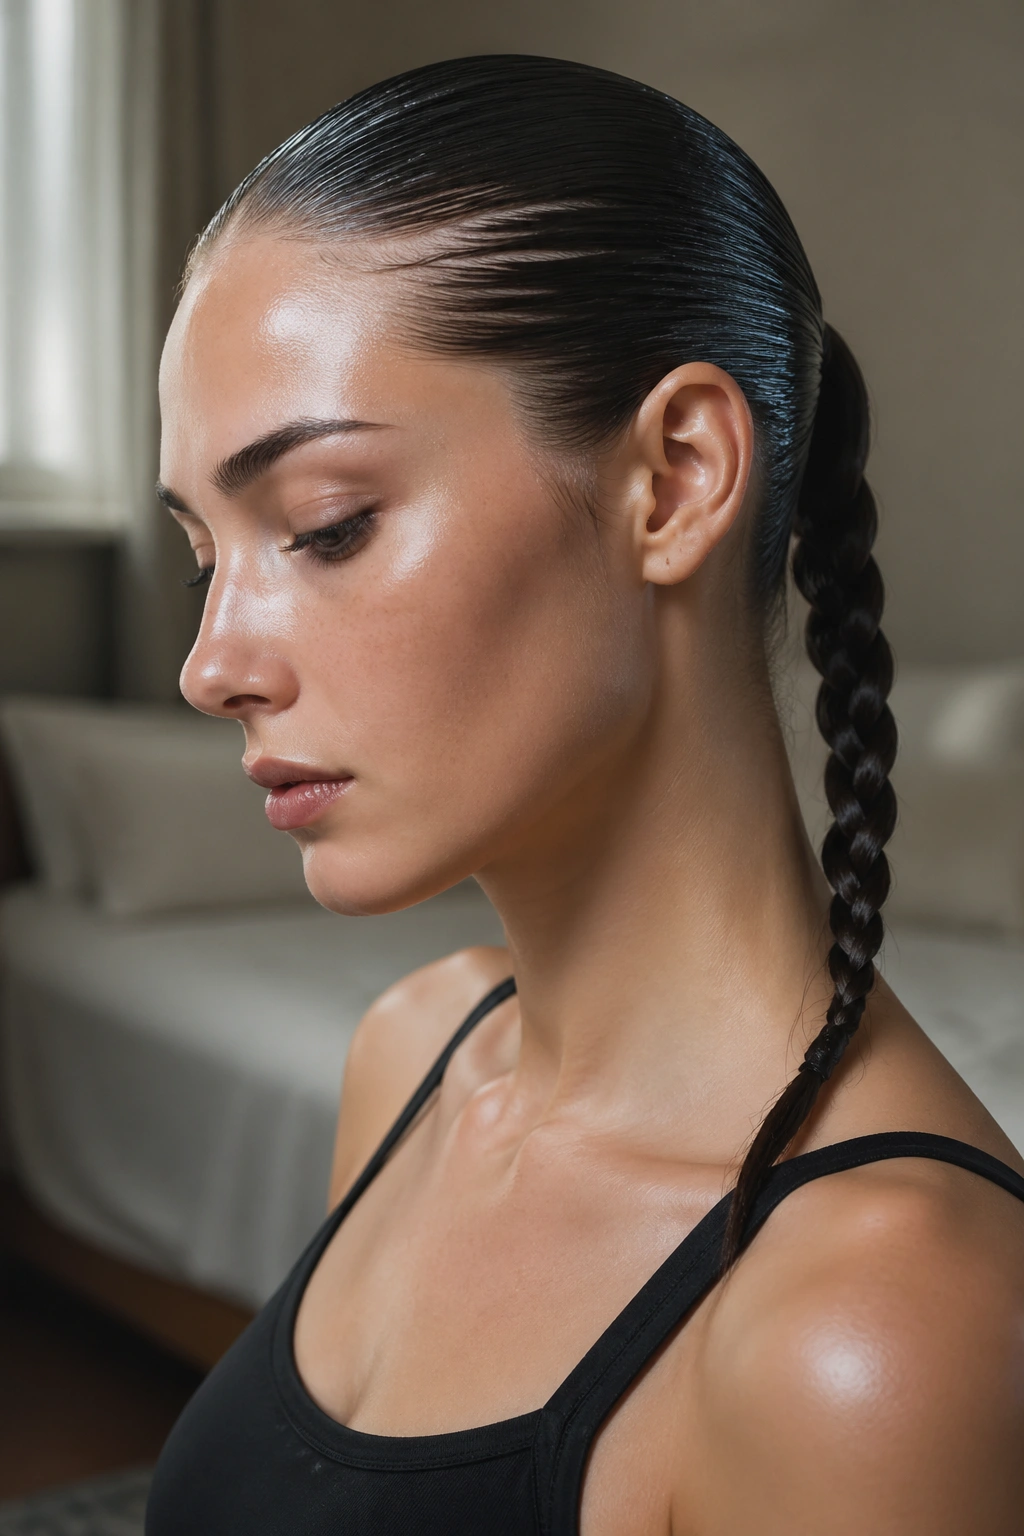
Can a braid look sharp and low-effort at the same time? Yes, if you start on damp hair and keep the surface smooth. A wet-look single braid has a glossy, pulled-together finish that feels spare in a good way. It’s one of the few styles that can look polished without requiring much length or volume.
How to Keep It Polished
Use a small amount of gel or styling cream on damp hair, then comb it straight back or into your chosen part before braiding. Don’t wait too long; once the hair starts drying unevenly, the braid picks up bumps. Braid the hair while it still has a little slip, then smooth the outer surface with your palms.
This style is useful for thick or frizz-prone hair because the moisture plus product keeps the flyaways down. It also makes shorter layers behave a bit better, though not perfectly. Short pieces around the hairline may still escape. That’s normal. The point is control, not perfection.
16. The Pancaked Braid for Extra Width

A braid that looks too skinny can disappear against a sweater or coat. Pancaking fixes that. By gently pulling at the outer edges of each braid section, you widen the plait and give it a softer, fuller shape. The braid still reads as a single braid, but it has more presence.
I like this technique on medium-thick hair that tends to look flat when braided tightly. Start with a normal braid, secure the end, then pinch and tug the outer loops from the bottom upward. Work slowly. If you rush, the braid twists apart and the shape turns lumpy. That’s the point where people overdo it and blame the haircut, which is unfair.
- Pull only the outer edges, not the center
- Start at the bottom and move upward
- Stop when the braid looks wider but still holds together
- Mist with light hairspray if the hair is very layered
This one rewards a light hand. Hard pulling looks clumsy.
17. The Single Braid for Curly Hair
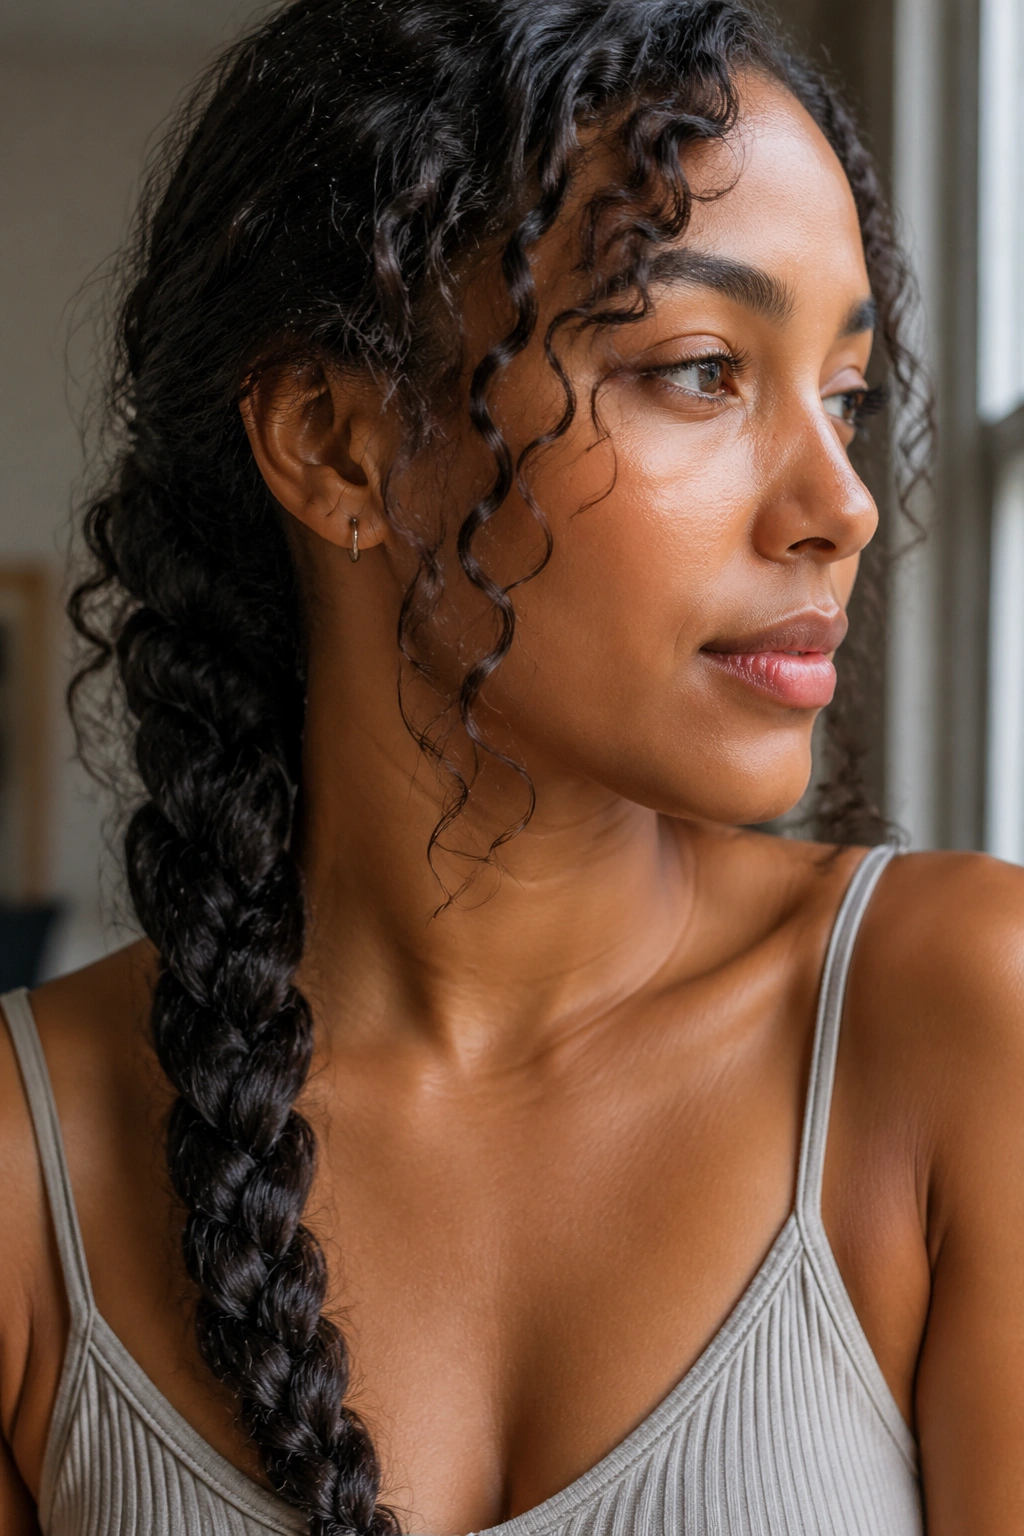
Curly hair changes the rules, and that’s part of the fun. A single braid on curls can look rich and relaxed at the same time, but only if you leave enough moisture in the hair before braiding. Dry curls braid badly. They puff, snag, and shed little frizzy pieces all along the length.
I like to smooth in leave-in conditioner or a curl cream first, then use fingers or a wide-tooth comb to gather the hair. A braid on curly hair should not be crushed flat unless that is the point. Let the pattern keep some of its body. That texture is the whole reason the style works.
The ends are worth paying attention to. Curly hair at the tail can knot quickly, so a tiny amount of oil on the last 2 inches helps a lot. Not a soak. Just enough to keep the braid from turning fuzzy by afternoon. This is one of those styles that looks better with a bit of softness anyway.
18. The Loose Braid That Works with Waves
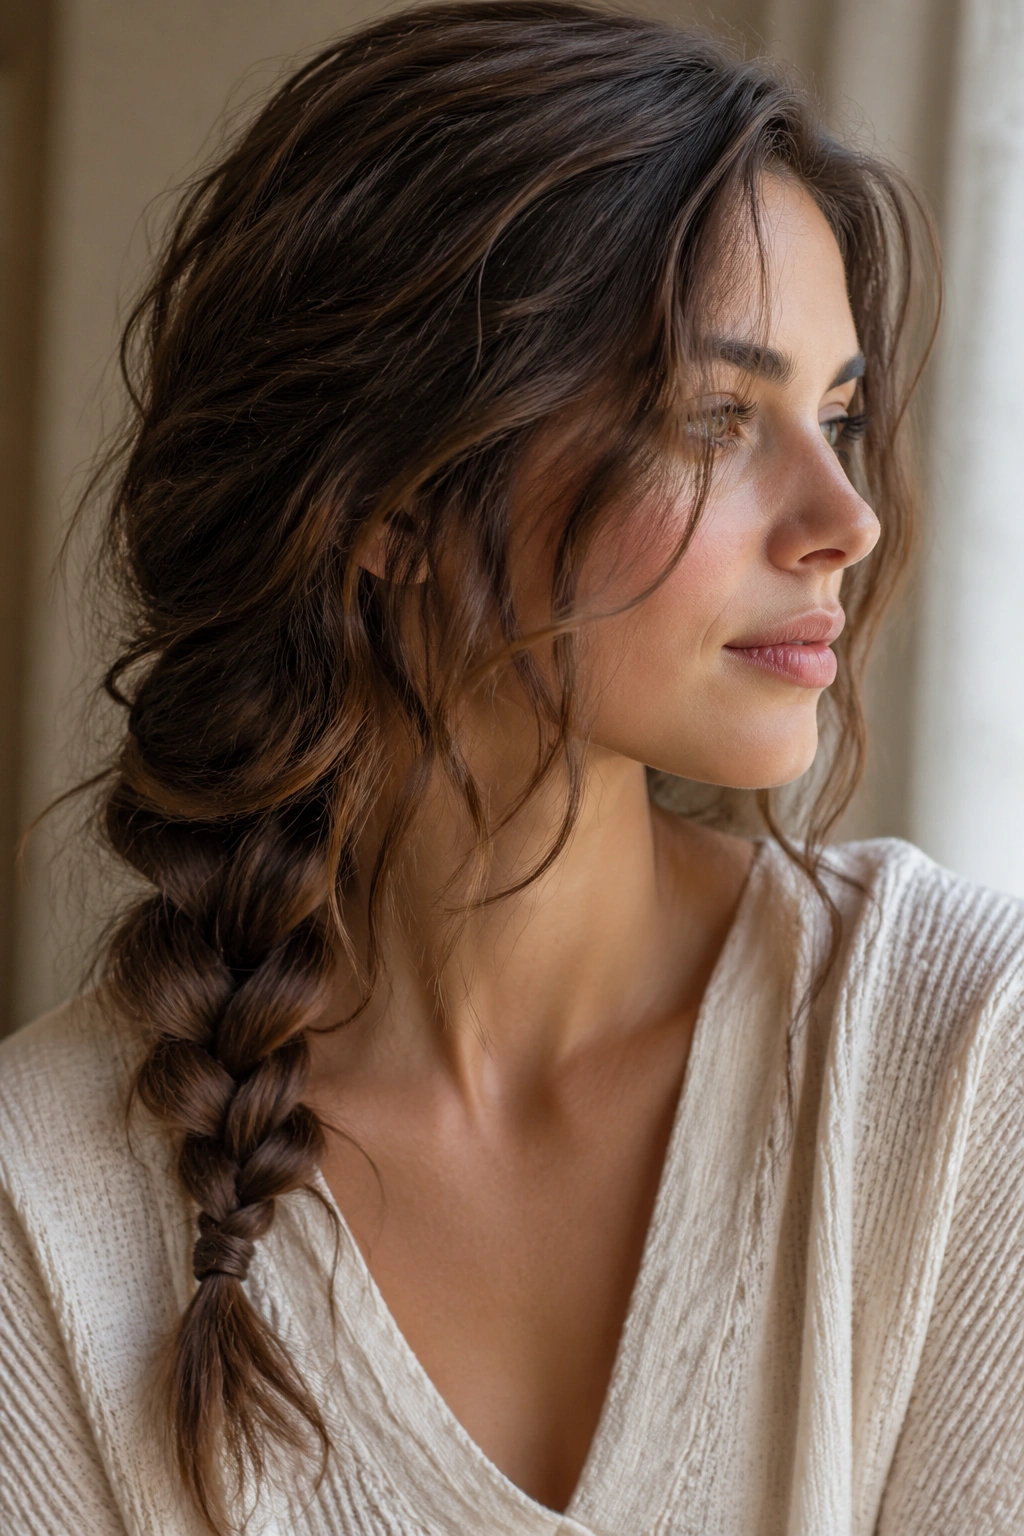
Wavy hair has an easy head start here. Unlike straight hair, waves already give a braid some built-in movement, so you can keep the plait looser and still have it read clearly. That makes this a smart daily style when you want minimal effort and a little texture.
I prefer this braid after air-drying or a rough blow-dry, because the natural bend helps the shape stay from root to end. A braid on very smoothed-out waves can look flat and controlled, which isn’t always the goal. Let the hair keep a little memory of its own pattern. It looks more relaxed that way.
If your waves puff in humidity, braid slightly tighter at the top and looser through the tail. That gives the style a cleaner base without flattening the ends into a stringy line. The braid should move when you walk. Not swing wildly. Just enough.
19. The Minimal Braid for Fine Hair
Fine hair can look shorter in a braid than it really is, and that annoys people more than they admit. The fix is a braid that stays narrow and close to the head, with enough texture at the roots to stop the sections from sliding. A minimal braid for fine hair should look neat, not tiny.
The Small Things That Help
Dry shampoo near the roots gives the braid a little friction. A tiny elastic at the end keeps the tail from unraveling. And if the hair is especially silky, braiding on day-two hair usually works better than braiding fresh, clean hair.
I’d skip thick pancake pulling on fine hair unless you want a softer, looser look. Too much tugging can make the braid look patchy. Better to keep the sections even, then loosen only the very outer edges near the finish. The clean line does more for this style than extra width ever will.
20. The Thick-Hair Braid That Stays Calm

Thick hair can make a braid look rich, but it can also get bulky fast. The way around that is to control the sections from the start. A tidy thick-hair braid begins with smaller parts than you think you need and a smooth base at the scalp.
The prep matters. Detangle all the way through, then gather the hair with a brush before you start braiding. If the roots are puffy, the braid grows heavy at the top and drags the rest of the style down. I also like a small amount of leave-in cream through the mid-lengths, because it keeps the strands from catching and frizzing while you work.
This braid looks best when it sits low or just off-center. A high thick braid can feel like too much hair in one place. A lower placement spreads the weight out and makes the whole thing calmer. That calm is the minimalist part.
21. The Shoulder-Length Single Braid
Can a braid work if the hair barely reaches the collarbone? Yes, but placement matters more. A shoulder-length single braid needs to start lower and stay compact so the ends don’t stick out in odd directions. The lower you begin, the better the braid holds its shape.
How to Fake a Little More Length
Use a middle or side part, gather the hair at the nape, and braid tightly for the first few passes. That keeps the short layers from popping free. If the tail is too short for a full three-strand finish, secure it with a tiny elastic and leave the last inch or so as a small tail. It still reads as intentional.
This is one of those styles that can look more polished than longer braids because it doesn’t drag. The whole thing sits close to the neck and keeps moving parts to a minimum. Honestly, I like that. No drama. No dangling ends getting caught in a scarf.
22. The Long-Hair Low Tail Braid
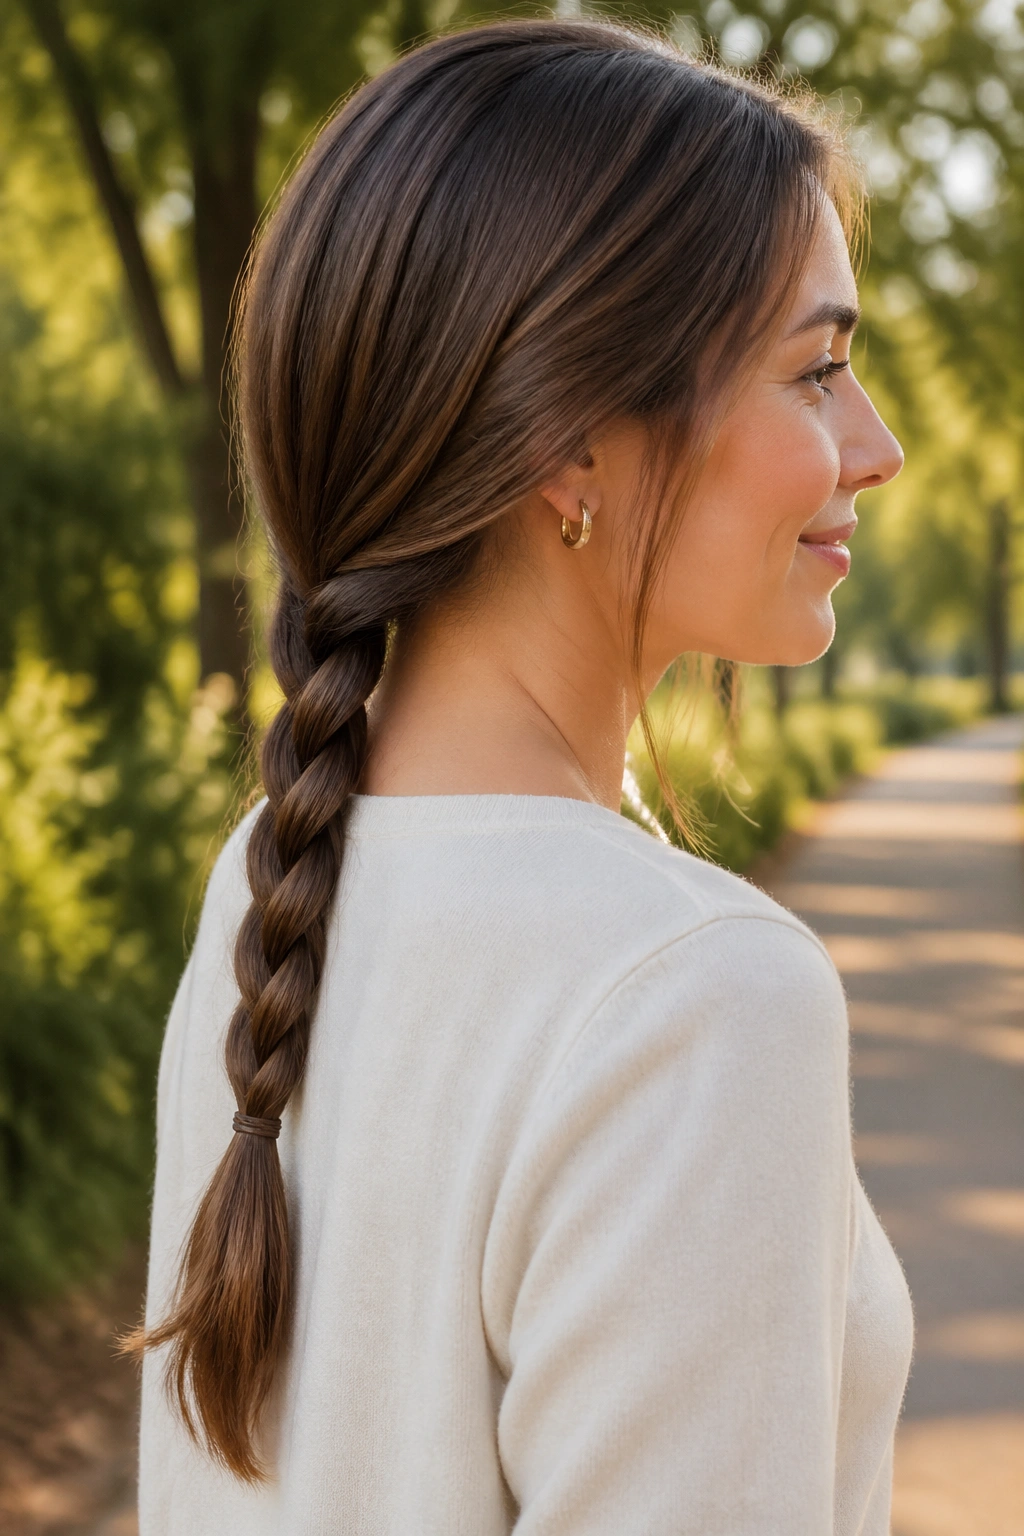
Long hair can make a braid look elegant, but it can also make it feel heavy if you let it hang straight down the back. A low tail braid keeps the weight contained and gives the length a cleaner line. The trick is not to over-tighten the top, or the style starts to look rigid.
This braid works best when the hair is brushed smooth from the crown to the nape, then braided with even tension through the tail. If the ends are very long, I like to stop a little earlier than expected and secure with a small elastic before the braid gets too thick at the bottom. That little adjustment keeps the shape from turning into a rope-like lump.
- Best with long, straight, or softly waved hair
- Keeps collars and backpack straps from catching the ends
- Can be worn centered or slightly off to one side
- Looks good with a matte tie instead of a shiny rubber band
There’s a reason this one never really leaves rotation. It’s clean, easy, and the length does most of the work.
23. The Wrapped-End Minimal Braid
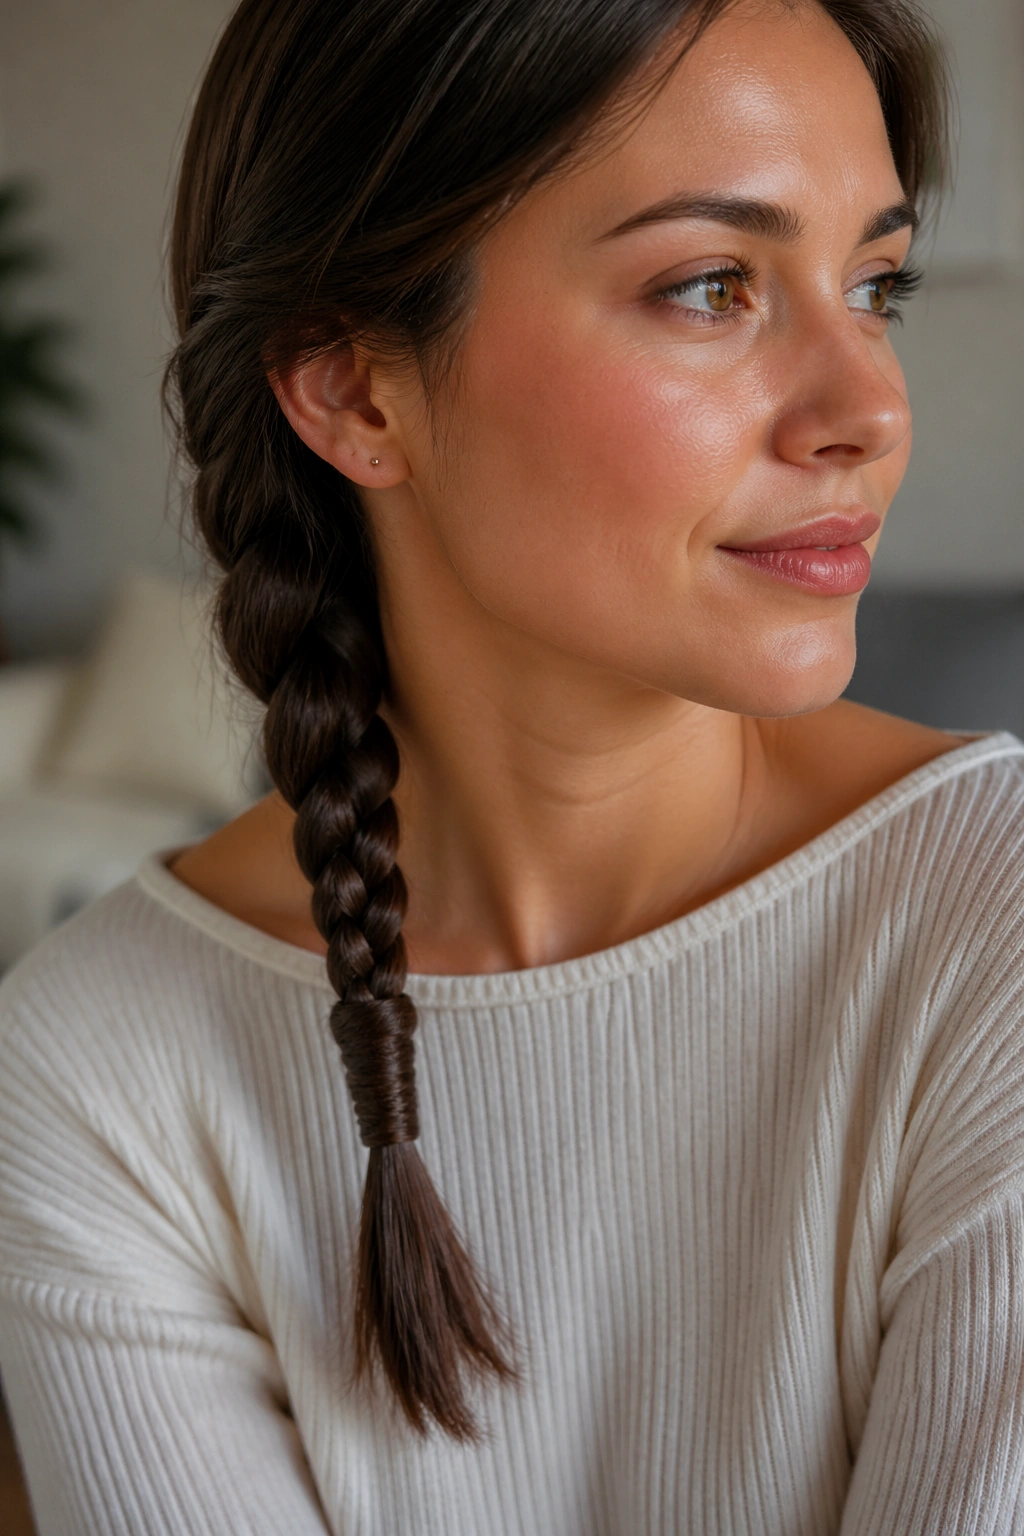
If you want one braid that looks finished without extra decoration, make the end disappear. A wrapped-end braid hides the elastic with a thin strand of hair, which gives the style a cleaner finish than a visible band ever will. Small move. Big payoff.
I like this finish on almost any of the braids above, but it especially suits the low styles. Gather a tiny strand from the braid’s tail, wrap it around the elastic twice, then pin the end underneath with a small bobby pin. The braid looks neater right away, and the back of the style stops calling attention to the hardware.
This is also the version I reach for when I want the braid to feel like part of the haircut instead of an add-on. No bows, no clips, no extra texture spray unless the hair needs it. Just one clean line from top to bottom, held together with a finish that stays out of sight. That kind of restraint never gets old.