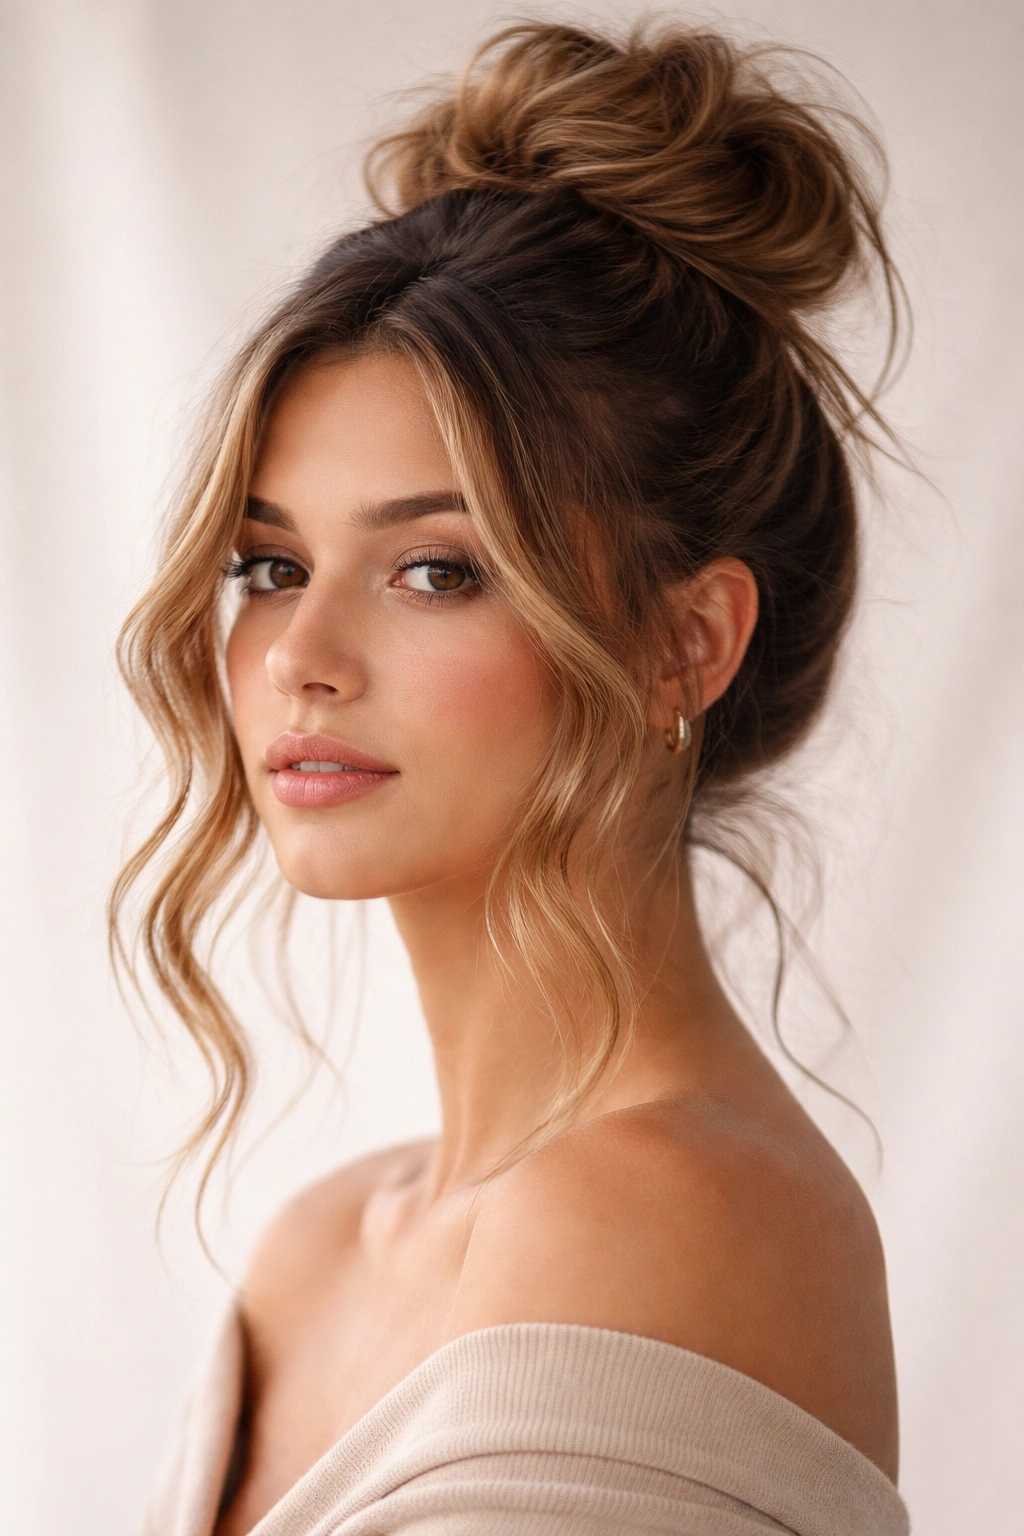
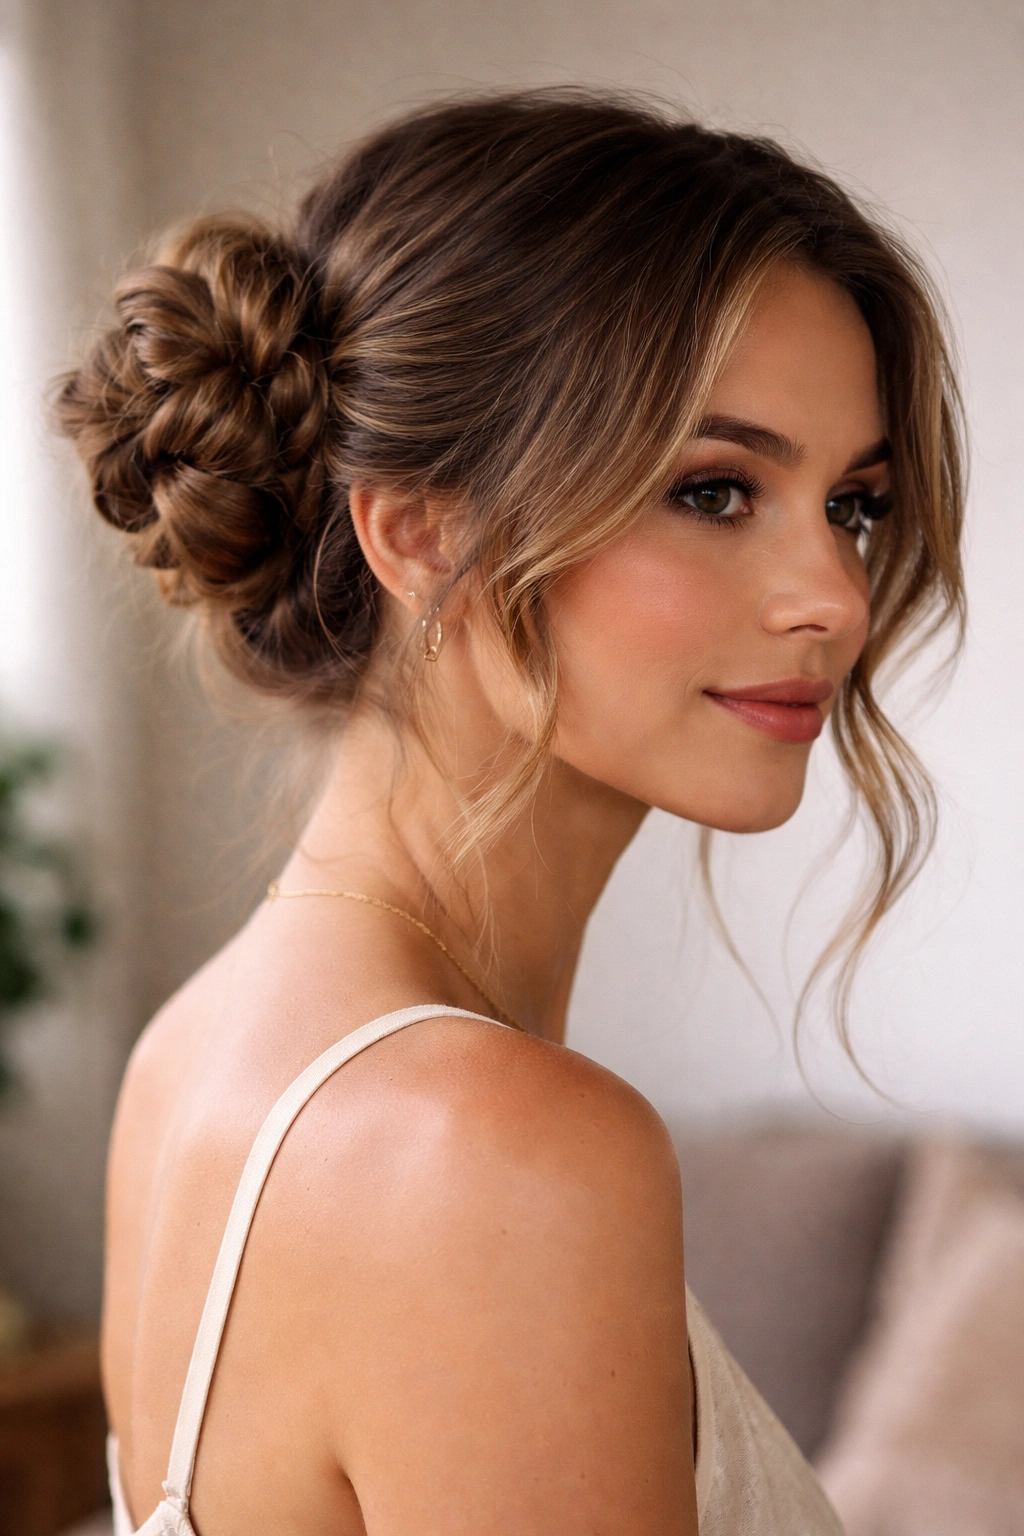
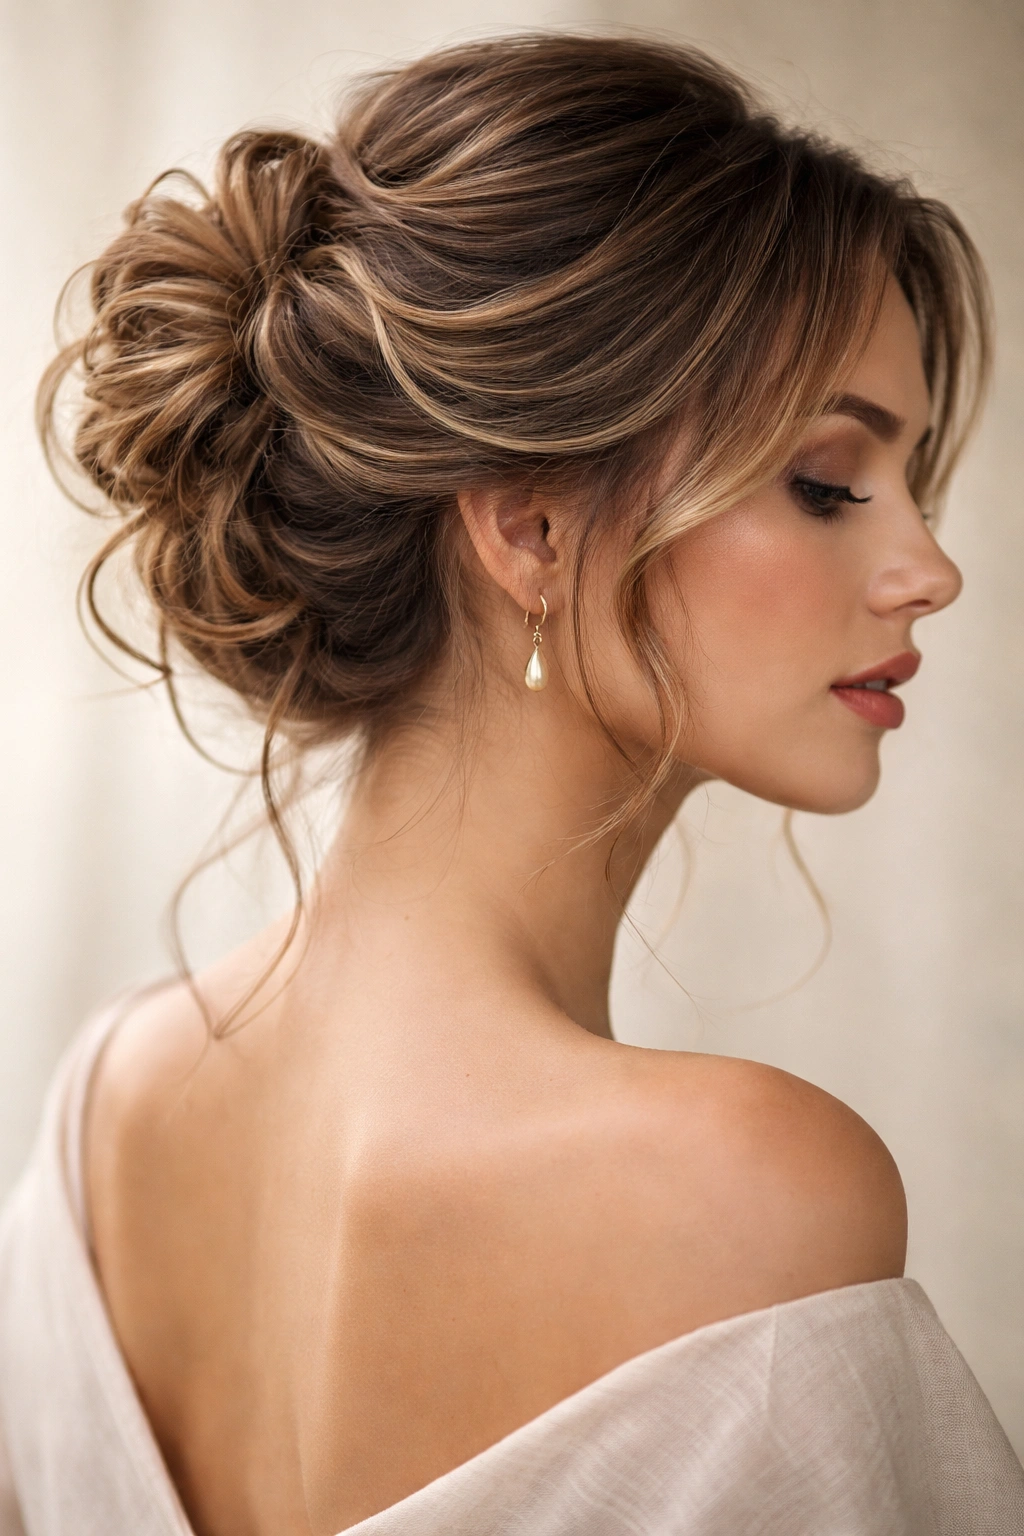
There’s something wonderfully freeing about pulling your hair up, and yet there’s also something undeniably sophisticated about an updo that actually works with your texture instead of fighting against it. If you have medium-length wavy hair, you’ve probably discovered that not all updos are created equal—some leave you with a flat, lifeless crown by midday, while others seem custom-made for the natural movement your waves already have. The key is understanding that wavy hair doesn’t need to be smoothed into submission to look polished. In fact, the ripple and dimension in your waves become one of your greatest assets when you choose the right updo style.
The challenge with medium-length wavy hair is finding that sweet spot: updos that are secure enough to last through a full day, interesting enough to feel intentional, and forgiving enough to actually look better as the day goes on and a few pieces gently fall loose. You’re not working with bone-straight hair that requires every strand to be meticulously placed, and you’re not working with long hair that can hide a multitude of styling sins. Medium length demands precision—but a precision that embraces movement, not one that fights it.
What follows are thirteen genuinely stylish updo options that celebrate wavy hair rather than tame it. Each one is practical enough for everyday wear, elegant enough for occasions when you want to feel put-together, and specifically designed so that your wave texture becomes part of the appeal. Some are quick enough to execute on a regular morning; others are worth the extra five minutes when you have something special planned. All of them work with your natural texture, not against it.
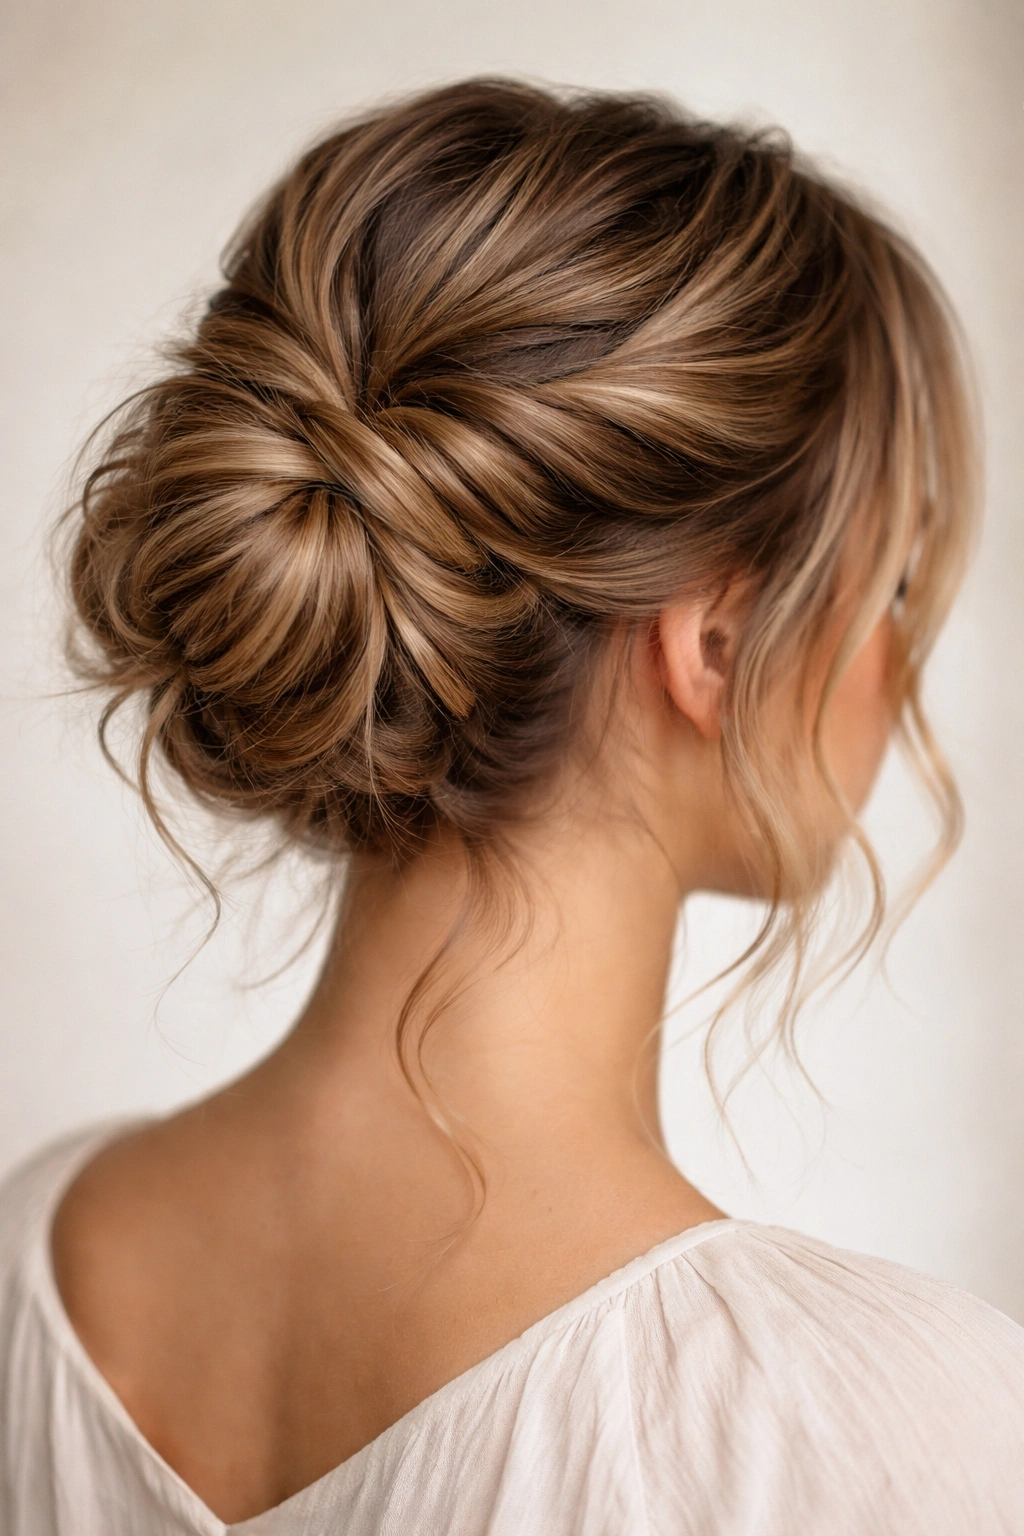
1. The Textured High Bun with Face-Framing Pieces
This is the updo that looks effortlessly polished while still feeling undone—and that’s exactly why it works so well for wavy hair. By gathering your hair into a high bun and deliberately leaving a few pieces around your face, you create a style that’s both neat and romantic. The bun sits at the crown, which is flattering on almost every face shape, and the strategic face-framing pieces soften the overall look while also helping to blend with your waves if a few strands escape during the day.
Why It Works for Wavy Hair
The wavy texture naturally creates dimension within the bun itself, so you get visual interest without needing your bun to be perfectly smooth. In fact, a slightly textured bun with visible waves looks infinitely more modern and intentional than a tight, polished one. The face-framing pieces integrate seamlessly with your natural wave pattern, which means they look intentional rather than like flyaways—because they’re supposed to be there. Your waves actually make this style look fuller and more interesting than it would on straight hair.
How to Style It
Start with hair that has at least some texture—second-day waves or hair that’s been lightly curled work beautifully. Apply a light texturizing spray to add grip. Pull your hair back into a high ponytail, but leave two larger sections around your face (about the width of your cheekbone). Twist the ponytail loosely and wrap it around itself to form the bun, securing with bobby pins tucked into the texture so they disappear. Pull the bun apart gently with your fingers to add shape and volume. Let your face-framing pieces fall naturally, and if they have a slight bend or wave, that’s perfect—don’t straighten them.
Pro tip: Use a texturizing spray or dry shampoo before styling to give your hair more grip and prevent slipping throughout the day.
2. The Twisted Low Side Bun
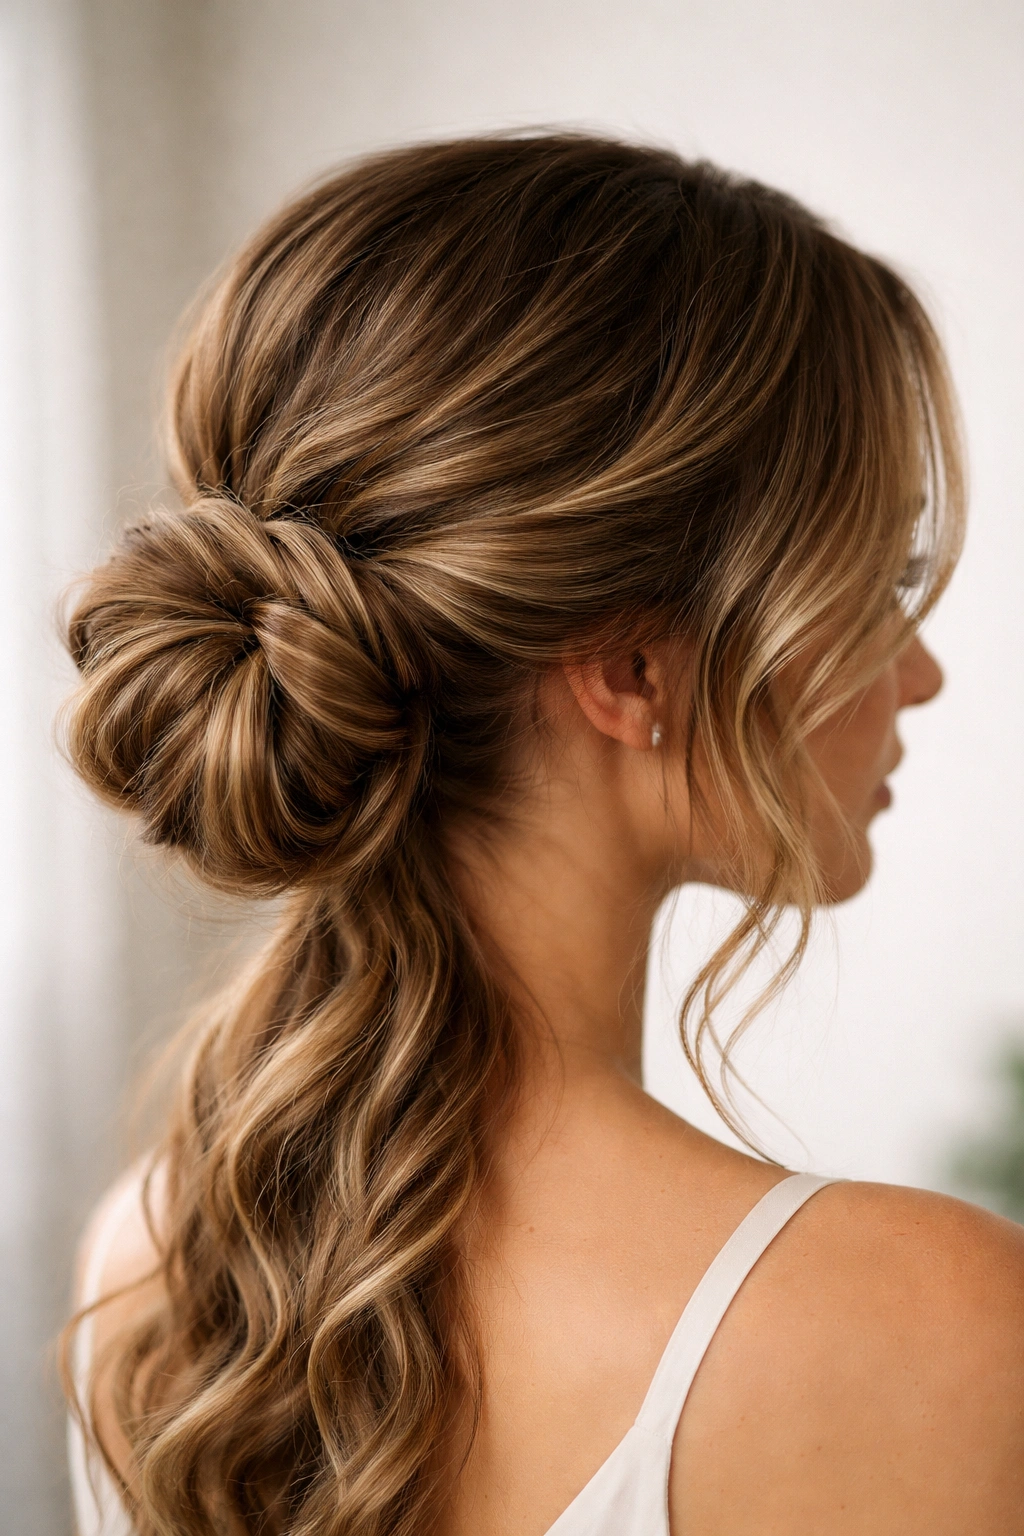
A low side bun positioned just behind one ear creates a graceful line that’s simultaneously casual and intentional. This style works particularly well for wavy hair because the twists integrate your texture beautifully, and the side placement means your waves can cascade over one shoulder, making it feel less “up” and more “styled.” It’s the kind of updo that can work for everything from a casual coffee date to a date night if you dress it up with a statement earring.
Why It Works for Wavy Hair
Side-positioned styles complement wavy hair’s natural movement because they don’t fight the way your hair naturally falls. The twists that make up this bun actually show your wave pattern rather than hide it, which means the more texture you have, the more interesting this style becomes. A perfectly smooth, slicked-back version might look a bit severe, but a textured, slightly undone version looks fashion-forward and intentional.
How to Style It
Brush your hair gently to blend your waves without completely smoothing them. Take a section from one side near your temple and begin twisting it back toward the opposite ear, adding hair as you go (like a twisted crown). Once you’ve twisted about two-thirds of the way across, gather all your hair into a low ponytail on one side and twist that section as well. Coil the twisted ponytail around itself and secure with bobby pins. Leave a few pieces loose around your face and let them wave naturally.
Pro tip: A light hairspray on the twists before you coil them into the bun will keep everything secure without making it feel stiff.
3. The Messy Middle Bun
Don’t let the word “messy” fool you—this style is carefully constructed to look effortless while being completely secure. Positioned at the midpoint of your head (not high, not low), this bun celebrates the fact that perfect smoothness isn’t the goal. Your wavy texture is the entire point; it’s what makes this look intentionally undone rather than just, well, undone. It reads as modern, cool, and like you spent way less time on it than you actually did.
Why It Works for Wavy Hair
Straight-haired people often struggle with messy buns because they lack inherent texture. Your waves are built for this style. The more texture you have, the more visually interesting your bun becomes. You’re essentially leaning into your hair’s natural personality rather than trying to smooth it away, which means this style actually looks better on wavy hair than on any other texture. It’s one of the few styles where your waves are genuinely an advantage.
How to Style It
Gather your hair into a ponytail at the midpoint of your head—not pulled tight, but with some gentle movement. Don’t brush it smooth; let the waves remain visible. Twist the ponytail loosely and wrap it around itself. Secure with bobby pins, but don’t worry about tucking every piece—some flyaways are the entire aesthetic. Take a few shorter pieces near the crown and gently backcomb them or tease them slightly to add dimension at the top. Finish with a light hairspray that won’t stiffen the texture.
Worth knowing: This style actually improves as the day goes on. A few pieces falling loose makes it look even more intentional, not less put-together.
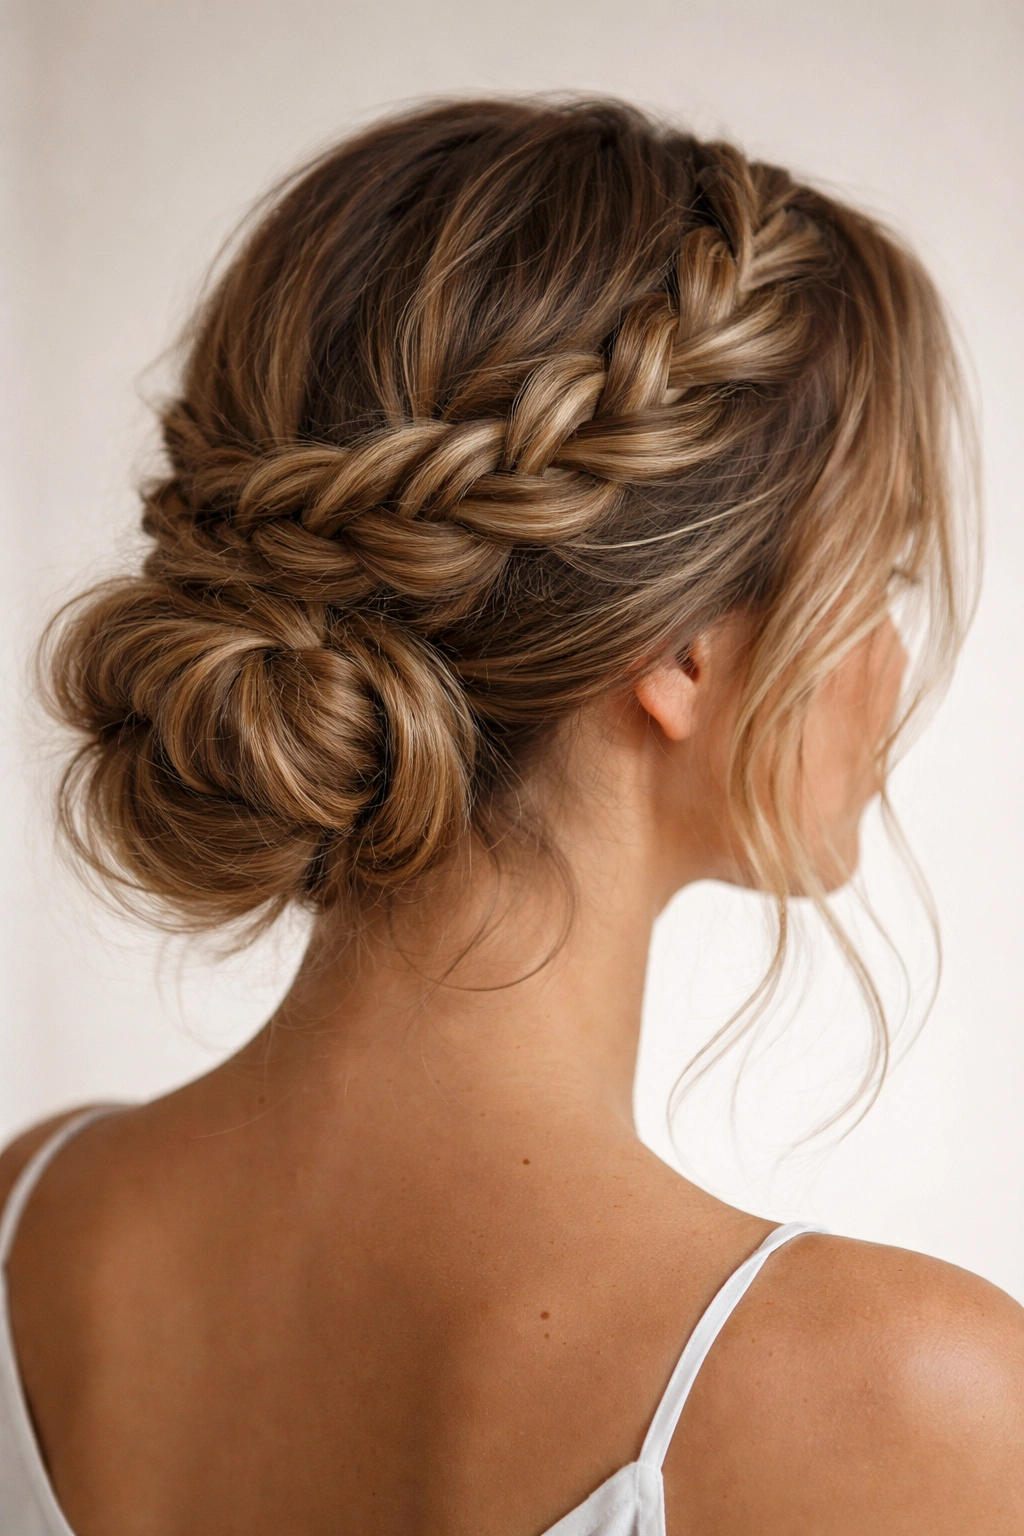
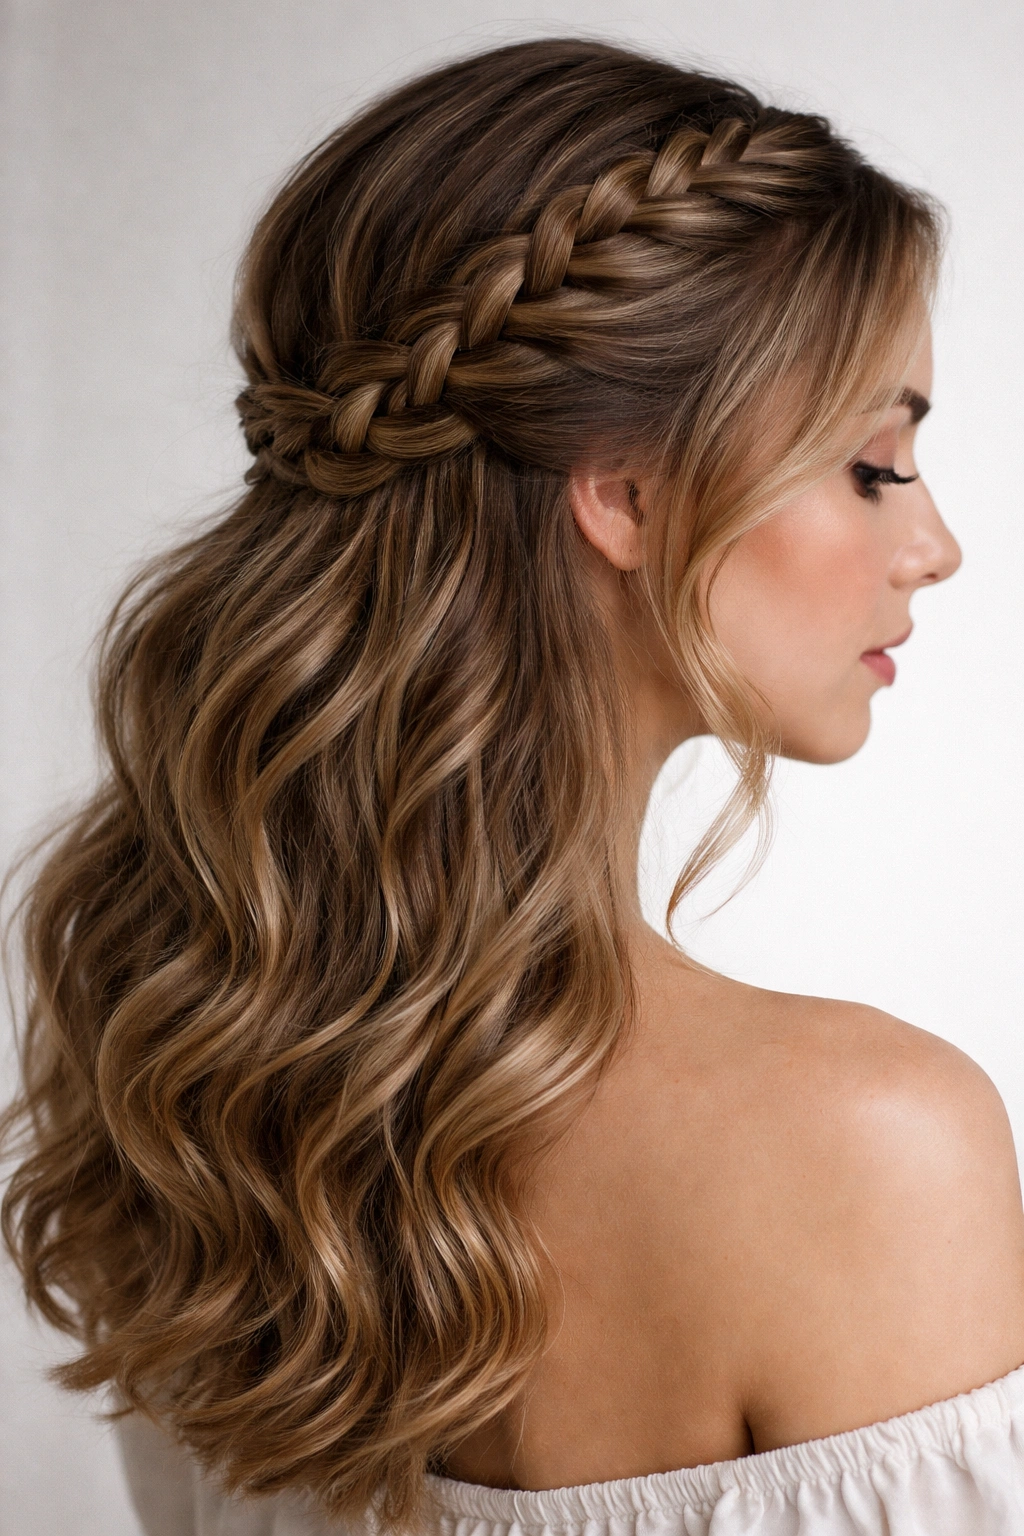
4. The Braided Crown with Low Ponytail
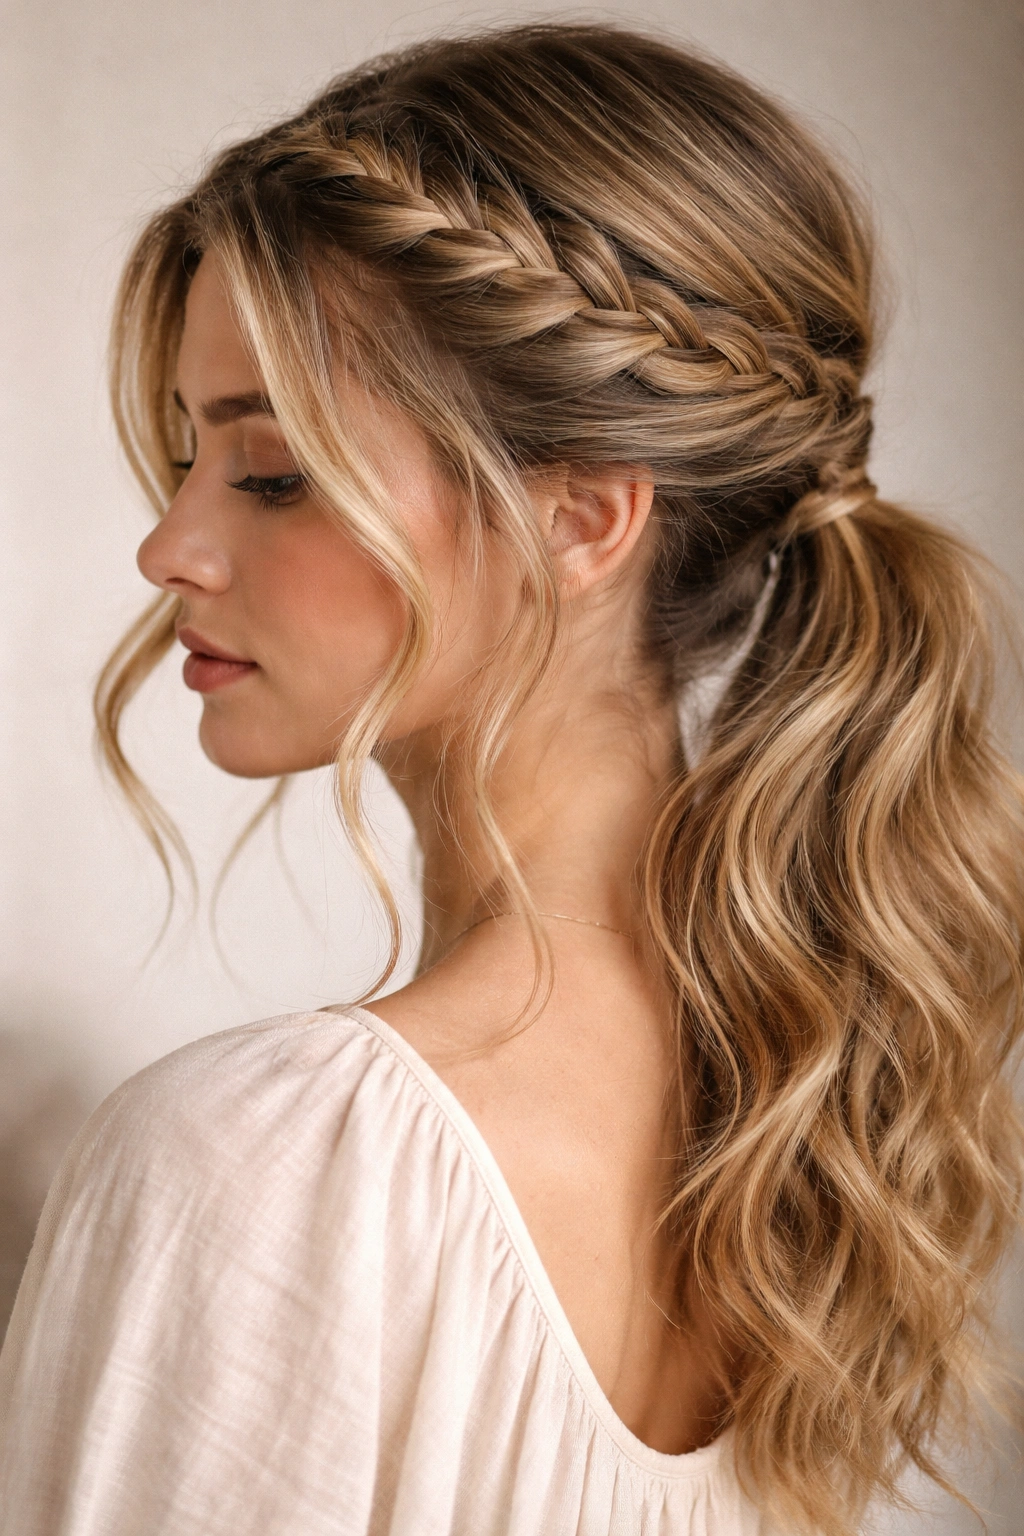
Combining a braid with a low ponytail gives you the best of both worlds: a style that feels special and constructed, but also comfortable and very wearable. The braid runs across the crown like a tiara, and then your wavy hair flows into a low ponytail beneath it. This is the updo for days when you want to look put-together but also feel comfortable—there’s no pulling at the crown, and the braid actually helps keep flyaways in place while looking decorative rather than restrictive.
Why It Works for Wavy Hair
Braids are naturally flattering on wavy hair because they interact with your texture in interesting ways. Where a braid on straight hair would look very uniform, a braid on wavy hair shows off the movement within each strand. The low ponytail lets your waves cascade naturally below, which feels romantic and is also very practical for keeping hair off your neck without pulling tightly at the crown. It’s the kind of style that makes people ask if you just came from a salon.
How to Style It
Start with textured hair (second-day waves are ideal). Create a deep side part. Beginning at one temple, French braid across the crown toward the opposite ear, incorporating more hair as you go and leaving the braid slightly loose for texture. Secure the braid with a small elastic at the back. Gather all your hair into a low ponytail below the braid, leaving the braided section separate. The braid should sit above the elastic, creating a decorative band. You can loosely braid the ponytail itself or leave it wavy—both look beautiful. Secure everything with bobby pins hidden within the texture, and finish with texture spray rather than heavy hairspray.
Pro tip: Pull gently on the sides of the braid after you’ve completed it to widen it and make it look fuller and more intentional.
5. The Twisted Double Bun
Two buns positioned symmetrically on either side of your head might sound playful (and it can be), but when executed with the right texture and proportion, it’s unexpectedly sophisticated. The key is keeping the buns relatively close to the back of the head rather than positioning them on the very sides, which makes this feel modern rather than young. Your waves give these buns dimension and interest that a smooth version would lack.
Why It Works for Wavy Hair
Double buns can sometimes feel a bit diminishing on fine or thin hair, but the texture of wavy hair makes them look full and intentional. The twisted sections create visible spiral patterns that are more interesting on wavy hair than on straight hair. You’re essentially using your natural texture to create visual depth and movement within a structured style. It’s an elevated version of what might otherwise feel too playful.
How to Style It
Create a center part that feels natural to your wave pattern. Divide your hair into two sections. On one side, take the section and twist it gently, then coil it around itself to form a bun positioned about midway between the temple and the back of the head. Secure with bobby pins. Repeat on the other side. The buns should be roughly the same size, but they don’t need to be perfect mirrors of each other. Leave a few pieces loose around your face and near the nape of your neck. Finish with a light texture spray that emphasizes the twisted pattern without stiffening it.
Worth knowing: The higher up you position these buns on the sides of your head, the more playful the look. The further back and lower you position them, the more sophisticated it becomes.
6. The Loose Halo Braid with Soft Bun
A halo braid—one that encircles the crown of your head—is an incredibly flattering updo that feels special without being difficult. Combined with a soft bun positioned at the nape of your neck, it creates a completely romantic, Pinterest-worthy look that actually holds up through a normal day. The halo braid integrates beautifully with wavy hair because it naturally follows the contours of your head and your waves create texture within the braid itself.
Why It Works for Wavy Hair
Halo braids can sometimes look very tight and formal on straight hair, but on wavy hair, they automatically have softness built in. Your waves prevent the braid from looking severe, and they add visual interest to each section of the braid. The low bun at the back captures all your length while the braid at the crown frames your face beautifully. It’s one of the most universally flattering updos for medium-length wavy hair.
How to Style It
Begin with wavy, textured hair. Starting at one temple, begin a Dutch braid (braiding over rather than under for a raised effect) that moves around the back of your head like a crown. You can do a single braid that goes completely around, or a halo braid on each side that meets at the back—both work beautifully. Make the braid intentionally loose; you want to see the texture and movement within it. Once the halo braid is complete, gather all your remaining hair into a low bun at the nape of your neck and secure it gently. Pull the halo braid slightly to widen it and emphasize the texture. Leave a few pieces loose around your face if desired.
Pro tip: Finish the halo braid with hairspray on your fingers, then gently separate the braid sections by pulling on the edges. This makes it look fuller and shows off your texture.
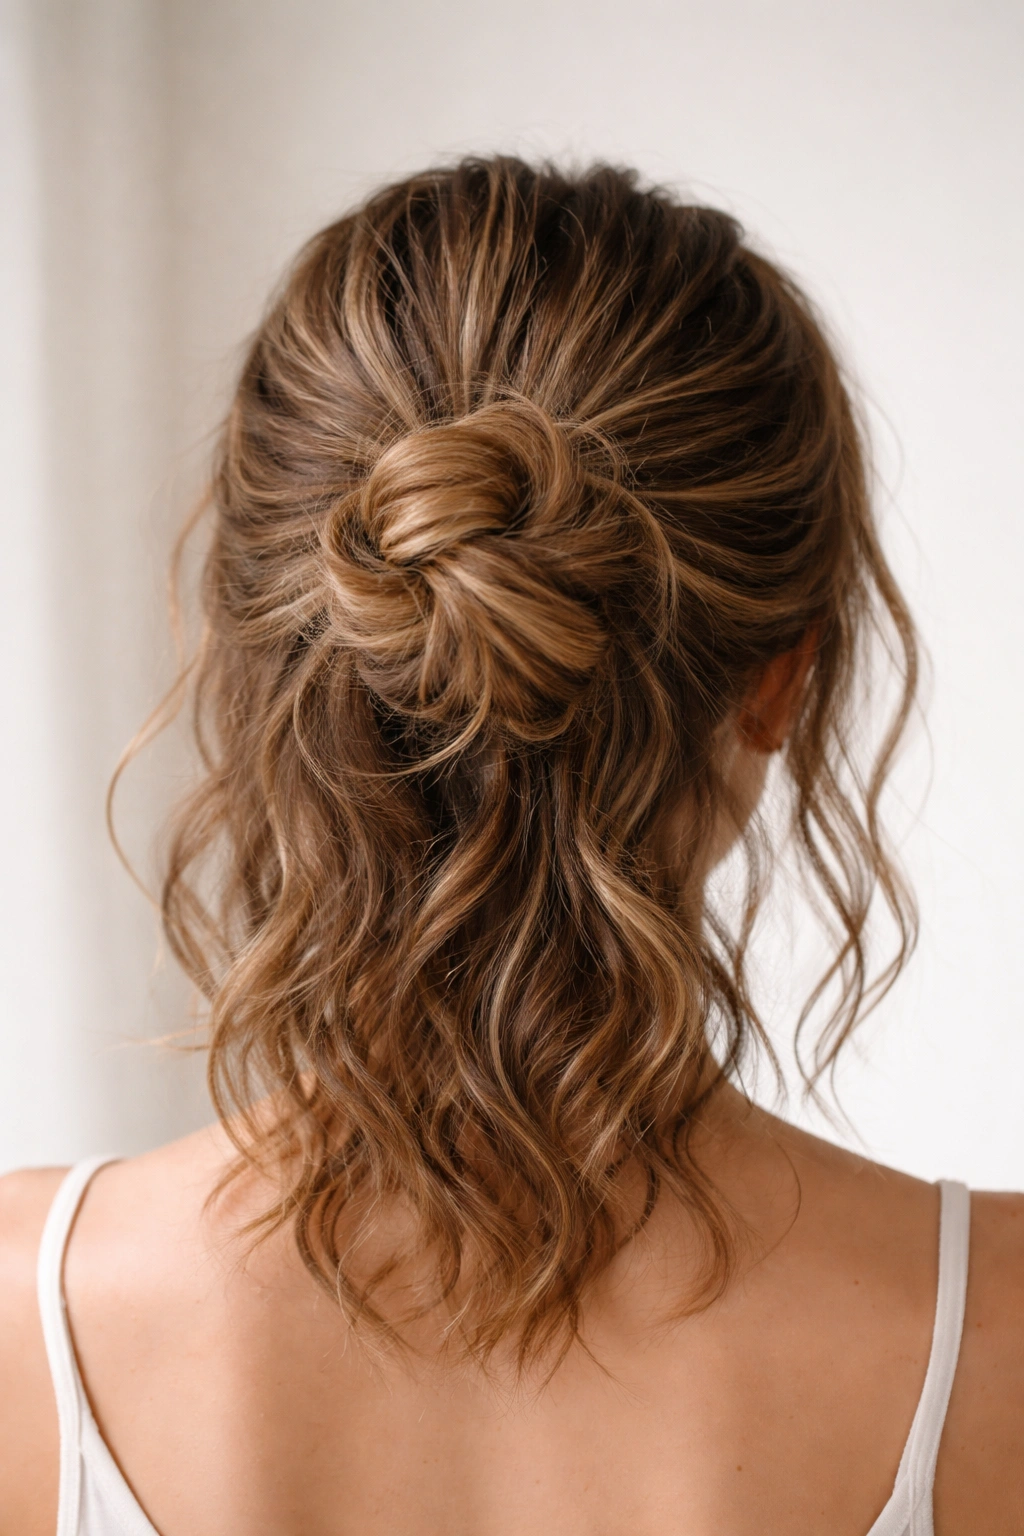
7. The Half-Up Twisted Knot
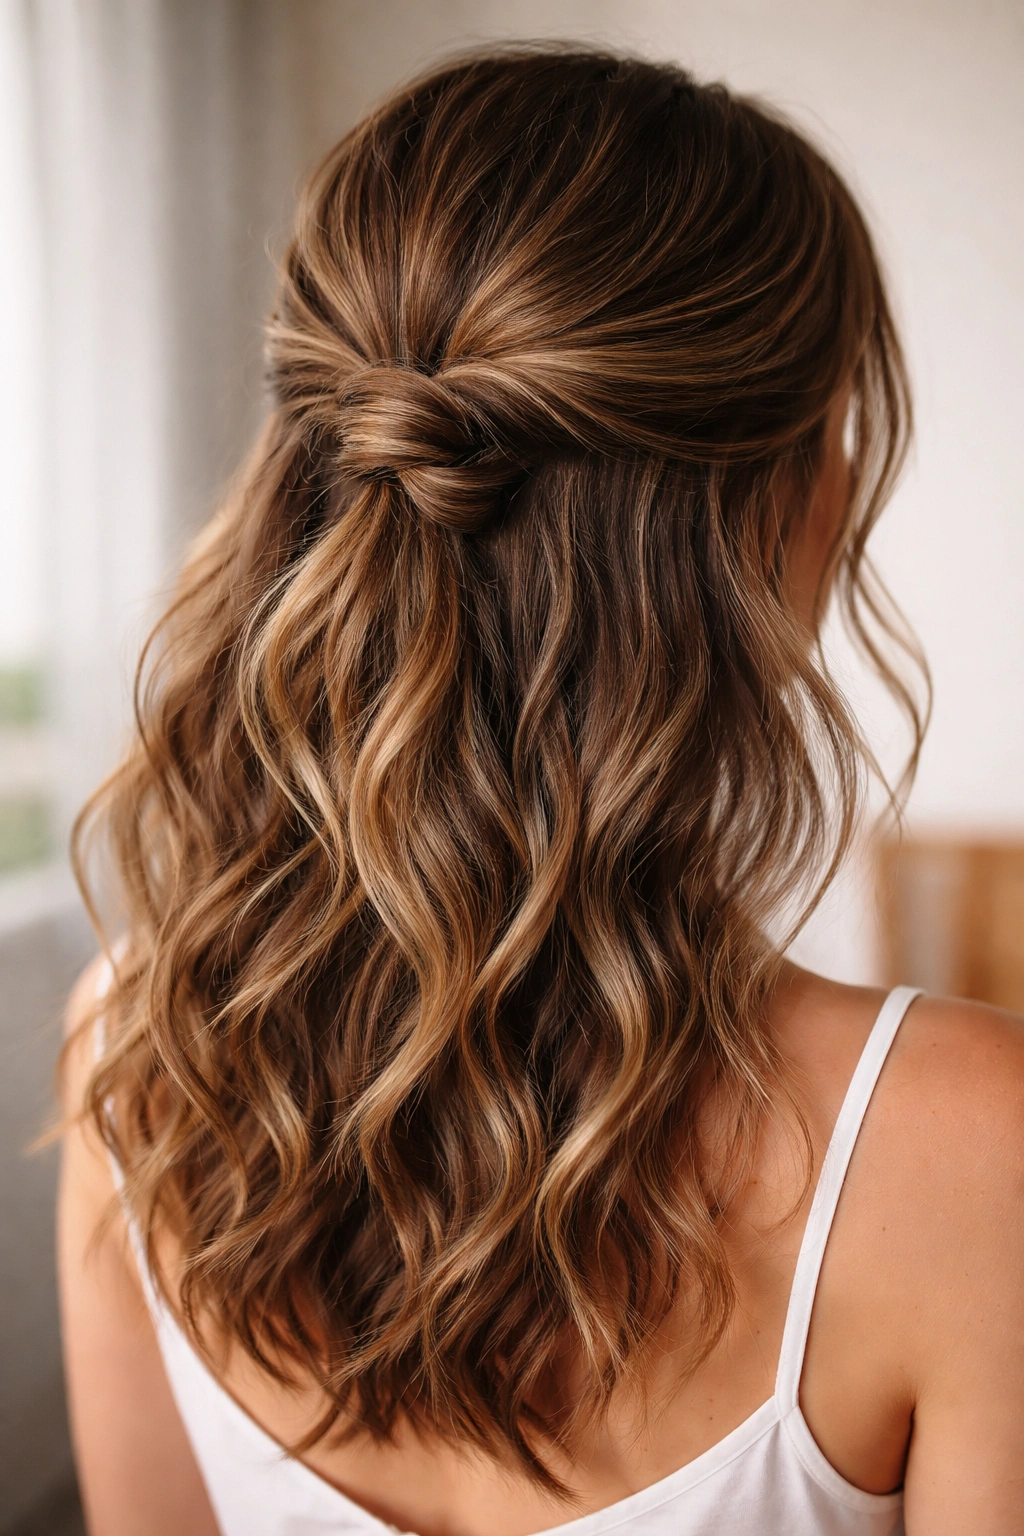
Not quite a full updo, not quite half-up—this style occupies a perfect middle ground. You’re gathering roughly half your hair from the crown and twisting it back into a knot that sits at the back of your head, leaving the bottom half of your wavy hair down. It’s the ideal style for days when you want hair off your face and neck but don’t want to commit to a full updo. It’s also surprisingly secure for how loose and undone it looks.
Why It Works for Wavy Hair
The twists interact beautifully with your wave pattern, creating depth and movement that you simply don’t get with straight hair. The bottom half of your hair remains down, which means your longest, most dramatic waves are on display. The upswept portion looks intentional and textured rather than slicked-back, which is exactly what you want. It’s a style that works equally well for casual days and for occasions when you want to look more polished.
How to Style It
Take two sections from your temples and twist them gently back toward the crown, adding more hair as you twist. Once you reach the back of your head, bring the two twisted sections together and tie them loosely, then twist that combined section and loop it to form a knot. Secure with bobby pins. The knot should sit at the crown or slightly back from it. Leave the bottom half of your hair down to wave naturally. If you have shorter layers around your face, let them fall loosely—they’ll integrate beautifully with your waves. Finish with a light texture spray.
Worth knowing: This style actually works better if you don’t make it too tight. The looser, slightly undone version looks infinitely more modern and is also more comfortable to wear.
8. The Rolled Side Bun
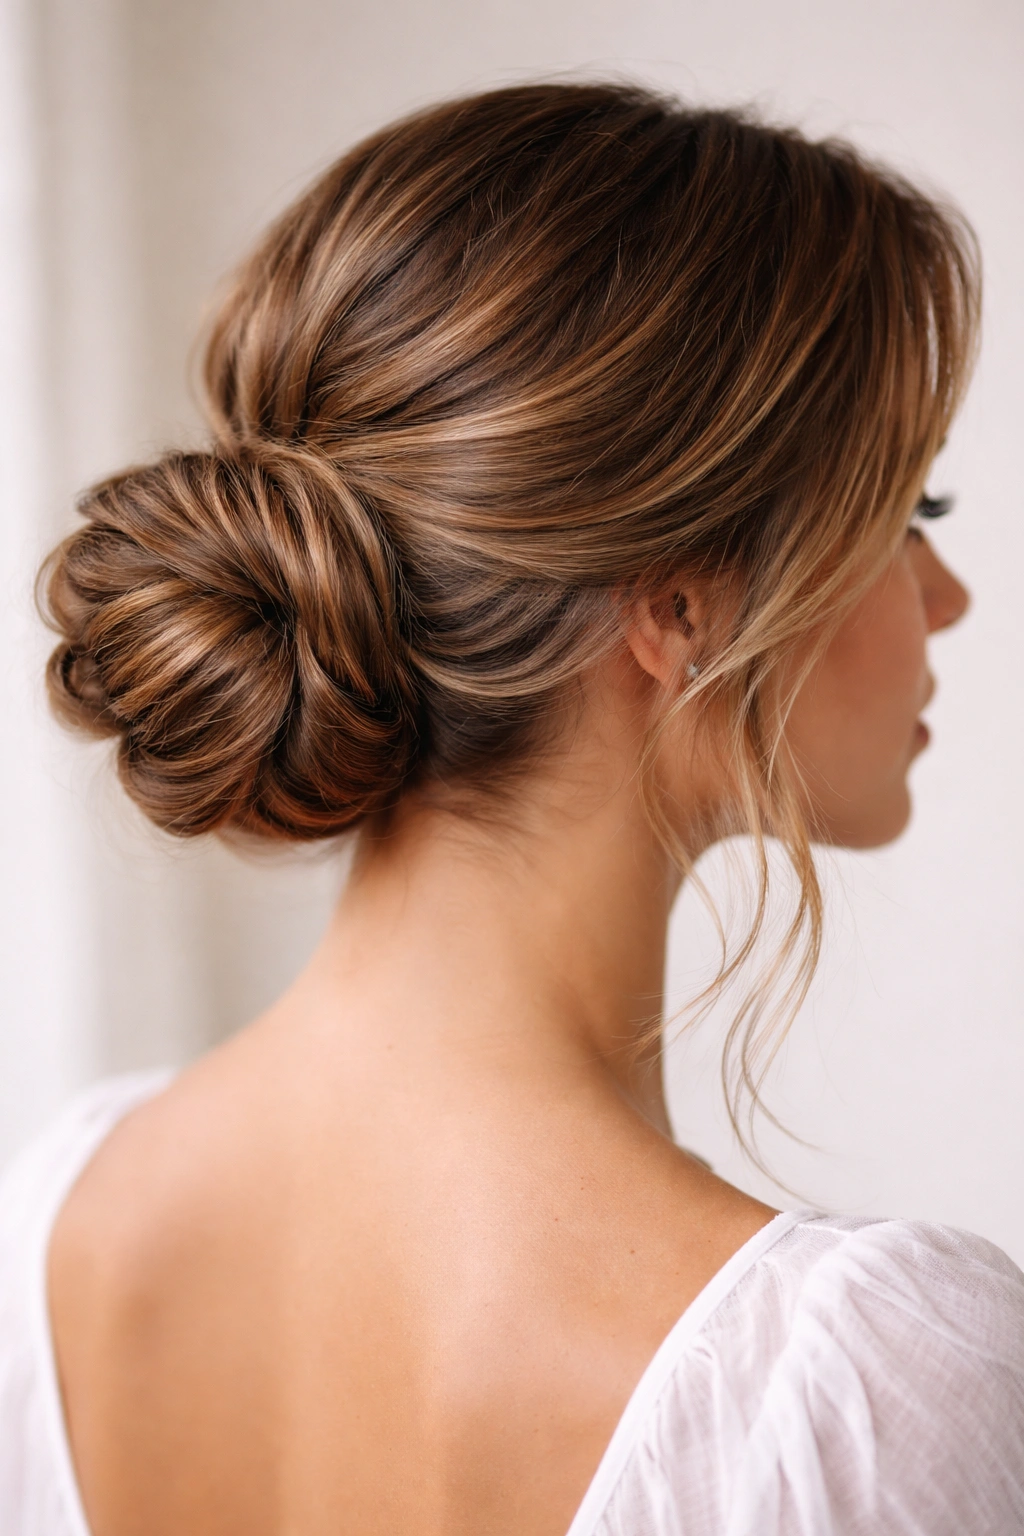
Instead of twisting your hair to form a bun, this style involves rolling your hair back into a cylindrical shape that curves around itself. Positioned low and to one side, it creates an elegant, almost vintage-inspired look that’s somehow both romantic and modern. The rolling technique creates beautiful texture and movement within the bun, which means your wavy hair shines. This is the updo to choose when you want to feel genuinely polished.
Why It Works for Wavy Hair
The rolling technique integrates your wave pattern beautifully—each undulation in your hair becomes visible within the rolled bun. Straight hair rolled into a bun can look a bit stiff and structured; wavy hair rolled creates organic-looking curves and depth. The side positioning, combined with the soft rolled texture, creates a flattering line that suits most face shapes and feels less severe than a back-center bun would.
How to Style It
Brush your hair gently to blend your waves without completely smoothing them out. Create a deep side part if that suits your face. Gather your hair into a low side ponytail. Instead of twisting it, use a fine-tooth comb or a small brush to gently roll the ponytail backward, creating a cylindrical rolled shape. As you roll, tuck the ends underneath and secure the entire roll with bobby pins placed at intervals along the length. The roll should have a subtle wave visible throughout it. Leave a few face-framing pieces loose if desired, and finish with a light hairspray that preserves the soft, rolled texture.
Pro tip: Using a texturizing spray or dry shampoo before styling gives you more grip and makes the rolling process easier.
9. The Stacked Waves Ponytail Bun
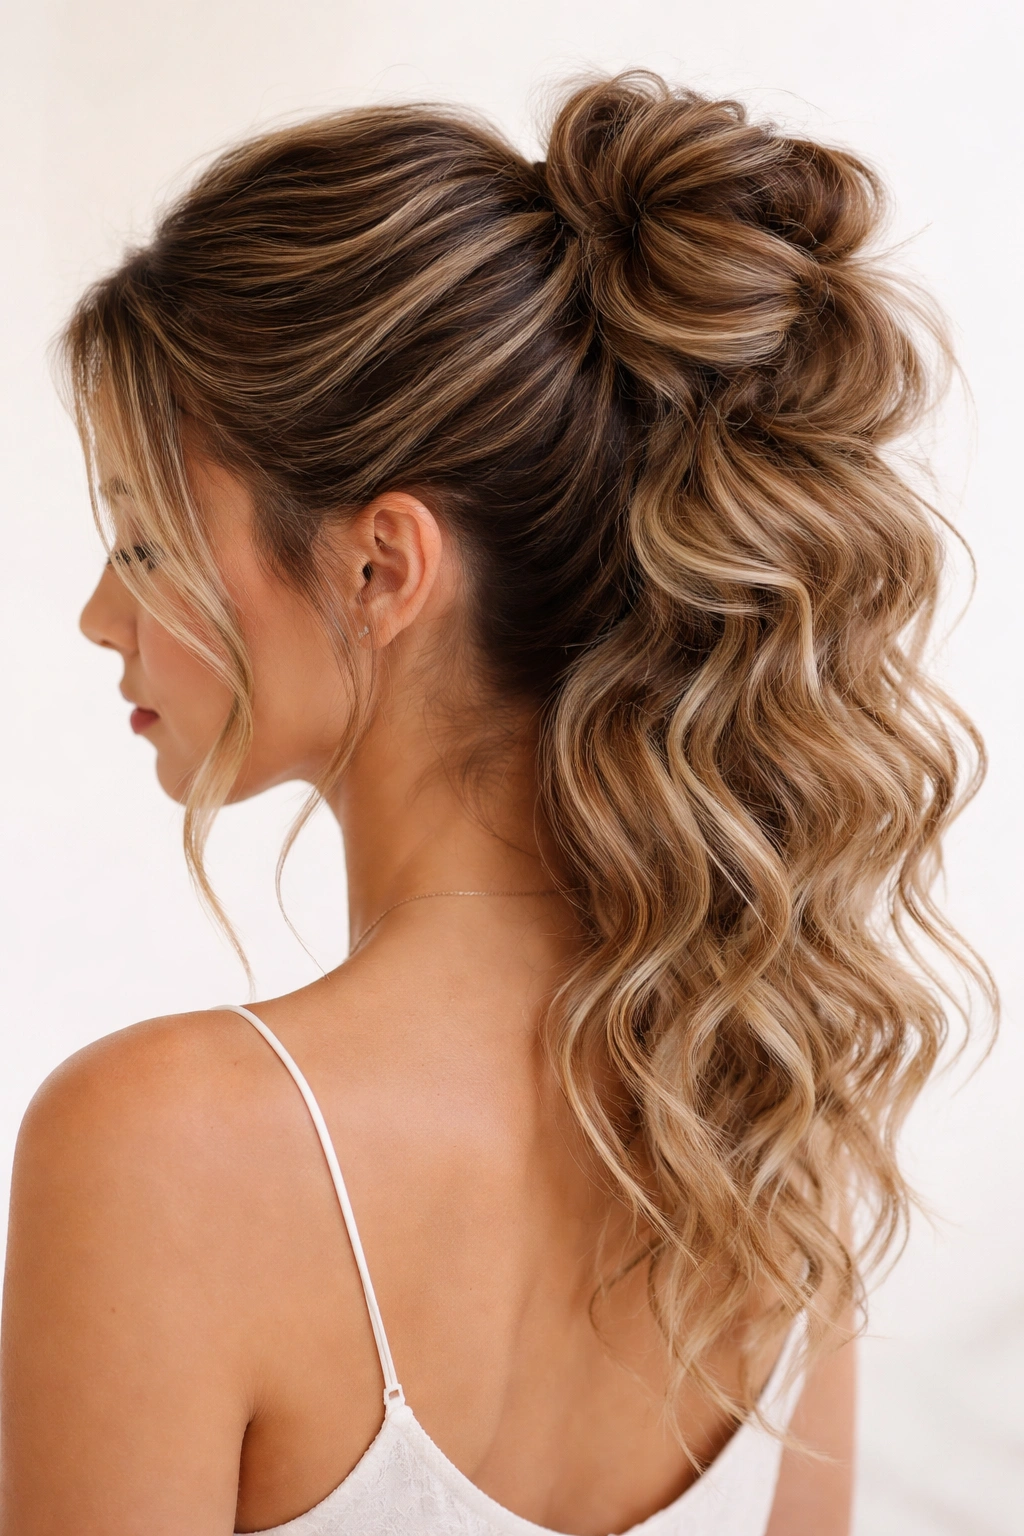
This is the updo for when you want serious visual impact combined with genuine wearability. Instead of creating a single bun, you’re creating multiple sections stacked on top of each other, each one slightly off-center, creating a cascading effect. It requires a bit more hair than some other styles, but if you have decent length and thickness, it’s stunning. Your waves create natural dimension within each section, making it look fuller and more interesting than it would on straight hair.
How to Style It
This style works best on hair with some texture already (second-day waves or lightly curled hair). Create a high ponytail and secure it. Below that, create a second ponytail using some of the hair from the first (your fingers create the sections rather than a center part). Continue creating small ponytails, each one slightly lower and offset from the previous one, for a cascading effect. You can leave the ends of the ponytails loose and wavy, or gather them into a final bun at the bottom. The stacked effect creates incredible volume and visual interest, especially when your wave texture is visible throughout.
Why It Works for Wavy Hair
Straight-haired people sometimes struggle to create enough volume with stacked ponytails, but your waves provide inherent fullness. Each ponytail sits over a wave-textured section below it, creating immediate depth and dimension. The offset positioning works beautifully with wavy hair because the natural movement in your hair complements the asymmetrical positioning of the stacks. It’s a style that celebrates volume and texture in the best possible way.
Worth knowing: Don’t make this style too tight. The more relaxed your stacks are, the better they look with your wave texture.
10. The Dutch Braid Down-Do
This is technically not a full updo—you’re leaving most of your hair down—but the Dutch braid running from crown to nape adds enough structure that it feels intentional and put-together. It’s the perfect choice for days when you want some definition and a certain polish without the commitment of a full updo. The down-do works beautifully with wavy hair because your waves cascade below the braid in a romantic, undone way.
Why It Works for Wavy Hair
The Dutch braid (braided over rather than under, so it sits raised on your head) creates beautiful contrast with your wavy hair below. The braid itself shows off your texture in the individual sections, and then your full wave pattern is on display below. It’s a style that looks intentional and constructed, but also effortless and natural. The combination of a structured element with your loose waves is visually compelling.
How to Style It
Start with wavy, textured hair—second-day hair is actually ideal. Create a deep side part. Beginning at the crown on the fuller side, start a Dutch braid (braiding over) that travels down the back center of your head to the nape of your neck. Make the braid slightly loose, accentuating your texture. Secure the braid at the bottom with a small elastic. All your hair below the braid remains down and wavy. If you have layers, they’ll frame your face beautifully. Finish with a light hairspray that preserves the texture rather than smoothing it.
Pro tip: After you complete the Dutch braid, gently pull on the edges to widen it. This makes it look fuller and emphasizes the texture within the braid.
11. The Inverted Braid Bun
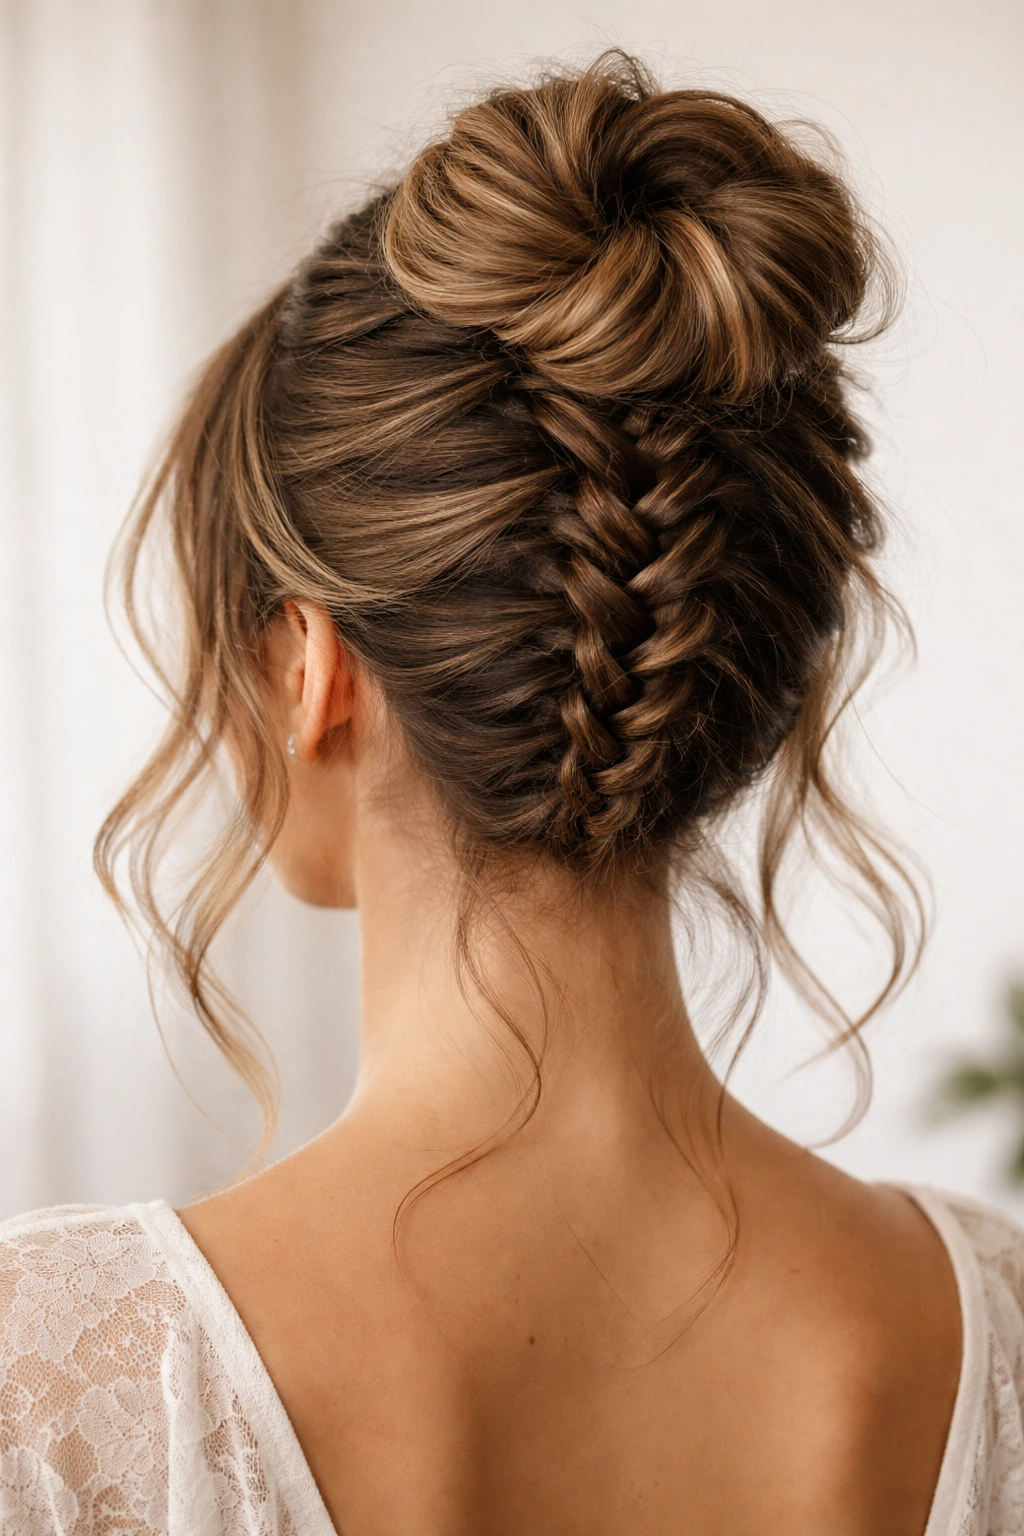
An inverted braid (one braided from the nape of your neck upward toward the crown) is inherently flattering on wavy hair because it embraces your natural texture rather than fighting it. Once the braid reaches the crown, you gather all your hair into a bun at the top of your head. This creates a look that’s completely unique—elegant, interesting, and surprisingly easy to execute. It’s the kind of style that makes people assume you spent far more time on it than you actually did.
Why It Works for Wavy Hair
An inverted braid shows off your texture beautifully, and because you’re braiding upward, the braid creates visual lift at the crown. The waves in your hair make the individual braid sections more visible and interesting. Once the braid reaches the crown and transitions into a bun, the overall effect is sophisticated and modern. It’s a style that celebrates the unique texture of wavy hair rather than trying to minimize it.
How to Style It
Start at the nape of your neck and create a French braid that moves upward toward the crown, adding hair from the sides as you go. Make the braid slightly loose to emphasize your texture. Once you reach the crown, gather all your hair (including the end of the braid) into a bun and secure it. The bun sits at the very top of your head, and the inverted braid creates a beautiful base for it. Pull gently on the sides of the braid to widen it and make it more visible. Leave a few face-framing pieces loose if desired. Finish with a light texture spray rather than heavy hairspray.
Pro tip: The looser you make this braid, the more your wave texture shows through. Resist the urge to make it tight and tidy.
12. The Bubble Bun with Loose Bottom Section
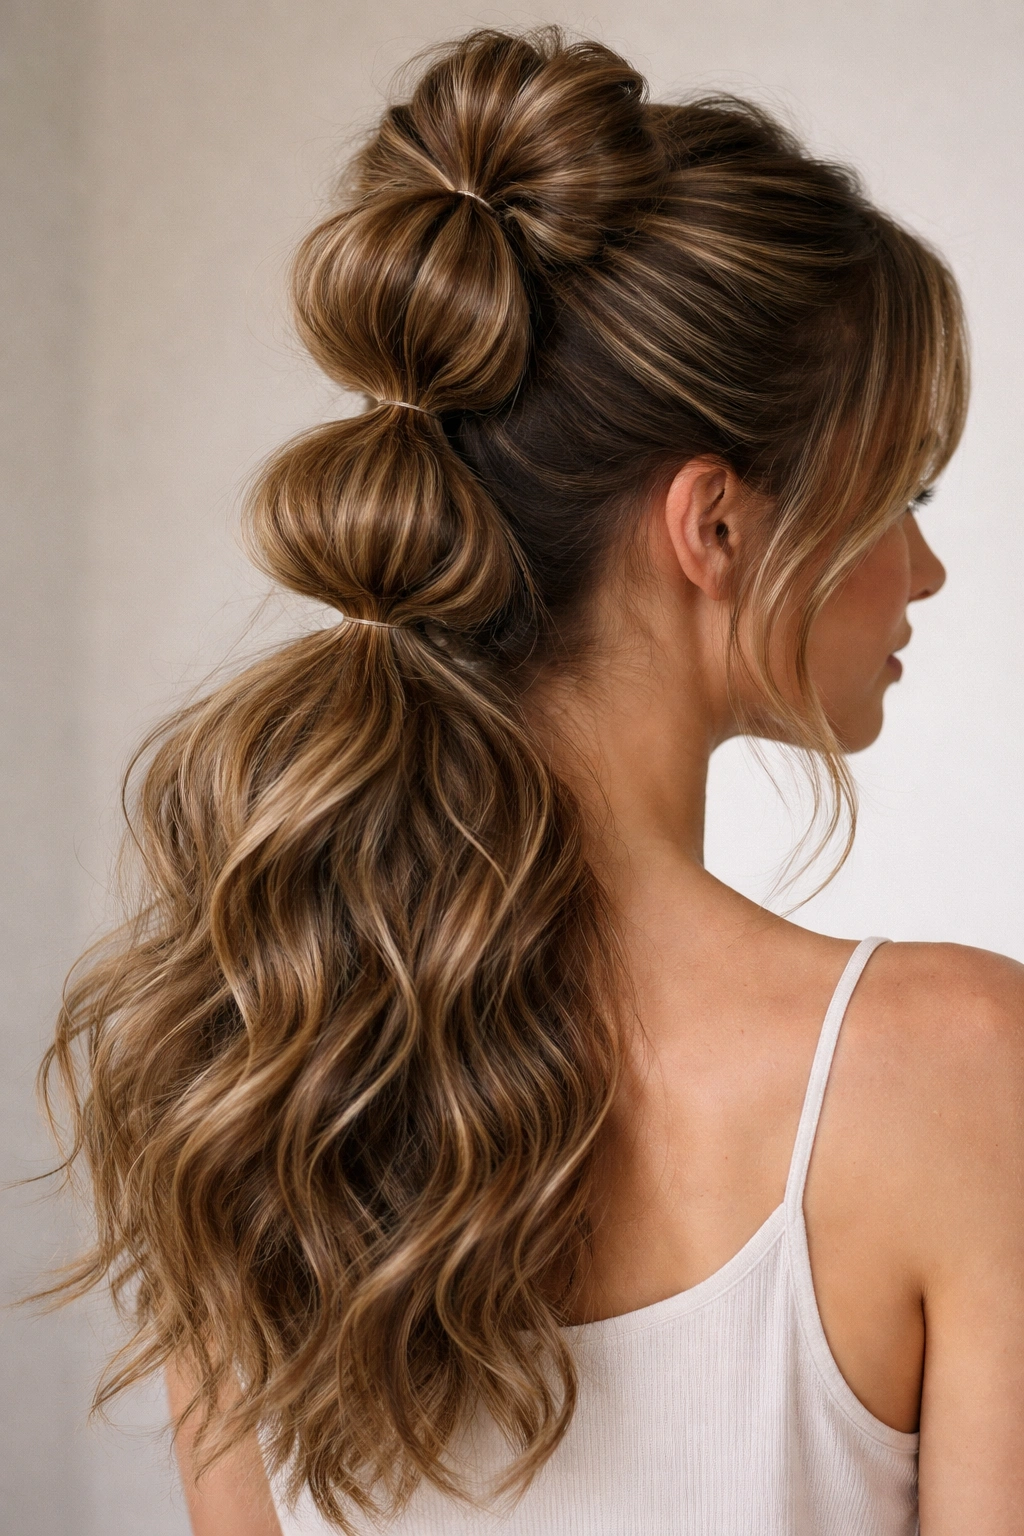
This playful style involves creating multiple small ponytails stacked on top of each other (creating the “bubbles”), and then releasing the very bottom section so it waves freely. It’s more fun and casual than some of the other options on this list, but it’s also genuinely wearable and doesn’t require you to sacrifice style for comfort. Your waves make each bubble visually interesting and full, rather than thin or sparse.
Why It Works for Wavy Hair
The bubbles of this style are created by the ponytails, which show off the thickness and fullness your waves provide. Each bubble has visible texture rather than looking sleek and smooth. Because you’re leaving the bottom section down and wavy, you get to show off the full length and movement of your hair. The combination of structured bubbles with loose waves below is visually striking and works perfectly with your hair texture.
How to Style It
Create a high ponytail and secure it loosely. Below that, create a second ponytail by taking roughly half the hair from the first ponytail, plus some hair from below. Secure it, and you’ve created your first “bubble.” Repeat the process, creating two or three bubbles, with each one positioned slightly lower than the previous. Once you’ve created your bubbles, release the bottom section of hair, allowing it to wave freely. You can smooth this bottom section slightly or leave it completely wavy—both look beautiful. Finish with a light texture spray.
Worth knowing: This style is more casual than formal, making it perfect for creative workplaces, weekend activities, or any day when you want to feel a bit playful without sacrificing polish.
13. The Twisted Wrap-Around Bun
For this final style, you’re creating twists from different sections of your hair that wrap around each other as they move toward the crown, eventually gathering into a bun. It’s architectural and interesting without feeling overly complicated or time-consuming. Your waves create beautiful texture throughout the twists, and the overall effect is polished and modern. This is the style that makes people think you’ve professionally styled your hair.
Why It Works for Wavy Hair
The twists show off your wave pattern beautifully—each twist has visible undulation rather than being a smooth, uniform spiral. Multiple twists wrapping around each other create depth and dimension that’s enhanced by your natural texture. The bun at the crown is full and interesting rather than looking thin or sparse. It’s a style that genuinely celebrates wavy hair as its own asset rather than treating it as something to manage or minimize.
How to Style It
Create a center part or a side part, depending on what suits your face. Beginning on one side near your temple, create a twist that wraps toward the back of your head. On the other side, create a second twist moving in the opposite direction, also moving toward the back. The twists should wrap around each other as they move toward the crown, creating a braided-bun effect. Once both twists reach the back, gather all your hair into a bun and secure it. The wrap-around effect should be visible, creating a decorative element at the back of your head. Leave a few pieces loose around your face and finish with a light texture spray that preserves the visible twists.
Pro tip: Using a texturizing spray before you create the twists gives them more grip and makes them last longer throughout the day.
Final Thoughts
The beauty of updos for wavy hair is that your texture is an asset, not an obstacle. Each of these thirteen styles celebrates your natural wave pattern rather than trying to fight it, which means they actually look better on you than they would on straight hair. The key to successful updo styling with wavy hair isn’t about creating perfect smoothness—it’s about embracing the dimension and movement you already have, then building a structure around it that lasts.
You’ll notice that the styles that work best for you might be different from the ones that work best for someone else with wavy hair. Your wave pattern is unique to you, as is the length and thickness of your hair. Experiment with different styles to find the ones that feel most comfortable and make you feel most like yourself. Some of these updos might become your go-to styles for everyday wear, while others might be reserved for occasions when you want to feel extra polished.
The real magic happens when you stop seeing your waves as something that complicates updo styling and start seeing them as an advantage. Your hair already has movement, texture, and dimension built in. All these styles do is organize that texture into a shape that feels intentional and put-together. Give yourself a few tries to find your favorites—your waves will make each one look genuinely effortless.