Wavy hair is a gift—it’s got natural texture, movement, and personality built right in. But let’s be honest: figuring out what to do with it, especially when you’re in a hurry or craving something more polished than your everyday waves, can feel tricky. The thing is, medium-length wavy hair sits in this perfect sweet spot for updos. You’ve got enough length to create real dimension and hold without needing 20 bobby pins, but not so much length that styling becomes a wrestling match.
The right updo doesn’t fight against your natural texture—it works with it. When you’re styling wavy hair, you’re actually starting with built-in grip and movement that straight-haired friends would have to create with heat tools. That means the updos that work best are the ones that lean into that texture rather than trying to smooth it flat. Whether you’re heading to a casual lunch, a work meeting, or somewhere you just need your hair off your neck for a few hours, there’s an updo here that’ll feel effortless and genuinely flattering.
What makes these styles work is that none of them demand perfection. A slightly messy wave texture? Perfect. A flyaway or two? That’s part of the charm. These are updos designed for real life—ones you can actually execute with a few bobby pins and maybe a texturizing spray, without needing a professional stylist or an hour in front of the mirror. Let’s dig into 15 styles that’ll change how you think about what’s possible with your wavy hair.
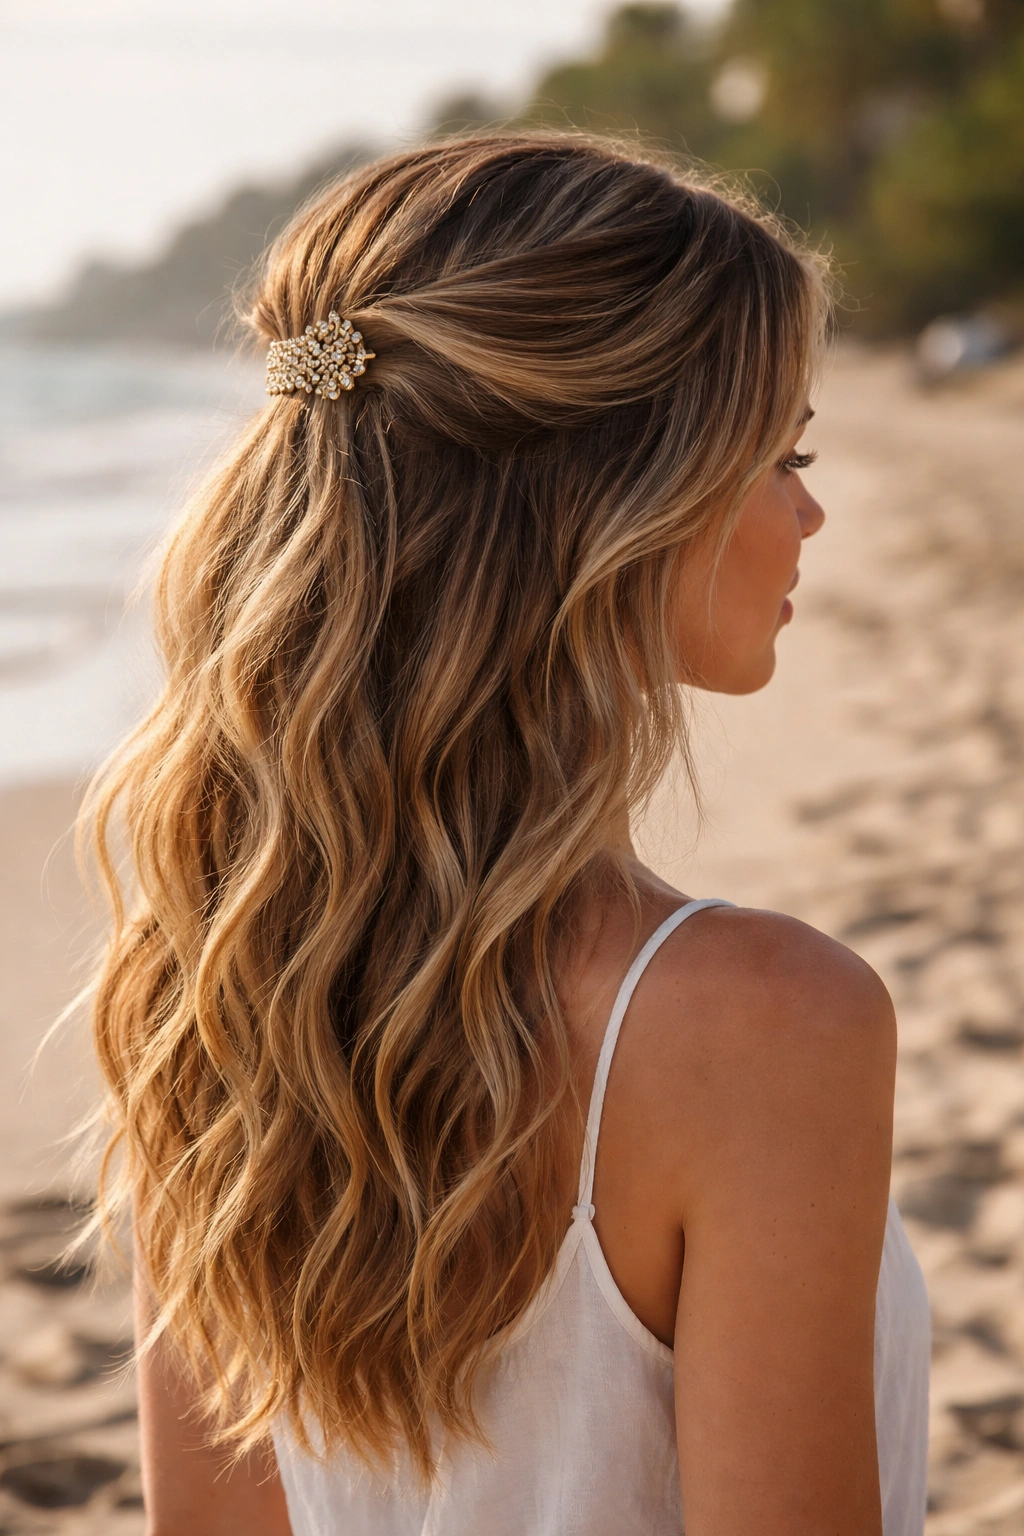
1. Twisted Half-Up Knot

This is the updo you can throw together in under five minutes, and it looks intentional rather than rushed. You’re essentially creating a half-up style, but instead of a traditional ponytail or clip, you’re twisting each side and wrapping them around each other to form a knot right at the crown. Because wavy hair already has texture and grip, the twist holds beautifully without needing to be pulled perfectly tight.
Why It Works for Wavy Hair
Twisted styles actually grip better when your hair has natural wave to it. The texture gives the twist something to hold onto, so you don’t need to crank the tension, which means less breakage and a softer, more flattering shape. The knot sits right where it catches light against your waves, creating this really beautiful visual depth.
How to Create This Style
- Part your hair down the middle or slightly off to one side
- Take a small section from the front left side, roughly from temple to ear, and twist it loosely toward the back
- Do the same on the right side, twisting in the same direction
- At the back center where the twists meet, wrap one twist around the other to create a loose knot shape
- Secure with 2-3 bobby pins tucked inside the knot—bobby pins disappear into wavy texture way better than they do in straight hair
- Pull gently at the knot to loosen it and create a softer, fuller appearance; this is key to making it look intentional, not tight and severe
Pro tip: If your waves are on the tighter or curlier side, let your hair air-dry completely before styling. Damp waves can shift and slip as they dry, which means your carefully twisted knot might loosen up throughout the day.
2. Braided Crown Updo
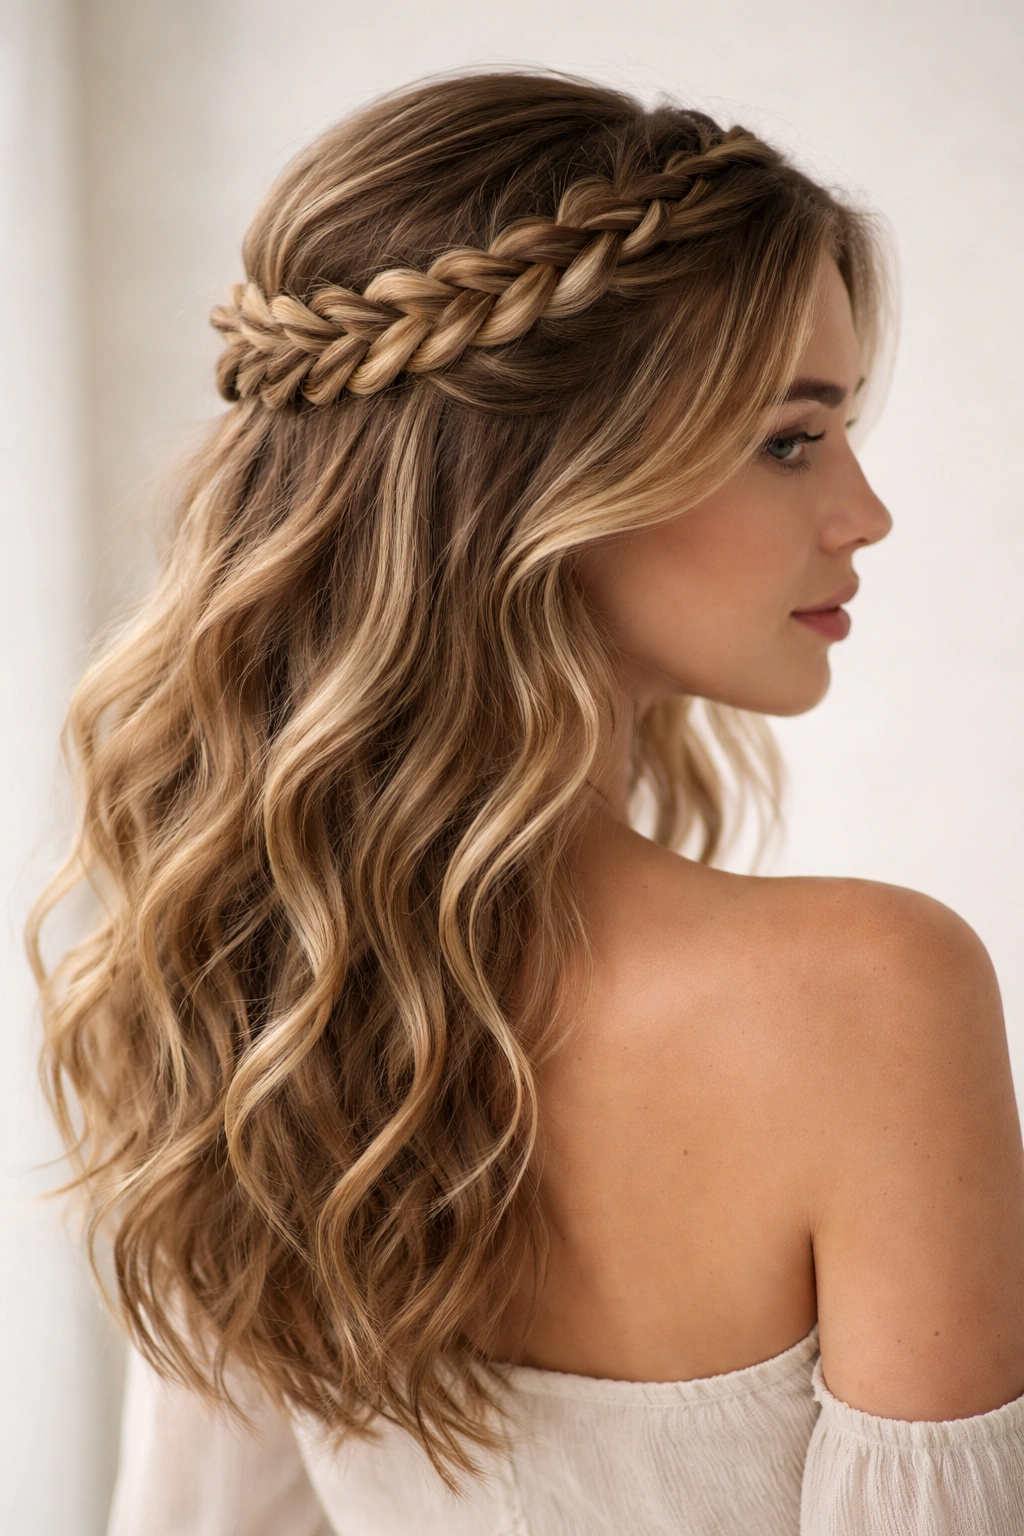
Imagine a braid that wraps around your head like a crown, with the rest of your hair left down in your natural waves. Except here’s the twist—instead of trying to braid from ear to ear, you’re creating a curved braid that sweeps from one side of your head, around the back, to the other side, then pinning the ends under so they’re hidden. It’s romantic without being overdone.
Why It Works for Textured Hair
Braids hold better in wavy hair because of the natural texture—you’re not working against friction like you would in very straight hair. The waves also mean your braid looks fuller and has more visual impact even if it’s a loose three-strand braid. The finished style reads as more intricate than it actually is.
Step-by-Step Technique
- Start by sectioning out a piece of hair about two inches wide from one side of your head, right at the temples
- Begin a loose three-strand braid, angling it diagonally back toward the crown
- As you braid, add small sections from underneath to gradually incorporate more hair
- Continue until the braid reaches the nape of your neck or slightly past it
- Secure the end with a small elastic, then gently pull at each loop of the braid to create texture and fullness
- Tuck the braided end toward the back and secure with bobby pins, letting the end disappear into the remaining loose waves
Essential detail: Don’t braid too tightly. Wavy hair looks best when there’s dimension and looseness—a tight, sleek braid against wavy texture looks like it’s fighting your hair rather than celebrating it.
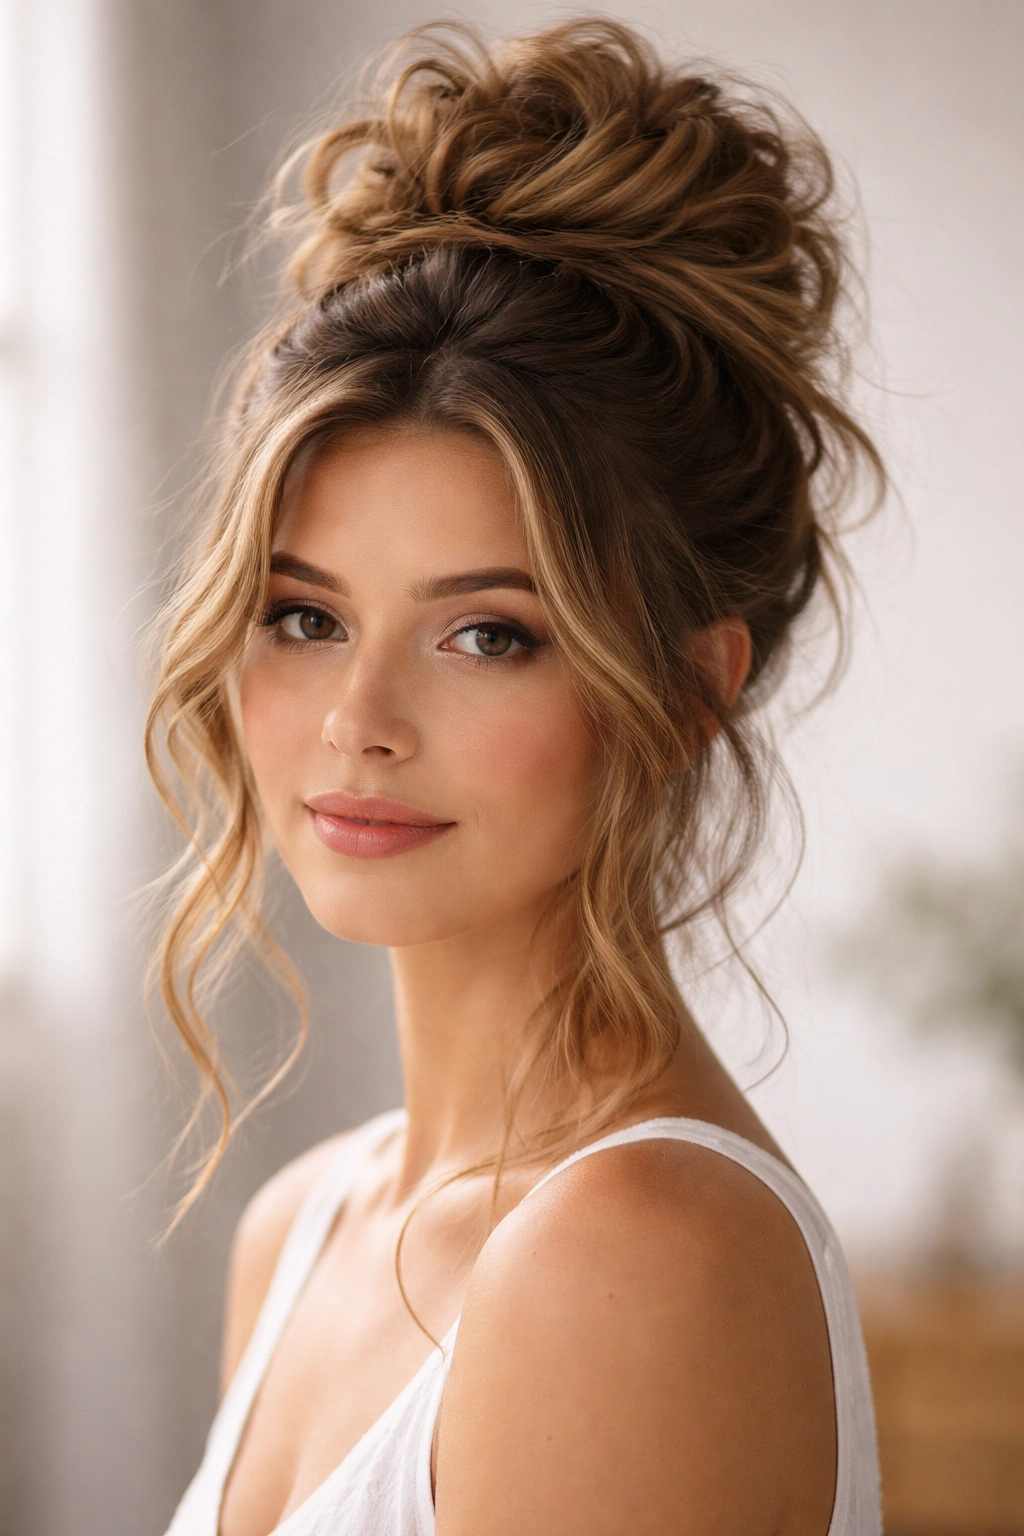
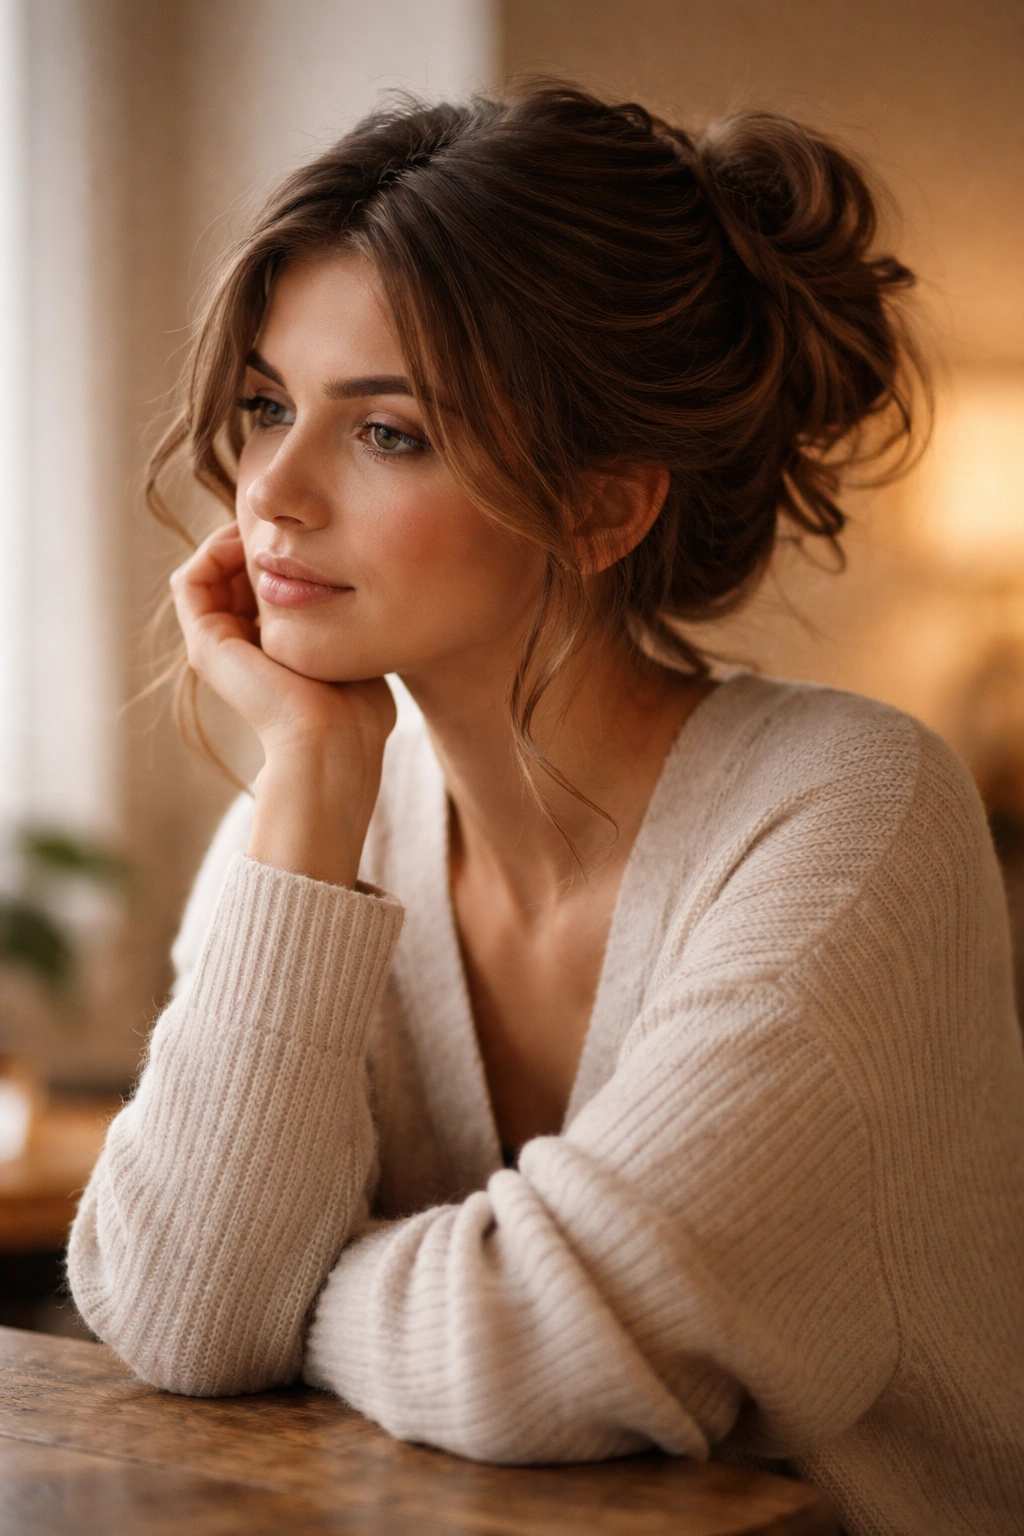
3. Messy Top Knot with Face-Framing Layers
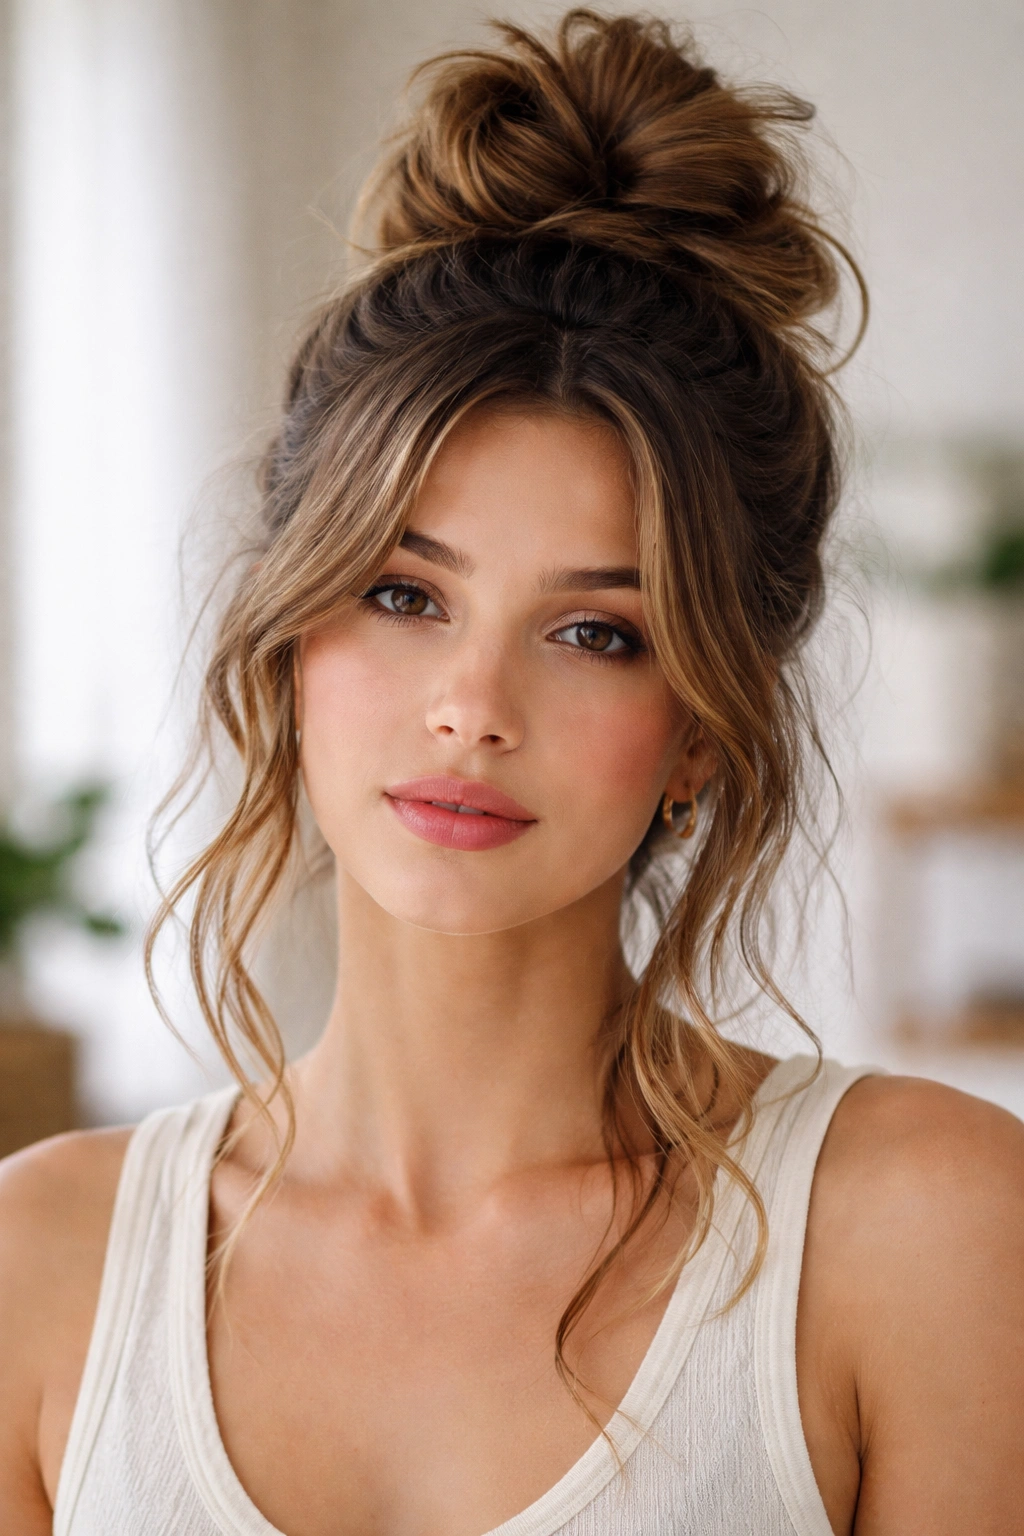
A top knot done right on wavy hair doesn’t have to be Instagram-perfect; in fact, the messier and more textured, the better. The idea here is to gather your hair into a high pony, twist it around itself at the crown, and leave a few intentional pieces down around your face. The face-framing pieces soften the whole look and let your waves show in all their glory.
What Makes This Style Stand Out
The beauty of a wavy-hair top knot is that you can literally just twist your hair and it holds because of the texture. Straight-haired friends have to backcomb and tease to get that chunky, textured look you get naturally. A messy knot feels polished on you, not sloppy.
Creating Volume and Texture
- Flip your head upside down and gather hair from the crown toward the very top of your head
- Secure with an elastic into a high ponytail
- Flip your head back up and gently backcomb at the base of the ponytail to create grip
- Twist the ponytail loosely around itself and wrap it into a circle at the crown
- Secure with bobby pins tucked all around the base
- Gently pull and tease at the knot to increase the messy, textured appearance
- Leave 2-3 small pieces unclipped around your face, focusing on the front corners and one side
Worth knowing: A texturizing spray or dry shampoo applied to the roots before styling gives you even more grip and makes the messy effect look intentional rather than accidental.
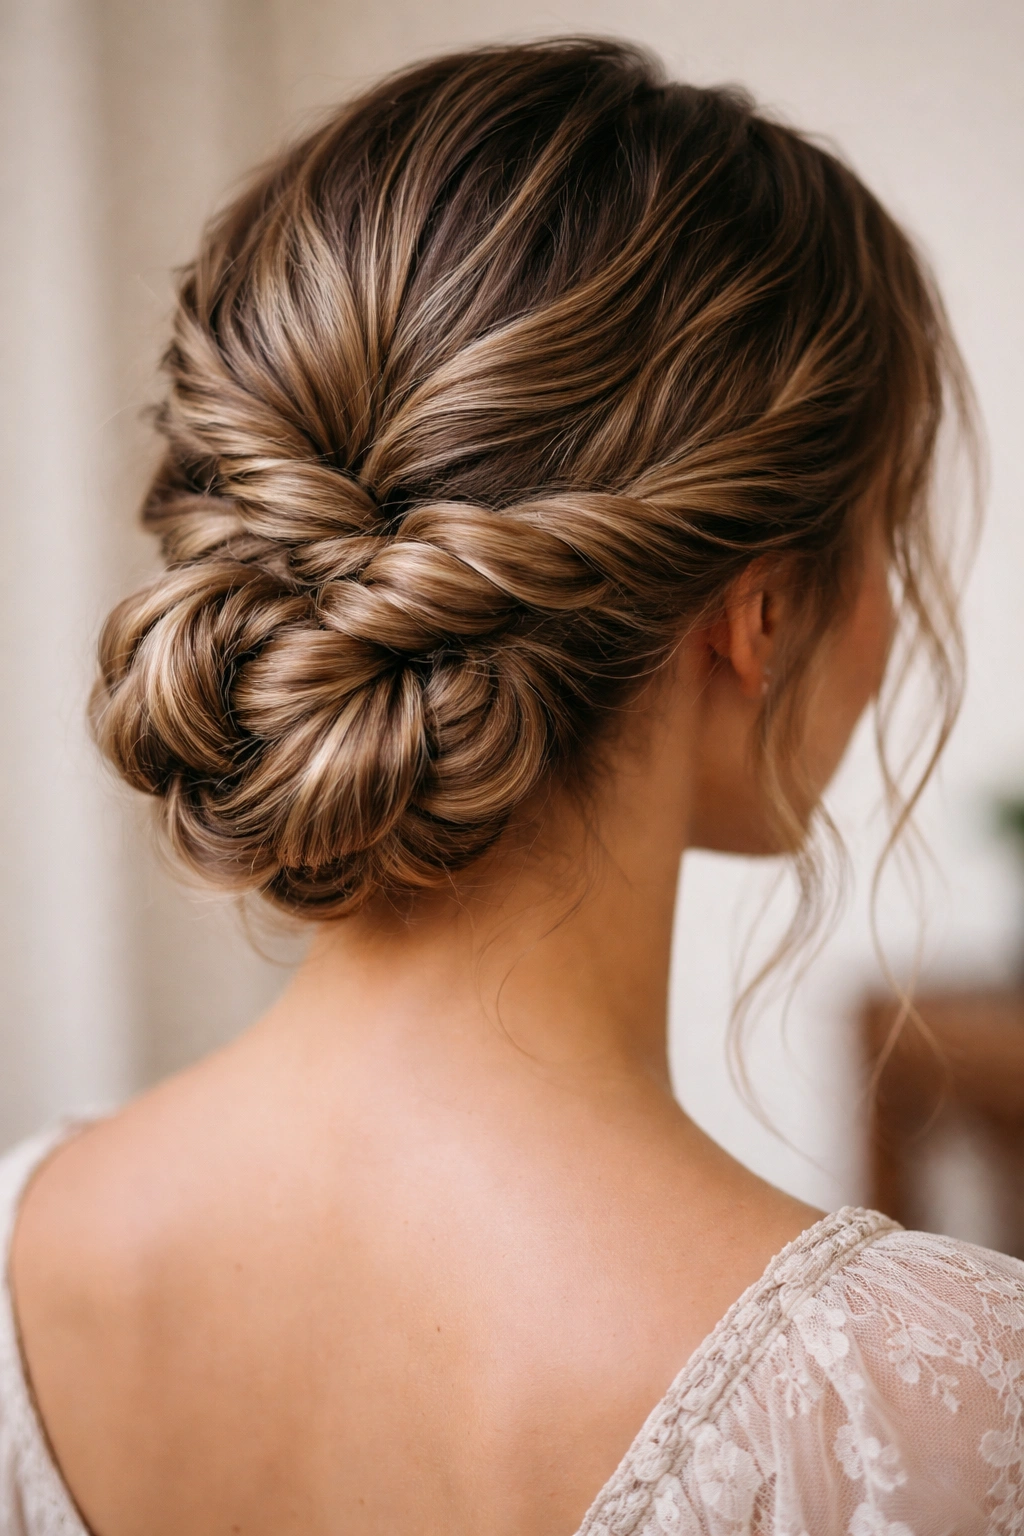
4. Low Twisted Bun
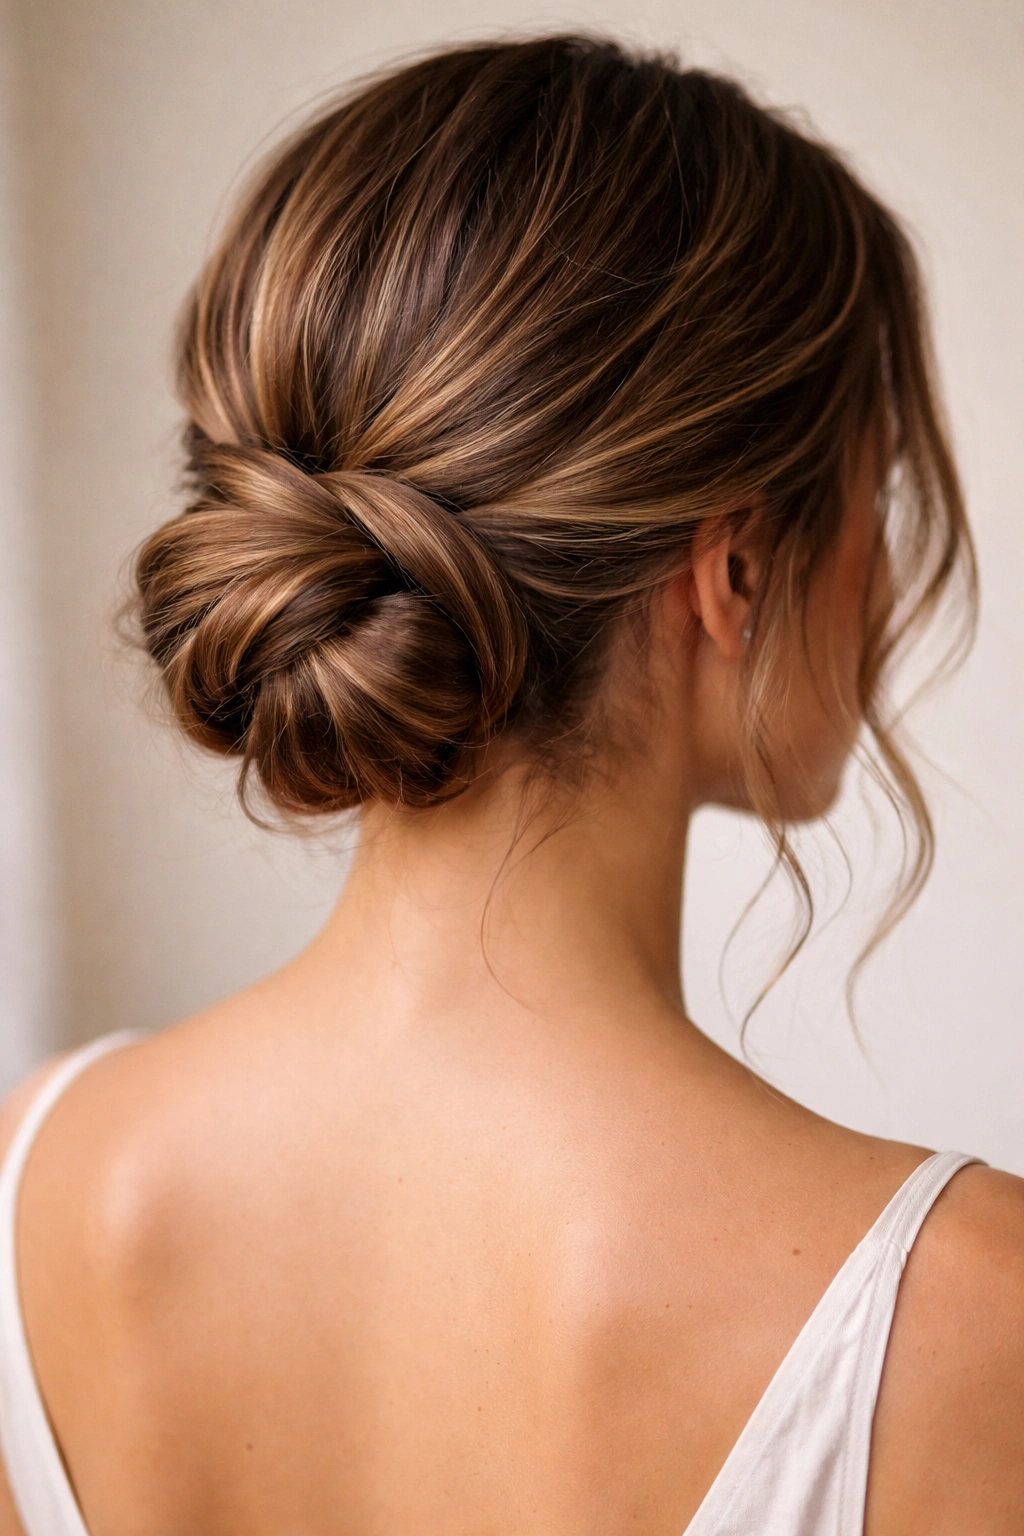
This is the sophisticated cousin of the top knot. Everything is lower, sleeker (relatively speaking—we’re still working with waves, not a polished ballet bun), and reads as more polished for work or formal settings. You’re creating two loose twists and wrapping them together into a bun at the nape of your neck instead of the crown.
What Makes It Special
A low bun keeps your face completely visible while still getting your hair off your shoulders. On medium-length wavy hair, it sits perfectly at the nape without looking sparse or stringy. The twists, instead of a regular wrap, add visual interest without extra complexity.
Styling Instructions
- Create a deep side part
- Take a section from the deeper side, starting at the temple, and twist it loosely toward the back
- Take a section from the other side and twist it in the same direction
- At the nape, combine the two twists and wrap them around each other to form a loose bun
- Secure with bobby pins
- Leave a few small waves and layers loose in front—this is important for framing your face and balancing the low placement
- Gently tease and loosen the bun so it’s full and textured rather than tight
Key detail: The bun should sit roughly two inches above your neck, not right at the hairline. This placement is more flattering and lets you actually move your head without feeling restricted.
5. Textured Ponytail with Twists
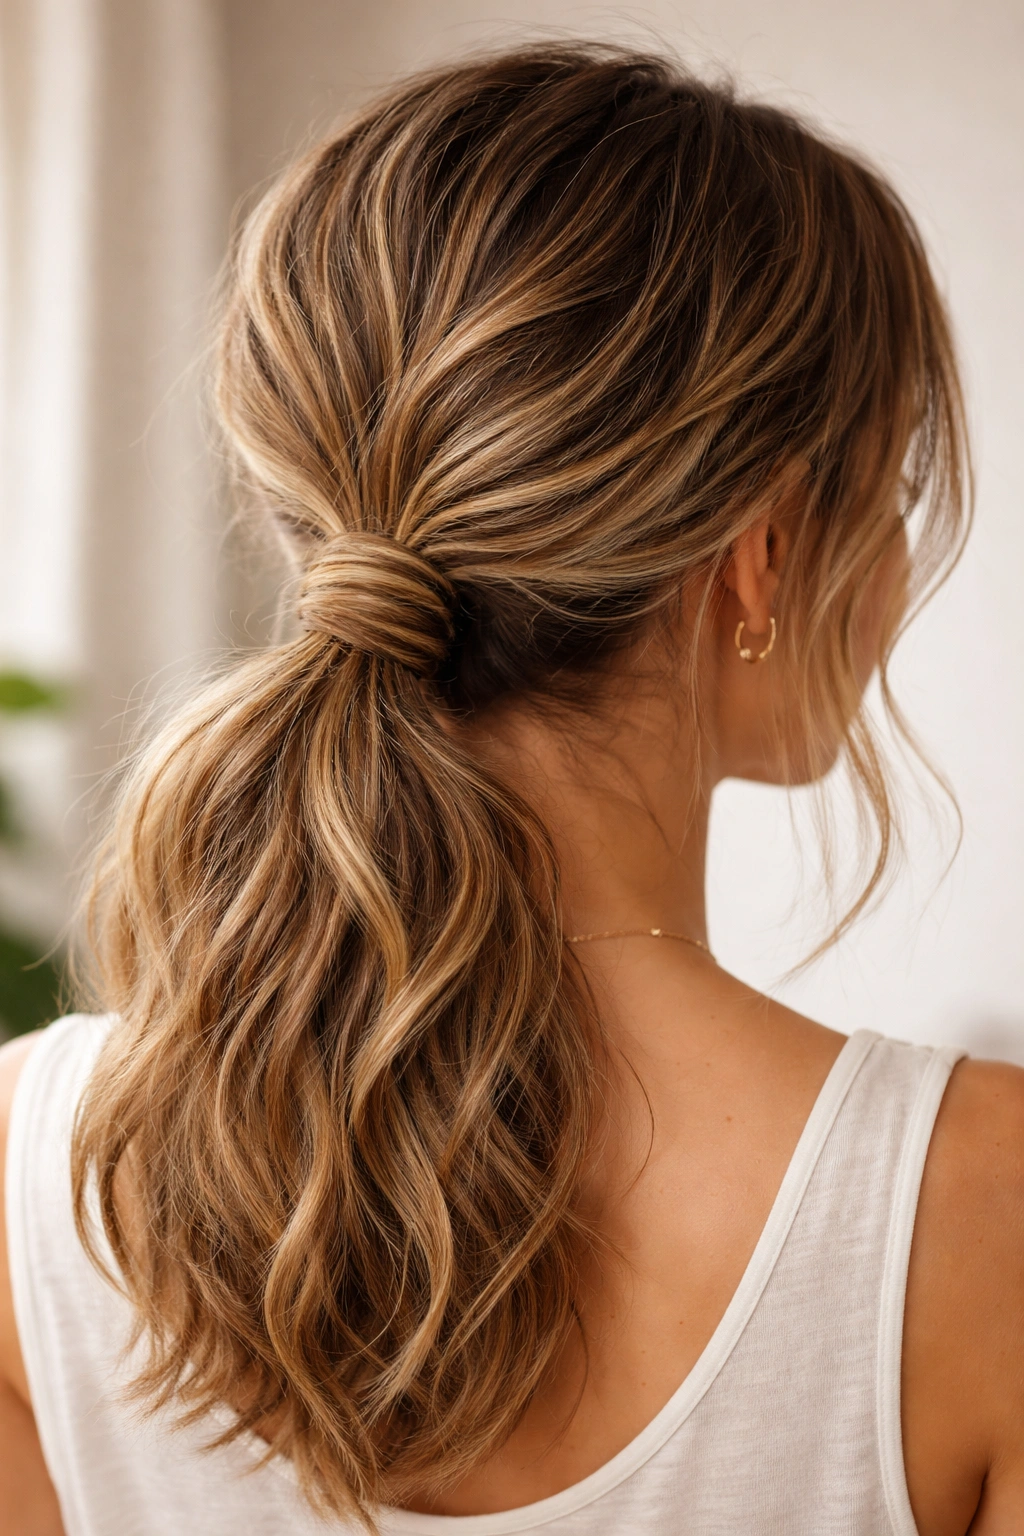
This is the updo for days when you want something that reads as “styled” but actually requires almost no effort. You’re creating a low ponytail, but instead of leaving it as a regular pony, you’re wrapping twisted sections around the base to hide the elastic and add visual interest. It bridges casual and polished perfectly.
Why It Works for Wavy Hair
The twists wrap beautifully around the ponytail base because they don’t need to be razor-sharp and sleek. Your wave texture actually makes the twists look fuller and more interesting than they would in straight hair. The whole style celebrates the fact that you have natural texture, not tries to fight it.
How to Build This Style
- Gather your hair into a low ponytail at the nape, not pulled too tight
- Secure with an elastic
- Take a small section from the ponytail itself, twist it around the base of the pony to cover the elastic
- Secure the twisted section with a bobby pin
- Repeat with another section from the ponytail, wrapping it around a slightly different part of the base
- You can do 2-3 twisted wraps depending on how thick your hair is
- Gently pull at the ponytail and the twists to create a fuller, more textured appearance
Insider note: If you’ve got really thick, dense waves, you can create a twisted wrap by taking one thin section and twisting it multiple times around the base instead of using separate sections. It has the same visual effect with less bulk.
6. Wrapped Bubble Ponytail
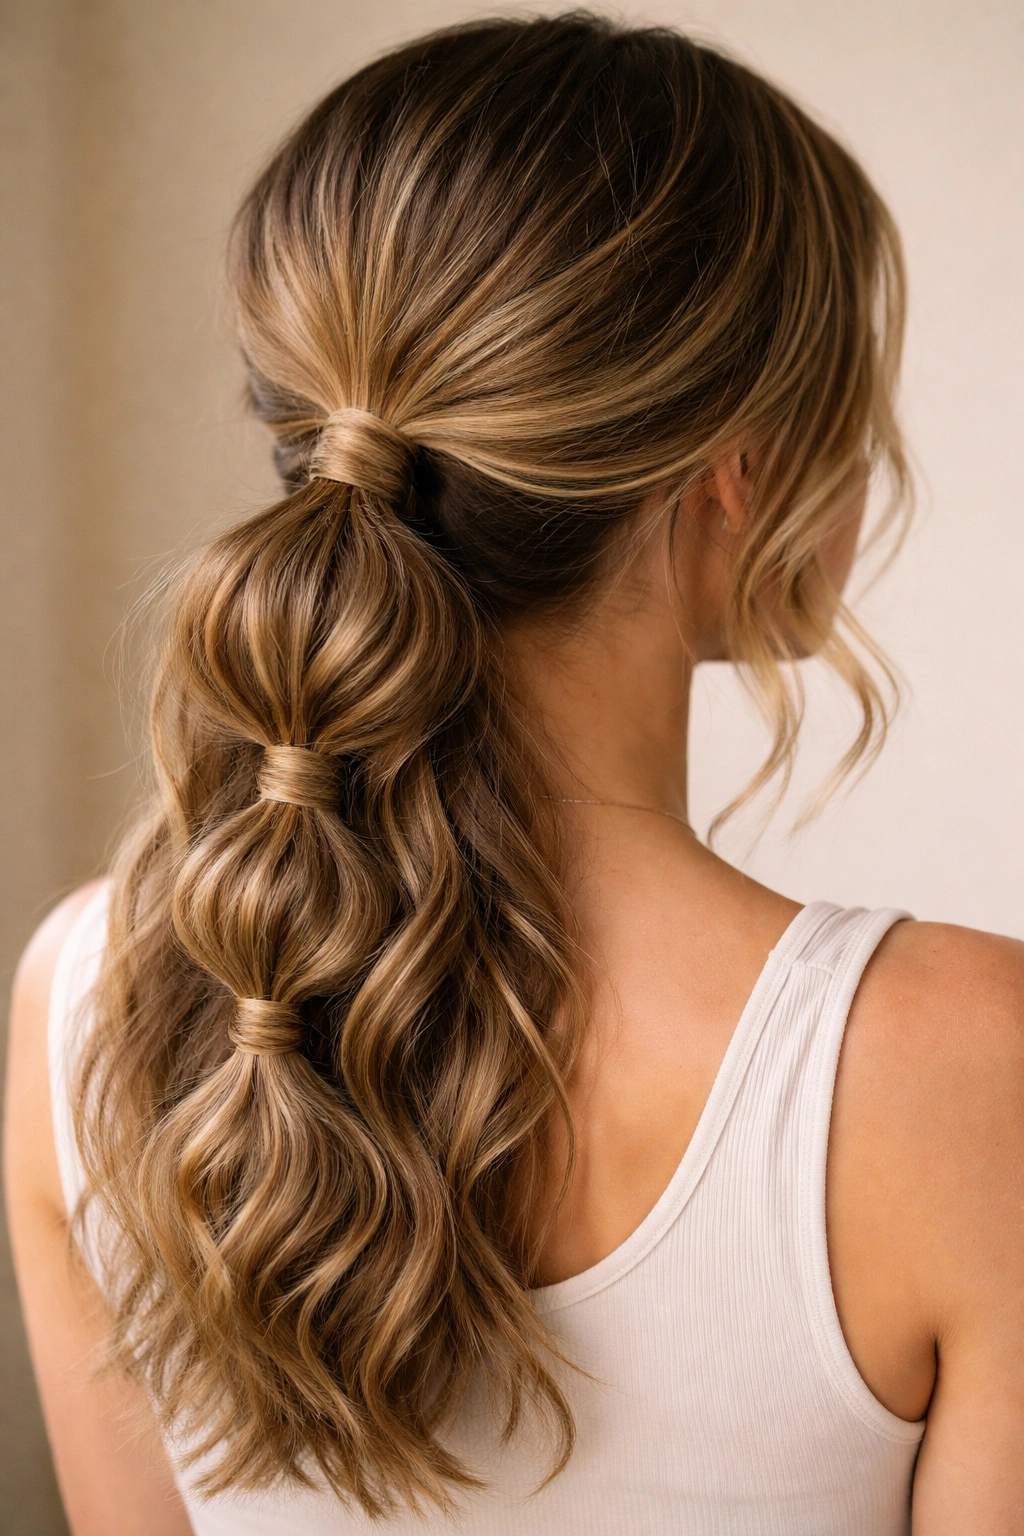
A bubble ponytail is that trendy style where you create multiple small sections within a single ponytail, separated by bands and puffed out for dimension. On wavy hair, those “bubbles” already have movement and texture, so they look dramatically fuller than they would on straight hair. It’s fun, youthful, and honestly pretty easy once you’ve done it once.
What Makes It Different
The wrapped version means you’re using small twisted or braided sections to connect the bubbles instead of just using elastic. This adds a handmade, intentional quality that makes it feel less like a trend and more like a thoughtful style choice. On wavy hair, these connectors look really beautiful because the texture shows.
Creating the Bubble Effect
- Create a low ponytail at the nape and secure
- About two inches down from the elastic, add another elastic to create the first “bubble”
- Gently pull and fluff the section between the two elastics to create volume
- Continue adding elastics down the length of the ponytail, spacing them 2-3 inches apart
- Once all the elastics are in place, take a small thin section from one bubble, twist it, and wrap it around the elastic below to hide it
- Repeat with the other bubbles
- Gently tease and pull at each bubble to maximize texture and fullness
Pro tip: Use clear elastics if you’re keeping this very casual, or fabric-covered elastics if you want a more polished look. On wavy hair, even clear elastics tend to disappear into the texture pretty well.
7. Soft Side Bun
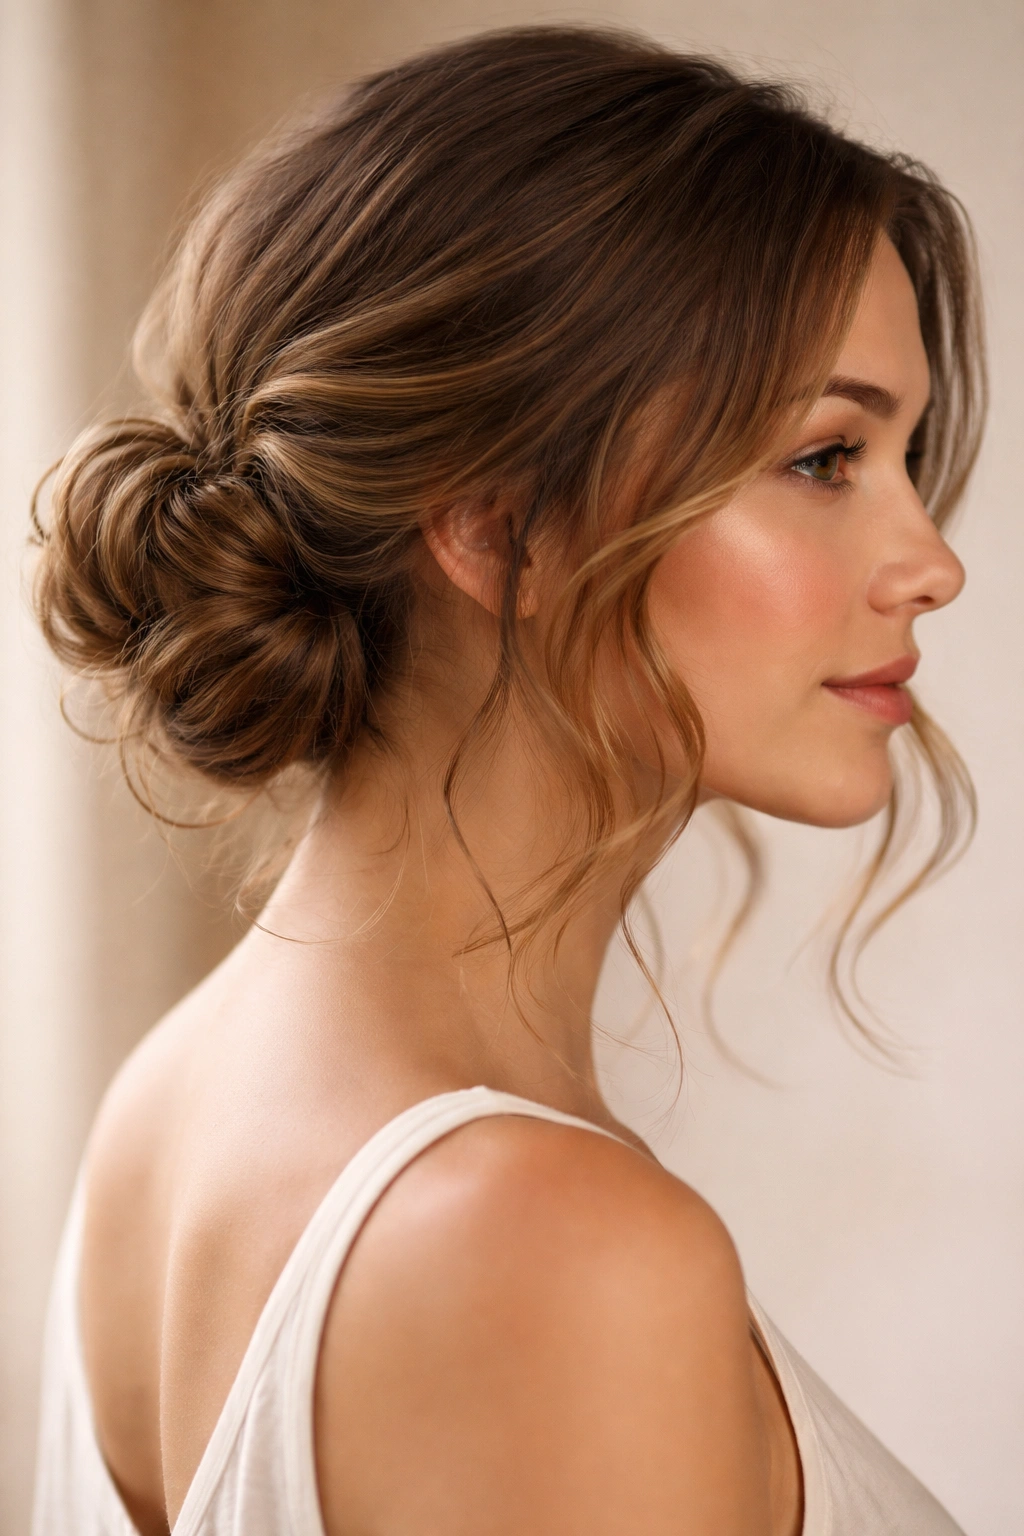
A side bun is inherently flattering—it elongates your face and lets you show off your waves on one side while keeping hair off the other. When you do it soft and loose on wavy hair, it’s the opposite of severe. This is the bun you wear when you want to look put-together but comfortable, when you want hair off your face but not in a way that screams “I’m busy.”
Why It Works for Textured Hair
Side buns read as intentionally romantic on wavy hair. The texture means you’re not aiming for that sleek, tight, potentially harsh look—instead, you get this naturally soft, cascading effect. The waves frame the bun beautifully and add movement even though most of your hair is actually up.
Step-by-Step Instructions
- Create a side part, making it deeper on one side than the other
- Brush your hair toward one side, gathering it toward the side of your head where you want the bun, roughly at ear level or slightly below
- Twist the gathered section loosely and wrap it into a soft coil at that side placement
- Secure with bobby pins
- Leave the hair on the other side of your part loose in your natural waves—this is the frame
- Gently pull at the bun to make it fuller and more textured; you’re going for soft, not sleek
- Use bobby pins in a color that matches your hair so they disappear into the waves
Worth noting: A side bun works best when you don’t pull the hair too tightly back. Let your natural hairline show. A little bit of “messy” at the temple is actually part of what makes this style work.
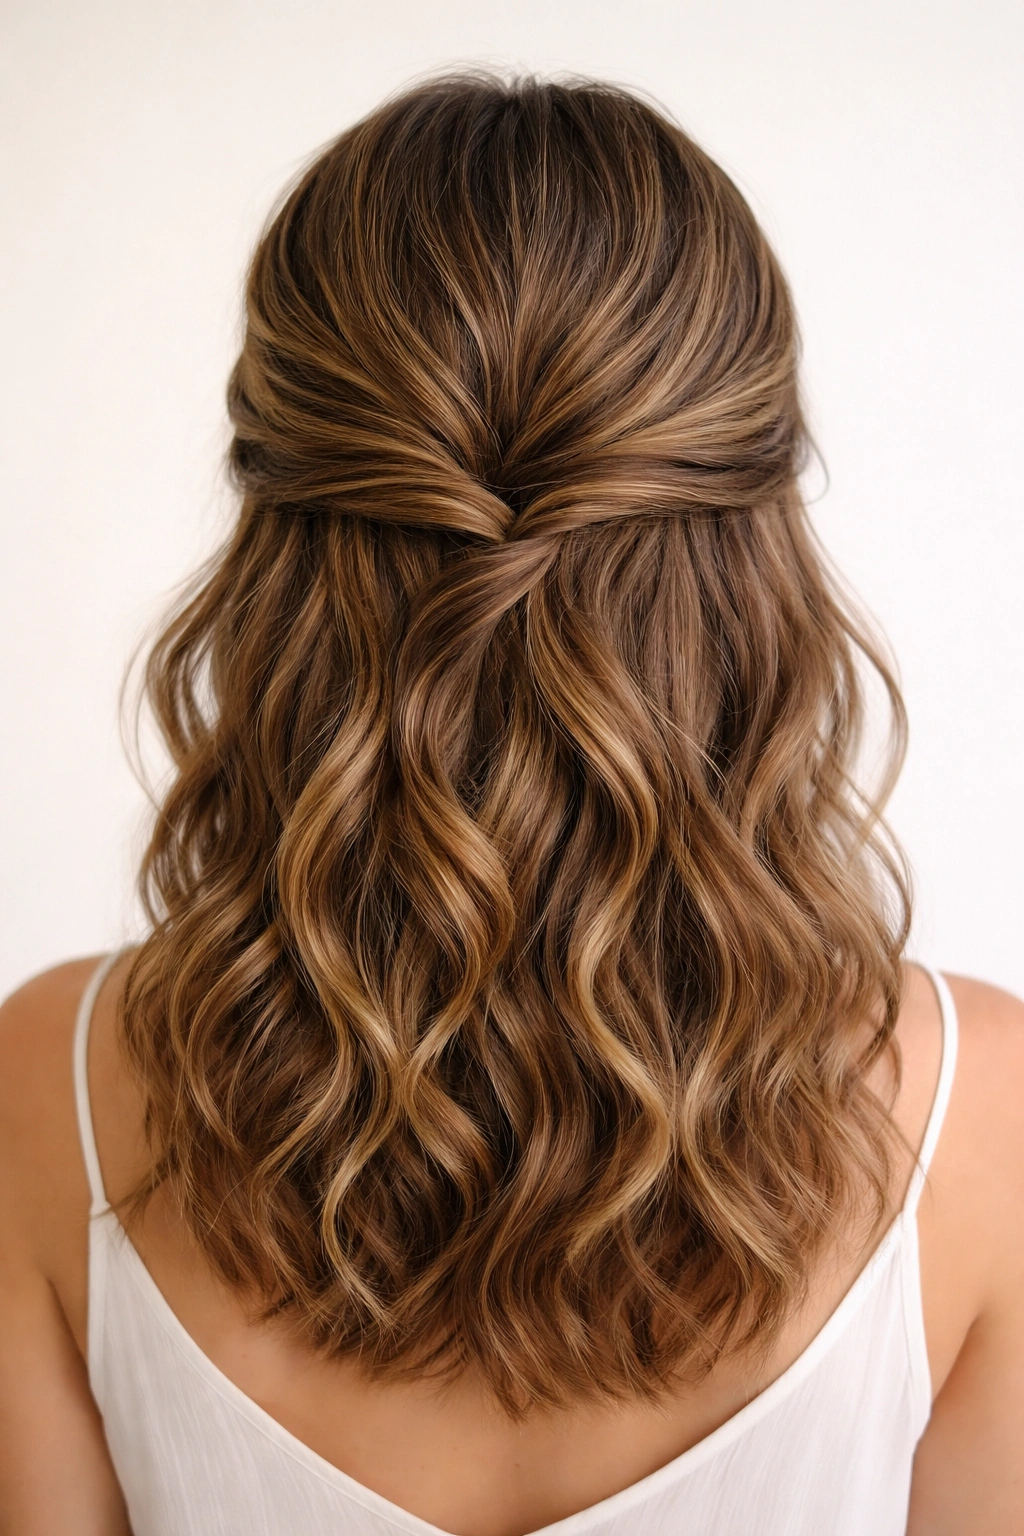
8. Twisted and Pinned Half-Up Style
This is technically half-up (some hair up, some down) but because you’re using twists instead of clips or traditional knots, it feels more intricate and intentional. You’re creating two or three small twists, pinning them at the back of your head, and letting the rest of your waves flow freely. It’s the best of both worlds—hair off your face but still showing your waves.
What Makes It Special
Twists are more interesting visually than a simple clip, and they hold really well in wavy hair. Because there’s no tight crown knot or high ponytail pulling your hair back, this style is incredibly comfortable for all-day wear. Your face stays visible, your waves stay visible, and you’re not fighting any tension headaches by evening.
Styling Process
- Create a deep side part
- Starting from the deeper side, take a small section of hair and begin twisting it loosely
- Twist toward the back center, gradually incorporating a bit more hair as you go
- Repeat on the other side with a matching twist going toward the same center point
- Where the twists meet at the back center, pin them together with bobby pins tucked underneath
- Leave the majority of your hair down in your natural waves
- Optionally, add a third, thinner twist if you want extra detail, but this is completely optional
Detail that matters: Don’t twist so far back that you’re pulling all your hair away from your face. You want some wave texture framing your temples and cheekbones. The half-up should feel balanced, with your face still very much the focus.
9. Braided Halo Updo
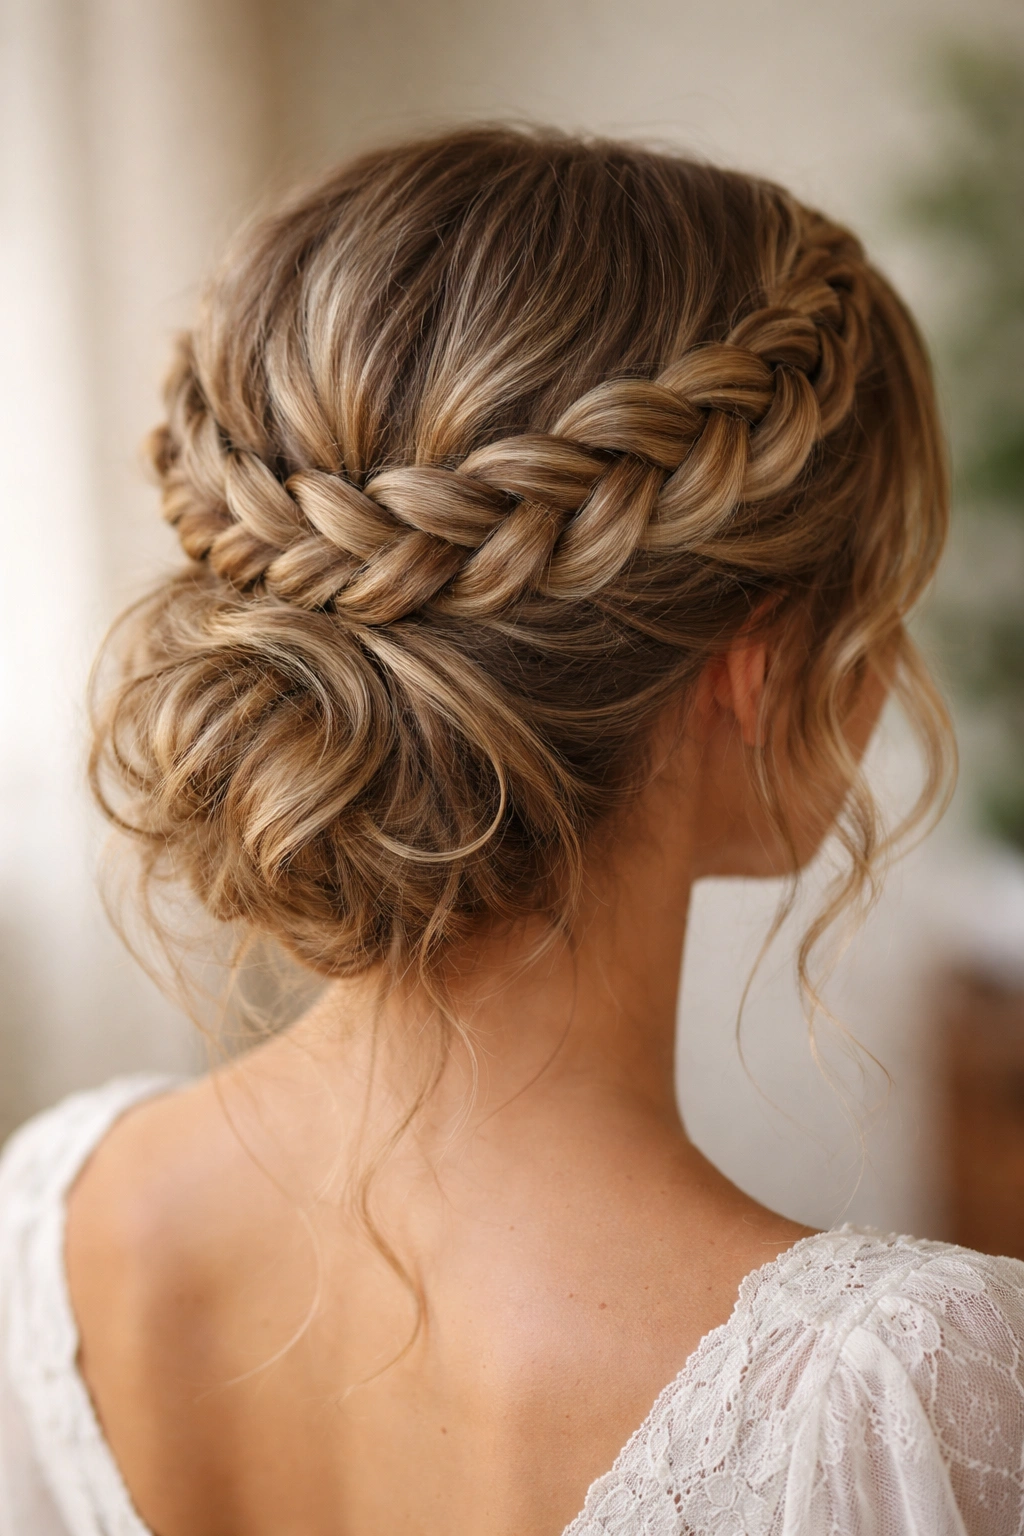
A halo braid wraps completely around your head like a crown, and when you end by pinning the braid to create an updo instead of leaving ends loose, you’ve got something that’s special-occasion-worthy but not complicated. The braid circles your head, creating dimension from every angle, and because it’s built on wavy hair, it looks fuller and more textured than it would on straight hair.
What Makes It Stand Out
A halo braid reads as intricate and romantic, which makes it perfect for events where you want to look extra but not overdone. The fact that it’s built on wavy hair means you don’t need it to be perfectly sleek or symmetrical—slight imperfections actually add to the charm.
How to Execute This Style
- Begin a Dutch braid (reverse three-strand braid where you cross strands under instead of over) on one side of your head, starting at the temple
- As you braid, gradually add hair sections from underneath, working toward the back of your head
- Continue the braid all the way around to the other side, finishing just above the opposite ear
- Secure the end of the braid with a small clear elastic
- Gently pull and loosen each section of the braid to create fullness and texture
- Wrap the braided end toward the back and pin it into place, tucking it underneath so the elastic is hidden
- Leave a few wispy waves loose in front for framing
Pro tip: Start this style with slightly damp waves. Completely dry waves can be frizzy and harder to work with; slightly damp waves hold the braid better and look smoother without being slicked-back.
10. Sleek Low Pony with Wave Details

This is the updo for when you want something that looks polished without sacrificing the beauty of your natural waves. You’re creating a low ponytail at the nape, but instead of trying to smooth every wave down, you’re leaving intentional pieces in front and on the sides, letting them wave freely while the majority of your hair is neatly gathered.
Why It Works for Wavy Hair
A sleek pony usually requires a ton of smoothing and can look harsh on some face shapes. But on wavy hair, you’re not going for sleek all over—you’re creating contrast by having some smooth, gathered sections and some loose, wavy sections. This plays up the texture rather than fighting it.
Creating This Style
- Create a side part, making it deeper than your everyday part
- Smooth the back and sides gently with a brush, but don’t pull tight
- Gather into a low ponytail at the nape and secure with an elastic
- Leave the front sections on both sides of your face completely loose—don’t smooth them back
- Let these front pieces wave naturally in their original texture
- You can smooth them slightly with a light hand, but the goal is to keep them looking like natural waves, not slicked-back pieces
- Use a small elastic in a color that matches your hair
Key element: The contrast between the neat pony and the loose, wavy pieces is what makes this style work. Don’t try to make the whole thing sleek—that would defeat the purpose.
11. Tousled High Bun
A high bun sits at the crown instead of the nape, giving your face a completely open, youthful frame. This version is deliberately tousled—messy, textured, and full. Because you’re working with wavy hair, achieving that tousled look is actually easier than it would be with straight hair; your natural texture does half the work.
Why It Works for Textured Hair
Wavy hair naturally has volume and movement at the crown, which is exactly what a high bun needs to look full and intentional rather than thin and scraggly. The texture reads as intentionally artistic rather than sloppy, even when you’re not trying to be perfect.
Building Volume at the Crown
- Flip your head upside down and gather your hair from underneath toward the very top of your head
- Flip back up and secure into a high ponytail at the crown
- Backcomb gently at the base of the ponytail to create grip and the appearance of a fuller foundation
- Twist or coil the ponytail and wrap it around the base to form a bun
- Secure with multiple bobby pins distributed around the base
- Gently pull and tease at the bun from all angles to create that intentionally messy, textured effect
- Leave a few small pieces loose around your face, especially at the temples
Worth knowing: The messier this style is, the better it works. Tight, perfect buns can look harsh; a bun that’s clearly textured and tousled looks intentional and charming on wavy hair.
12. Twisted Rope Updo
A rope twist is created by taking two sections of hair, twisting each one individually, then twisting those two twisted sections together. It creates a thicker, more textured twist than a regular three-strand braid, and when you coil it into an updo at the nape, it looks really impressive for minimal effort. Wavy hair makes rope twists look especially full and interesting.
What Makes It Different
The texture of a rope twist is different from a braid—it’s thicker, chunkier, and has a lot more visual interest. On wavy hair, those chunky twists show off your texture beautifully. The style reads as more intricate than it actually is, which is always a win.
How to Create a Rope Twist Updo
- Gather your hair into a low ponytail at the nape
- Divide the ponytail into two equal sections
- Twist one section tightly around itself in one direction
- Twist the other section tightly in the same direction
- Now twist the two twisted sections together around each other, which creates the rope effect
- Coil the rope around the base of the ponytail to form an updo
- Secure with bobby pins tucked into the coil
- Gently pull at the rope to loosen it and create dimension
Detail: The rope twist should be slightly loose, not tight. Tight rope twists can look severe, while loose ones with that natural wave texture look soft and romantic.
13. Layered Half-Up Clip Style
This style uses the height and dimension of your layers to create visual interest. You’re creating a half-up style, but instead of gathering everything smoothly, you’re clipping just the top layers back, leaving the underneath layers loose. It’s easy, it looks like you tried, and it works beautifully on medium-length wavy hair because your layers are already there.
Why It Works for Layered Hair
If your medium-length waves are layered (and most wavy cuts are), this style takes advantage of that structure. You’re not fighting your cut; you’re using it. The clipped layers sit neatly while the underneath layers flow, creating depth and dimension that looks way more complicated than it is.
Styling Instructions
- Identify your top layers—these are the shorter pieces around your crown and temples
- Take just these top layers and brush them back gently
- Gather them at the crown or slightly off-center and clip with a clip in a complementary color
- Leave all the underneath, longer layers completely loose in your natural waves
- The clip should sit high enough that it’s visible as an intentional style choice, not hidden
- Let your waves flow freely below the clip
Insider tip: This works especially well if you have lots of layers. If your layers are minimal, you can create more definition by using a texturizing spray on just the top section before clipping.
14. Tucked and Twisted Updo
This is a more complicated-looking style that’s actually quite straightforward. You’re creating a half-up style, but instead of clipping or tying it at the back, you’re twisting it and tucking the ends underneath the gathered hair, creating a seamless, polished updo that looks like it took serious effort but didn’t.
What Makes It Special
The tucked-and-twisted technique creates a really clean, intentional look without any visible clips or elastics. Wavy hair actually makes this easier because the texture provides grip—the twisted section won’t slip and slide as easily as it would on smooth hair.
Step-by-Step Technique
- Create a deep side part
- Take a section from the deeper side, starting at the temple, and twist it loosely as you move toward the back
- Do the same on the other side with a matching twist
- At the back center, where the twists meet, begin tucking the twisted ends underneath and pinning them into place
- The result should look like a half-up style, but with no visible clip or elastic at the back—just the seamless gathered section
- Gently loosen and fluff the twisted sections and the gathered area for a softer, more textured appearance
- Leave face-framing waves loose in front
Important detail: Make sure you’re securing the tucked ends with enough bobby pins that they don’t come loose. 3-4 pins distributed around the gathered section should do it.
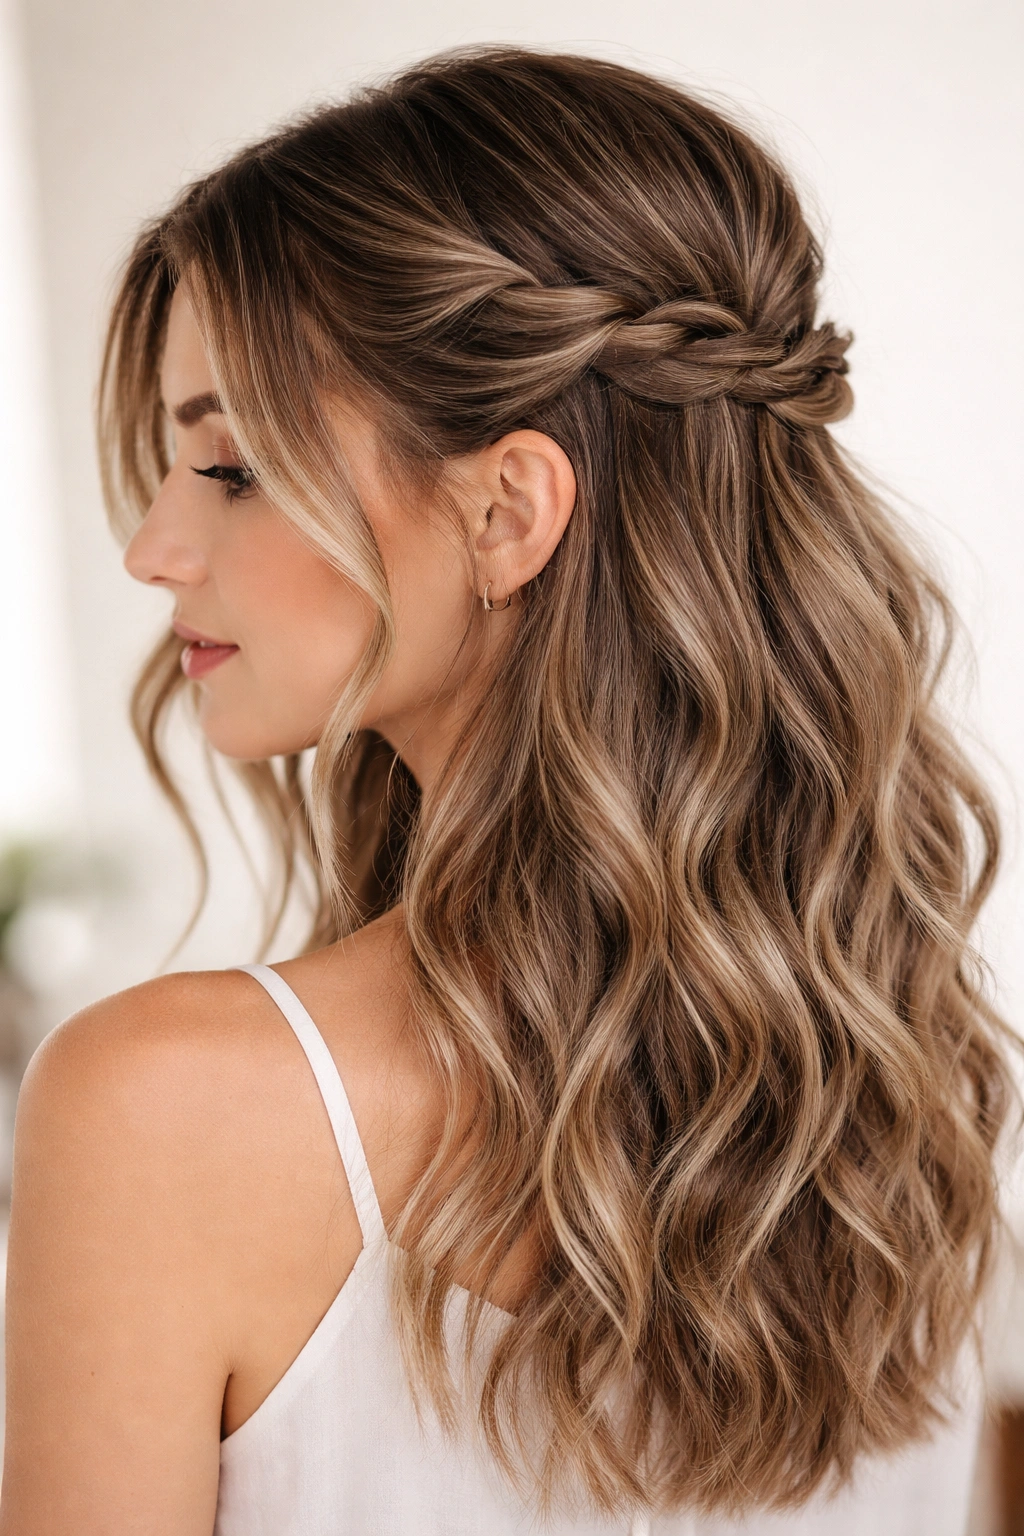
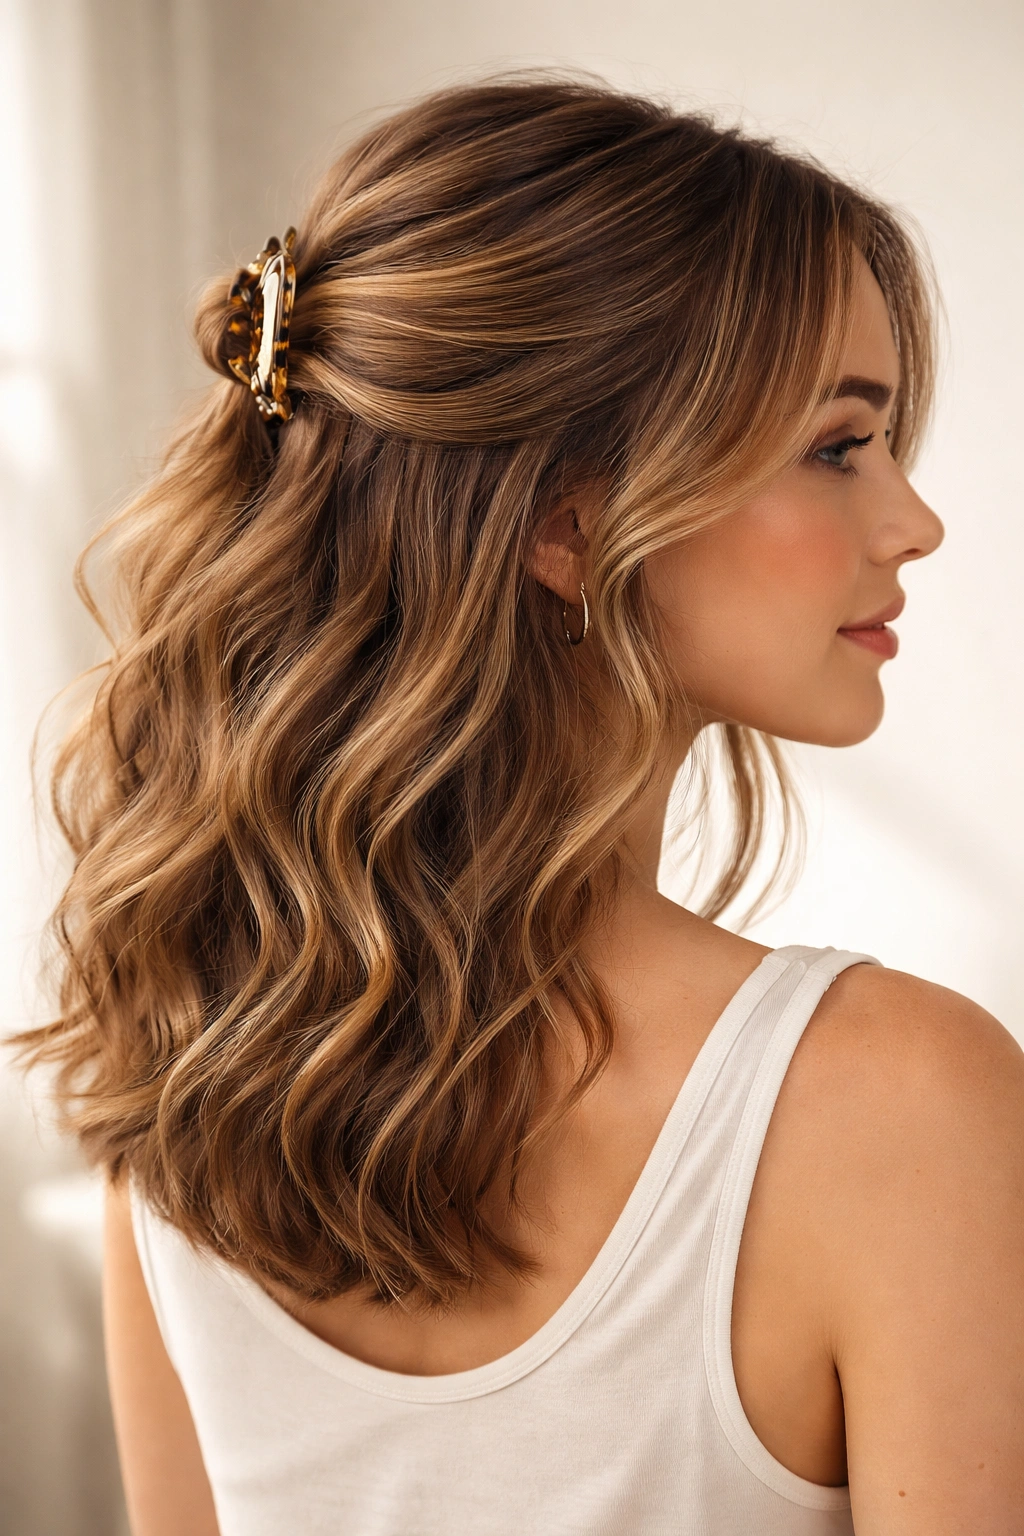
15. Beachy Waves Half-Up
This is the style for when you want something that looks effortlessly beachy and cool. You’re essentially leaving your waves down but sweeping just the top sections back and fastening them with a clip at the crown or slightly off-center. It barely feels like an updo, but it keeps hair off your face while showing off your full wave texture.
Why It Works for Wavy Hair
This is the ultimate “your hair, but slightly more intentional” updo. Because you’re not gathering much hair, it’s more about the placement of the clip and the styling of your waves than about any complicated technique. On wavy hair, this reads as effortlessly chic.
Creating This Style
- Apply a sea salt spray or texturizing product to enhance your natural waves (completely optional but recommended)
- Let your waves air-dry or scrunch them with a diffuser if they need refreshing
- Take just the top layer of hair from both sides of your head, sweeping it back
- Clip at the crown with a clip that complements your hair color and vibe
- Leave all the underneath hair loose and flowing in your natural waves
- You want the clipped section to look like it’s holding back just enough hair to frame your face—not bunching too much
Pro tip: The best clips for this are ones that blend into your hair rather than stand out. Tortoiseshell clips on darker hair, clear or metallic clips on lighter hair, tend to disappear nicely.
Final Thoughts
Medium-length wavy hair is genuinely one of the easiest hair lengths to style into updos because you’ve already got the texture working in your favor. These 15 styles prove that an updo doesn’t need to take an hour or require a ton of skills—most of them come together in 5-10 minutes once you’ve done them once or twice.
The real secret is stopping trying to fight your waves and instead building your updo around them. The messier you’re willing to let things be, the better they usually look. A slightly loose twist, a textured knot, a few intentional pieces left out—these “imperfections” are actually what make your updo look intentional and interesting rather than overdone or harsh.
Pick one or two of these styles to start with, practice them a couple times, and watch how quickly they become second nature. Before long, you’ll be mixing and matching techniques to create your own variations. That’s when you know an updo has really become part of your styling toolkit.