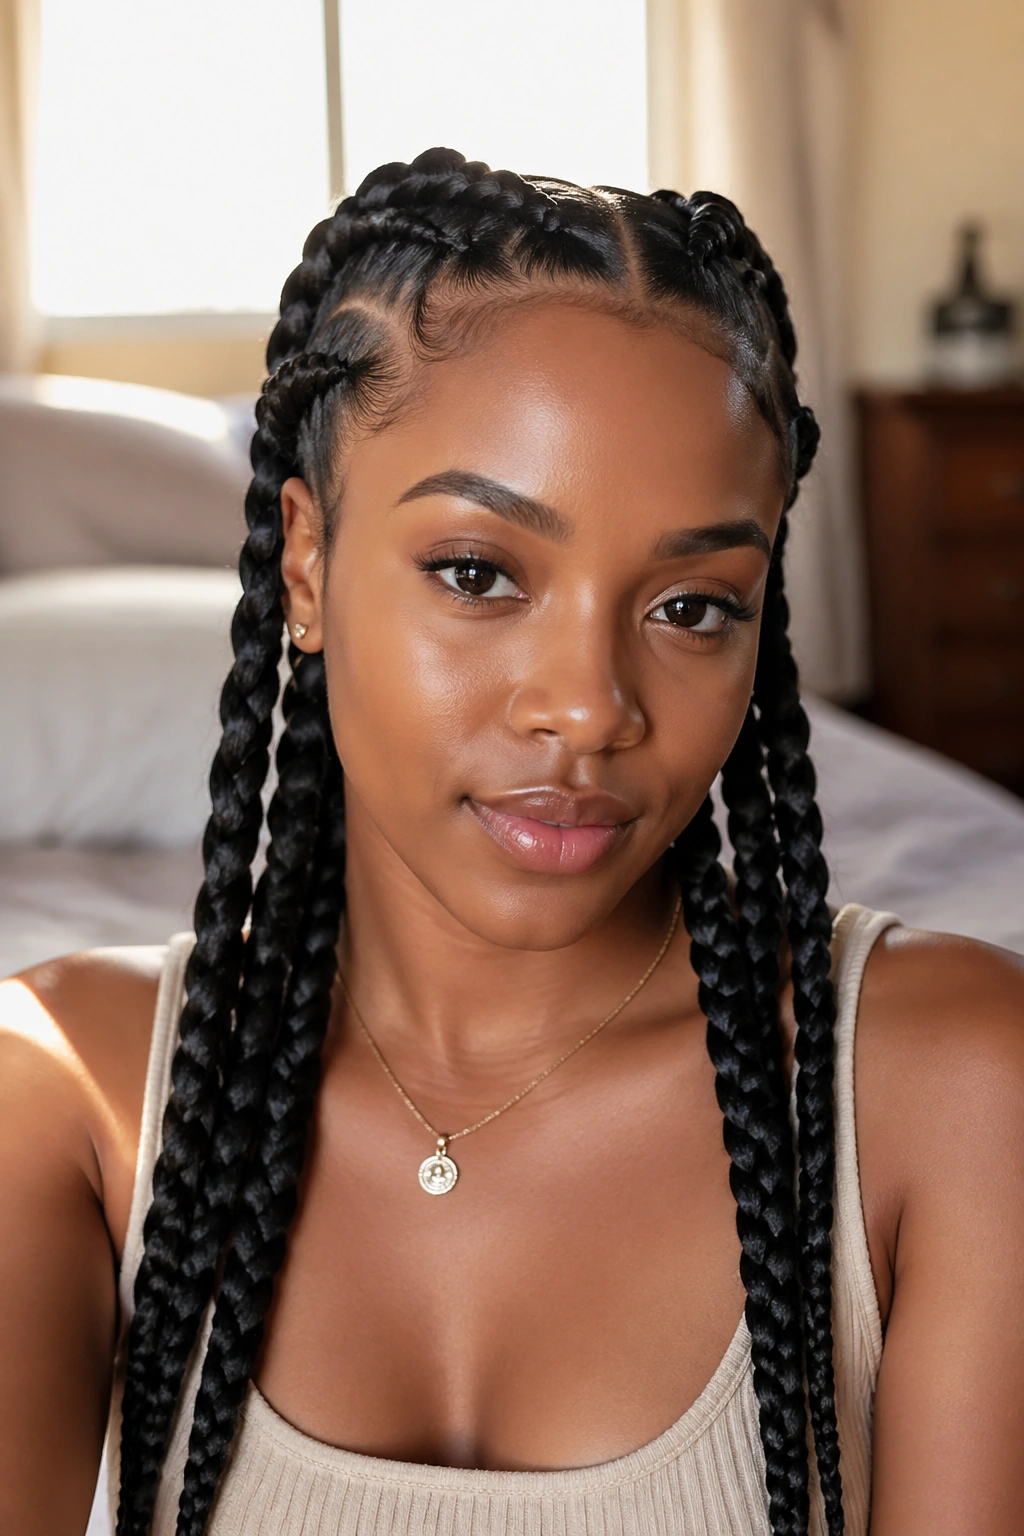
Dutch-style rope braids on type 4 natural hair can look sharp, soft, or regal, and the difference usually comes down to parting and tension—not hair texture. Type 4 coils hold shape well, which is part of the fun. The braid does not have to fight the hair; it can sit on top of it, travel across it, and stay put once the sections are clean.
Shrinkage changes the whole mood. On stretched hair, a rope braid reads crisp and defined, almost architectural. On hair with more shrinkage, the same braid looks fuller and more textured, which can be gorgeous, but it also means your parts need to be cleaner and your fingers a little more patient. A loose section can bloom into a puff faster than you expect. That is not a flaw. It is the point.
The sweet spot is usually moisturized hair with a light hold at the roots, not a greasy one. A rat-tail comb, duckbill clips, a little leave-in, and a scarf for nighttime go a long way. Too much product makes the braid slippery. Too little turns the whole process into a tug-of-war. Start with a shape that flatters your head and your texture, then move into the versions that need a bit more hand skill.
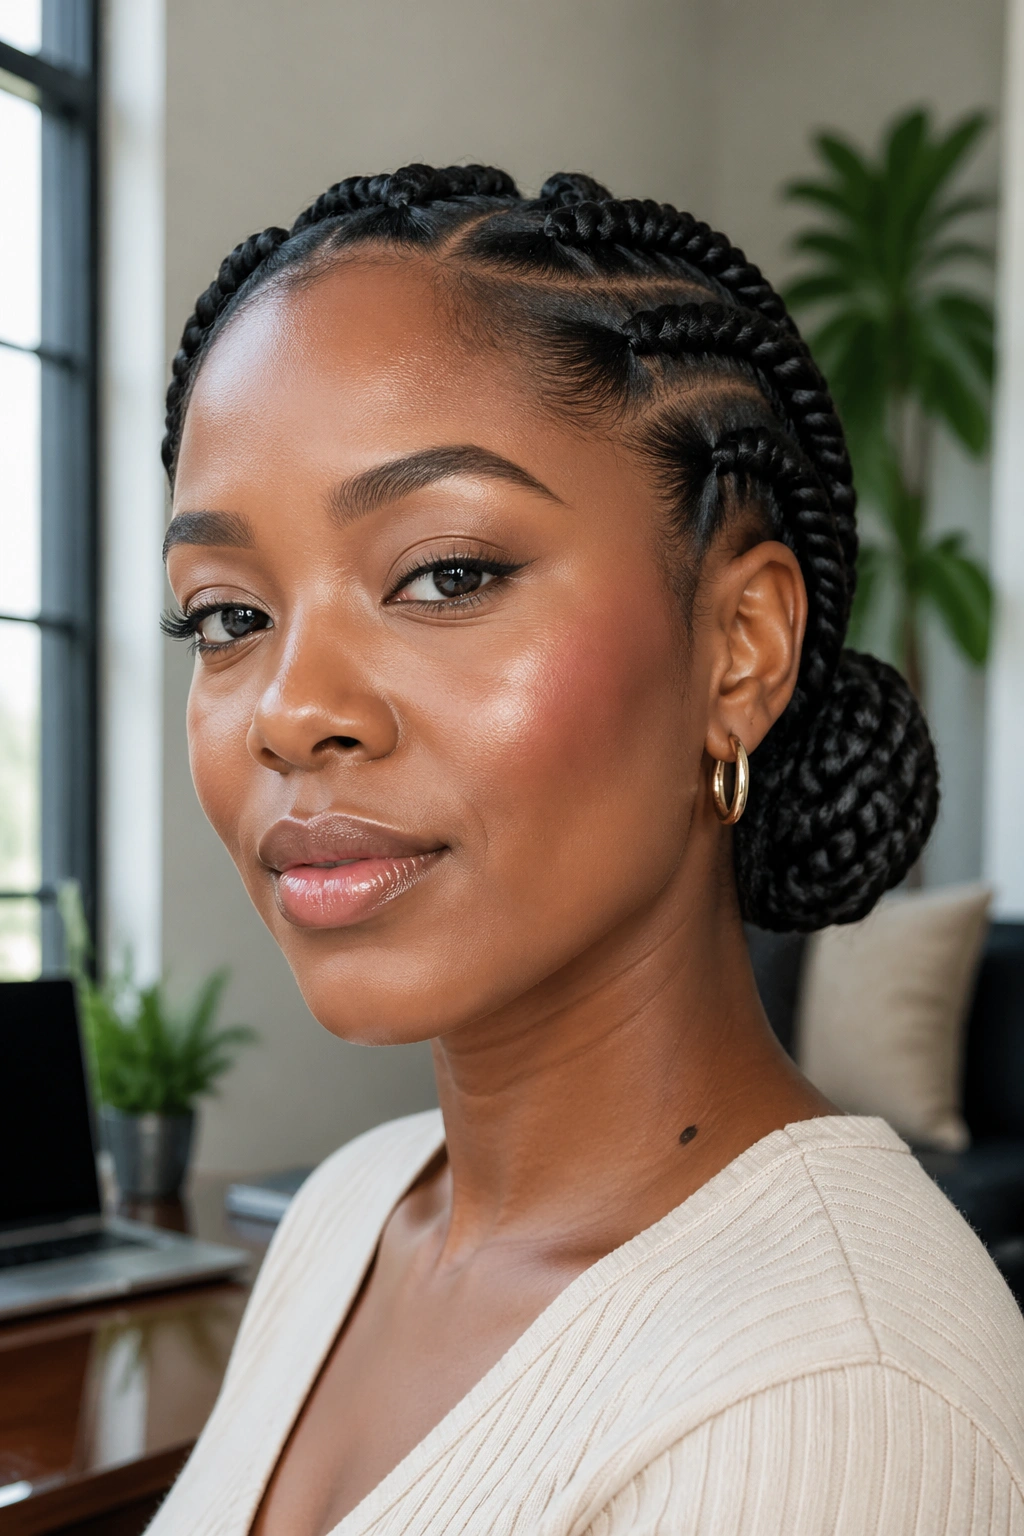
1. The High Crown Dutch Rope Braid
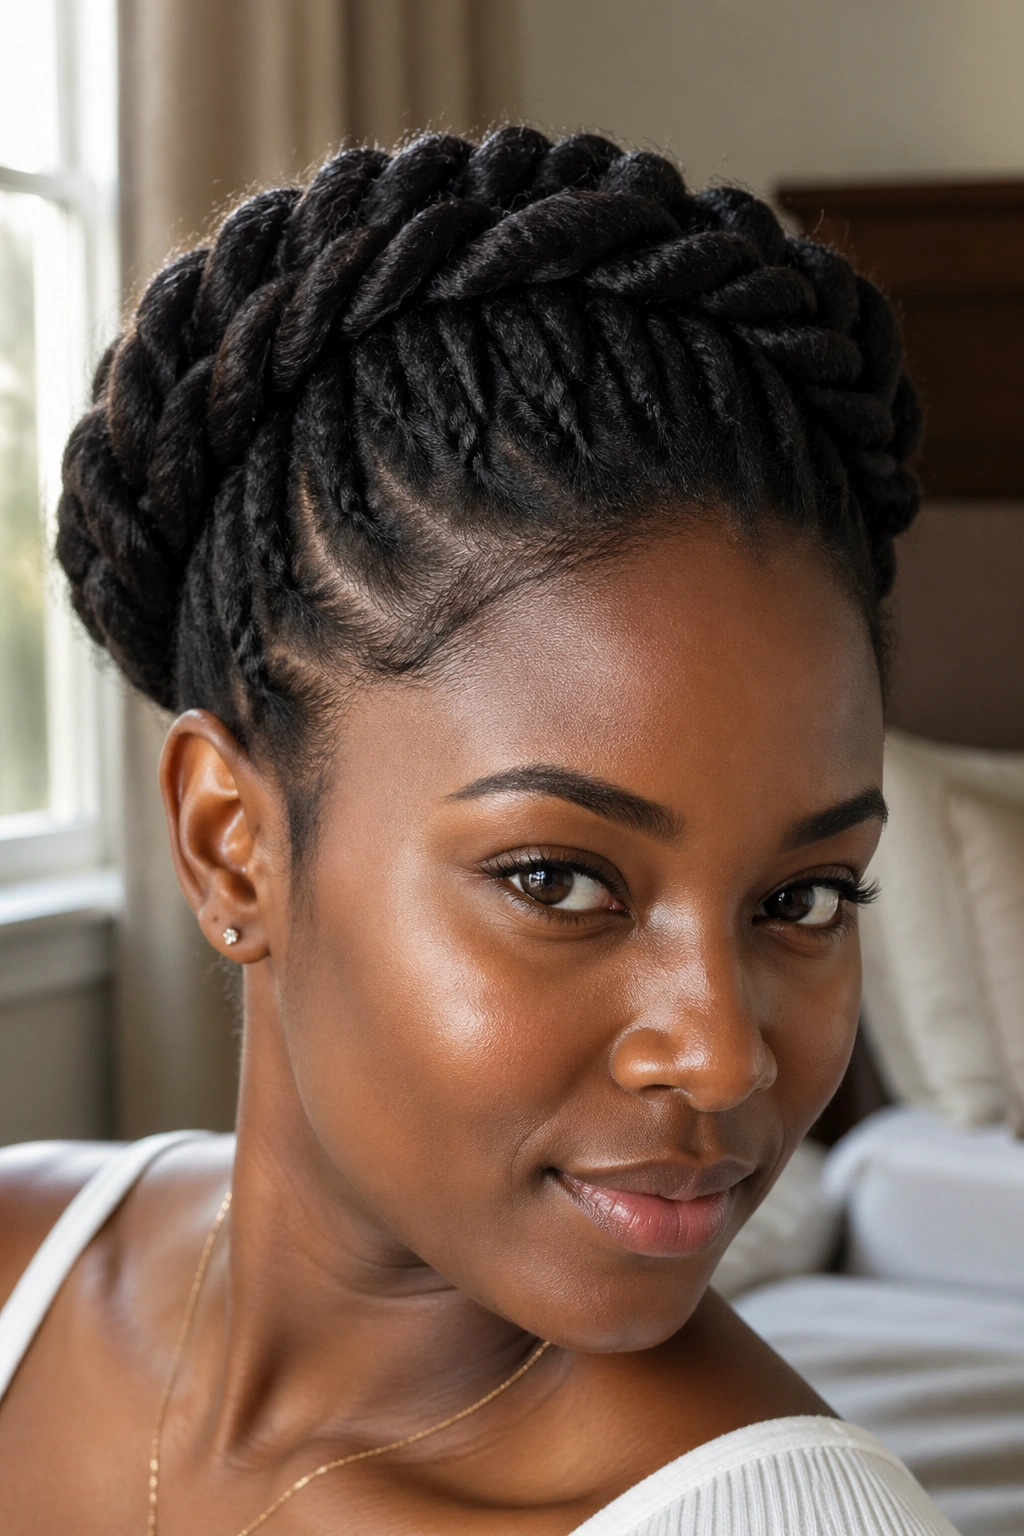
This is the braid that makes type 4 hair look taller. One braid starts near the front hairline, sweeps across the crown, and lands at the opposite side like it was meant to be there all along. The raised shape works because the Dutch-style base keeps the braid visible, while the rope twist adds that ribbed, braided texture people notice from across the room.
Why the crown placement matters
On type 4 hair, a crown braid can look too bulky if the section at the front is wide and uneven. Keep the first grab small, about 1 to 1½ inches across, then feed in hair gradually as you move back. That keeps the braid sitting up instead of puffing out in random spots.
The cleanest version comes from stretched hair. A twist-out that has been re-stretched, banded hair, or a light blow-dry on low heat gives you enough length to make the arc smooth. Fresh wash-and-go curls can work, but the braid will look thicker and less neat at the start. That may be the look you want. Fine. Just know what you are choosing.
Quick facts
- Best on medium to long stretched type 4 hair.
- Use a small amount of gel or mousse at the roots so the first inch lays flat.
- Anchor the end with a clear elastic or a small covered band.
- Finish by wrapping the tail under the crown or tucking it behind the ear.
Tip: If the front keeps lifting, braid the first two inches tighter than the rest, then ease off. The braid will hold without pulling your edges like it has a grudge.
2. Twin Rope Braids That Frame the Face
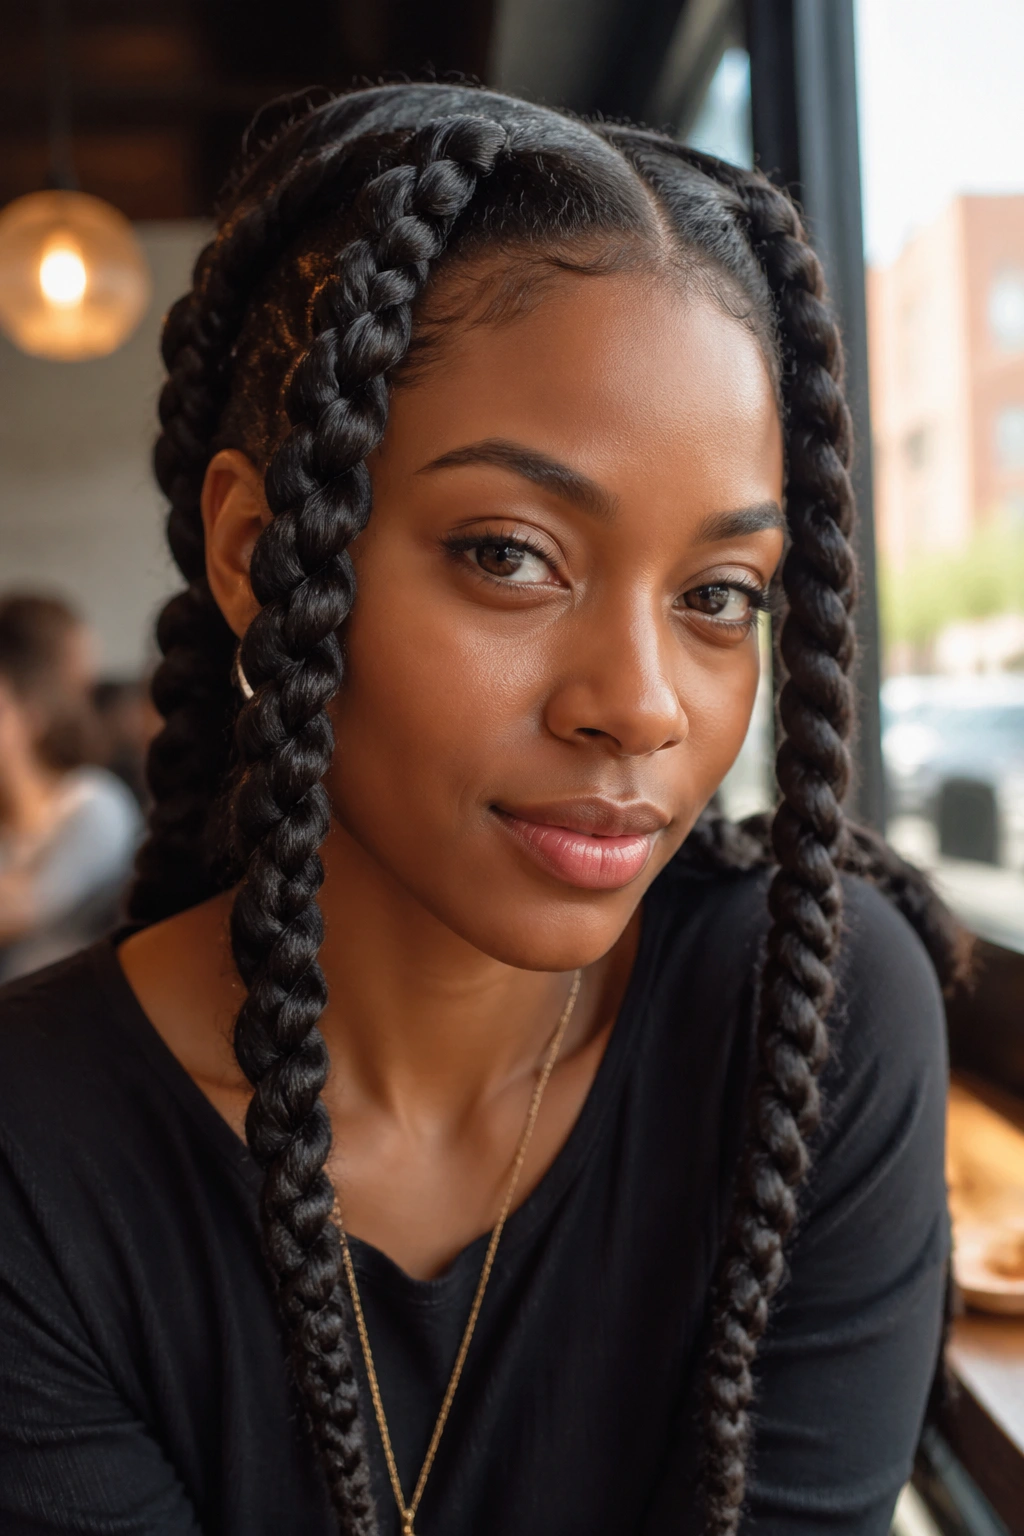
Two rope braids are the fastest way to make type 4 hair look deliberate. Clean, symmetrical, and a little bold. They also solve a practical problem: if your hair is thick and you want definition without spending forever on one giant braid, this style gives you structure in half the time and still leaves room for volume.
The trick is balance. Part the hair down the middle or slightly off-center, then keep both sections close in size from root to end. One braid should not look like it ate the other. That sounds obvious, but with thick coils and a little shrinkage, size creep happens fast.
I like this style on hair that has been stretched enough to separate easily, but not so bone-straight that it loses grip. A soft blow-dry, or even banded hair that has been fully dried, gives you enough length for the ropes to sit neatly. Wear the braids forward, over the shoulders, or pinned back behind the ears if you want the face open.
A small detail makes a big difference here: keep the rope twist direction consistent on both sides. If one braid spirals left and the other spirals right, the style can look messy even when the parting is clean. Symmetry does a lot of heavy lifting.
3. The Deep Side Rope Braid Sweep
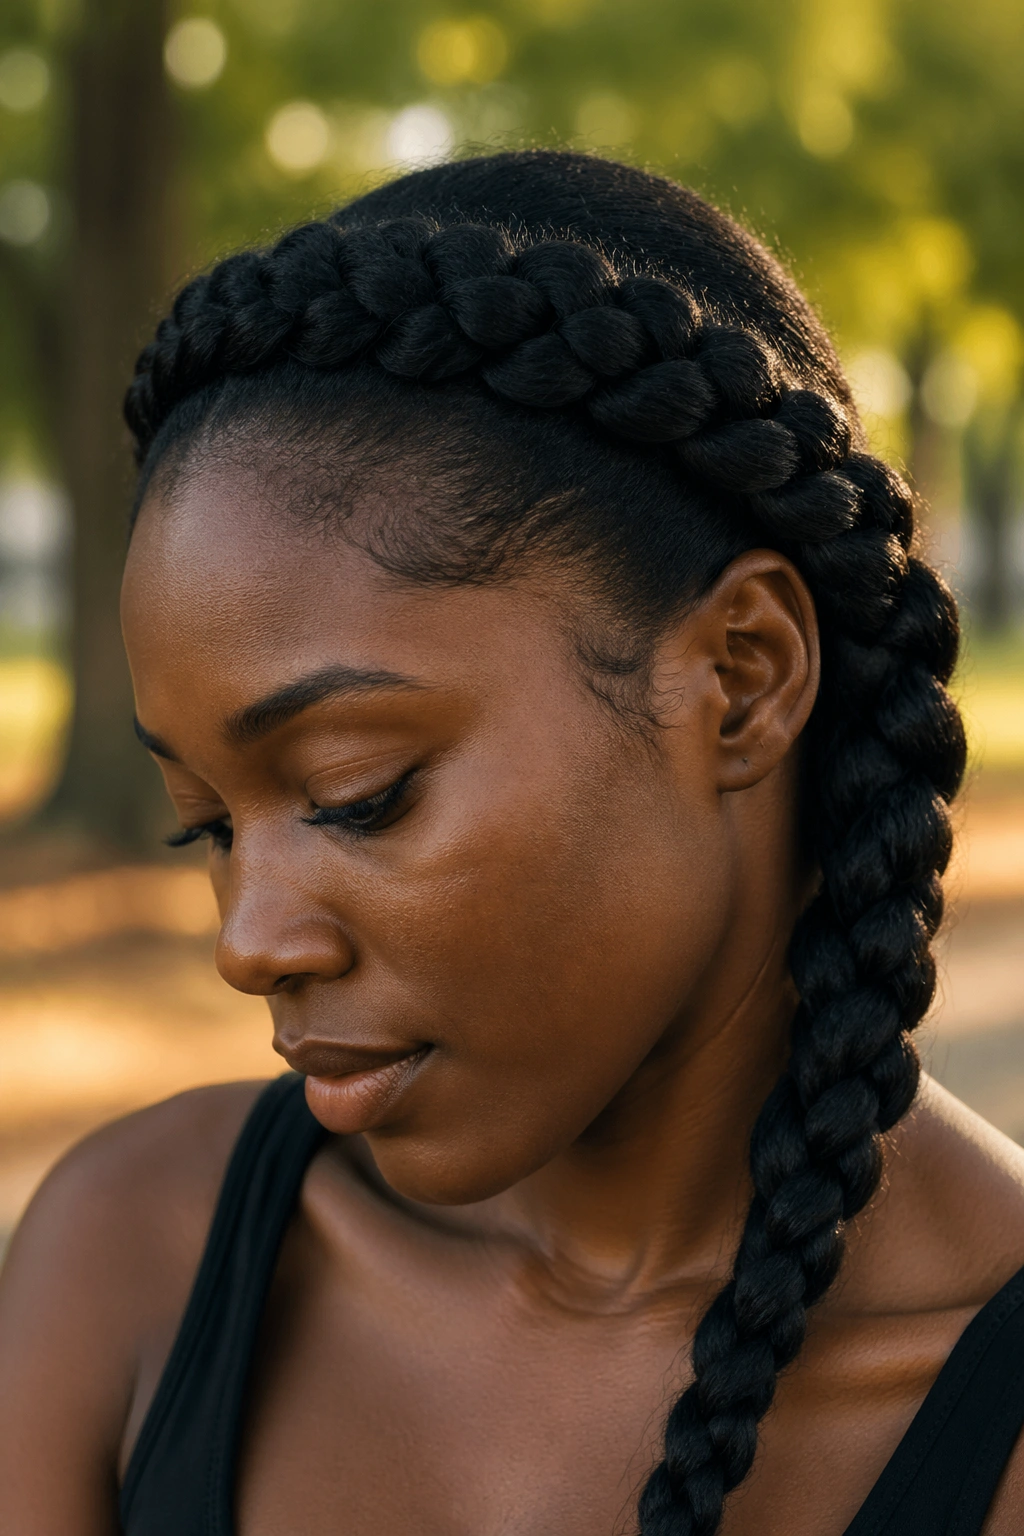
Why does a side Dutch rope braid work so well on type 4 hair? Because the shape gives the hair somewhere to go. Instead of building straight back, the braid leans across the head and falls over one shoulder, which lets the texture read soft and full instead of boxed in.
This style is especially kind to people who like side parts but hate how flat they can look after a few hours. Start on the heavier side of the part, take a compact front section, and guide the braid diagonally toward the nape. The braid should feel like it is wrapping the head, not sitting on top like a helmet. You want curve. Not stiffness.
How to wear it
A deep side braid looks best when the loose side has some movement. Leave a few curls out at the temple if you like that softer, face-framing look, or smooth everything back if you want the braid to carry the whole style. I prefer a little lift at the root and a less-perfect finish through the tail. That feels more natural on textured hair.
This one also pairs well with earrings. Big hoops, a single cuff, or even nothing at all. The braid already does the talking.
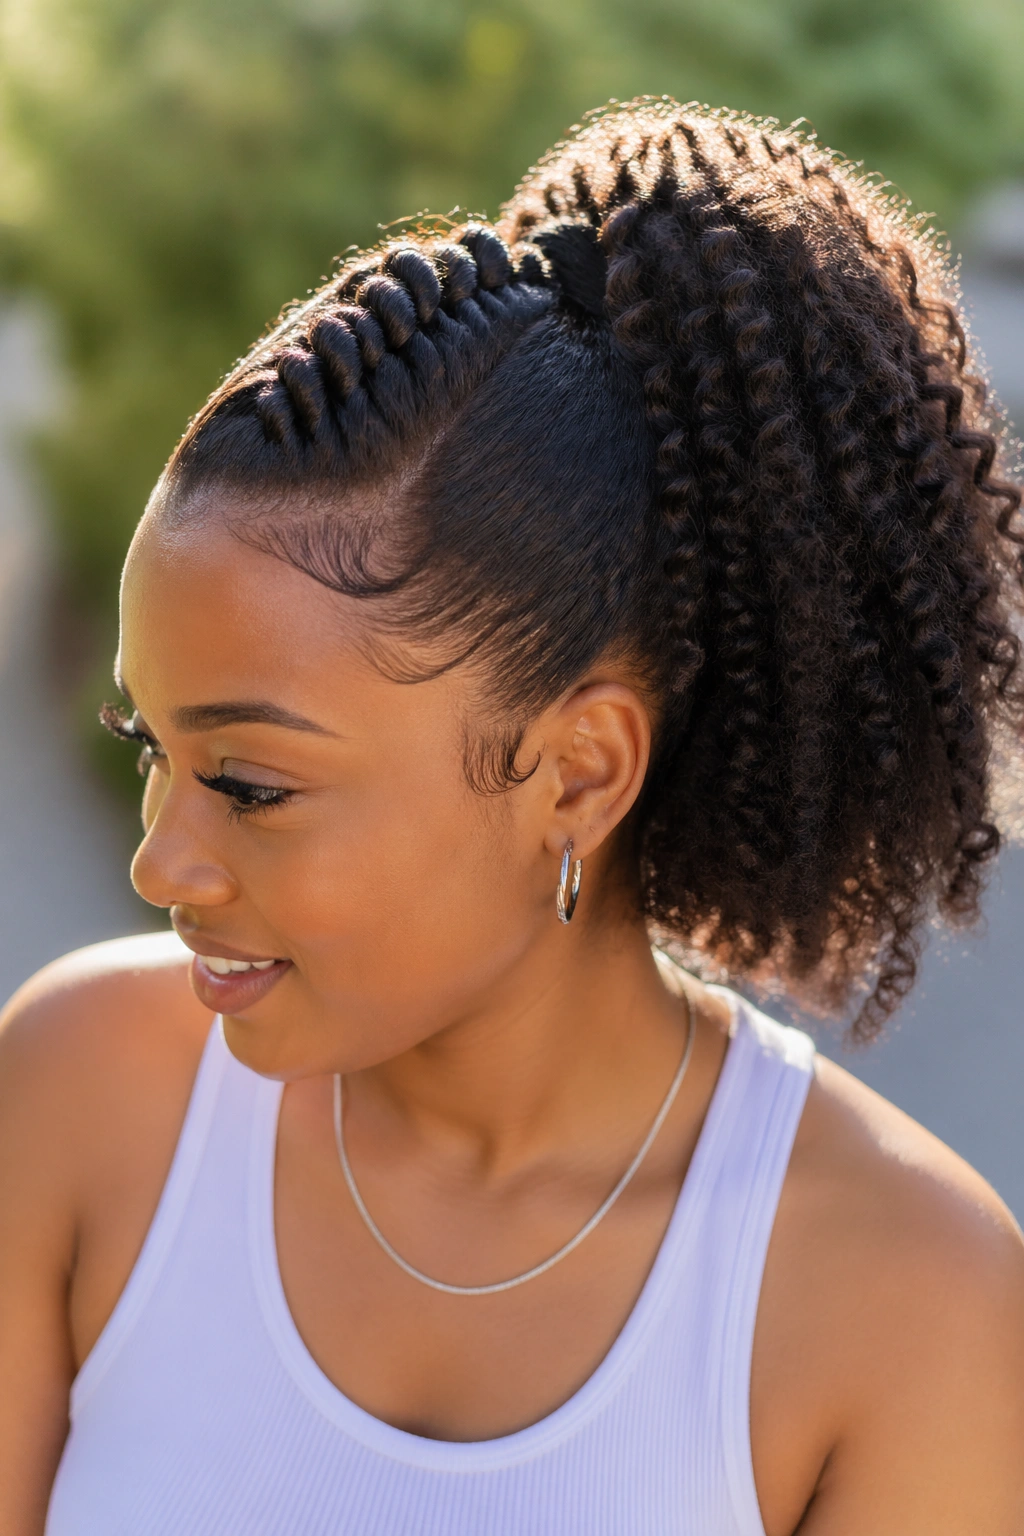
4. The Rope Braid Mohawk for Big Texture
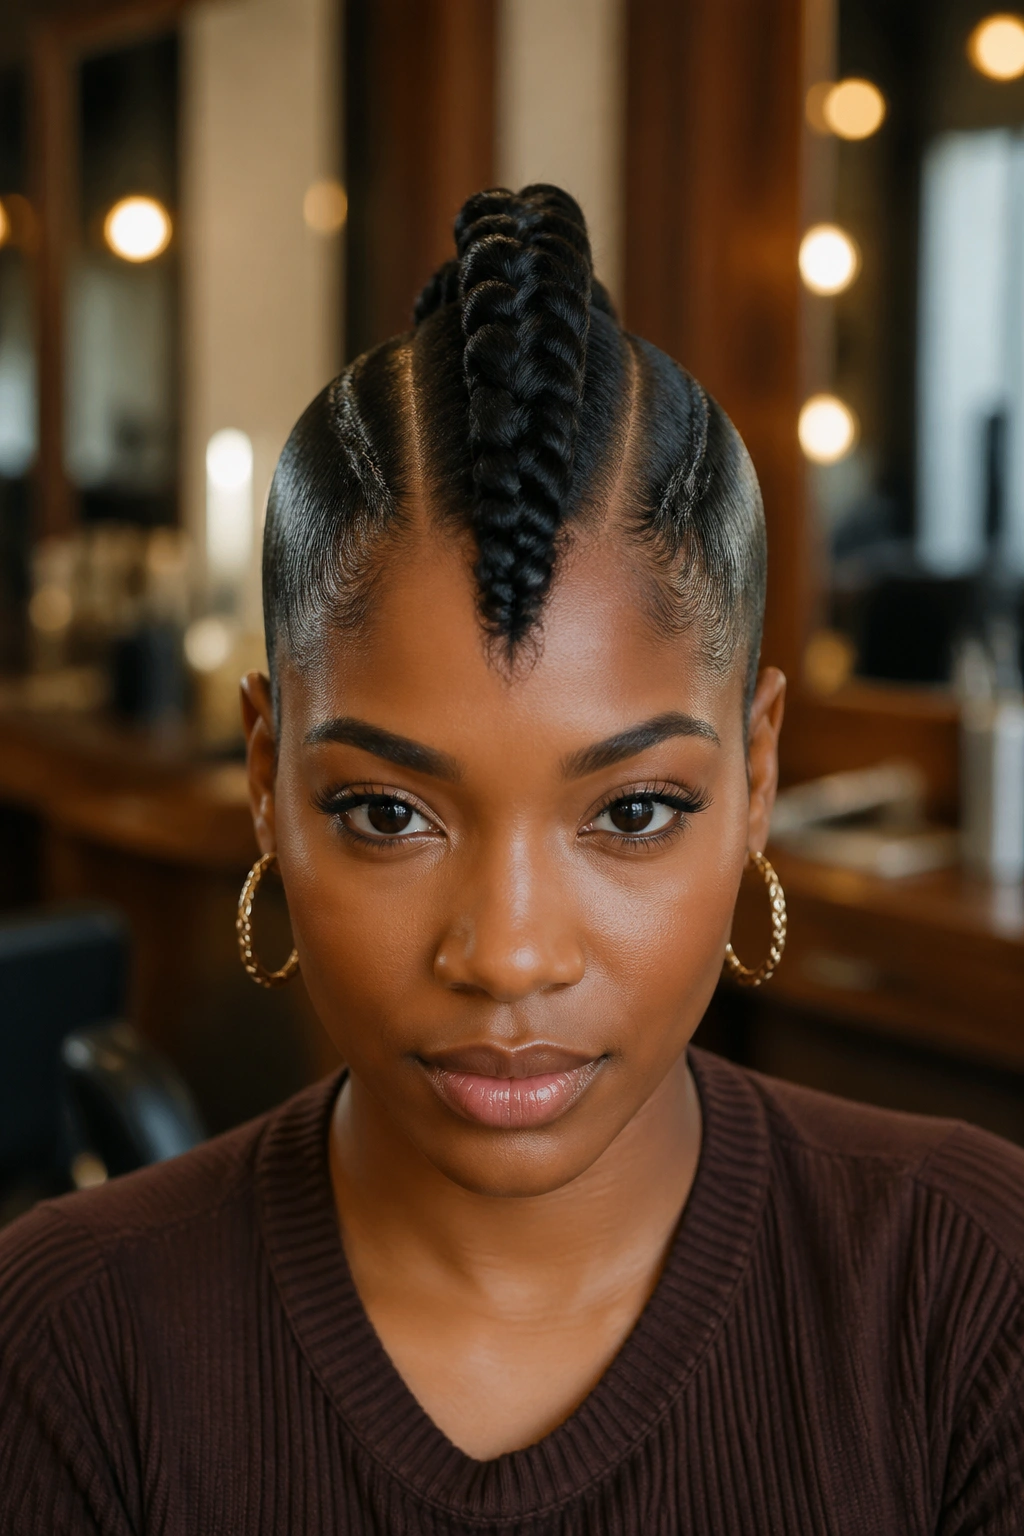
A rope braid mohawk is the style you reach for when you want drama without stacking a dozen tiny parts across your scalp. The center braid runs from front to back, while the sides stay slicked, flat-twisted, or tucked close to the head. On type 4 hair, that contrast is the whole appeal. Full crown. Clean sides. Zero apology.
The structure is simple, but it works because of restraint. You are not braiding every inch of hair. You are giving the eye a single strong line to follow, then letting the volume build in the middle where it does the most good. If your hair is dense, this style can be a relief. Less hand work. Less fuss.
- Keep the side sections narrow and smooth.
- Make the center braid slightly wider at the top than at the nape.
- Finish the ends in a puff, a tucked bun, or a wrapped tail.
- Use bobby pins that match your hair color if the sides need help staying flat.
A mohawk braid can look harsh if the parting is too sharp. Softening the corners at the temples helps a lot. And if you want it to feel less edgy, leave the braid a little fuller and skip the tight slick-down. The style still reads strong, just less severe.
5. The Low Rope Braid Bun That Stays Neat All Day
A low rope braid bun is one of those styles that quietly does everything right. It keeps the hair controlled, shows off the braid pattern, and sits at the nape where type 4 texture can gather into a neat coil without feeling overworked. If you need a style for work, church, a dinner, or a day when you do not want hair in your neck, this is a good one.
Start the braid low and keep it close to the head. The lower you anchor it, the less likely it is to pull the front and sides upward as the day goes on. Once the braid reaches the nape, twist the tail into a bun and pin it in a circle. I like crossing two pins in an X. It holds better than a single pin, which always seems brave until about hour four.
A little detail many people skip: tuck the end of the rope braid under the bun before pinning. That hides the thinner tail and keeps the bun from looking stringy. If your hair is very dense, use a small satin scrunchie under the bun first. It gives the style a little cushion and helps the coil sit round instead of flat.
This is not the flashiest option in the bunch. It is one of the smartest.
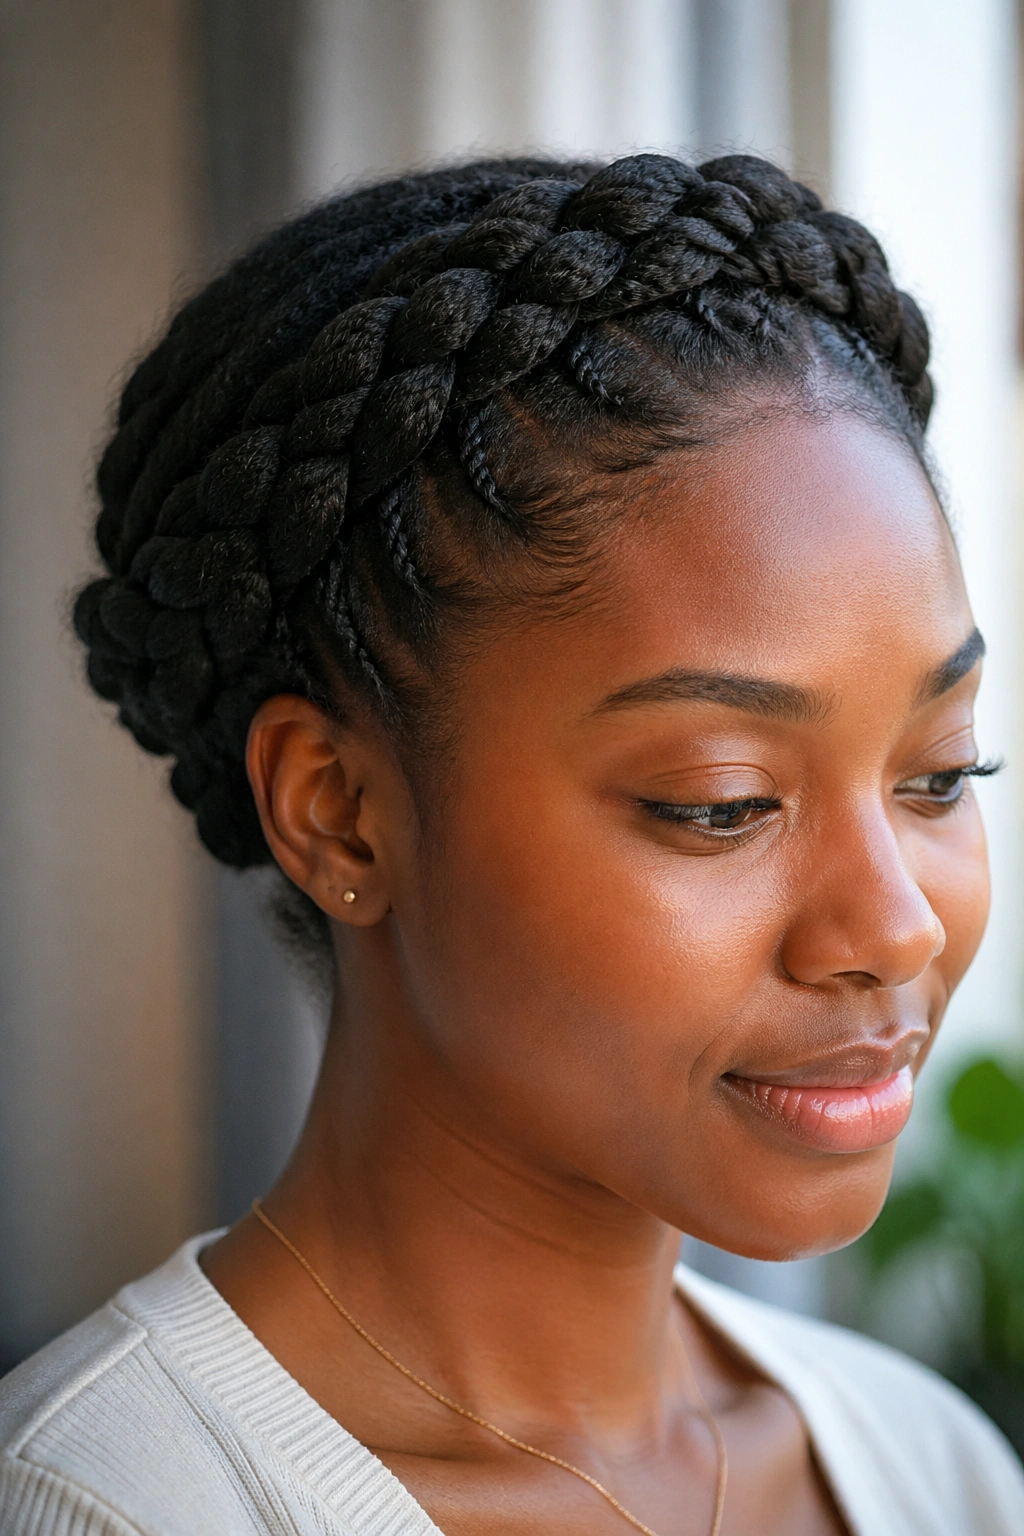
6. The Halo Rope Braid That Circles the Head
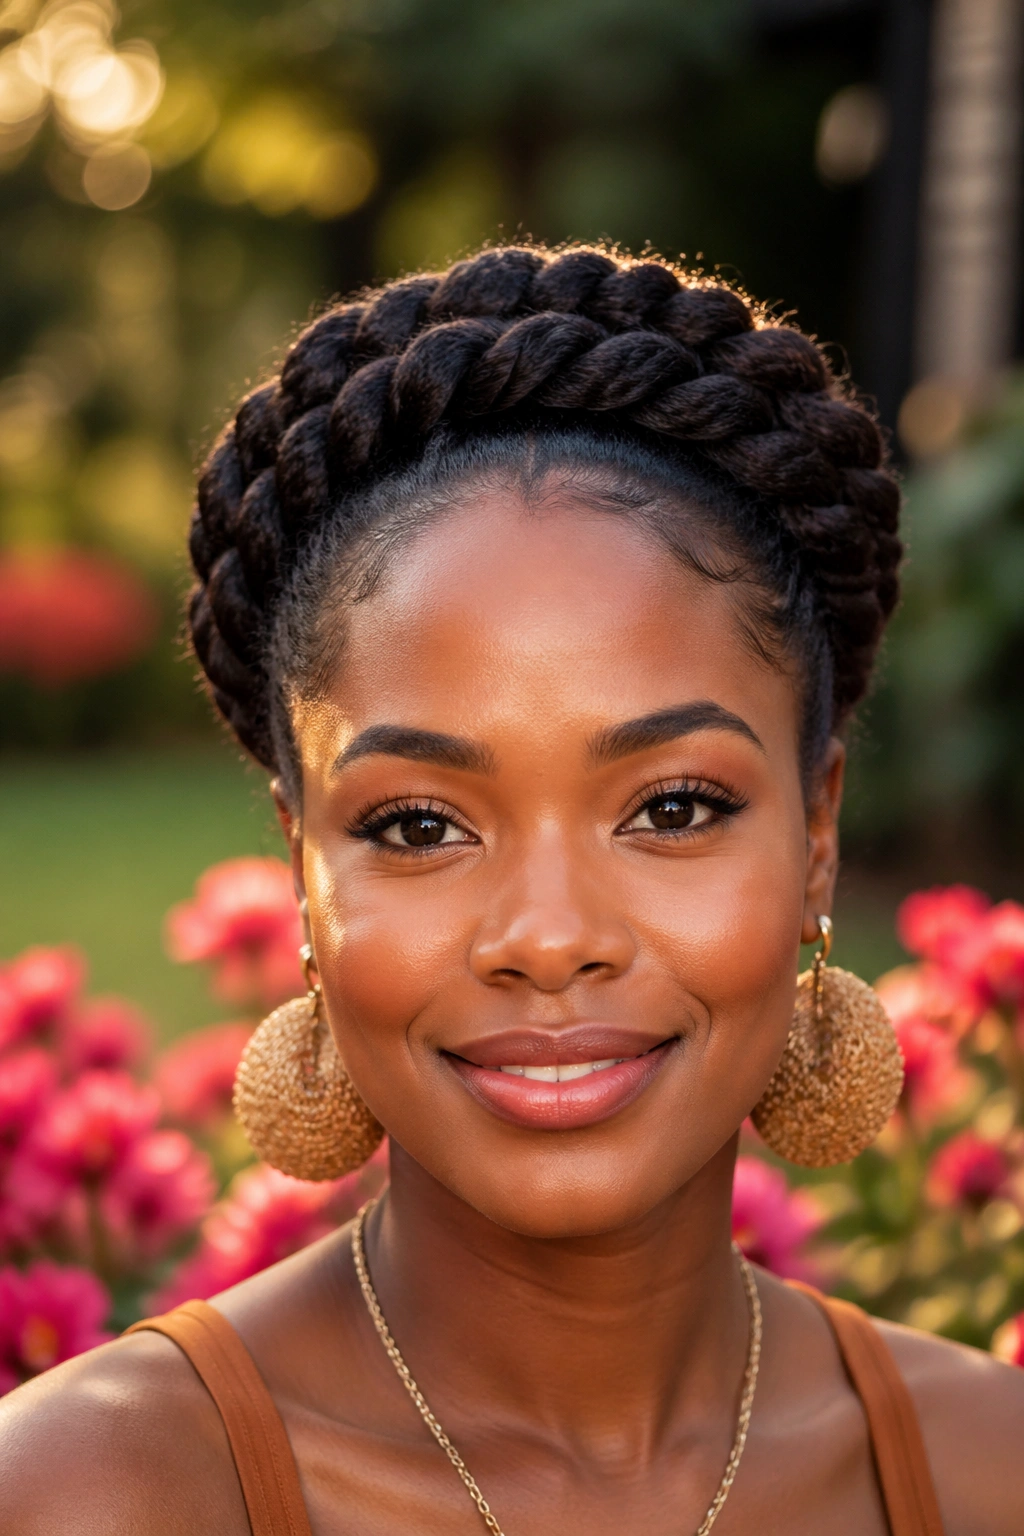
Unlike a flat braided crown, a halo rope braid keeps more lift around the perimeter. That matters on type 4 hair, because the texture already gives you body, and a halo braid can either celebrate that or crush it. The raised rope pattern keeps the braid visible while still wrapping the head in a clean, continuous line.
What makes this version different is the path. Instead of starting at one side and stopping at the other, you braid around the full hairline and tuck the end out of sight near the starting point. The shape reads soft from the front and tidy from the back. It is one of the few braids that can look formal without feeling stiff.
This works best when the parts around the edges are neat but not tiny. Tiny parts around the whole head can take forever and may irritate a sensitive scalp. A halo braid looks better when the sections are slightly wider, especially on thicker type 4 strands. The braid needs enough meat to sit up and keep its shape.
If you want the style to feel protective, keep the edges smooth but not tight. That line matters. A halo braid should sit on the hair, not haul on it.
7. Half-Up Rope Braids on Stretched Afro Hair
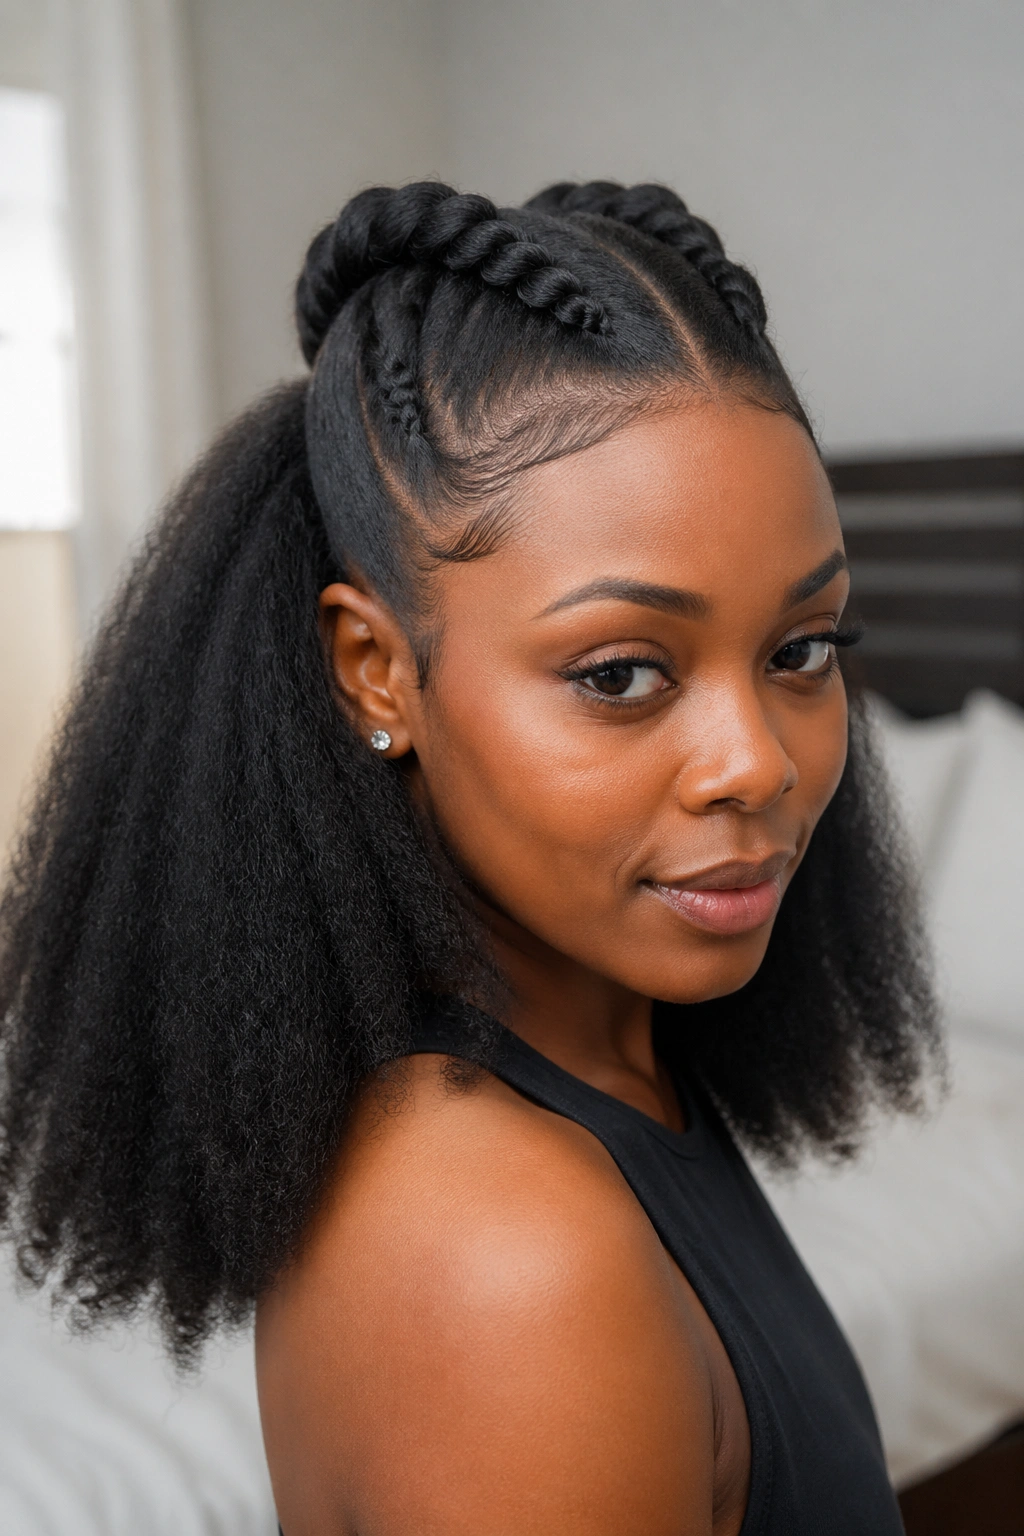
A half-up rope braid set is the style I recommend when someone wants structure at the top and freedom at the bottom. The top half gets braided back in two Dutch-style rope sections, and the rest of the hair stays out in its full texture. It works because it gives the face a clear frame while leaving the natural hair visible, which is often what people actually want.
The key is making the top sections neat enough to hold the shape, then letting the lower half stay fluffy and alive. If the top is too loose, it collapses. If the bottom is too slicked down, the whole style loses that easy contrast. The magic is in the tension difference. Tight enough near the part. Soft through the ends.
What to watch for
- Part the top section from temple to temple, not too far back.
- Keep the bottom hair detangled so it hangs evenly.
- Use a small clip or decorative pin where the two braids meet.
- Refresh the exposed hair with a light mist of water and leave-in if it starts to puff unevenly.
This style is forgiving. It is also honest. If the front parts are crooked, you will see it. If they are clean, the whole look feels intentional without trying too hard.
8. Feed-In Rope Braids at the Hairline
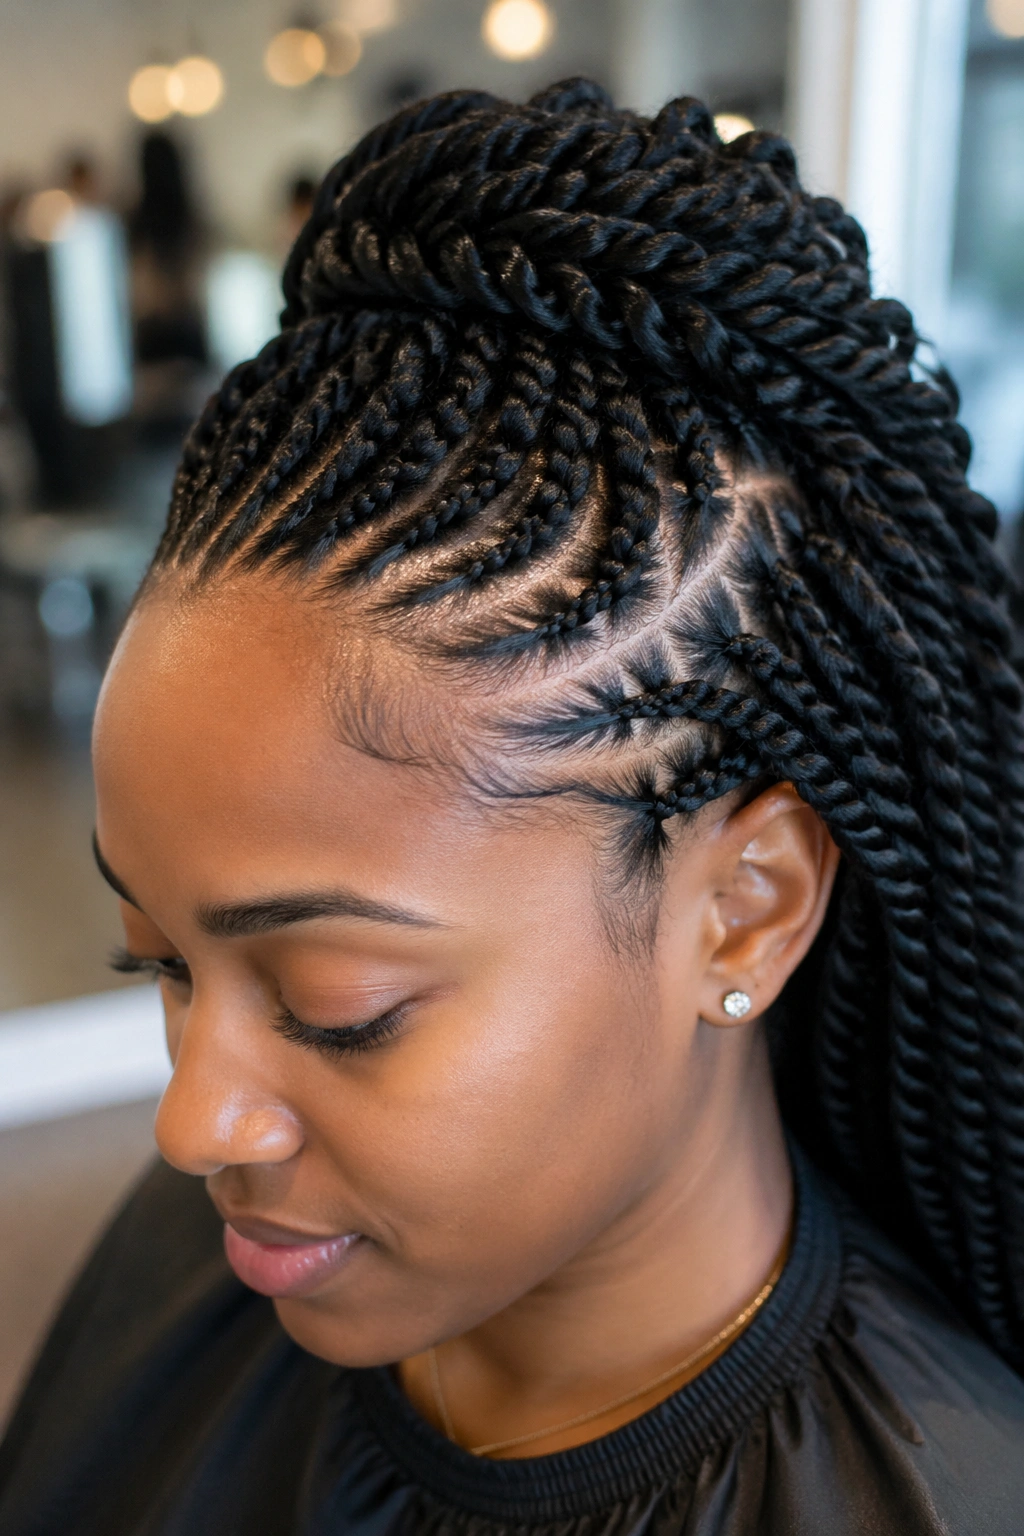
A feed-in rope braid can save a style when you want that neat Dutch look without starting from a thick front section. The braid begins small, then hair is added a little at a time as it moves back. That gradual build helps the hairline stay smoother, which is especially useful on type 4 hair if the front is dense or a little shorter than the rest.
This is the version I reach for when the scalp is sensitive or the edges need a gentler setup. You are not forcing a large chunk into place from the start. You are building the braid slowly, almost like making a trail instead of carving a trench. The result usually looks cleaner near the temples and less bulky at the root.
The feed-in method also works well if you want the braid to look more natural as it grows back from the hairline. The sections blend instead of forming a hard bump at the front. That little soft slope is the difference between a braid that looks set and one that looks rushed.
A small warning, though: feed-in braids demand patience. If you add too much hair too fast, the braid will puff and your part will start wandering. Tiny additions. Steady hands. That is the whole game.
9. The Rope Braid Ponytail with a Puffy Tail
Why does a rope braid ponytail keep showing up in natural-hair styling? Because it solves two problems at once. You get the tidy line of a braid at the scalp and the softness of a puff or curly tail at the end. On type 4 hair, that contrast looks good without needing much embellishment.
The braid usually starts at the front or just above the forehead, then travels straight back into a ponytail base. From there, the remaining hair can stay blown out, twisted-out, or gathered into a puff. If the ponytail is high, the style feels sporty and lifted. If it sits lower, it reads smoother and a little more polished.
How to wear it
The best version uses a ponytail holder that grips without chewing the hair. A covered elastic or a soft band works better than a thin rubbery tie, which can snag the ends. Smooth the base with your hands, not a heavy layer of product. Too much gel around the ponytail can make the tail look hard and dry.
If you want the braid to stand out, keep the tail fuller. If you want the puff to be the star, make the braid slim and clean. Either way, this style gives you movement, which is often the missing piece in braided looks on dense hair.
10. The Braided Crown with Twisted Ends
A braided crown with twisted ends is the kind of style that looks like you spent longer on it than you probably did. Two Dutch-style rope braids travel from the front and meet near the back, then the ends are twisted and pinned under the crown. The visual effect is tidy, round, and a little romantic without going soft around the edges.
This style is a nice fit for type 4 hair because the texture fills in the crown. You do not need every part to be perfect. The hair naturally adds fullness, which makes the braids look richer and less stiff than they might on straighter textures. That fullness is part of the design, not a problem to fix.
- Keep the front part clean and centered or slightly off-center.
- Braid both sides at the same angle so the crown meets evenly.
- Twist the ends before pinning them under the back section.
- Use 4 to 6 bobby pins, depending on thickness and length.
The crown can look too tight if you pull the braids straight back from the temples. Let them arc a little. That small curve softens the whole style and keeps the hairline from looking severe. Good crowns look balanced, not squeezed.
11. Crisscross Dutch Rope Braids into a Bun
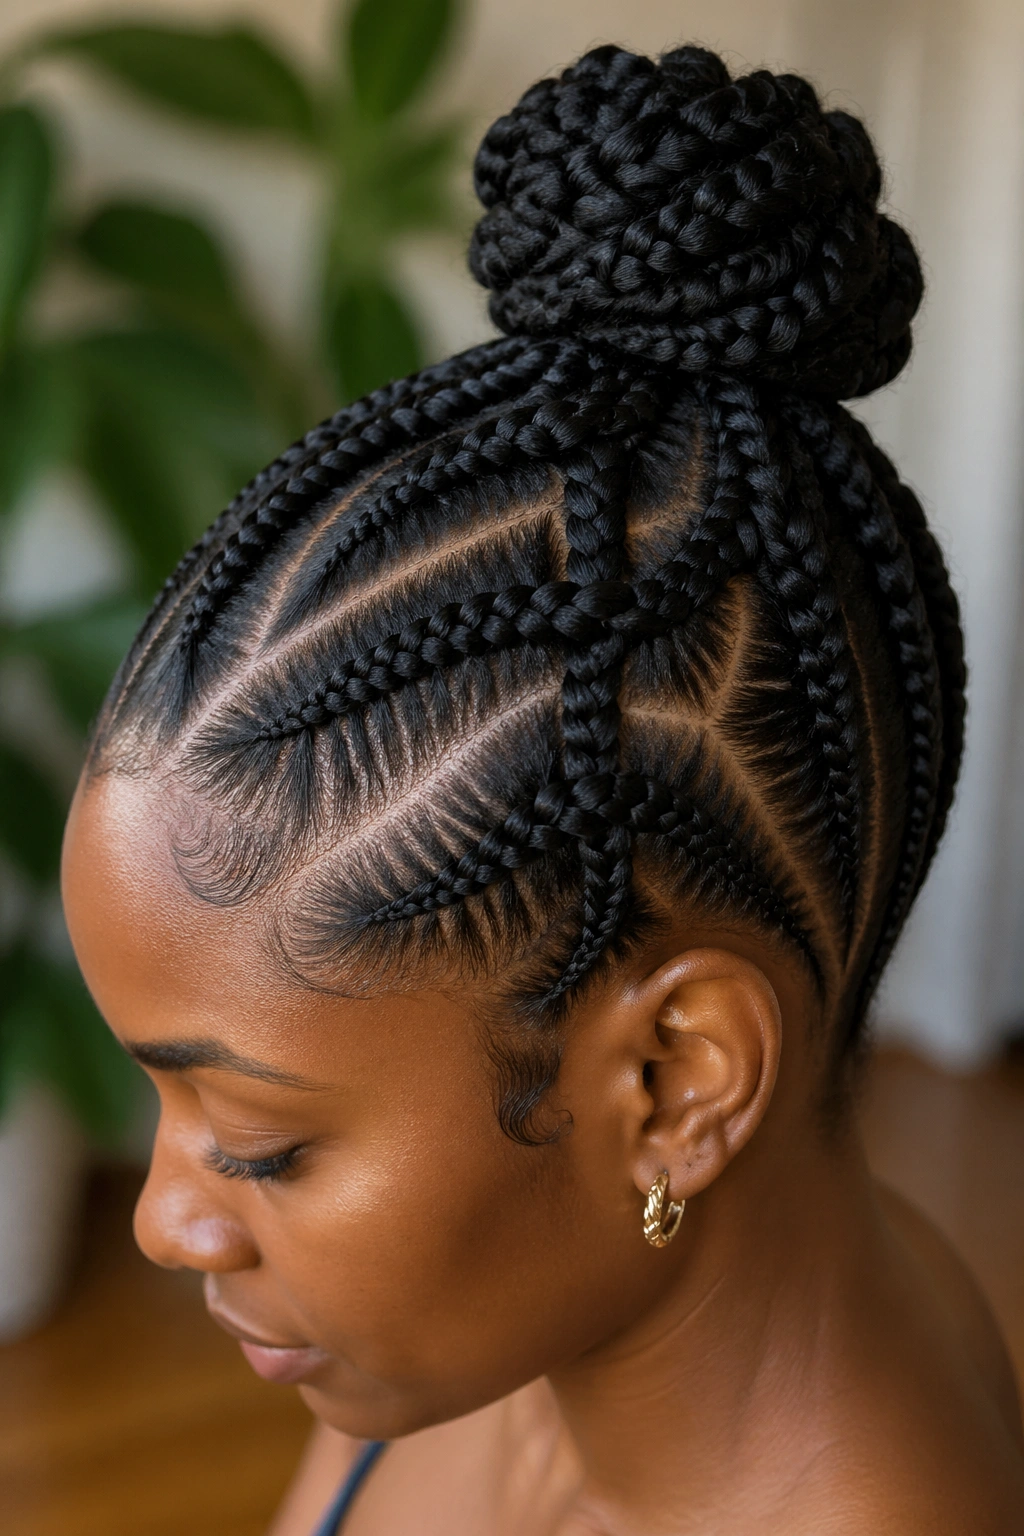
This is the one for people who like a bit of structure and do not mind a style with more parts. Crisscross Dutch rope braids start in separate sections, travel across the head in overlapping lines, and finish in a bun or tucked knot. On type 4 hair, the pattern looks especially rich because each braid catches light differently and the texture keeps the layout from looking flat.
The style works best when the parting is the hero. That sounds fussy, but it is worth the time. Clean diagonal sections give the crisscross effect its shape, and the bun at the end keeps the whole thing from feeling too busy. If the parts are sloppy, the braid pattern loses its geometry. If they are sharp, the style looks intentional in the best way.
I like this one for dense hair because it uses the volume instead of arguing with it. Each rope braid can be a little chunkier than you might think, and the overlap adds interest without asking you to create a dozen tiny rows. It is a good compromise between ornate and wearable.
One thing I would not do: make the braids tiny just because you can. On type 4 hair, that often means more tension, more time, and less payoff. Bigger sections usually look better here.
12. Rope Braids with Beads, Cuffs, or Thread
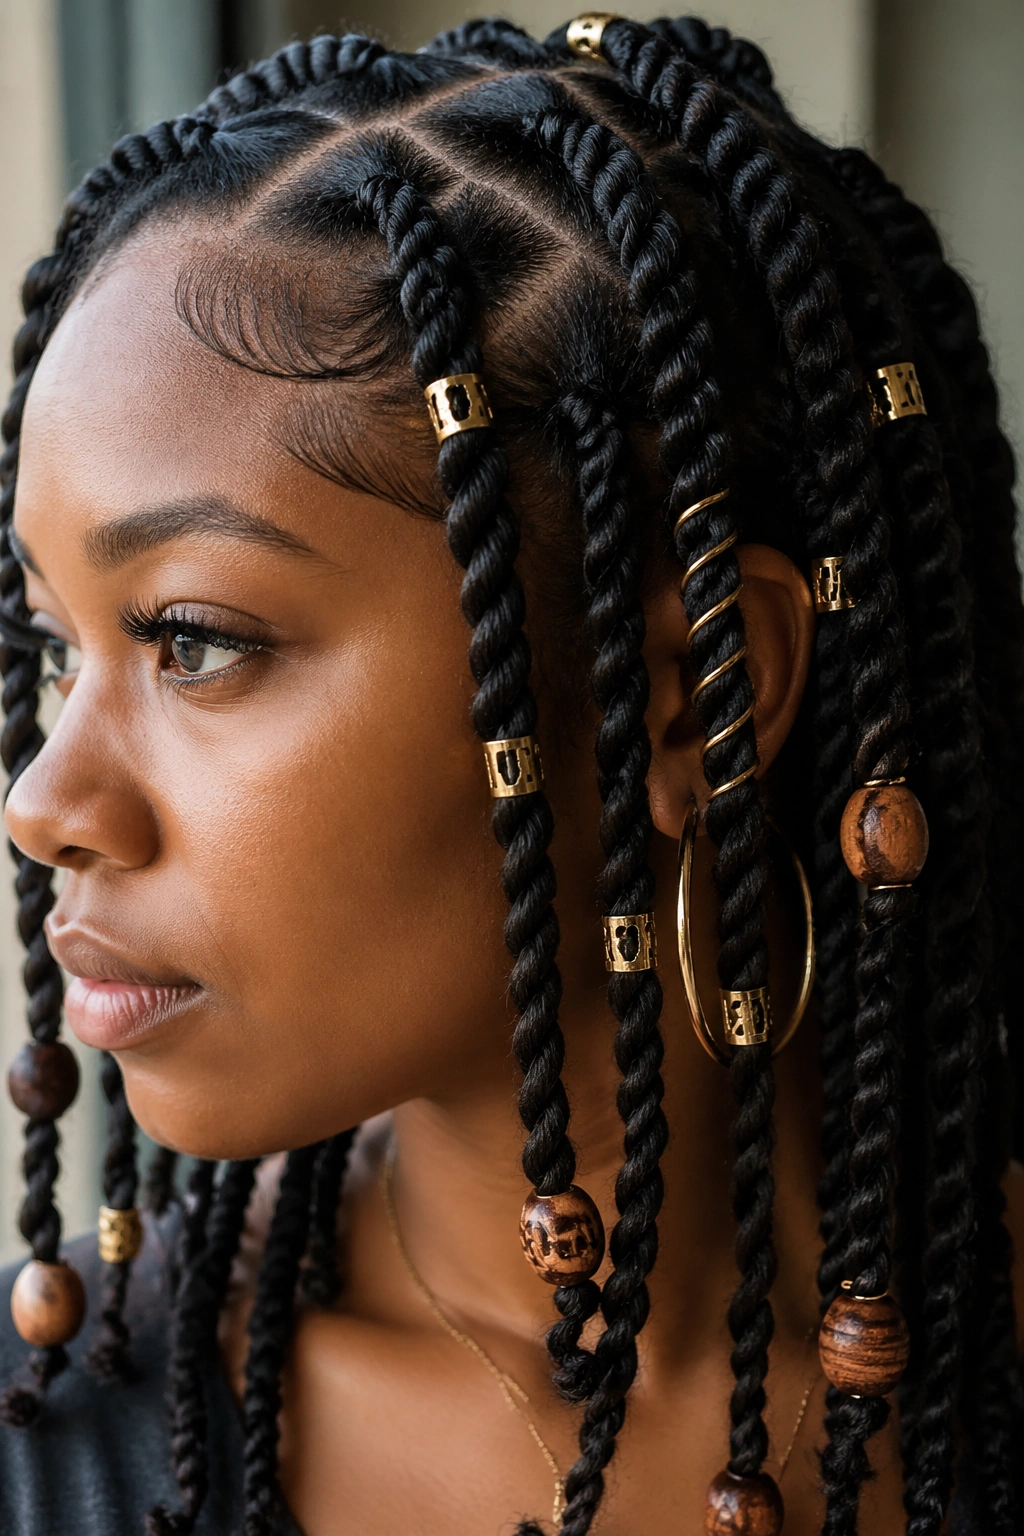
Accessories change the mood fast. A plain Dutch rope braid on type 4 hair already has texture and movement, but add a few beads, cuffs, or wrapped thread and the style becomes more personal without needing a new braid pattern. That is what makes this option so useful. The base style stays the same. The finish tells a different story.
Beads work best when the braid ends are thick enough to support them. If the tail is thin, the beads slide or swing awkwardly. Cuffs need less length and can go anywhere along the braid, which makes them easier for shorter styles. Thread is the most flexible of the three. Wrap a single section in a color that echoes your clothes, or go neutral if you want the braid texture to stay front and center.
What makes each accessory different
- Beads add weight and movement at the ends.
- Cuffs create small points of shine along the braid.
- Thread changes the color story and can hide uneven sections.
I prefer accessories on braids that are already cleanly finished. If the braid itself is fuzzy or uneven, extra decoration can look like a distraction. Start with a solid base. Then add the ornament. That order matters.
13. The Wear-All-Week Four-Braid Set
A four-braid set is not flashy, and that is exactly why it works. Part the hair into four clean sections, build each one into a Dutch-style rope braid, and keep the parts large enough that you can actually maintain them without fussing every morning. On type 4 hair, this kind of set feels balanced: enough structure to protect the hair, enough space for the texture to breathe.
This is the style I would pick for a busy stretch when you still want the hair to look done. Each braid can be worn down, crossed back, pinned into a low arrangement, or left loose with the ends tucked. It also gives you a straightforward night routine. Wrap the braids in a satin scarf, sleep on a bonnet if you prefer, and smooth the roots in the morning with a tiny mist of water or leave-in on your palms.
The clean parting is the part people skip. They should not. If the four sections are even from the start, the style grows out more gracefully and stays wearable longer. Uneven parts get annoying by day two. Equal sections age better. Simple as that.
A set like this has one more advantage: it does not box you in. You can leave it neat, loosen the crown a little for volume, or fold the ends under for a softer finish. That flexibility is why it earns a spot at the end of the list. It is the style you can actually live with, not just admire in the mirror.