A wig can look expensive and still sit wrong if the braid base underneath is bulky. That ridge at the crown? You see it immediately. So does everybody else, even if they can’t name what’s off.
A flat wig install starts with the braid pattern, not the lace, not the glue, not the baby hairs. A slick edge can’t hide a hump under the middle of the head, and a deep side part cannot save a braid pattern that was thrown together in five minutes. The foundation has to match the wig you’re planning to wear.
Different wigs ask for different braid maps. A closure unit can live on a simple base. A frontal with a side part needs a cleaner lane where the part will sit. A big curly unit needs a pattern that keeps the crown low and the perimeter calm. That part gets missed a lot, and it’s why some installs look fine from the front but puffy in profile.
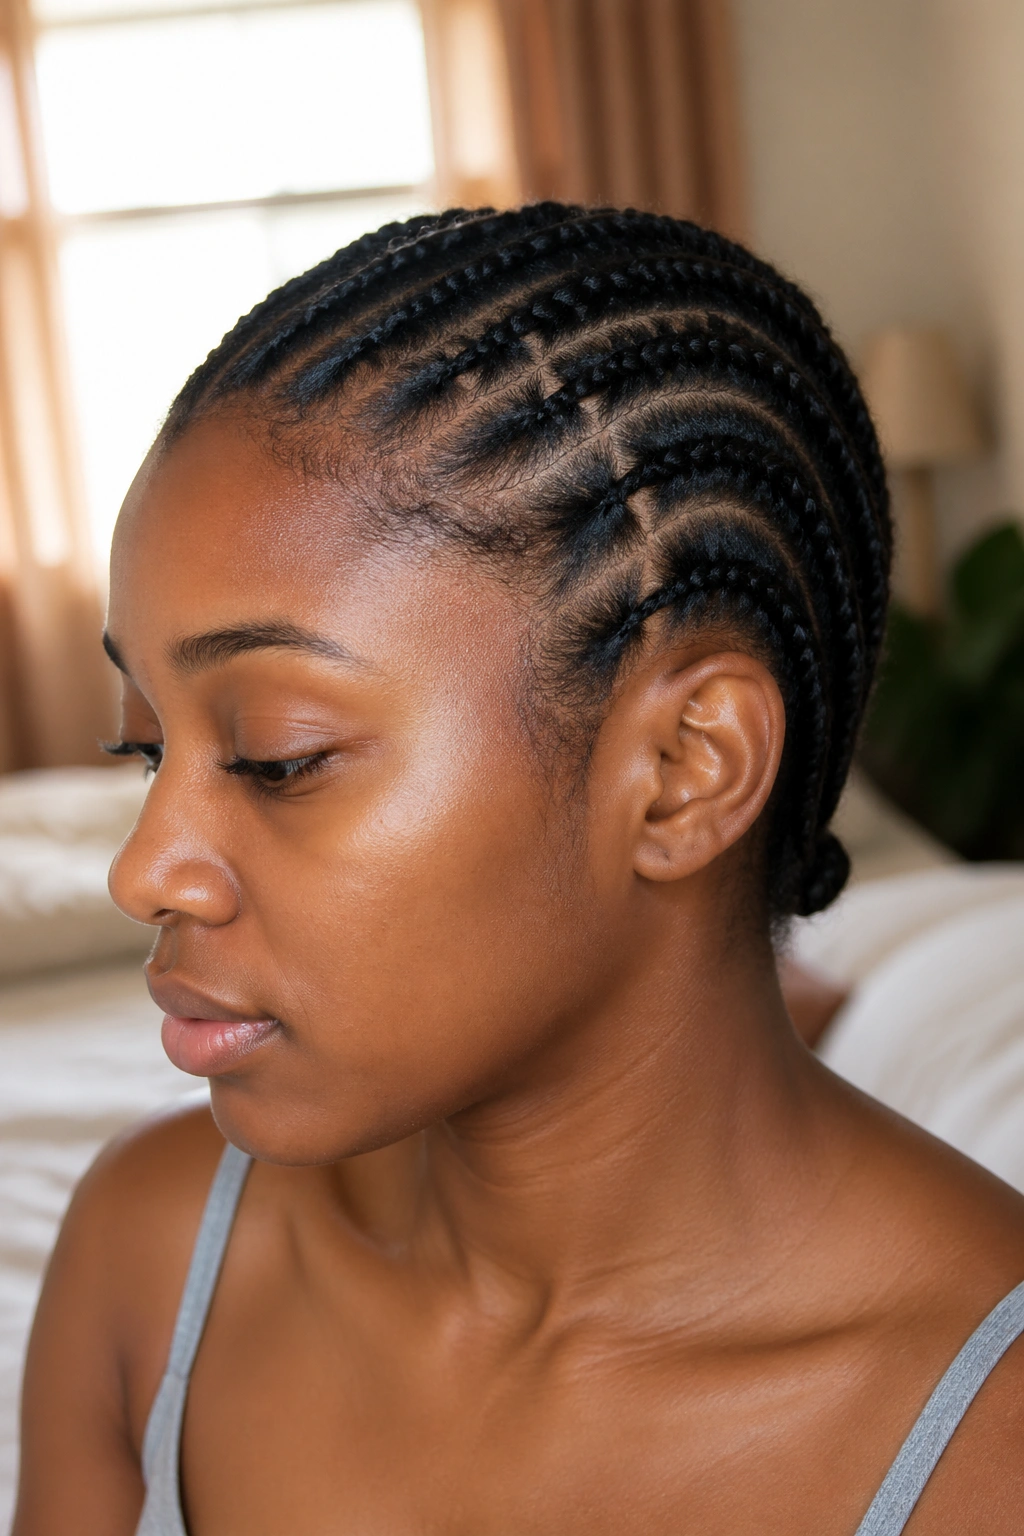
1. Straight-Back Cornrows for a Flat Wig Install
If you want the safest place to start, use straight-back cornrows. They’re plain for a reason. They sit low, they’re easy to anchor, and they make a wig cap behave instead of fight you.
Why it works
The brain loves straight lines, but hair does too. Straight-back rows move the bulk toward the nape, which keeps the center of the head from building up into a ridge. On medium-density hair, I like 5 to 8 rows, depending on head size and how thick the hair is.
Keep the parts even. A row that starts wide at the front and shrinks at the back will leave little bumps that show under a cap. If the hair is long, braid it all the way down and tuck the ends flat against the neck instead of looping them into a knot. That small detail matters more than people think.
What to watch for
- Don’t make the front row too thick. A heavy first cornrow is the fastest way to raise the hairline under a lace front.
- Keep the spacing about 0.5 to 1 inch. Wider than that can create soft spots that collapse under a wig cap.
- Flatten the ends at the nape. A tiny folded tail is fine; a ball of braids is not.
- Use this pattern for closure wigs, bob units, and quick glueless installs.
My blunt take: straight-back cornrows are boring, and that’s exactly why they work.
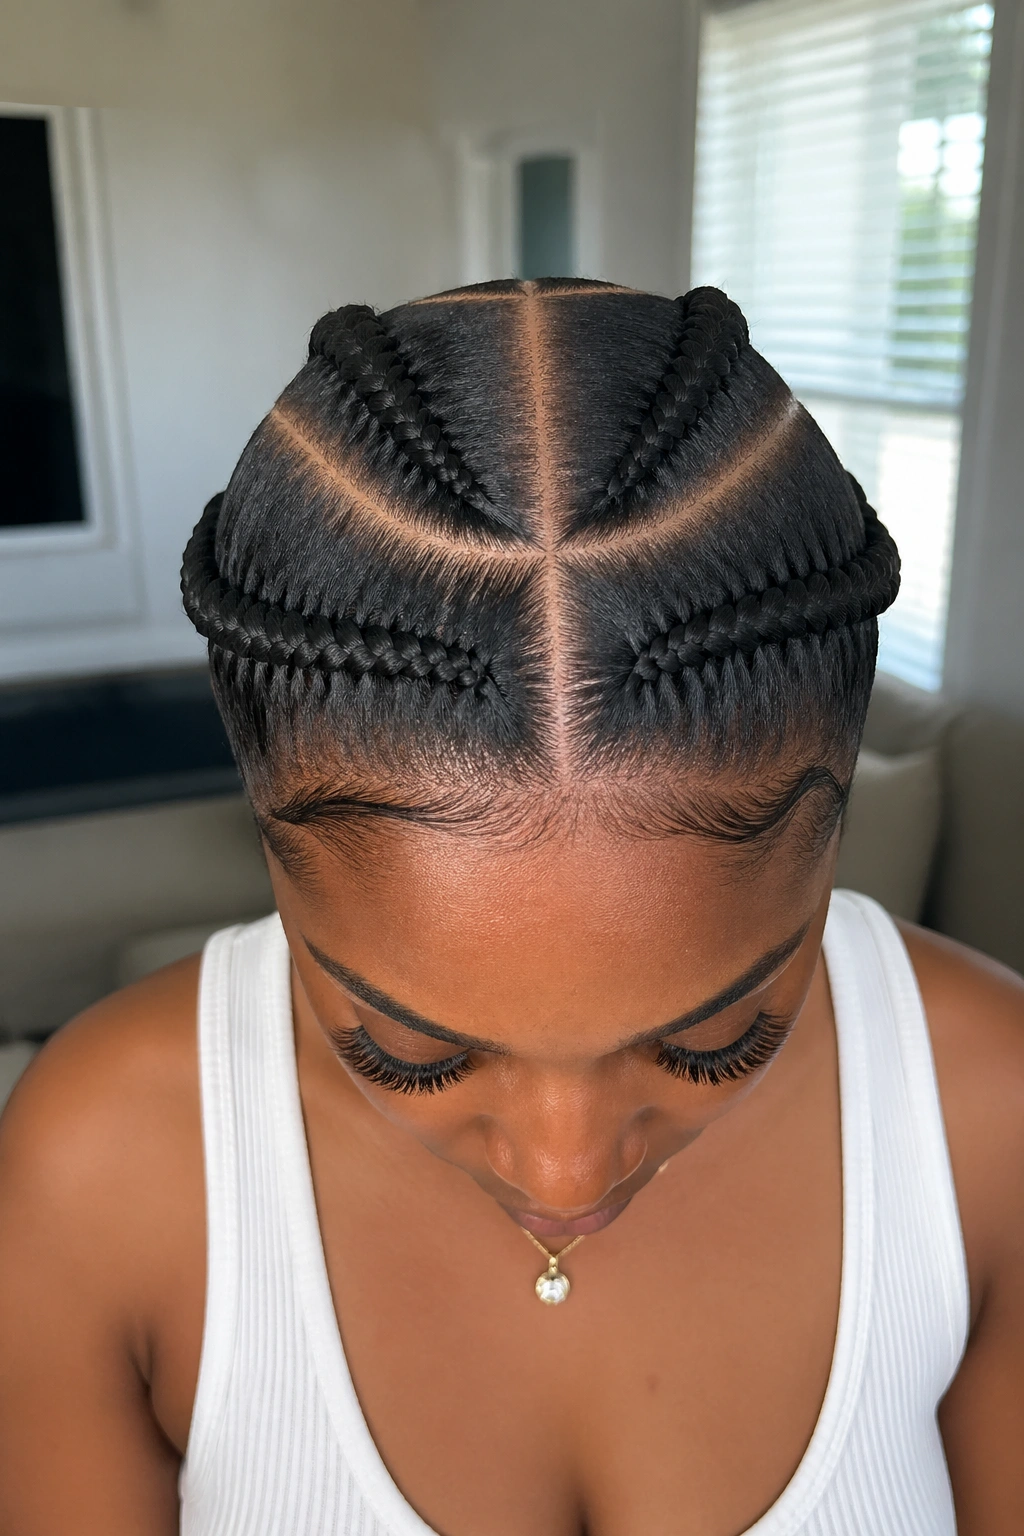
2. Middle-Part Cornrows for a Centered Wig Part
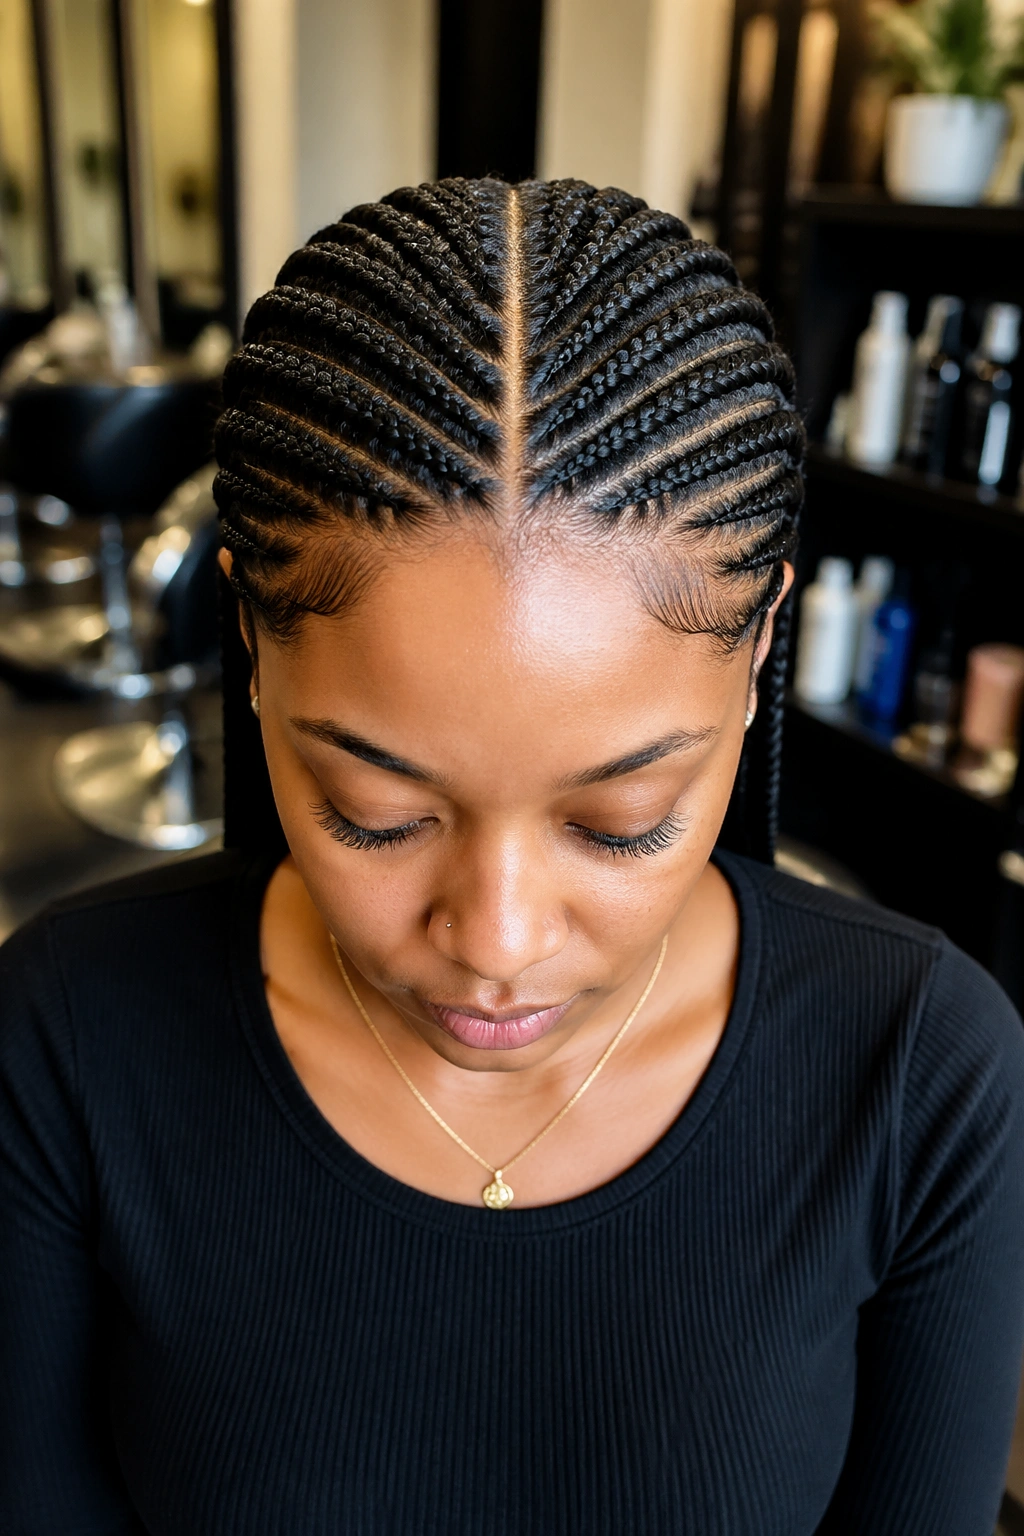
A center part only looks clean when the braid path underneath is centered. If the middle row drifts even a little, the wig part usually looks slightly off, and people may not know why.
This pattern is the one I reach for when the wig is meant to sit balanced on the head. A middle-part braid base creates a natural split down the scalp, which helps a closure or frontal lay with less pushing and prodding. It’s especially useful on wigs with a straight or body-wave finish, where the part is doing a lot of visual work.
The trick is to keep the part narrow and straight from the front hairline to the crown. Then braid away from the part on both sides, keeping tension even. If one side is tighter than the other, the wig will sit a little crooked. You’ll feel it before you see it.
This pattern is not the best pick if your natural part shifts all over the place or if your hair tends to puff at the roots. In that case, a beehive or circular base may lay flatter. But when you want symmetry, center-part cornrows earn their keep.
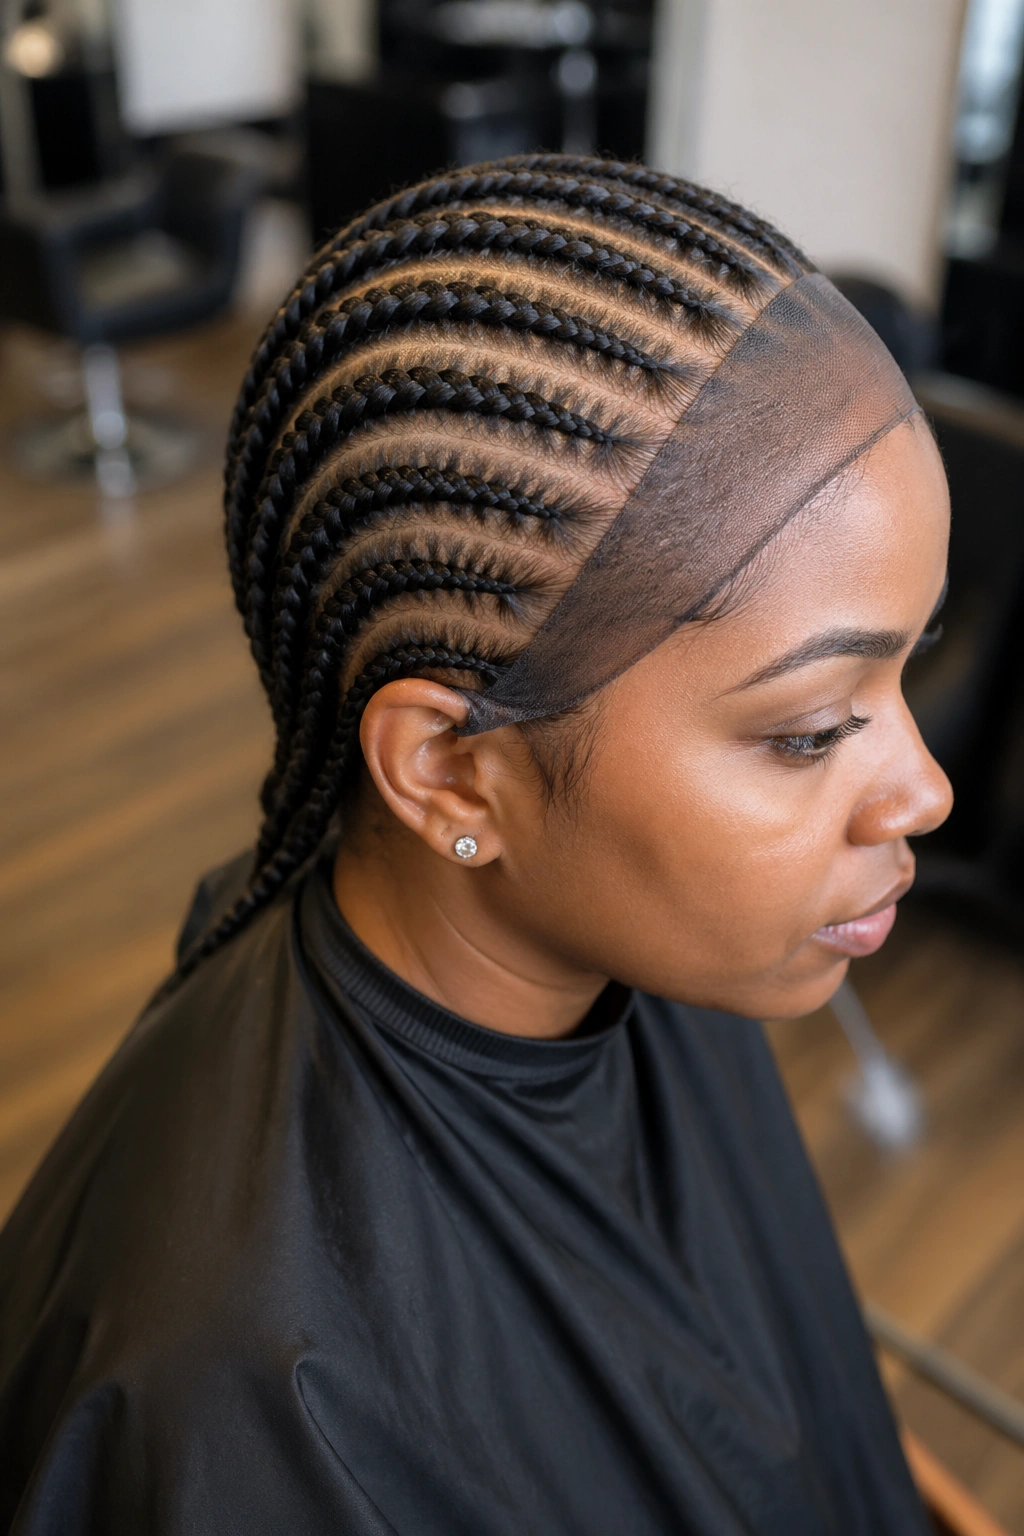
3. Side-Part Cornrows for a Deep Part Install
Why does a side part sometimes look bulky on one side and flat on the other? Usually because the braid pattern under it was still thinking in the middle, even though the wig was not.
A side-part braid base should follow the part line, not fight it. Start your main braid path where the wig part will open, then angle the rows so the part side stays low and the heavier side gets room to settle. That keeps the lace from sitting on top of a ridge near the temple, which is a dead giveaway when the style is sleek.
How to map it
Trace the part first
Make the part on the actual scalp before you braid. A loose guess turns into a crooked install later.
Shift the bulk away from the part
The braids on the heavier side can be a touch wider, but not sloppy. You want balance, not a lopsided helmet.
Keep the temple area light
That corner near the temple is where too much hair piles up fast. If it’s thick there, the wig front lifts.
This pattern works best for side-part bobs, deep-wave units, and any frontal wig that is going to live in one direction. Clean, calm, and a little fussy. Worth it.
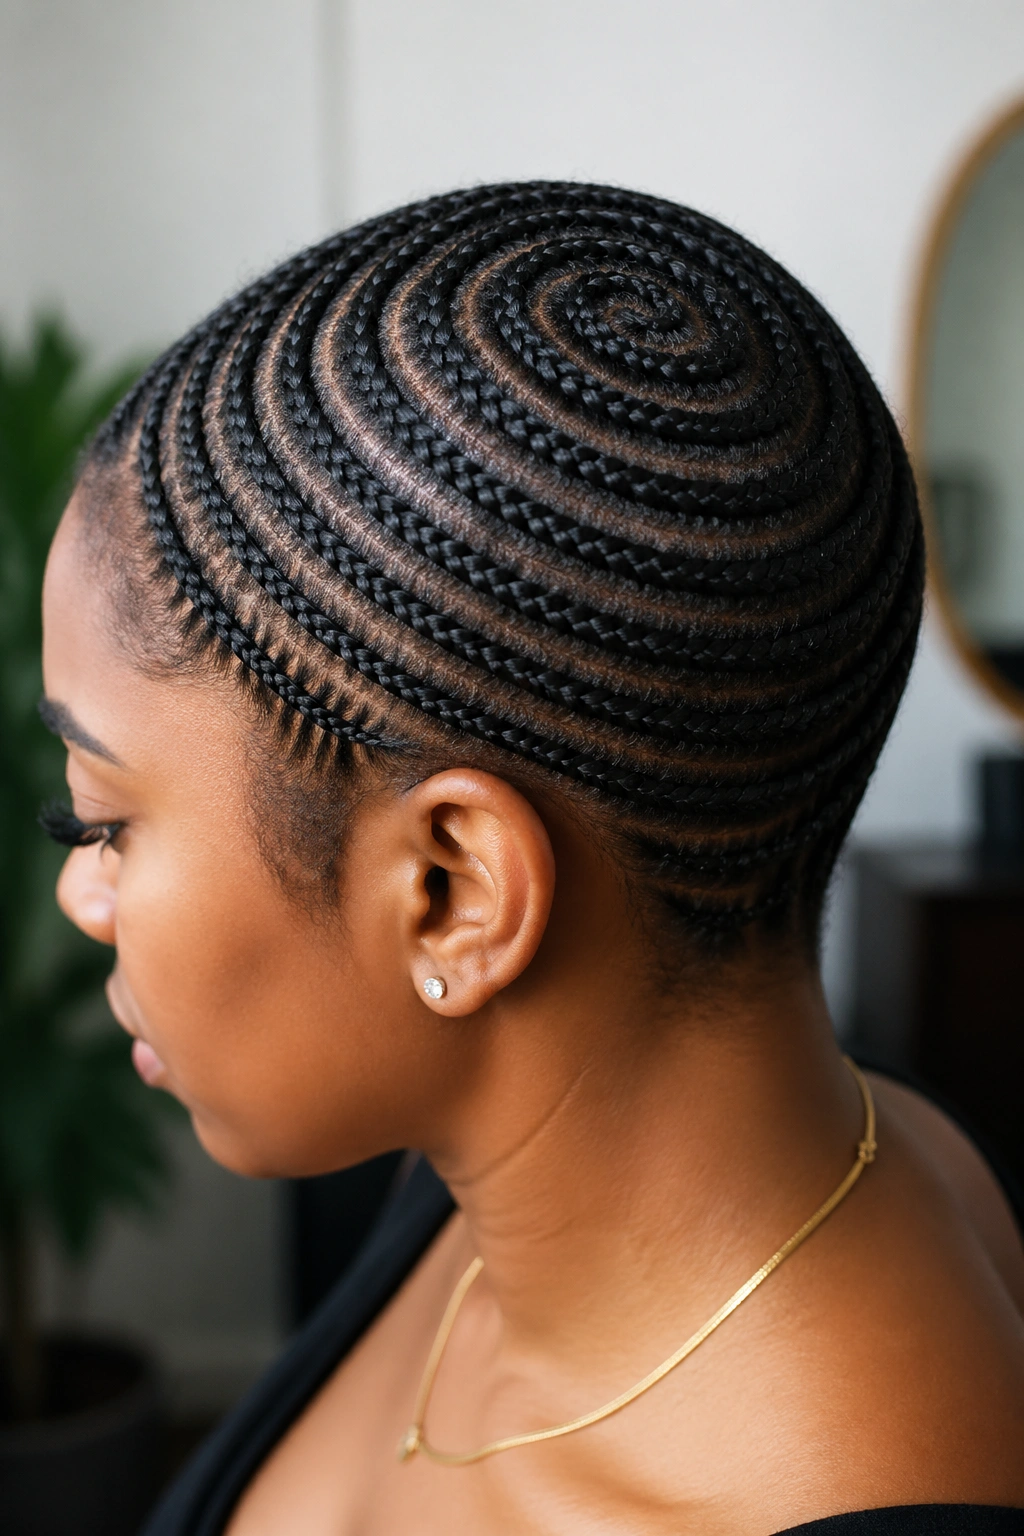
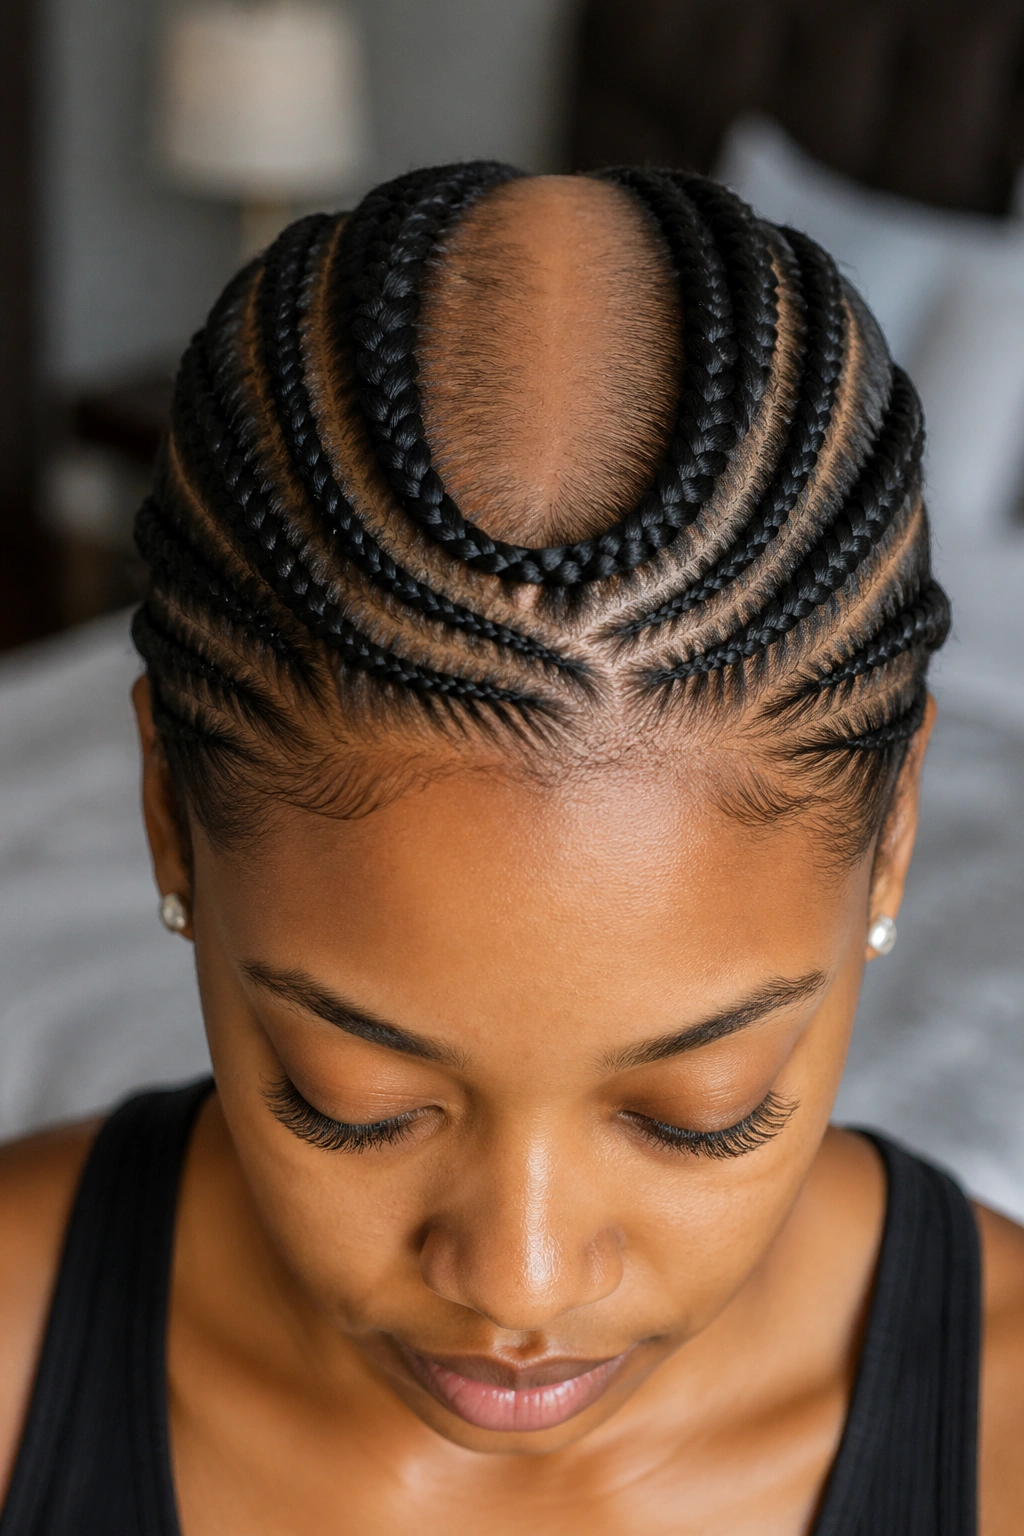
4. Beehive Braids That Follow the Head Shape
The first time you put a lace frontal over a beehive base, the crown disappears in a good way. The head looks smoother. The wig stops fighting the shape underneath.
Beehive braids curve around the head in circles or arcs instead of running straight back. That means the hair is laid in the same direction the head already curves, which cuts down on bulk at the top. It’s one of the better patterns for a truly flat wig install when the unit is heavy or long.
Key details
- Start at the perimeter and work inward in a spiral or curved path.
- Keep the rows 0.25 to 0.5 inch apart if you want the cap to hug close.
- Make the center braids smaller so the crown does not bunch up.
- Tuck the final center ends flat, not into a thick knot.
This pattern takes more time than straight-back cornrows. No way around that. But it pays off when the wig has a lot of hair or when you want the top to sit like it grew there. If you wear big curls, long body waves, or a blunt frontal unit, beehive braids are the foundation that lets the style stay low instead of puffing up like a little dome.
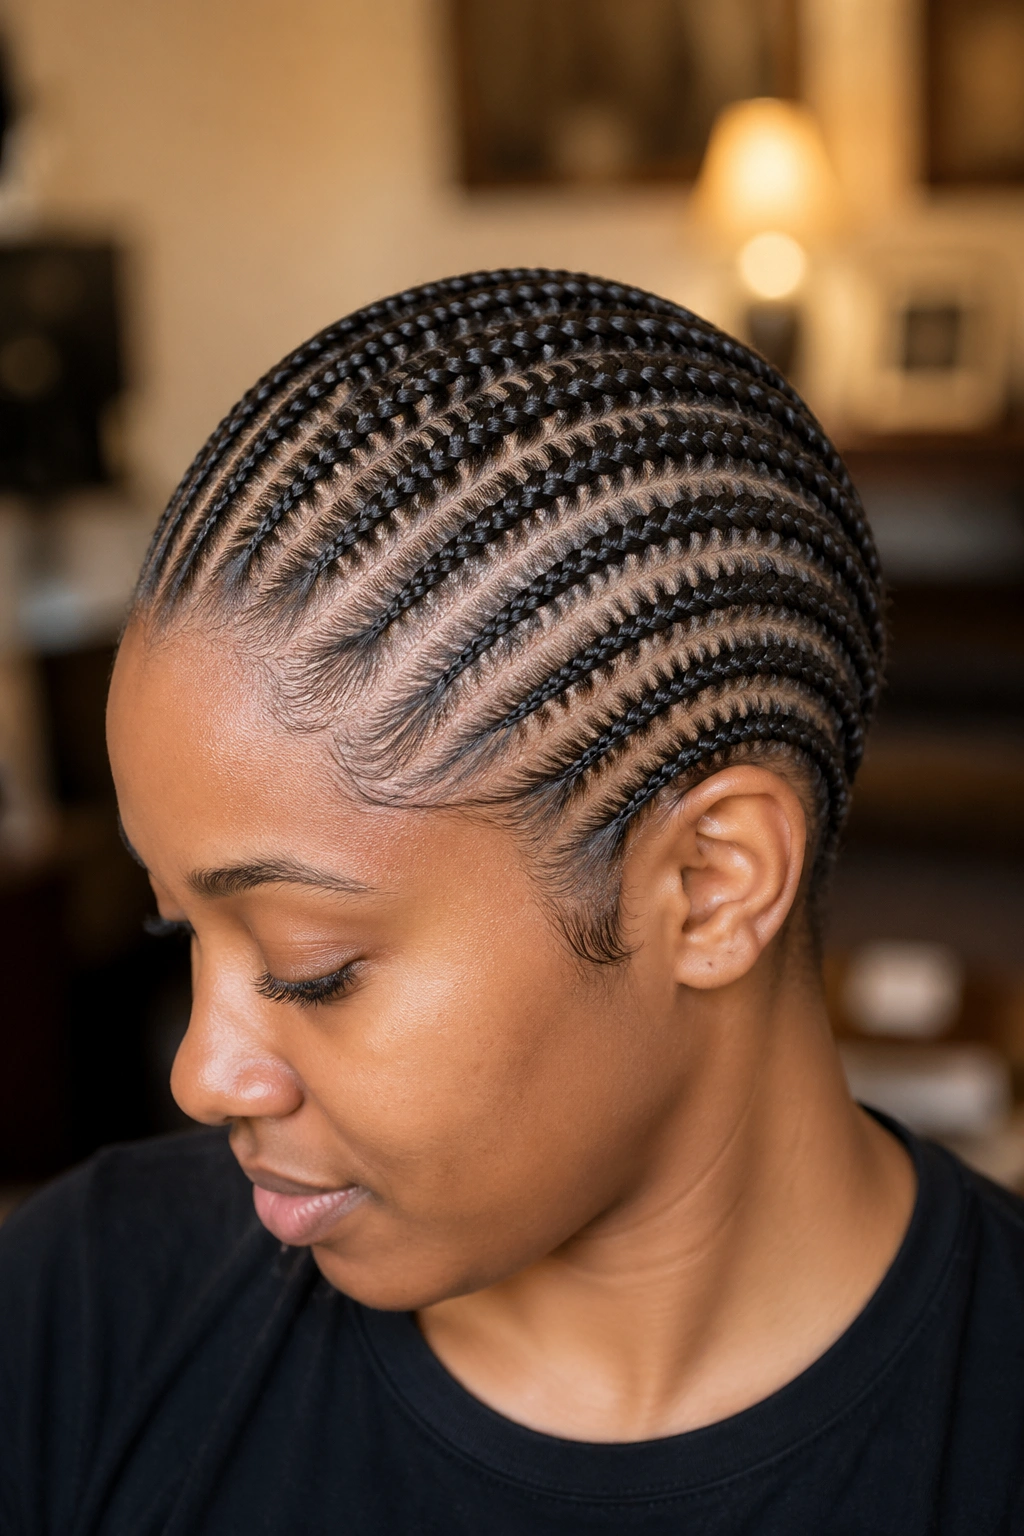
5. Circular Braids for Short Hair and a Snug Cap
Circular braids are one of those patterns that looks more complicated than it is. You start near the nape and keep braiding in a round path, working toward the center of the head. The shape is smooth, and the result is often flatter than people expect, especially if the natural hair is short.
This pattern is a favorite for very short hair because it gives the wig cap something to grab onto without creating a stack of braids in the middle. Short hair can be slippery under a cap, and a circular base helps everything feel locked in. It also works well if the wig is snug and you hate feeling the cap shift when you move your head.
The real danger is making the center too tight. People get excited and start pulling the middle down hard, which leaves the scalp sore and the wig base too high in the back. Keep the tension firm, not harsh. Firm holds the braid. Harsh only creates a headache.
Circular patterns also pair nicely with units that have less volume at the crown. A straight bob, a silky middle-part wig, a closure unit with a neat scalp effect — all of those sit cleanly on a circular base. It’s a quiet little pattern. Very practical. Not flashy at all, which is part of the charm.
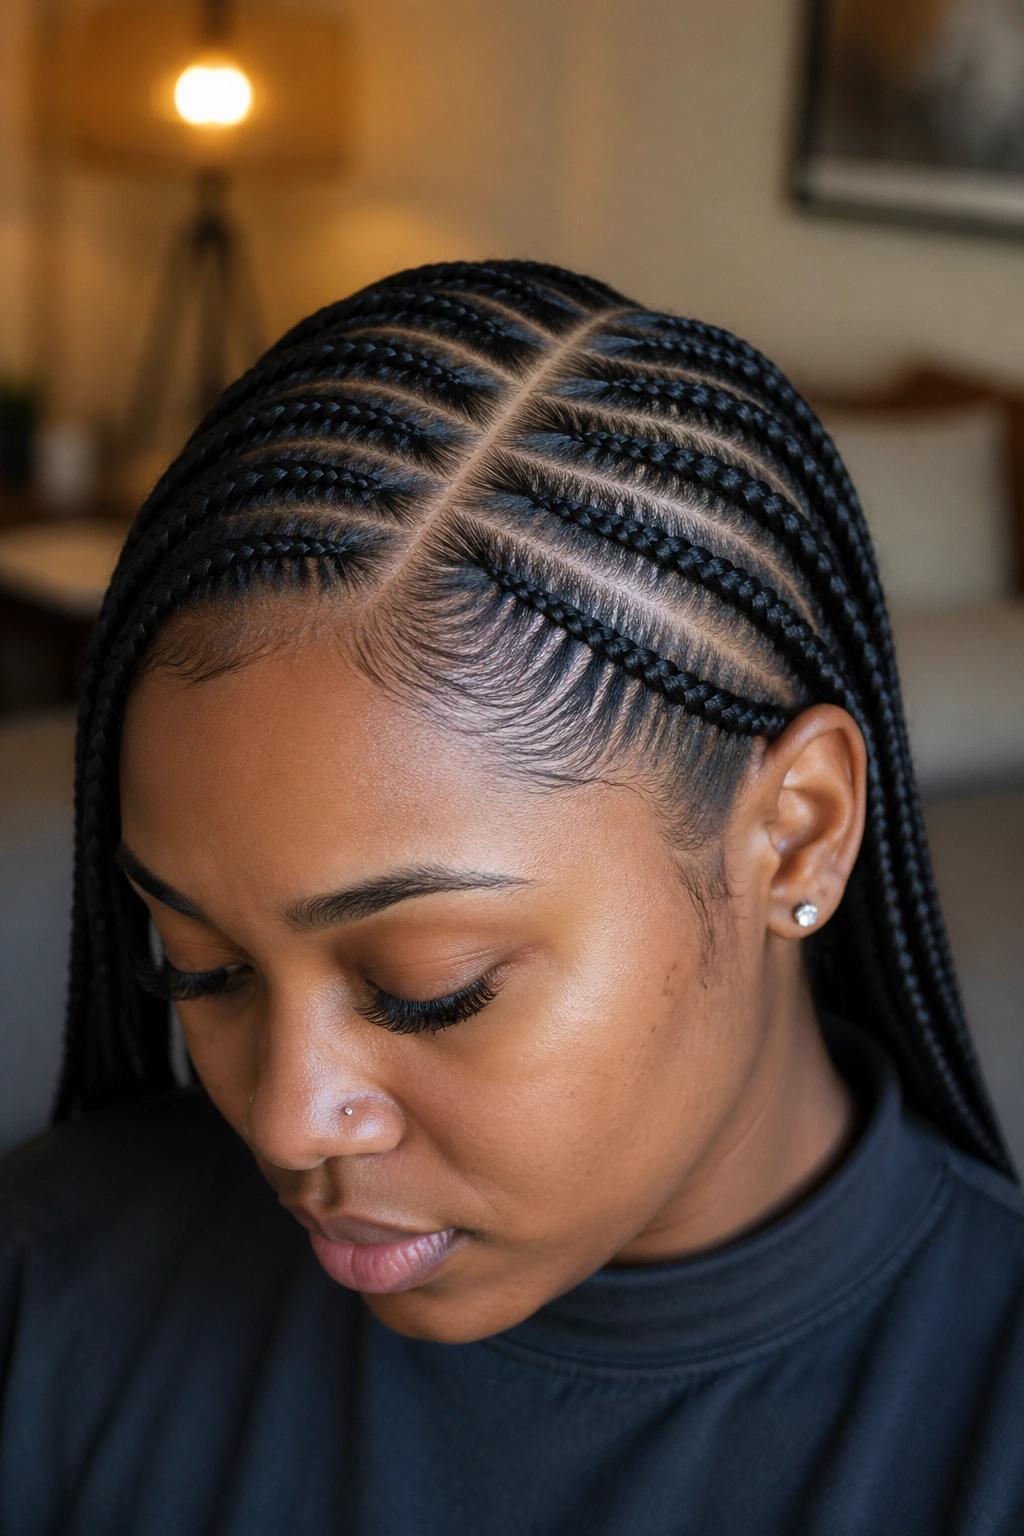
6. Diagonal Cornrows for a Softer Lay Across the Crown
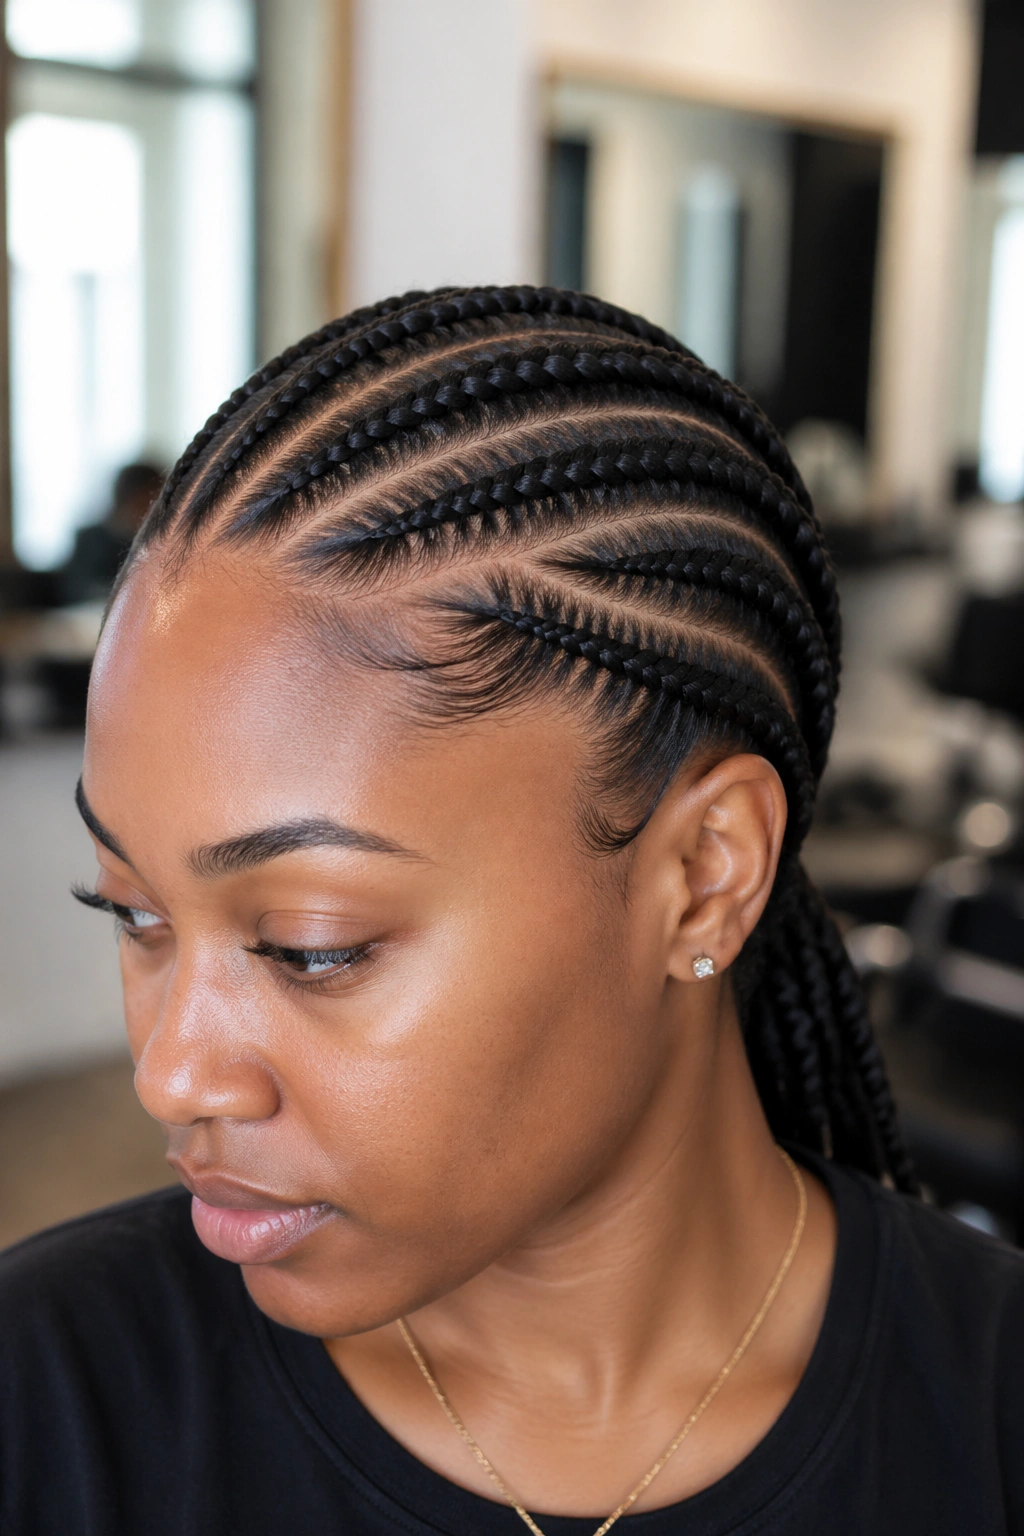
Unlike straight-back rows, diagonal braids move the bulk off the center line. That small shift changes how the wig settles, especially when the crown is dense or the style has a side sweep.
Diagonal patterns are useful when you want the head to look less boxy under the wig cap. The rows cut across the scalp at a slant, which helps spread the hair more evenly. On thick hair, that can make the difference between a smooth install and one that feels like it’s riding on top of a stack of rope.
The best part is how flexible this pattern is. It works for frontals, closures, and even some U-part units if you leave the right opening. A diagonal map also gives you a little freedom when the wig part needs to sit just off center. You are not locked into the same straight tracks every time.
If you’re doing this on yourself, keep the angle consistent. Wavering diagonals create little corners that poke through the cap. And make the rows follow the curve of the head, not the other way around. That’s the point. You want the braid base to disappear, not announce itself.
7. Flat Twists for Fine or Fragile Hair
Flat twists are the kinder option when your hairline gets sore easily or your strands are fine and don’t love tight cornrows. They still lie close to the scalp, but they tend to feel softer and less aggressive than braids.
When twists beat cornrows
Twists are useful when you need a flat wig install but want to keep tension down. They also leave less visible buildup at the root, which matters if your natural hair is thin and every bump shows through the cap. I like them for people who wear wigs often and need the scalp to feel normal after a few days.
The pattern itself is simple: part the hair cleanly, flat twist each section back, and pin or tuck the ends flat at the nape. Keep the twist size even. A chunky twist at the front and tiny ones in the back makes the cap sit unevenly, and that is the sort of thing you can feel before you see it.
Quick reasons to choose flat twists
- Better for fine strands or tender edges.
- Easier to undo than tight cornrows.
- Good for short-to-medium hair under glueless wigs.
- Less likely to leave sharp braid ridges.
I do not reach for flat twists on every install. They are not the slickest option on very dense hair. But when the hair is fragile or the scalp needs a break, they’re a smart trade.
8. Feed-In Cornrows at the Hairline
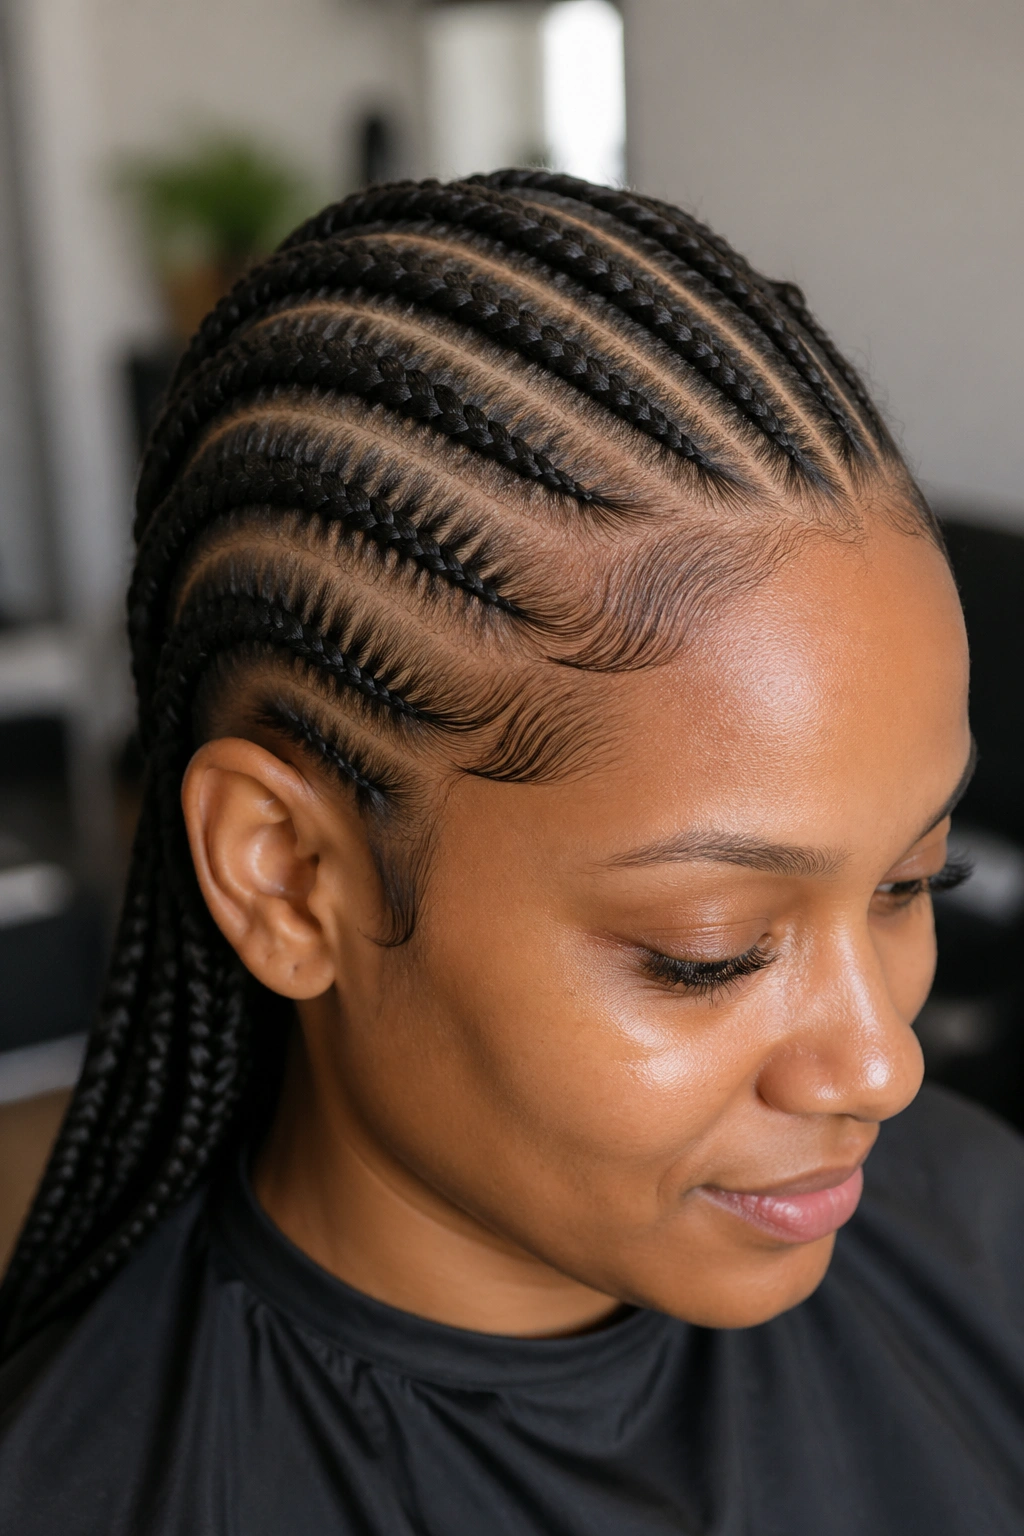
A front hairline can ruin a flat wig install faster than anything else. If the first row is too thick or starts too abruptly, the lace sits on a little wall instead of gliding down.
Feed-in cornrows solve that problem by starting small and adding hair gradually. The first inch near the hairline stays slim, then the braid builds out as it moves back. That softer start makes the front lay flatter under a wig cap, and it keeps the edge from looking bulky.
This pattern is especially useful for frontal wigs, where the front few inches do a lot of work. You want the transition from hairline to cap to be smooth. No jump. No ridge. If you use added hair, add tiny amounts — think thin sections, not thick handfuls. The braid should look like it grows out of the scalp, not like it was dropped there.
Feed-in work takes a steady hand, but the payoff is clear. The lace lies closer, the front sits lower, and the overall install looks more finished. If the front of the wig is where your eye goes first, this pattern earns its place fast.
9. Horseshoe Braids for Closure and U-Part Wigs
Why do some closure and U-part wigs lay beautifully while others seem to hover at the edges? Often it comes down to the shape underneath. A horseshoe pattern gives the wig a clear opening without making the rest of the head too bulky.
The braid path follows a U-shape around the crown, leaving the top center open for the wig’s part or exposed section. Everything outside that horseshoe gets braided down and flattened. That means the wig can sit in the open space instead of fighting through a full head of braids. It’s a smart pattern for units that need a defined leave-out area or a clean middle opening.
How to trace the horseshoe
Make the open section first. Then braid around it in a smooth arc, keeping the perimeter low and even. The sides should stay neat, because the wig will show if one temple sits higher than the other. End the braids flat at the back and sides so the opening remains the smoothest part of the head.
This pattern works best when the unit has a small to medium opening. A huge leave-out area can make the base feel too exposed. But for closure wigs, U-parts, and some headband styles, the horseshoe is a clean, practical choice.
10. Vixen Braids for Multiple Part Options
If you keep changing your part, a vixen base is the one that saves time. It gives you four sections to work with, so the wig can be styled in more than one direction without tearing the cap apart every time you switch things up.
The pattern leaves parting spaces around the perimeter while braiding the middle sections back. That creates flexible openings for different styles — side part, center part, pulled-back looks, or a half-up shape. The crown stays flatter than you might expect because the bulk is controlled in sections instead of being stacked in one place.
What makes it different
- More styling freedom than a basic straight-back base.
- Better for people who rotate between a middle part and a side part.
- Useful for wigs that get worn in updos or half-up styles.
- Needs cleaner sectioning than a simple braid-down, or the openings drift.
The catch is that vixen braids ask for more planning. If the sections are uneven, the wig can sit oddly, and one part opening may look wider than the others. Still, when the wig gets worn in different styles, this pattern is worth the extra work. It’s one of the few options that lets you change your mind without rebuilding the whole base.
11. Braided Mohawk Patterns for Thick Hair
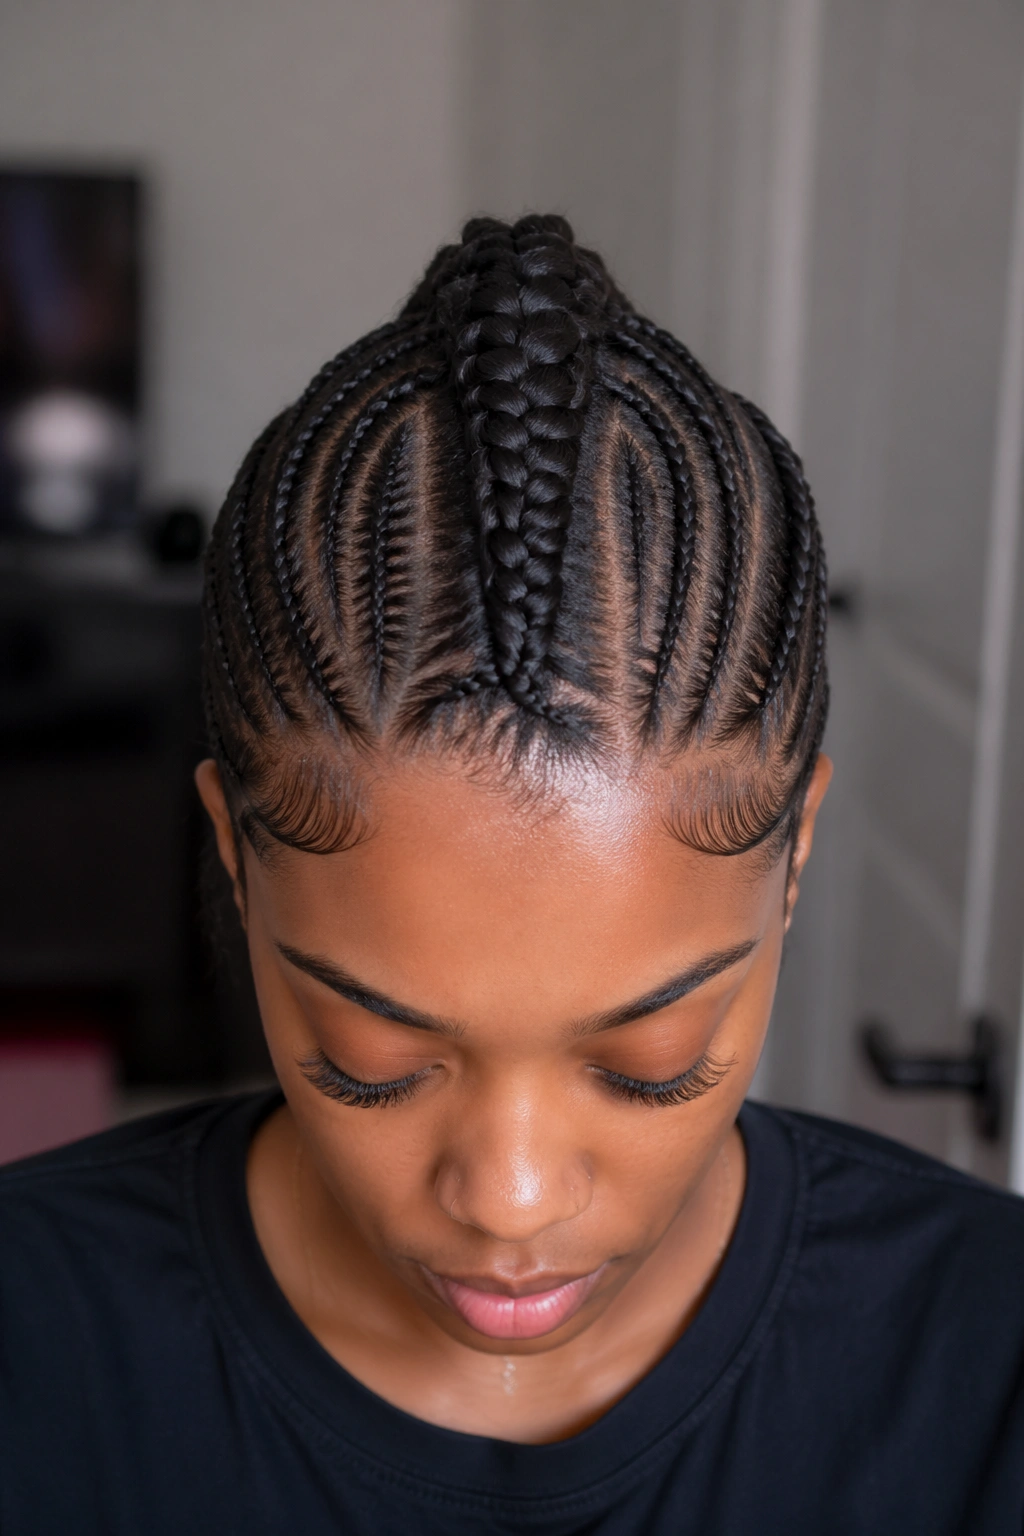
Thick hair has a way of pretending it is flat when it is not. You braid it down, put the cap on, and suddenly the middle is sitting higher than you expected. A braided mohawk pattern helps solve that.
The idea is to braid the sides down and direct the hair toward a central strip, almost like building a low ridge that can be covered and controlled. That keeps the sides from ballooning under the wig, which is usually where the bulk starts to show. It also gives you a cleaner perimeter around the ears and nape, where bulky rows can press against the cap.
This pattern is one of my favorites for dense natural hair or stretched hair with a lot of volume. You get more control over the overall shape, and the middle can be made flatter than with a grid of straight rows. The catch is that you need to keep the center strip narrow enough to stay low. Too wide, and the mohawk becomes the problem instead of the fix.
For heavy curly units, long straight wigs, or installs that need to last through a lot of movement, this pattern holds up well. It is not the simplest braid map to do on yourself, but it is useful when regular rows leave too much padding under the cap.
12. Cross-Hatch Braids for Even Weight Distribution
Straight rows are easy. Cross-hatch patterns are a little fussier, but they spread tension in a way that can help a wig sit flatter over time.
Unlike a plain back-and-forth layout, a cross-hatch pattern breaks up the direction of the braids so the bulk is not all traveling the same way. That can matter on a large head, a dense hairline, or a heavy wig with lots of hair sewn onto the unit. The foundation feels less one-directional, which means less of that boxy look some installs get by day two.
It is a pattern I reach for when the wig itself is heavy. A lot of body-wave and curly units pull at the cap in the front and back, and a cross-hatch base gives them more support. Still, the sections need to be neat. If the lines cross too tightly, the head can feel pinched, and pinched is not flat. It is just tight.
If you are new to wig braiding, this is not the first pattern I would practice. Start with straight-back or beehive first. But once your sectioning gets cleaner, cross-hatch braids are worth knowing because they handle weight better than the neat little grids most people default to.
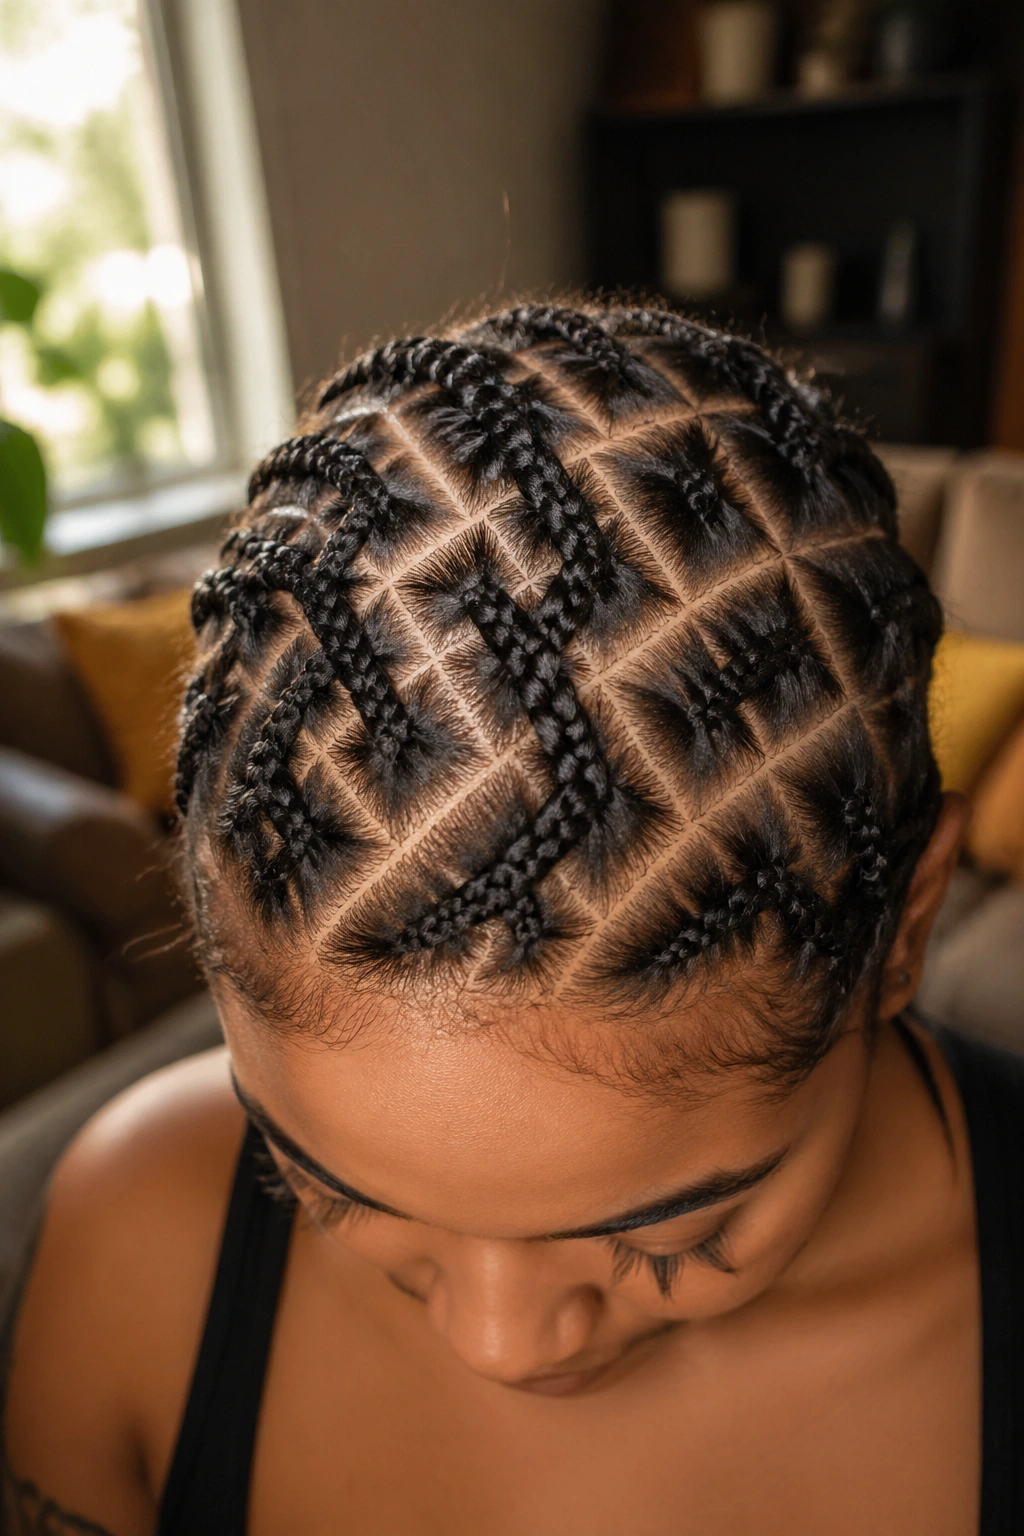
13. Diamond-Part Braids for Dense Hair and a Clean Wig Line
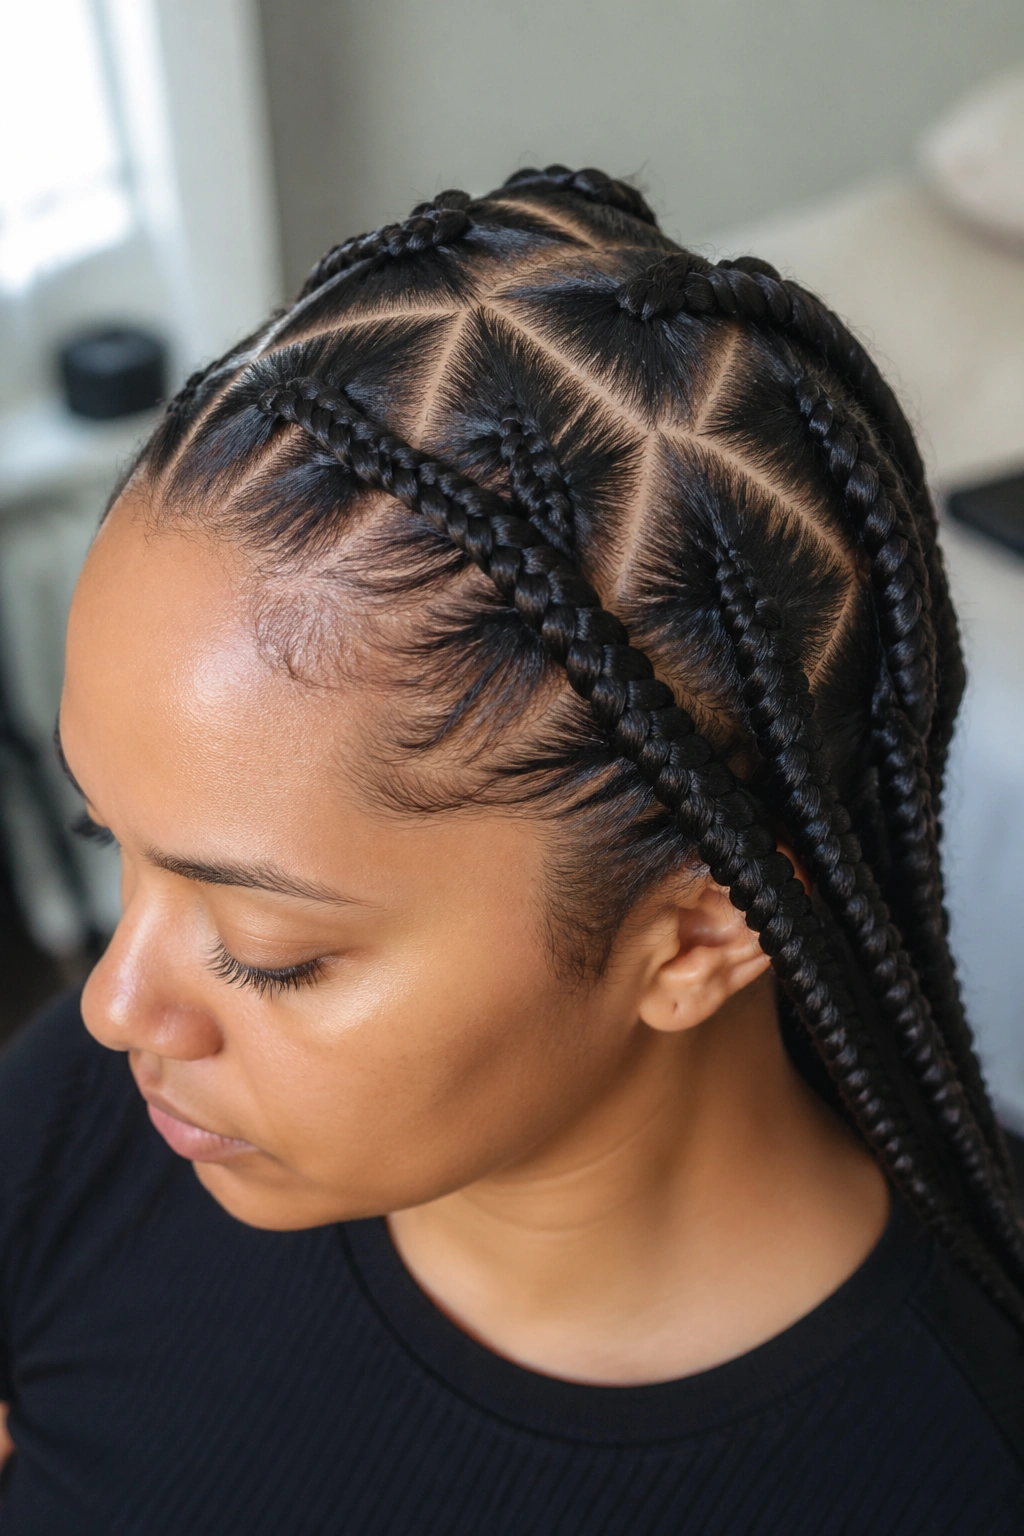
Diamond parts do a nice job of breaking up bulk without making the scalp look chopped up into squares. That matters when your hair is thick and straight rows leave a heavy strip right down the center.
The shape staggers the braid sections, so the pressure is spread across the head instead of sitting in one hard line. For a flat wig install, that can make the crown look softer and the cap sit closer. It also helps with wig units that have a deep part, because the braid intersections do not all land in one obvious place under the lace.
Where this pattern shines
- Dense hair that needs the bulk spread out.
- Wigs with a defined center or side part.
- Longer wear, when a straight grid starts to feel heavy.
- Installations where the crown keeps popping up under the cap.
The parting takes more patience, sure. Diamond sections are slower to map than straight rows, and if you rush, the shapes end up crooked. But when they’re clean, they give you a base that looks thoughtful instead of forced.
A small warning
Do not make the diamonds tiny just to be fancy. Tiny parting means more lines, more tension, and more work for no real payoff. Keep the shapes medium-sized, keep the rows low, and let the wig do its job once the foundation is set. That is the whole point, really. The braid pattern should disappear once the wig goes on.