A side braid can do something a center braid rarely manages: it sends the eye on a diagonal, from the temple to the jaw, and that diagonal changes the whole feel of the face. Hair falls differently when it’s pulled across one side, and that small shift can sharpen a soft jaw, soften a square one, or make a round face look a little longer.
The catch is placement. If the braid starts too high, it crowds the cheek. If it starts too low, it slips past the face and loses the shape you wanted in the first place. The sweet spot usually lives somewhere between the temple and the top of the ear, with a few slim pieces left free around the front so the braid doesn’t feel pinned on.
That’s why some side braids look flattering and others just look busy. The good ones have a clear line, a little bend, and enough texture to hold their shape without swallowing the face. Placement does the heavy lifting.
And once you start looking for it, the pattern is obvious. The braids that frame the jawline aren’t all the same, but they all know where to stop.
1. Deep Side French Braid with Loose Face-Framing Pieces
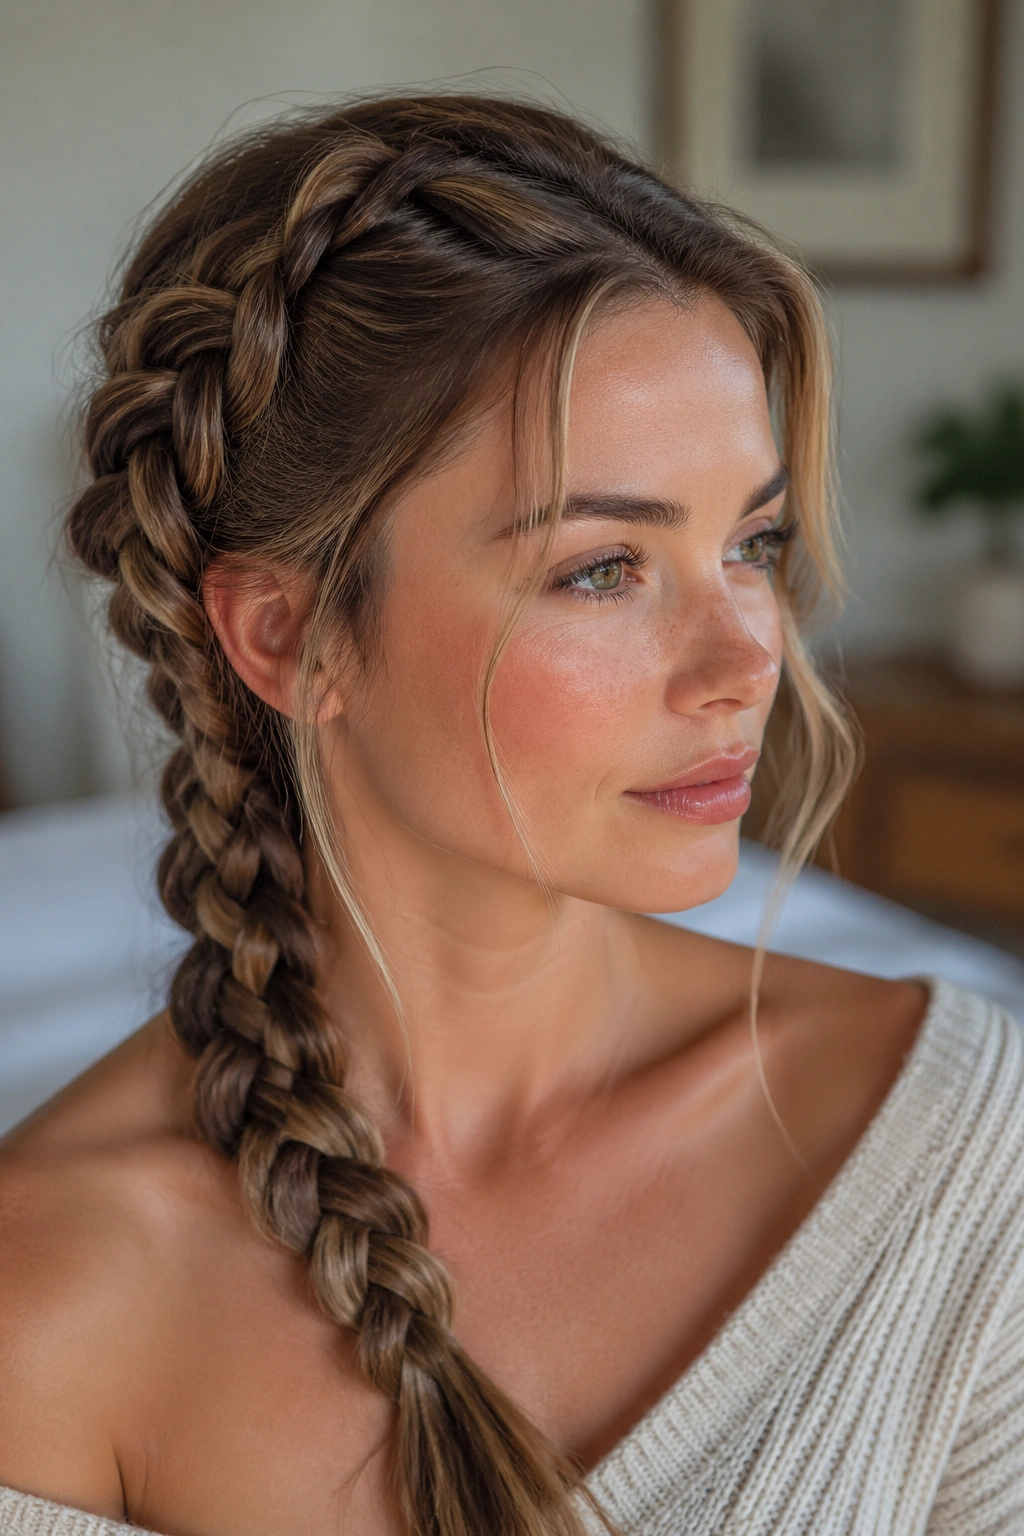
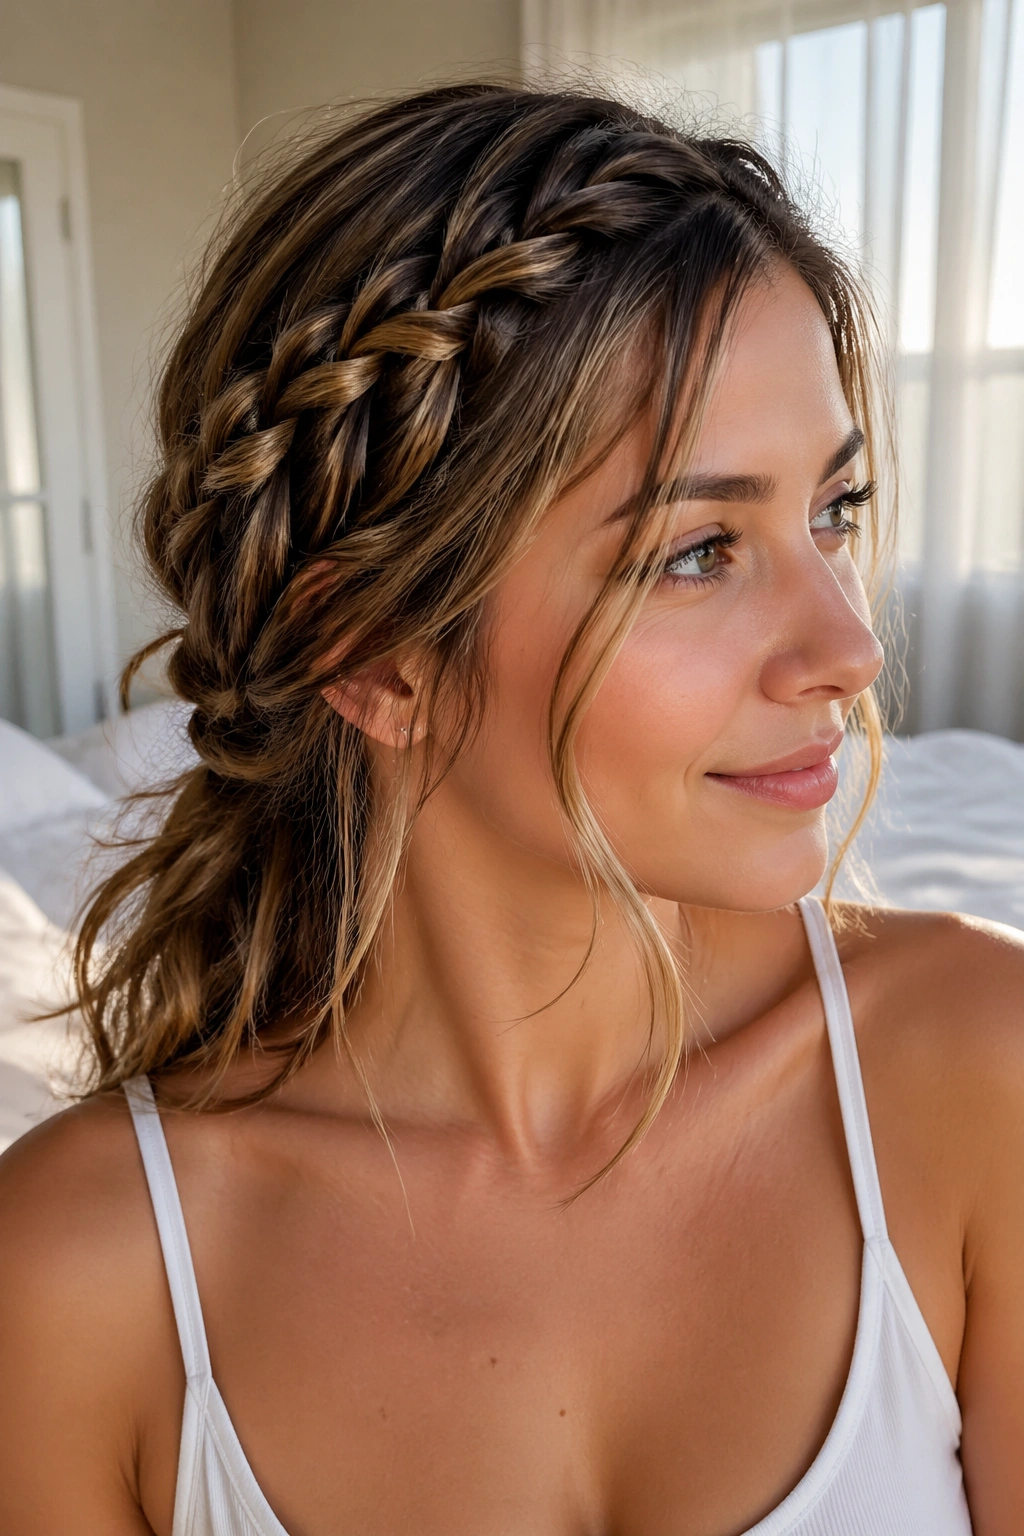
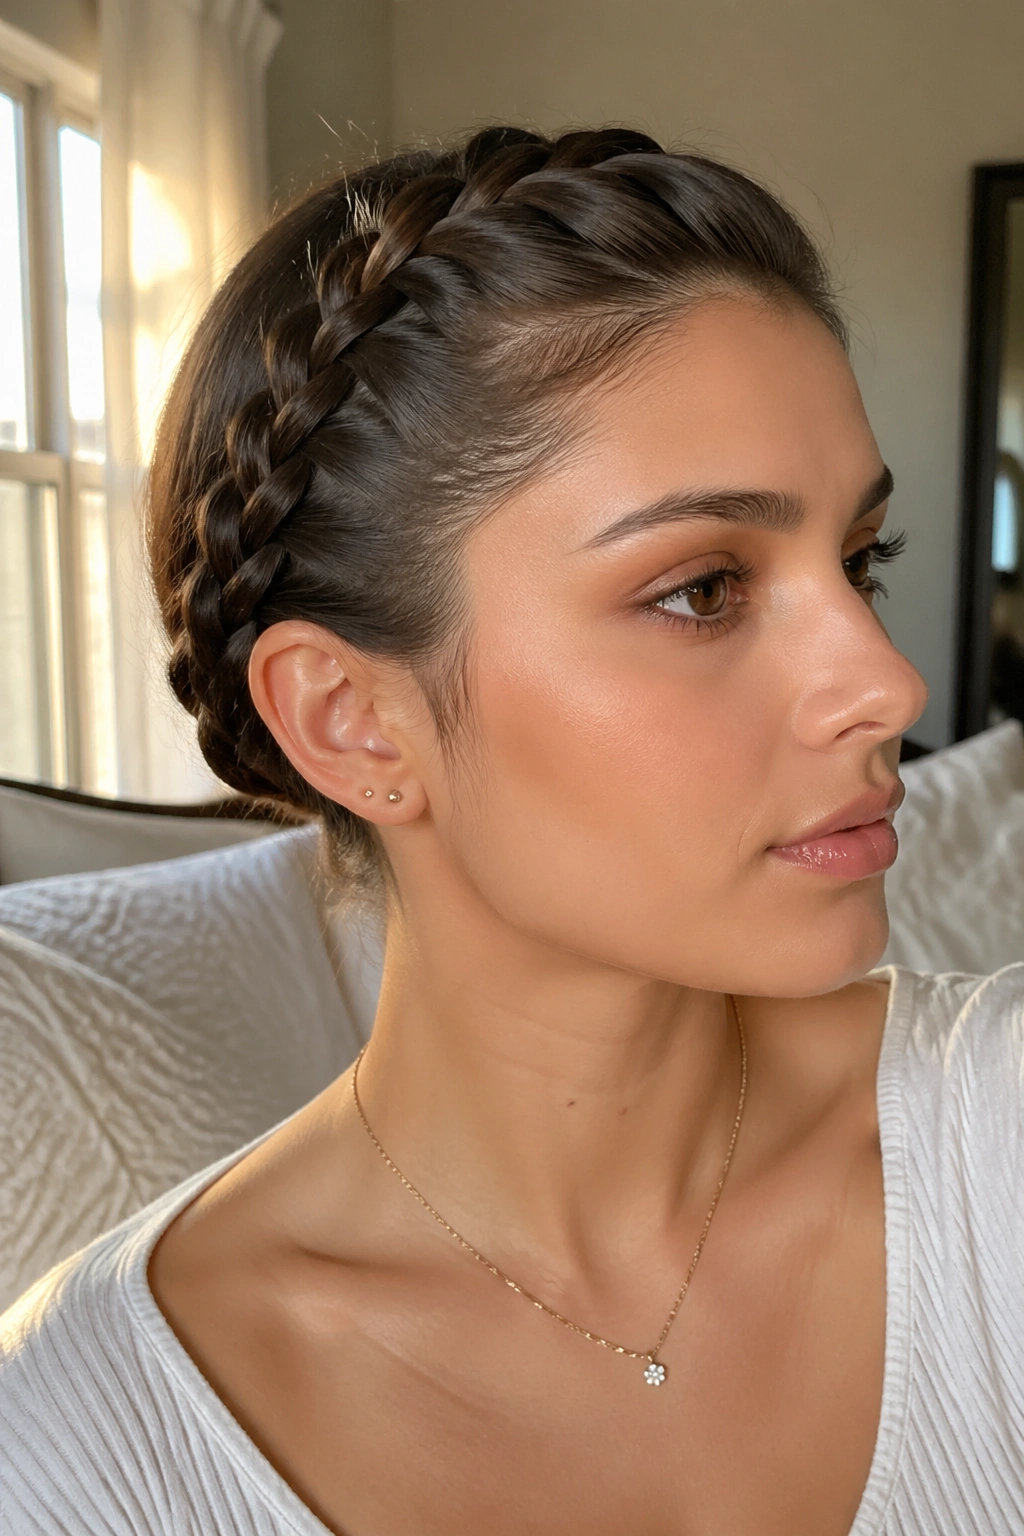
This is the braid I reach for when I want the face to look a little more sculpted without turning the hair into a helmet. A deep side French braid sits close to the head, then drops into a soft curve beside the jaw, which gives the lower face a neat line to follow.
Why It Works
The braid starts just behind the heavier side part and gathers hair as it moves toward the ear. That diagonal path is the whole trick. It draws a clear line from the temple down to the jaw, and the loose front pieces keep the style from looking stern.
- Part 2 to 3 inches off center.
- Leave two front pieces about 1/4 inch wide.
- Keep the first three crosses snug.
- Braid toward the opposite nape instead of straight back.
Tug only the outer loops after you secure the elastic. If you loosen the braid too early, it spreads before it has shape.
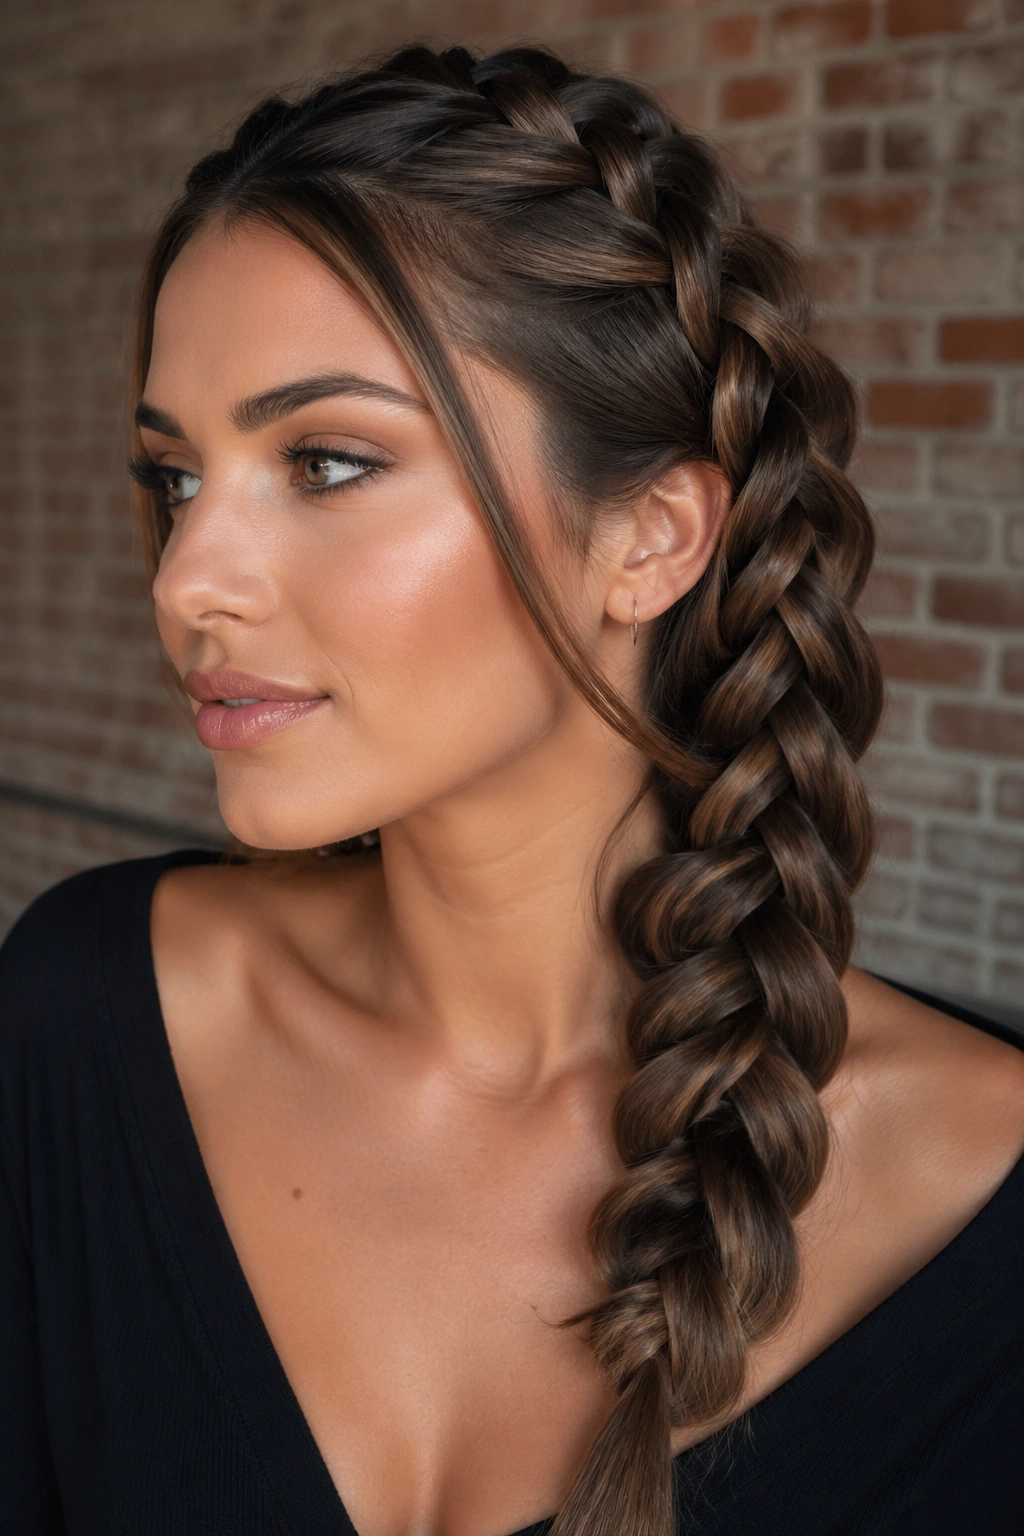
2. Dutch Side Braid with Strong Jawline Sweep
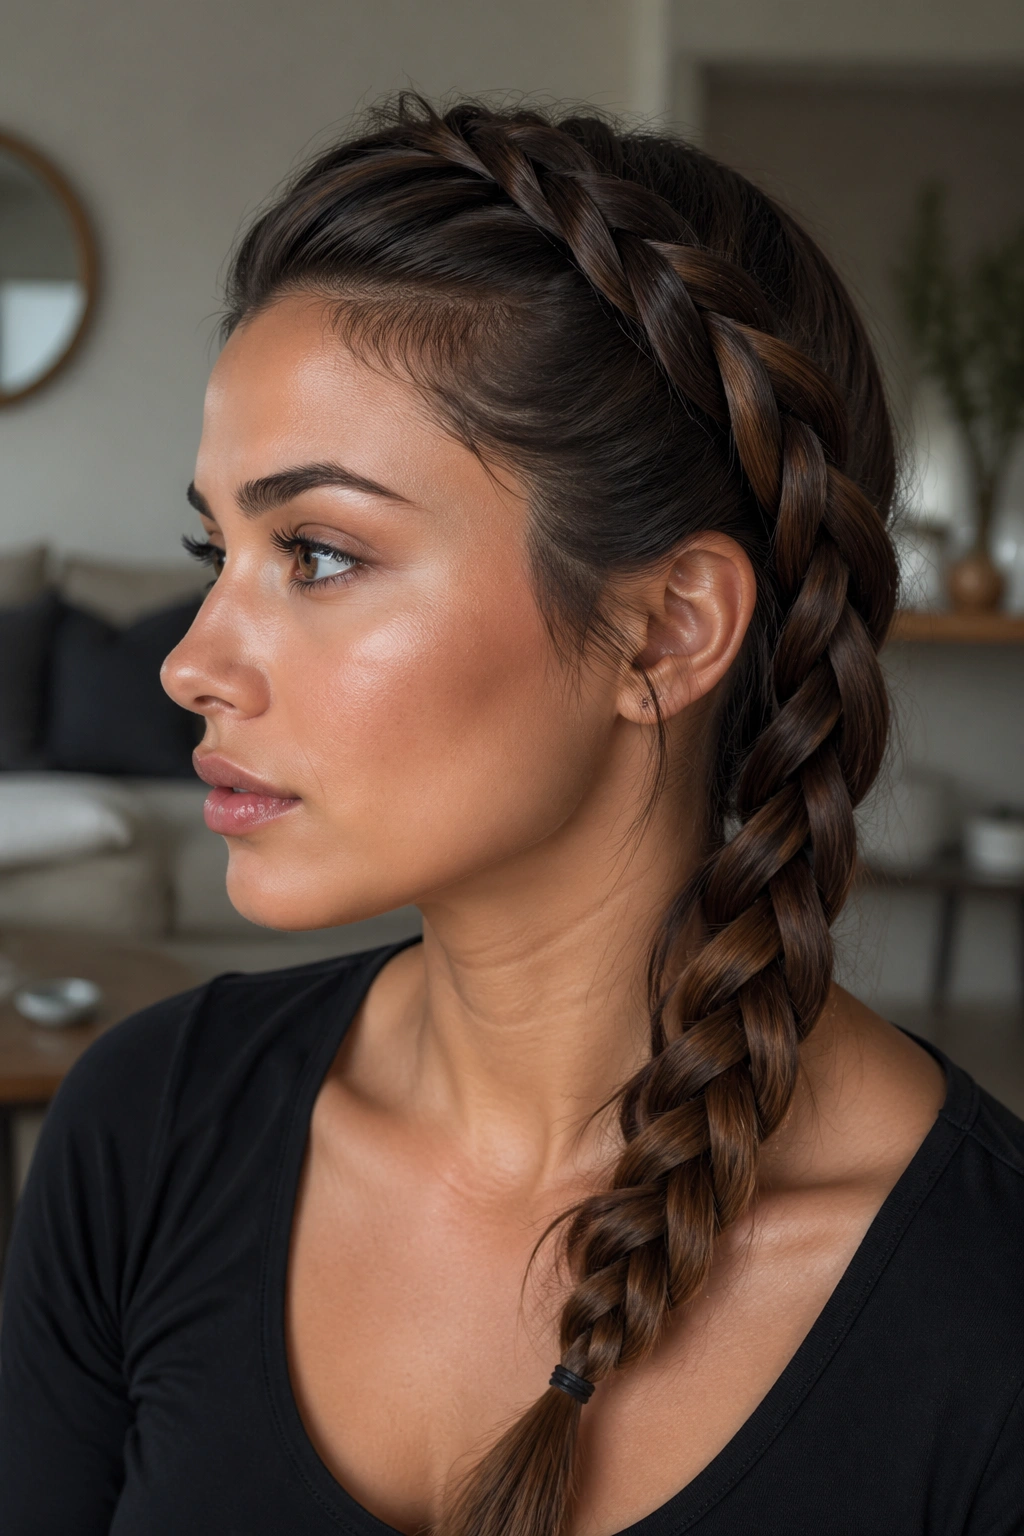
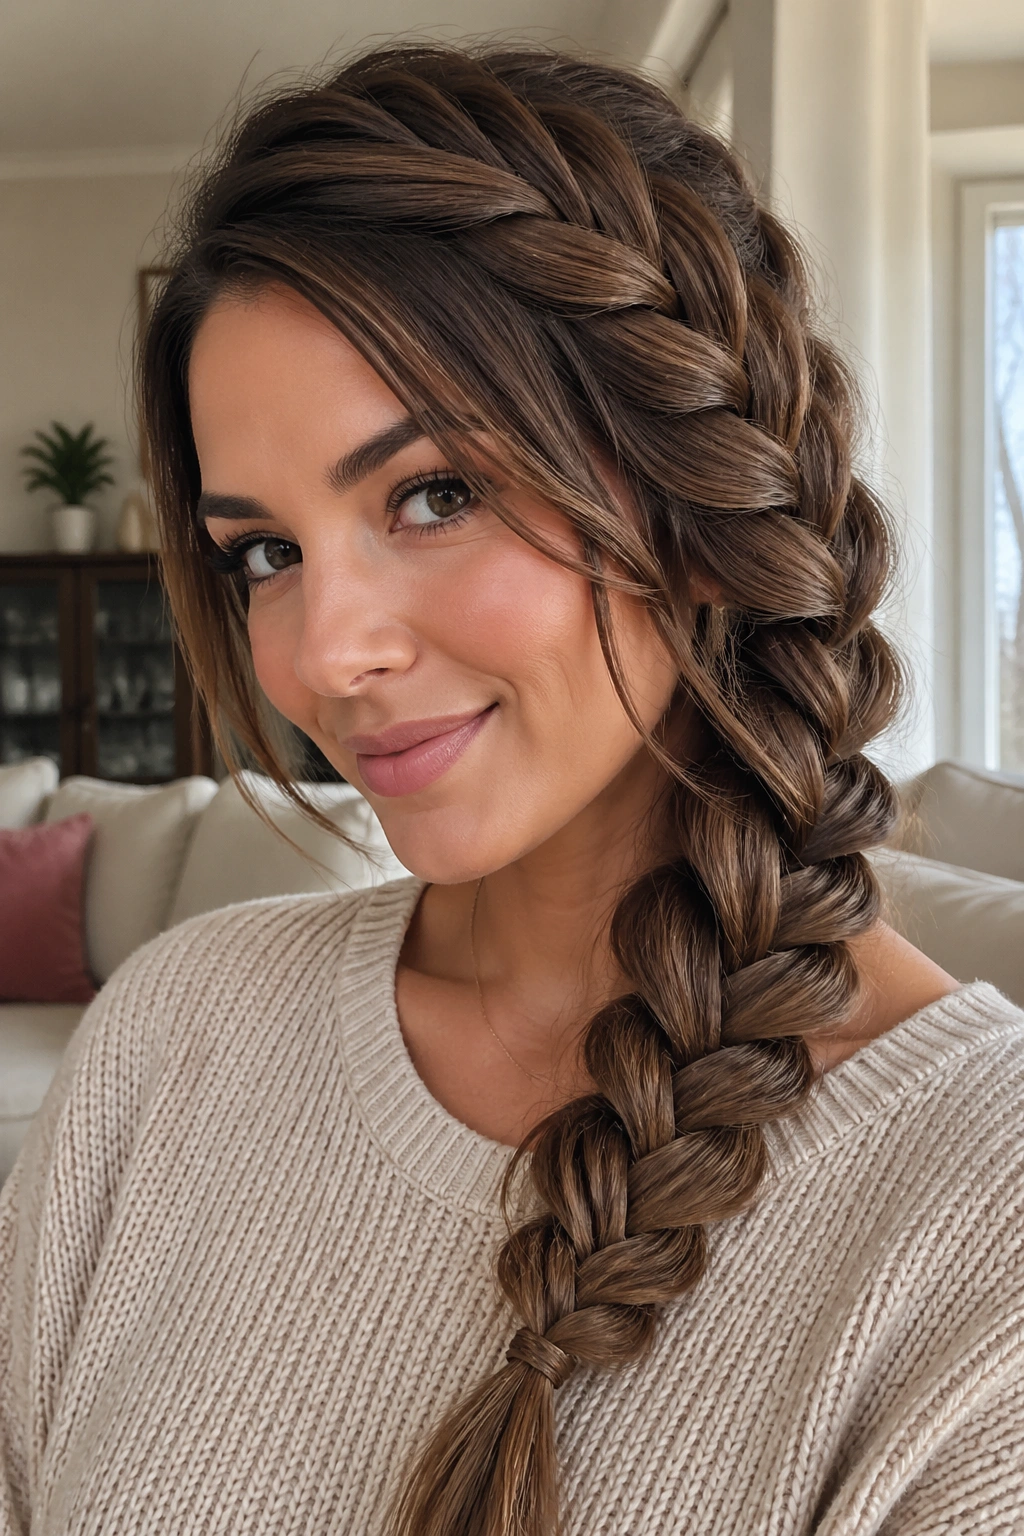
A Dutch side braid looks louder than a French braid because it sits on top of the hair instead of sinking into it. That extra lift throws little shadows under each ridge, and those shadows help define the lower face in a way that feels clean, not fussy.
The braid should start near the temple and stay neat for the first few passes. After that, you can open it up a little with your fingers, but don’t pull the crown apart too soon. The best version arcs down beside the cheek and lands near the collarbone, where the side sweep still feels deliberate.
Thick hair loves this style. So does layered hair that needs a stronger outline. If your hair has a lot of movement already, the Dutch braid gives it a spine.
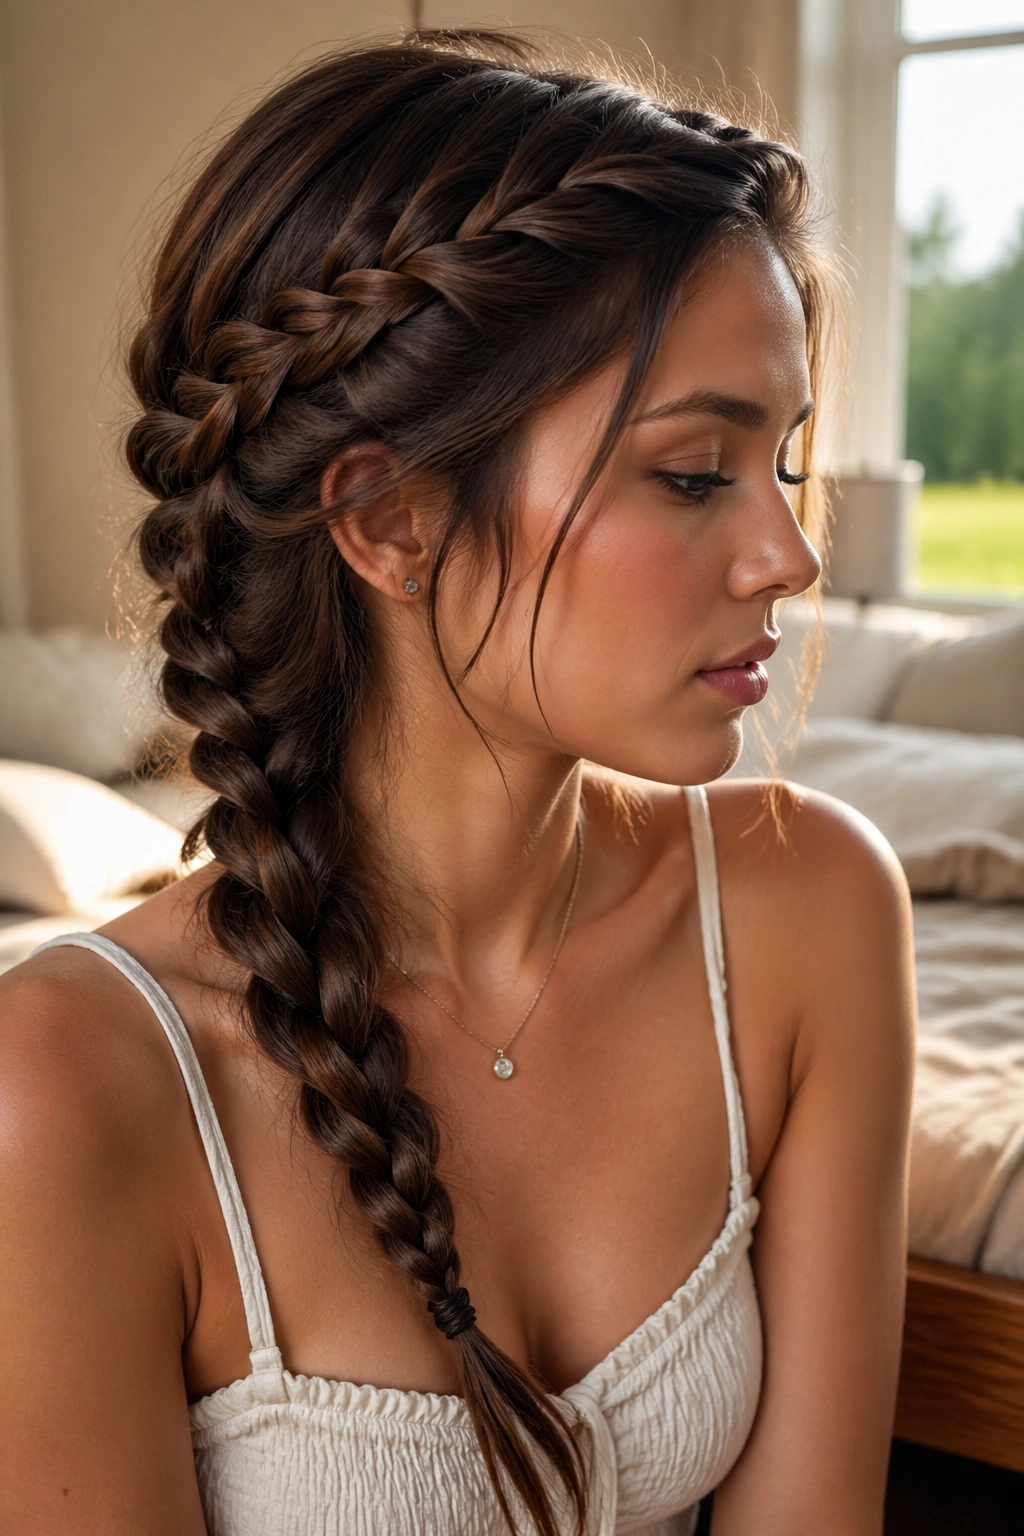
3. Fishtail Side Braid over One Shoulder
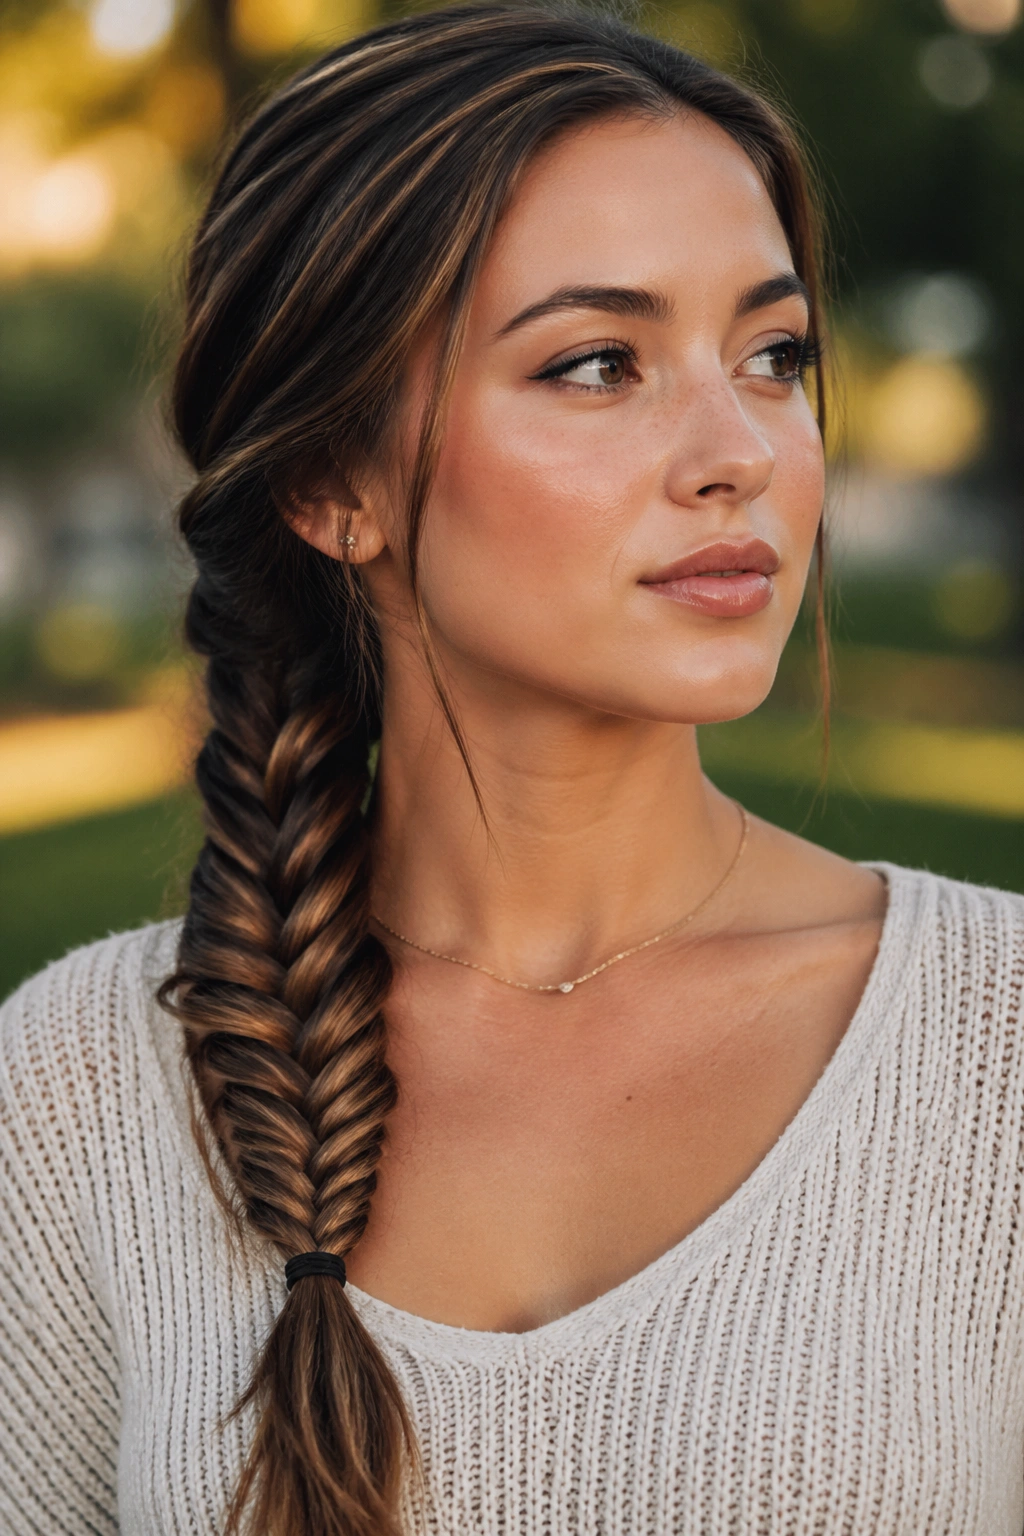
Why does a fishtail side braid soften the lower face so well? Because it breaks the braid into tiny, repeated overlaps, and that smaller texture reads less rigid than a three-strand plait. The result is a braid that feels detailed without looking heavy.
How to Wear It
Pull the braid over the shoulder on the same side as the part, then let it rest on the collarbone. That placement keeps the line near the jaw instead of disappearing down the back.
- Use 1/2-inch sections for a tighter fishtail.
- Use 1-inch sections if you want a looser finish.
- Add a light mist of texture spray before braiding.
- Keep the last 3 inches a little loose so the tail doesn’t look clipped.
If your hair is slippery, work with day-old texture. A fresh wash can make the braid slide apart before it settles.
4. Rope Twist Side Braid with a Soft Bend
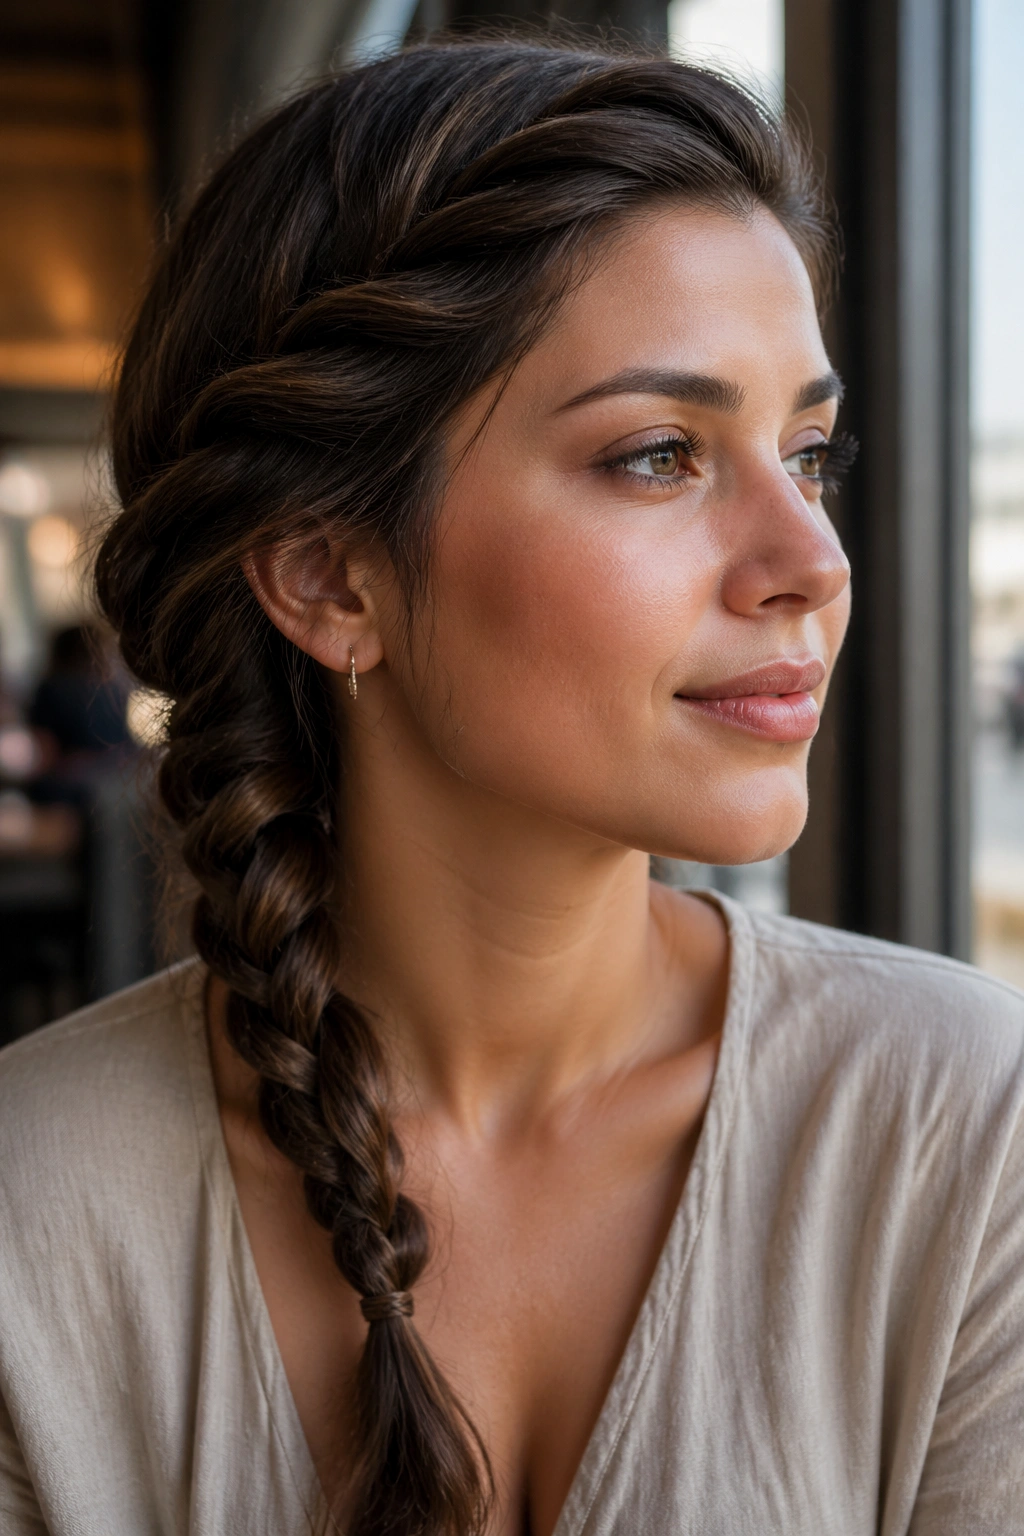
Picture this: you need hair out of your face, but a plain twist feels too bare. A rope twist solves that fast. It’s two sections, twisted away from each other, then wrapped together into a line that bends neatly around the jaw.
The shape is slimmer than a classic braid, which is why it works well on fine hair. It gives you a clean side line without adding too much bulk at the ear. If your hair tends to puff up at the crown, start the twist a little lower, almost at the top of the ear, so the volume stays under control.
- Split the hair into two even sections.
- Twist each section away from the face.
- Cross them in the same direction until you reach the shoulder.
- Secure with a small elastic that matches your hair color.
The twist line should feel taut, not stretched. Too much tension kills the curve.
5. Side Waterfall Braid with Loose Ends
A side waterfall braid looks airy because it gives you two things at once: a braided edge and loose lengths falling underneath. That mix matters around the jaw. The braid provides the outline, and the dropped strands keep the style soft enough to sit close to the face without feeling boxed in.
It works best when the first section starts above the temple and stays small, about 1/2 inch wide. Bigger drops make the braid lose its clean edge. Smaller ones keep the braid neat while still leaving enough hair free to move.
It looks airy.
Straight hair often needs a little grip first, so a dry shampoo or light texturizing spray at the roots helps. Wavy hair tends to hold the pattern faster, which is one reason this style shows up so often on hair that has a natural bend.
Let the loose pieces skim the jaw instead of tucking them behind the ear. That tiny move keeps the face open and preserves the line you worked for.
6. Pancaked Side Braid with Full Width
Unlike a tight braid that disappears into the hair, a pancaked side braid wants to be seen. The whole idea is to widen the braid after it’s secured, so each loop spreads out into a flatter, fuller shape.
That extra width matters if you want the braid to frame the jawline instead of clinging to it. A fuller braid creates a softer border beside the cheek, which can be useful on thick hair or hair with blunt ends. It also keeps the style from looking too small in relation to the face.
Use your thumbs and index fingers to flatten only the outer edges of each braid segment. Don’t drag on the center. That’s the part that gives the braid its structure, and if you pull there, the whole thing goes mushy fast.
This version is not subtle. That’s the point.
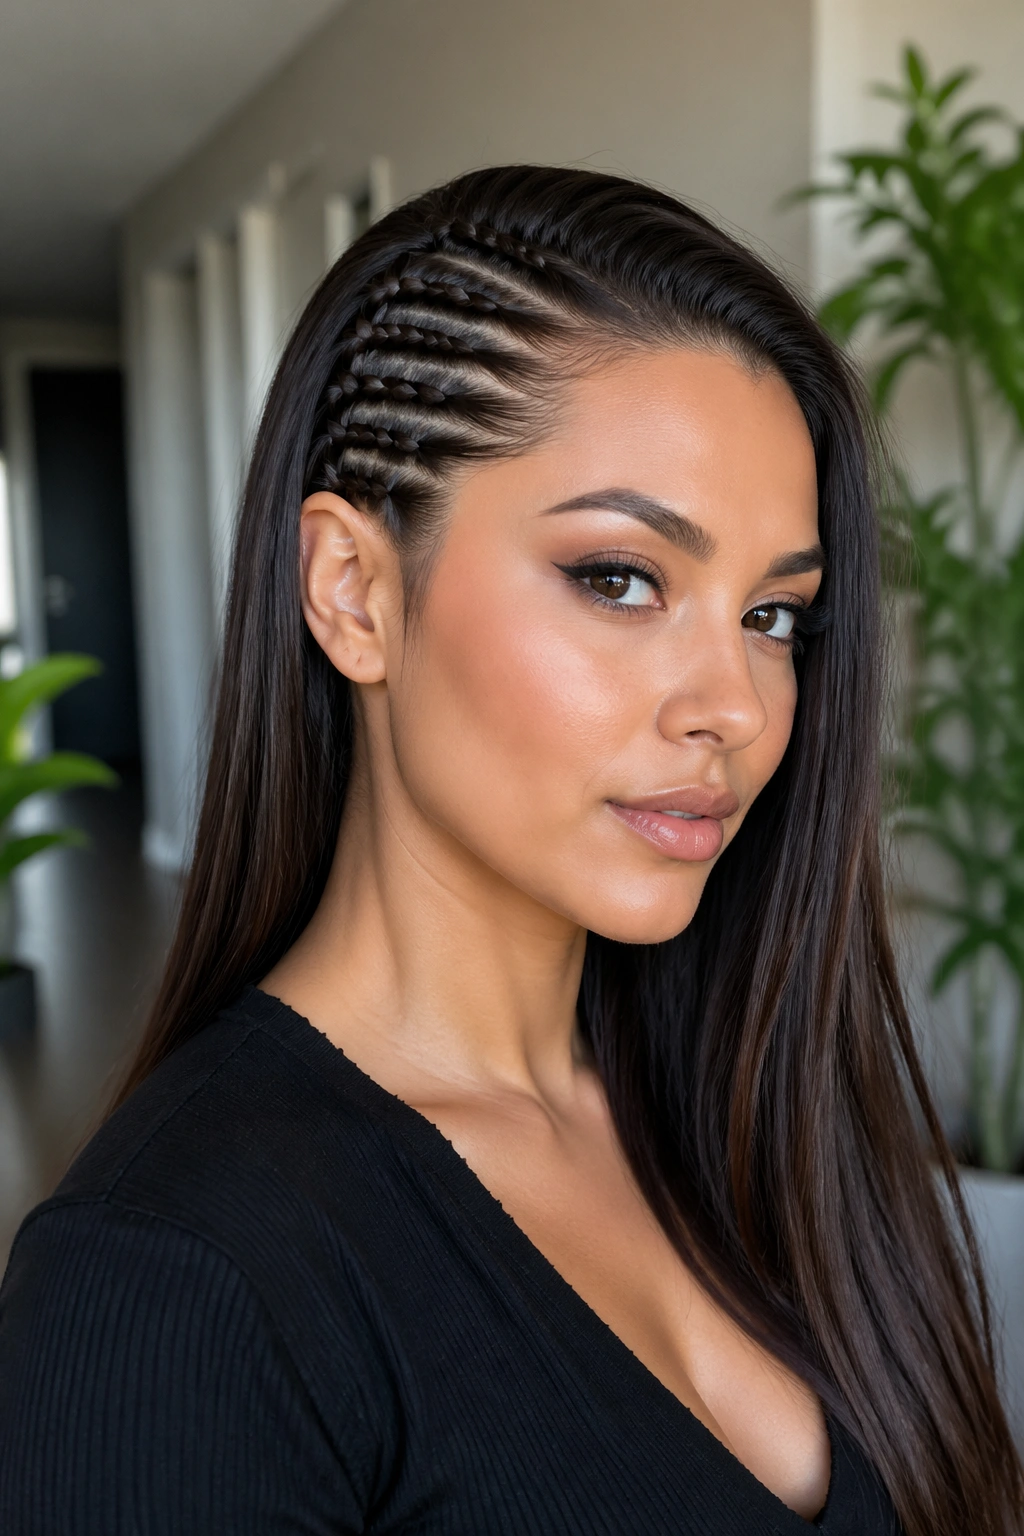
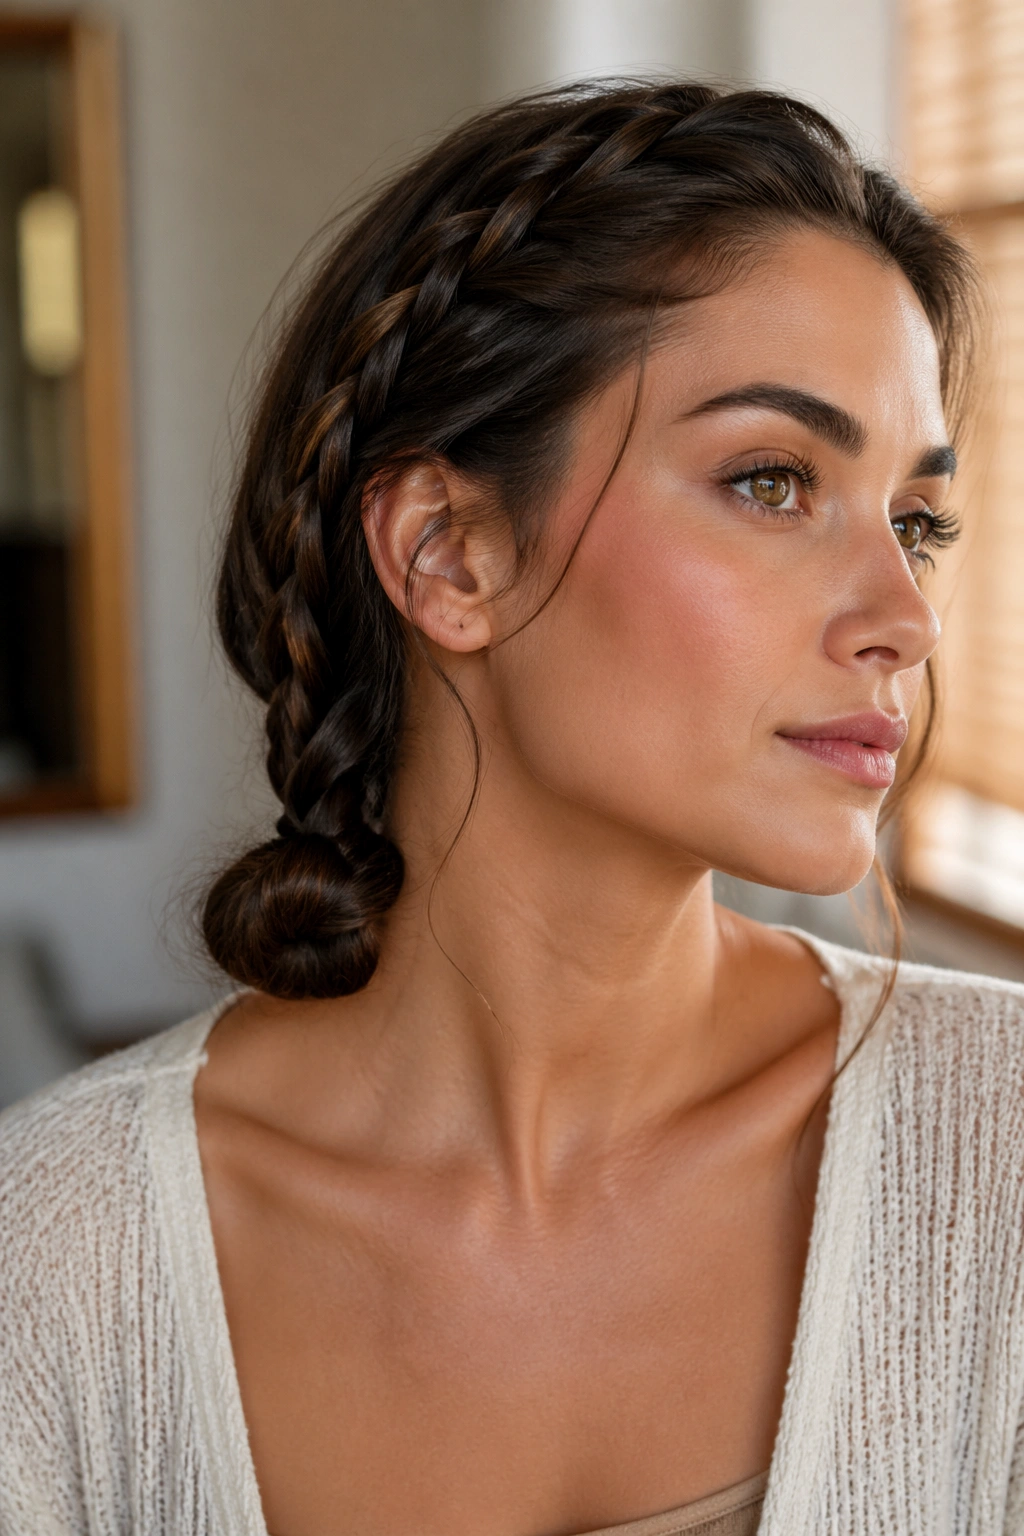
7. Side Cornrow into a Low Bun
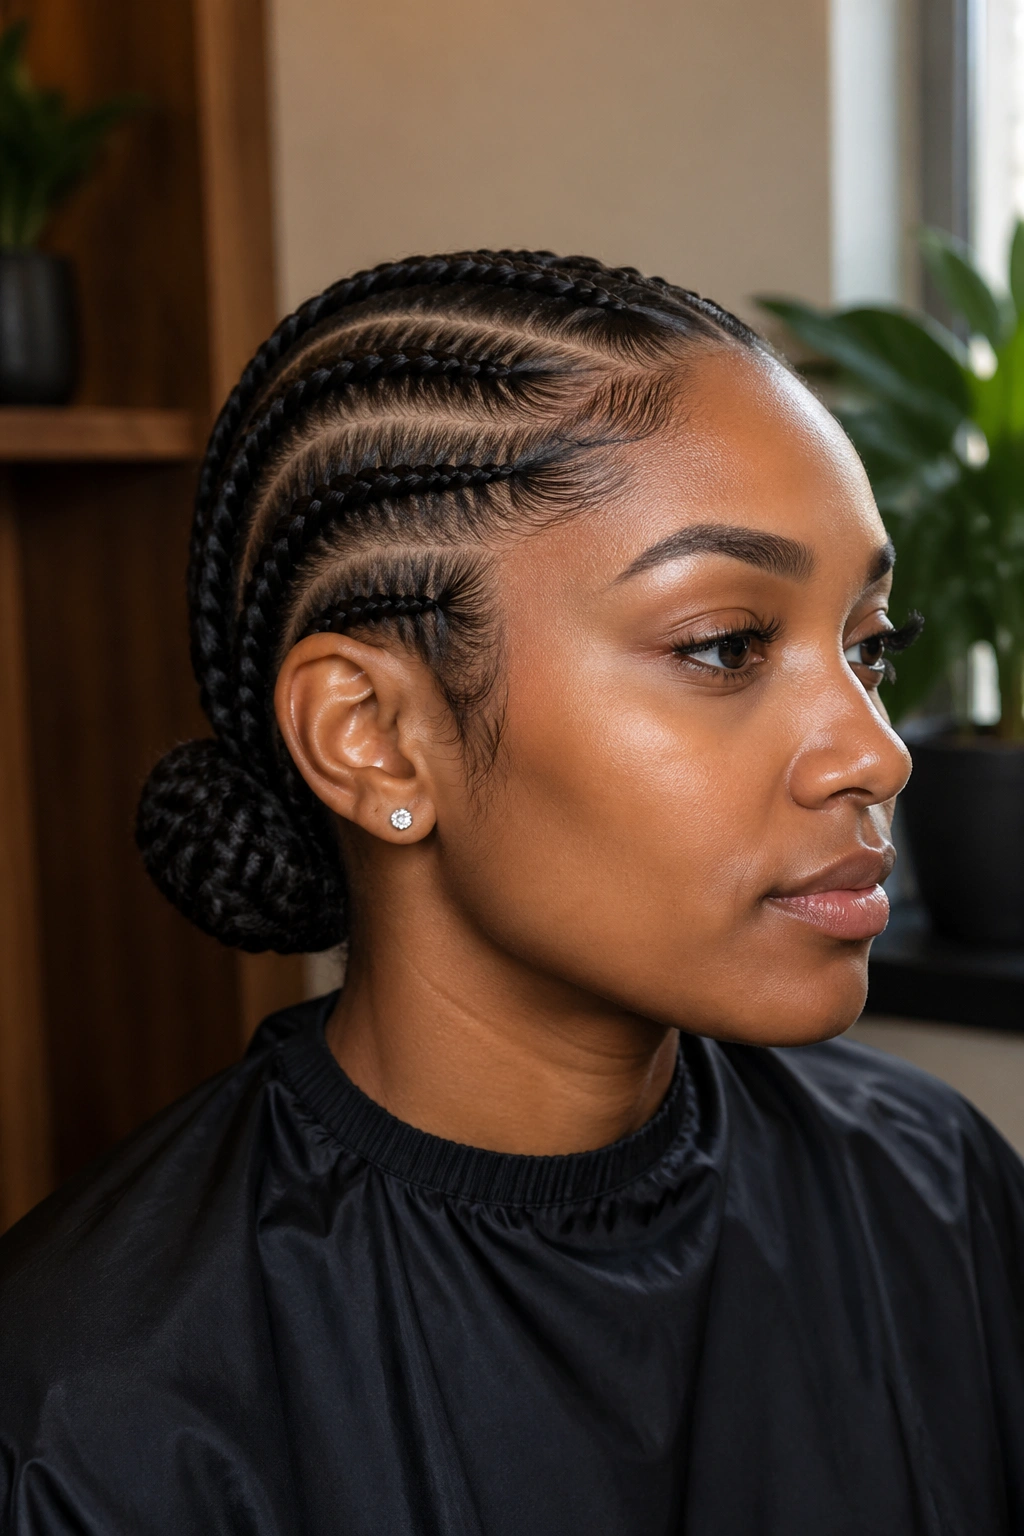
A side cornrow into a low bun gives you a sharp line along the scalp and a neat stop at the nape. That clean route makes the jaw look more defined because the braid stays close to the head before turning into a smooth knot.
Why It Flatters the Jawline
The visible braid runs right beside the face, then tucks down low where the bun can’t steal the attention. The effect is tidy and directional, which is exactly what you want if your hair tends to blur your features instead of outlining them.
- Start the part from the arch of one eyebrow.
- Braid close to the scalp along the side of the head.
- Keep the bun at the nape or just behind the ear.
- Use a pea-size amount of gel on the part if flyaways keep lifting.
The bun should sit low enough that the braid stays visible. If the bun rises too high, the jawline frame gets lost in the back.
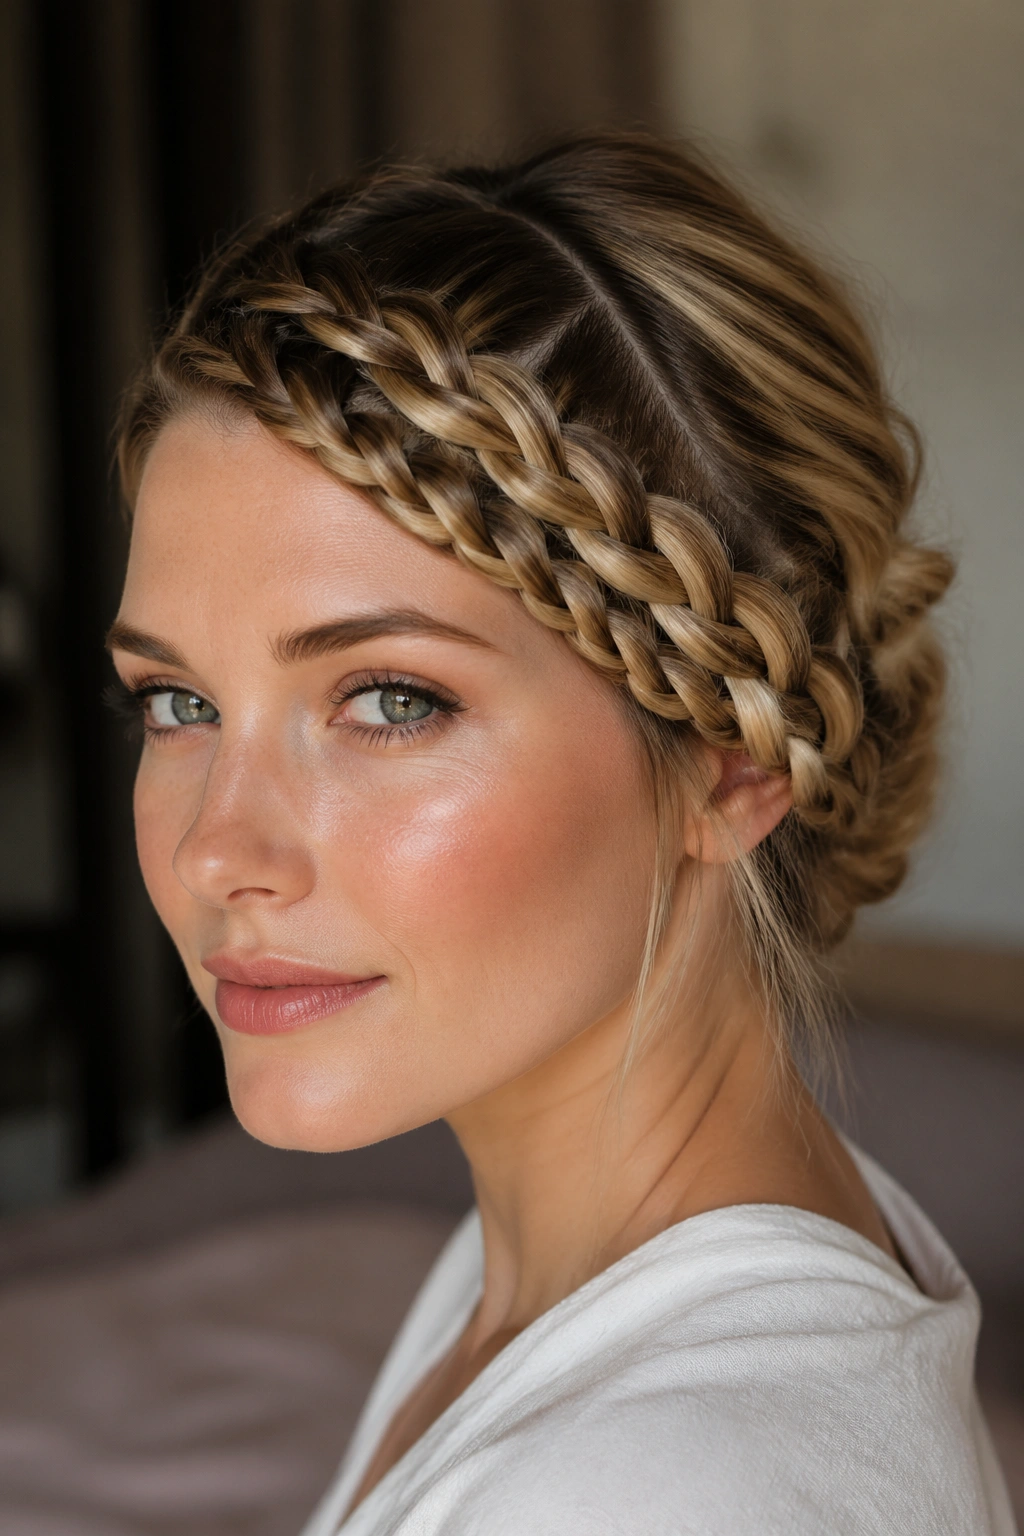
8. Messy Side Crown Braid with Jawline Tendrils
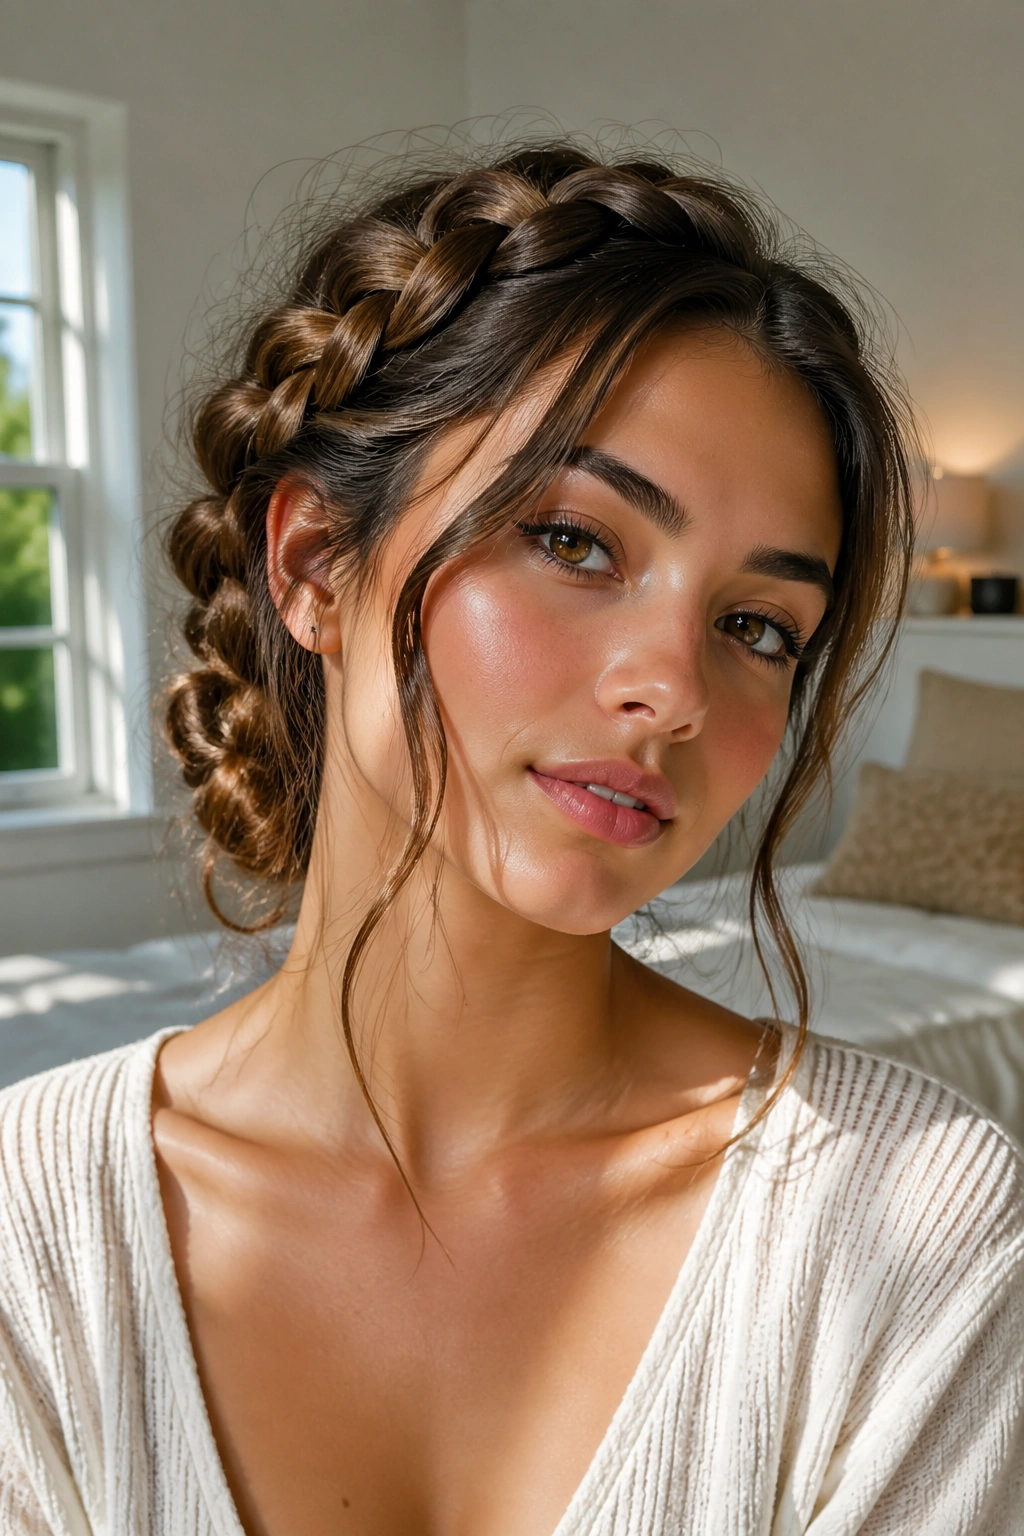
A messy side crown braid can soften a square jaw faster than people expect. The braid curves around the side of the head like a loose band, then drops down with tendrils that sit along the cheek and jaw. That downward movement does the flattering part.
The trick is to keep the crown braid airy but not sloppy. If you pull the sections apart too hard, the braid loses its line and starts to look like it fell out halfway through the day. A little looseness at the top is enough. You want shape, not collapse.
I like this version most on day-two hair, because the braid has a bit of grit and the front pieces fall naturally. If your hair is freshly washed, a texture spray near the roots helps the braid keep its hold.
Leave two front tendrils a touch thicker than you think. Skinny face pieces disappear in a hurry, and then the whole style loses its frame.
9. Ladder Side Braid with Sleek Length
Why does a ladder braid look so deliberate on one side? Because each crossbar reads like a tiny horizontal step, and those repeated lines bring texture without making the hair feel bulky. On a side placement, the ladder effect runs right alongside the jaw and creates a crisp frame.
How to Get the Most From It
A ladder braid works best on straight or blown-out hair, where the segments stay visible. Curly hair can wear it too, but the ladder details need more pinning and a bit more patience.
- Use 4 to 6 small clear elastics.
- Keep each rung about 1 inch apart.
- Smooth the crown first so the pattern shows.
- Pin the bottom section behind the ear if it starts slipping.
The braid should sit high enough to be seen but low enough to skim the cheek. That balance matters more here than on most side braids.
10. Side Braided Ponytail with Wrapped Base
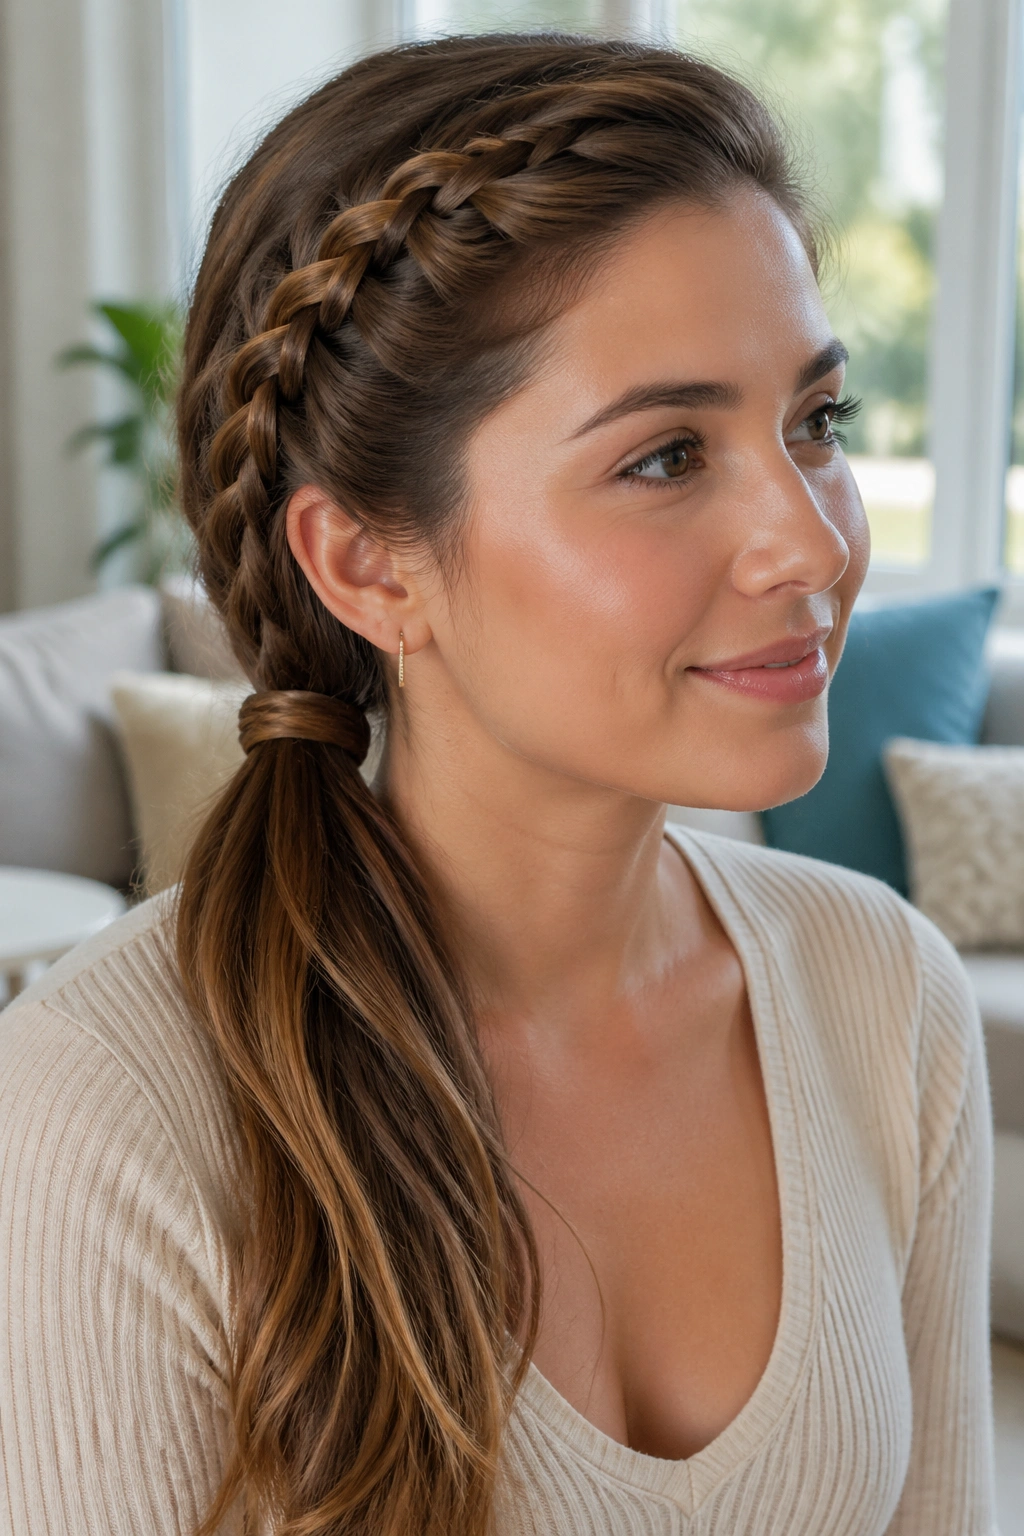
You know those days when you need hair out of your face and a plain ponytail feels dull? This fixes that in about five minutes. The side braid feeds into the ponytail, and the diagonal line from the part to the tie gives the lower face a cleaner outline.
Start the braid at the temple and aim it toward the point just below the ear. Then gather the rest of the hair into a low ponytail on the same side, or wrap the braid around the base if you want a neater finish. The braid should look like part of the ponytail, not an extra piece stuck on top.
- Secure the ponytail with a covered elastic.
- Wrap a small strand around the base for polish.
- Keep the braid section loose enough to curve beside the jaw.
- Finish with a light mist of flexible-hold spray.
This style works especially well when your hair has mixed textures. The braid gives structure; the ponytail keeps it practical.
11. Halo-to-Side Braid Hybrid
A halo-to-side braid does something interesting: it starts with a crown-like sweep, then drops the tail to one shoulder where the jawline can catch it. That long curve is why the style feels softer than a strict side braid. It bends around the face instead of cutting straight across it.
Medium-length hair handles this nicely because the braid has enough room to travel without looking cramped. On longer hair, the tail can be left fuller and a little rumpled, which keeps the style from feeling stiff. Curly hair works too, though the braid should start a touch tighter at the crown so it doesn’t loosen too fast.
The braid should not begin too far back. If it does, the front loses that framing effect and the style becomes more about the back of the head. Keep the first pass near the temple, then let it travel across the hairline and settle low on one side.
I like this braid when I want shape and softness at the same time. It gives both.
12. Side Pull-Through Braid with Thick Panels
Unlike a classic three-strand braid, a pull-through braid gives you chunky sections that read almost like stacked bows. On one side, those thicker panels create a strong visual line next to the jaw, which makes the braid feel fuller than it actually is.
This style is a smart choice for layered hair that keeps slipping out of regular braids. The elastic sections hold each step in place, so you get a clean pattern even if the ends are slippery. It also suits hair that looks too thin in a standard braid, since the pull-through structure builds width fast.
Use clear elastics every 2 inches, then tug each panel outward after the braid is assembled. Don’t pull the middle of the section; widen the outer edges only. That’s how you keep the shape from turning fuzzy.
If you want a side braid that reads bold from across the room, this one does the job without much drama.
13. Side Lace Braid with Tucked Ends
A lace braid is the neat cousin of the French braid. Instead of gathering hair from both sides, you add hair from only one side as the braid travels along the head. That makes it ideal for jawline framing, because the braid can hug the hairline on one side and then tuck under the ear in a clean curve.
What Makes It Different
The braid stays close to the face, which keeps the line tidy. It doesn’t spread out the way a full crown braid can, and that narrow shape keeps the jaw visible.
- Add hair only from the top side of the braid.
- Keep the lower side tight and clean.
- Tuck the tail behind the ear when you reach the end.
- Pin the last inch under a wave or clip.
Use a tail comb for the first parting. The straight line at the scalp matters more here than the braid size itself.
14. Four-Strand Side Braid for Extra Texture

If three strands look too familiar, four strands fix that without needing a ribbon or clip. The extra strand gives the braid a richer pattern, and on the side of the face that pattern looks denser and more dimensional, which helps the jawline feel framed instead of buried.
The trick is to keep the four sections even from the start. If one strand runs fat and the others run skinny, the braid twists off-center and starts pulling away from the cheek. Once the braid is underway, keep your hands close to the end of the braid so the sections don’t unravel while you work.
This style is especially good on highlighted hair, because the different tones show up in the woven pattern. Dark hair gets more contrast from the braid shape itself, while lighter hair shows the strand order more clearly.
It takes more patience than a regular side braid. Still, the payoff is worth it when you want texture that feels a little richer and a little less expected.
15. Braided Headband with One-Sided Draping
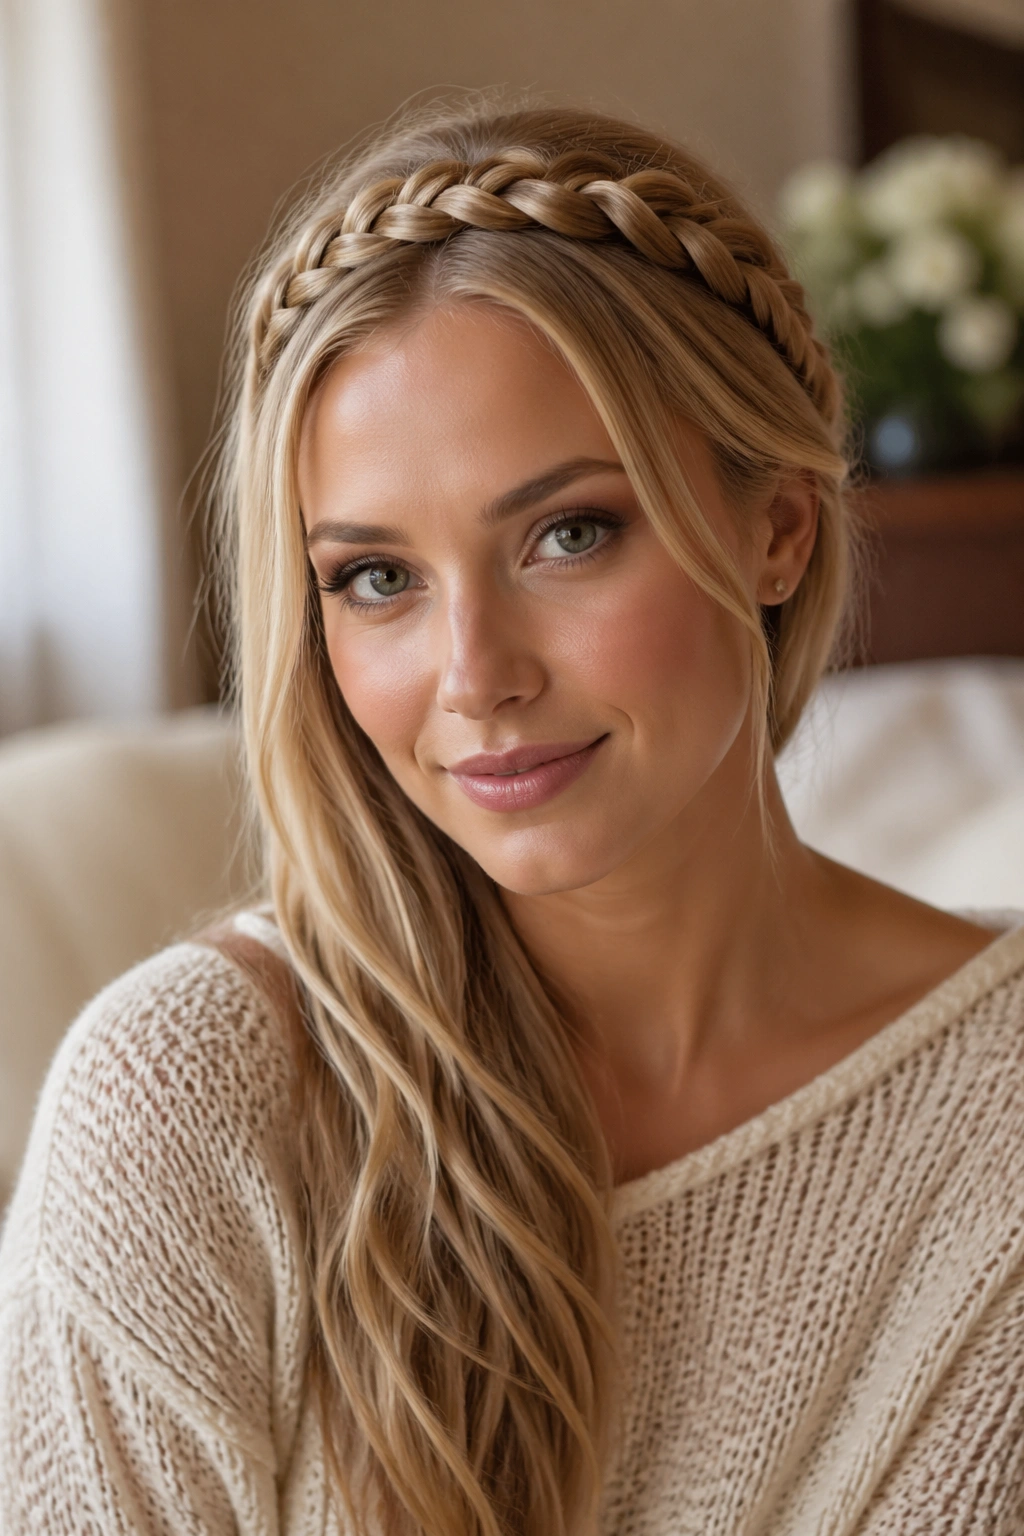
Can a braid that stays high still frame the jaw? Yes, if the rest of the hair falls to one side. The headband braid gives you the line across the top, and the loose lengths create the diagonal that finishes the job near the jaw.
How to Use It
This style works well when you want the front of the hair off your face but don’t want the whole look pinned back. It’s a good rescue move for second-day hair, especially if the roots need control and the ends still move nicely.
- Start the braid at the temple.
- Keep it close to the hairline.
- Let the rest of the hair fall over one shoulder.
- Pull two face pieces free, about 1/2 inch wide.
The braid should feel like a band, not a crown. That small difference changes the whole line of the style.
16. Side Braid into Soft Waves
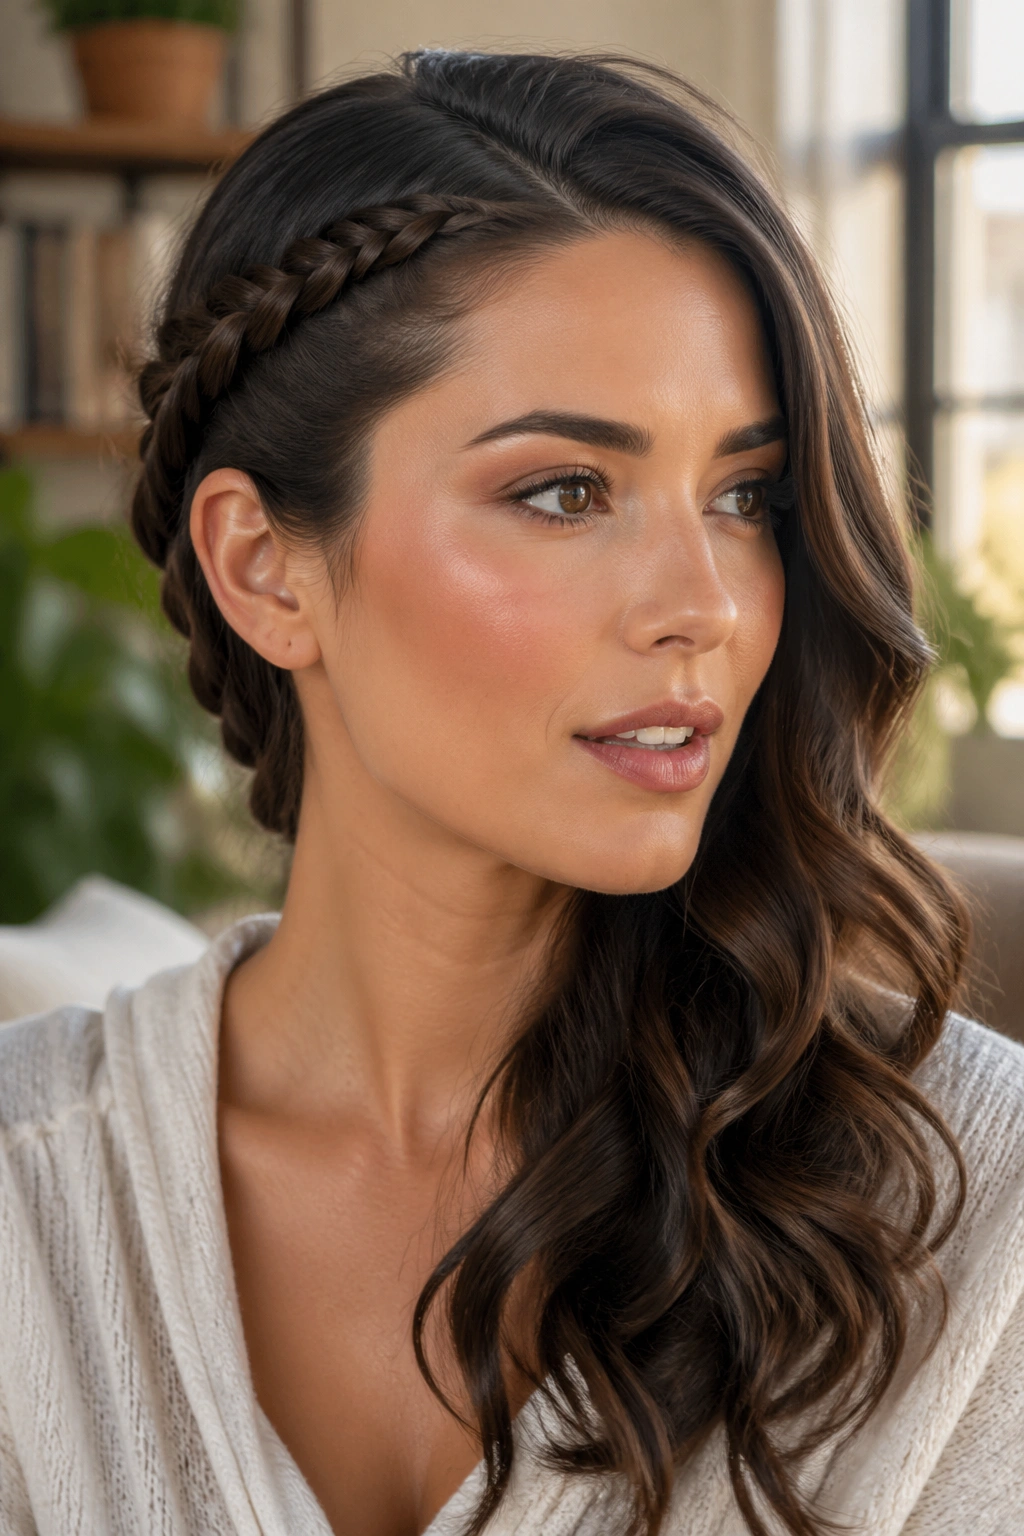
A side braid can be the setup for better waves, not just the final style. When you braid damp hair and let it dry in one side sweep, the result is a gentle bend that lands near the jaw and breaks up straight lines around the face.
The easiest version starts at the temple and runs down to the ear with a loose three-strand braid. Keep the sections a little uneven on purpose. That roughness helps the hair take on a more natural wave once it’s released. If the braid is too tight, the wave gets too crisp and loses that soft edge.
- Start on hair that’s about 80% dry.
- Braid from temple to ear.
- Secure with a soft elastic.
- Unbraid after 6 to 8 hours, or the next morning.
The face pieces around the jaw should stay slightly curved, not flat. That’s the part that makes the style feel finished.
17. Side Bubble Braid with Braided Section
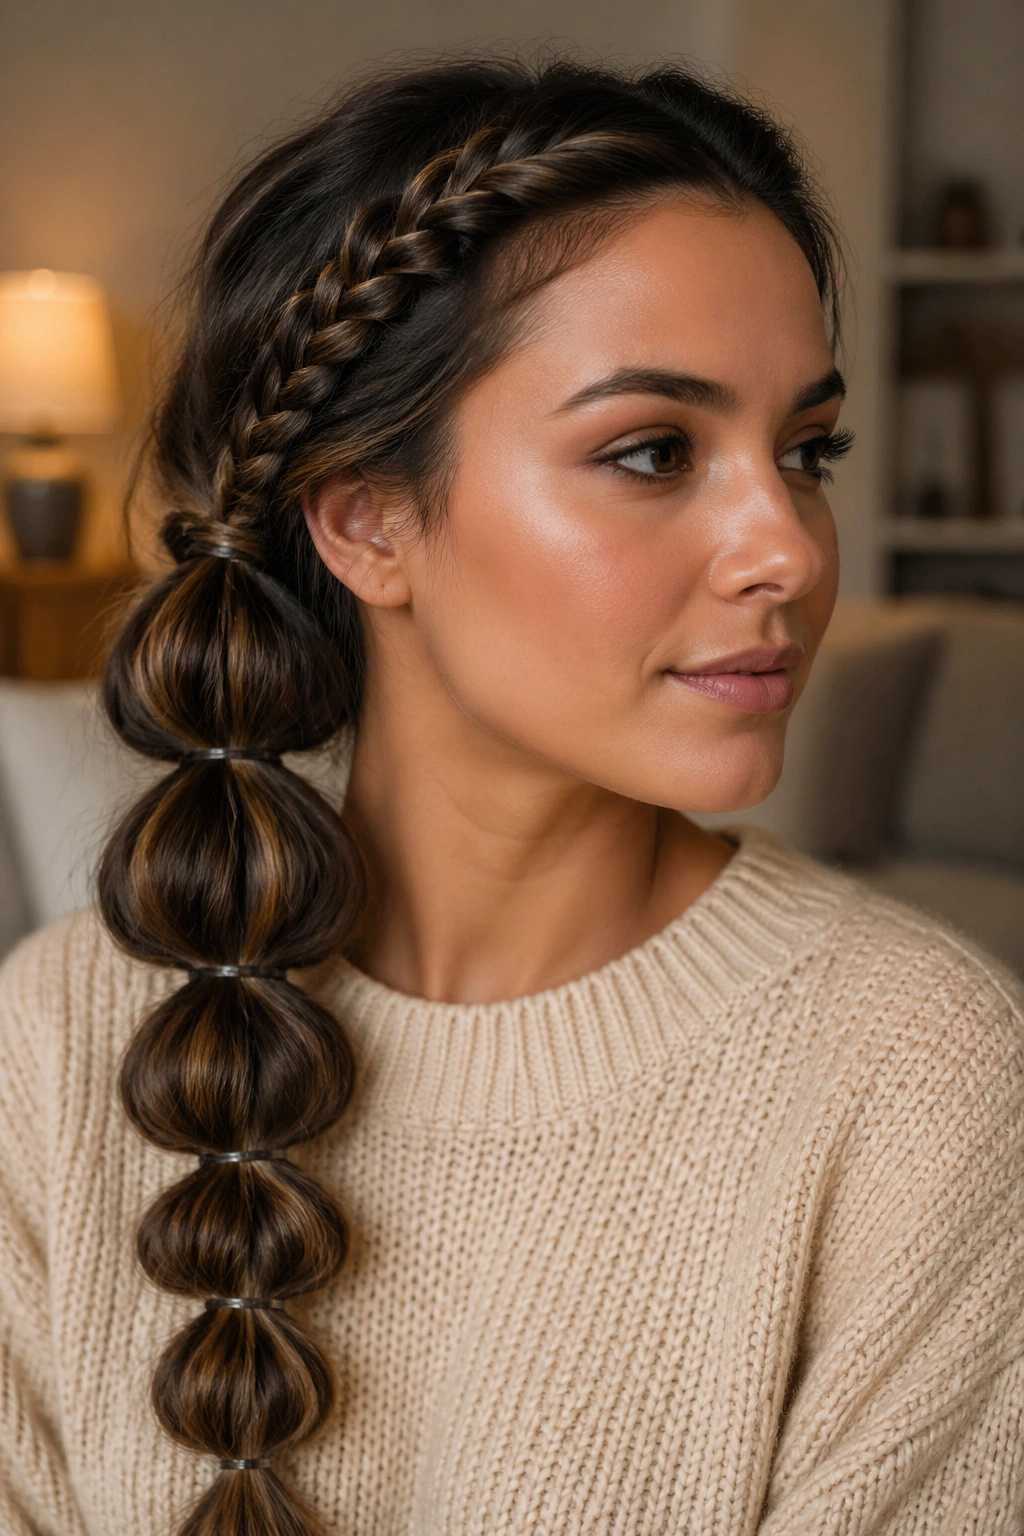
A side bubble braid gives you shape fast because each elastic creates a soft, rounded section down the length of the hair. Add one small braid at the top, and the style gets enough texture to frame the jaw without looking like a regular ponytail with decorations tacked on.
The key is spacing. If the bubbles sit too close together, the style turns cramped. If they’re too far apart, the braid section loses its connection to the rest of the hair. I like 1.5 to 2 inches between each elastic, with a small braided lead-in near the temple so the eye travels diagonally across the face before it reaches the bubbles.
This style is especially useful on long hair that feels heavy around the neck. The bubble sections lift some of that weight visually, and the braid at the front keeps the line near the jaw.
It’s playful, but it still has structure. That combination is rare enough to be useful.
18. Side Milkmaid Braid with a Deep Part
A milkmaid braid can feel heavy when it sits flat across the crown. A side version with a deep part fixes that by letting the braid cross the forehead diagonally and stop near the jaw instead of circling the head evenly. The result is softer, and the face keeps more breathing room.
This is a good choice for medium to long hair that has enough length to loop and pin without fraying at the ends. If the hair is very layered, tuck the shorter pieces under the braid with a few hidden pins before you secure the back. Otherwise the braid starts to split around the ears.
The deep part matters more than people think. It gives the braid a direction, and direction is what makes the jawline look framed rather than boxed in. Without that off-center start, the style can feel too symmetrical for the face.
Use two strong bobby pins at the back crossing in an X. That keeps the braid from slipping during the day.
19. Side Braid With Ribbon Woven Through
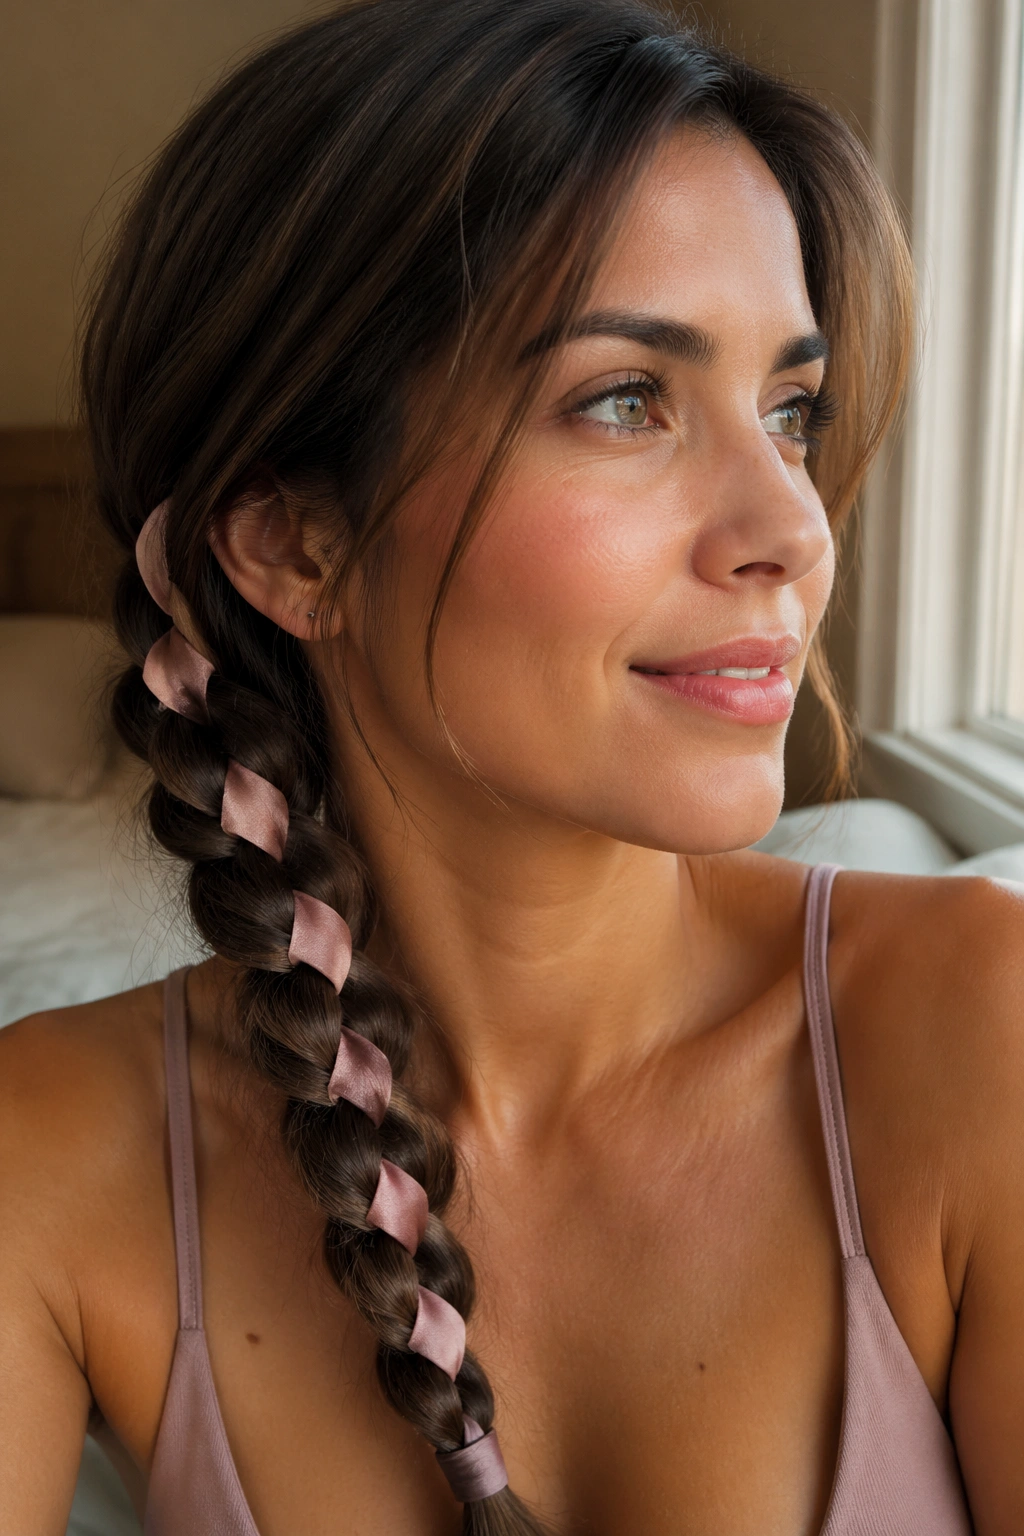
A ribbon changes a side braid fast. It adds a clear color line, but it also adds width, which matters if you want the braid to read across the jaw instead of blending into the rest of the hair.
What the Ribbon Changes
The ribbon should be flat, not twisted. Flat ribbon sits better in the braid and keeps the braid line smooth beside the face. Matte ribbon grips more easily than slick satin, especially if your hair is fine or freshly washed.
- Choose ribbon that’s 1/4 to 1/2 inch wide.
- Tie it under the elastic at the start.
- Match the ribbon length to the braid length plus 6 inches.
- Keep the ribbon flat as you braid.
Don’t twist the ribbon as you go. Twisted ribbon builds bulk in the wrong spots and can push the braid away from the jaw.
This one leans more styled than casual, which is part of the appeal.
20. Short Hair Side Braid with Hidden Pins
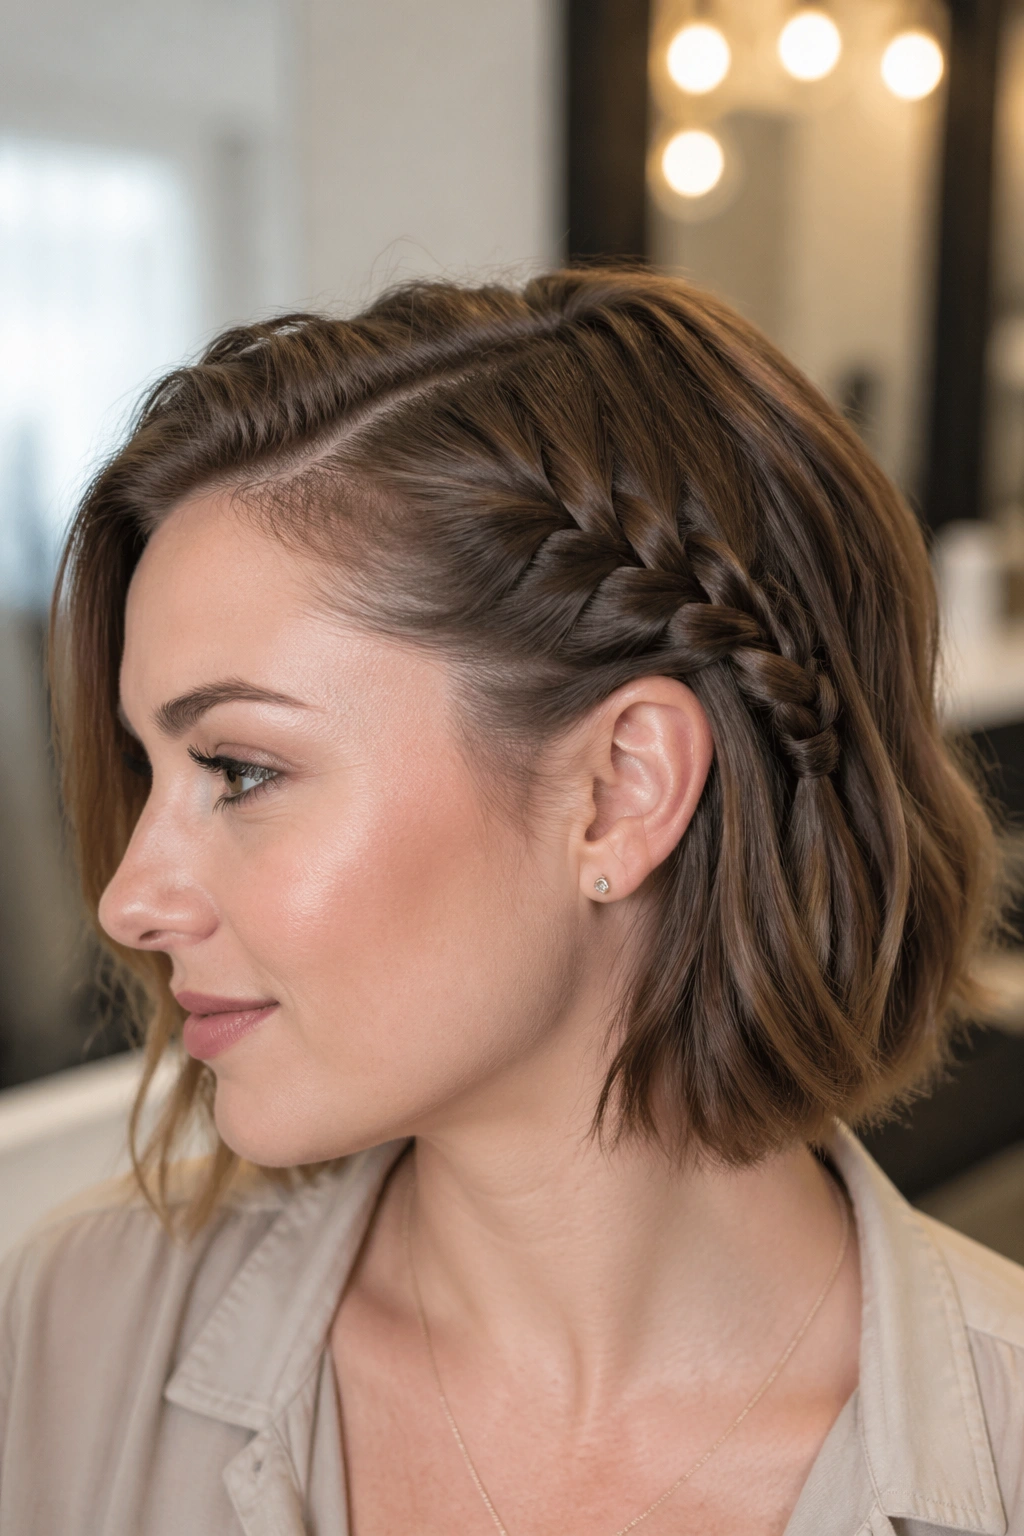
Short hair is not too short for a jawline braid. It just needs a smaller braid and a smarter pinning job. A side braid on a bob or lob can still make the face look shaped, especially if the braid starts near the temple and stops right at the ear.
The trick is to use tiny sections, about 3/4 inch wide, and keep the braid tight enough to hold but loose enough that it doesn’t spring apart. Once the braid reaches the ear, pin the tail under the rest of the hair with crossed bobby pins. That keeps the finish clean instead of stubby.
- Use a strong texturizing spray before braiding.
- Keep the braid close to the hairline.
- Cross two pins in an X at the end.
- Smooth the front with a tiny bit of wax or cream.
Short hair can do this. It just needs neat edges and less ambition in the tail.
21. Low Side Braid Knot with a Clean Jawline Finish
What if you want the braid to stop exactly where the jaw turns toward the neck? A low side braid knot does that neatly. The braid starts higher at the side part, then drops low and twists into a small knot or loop near the nape, so the face still gets a diagonal line before the style ends.
How to Style It
This one works best when the braid is smooth at the top and a little looser at the bottom. That contrast keeps the front of the style tidy while the knot stays soft enough to sit beside the neck.
- Braid from a deep side part toward the nape.
- Leave the last 3 to 4 inches free.
- Twist the tail into a small knot or loop.
- Secure with 2 pins tucked underneath.
A 1-inch face piece can help if you want a softer edge around the cheek. If you want a cleaner look, skip the extra pieces and let the braid do all the framing.
This one lands cleanly.