There’s something undeniably powerful about a sleek ponytail on natural hair. It’s not just a hairstyle—it’s a statement that combines practicality with polish, strength with sophistication. Whether you’re managing coils, coils, waves, or locs, a well-executed ponytail transforms your look from casual to commanding in minutes. The beauty of natural hair is that it works with texture rather than fighting against it, creating ponytails that are uniquely voluminous, dimensional, and eye-catching in ways that straight hair often can’t achieve.
The challenge many people with natural hair face is figuring out which ponytail styles will actually work for their specific texture, hair length, and lifestyle. Not every sleek ponytail tutorial you find online accounts for the unique needs of coily, curly, or kinky hair. You need techniques that respect your curl pattern, products that hold without flaking or crunchiness, and styling methods that don’t cause breakage at the crown or temple. The good news? There are far more options than most people realize, and once you understand the foundational principles—sectioning, smoothing, protecting the hairline, and choosing the right grip—you can execute virtually any sleek ponytail style with confidence.
Over the next sections, you’ll discover twelve distinct sleek ponytail styles specifically designed for and tested on natural hair textures. Each one can be customized for your hair length, curl pattern, and the occasion—from low-key office days to date nights that demand serious impact. Some are purely protective; others prioritize visible polish. Some take five minutes; others are worth the investment of time on a lazy Sunday. You’ll learn not just how to create each style, but why certain techniques work better for natural hair, what products deliver real hold without damage, and how to adapt each style to suit your unique texture and hair goals.
1. The High Gel Sleek Ponytail
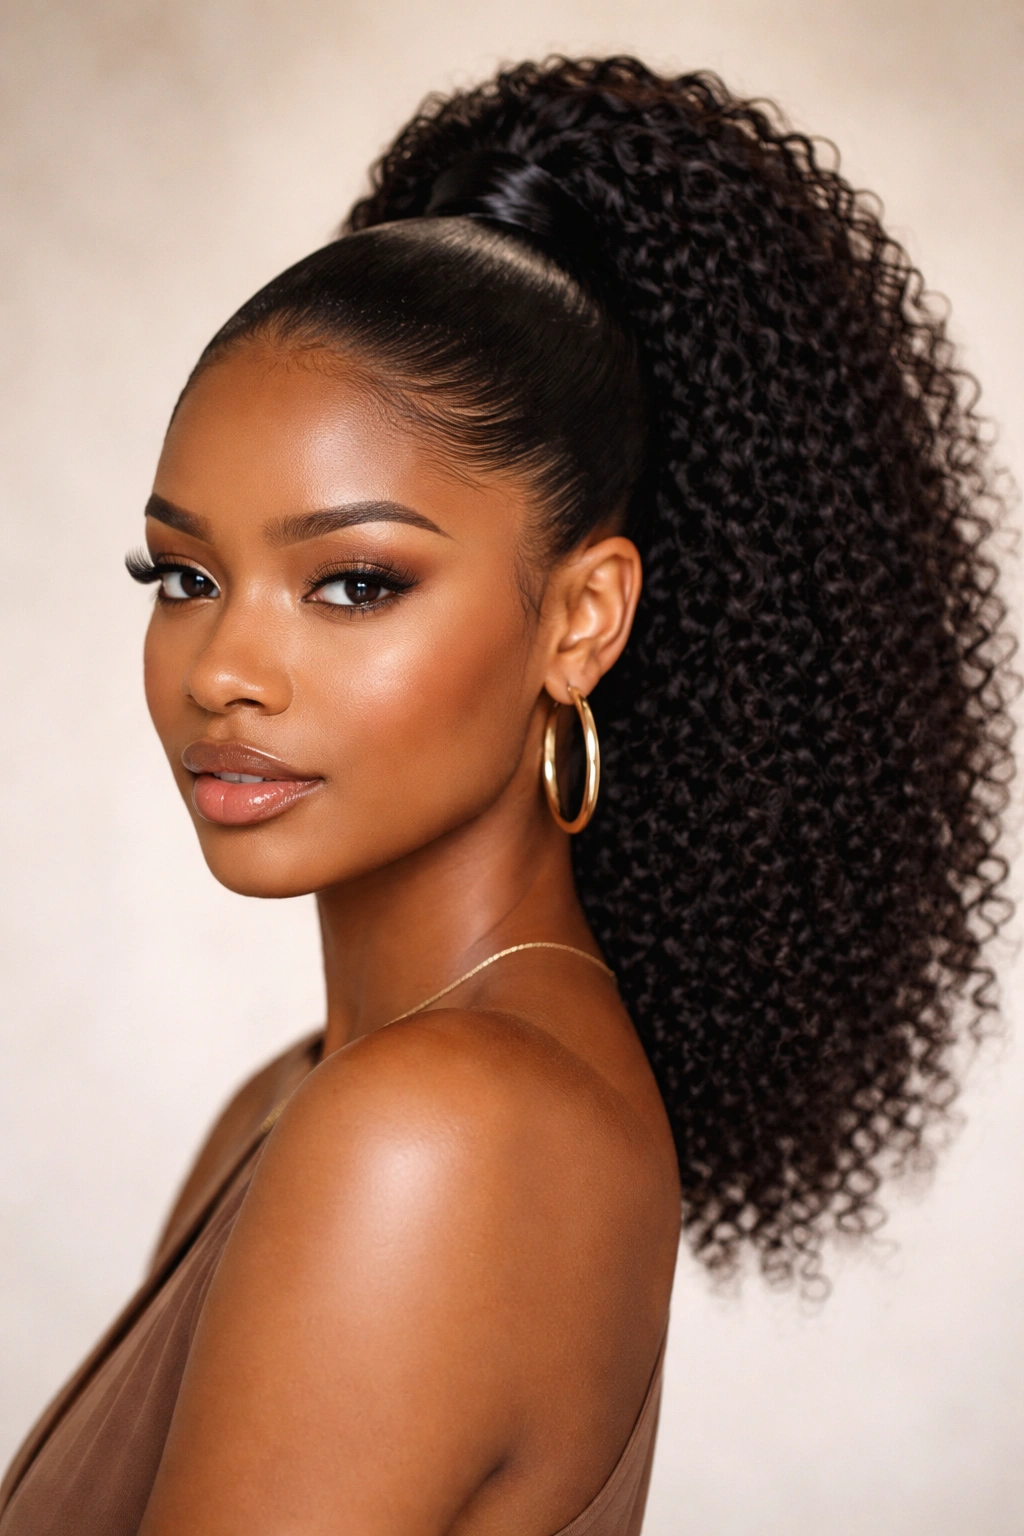
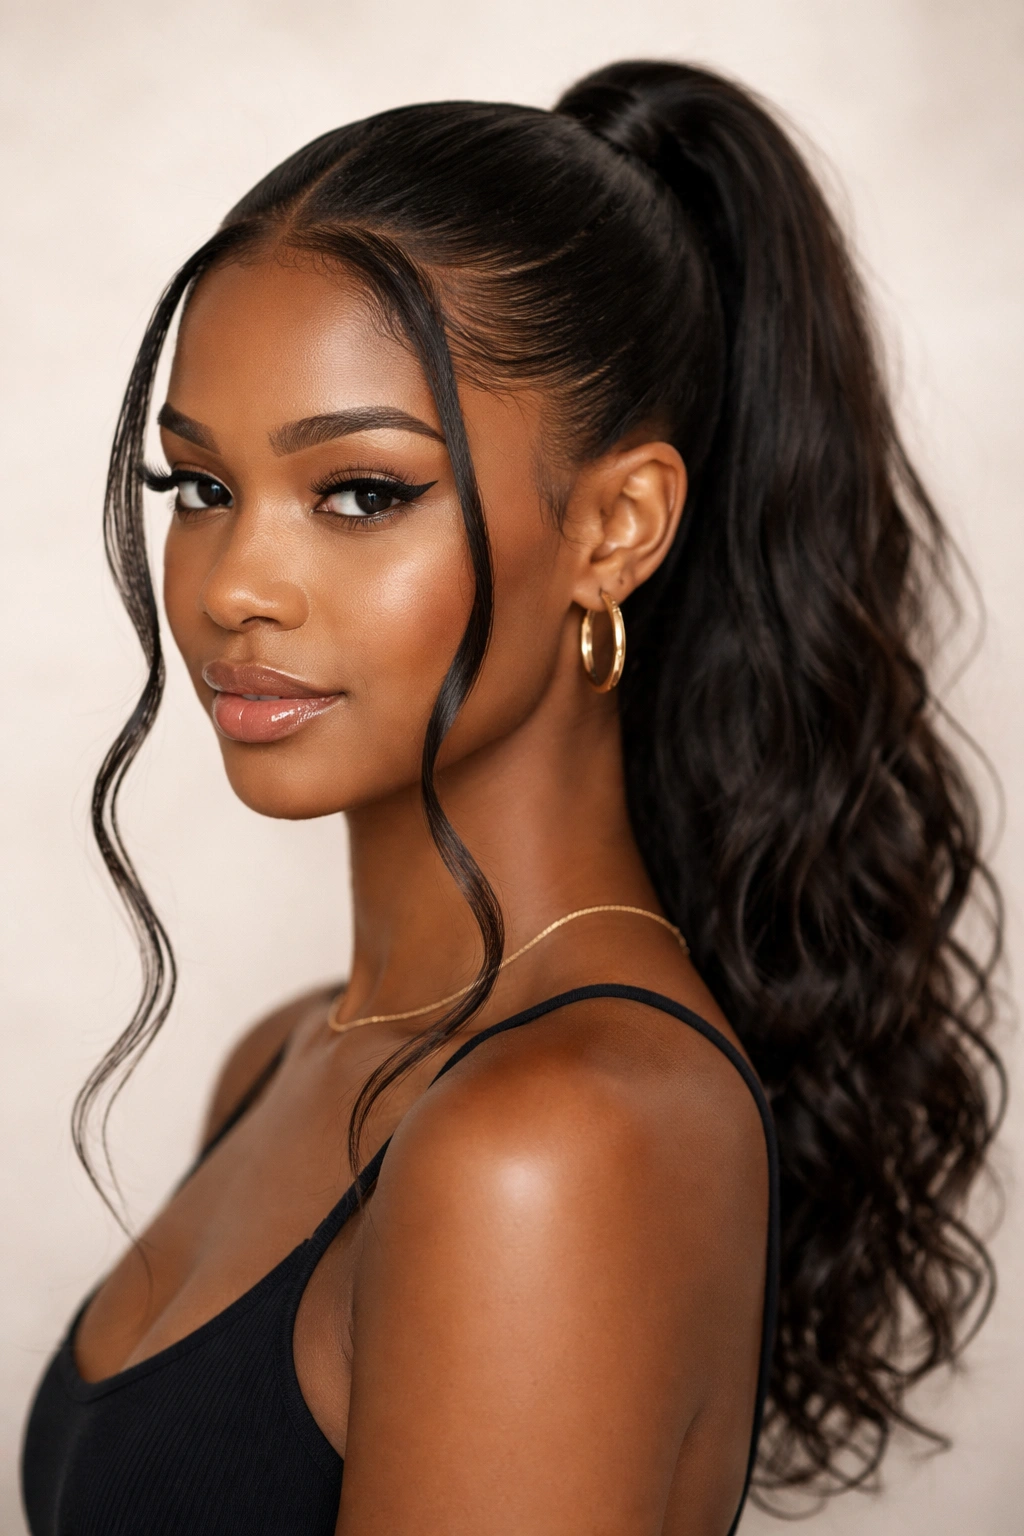
This is the gold standard of natural hair ponytails—the one that makes people stop and ask what product you’re using because every hair appears to be in place without looking crunchy or fake. A high gel sleek ponytail sits at the crown, pulls back smoothly, and finishes with all the polish of a sleek style while celebrating the fullness and volume that natural hair delivers at the base.
Why It Works So Well for Natural Hair
A high ponytail positioned at the crown sits above where your hair naturally wants to gather, which means you’re working with your natural texture rather than trying to flatten it completely. This style leverages the volume that curly and coily hair naturally creates, so the ponytail itself looks fuller and more impressive without any teasing or backcombing. The key is creating a smooth top section without breaking your hair or damaging your edges.
How to Create a High Gel Sleek Ponytail
- Start with damp hair or apply a light water-based mist to your entire head so your strands are pliable but not dripping. Completely dry hair resists smoothing products and breaks more easily under tension.
- Apply a smoothing gel or edge control to the hairline first, working it through your edges with a soft toothbrush or edge brush in the direction you want them to lay. This prevents flyaways and protects fragile baby hairs while keeping your hairline clean.
- Gather your hair into a high ponytail at the crown, using your fingers to position it where you want it—typically 1-2 inches back from your natural hairline. Don’t pull too tight on the first try; you can always adjust the tension.
- Apply smoothing gel generously to the crown and sides, using a fine-tooth comb or your fingers to smooth any bumps or flyaways. Work gel through the section you’re pulling back in the direction of the ponytail to ensure a sleek appearance.
- Secure with a covered elastic band (never a thin rubber band, which causes breakage). Wrap the elastic 2-3 times for a secure hold that won’t slip throughout the day.
- Finish by applying a light edge control or gel to the hair around your ponytail base and hairline for maximum polish.
The real advantage: This ponytail actually grows out gracefully. As your hair grows and your natural texture reasserts itself, it doesn’t suddenly look messy—it looks intentionally textured at the base with a polished ponytail length.
2. The Low Wraparound Ponytail
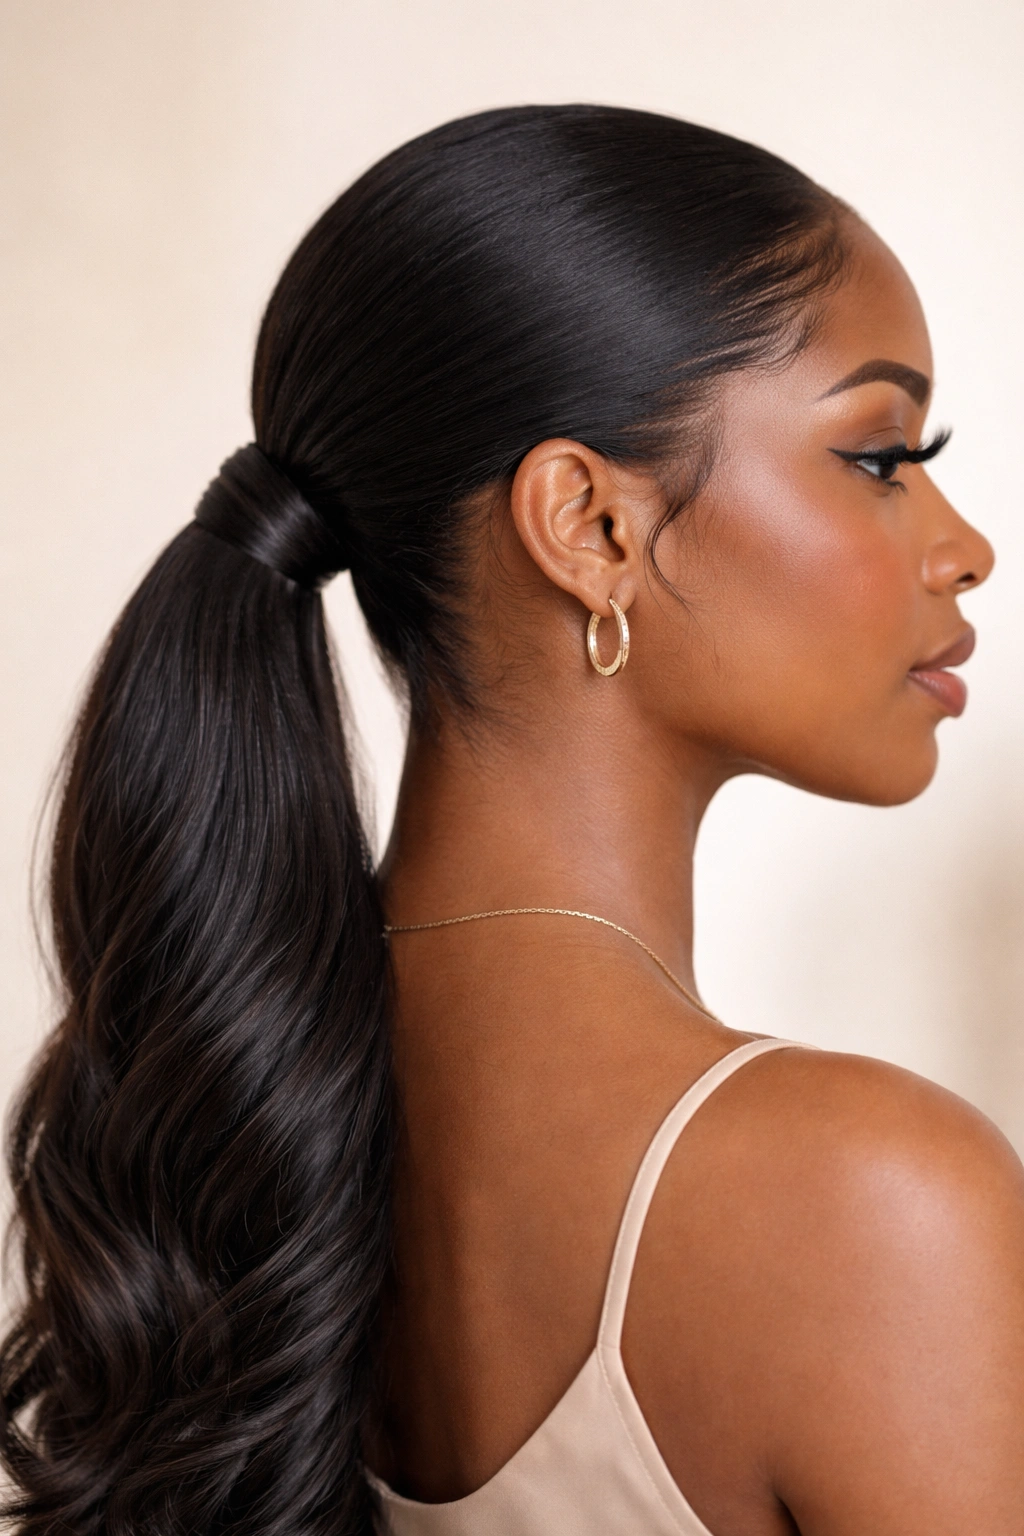
A low ponytail positioned at the nape of your neck offers a completely different energy than a high ponytail—it’s elegant, elongating, and visually calming. The wraparound detail involves taking a small section of hair from the ponytail itself and wrapping it around the base to cover the elastic band, creating a polished, finished appearance that reads as intentional and sophisticated.
The Elegance Factor
Low ponytails feel more refined and less athletic than high ones, which makes them perfect for professional settings, dinners, or any time you want to dial up the sophistication. Because the ponytail sits lower, it places less tension on your crown and edges, making this an excellent choice if you’re being protective with your hairline or dealing with any hair loss concerns. The wrapped base detail transforms what could be a basic ponytail into something that looks high-effort and intentional.
Step-by-Step Construction
- Create a low section by gathering hair at the nape of your neck, roughly 2-3 inches above the lowest point. Apply smoothing gel or edge control to create a sleek base, using the same technique as the high ponytail.
- Secure the ponytail with a covered elastic, wrapping it 2-3 times. This base should sit comfortably at the nape without pulling your head back.
- Take a thin vertical section from underneath the ponytail (about the thickness of a pencil) and remove it gently by unraveling it from the main ponytail.
- Wrap this thin section tightly around the elastic band at the ponytail base, going around 2-3 times until the elastic is completely hidden. Pin the end of this wrapped section underneath using a bobby pin that matches your hair color.
- Smooth the wrapped section with a tiny bit of edge control or smoothing gel so it blends seamlessly with the rest of your ponytail.
Pro tip: The wrapped section should feel secure but not tight—tight wrapping can actually cause the base section to break. You want coverage, not constriction.
3. The Slicked-Back Bun

This style combines the sleekness of a ponytail with the contained elegance of a bun, creating a look that’s simultaneously sporty and polished. Everything—from the front hairline to the gathered base to the bun itself—reads as intentionally sleek, making this perfect for days when you want maximum control without actually sacrificing style.
Why This Works for Textured Hair
Buns on natural hair can sometimes look sparse or show scalp if you’re not careful, but slicked-back buns actually benefit from textured hair because the curl pattern gives the bun more apparent volume. Even a modest amount of hair can create a full-looking bun when your hair is coily. The slicking creates dramatic contrast with the natural texture of the bun itself, which is visually striking.
Building Your Slicked-Back Bun
- Start with the high ponytail technique described above, ensuring your crown and sides are completely smooth with gel.
- Once your ponytail is secured, gather all the hair in the ponytail into a bun by twisting the length around itself, creating a spiral, or simply gathering it into a messy-but-intentional knot. The actual texture of the bun can be natural and textured—only the back section needs to be aggressively sleek.
- Secure the bun with bobby pins inserted horizontally, crisscrossing them for stability. You need at least 3-4 pins for a bun that will last all day.
- Apply edge control to your hairline and any flyaways visible around the crown and sides, smoothing them with a soft brush.
- Optional: Use a bun cover in your hair color to add dimension and polish, or wrap a small section of hair around the base of the bun (same technique as the wraparound ponytail) for seamless coverage.
Worth knowing: The tighter you pull the ponytail section, the rounder and fuller your bun will appear. A moderately tight ponytail base creates a bun that looks intentional without creating undue stress on your hairline.
4. The Side-Swept Ponytail
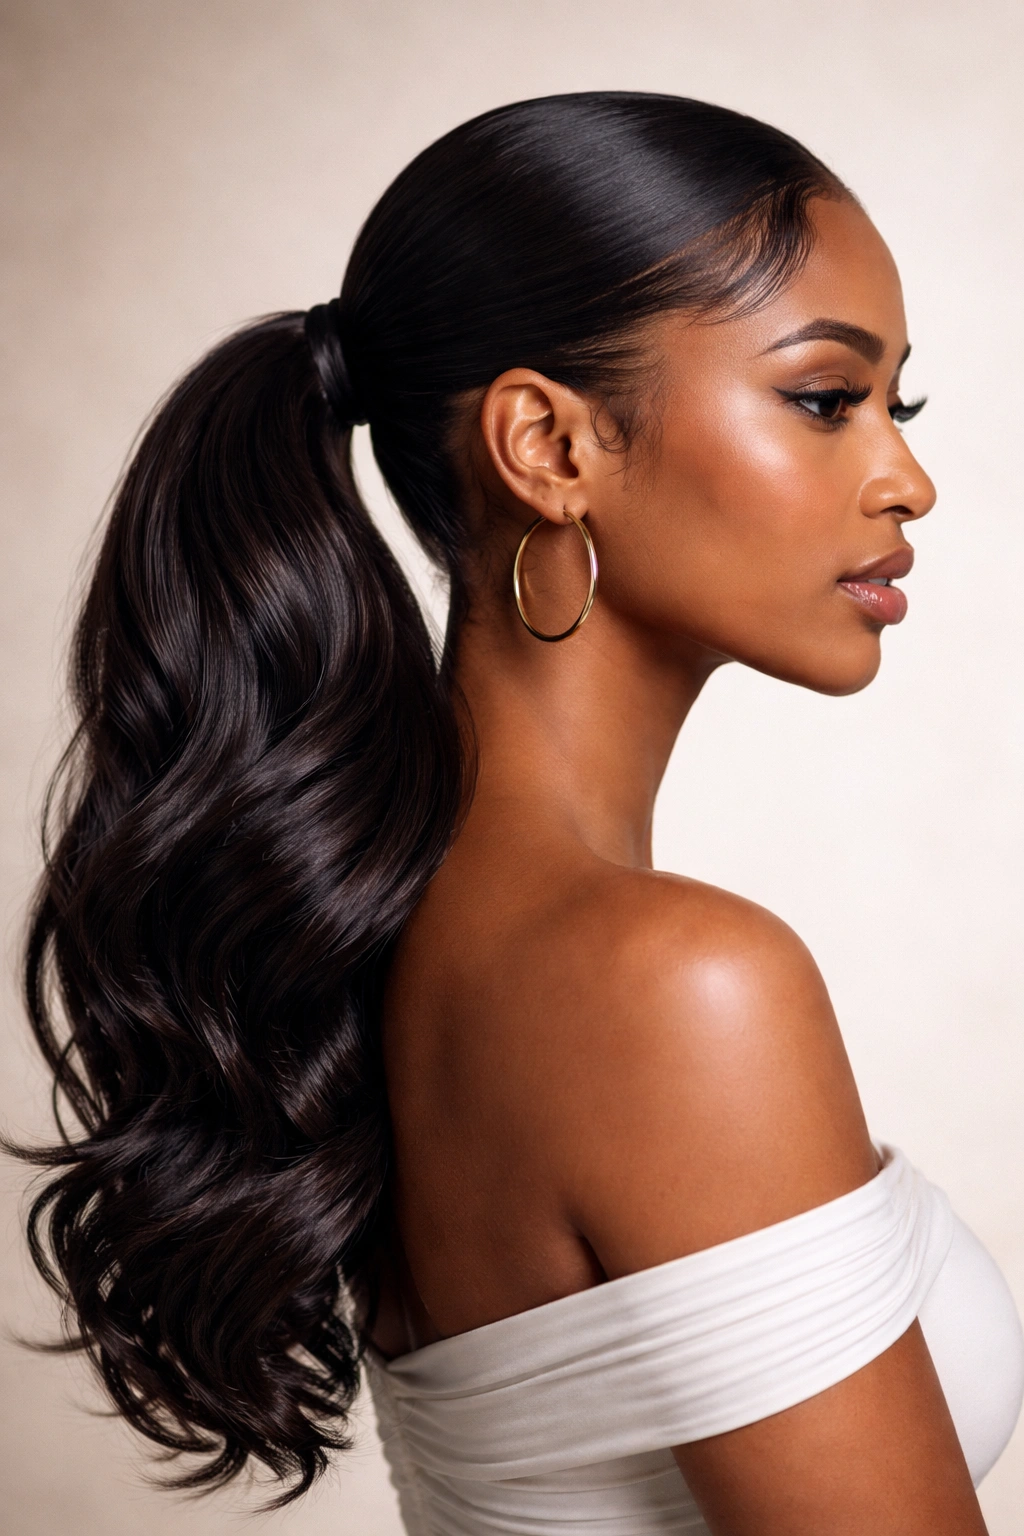
This style sweeps your hair dramatically to one side, creating an asymmetrical, fashion-forward look that photographs beautifully and works particularly well if you have longer natural hair that can really show off the length. The side sweep adds movement and visual interest compared to a centered ponytail, and it’s versatile enough for both casual and formal occasions.
The Visual Impact
A side-swept ponytail elongates the face and draws attention to your profile, making it an excellent choice for date nights or photography. Because the hair is gathered to one side rather than centered, it creates an off-balance elegance that reads as intentional and current. The key to making this work on natural hair is ensuring the smooth, swept section doesn’t flatten your natural curl pattern but rather complements it.
Creating a Side Sweep
- Start with damp or lightly misted hair and apply smoothing gel or edge control to one side of your head, smoothing it diagonally toward the back where your ponytail will sit.
- Gather all your hair toward one side, positioning the ponytail roughly 1-2 inches behind your ear on the side you’ve chosen. This off-center placement is what creates the dramatic sweep.
- Secure with a covered elastic, ensuring the ponytail is positioned where you want it before tightening. Side ponytails work best when they sit slightly lower and more toward the back than a traditional centered high ponytail.
- Smooth the side-swept section with a fine-tooth comb and additional gel or smoothing serum, creating a seamless transition from your hairline to the ponytail base.
- Allow some texture at the crown and let your natural curl pattern show slightly—fighting it completely defeats the purpose of celebrating natural hair.
The benefit: A side ponytail is less likely to pull directly from your crown, which means less tension on your edges and a more protective styling choice overall.
5. The Sleek Bubble Ponytail
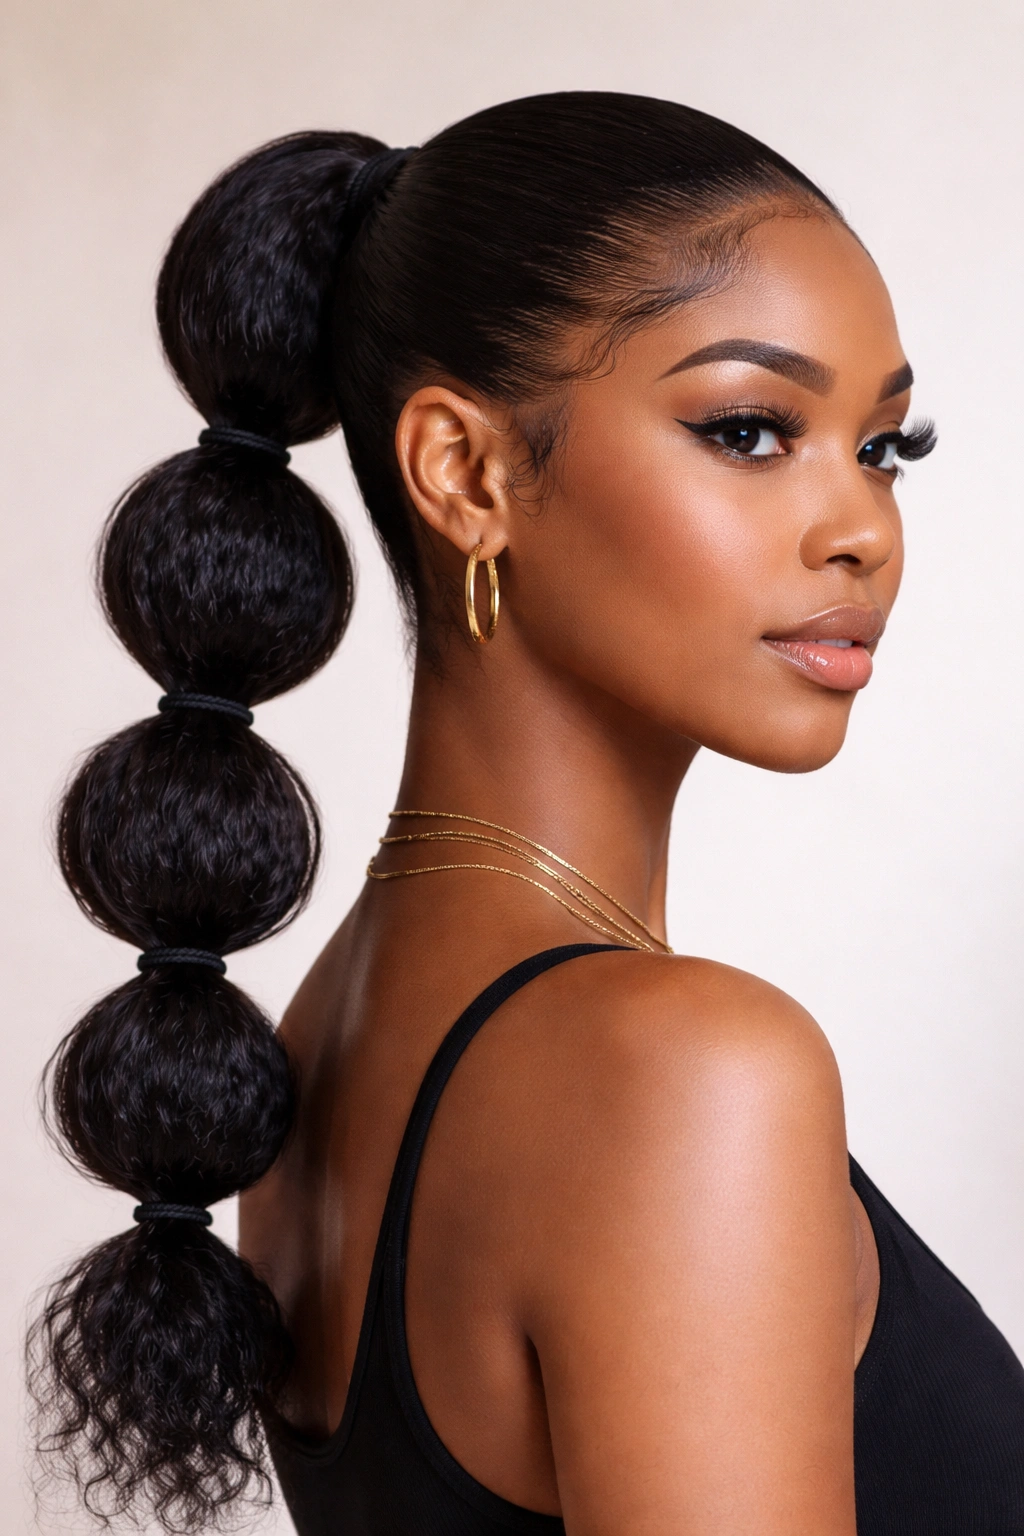
This playful yet polished style divides your ponytail into sections, bunching each section slightly to create a “bubble” effect down the length. It’s more editorial and fashion-forward than a standard ponytail, making it perfect for creative professionals, natural hair enthusiasts who love a statement style, or anyone wanting to try something a little bolder.
The Artistry Behind It
The bubble ponytail is essentially a series of small, intentional buns stacked vertically down your ponytail length. On natural hair, this style showcases texture beautifully because each bubble can display your curl pattern, creating dimensional visual interest from multiple angles. The sleek crown contrasts with the textured bubbles, which is exactly what makes this style so eye-catching.
Executing the Bubble Ponytail
- Create a smooth high or mid-height ponytail using the gel-sleek technique, securing it with a covered elastic.
- Divide your ponytail into 4-5 sections (depending on length) using additional small covered elastics. Space them roughly 2-3 inches apart down the length of the ponytail. These elastics should be snug but not painfully tight.
- Gently push each section slightly upward from the elastic below it, creating a puffy “bubble” effect. You’re essentially creating gathering above each elastic. Do this by loosening each elastic very slightly and repositioning it higher up the ponytail section, which creates the bunching.
- Gently tease or fluff each bubble with your fingers or a fine-tooth comb to maximize the dimensional effect.
- Apply a light smoothing serum or oil to the sleek crown section to ensure it maintains its polish while the bubbles show off your texture.
Pro tip: This style actually looks better with a slightly looser ponytail base than your tightest sleek option. A slightly relaxed base allows the bubbles to fluff more dramatically without fighting tension.
6. The Braided Crown Ponytail
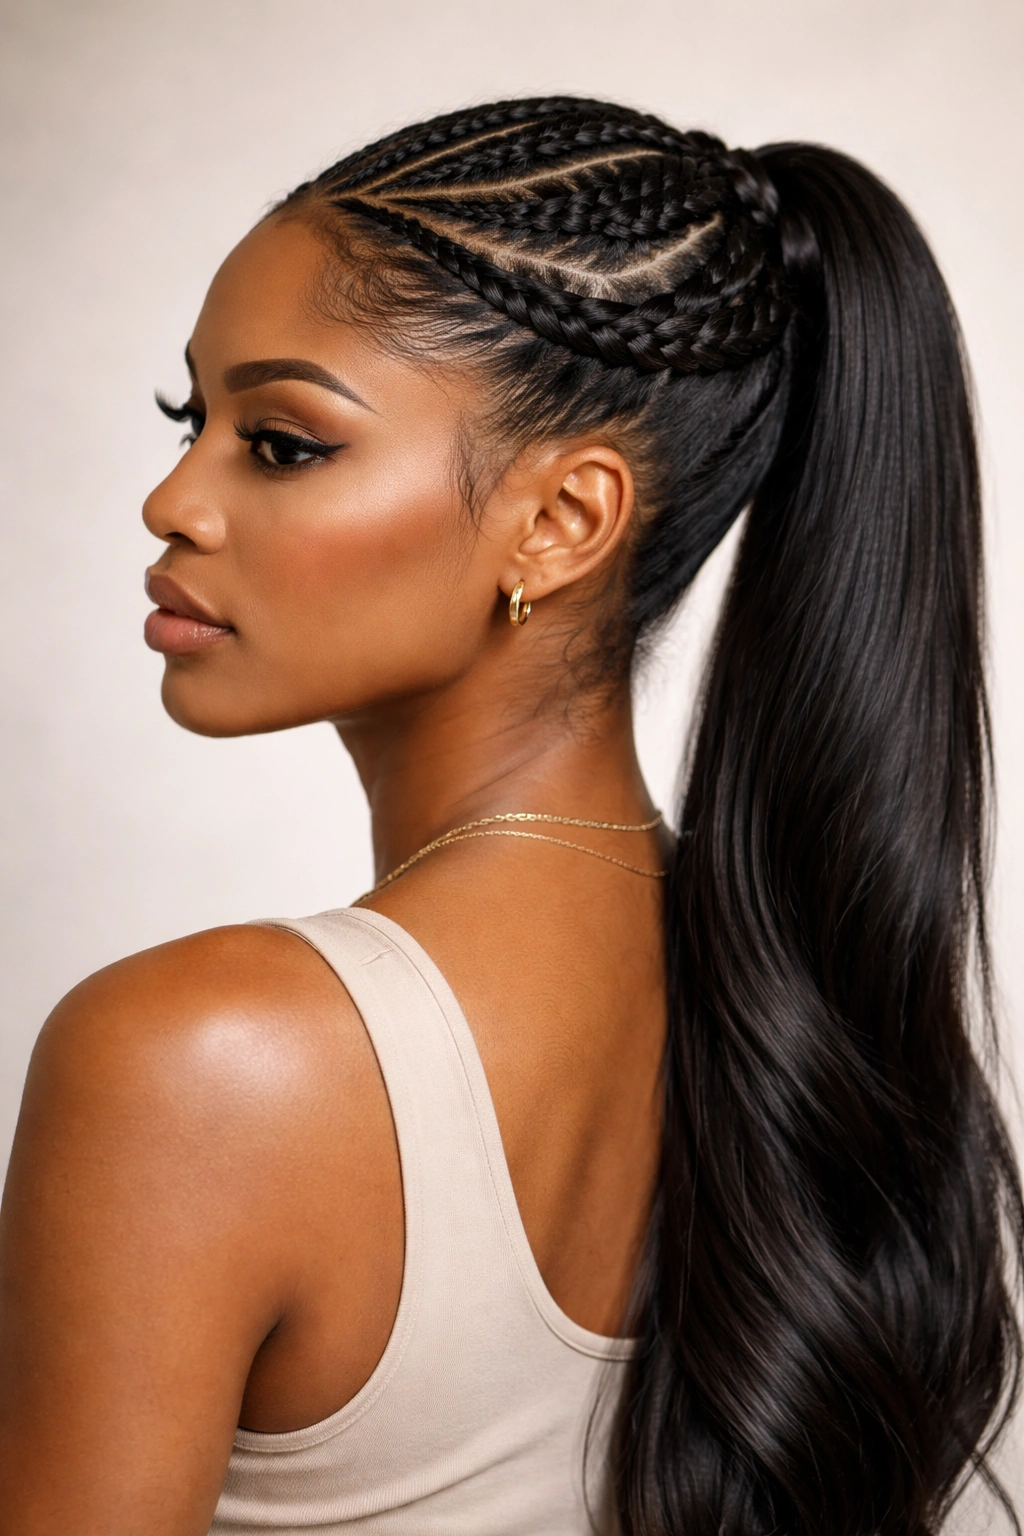
This style incorporates a braid or multiple braids into the ponytail, either by braiding sections before gathering them into the ponytail or by braiding the ponytail itself. It’s more textured and visually intricate than a completely sleek style, adding sophistication and artistry while still maintaining the clean, polished effect that defines “sleek” ponytails for natural hair.
Why Braiding Adds Dimension
Braiding natural hair creates defined visual texture that’s both protective and stunning. A braid woven through your ponytail or incorporated into the crown section adds depth, movement, and visual interest without requiring you to achieve a glass-smooth finish. This is particularly powerful for natural hair because braids celebrate curl patterns rather than fighting them.
Building a Braided Crown Ponytail
- Section your hair into 3-5 sections depending on your texture and hair density. You’ll braid each section and then combine them into your ponytail.
- Smooth the sides and crown with gel, but don’t worry about making them perfectly sleek—the braids will be the focal point.
- Create a Dutch braid or French braid in each section, starting from the front of that section and braiding backward toward the crown. Dutch braids (where you braid under rather than over) create a raised, dimensional appearance that’s ideal for this style.
- Gather all your braided sections into a single ponytail at the crown or nape (depending on the look you want), securing with a covered elastic.
- Smooth any flyaways around the crown and hairline with edge control, but allow the braids themselves to maintain their texture and definition.
The advantage: This style is highly protective because the braids contain your hair and reduce manipulation throughout the day. It also lasts longer than a sleek ponytail—the braids hold their shape for 2-3 days easily.
7. The Sleek Puff with Ponytail Tail
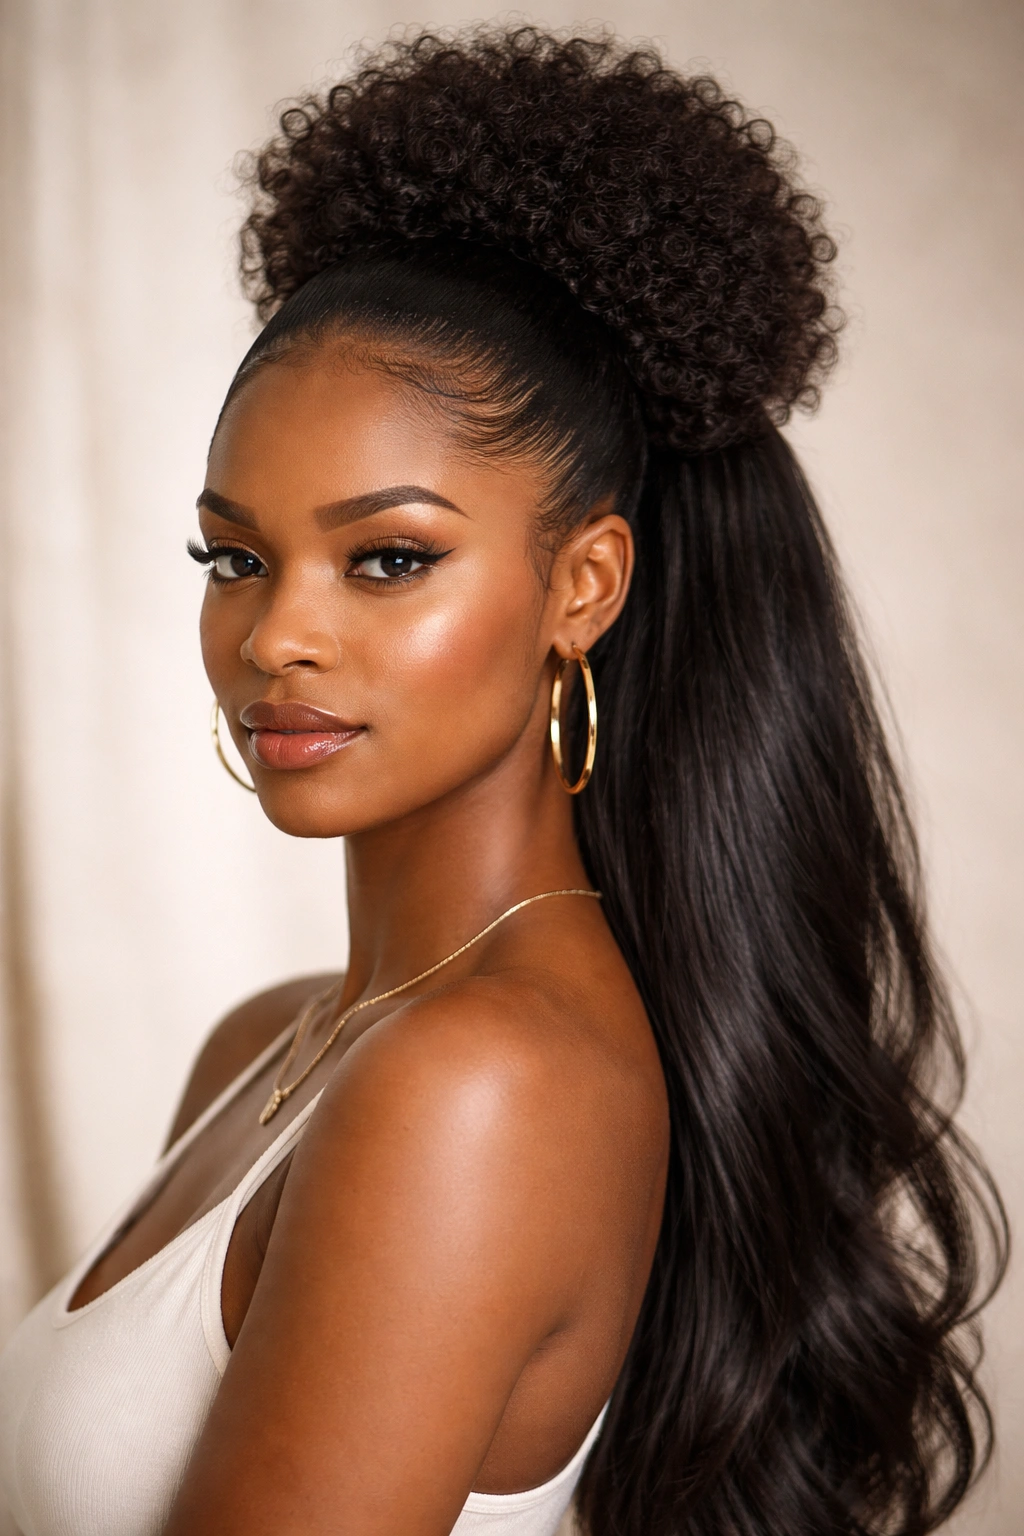
This hybrid style creates a high puff at the crown (gathering all your hair up and creating volume) while leaving a long, sleek ponytail section trailing below. It’s simultaneously cute and sophisticated, manageable and visually impressive—a genuinely practical style that works for everything from gym sessions to office meetings to evening events.
The Best of Both Worlds
You get the visual fullness and textured beauty of a puff at the crown, plus the polished, sleek detail of a ponytail. The puff celebrates your natural curl pattern while the ponytail section maintains that sleek aesthetic. This is hands-down one of the most flattering natural hair ponytail styles because it showcases volume, length, and texture all at once.
Creating the Sleek Puff-to-Ponytail
- Gather your hair high at the crown and secure it loosely with a covered elastic. Don’t worry about smoothness yet—this will be your puff base.
- Create a small, sleek ponytail using the upper portion of your gathered hair (about the top quarter or third). Apply smoothing gel to this section and gather it tightly into a smaller ponytail sitting about 1 inch above your main elastic, securing it with a second, thinner elastic.
- Gently pull and fluff the hair below your sleek ponytail base to create volume and texture. This section becomes your puff—you want it full, dimensional, and celebratory of your natural curl pattern.
- Smooth your hairline and crown with edge control, creating a neat frame around the puffed section.
- Optional: Wrap a thin section of your sleek ponytail around the base of your puff for a polished finish (same wraparound technique as the low ponytail).
Worth knowing: The key is creating two distinct tiers—a tight, polished ponytail section above, and a full, textured puff below. The contrast makes the style work.
8. The Sleek Ponytail with Accessorized Crown
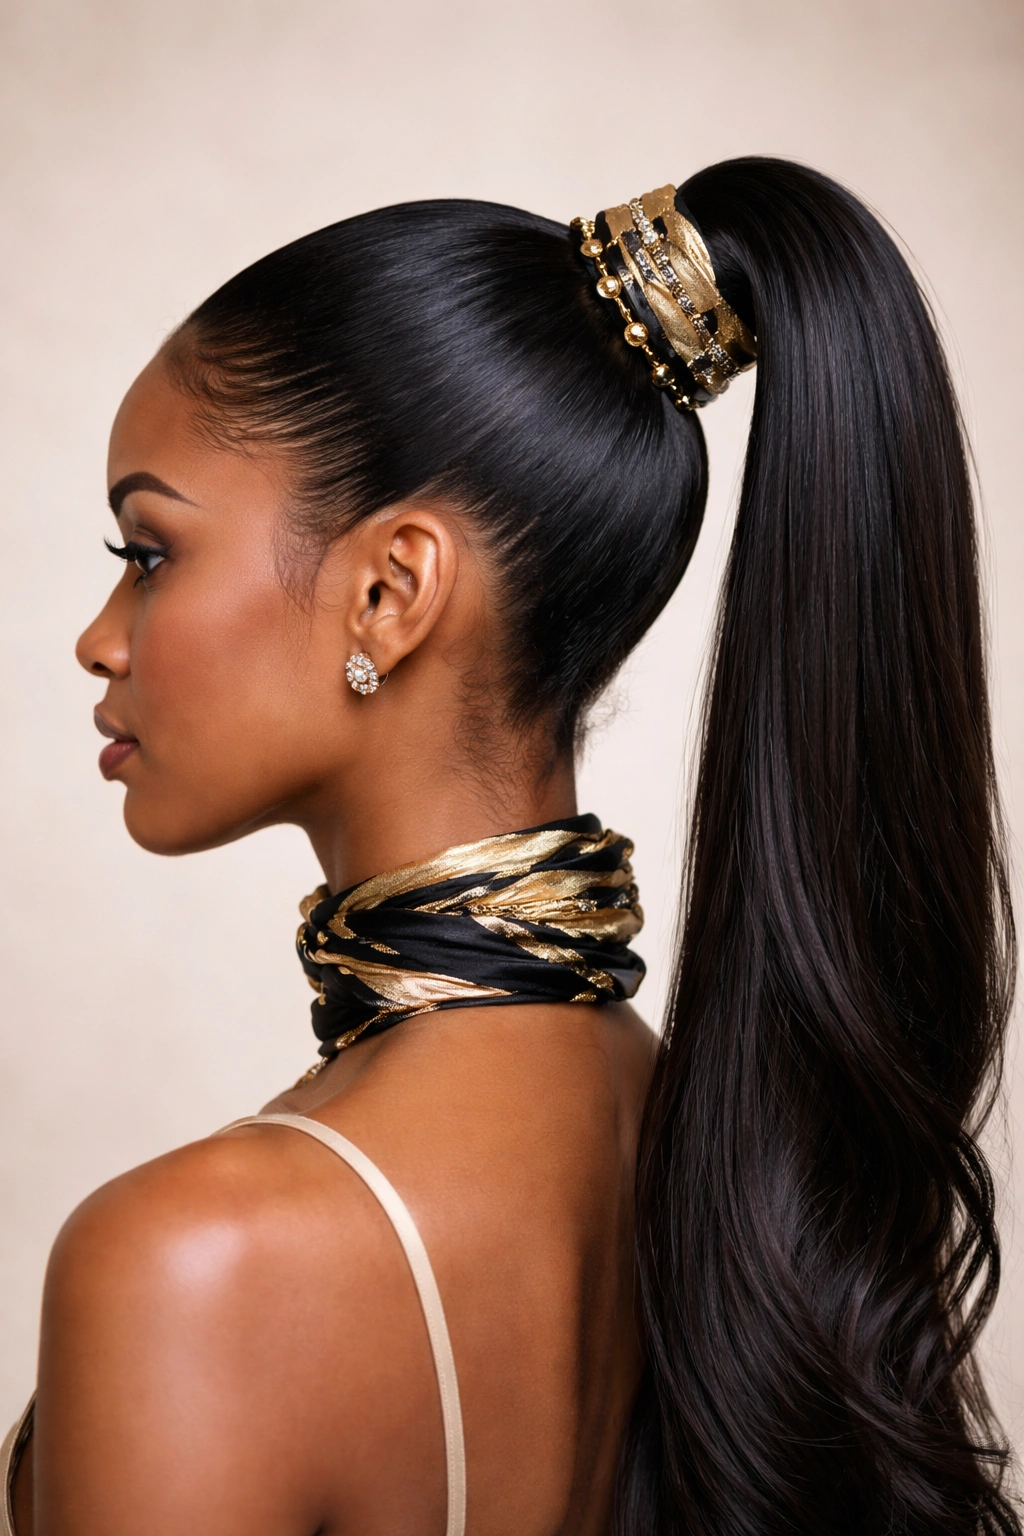
While the ponytail itself remains smooth and polished, this style elevates the look by adding decorative elements—cuffs, clips, scarves, or ornamental bobby pins—along the crown and ponytail base. It transforms a basic sleek ponytail into something more intentional and personalized, perfect for anyone who loves styling details and wants to express creativity without sacrificing the clean, polished aesthetic.
The Personalization Power
This is where sleek ponytails become truly your own. A silk scarf wrapped and tied at the ponytail base, gold or silver cuffs encircling the base, a decorative hair comb secured at an angle, or coordinated bobby pins arranged deliberately along your crown can completely change the vibe of your ponytail. It’s the difference between “polished” and “intentionally styled.”
Adding Accessories Strategically
- Create your base sleek ponytail using whichever height and style appeals to you (high, low, side-swept).
- Choose your accessory, keeping in mind the occasion and your outfit. Metallic cuffs feel edgy; scarves feel playful; ornamental combs feel elegant.
- For a wrapped scarf: Take a silk or satin scarf, fold it into a triangle, and wrap it around your ponytail base, tying it at one side. Let the triangle’s point hang as decoration or tuck it into the wrap.
- For cuffs: Slide them onto your ponytail before securing it, or position them after. Cuffs work best in groups of 2-3 for visual interest.
- For a hair comb or decorative clip: Position it at an angle through your ponytail base or at the crown, ensuring it’s secure. This typically requires a bobby pin on the back side for stability.
- For intentional bobby pins: Use pins in metallic finishes or decorative styles, clustering 2-3 of them at your crown or ponytail base in an asymmetrical but intentional arrangement.
Pro tip: The more minimalist your base ponytail, the more room your accessories have to shine. Don’t compete—let either your ponytail or your accessories be the statement.
9. The Center-Parted Sleek Ponytail
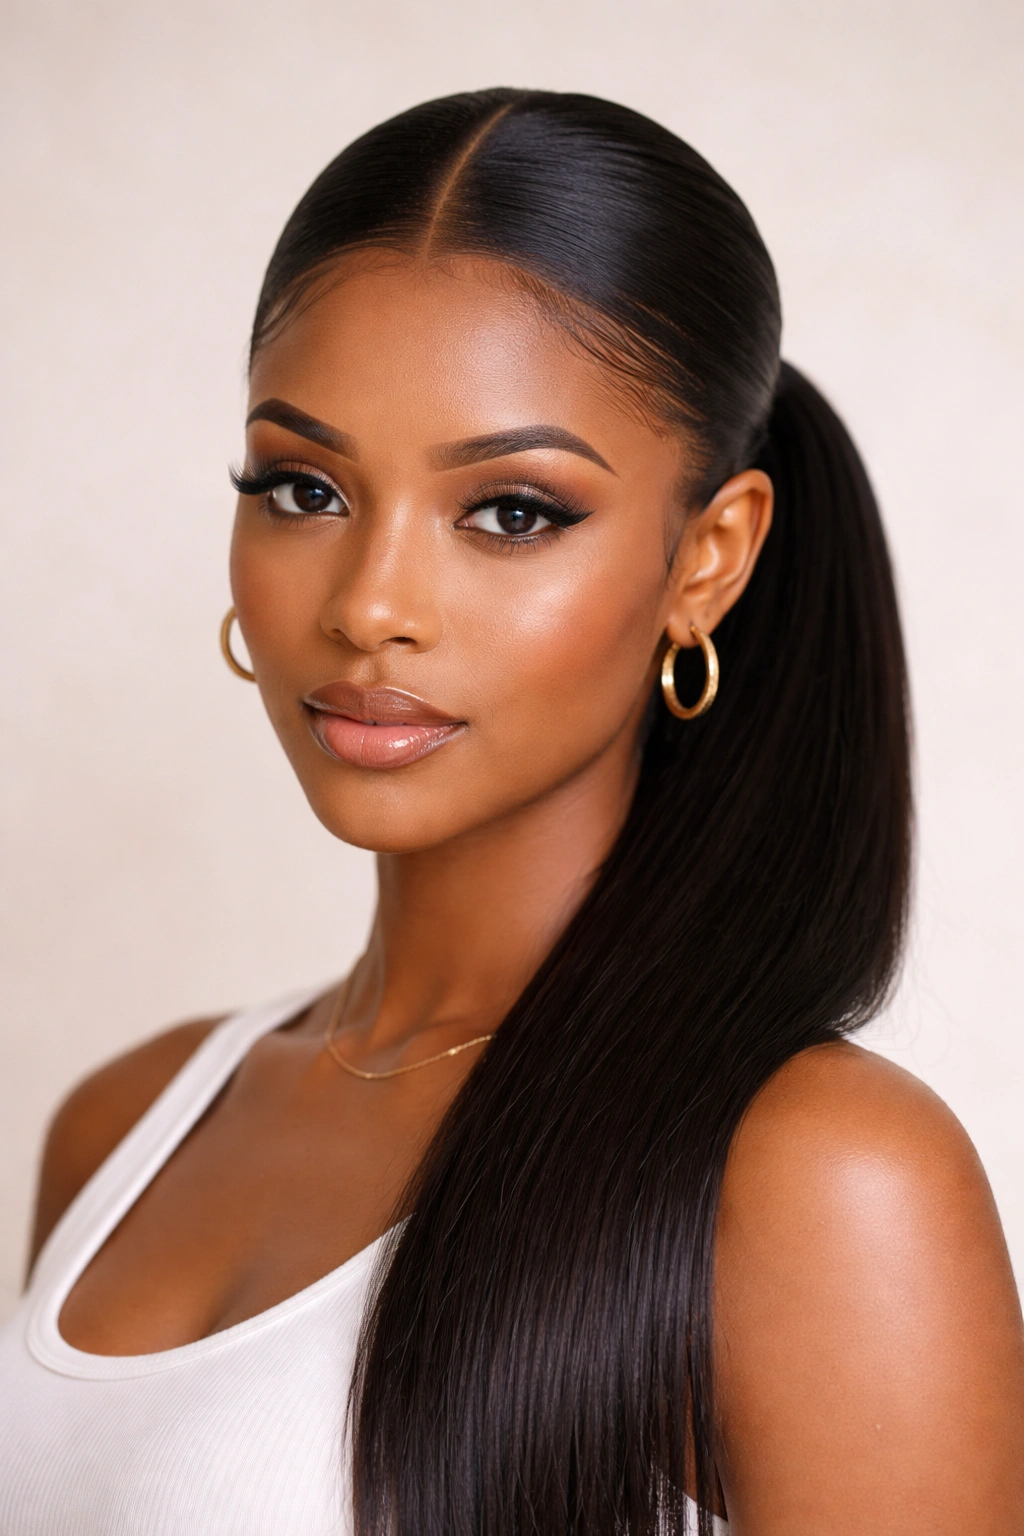
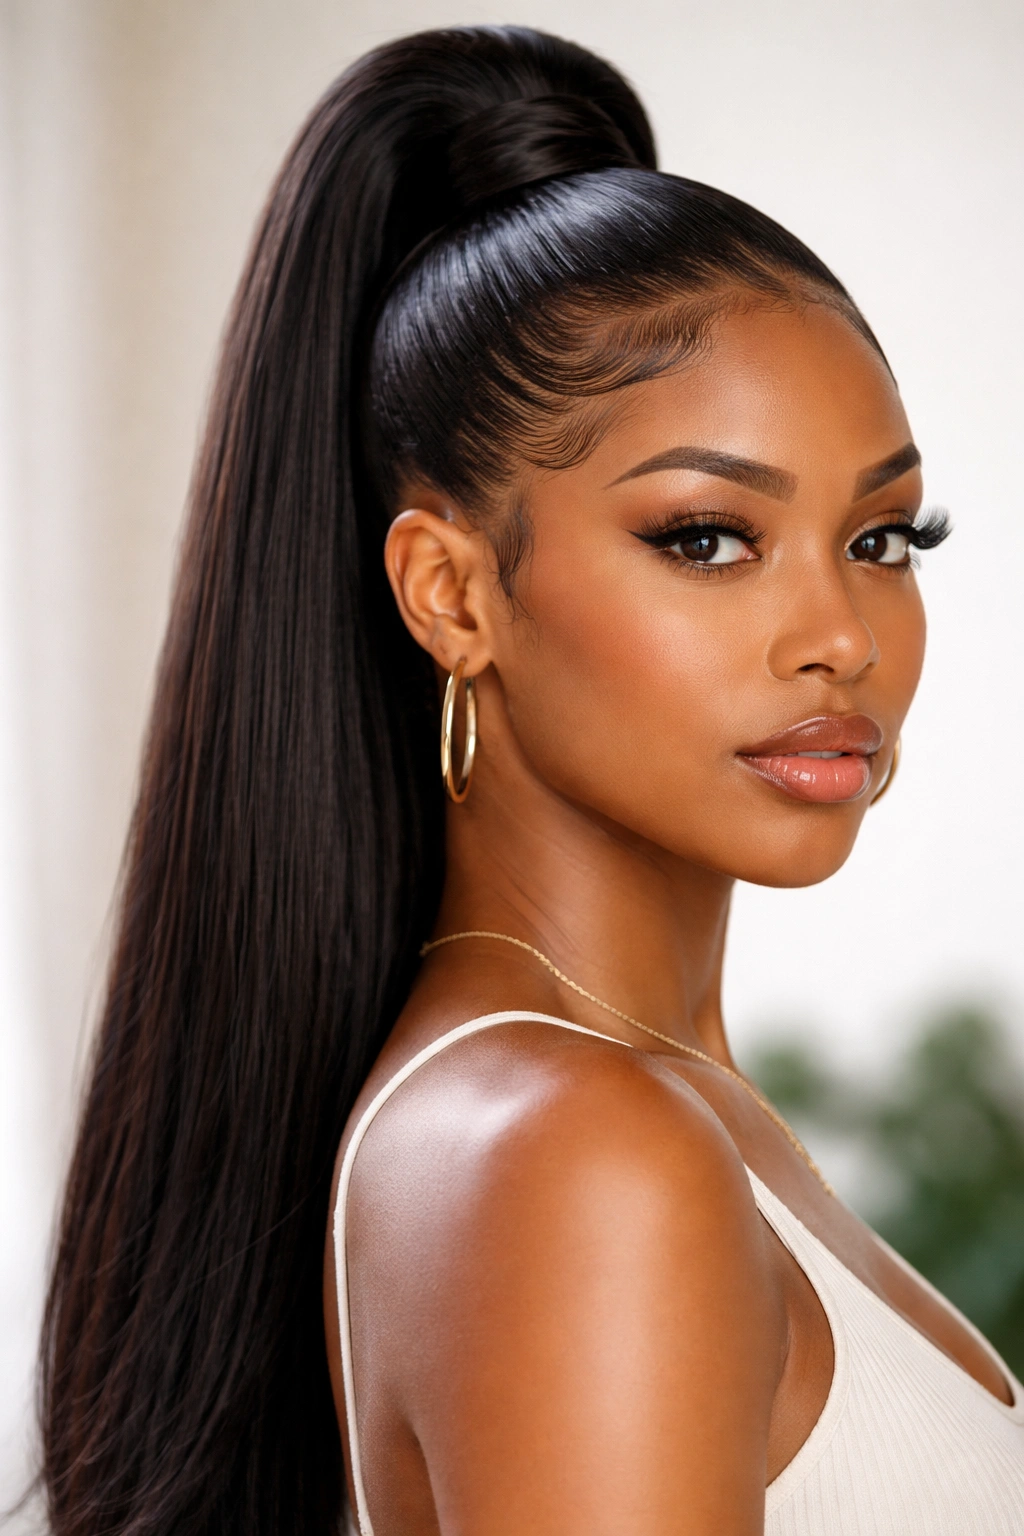
This style creates a clean center part from your hairline all the way to your ponytail base, adding architectural precision and a streamlined appearance that’s elegant and undeniably polished. The center part frames your face symmetrically and creates a visual line that elongates, making this style particularly flattering for many face shapes.
The Geometric Appeal
A center part reads as intentional, precise, and deliberately styled. It’s a classic choice that never feels dated, and it works on virtually any face shape and hair texture. For natural hair, a center part with a sleek ponytail creates beautiful symmetry that showcases your curl pattern while maintaining polish.
Executing the Center Part Sleek Ponytail
- Create a precise center part by using a fine-tooth comb to part your hair directly down the middle from your hairline to the nape of your neck. You want this line to be visible and clean.
- Section your hair into two halves and work on one side at a time. Apply smoothing gel along your part line and down the sides of your head.
- Smooth each side with your comb, working the gel through in the direction away from your center part. Both sides should be sleek and smooth, with the part line remaining visible and clean.
- Gather both sides into a ponytail at your chosen height (high, mid, or low), ensuring the part remains visible at the crown.
- Smooth your hairline and any flyaways with edge control, maintaining the precise center line.
The advantage: A center part actually helps create the illusion of more hair at your crown because it distributes volume equally on both sides. This style is particularly good if your ponytail feels thin or if you’re working with finer-textured natural hair.
10. The Sleek Ponytail with Face-Framing Strands
This modern, softer take on the sleek ponytail pulls most of your hair back into a smooth, polished base while intentionally leaving two small sections of hair loose at the front to frame your face. It combines the polish of a sleek style with the softness of a face-frame, creating a look that’s current, intentional, and incredibly flattering.
Why Face-Framing Works
Face-framing pieces soften a sleek style and prevent it from feeling severe or overly tight. They add an element of ease and approachability while maintaining the polished aesthetic. This is particularly effective for natural hair because the framing pieces can show off your curl pattern up close, drawing attention to your face rather than pulling everything back.
Creating Face-Framing Pieces
- Identify your face-framing sections by taking a small, vertical section of hair from each temple (about the thickness of a pencil). These pieces should be long enough to reach at least to your chin, ideally longer.
- Set these sections aside by clipping them out of the way while you create your sleek ponytail with the rest of your hair.
- Create your sleek ponytail using your chosen technique, pulling all your remaining hair back smoothly and securing it with a covered elastic.
- Release your face-framing pieces and apply a smoothing serum or light gel to them. Style them however you’d like—they can hang straight, be twisted, braided, or curled, depending on your preference.
- Optional: Tuck the ends of your face-framing pieces slightly behind your ears once they’ve passed your cheekbones, creating a soft, intentional frame without them interfering with your day.
Worth knowing: The face-framing pieces should feel like a deliberate style choice, not like hair that escaped your ponytail. Be intentional about their placement and styling.
11. The Sleek High Ponytail with Defined Edges
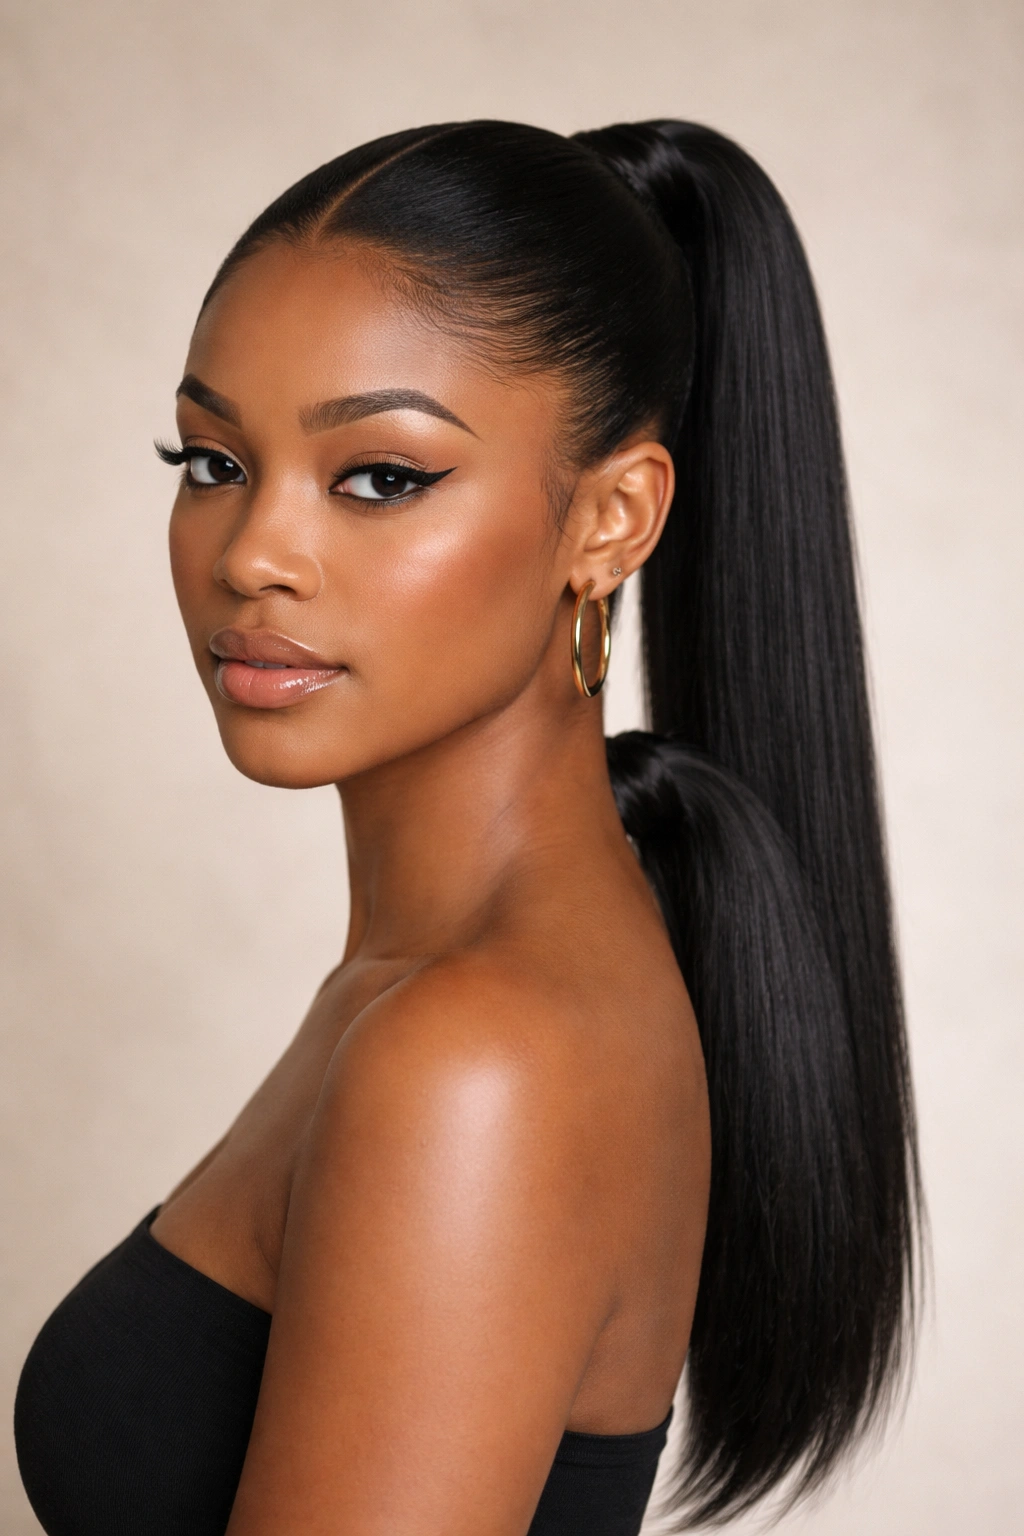
This style emphasizes the precision of your edges—your hairline, temples, and nape—treating them as part of the overall aesthetic rather than just managing them as an afterthought. Perfect edges transformed into a stylistic feature create an ultra-polished appearance that reads as high-effort and intentional. This style is particularly impactful for natural hair because strong, well-defined edges create a powerful visual frame for your face.
Edge Definition as Art
Well-maintained edges are an art form in natural hair styling. Rather than just smoothing them down, this style celebrates them as a design element. Defined, gelled edges create geometric precision that contrasts beautifully with the curved softness of your ponytail, creating visual interest and intentionality.
Perfecting Your Edges with the Ponytail
- Start with a high ponytail at your crown, applying smoothing gel or edge control to the ponytail base and crown section.
- Focus intensively on your edges using a soft-bristled toothbrush or edge brush. Create clean lines: smooth your hairline in a slight curve from temple to temple, define sharp angles at your temples, create a clean line at the nape of your neck, and define the edges of your part if you’re using one.
- Use a strong-hold edge control or lightweight gel for this section—you want definition that lasts all day without flaking or crunchiness.
- Allow the gel to dry completely (3-5 minutes) before touching your edges. The edges will feel crispy when wet but will soften as they fully dry.
- View your edges as design elements: create intentional curves, sharp angles, or geometric patterns that feel like part of your overall style rather than just accident management.
Pro tip: The best edge definition happens with a firm but not painful ponytail base. If your edges hurt, your ponytail is too tight, which will eventually damage your hairline.
12. The Sleek Two-Ponytail Style
Also known as “double ponytails,” this style creates two sleek ponytails positioned vertically—one at the crown and one at the nape—creating a striking, dimensional look that’s both youthful and intentionally styled. It’s a fashion-forward choice that works beautifully for natural hair, allowing you to show fullness and texture while maintaining the sleek aesthetic.
The Modern Appeal
Two ponytails feel more current and editorial than a single ponytail, perfect for creative professionals, content creators, or anyone who loves making a statement with their style. On natural hair, this style is particularly effective because two smaller ponytails can look fuller and more dimensionally interesting than one large one, and the gap between them showcases your texture beautifully.
Building Your Two-Ponytail Style
- Create a sleek high ponytail at your crown using your standard gel-smoothing technique. Secure it tightly with a covered elastic.
- Create a second sleek ponytail at the nape of your neck, positioning it about 3-4 inches below your first ponytail. This ponytail should be equally smooth and polished.
- Ensure both ponytails are exactly centered and equidistant from your center part line. They should be perfectly symmetrical.
- Smooth the section of hair between your two ponytails so it blends seamlessly with both. You want the transition to feel intentional, not like a gap.
- Optional: Wrap a thin section of hair around the base of each ponytail for a polished, finished appearance.
- Style the tails however you’d like—they can hang long and straight, be braided, curled, or bunched into small buns.
The advantage: This style distributes weight across two bases instead of one, reducing tension on your crown and edges. It’s also highly protective because it contains your hair in distinct sections, reducing daily manipulation.
Final Thoughts

A sleek ponytail on natural hair is far more than just a practical way to manage your hair—it’s a statement of style, an expression of your creativity, and a celebration of your curl pattern. Whether you choose the timeless elegance of a low wraparound ponytail, the modern edge of a bubble ponytail, or the polished precision of a center-parted style, the key is understanding your specific hair texture and what techniques will give you longevity and integrity for your edges and hairline.
The products you choose matter tremendously. Lightweight smoothing gels and edge controls that won’t flake or feel heavy, covered elastic bands that won’t snag, and perhaps most importantly, a willingness to work with your natural texture rather than fighting it—these elements transform a basic ponytail into something genuinely beautiful. Your hair is strong, versatile, and capable of far more than most styling guides suggest.
Experiment freely with these styles. Not every single one will feel like “you,” and that’s completely fine. Some might require slightly different techniques based on your specific curl pattern, porosity, or hair density. Pay attention to which styles keep your edges protected, which ones make you feel confident, and which ones last longest throughout your day. Over time, you’ll develop intuition for what works, and styling will feel less like following instructions and more like expressing yourself.