A braided ponytail is one of those rare hairstyles that works for literally anyone—it flatters every face shape, works with any hair type, and shifts instantly from casual to formal depending on how you style it. The beauty is that the braid does the heavy lifting, creating texture, dimension, and a polished look that feels intentional without requiring hours of prep. Whether you’re heading to the gym, the office, a wedding, or just running errands, there’s a braided ponytail variation that fits the occasion perfectly.
What makes braided ponytails so special is their versatility. You can wear them sleek and refined, messy and romantic, tight and sporty, or loose and flowing. The braid can wrap around the base, run through the center, weave along the side, or showcase multiple strands plaited together. Each variation completely changes the vibe while still delivering that signature polished, put-together look that somehow feels effortless.
The real secret isn’t complexity—it’s understanding which braided ponytail suits which moment and how to execute it with confidence. A Dutch braid wrapped around the base feels sophisticated for date night. A side braid that feeds into a high pony works beautifully for professional settings. A loose, textured French braid ponytail reads as romantically undone for casual hangouts. Once you understand the mechanics and the effect each creates, you can pivot between them depending on your mood, outfit, and plans.
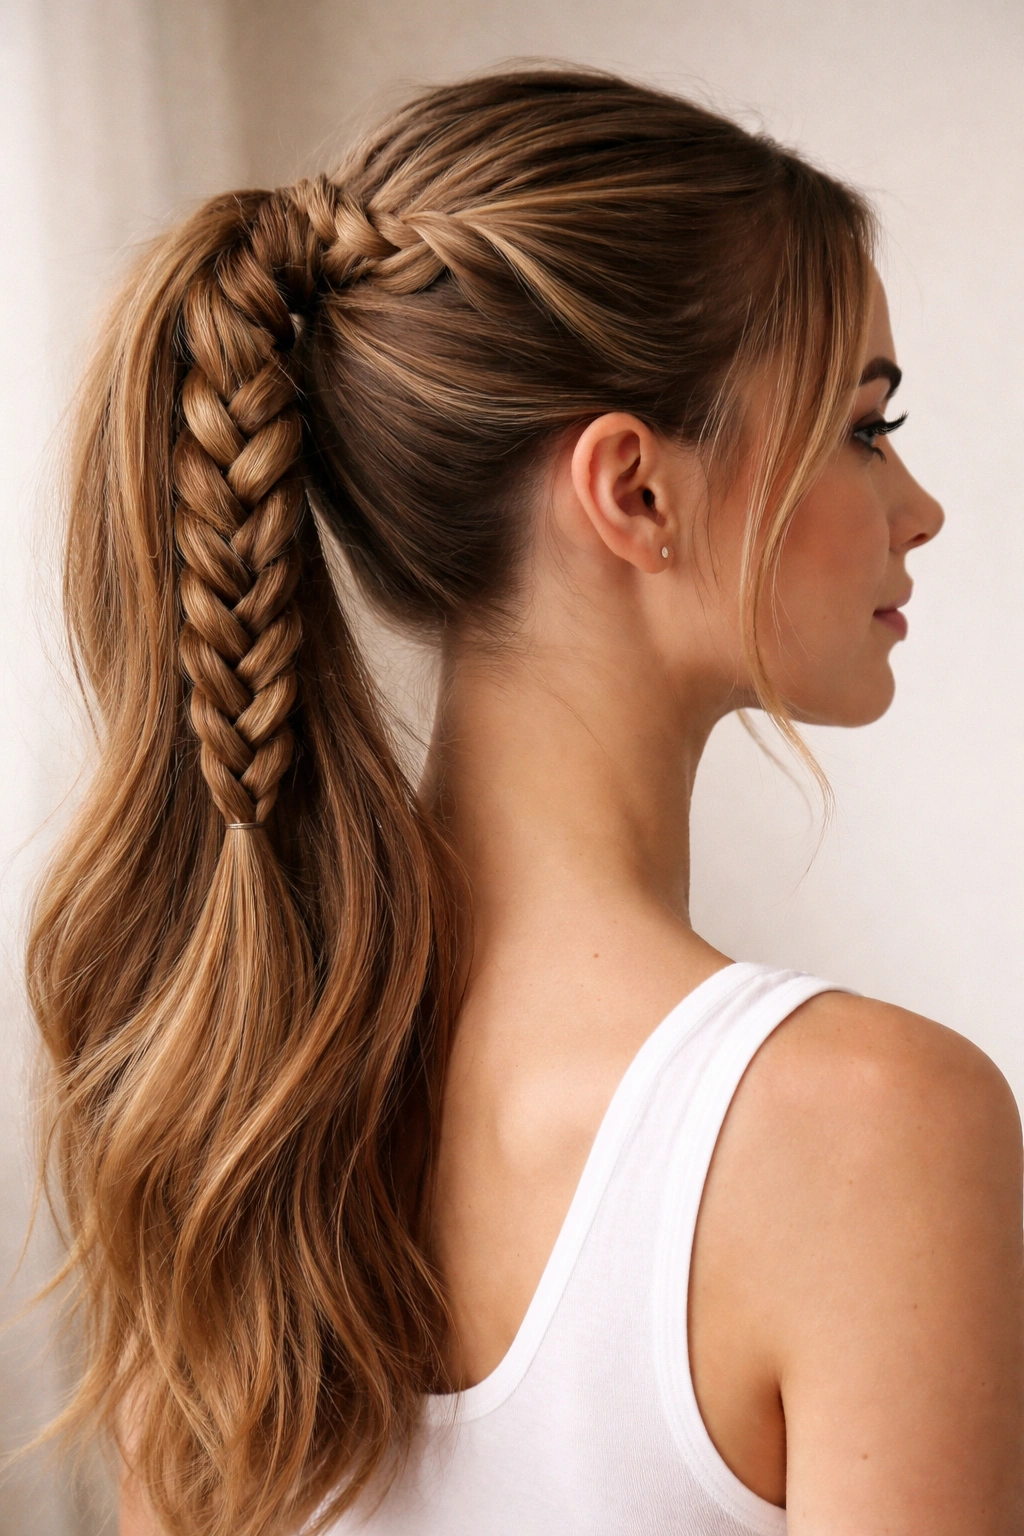
1. The Classic French Braid Ponytail
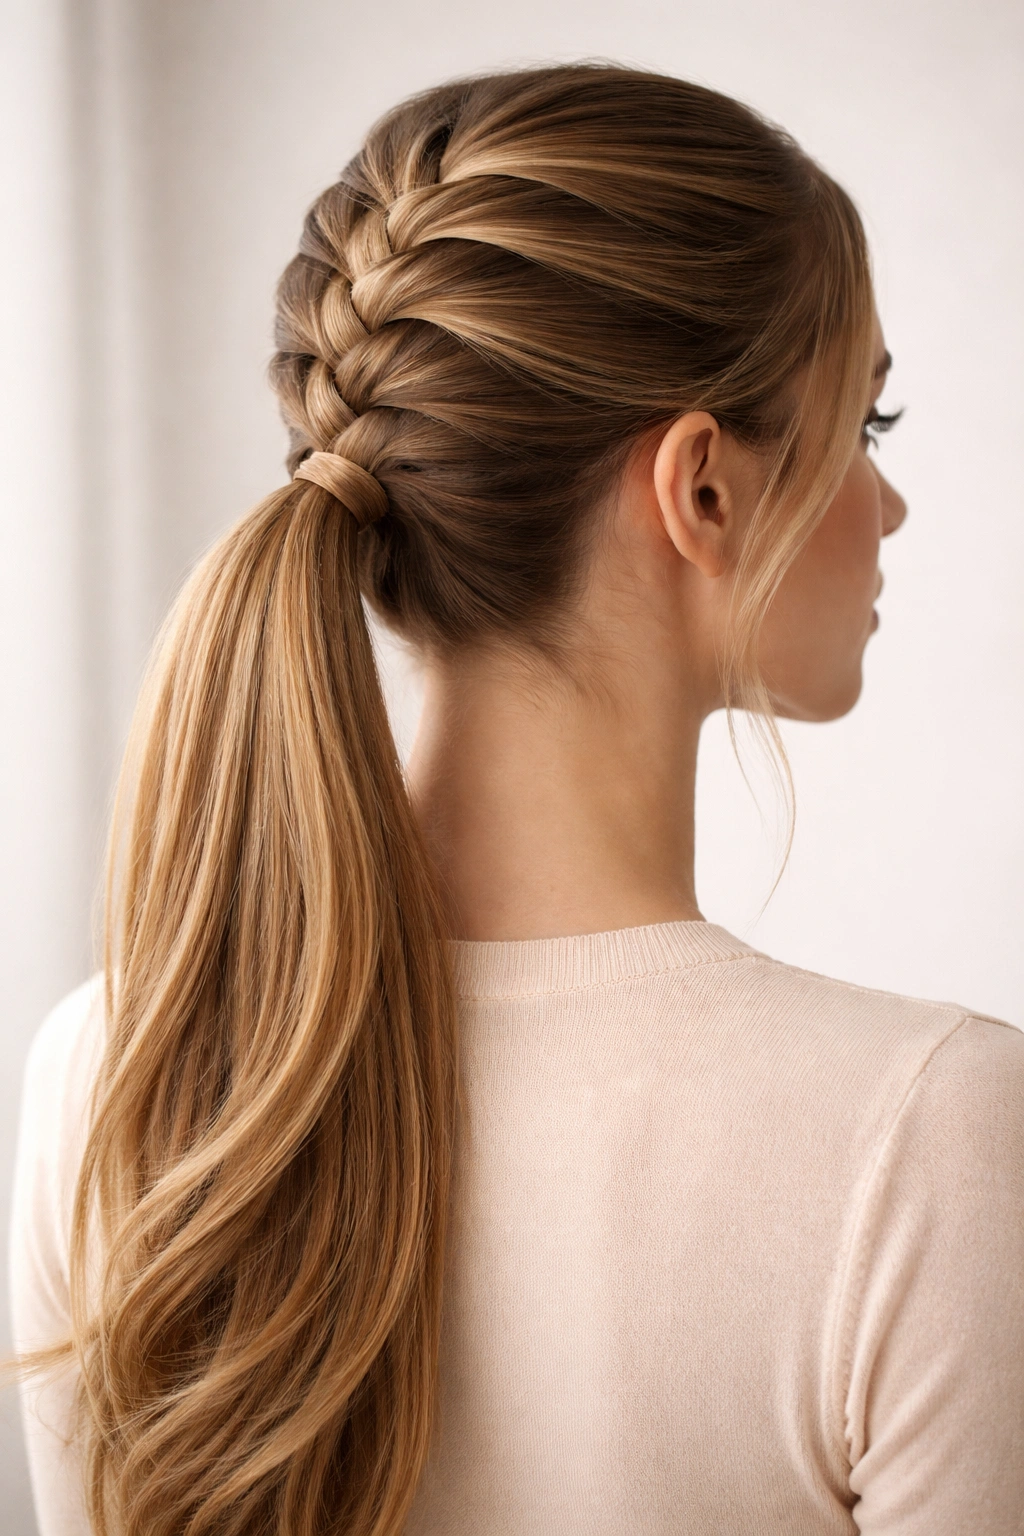
The French braid ponytail is the foundation style that sits at the intersection of elegant and effortless. You start braiding at the crown, feeding hair from either side into the braid as you move downward, and let the braid flow directly into your ponytail. This creates one continuous, unified look that feels polished without appearing stiff.
Why This Style Works for Any Occasion
A French braid ponytail works because it’s recognizable, always flattering, and reads as intentional without being overdone. The braid adds visual interest and texture to what could be a simple ponytail, but it doesn’t scream “I spent an hour on my hair.” It’s casual enough for weekend errands and refined enough for professional meetings or casual dates. The key is that the braid keeps flyaways secured while creating a smooth, finished line from crown to tail.
How to Achieve It and Make It Last
Start with hair that has light texture—either straight hair with a little texture spray or hair that’s been air-dried or lightly waved. Section off hair at your crown, divide it into three strands, and begin a standard three-strand braid. As you braid downward, pick up a small section from the left side, add it to the left strand, cross it over the center, then pick up a section from the right side and repeat. Keep the braid snug but not uncomfortably tight. Braid all the way down to the nape of your neck, then gather all your hair into a ponytail at your preferred height. Secure with an elastic, then gently pull the braid slightly looser to add dimension and soften the line. This takes about 5-7 minutes and holds all day with a light hairspray.
2. The Dutch Braid Wrapped Ponytail
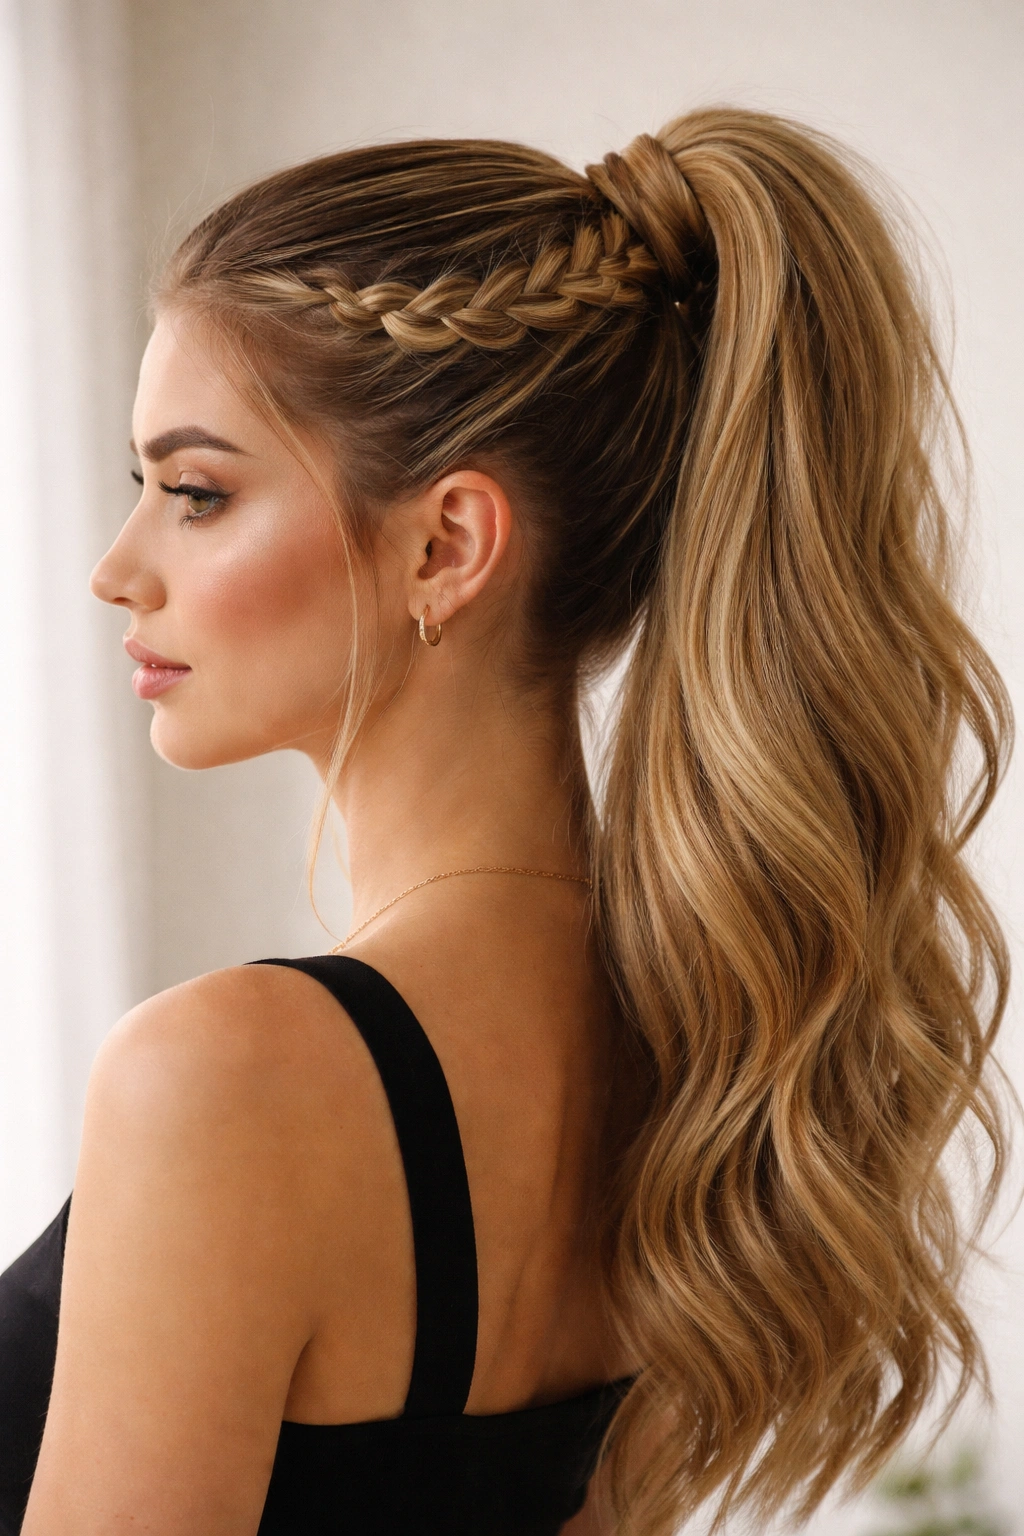
A Dutch braid is essentially a French braid’s textured cousin—instead of crossing strands over the center, you cross them under, creating a braid that sits on top of your hair and reads as more dimensional and graphic. When you wrap a Dutch braid around the base of a ponytail, it adds an architectural quality that feels designer-level polished.
What Makes This Style Stand Out
The Dutch braid wrapped ponytail works because it looks intentional, structured, and more intricate than it actually is. Wrapping the braid around the base creates a crown-like effect that frames your face beautifully and adds height without actually requiring more volume. This style reads as more formal than a standard French braid ponytail—it’s ideal for weddings, date nights, or any occasion where you want to look a bit more dressed up without going full glam.
Building the Look Step by Step
Start by blow-drying your hair smooth or creating light waves if your hair tends toward flatness. Create a high ponytail at the crown—this becomes your anchor point. Before securing it, create a Dutch braid by taking a small section of hair from one side of your head at the temple, dividing it into three strands, and braiding downward while picking up sections from both sides underneath each strand. Once you’ve braided around to the back of your head, feed the remaining length of the braid around the base of your ponytail like a spiral, securing it with bobby pins and finishing with hairspray. The braid should wrap completely or nearly completely around the elastic. This takes about 10 minutes total and creates an incredibly polished effect that lasts for hours.
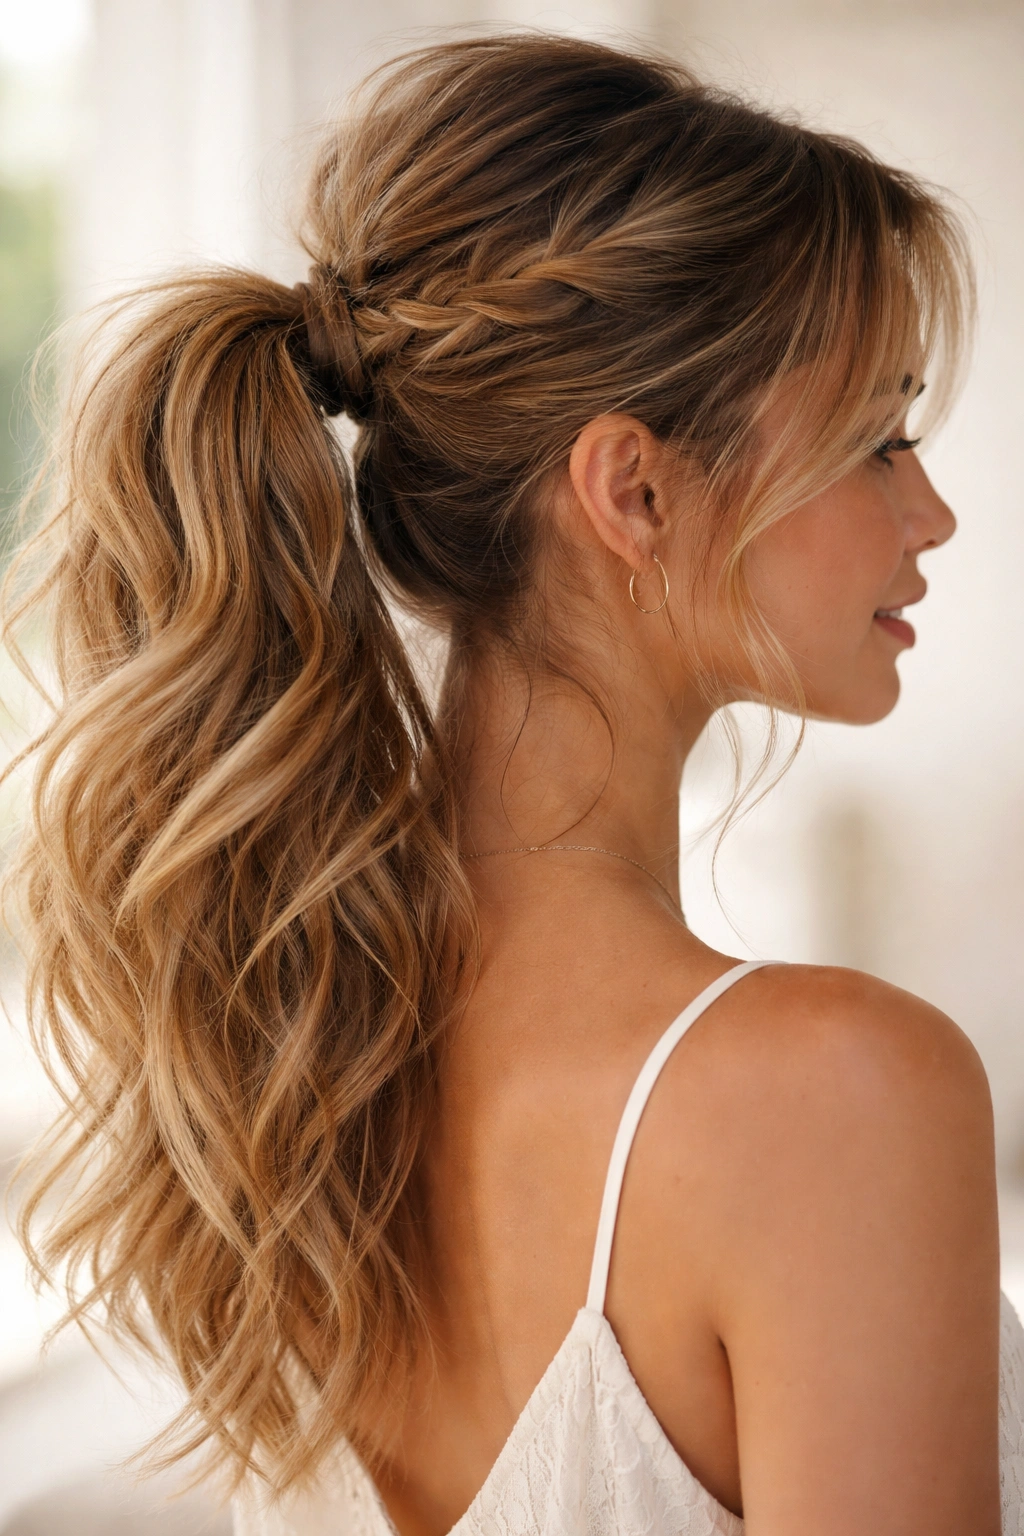
3. The Loose Textured Ponytail Braid
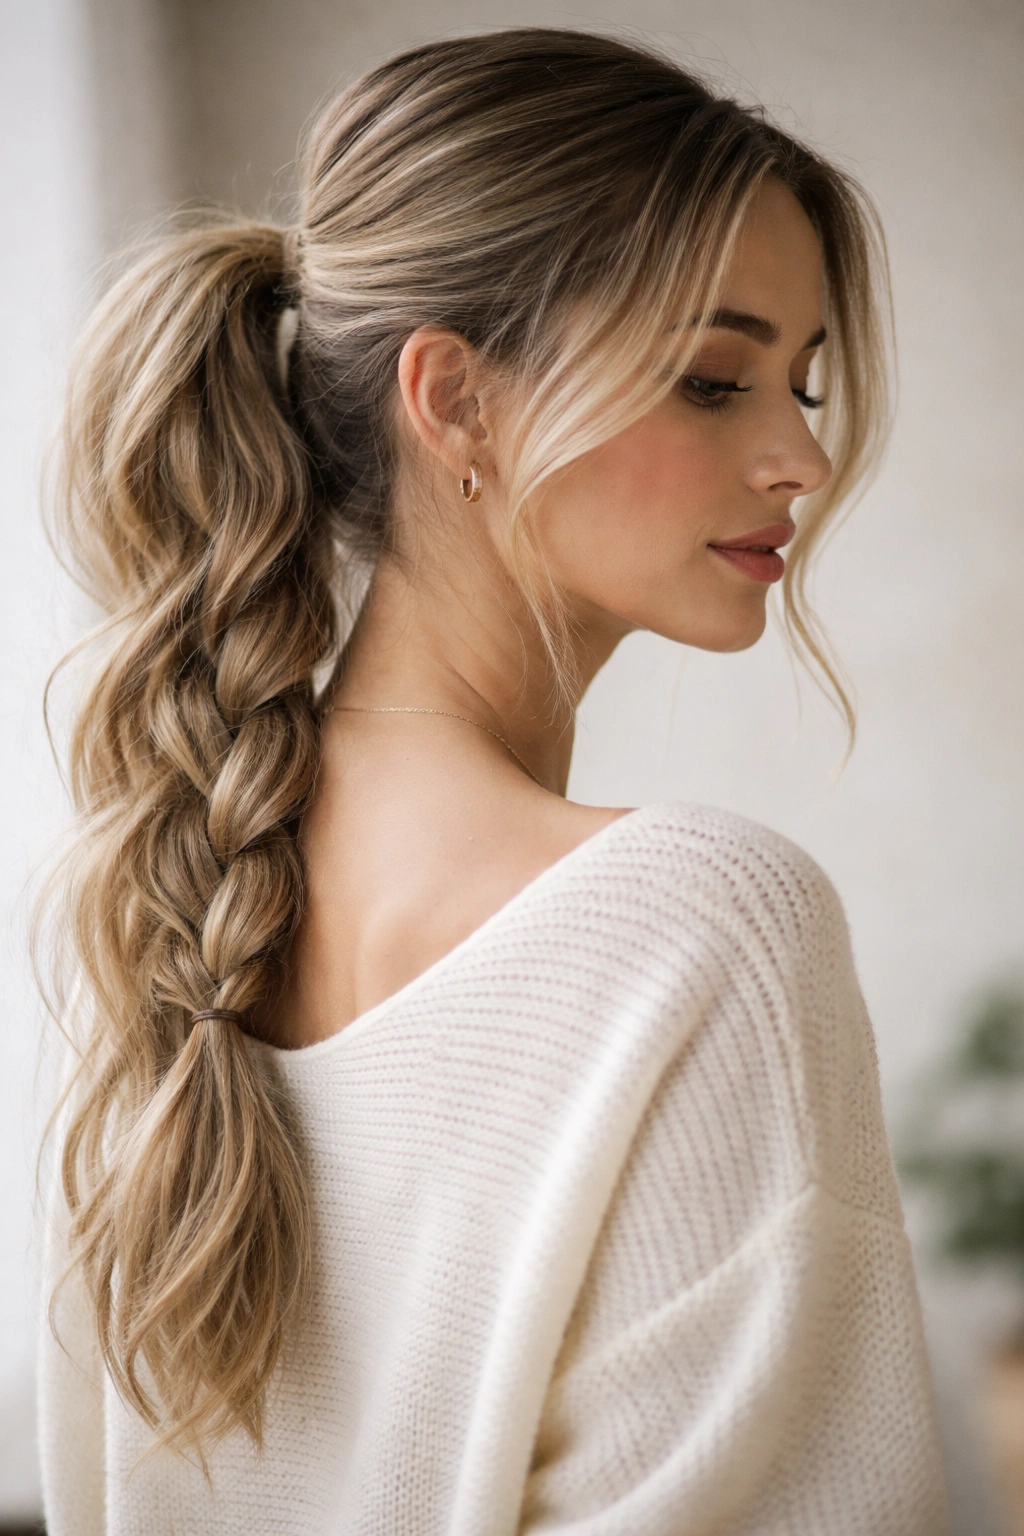
This style splits the difference between casual and intentional—the braid is noticeably loose, slightly undone, and romantic rather than pristine. It works beautifully when you want to look effortlessly put-together rather than meticulously groomed. The loose texture also makes it accessible for all hair types, including thinner or more delicate hair that might look stringy in a tight braid.
Why Loose Braids Photograph Better and Feel More Modern
Tight, perfect braids have their place, but loose, textured braids read as more current and approachable. They feel intentional rather than rigid, which is what separates this from looking like you’re trying too hard. A loose braid also photographs better because it has dimension—light and shadow play differently across the varied texture. This style works for romantic dates, casual hangouts, creative professional environments, and any day when you want to feel put-together but not formal.
Creating Loose, Touchable Texture
Start with hair that has some texture already—either naturally wavy, air-dried, or lightly waved with a curling iron. Create a lower side ponytail (roughly at ear level or below), then create a loose three-strand braid with the ponytail length. Here’s the critical part: as soon as you finish braiding, use your fingers to gently pull the outer edges of each braid loop outward, making the braid visibly looser and wider. The braid should look like it could nearly fall apart but somehow holds together—that’s the sweet spot. Secure the bottom with an elastic and finish with a flexible hairspray that won’t stiffen the texture. You’ll want to refresh this style every 15-20 minutes by gently pulling the loops loose again, which is part of its charm.
4. The Double Braided Ponytail

Instead of one central braid, this style features two braids that run parallel down the back of your head before feeding into a single ponytail. The effect is visually striking, creates more texture and interest, and actually feels easier to execute once you understand the mechanics. It’s perfect for days when you want your hair to read as more voluminous or textured than it actually is.
The Visual Impact and Best Occasions
A double braided ponytail creates immediate visual interest and reads as more intentional and styled than a single braid. It works beautifully for music festivals, creative dates, casual outdoor events, and any time you want your hair to be a bit of a statement without being over-the-top. The two braids together create the impression of more volume and texture, which is why this style works particularly well for fine or thin hair. It’s also surprisingly low-maintenance once the braids are in—they hold well and don’t require constant refreshing.
Sectioning and Executing Two Braids Simultaneously
Start by creating a clean center part. Divide your hair down the middle from forehead to nape. On the left side, take a section of hair at your temple and create a French or Dutch braid moving downward and back. Do the same on the right side, making sure both braids are roughly even in thickness and tightness. Bring both braids to a ponytail at the back of your head at your preferred height and secure both together with a single elastic. You can finish by taking a small section of hair from the ponytail itself and wrapping it around the elastic to hide it, which adds a refined touch. This style takes about 8-10 minutes and holds beautifully through an entire day of activity.
5. The Side Braid Ponytail

A side braid ponytail takes the braid from the crown area and shifts it dramatically to one side, creating an asymmetrical, romantic, and decidedly more casual look than a centered braid. This style works for every face shape because you’re creating visual balance through the off-center placement rather than symmetry. It feels effortlessly pretty without looking like you labored over it.
Why Asymmetry Reads as More Relaxed and Modern
An asymmetrical side braid ponytail automatically feels more relaxed than a centered one, even if it takes the exact same effort. There’s something inherently more modern and less “done up” about moving away from perfect symmetry. This style reads beautifully for casual dates, creative workspaces, weekend activities, and any setting where you want to look put-together but approachable. The side placement also elongates your neck and creates movement toward one side of your face, which is flattering on most face shapes.
Positioning and Braiding for Maximum Impact
Start with lightly textured hair. Take a small section from near the crown on one side of your head and begin a French braid, angling it toward the opposite ear as you braid downward. Feed the braid around behind your ear and toward the nape of your neck on the opposite side. Gather all your hair into a ponytail positioned slightly to the side and back. The braid will now wrap around one side of your head and feed directly into the ponytail, creating a gorgeous asymmetrical line. The key is maintaining even tension so the braid doesn’t pull too harshly on one side. This style takes about 6-8 minutes and reads as more casual than it actually is.
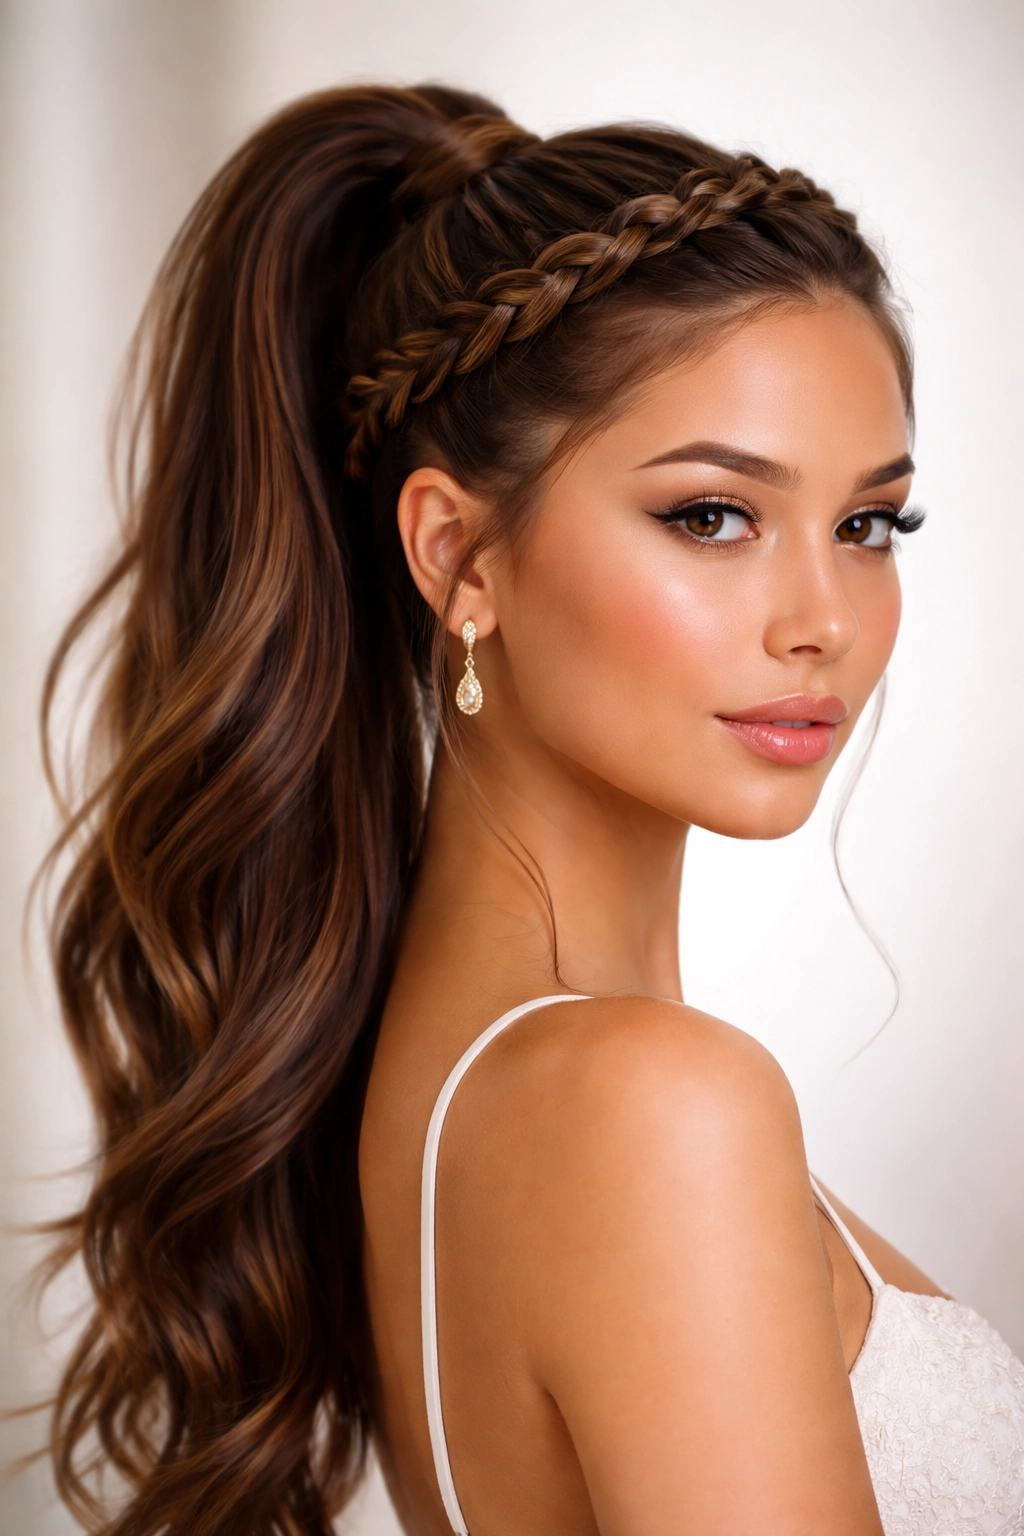
6. The Crown Braid Ponytail
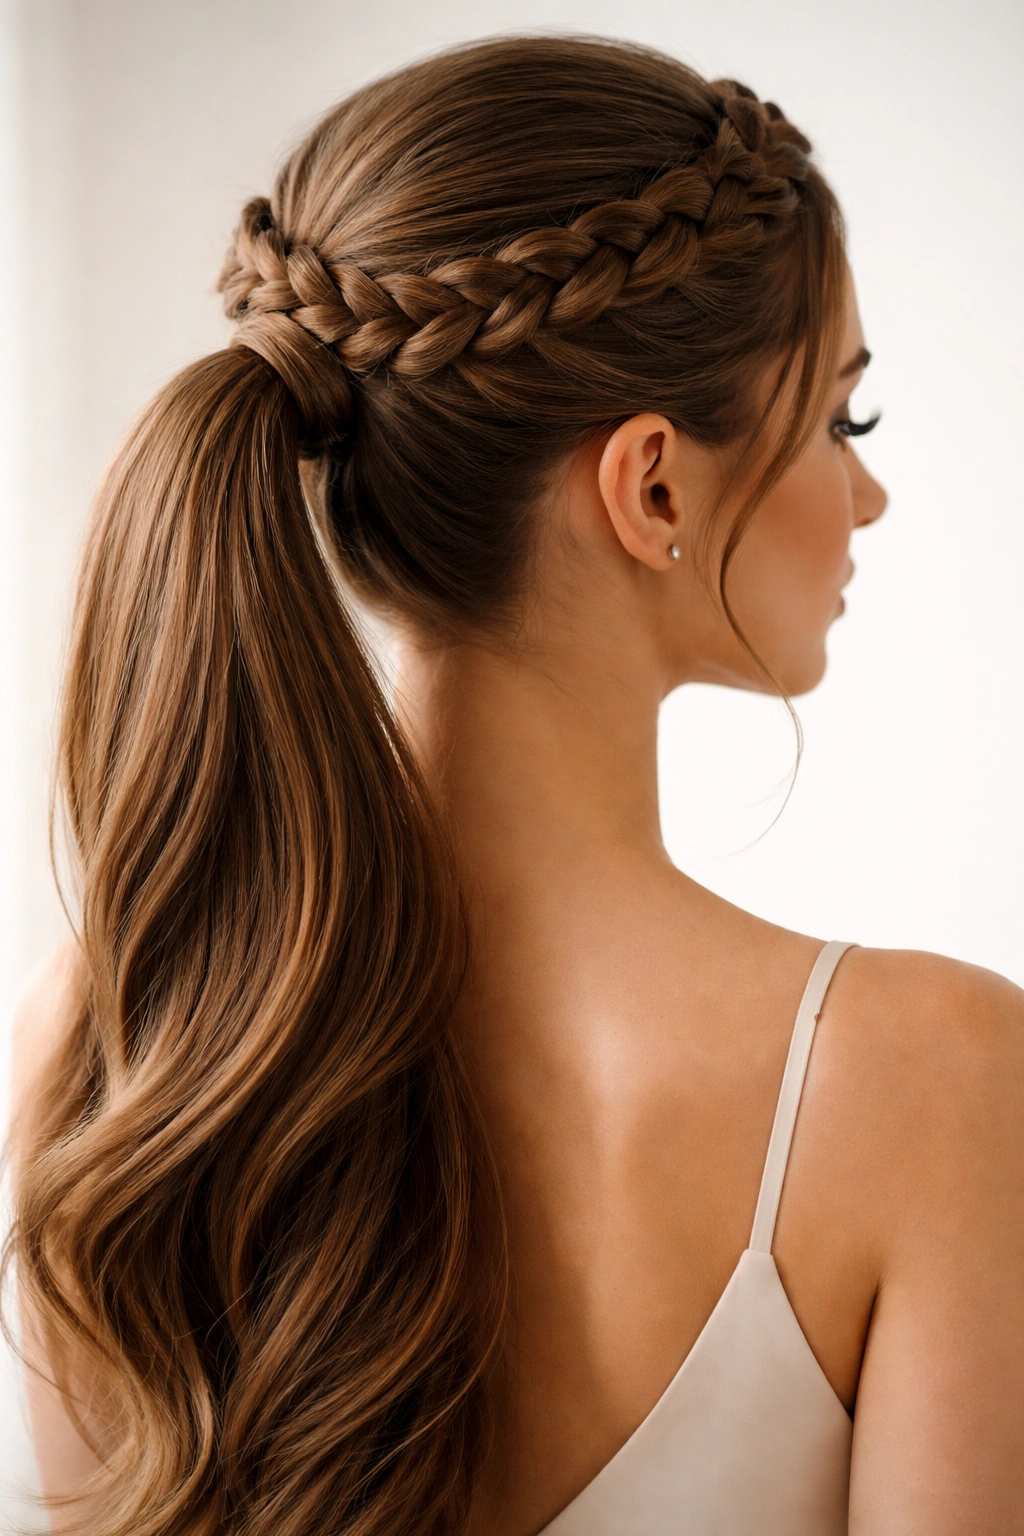
A crown braid wraps around the top and sides of your head like a tiara or circlet before feeding into a ponytail below. It’s one of the most visually striking variations and reads as intentionally styled for special occasions, celebrations, or days when you want to feel genuinely special. The style works well for all hair types as long as you have enough length to create the braid and ponytail.
Creating a Halo Effect and When to Wear It
A crown braid creates an immediate halo or tiara effect that works beautifully for weddings, formal events, date nights, or any occasion where you want to feel extra. The braid frames your entire face and sits high enough that it creates the impression of more height and elegance. This style is particularly stunning on people with longer faces or narrower face shapes because the horizontal line of the braid across the crown creates visual width and balance. It reads as more formal and intentional than most other braided ponytail variations.
Building a Secure Crown Braid from Start to Finish
Start with blow-dried or lightly waved hair. Create a deep side part. Beginning at the temple on the deeper side of the part, start a Dutch or French braid, angling it across the crown toward the opposite ear. As you braid, keep picking up thin sections from near the hairline to create the crown effect. Continue braiding around the back of the head to the opposite ear. Gather all remaining hair into a ponytail at the back and slightly lower than center (mid-occiput area works beautifully). Wrap a small section of hair from the ponytail around the elastic to hide it. Secure the crown braid with bobby pins along the way, ensuring it feels secure before releasing the ponytail. This style takes 10-12 minutes but lasts beautifully throughout an entire formal event.
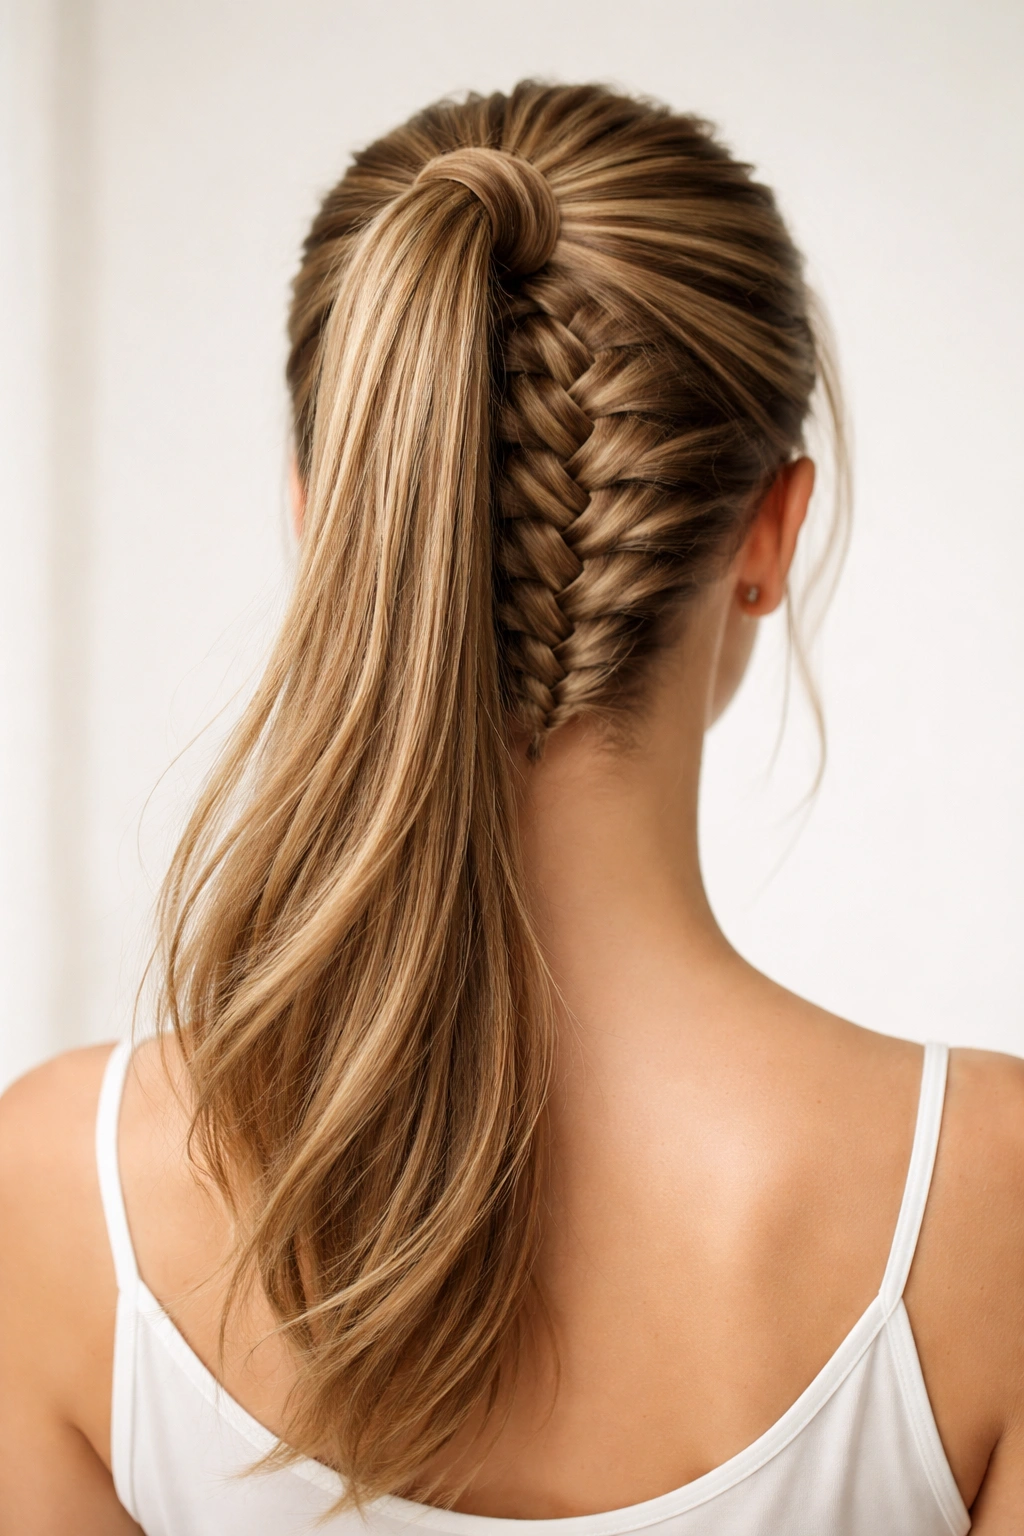
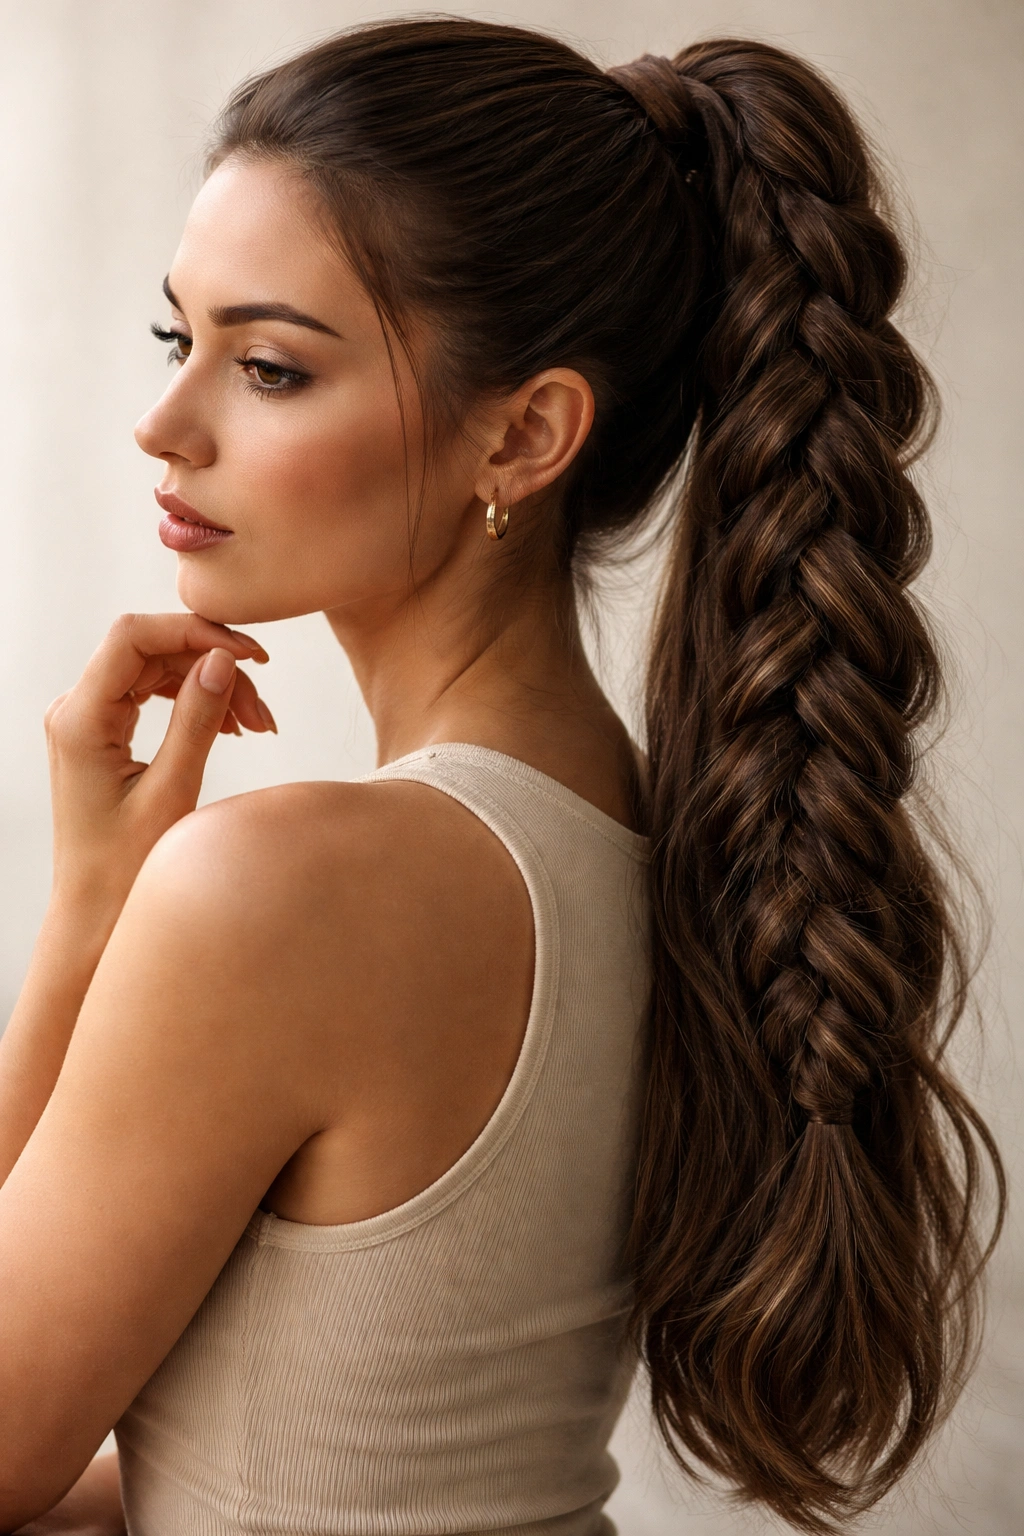
7. The Fishtail Braid Ponytail

A fishtail braid looks complex and intricate but is actually quite simple once you understand the mechanics—it uses only two strands instead of three, creating a narrow, detailed-looking braid that reads as more delicate and refined than a standard three-strand braid. Fishtail braids have a softer, more bohemian quality that works beautifully for casual and semi-formal occasions alike.
The Delicate Look and Wide Range of Occasions
A fishtail braid reads as more delicate and intricate than a standard braid, which makes it ideal for occasions where you want to look thoughtfully put-together without being obvious about it. The narrow, detailed pattern works beautifully for romantic dates, creative professional settings, casual outdoor events, and everyday wear. Fishtail braids also photograph exceptionally well because of the detailed texture. They work for all hair types and lengths, and the style is particularly stunning on longer hair where the braid has room to showcase its pattern.
Two-Strand Braiding Technique for Beginners
Divide a section of your hair into two equal strands. Take a small section (roughly the thickness of a pencil) from the outer edge of the left strand and cross it over to the right strand. Then take a small section from the outer edge of the right strand and cross it over to the left. Continue this alternating pattern all the way down. The key is making your outer sections as thin as possible—thinner sections create a more defined, detailed-looking braid. Once you finish, gently pull the braid loose to add texture and dimension. Create the ponytail by either gathering all your hair with the fishtail braid, or braiding only part of your hair and incorporating the braid into a higher ponytail. This takes about 7-10 minutes depending on your hair length and thickness.
8. The Inverted Braid Ponytail
An inverted braid starts at the nape of your neck and braids upward toward the crown, creating a braid that sits on the back of your head in a completely different orientation than standard braids. When you gather it into a high ponytail, the inverted braid creates texture and visual interest along the back of your skull that feels modern and unexpected.
Why Inverted Braids Feel Fresh and Different
An inverted braid feels more modern and less conventional than standard downward braids, which is exactly why it works for people who want to look current and thoughtful without following the typical braid formula. The braid sits on the back of your head rather than framing your face, which shifts the visual interest and creates a completely different silhouette. This style works beautifully for professional settings where you want to look polished but not overly casual, creative environments, and personal styling preferences that lean toward the unconventional.
Positioning and Executing an Upward Braid
Start by flipping your head upside down or leaning your head back so you can easily access the nape of your neck. Create a Dutch or French braid starting at the base of your hairline at the nape. As you braid upward toward the crown, pick up sections from the sides. The braid will naturally spiral upward and around the back of your head. Once you reach the crown area, gather all your hair into a high ponytail, making sure the inverted braid feeds smoothly into it. The braid should now be visible on the back of your head as a distinct textured element. Secure everything with an elastic and bobby pins as needed. This style takes about 8 minutes and creates an incredibly polished, modern effect that absolutely holds all day.
9. The Braided Wrap-Around Low Ponytail
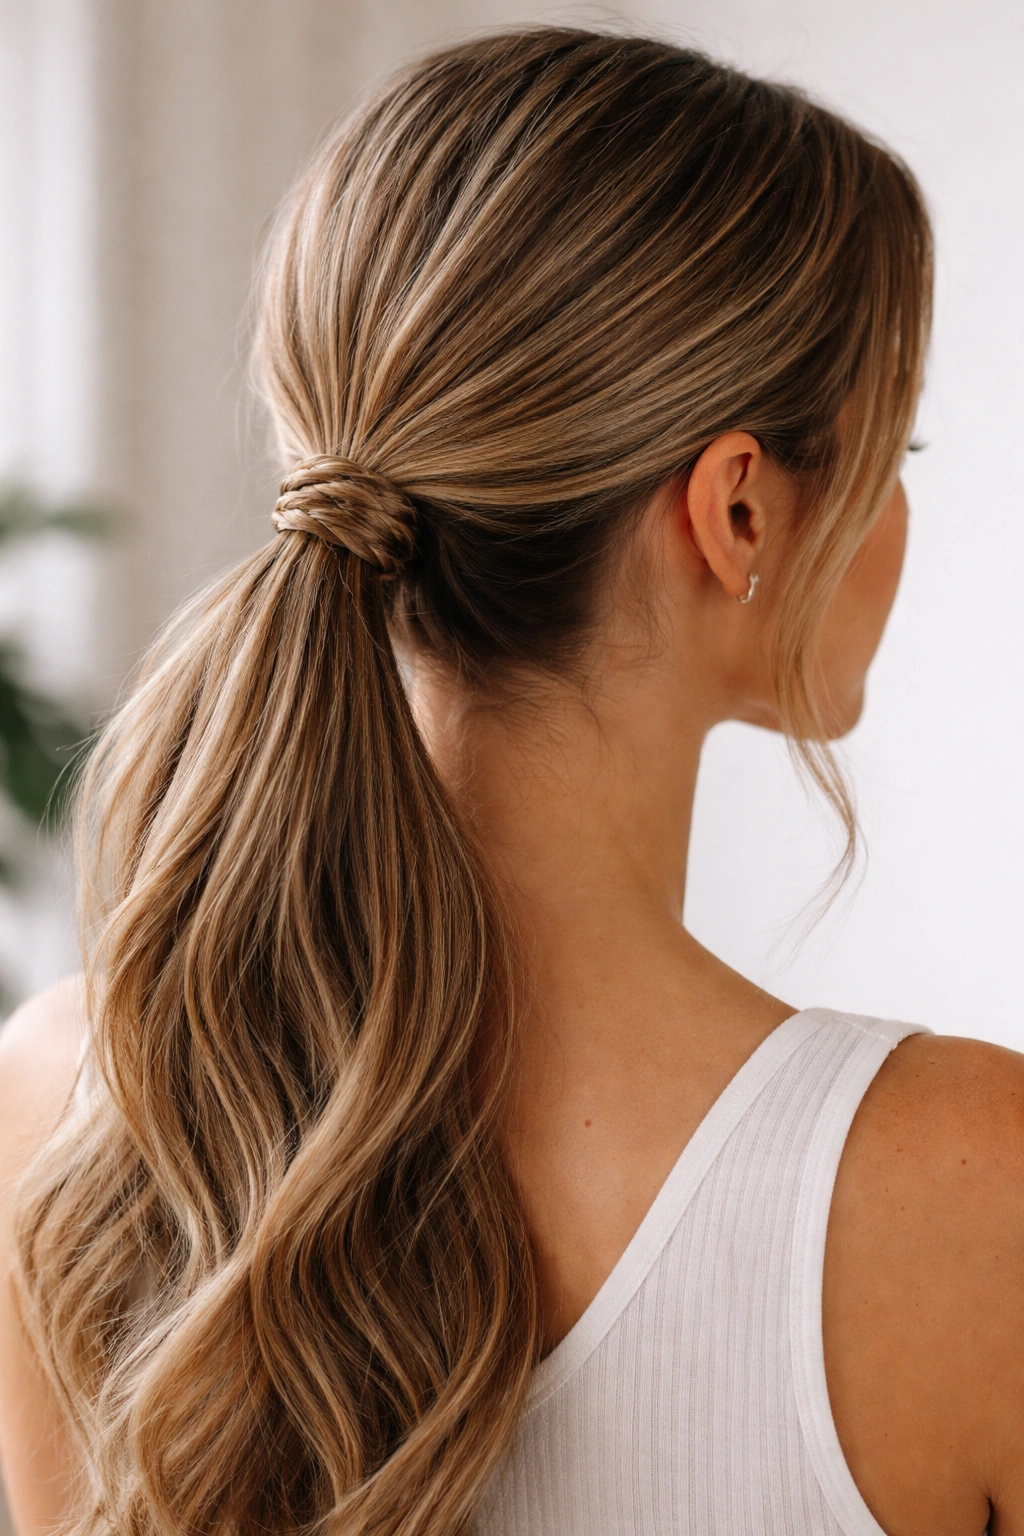
This style creates a low, relaxed ponytail (positioned at the nape of your neck) with a thin braid wrapped around the base like a ribbon. It’s the essence of casual elegance—the low placement feels relaxed and approachable, while the braid wrap adds just enough intentionality to read as styled rather than simply thrown-up. It works beautifully for professional settings, casual dates, and everyday wear.
Combining Relaxation with Subtle Intentionality
A low ponytail with a braided wrap feels effortlessly put-together because it balances a relaxed, casual ponytail placement with a small detail that shows you cared about your appearance. This combination works for nearly any occasion—it’s professional enough for office settings, casual enough for weekend hangouts, and romantic enough for low-key dates. The style particularly flatters people with longer faces or anyone who prefers the softness of a lower ponytail placement without the risk of looking simply sloppy.
Creating a Braided Wrap That Actually Holds
Create a low ponytail at the nape of your neck using an elastic. Take a thin section of hair from the ponytail itself—aim for a section about the thickness of a pencil—and create a simple three-strand braid with just that small section. Wrap this thin braid around the elastic at the base of the ponytail as many times as it will go, then secure it with a bobby pin tucked behind the wrap where it won’t show. You can also take a slightly thicker section and create a fishtail braid for a more detailed look. The thin braid disappears visually because it’s so delicate, but it creates the impression that you’ve given thought to finishing details. This takes about 5-7 minutes and feels incredibly polished without any obvious effort.
10. The Reverse Braid Ponytail
A reverse braid is created by braiding from the bottom upward into a ponytail, rather than starting from the top and braiding down. You gather your hair into a low ponytail first, then braid upward from the elastic. The result is a braid that sits in reverse—wider at the base and narrowing as it reaches the ponytail. This creates visual interest and a unique texture that reads as more intentional and styled.
The Graphic Quality and Modern Appeal
A reverse braid ponytail has a graphic, sculptural quality that photographs beautifully and reads as more modern than standard braids. The reversed texture creates movement and interest that draws the eye, making this style ideal for occasions where you want your hair to be visually interesting. It works beautifully for creative dates, social events, professional settings with more flexible dress codes, and any time you want to stand out subtly without looking costume-y.
Executing a Reverse Braid from the Ponytail Up
Gather your hair into a low or mid-height ponytail and secure with an elastic. Take the entire ponytail section and divide it into three strands starting from the elastic. Instead of crossing strands over the center, cross them under (like a Dutch braid), which creates the inverted look. Braid upward toward the elastic, maintaining tension so the braid stays secure. Once you reach the top of the ponytail, tuck the end under and secure with bobby pins. The braid will now sit in reverse, with the widest, most textured section at the base near the elastic. Gently pull the braid to add texture and dimension. This takes about 8-10 minutes and creates an effect that’s visually striking without being high-maintenance once it’s done.
11. The Halo Braid High Ponytail
A halo braid wraps completely around the head like a tiara before feeding into a high ponytail, creating a rounded, crown-like silhouette. It’s more elaborate than a simple wrapped braid but not quite as formal as a full crown braid. This style is ideal for special occasions, celebrations, or any day when you want to feel genuinely polished and special.
The Romantic, Celebratory Quality
A halo braid reads as romantic, intentional, and celebratory—it’s the kind of style that makes you feel a bit fancy regardless of what else you’re wearing. The circular, crown-like effect is inherently flattering on most face shapes because it creates a soft frame around your features. This style works beautifully for celebrations, formal events, special dates, or simply a day when you want to feel extra. It reads as more formal than most other braided ponytail variations but not so formal that it requires professional styling.
Building a Complete Halo from Template Points
Start with blow-dried, lightly waved, or textured hair. Create a deep side part. Beginning at the temple on the deeper side of the part, start a Dutch or French braid. As you braid, work your way around the entire circumference of your head, picking up thin sections from near the hairline as you go. The braid should wrap all the way around to the opposite temple, creating a complete circle. Once the halo braid is complete, gather all remaining hair into a high ponytail centered at the crown and directly below where the halo braid ends. The halo and ponytail should look like they’re working together—the braid as a circlet, the ponytail flowing down from within it. This takes about 12-15 minutes but creates a stunning, special-occasion look that lasts all day.
12. The Messy Textured Braided Ponytail
This final style is deliberately undone and texture-focused—the braid is intentionally loose and slightly imperfect, the ponytail is voluminous and full of movement, and the overall effect is romantic and effortlessly beautiful. This is the “I woke up like this but actually spent 10 minutes making it look like I didn’t” style that reads as the most modern and approachable of all braided ponytail variations.
The Undone Look That Actually Requires Intention
A deliberately messy, textured braided ponytail is perhaps the most deceptive style on this list—it looks effortless but actually requires intentional steps to achieve the right level of undone-ness. The key is understanding that the mess needs to be controlled mess, not actual messiness. The braid should be loose enough to look romantic and undone, but tight enough to hold all day. The ponytail should have visible texture and movement without actual pieces falling down.
Building Controlled Texture and Intentional Looseness
Start with hair that has natural or created texture—either air-dried waves, curling iron waves, or even dry texture spray applied to clean hair. Create a lower side ponytail gathered slightly loosely (not as tight as you’d normally secure it). Create a loose three-strand braid with the ponytail, making the braid visibly relaxed. Then use your fingers to pull the braid deliberately loose, widening each loop of the braid until it looks like it might fall apart but somehow holds together. Secure the ponytail with a flexible elastic that won’t show, and set with a flexible hairspray that won’t stiffen the texture. The final effect should read as “I braided my hair but didn’t take it too seriously,” which is the whole point. This takes about 7-8 minutes and works beautifully for casual dates, weekend hangouts, creative environments, or any setting where approachable, relaxed beauty is the goal.
Final Thoughts
Braided ponytails offer something genuinely special—they’re versatile enough to work for countless occasions, accessible enough that anyone can learn them with practice, and flattering enough that they work for every face shape and hair type. The real secret isn’t picking the perfect style; it’s understanding which variation matches your mood, your plans, and the impression you want to create.
The best way to find your favorite is to experiment without pressure. Try a loose textured braid on a casual weekend and notice how it feels. Attempt a crown braid for a date and observe how it changes your posture and confidence. Play with inverted braids or double braids and discover which ones suit your hair’s natural texture best. Each style teaches you something about what works for you—what holds well, what feels comfortable, what reads as “you.”
Once you’ve practiced a few variations, you’ll develop the muscle memory and intuition to execute them quickly, sometimes in under 10 minutes. That’s when braided ponytails become genuinely effortless—not because they require no effort, but because the effort becomes second nature. You’ll find yourself reaching for different styles naturally depending on your mood and plans, and that’s when you’ll really appreciate just how versatile and wonderful a braided ponytail can be.